Step-by-step tutorial
Step 1
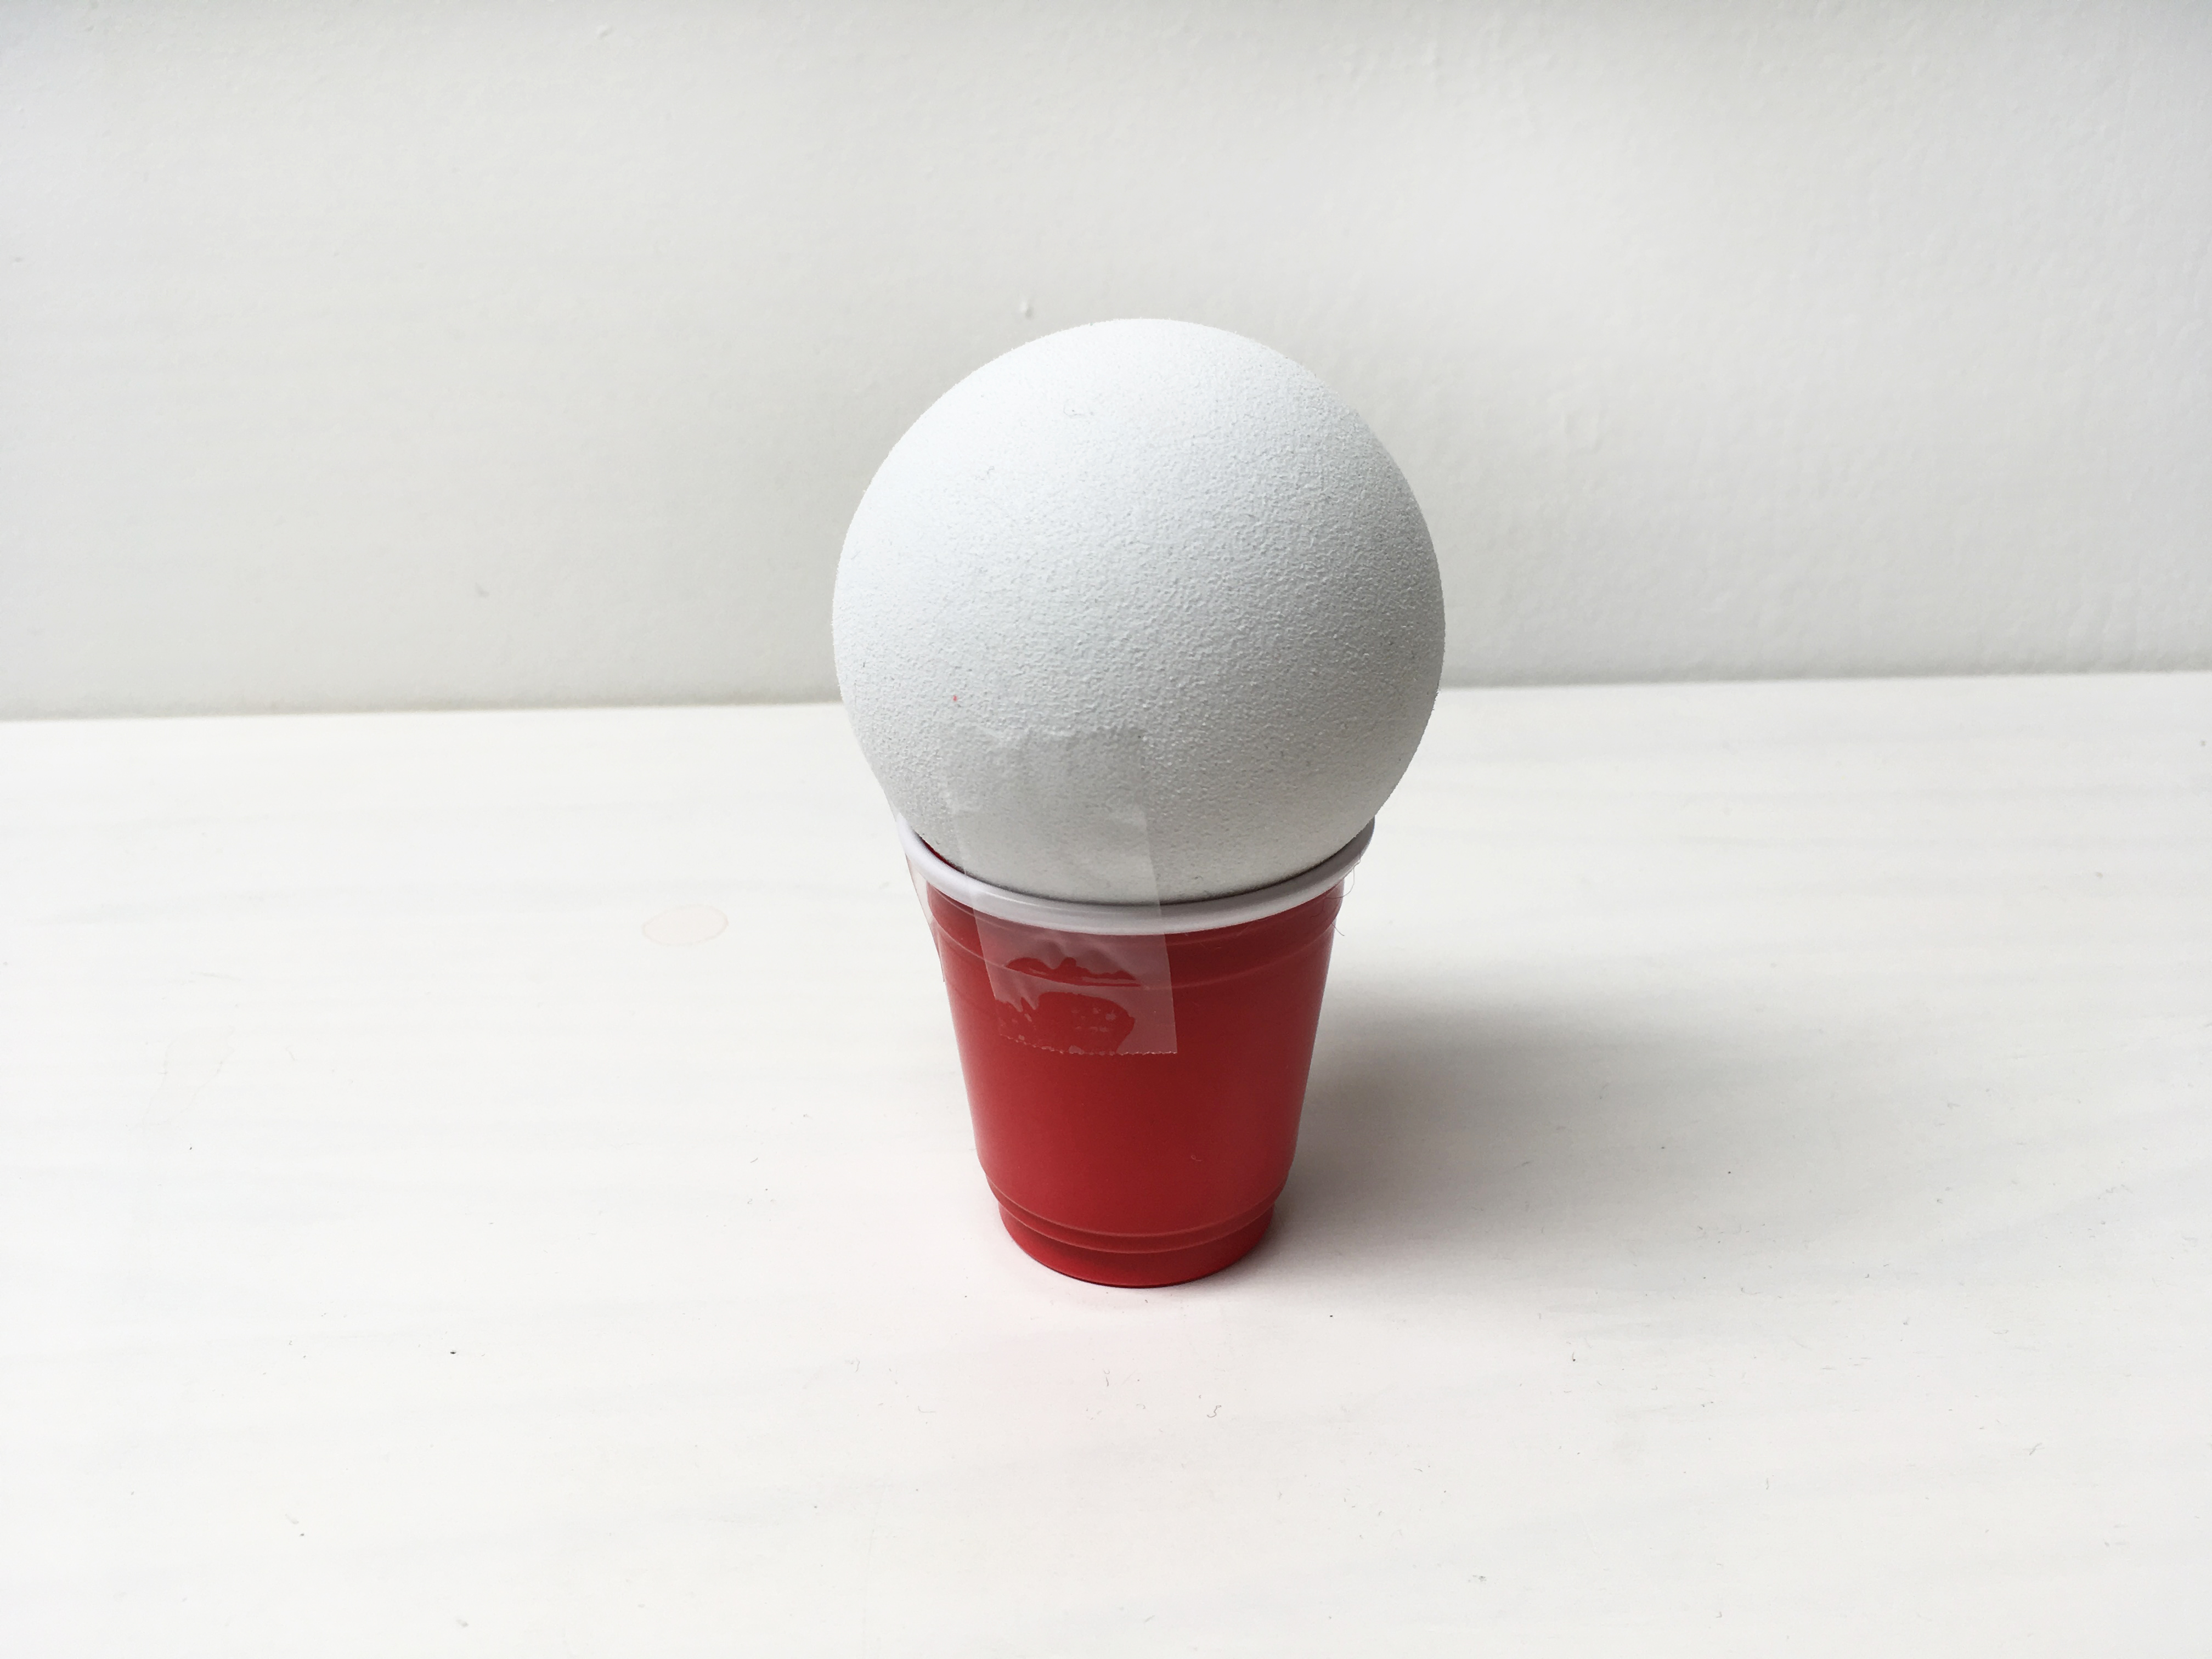
To make a mold for your ghost luminaries, place a ball (foam, plastic, or aluminum) on a cup. Make sure the ball is bigger than the opening of the cup. Then, use tape to secure them together.
We used a foam ball and a few aluminum balls we made ourselves. To make an aluminum ball, crumple up a sheet of aluminum foil and push down any sharp edges.
Tip
If you use a softer ball, it will be easier to separate the clay from the ball once dry.
Step 2
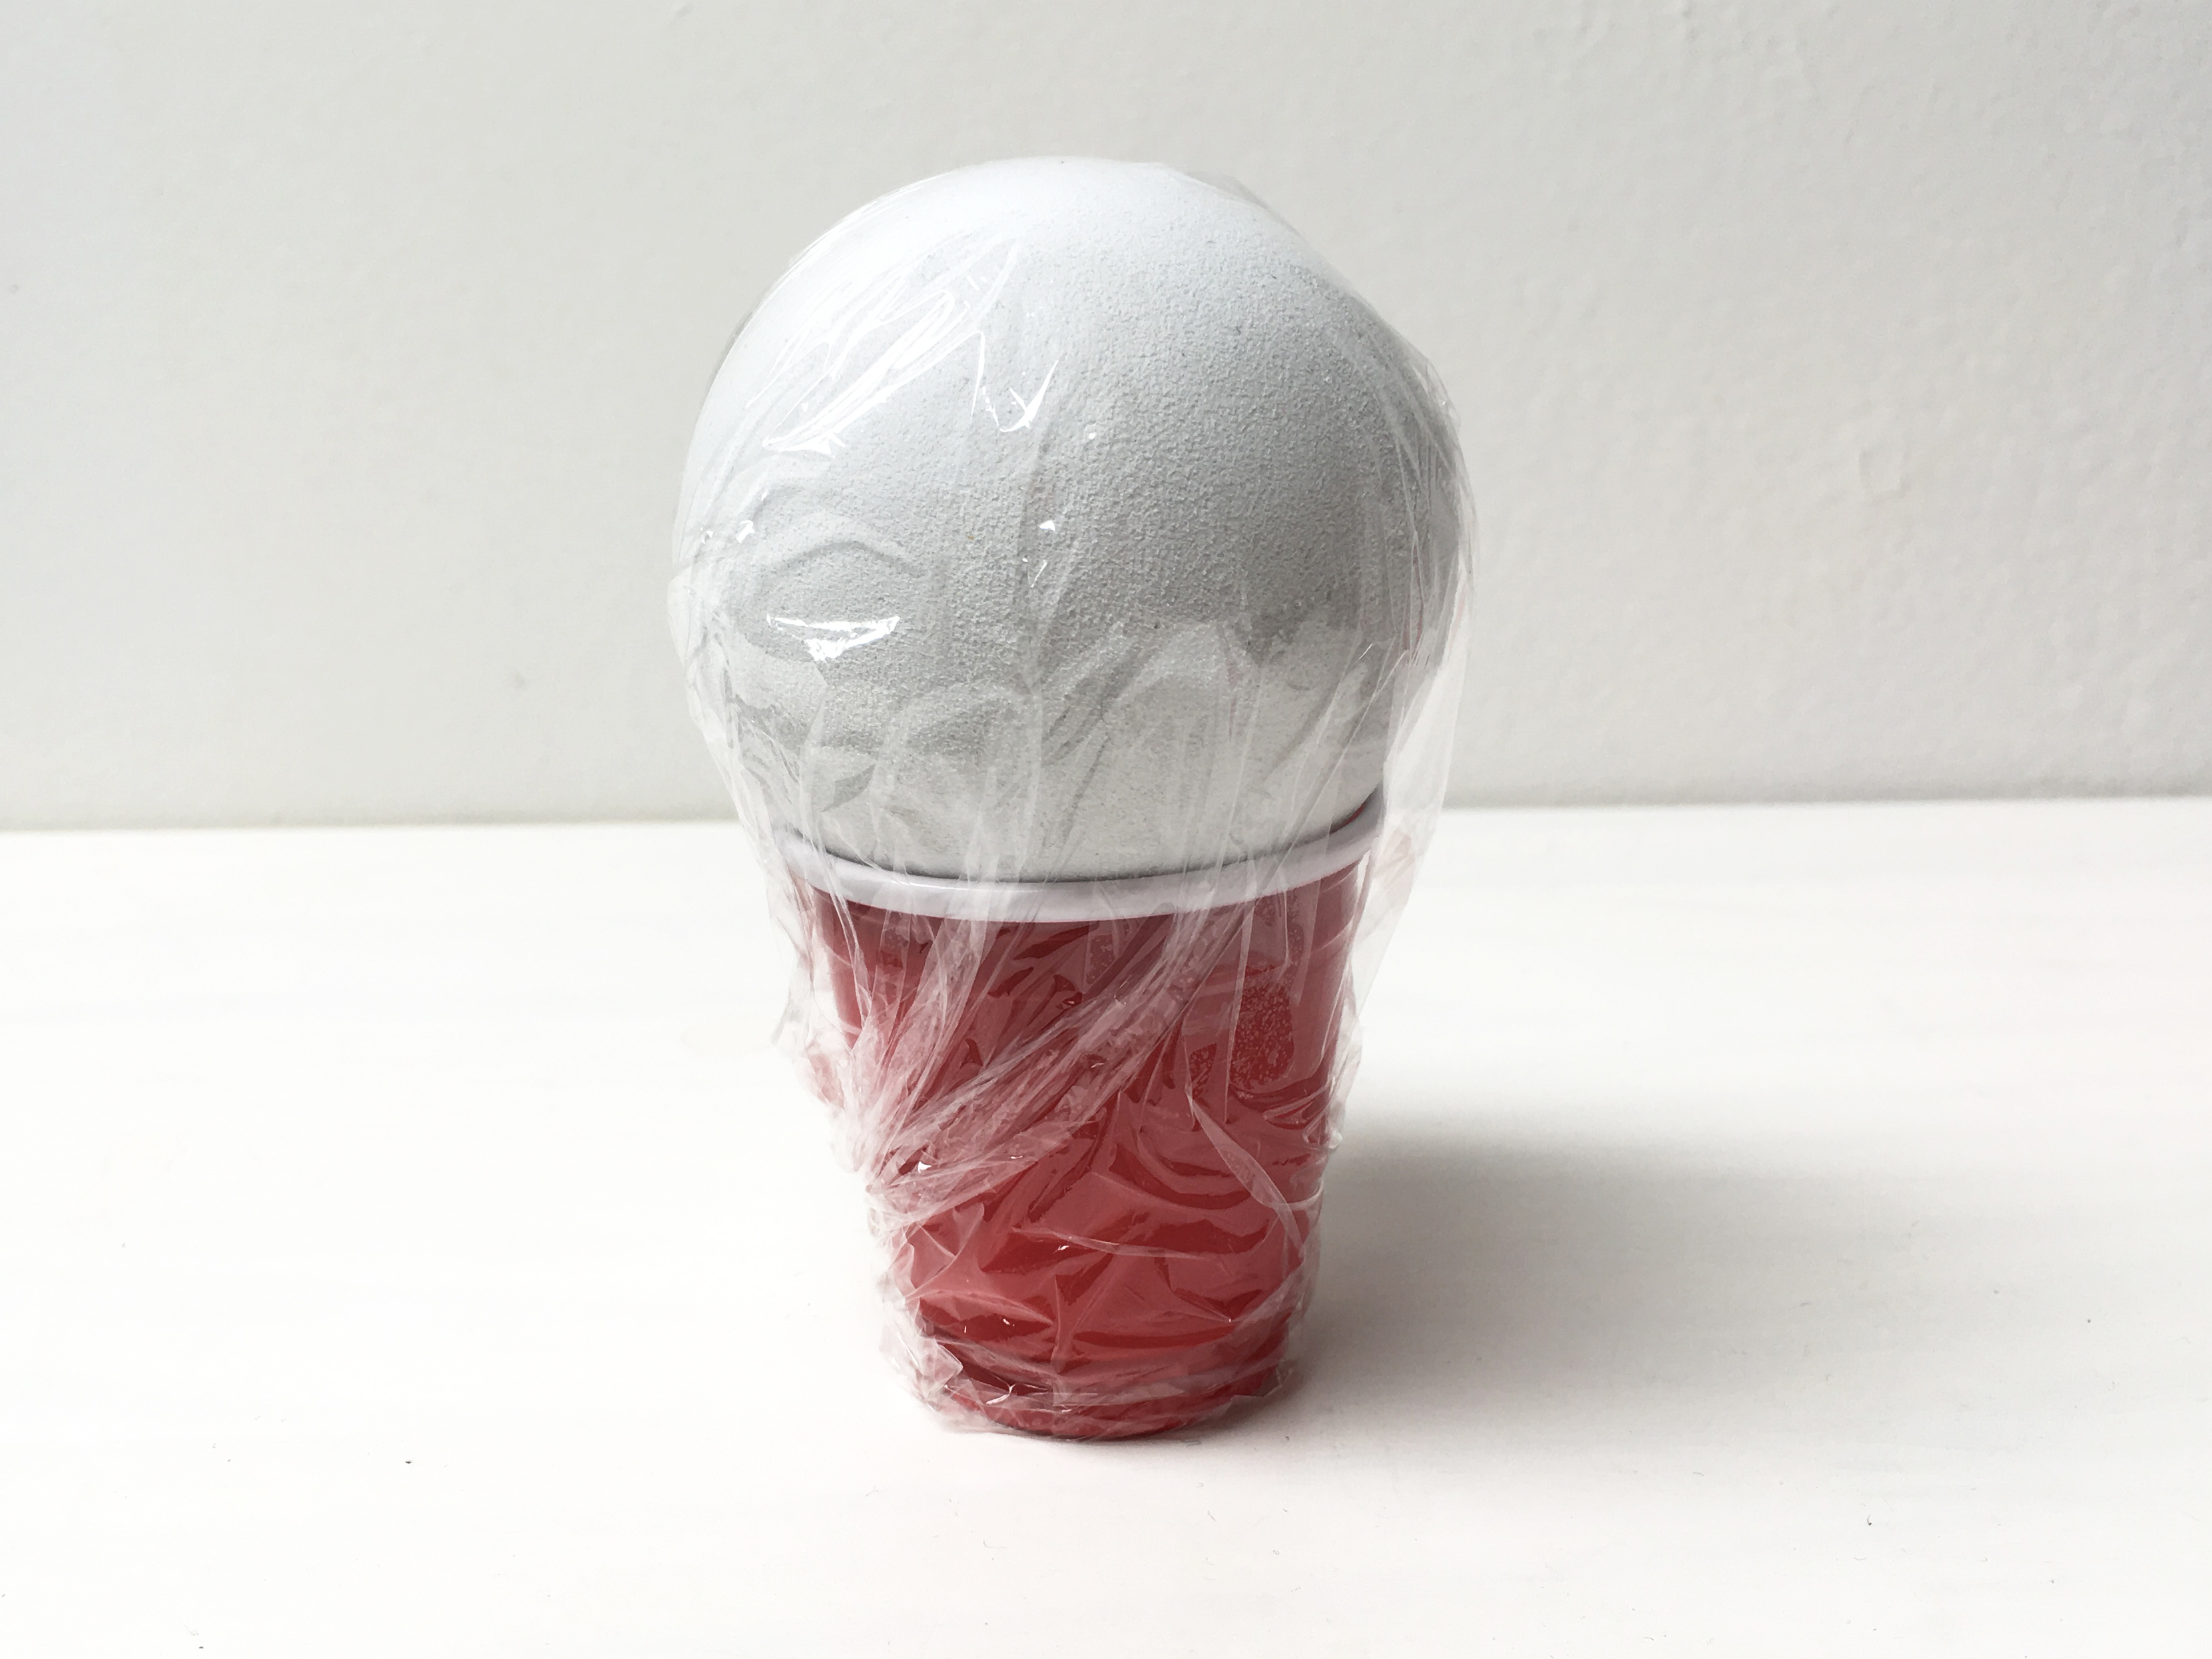
Lay a sheet of plastic wrap over the mold and tape it in place.
Step 3
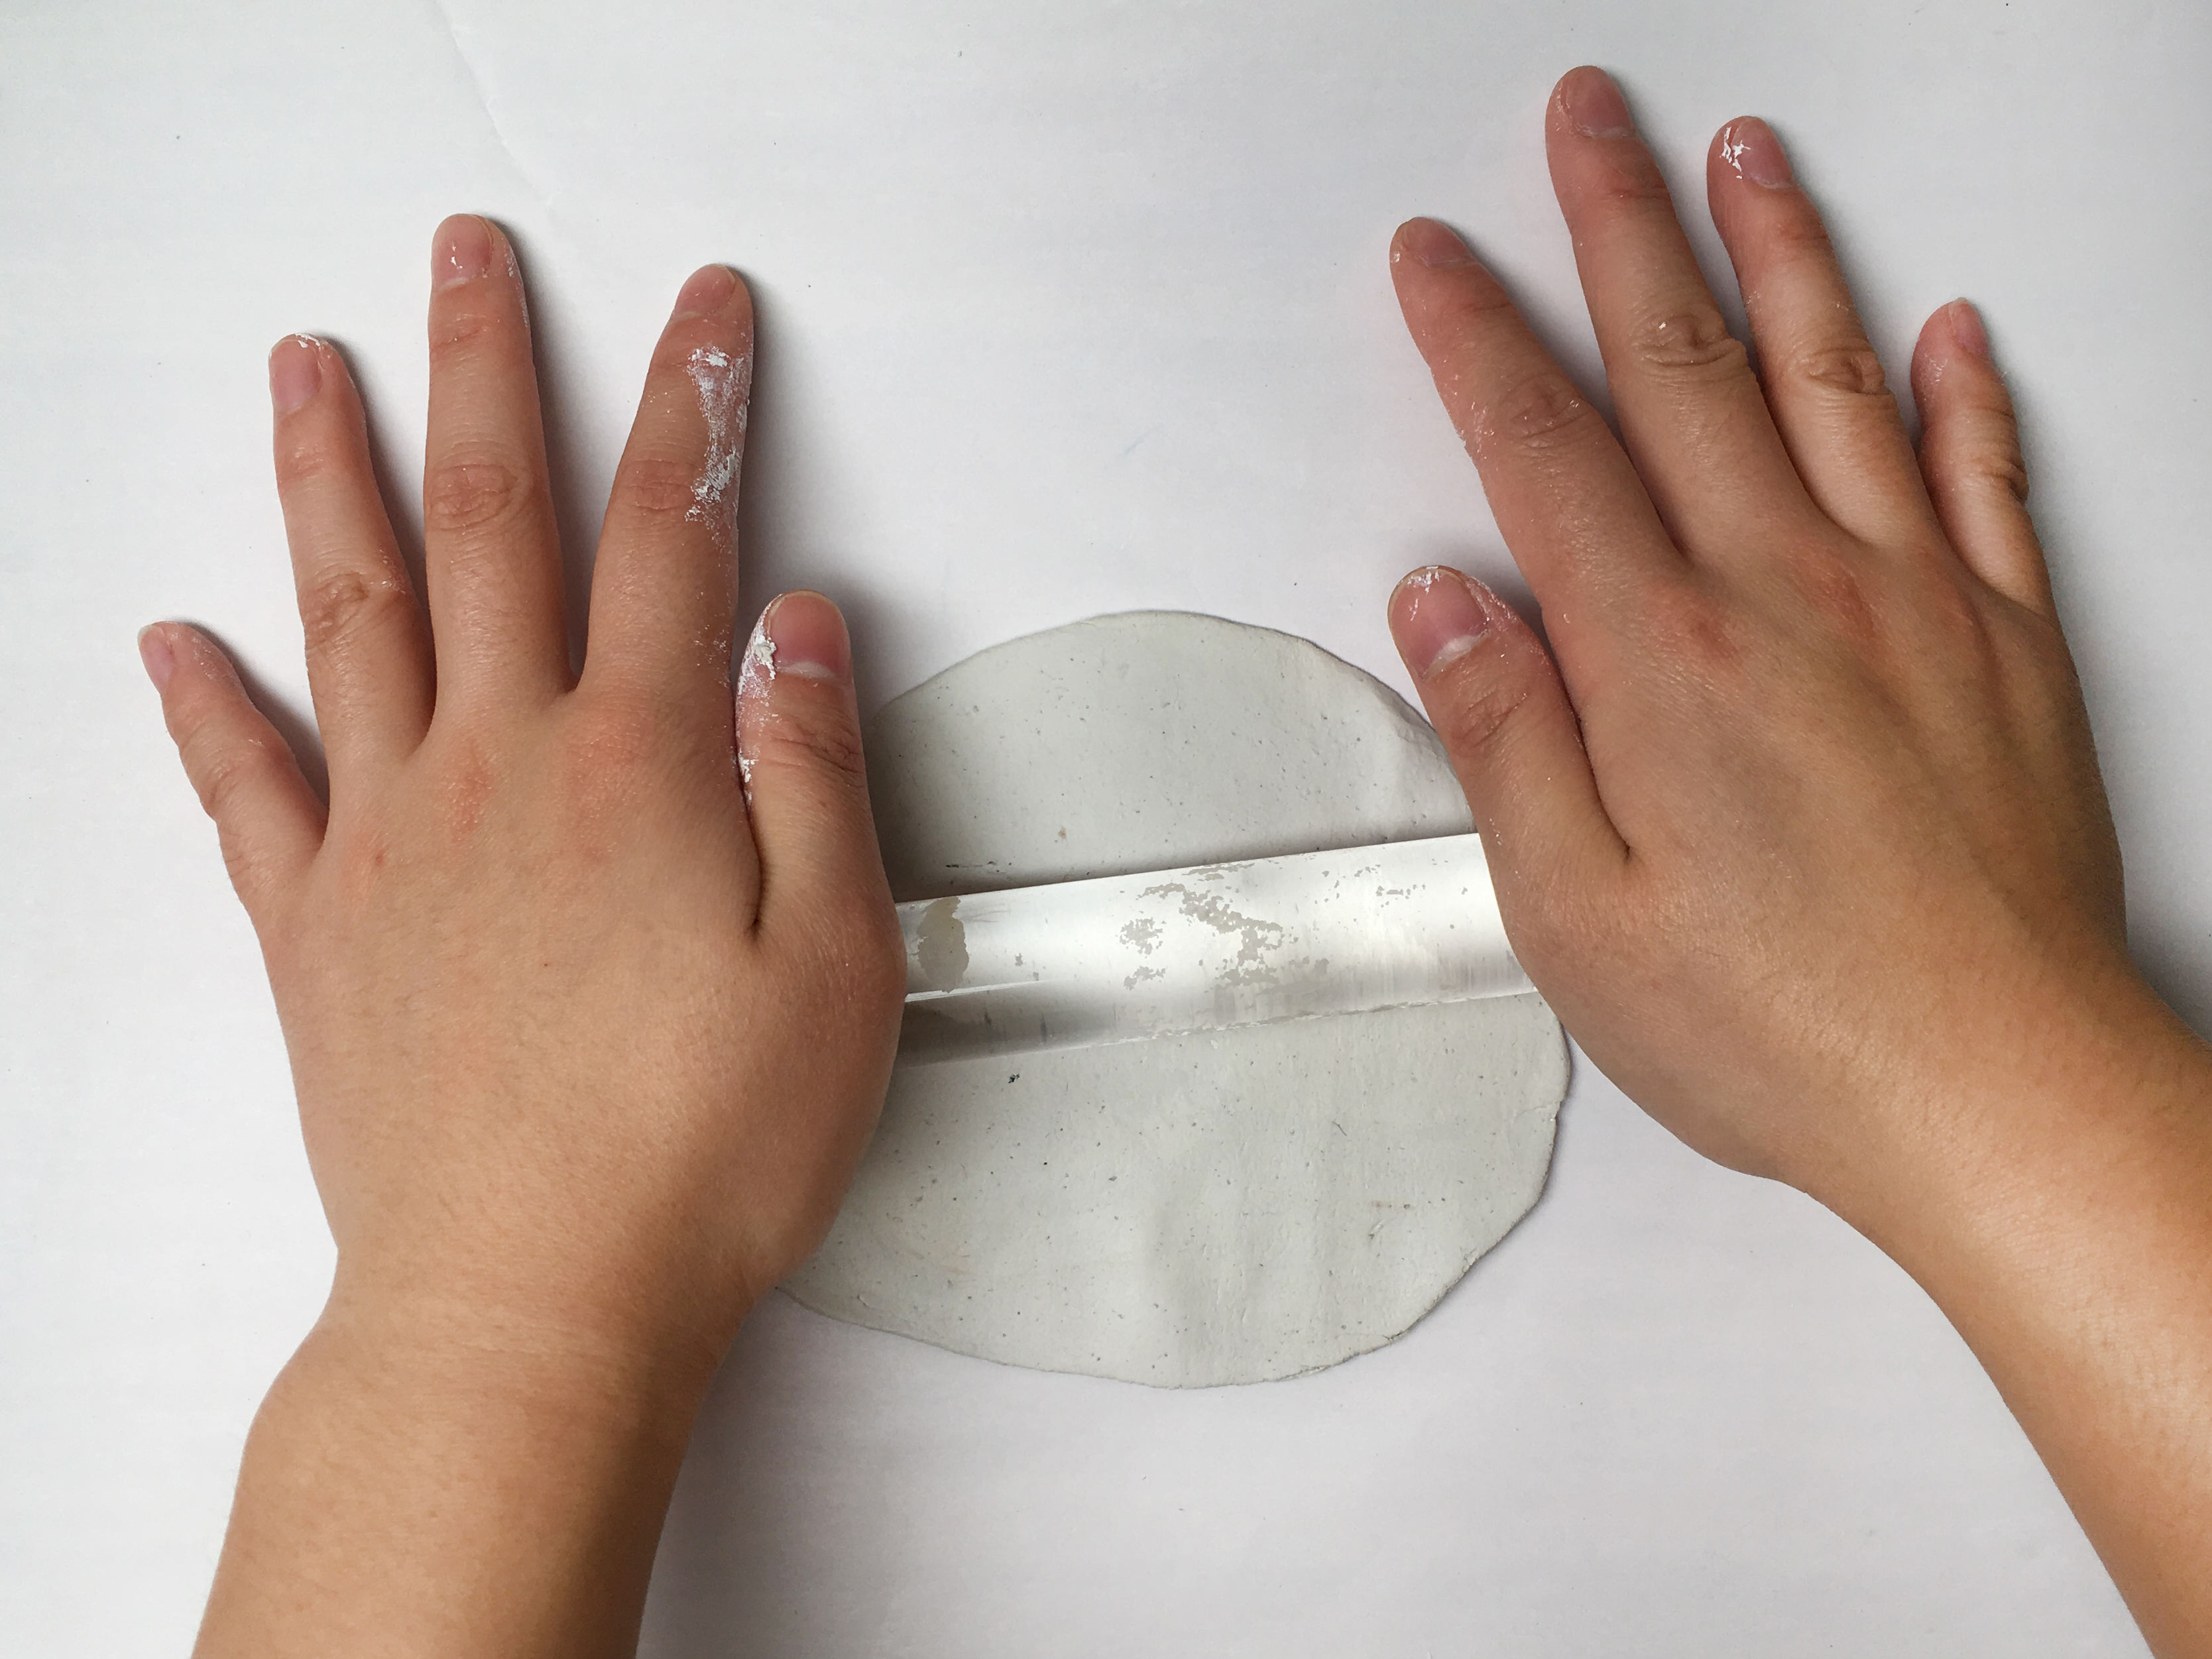
Roll out the clay into a 2D circle with a 1/8" thickness. Use a plastic knife to cut off uneven edges if needed.
Tip
Before you roll out the clay, tape a piece of wax paper onto your work surface to prevent the clay from leaving marks on your table.
Step 4
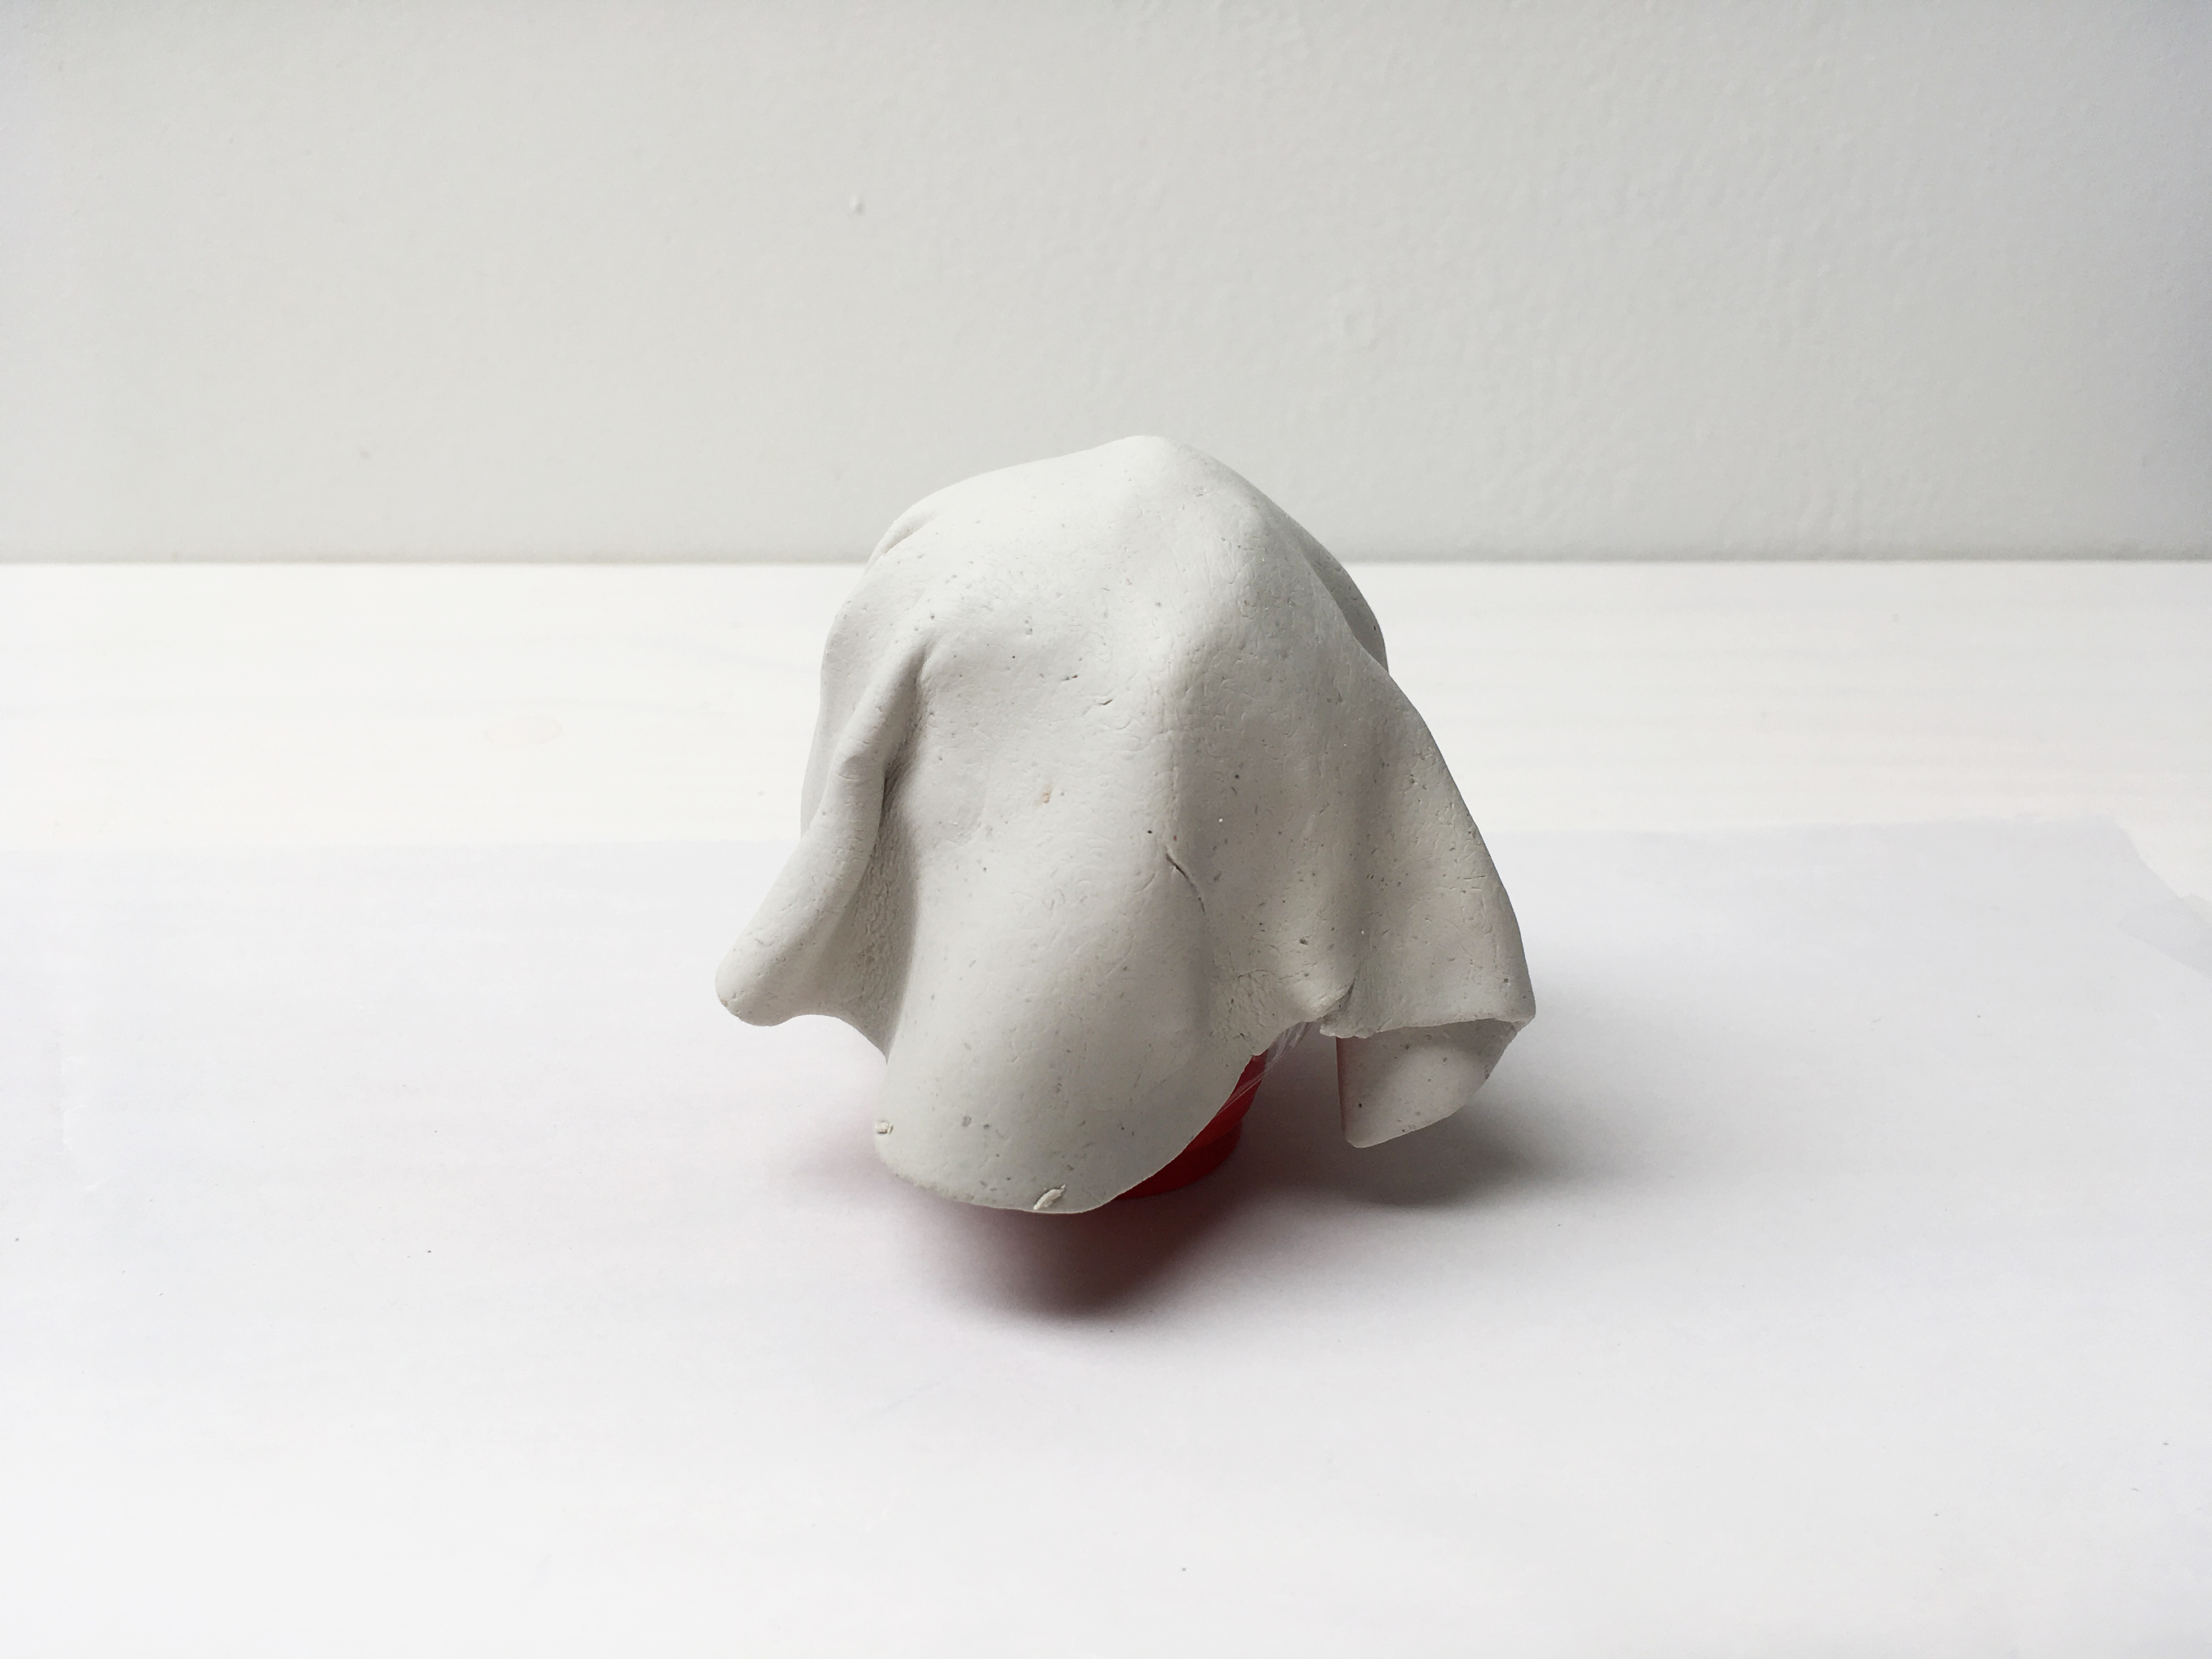
Carefully lift the clay from the table, and drape it over the mold. Try to line up the center of the clay with the top of the mold for the ghost to stand up straight later on.
Tip
When you drape the clay over the mold, don't press your clay against the space between the ball and the cup. This will make it easier for you to take the ball out of the mold once your clay has dried.
Step 5
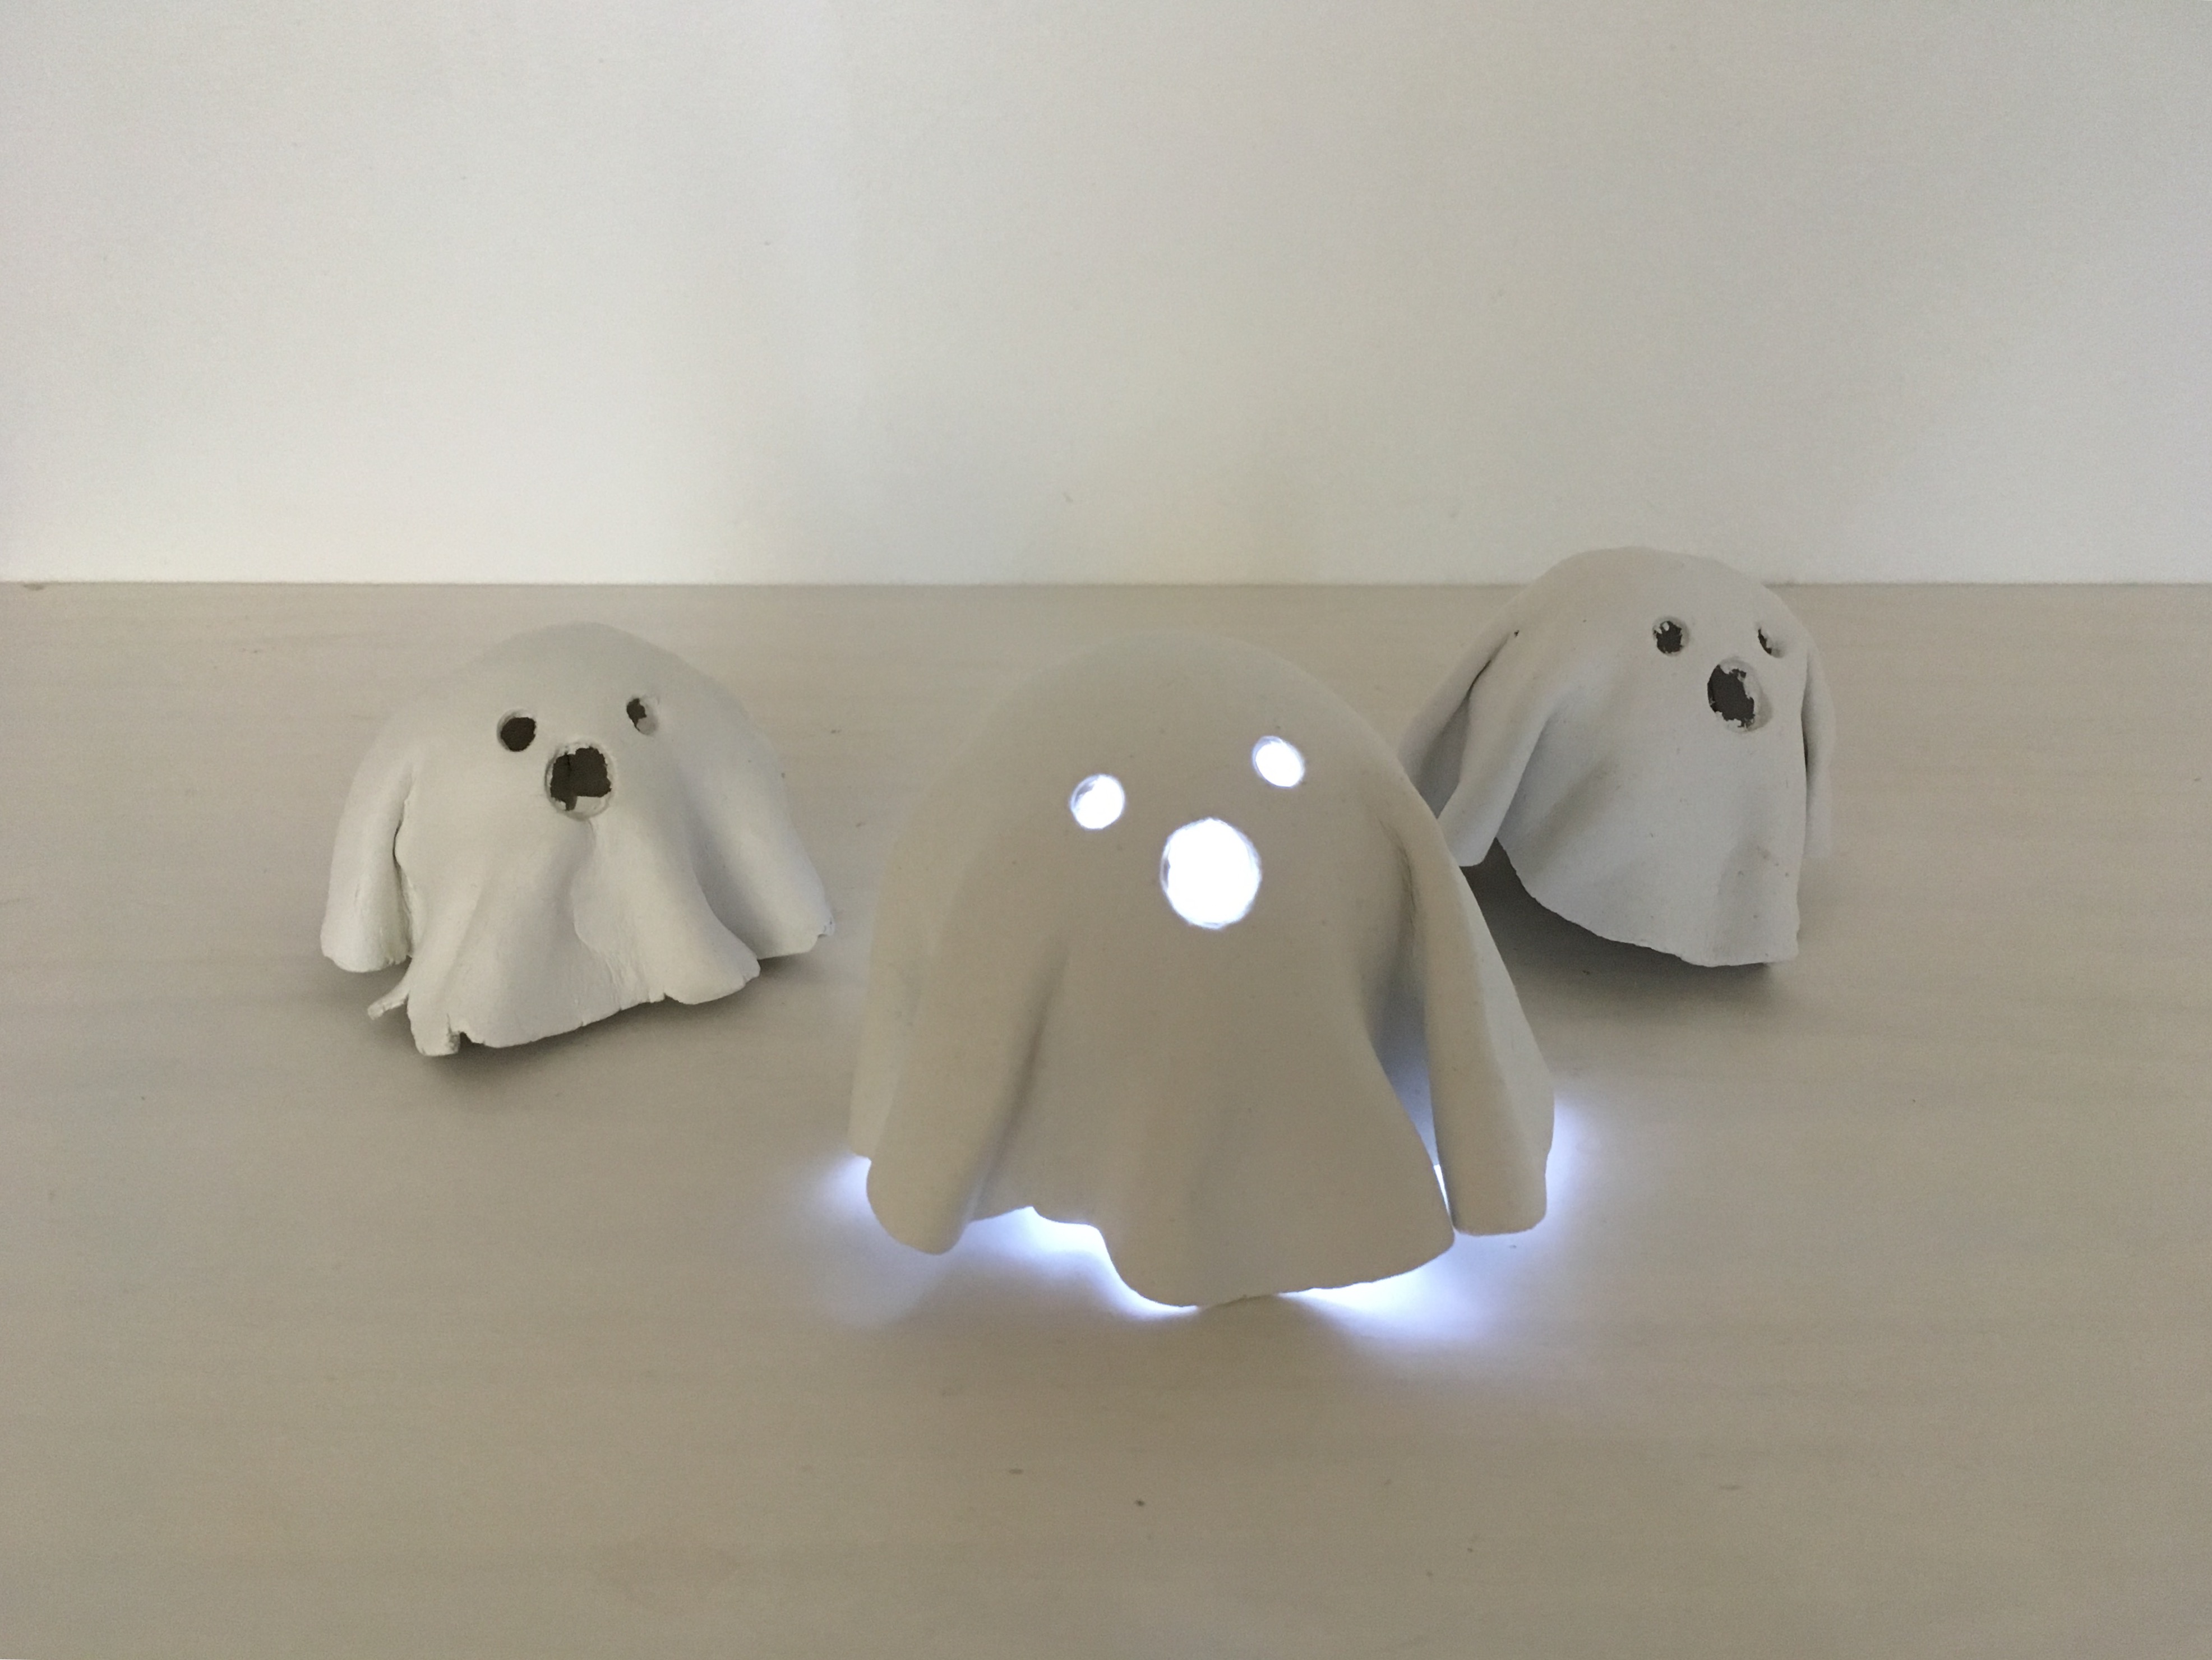
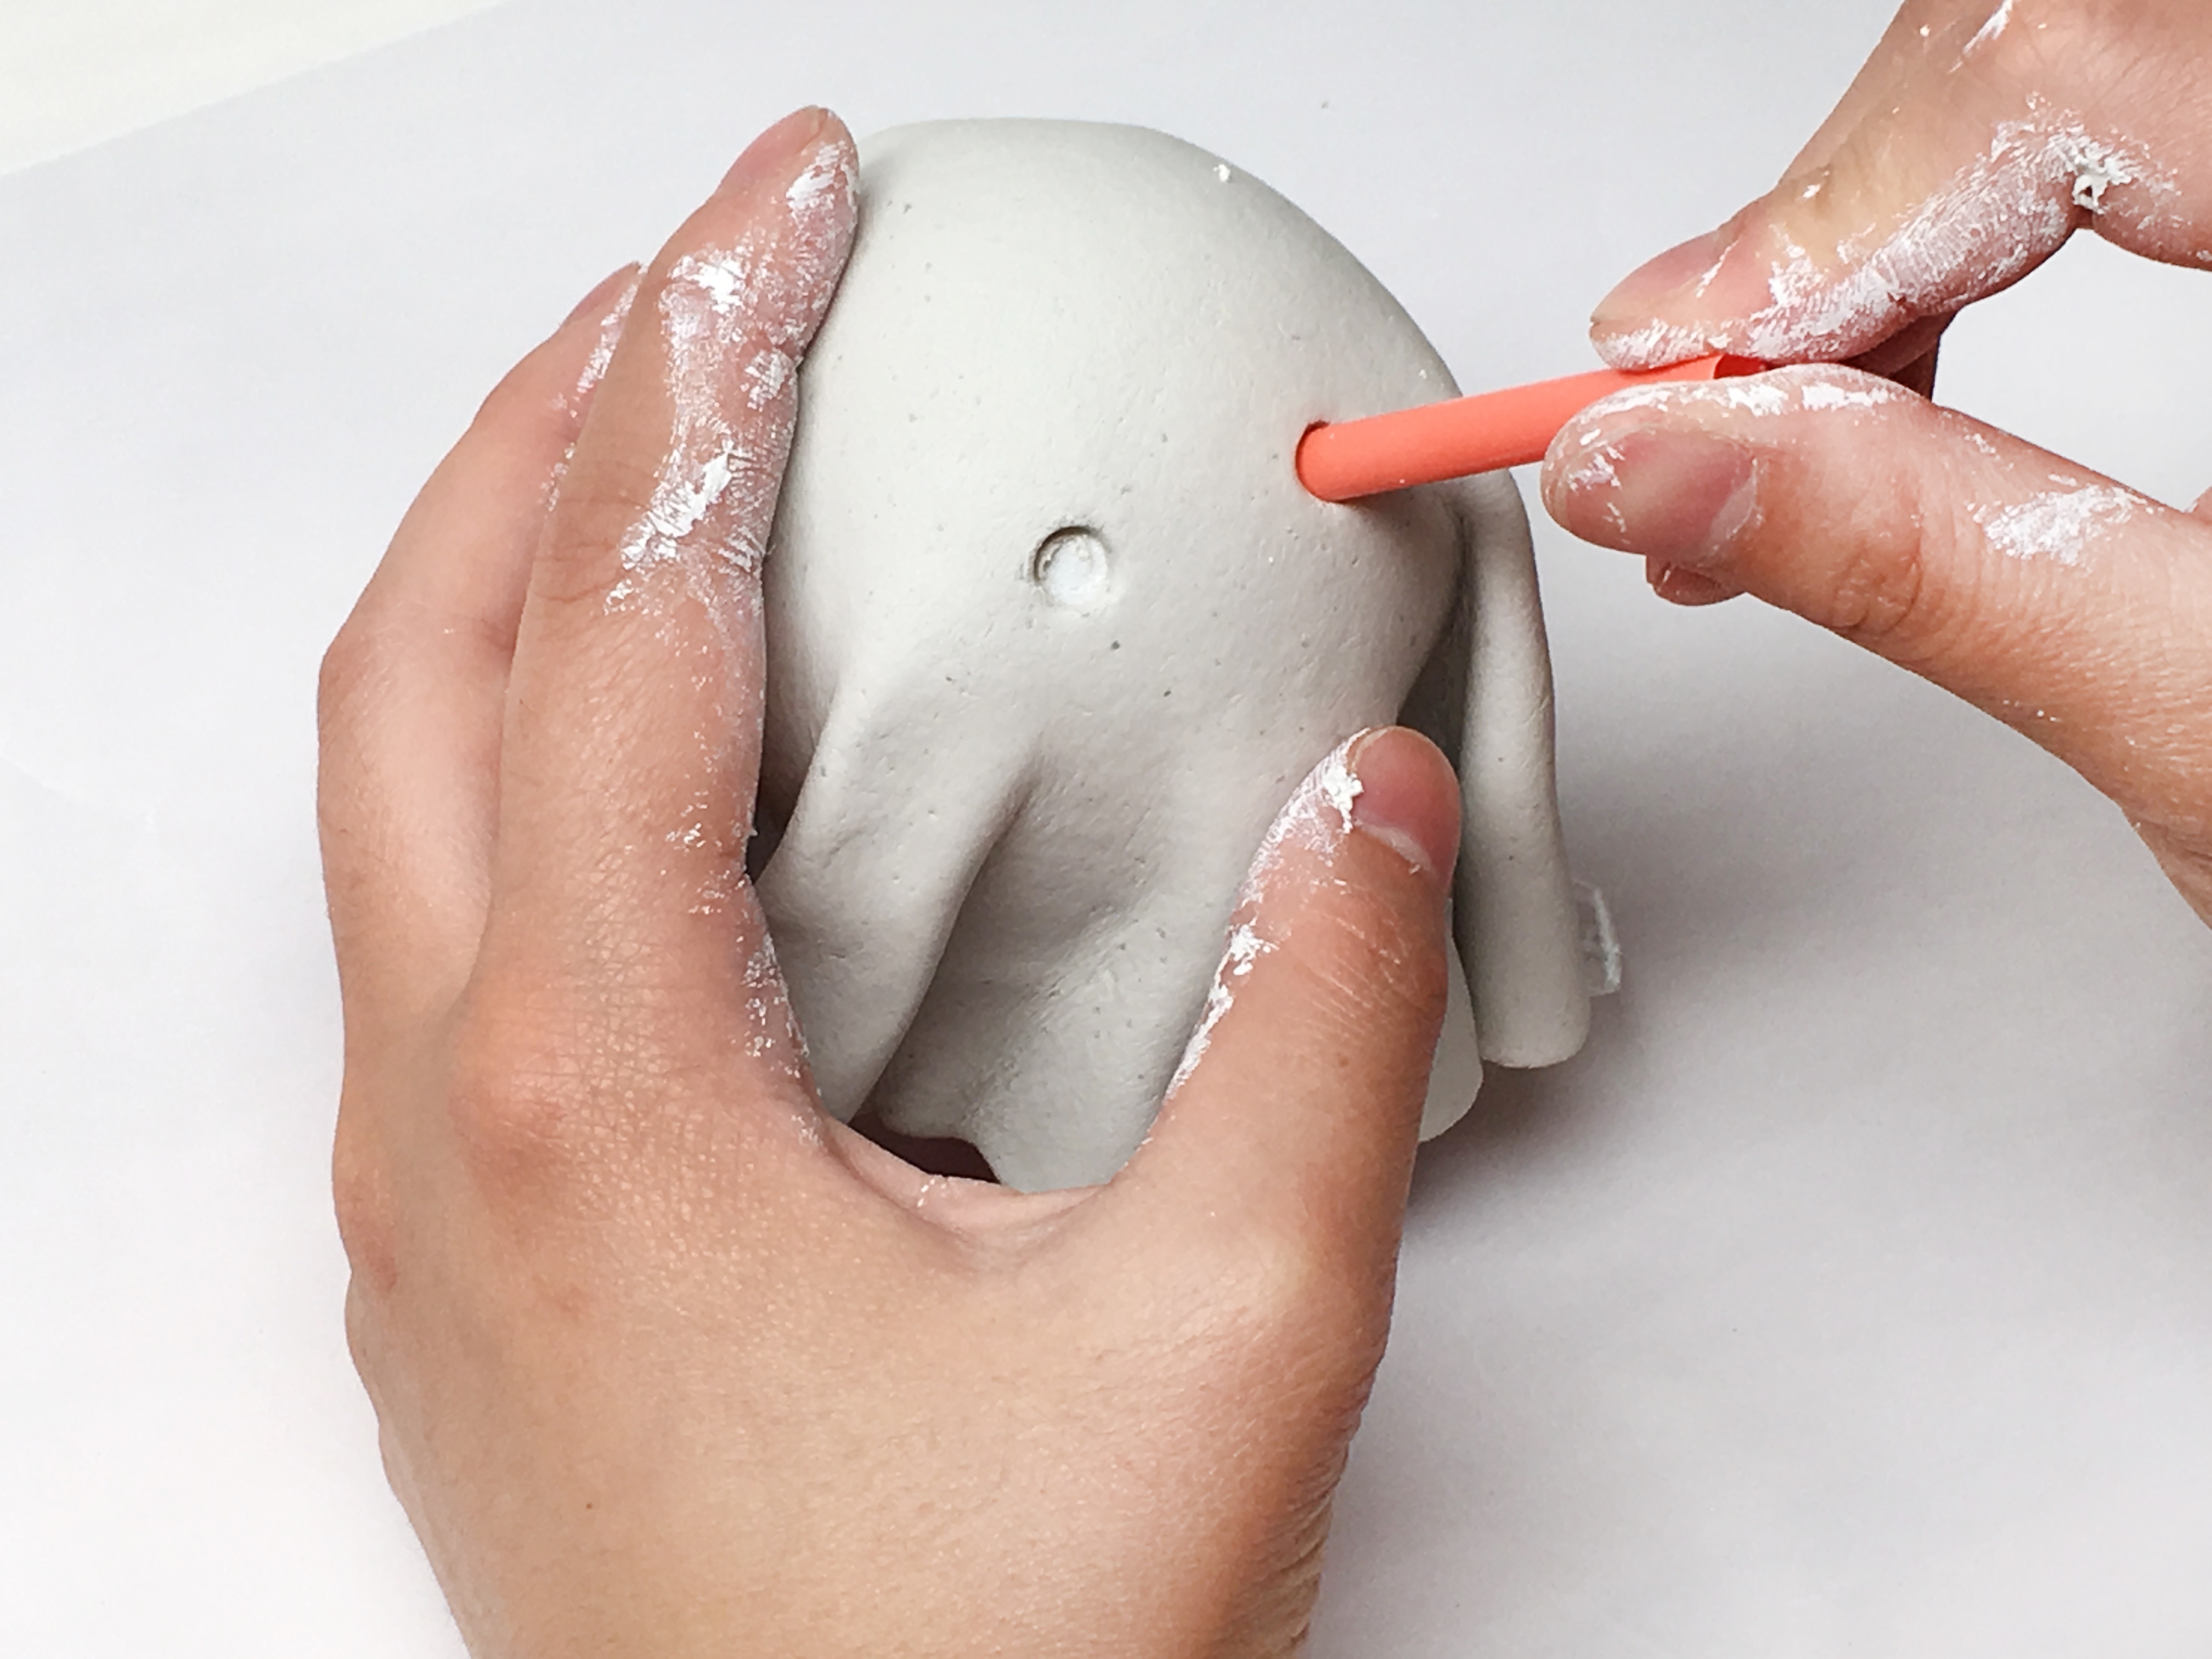
Use a large straw to punch holes out for the eyes of the ghost. Then, let your ghost(s) dry for a few hours. Depending on your air-dry clay, you may have to wait just a few hours or all night for the ghost to be completely dry. Repeat steps 1-5 to make a few friends for your spooky little ghost! Try making different size molds to make larger and smaller ghosts.
Step 6
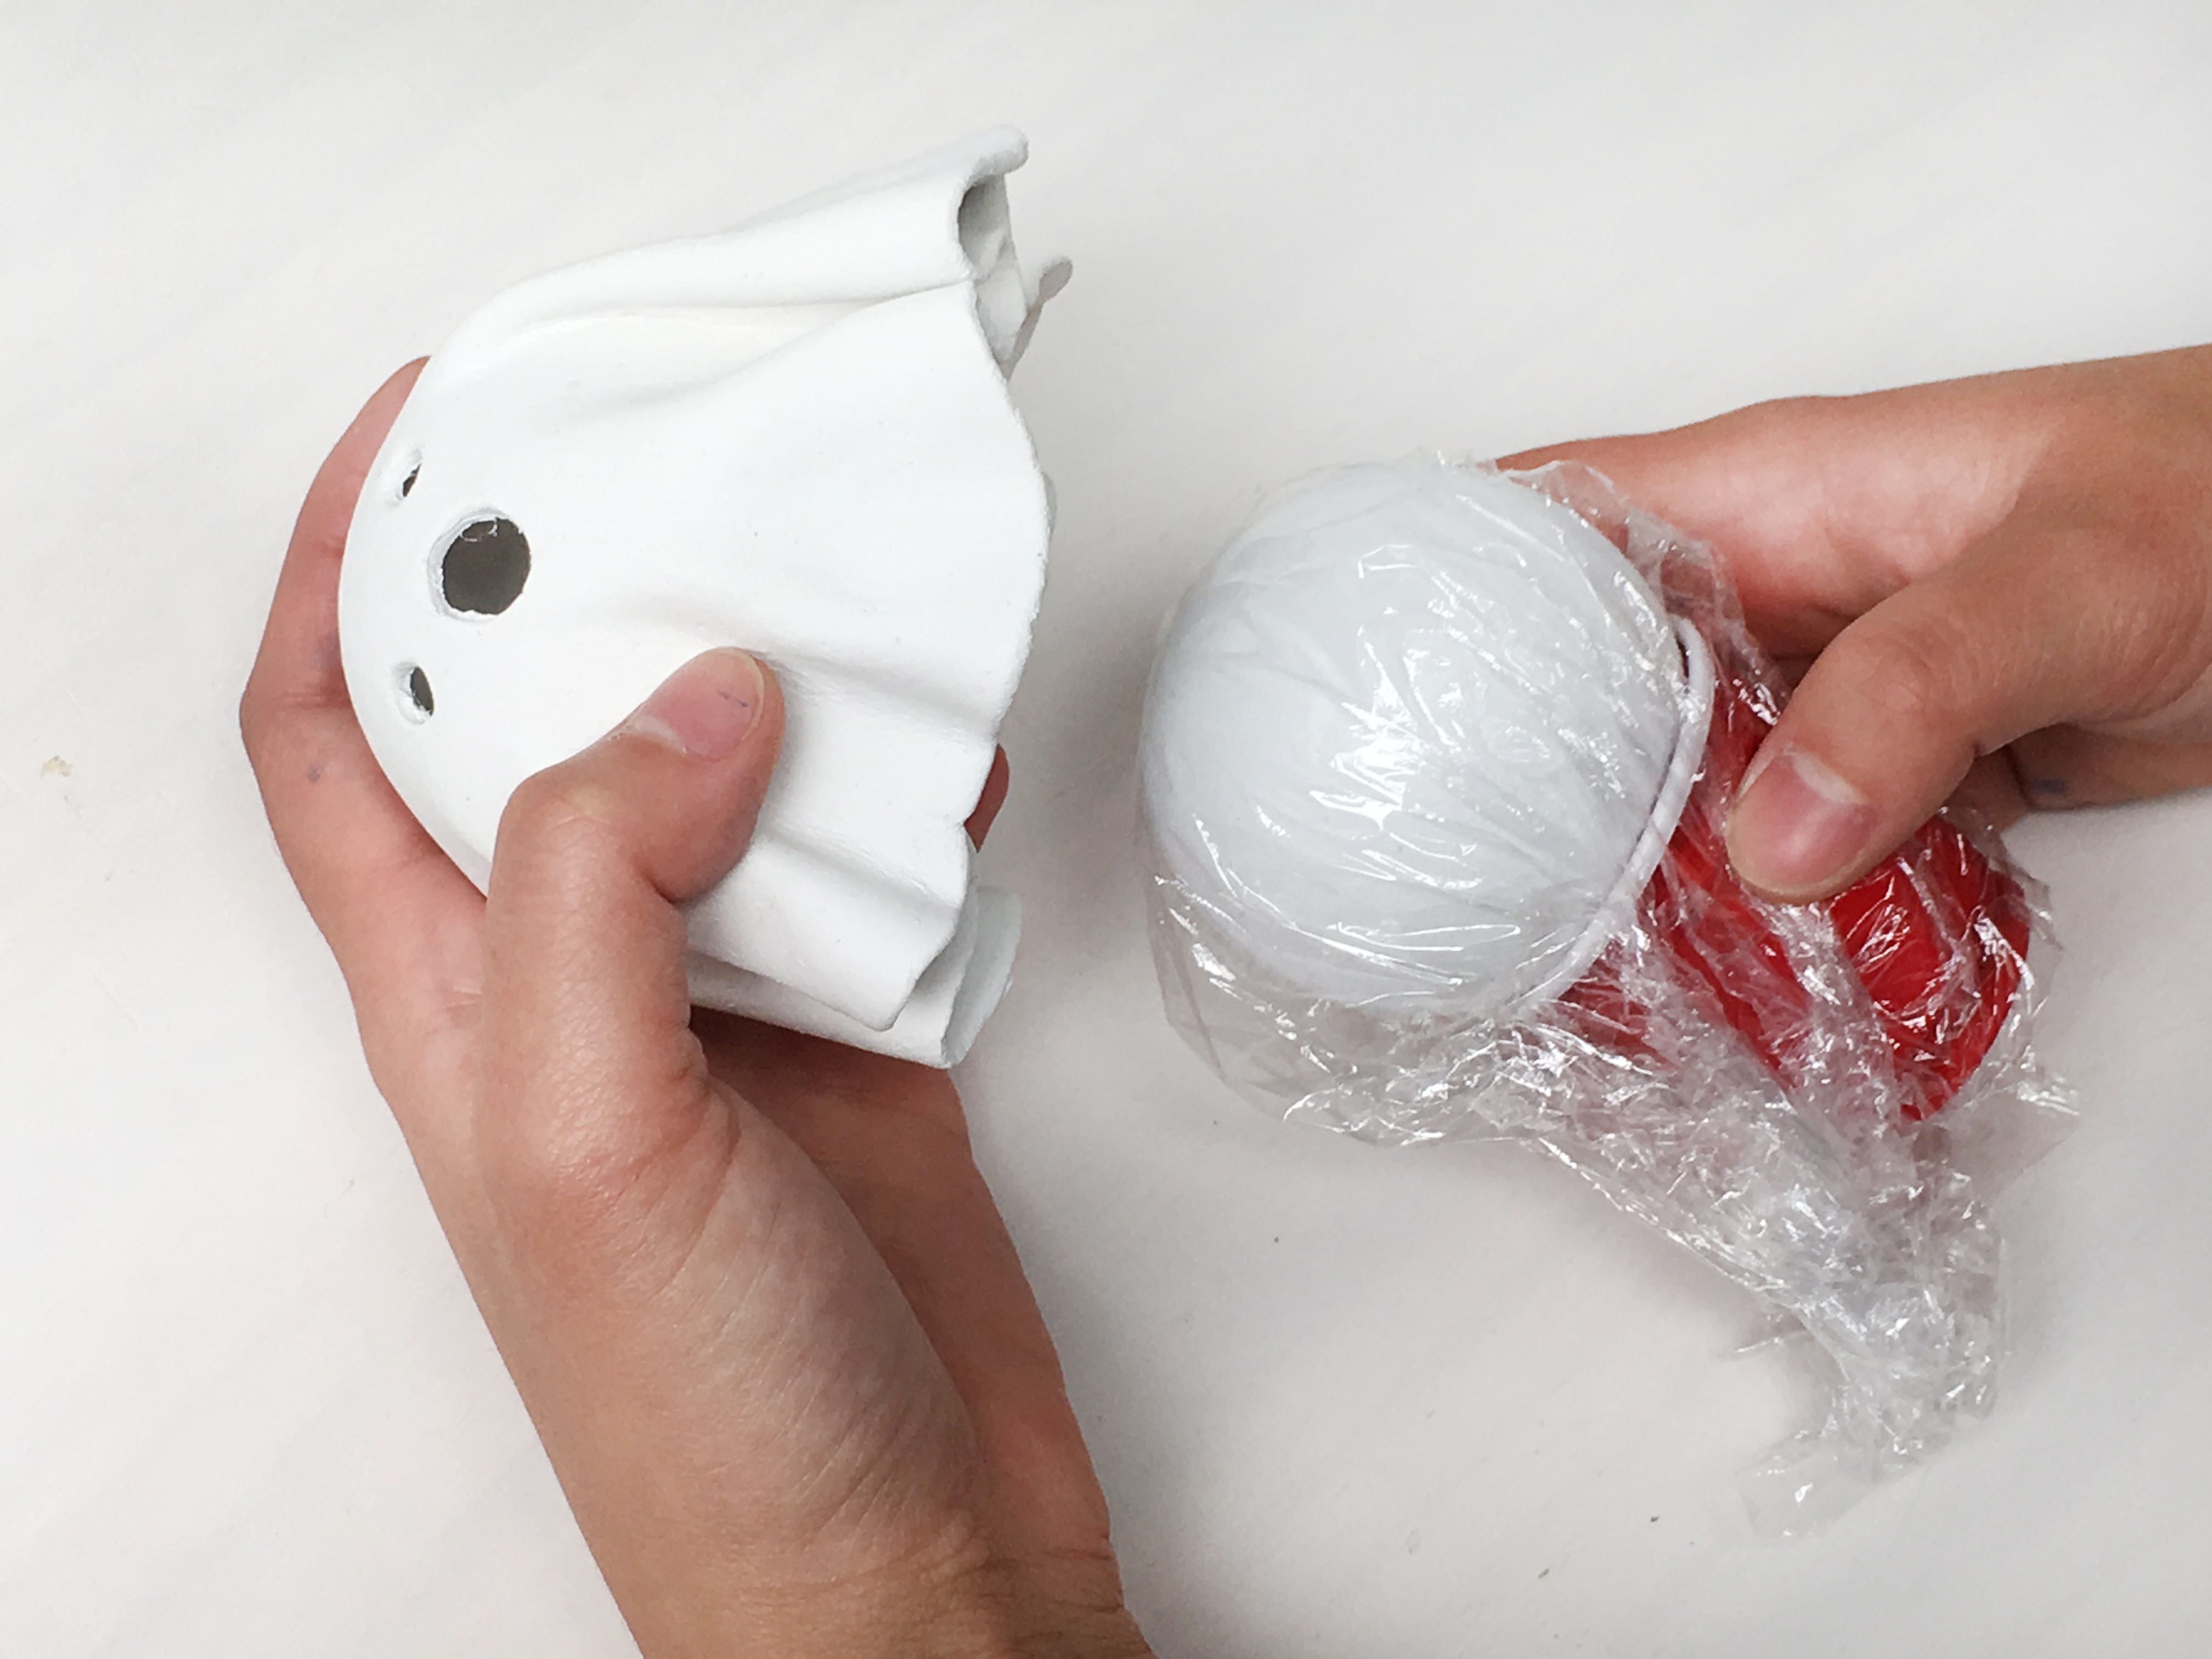
Once the ghost is dry, carefully remove it from the mold.
Final result!
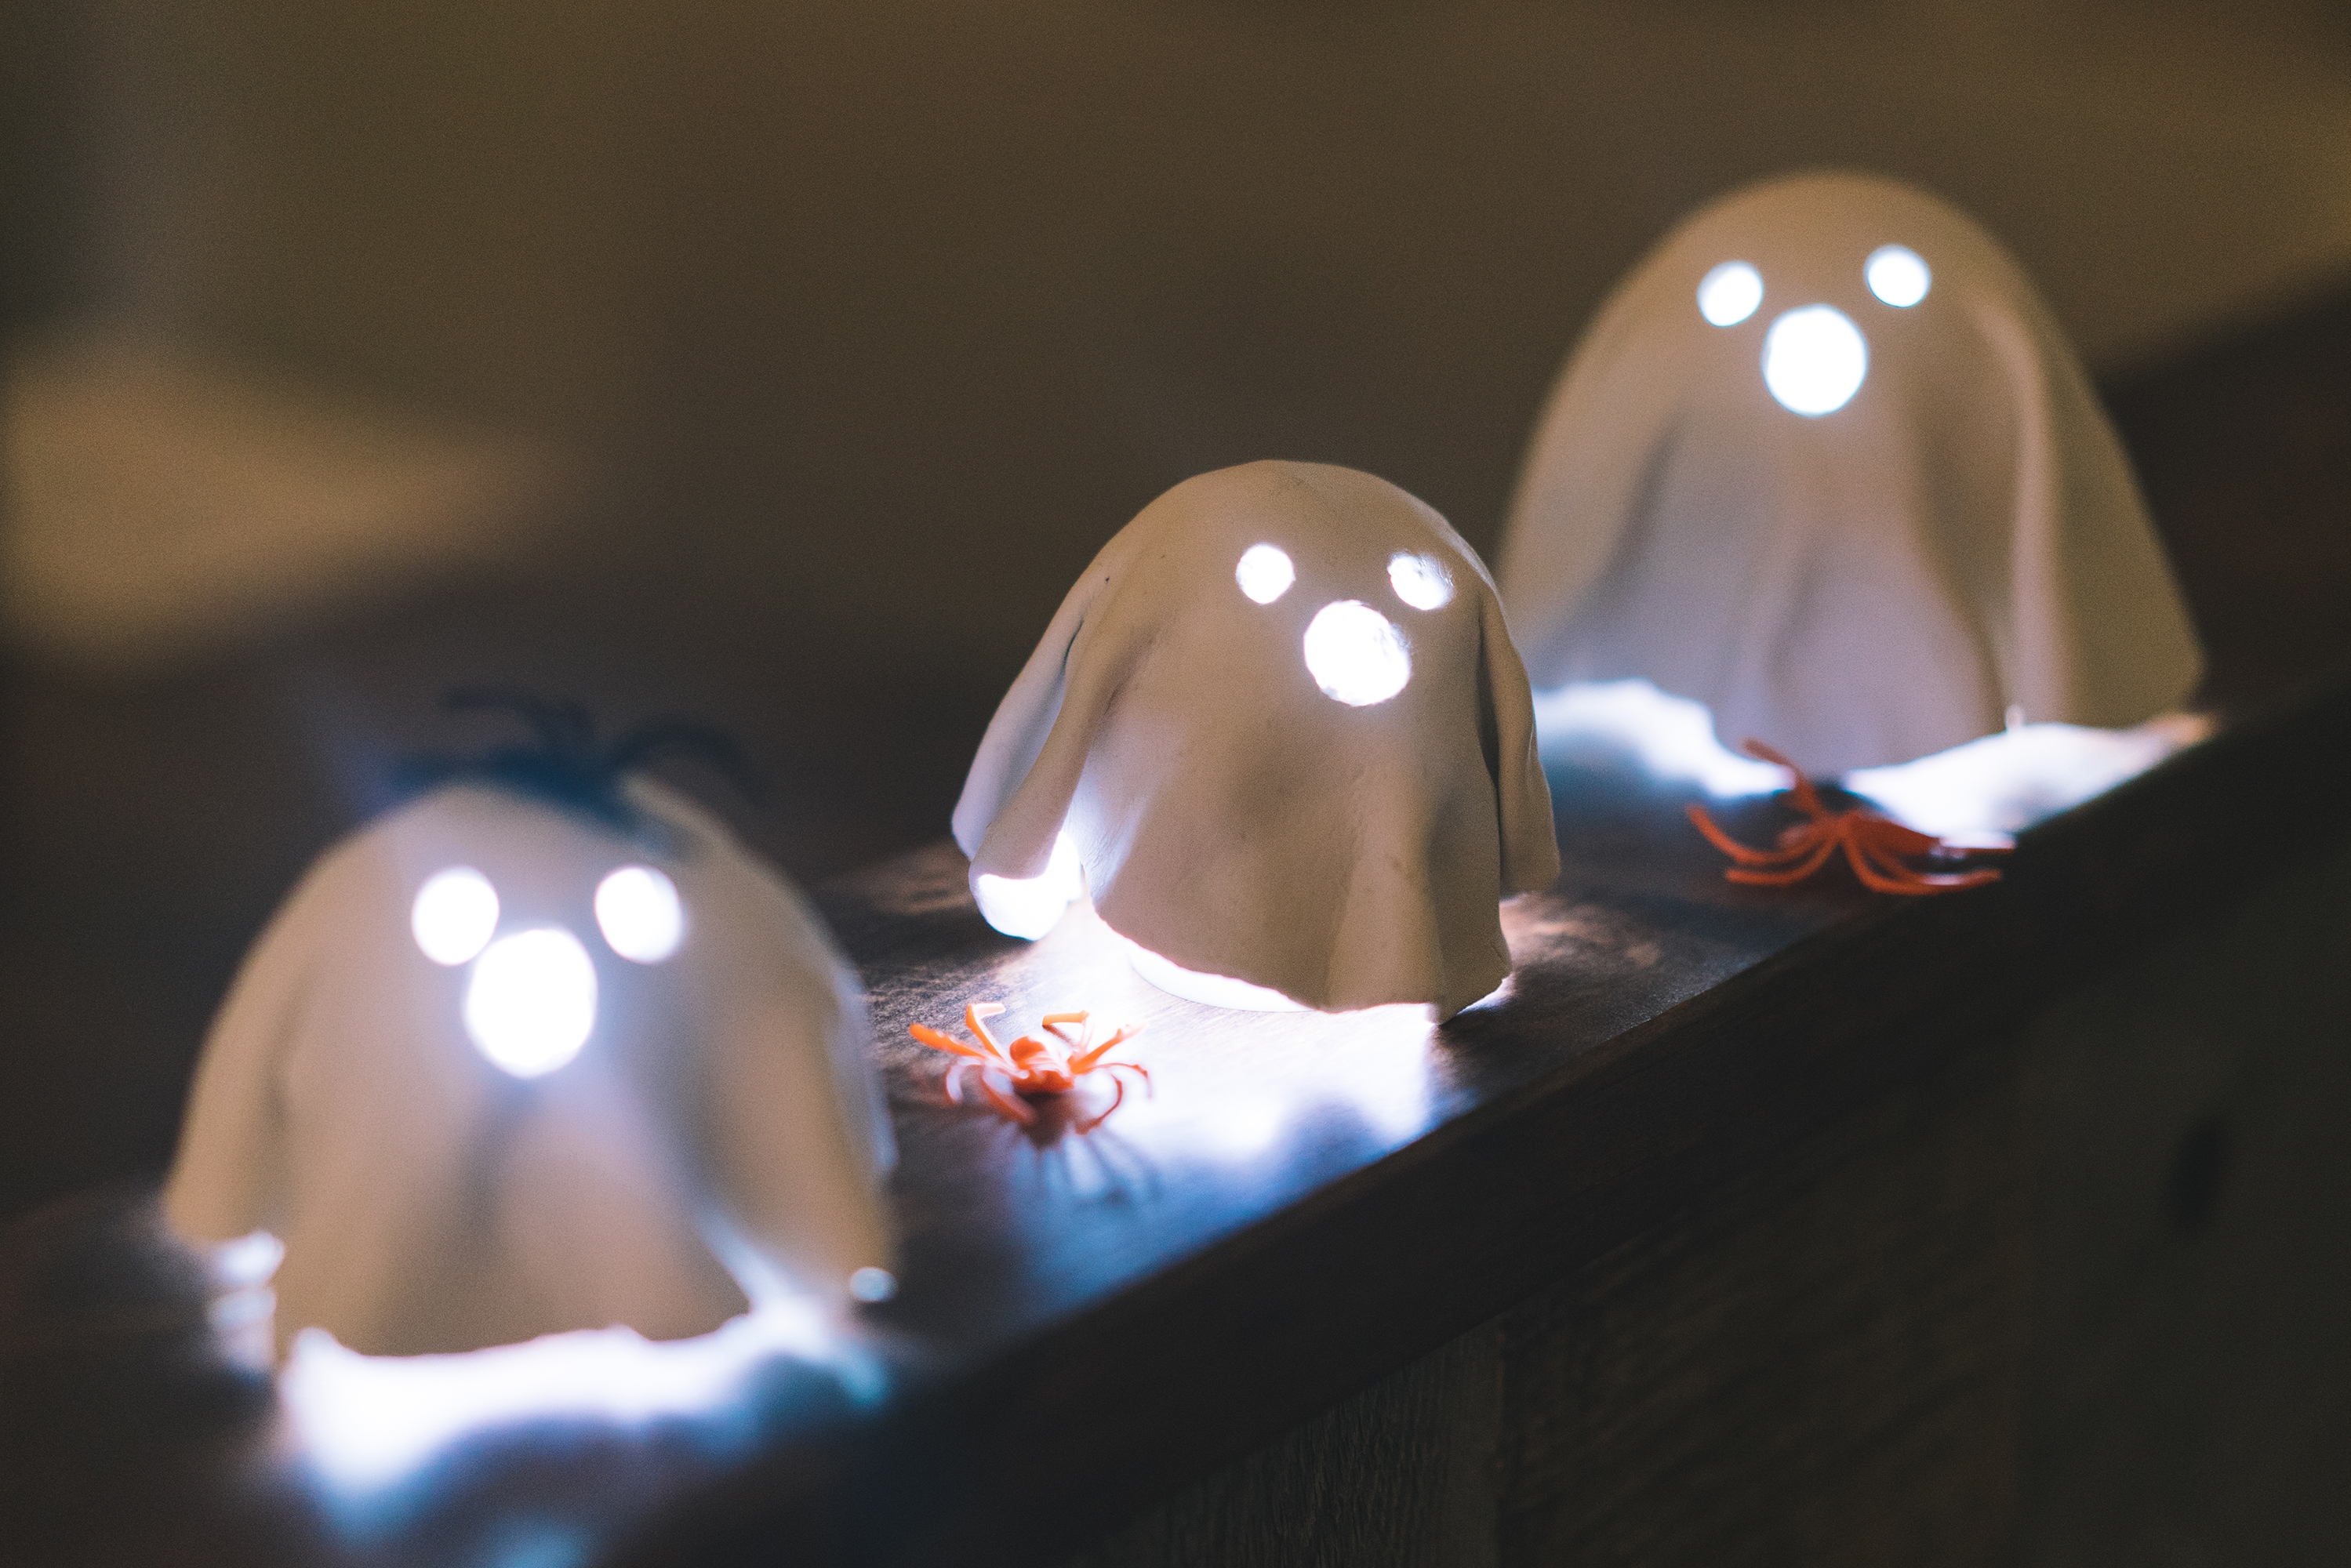
Finally, place your ghost over a tea light, turn off the lights, and get a little spooked!