Step-by-step tutorial
Step 1
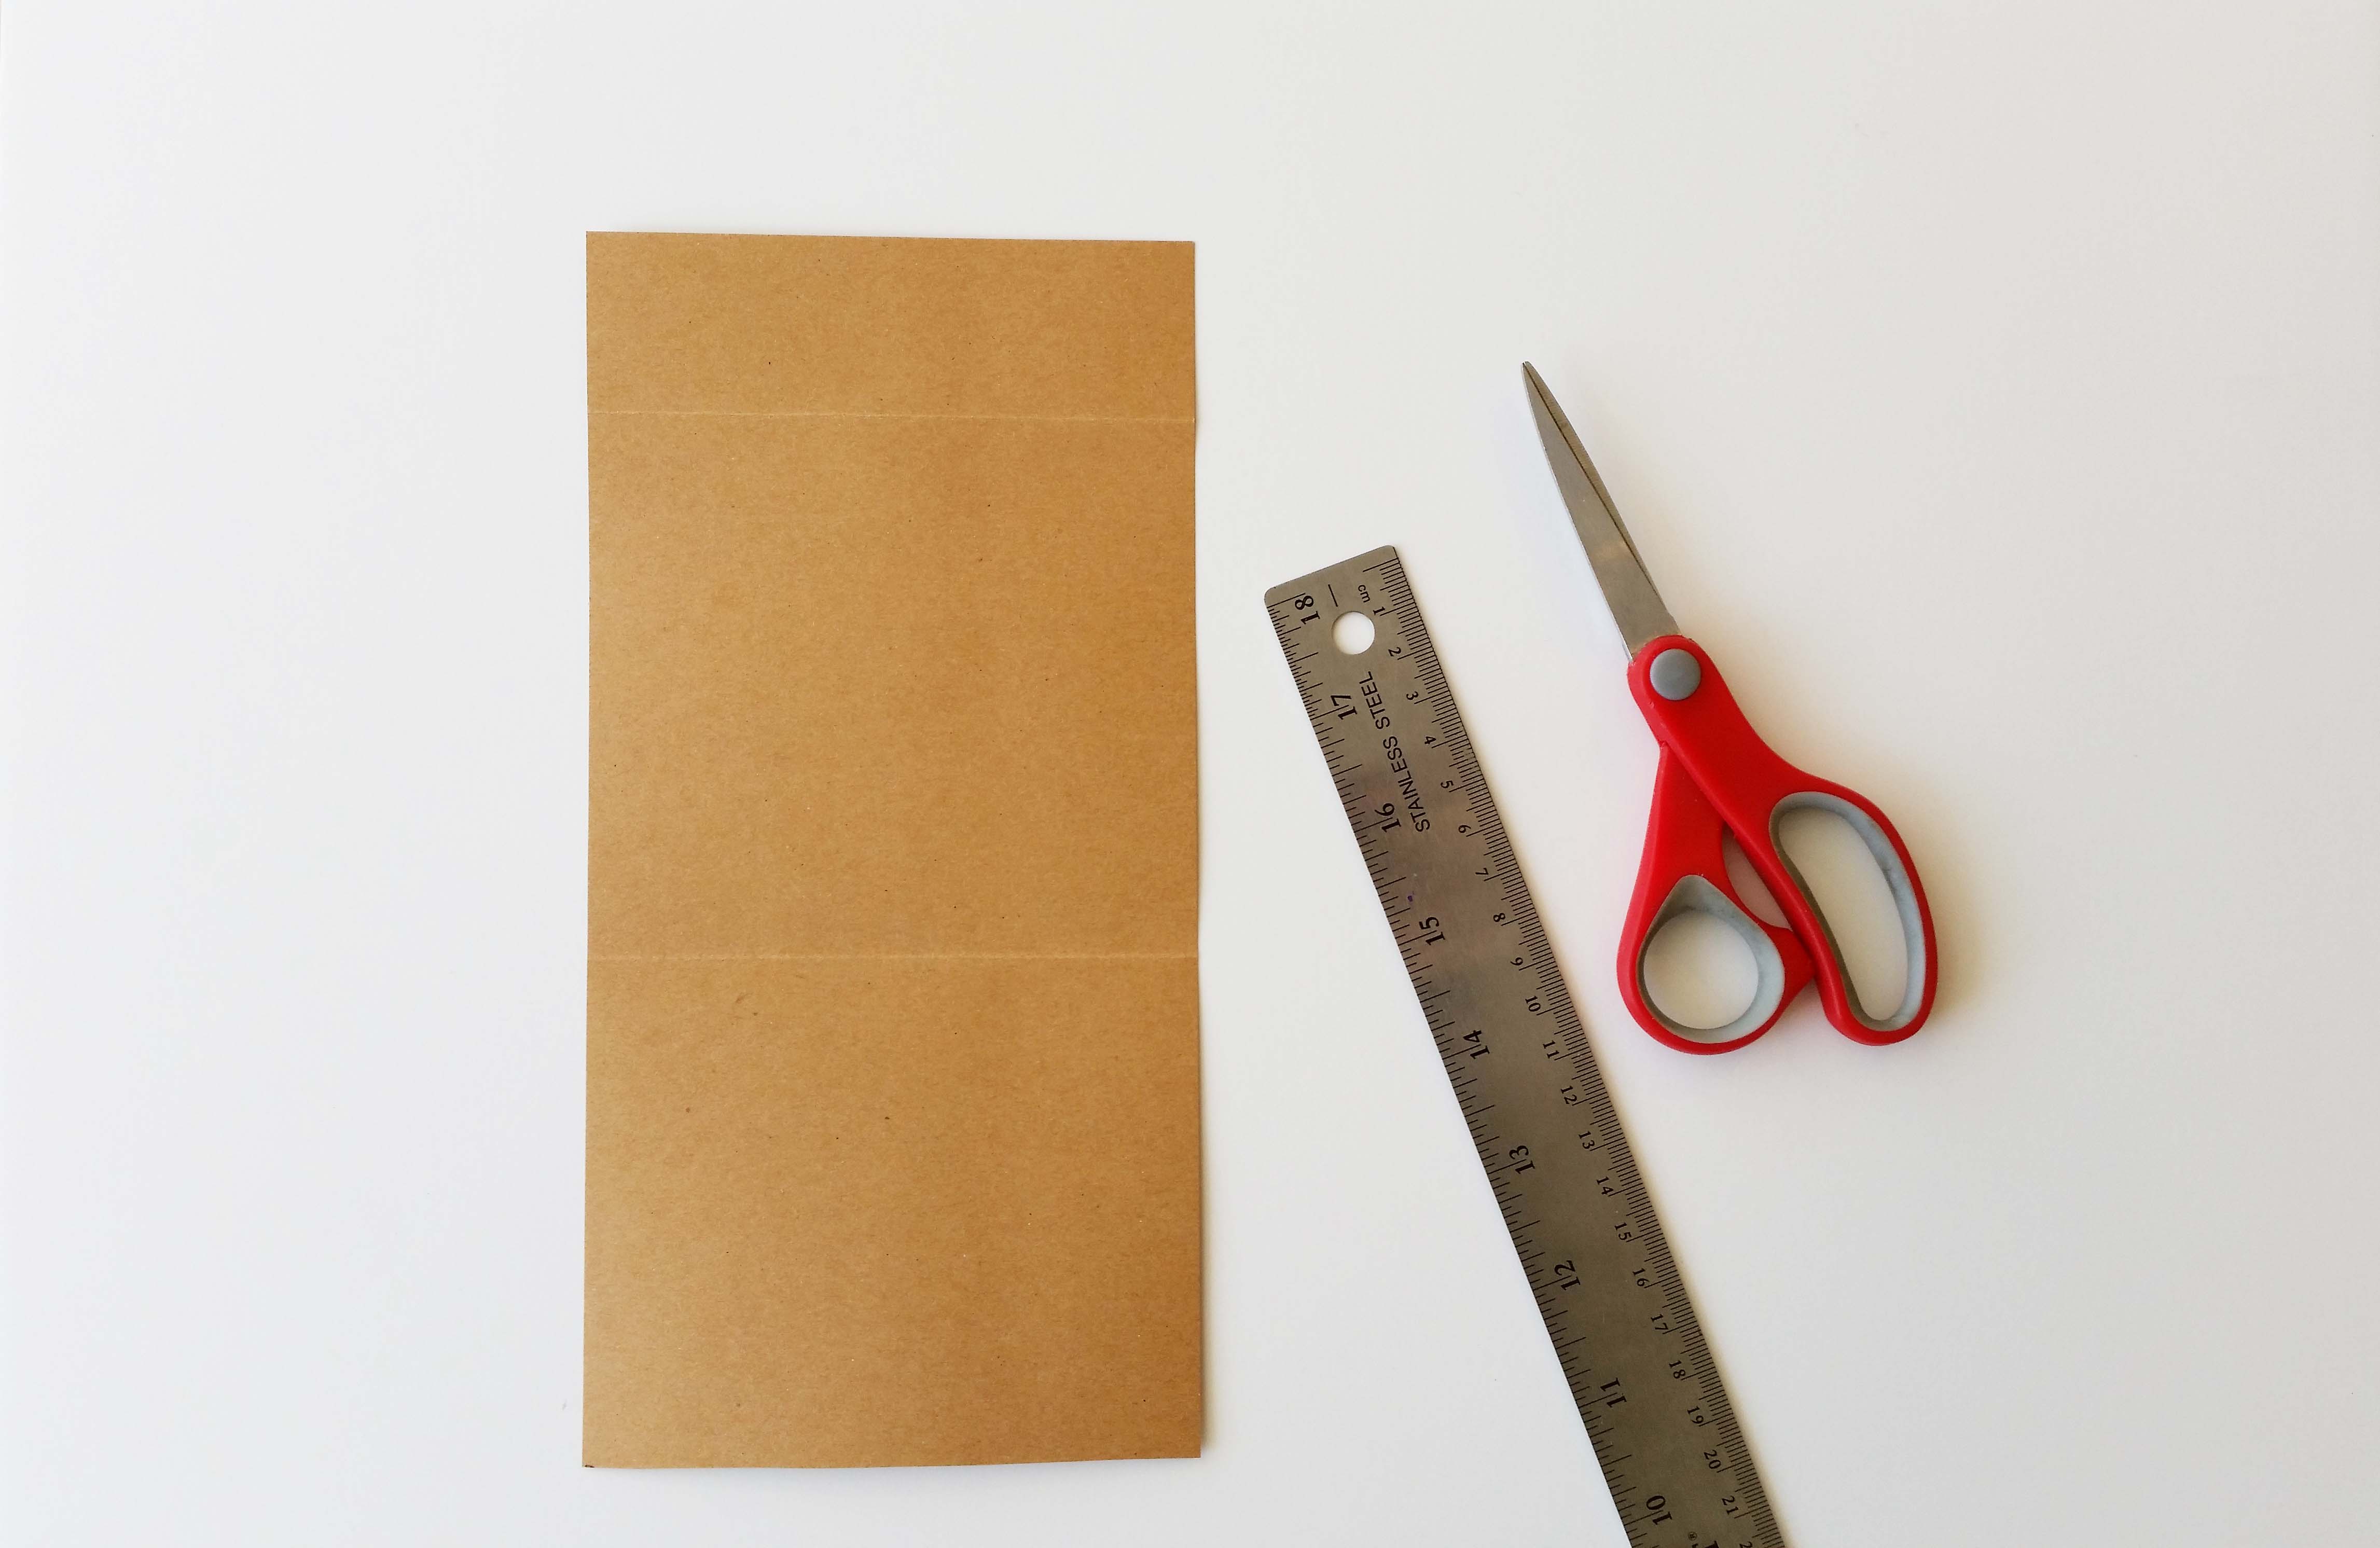
Cut the brown cardstock into a 4" x 10.5" strip.

Step 2
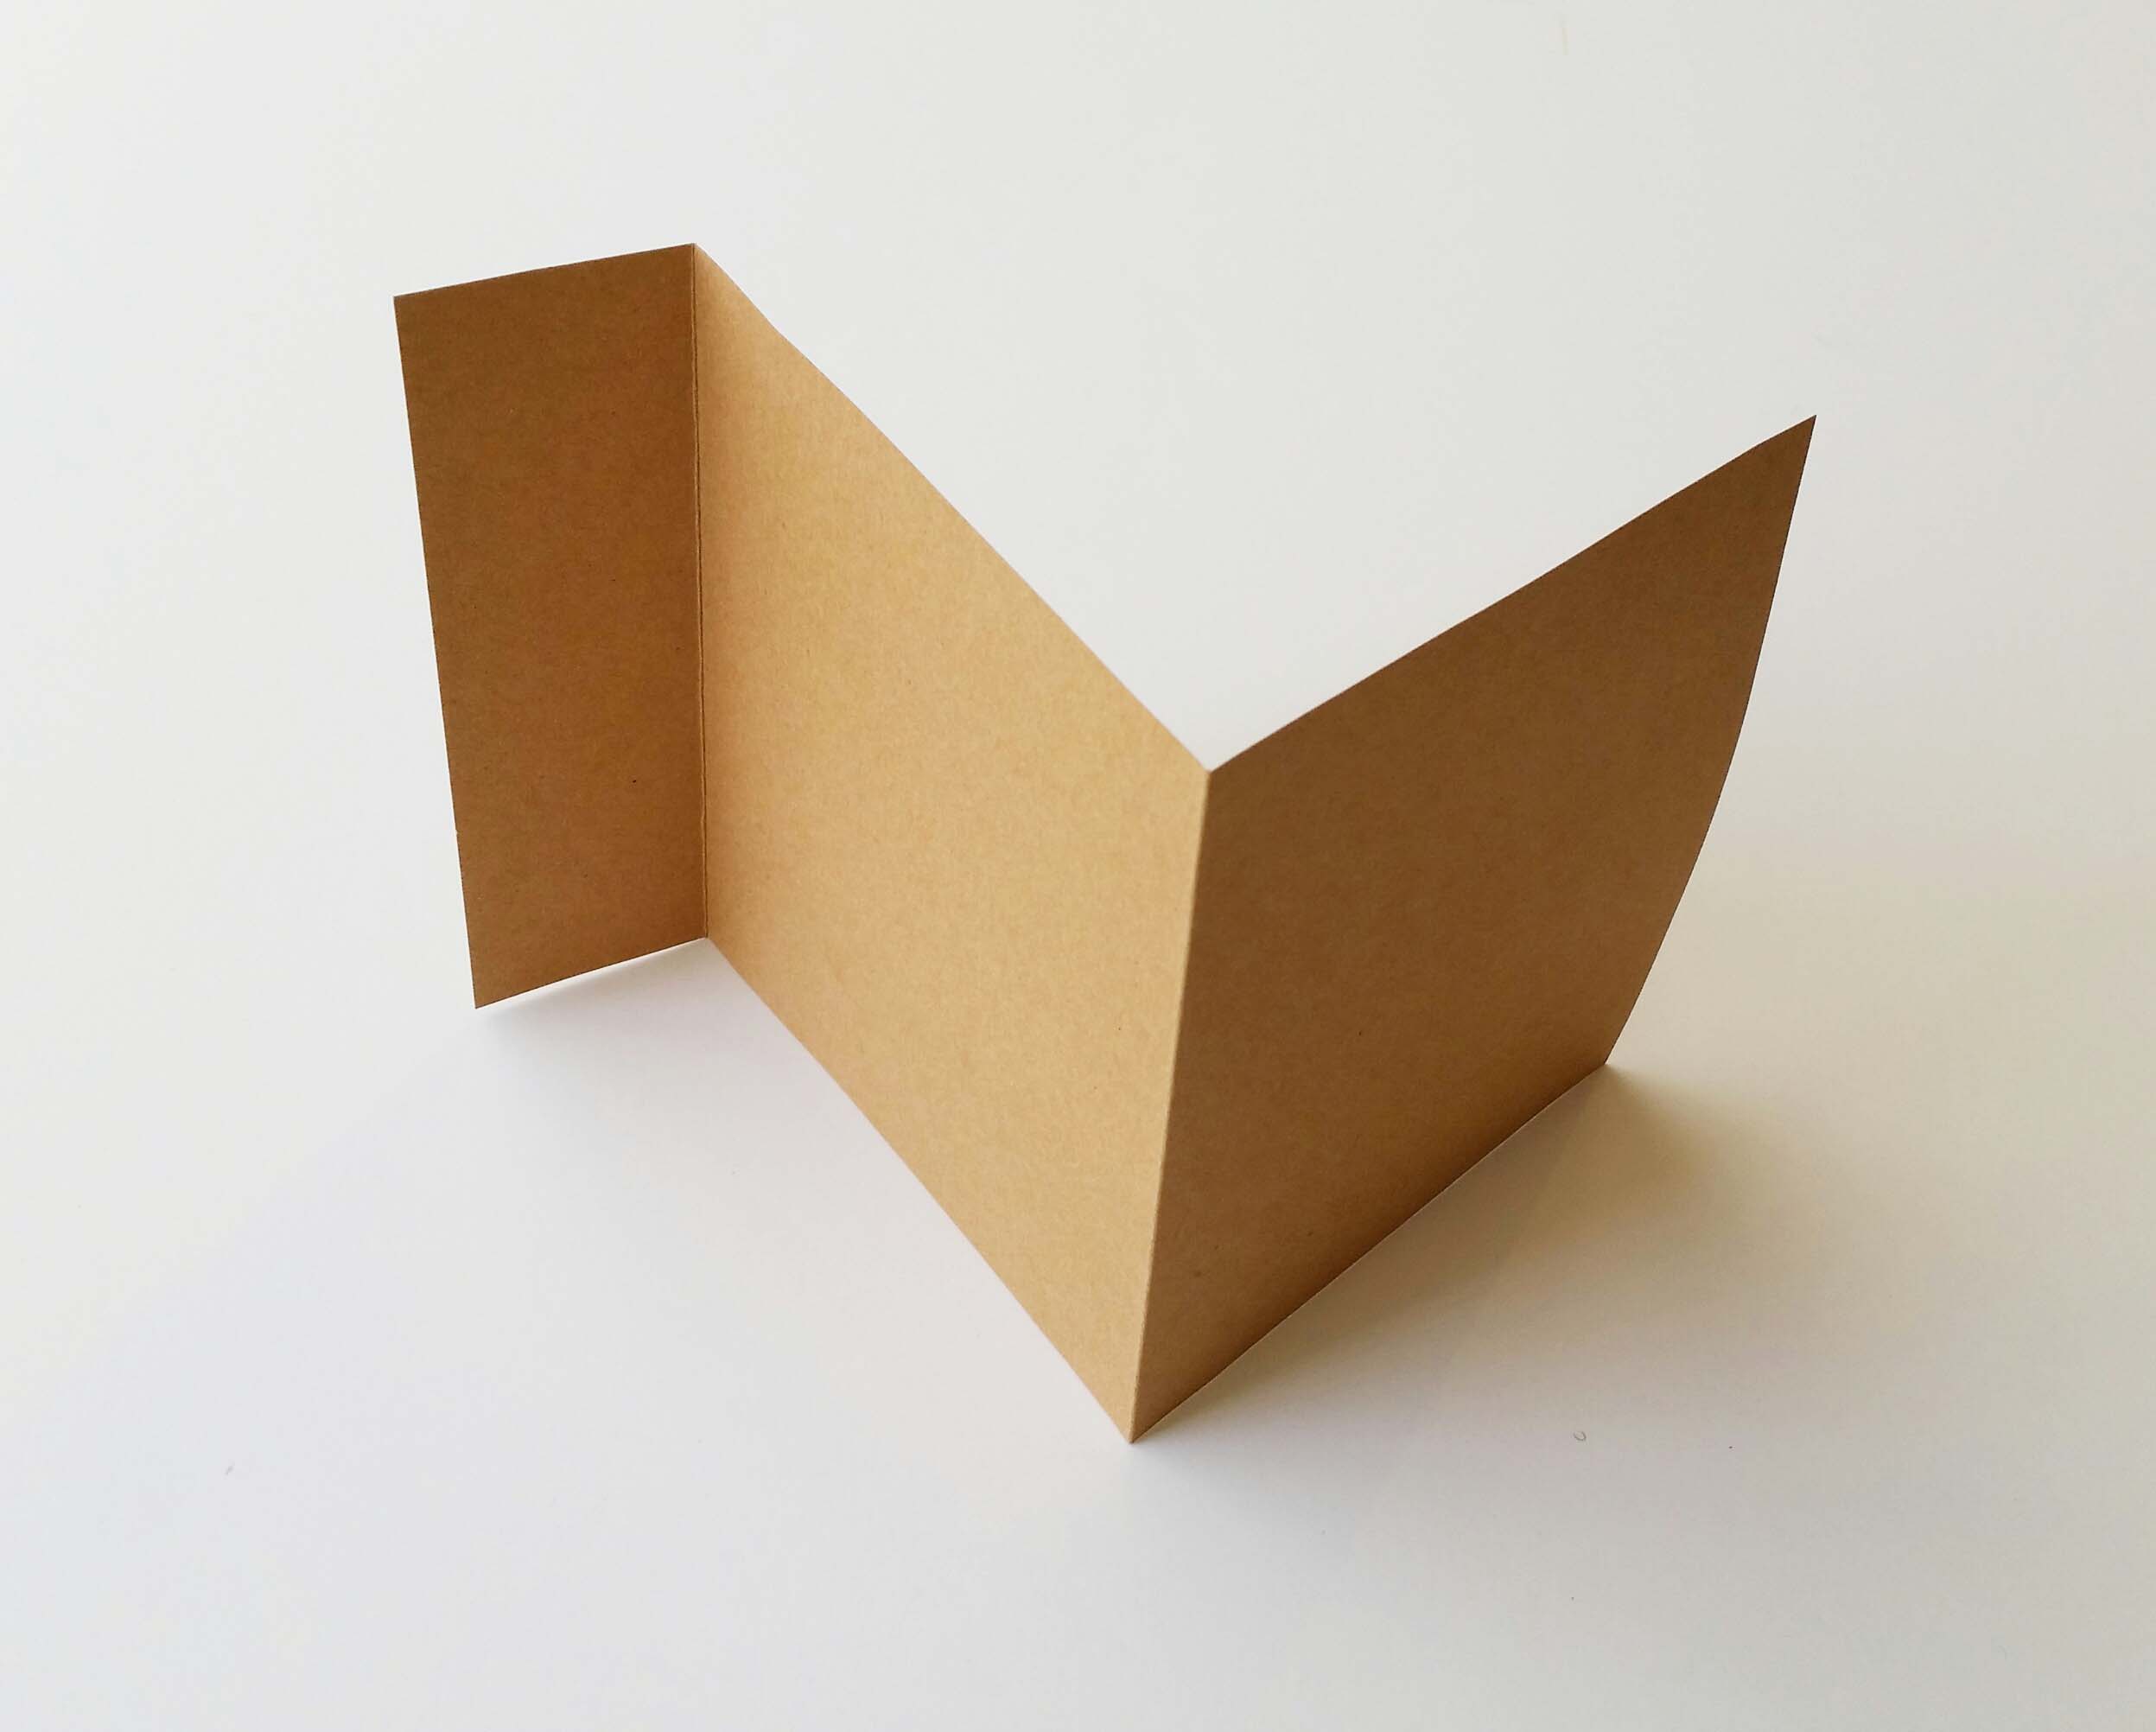
Fold over 1.5" of cardstock on one end. On the other end, fold the remaining cardstock in half in the opposite direction, creating a Z-shape. The folded cardstock piece should be 4.5" tall.
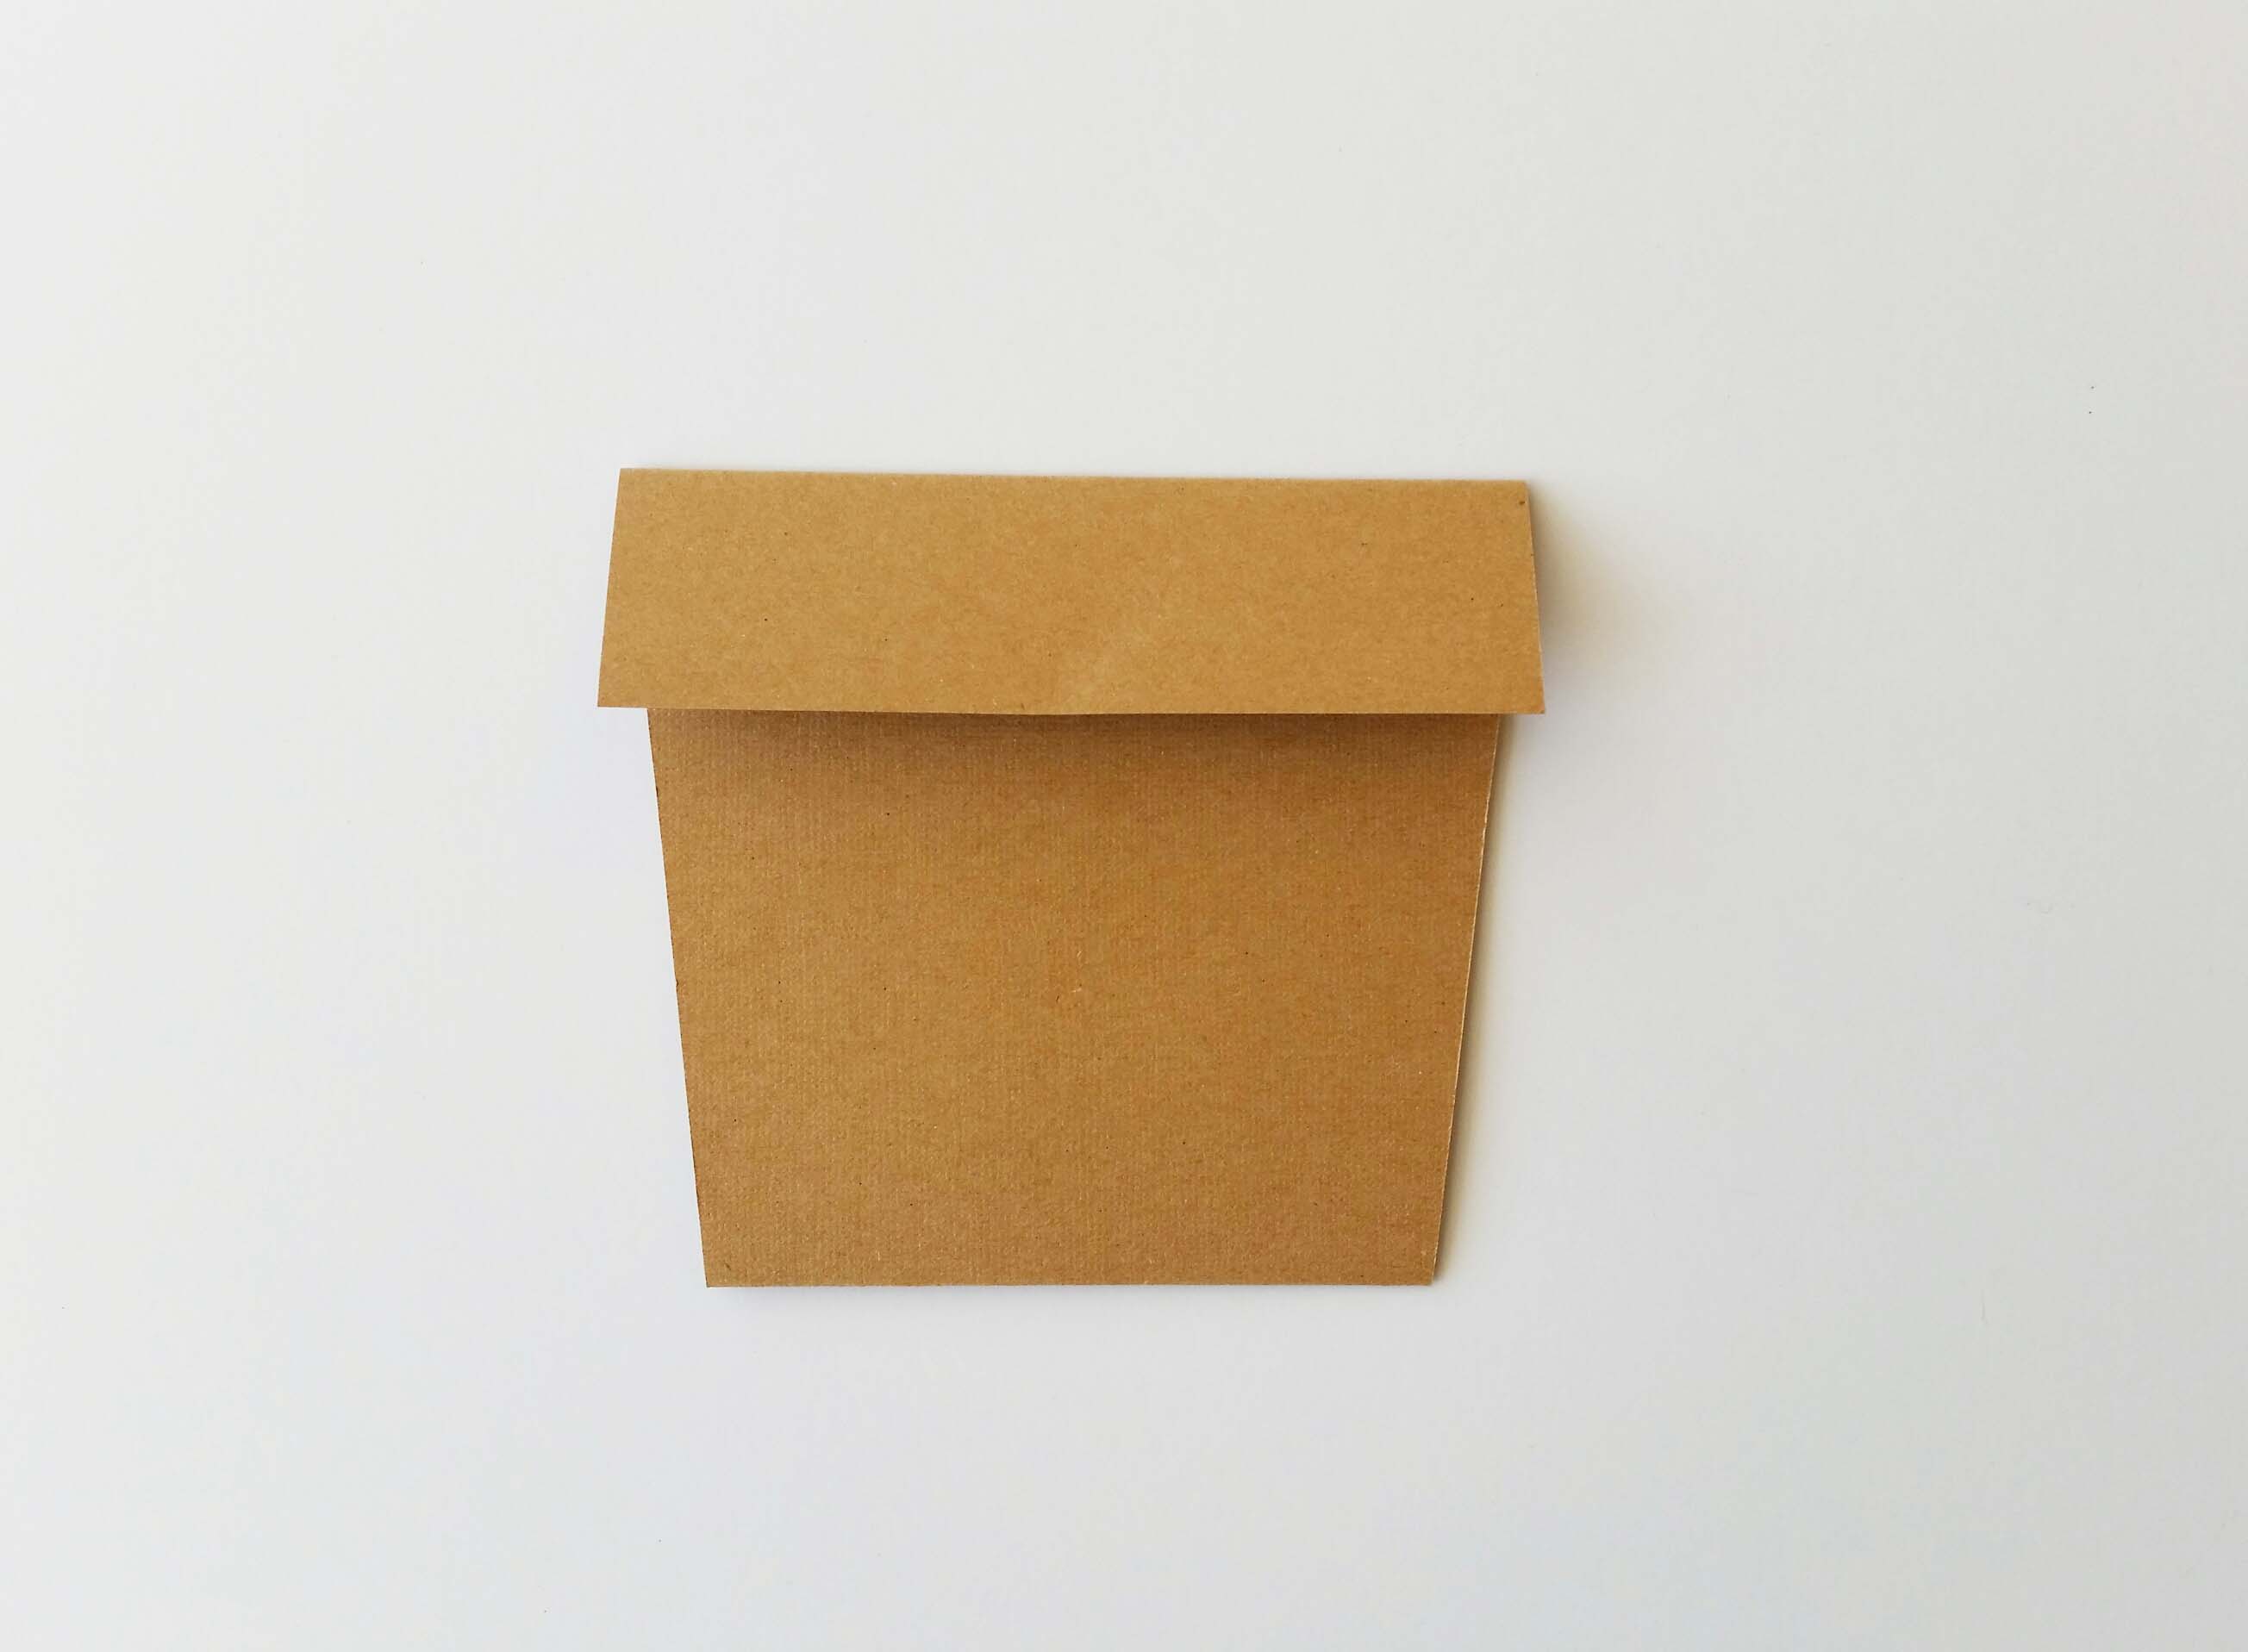
Step 3
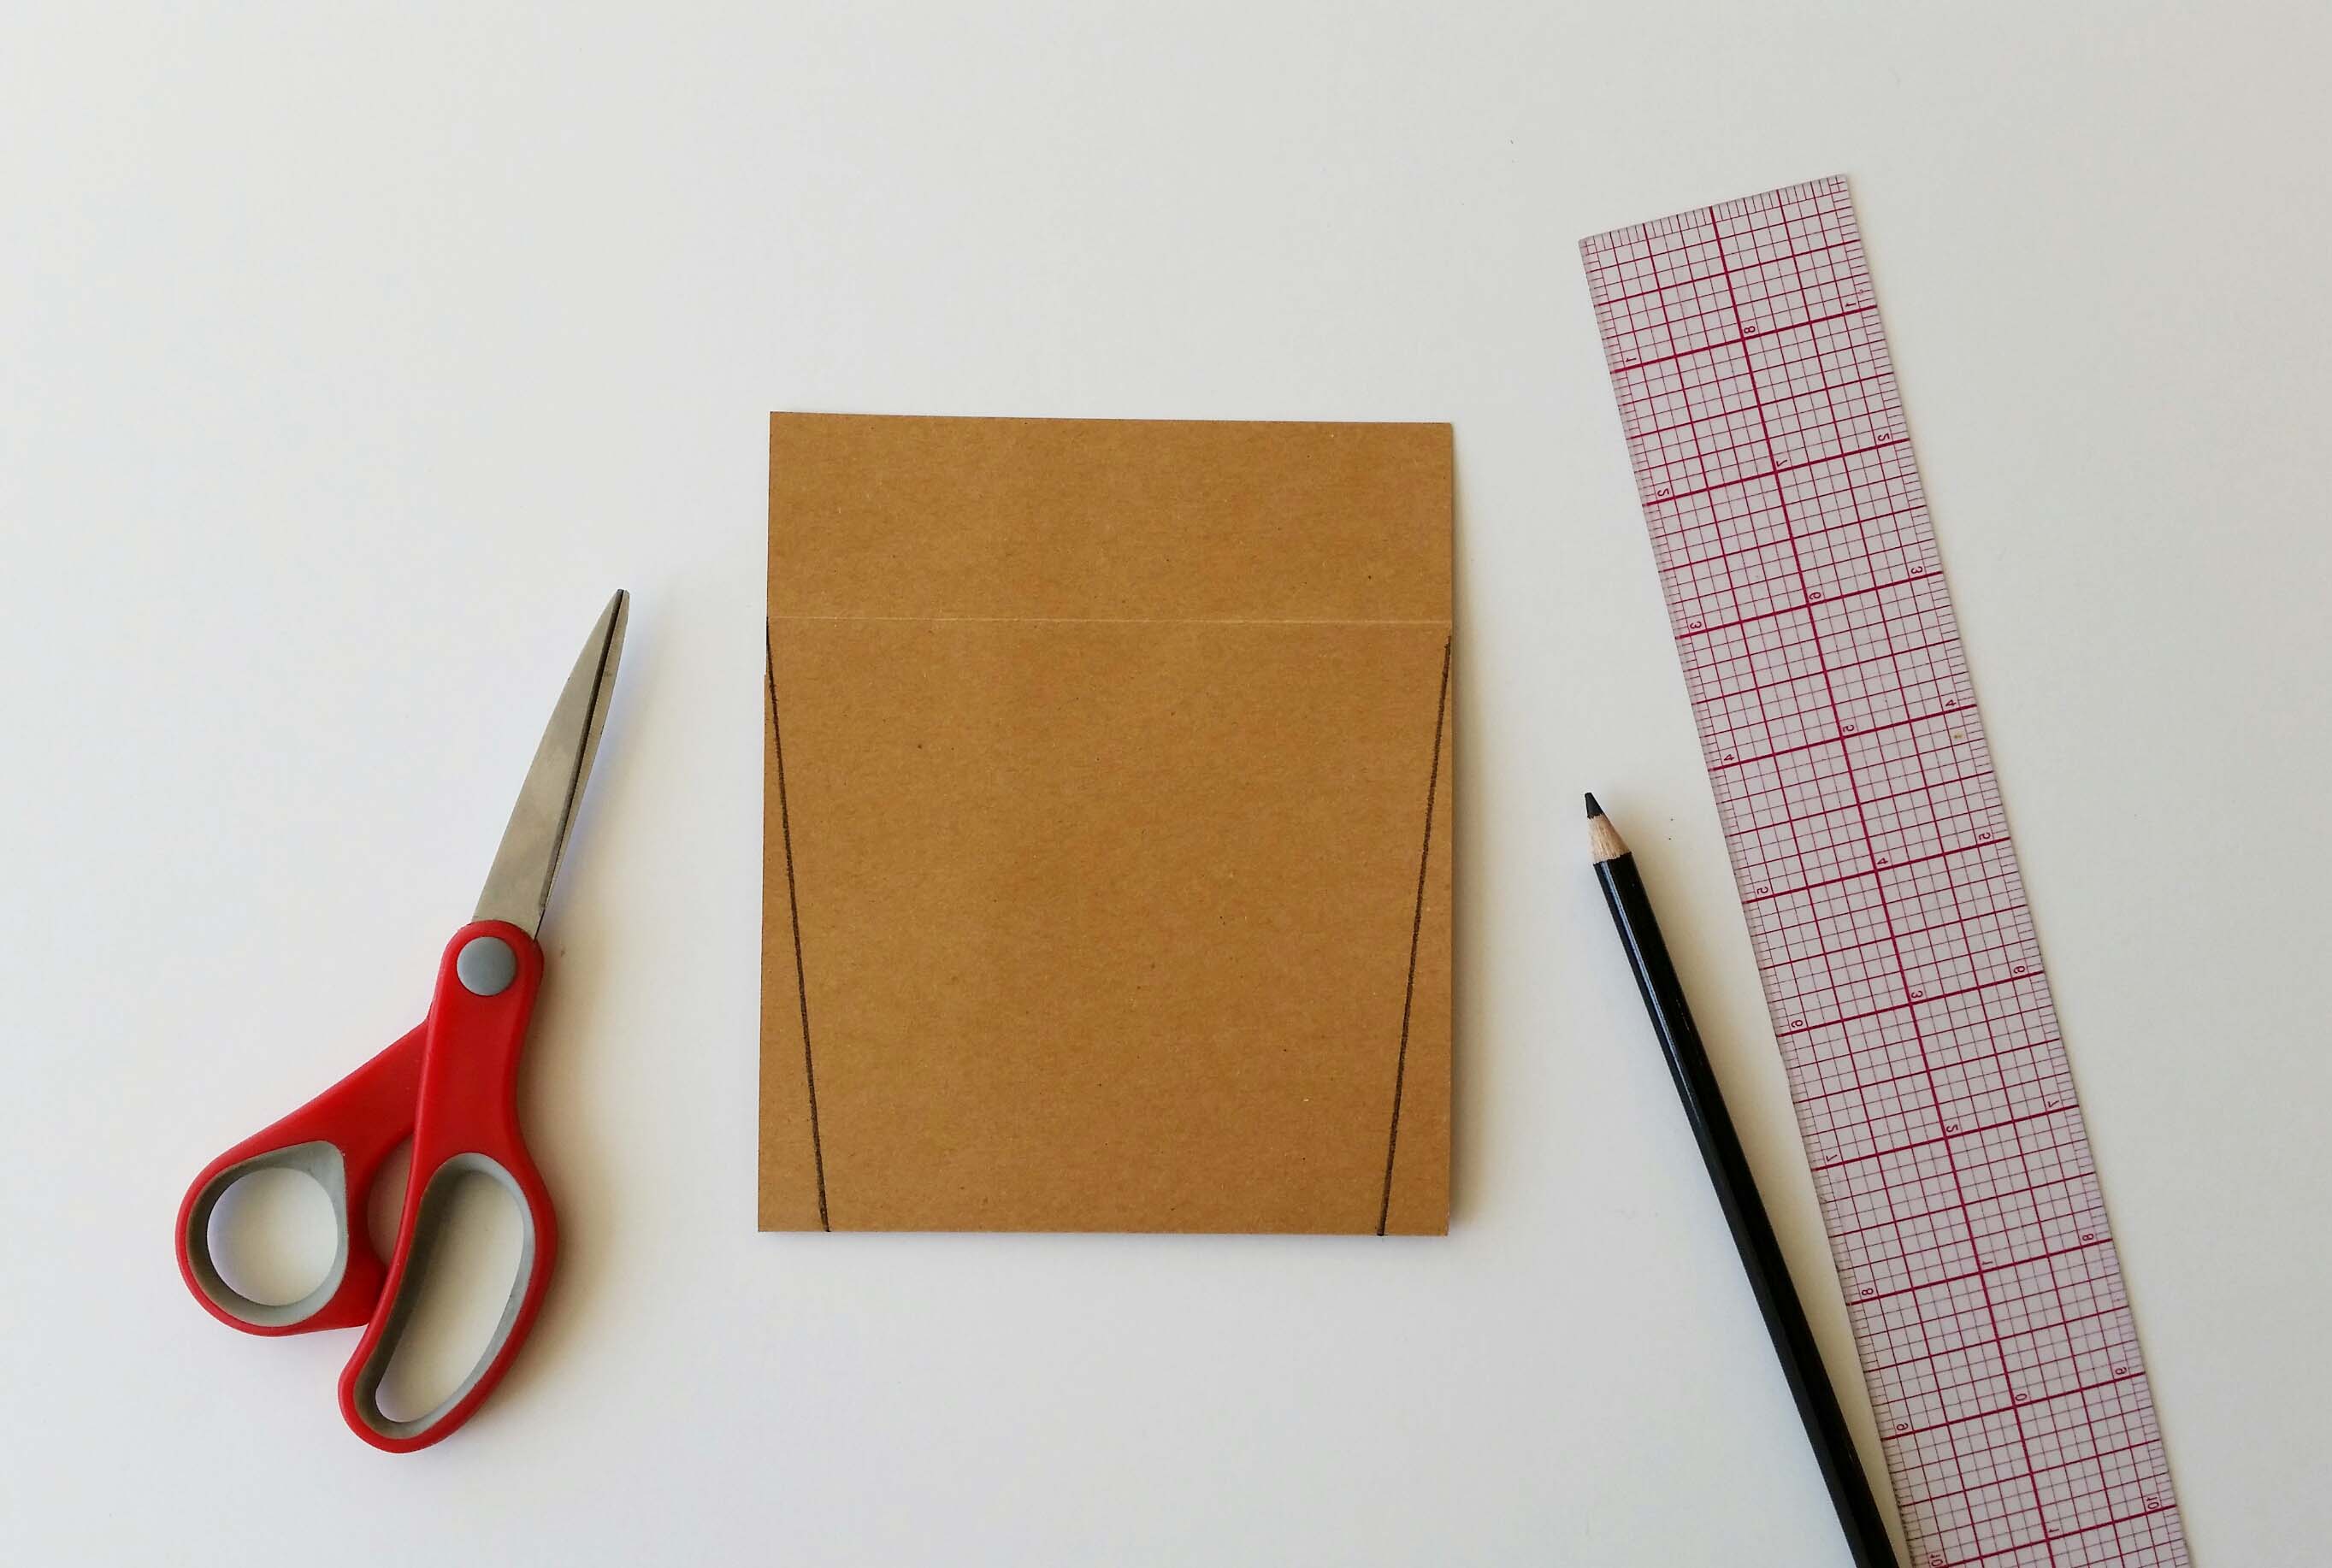
Unfold the 1.5" flap of your cardstock piece and lay it down so the unfolded flap is at the top.On the bottom edge, mark 0.5" in from both of the ends. Draw straight lines from 0.5" marks to the crease line of the flap.
Step 4
Cut along the lines and then fold the flap back down towards you. This will be your flower pot!
Step 5
Use the various colors of cardstock to cut out flower heads and petals in different shapes and sizes. Keep your pot close by to size the flowers appropriately. You should be able to arrange around 3-5 flowers over your pot.

Tip
Get creative! Mix and match different colors, sizes, and textures. Try experimenting with other craft materials (like buttons or pom-poms) to use as your flower heads. Glue the flower heads onto your petals.
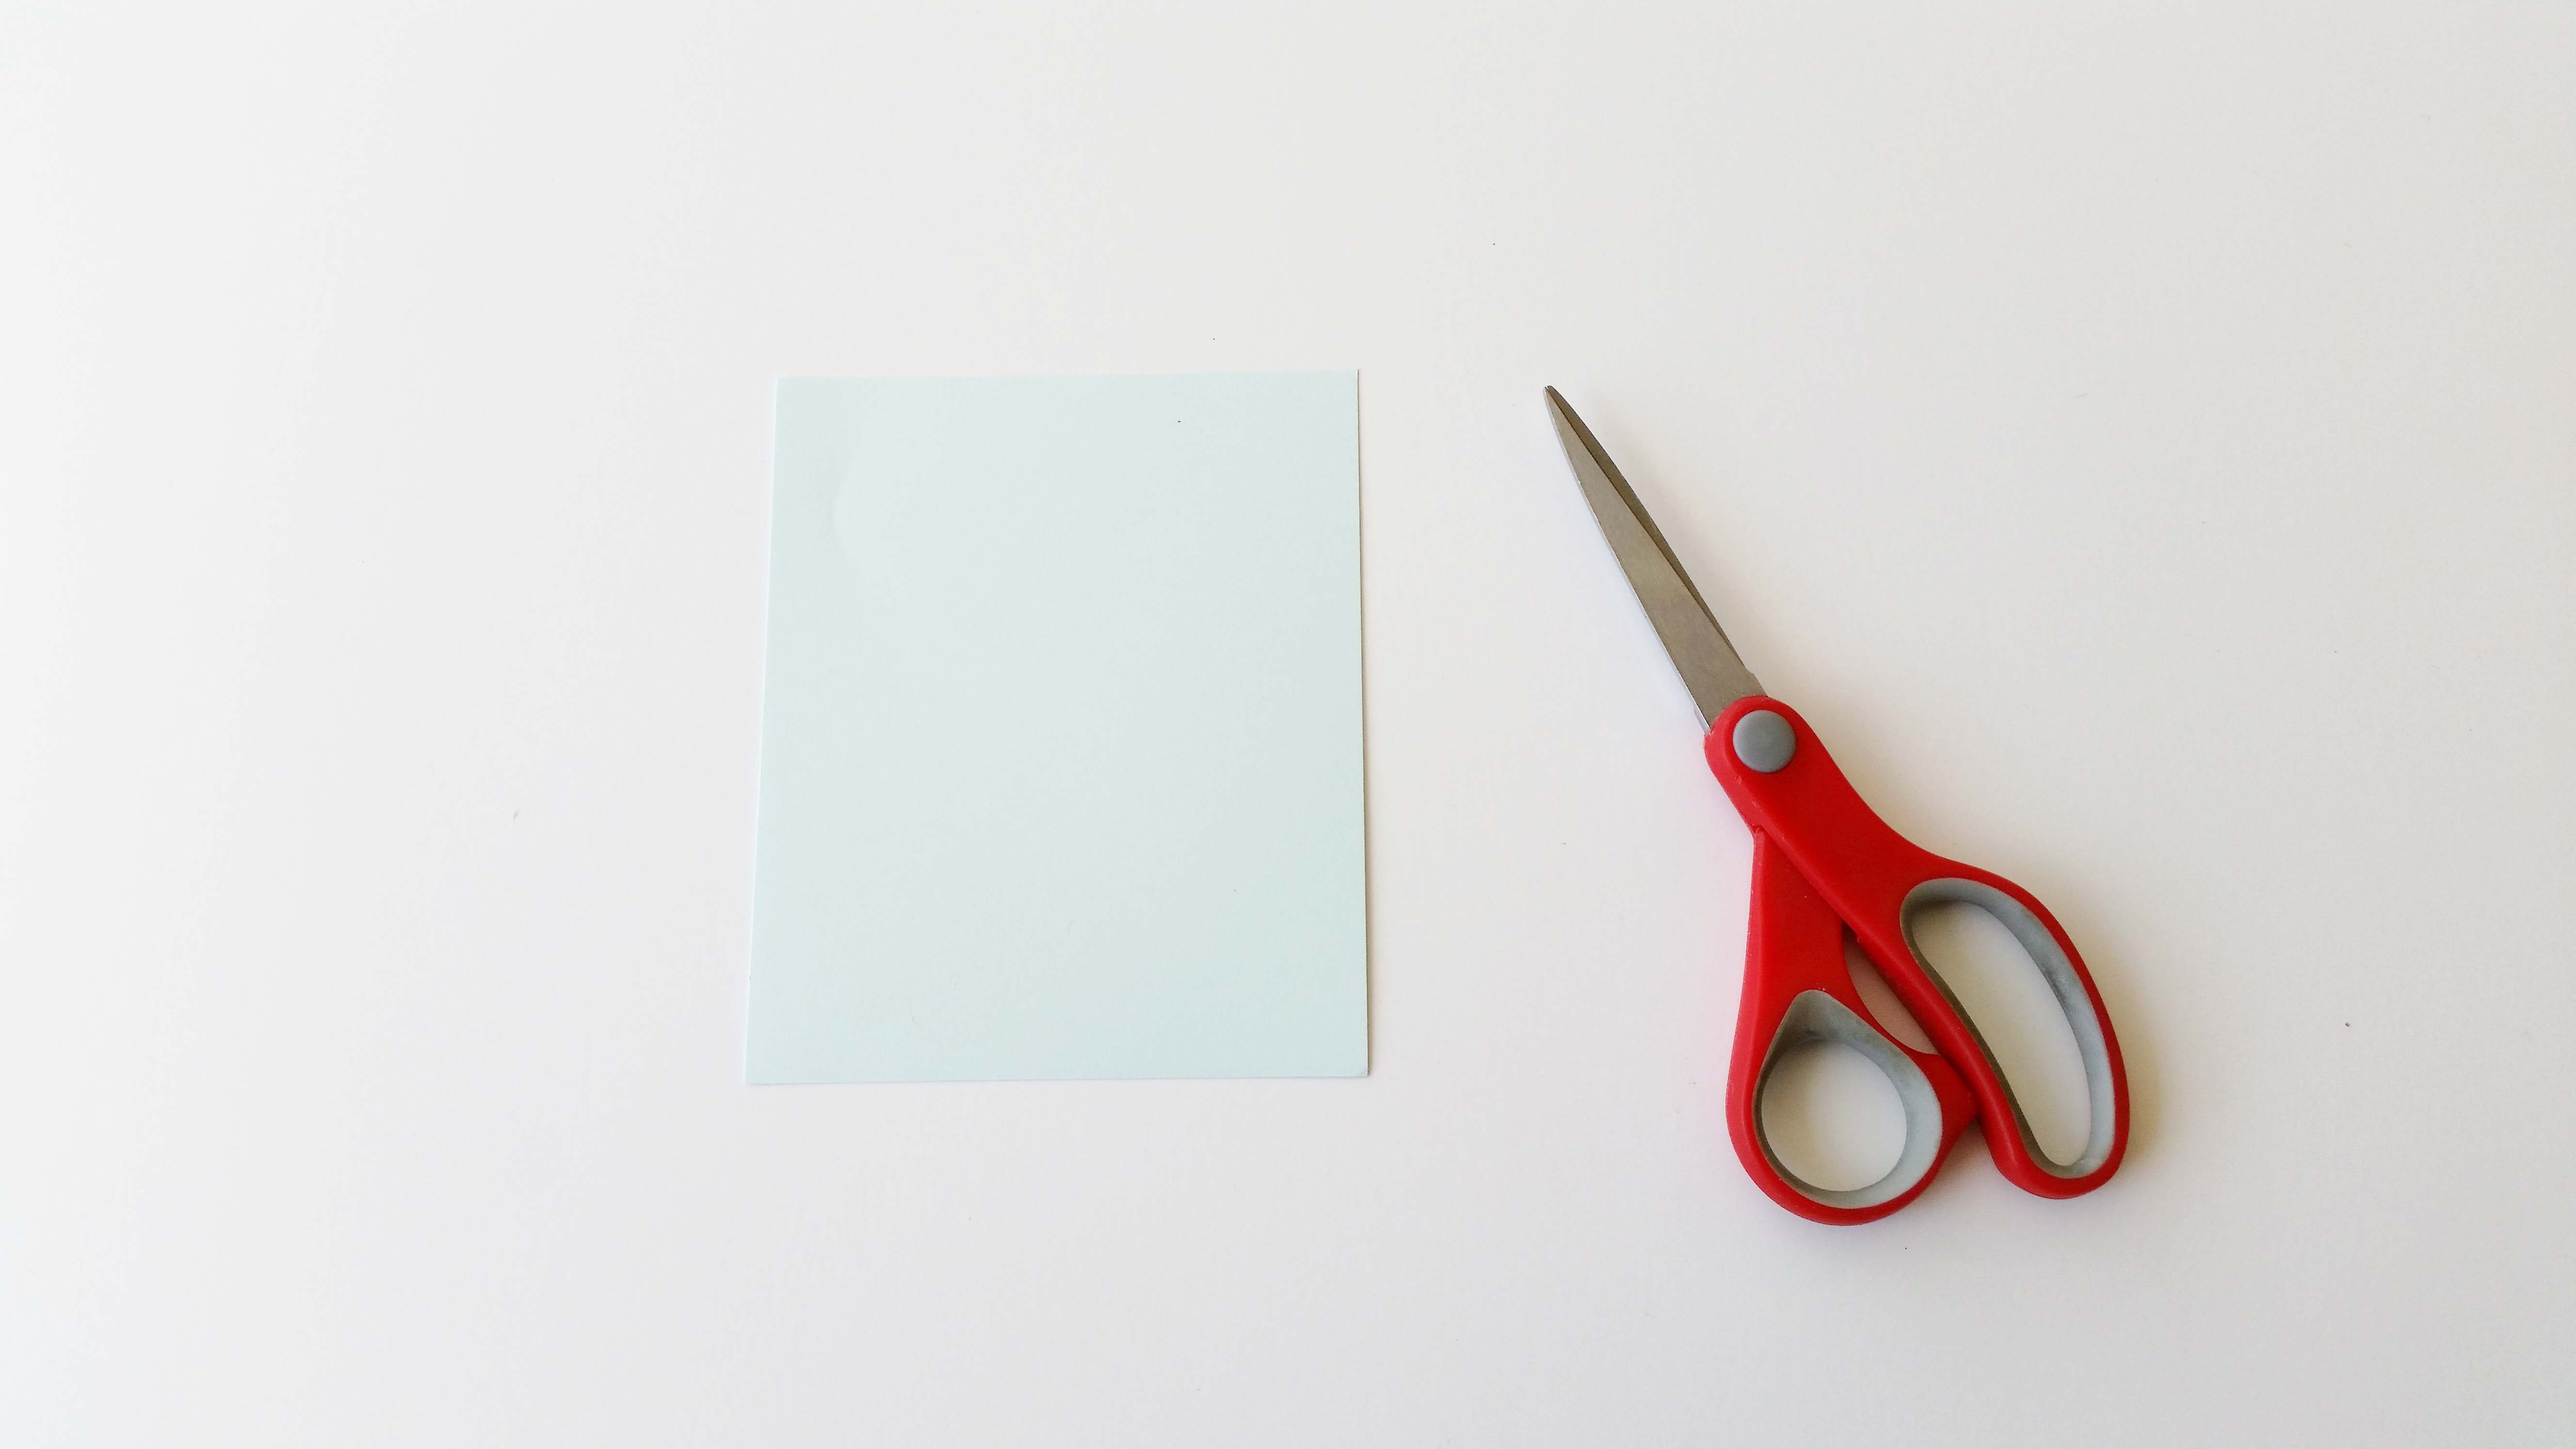
Step 6
Pick a piece of cardstock to use as the base of your card. Cut it into a 3" x 7" rectangle.
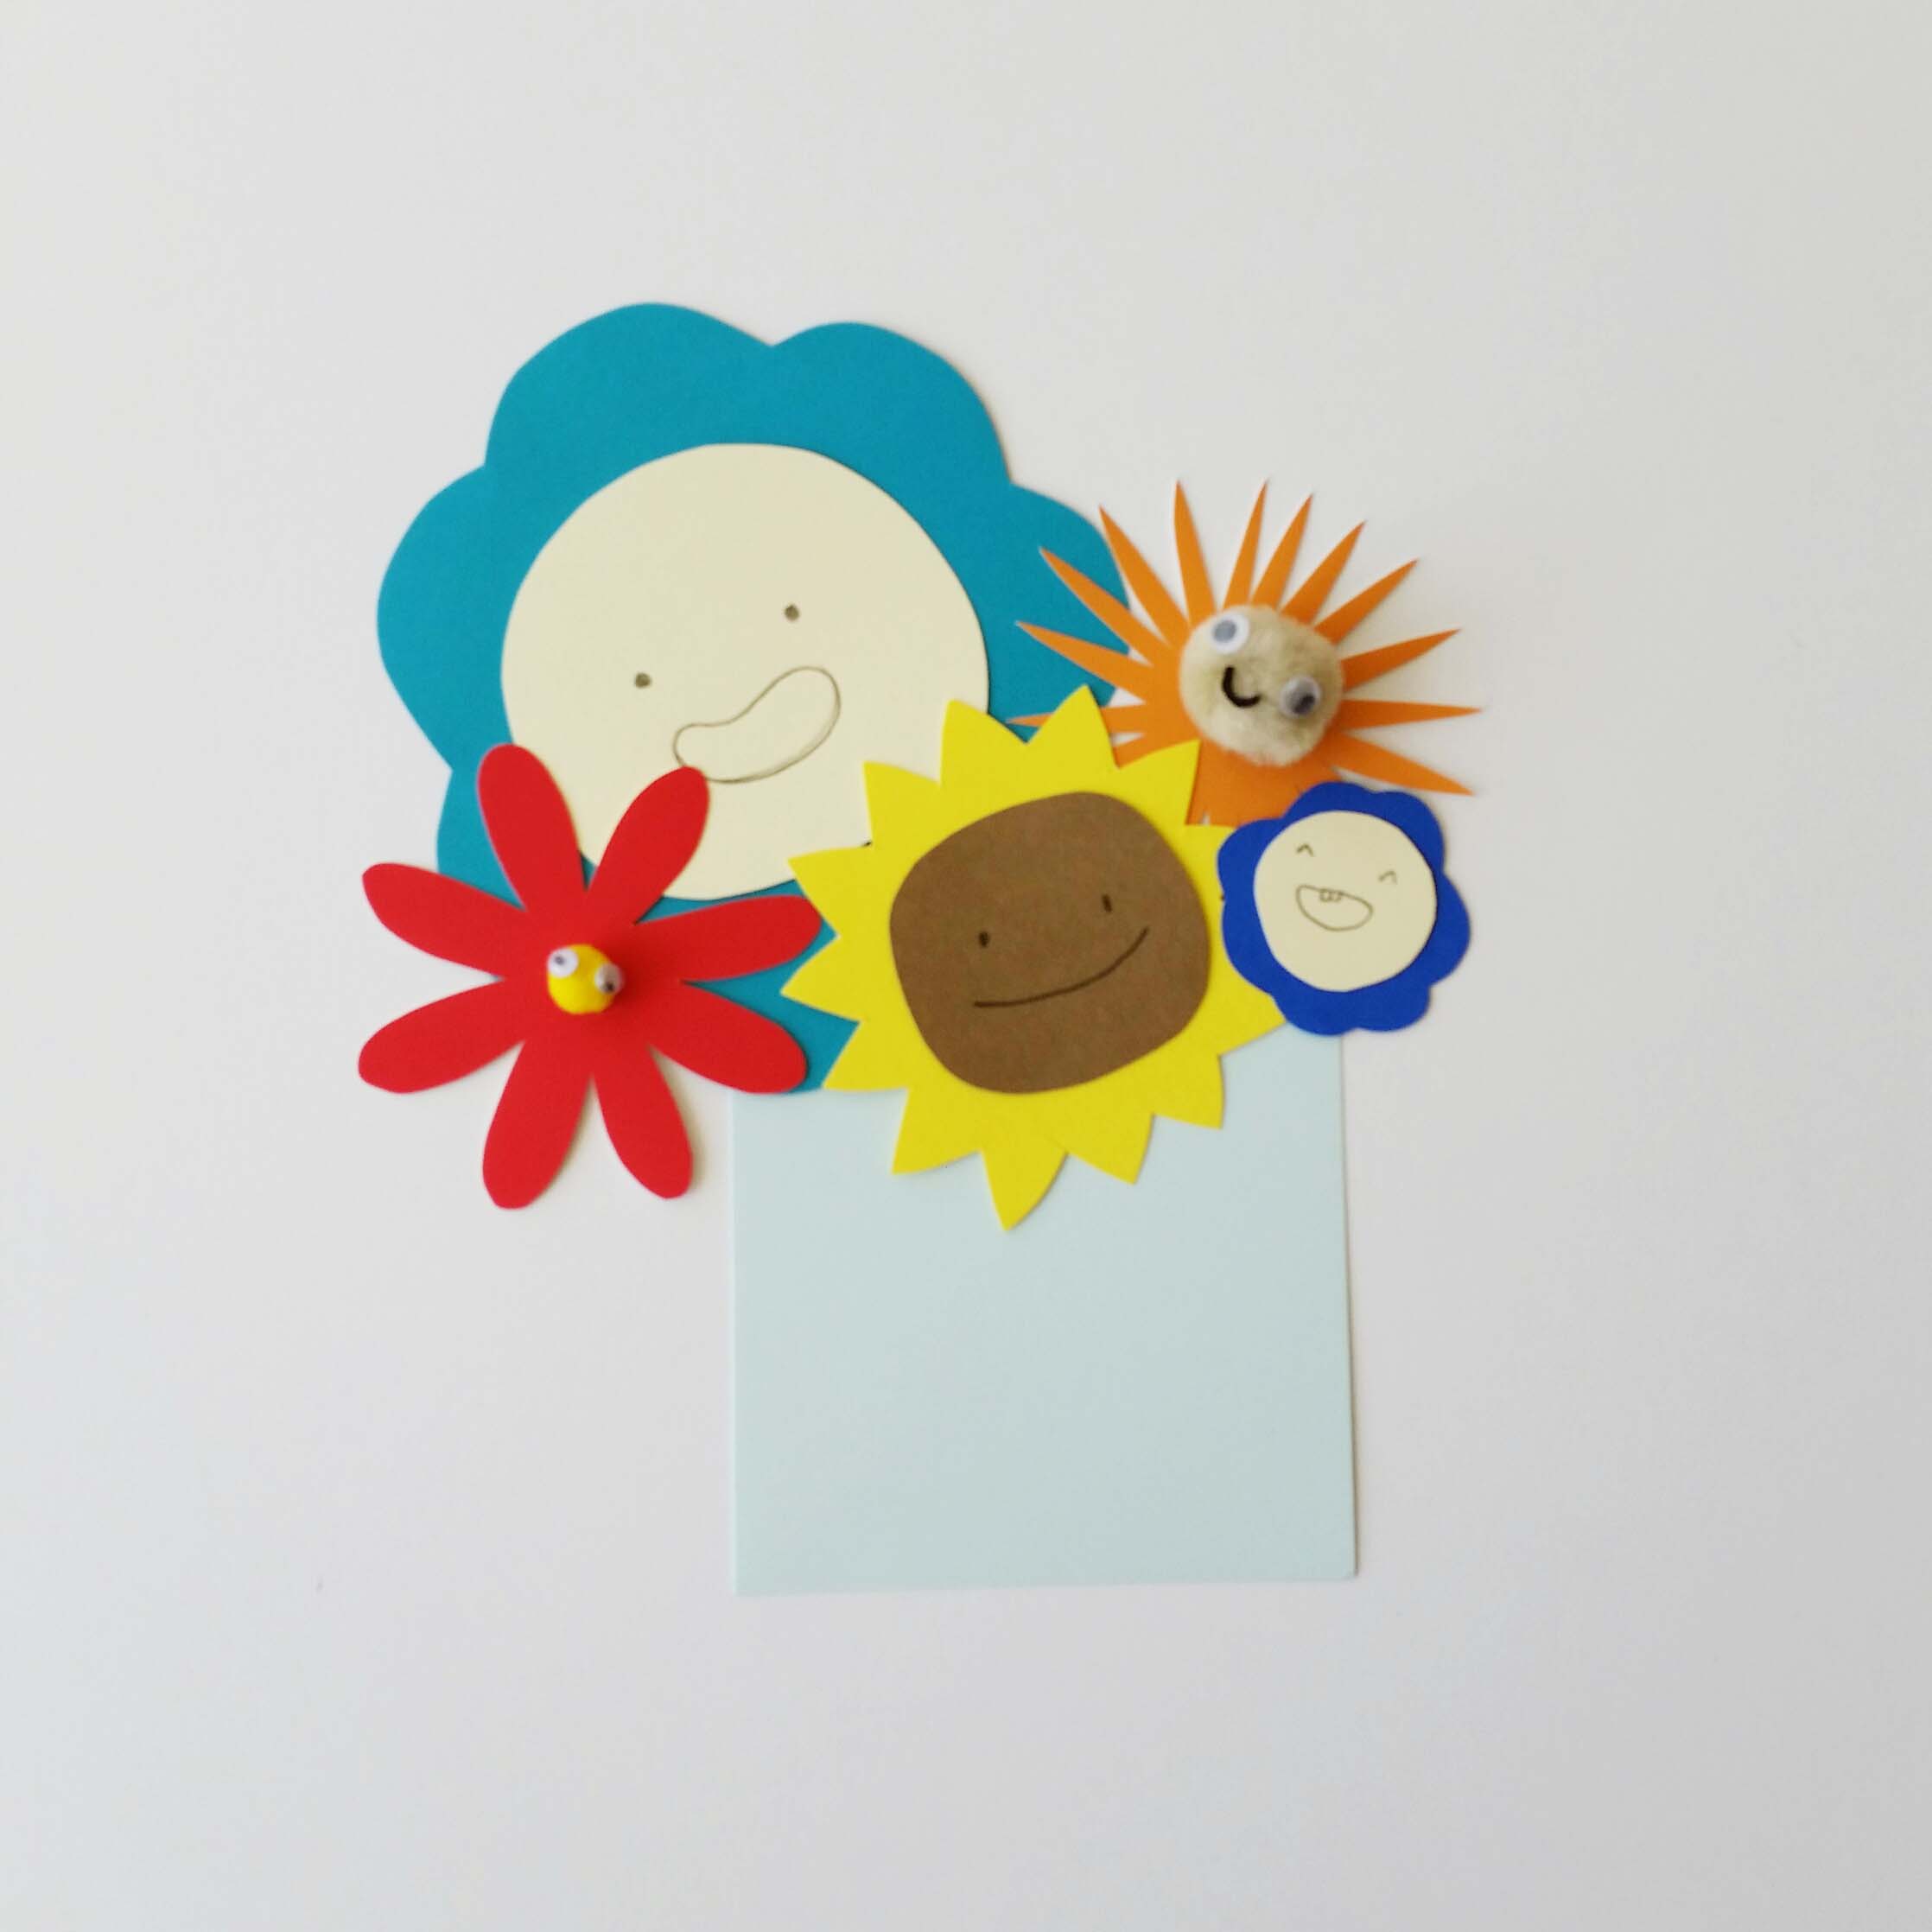
Step 7
Arrange your flowers around the top of your rectangle (it's okay if some of the petals stick out over the top edge and the sides). Try to keep the center of each flower within 2.5" of the top edge.
Step 8
Cut your flower stems, leaves, and grass out of the green cardstock and position them underneath the center of each flower head.
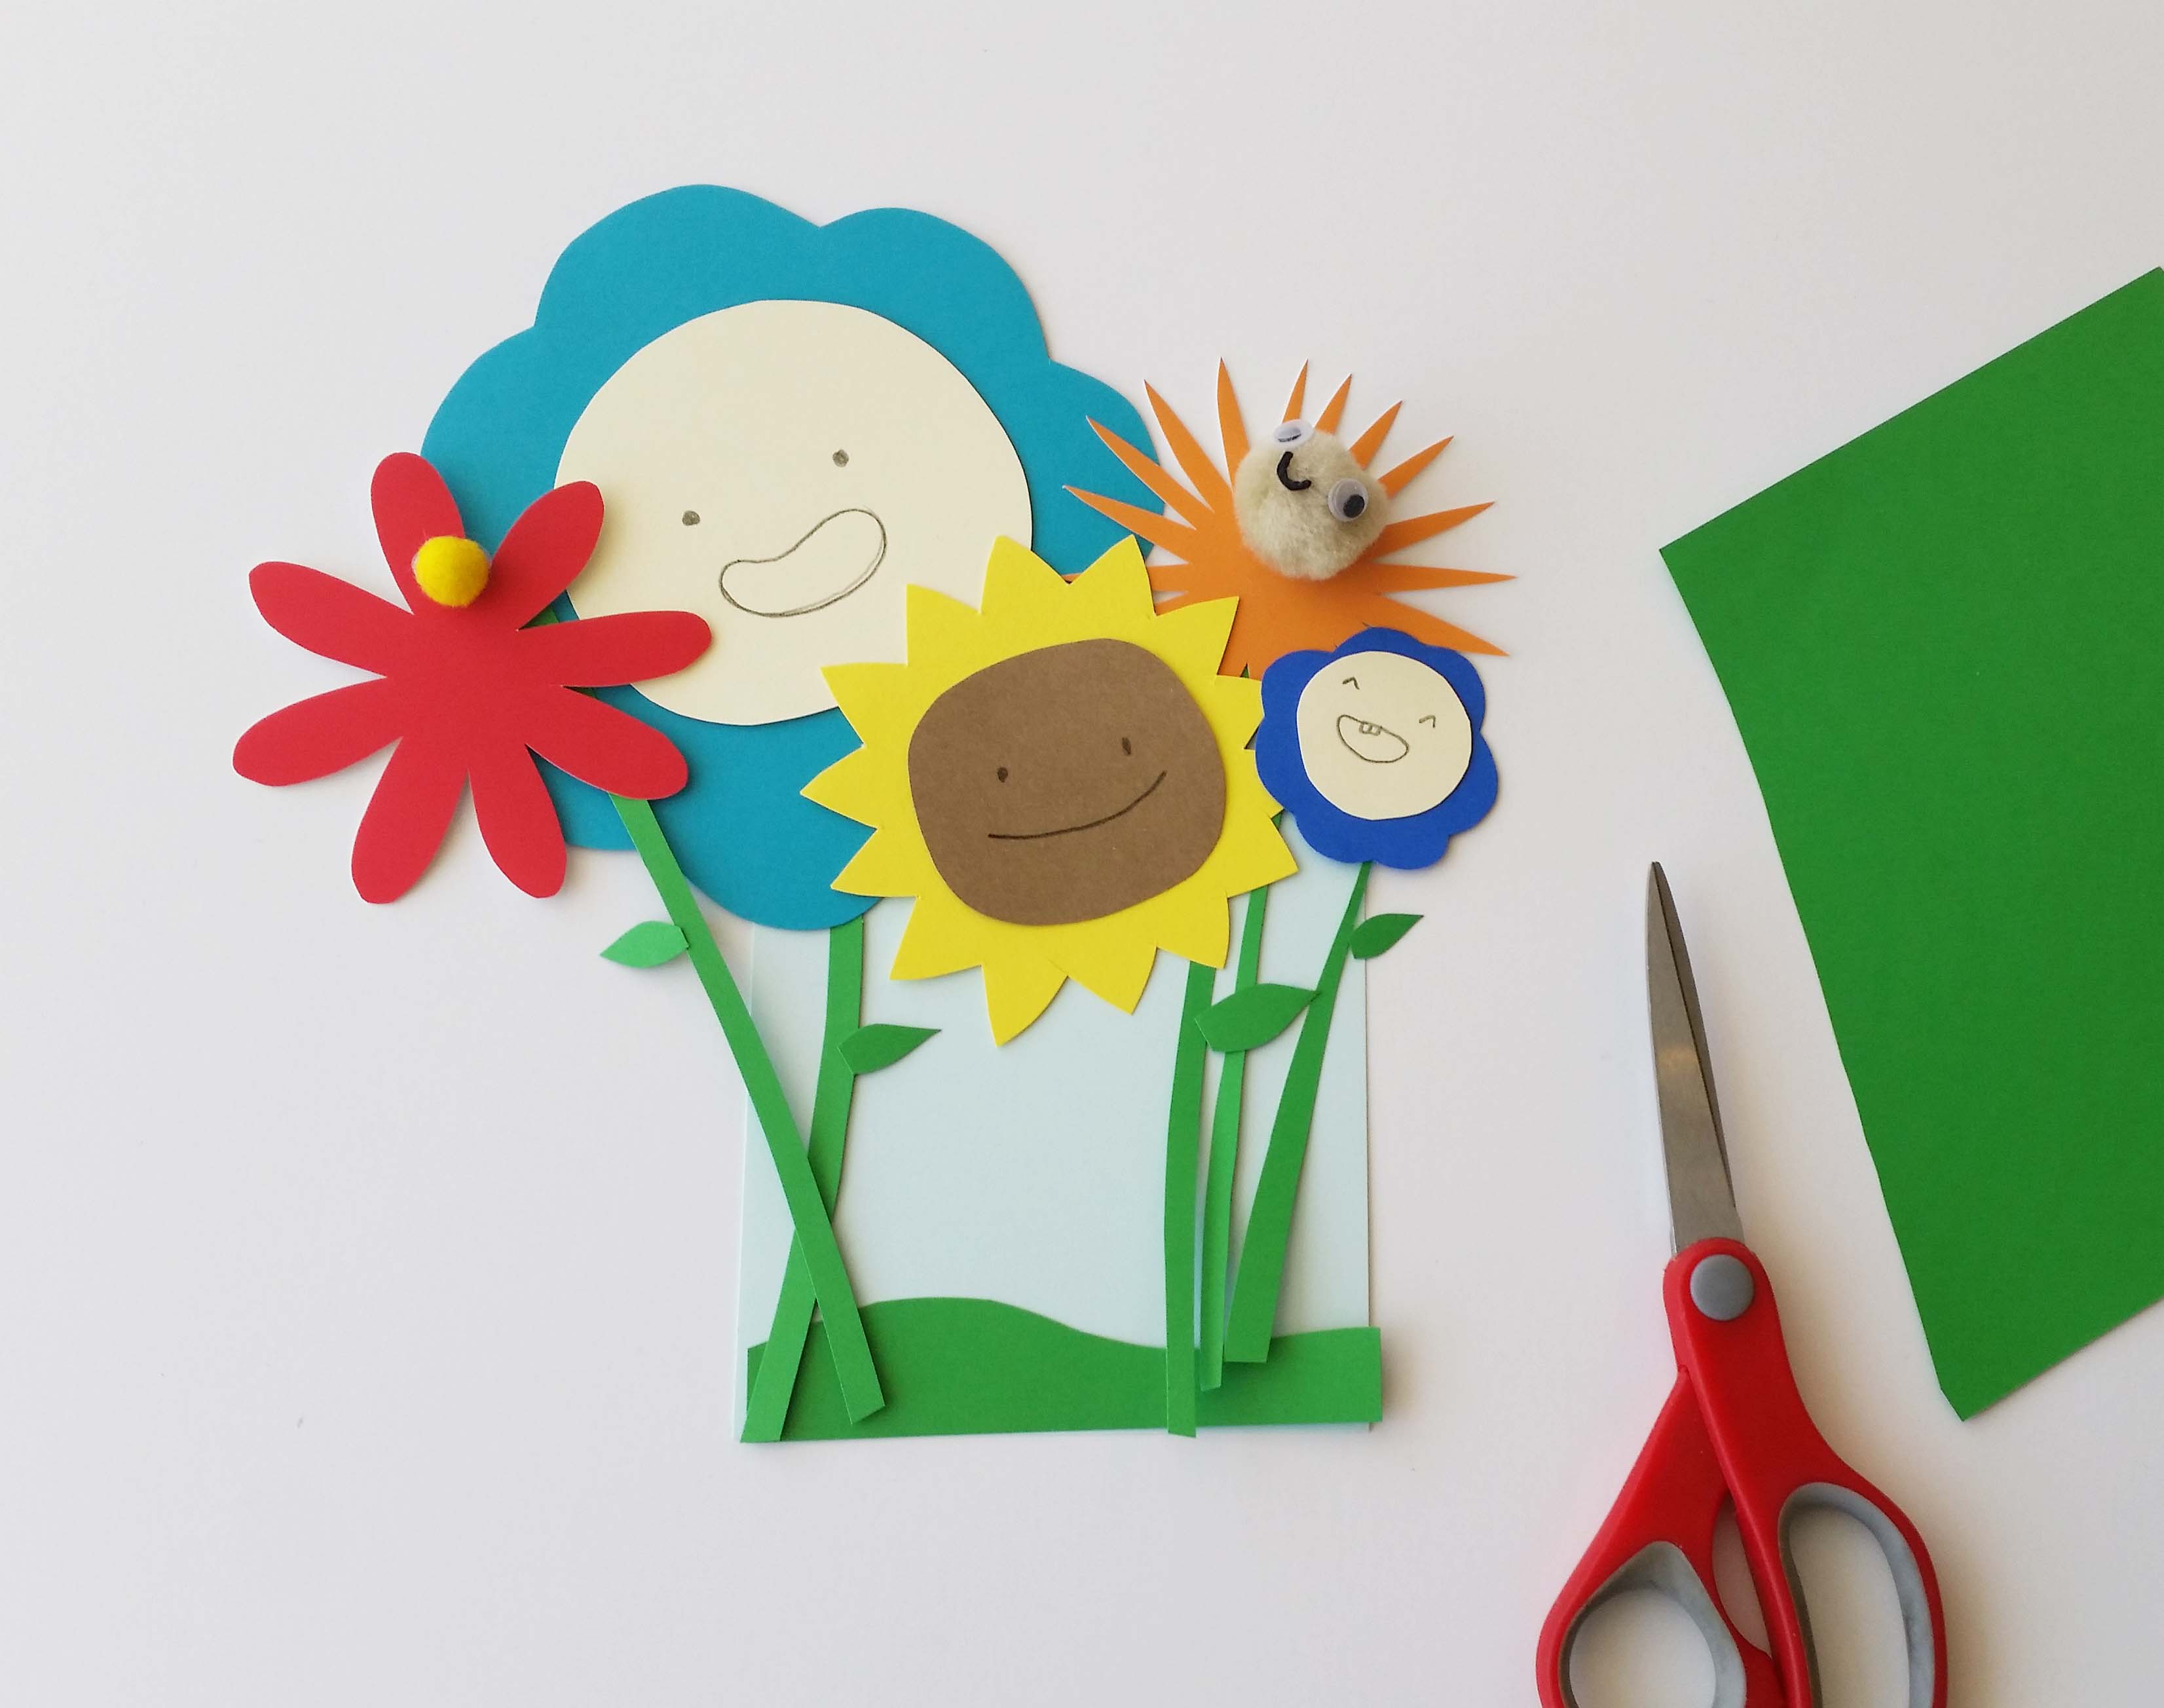
Tip
Try to position them so there is some empty space left in the middle of the card for you to write your message. Trim off any excess that goes past the bottom edge of the card.
Step 9
Add glue to the center of the back of each flower (avoid gluing on the petals) and stick them back down on the card. Then add glue to the stems and leaves.
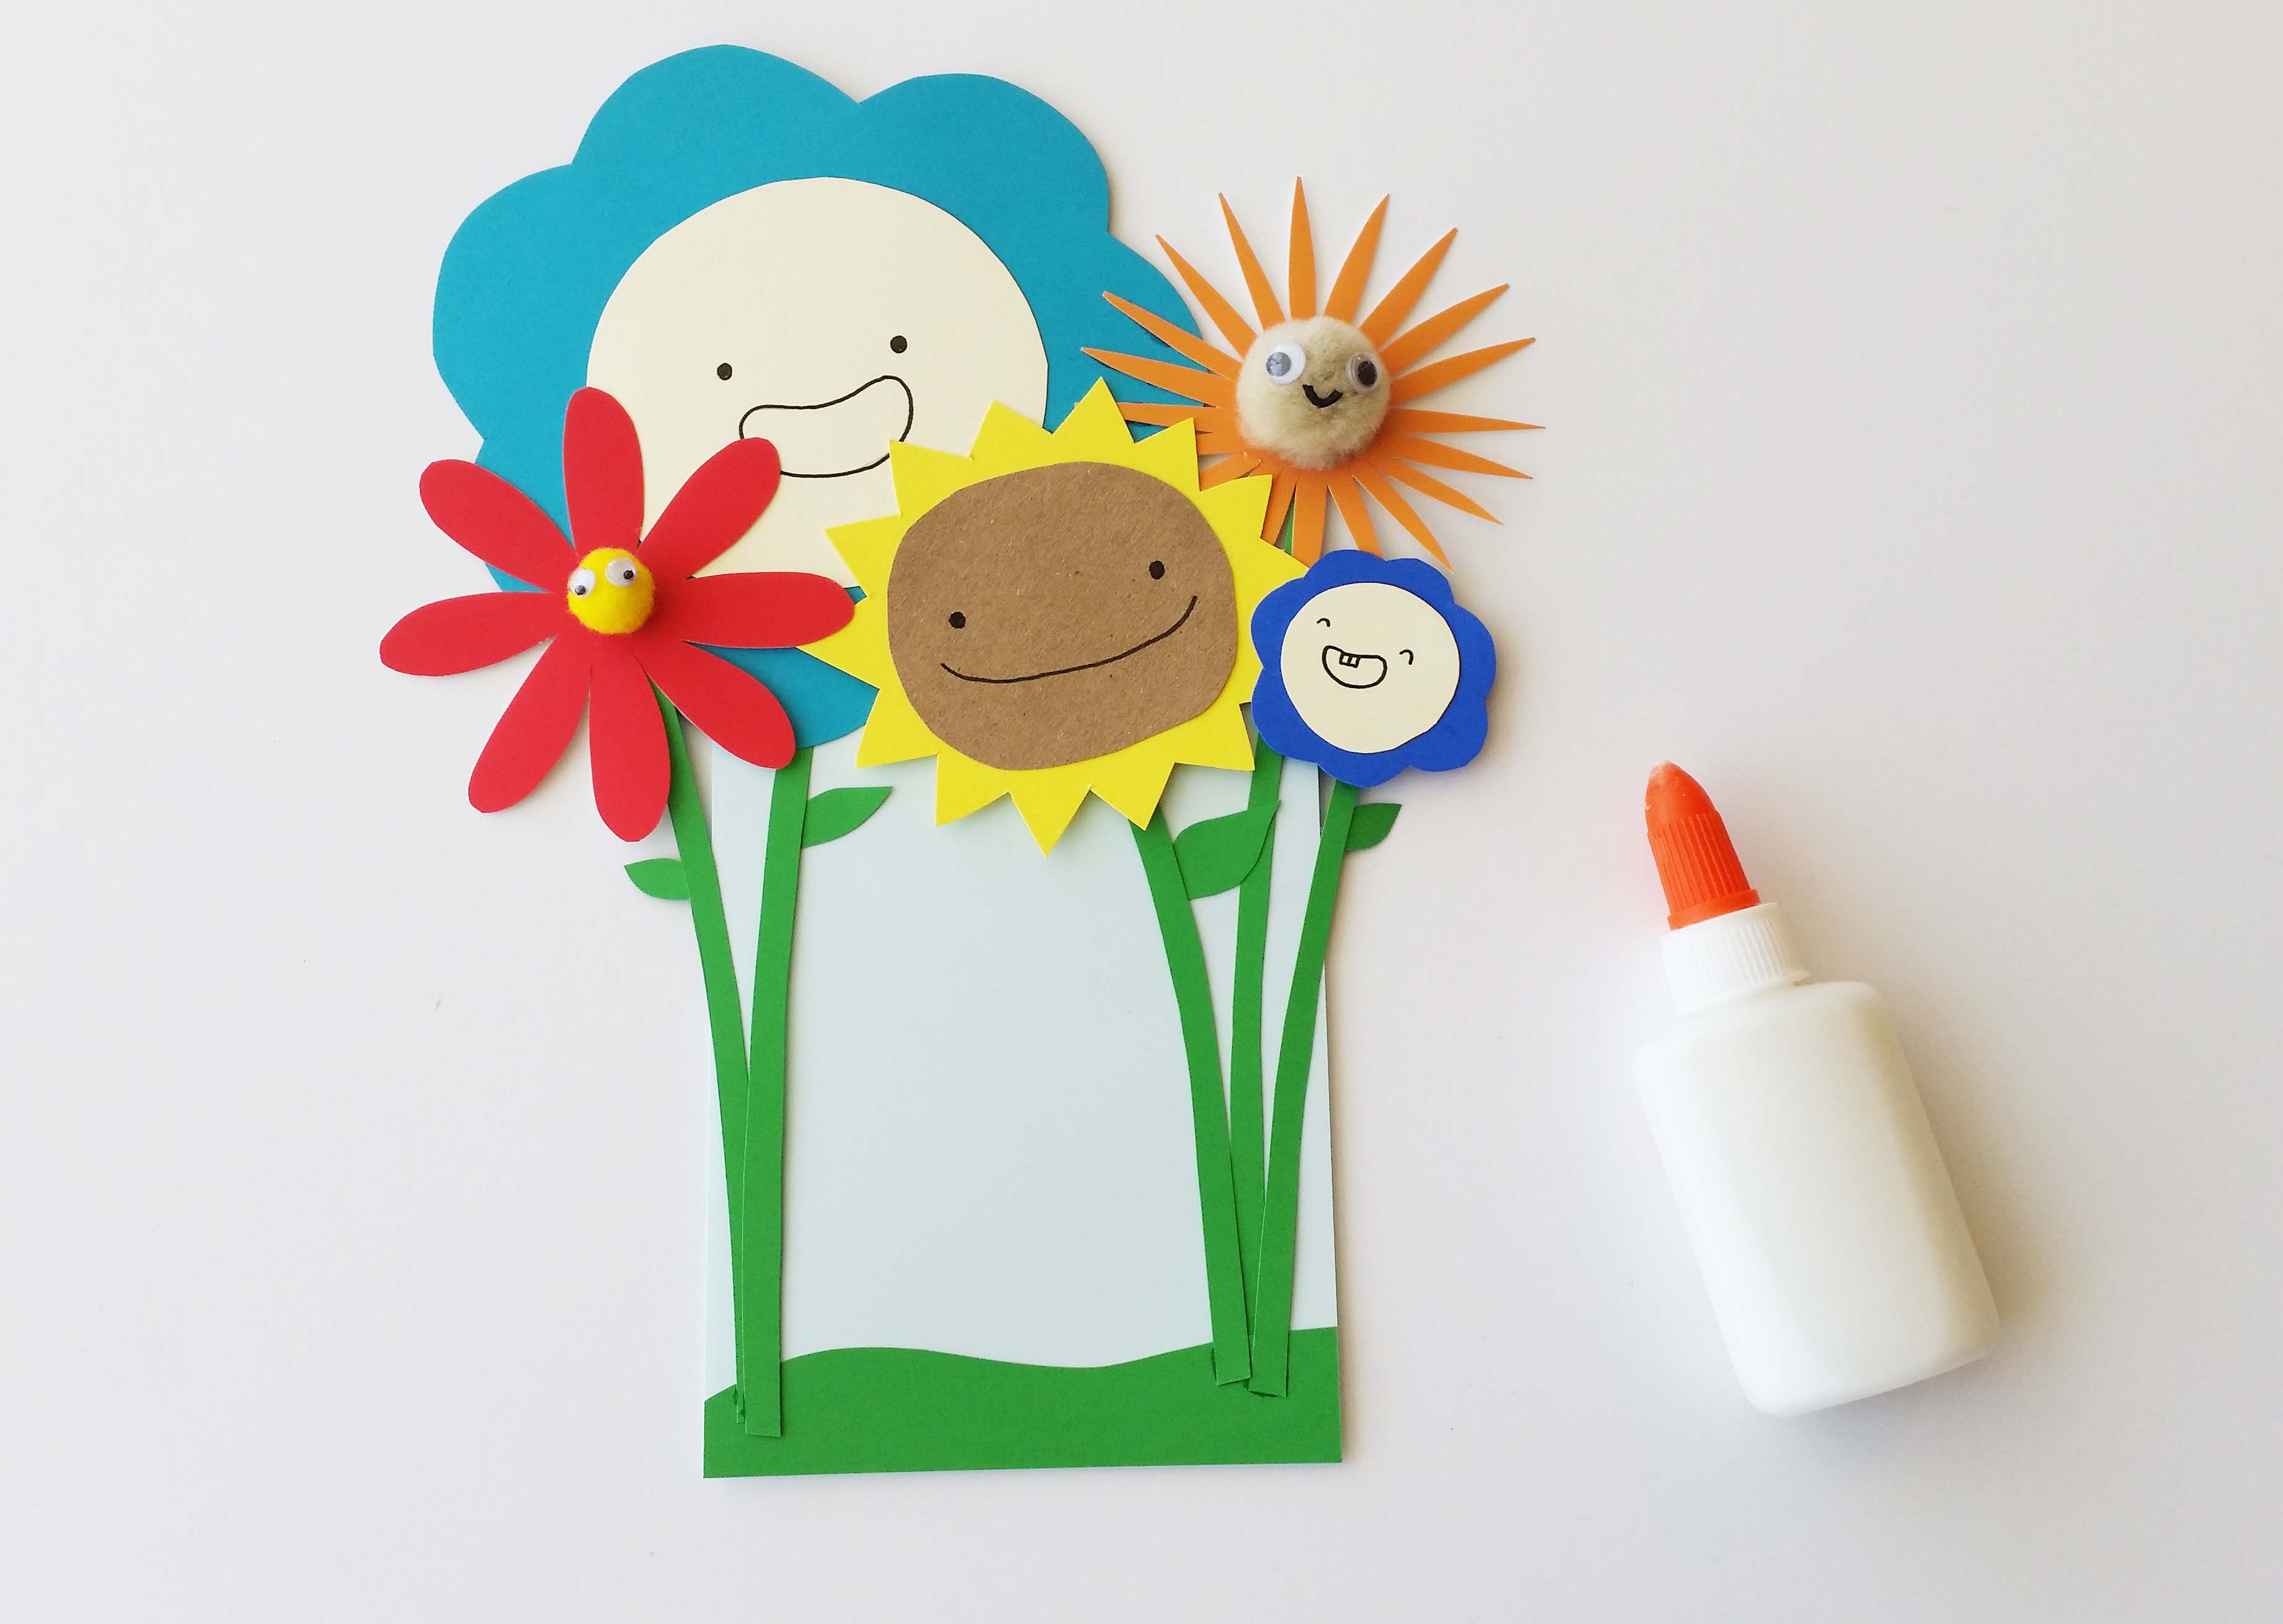
Tip
Double-check that the center of each flower will be within the top 2.5" of the card.
Step 10
Use your string or ribbon to tie a bow around the top of your flower pot.
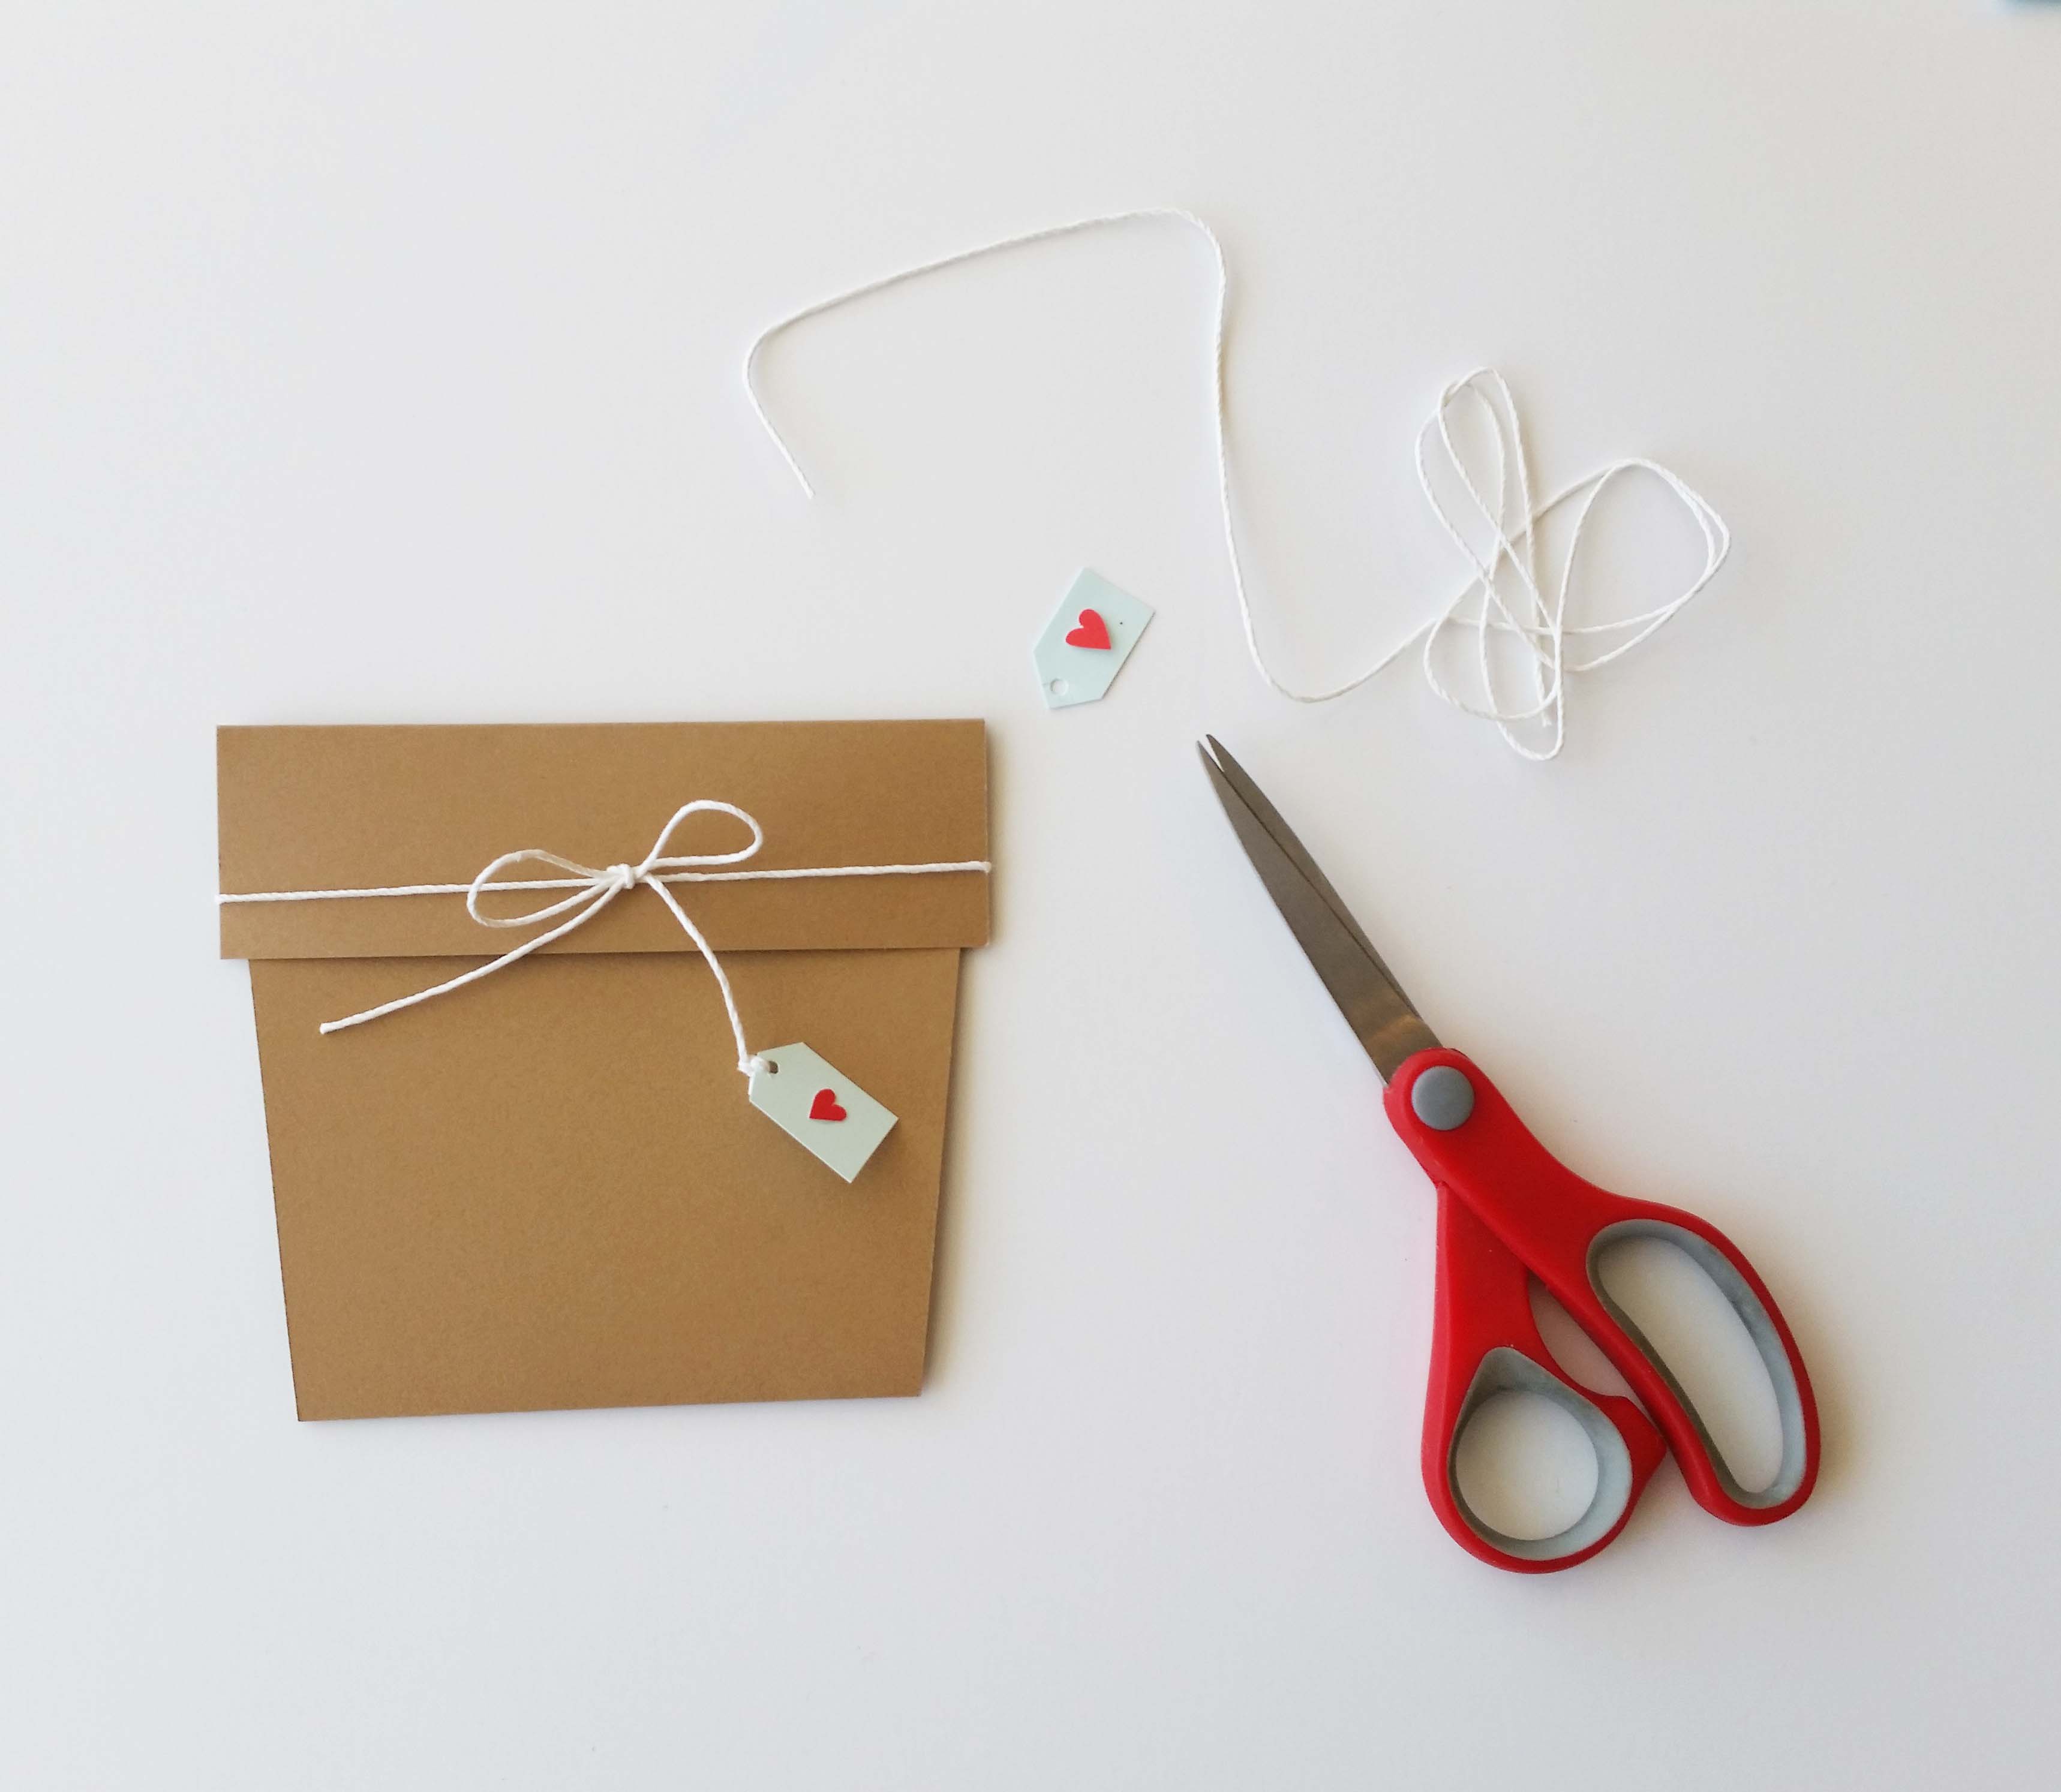
Tip
Get creative! Make a tag with your extra cardstock and tie it to your ribbon.
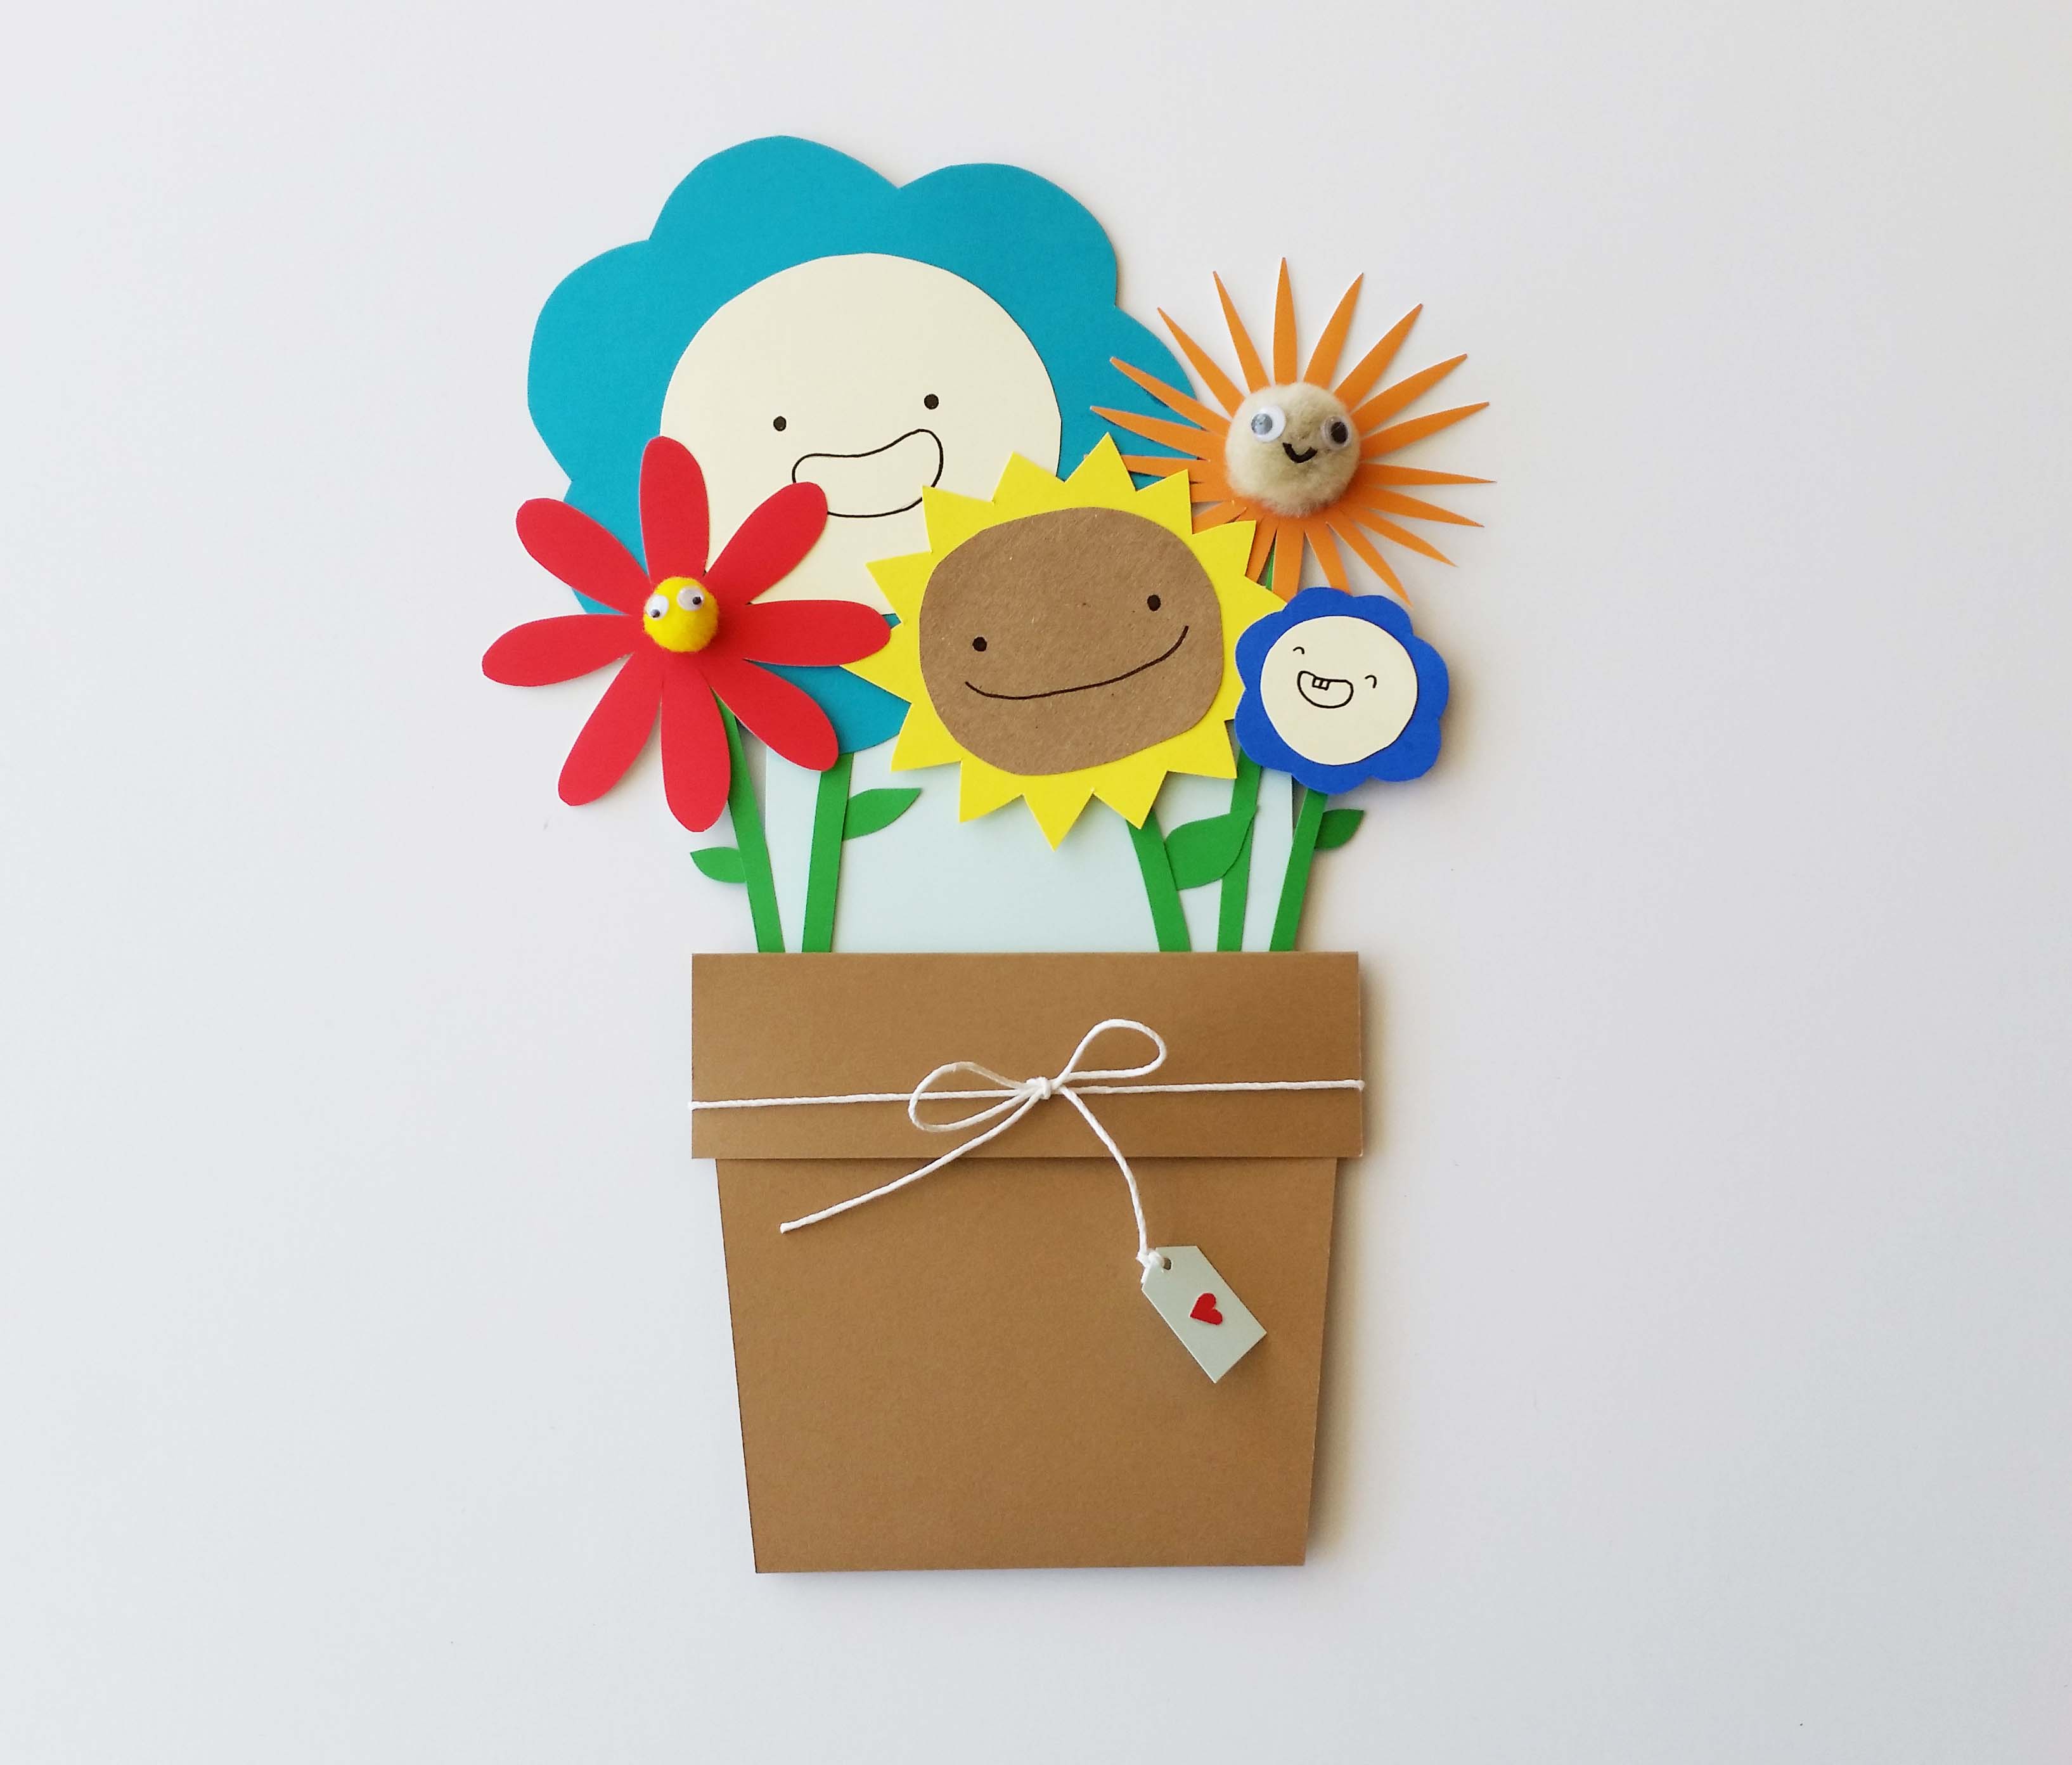
Final result!
Write a message on your card, then slide it into the pocket of your pot. When you slide it back out, it will look like the flowers are growing!