Step-by-step tutorial
Step 1
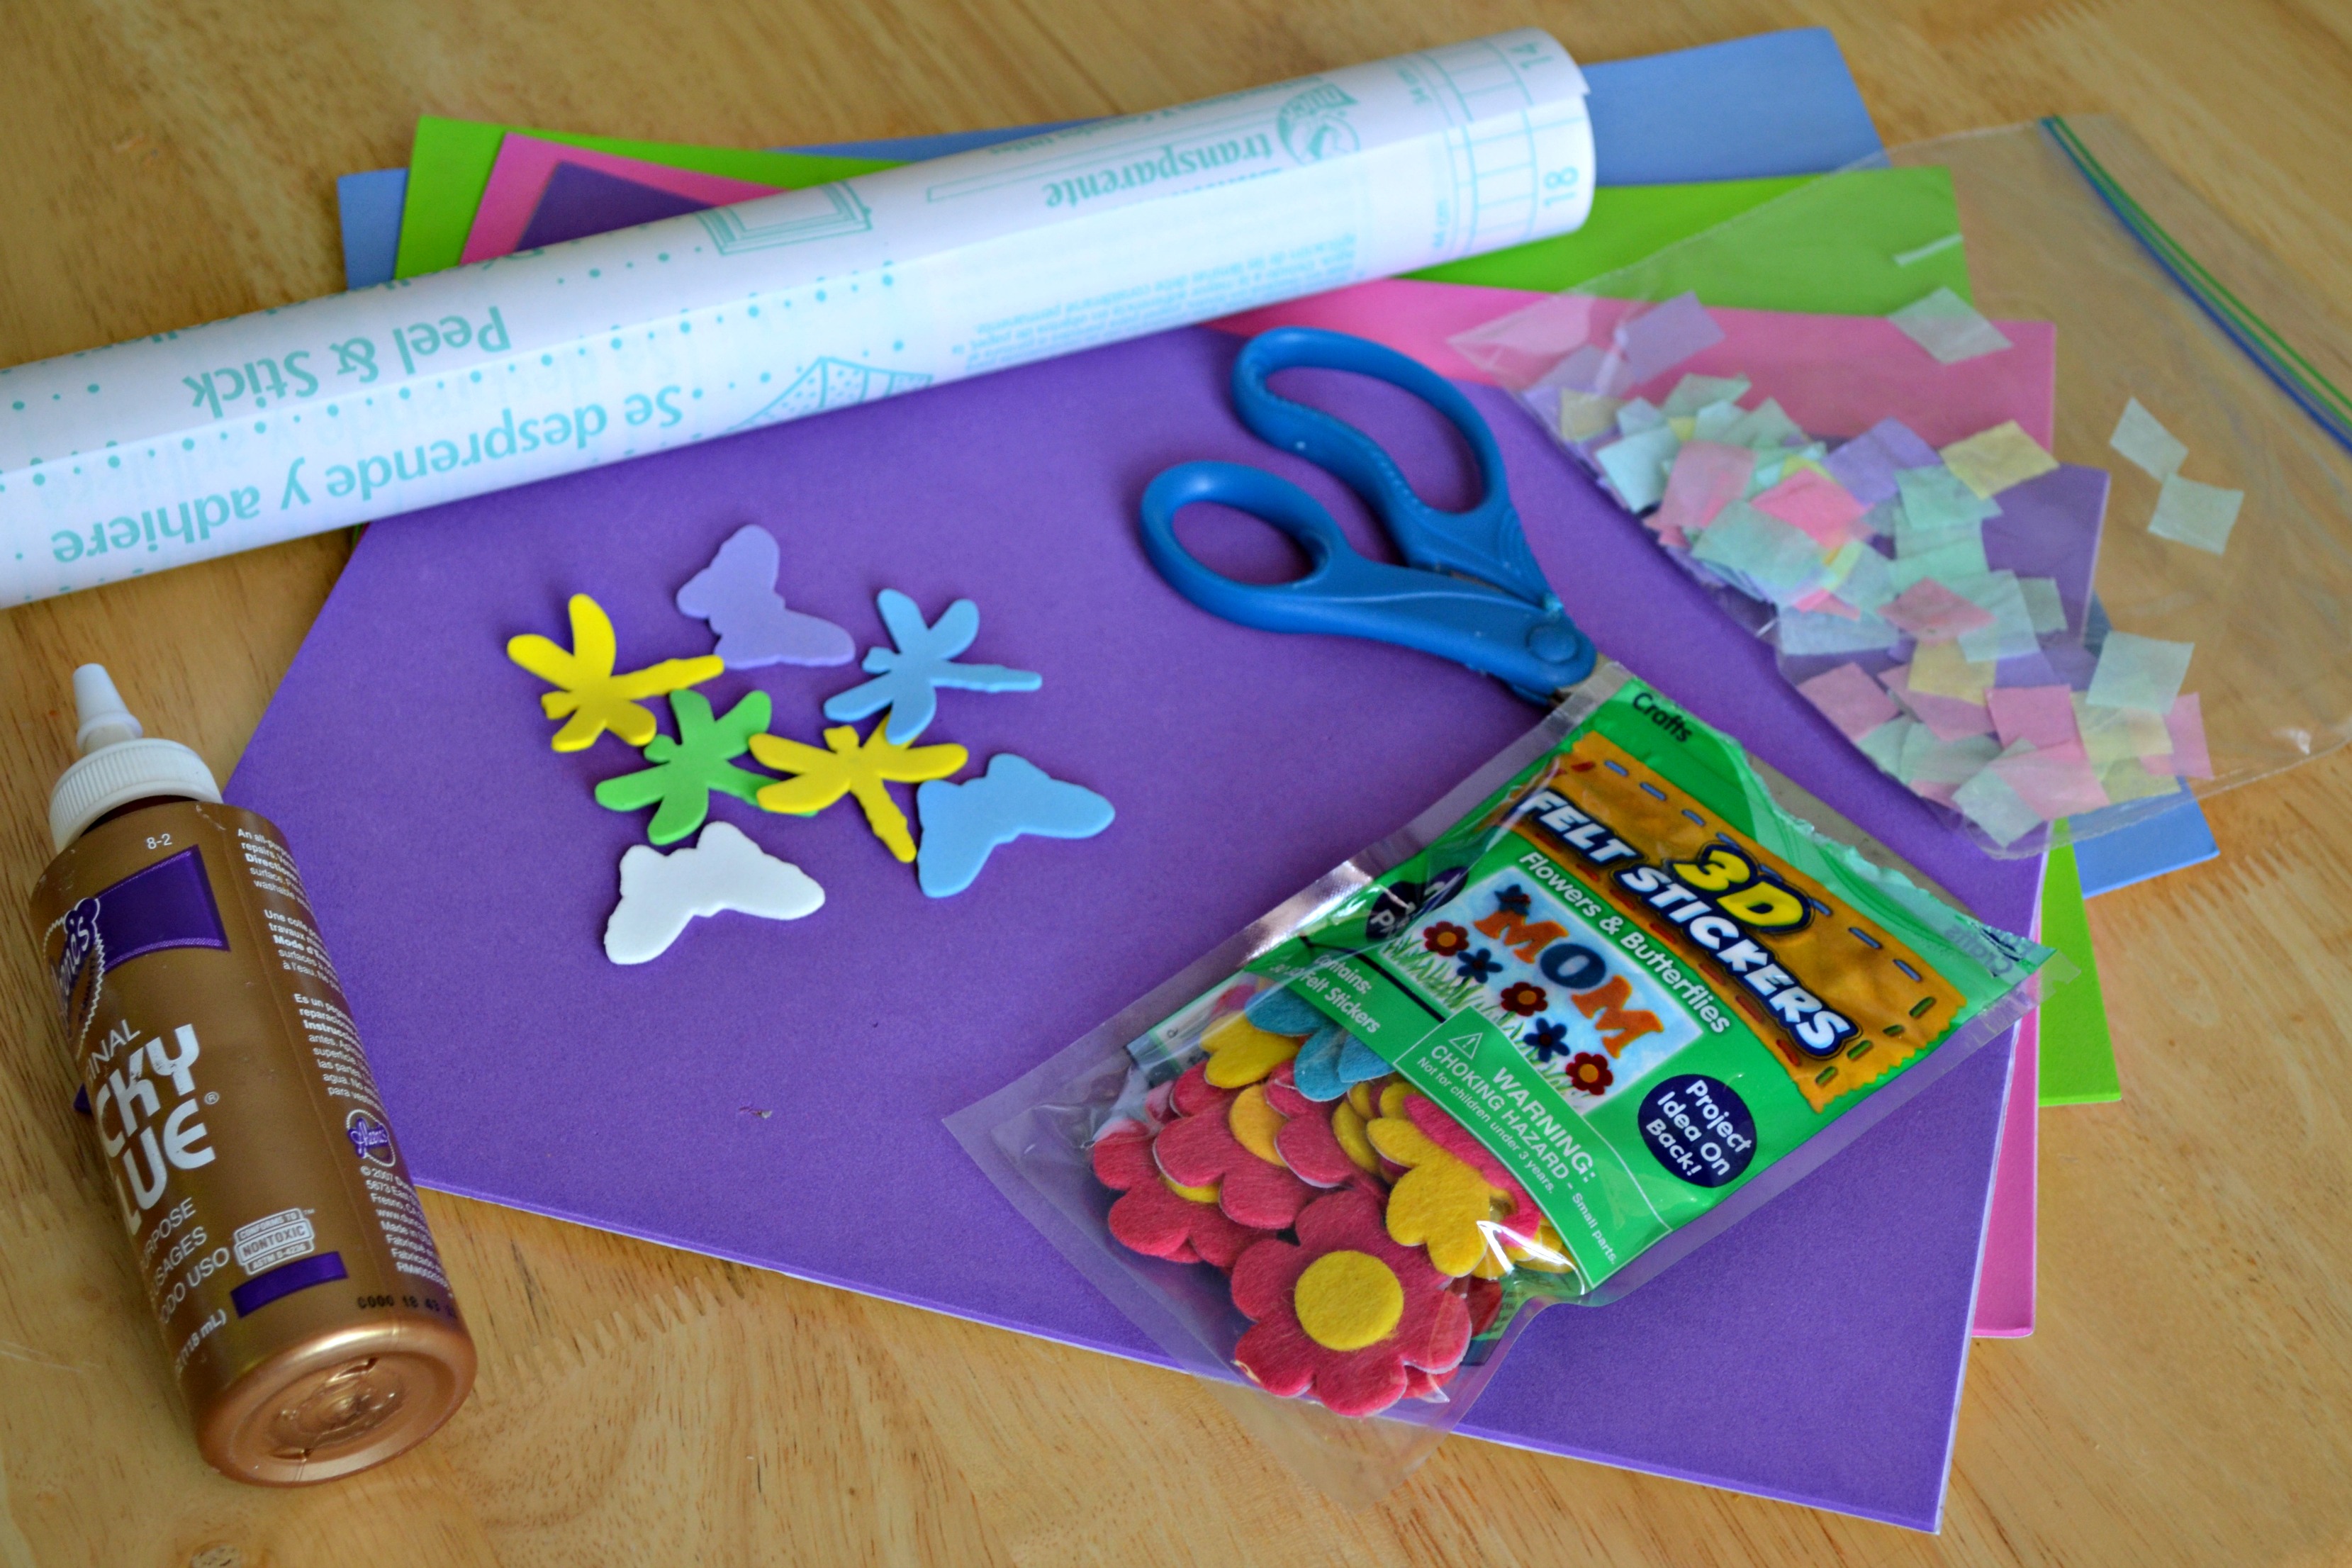
Gather all materials. We had some great felt flower stickers and some foam bugs that we used for this. We also used leftover birthday tissue paper that we had cut into small squares for another project.

Step 2
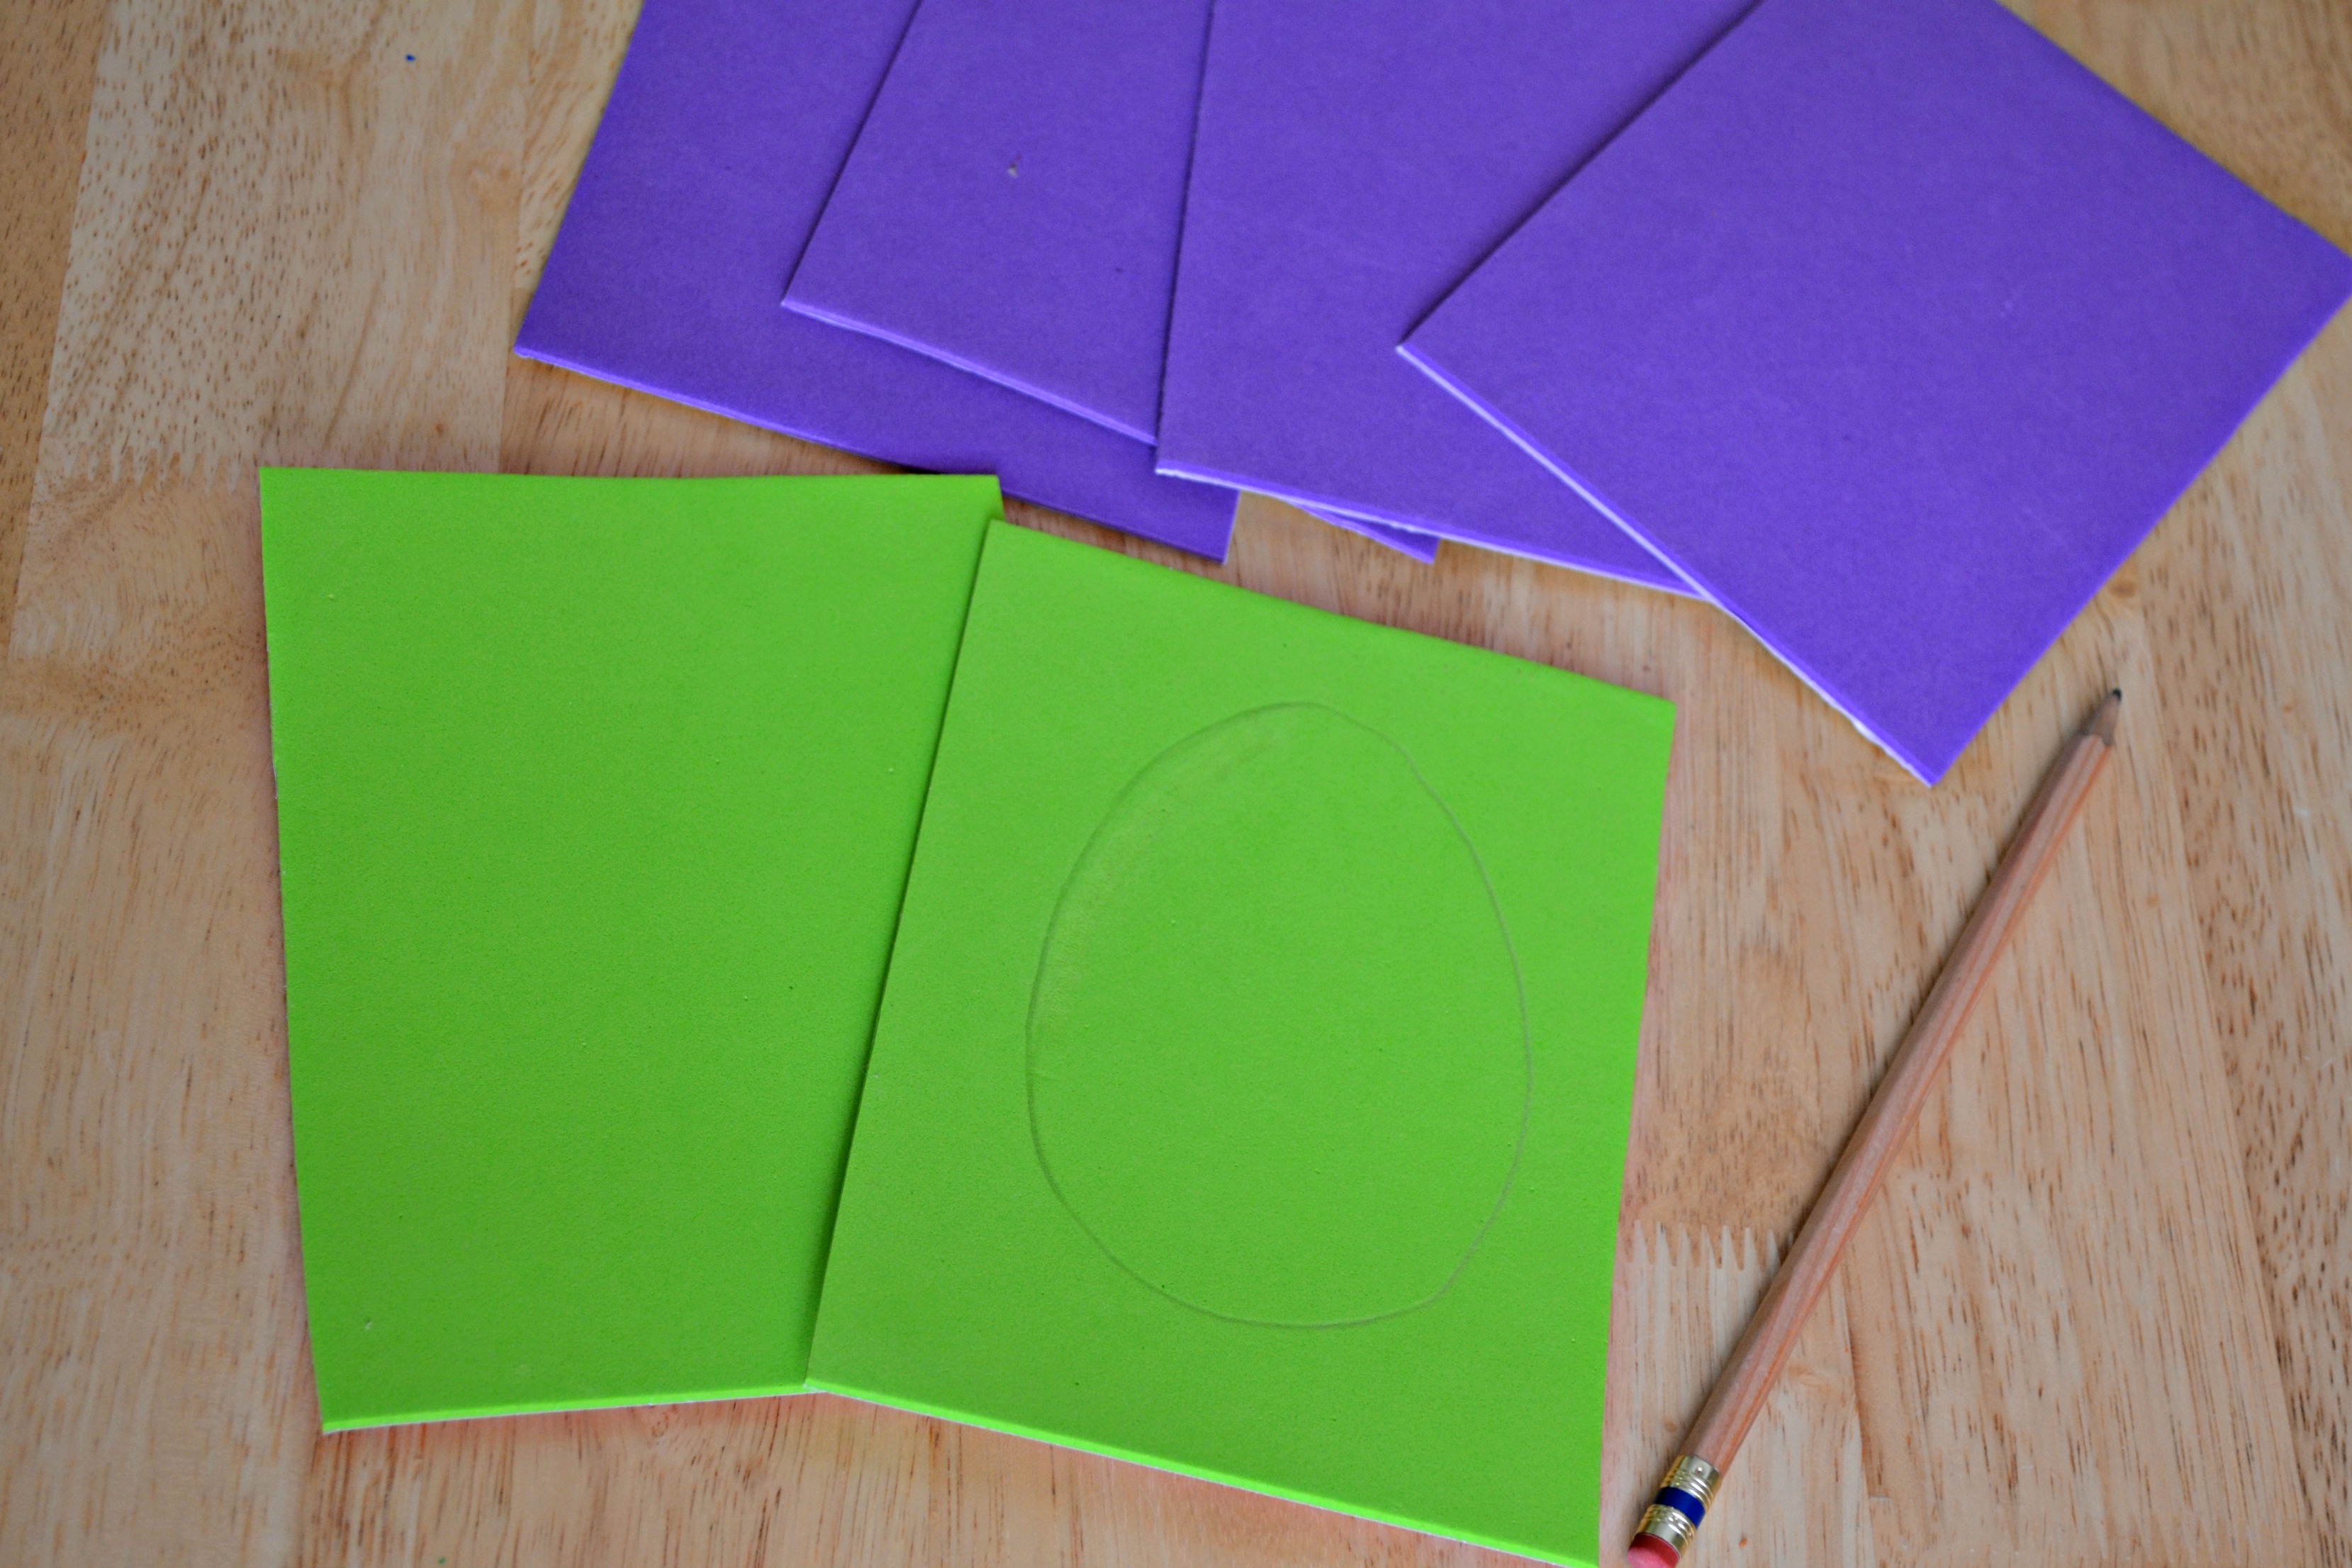
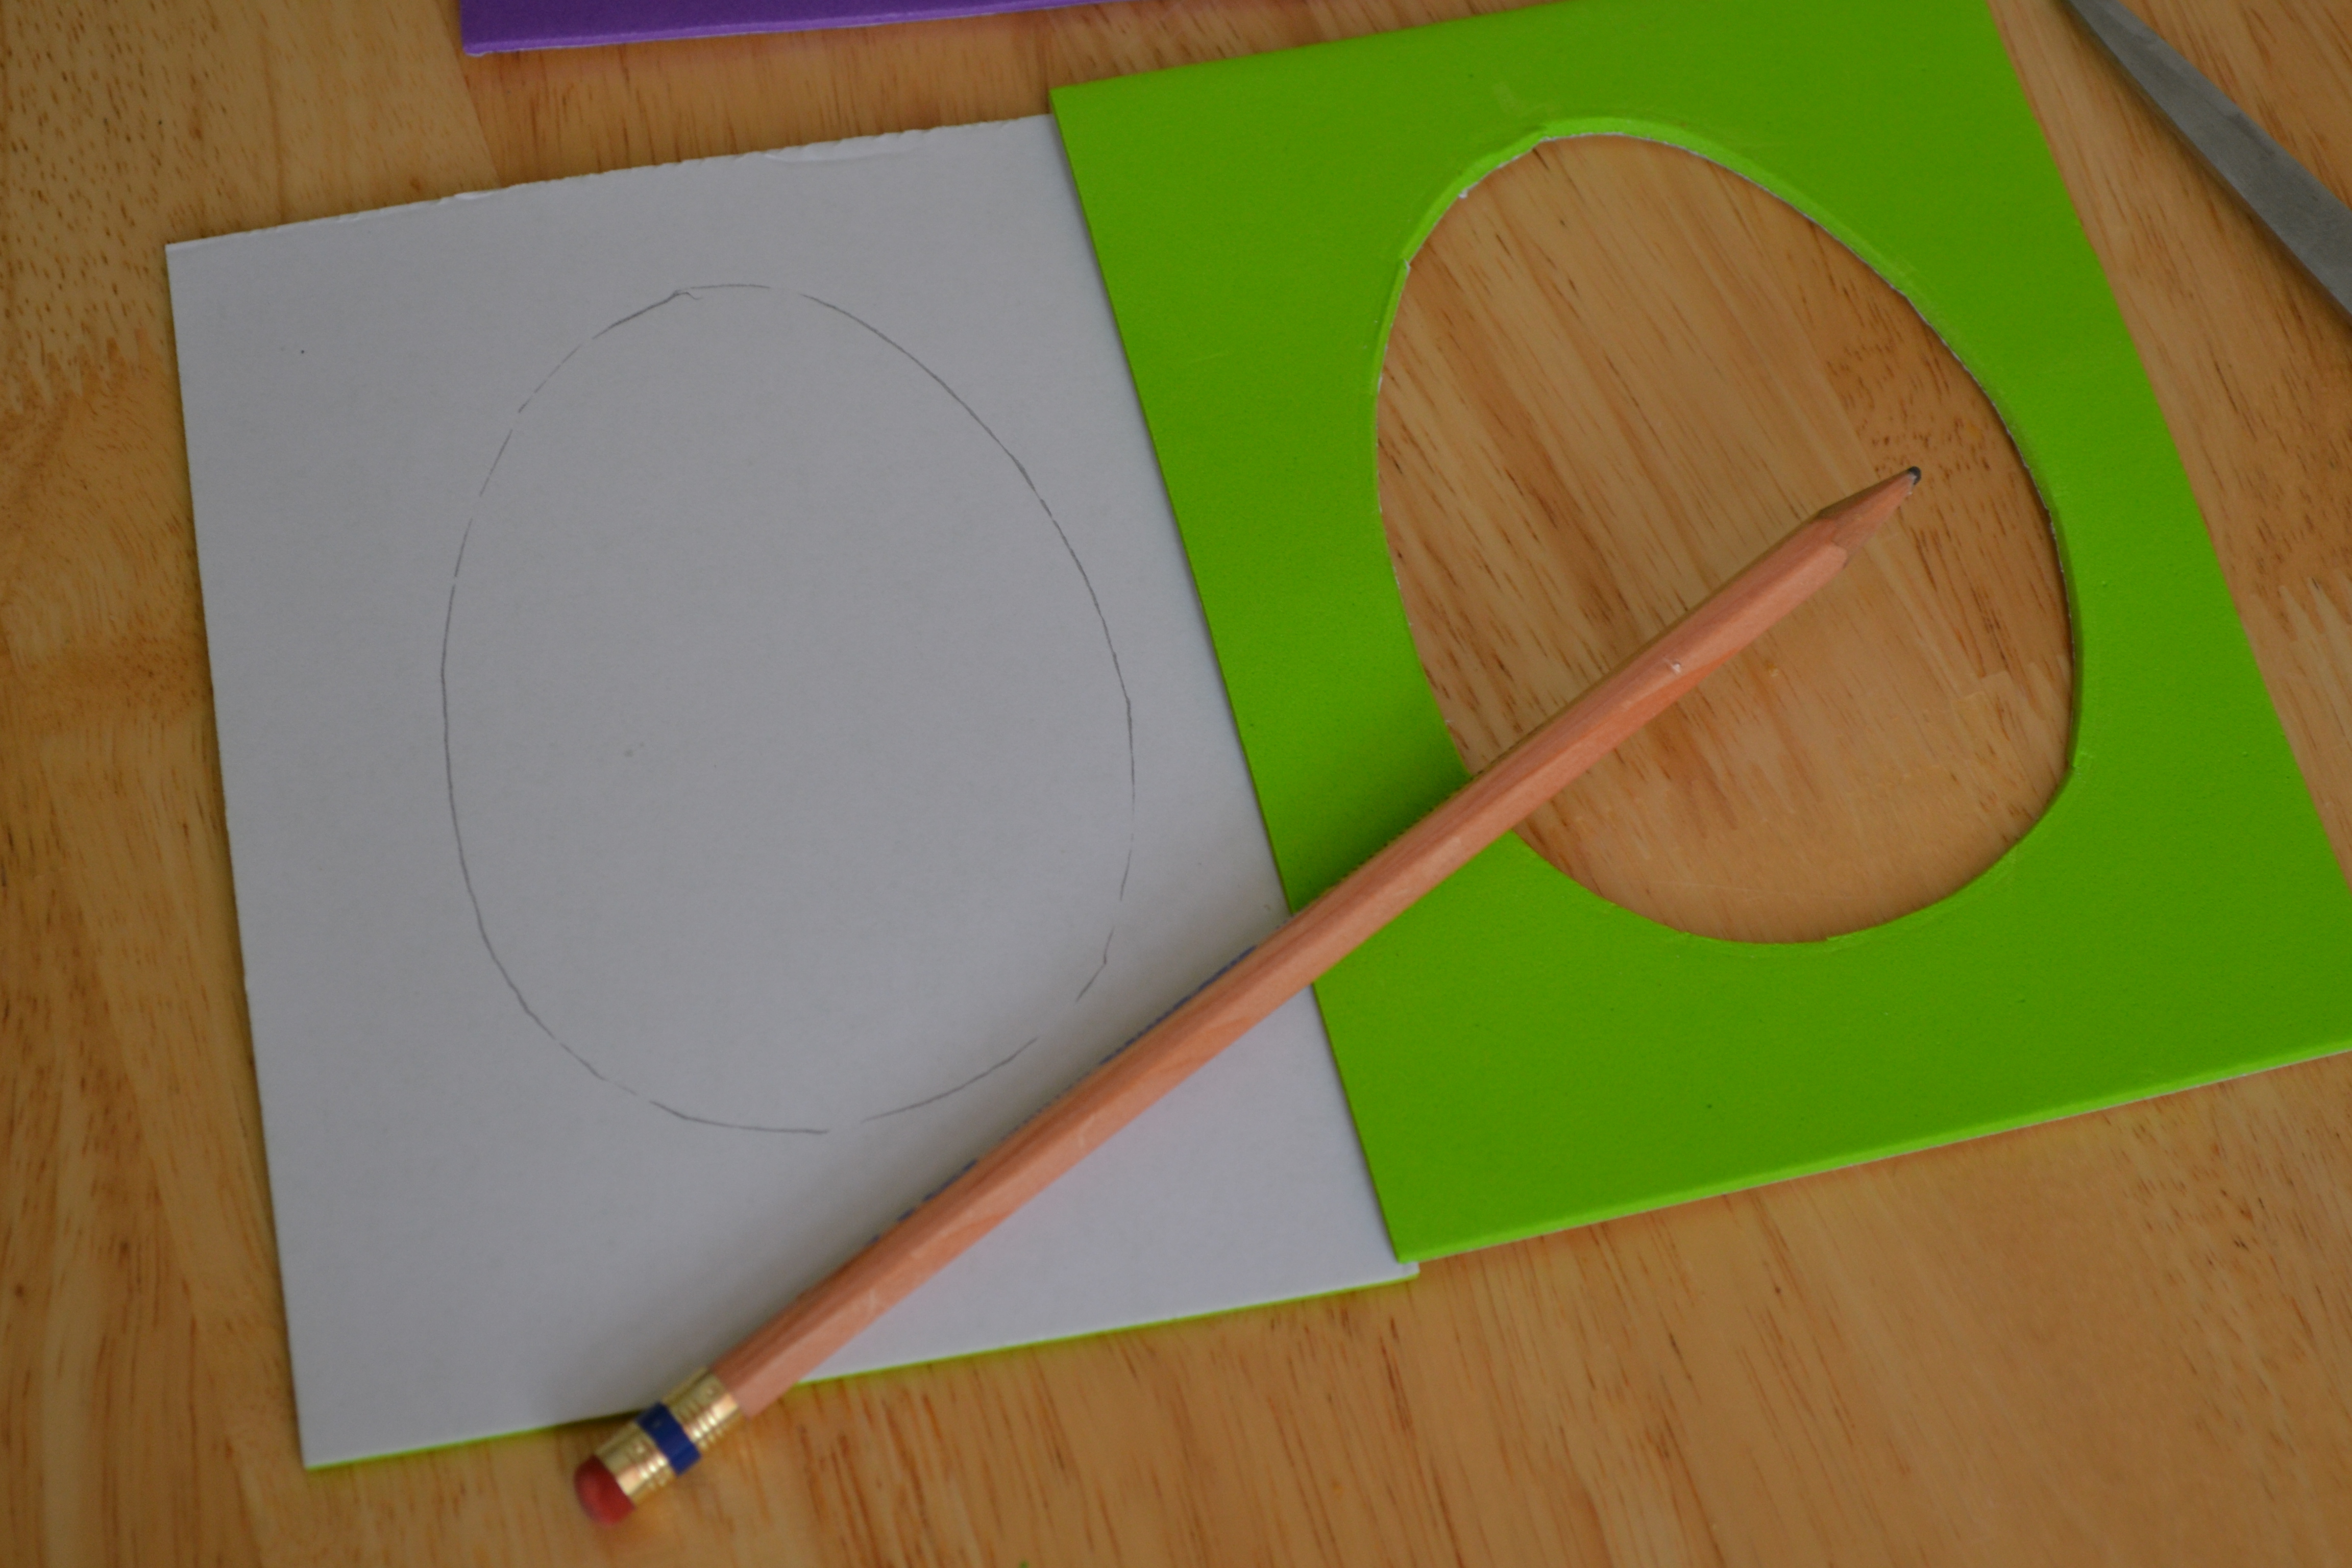
We decided that we wanted to make smaller plaques so we cut our sheets of adhesive foam into fourths and used two pieces for each project. My 9-year-old drew an egg shape on her foam piece and I drew egg shapes for my younger kids.
Step 3
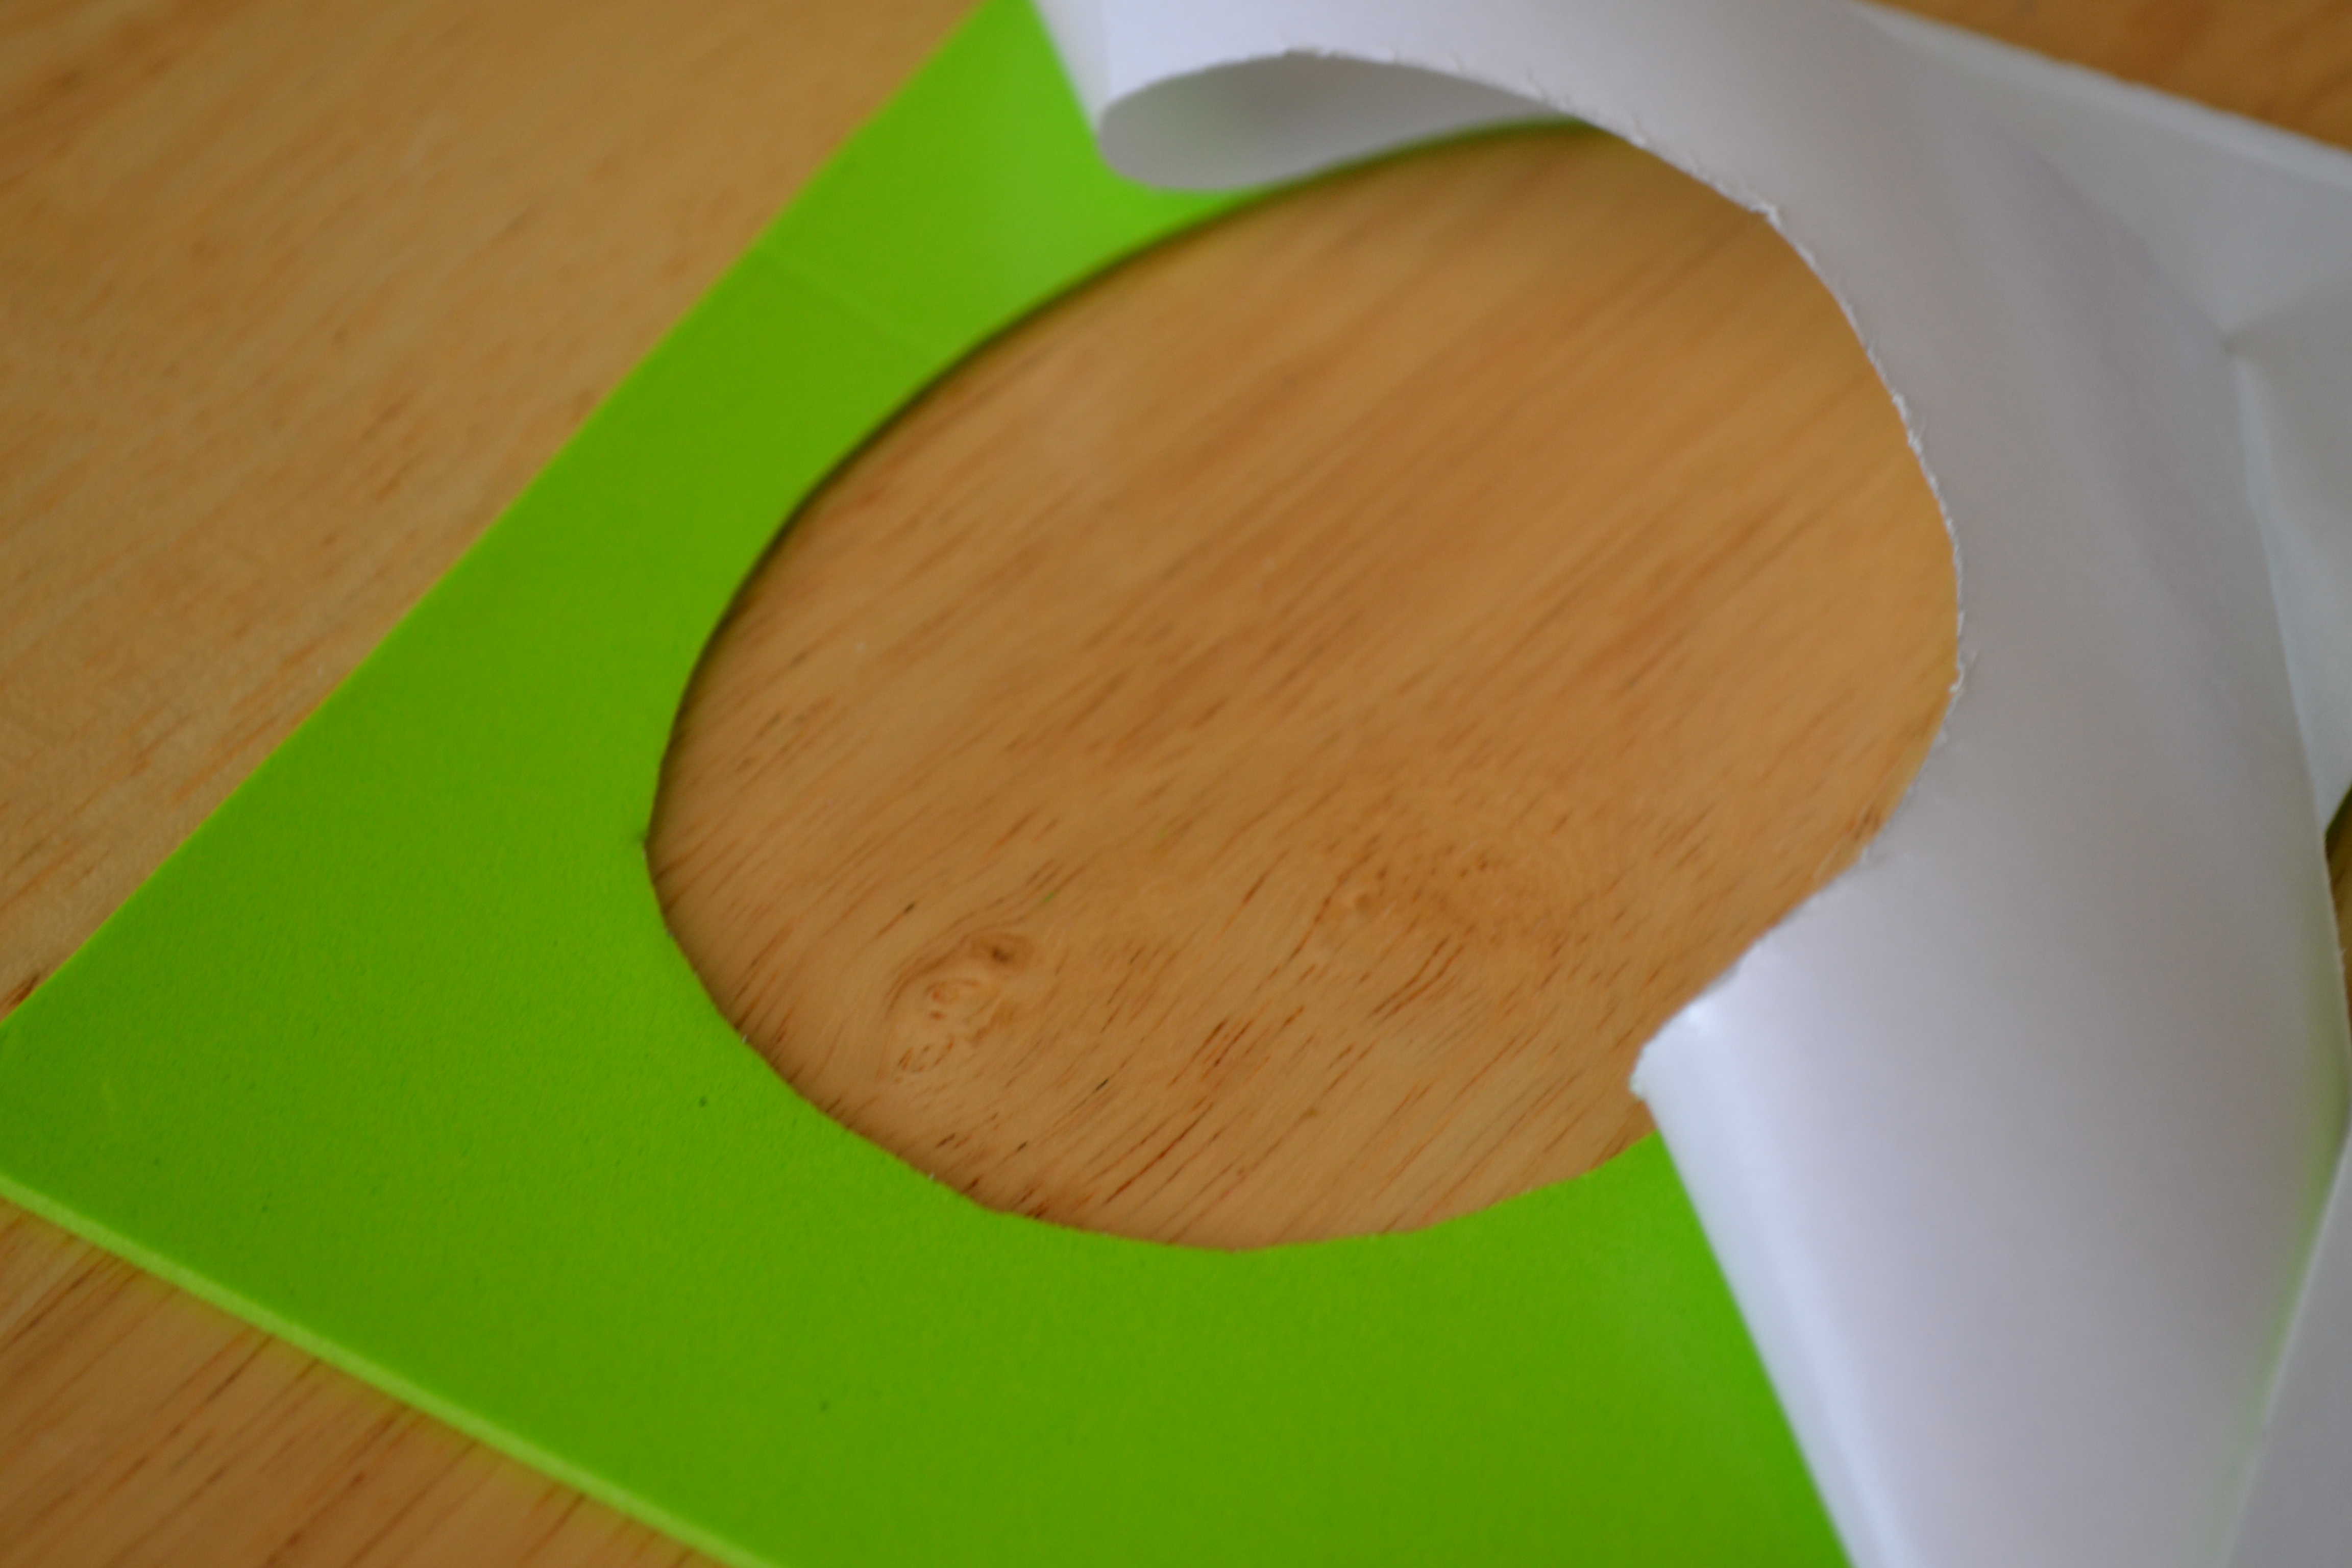
We cut out the first egg and used the leftover hole to trace an identical egg on the other piece of foam. Be sure to trace your egg shape on the back of your foam piece (where the adhesive is) to make sure that the two pieces match up. We had to learn this the hard way when our first project didn't match up!
Step 4
Once all the egg shapes were cut, the kids carefully peeled the adhesive backing off of their foam pieces. My 4-year-old was able to do this easily without any help.
Step 5
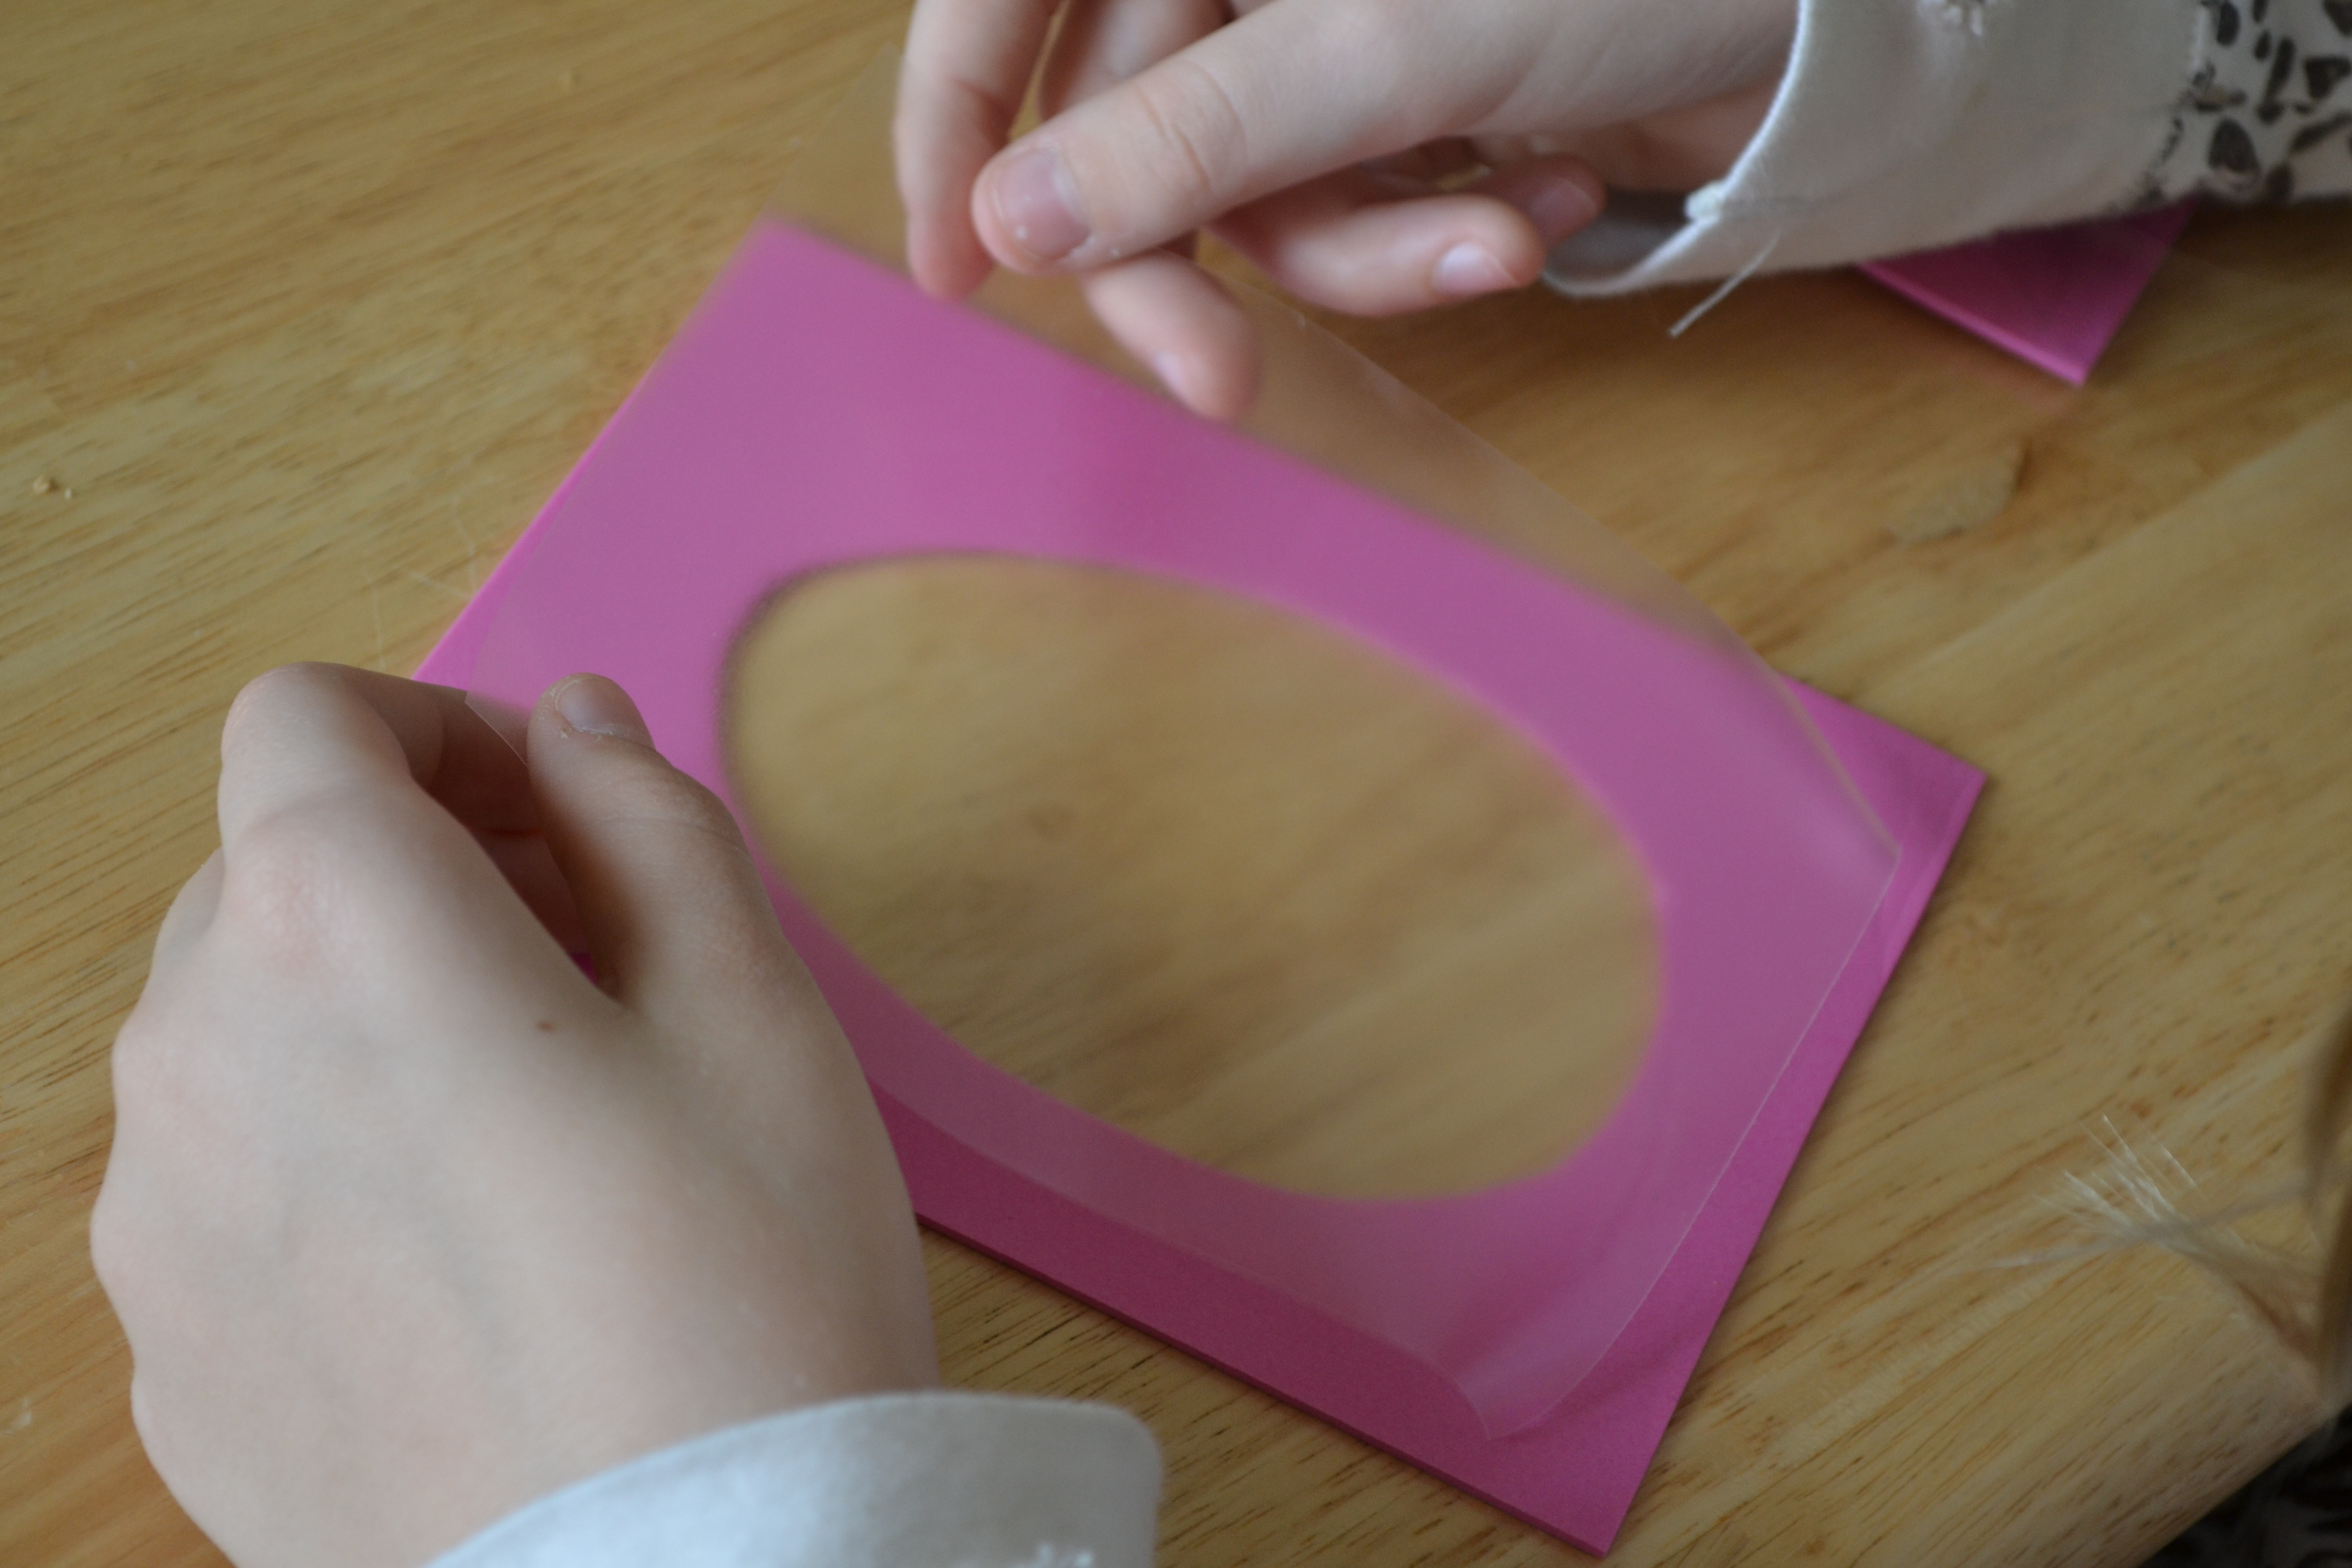
I cut contact paper squares to cover the egg hold and the kids laid the contact paper on top of the adhesive side of their foam piece. My son laid his contact paper with the sticky side facing down so he had to start over. The second time we were very careful to help him attach his contact paper to the foam with the sticky side facing up!
Step 6
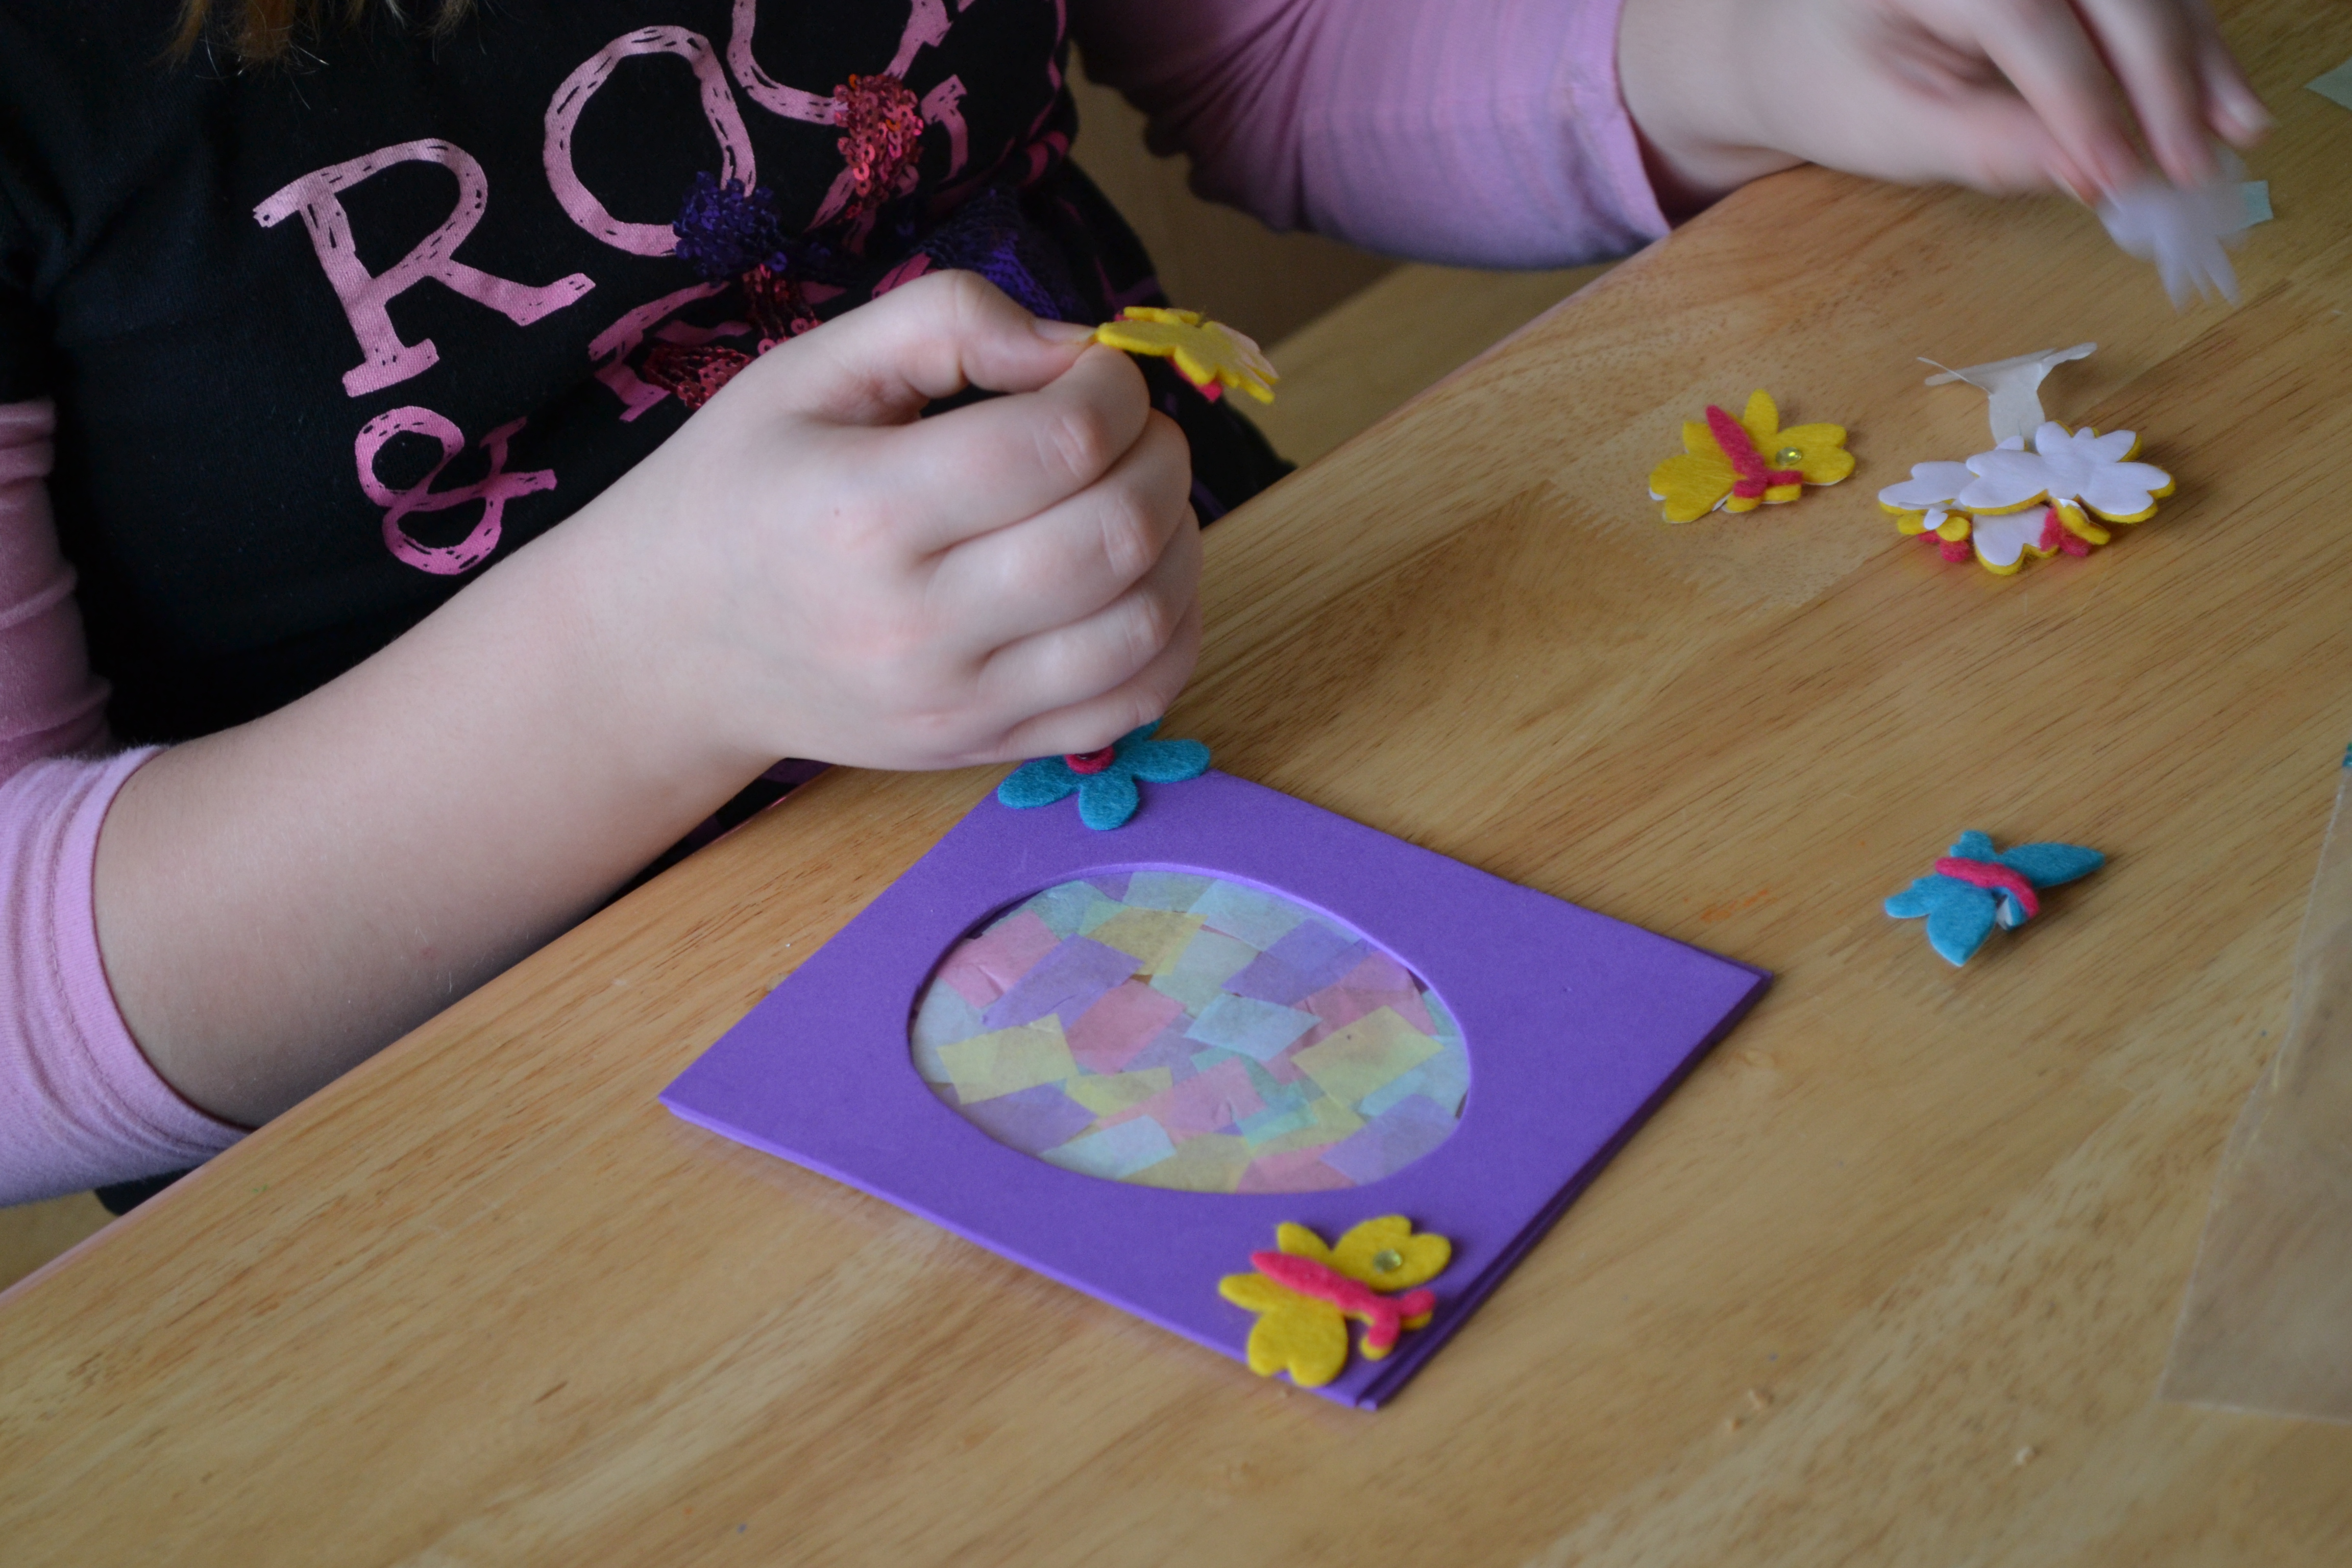
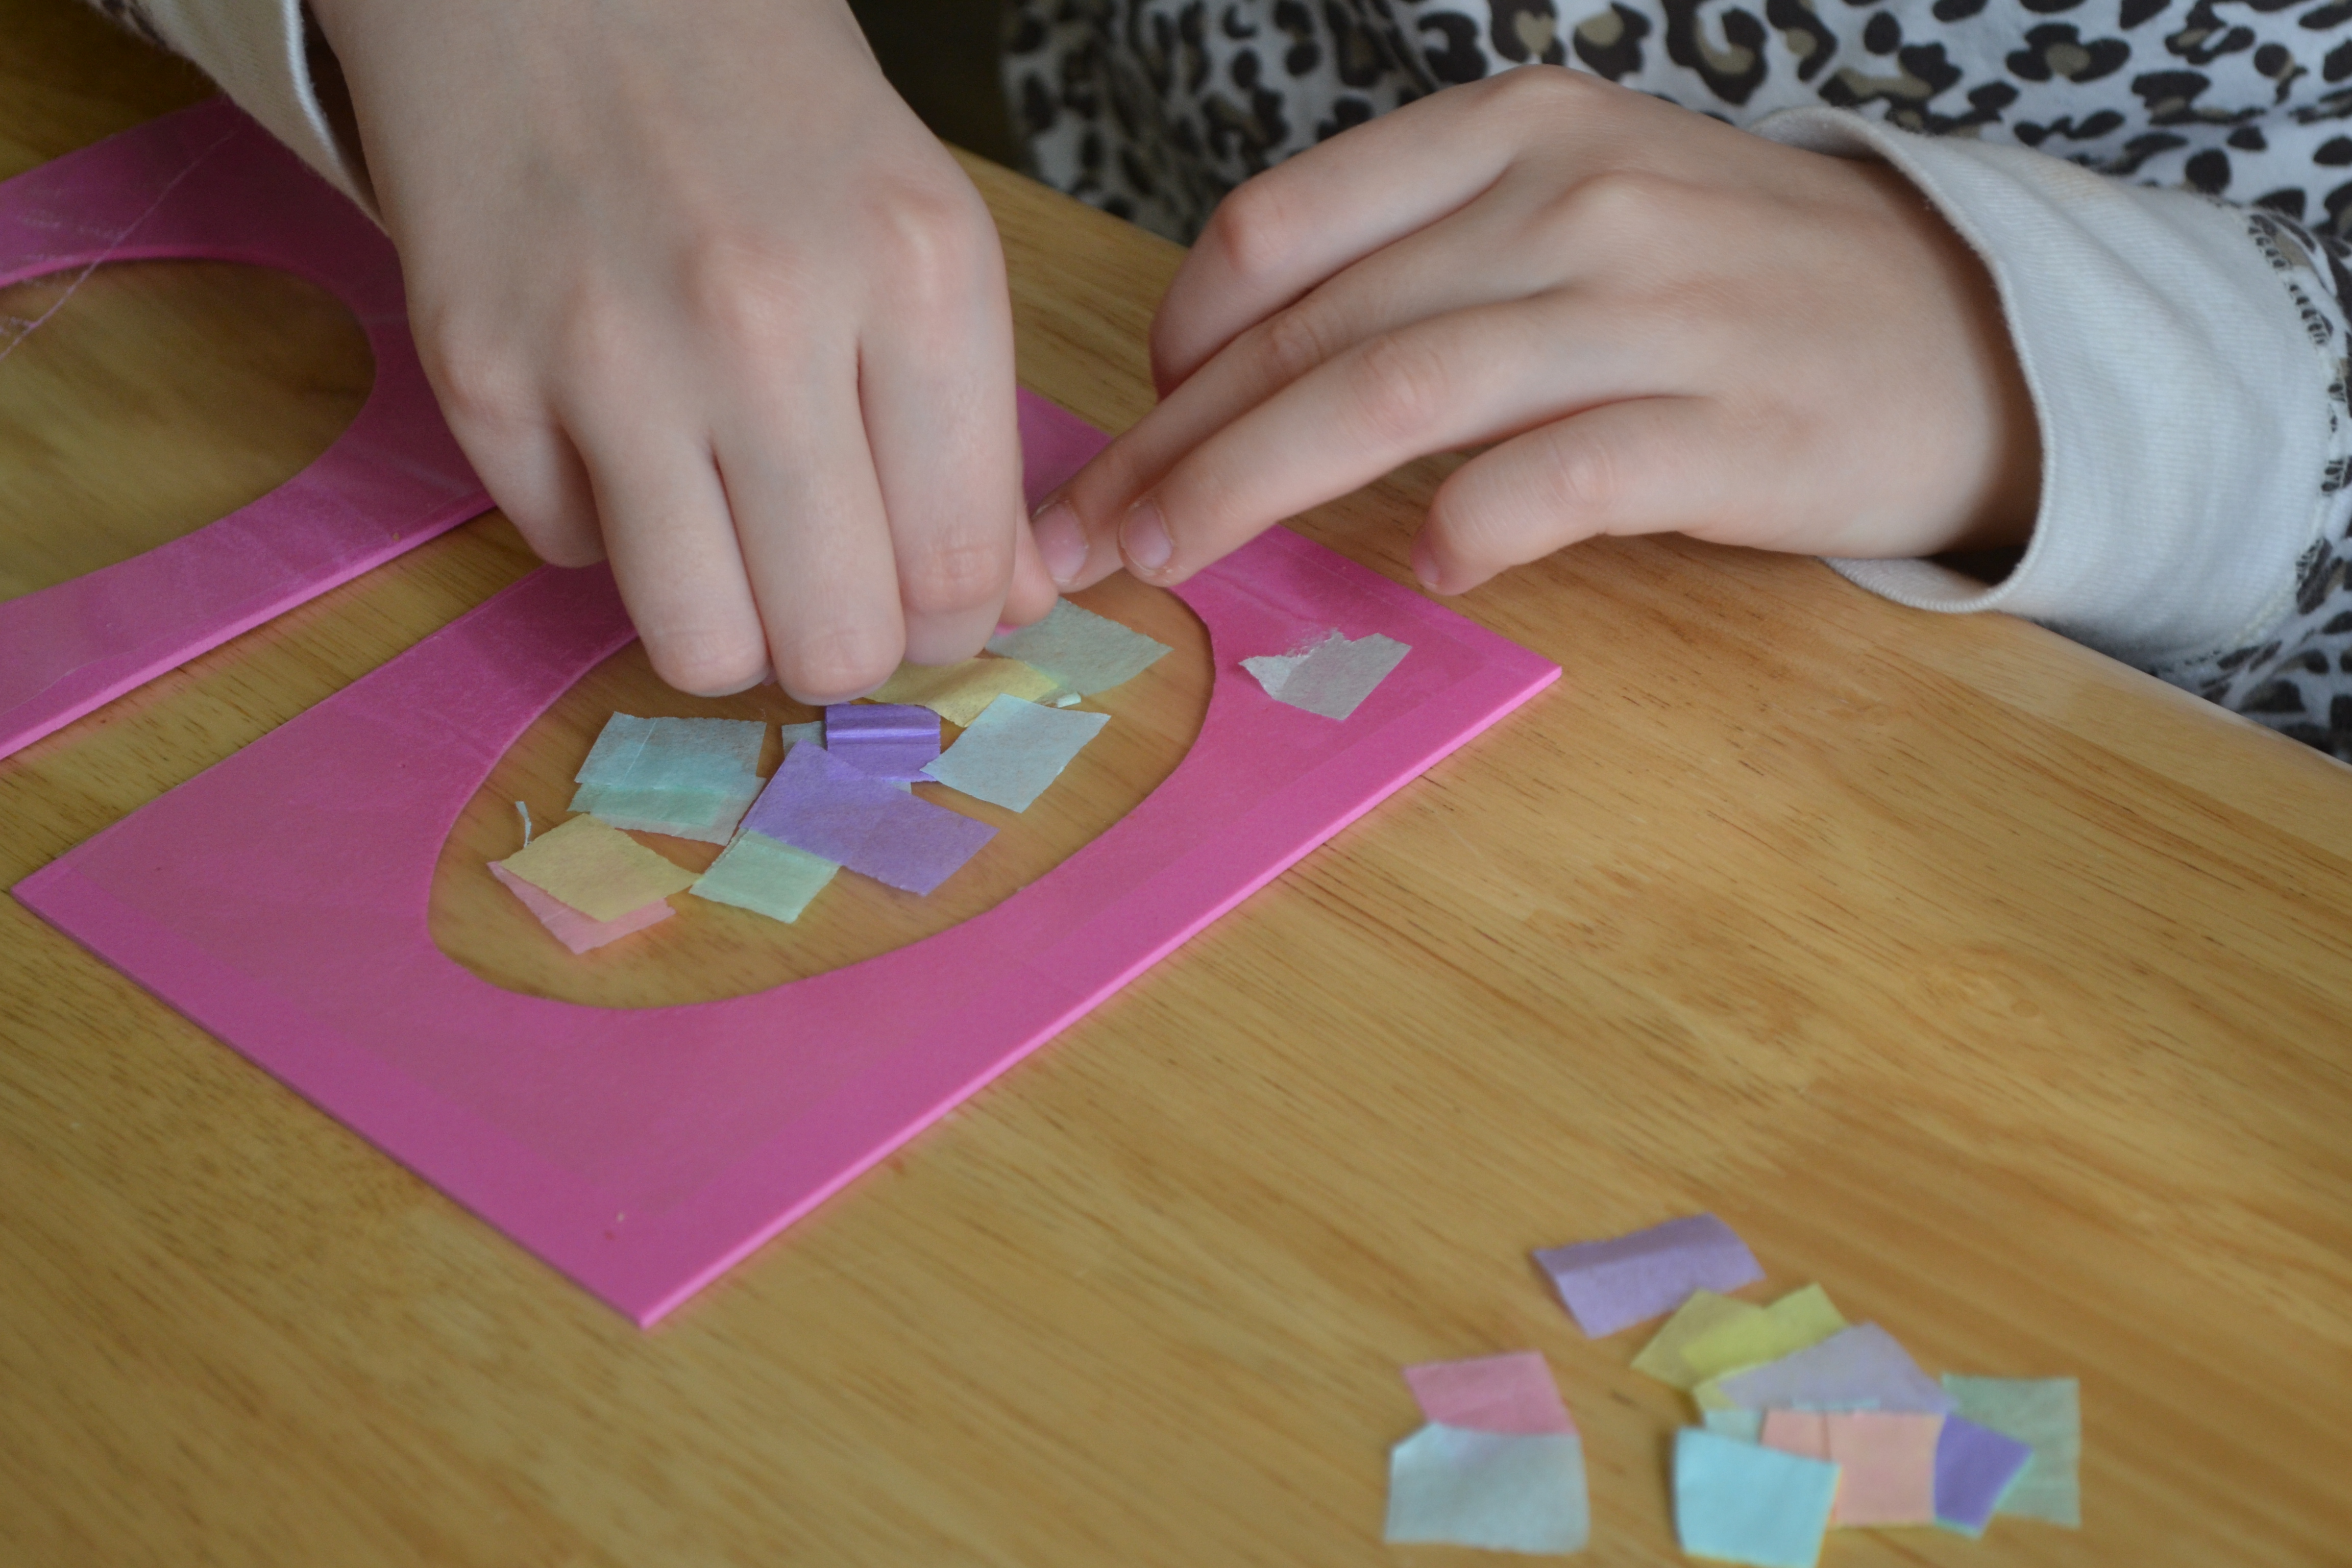
Once everyone had their contact paper attached to both pieces of foam, they decorated the contact paper on one piece with their tissue paper squares. Some of the kids tried to make patterns. My 4-year-old just sprinkled and then squashed his tissue paper.
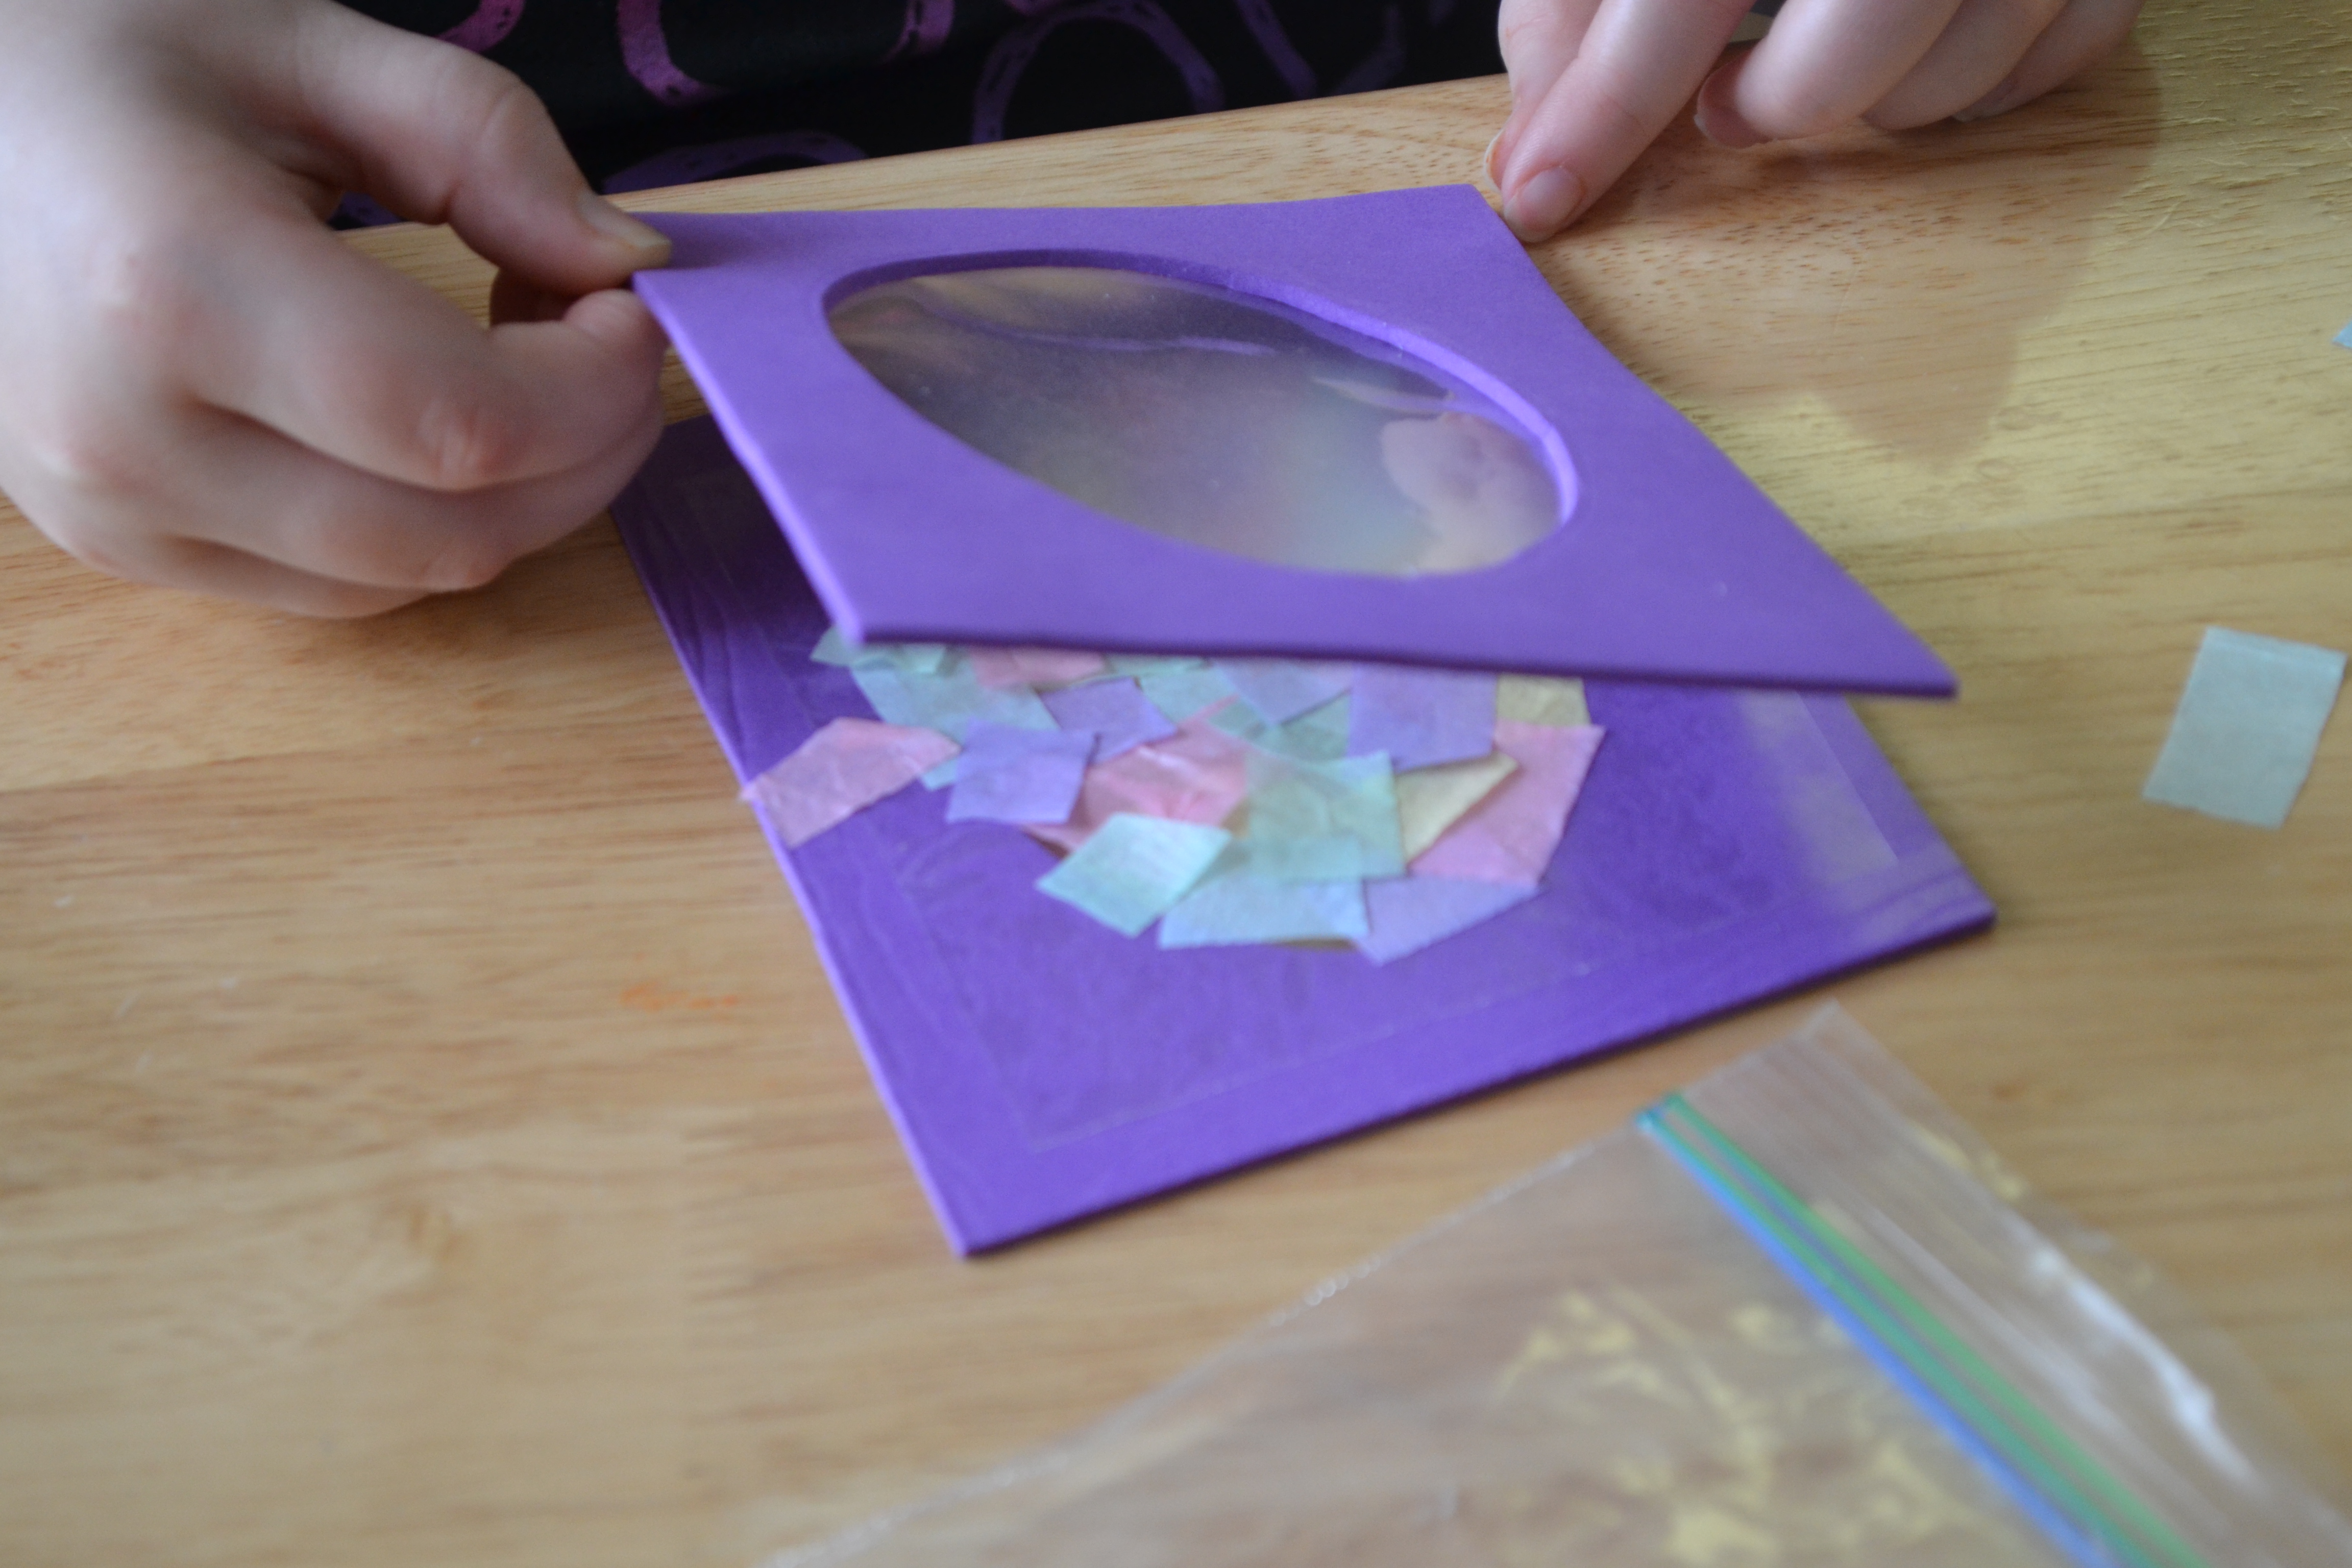
Step 7
After decorating, the kids laid their second piece of foam on top of their decorated piece. They were very careful to attach them so that the egg holes lined up.
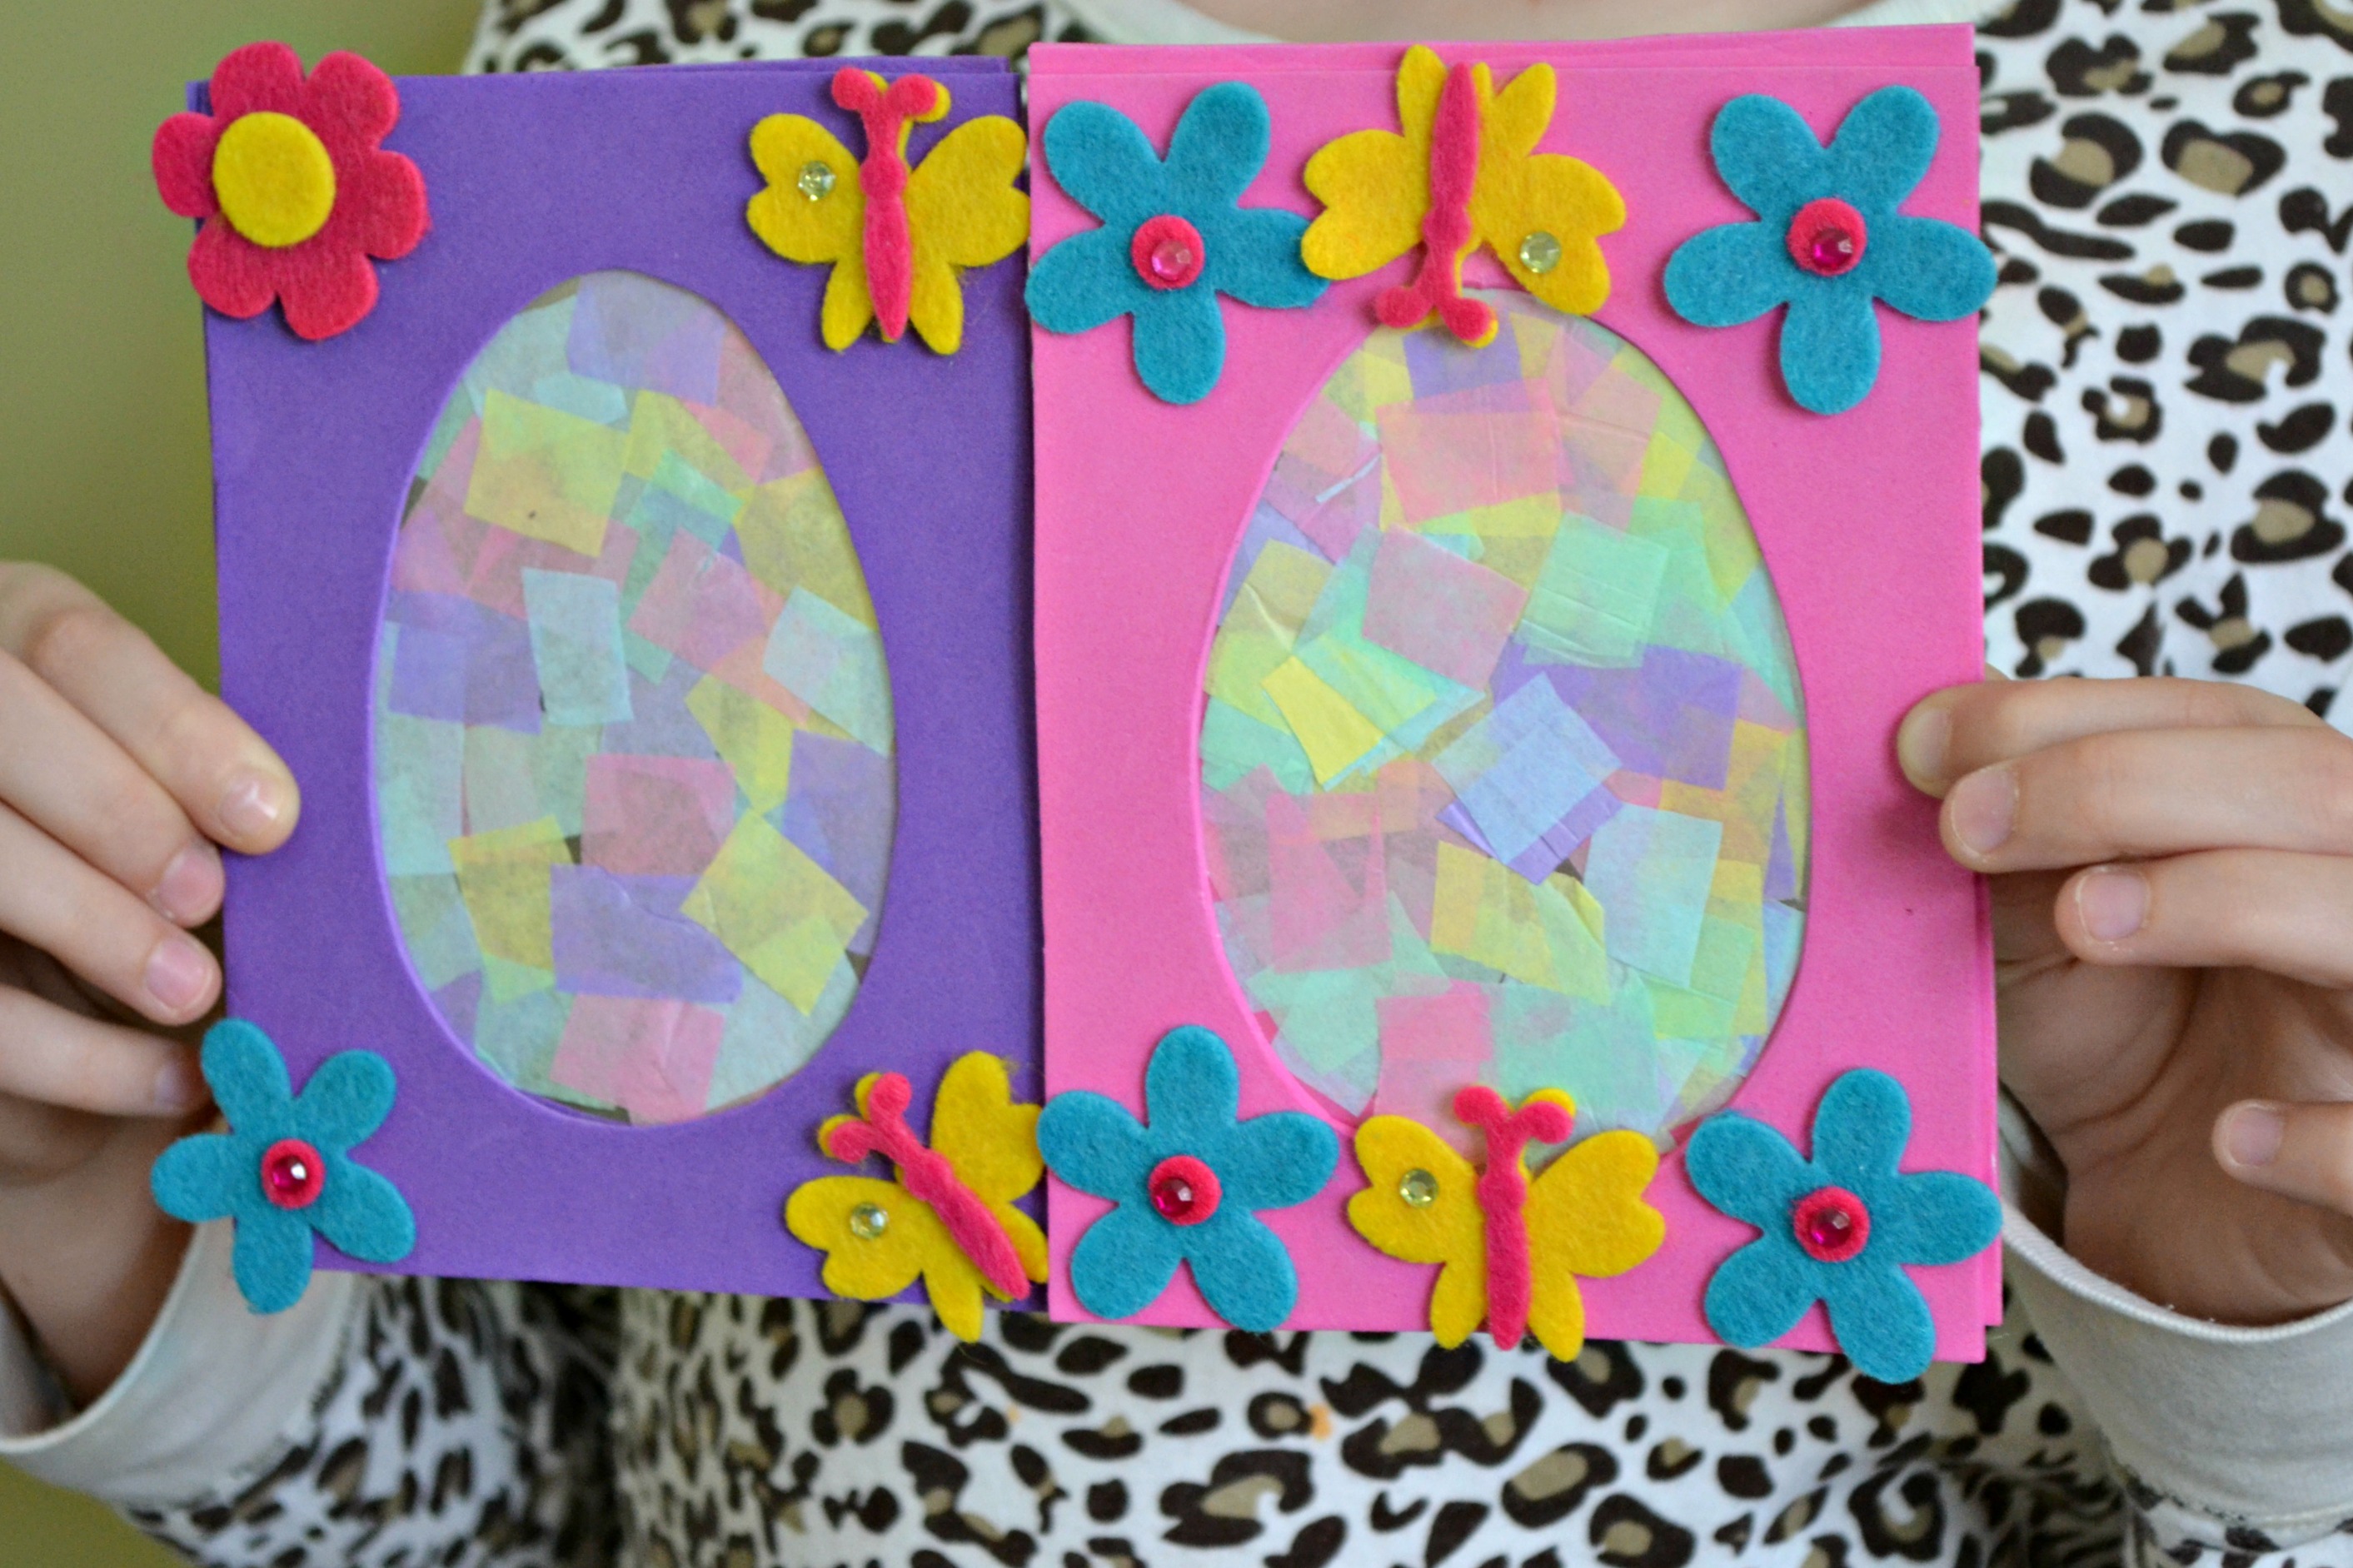
Final result!
My kids then added foam stickers to their plaques. I loved this extra piece of personalization. When everyone was finished, we hung a garland across the kitchen window to finish off our Easter decor.