Step-by-step tutorial
Step 1
This is one of my children's very favorite projects. Lots of jumps for joy and "hooray!"s for this one. Of course, Maddie jumps and skips around the house most of the time regardless, but still--she especially likes this one!

Step 2
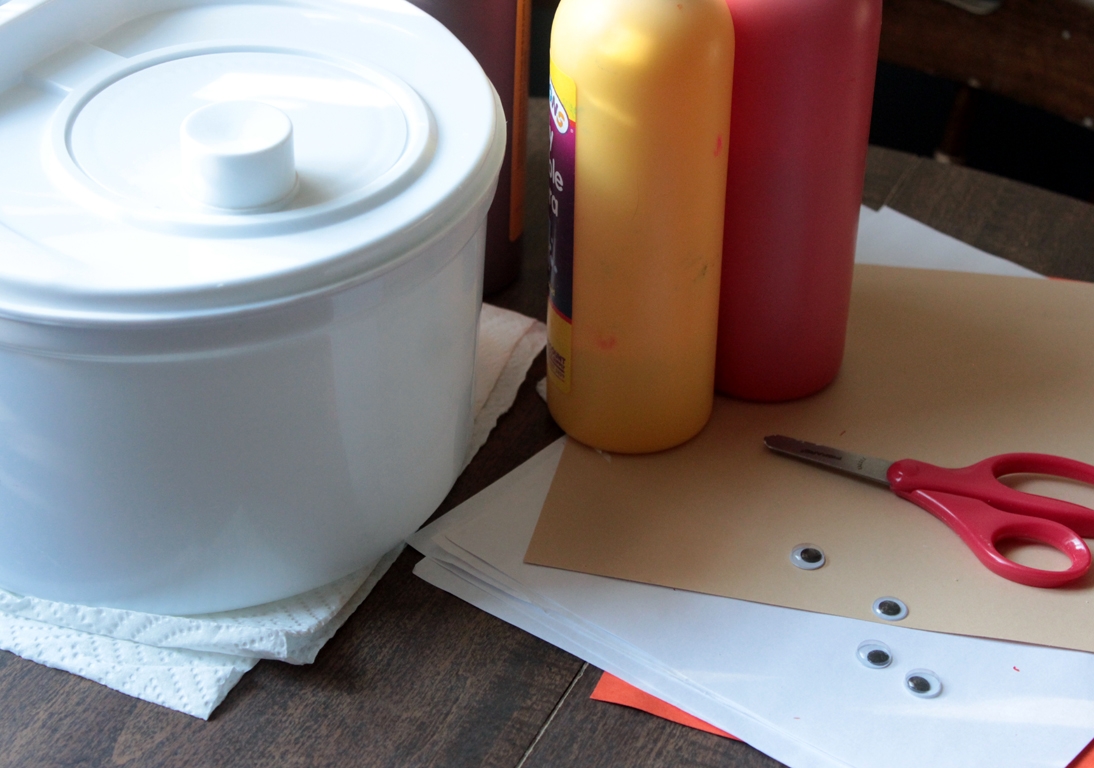
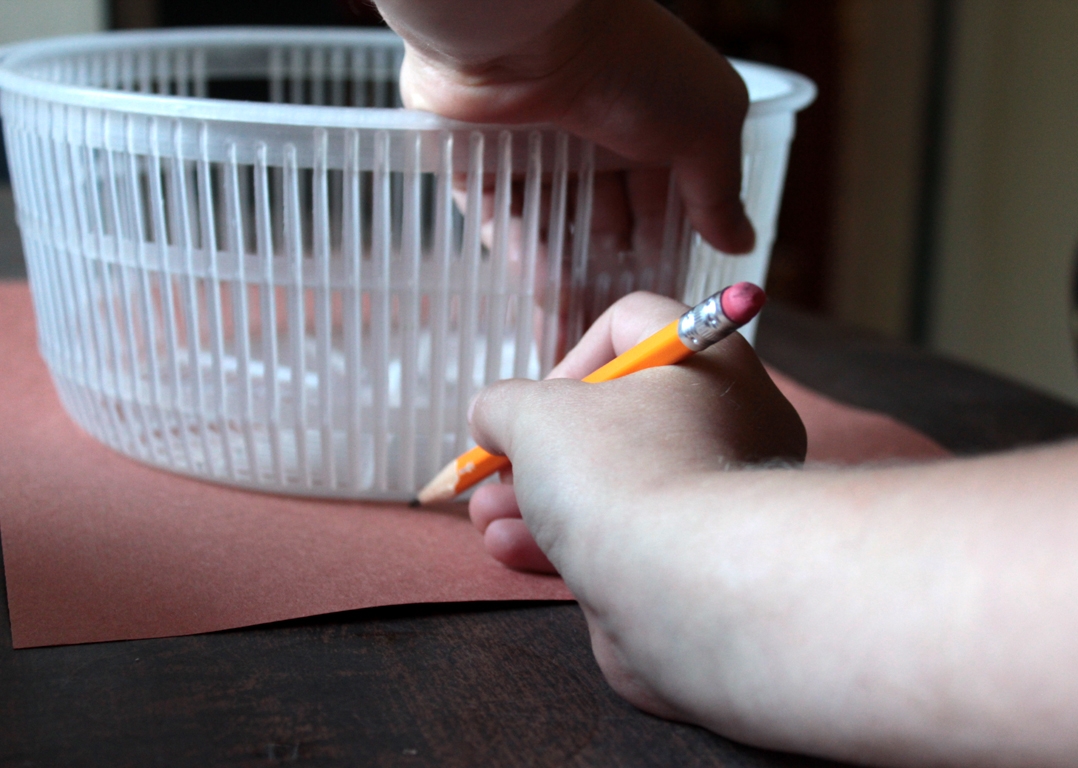
First you'll need a (heavy) paper that fits into your salad spinner. The easiest way to do that is to take out your basket, and trace it onto your paper, pressing your pencil toward the inside so that it will be a bit smaller than your basket. Then put two or three paper towels underneath your spinner to make clean-up easier.
Step 3
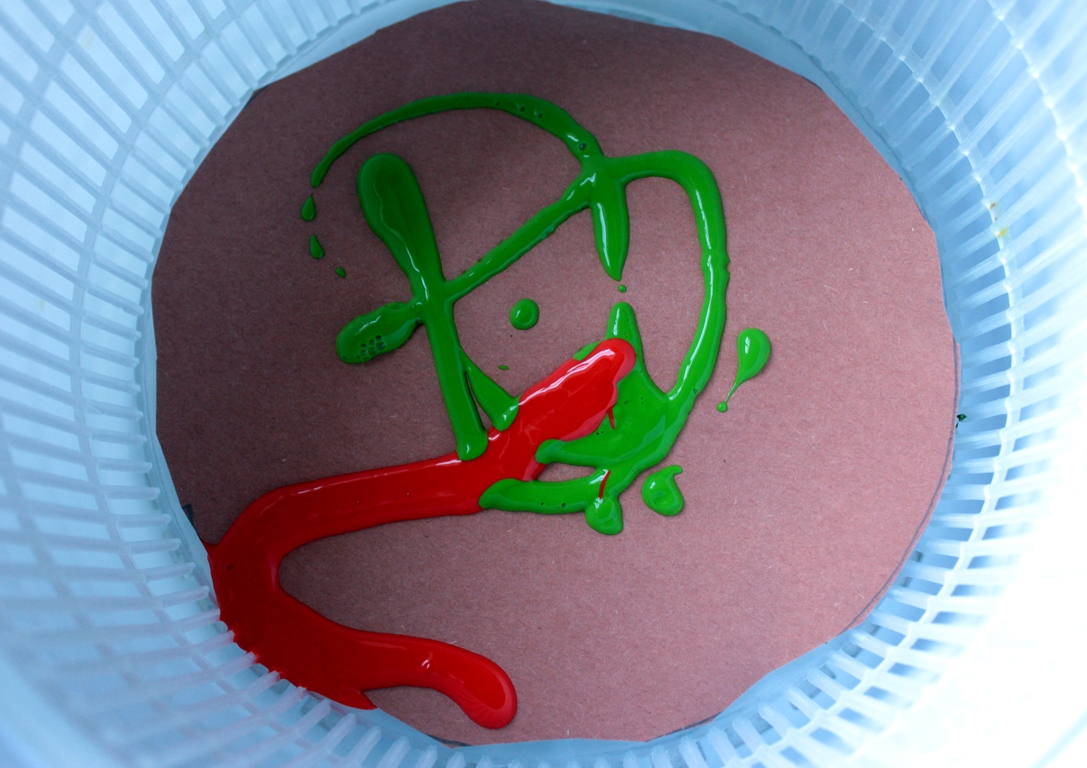
Now things get very exciting! Experimenting is certainly the best part of this step, but know that squiggles are better than big puddles. (Big puddles will all just swoosh to the side, leaving you with lots of wasted paint.) Now spin, spin, spin!!!
Step 4
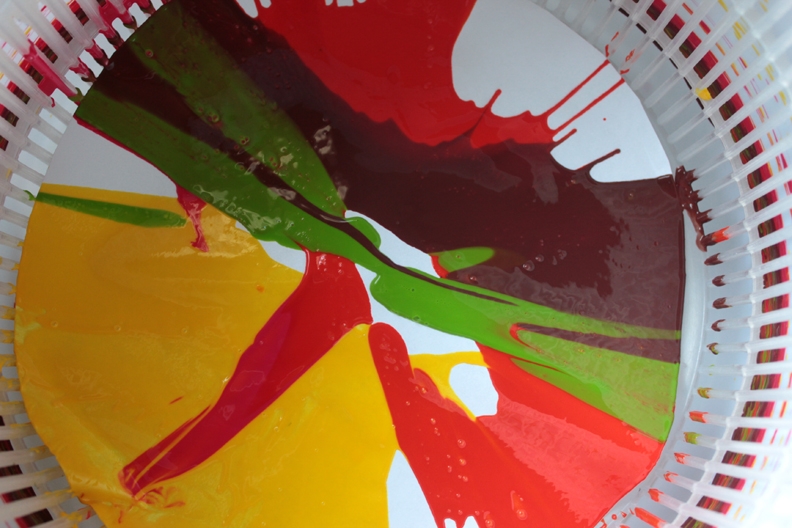
Time to check it. Oh, it's so exciting! (Yes, this is a different one, I told you we make LOTS of these.) Add more paint, and spin it again.
Step 5
When it's colorful enough to satisfy you, set it somewhere to dry for a bit. If your paper is light weight and not heavy card stock, it might start to curl. When the edges are dried (they'll dry first), and if it wants to curl up, find a bowl or saucer that about fits the edges of your paper so that it can hold down the paper while it dries.
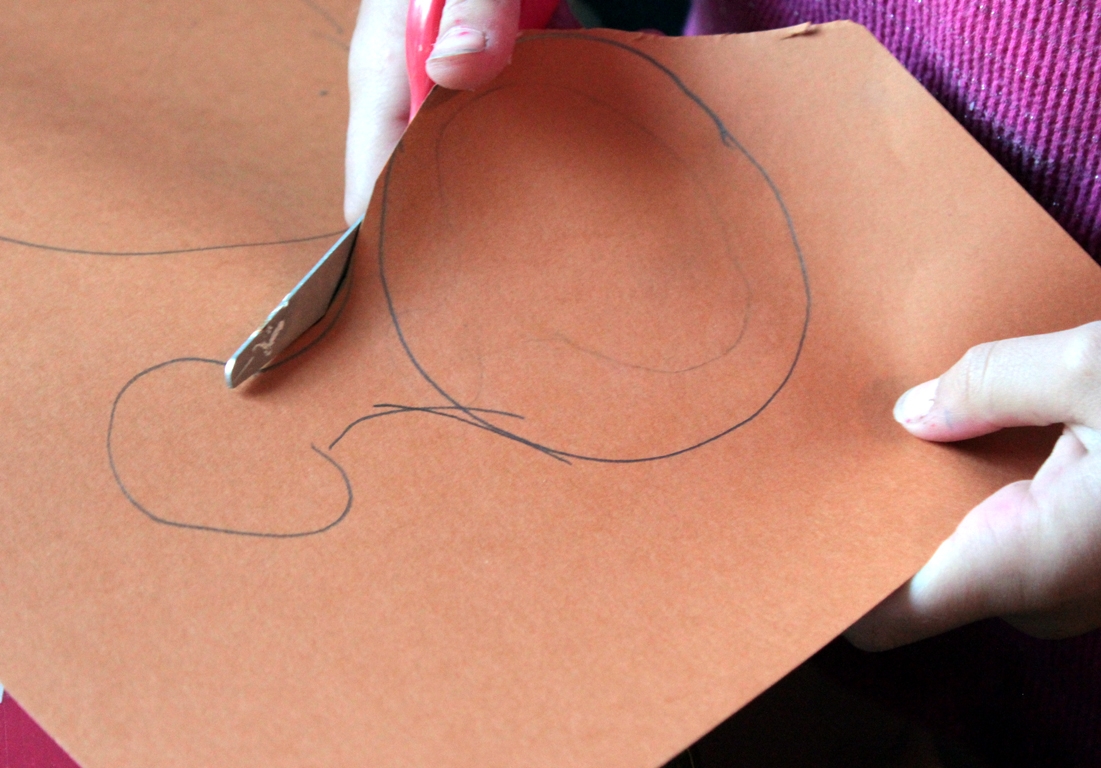
Step 6
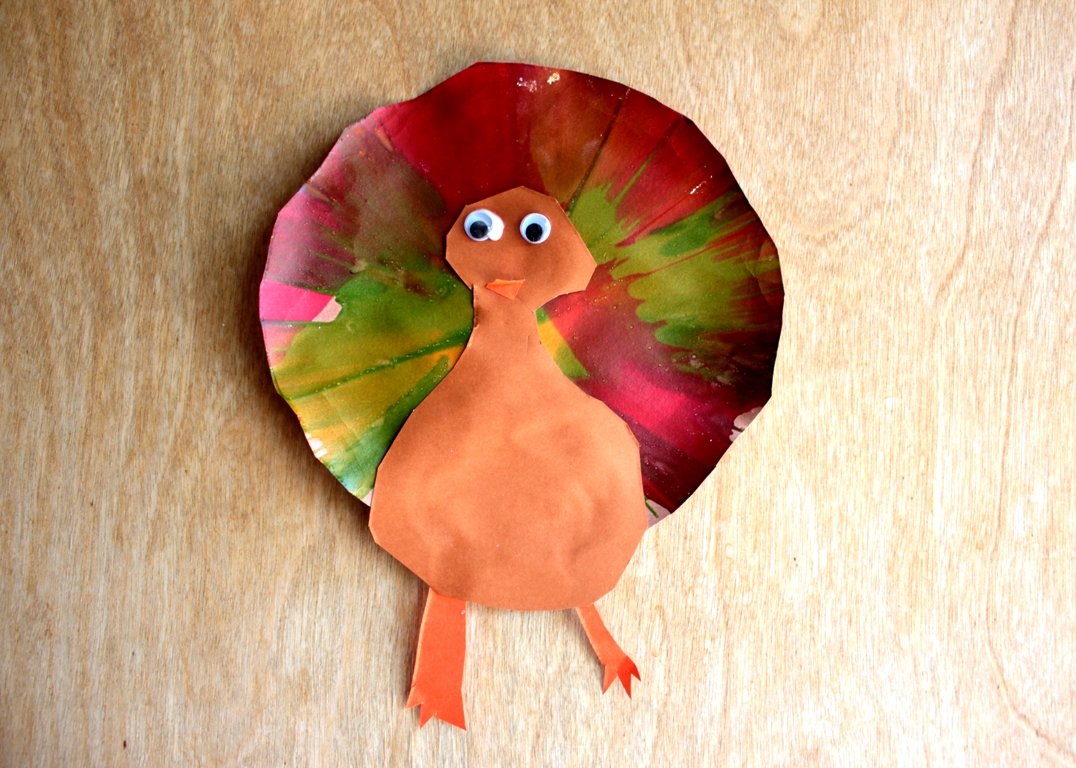
Now for the rest of the turkey. Design and cut out a body, feet, and a diamond for a beak.
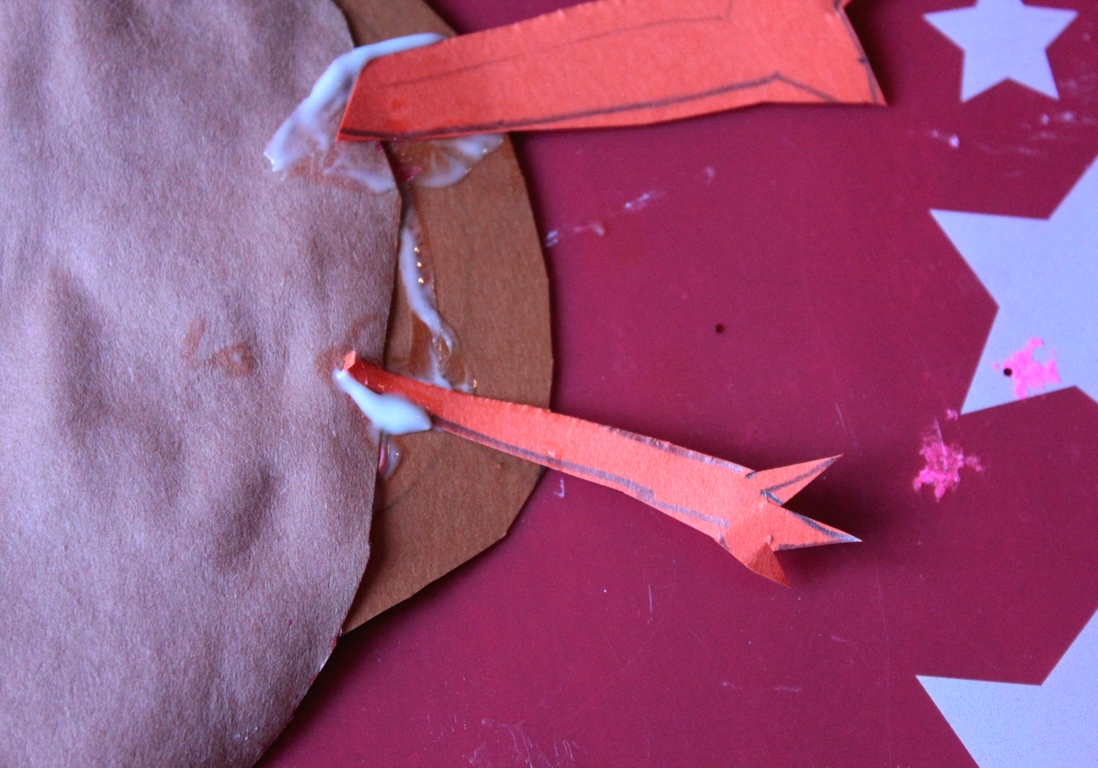
Step 7
Glue the body and legs onto your circle,
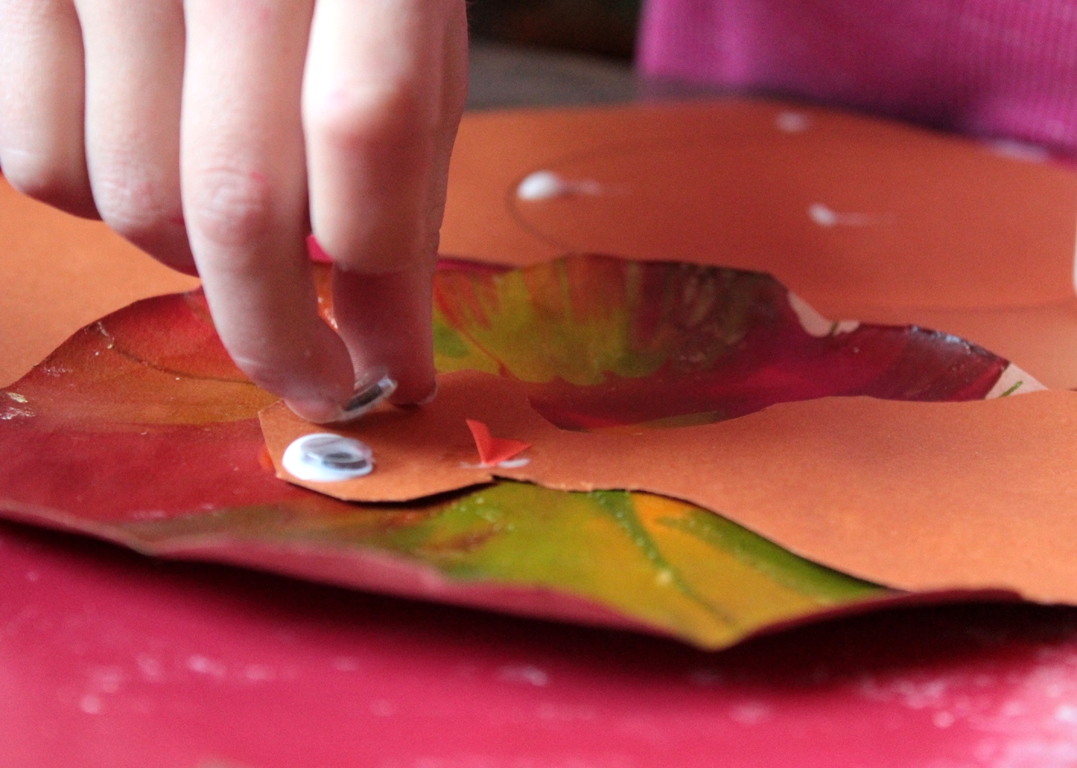
Step 8
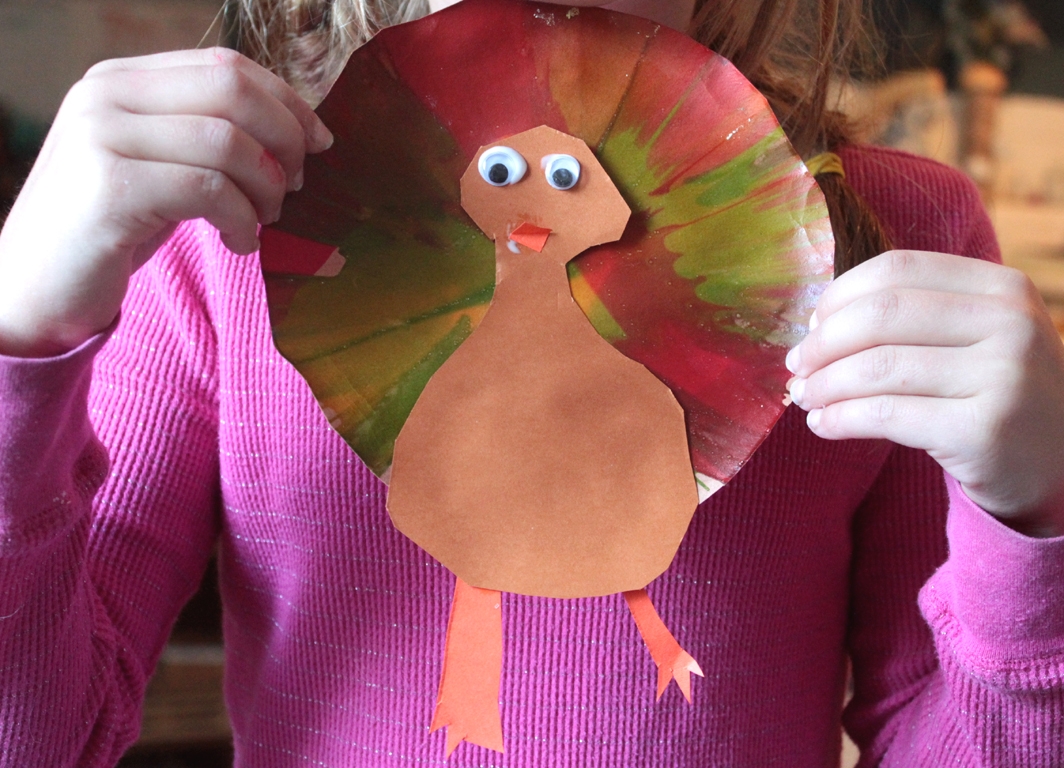
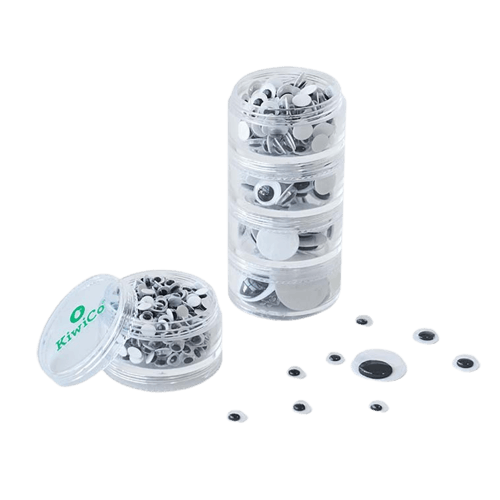
Add your eyes (googly or ones you've made), bend the beak, and glue one 'triangle' down....
Done!
...and he's finished! Isn't he a fine Tom Turkey?