Step-by-step tutorial
Step 1
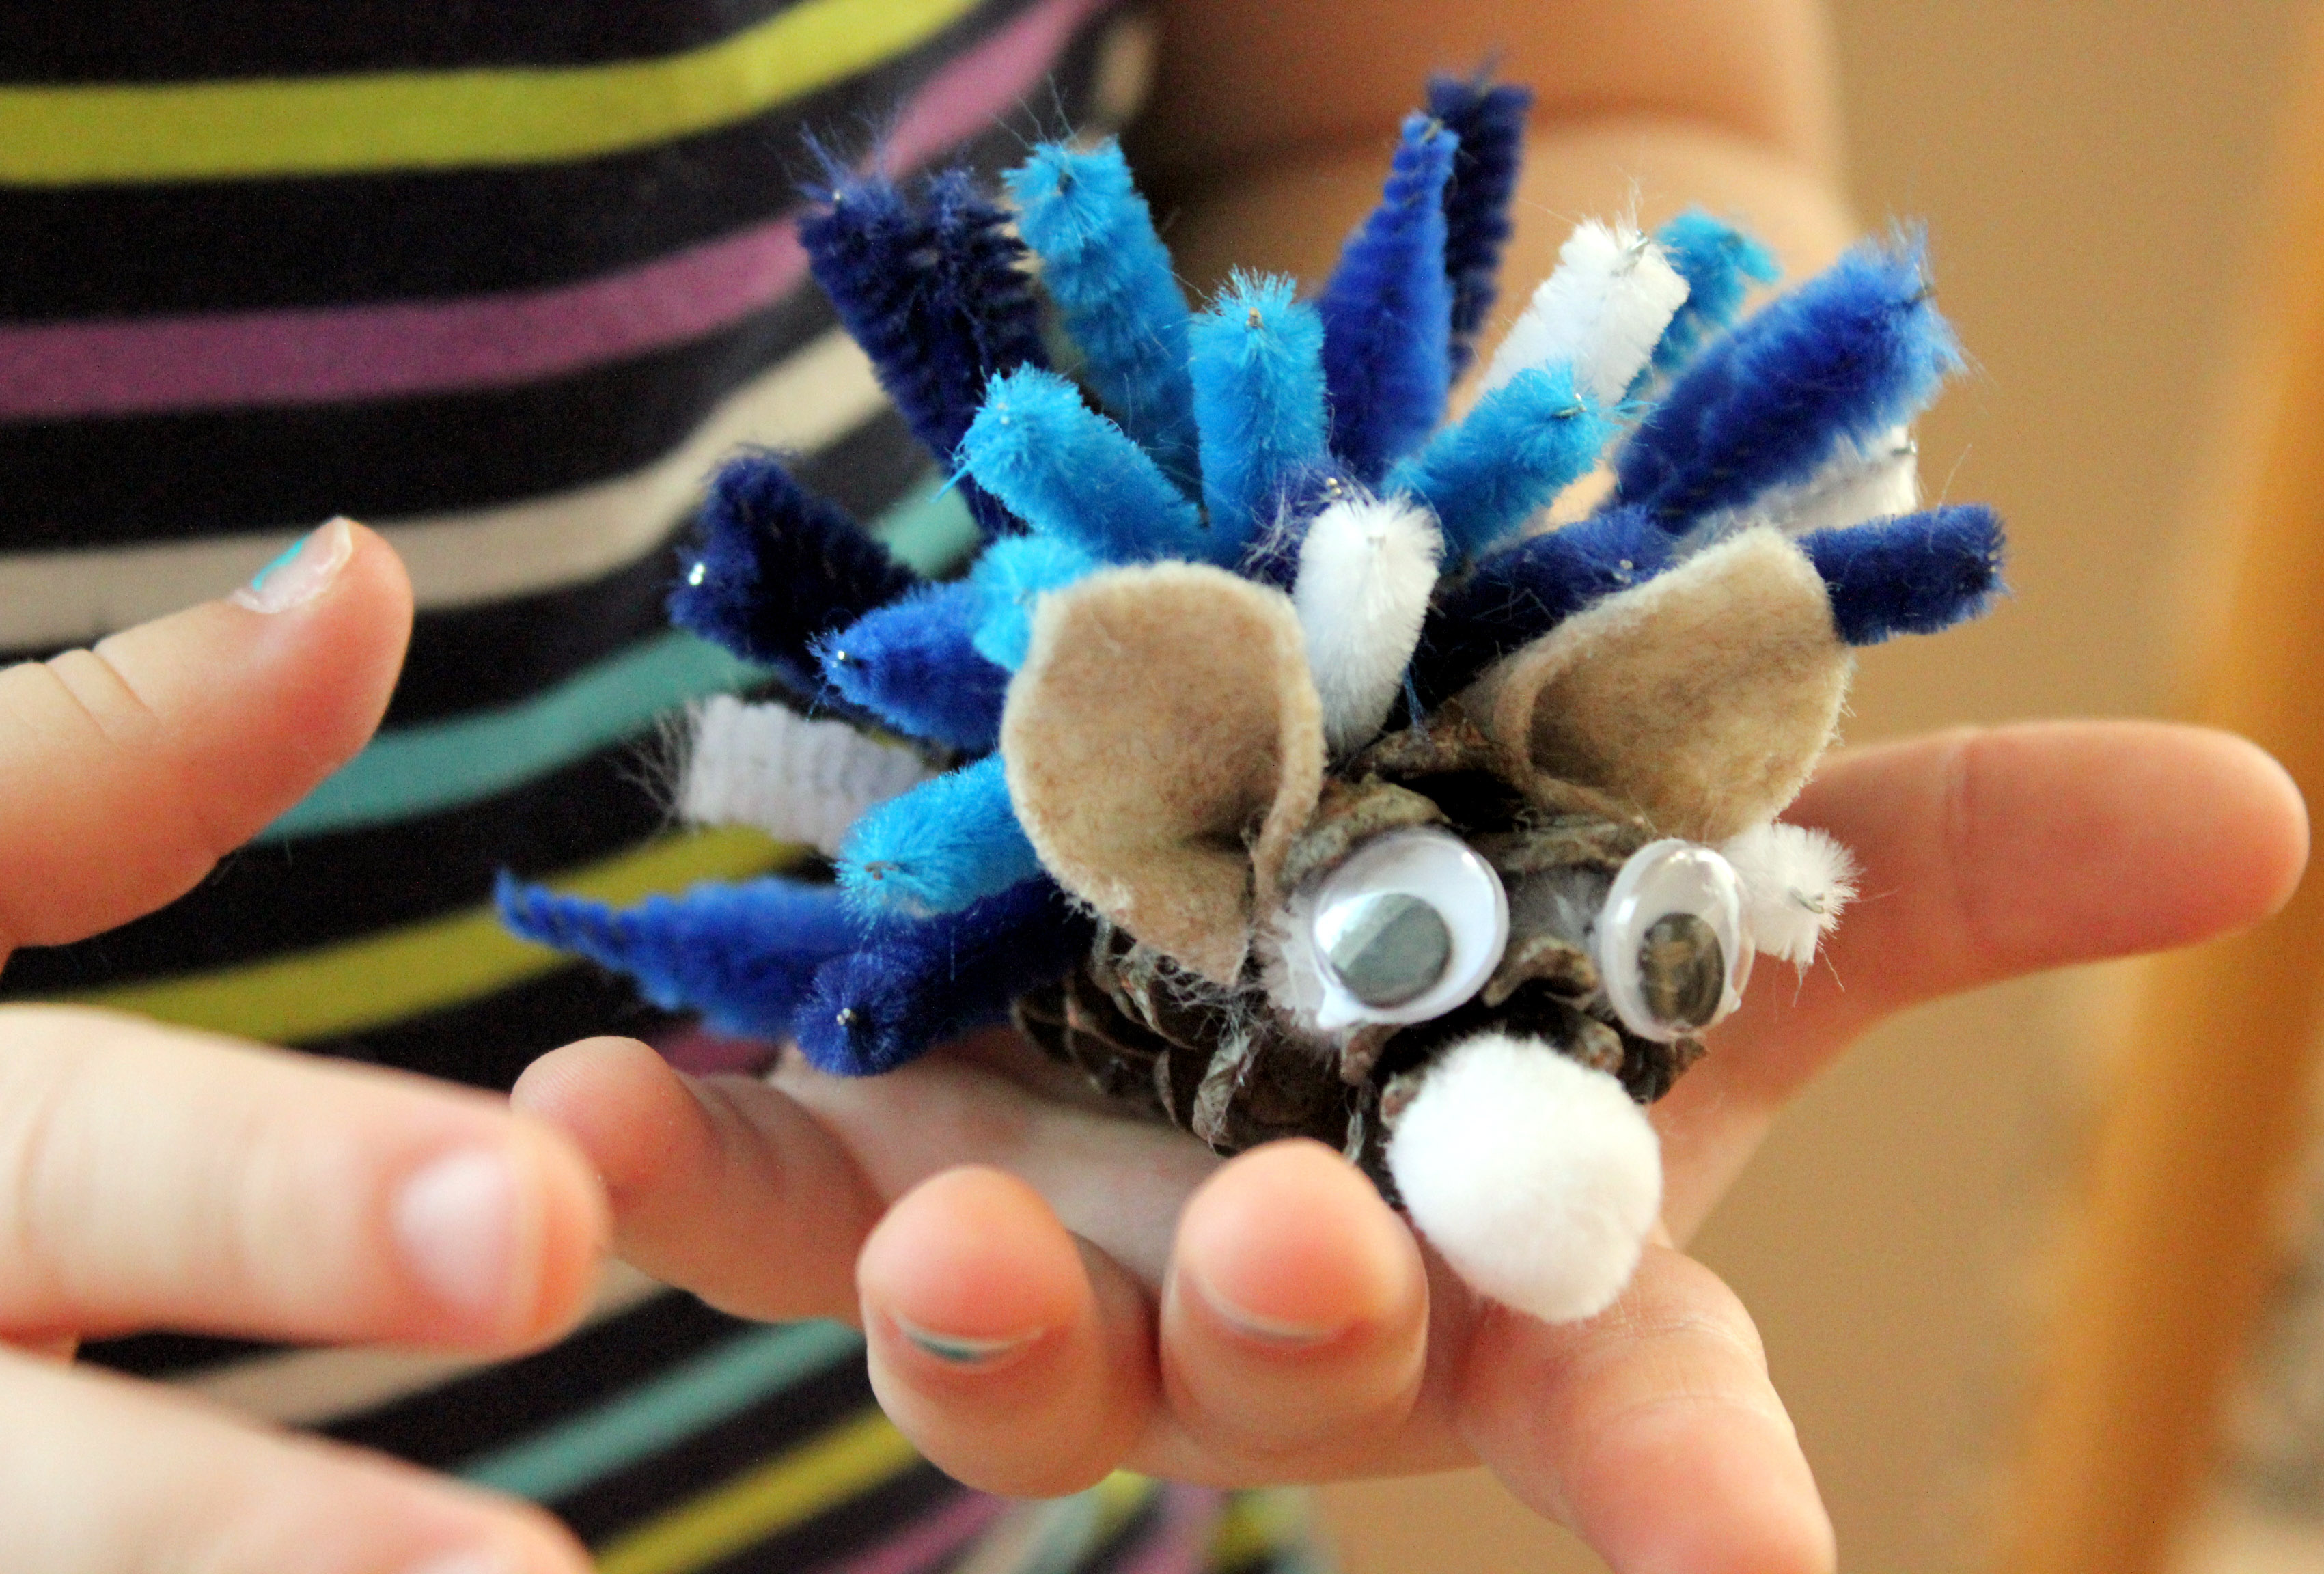
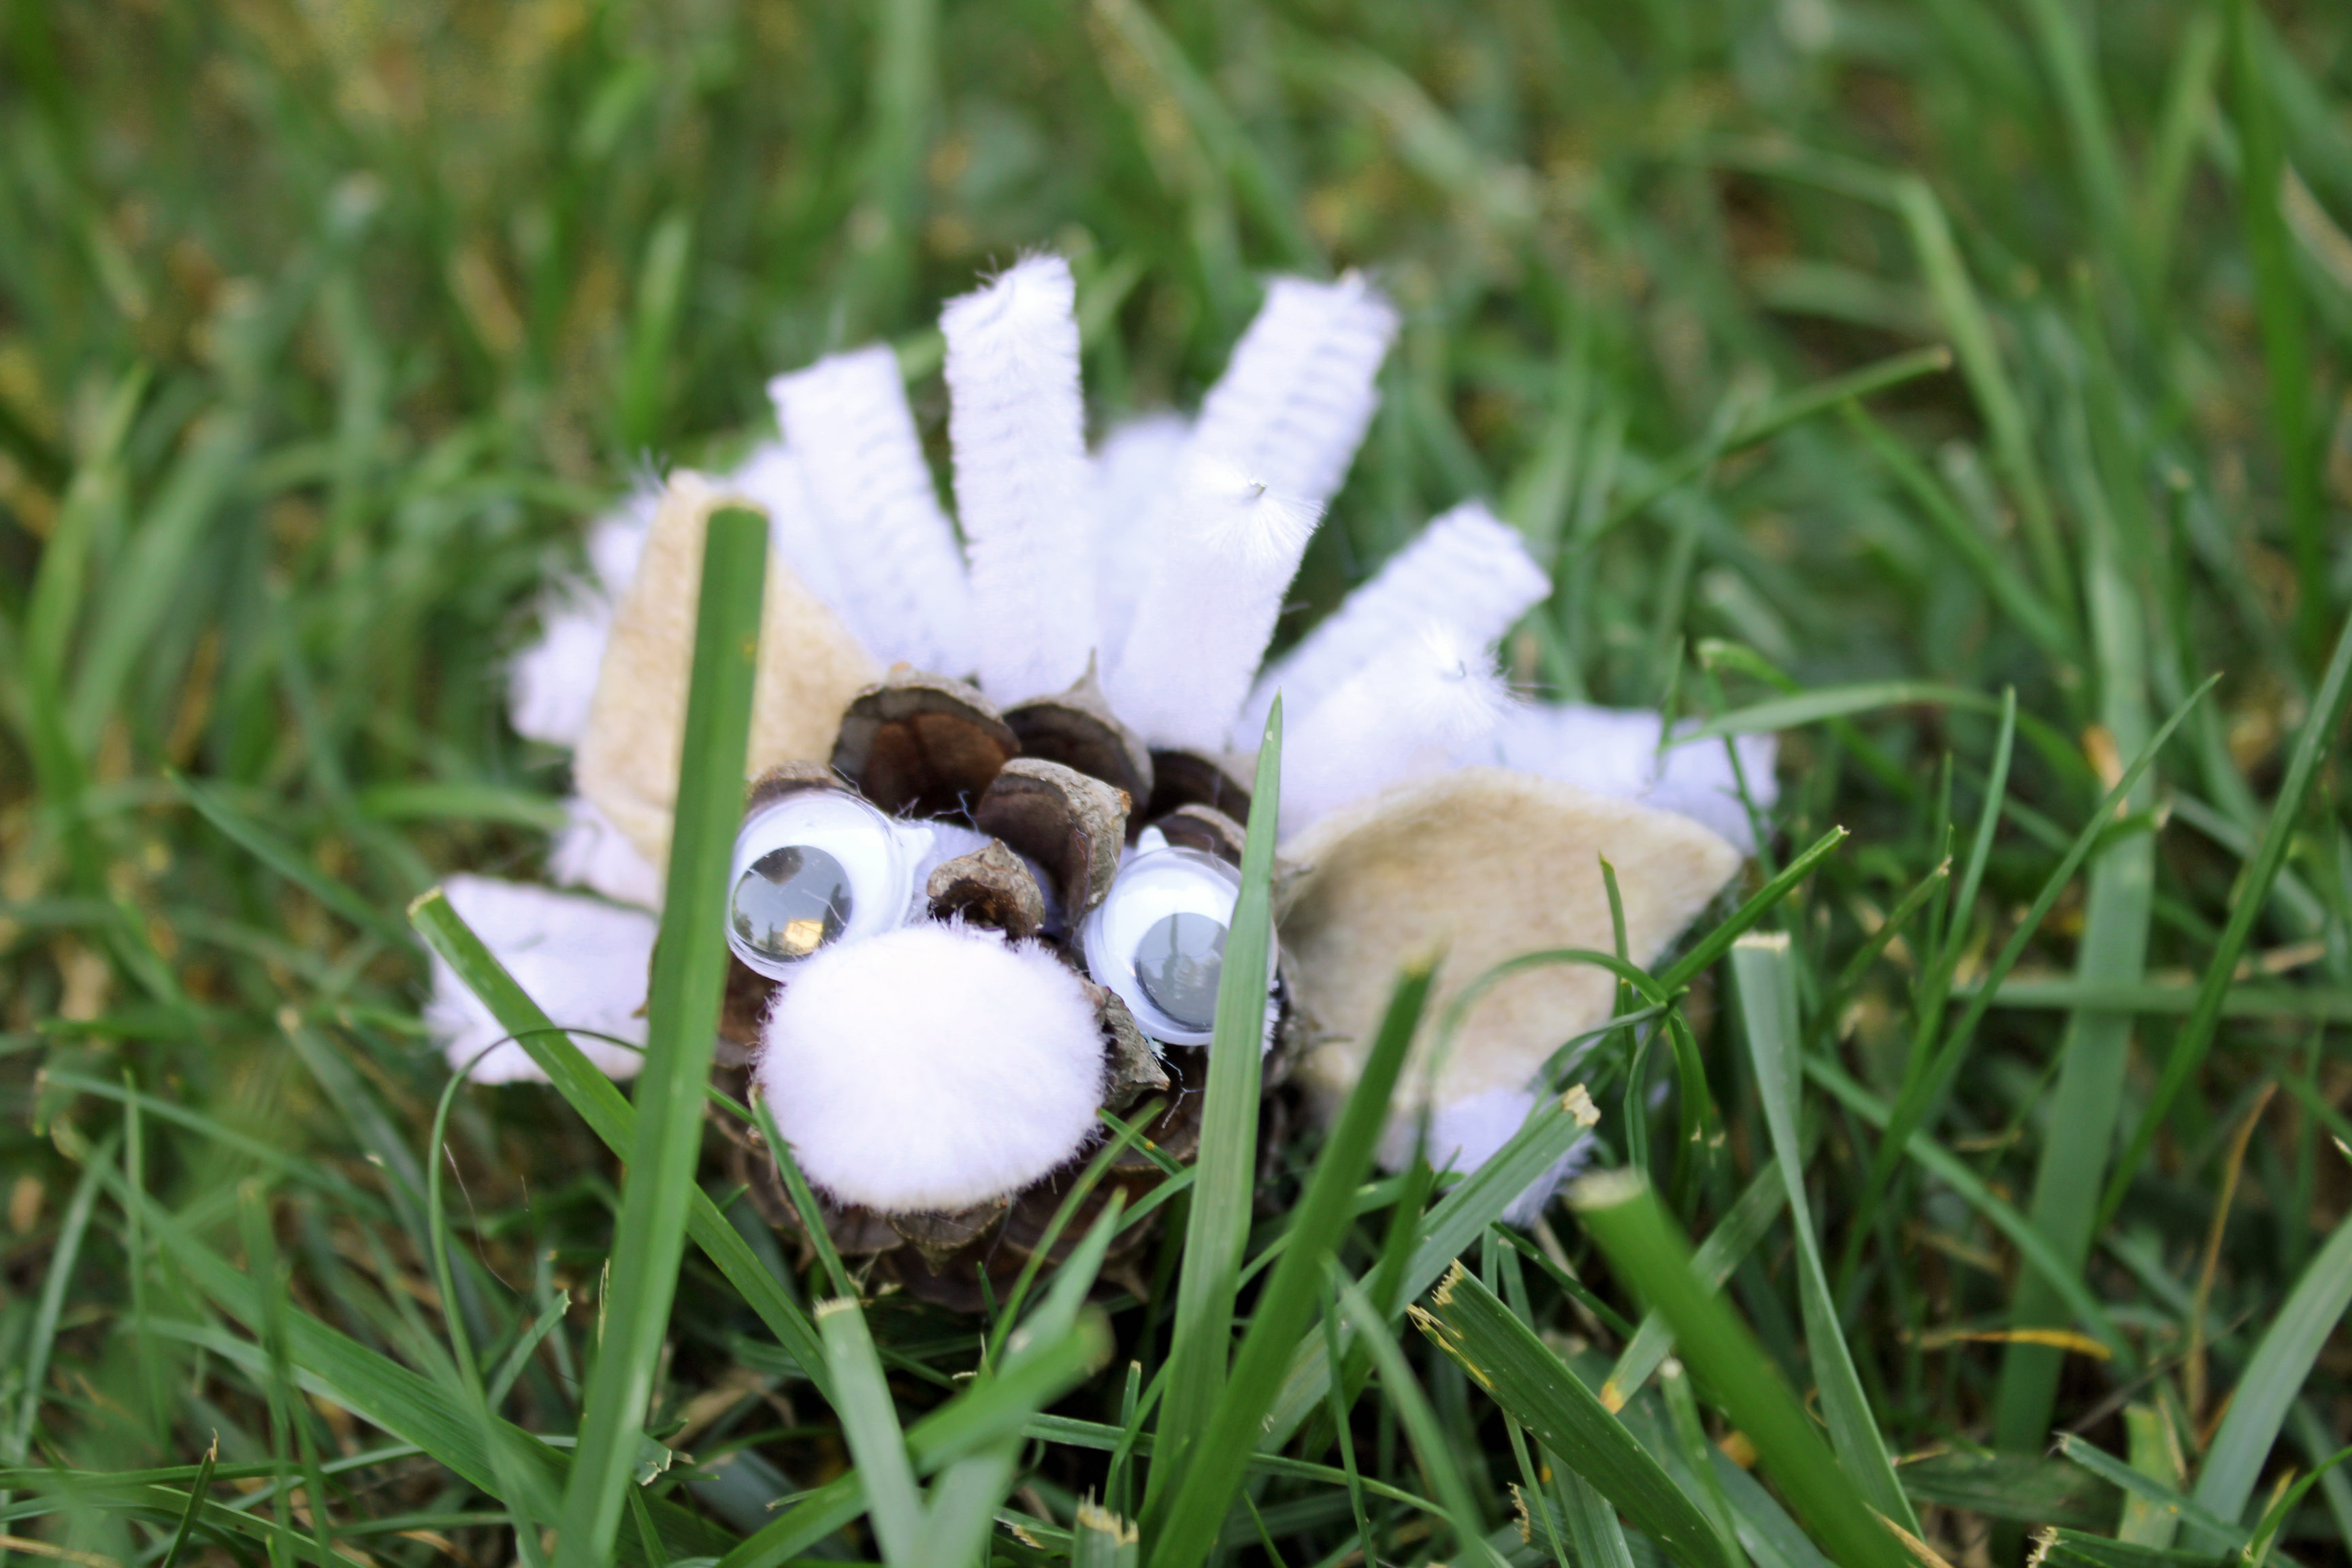
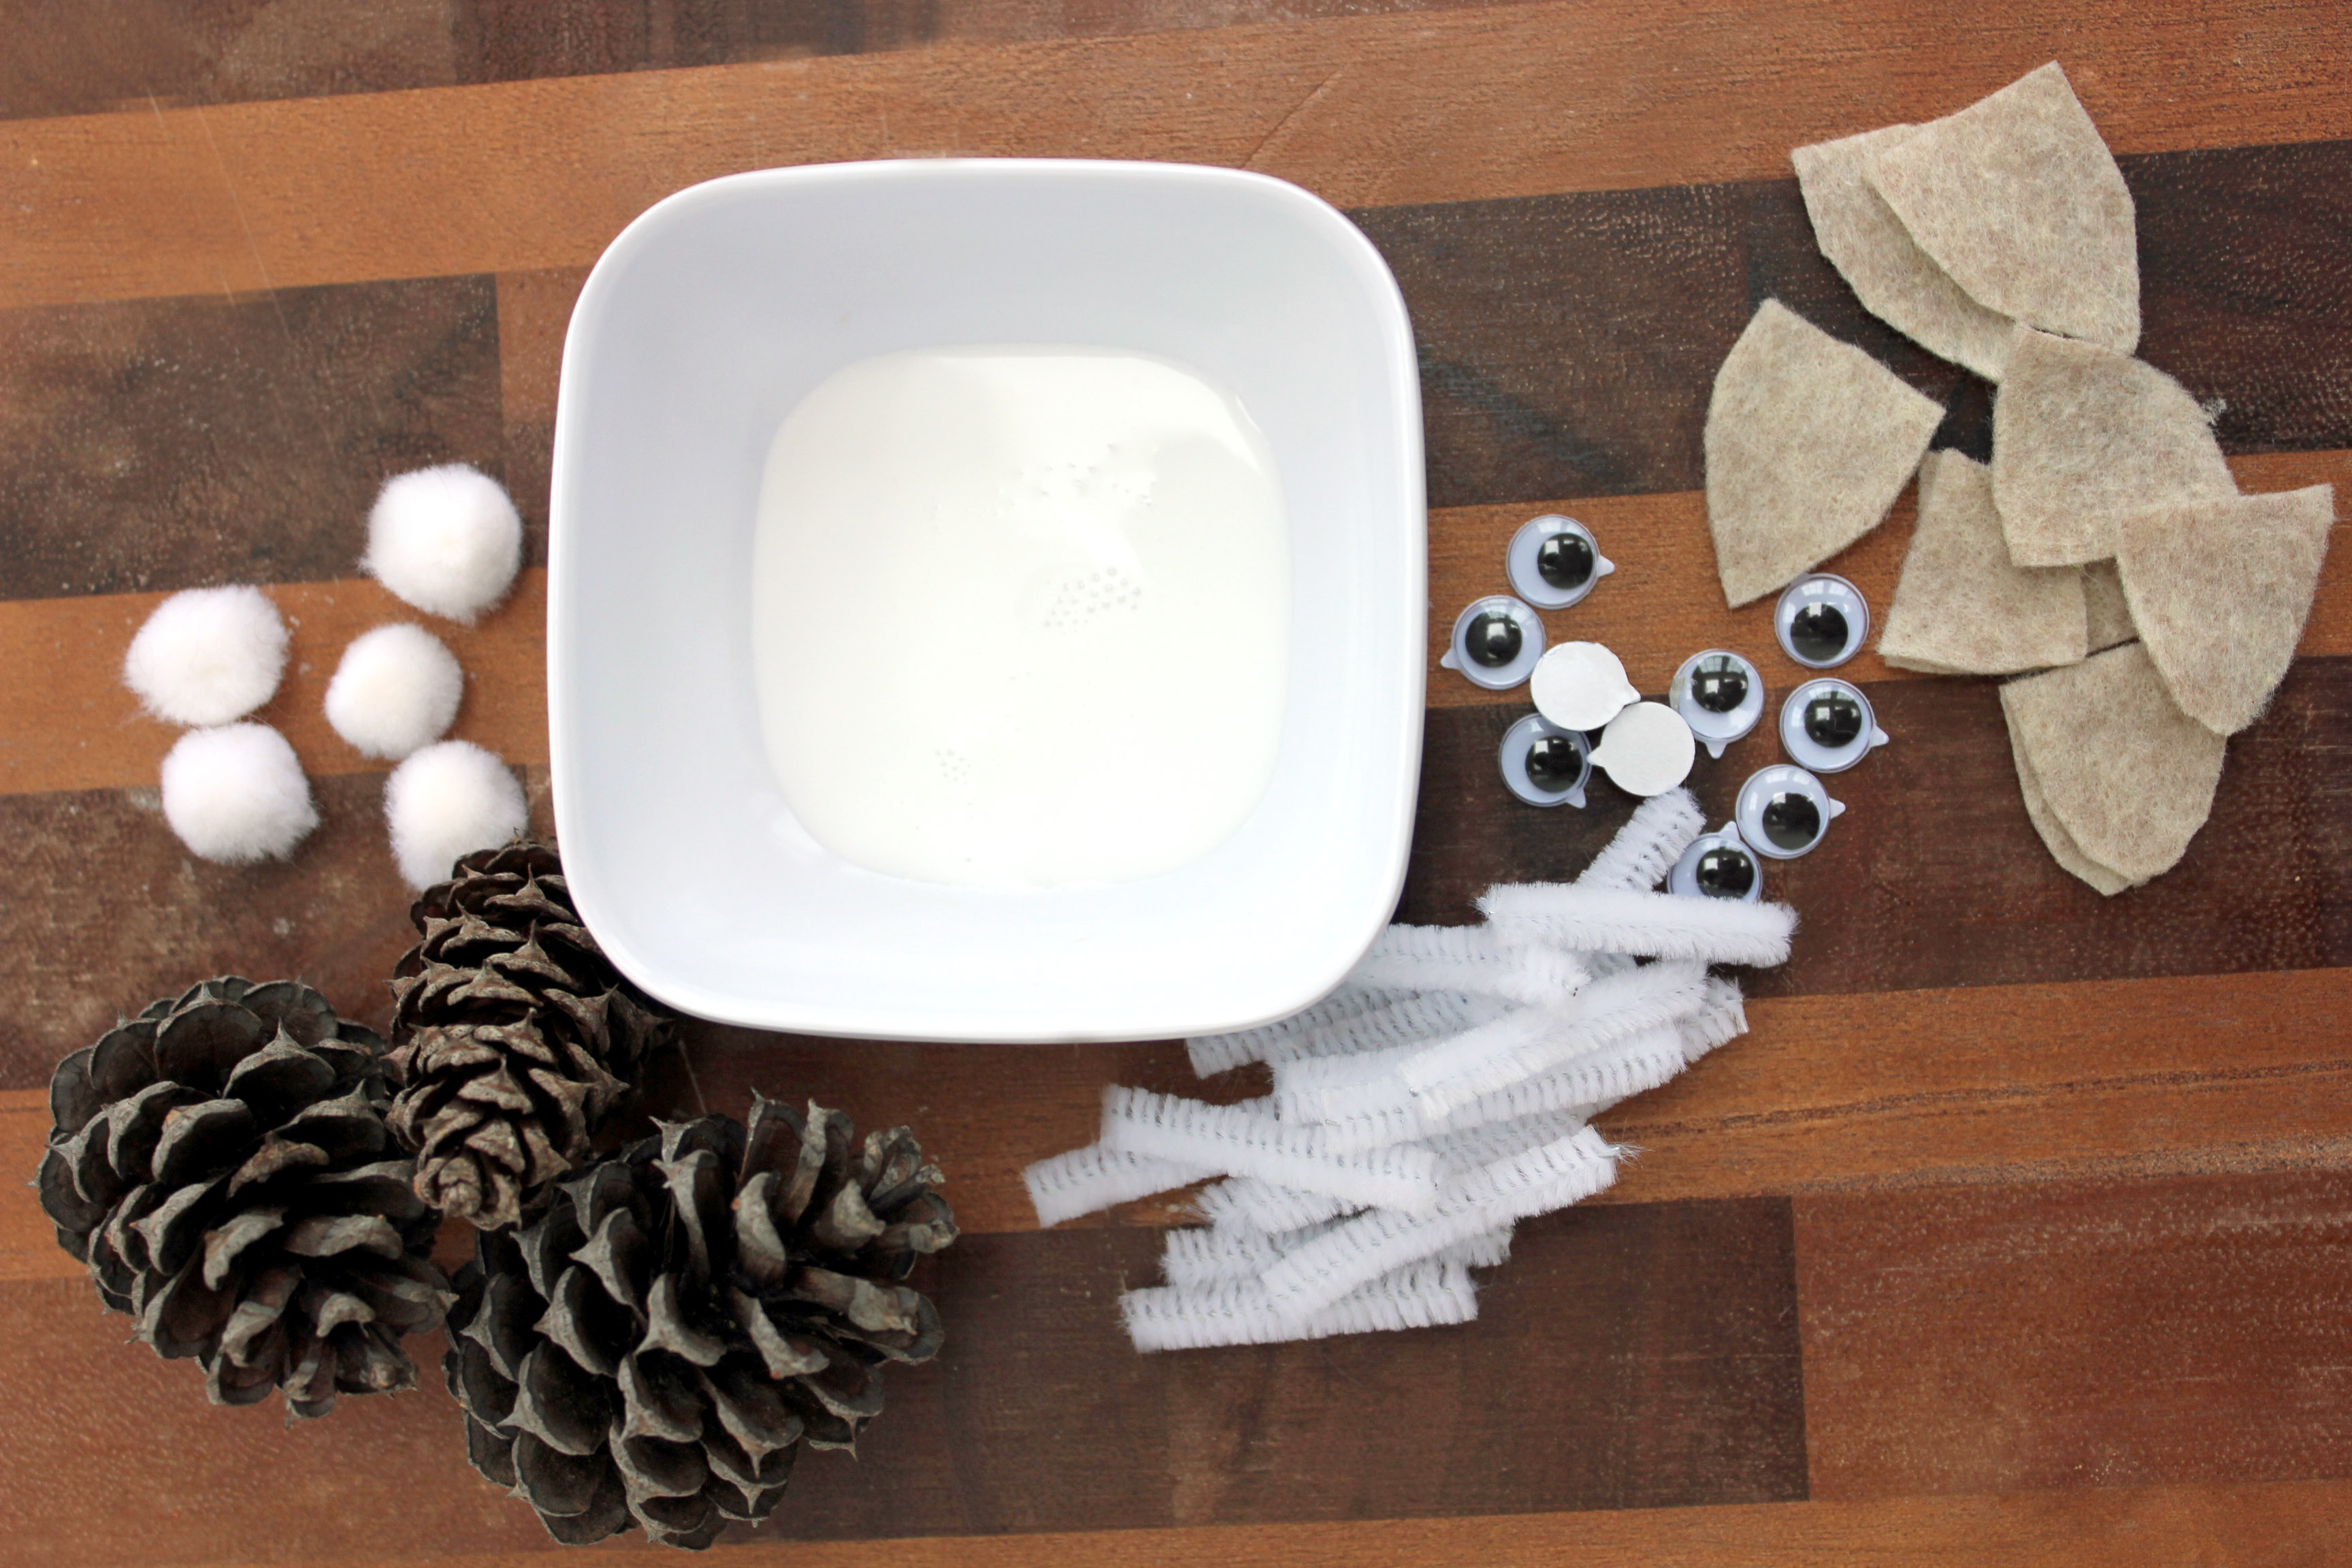
Start cutting your pipe cleaners in smaller pieces. I cut ours in a range of 1" to 2" pieces to add depth and dimension to the spiny little fella. Set aside two pieces of cut pipe cleaners. (These will be for the eyes.) Cut your felt into small curved triangles. (These will be the ears.)

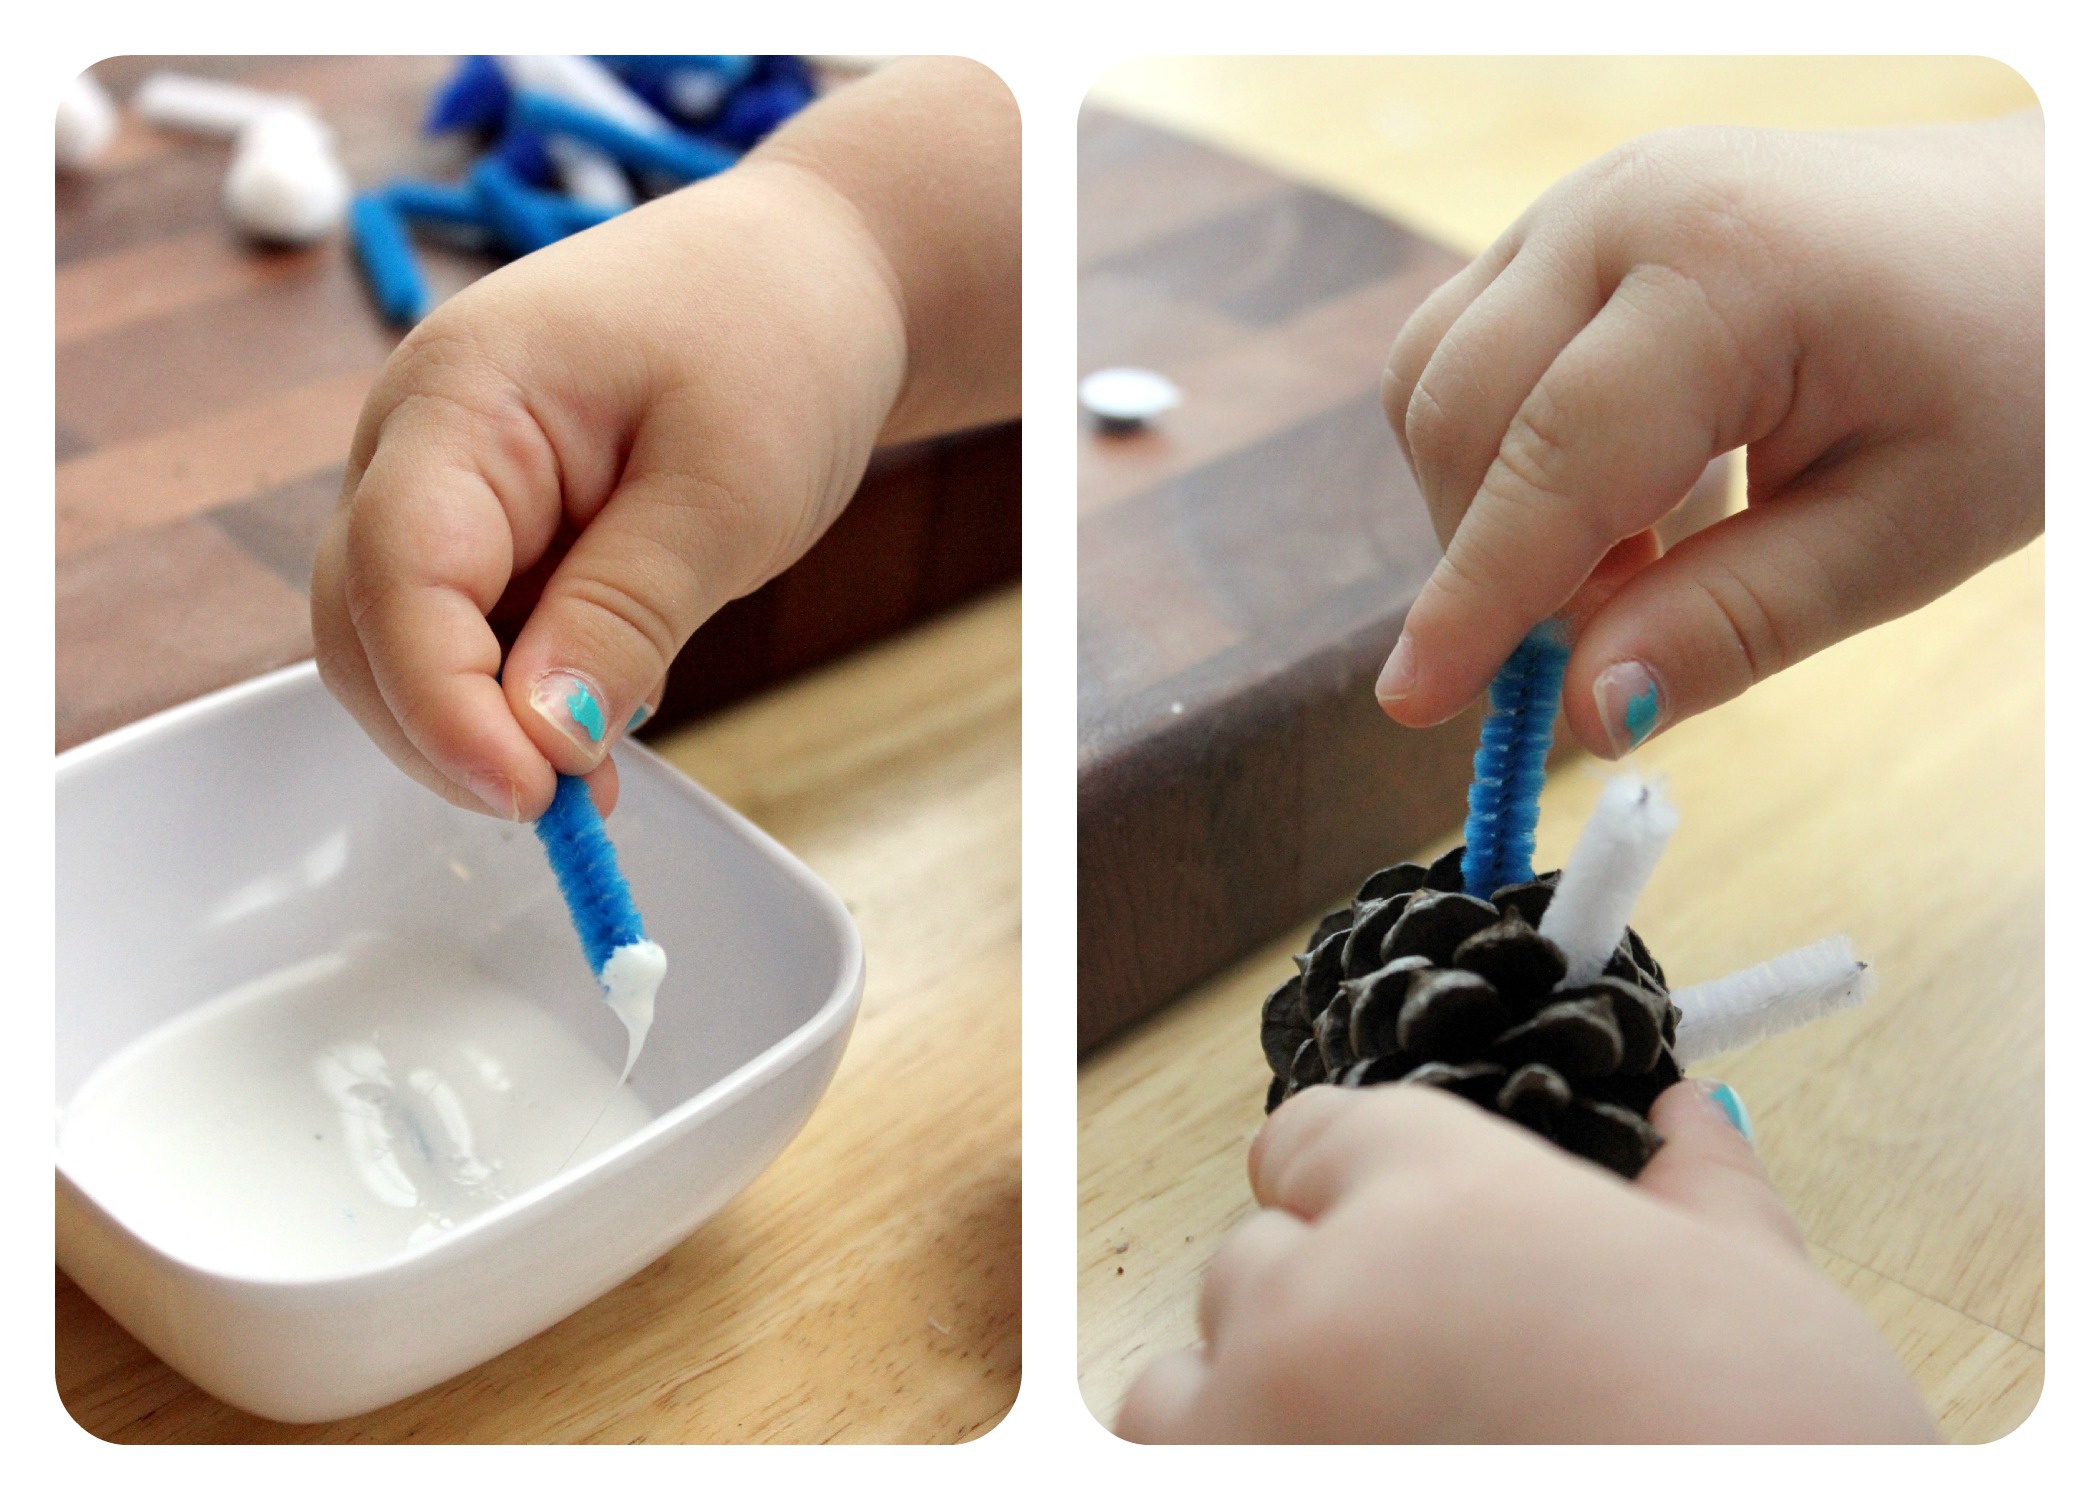
Step 2
Now have your child dip each pipe cleaner end into the white glue and place in between the pinecone "leaves" to create hedgehog spines. V loved doing dipping the pipe cleaners in the glue. There were several "spines" that were completely covered in glue that made their way into the trashcan.
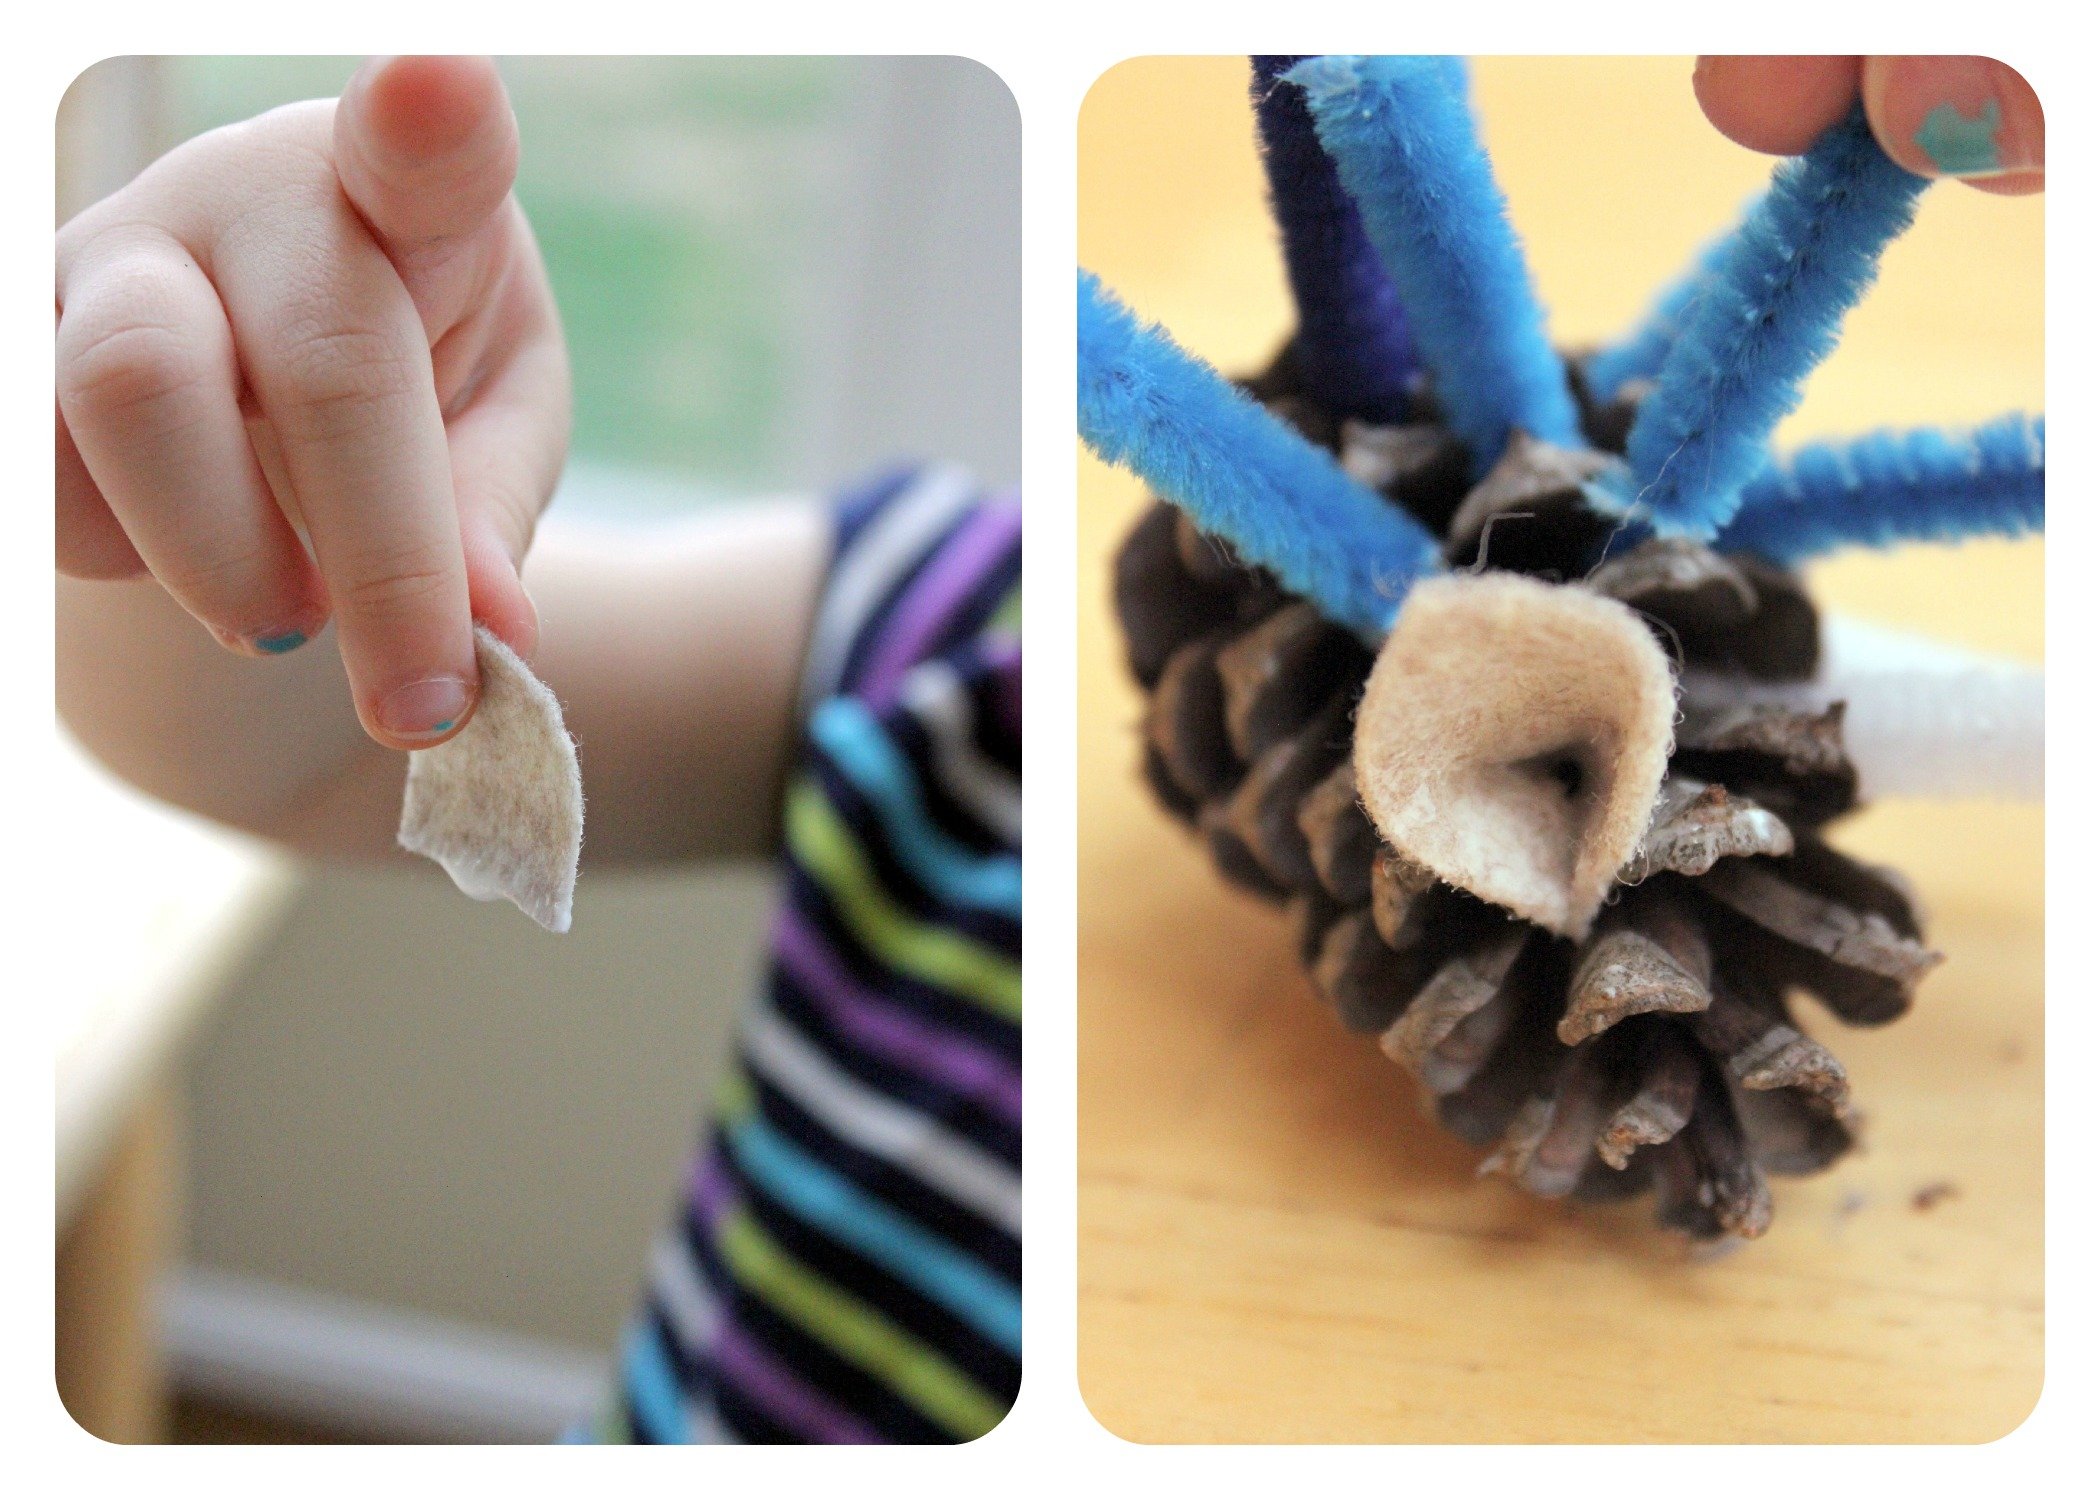
Step 3
Next have your child dip the flat edge of each felt triangle into the white glue. Because this involved more glue dipping, it was a fan favorite. I did this next step, but if your child is older you can have them do it: Curl the bottom points of the triangle so that the corners overlap and wedge it into a space on the pinecone to create an ear. Repeat to make the other ear.
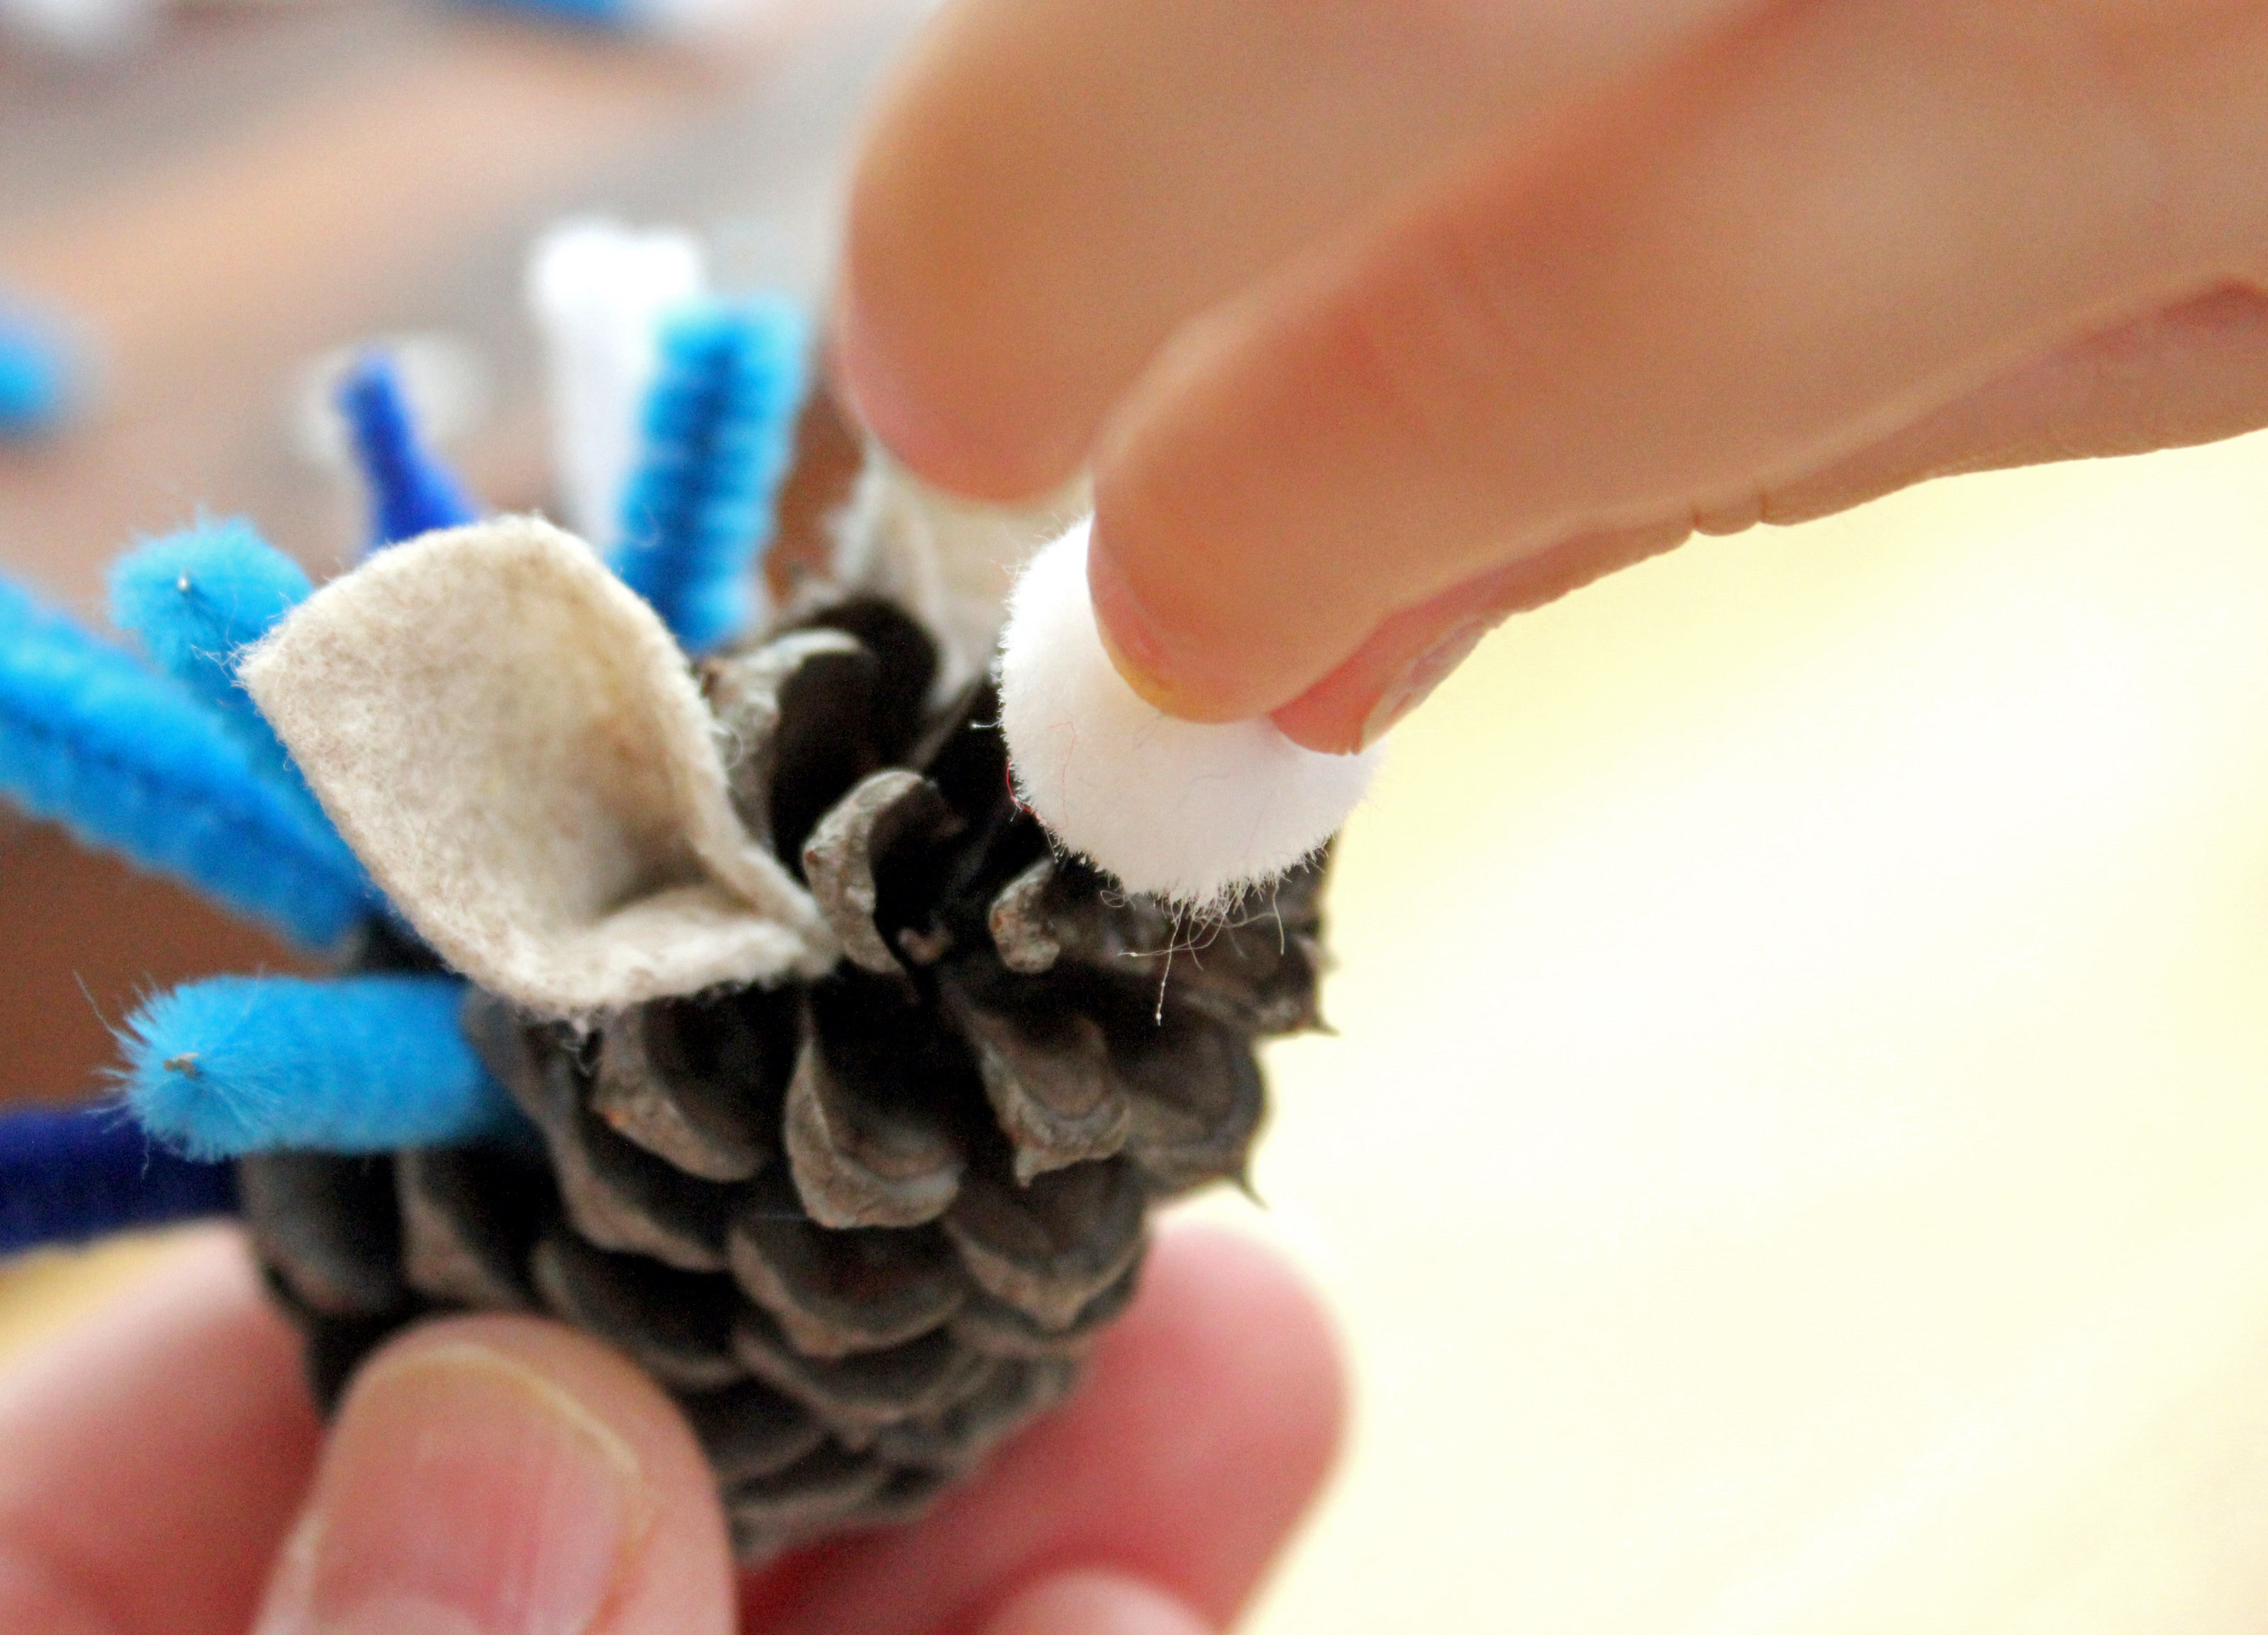
Step 4
Next attach the nose. This involves even more glue dipping! Dip the pom-pom partially into the glue and nestle it into the tip of the pinecone. I held the hedgehog while V placed the nose.
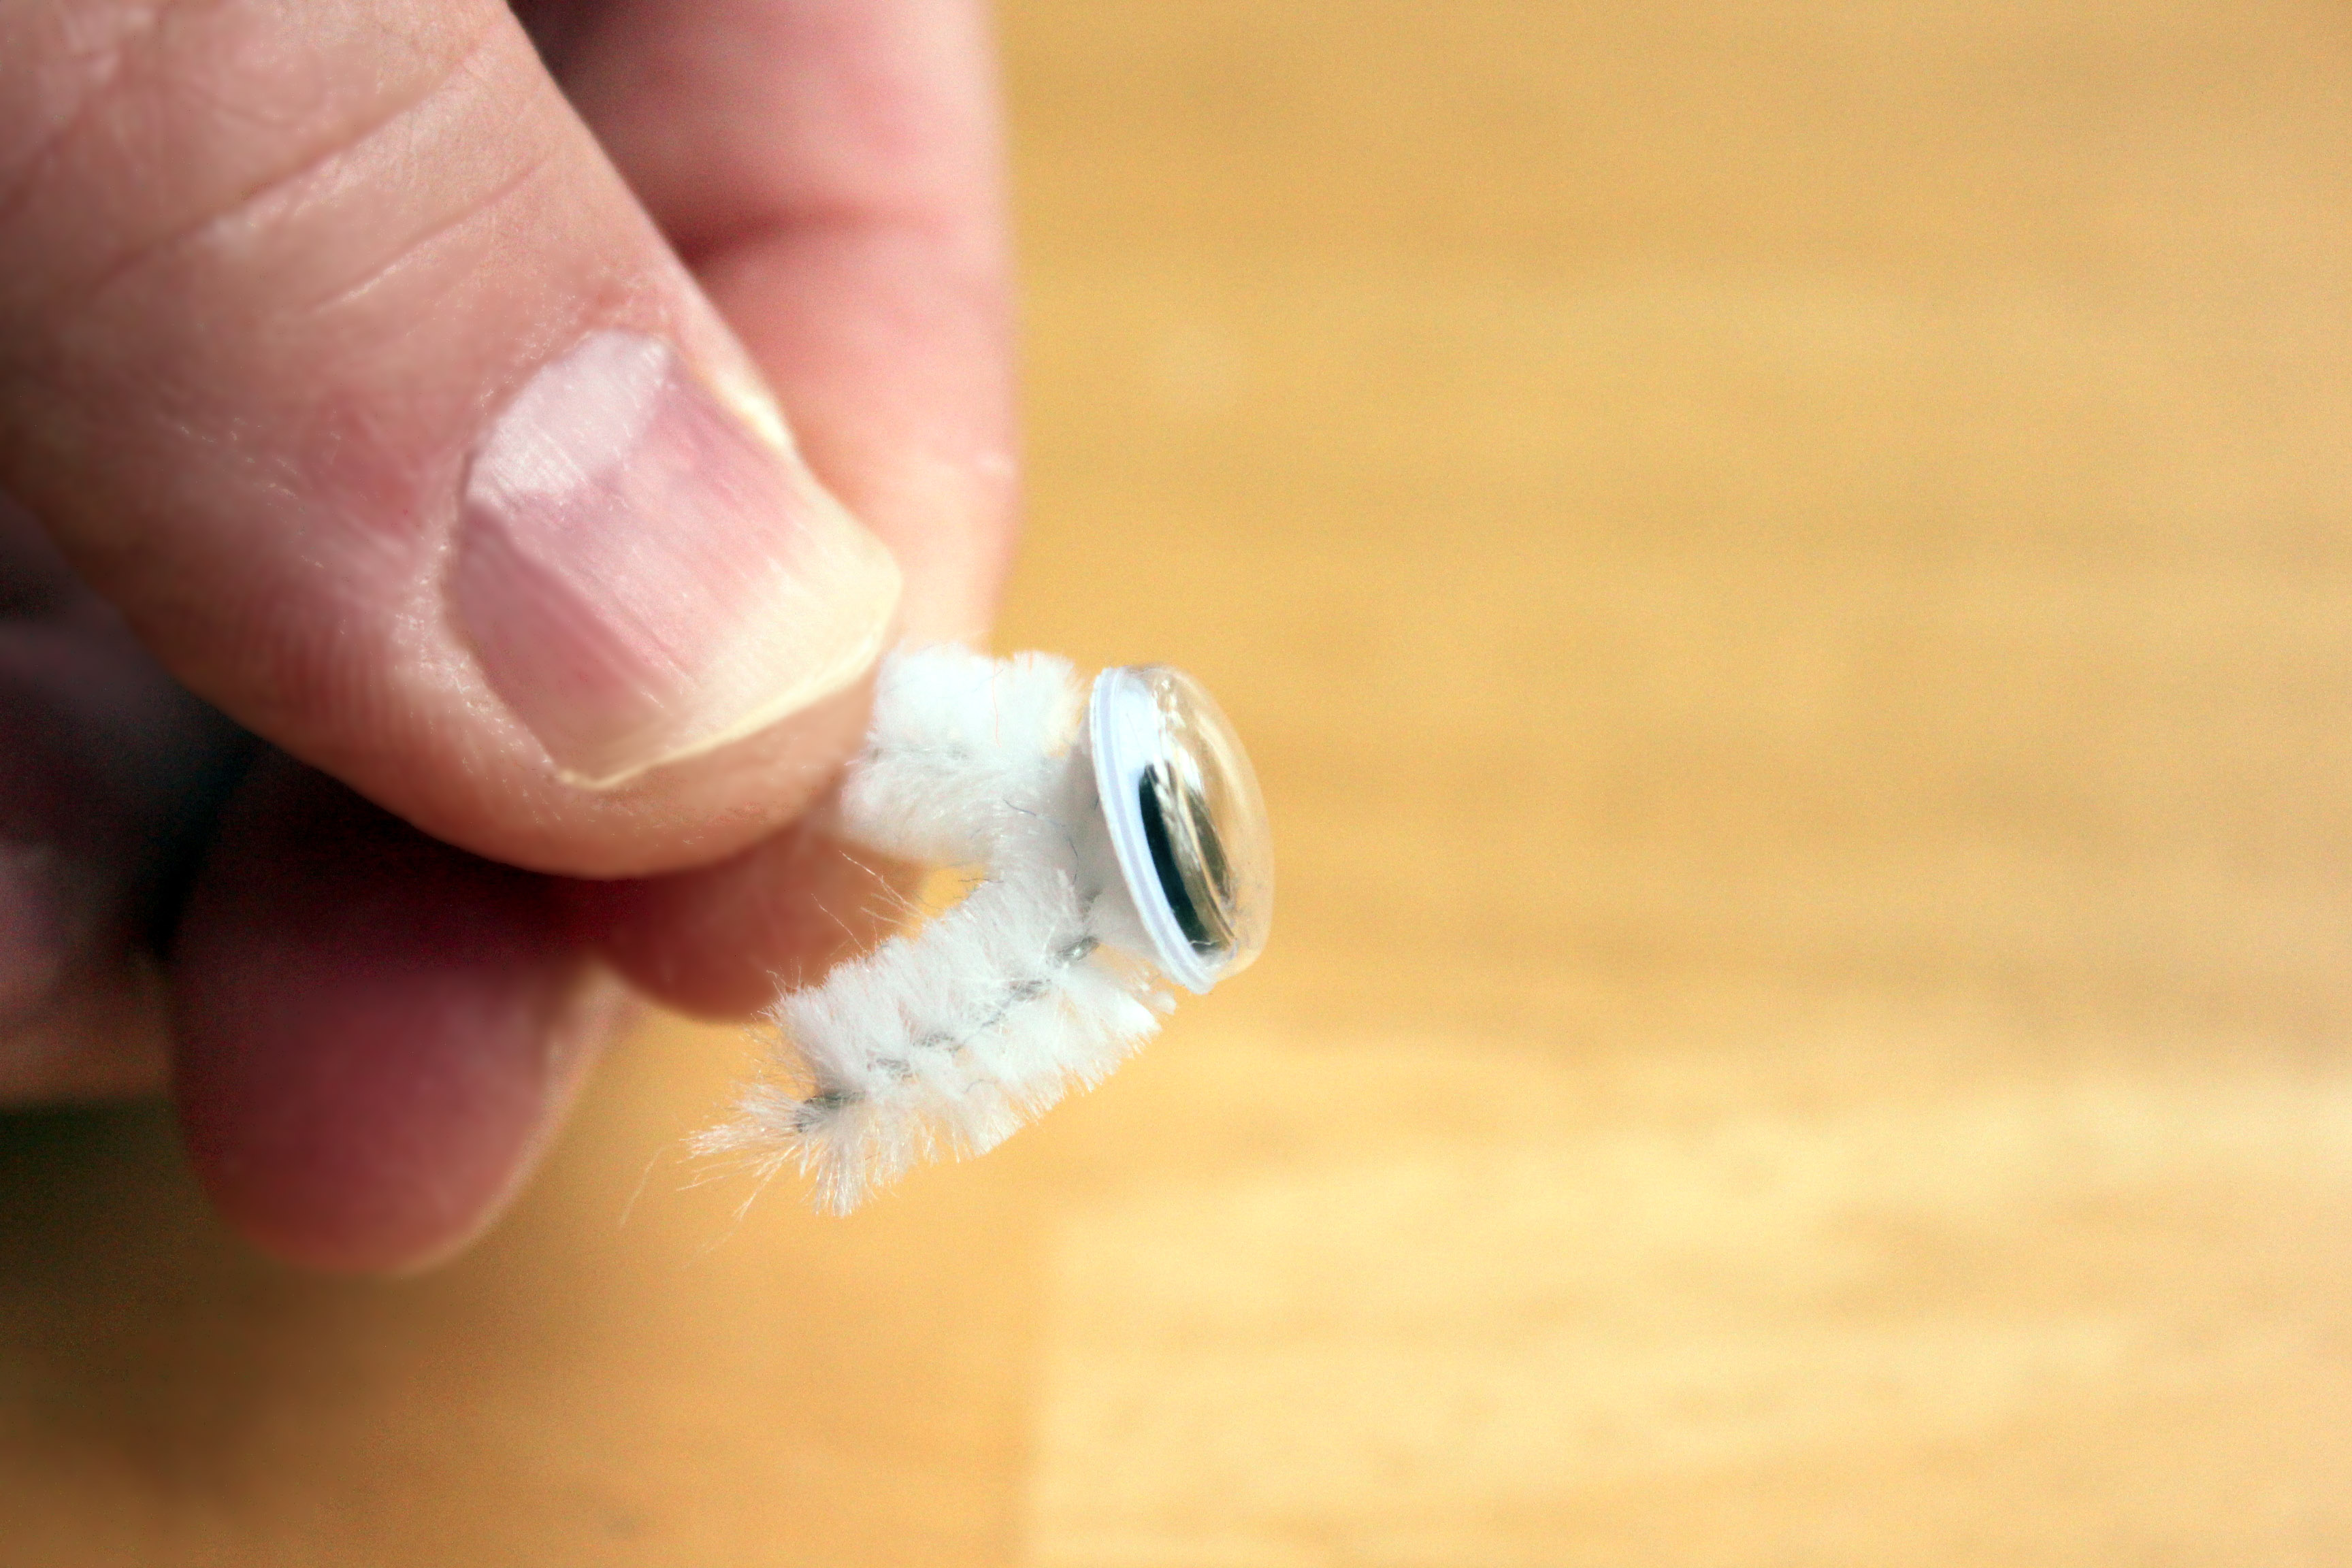
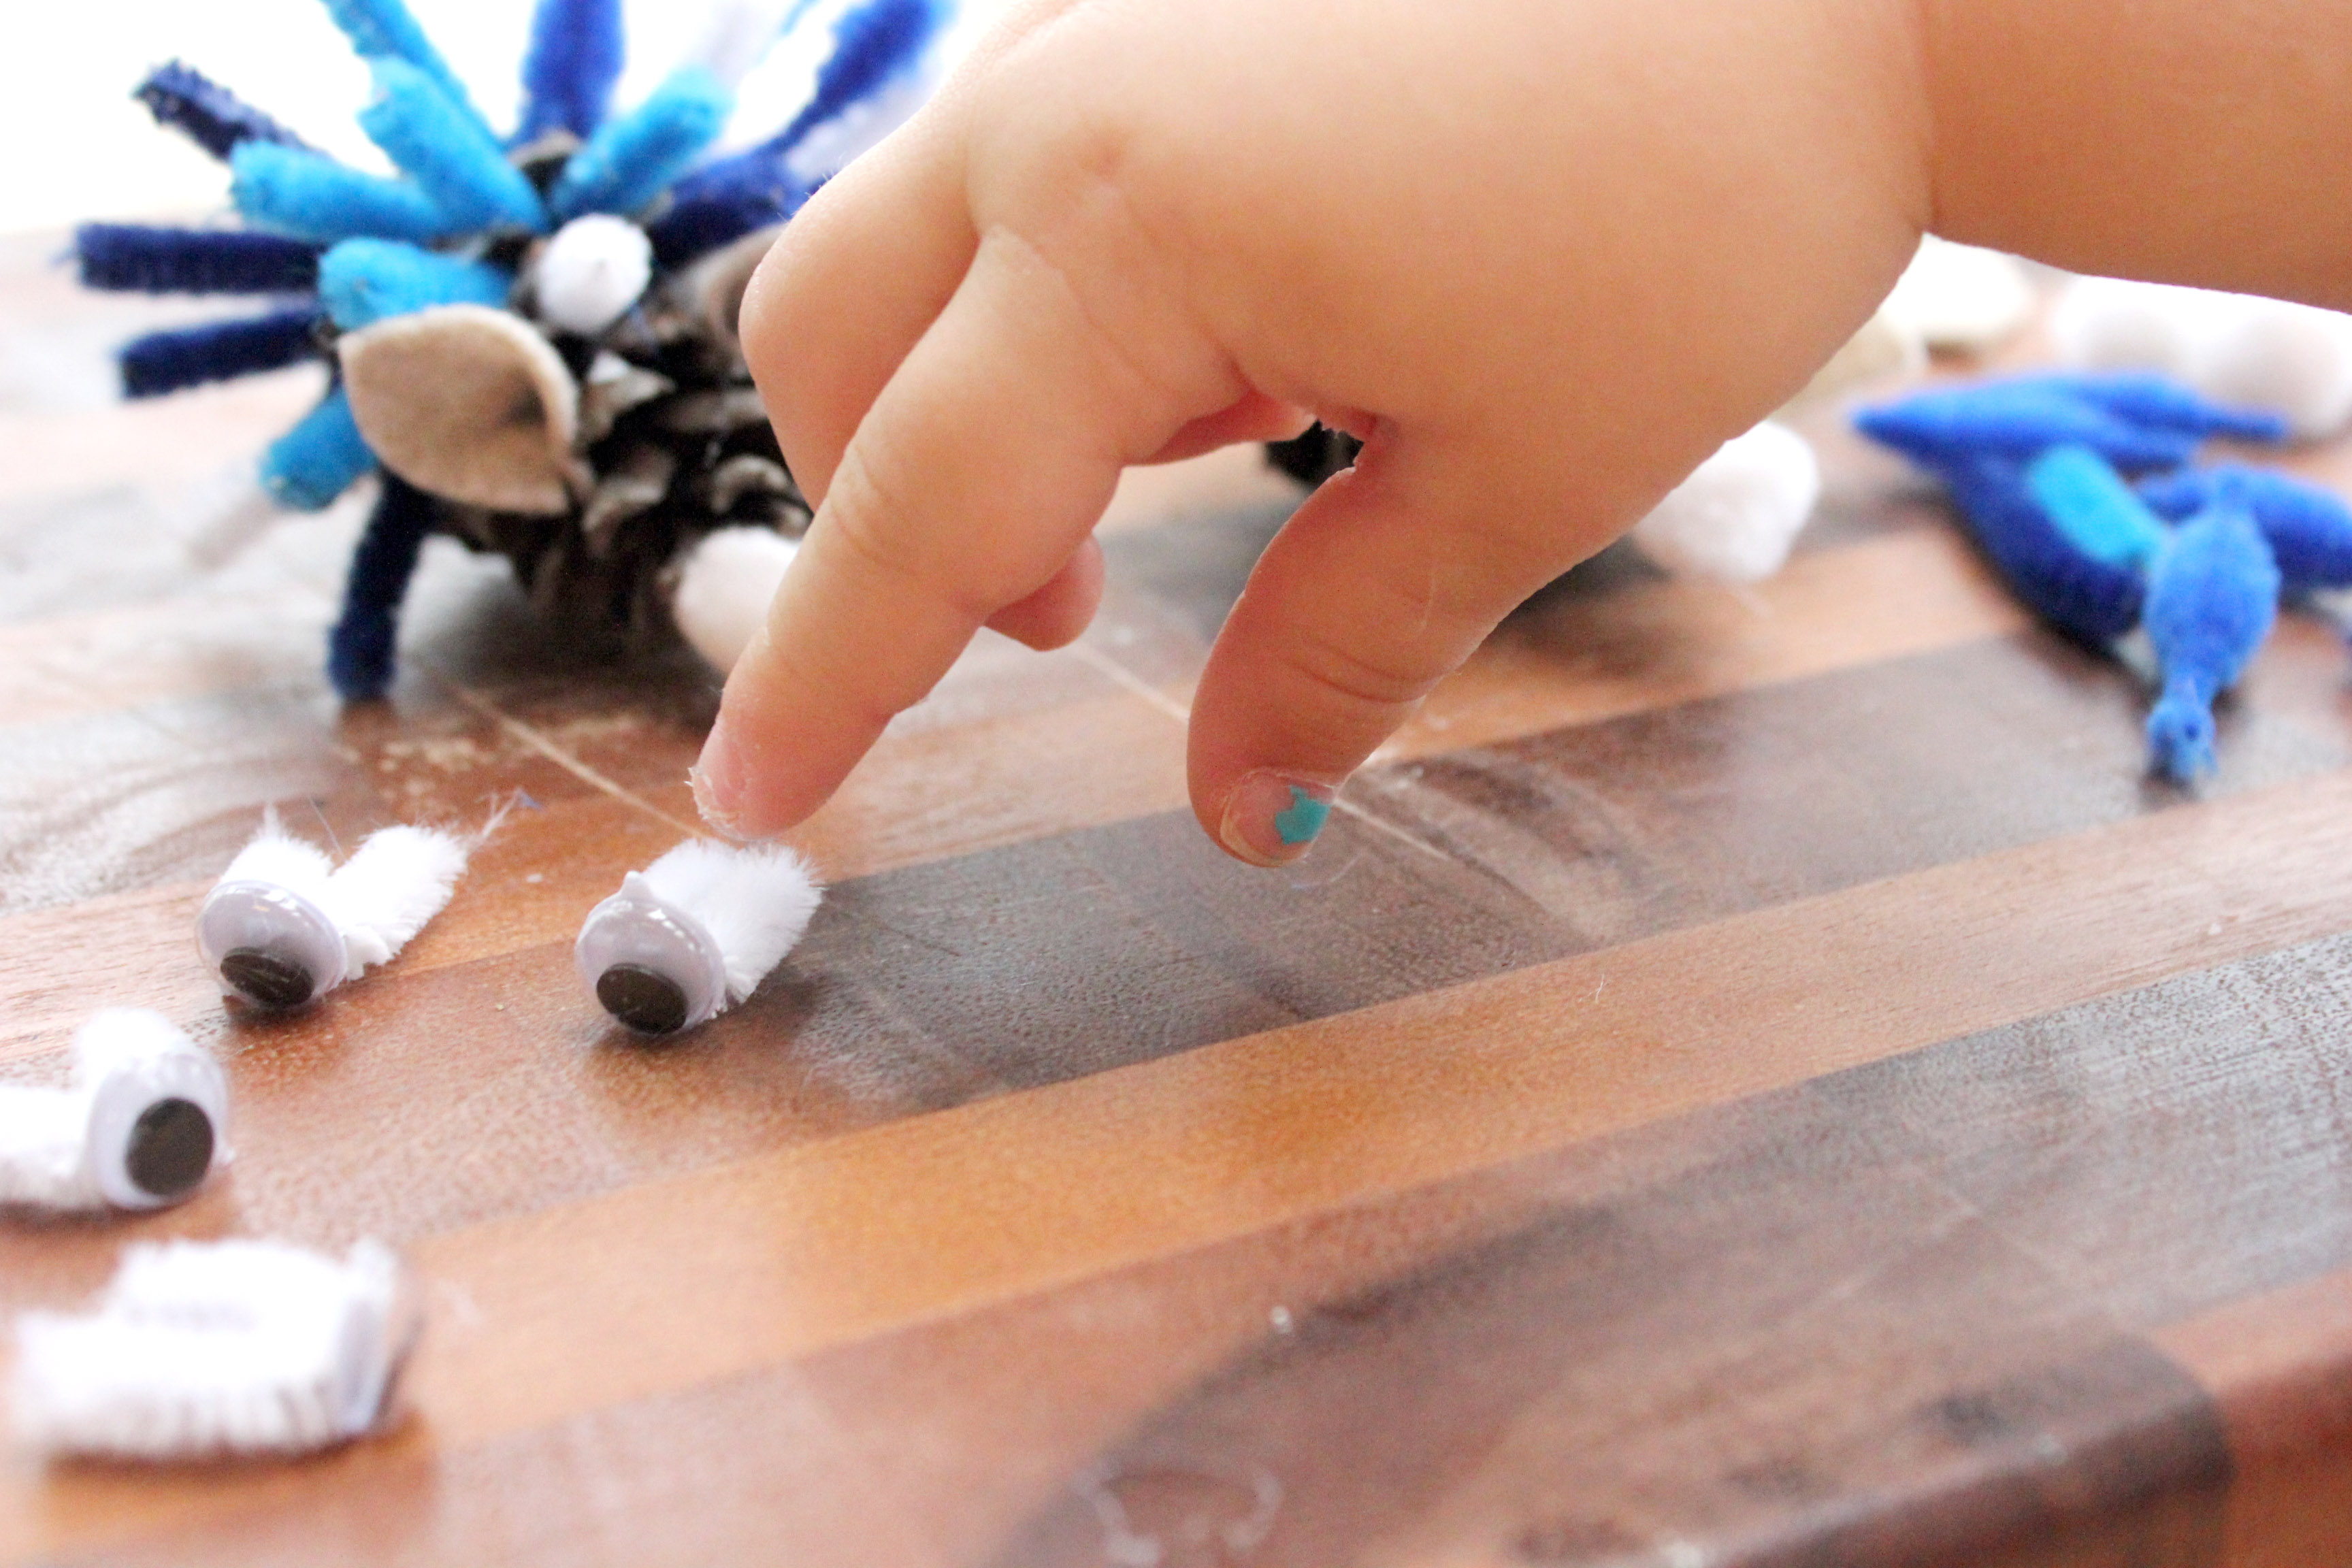
Step 5
Grab the two pieces of cut pipe cleaners you set aside earlier. Bend each one in half, forming a rounded point. Dip the rounded point in the white glue and attach a googly eye. Repeat to make the other eye. Set aside and let dry for approximately 1 hour before placing them on the pinecone.
Step 6
V. waited as patiently as an-almost-three-year-old can wait. (Activities that tend to require any drying time I usually try to do right before V. naps. That way the projects can dry during nap time and can be finished up once V. wakes up.)
Step 7
Once dry, dip the two tips of each eye piece you've created in glue. Place it into an empty space on the pinecones to create an eye, then do the same for the other eye piece.

Done!
Now you can pick up your new spiny friend and begin to play with him. (Be sure to make sure everything is secure and completely dried before playing.) We took our little hedgies outside and played in the grass. V says the white-spined one is the mama and the blue-spined one is the baby.