Step-by-step tutorial
Step 1
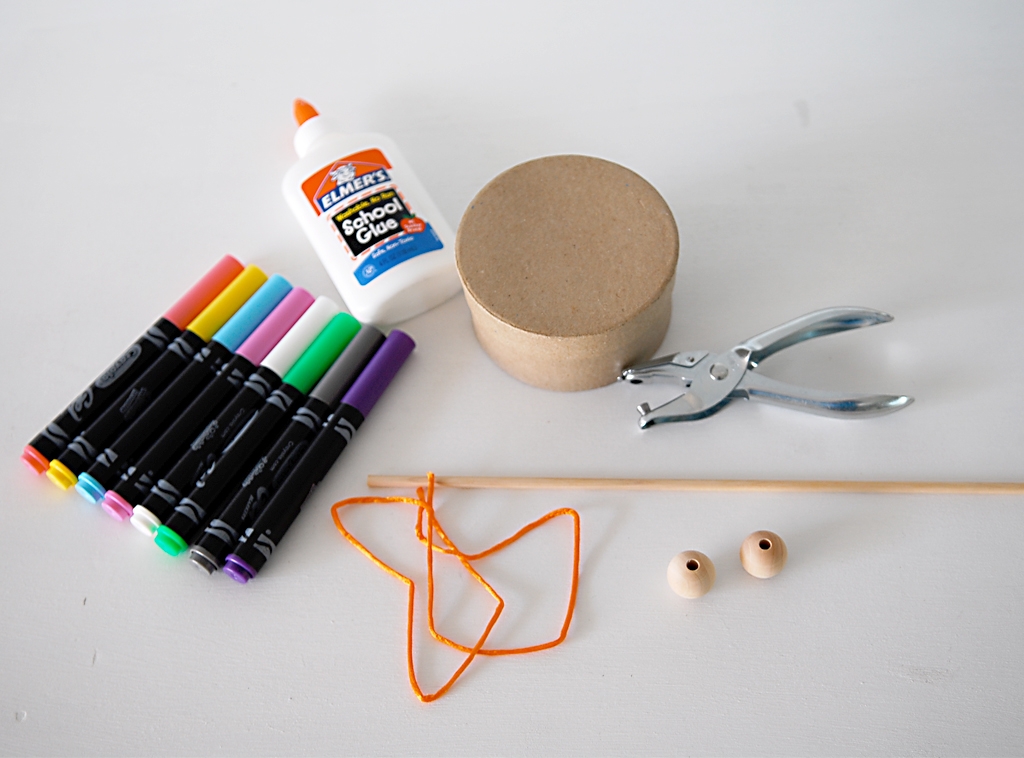
Gather up your supplies. We used a small round papier-mache box for the base of our drum. The with of the wooden dowel's end should be no larger than the width of the hole punch. We also used large wooden beads (but any bead should be fine).

Step 2
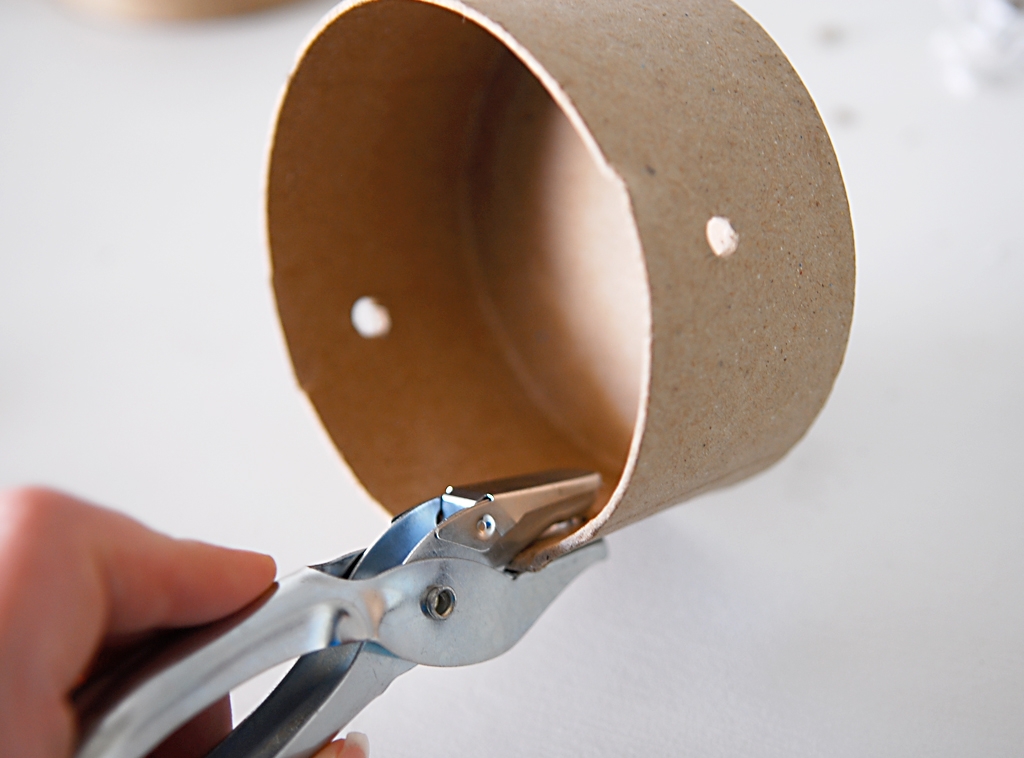
Start by punching three holes in the bottom "base" part of your box. Punch a hole at 3 o'clock, 6 o'clock, and 9 o'clock (as pictured here). If your kids have strong hands, they can easily do this themselves. My kids 9ages 5 and 3), had a bit off difficulty, so I helped them with this step.
Step 3
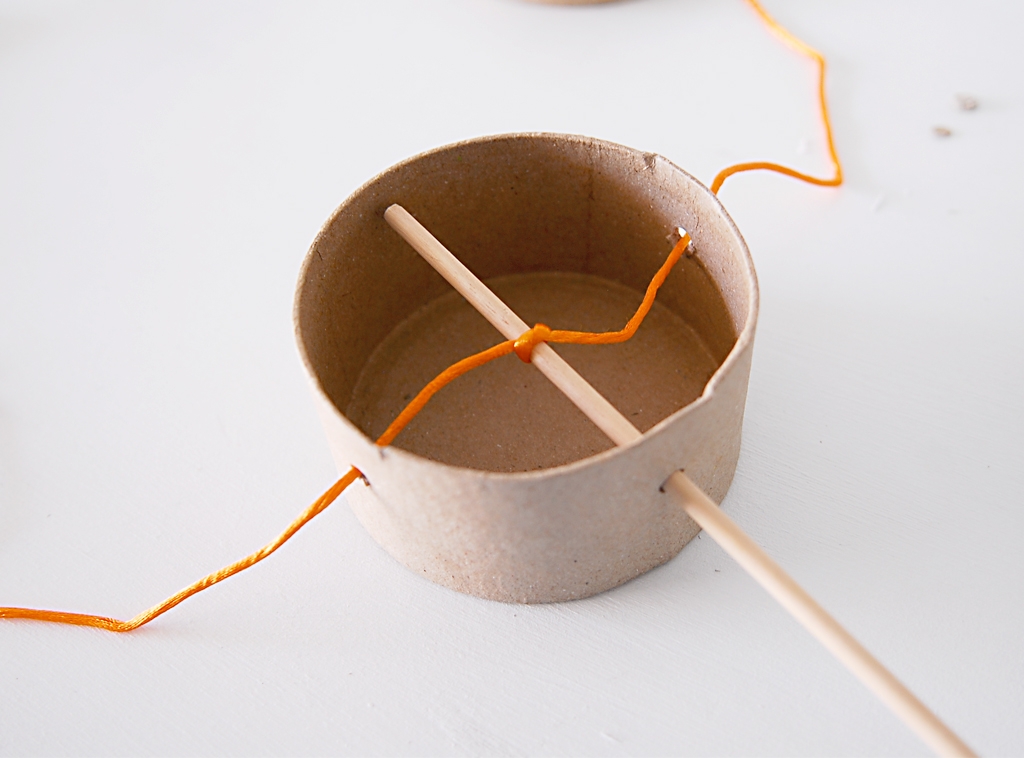
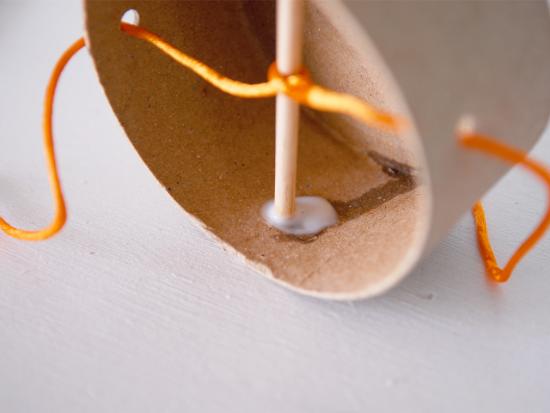
Put the wooden dowel in the bottom hole and feed the string through the side holes, tying the string around the dowel in the center.
Step 4
Glue the dowel in place at the top. We added a glob of glue and then let it dry before we moved on.
Step 5
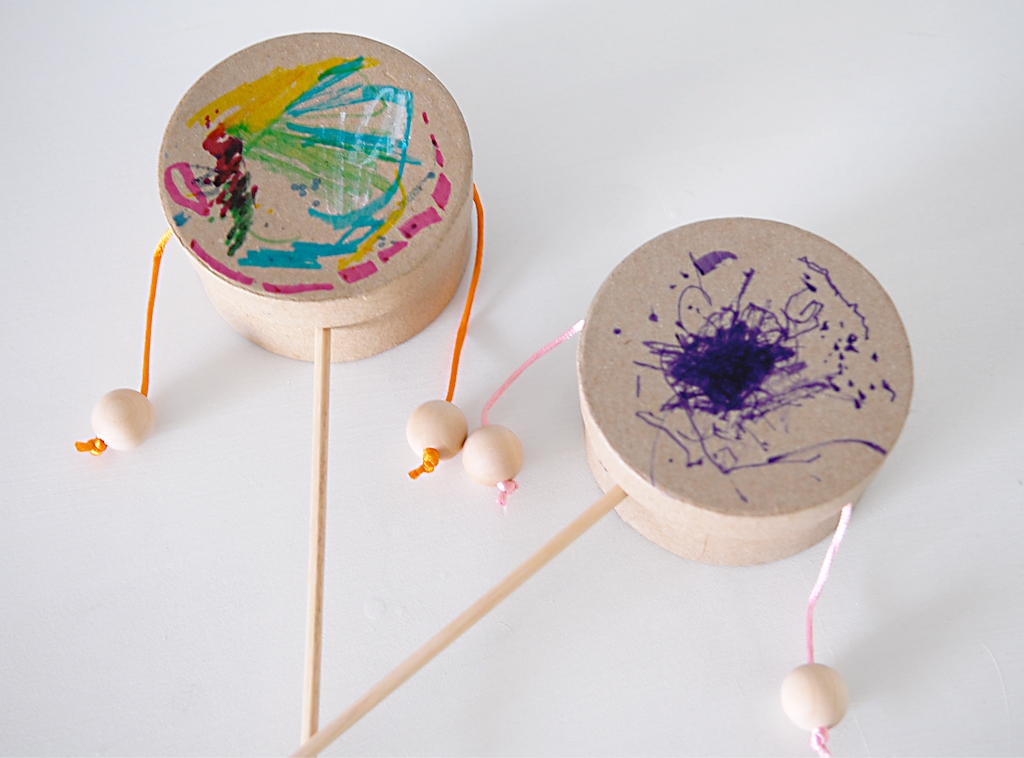
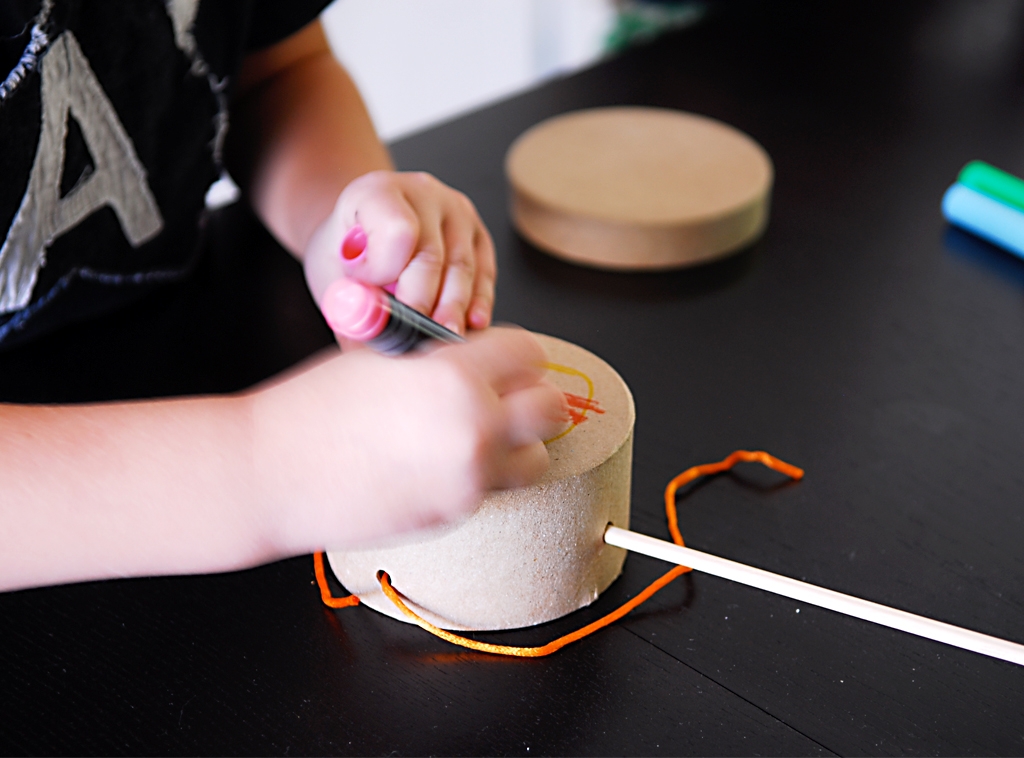
The kids each decorated their drum base and lid with some markers.
Step 6
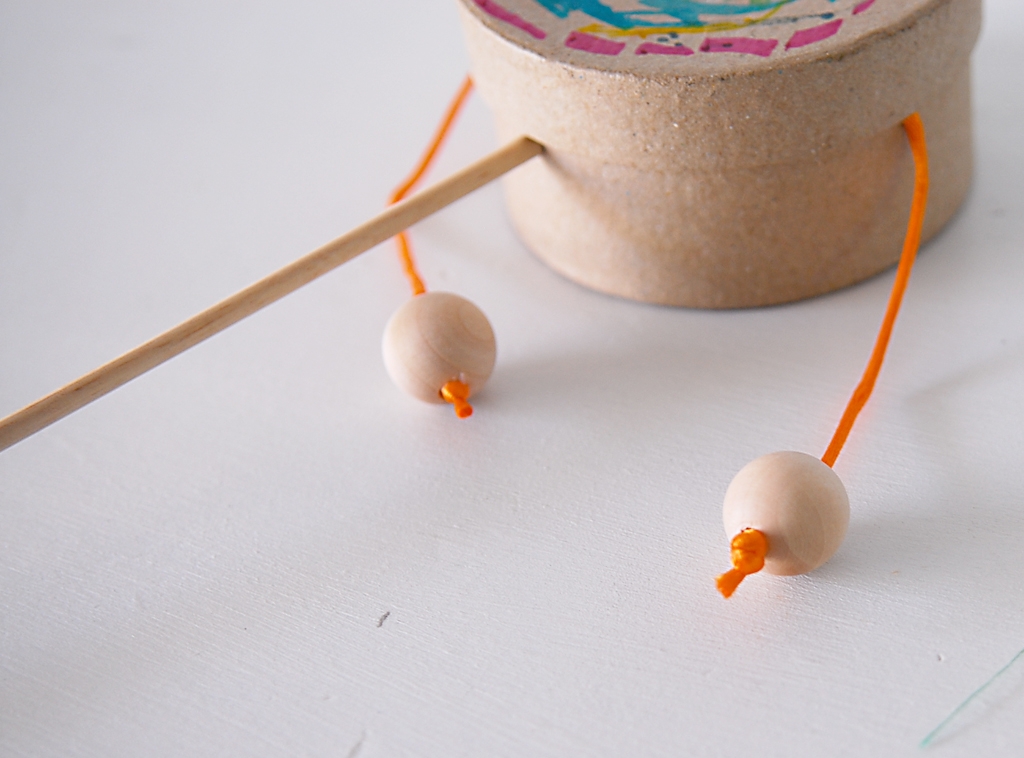
Next we glued the lid on the box, and tied a bead on both strings. You want the string to be long enough that the bead hits about the center of the box. You may need a double knot to keep the bead on.
Done!
Then they are ready to be spun and enjoyed! In no time, my kids were off marching to the beat of their own drums, singing songs, and organizing a two-person parade. So fun!


