
Step-by-step tutorial
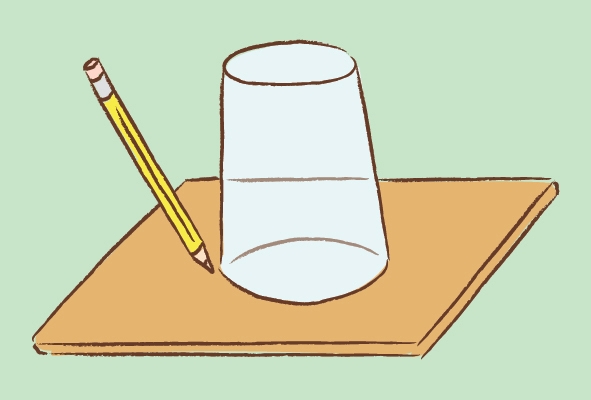
Step 1
Use a cup to trace a circle on cardboard and cut it out. If you want, decorate your circle!

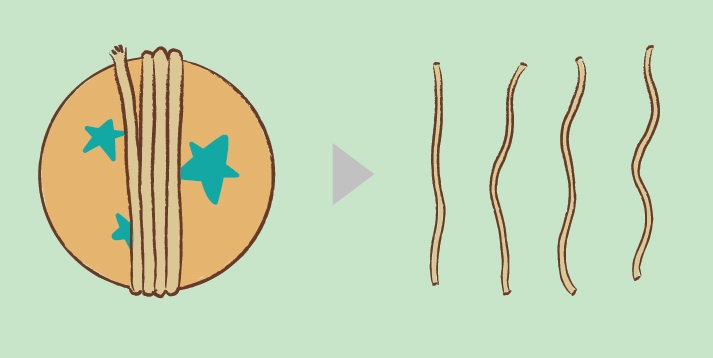
Step 2
Measure out some string by wrapping it around the circle four times. Then cut the string into four equal pieces.
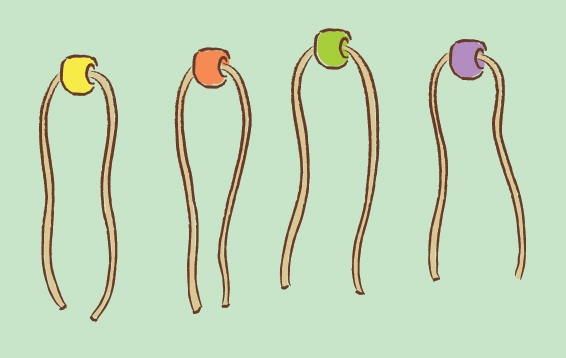
Step 3
Thread a bead onto each piece of string, then fold it in half.
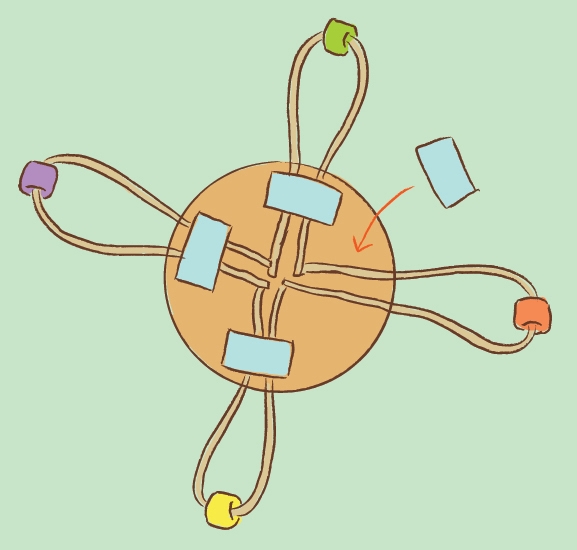
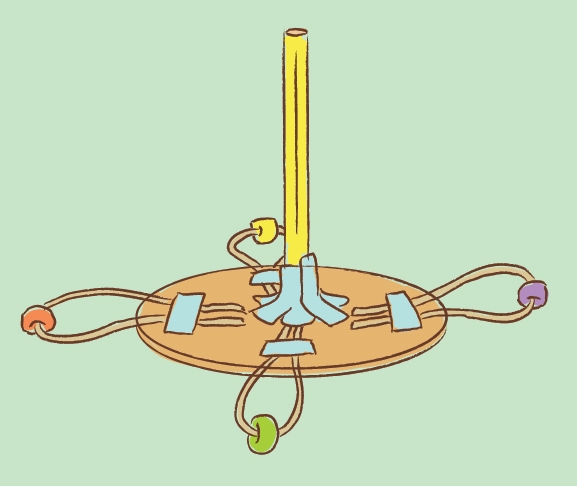
Step 4
Flip the circle over and tape the ends of the strings down in an “X” shape. The beads should only hang off a little.
Step 5
Tape the eraser end of a pencil to the middle of the circle.
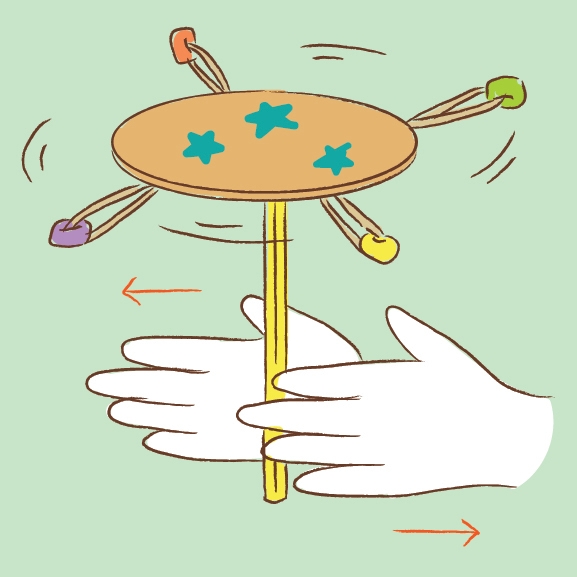
Step 6
Hold the twirligig between your hands and rub them to make the beads fly!
Tip
If your strings are tangling, try shortening them just a little.
Fact

Ride engineers have to think about the length of the ropes, the weight of the riders, the speed of the spin, and more. See what happens if you:
spin your twirligig faster or slower
change the length of the string
add more beads around the edge.


