Step-by-step tutorial
Step 1
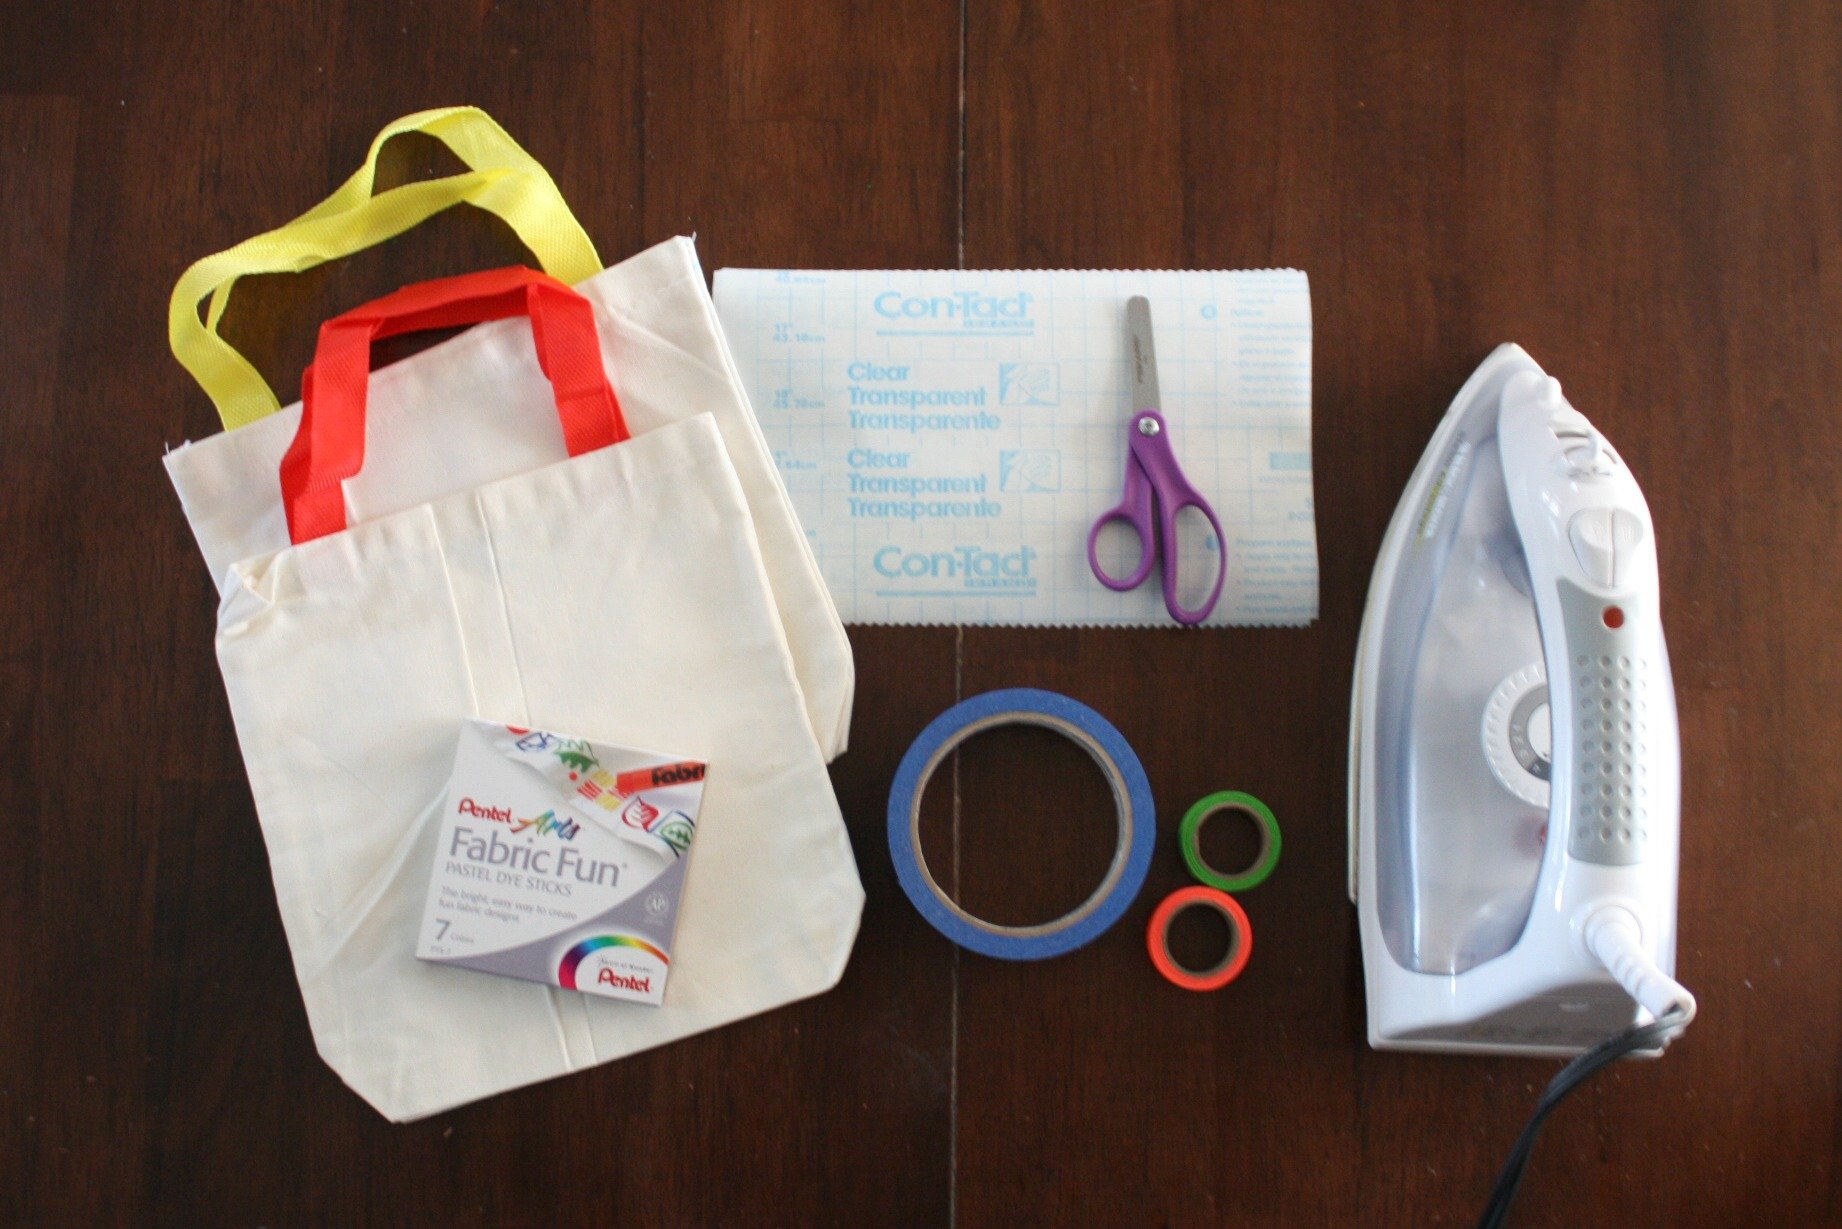
Gather your supplies together. We used a small canvas tote bag and some rolls of painter's tape and thin masking tape.

Step 2
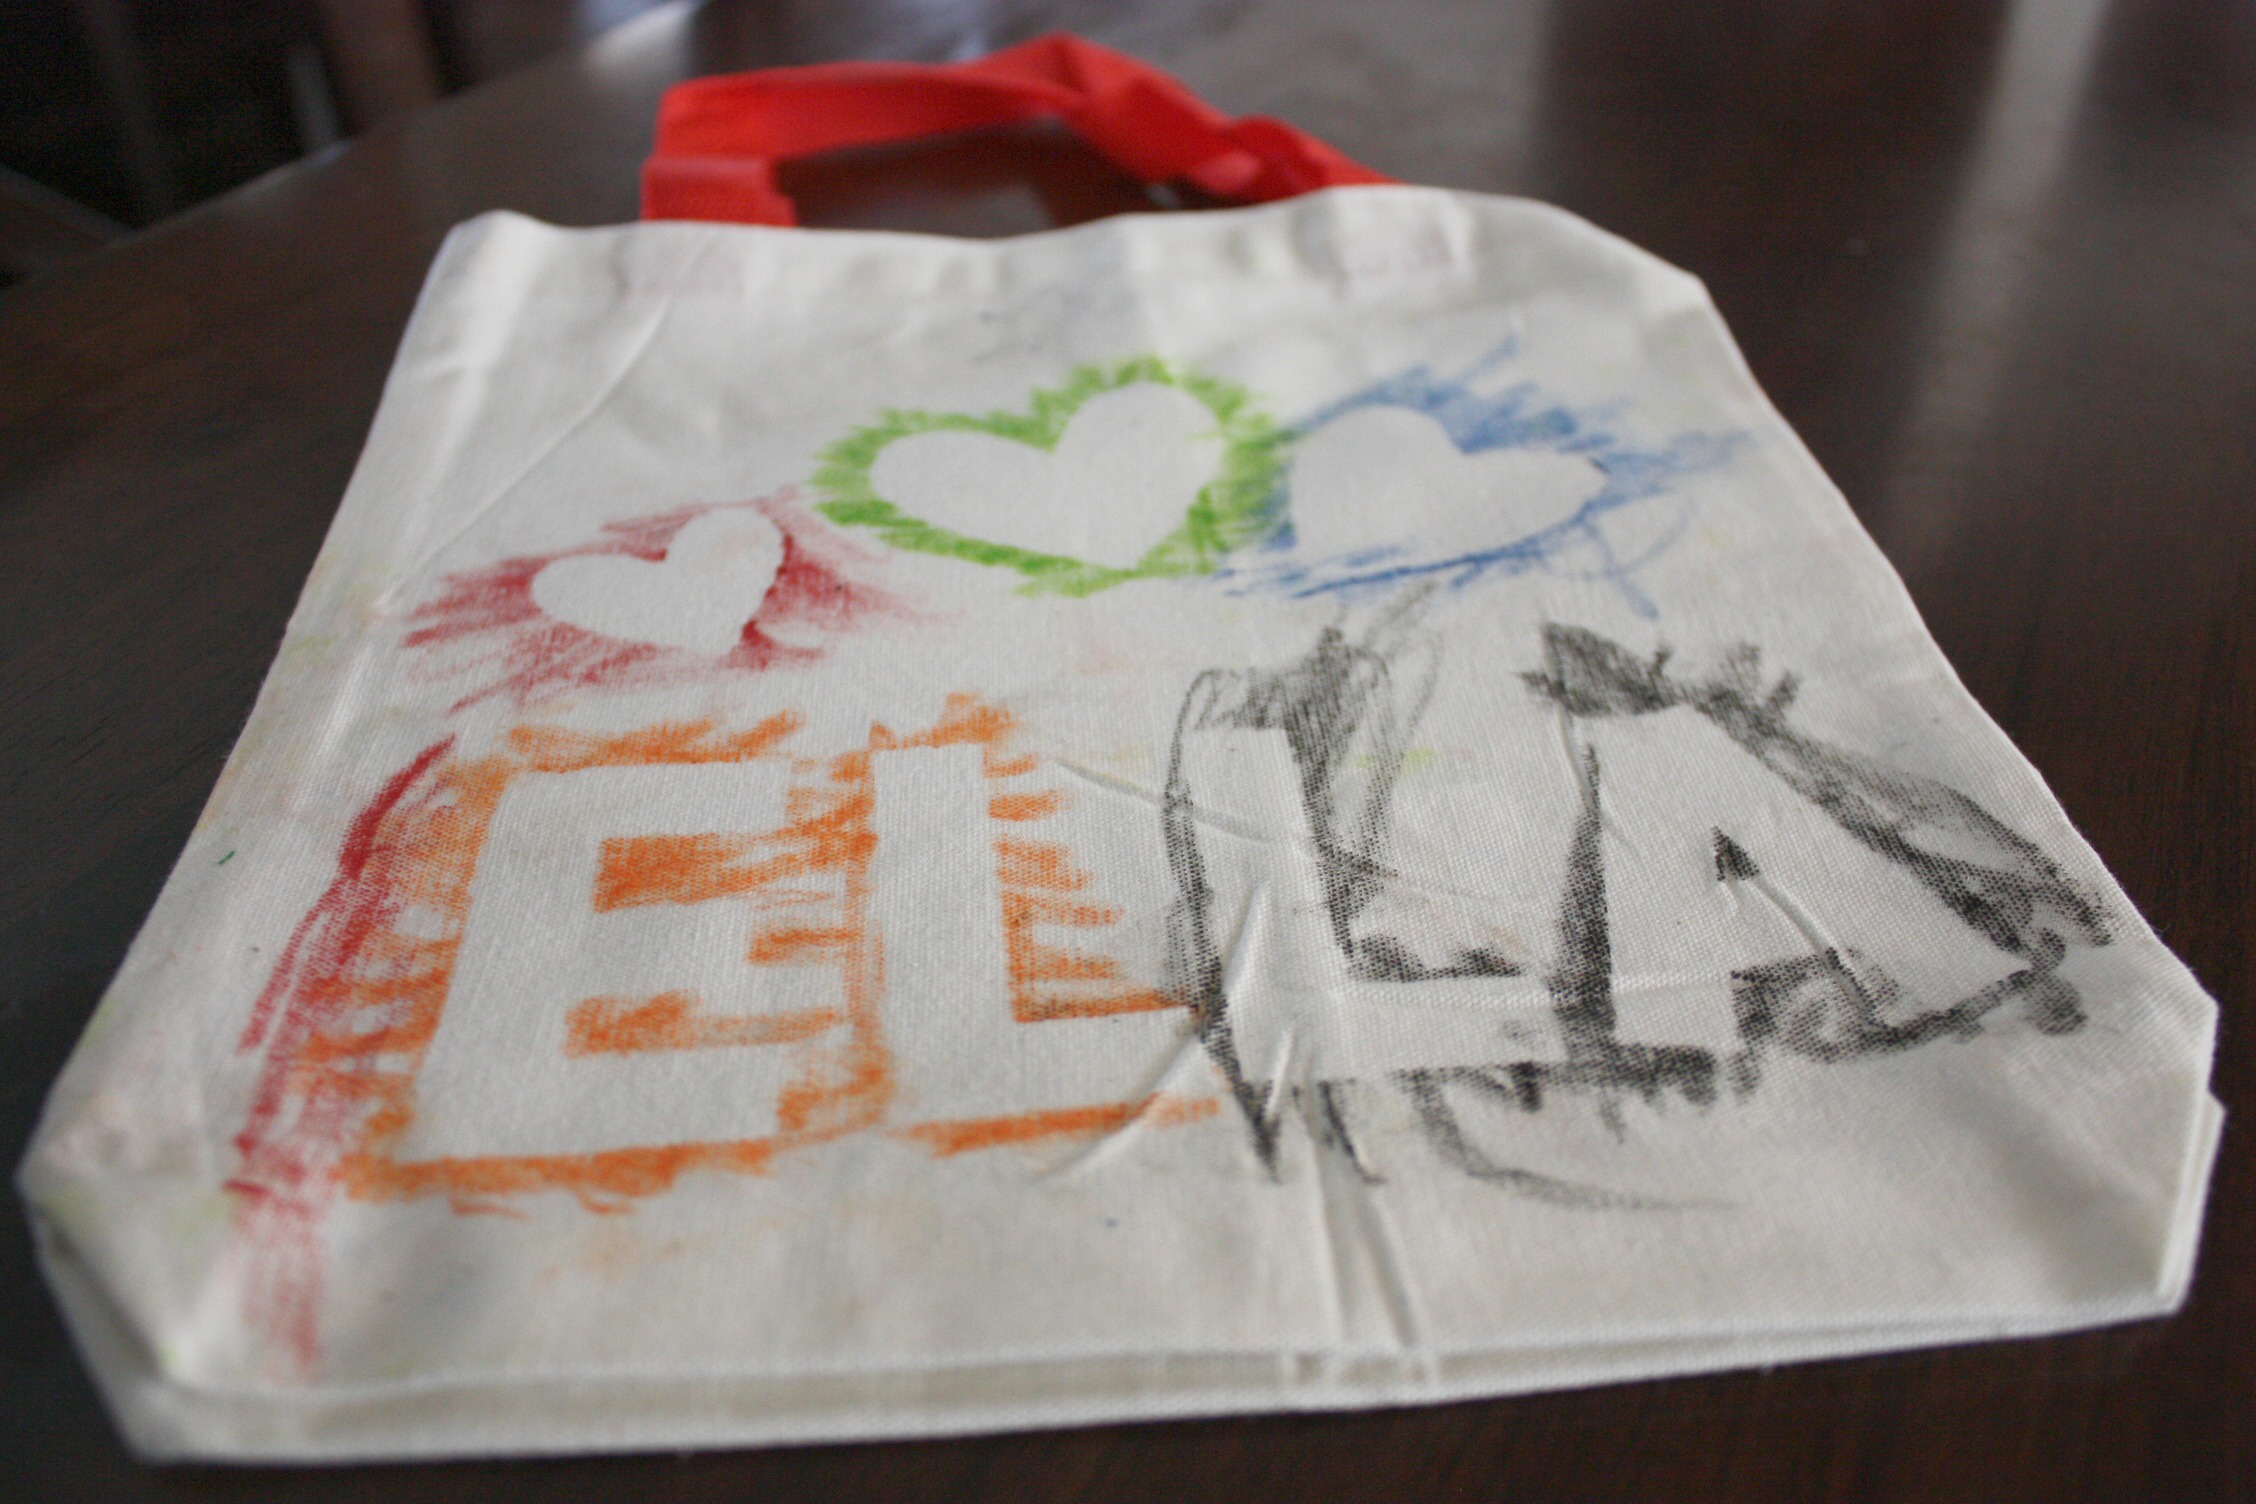
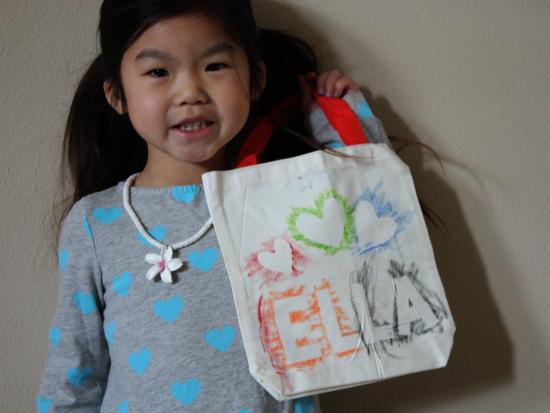
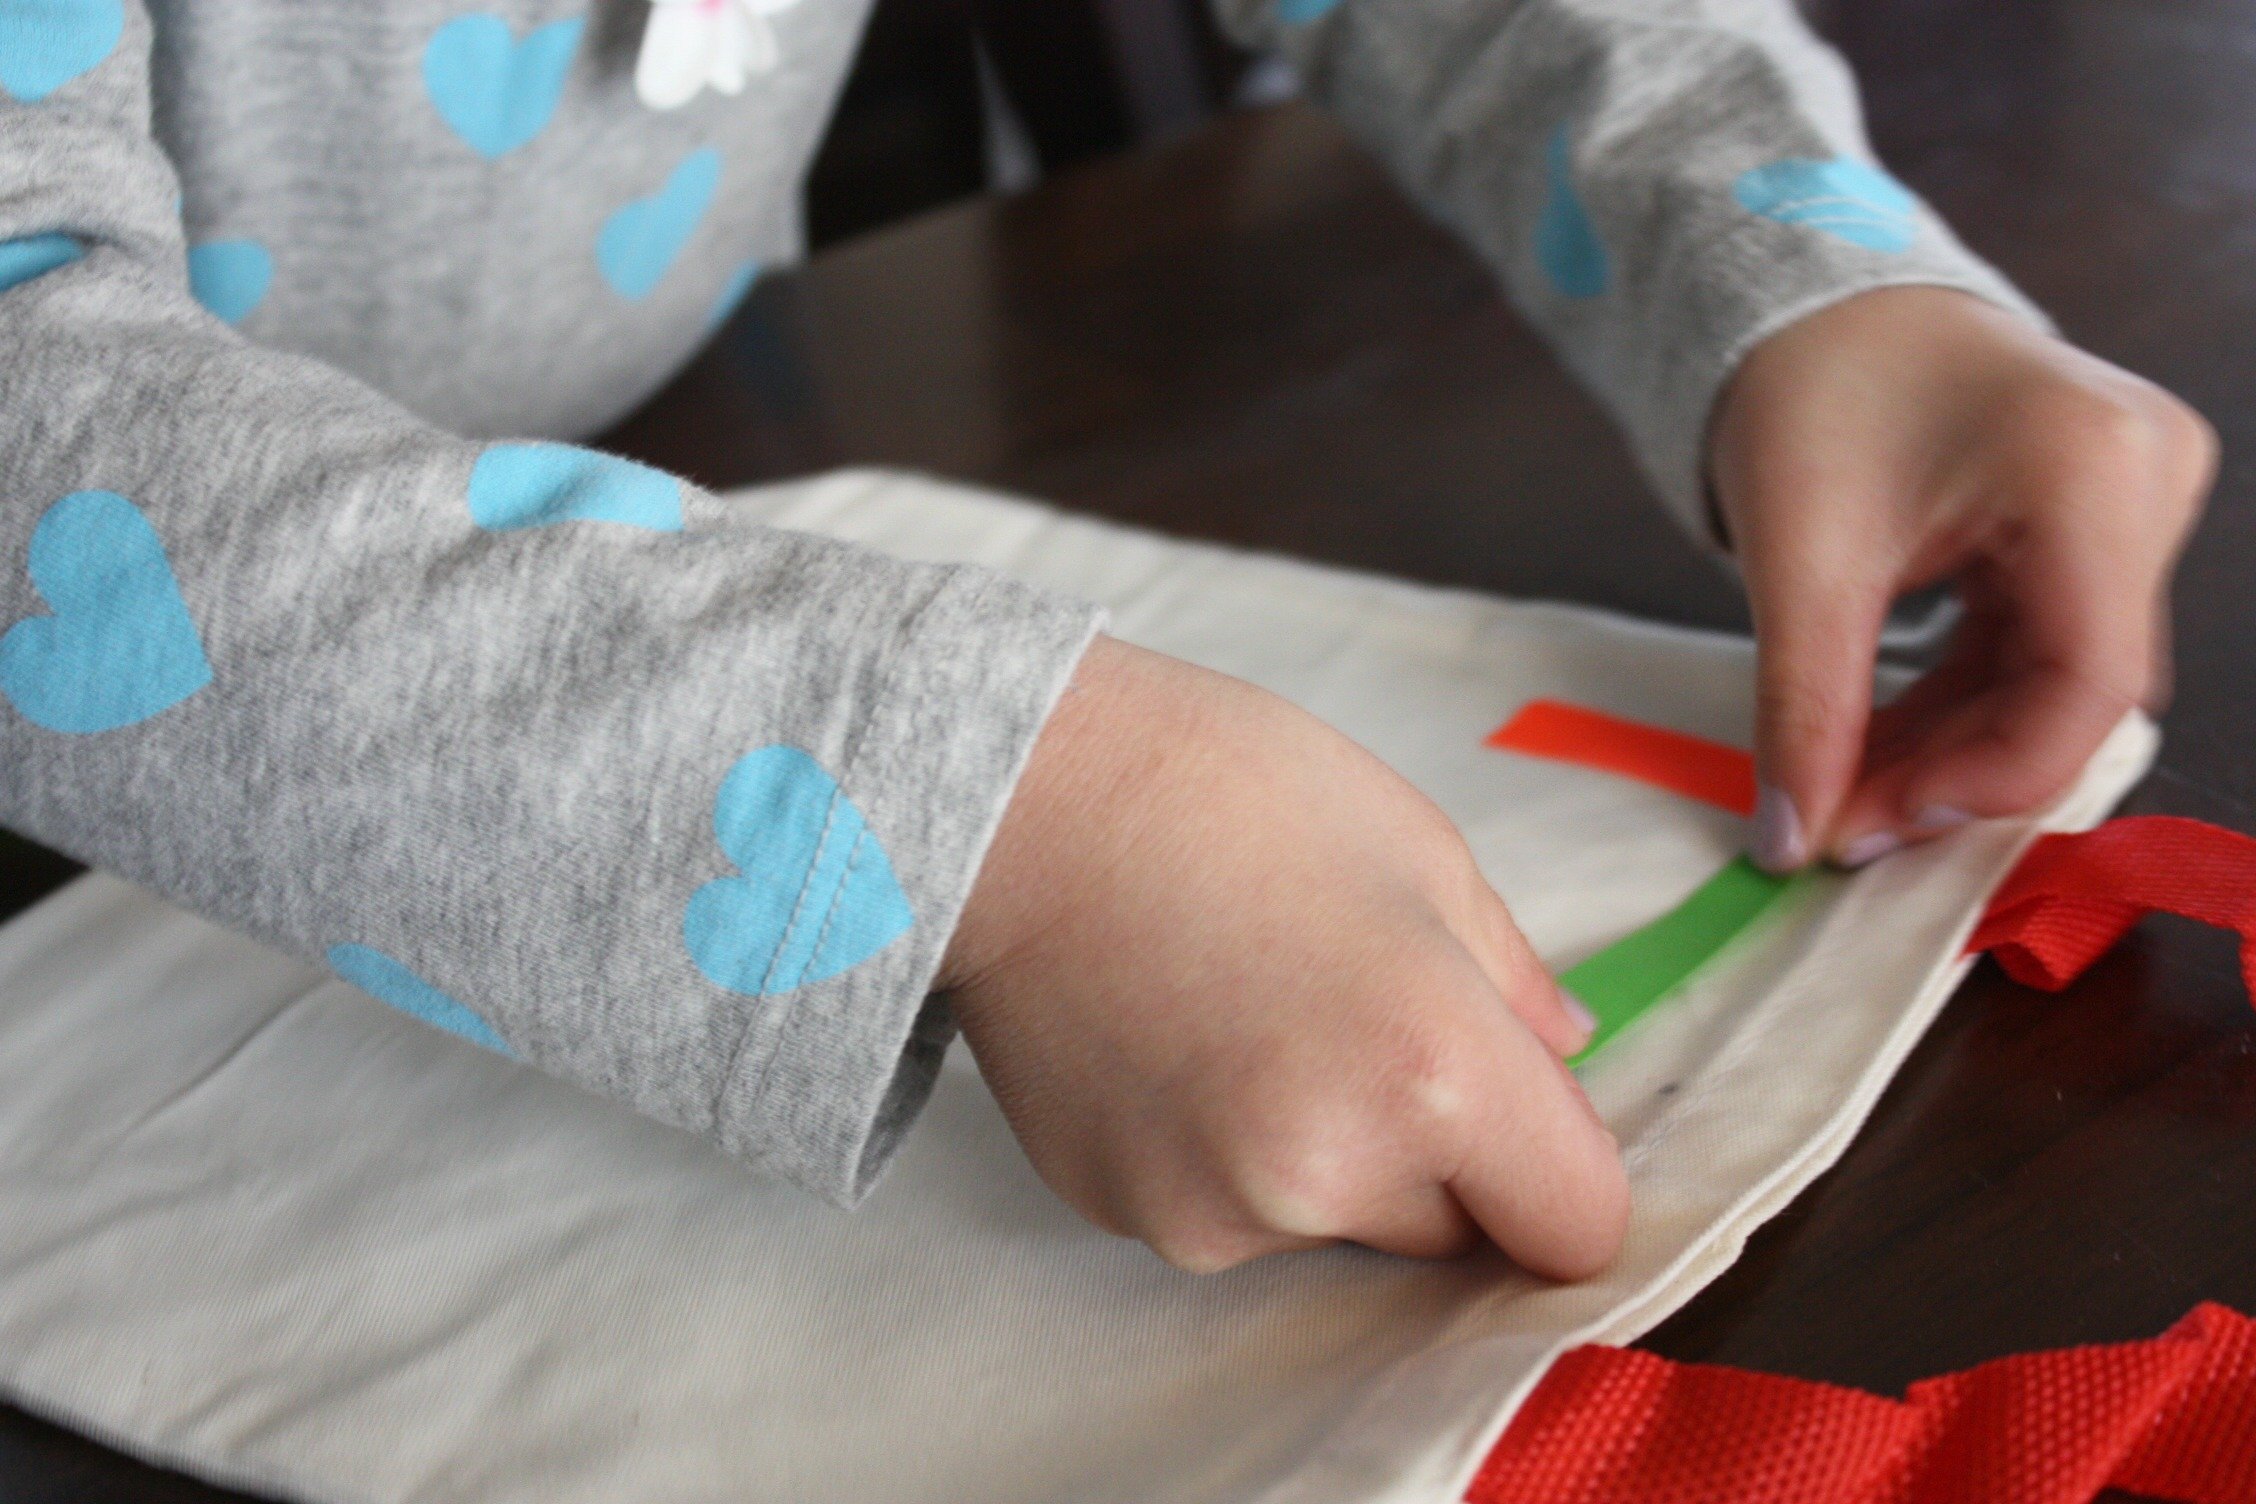
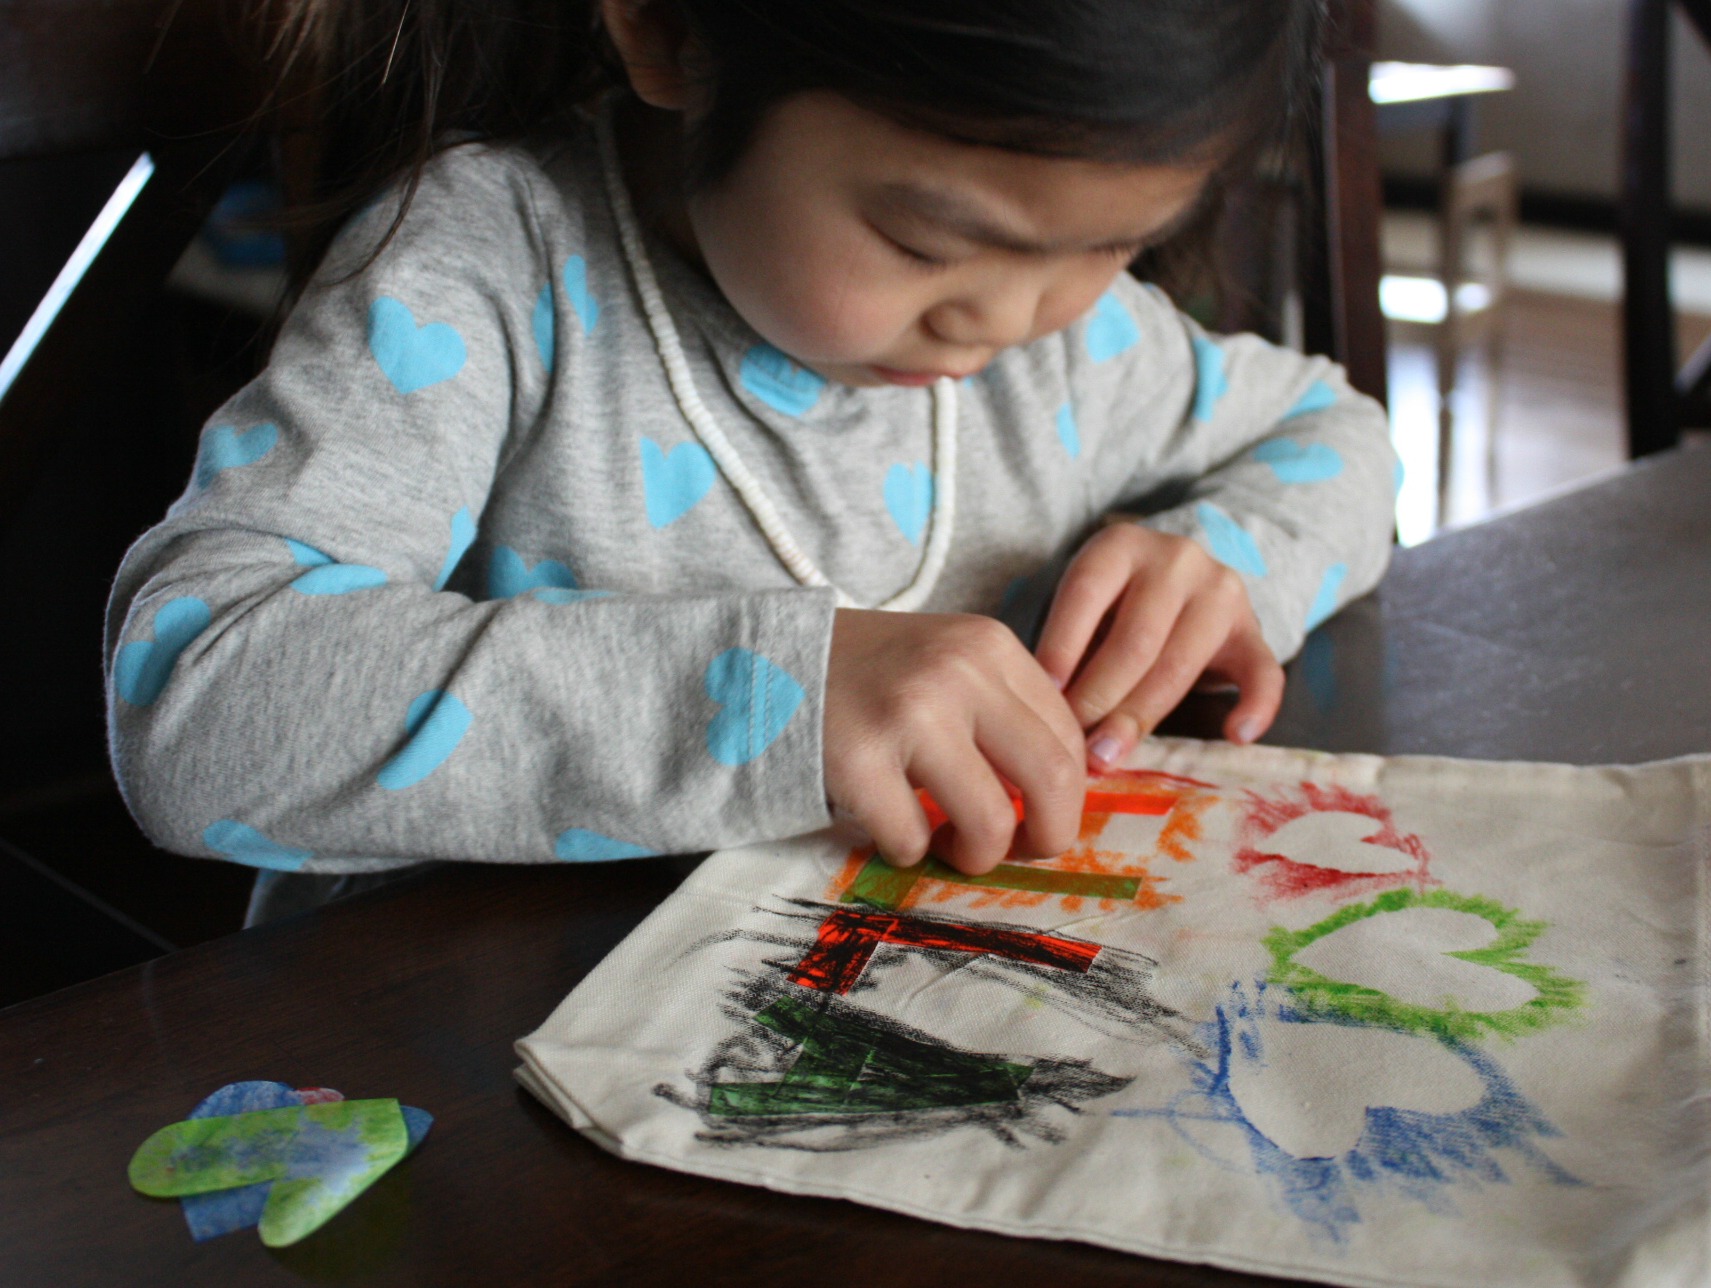
Cut strips of tape or shapes out of the contact paper to create a pattern, picture, or letters on the tote bag. My daughter wanted her name on the bag, so we used the thinner tape to write it out. We also cut out some hearts from the contact paper.
Step 3
Use the fabric crayons to color over all the contact paper shapes and strips of tape. The nice thing about this technique is that the more scribbles that go outside the lines, the better!
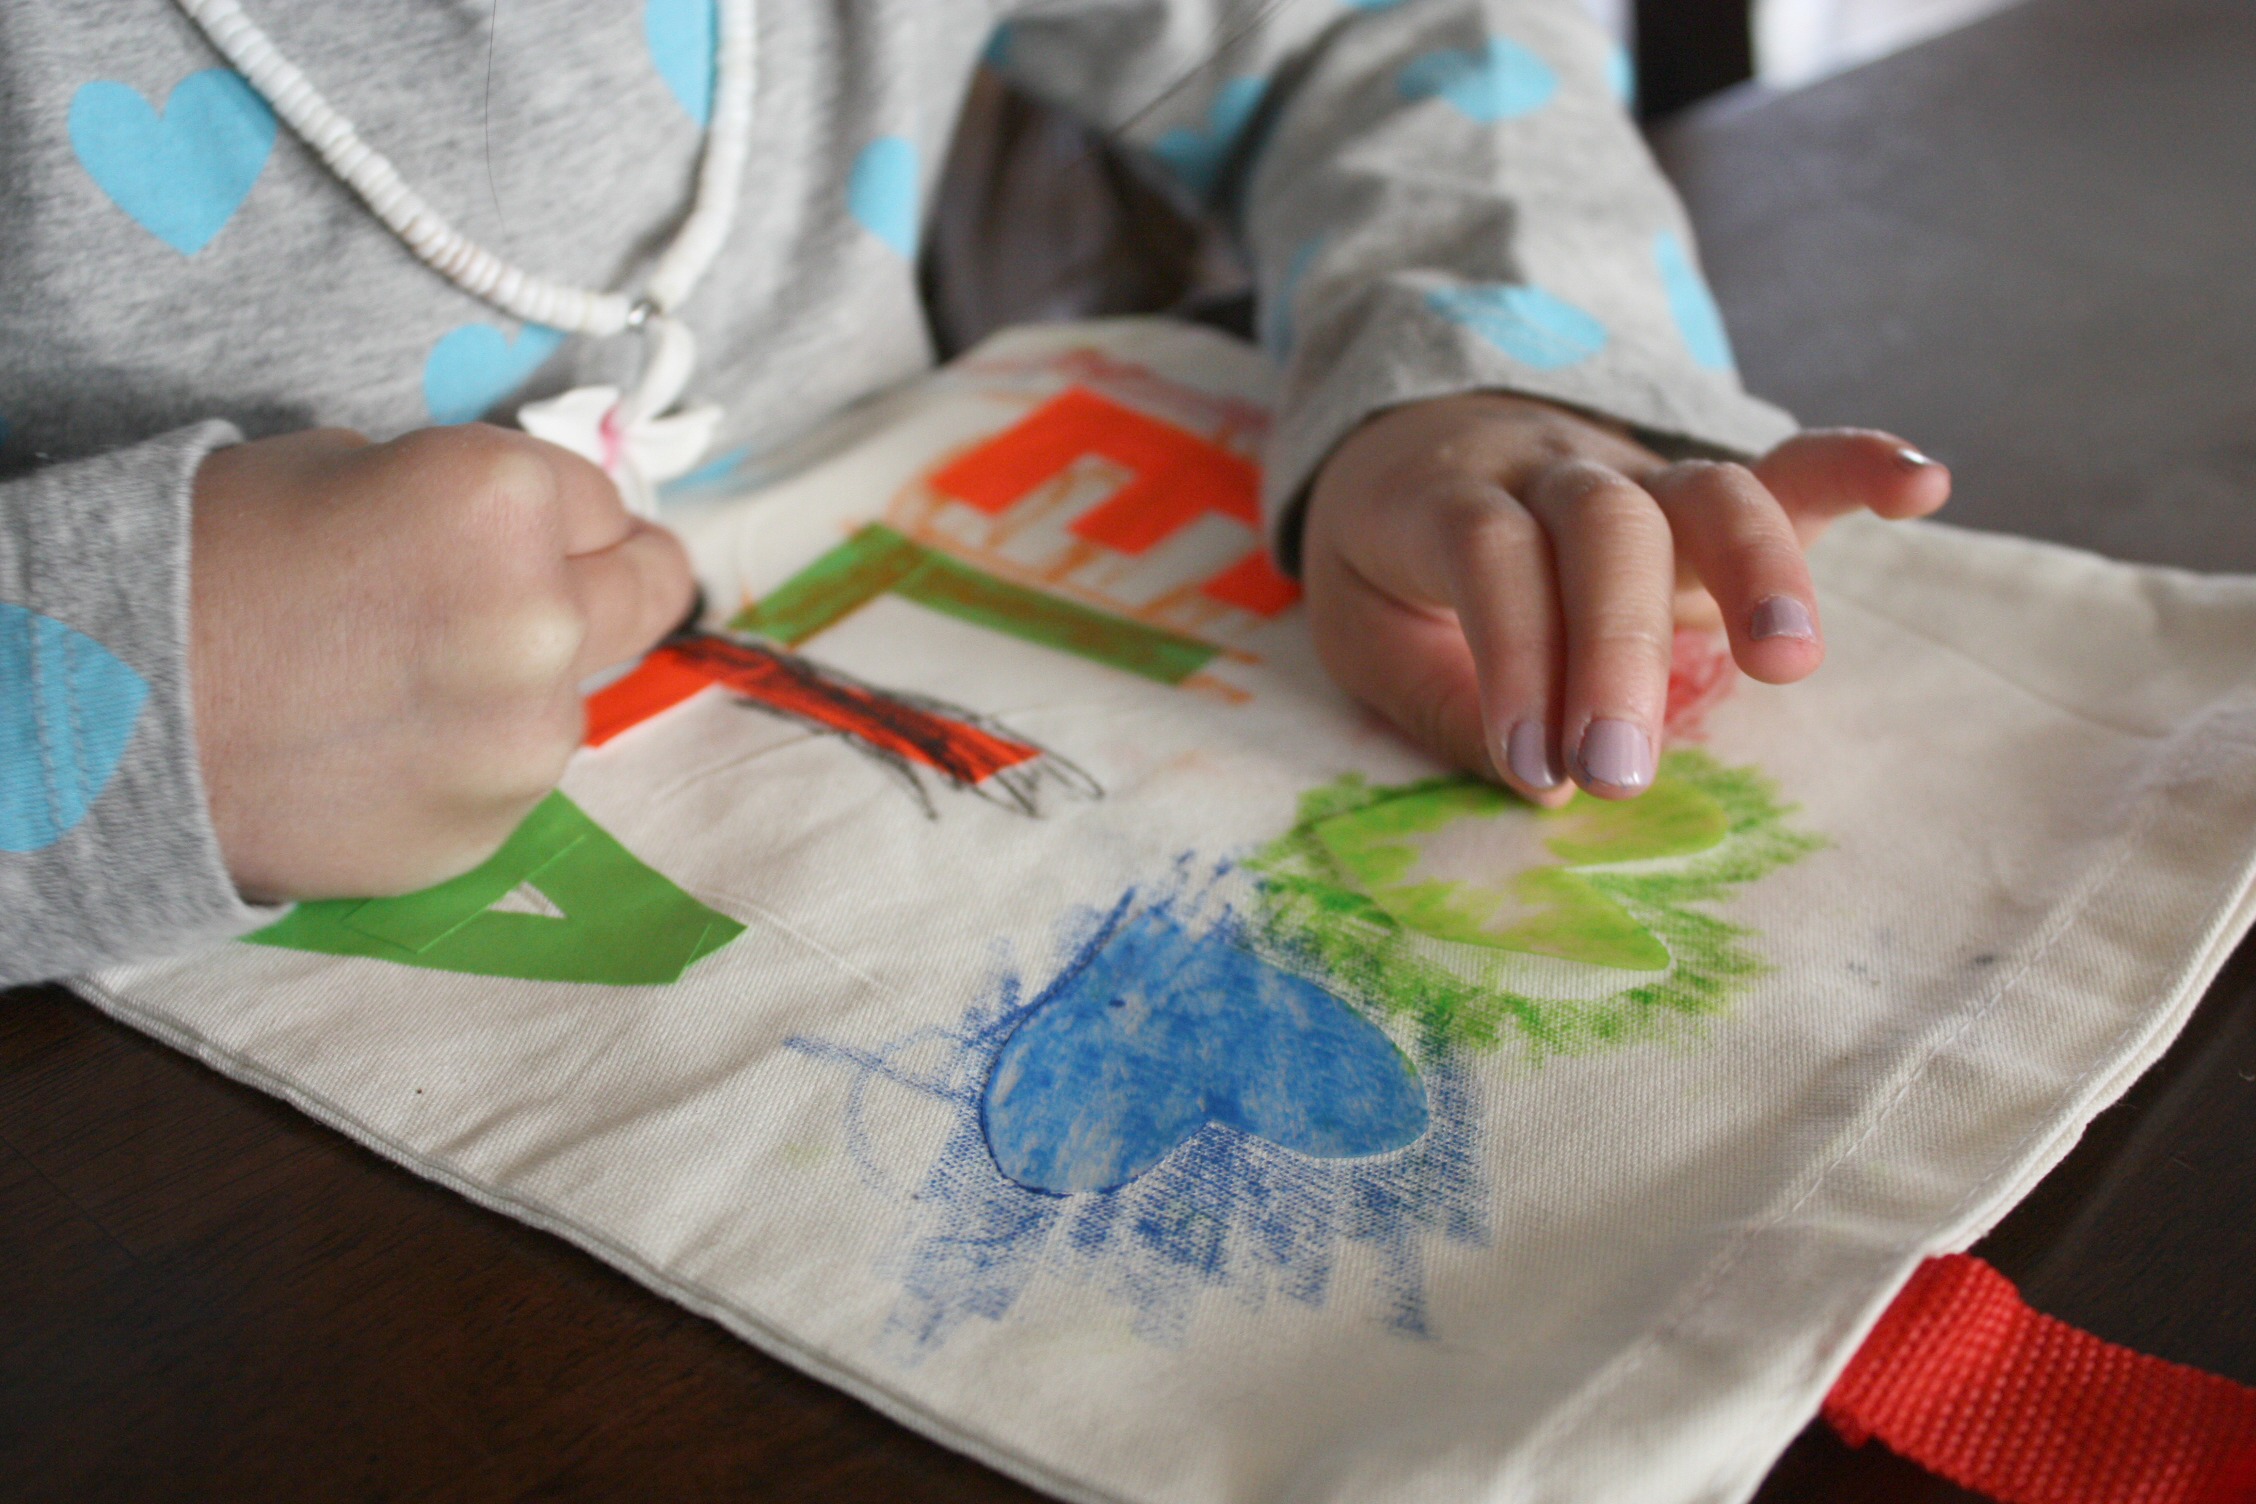
Step 4
As soon as you are finished coloring, peel off all the tape and stickers! My daughter loved this part of the process. She was so excited to see her name "magically" appear.
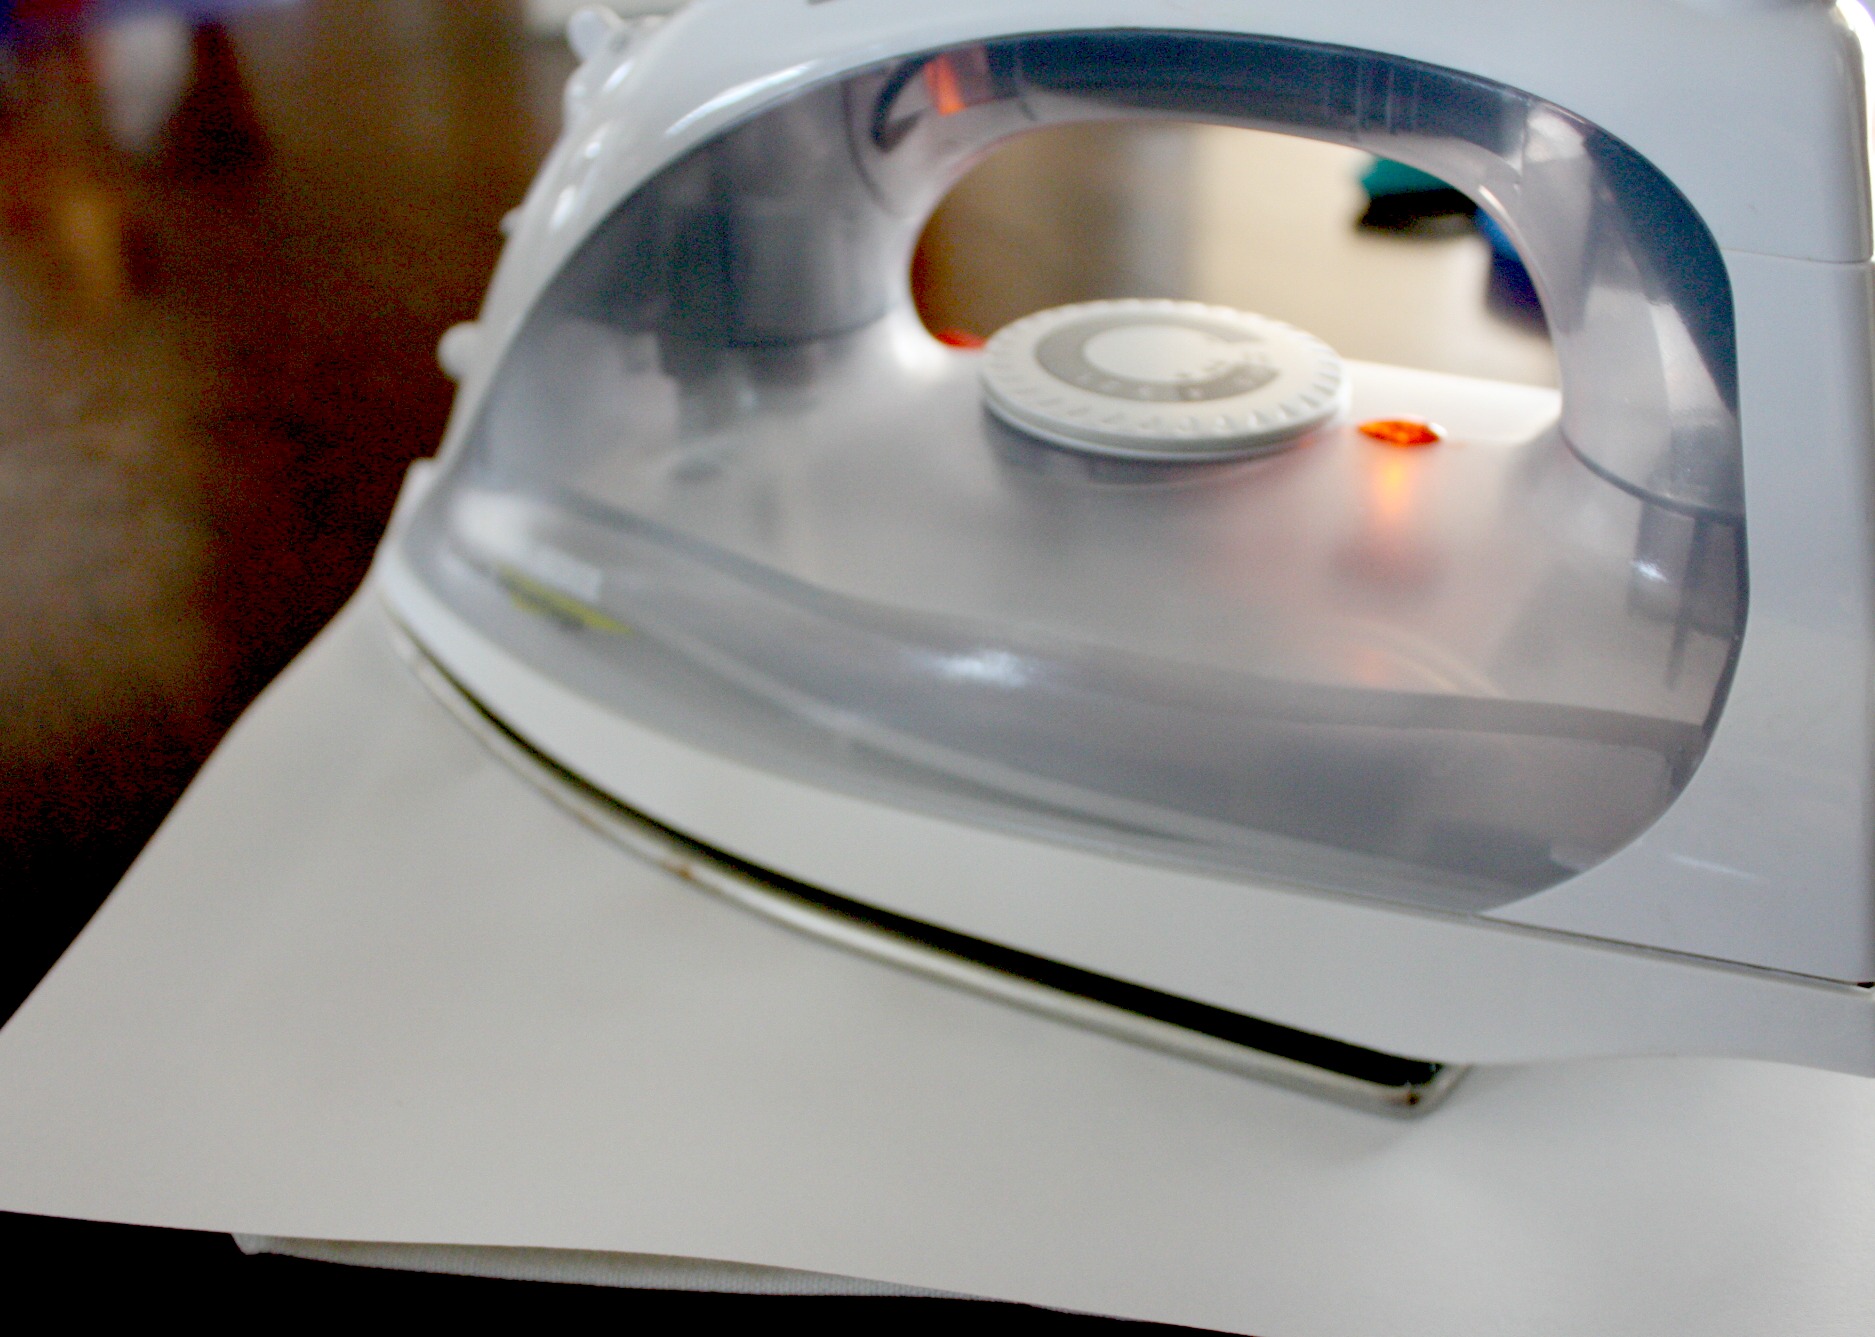
Step 5
In order to set the crayons and make the artwork permanent, place a piece of paper over the bag and press with a hot iron.
Final result!
Now your tote bag is ready to use. We used ours to hold stickers and crayons when we went out to lunch.