Step-by-step tutorial
Step 1
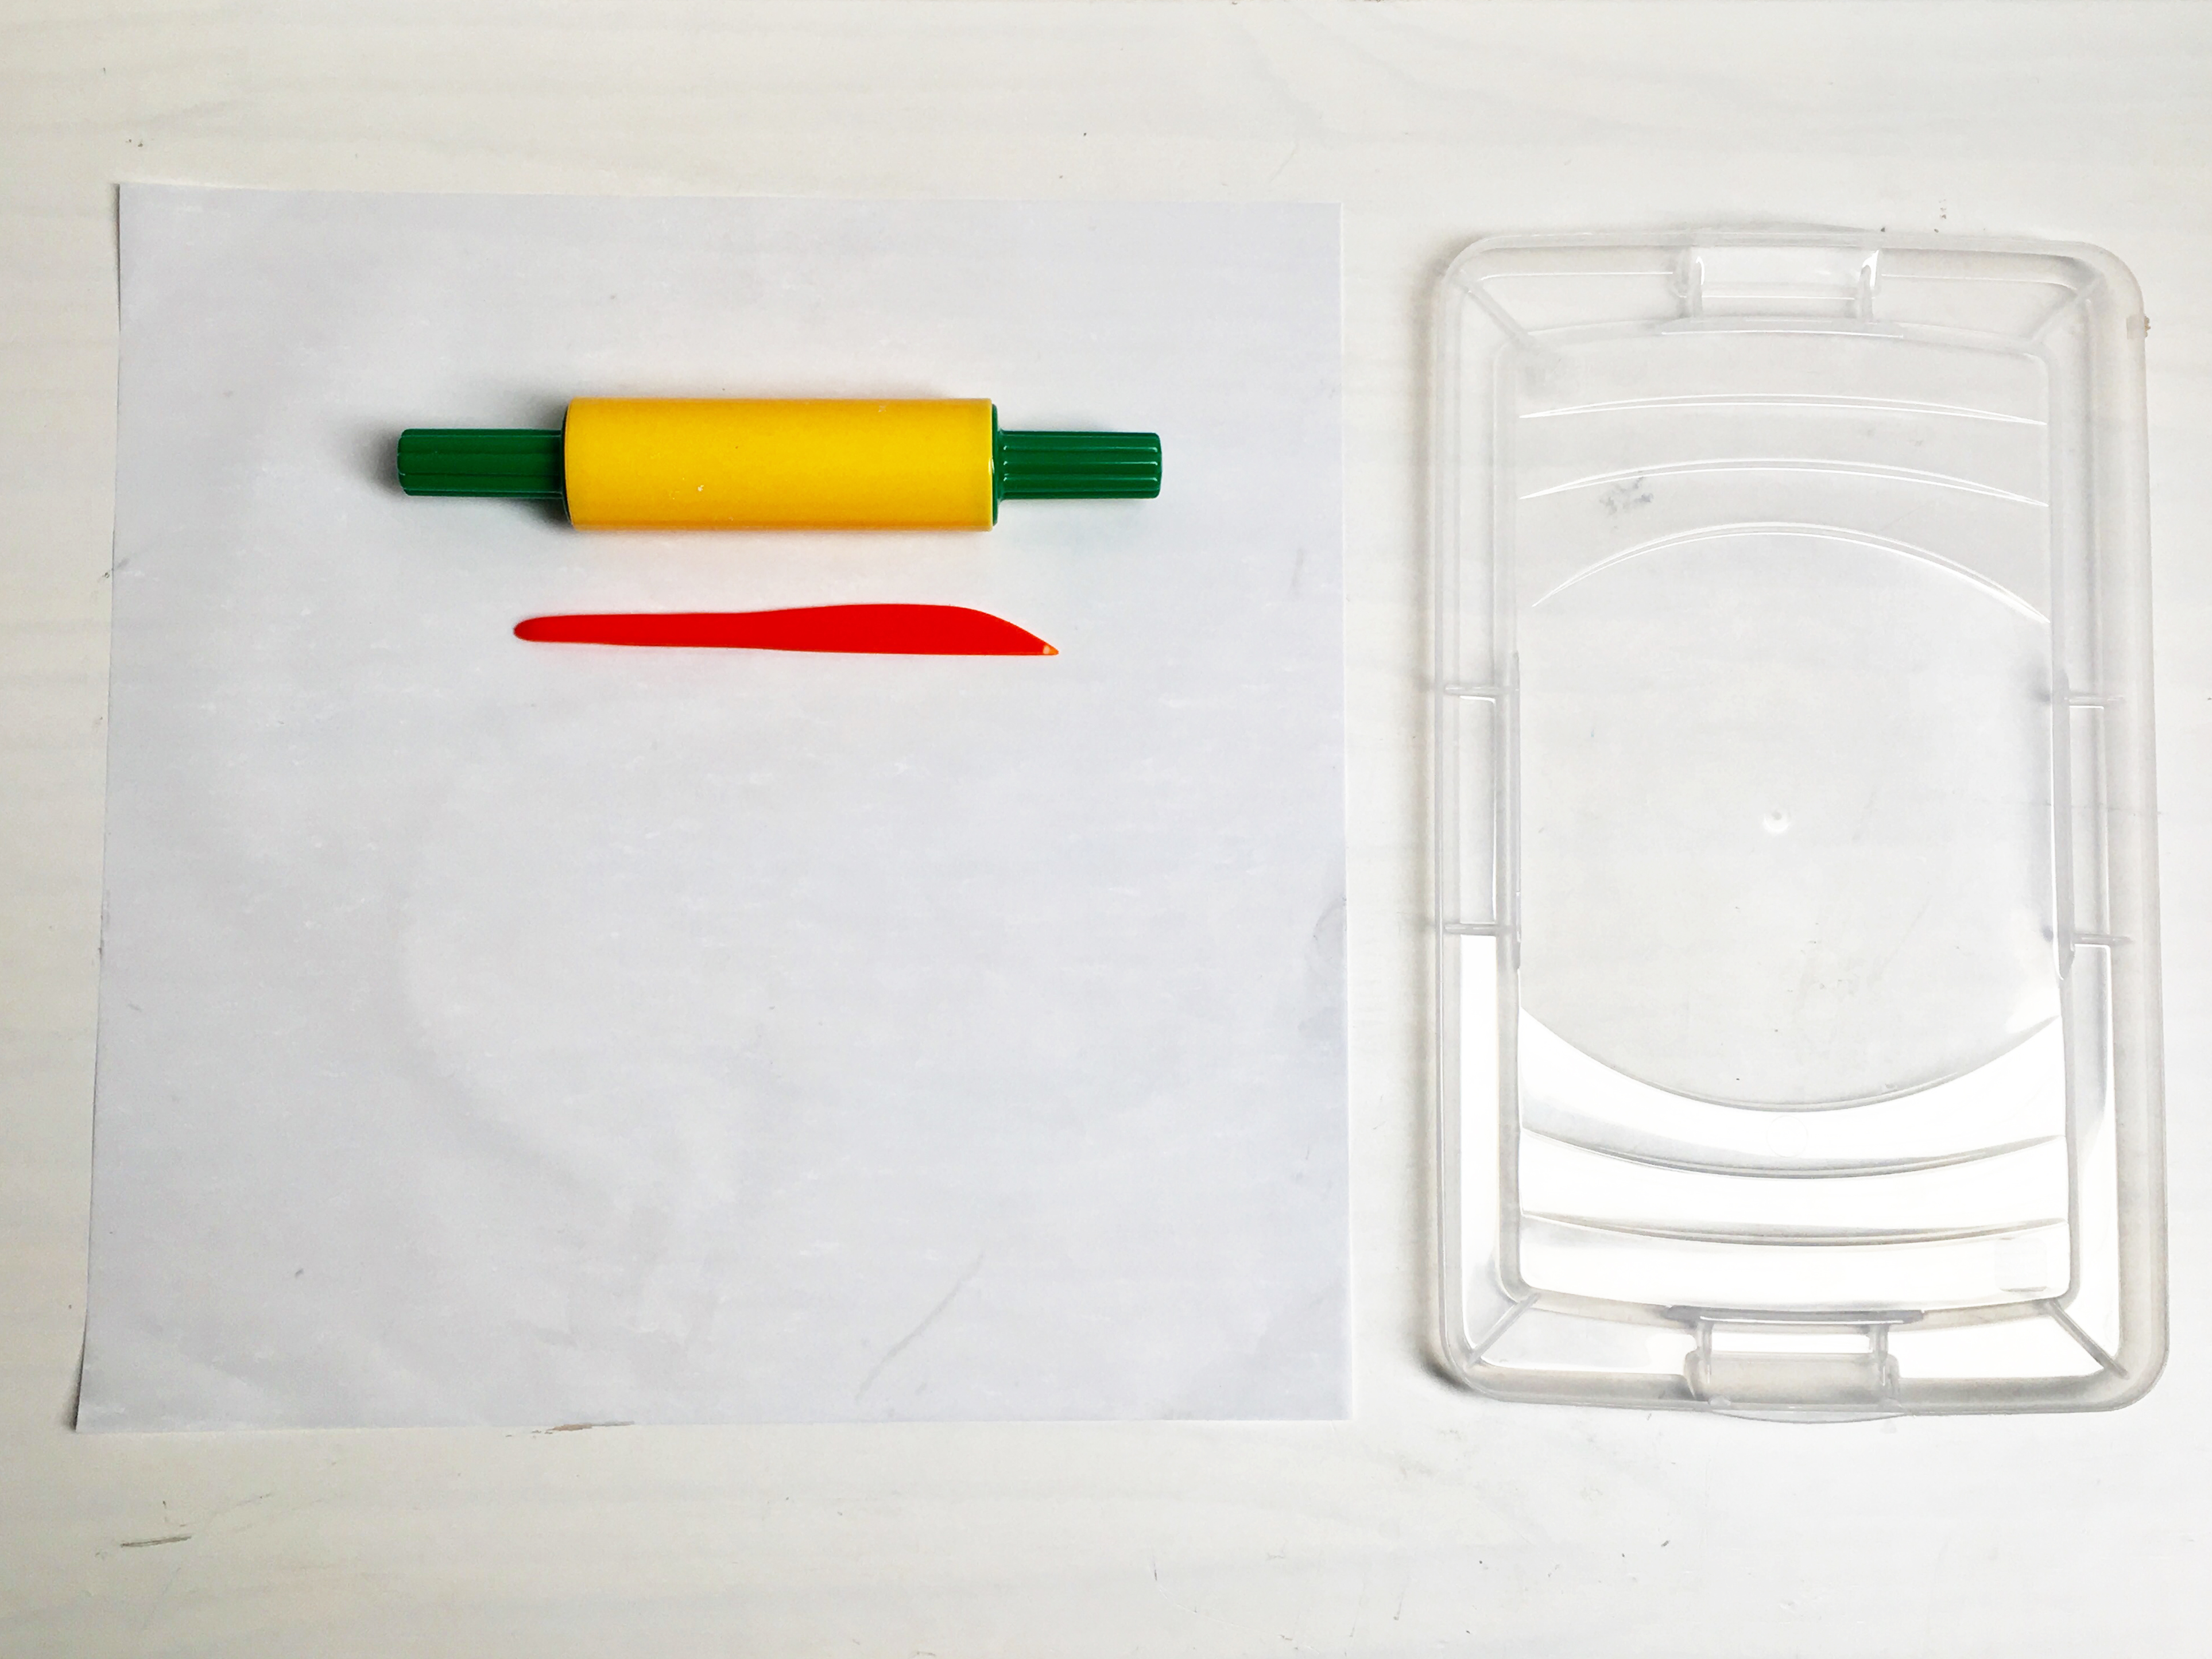
Prepare a clean surface area to to roll out your clay and a safe place for your clay creation to dry (away from curious hands!). We rolled out our clay on wax paper and used the plastic top of a container as a tray to dry our clay on..

Step 2
Blow up a balloon and then release small amounts of air until it would comfortably fit your child's hand. The size of the balloon will help shape the clay bowl.. Tie the balloon end when you've gotten the right size.
Tape the balloon's knot to the tray to secure it in place.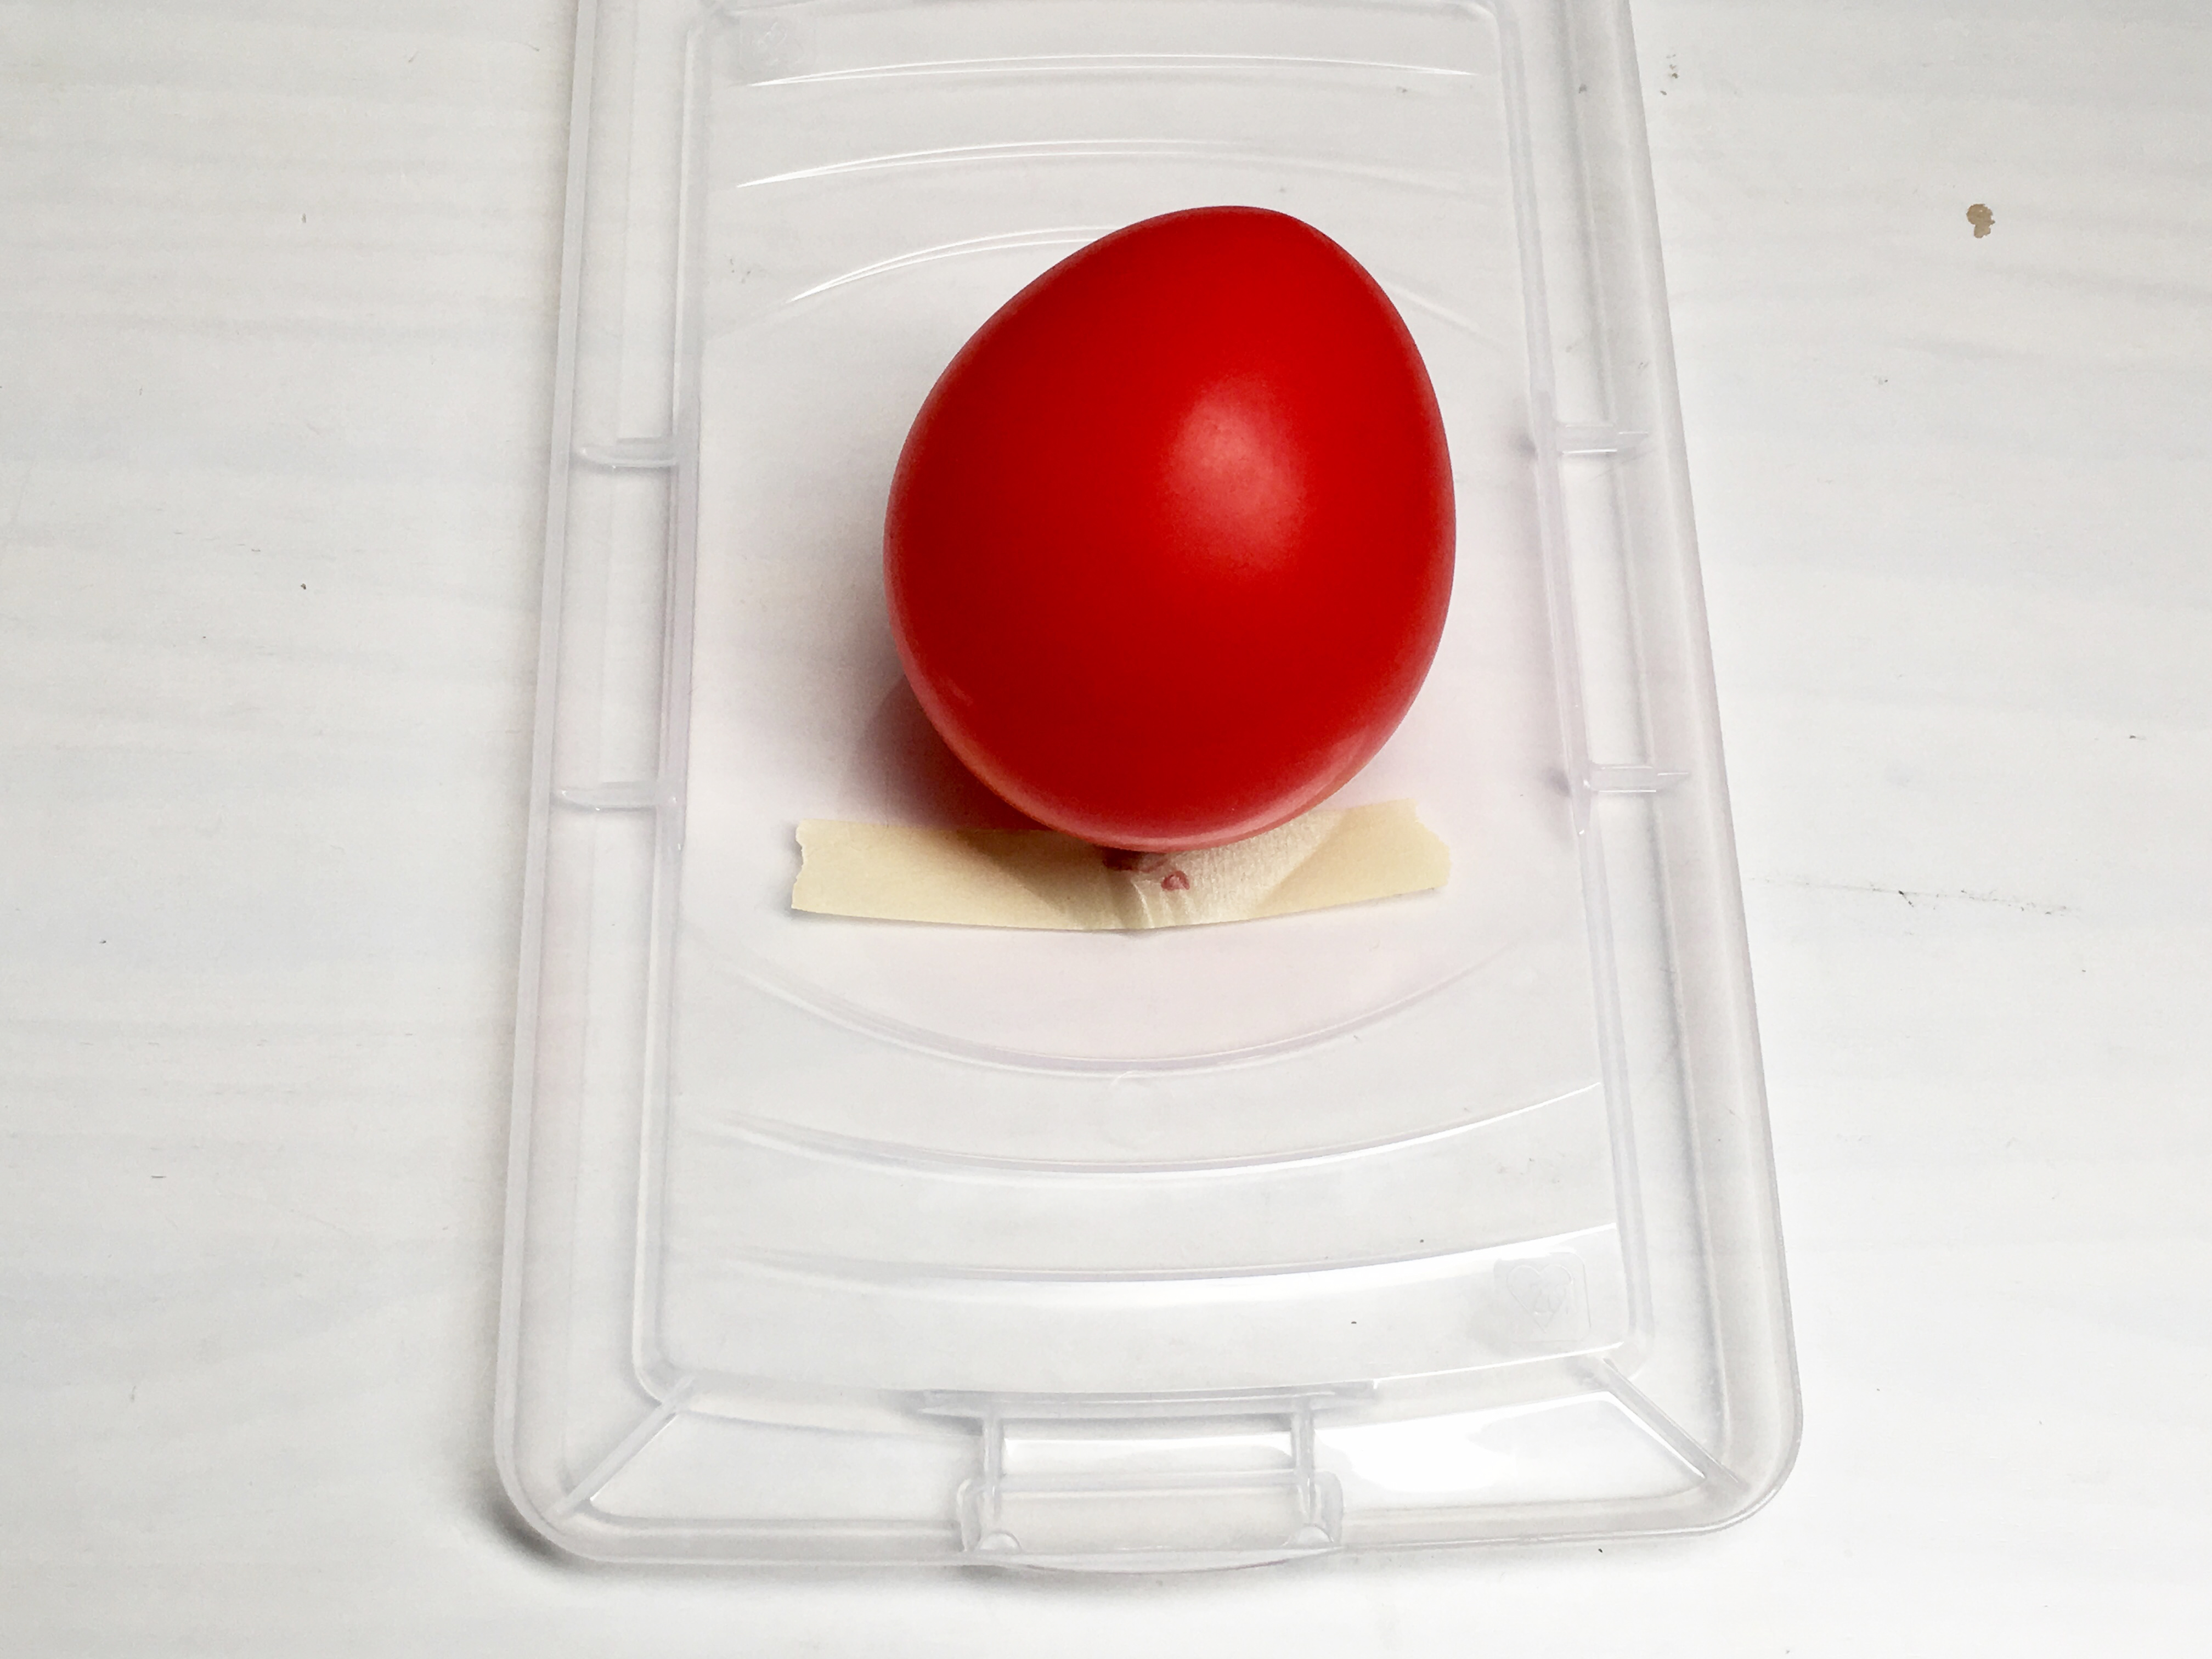
Step 3
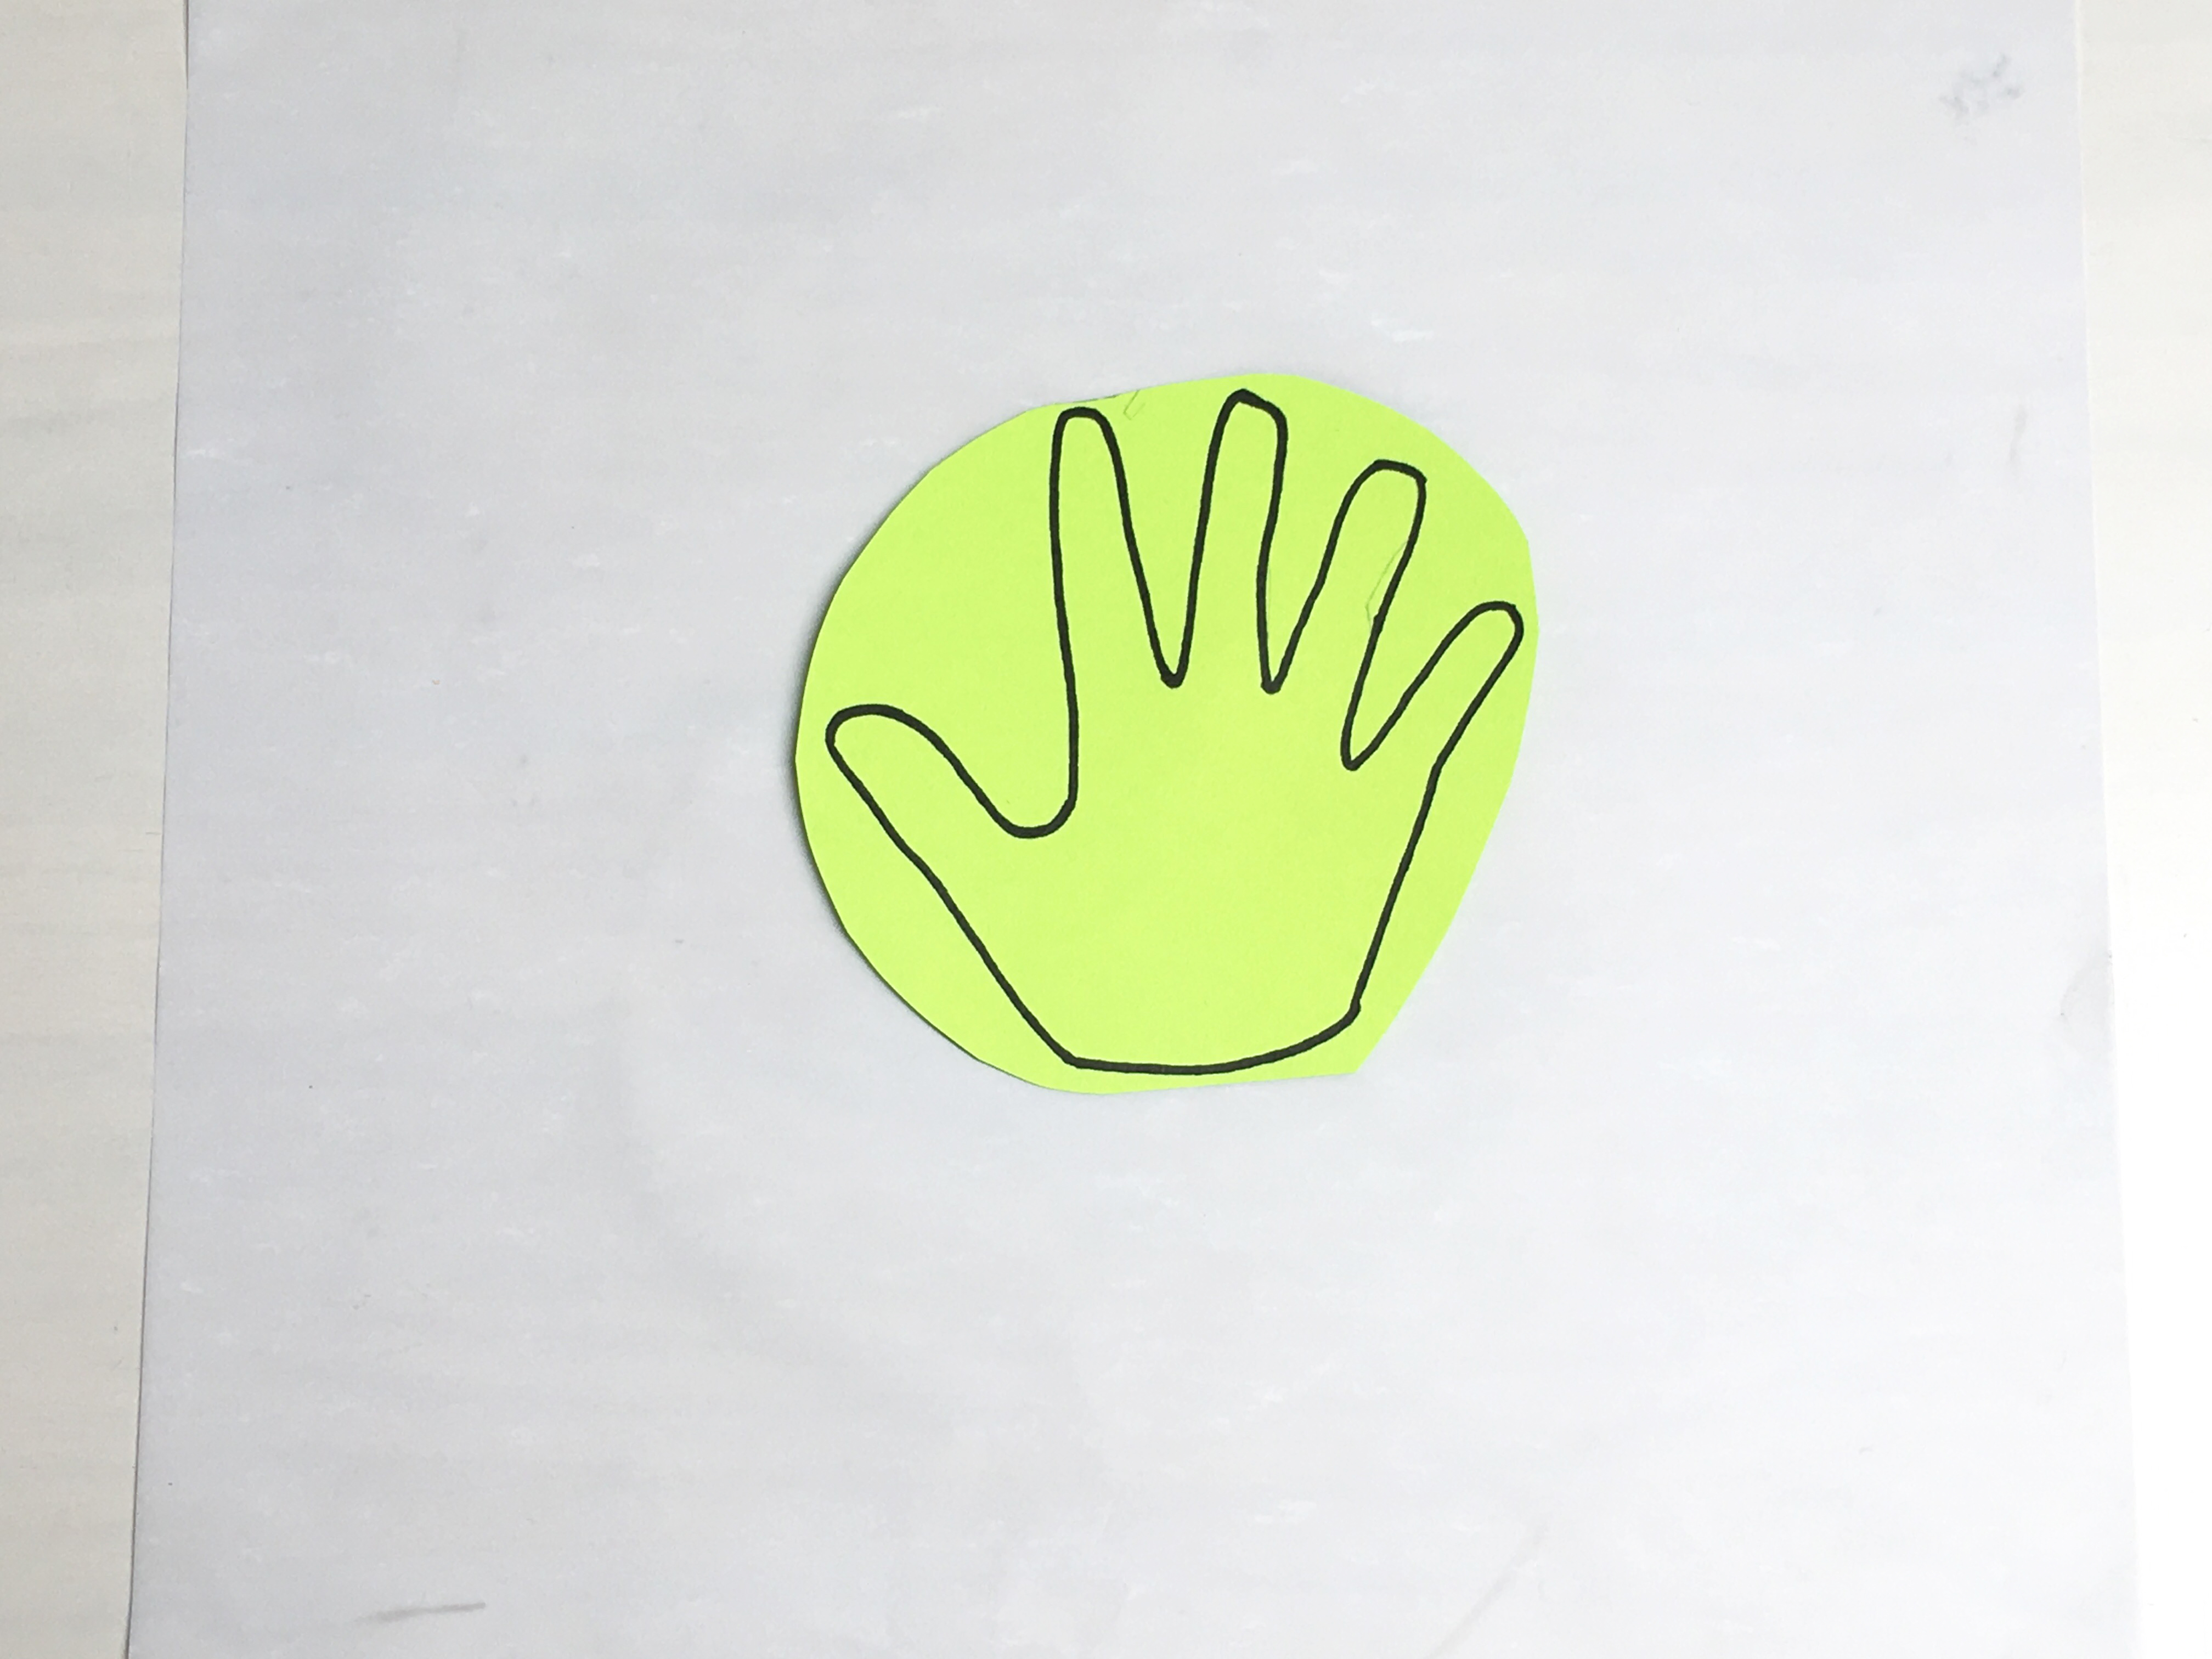
Trace your child's hand onto a piece of thick paper or cardstock and cut it out with scissors.
Step 4
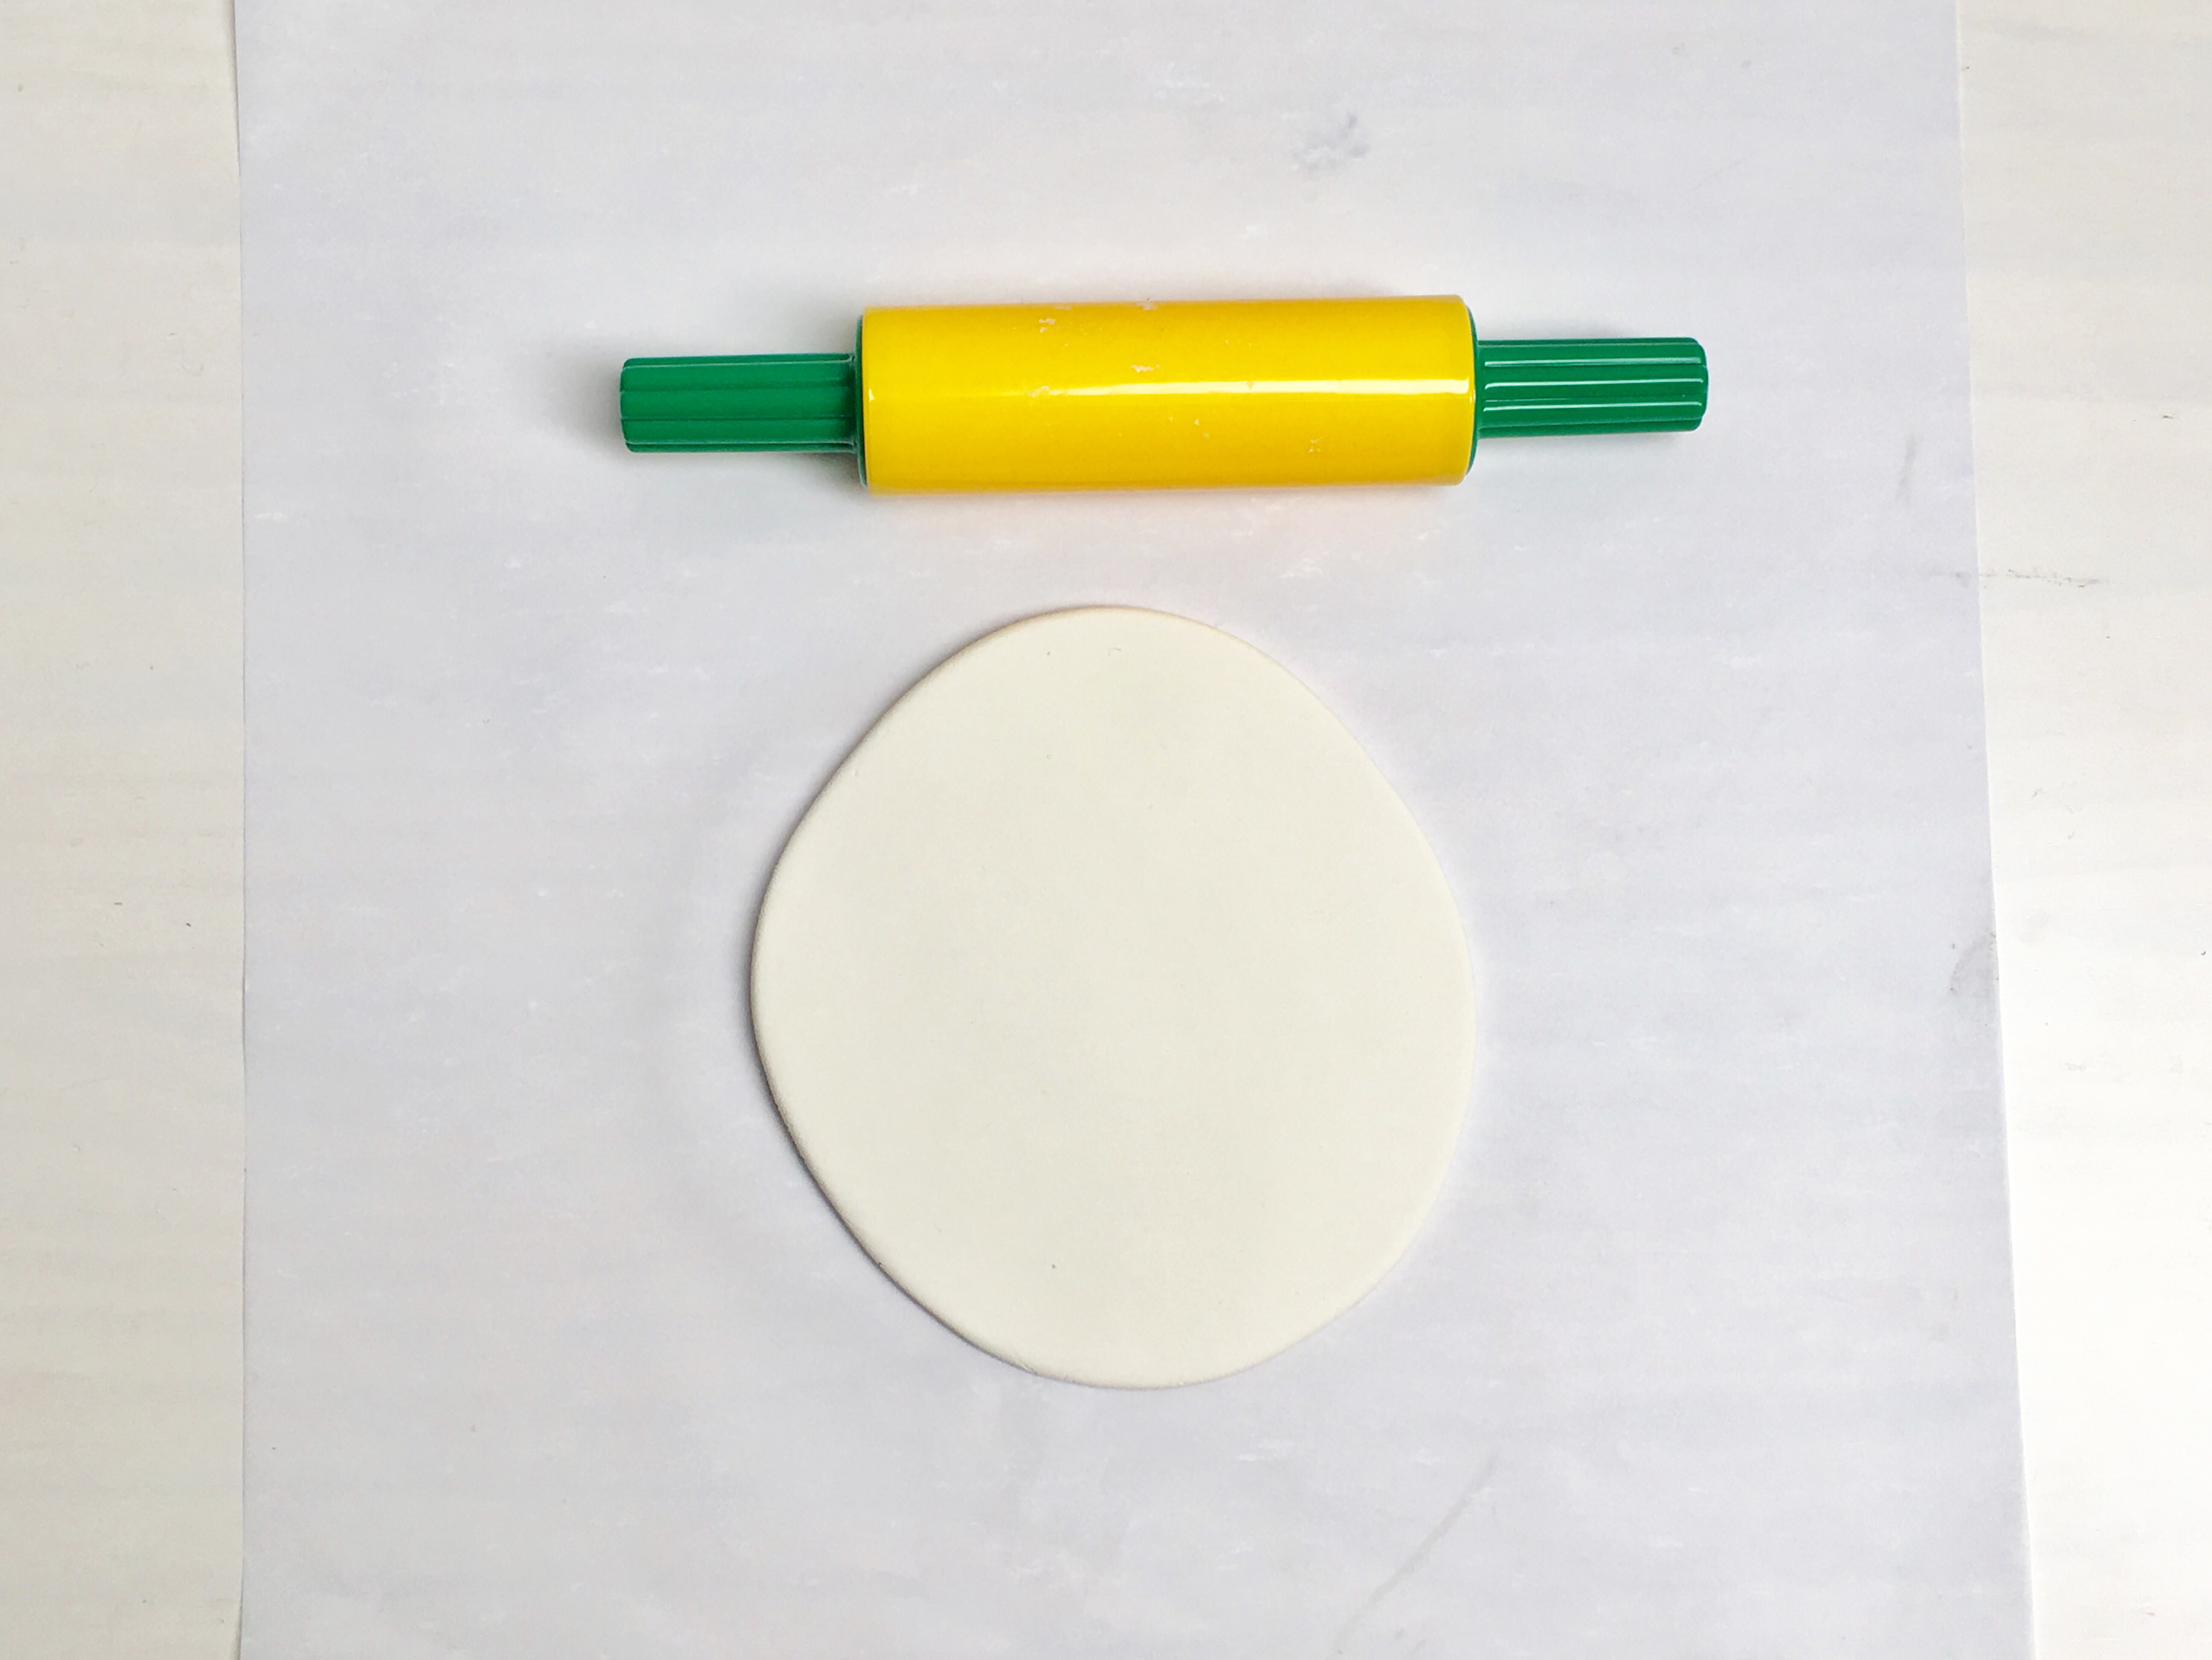
Take some clay (about the size of an orange) and knead it until it is smooth. Flatten it, and use a rolling pin to roll it into a circle, about 1/4" (.635 cm) thick.
Step 5
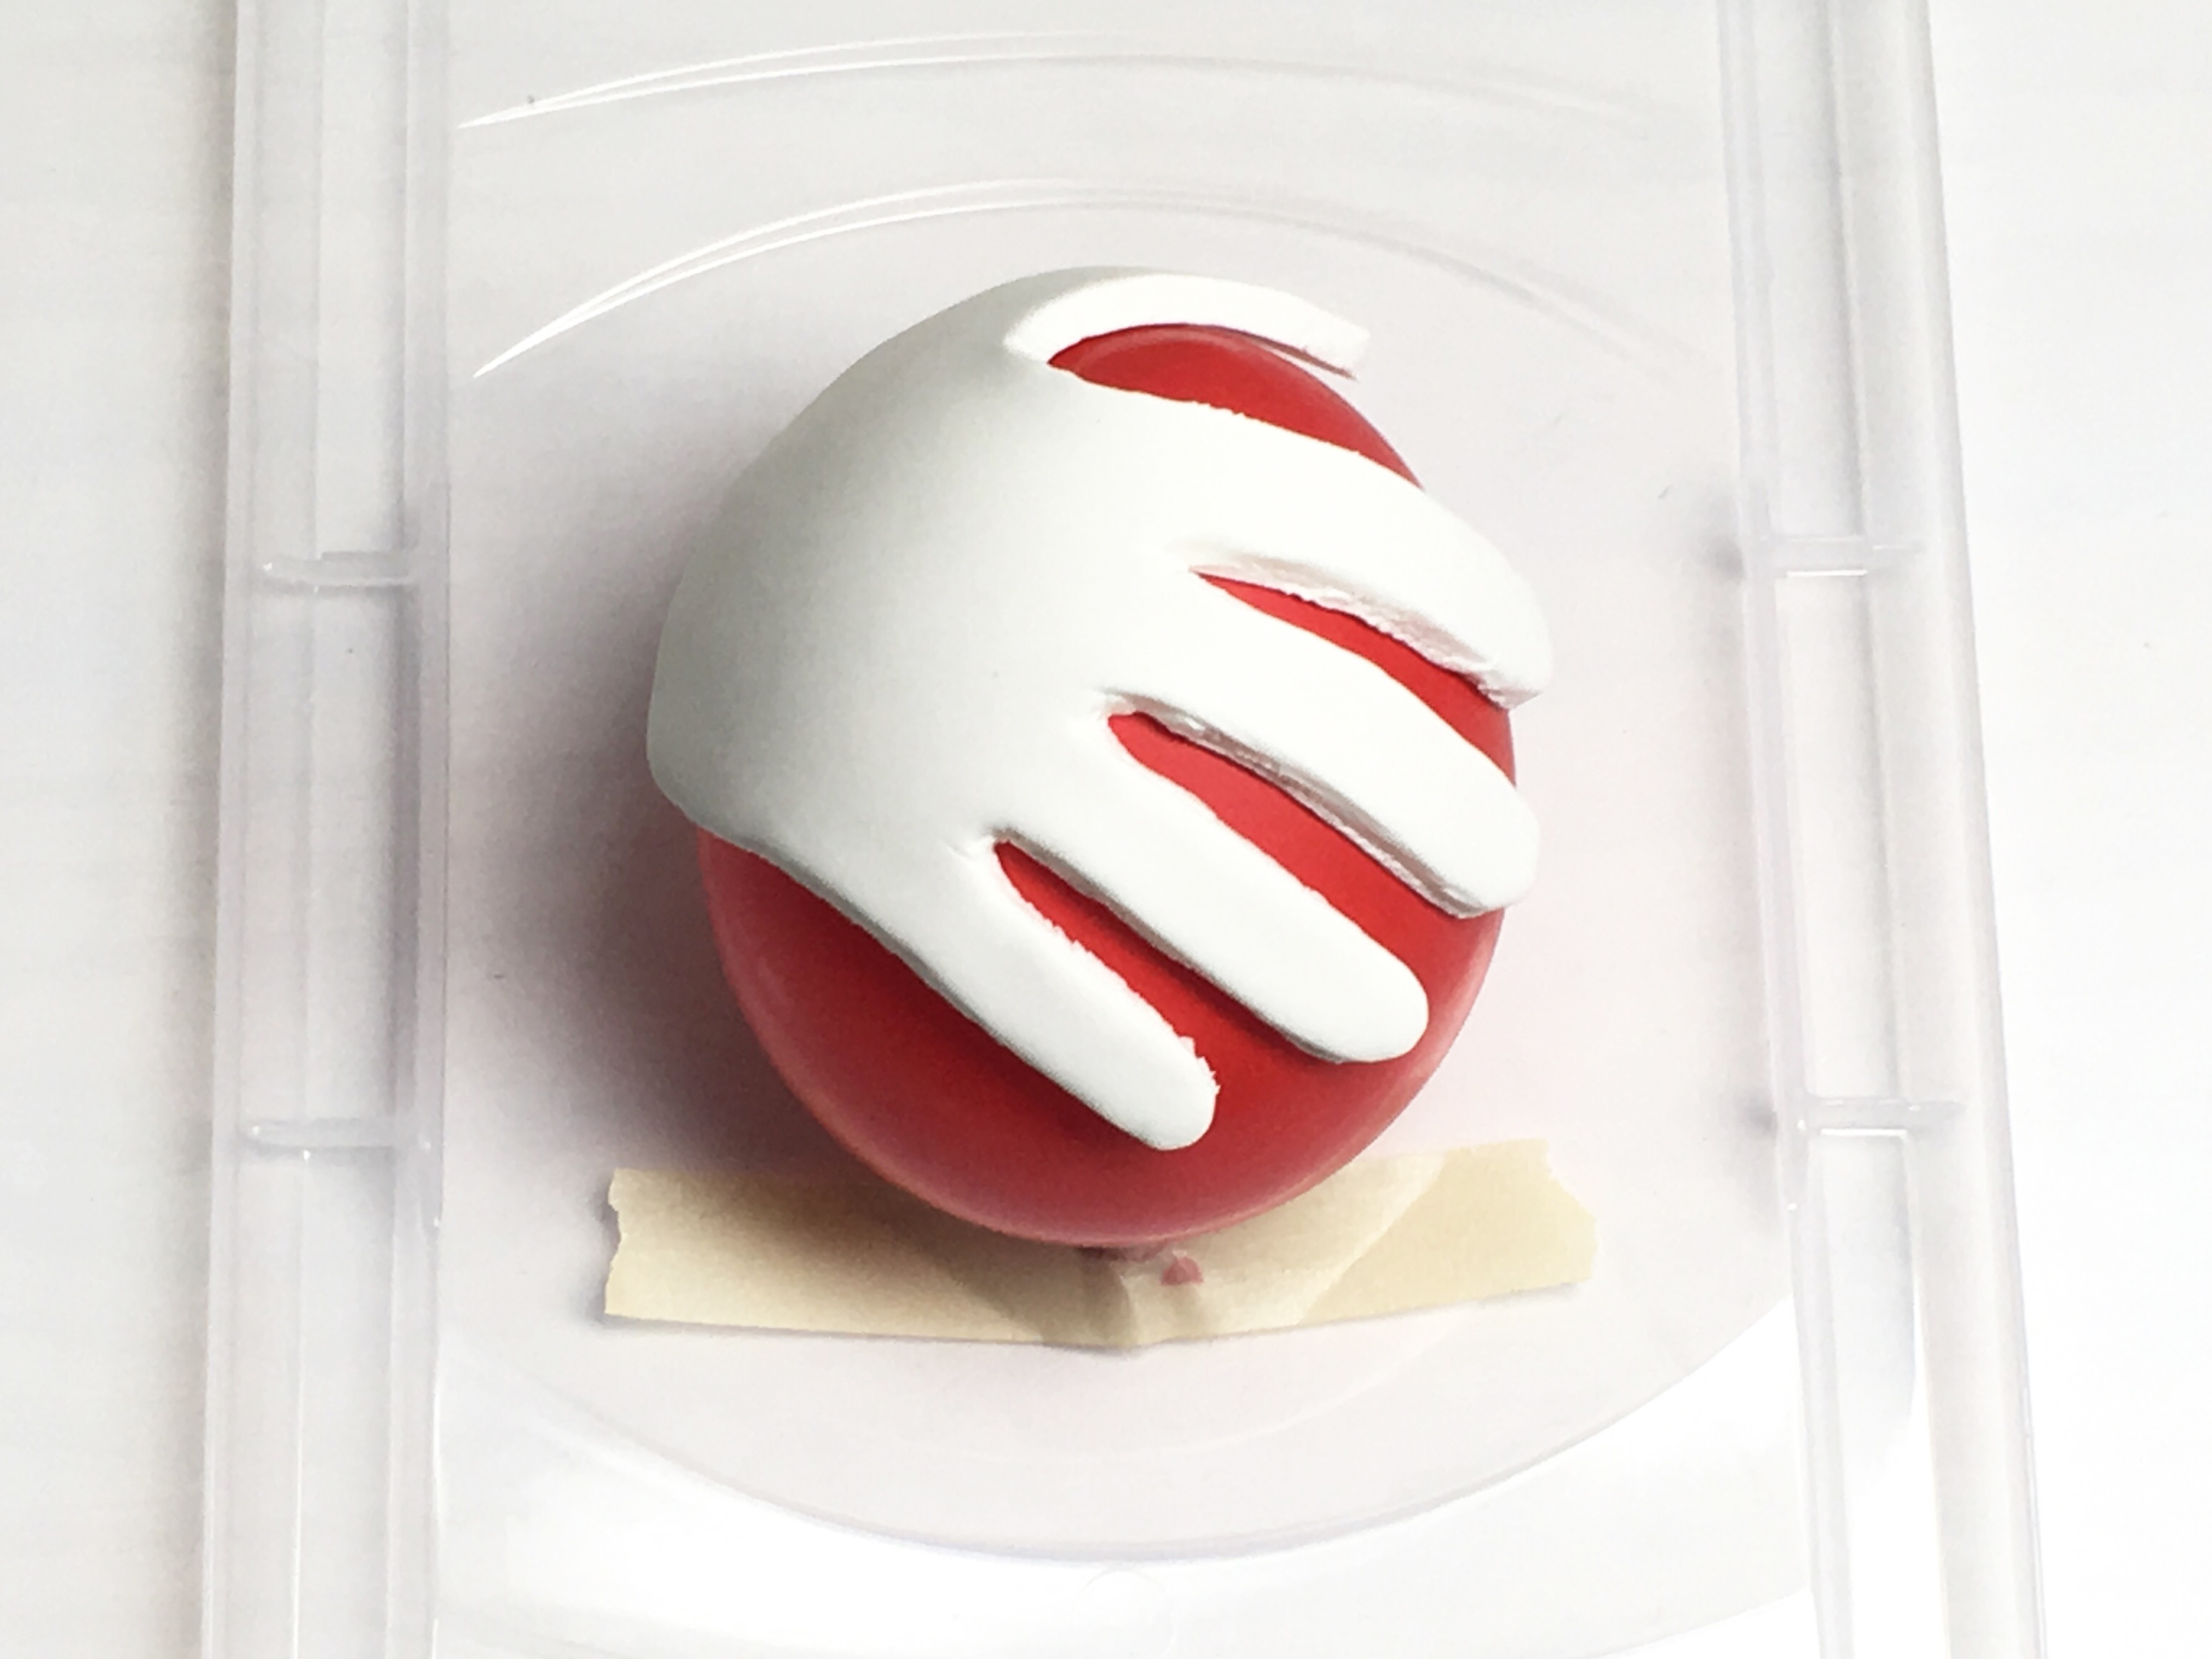
Lay the paper hand down on the clay and cut out the handprint with a clay sculpting knife (a plastic knife will work here too!).

Step 6
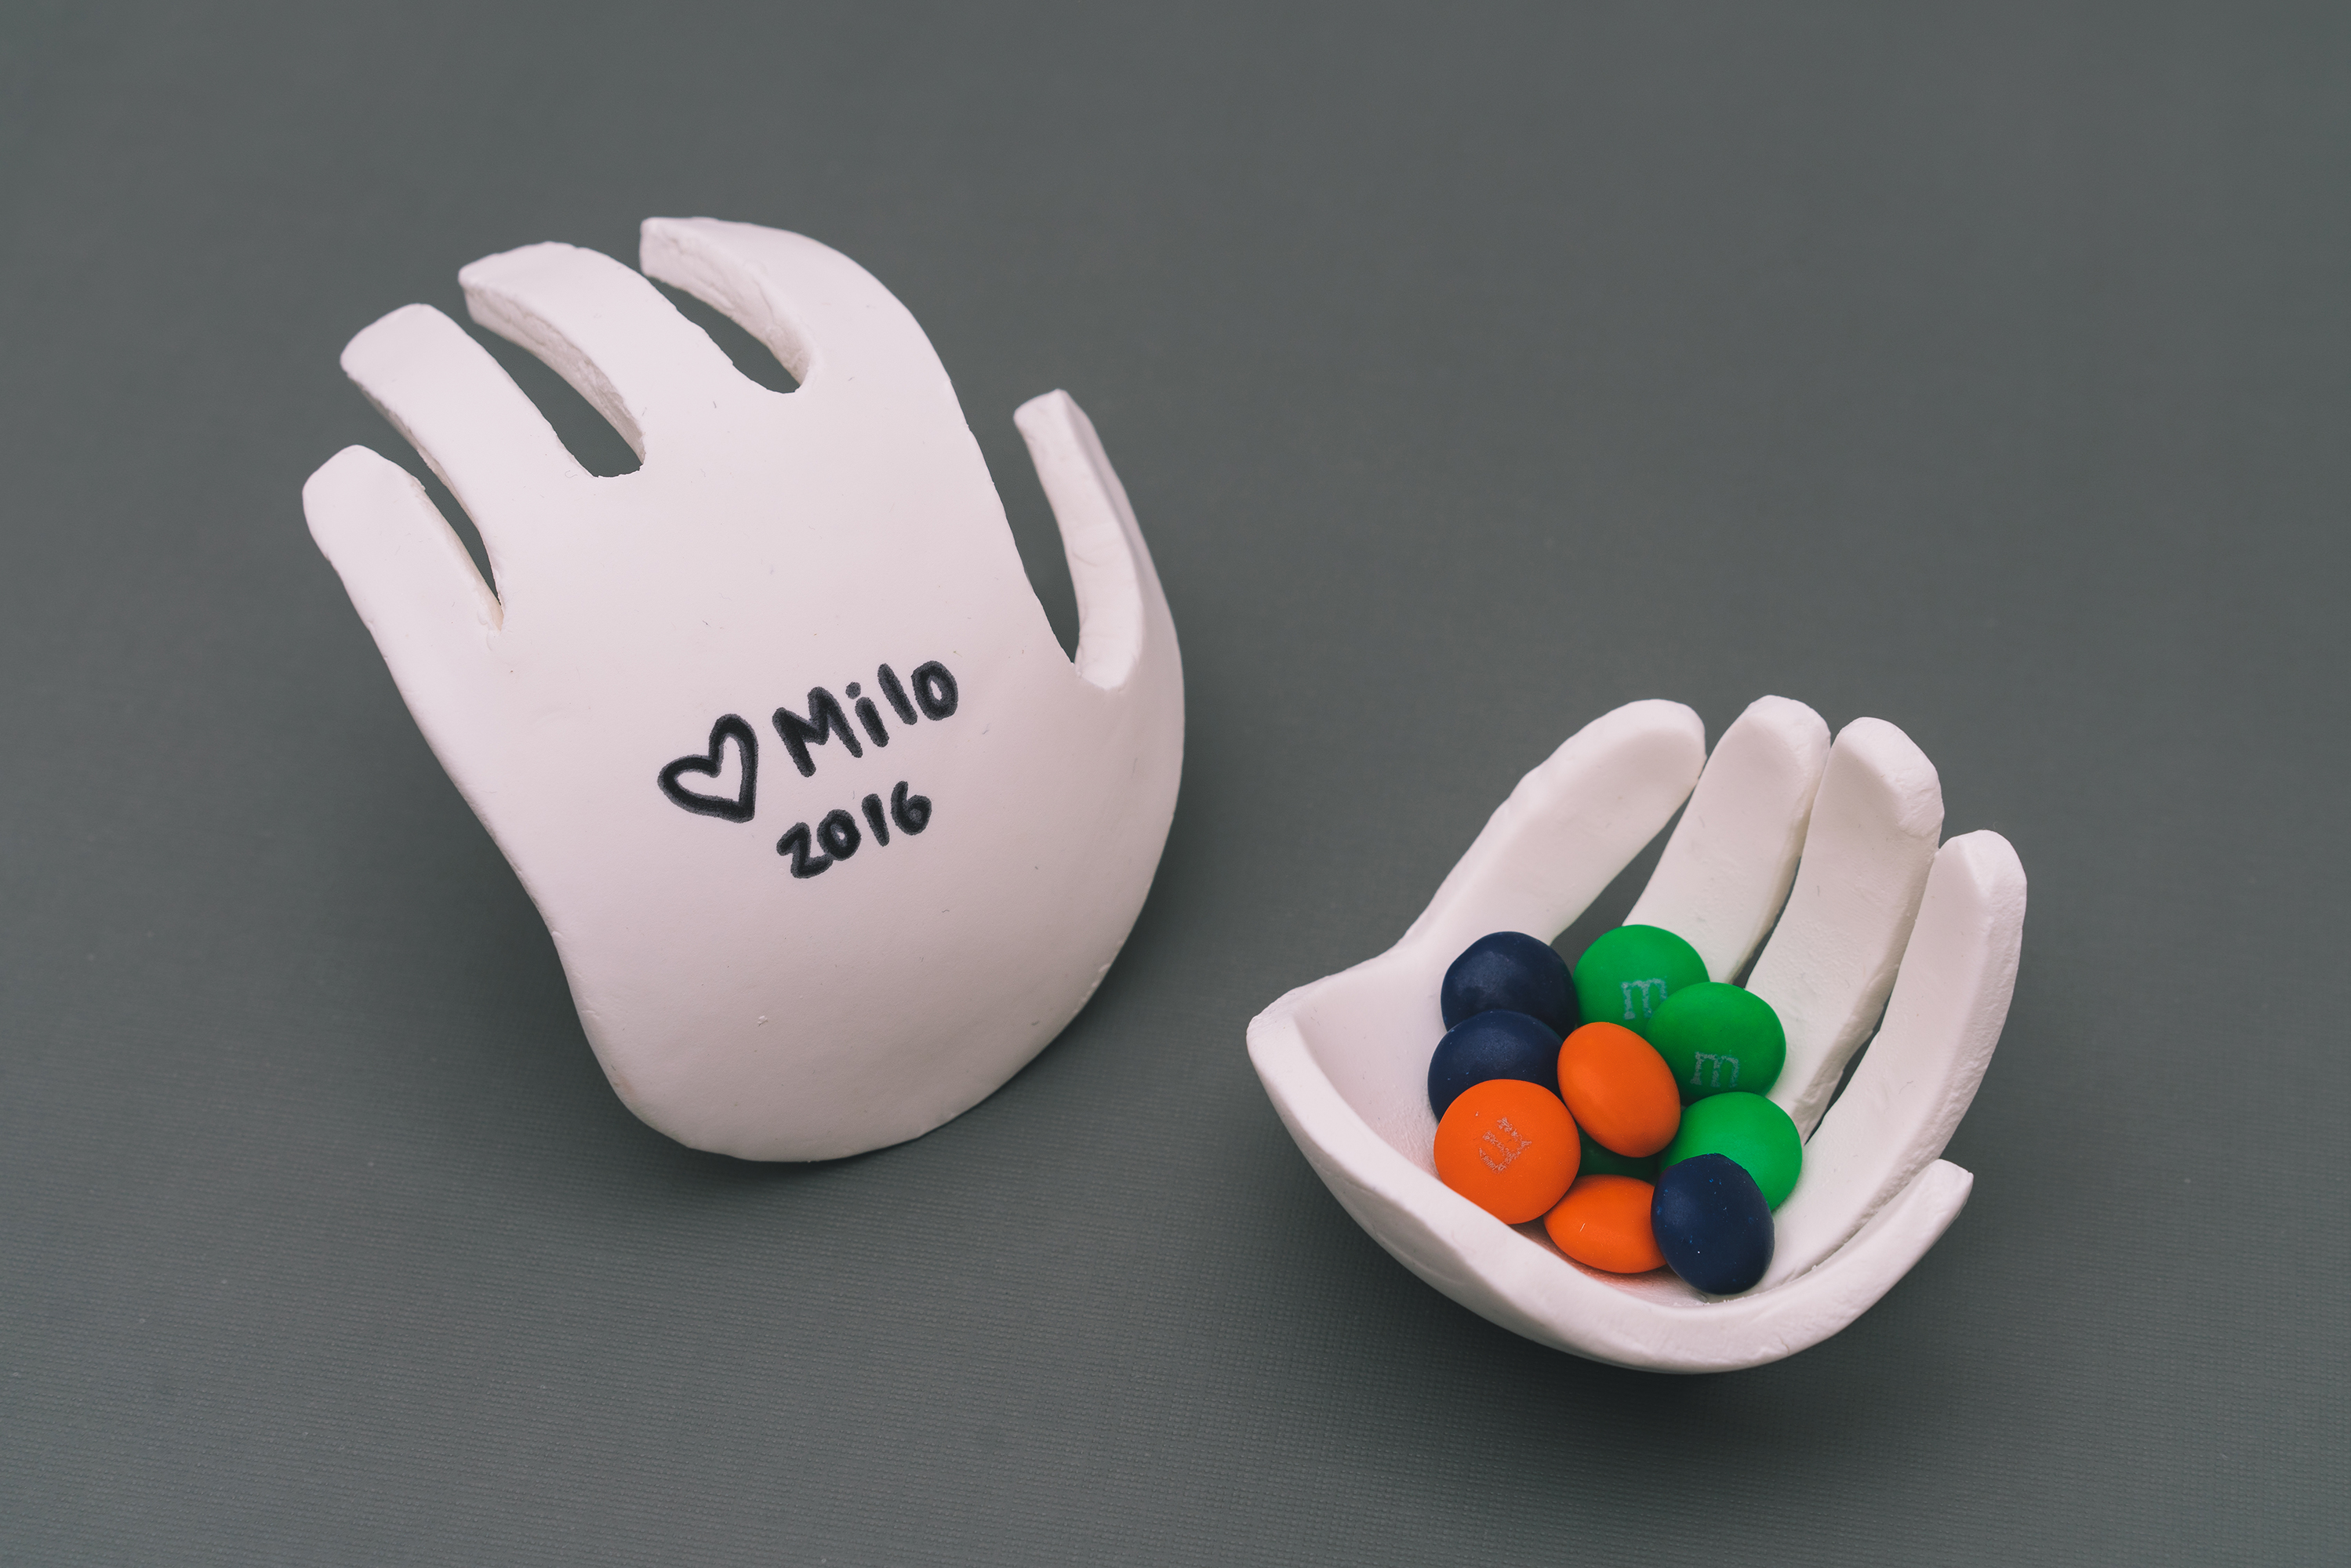
Smooth out the cut edges with your fingers and then gently lay it over the balloon and form it in place. Let the clay dry thoroughly. Depending on which clay you use, the clay may have to dry overnight.
Done!
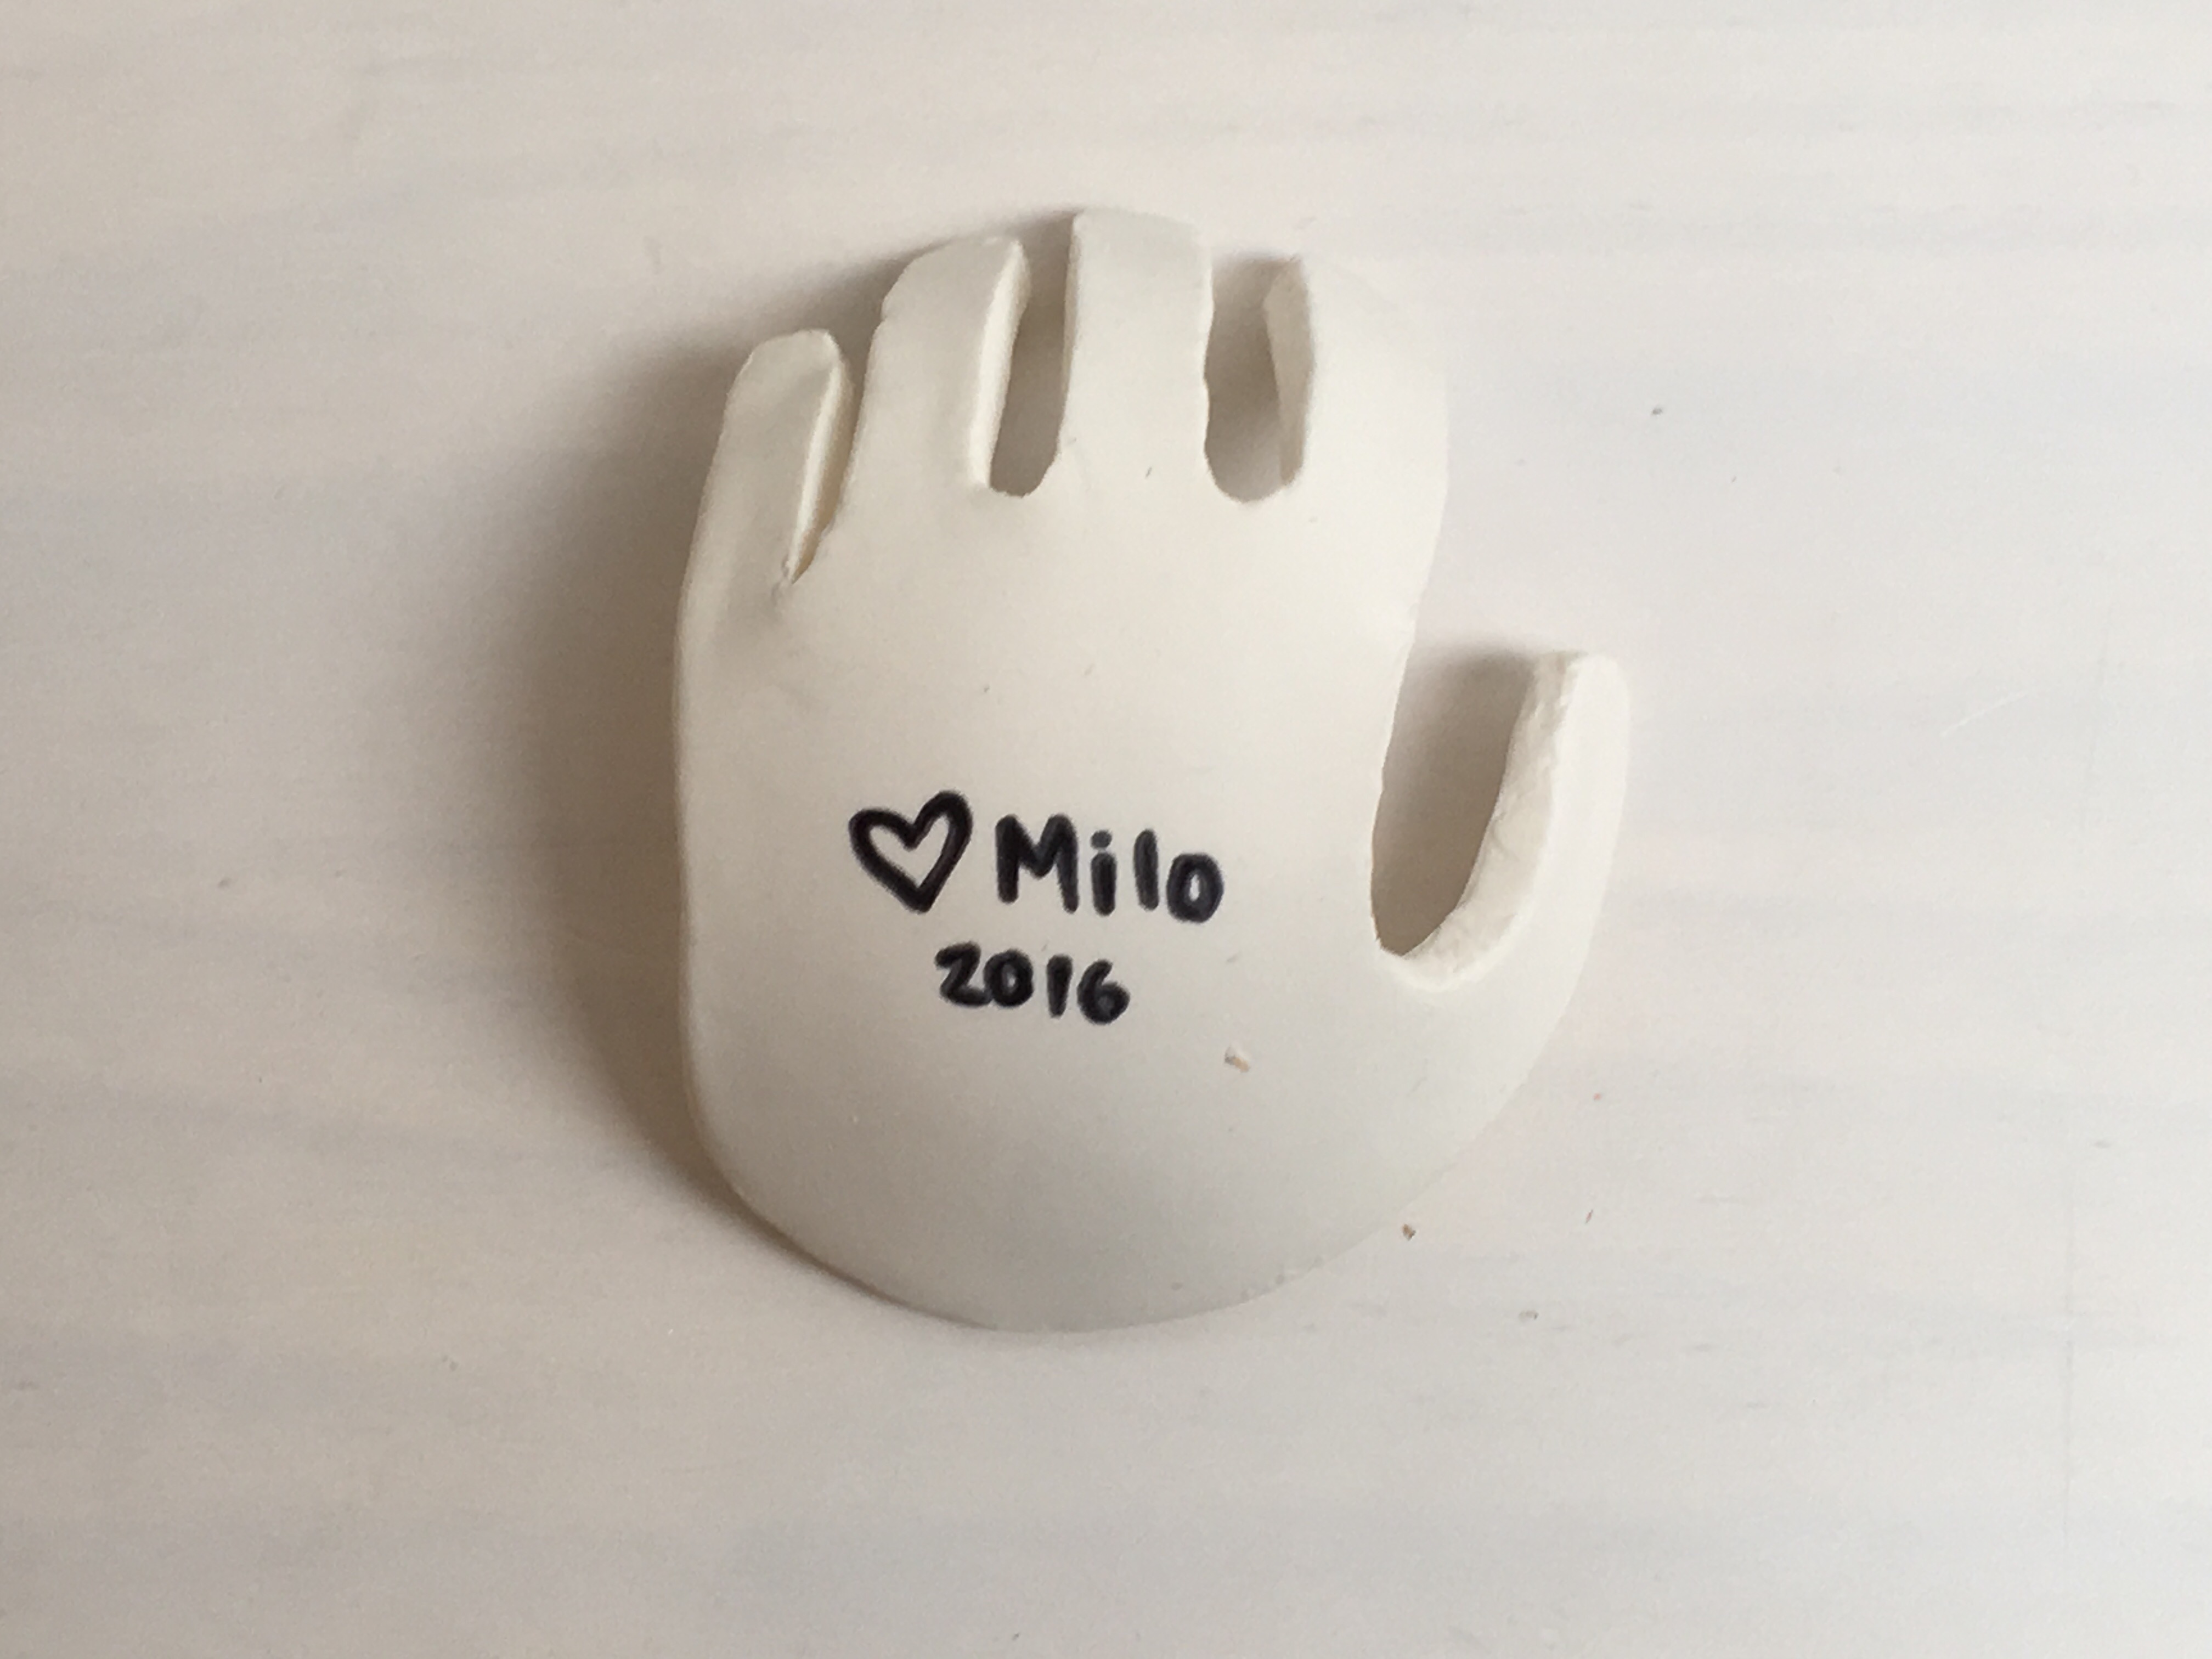
When the clay was dry, I wrote my child's name on the bottom along with the date. You could also paint them or glue on other embellishments but we decided to keep ours plain and simple! Show us your hand-shaped dishes in the comment below!