
Step-by-step tutorial
Step 1
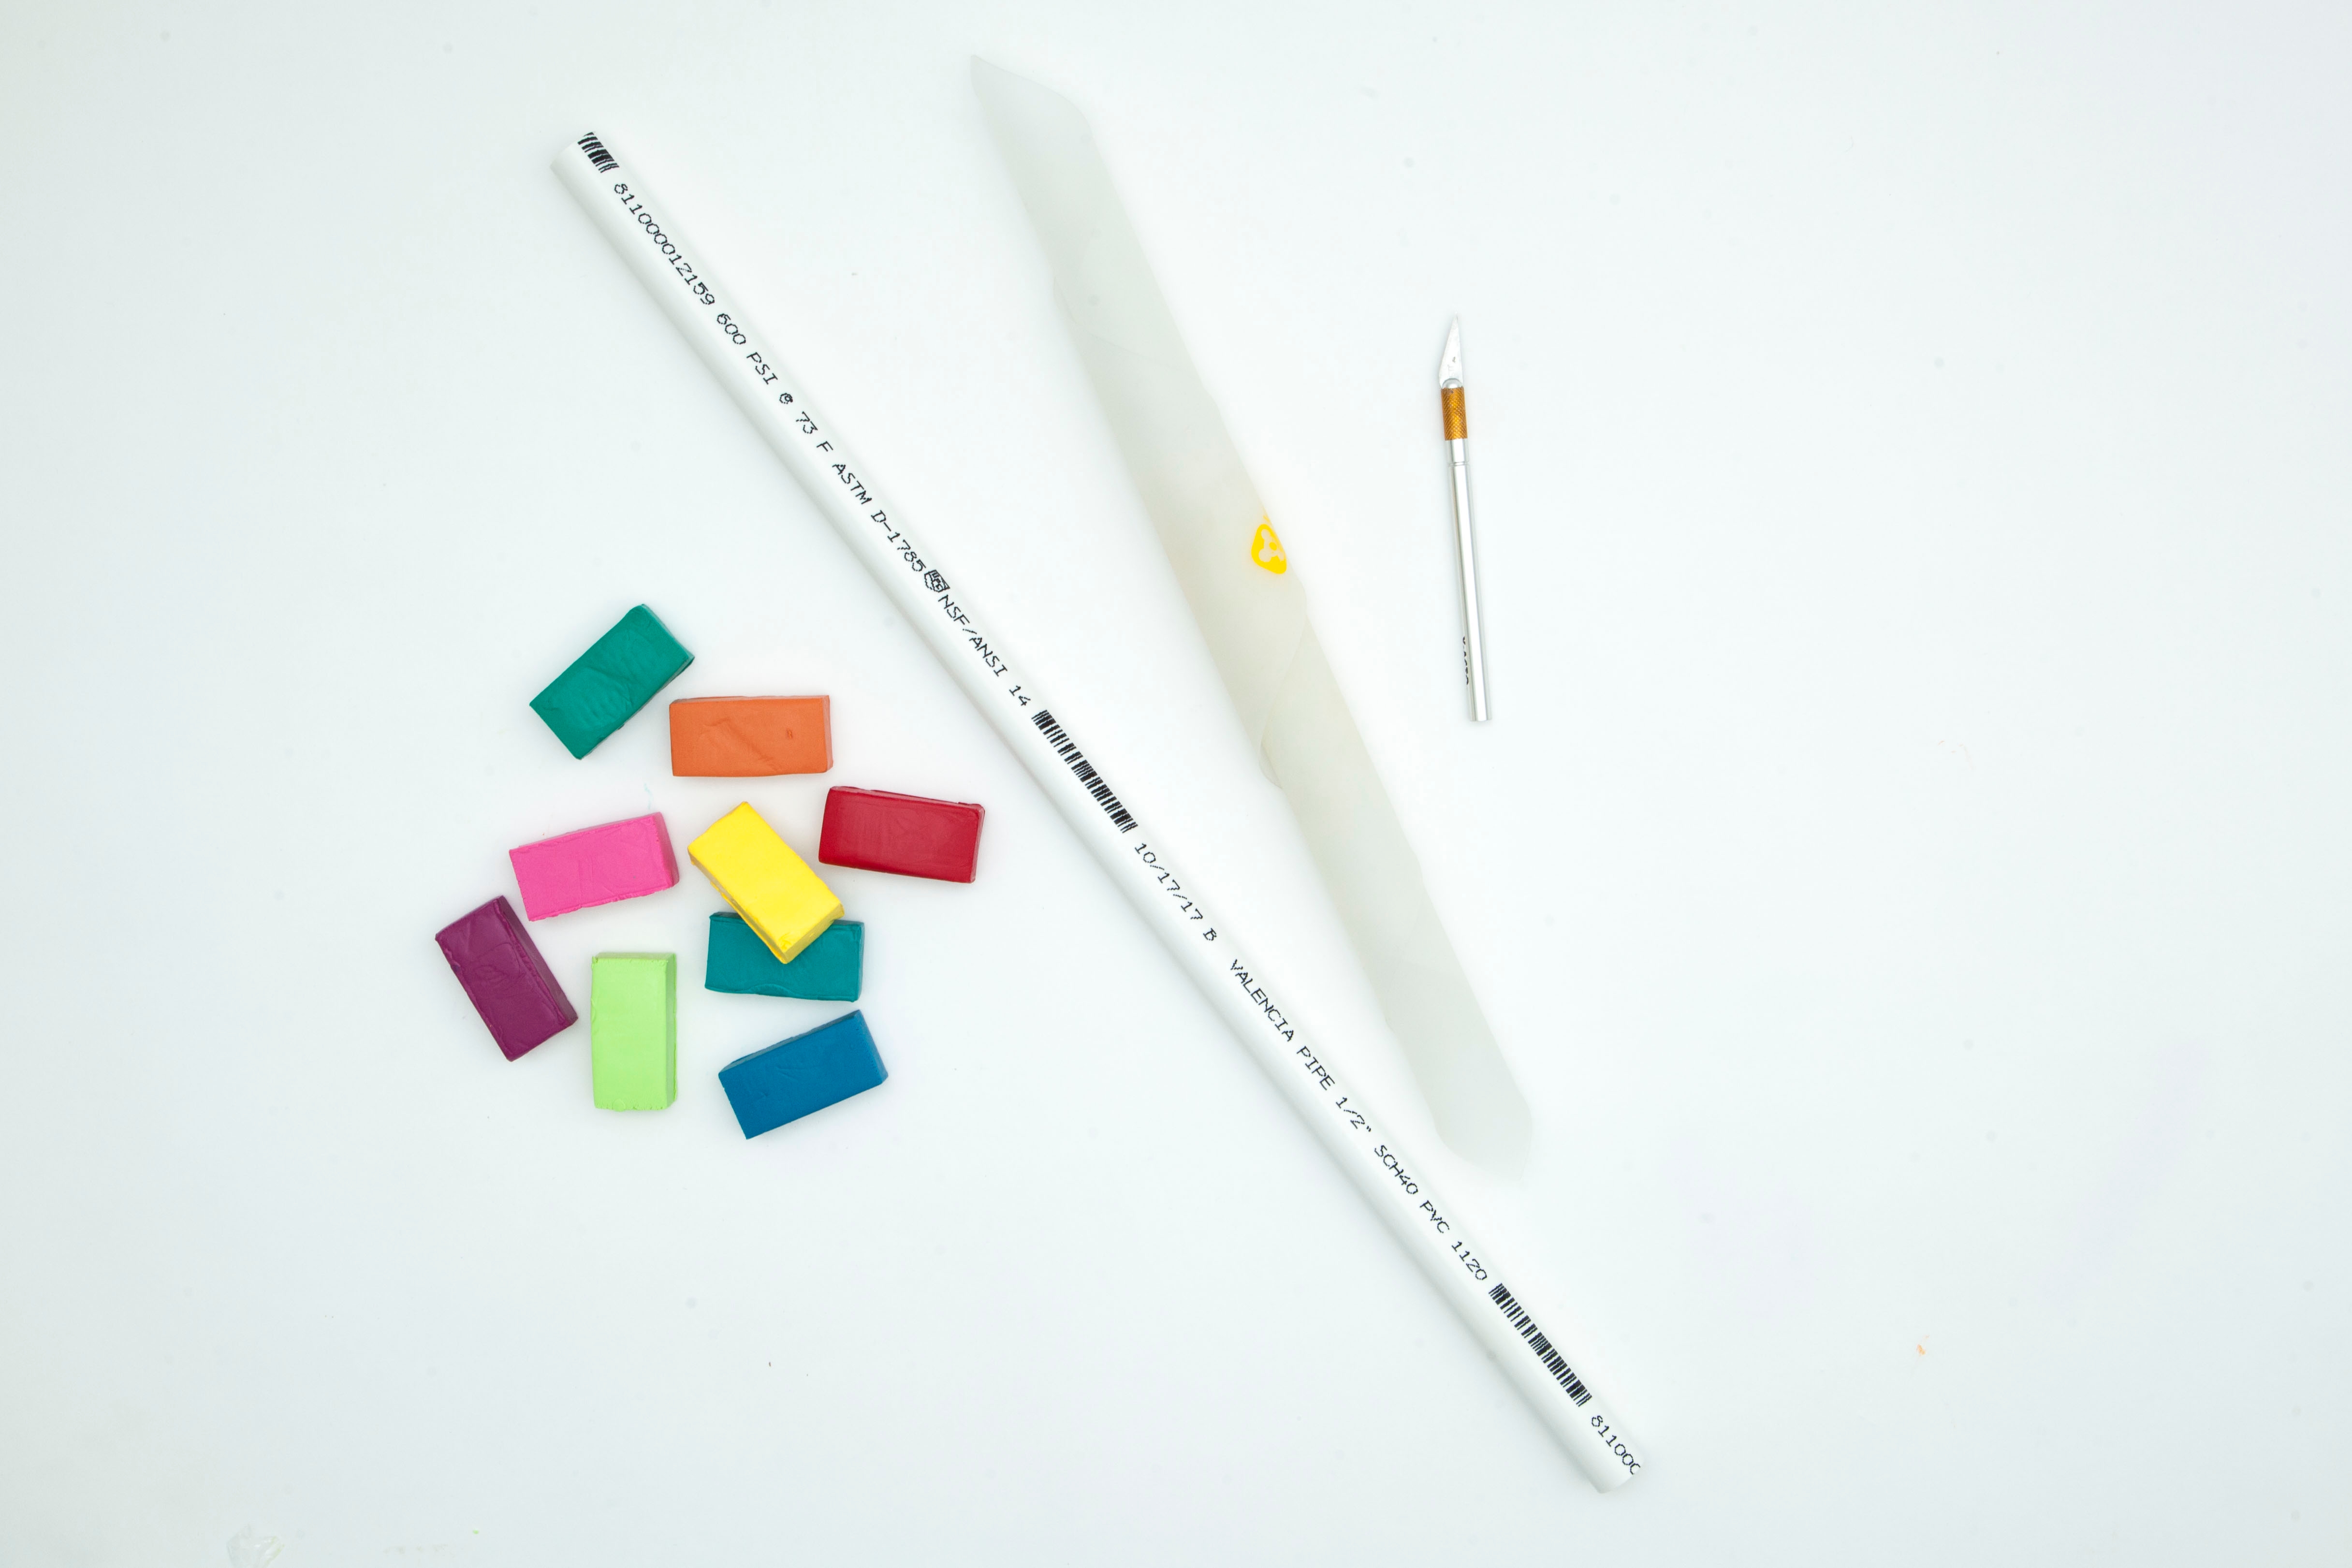
Gather your materials.

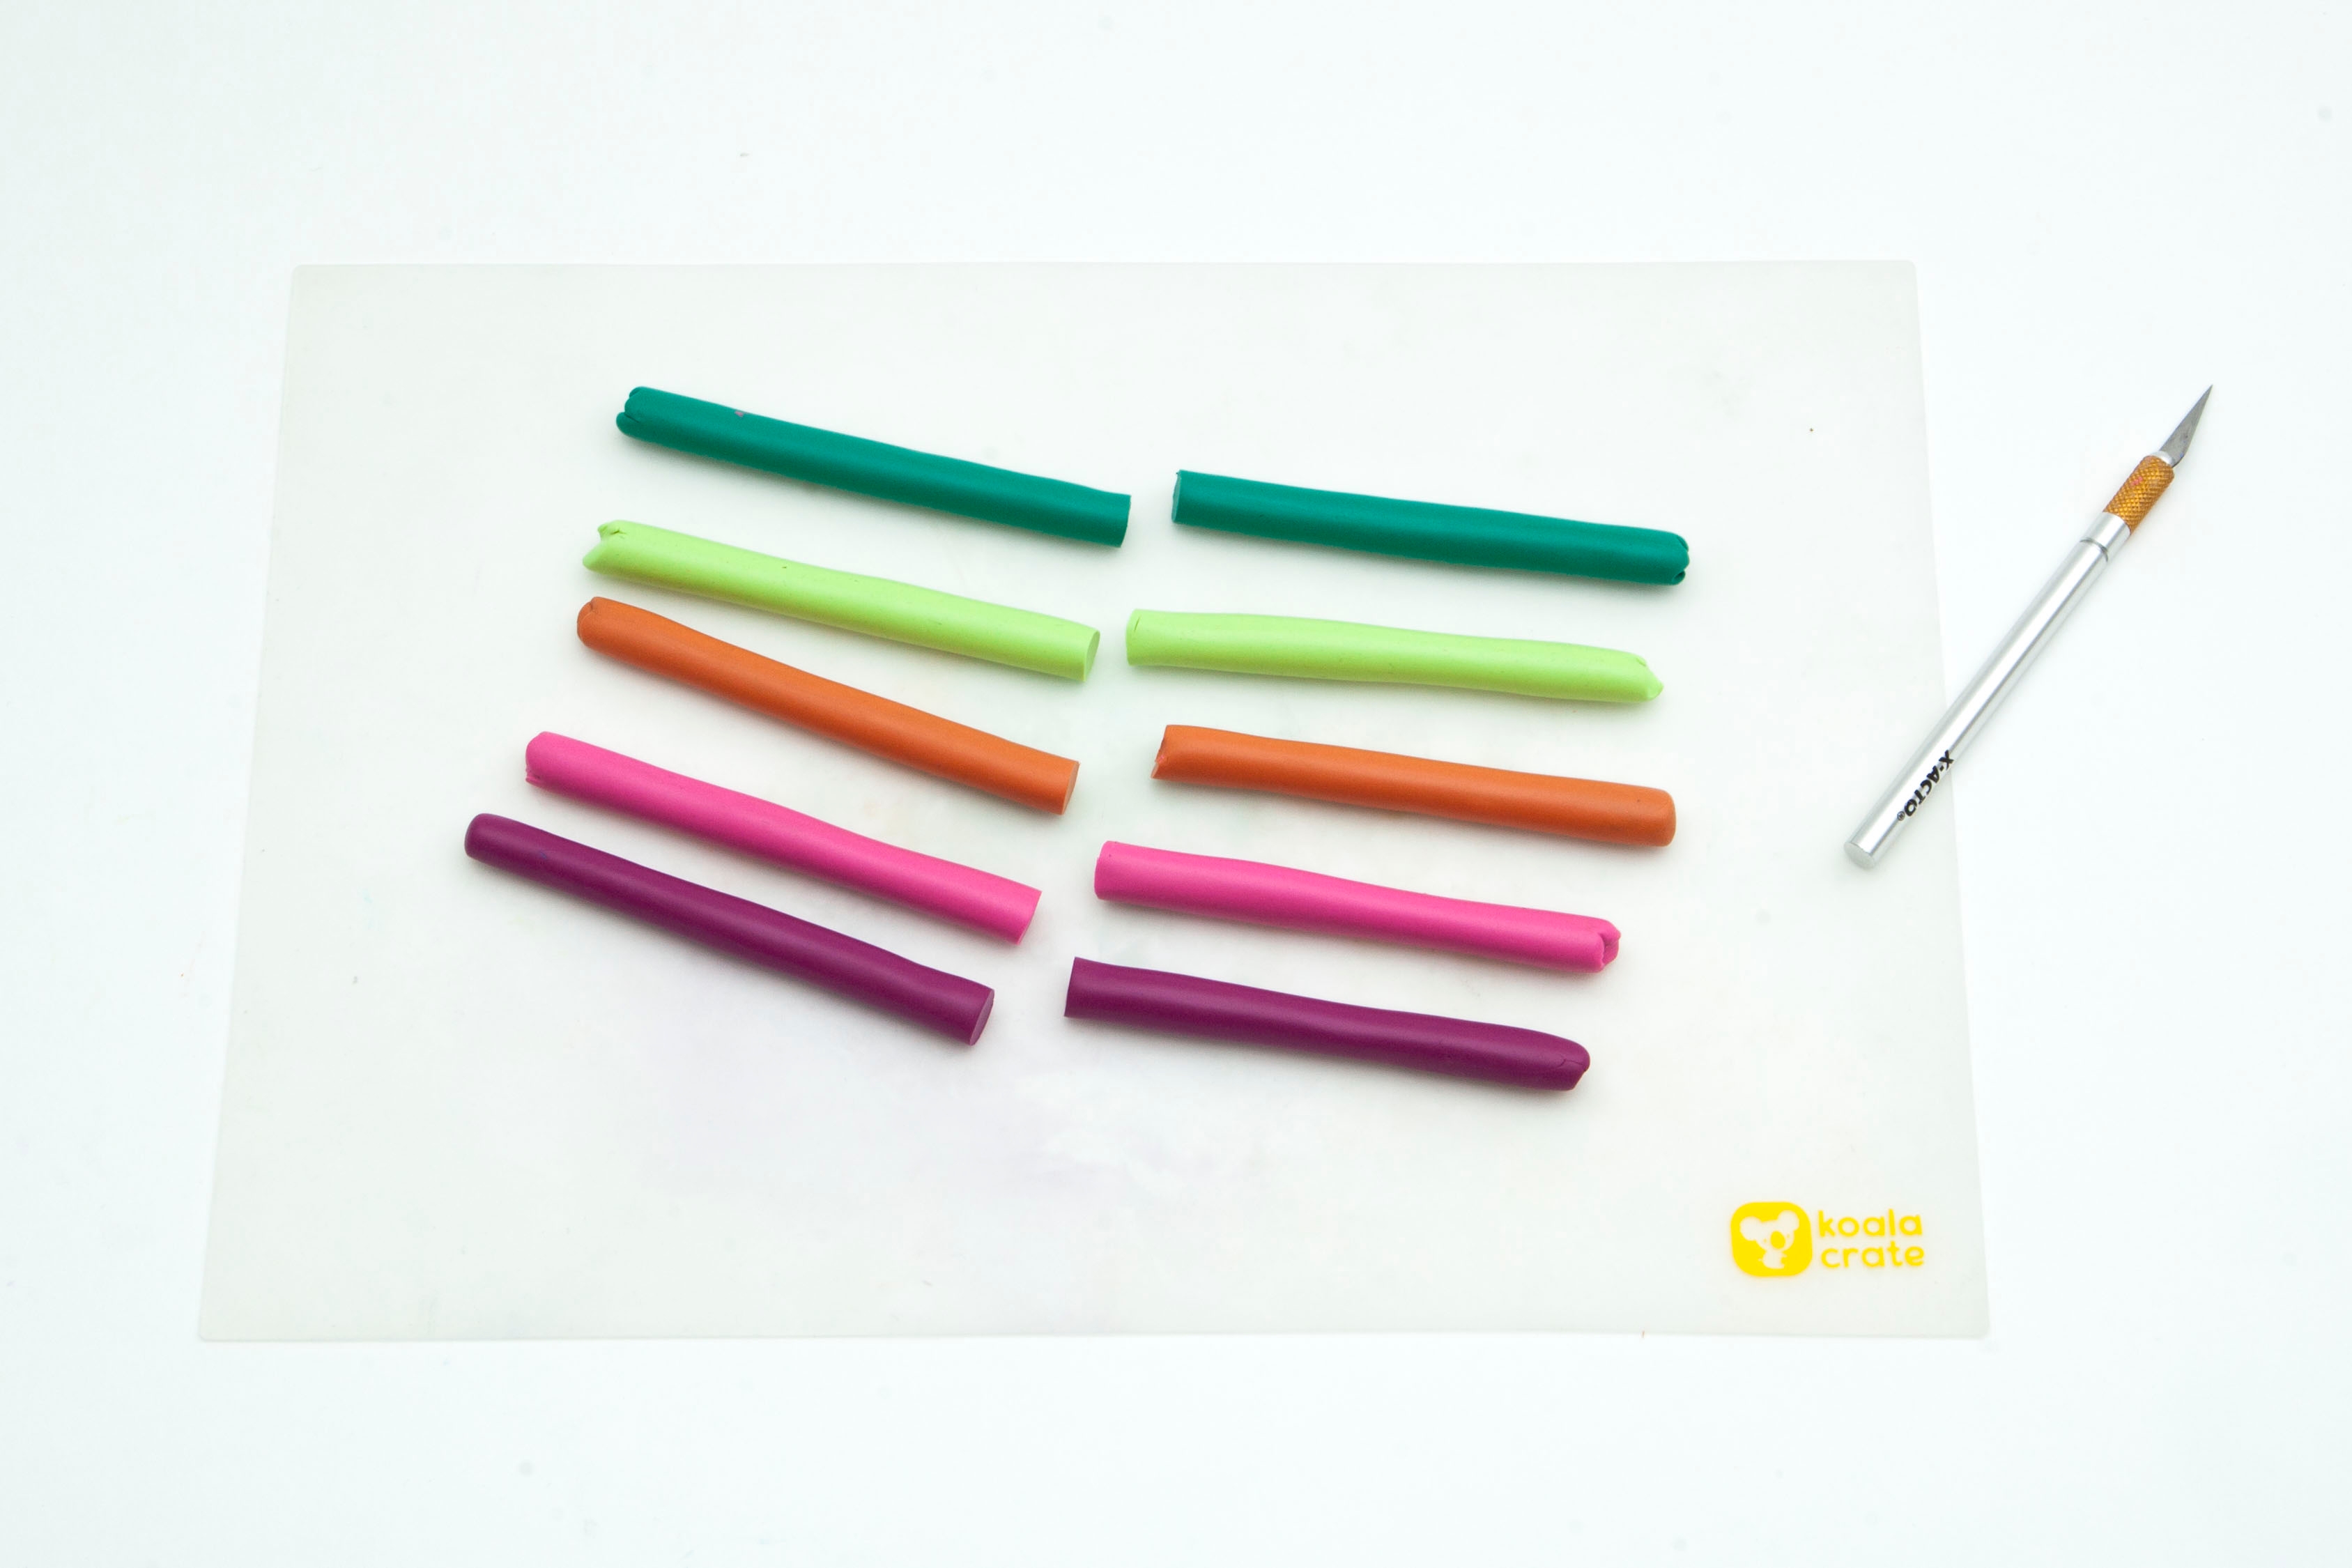
Step 2
Work each color of clay in your hands and shape it into a ½-inch wide rod. Then, cut each rod in half.
Step 3
Take a light green rod and roll it out. Then, trim the edges to make a rectangle the same length as the other clay rods.
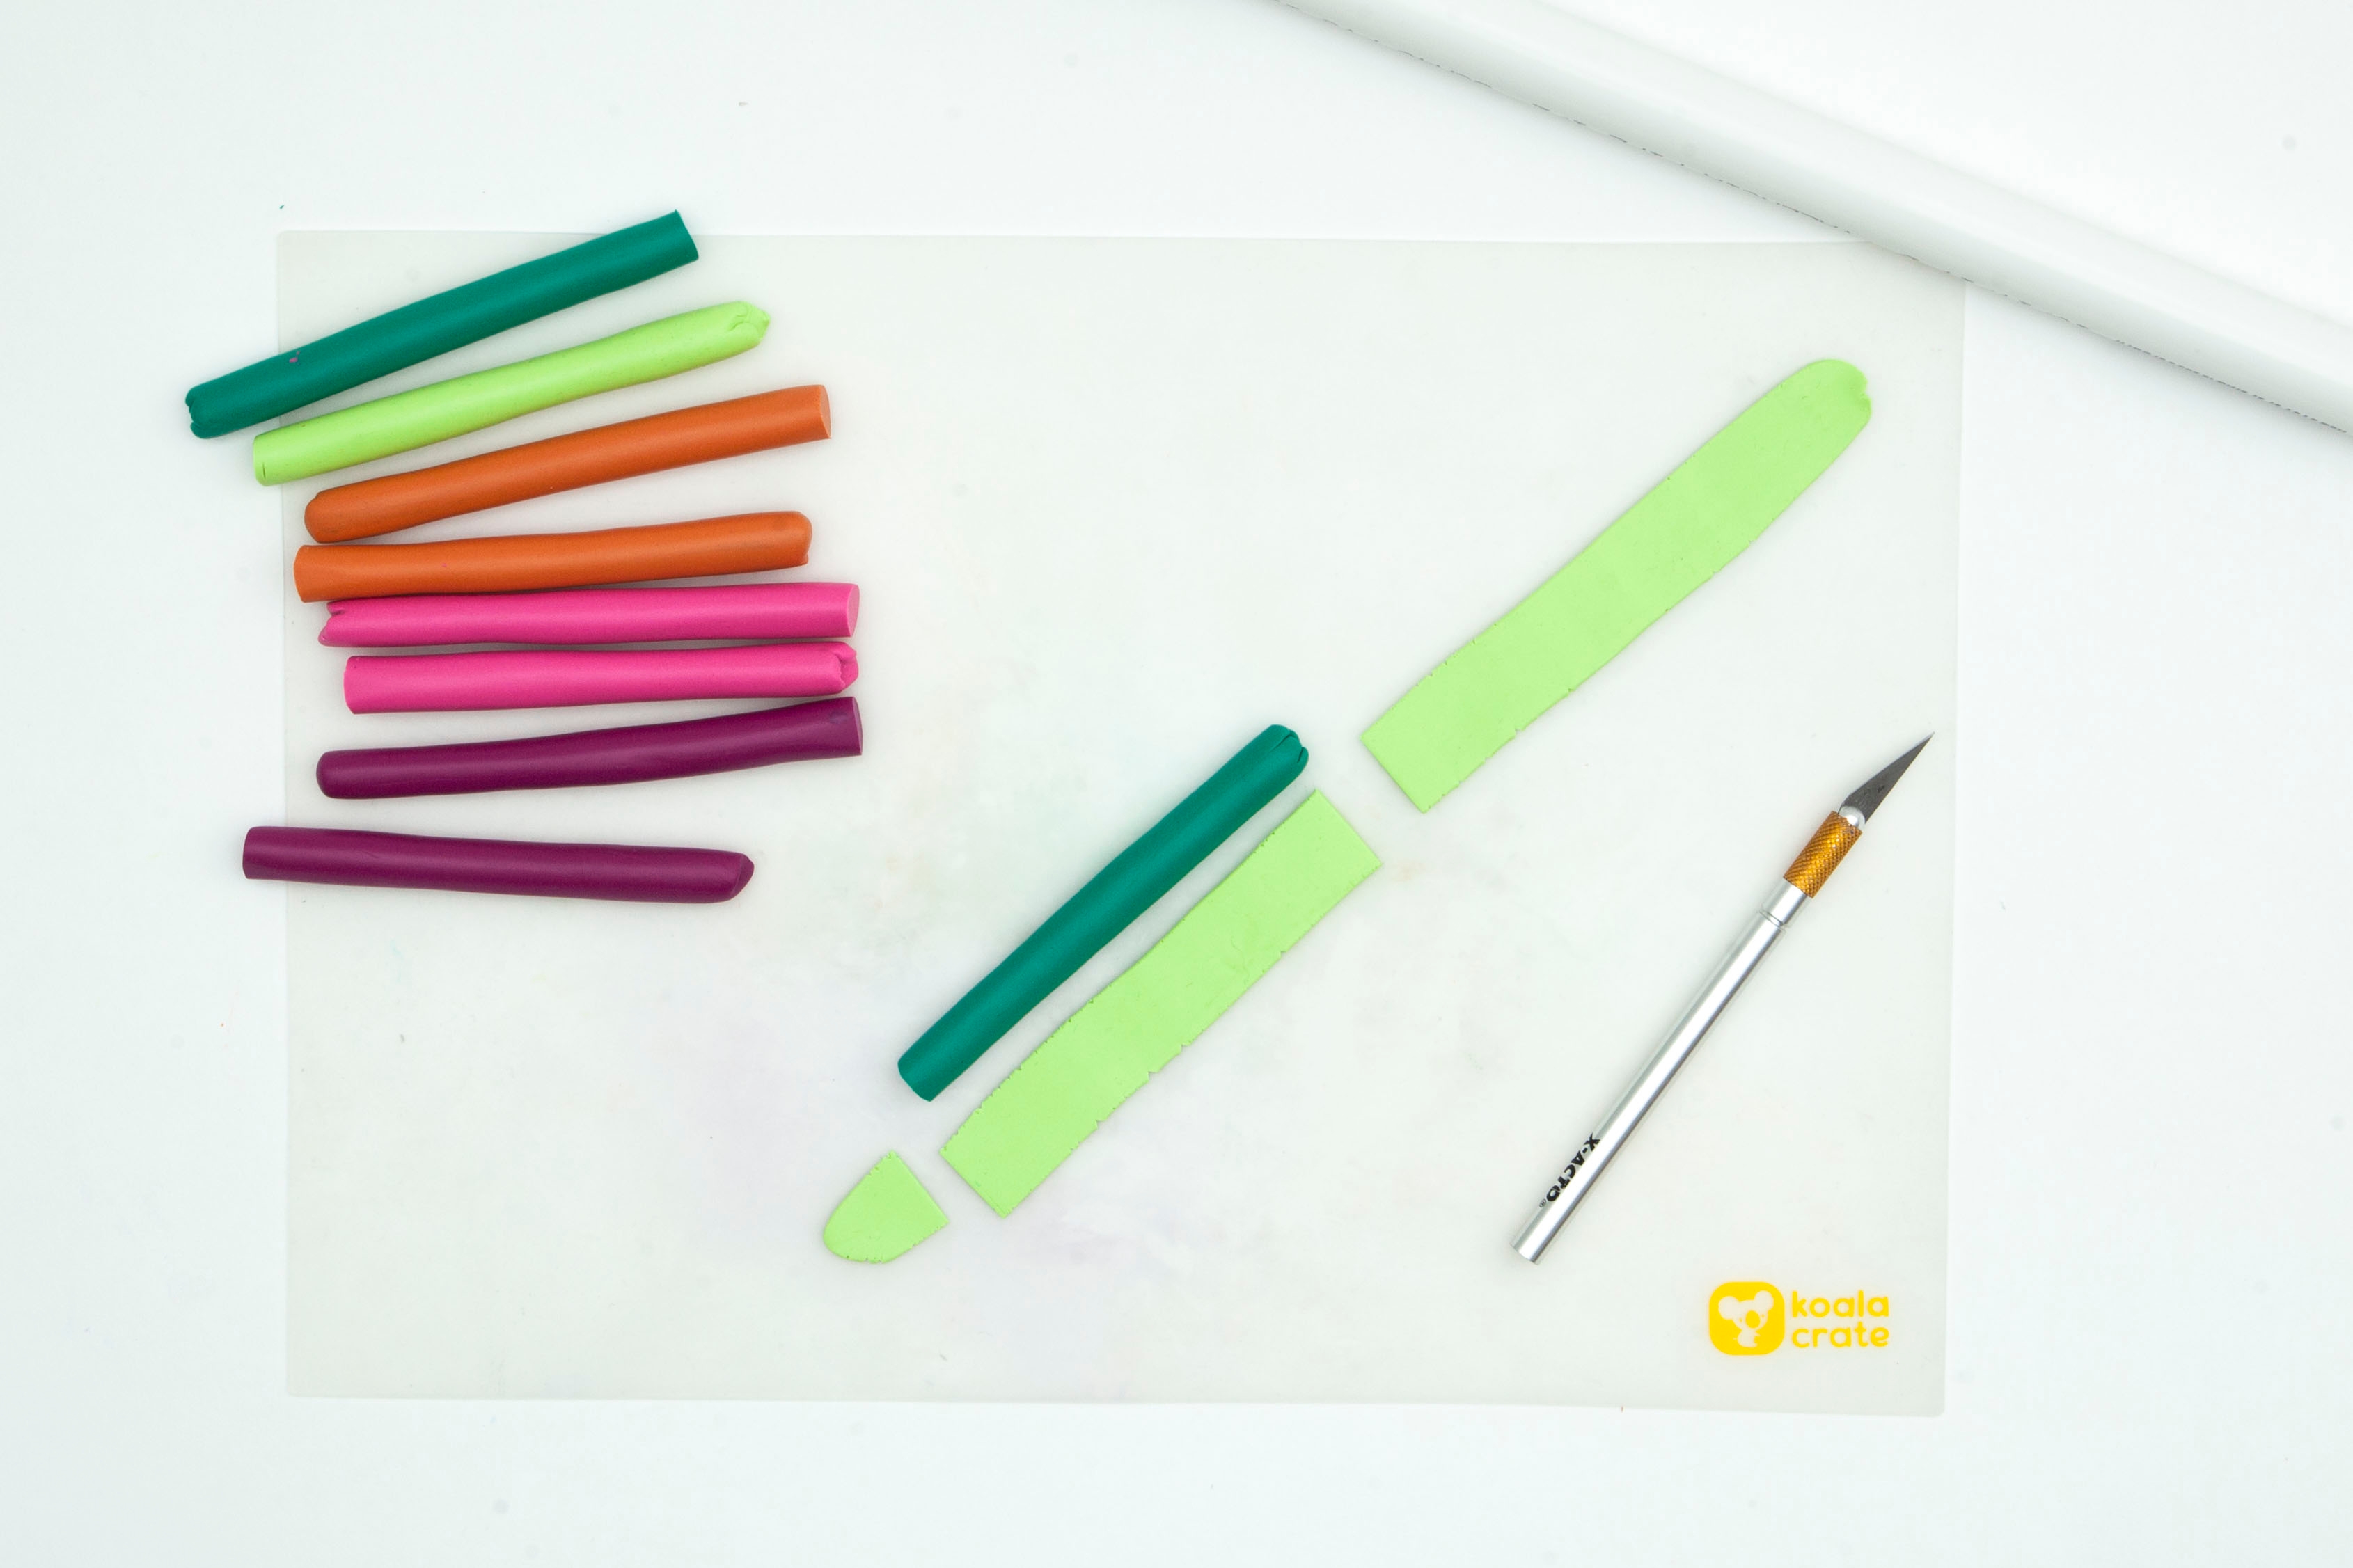
Step 4
Wrap the light green rectangle halfway around the dark green rod.
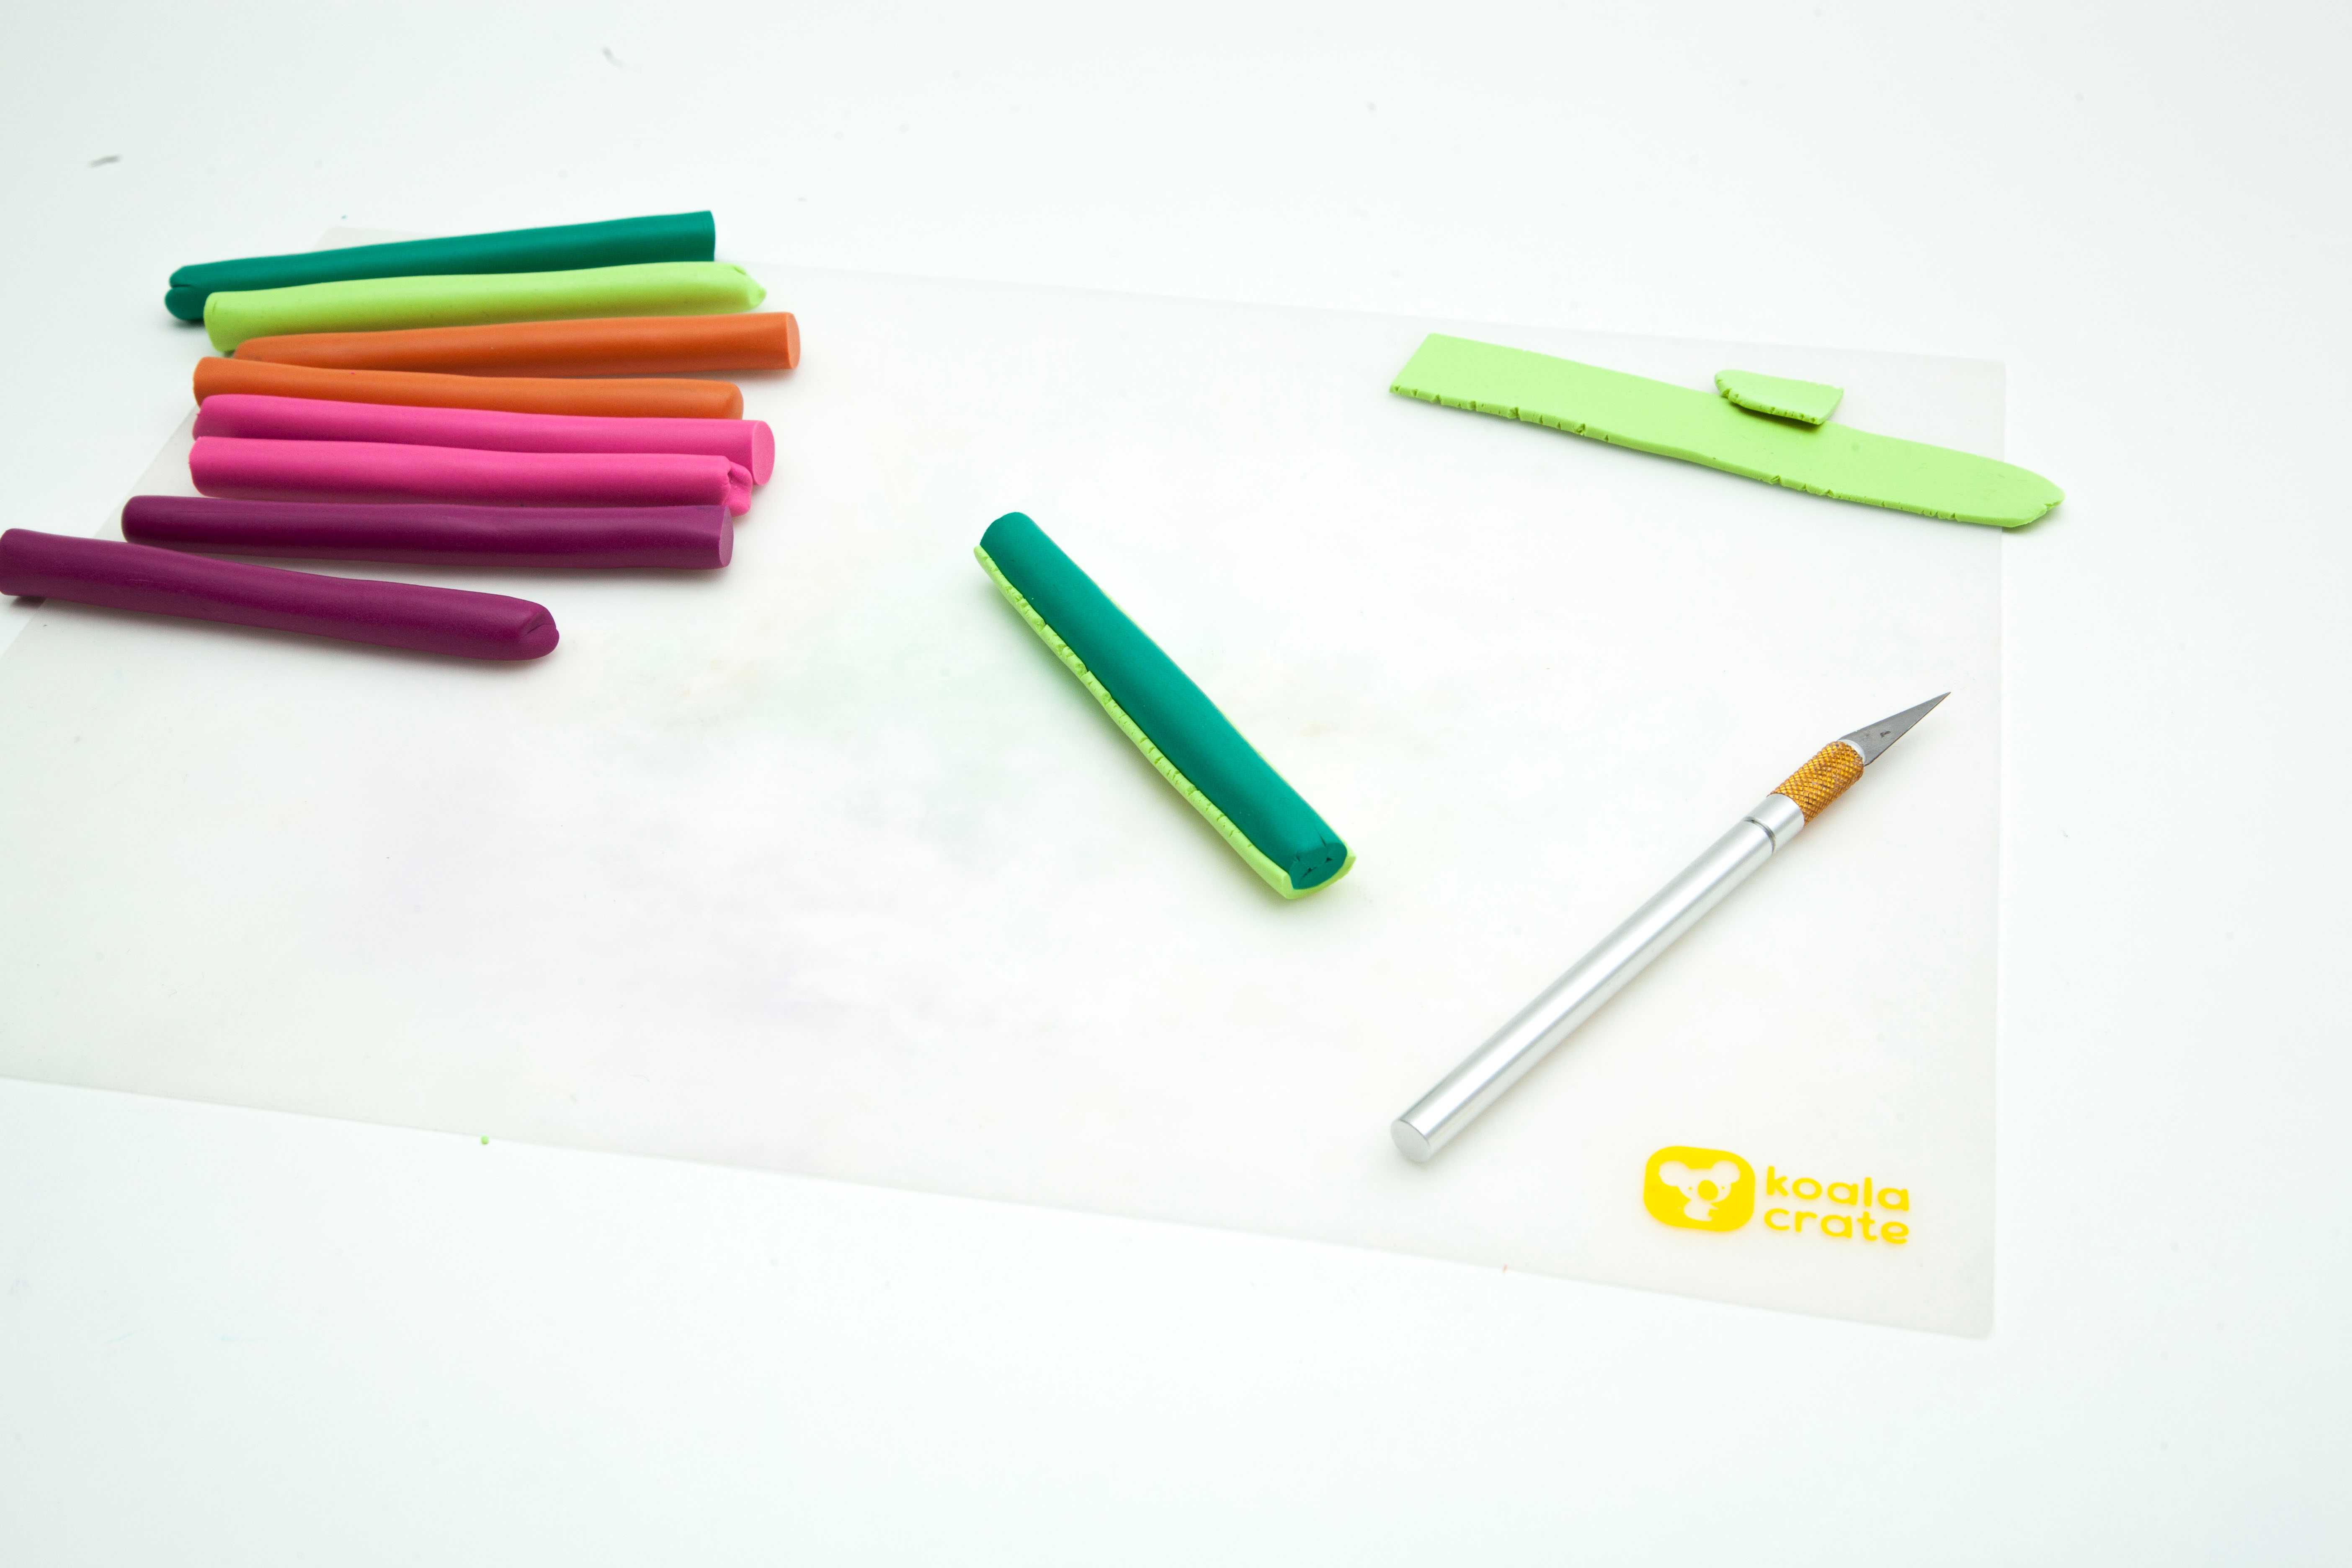
Step 5
Repeat step 3 with the orange and pink rods, and layer them around the green rod too.

Step 6
Slice the dark green rod down the middle, but don’t cut all the way through.
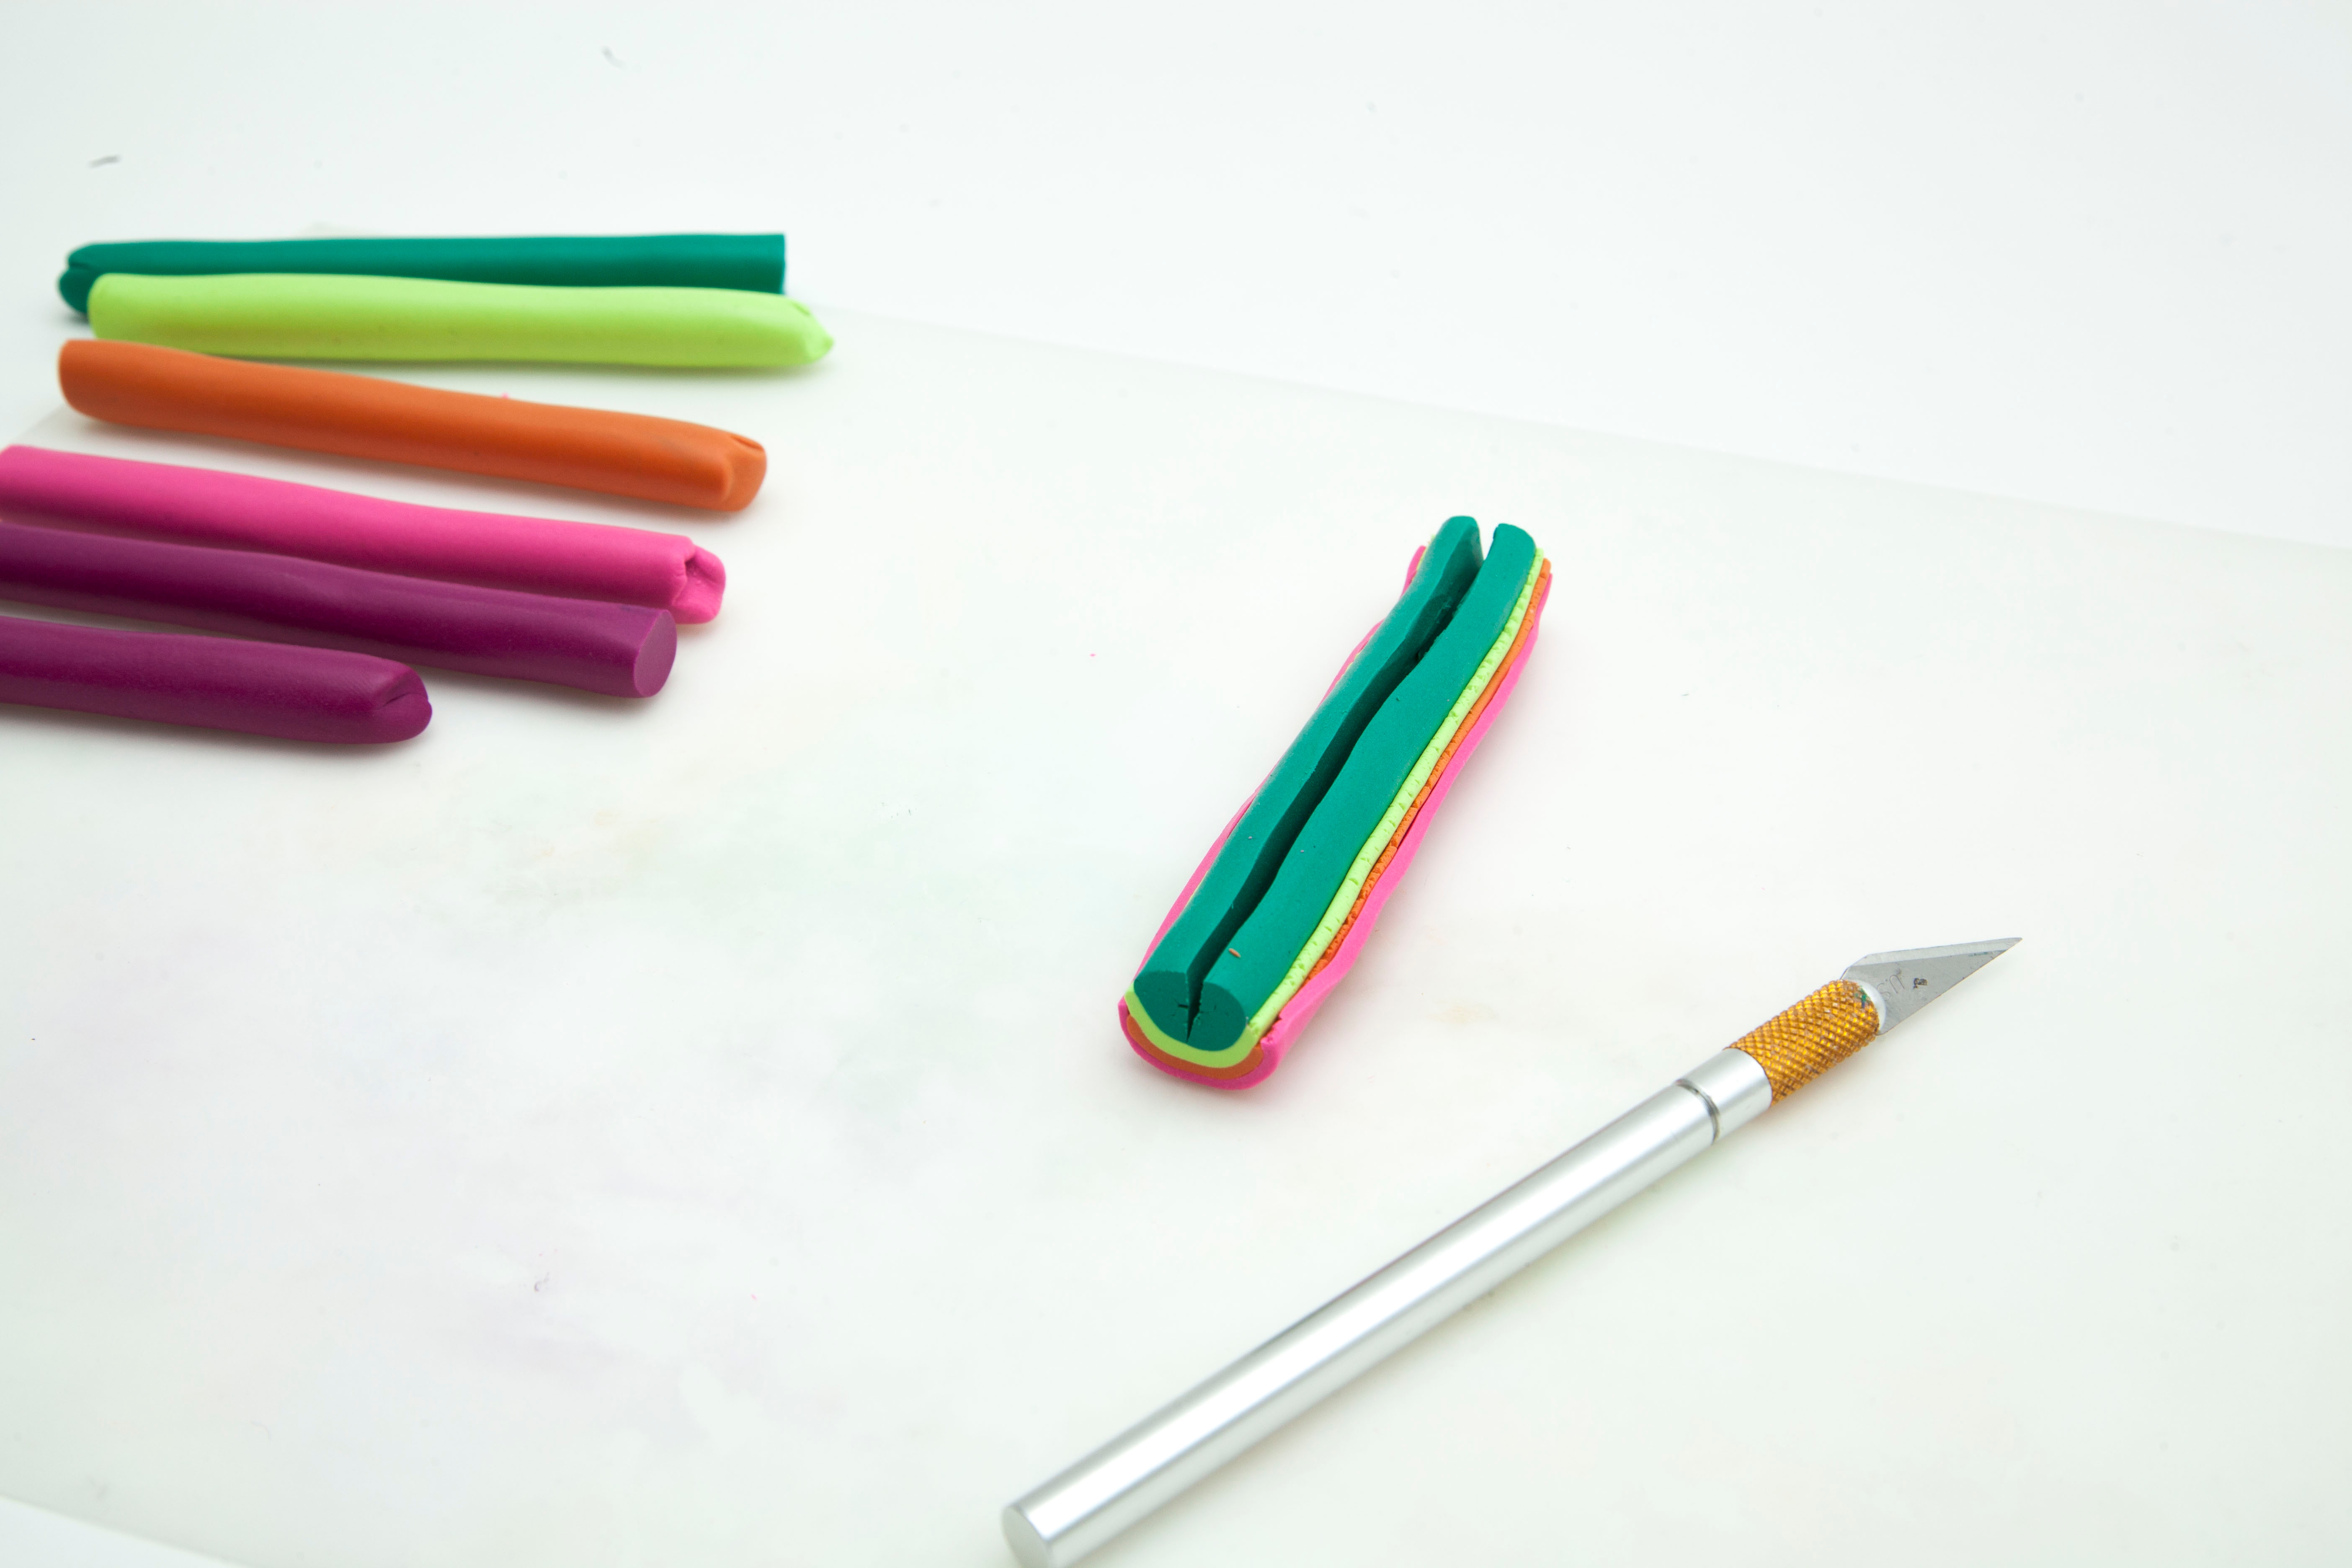
Step 7
Roll out the purple rod into a rectangle. Then, and insert it into the middle of the dark green rod and trim it so that it is flush to the top of the dark green rod.
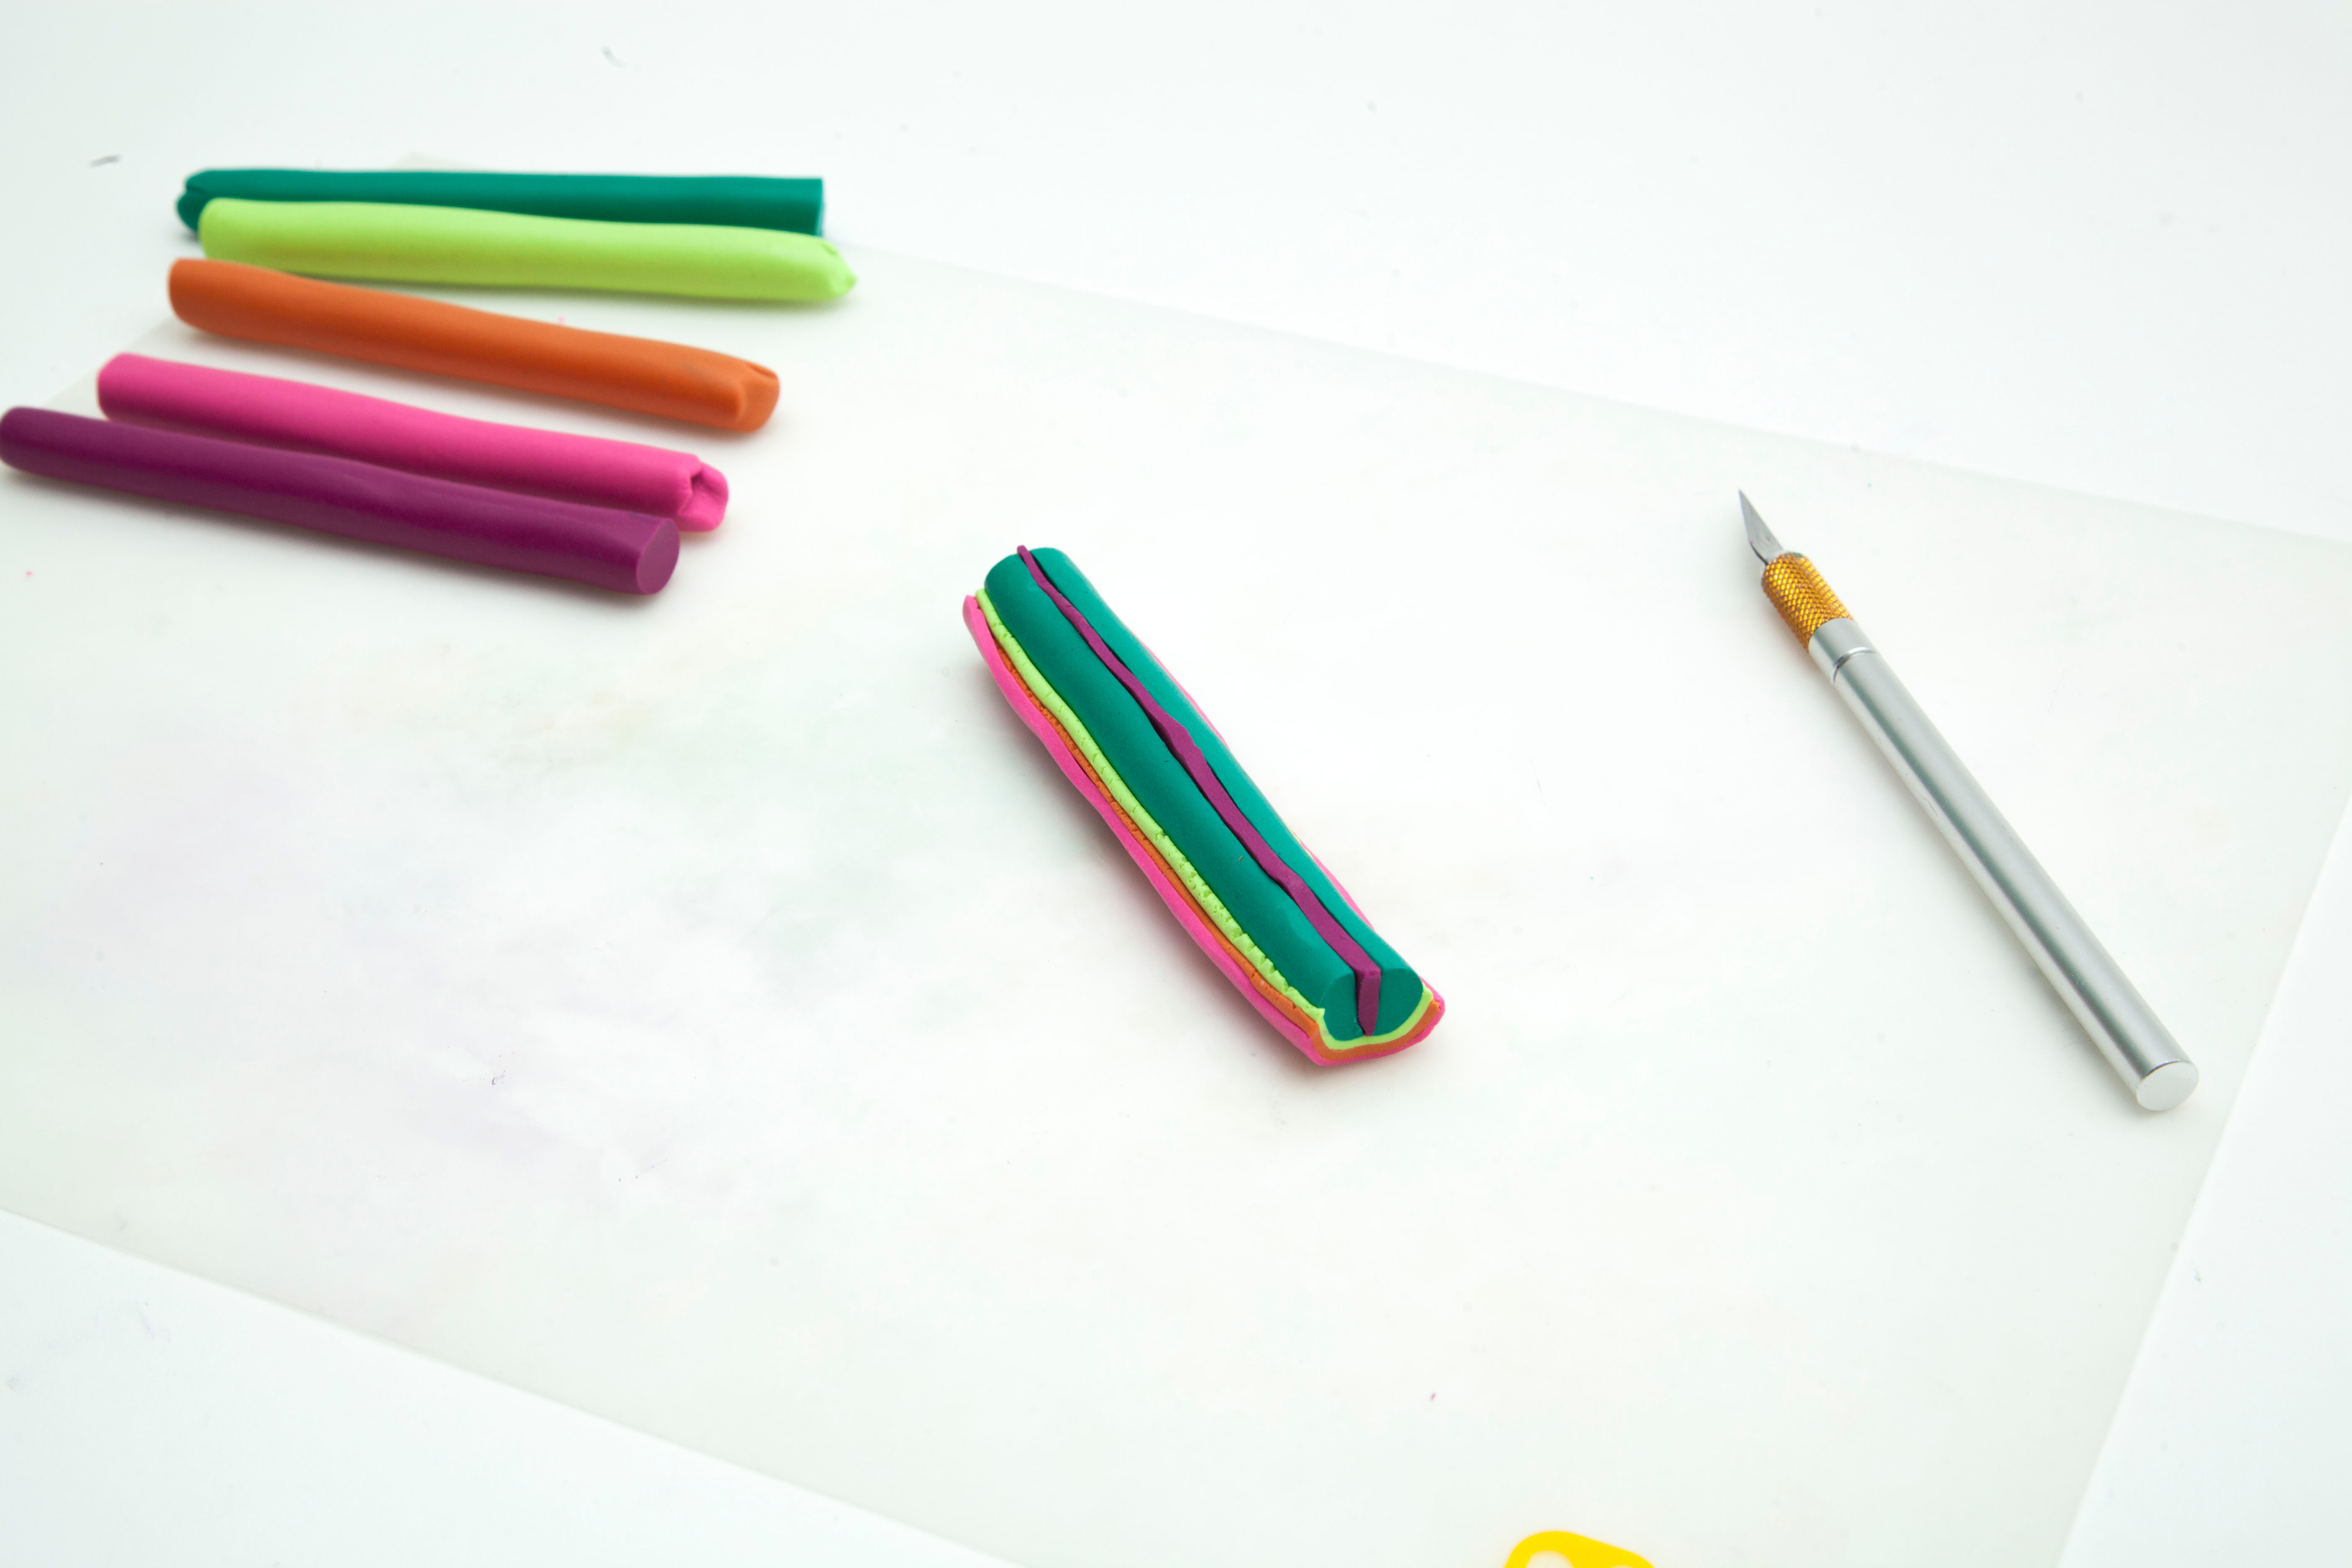
Step 8
Roll the rod together so the clay melds.
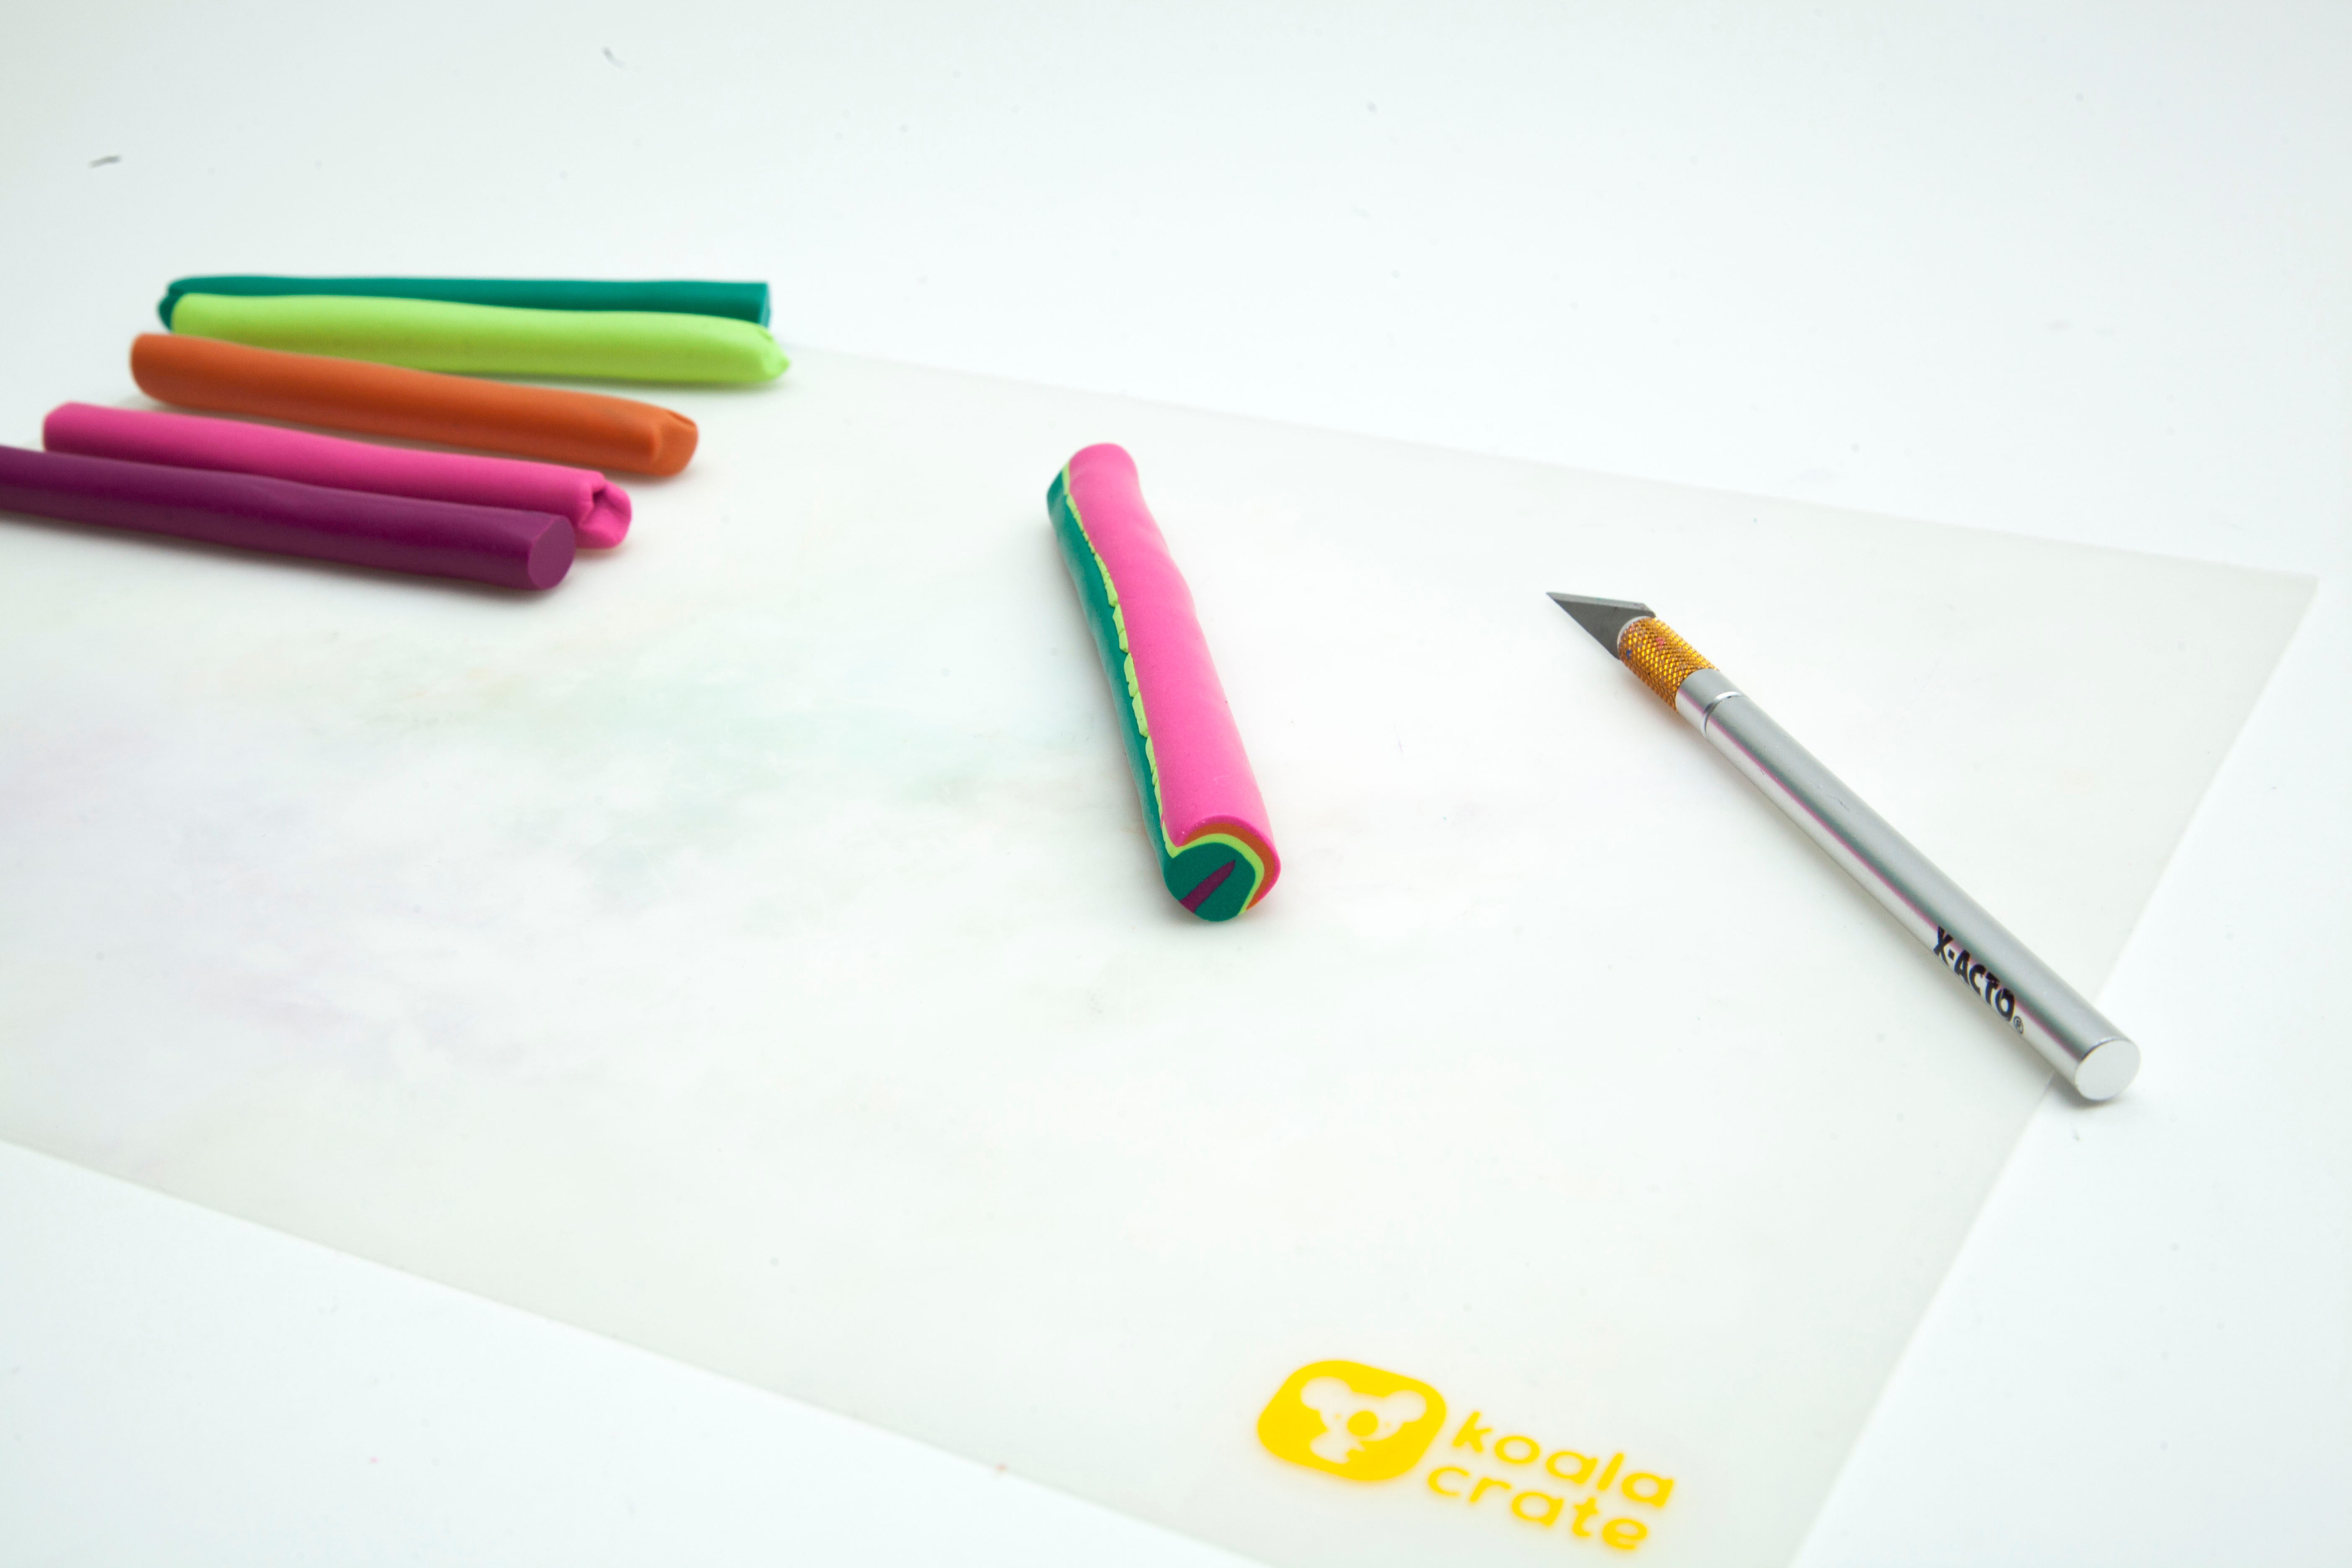
Step 9
Pinch the dark green side of the rod so that it is in the shape of a petal.
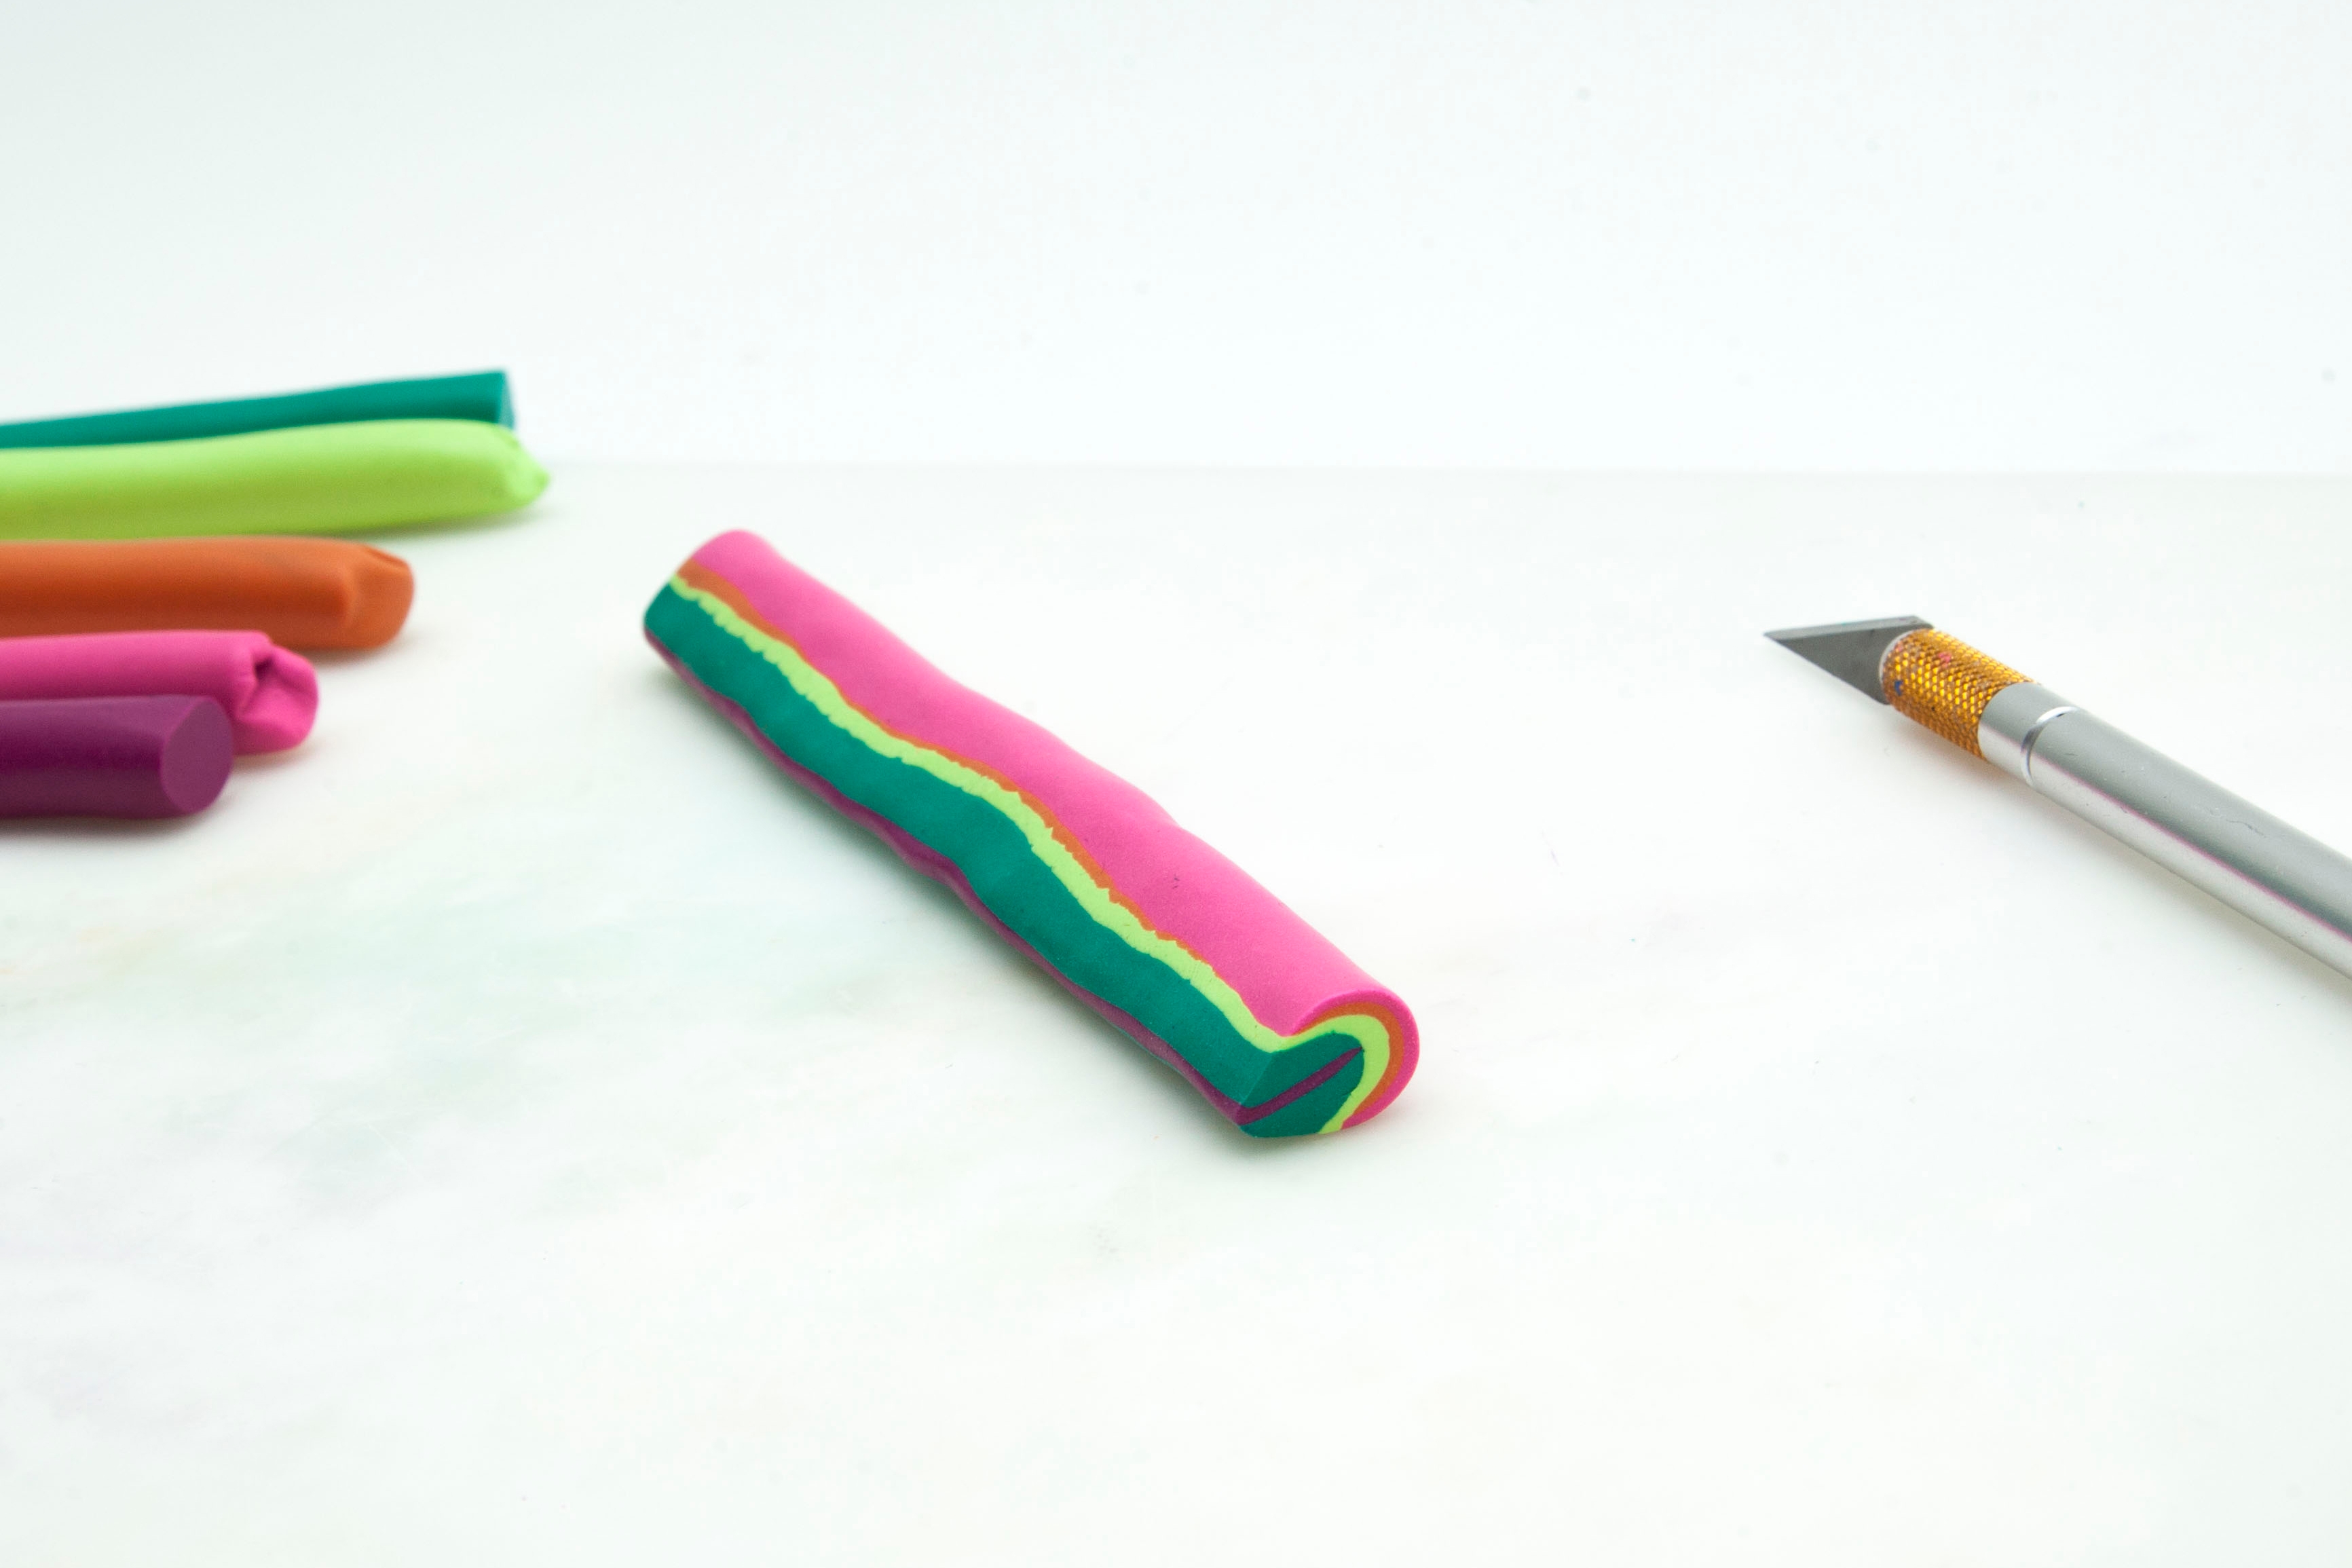
Step 10
Work the pink rod in your hands and shape it into a ¼-inch wide rod. Then, roll out the purple rod into a rectangle.
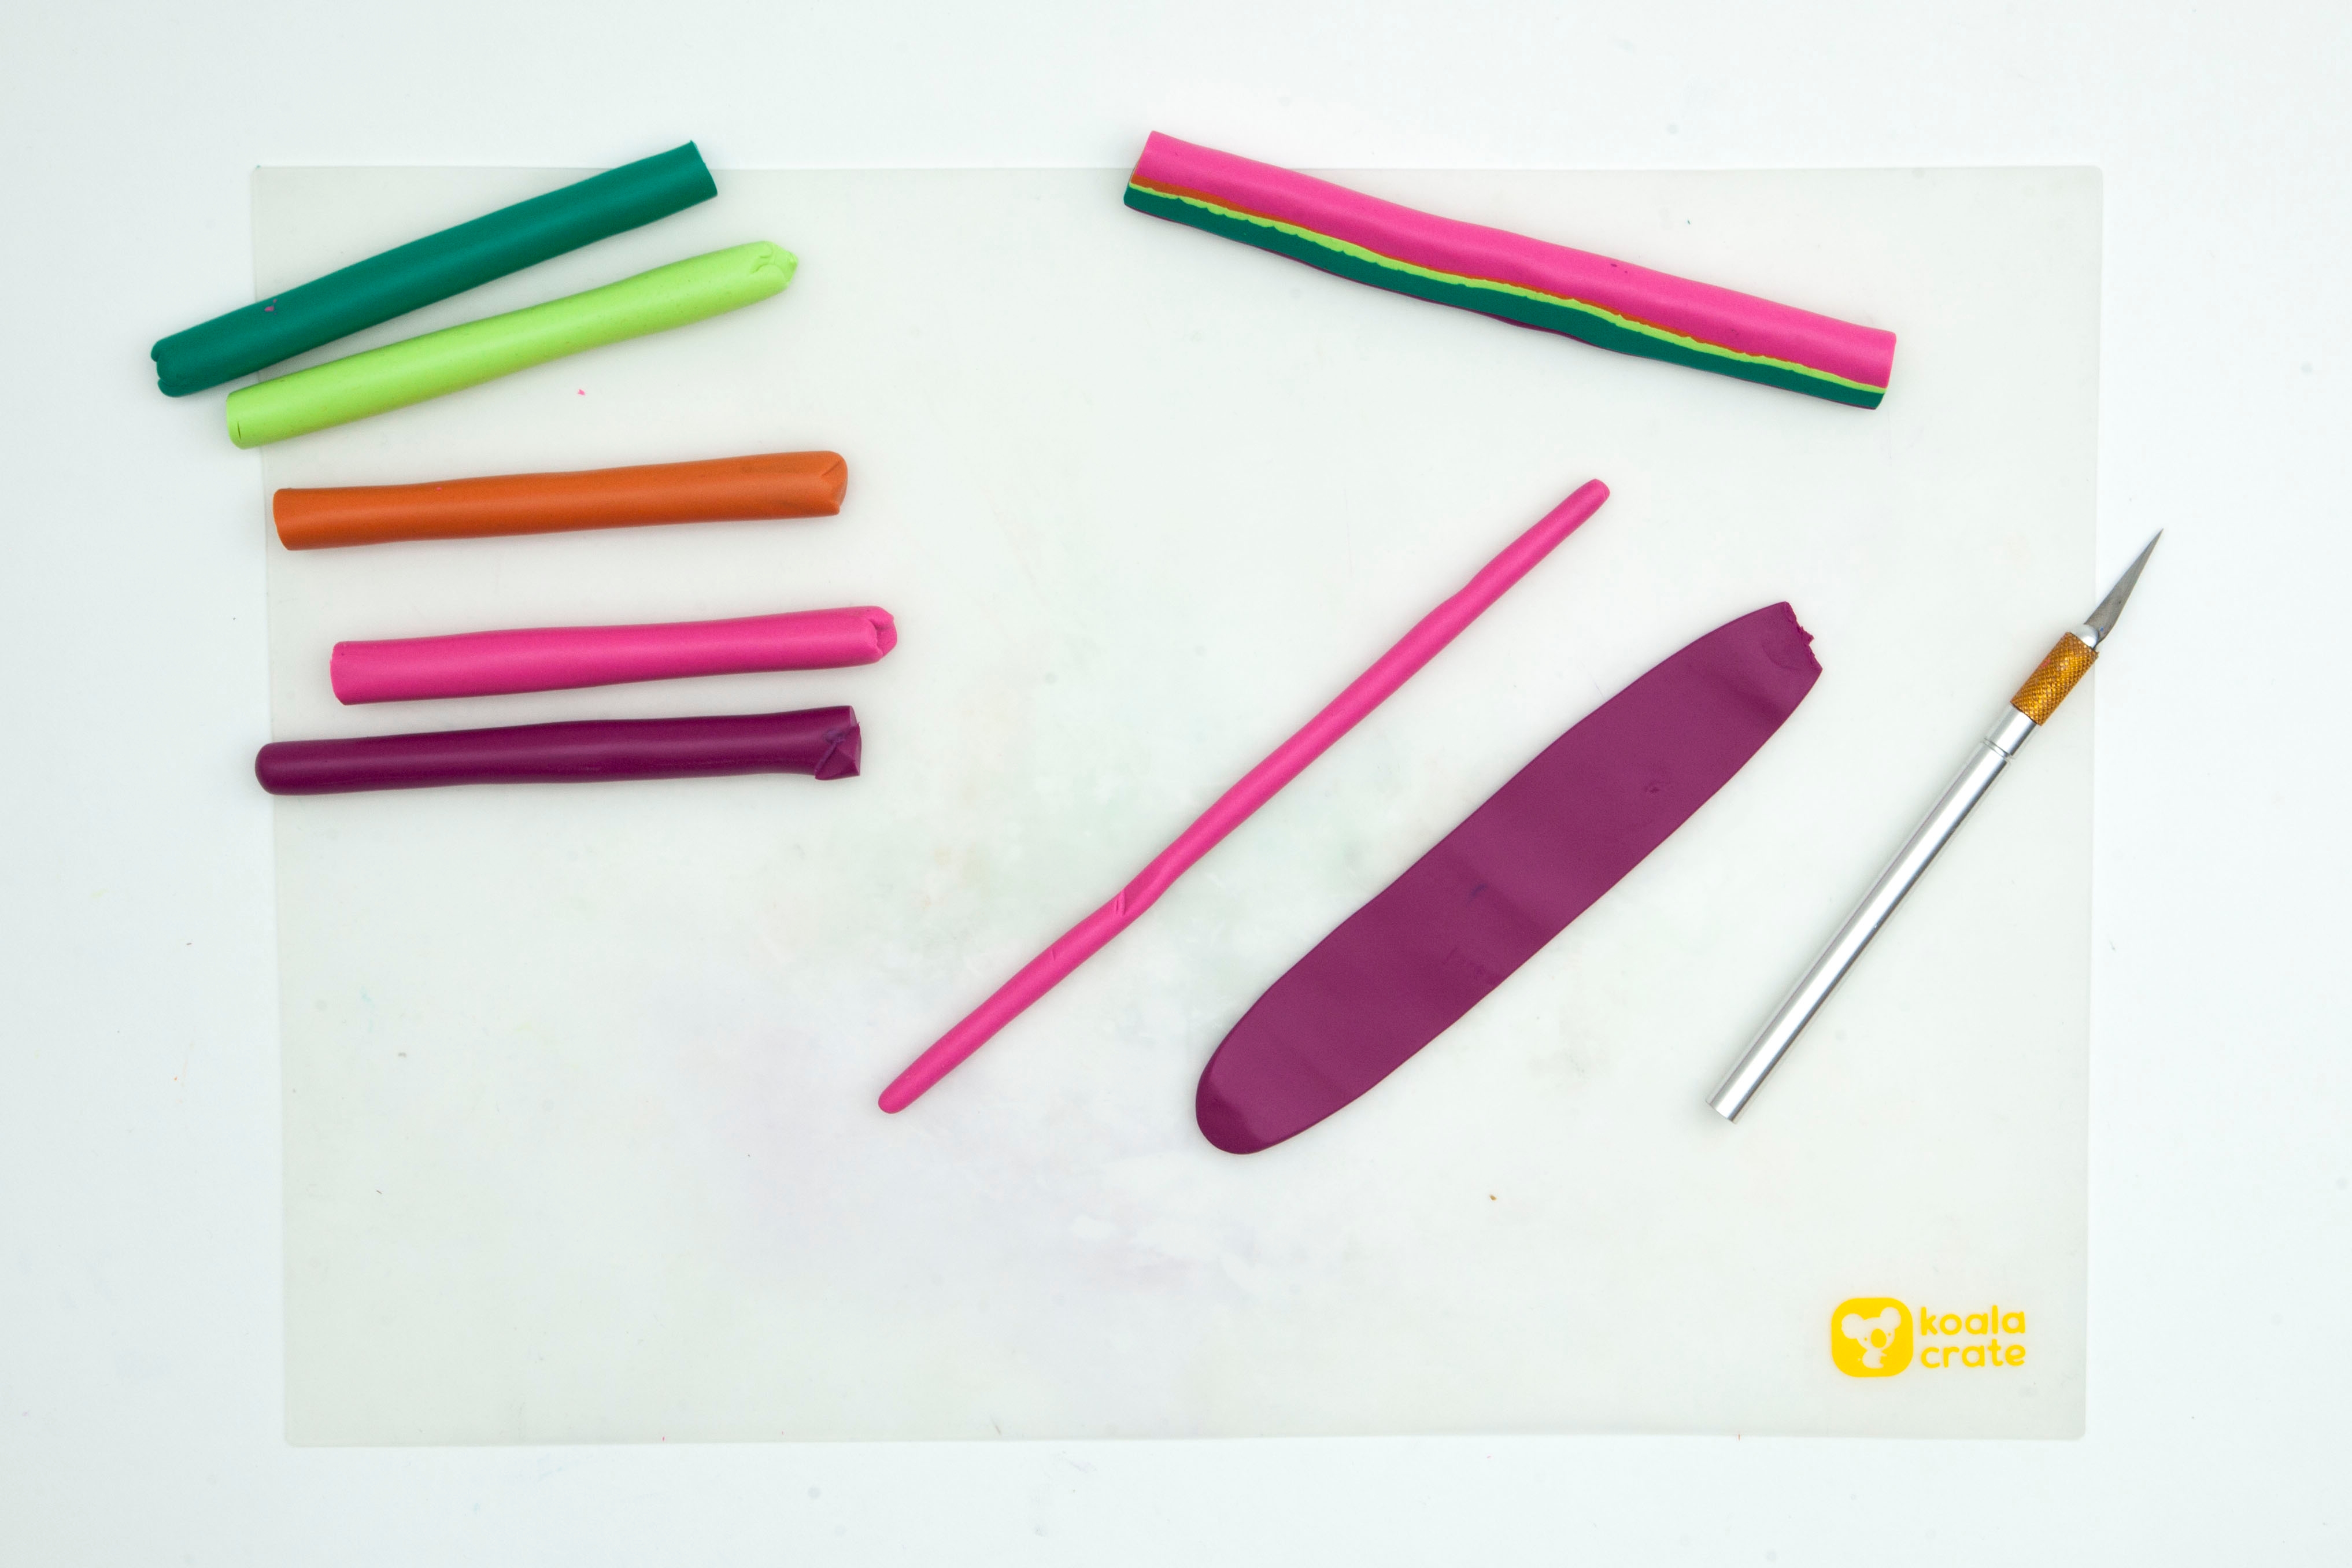
Step 11
Cut the petal-shaped rod into six pieces of equal length.
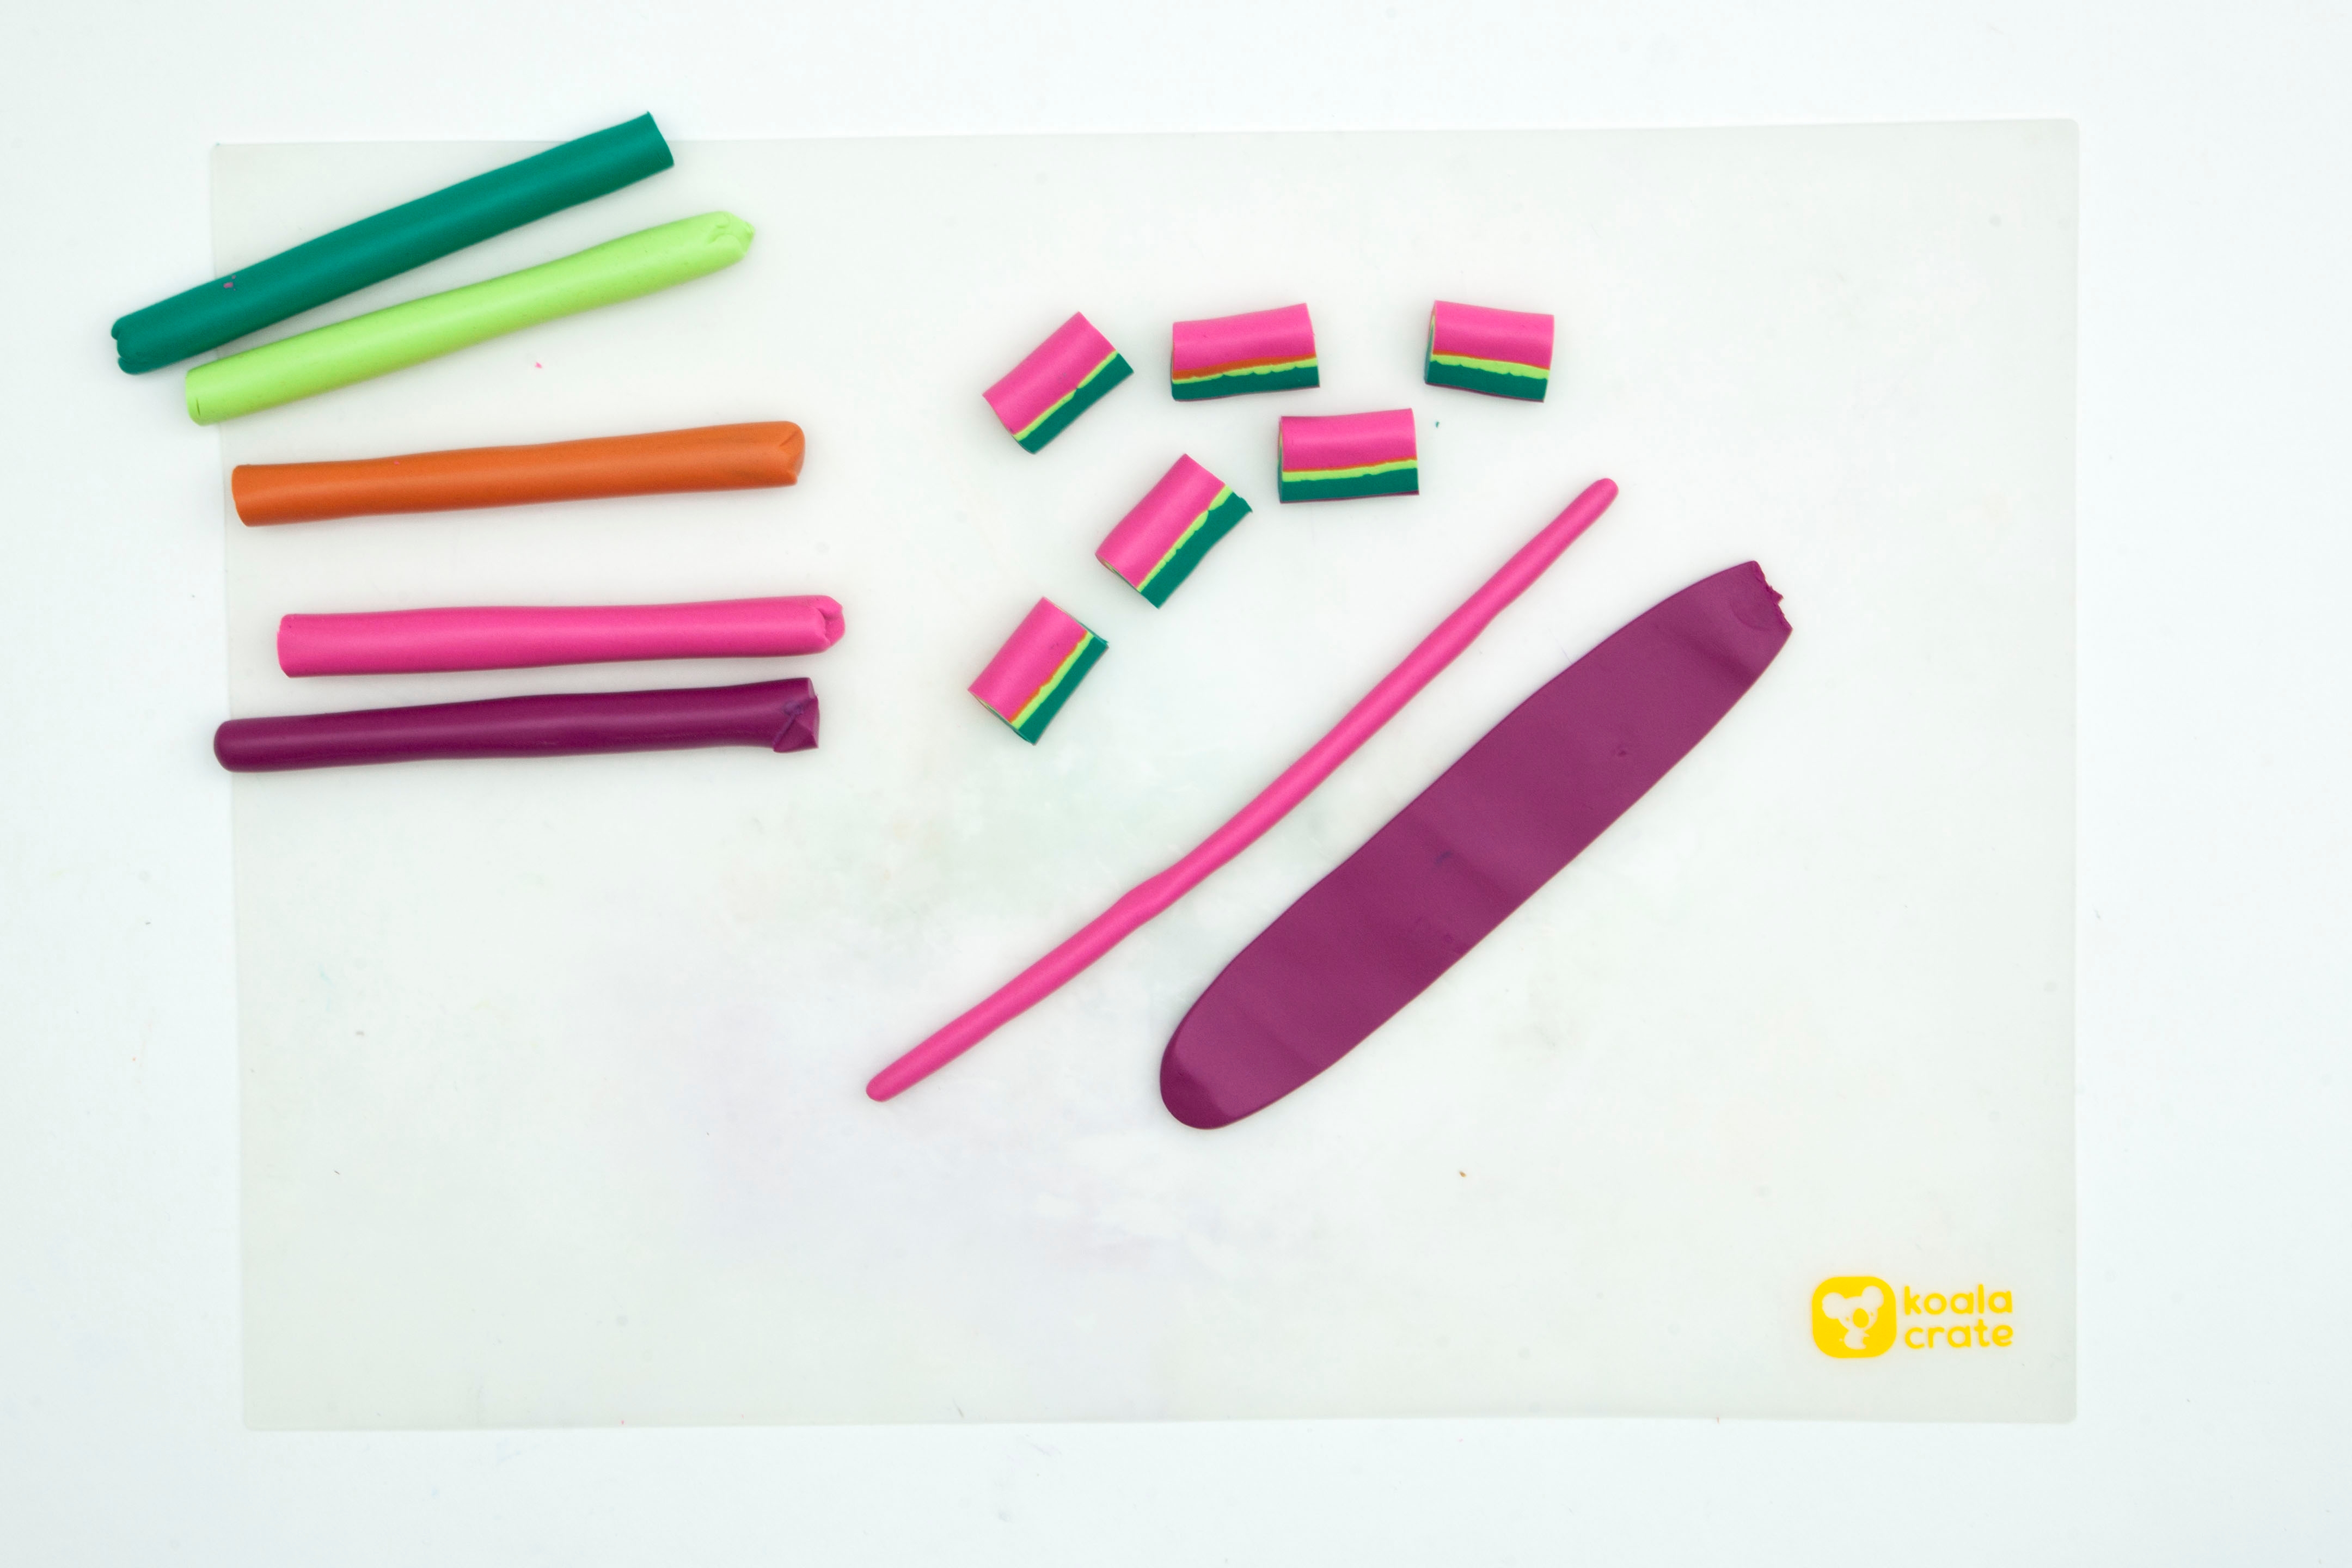
Step 12
Trim a piece off the pink rod and purple rectangle the same length as the petal pieces.
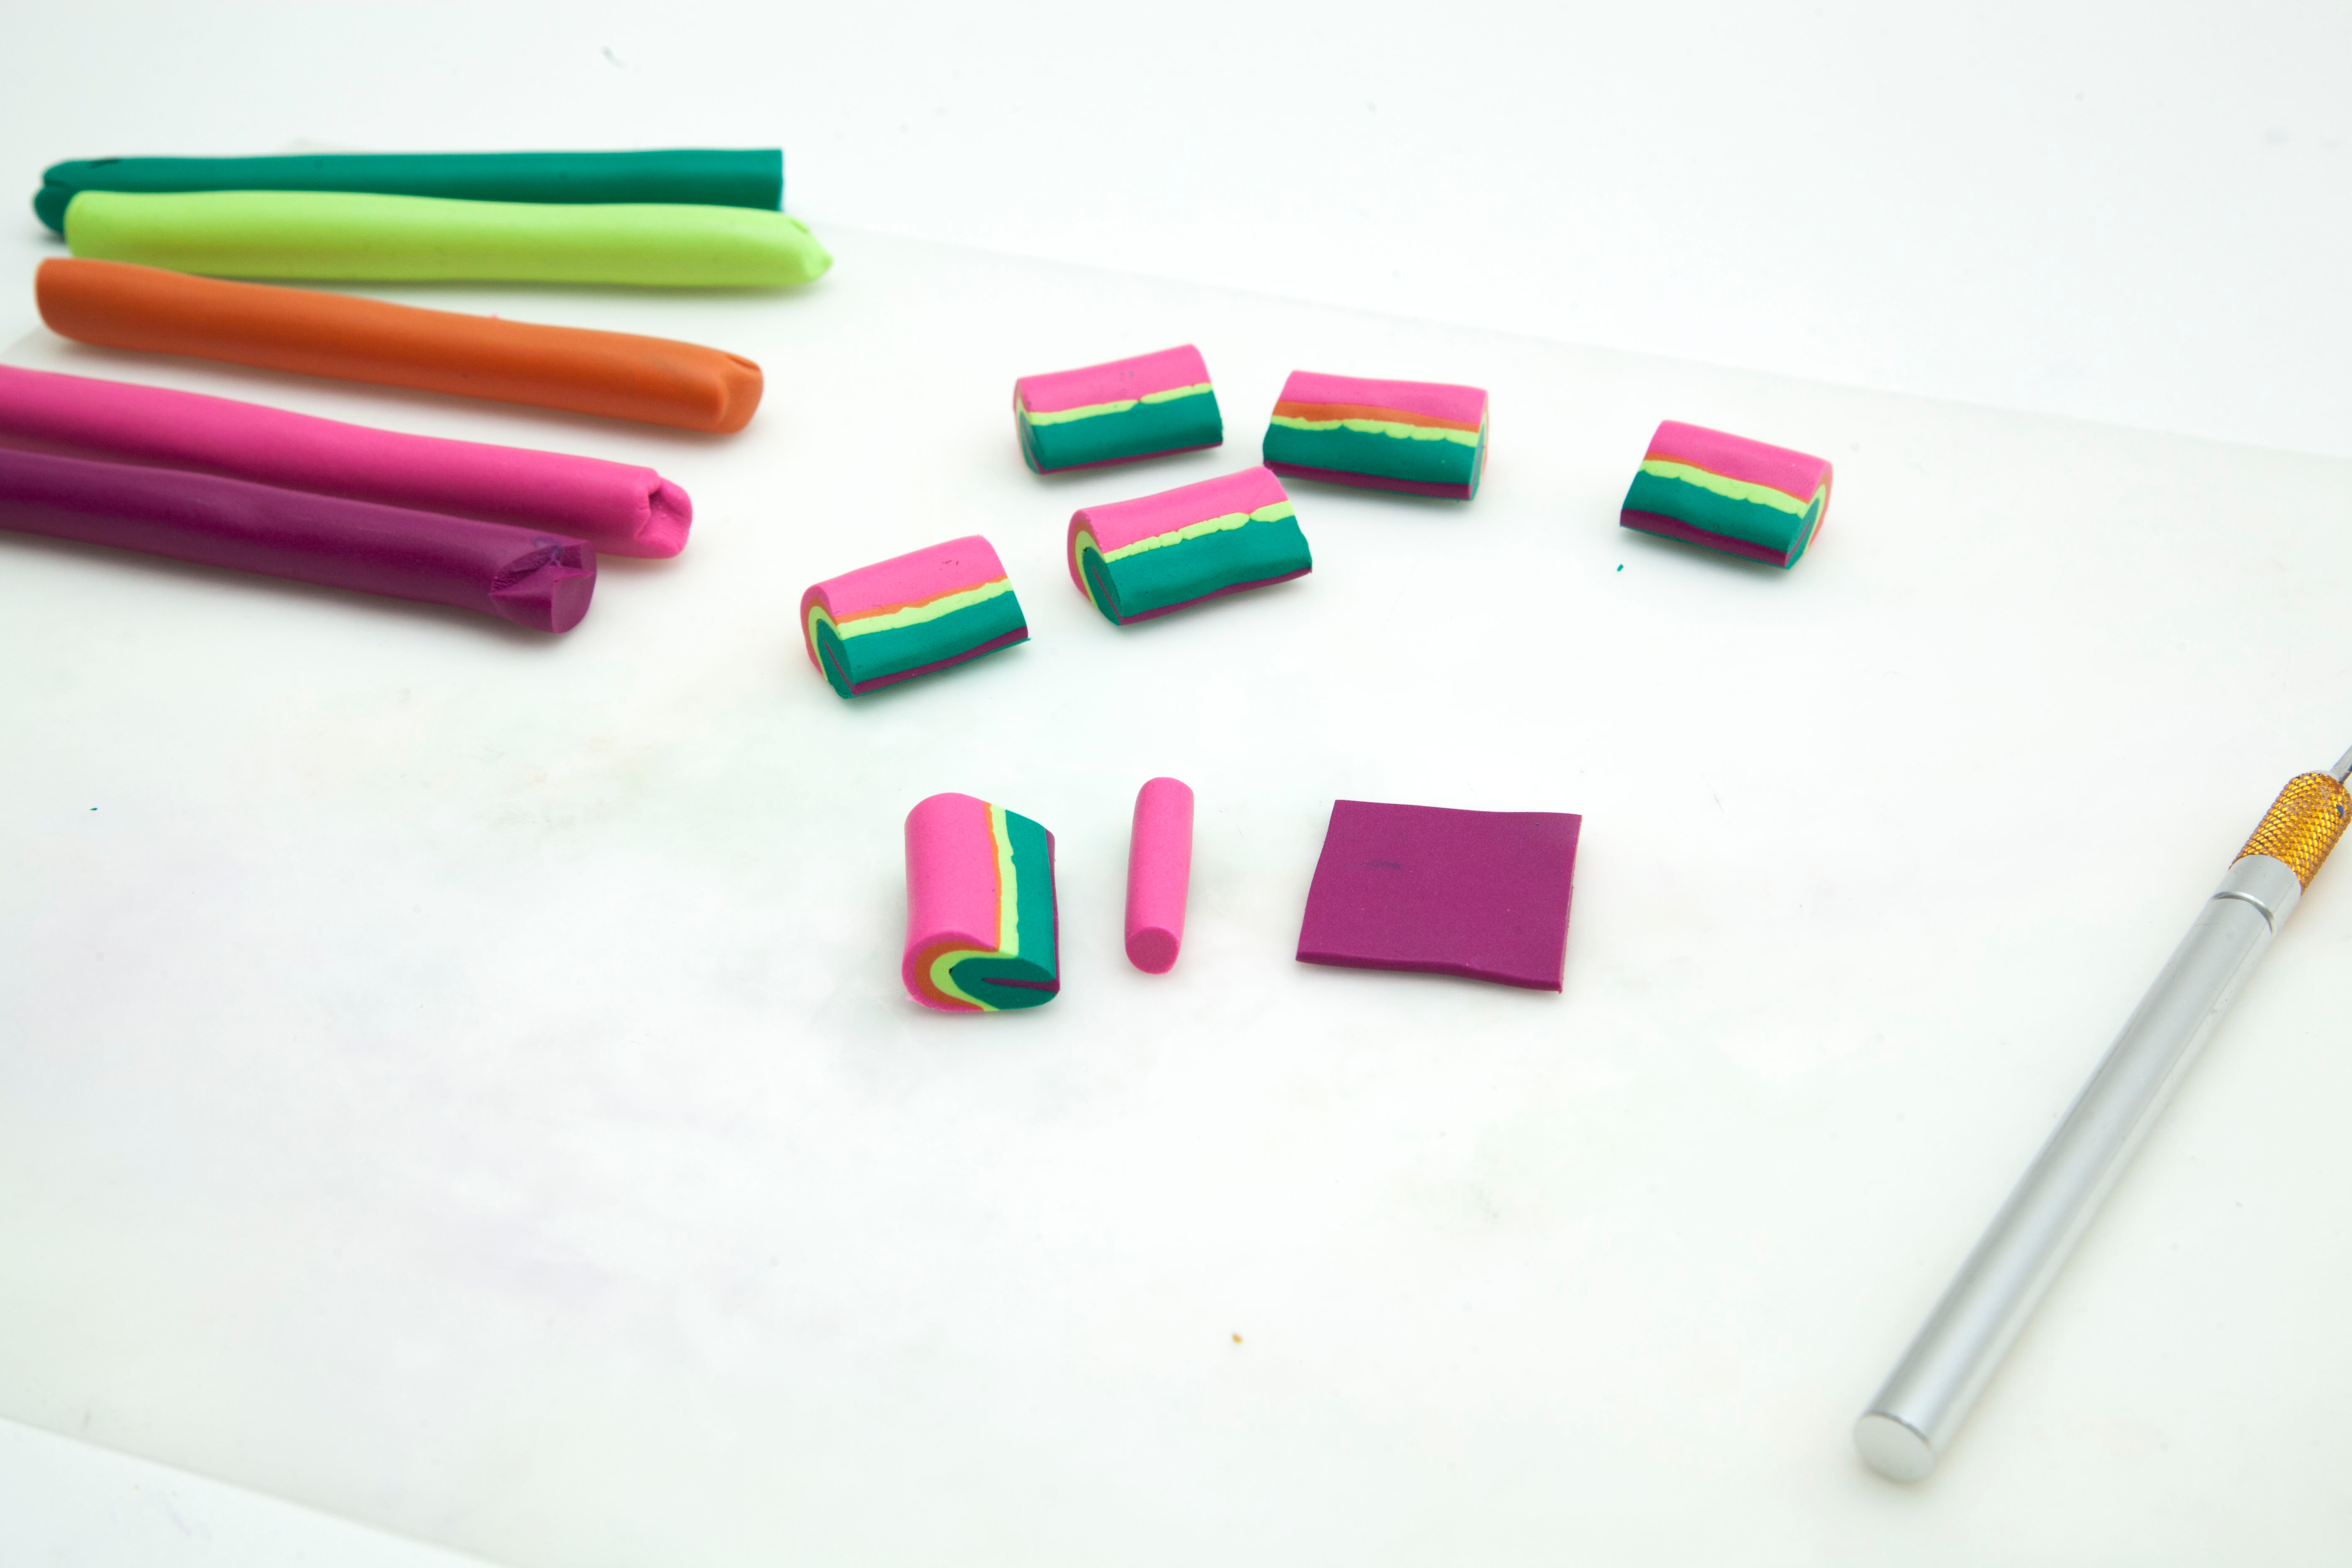
Step 13
Wrap the purple rectangle piece around the pink rod piece and roll them together. If the rod gets longer as you roll it out, trim it to the same size as the 6 petal pieces.
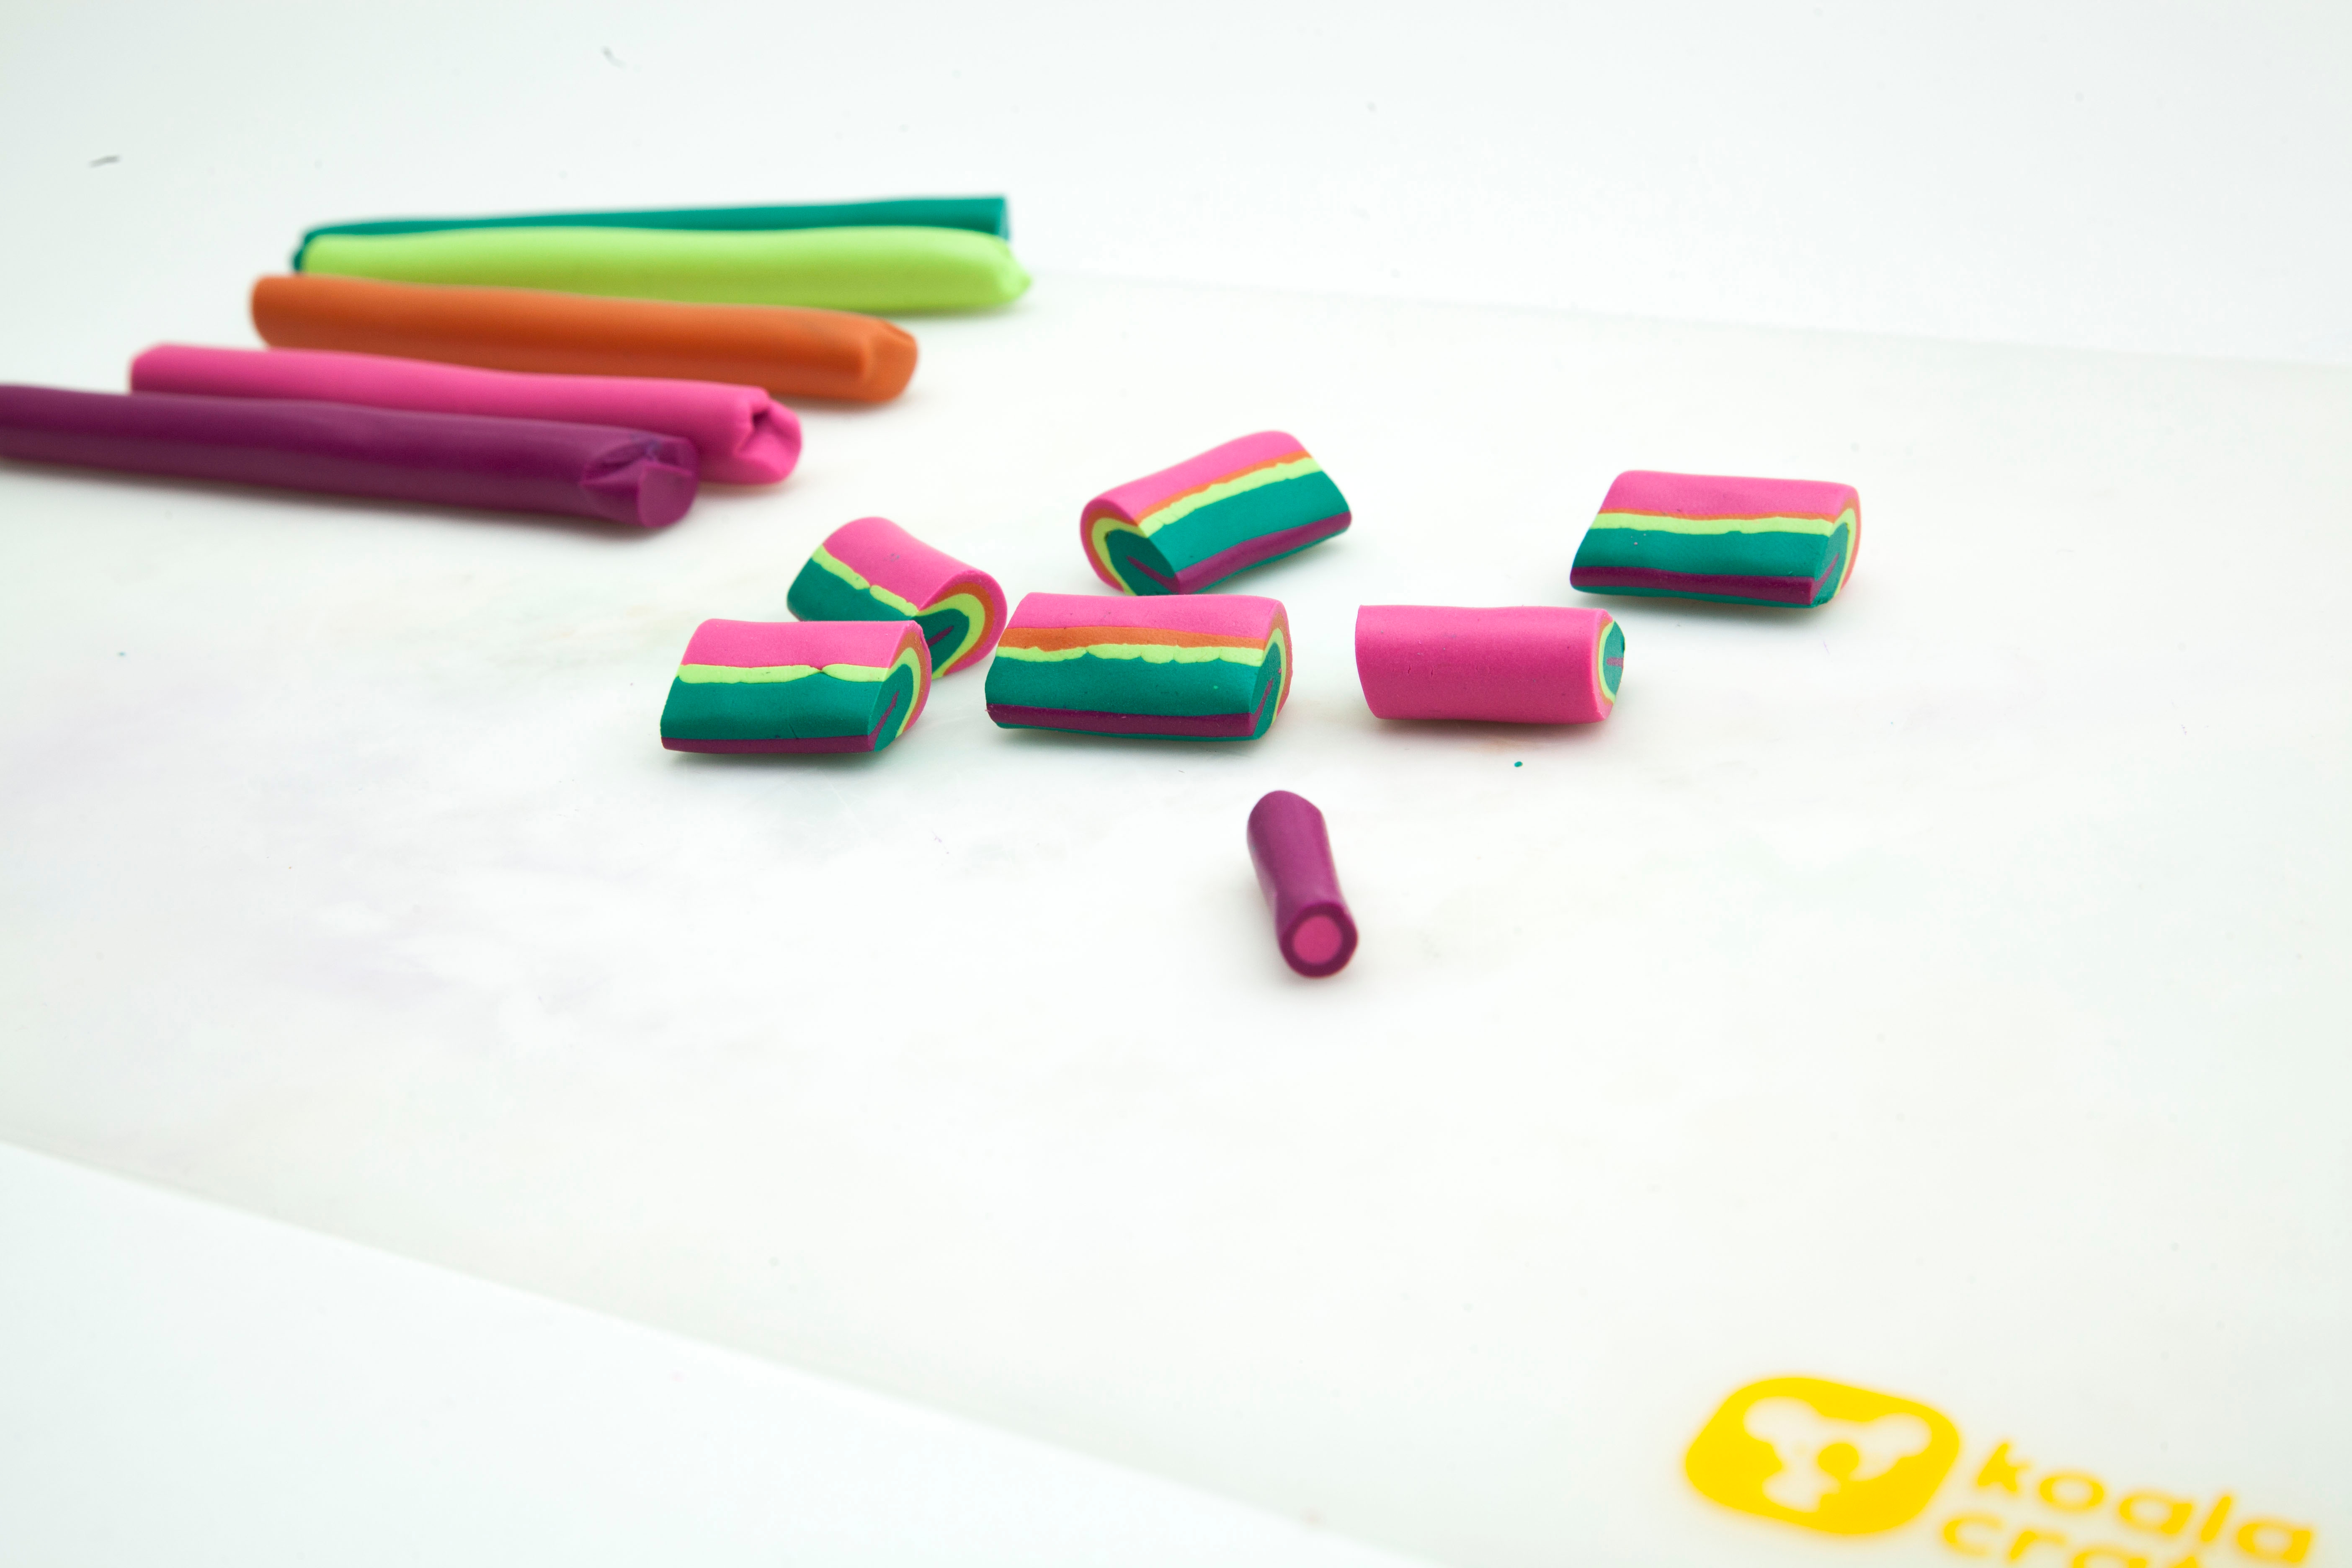
Step 14
Position the petals around the pink rod piece as pictured. Then, pinch and roll the petals around the rod to meld the clay into a flower shape.
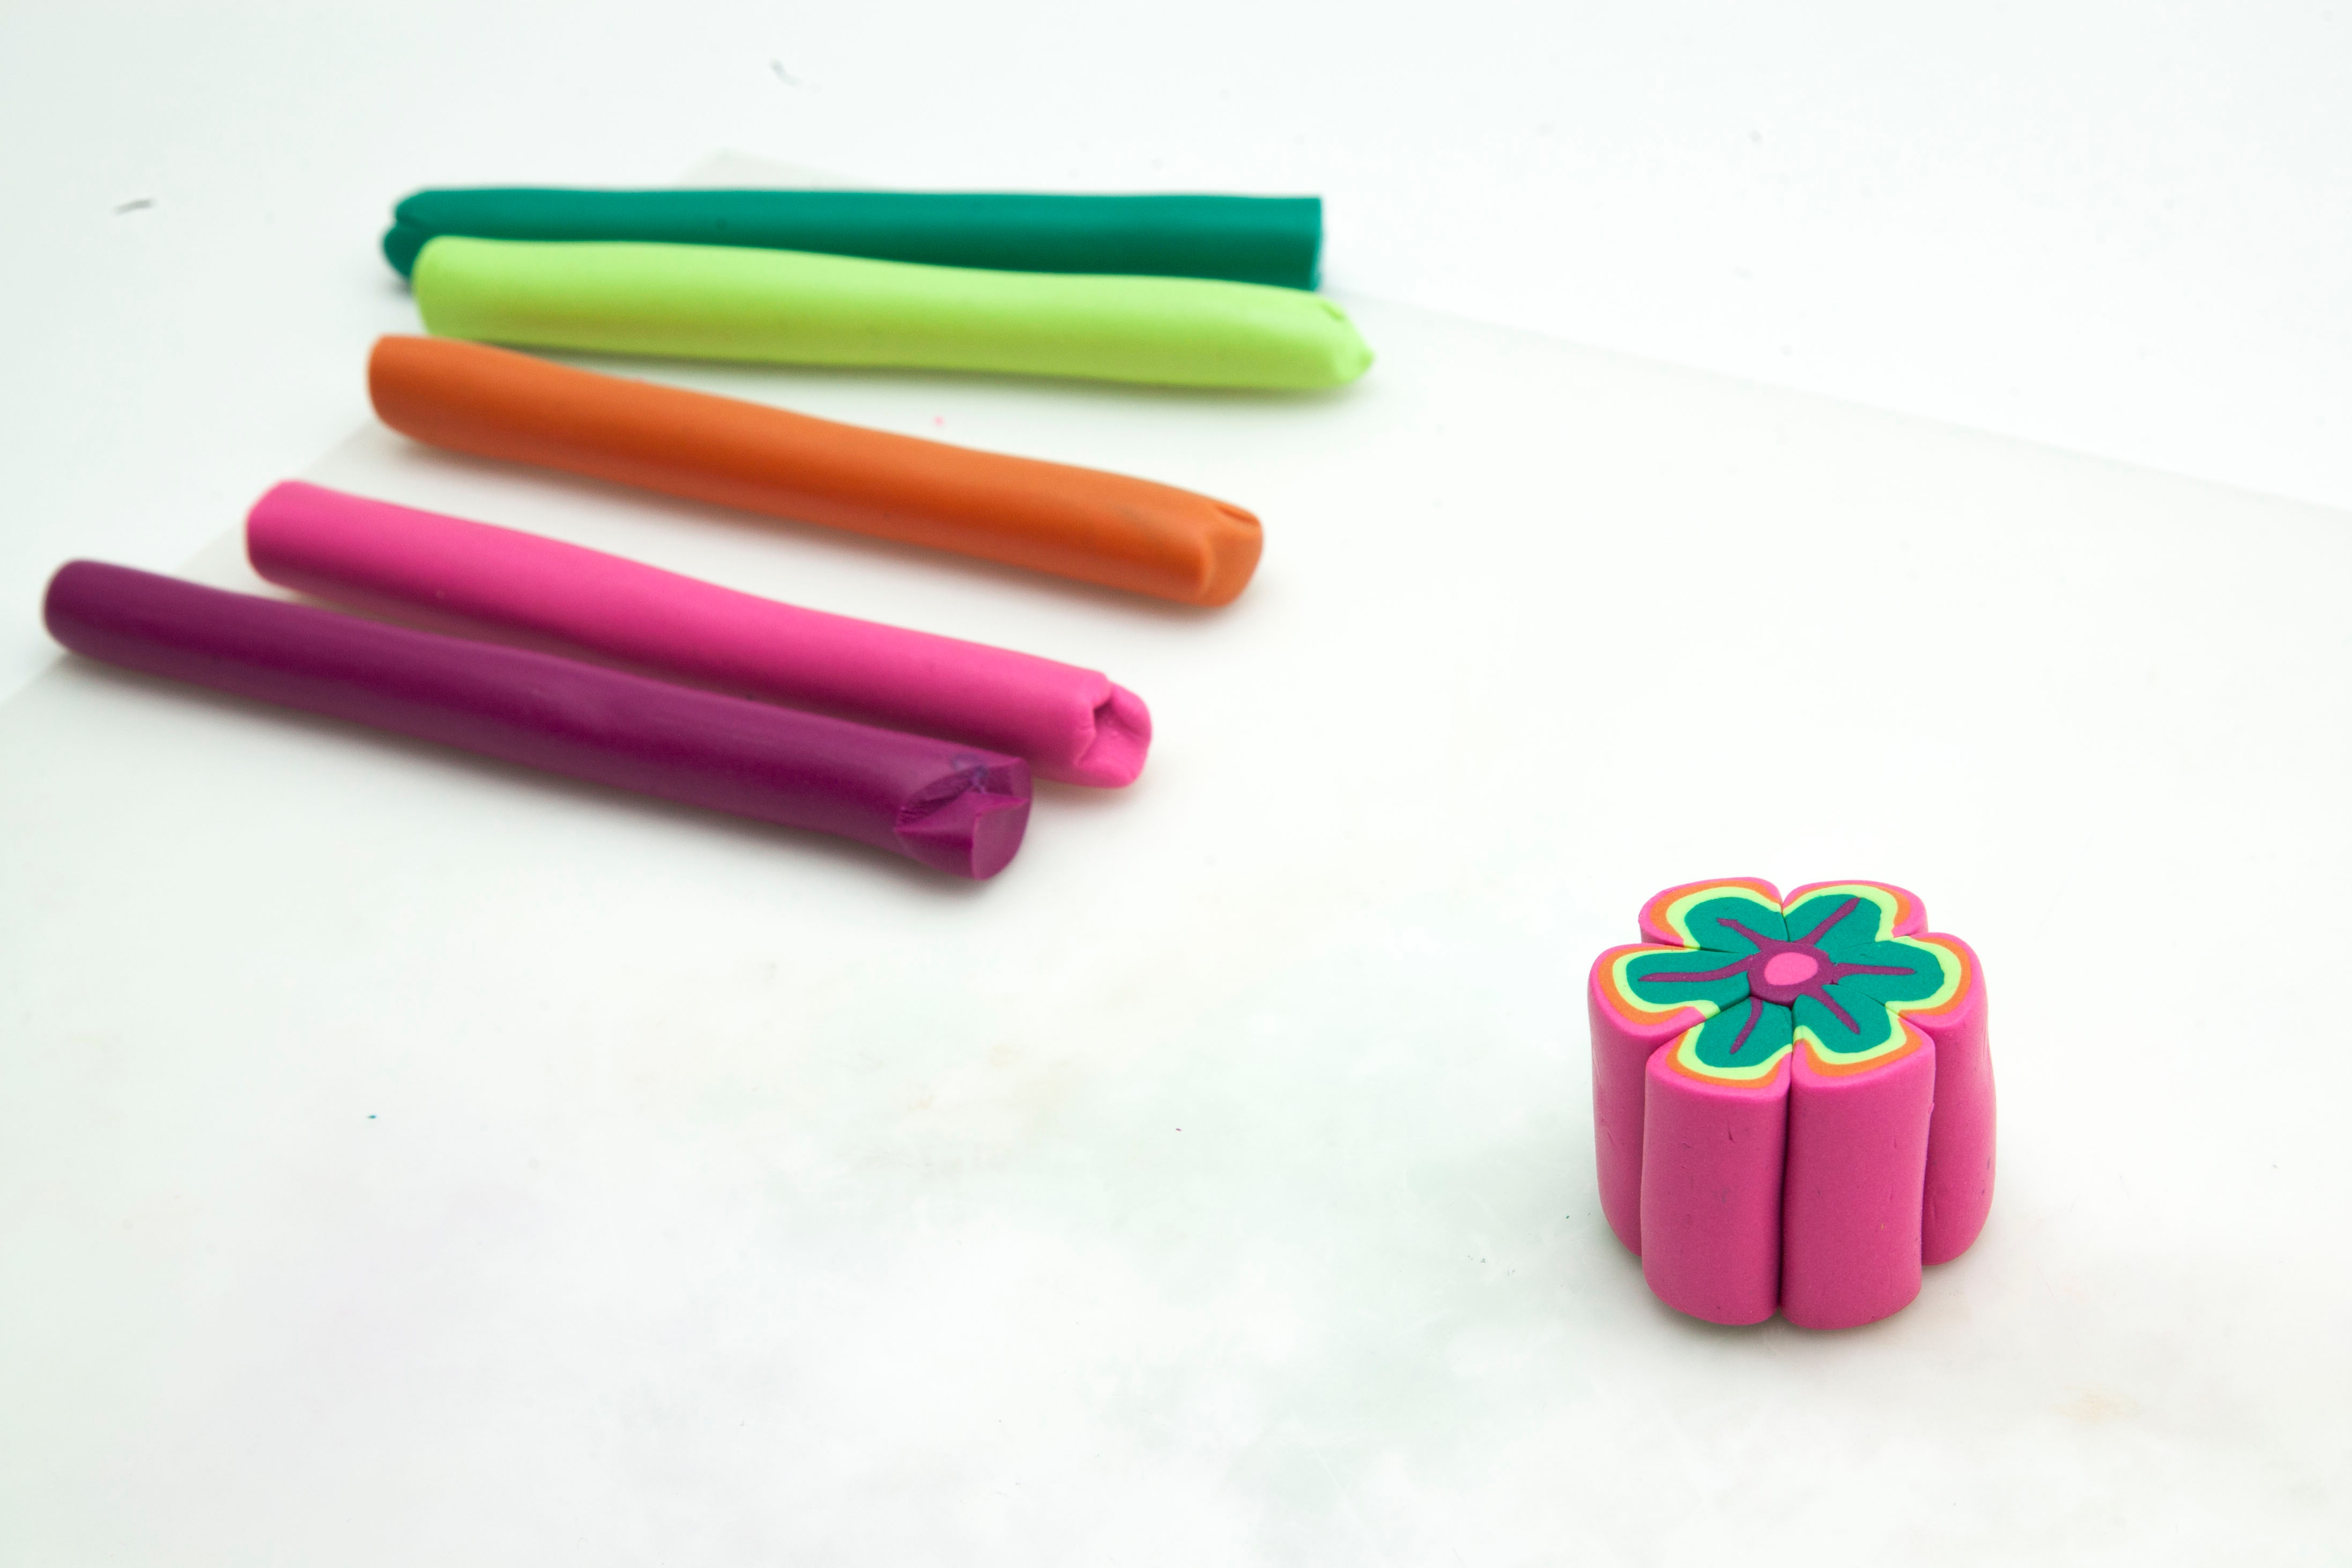
Step 15
Cut a cross section off of the flower shape.
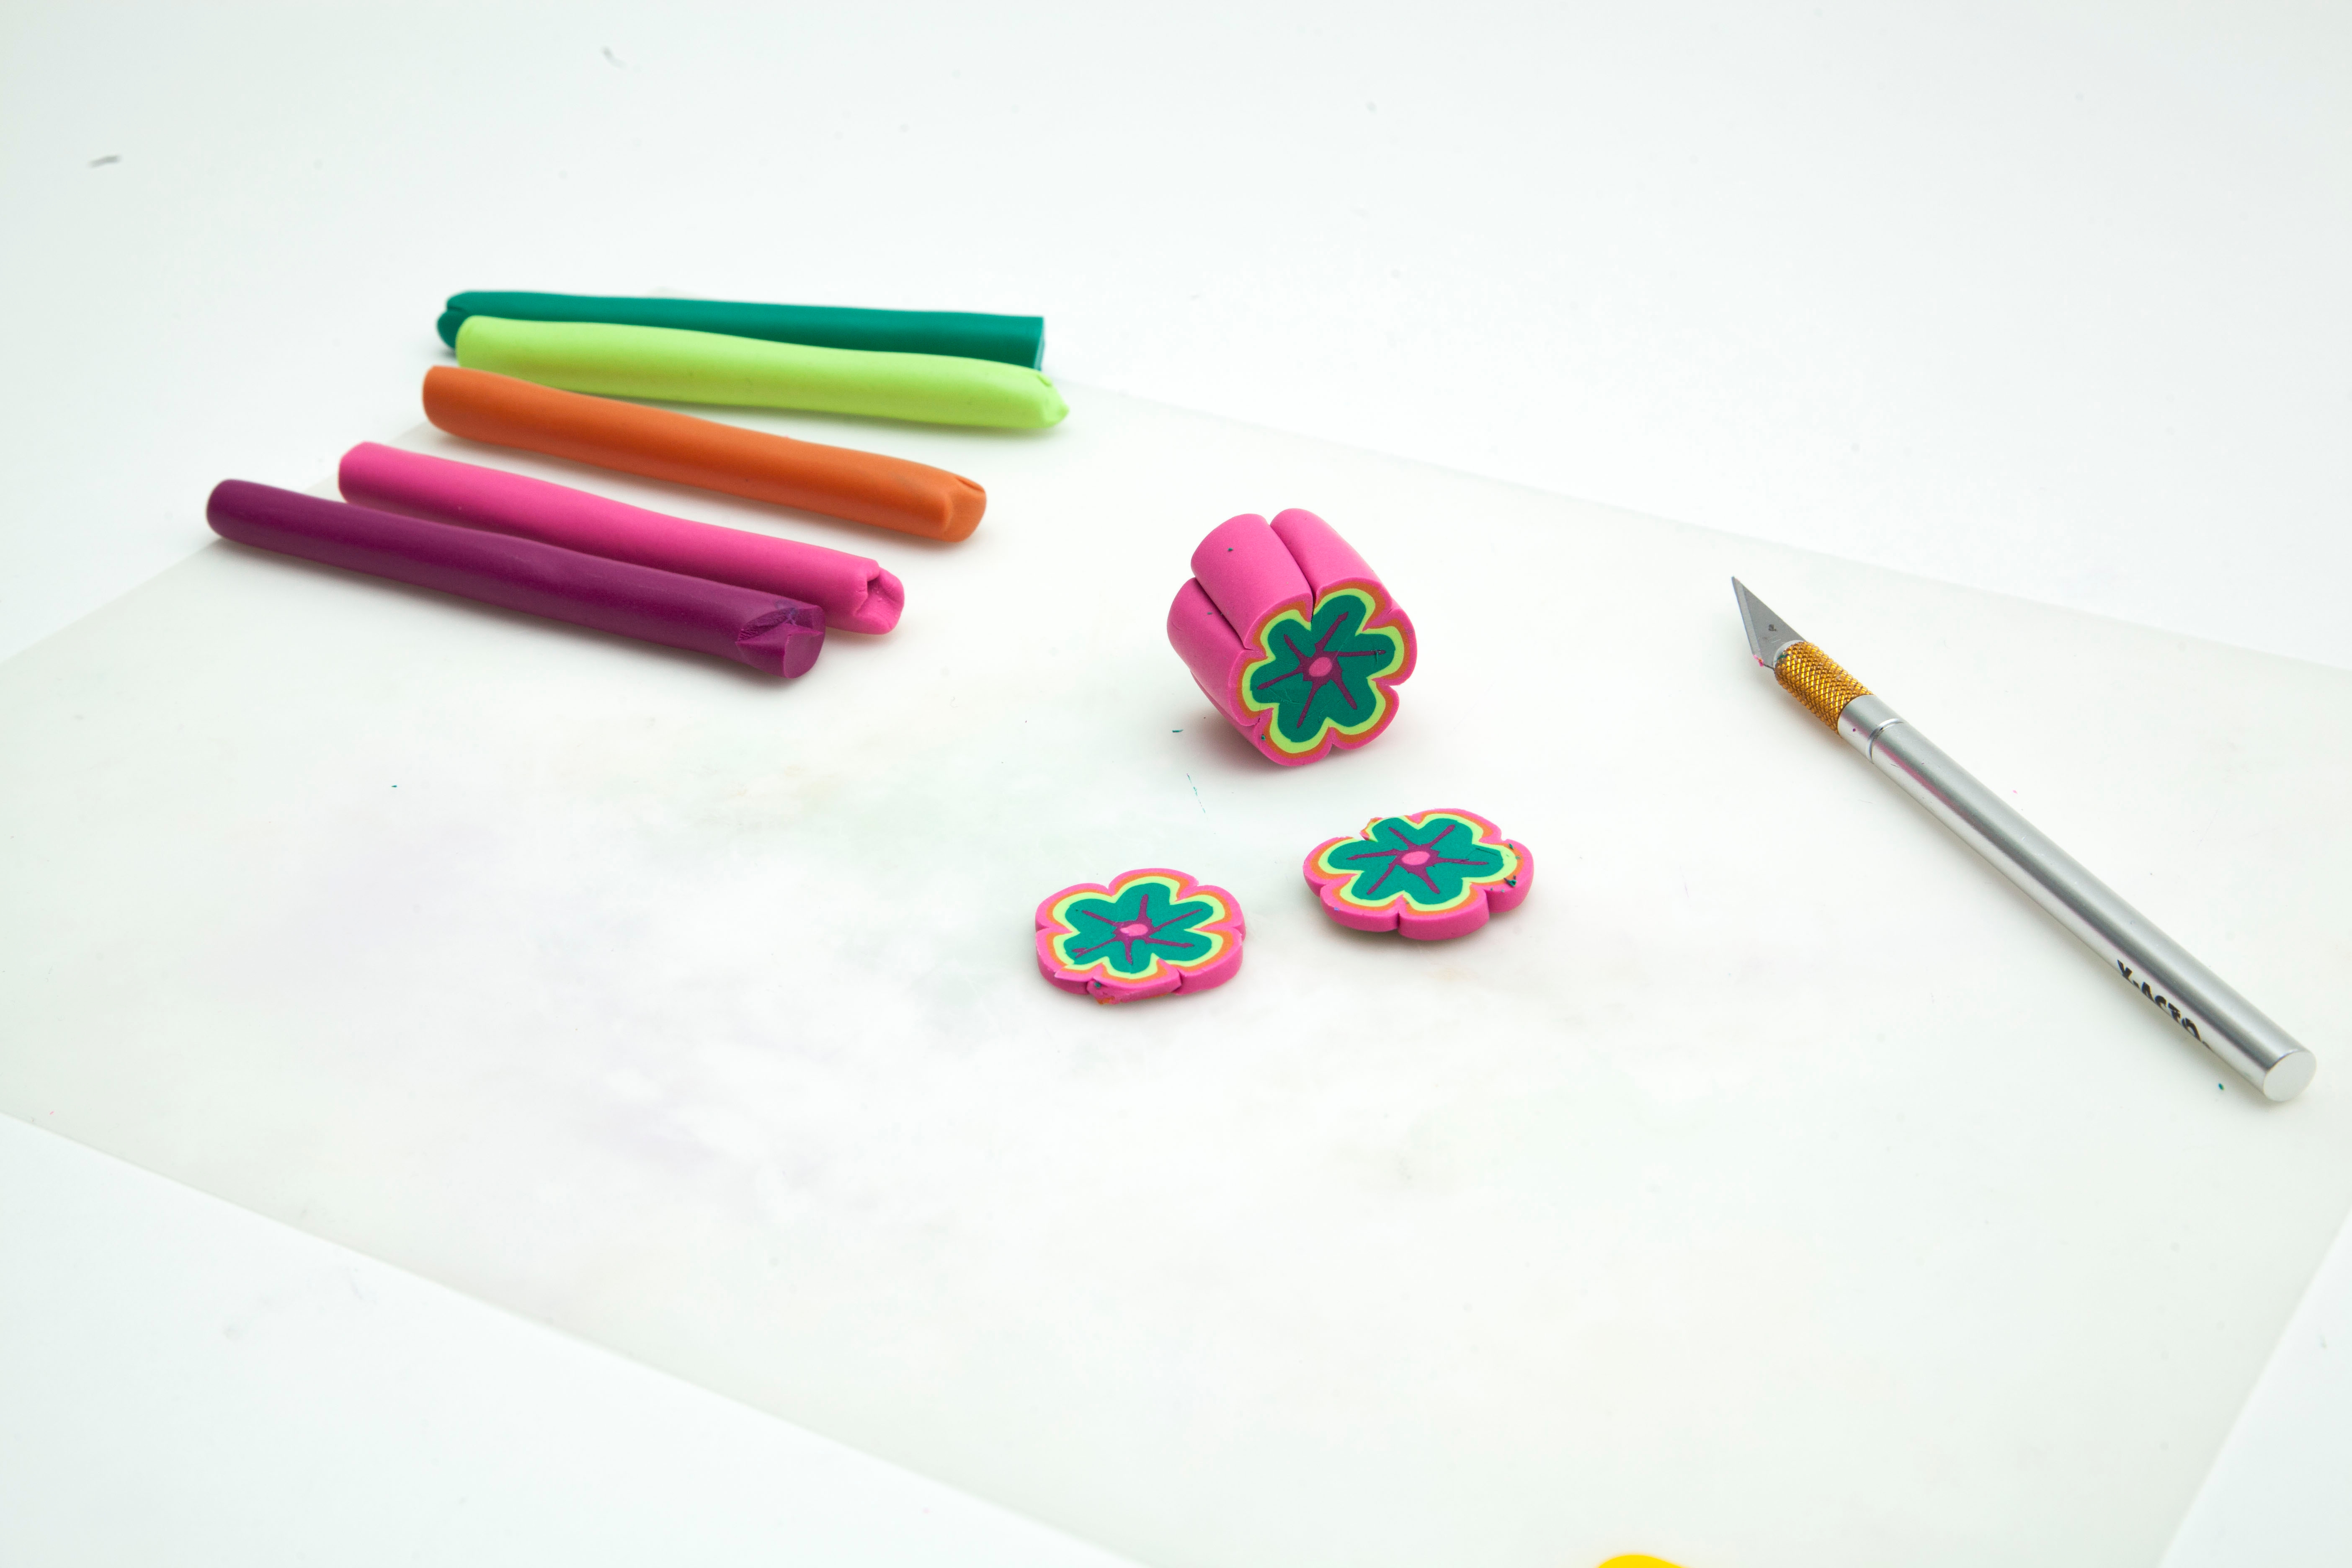
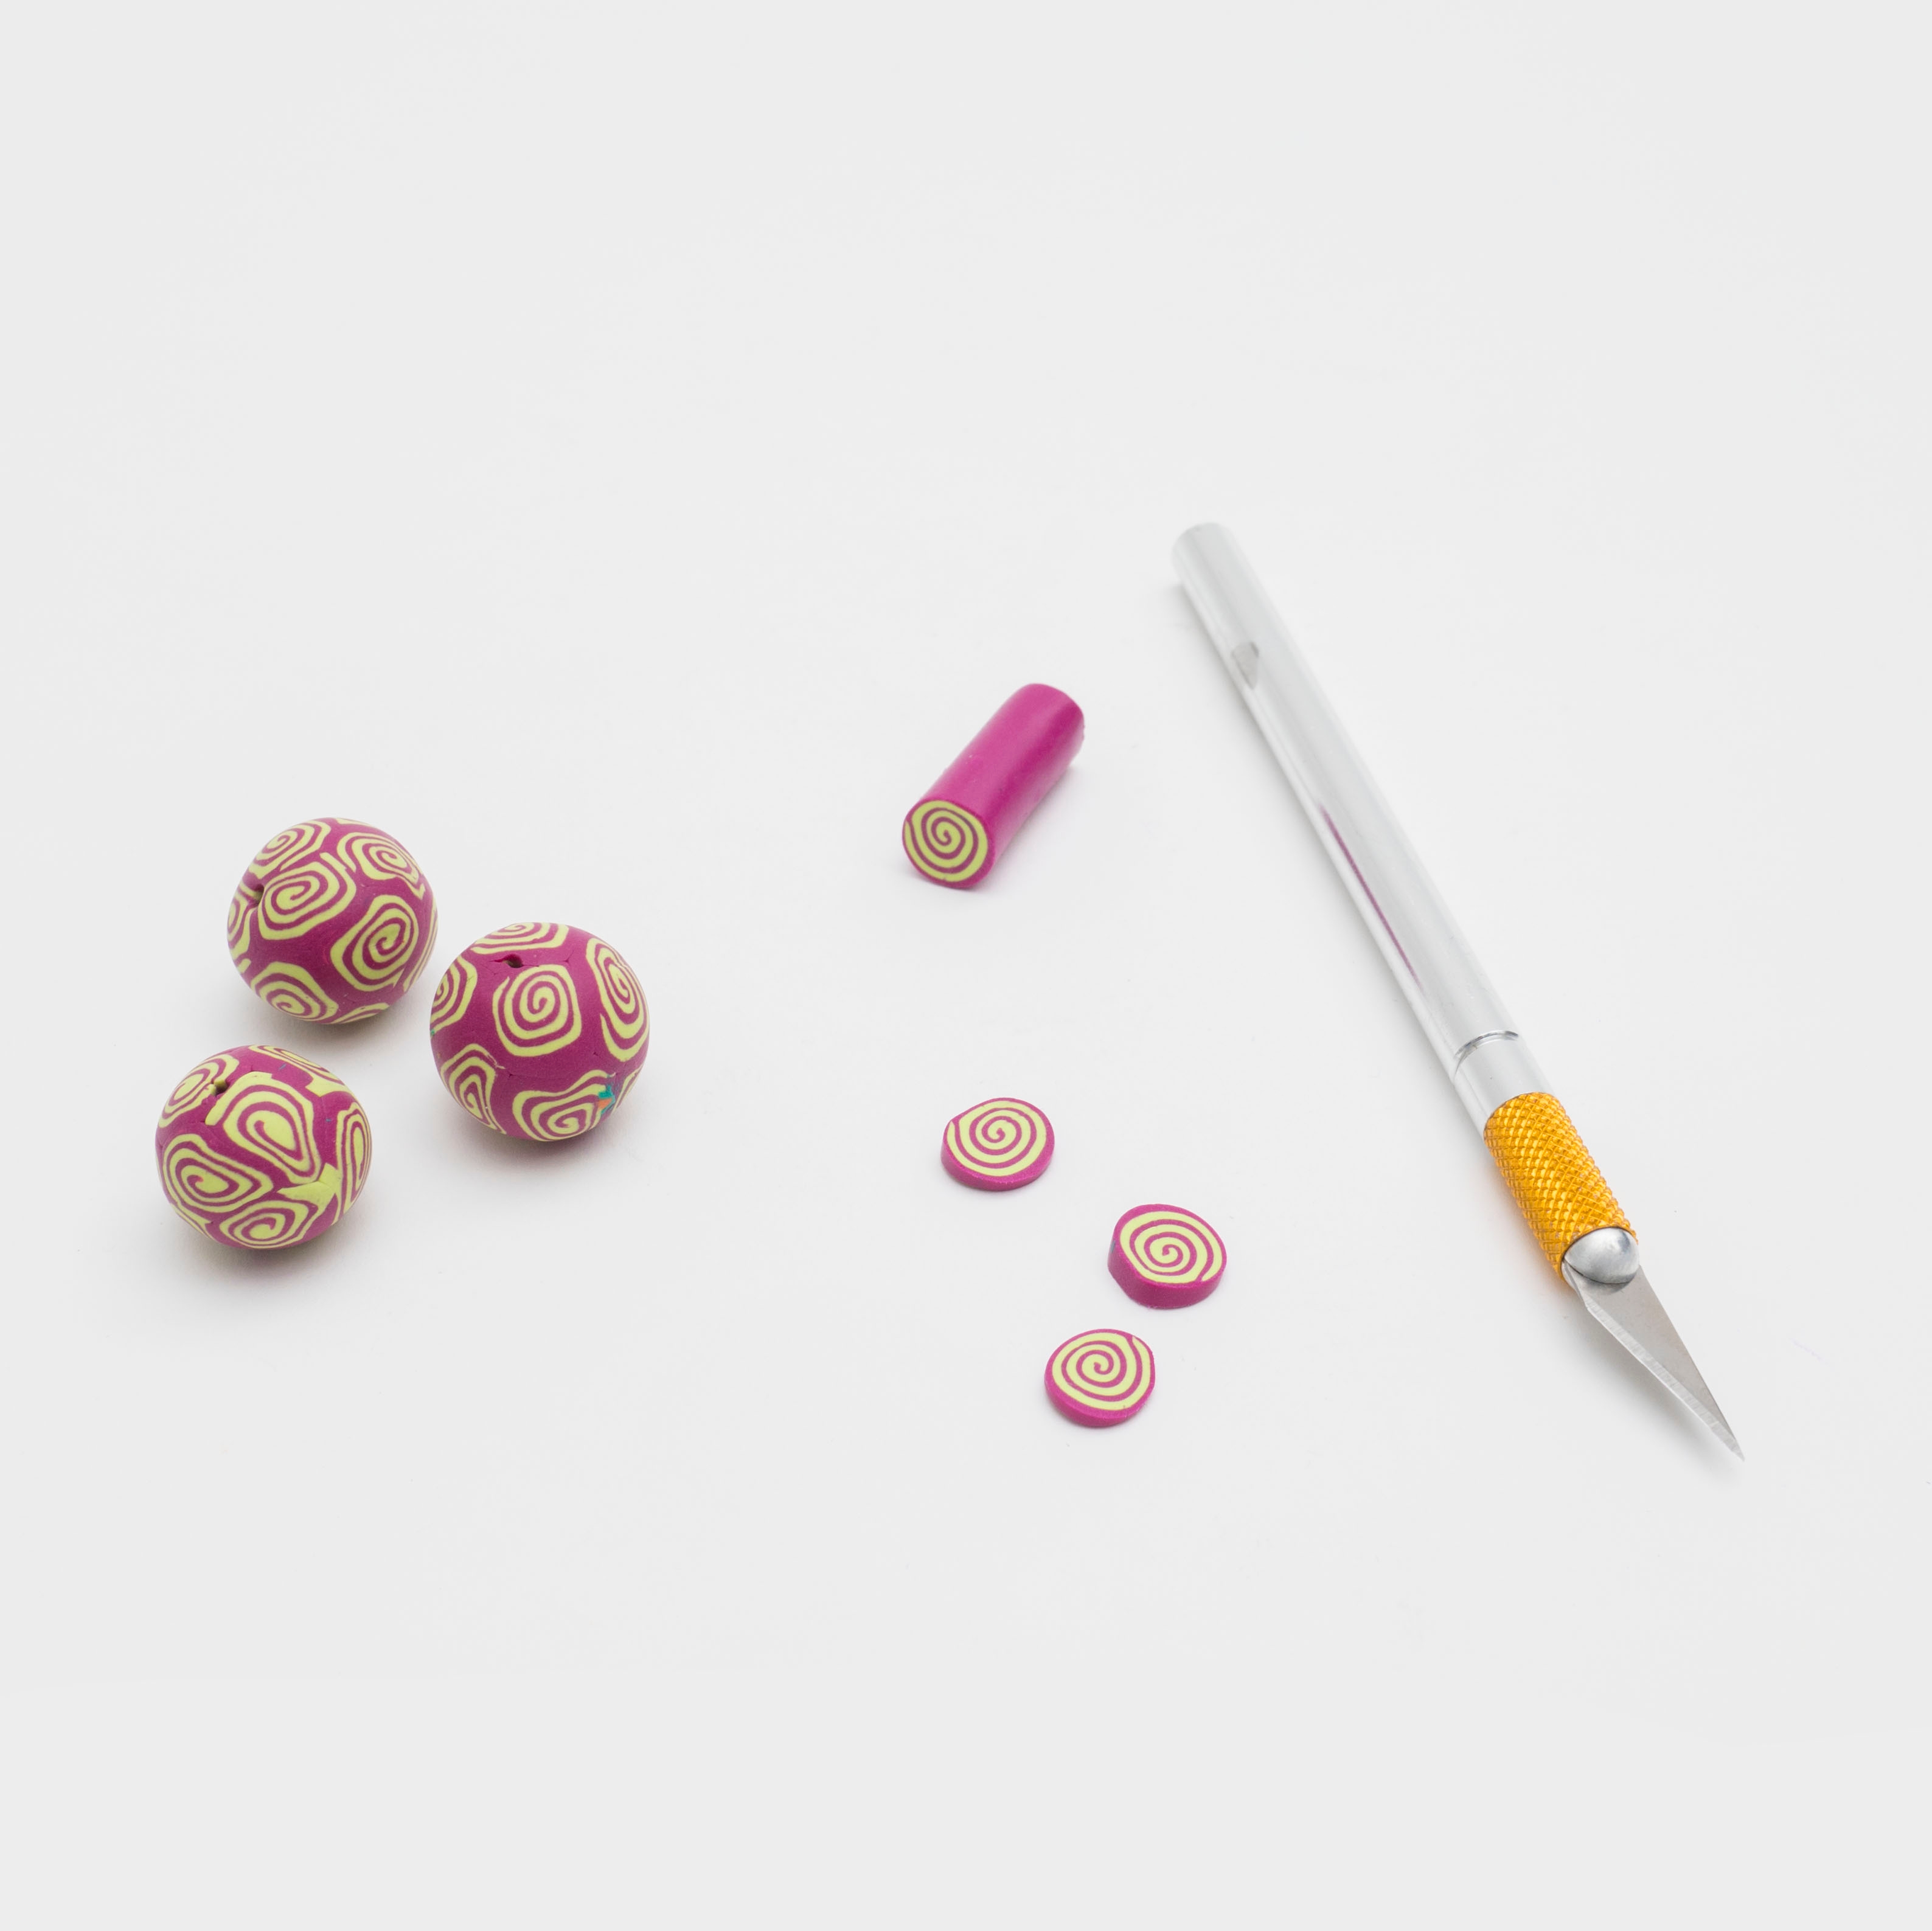
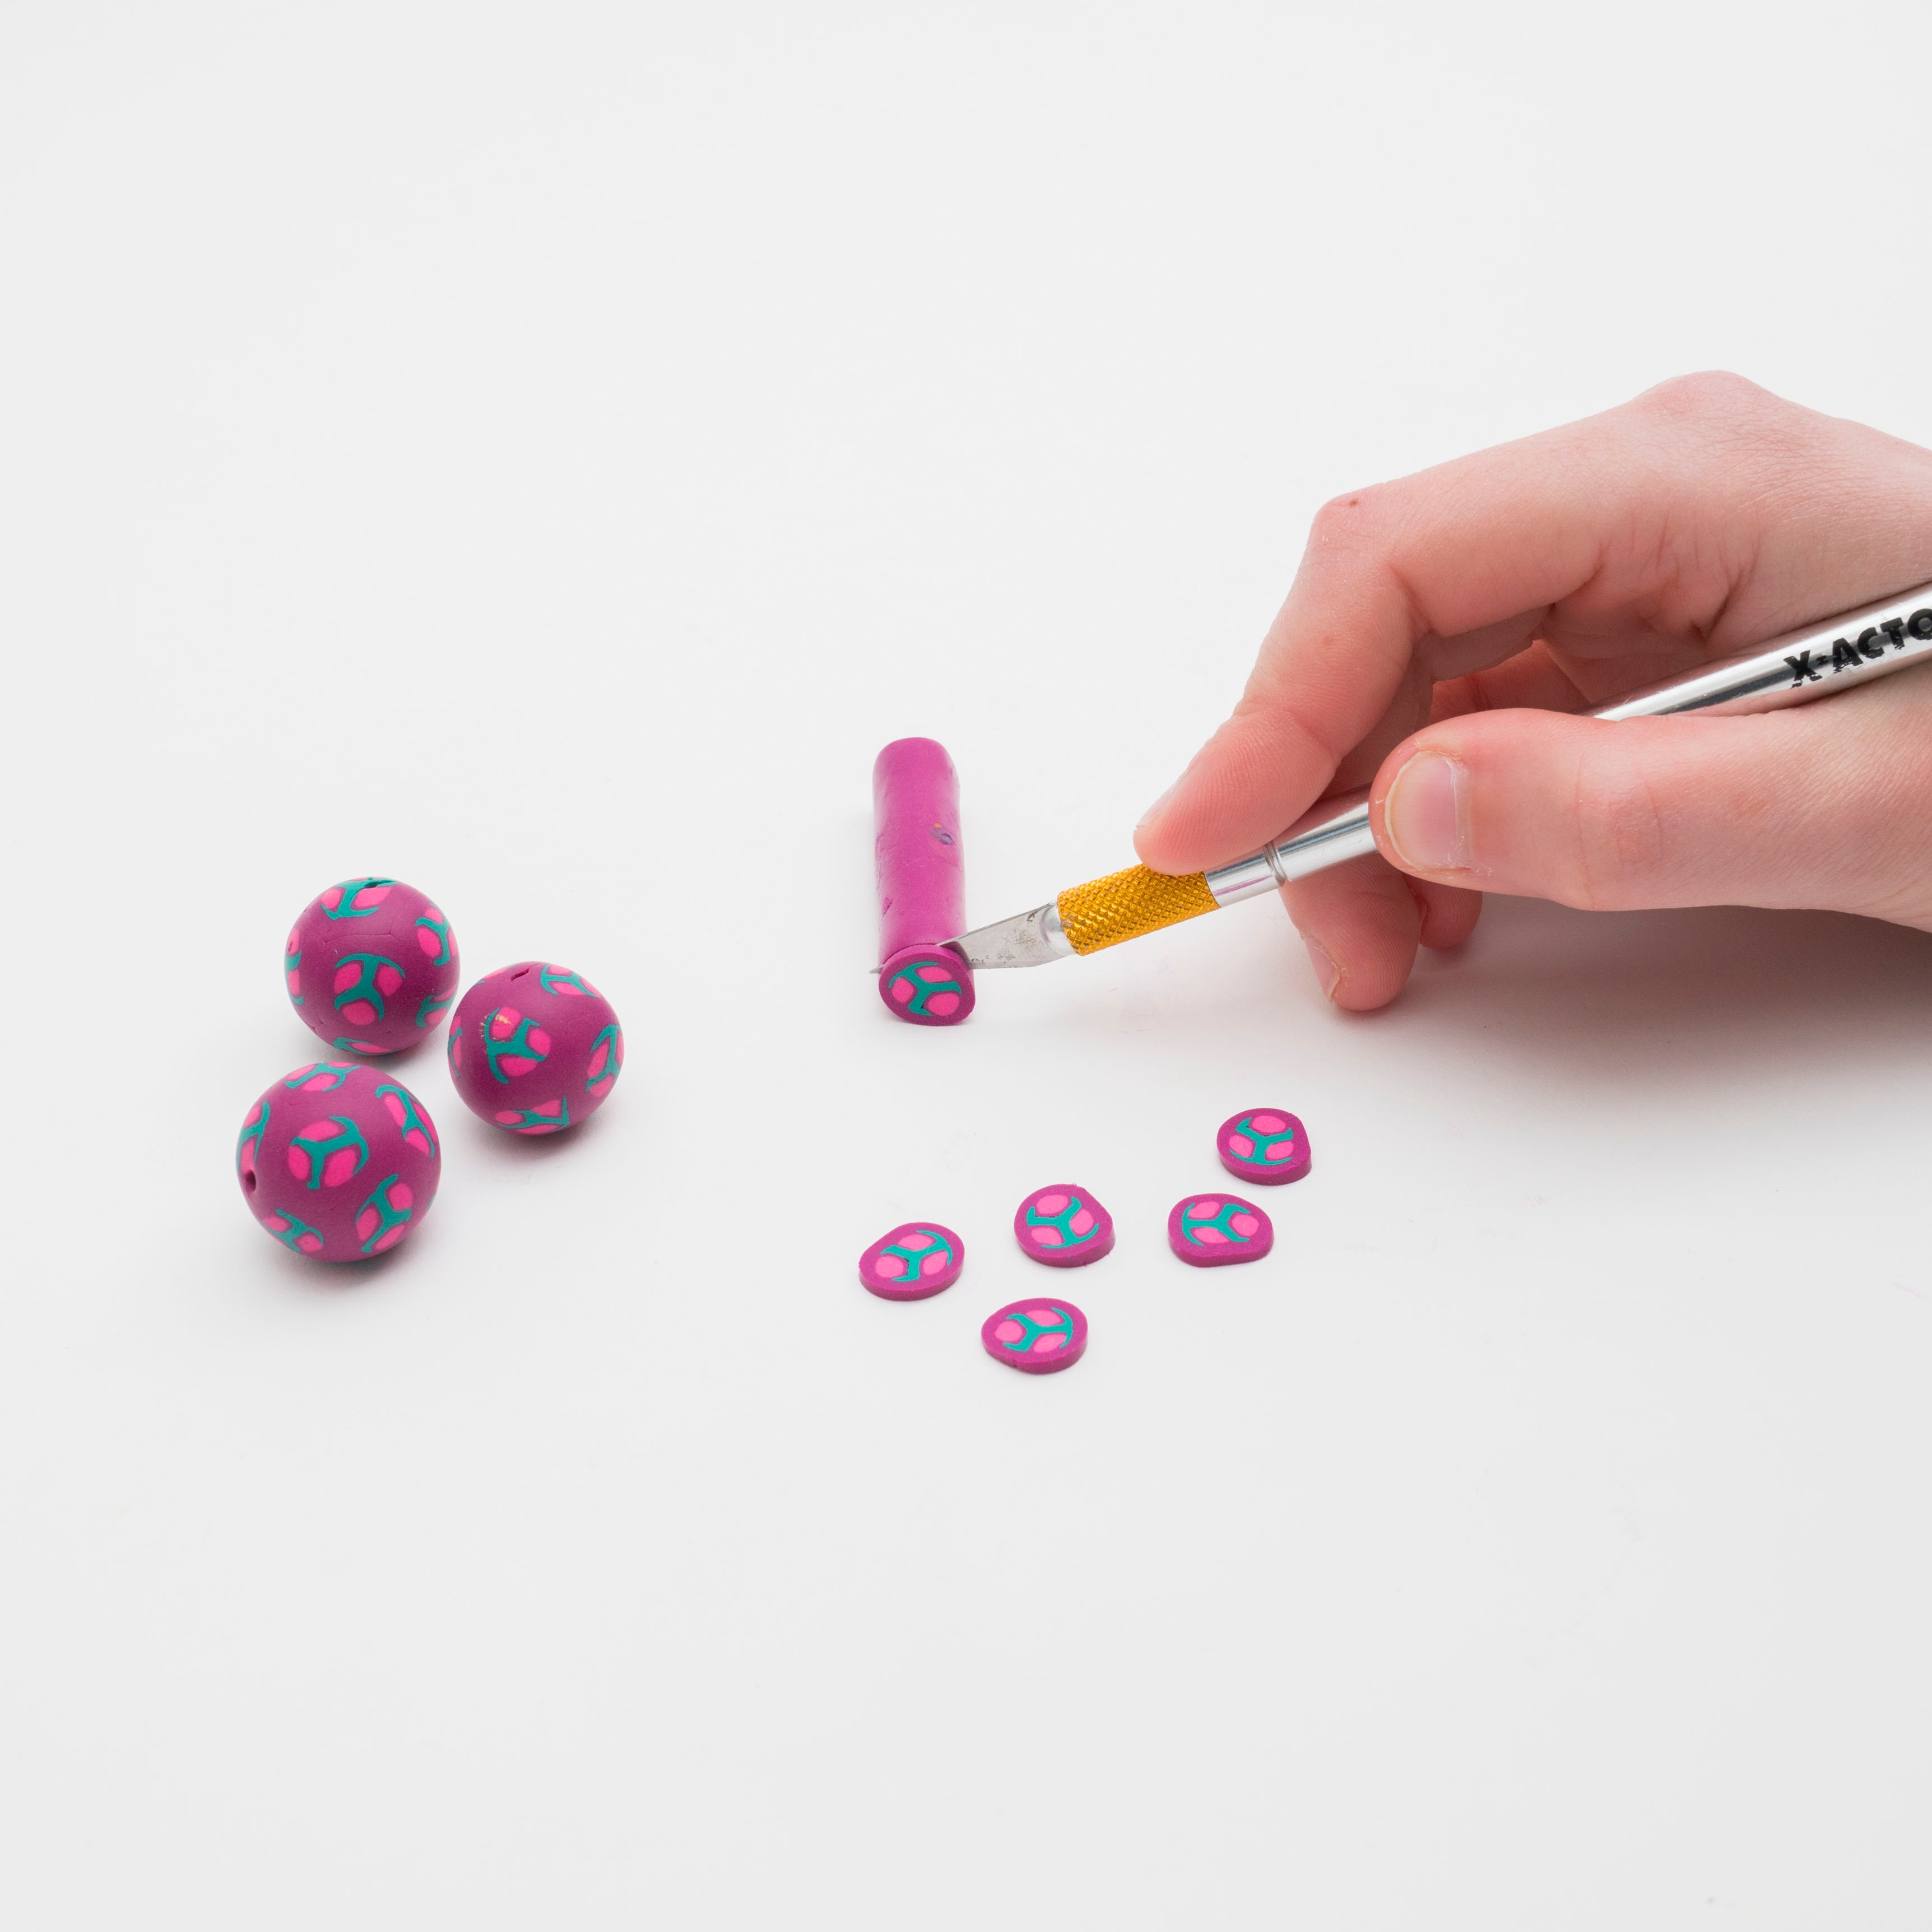
Step 16
Now that you know what you’re doing, there are a bunch of different patterns you can make! Try cutting multiple cross sections and putting them together around a clay ball - like these!
Done!
To make your designs permanent, bake your clay at 275 degrees, adding 30 minutes to your bake time for every ¼-inch thickness.


