Step-by-step tutorial
Step 1
We used an acrylic paint that was made for glass on our jar, but any paint will work if you are not looking for a very permanent paint. Foam stars are ideal for easy removal. We used what we had and they worked fine too.


Step 2
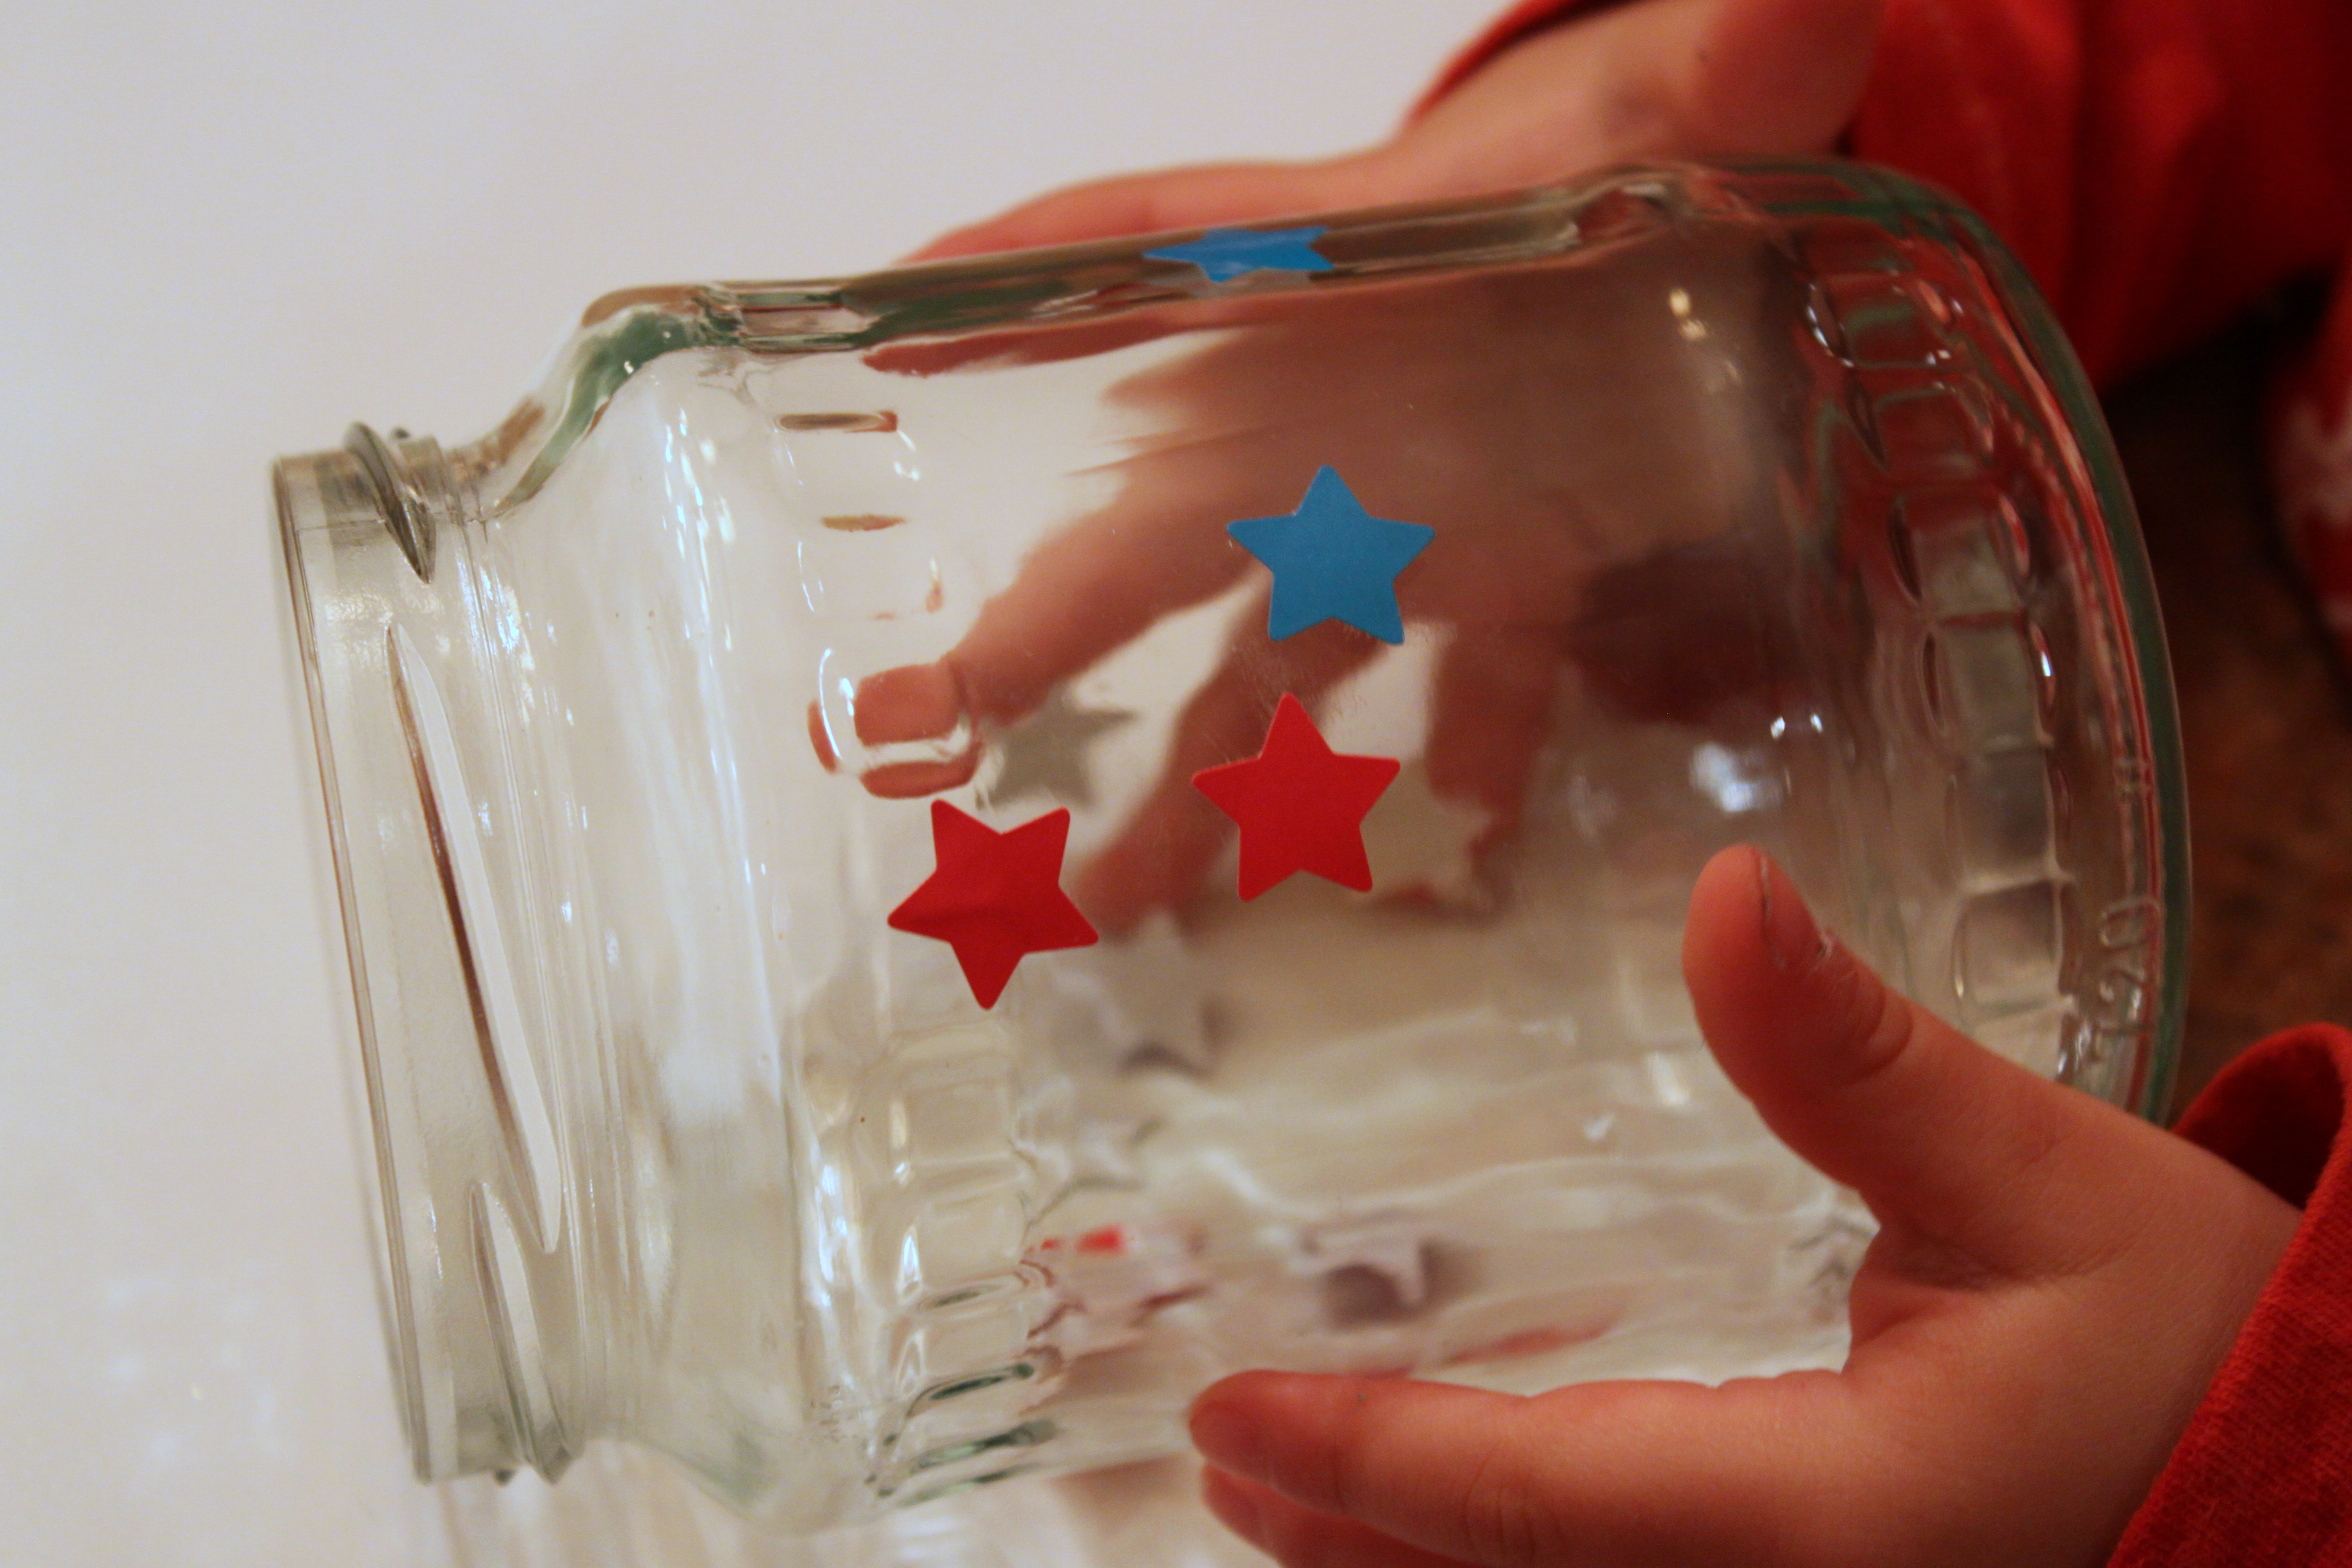
Grayson got to placing the stars all over the jar. He liked deciding the placement of each and every one.
Step 3
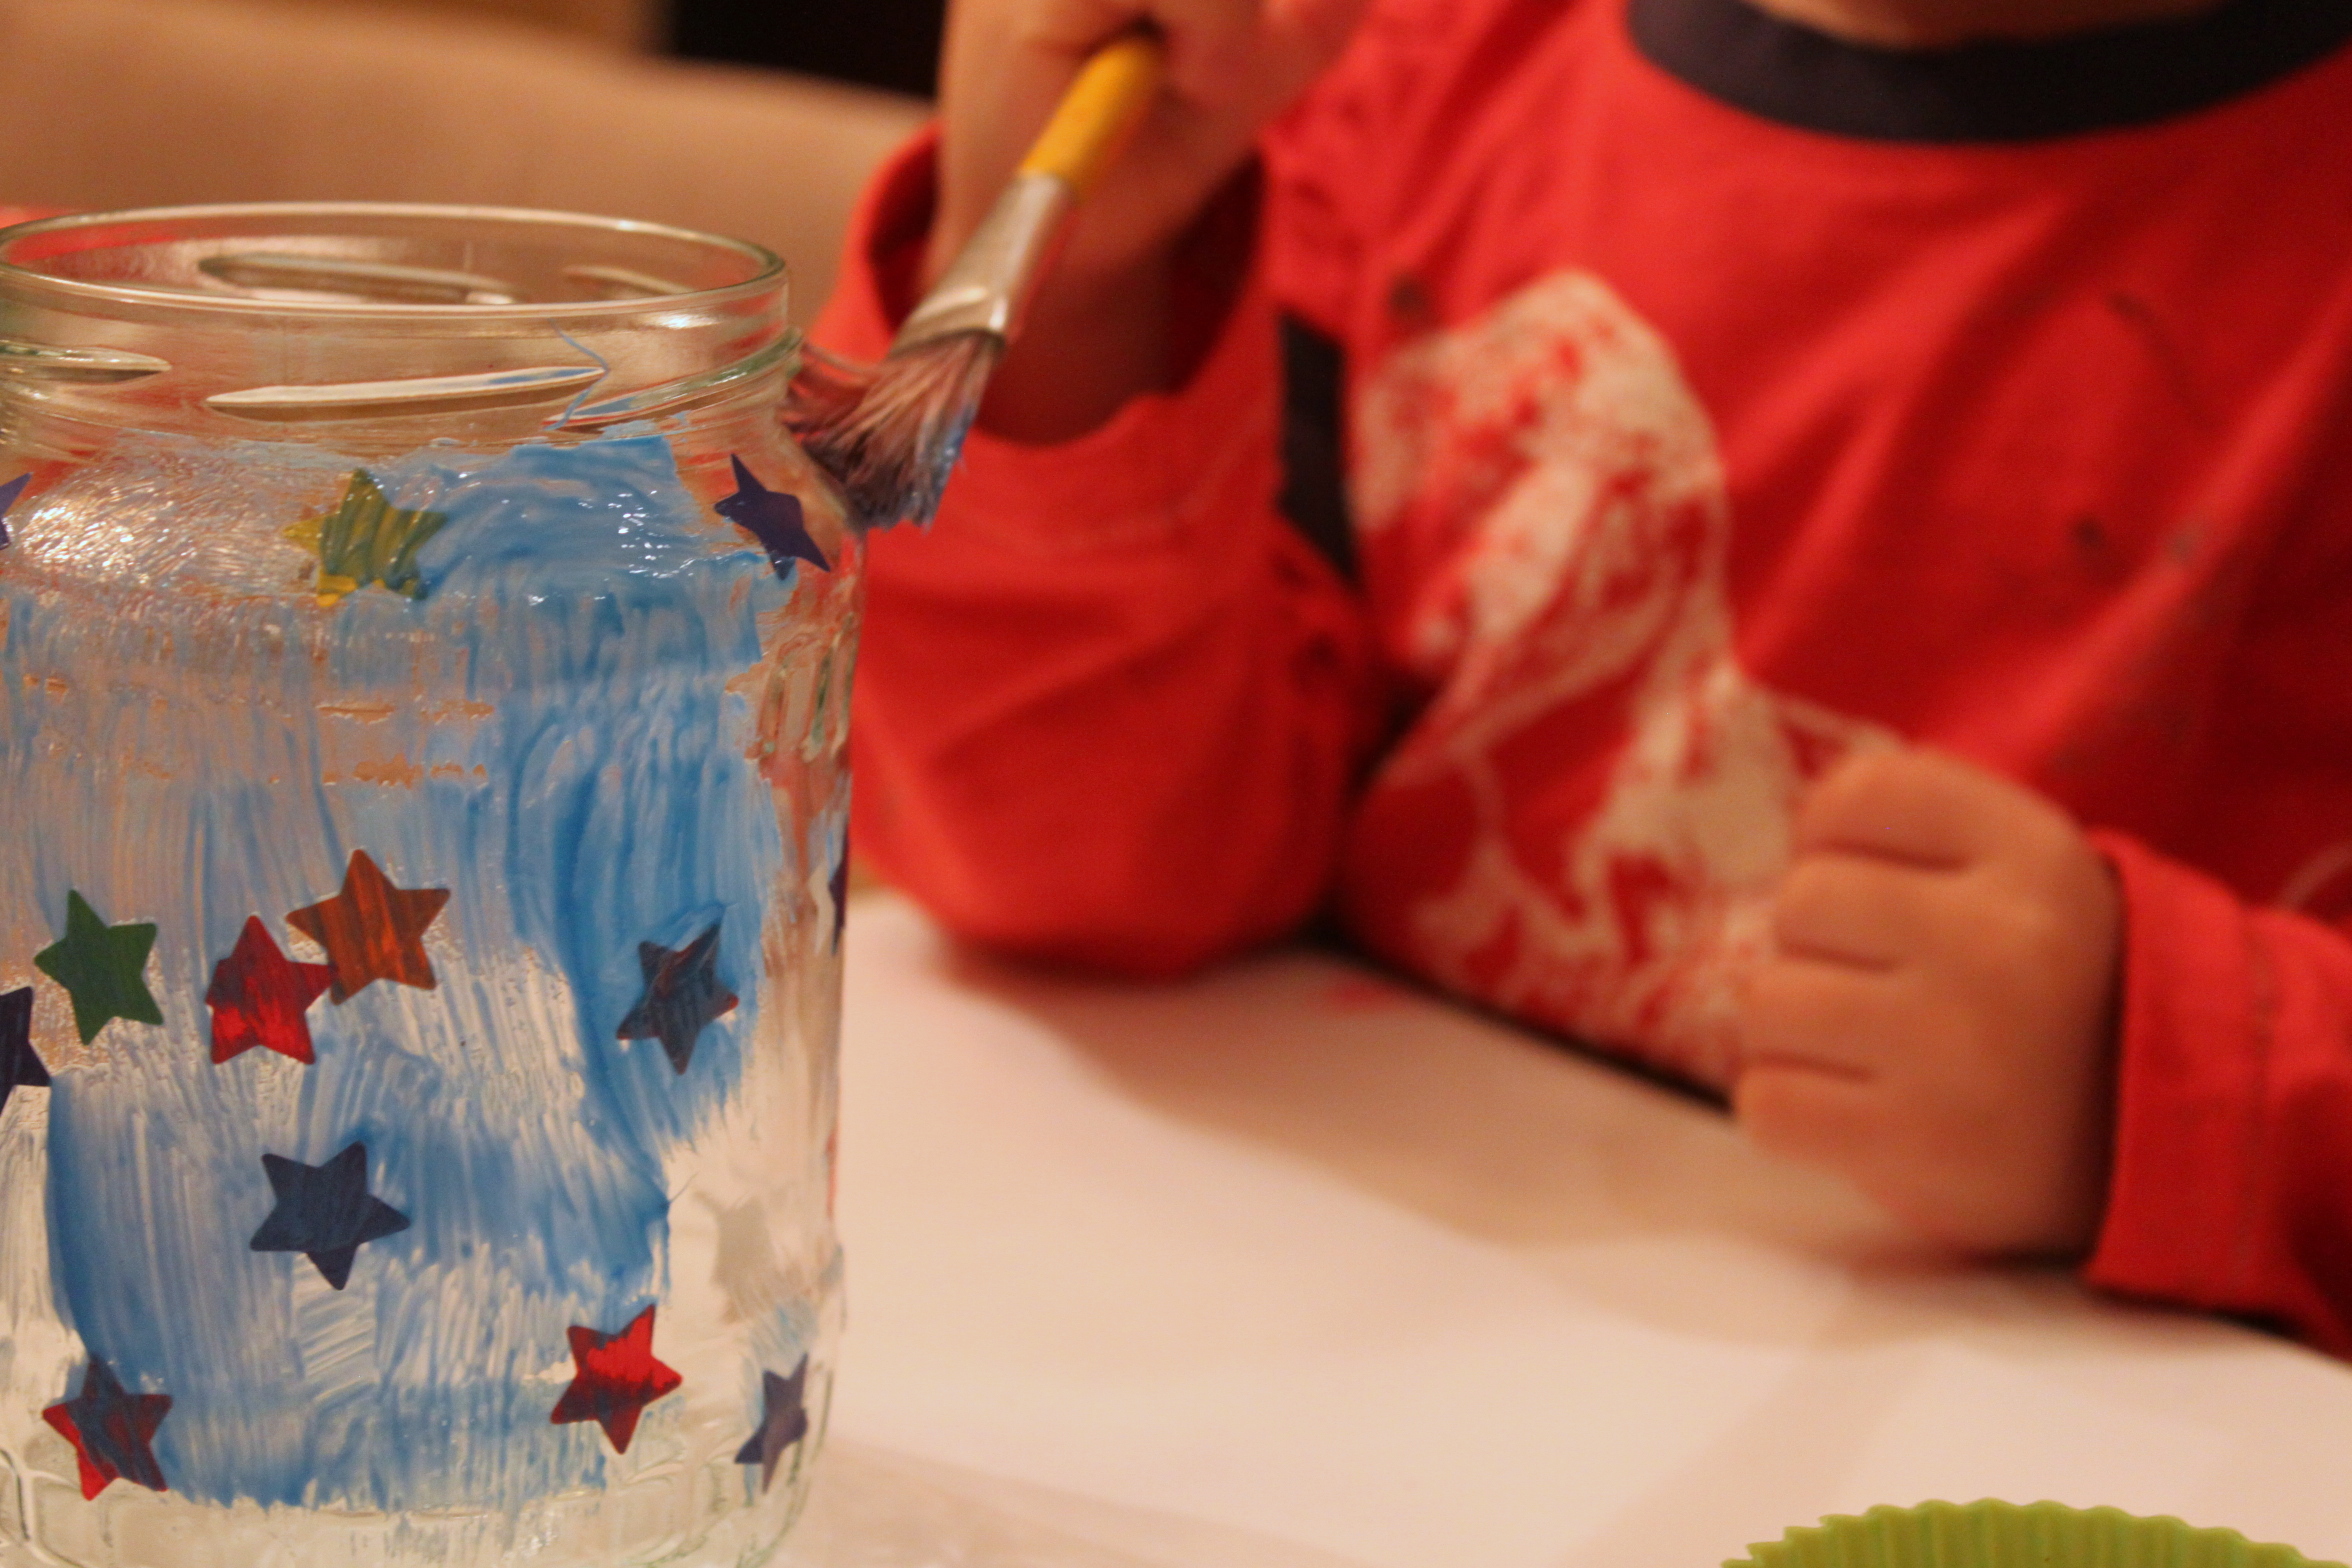
Once the stars were in place, Grayson painted over the entire jar (stickers and all).
Step 4
We let it set for a few minutes and while the paint was still wet, we pulled off each star. Grayson (age two) needed help pulling his stars off, but my five-year-old could easily do this step.
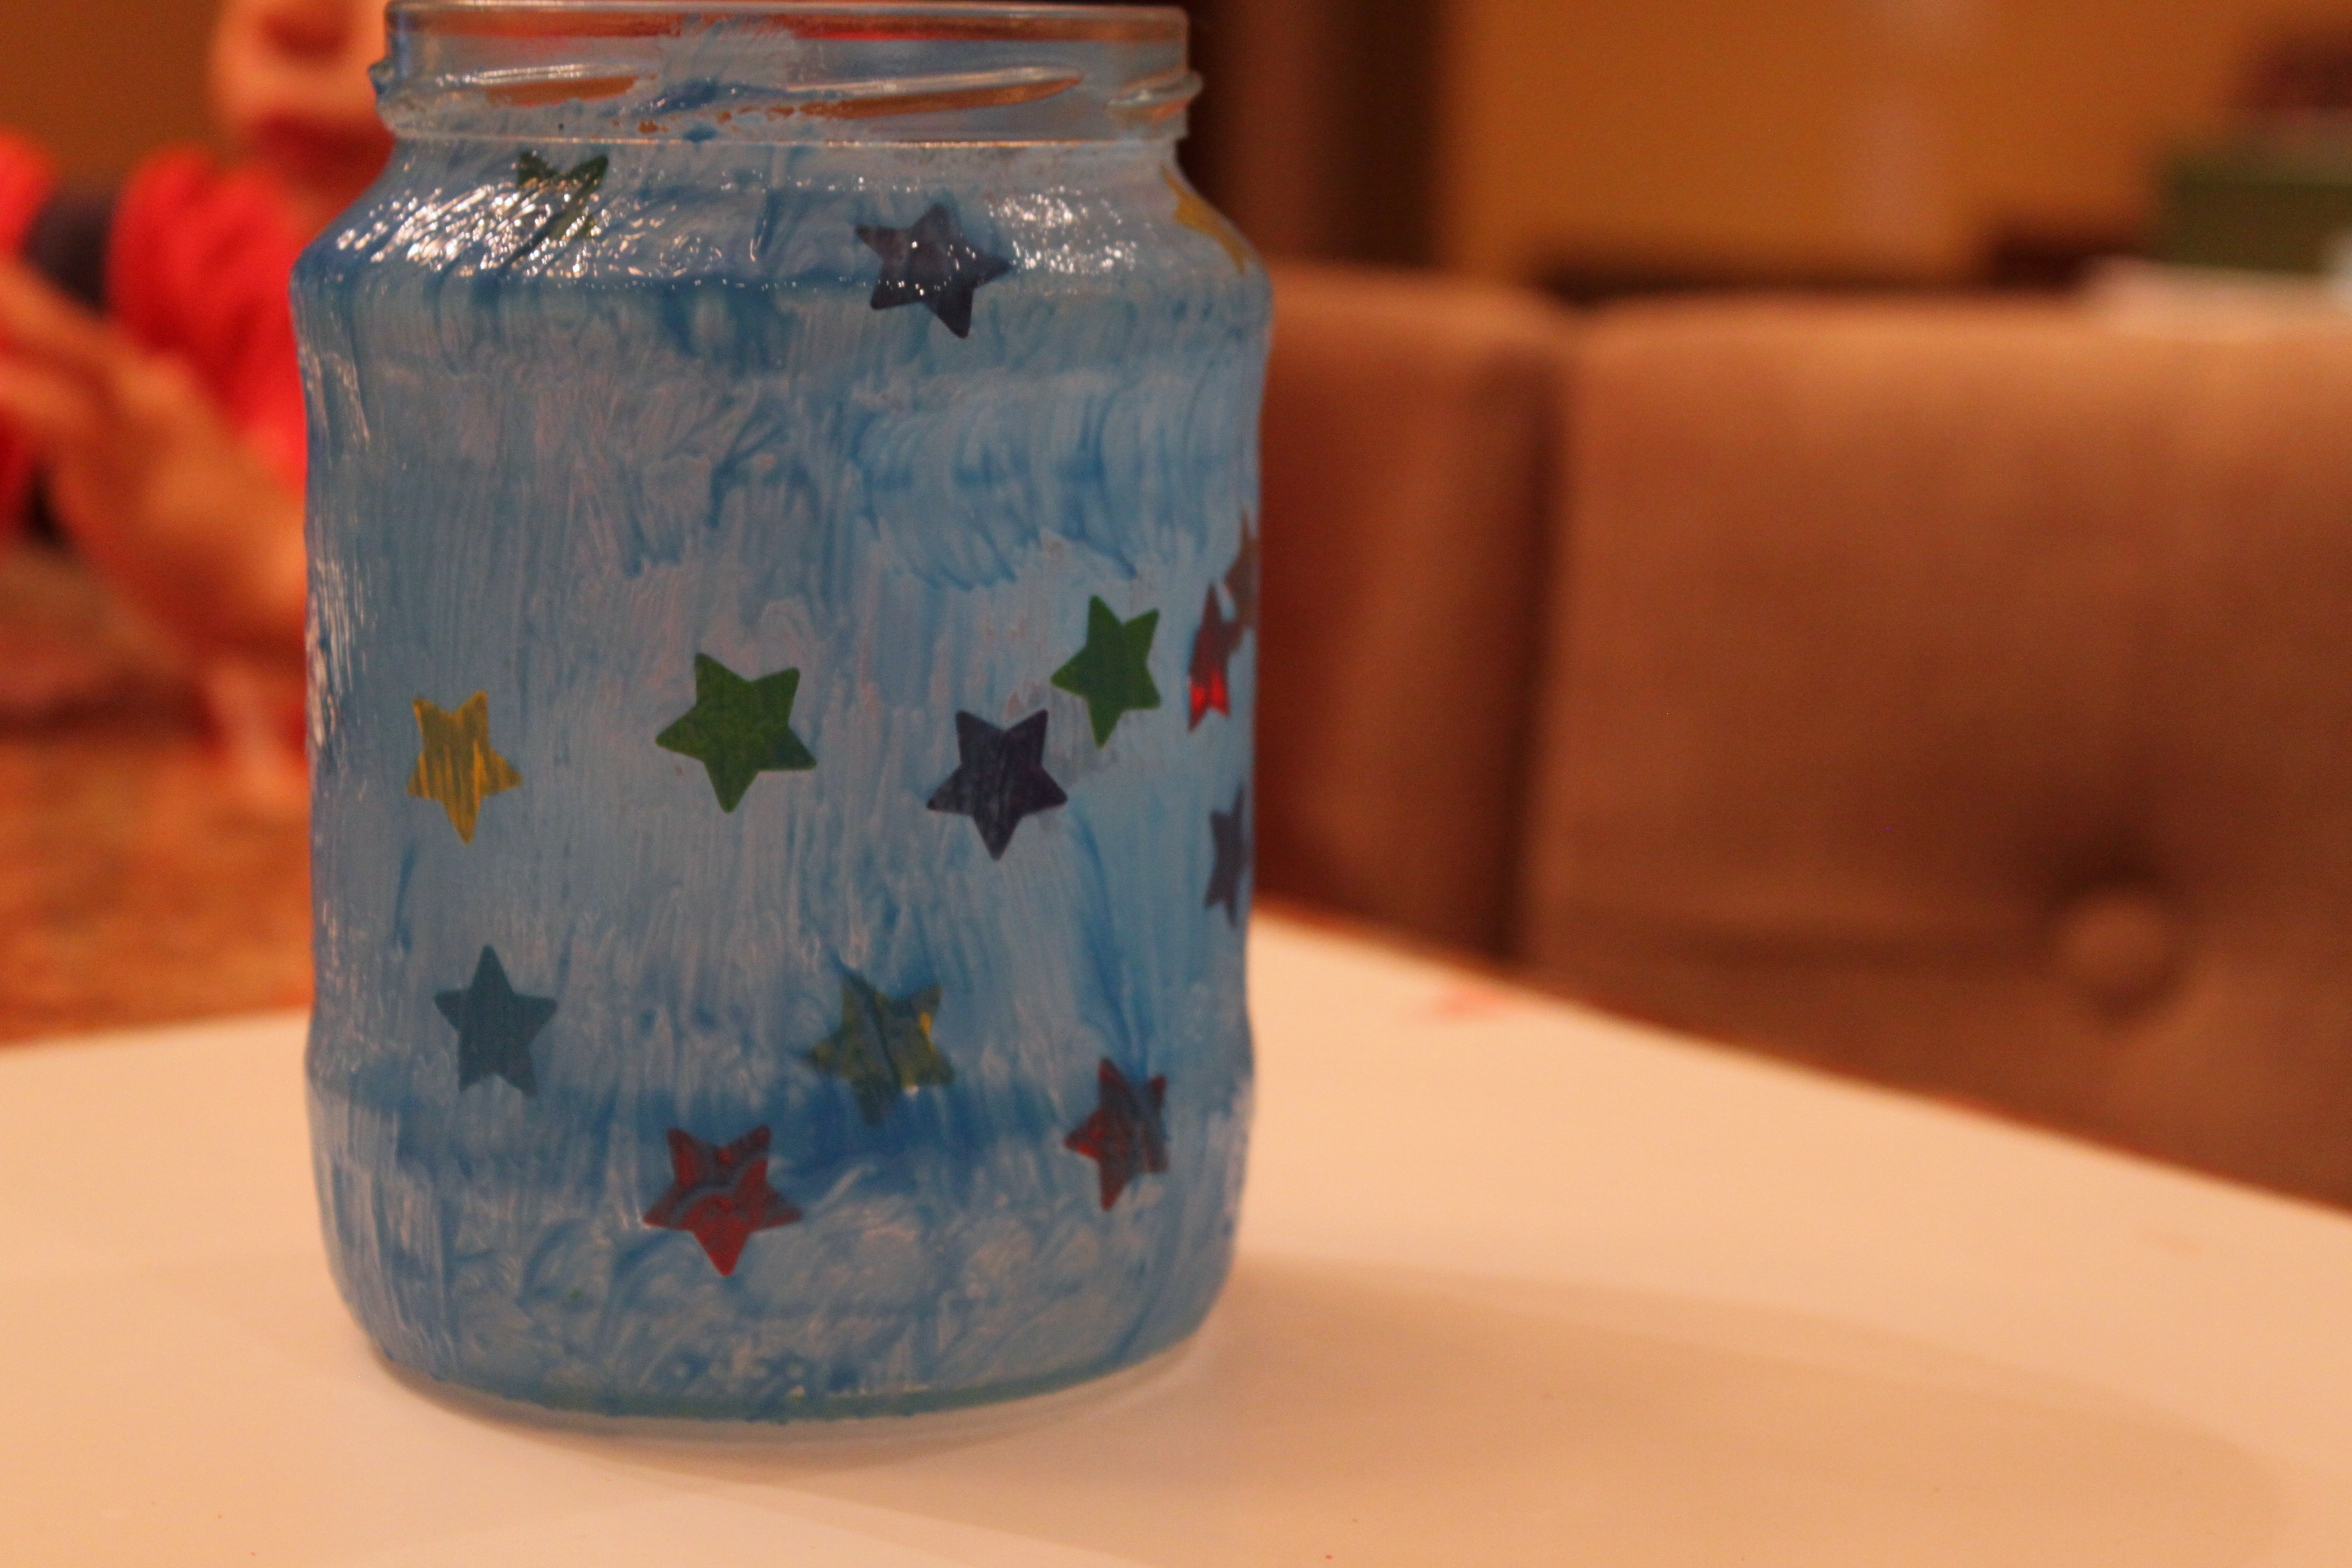
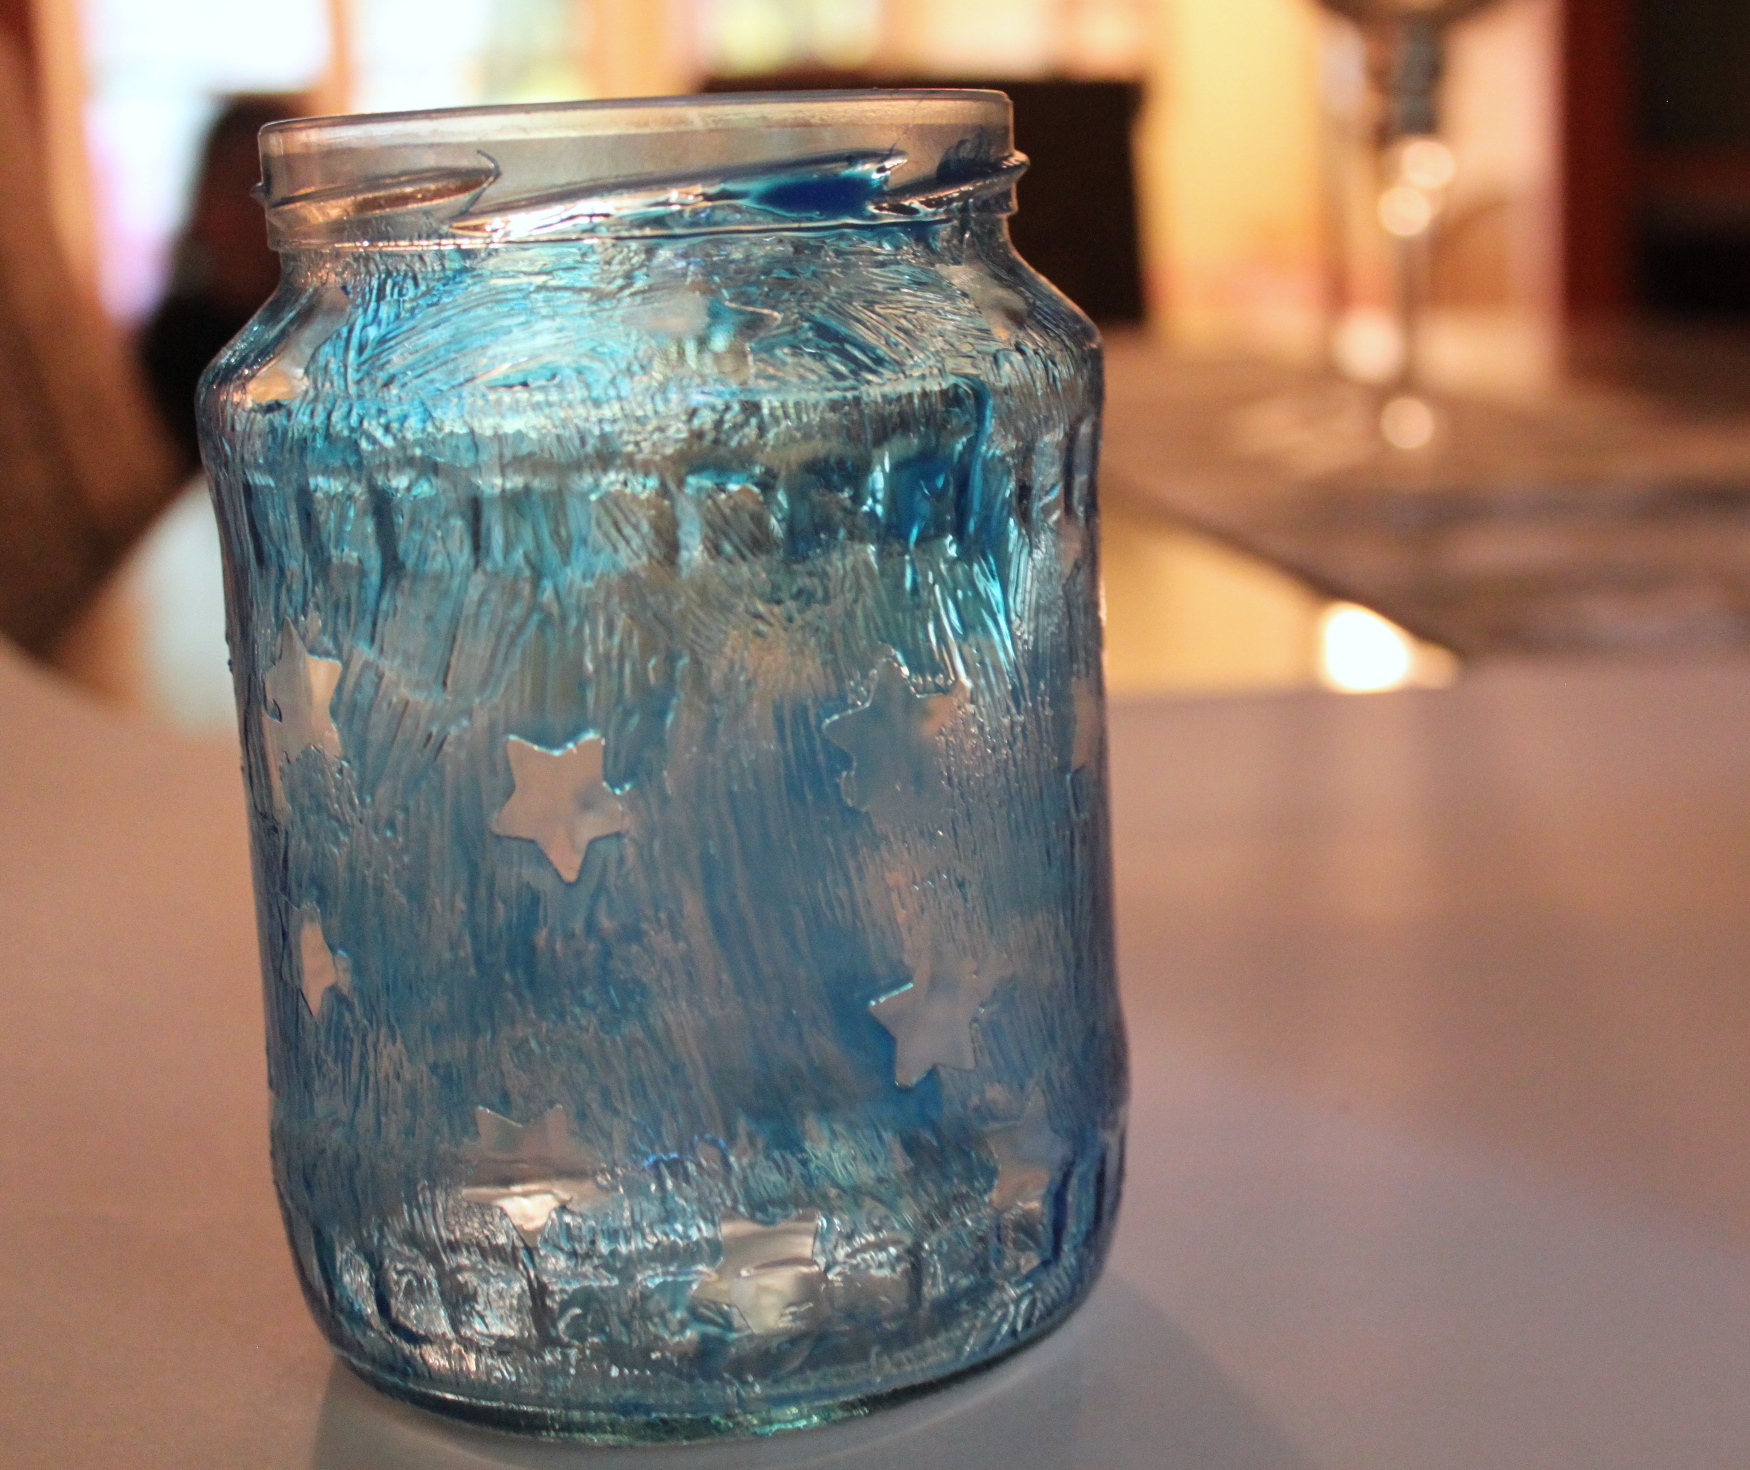
Done!
Once the stars were all removed, we let the jar dry and enjoyed the whimsical look of our star jar just as it was. When we added a battery-operated tea light later on, it became such a beautiful luminary for the kids' room.