Shaving Cream Prints

This is one of those projects that you don't get the wow factor out of until you finally do it. We have become a little addicted to making these paintings now. It feels almost magical when you reveal. The final shaving cream print can then be turned into all sorts of things, such as the bookmarks we made. You could then give them out as gifts. I am sure they would make great Father’s Day presents or a fun activity to do with Dad.

How it works?

Shaving cream contains soap, and soap is an emulsifier. That means it can grab grease and water, making it easier to wash grime away. In this project, the soap helps provide a platform for you to mix up the colors. Because food coloring is mostly made of water, the water-fearing end of the soap pushes it away. This keeps the color floating on the surface of the shaving cream so that you can make your print.

  1. Ages: 0 - 5

  2. <30 minutes

  3. Messy

Tags:

Materials you'll need

Step-by-step tutorial
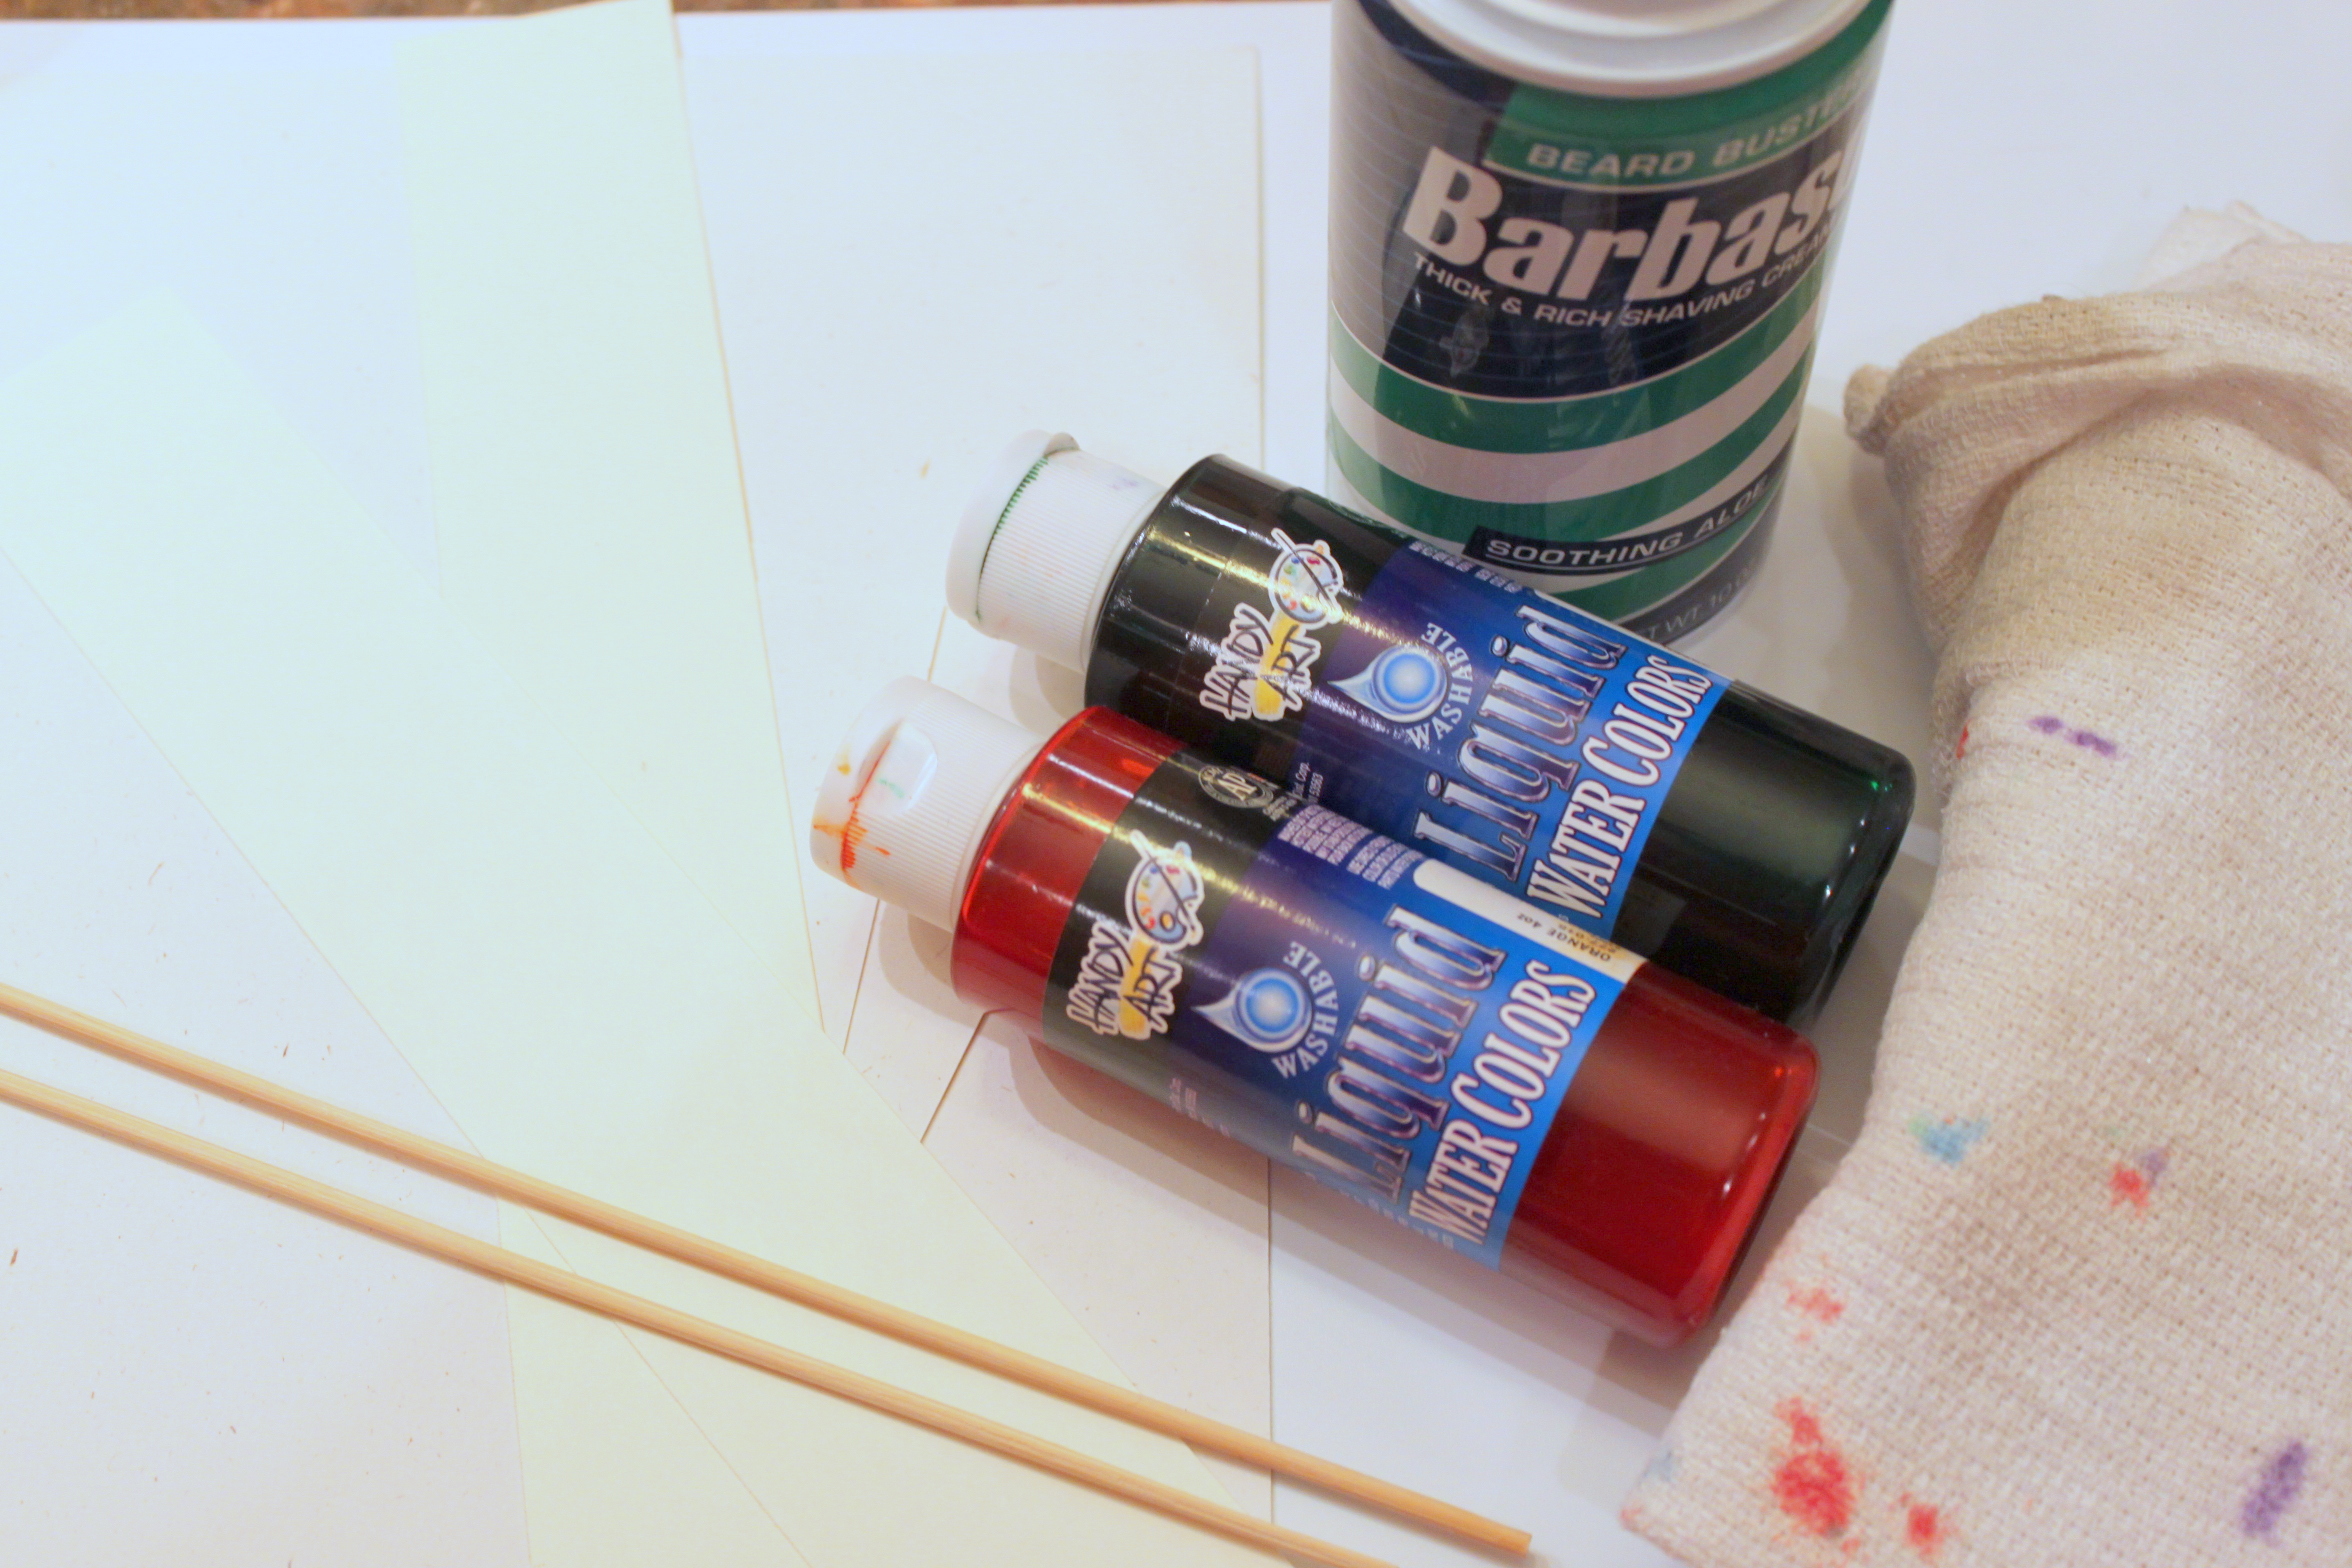
  • Step 1

    We used liquid watercolor paint for this, but you can also use food color for this project.
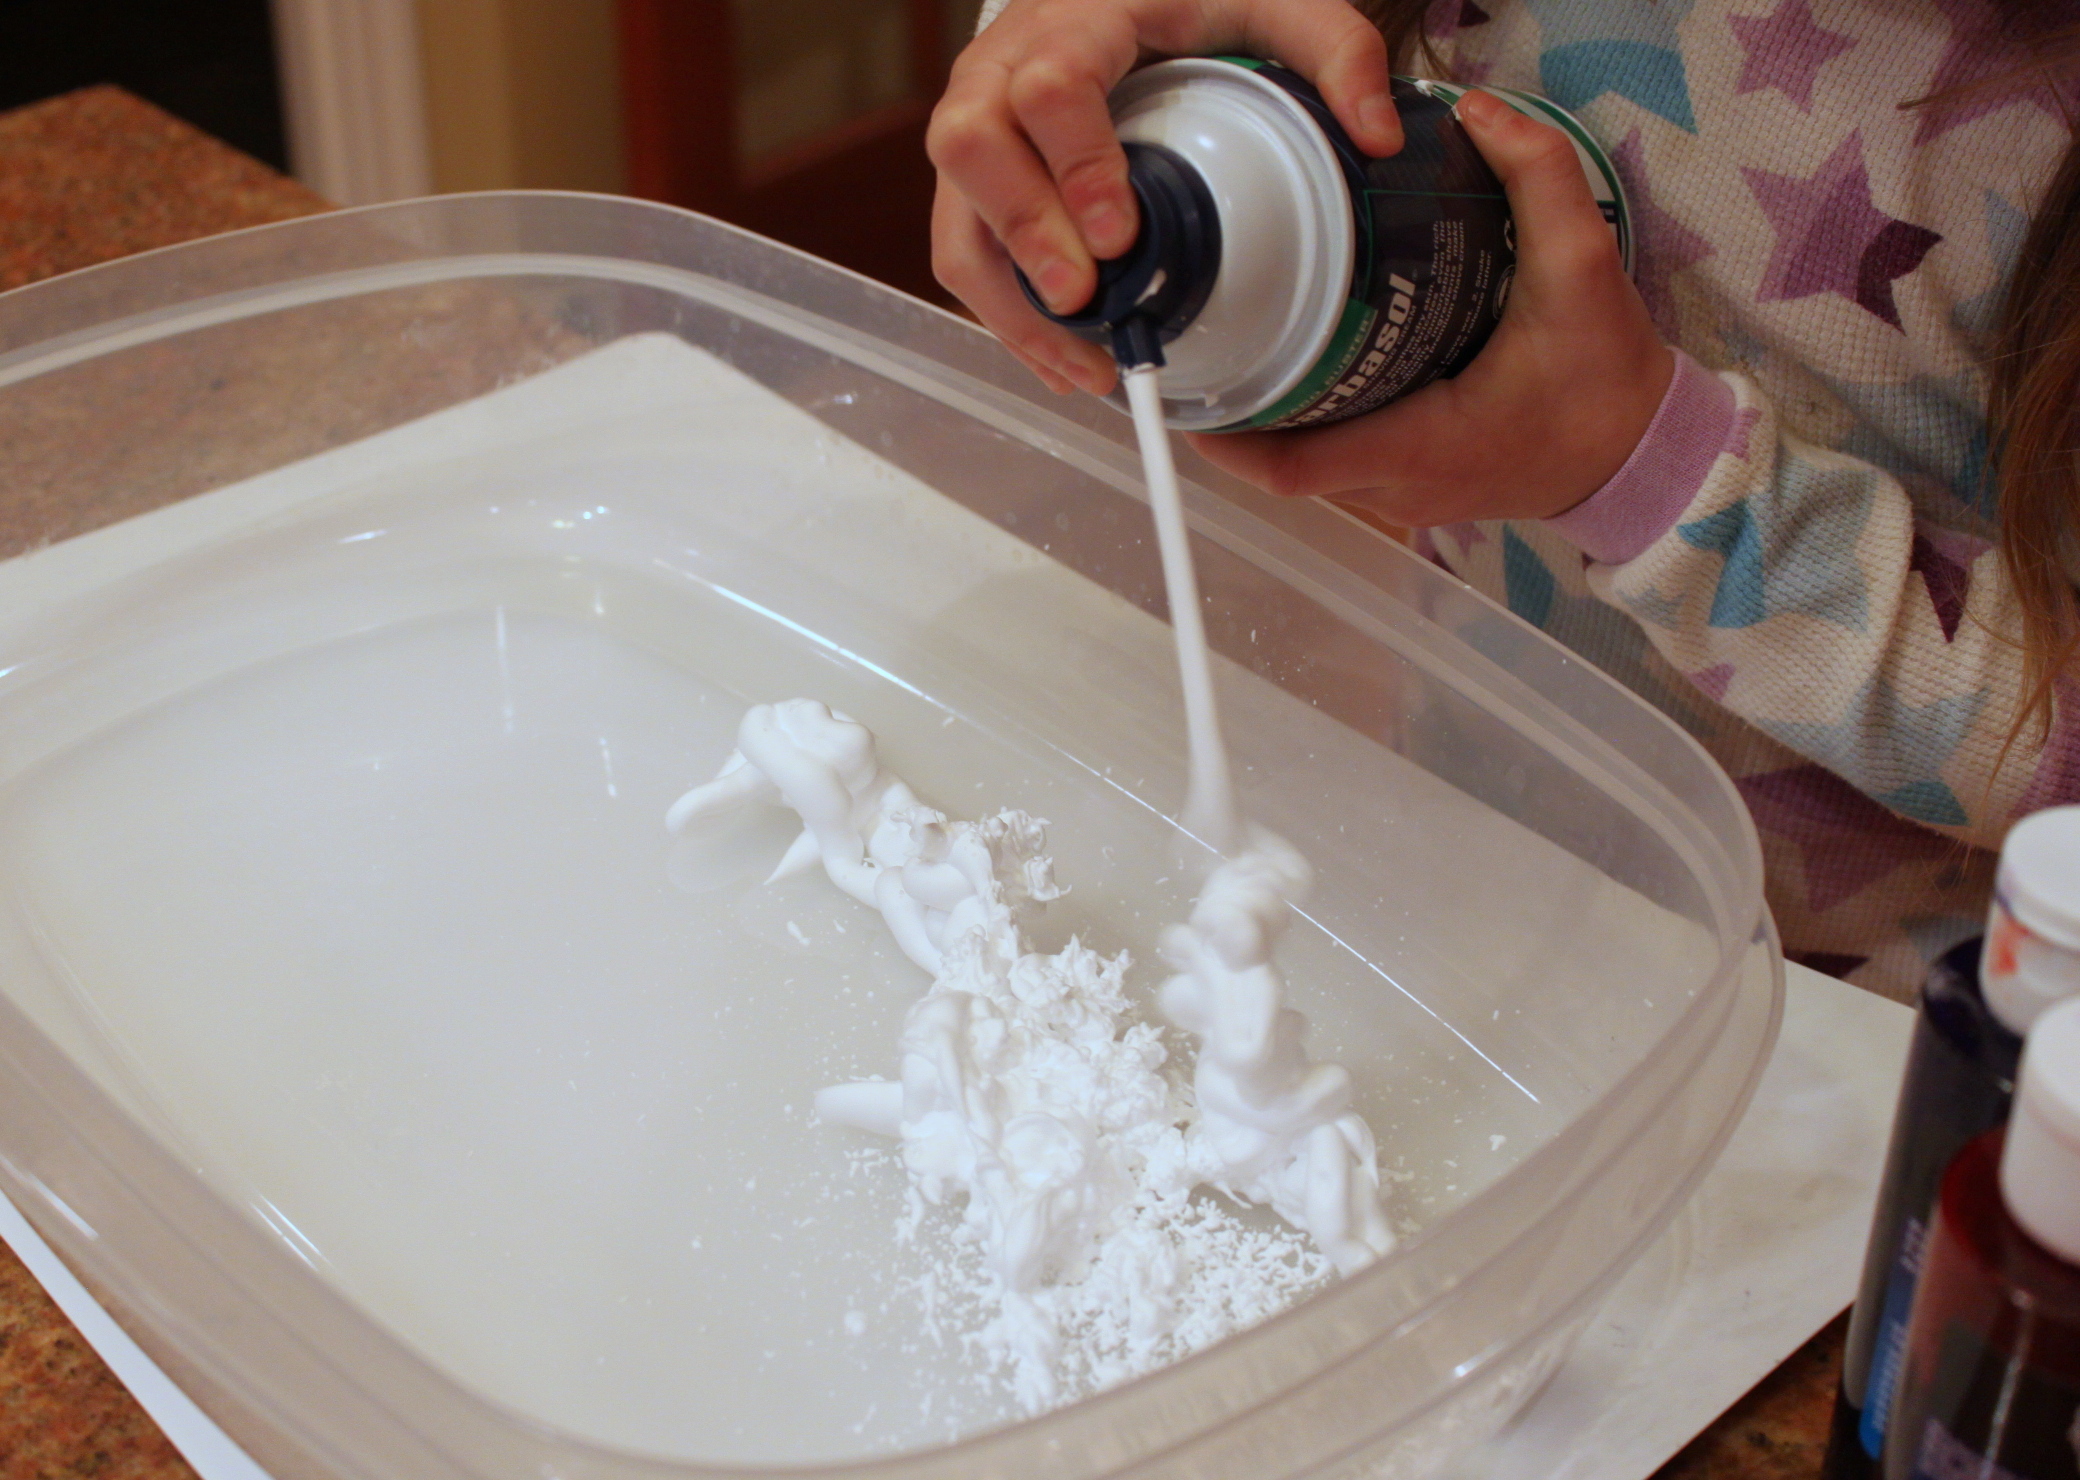
    Photo reference of how to complete step 1

  • Step 2

    We first filled our shallow tray with shaving cream and spread it out into an even layer.
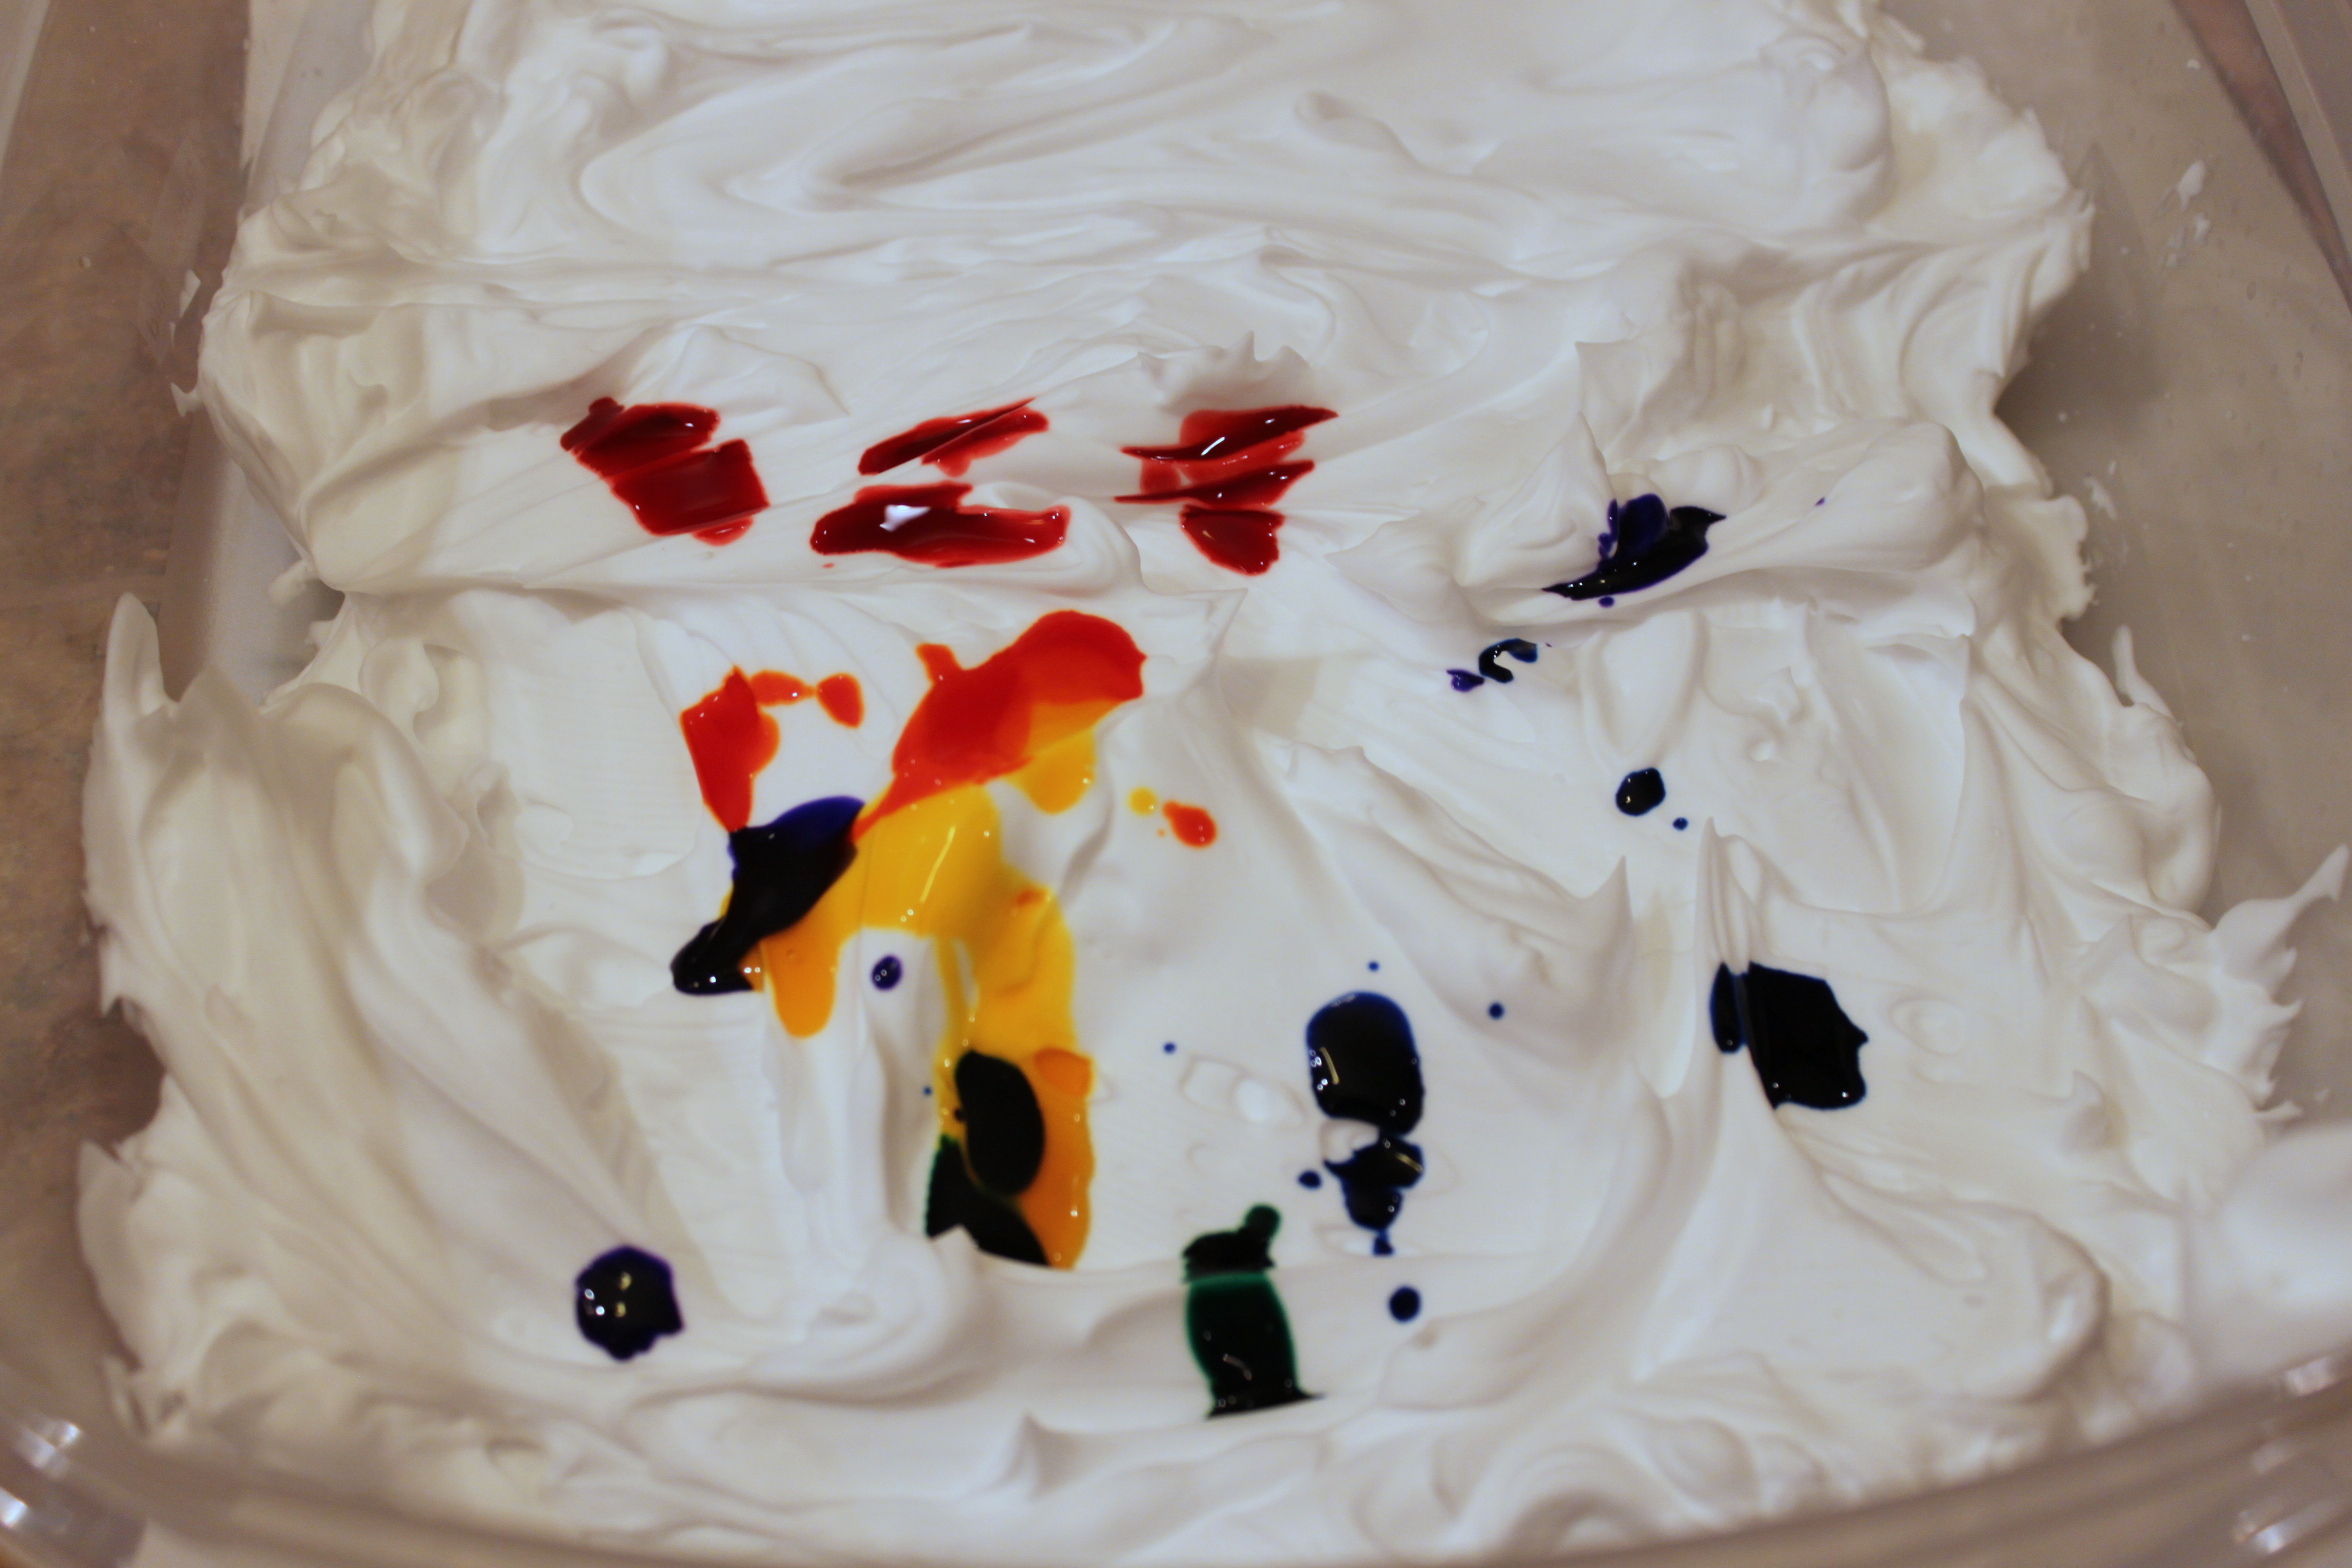
    Photo reference of how to complete step 2

  • Step 3

    Next, Emma added a few drops of the paint right on top.
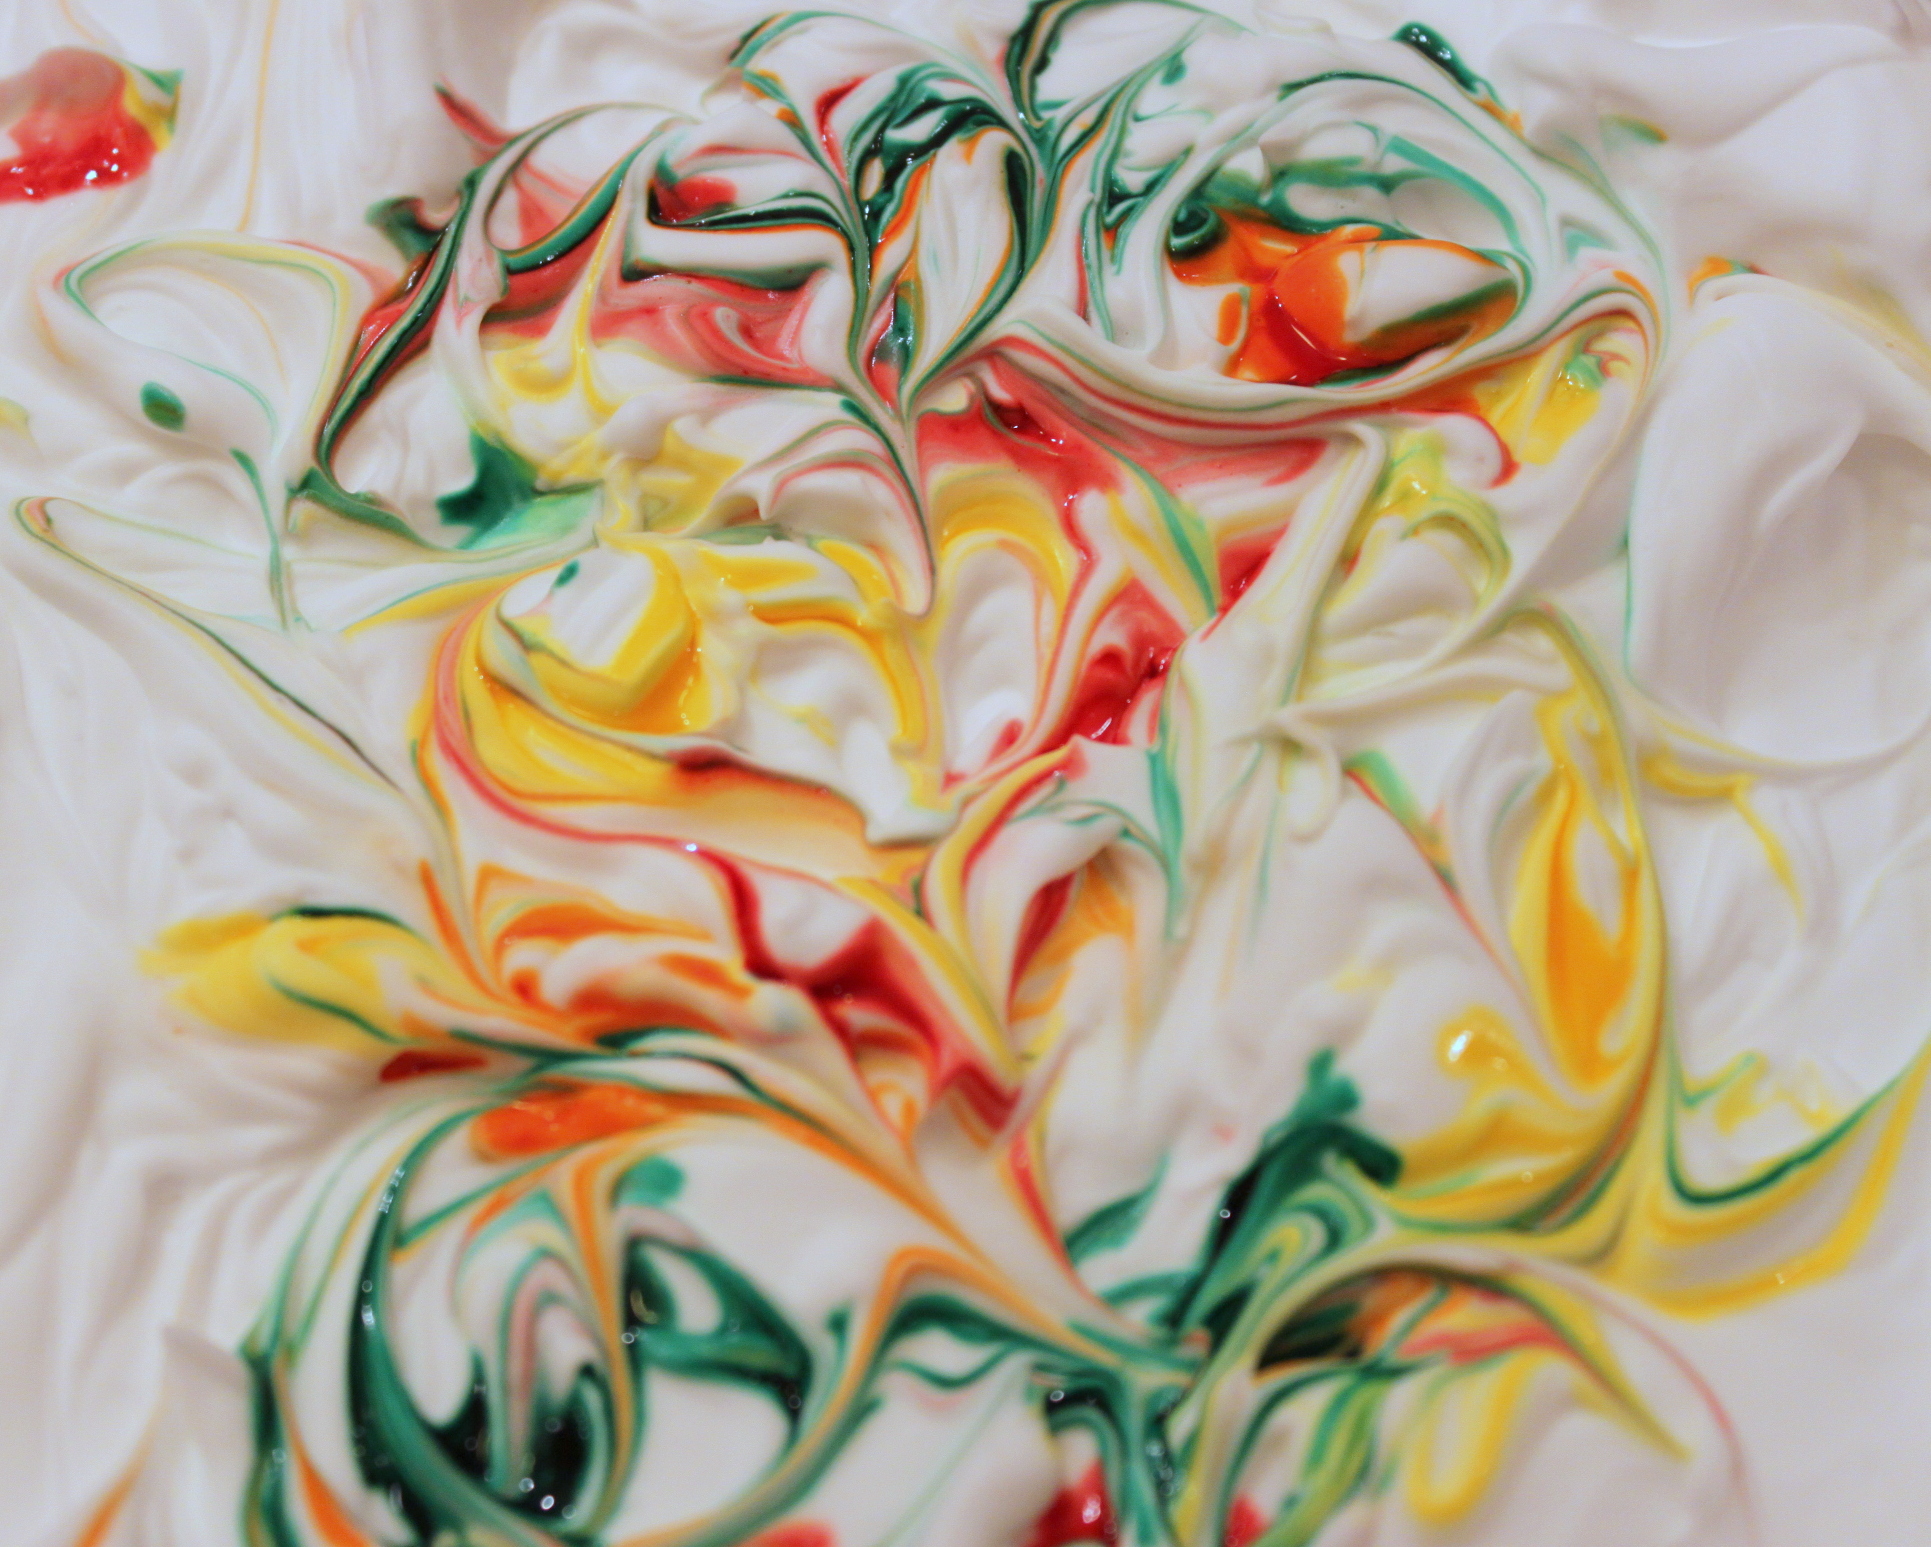
    Photo reference of how to complete step 3

  • Step 4

    With a skewer we swirled the paint into the shaving cream. This was especially fun for my two-year old. It is all he wanted to do the entire time!
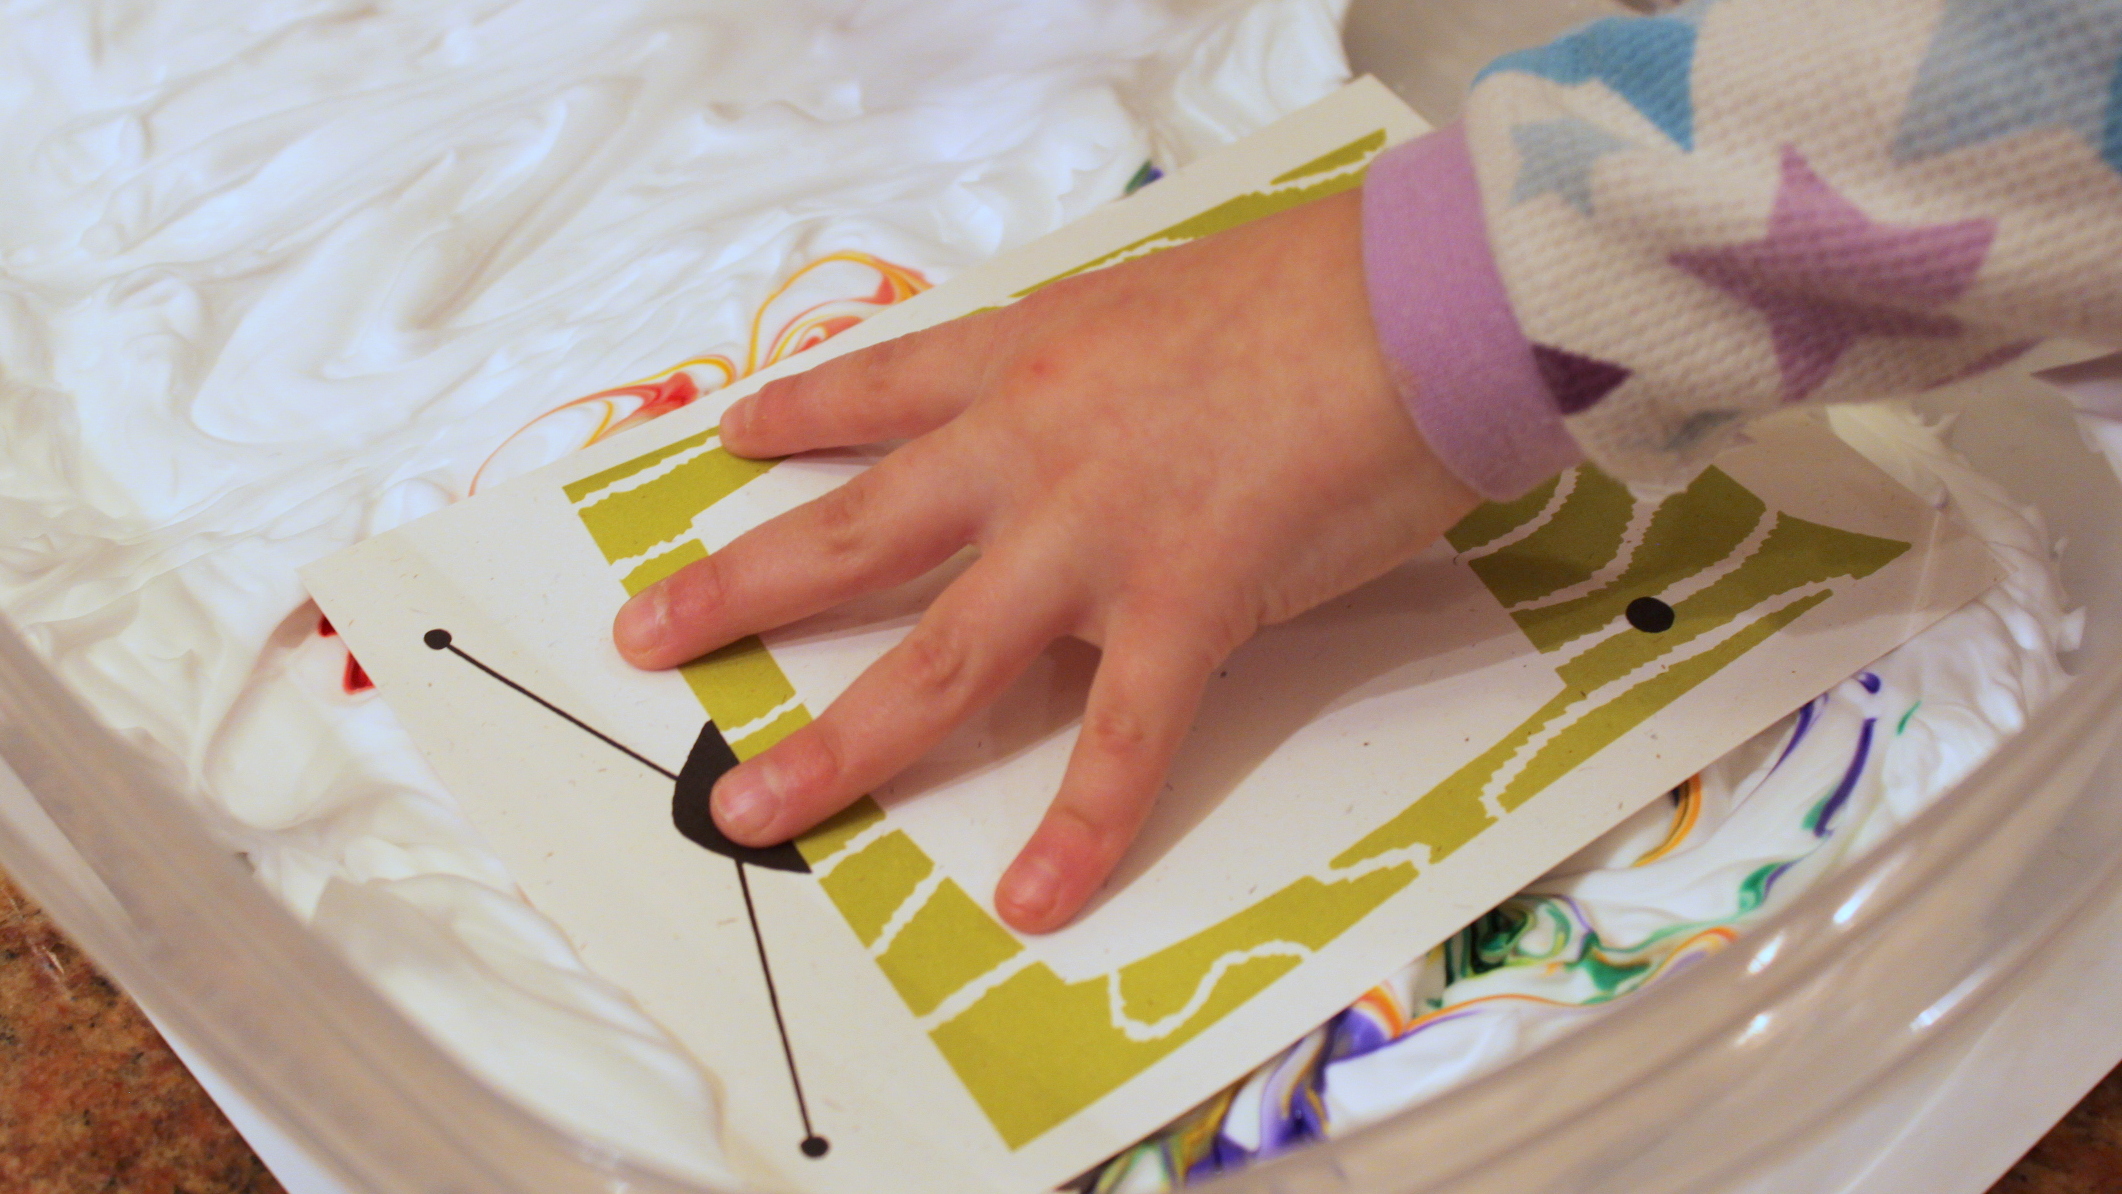
    Photo reference of how to complete step 4

  • Step 5

    Once we were satisfied with our swirl design Emma laid her card stock right on top of the shaving cream and pressed softly.
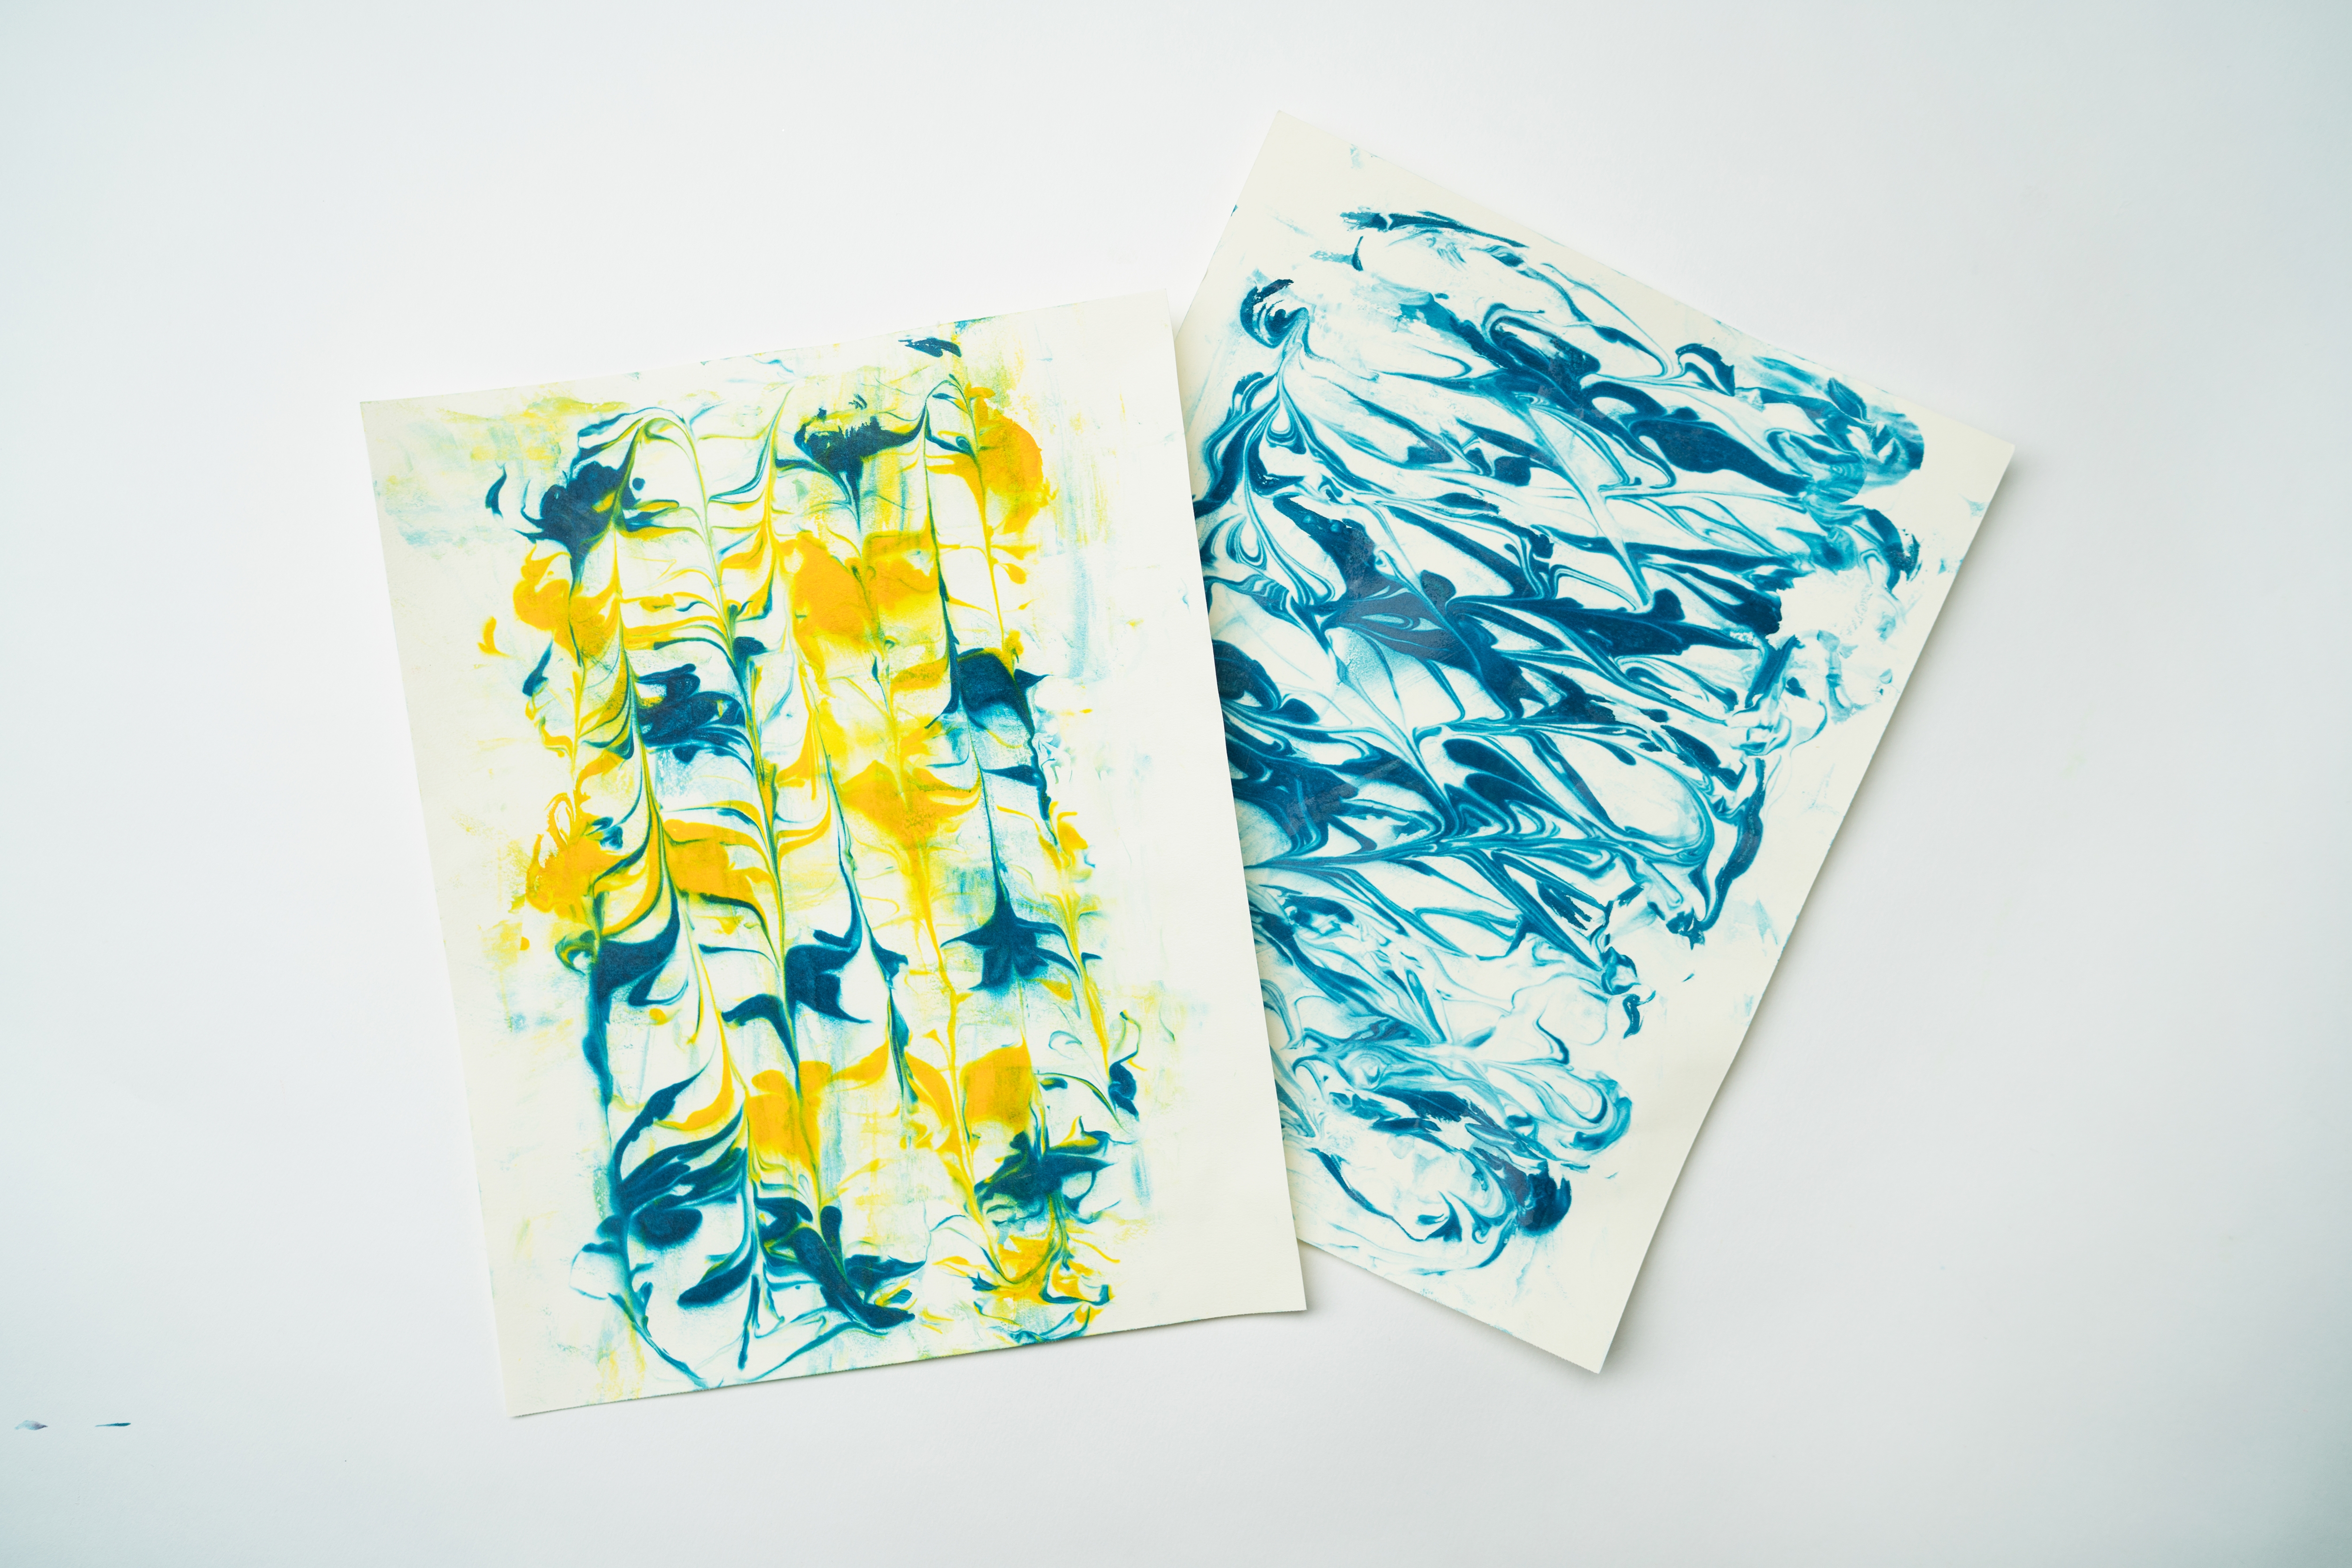
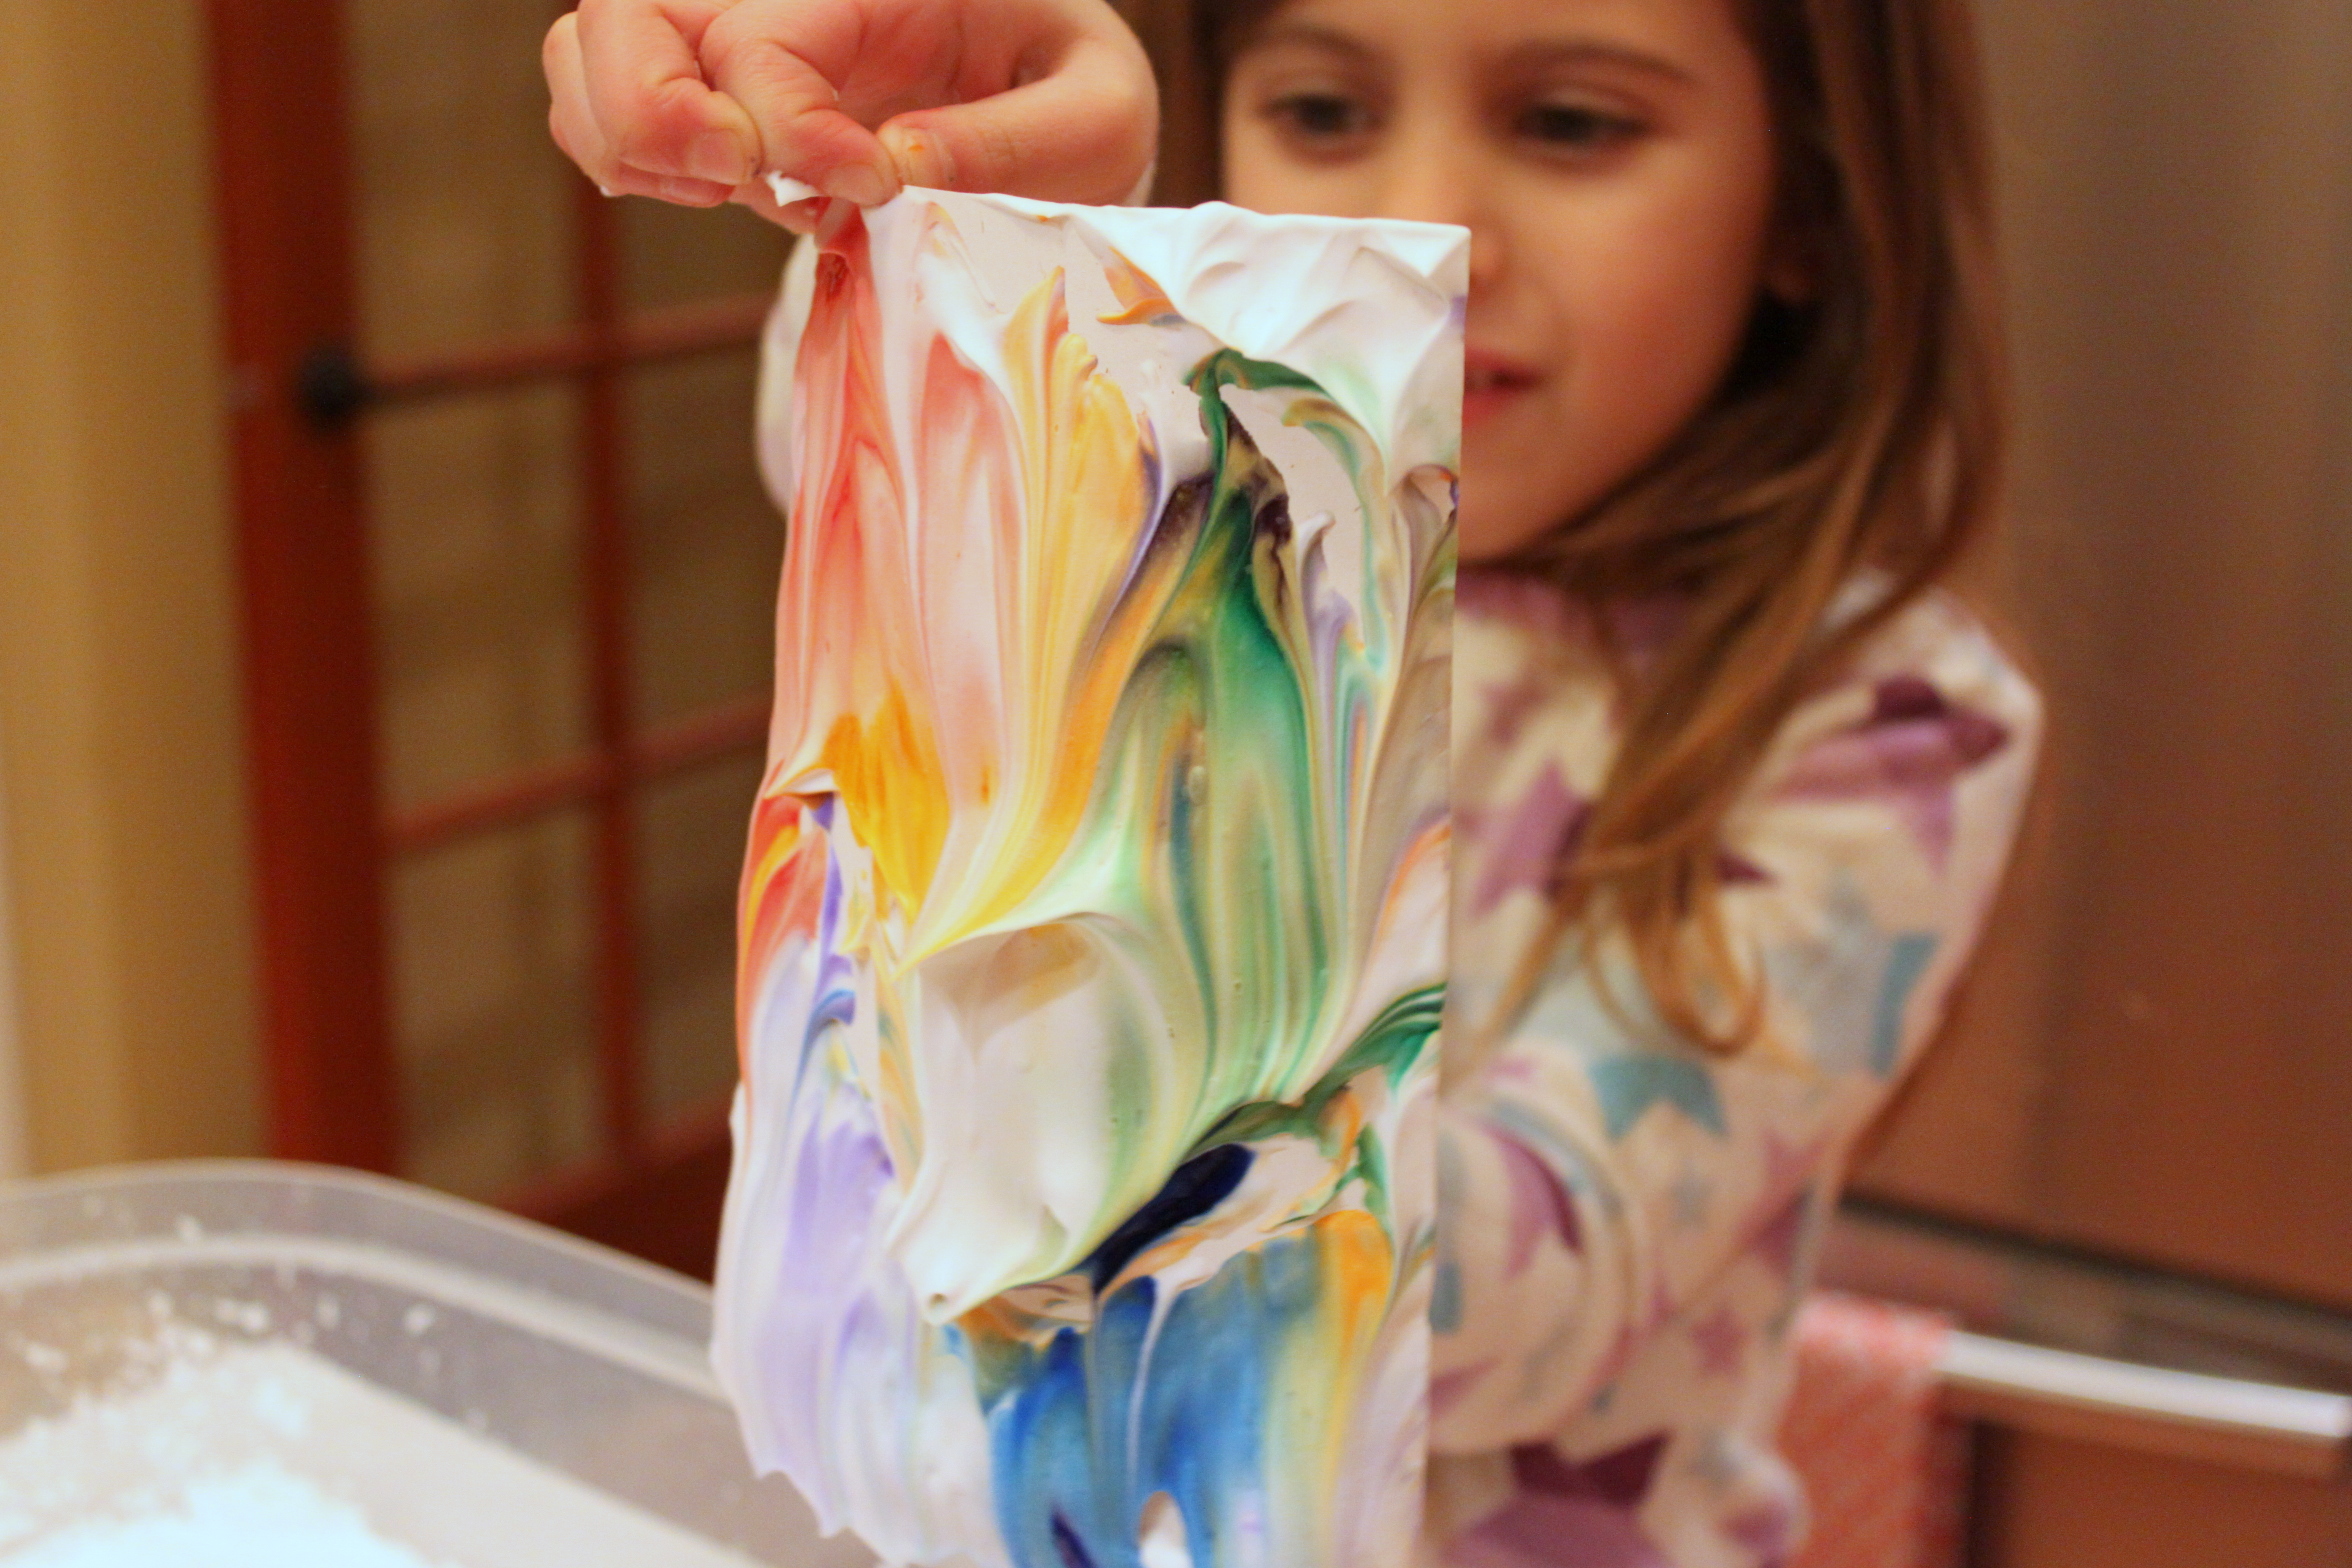
    Photo reference of how to complete step 5

  • Step 6

    It was already so beautiful when we lifted it up. With an old towel we wiped away the shaving cream to reveal the beautiful painting underneath.
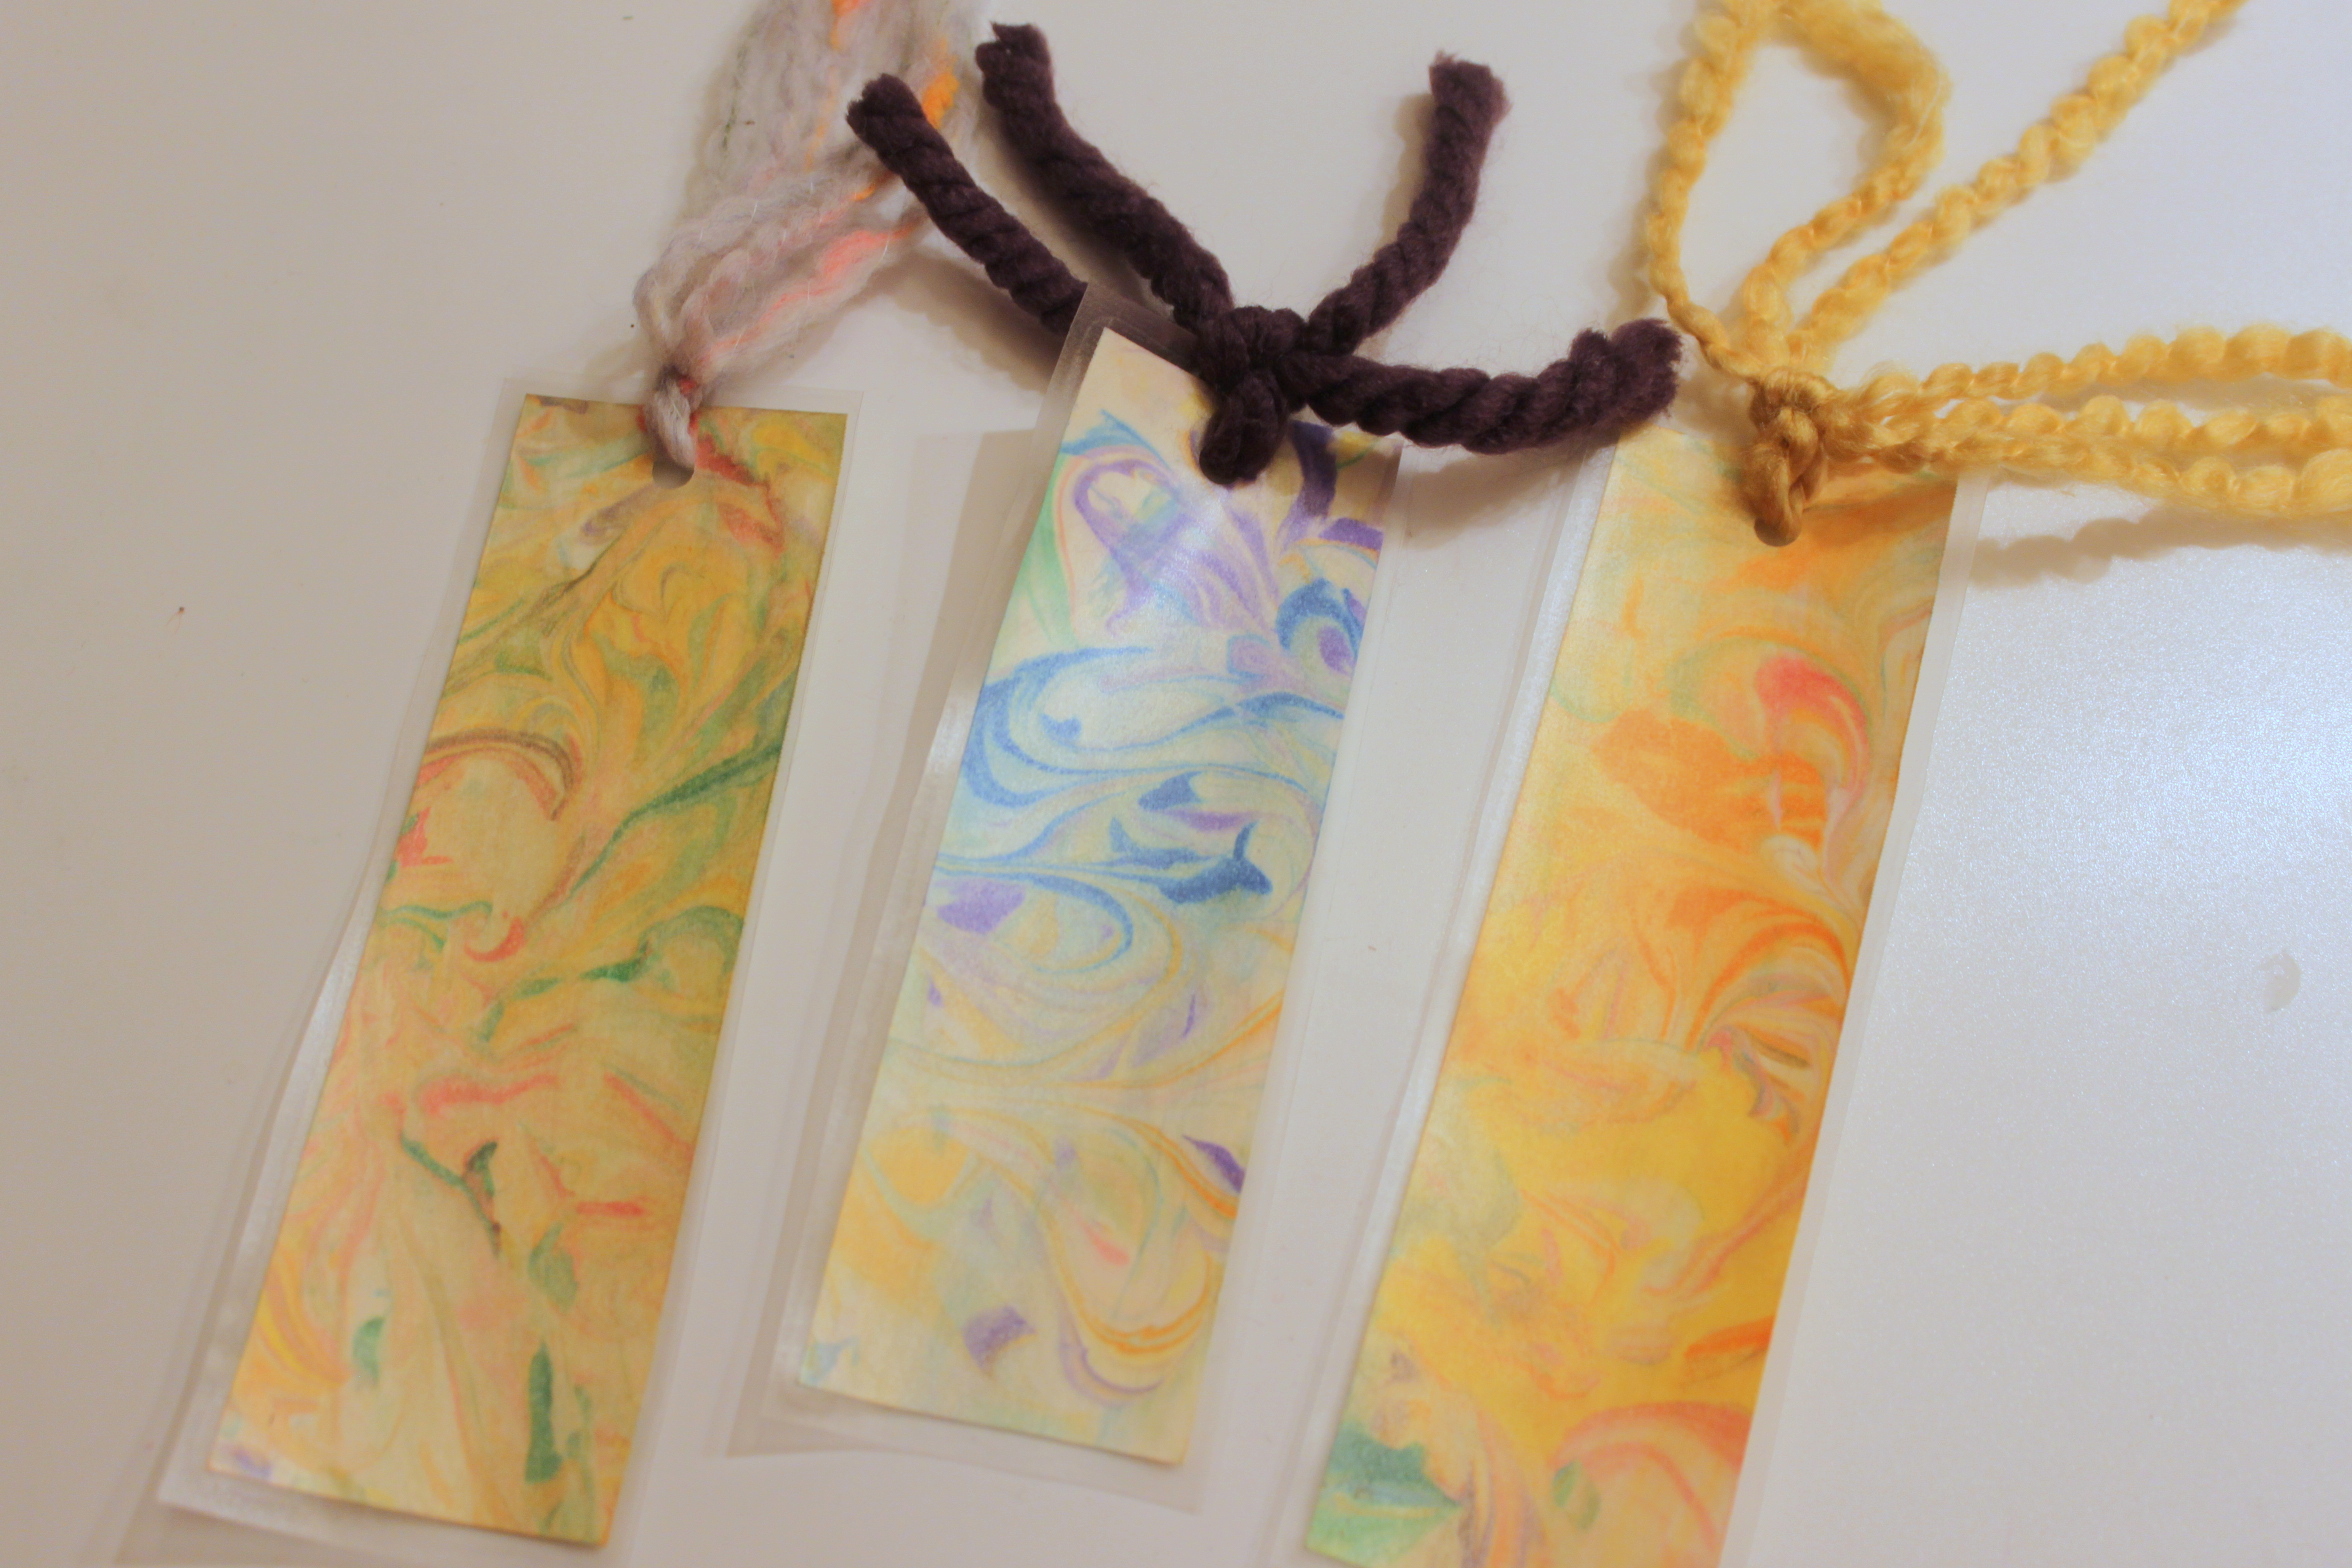
    Photo reference of how to complete step 6

  • Final result!

    We made a few bookmarks with some of our designs. They all came out so beautiful!

    Photo reference of how to complete step 7

You might also like

Top categoriesBurst graphic

Share what you made & tag us at!

;