Step-by-step tutorial
Step 1
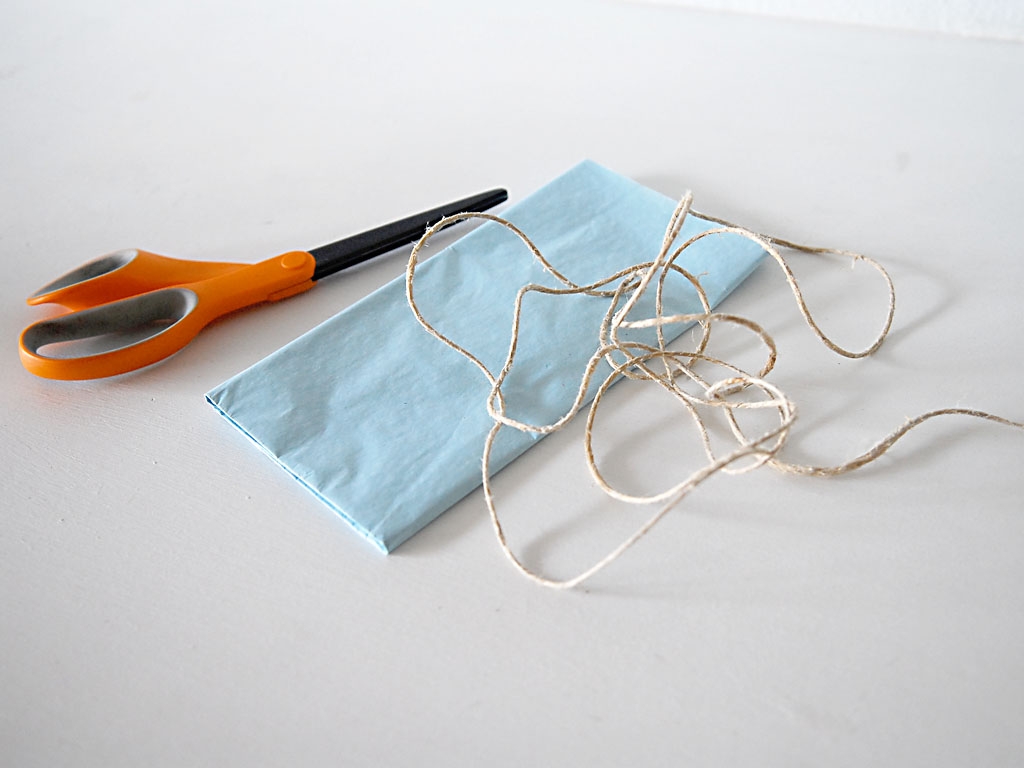
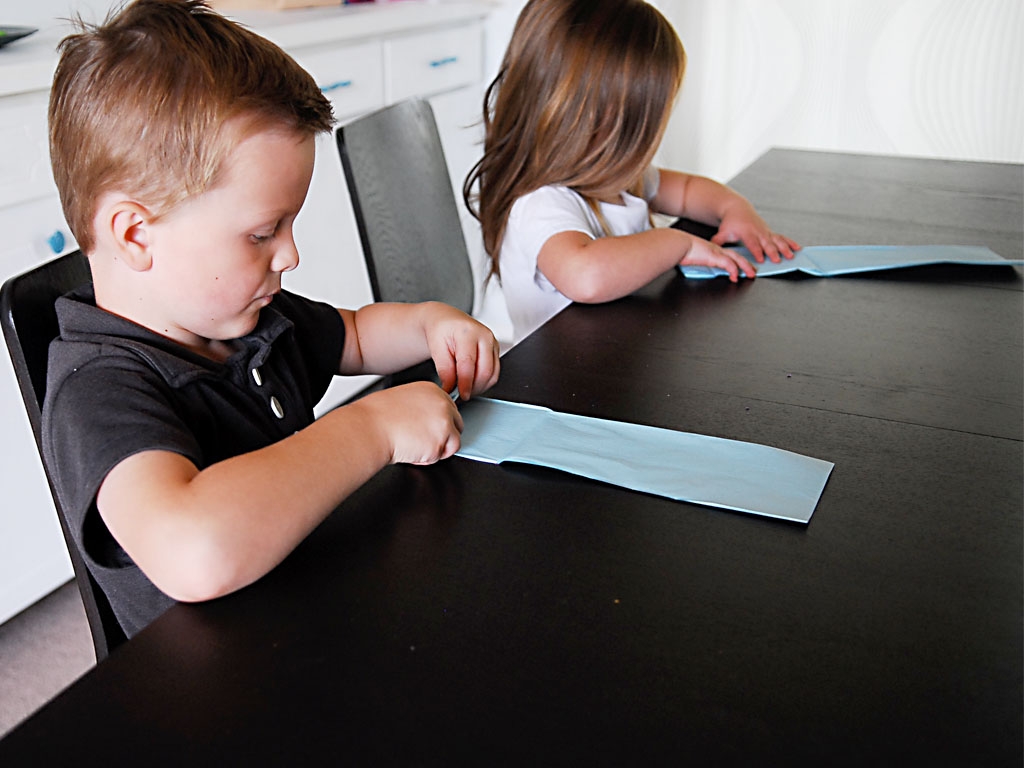
First gather up your supplies. You can use colorful yarn, twine, or string, anything that can tie will work just fine. Older kids can help prepare the tissue paper. Or it can be done quickly by an adult.

Step 2
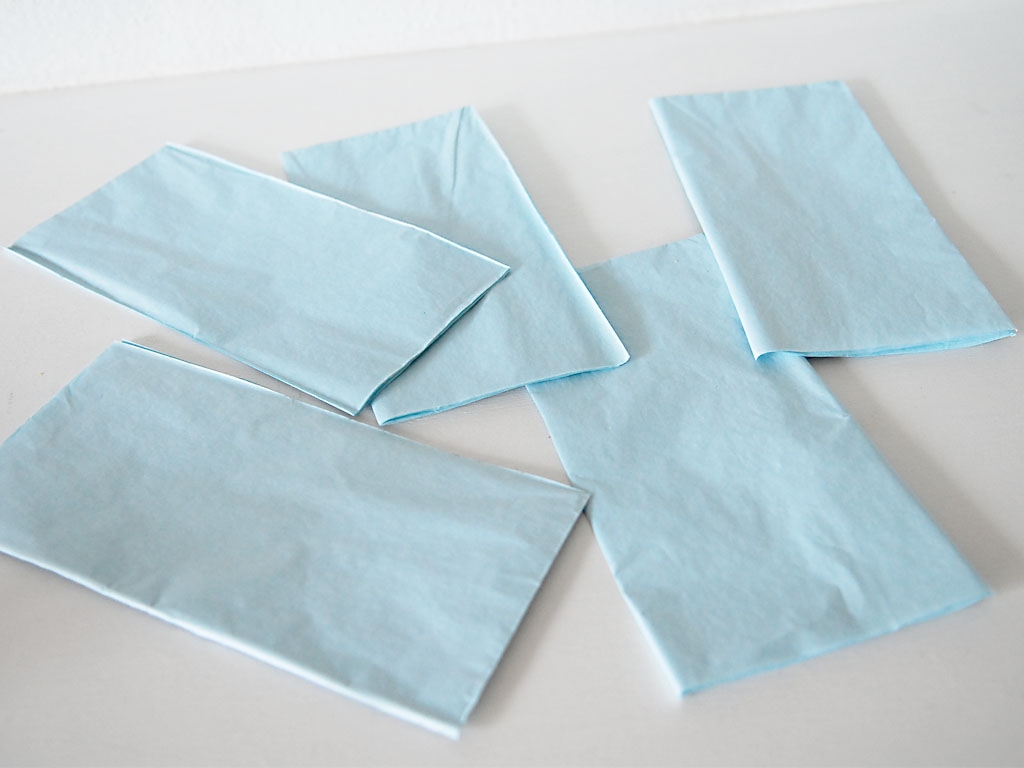
To prep the tissue paper, unfold the tissue paper length wise. (You want several sheets to still be folded in half.) Then cut the tissue paper along the fold lines so you have several rectangles. You will want as many rectangles as you want "puffs" in as many colors as you'd like.
Step 3
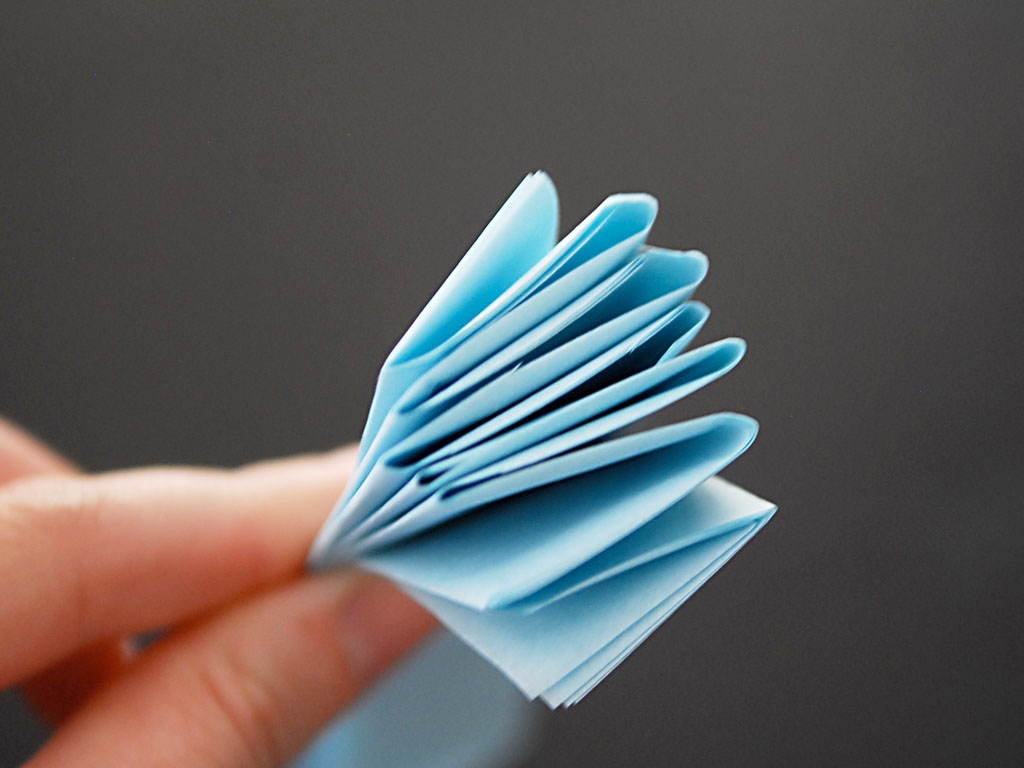
Unfold the rectangles. You will still have several sheets stacked together. Take each rectangle and fold it in a "fan fold" (so the folds go back and forth).
Step 4
You'll end up with some nicely folded strips. Both kids liked the folding part and it was good for their little hands to work the paper back and forth flipping and folding.
Step 5
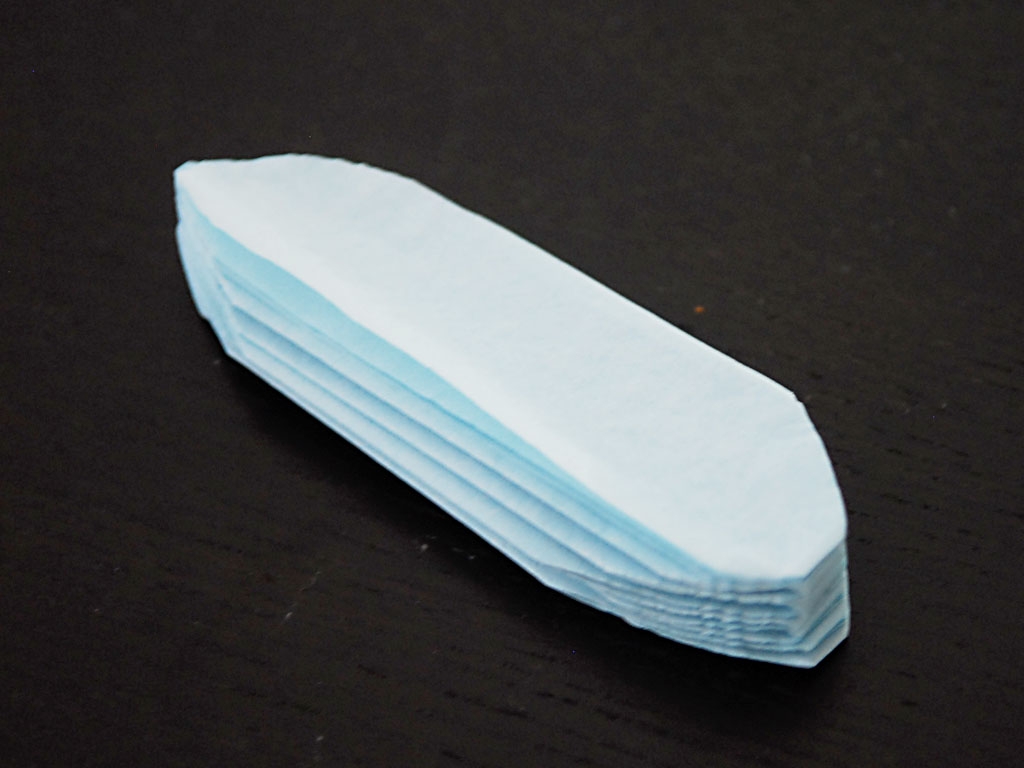
You can leave the folded piece as is, or you can round the corners for a more "snowflake" look, as my kids called it.
Step 6
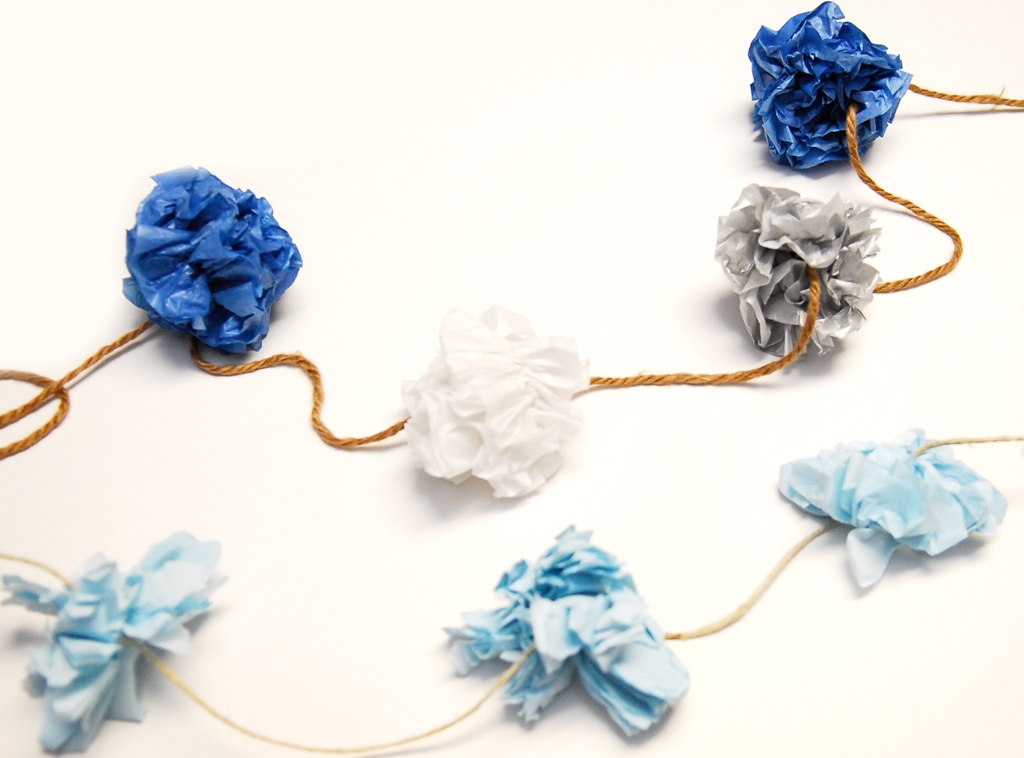
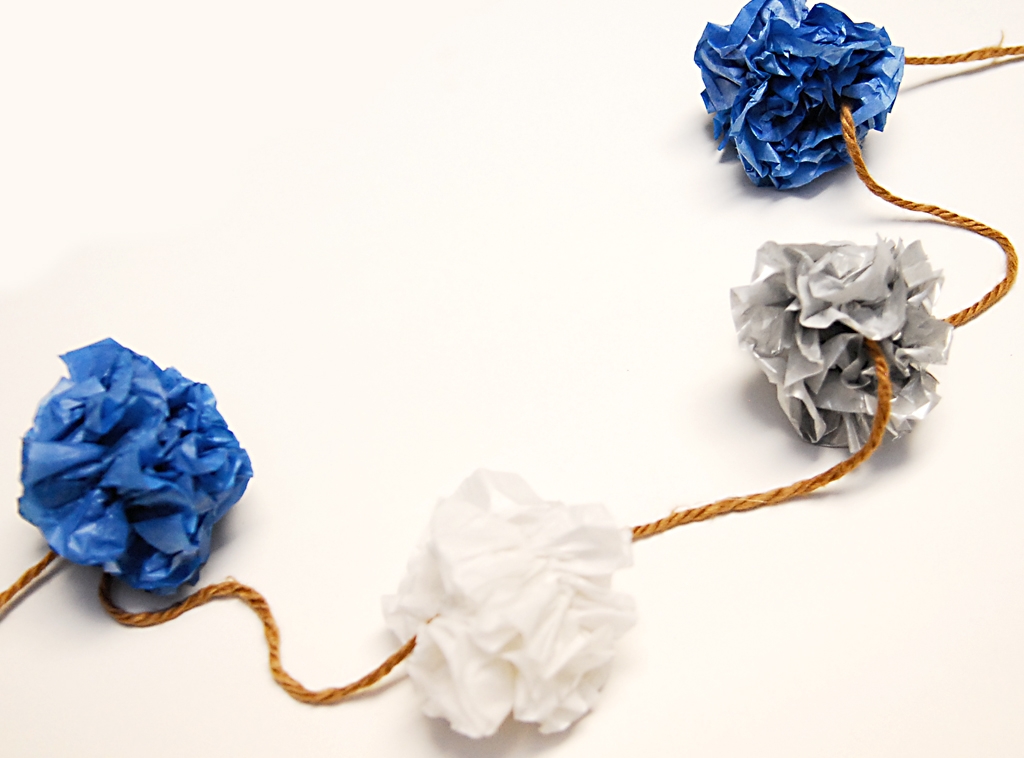
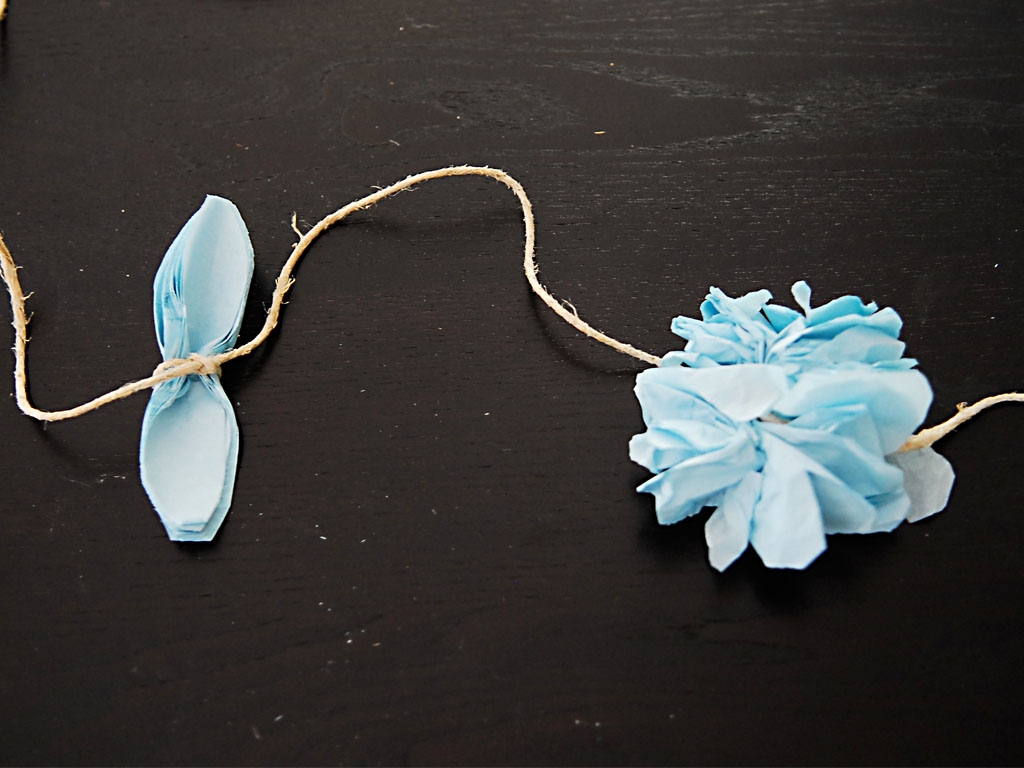
Tie the string right through the middle of the folded pieces, spacing the paper along the string.
Step 7
Now for my son's favorite part: separating the pieces of tissue apart and fanning them out. My son loved watching them puff out; he said it was like making popcorn. To separate the pieces, spread out the fan fold on each side of the tie and then peel apart each layer of tissue. (It's totally fine if the papers get a bit ripped or crunched.)

Done!
Continue tying and puffing each section until you are done. I love how each one turned out a little different depending on how the kids spread them out. We ended up making several since they're easy to make and the colors can be customized for any celebration.