Step-by-step tutorial
Warning
Borax (sodium tetraborate) is a naturally-occurring mineral salt commonly used as a laundry booster or cleaner. As with any other cleaning product, it should be kept away from children not under direct supervision of an adult. Do not allow children to ingest Borax. If consumed, contact a poison control center immediately. Wash hands after play, as prolonged skin exposure may cause irritation.
Step 1
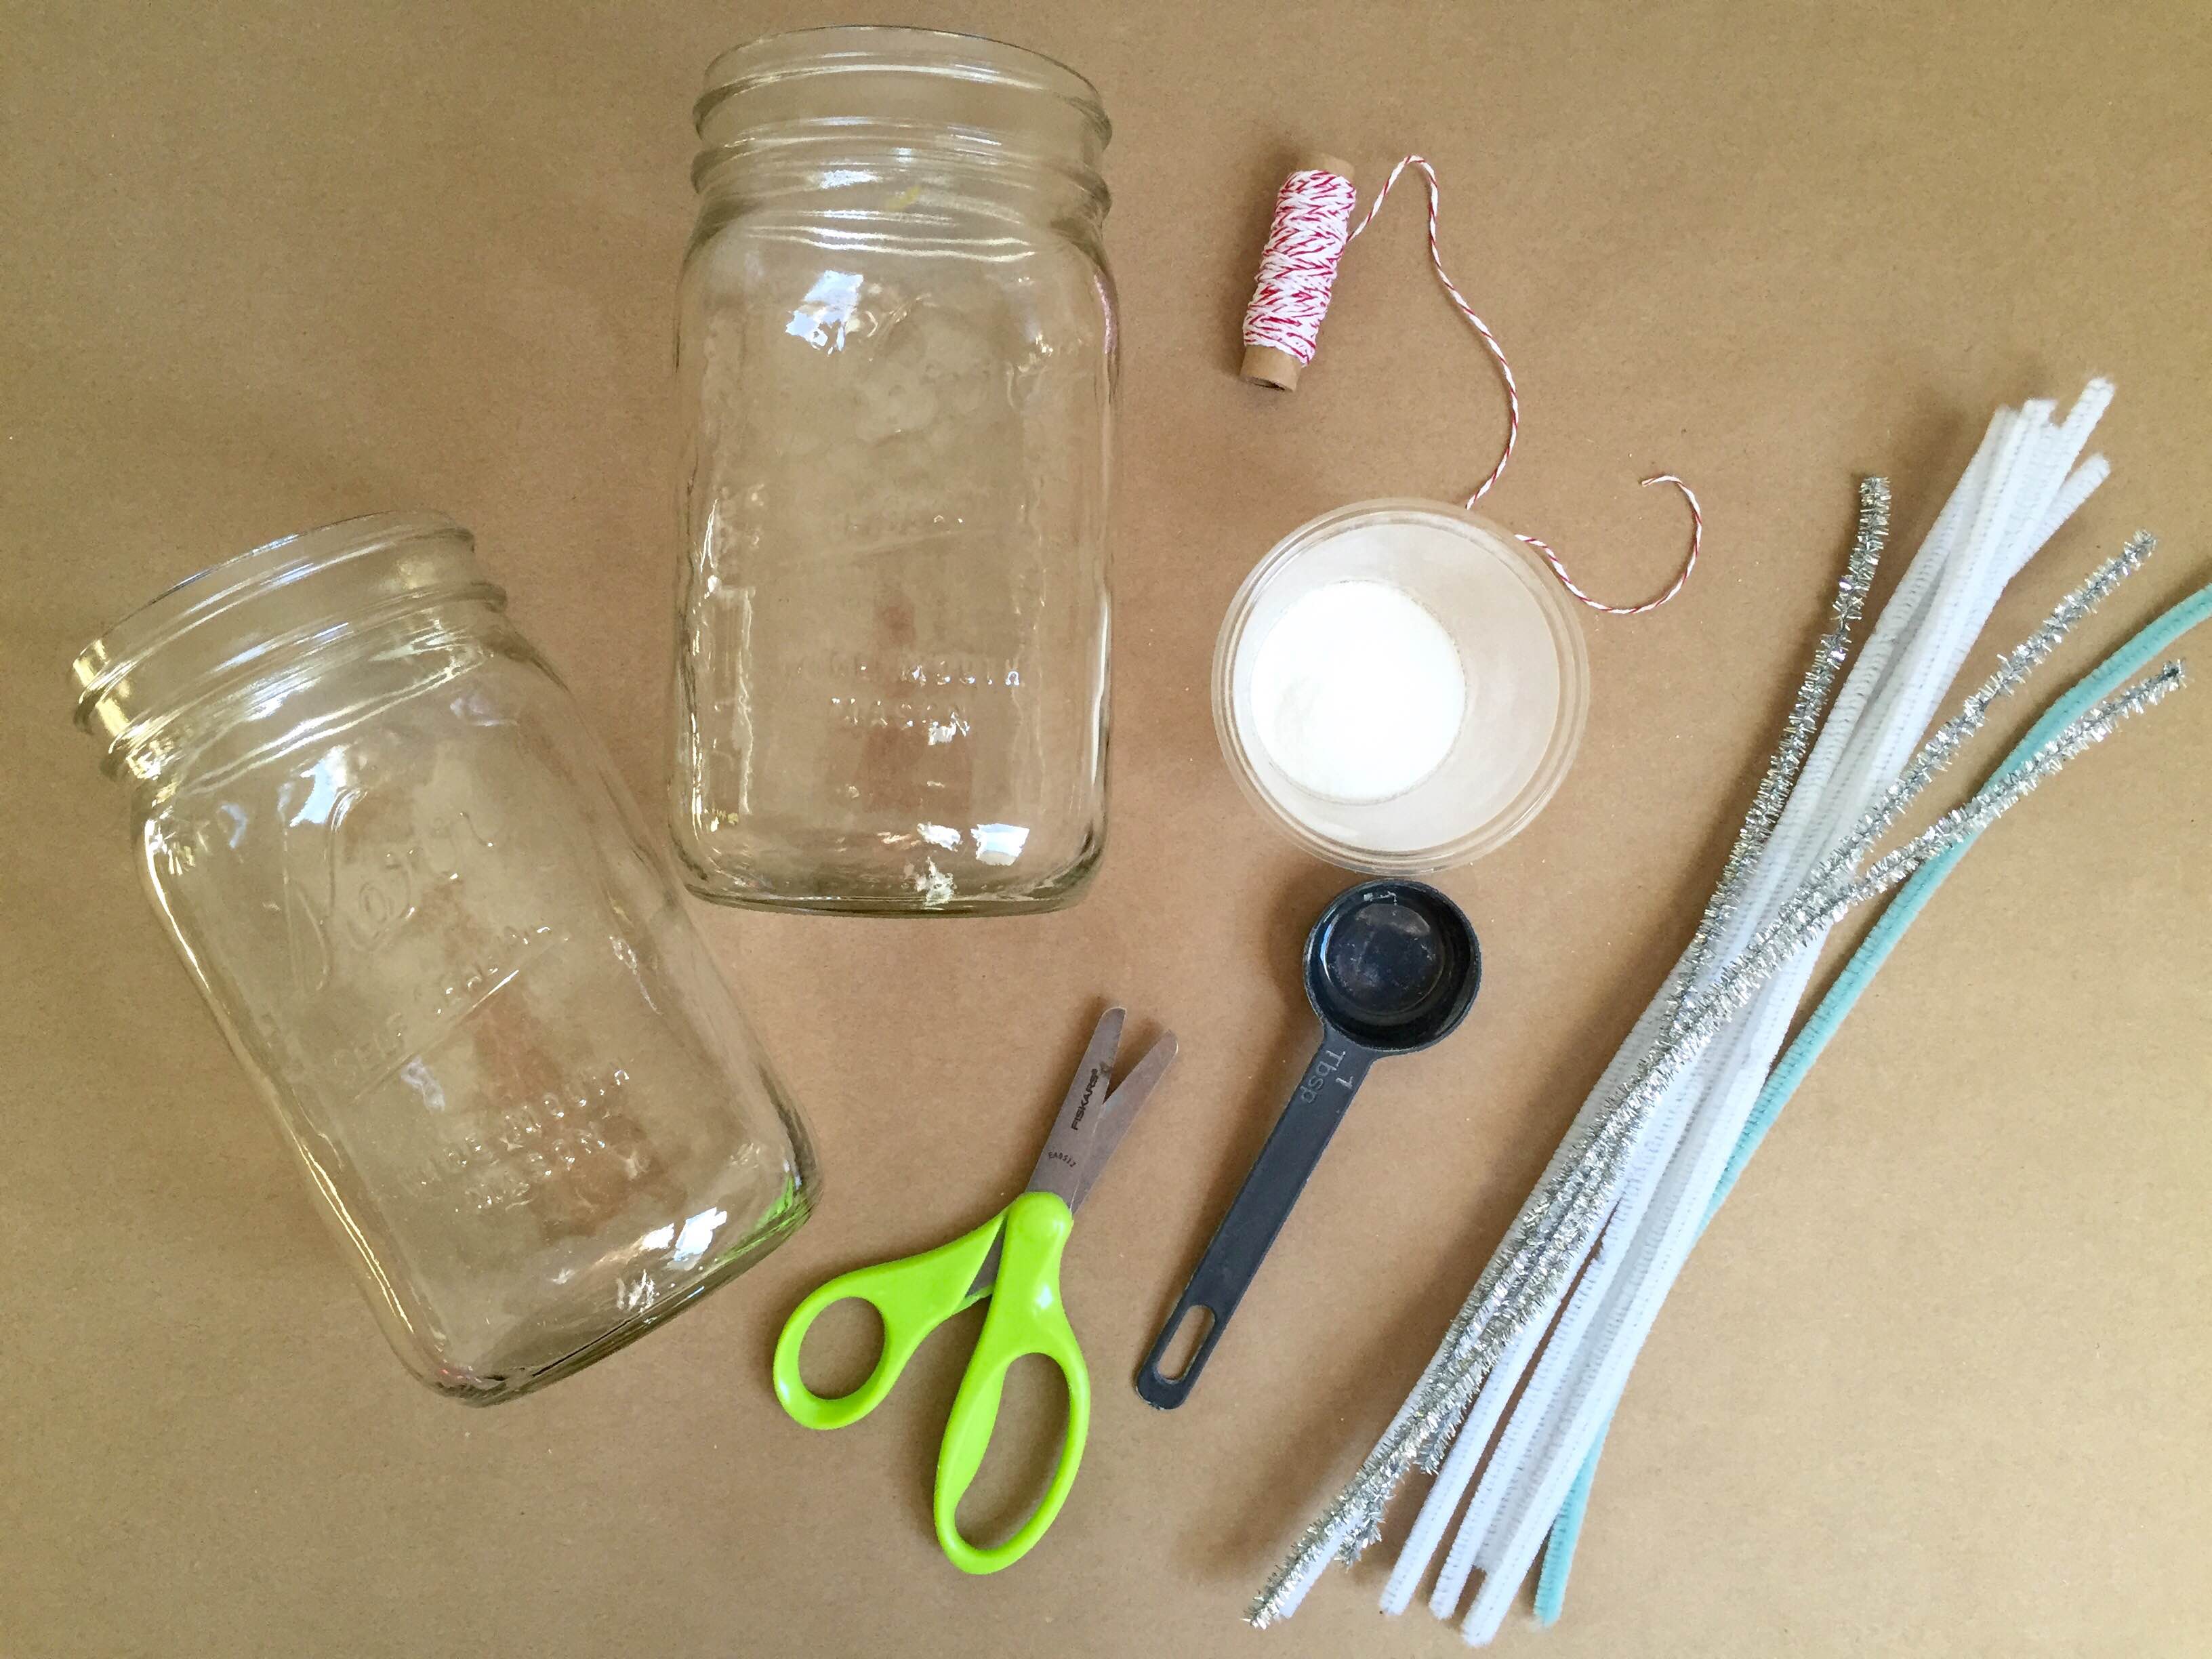
Gather your materials

Step 2
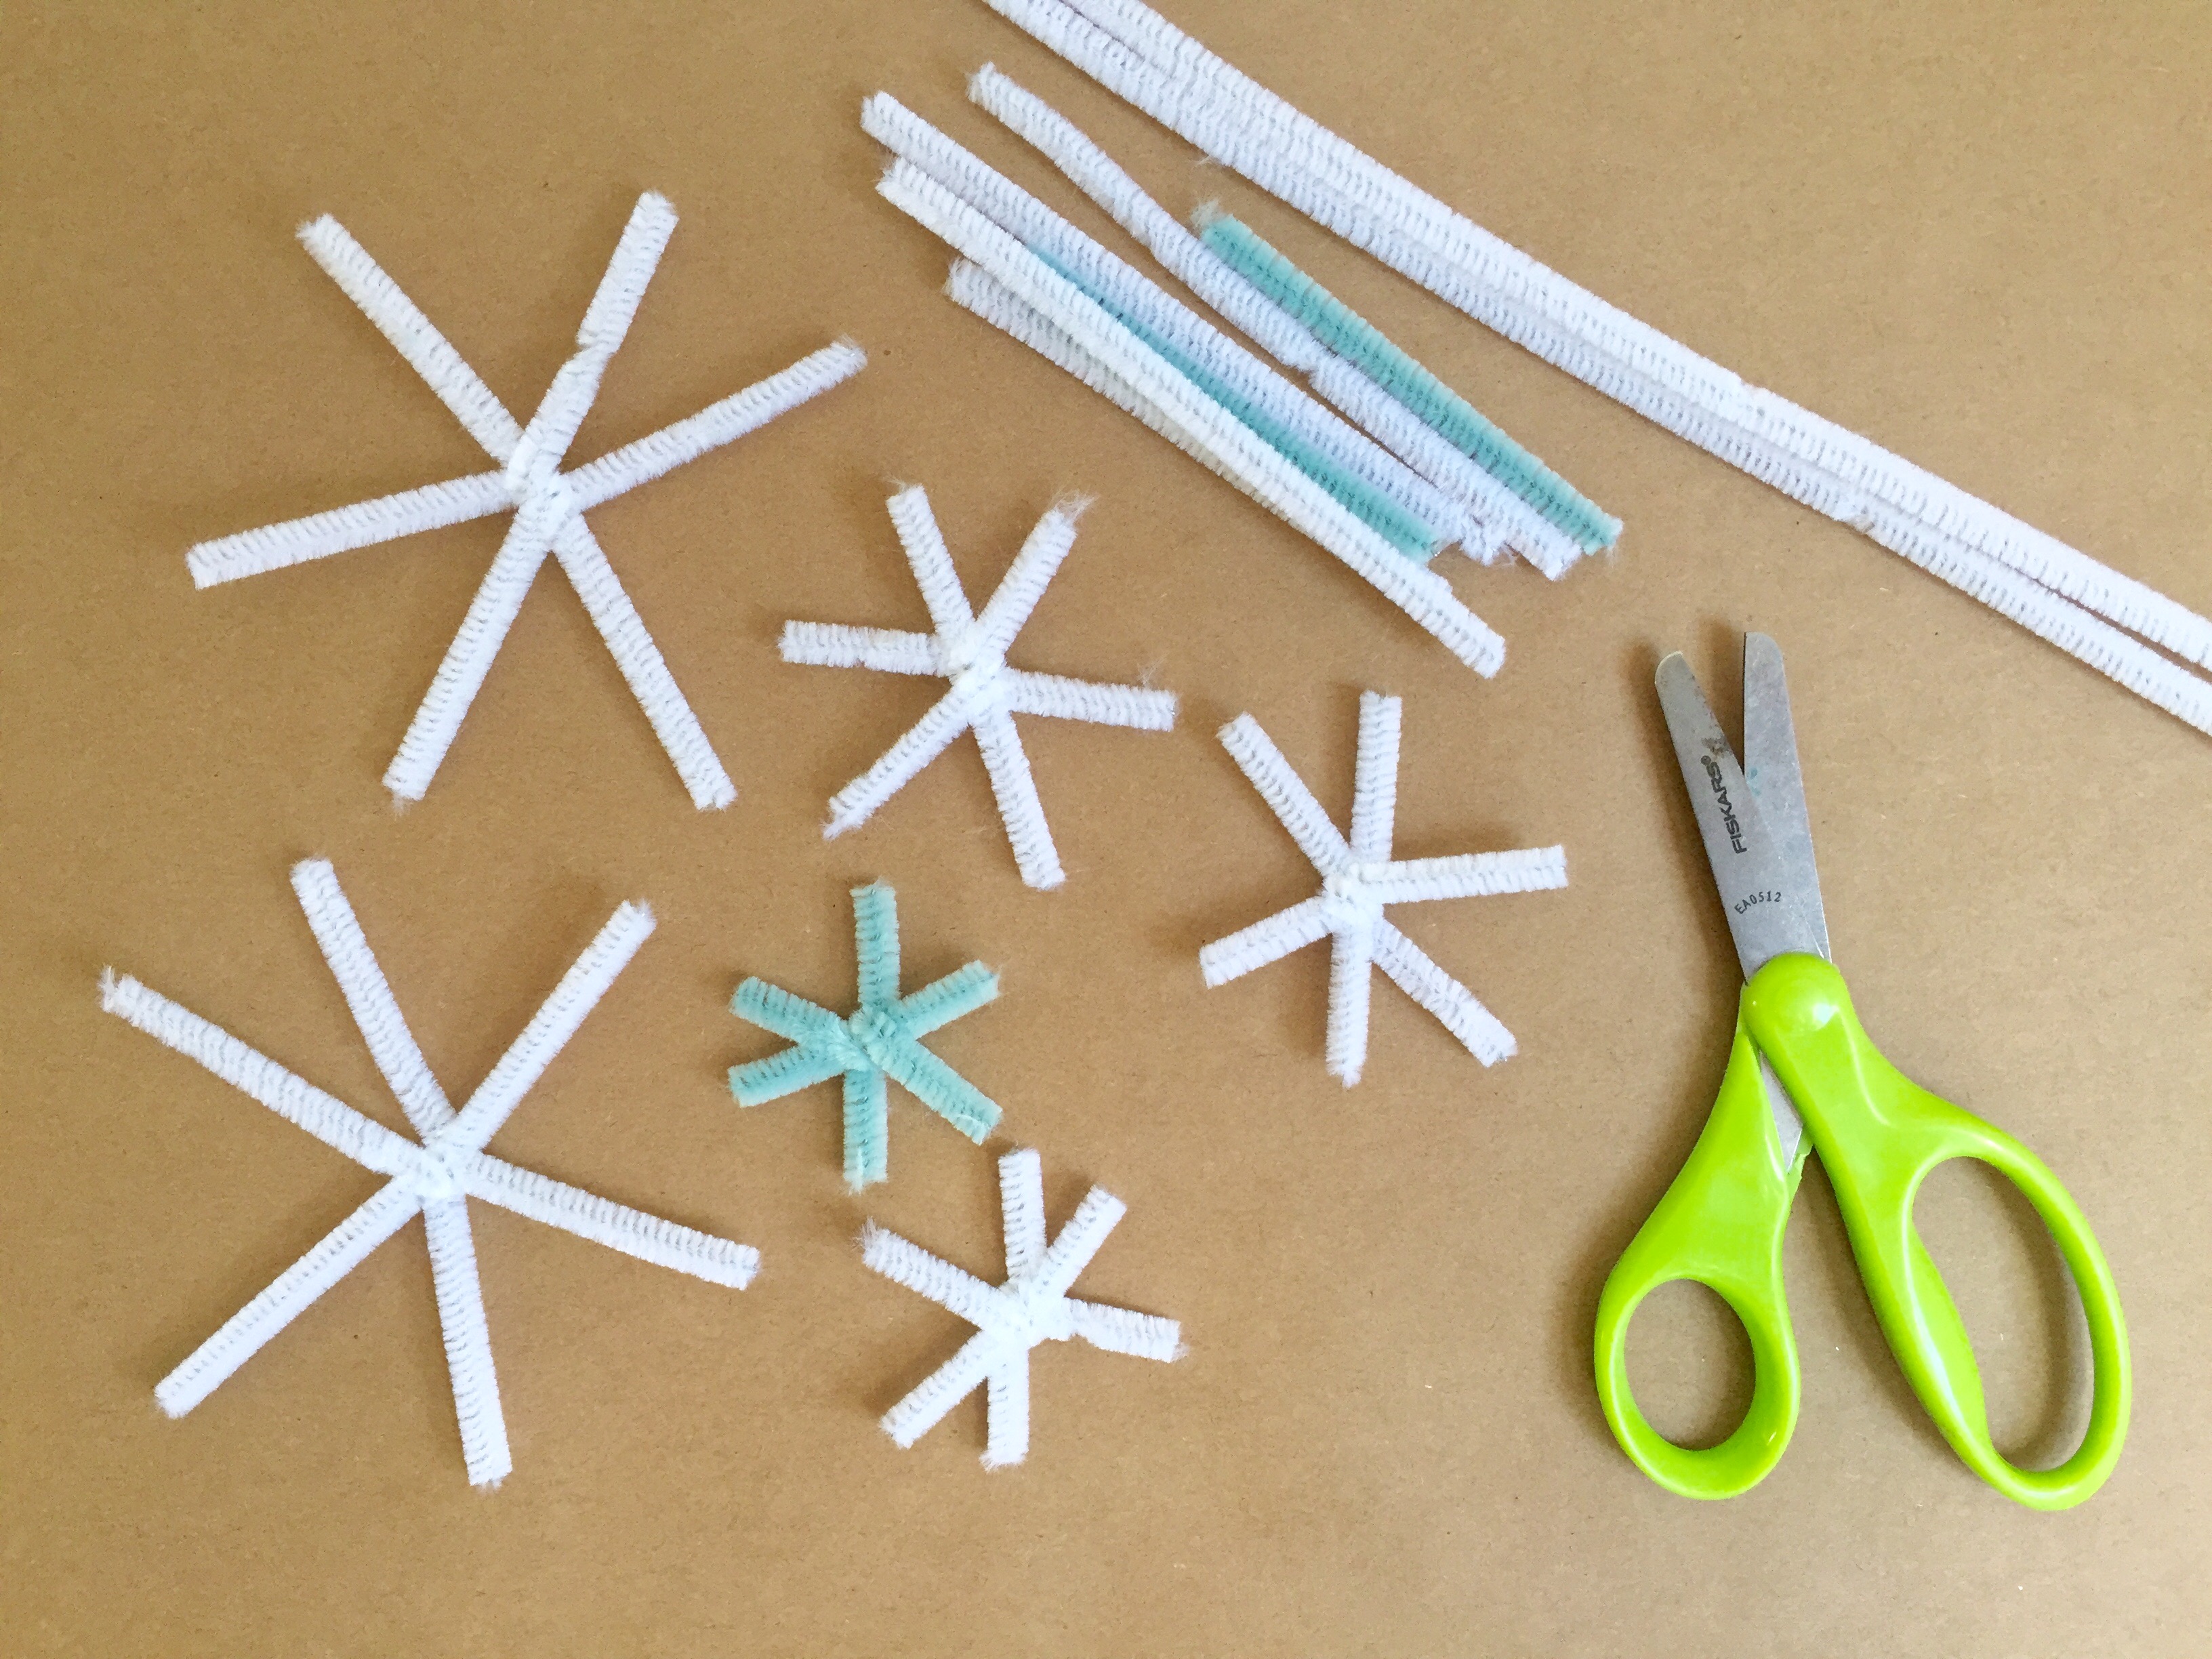
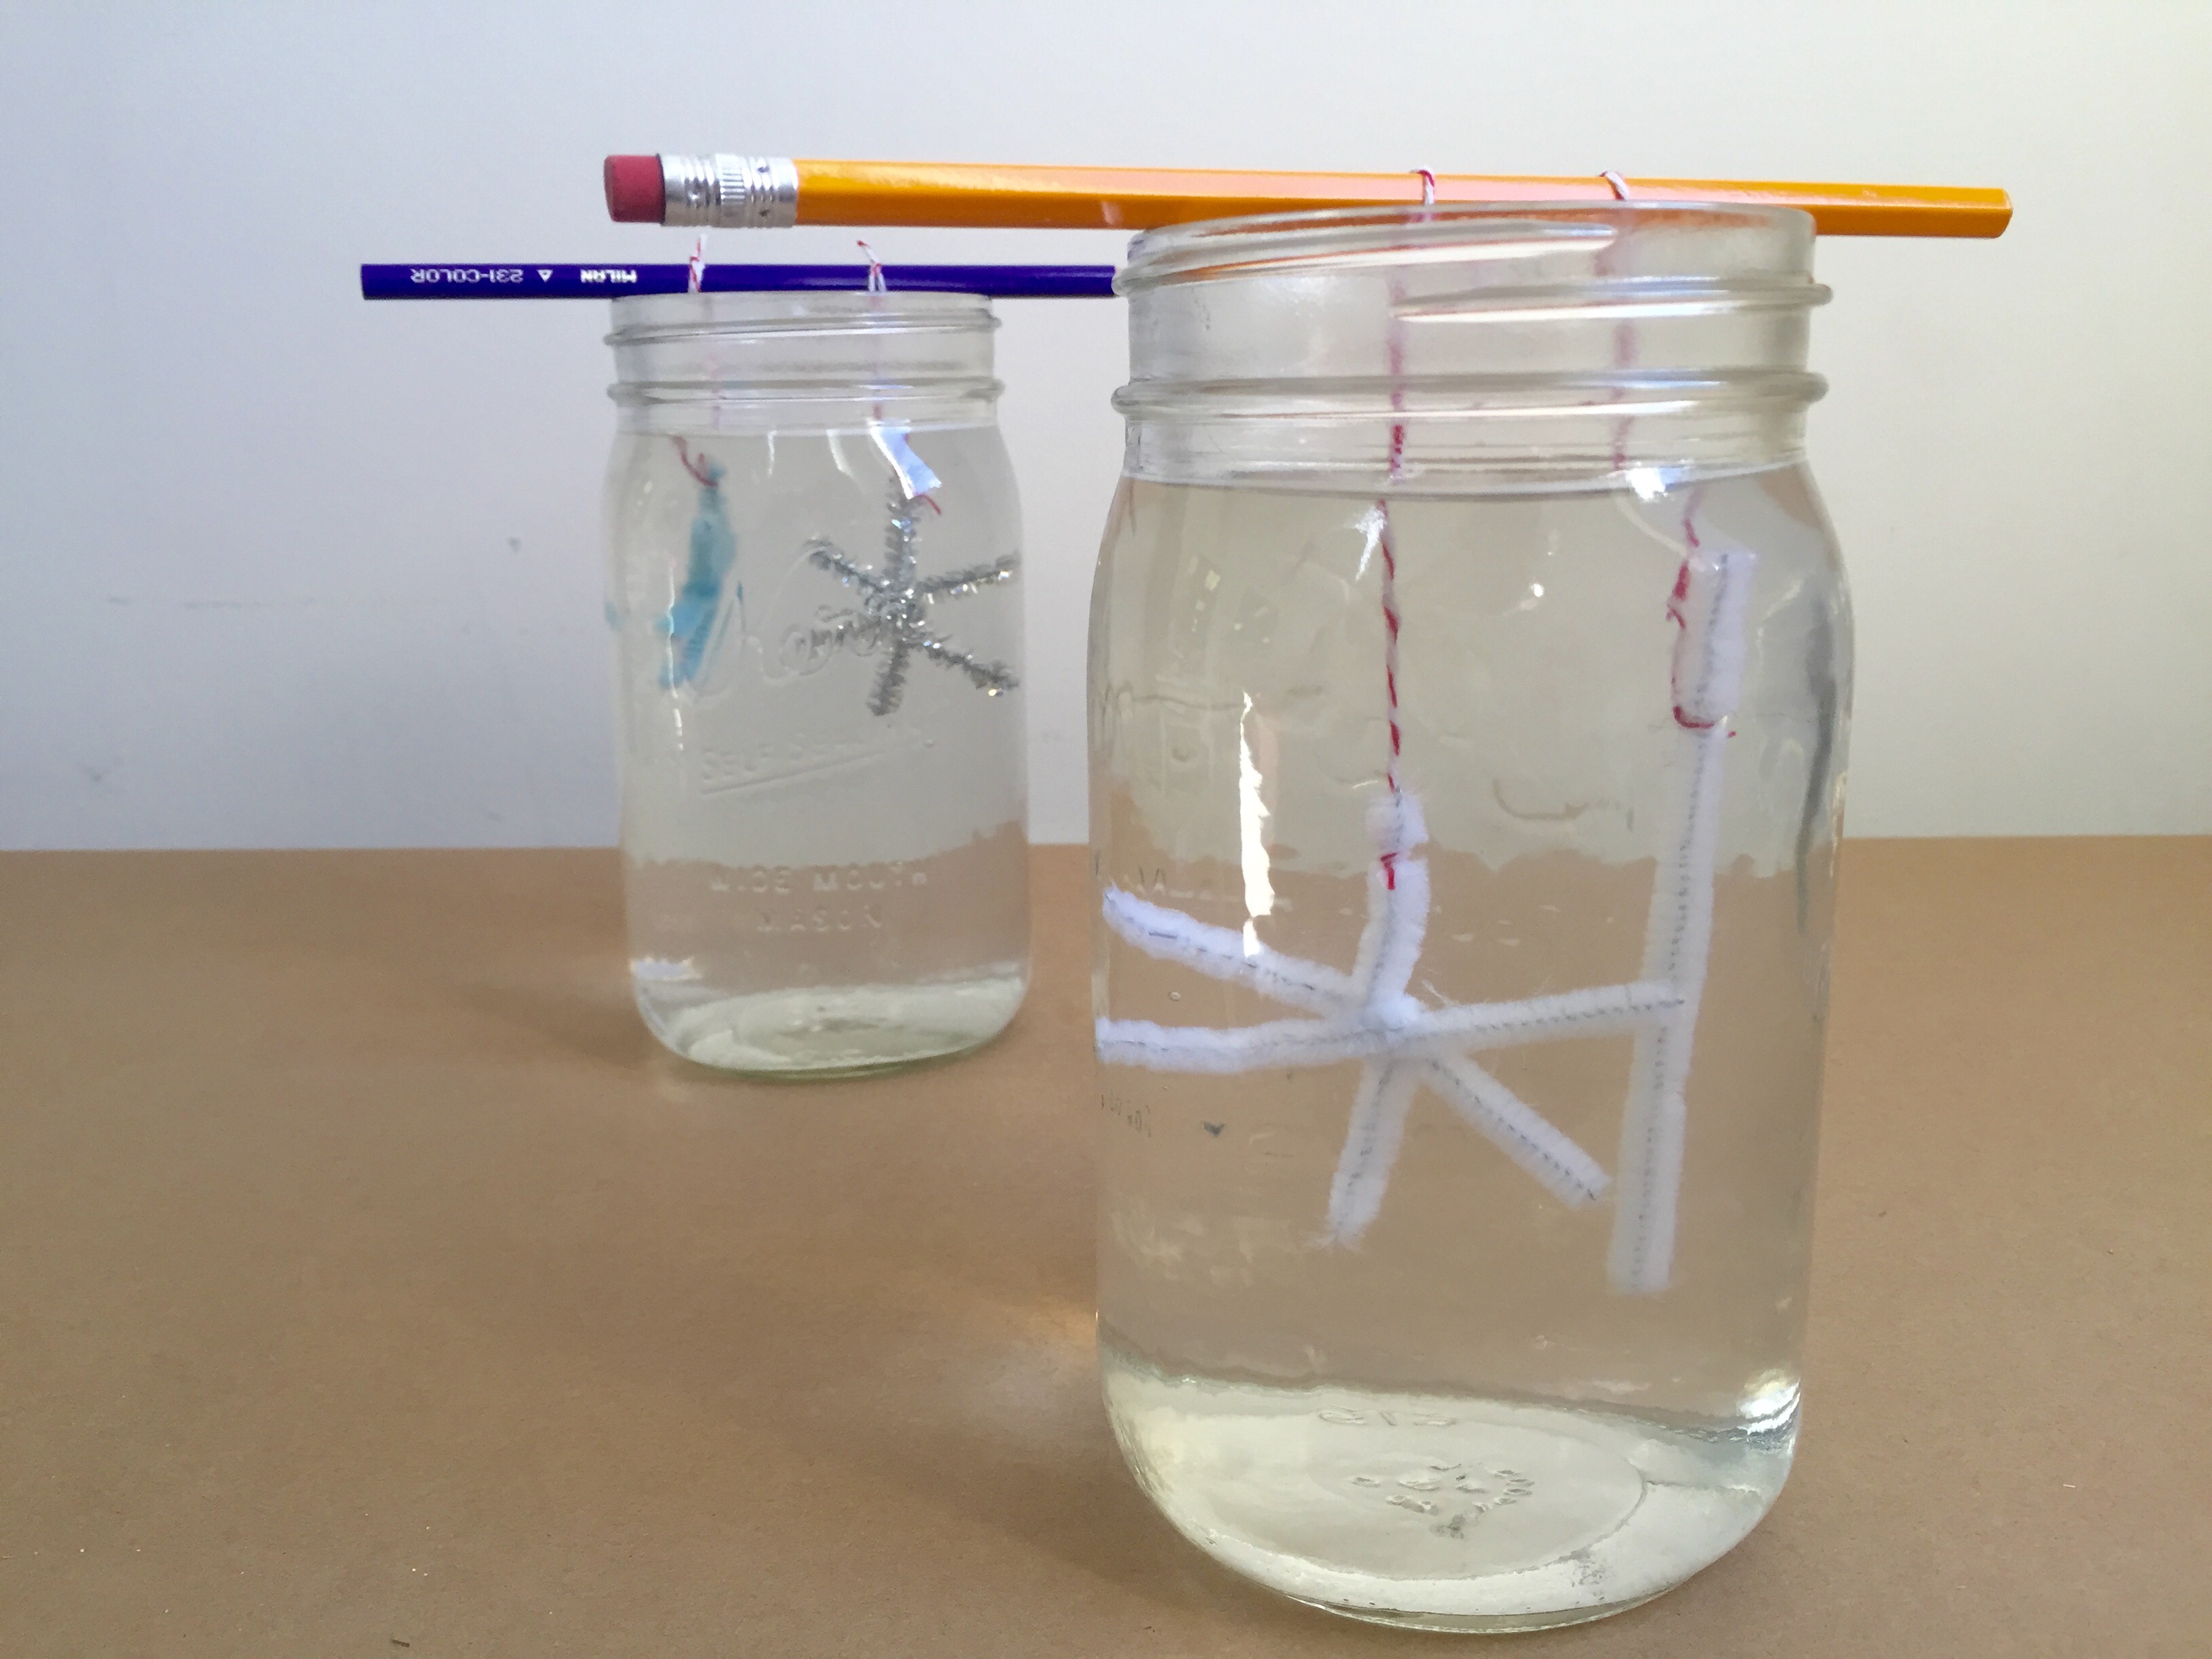
Cut and twist pipe cleaners to create snowflake shapes. To create icicles, you can cut the pipe cleaners into short, straight pieces. Make sure that each pipe cleaner shape can fit in the jar without touching the sides.
Step 3
Cut a piece of string and tie one end to the snowflake and the other end to a pencil. The pencil will be placed on the mouth of the jar, so cut the string long enough to suspend your snowflake in the middle of the jar.

Step 4
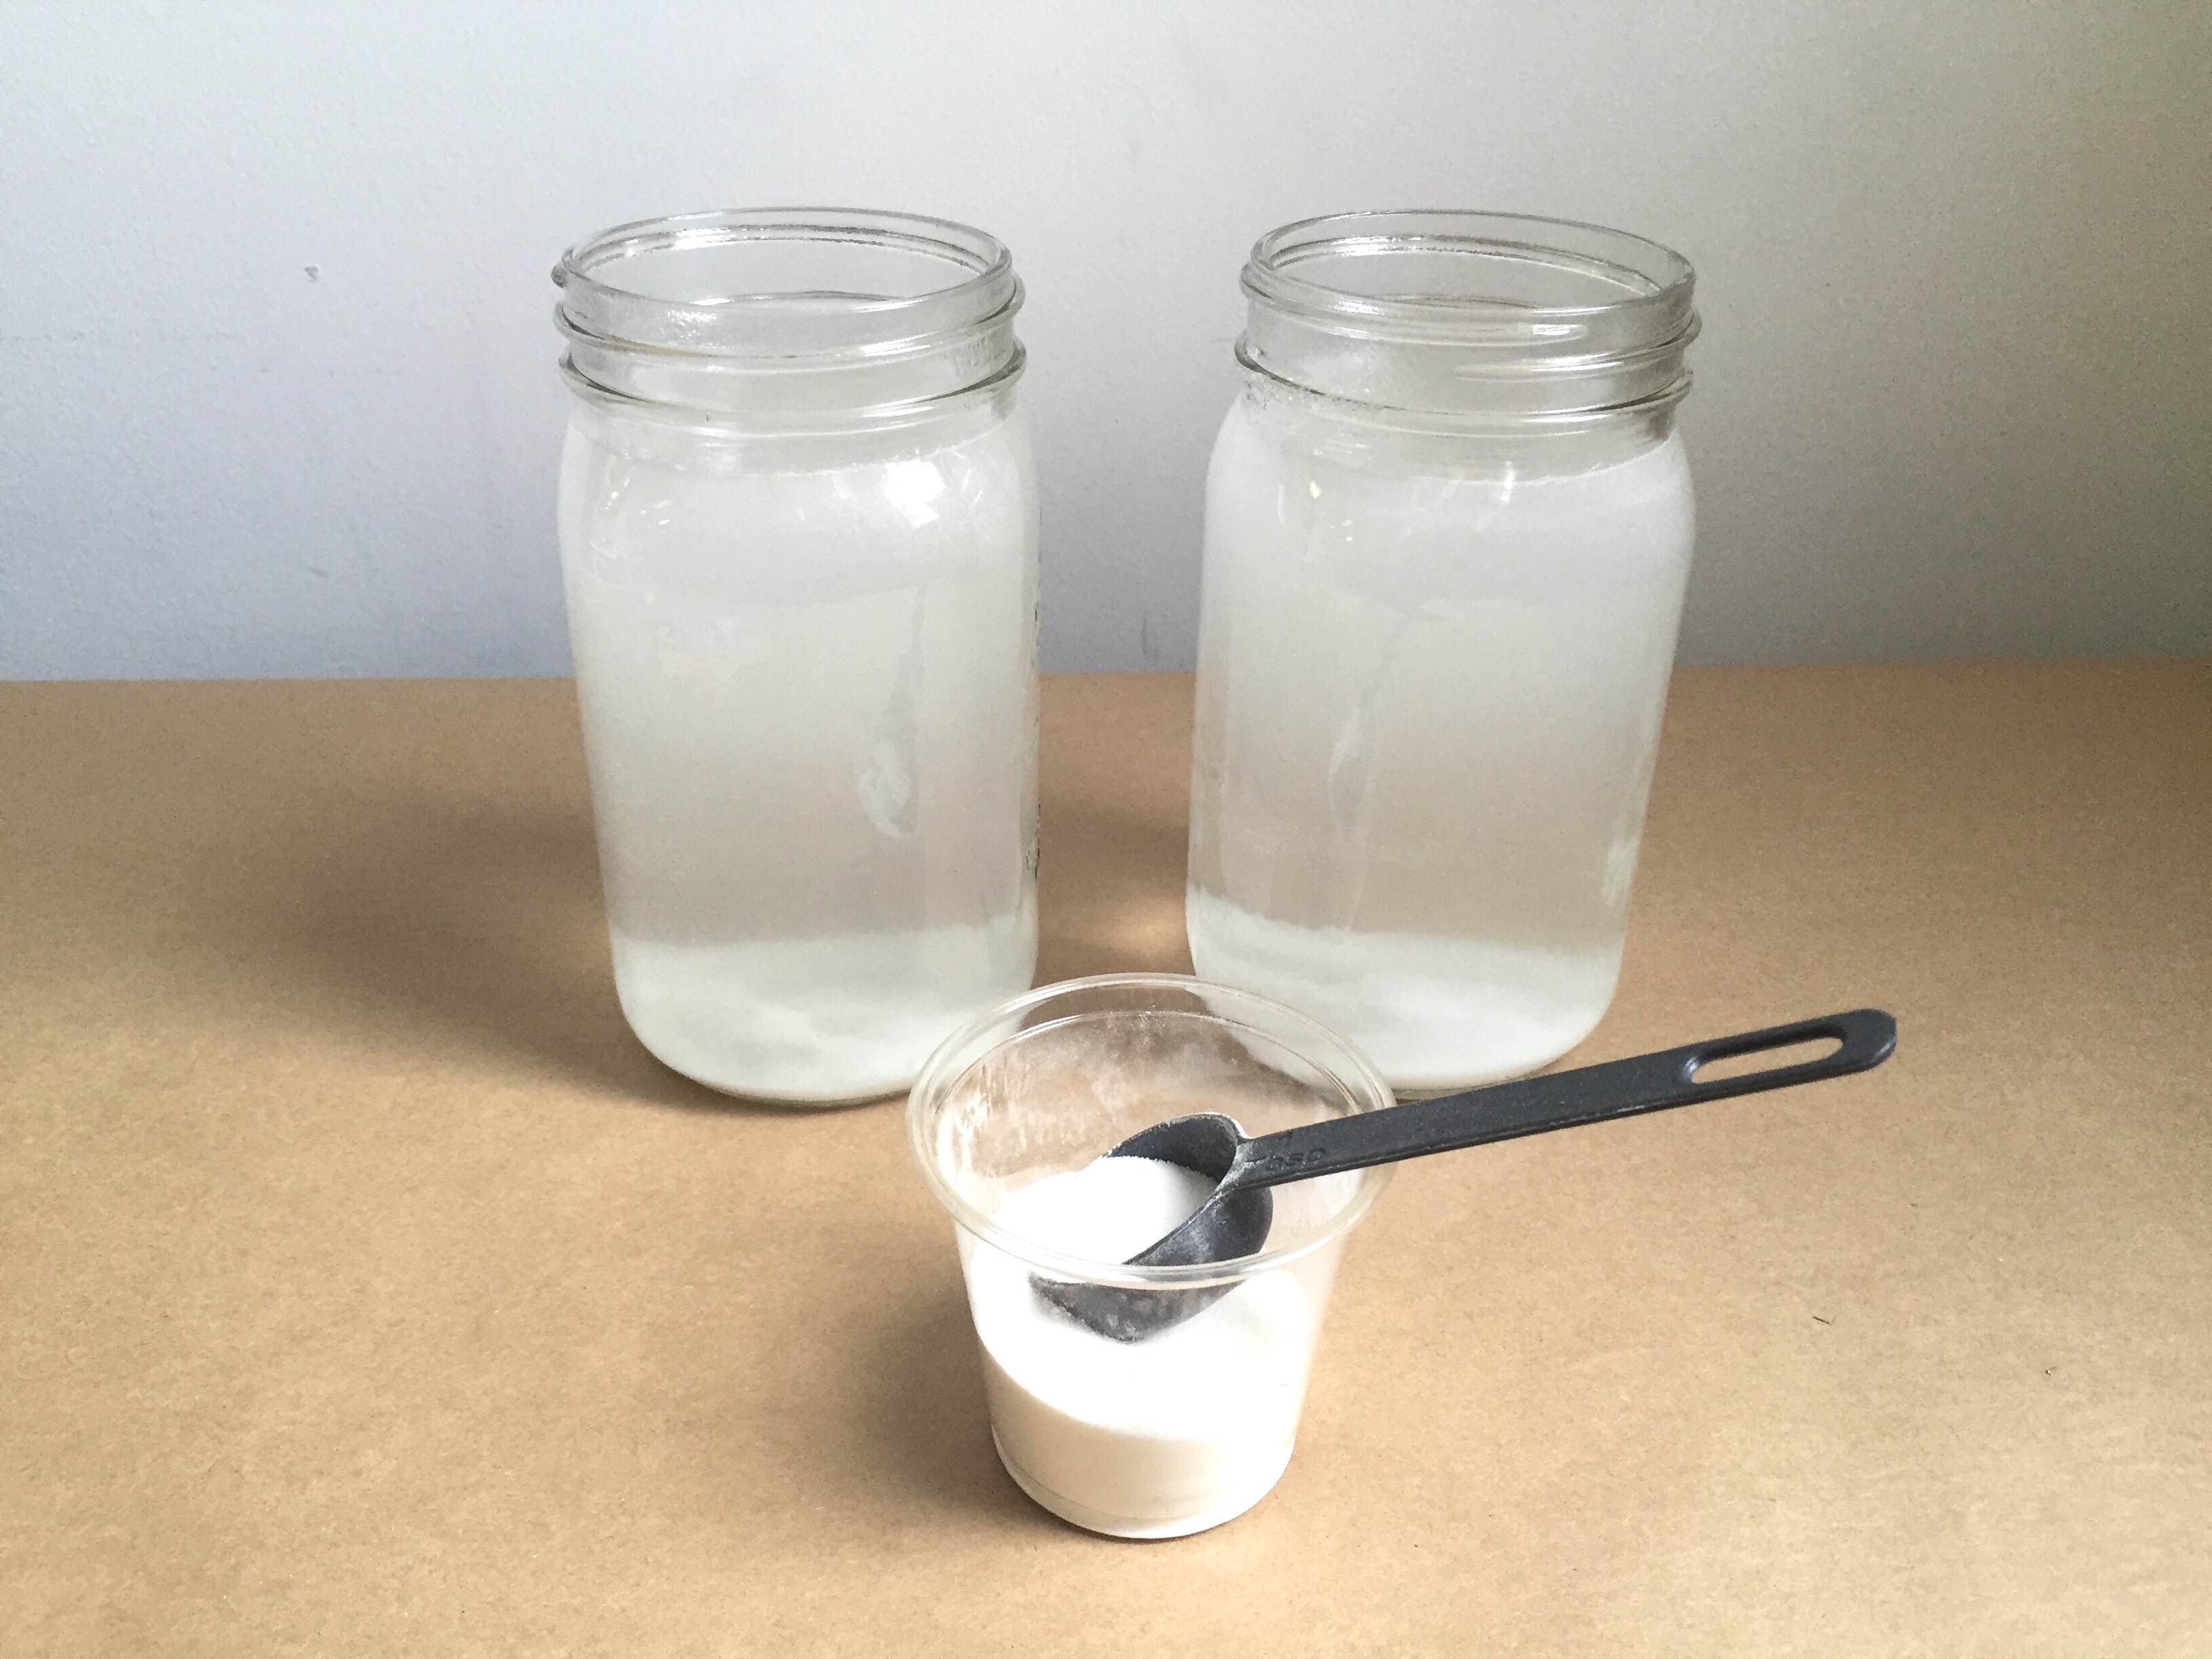
Fill your jar with hot water. Add a tablespoon of borax at a time and stir to dissolve it. We used about three tablespoons of borax per one cup of water. (Not all of our borax dissolved in the water, but it wasn't a problem!)
Step 5
Rest your pencil on the mouth of the jar, so your snowflake shapes are floating in the mixture. Make sure each shape isn't touching anything else.
Done!
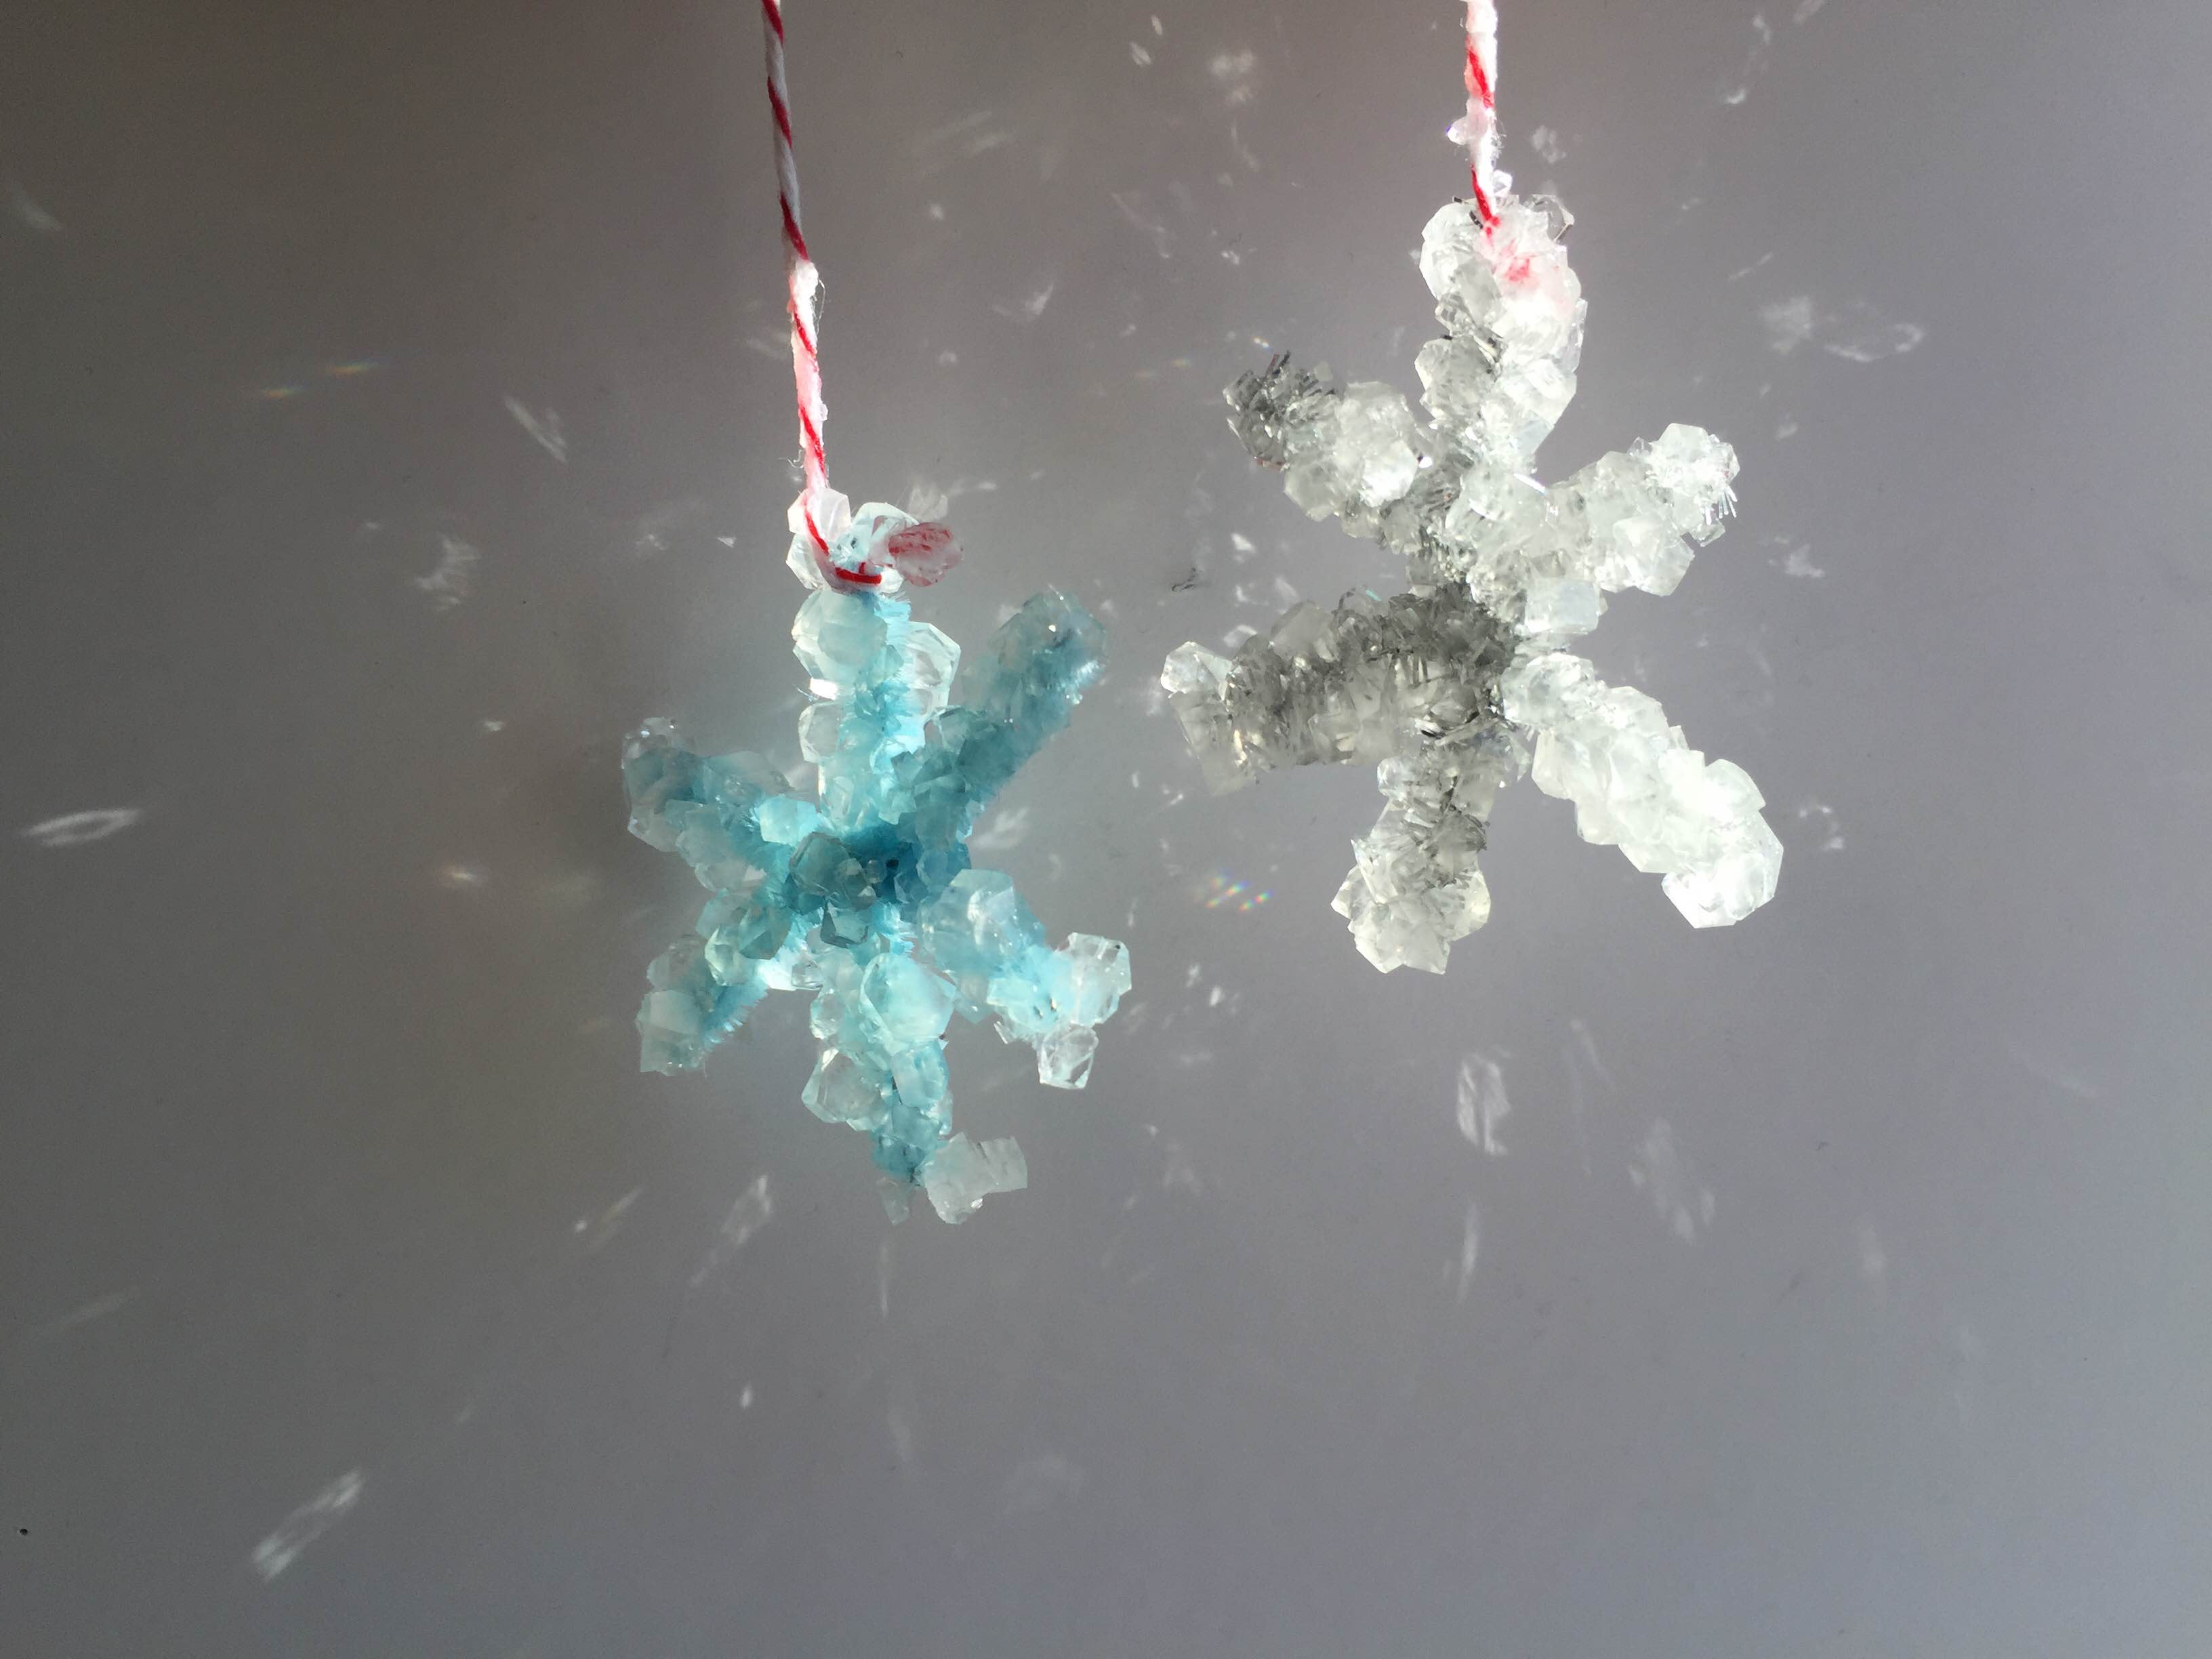
Allow the jars to sit overnight in an undisturbed location. Check on your jars in the morning and you should find formed crystals! Our kids were ooh-ing and ah-ing over their new creations.
These crystals were the perfect accents to add as holiday tags to our gifts. Next time we try this, we might even add food coloring to the mixture!


