Step-by-step tutorial
Step 1
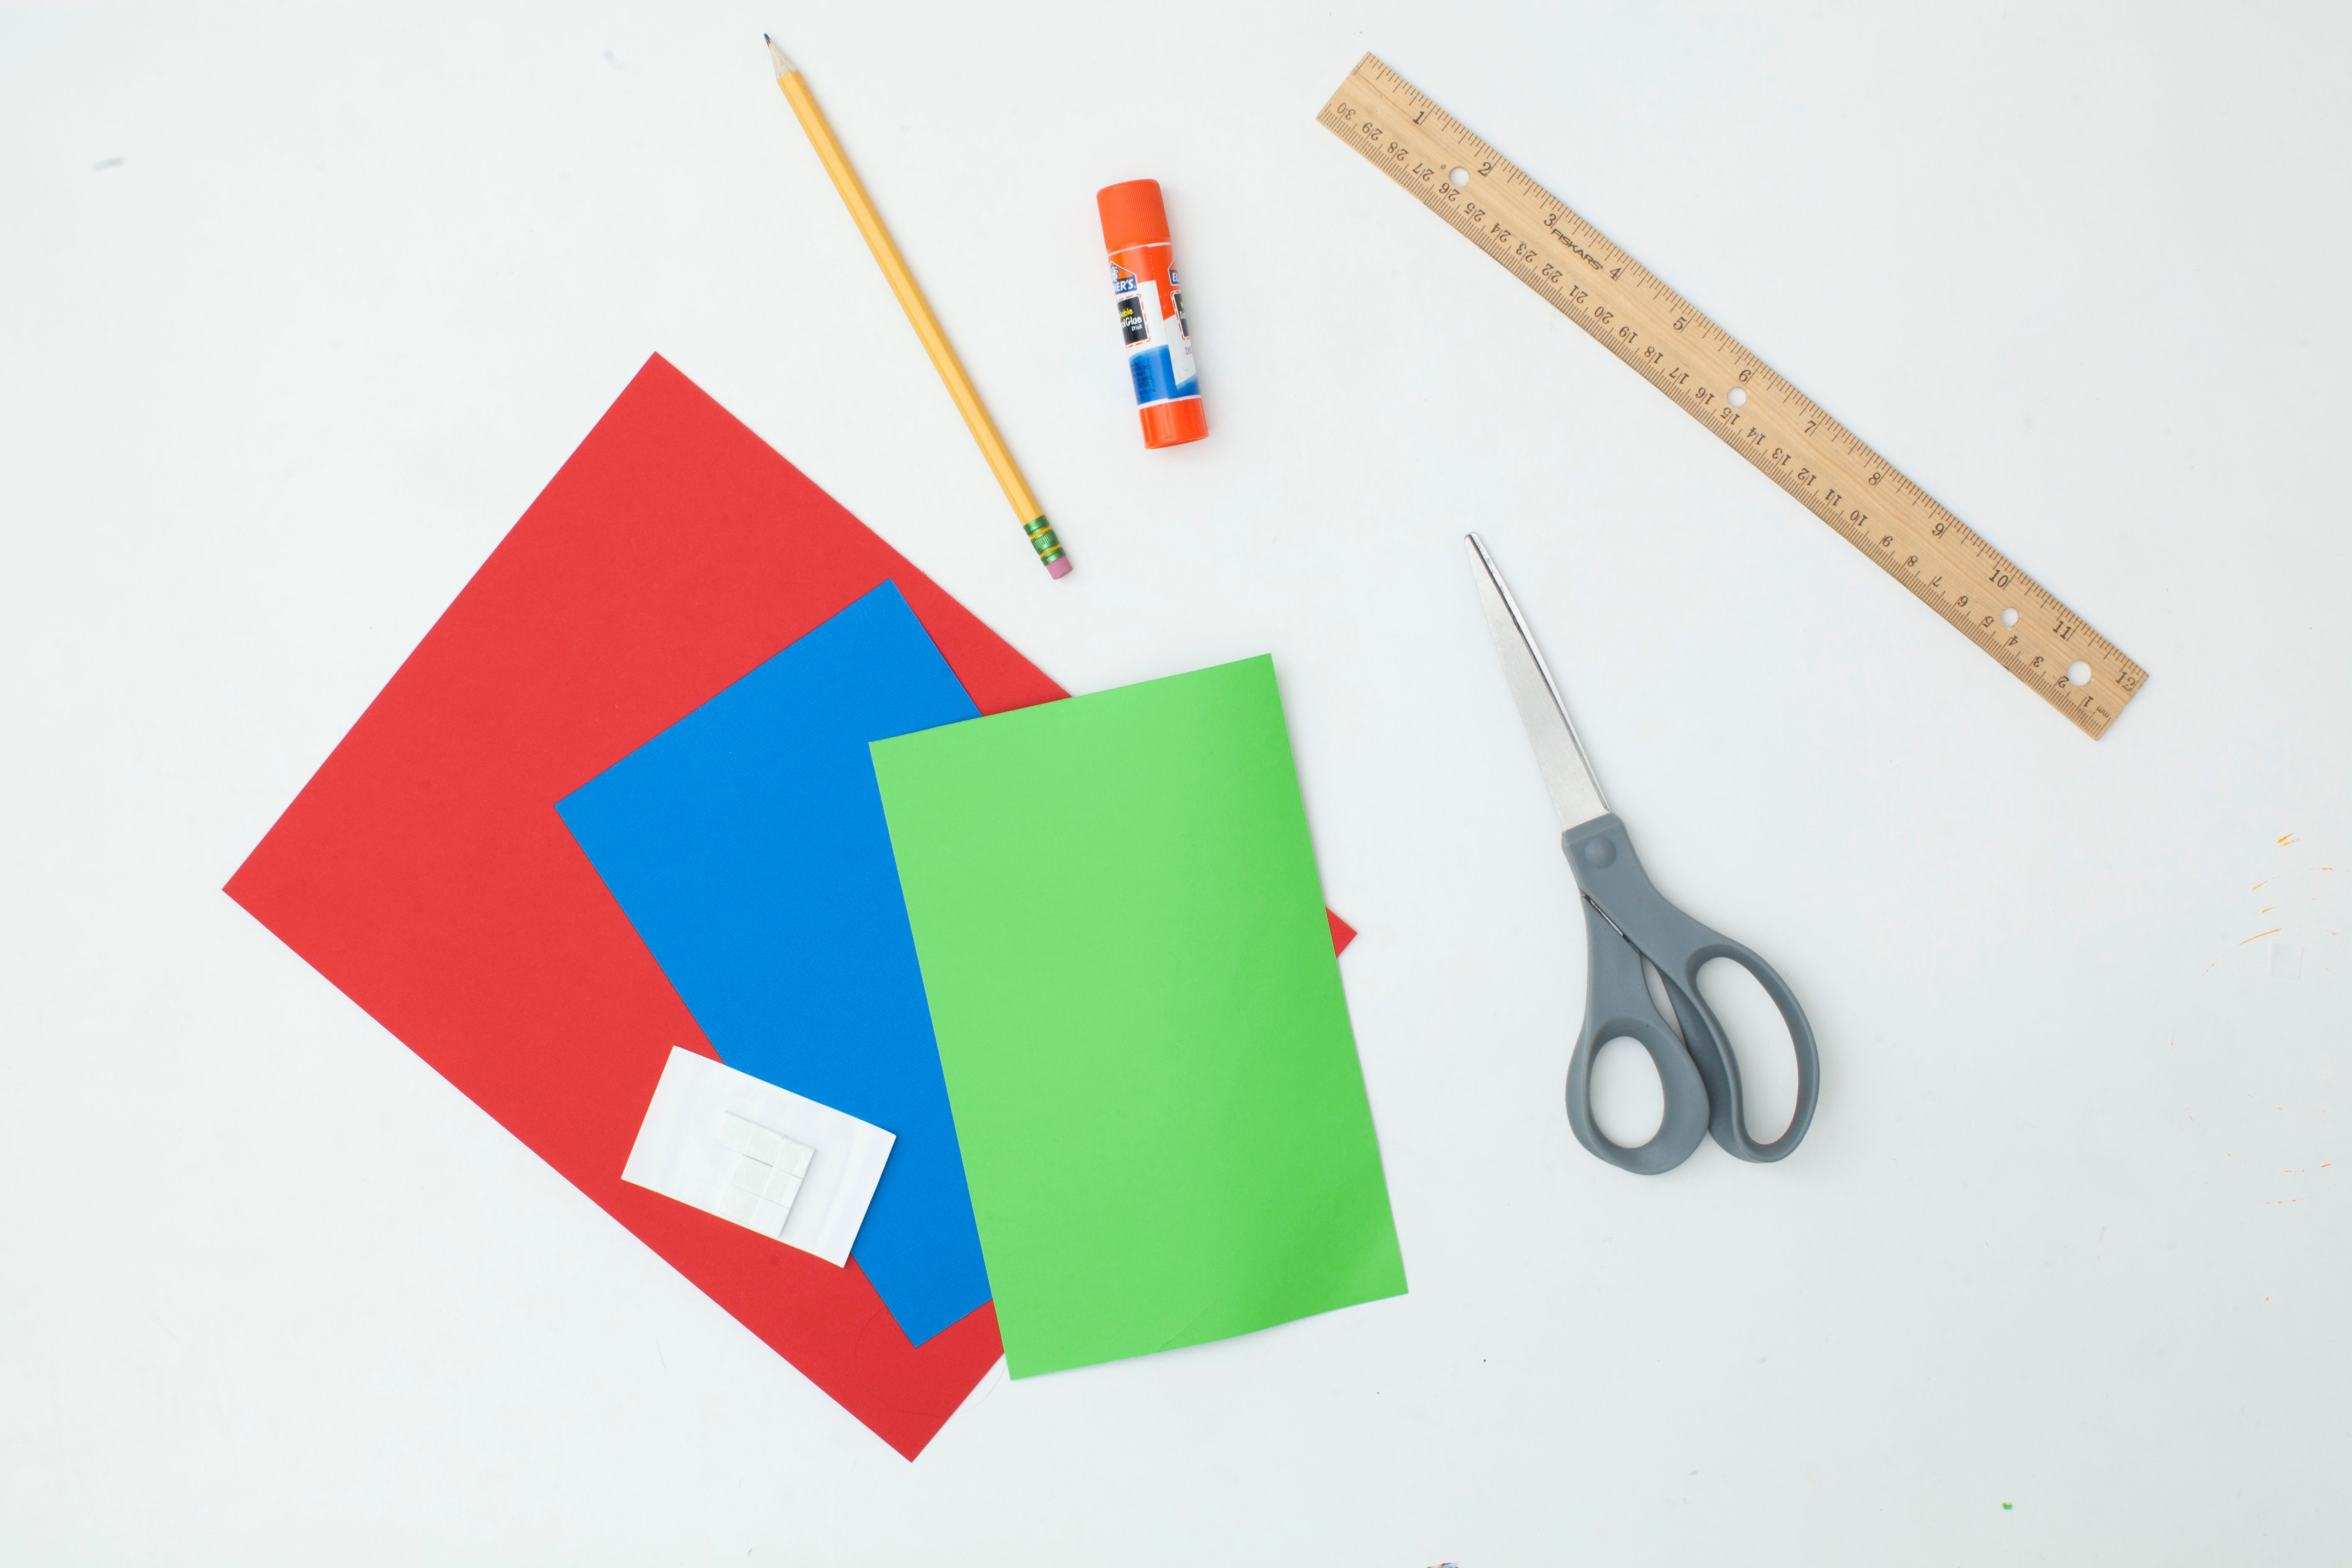
Gather your materials.

Step 2
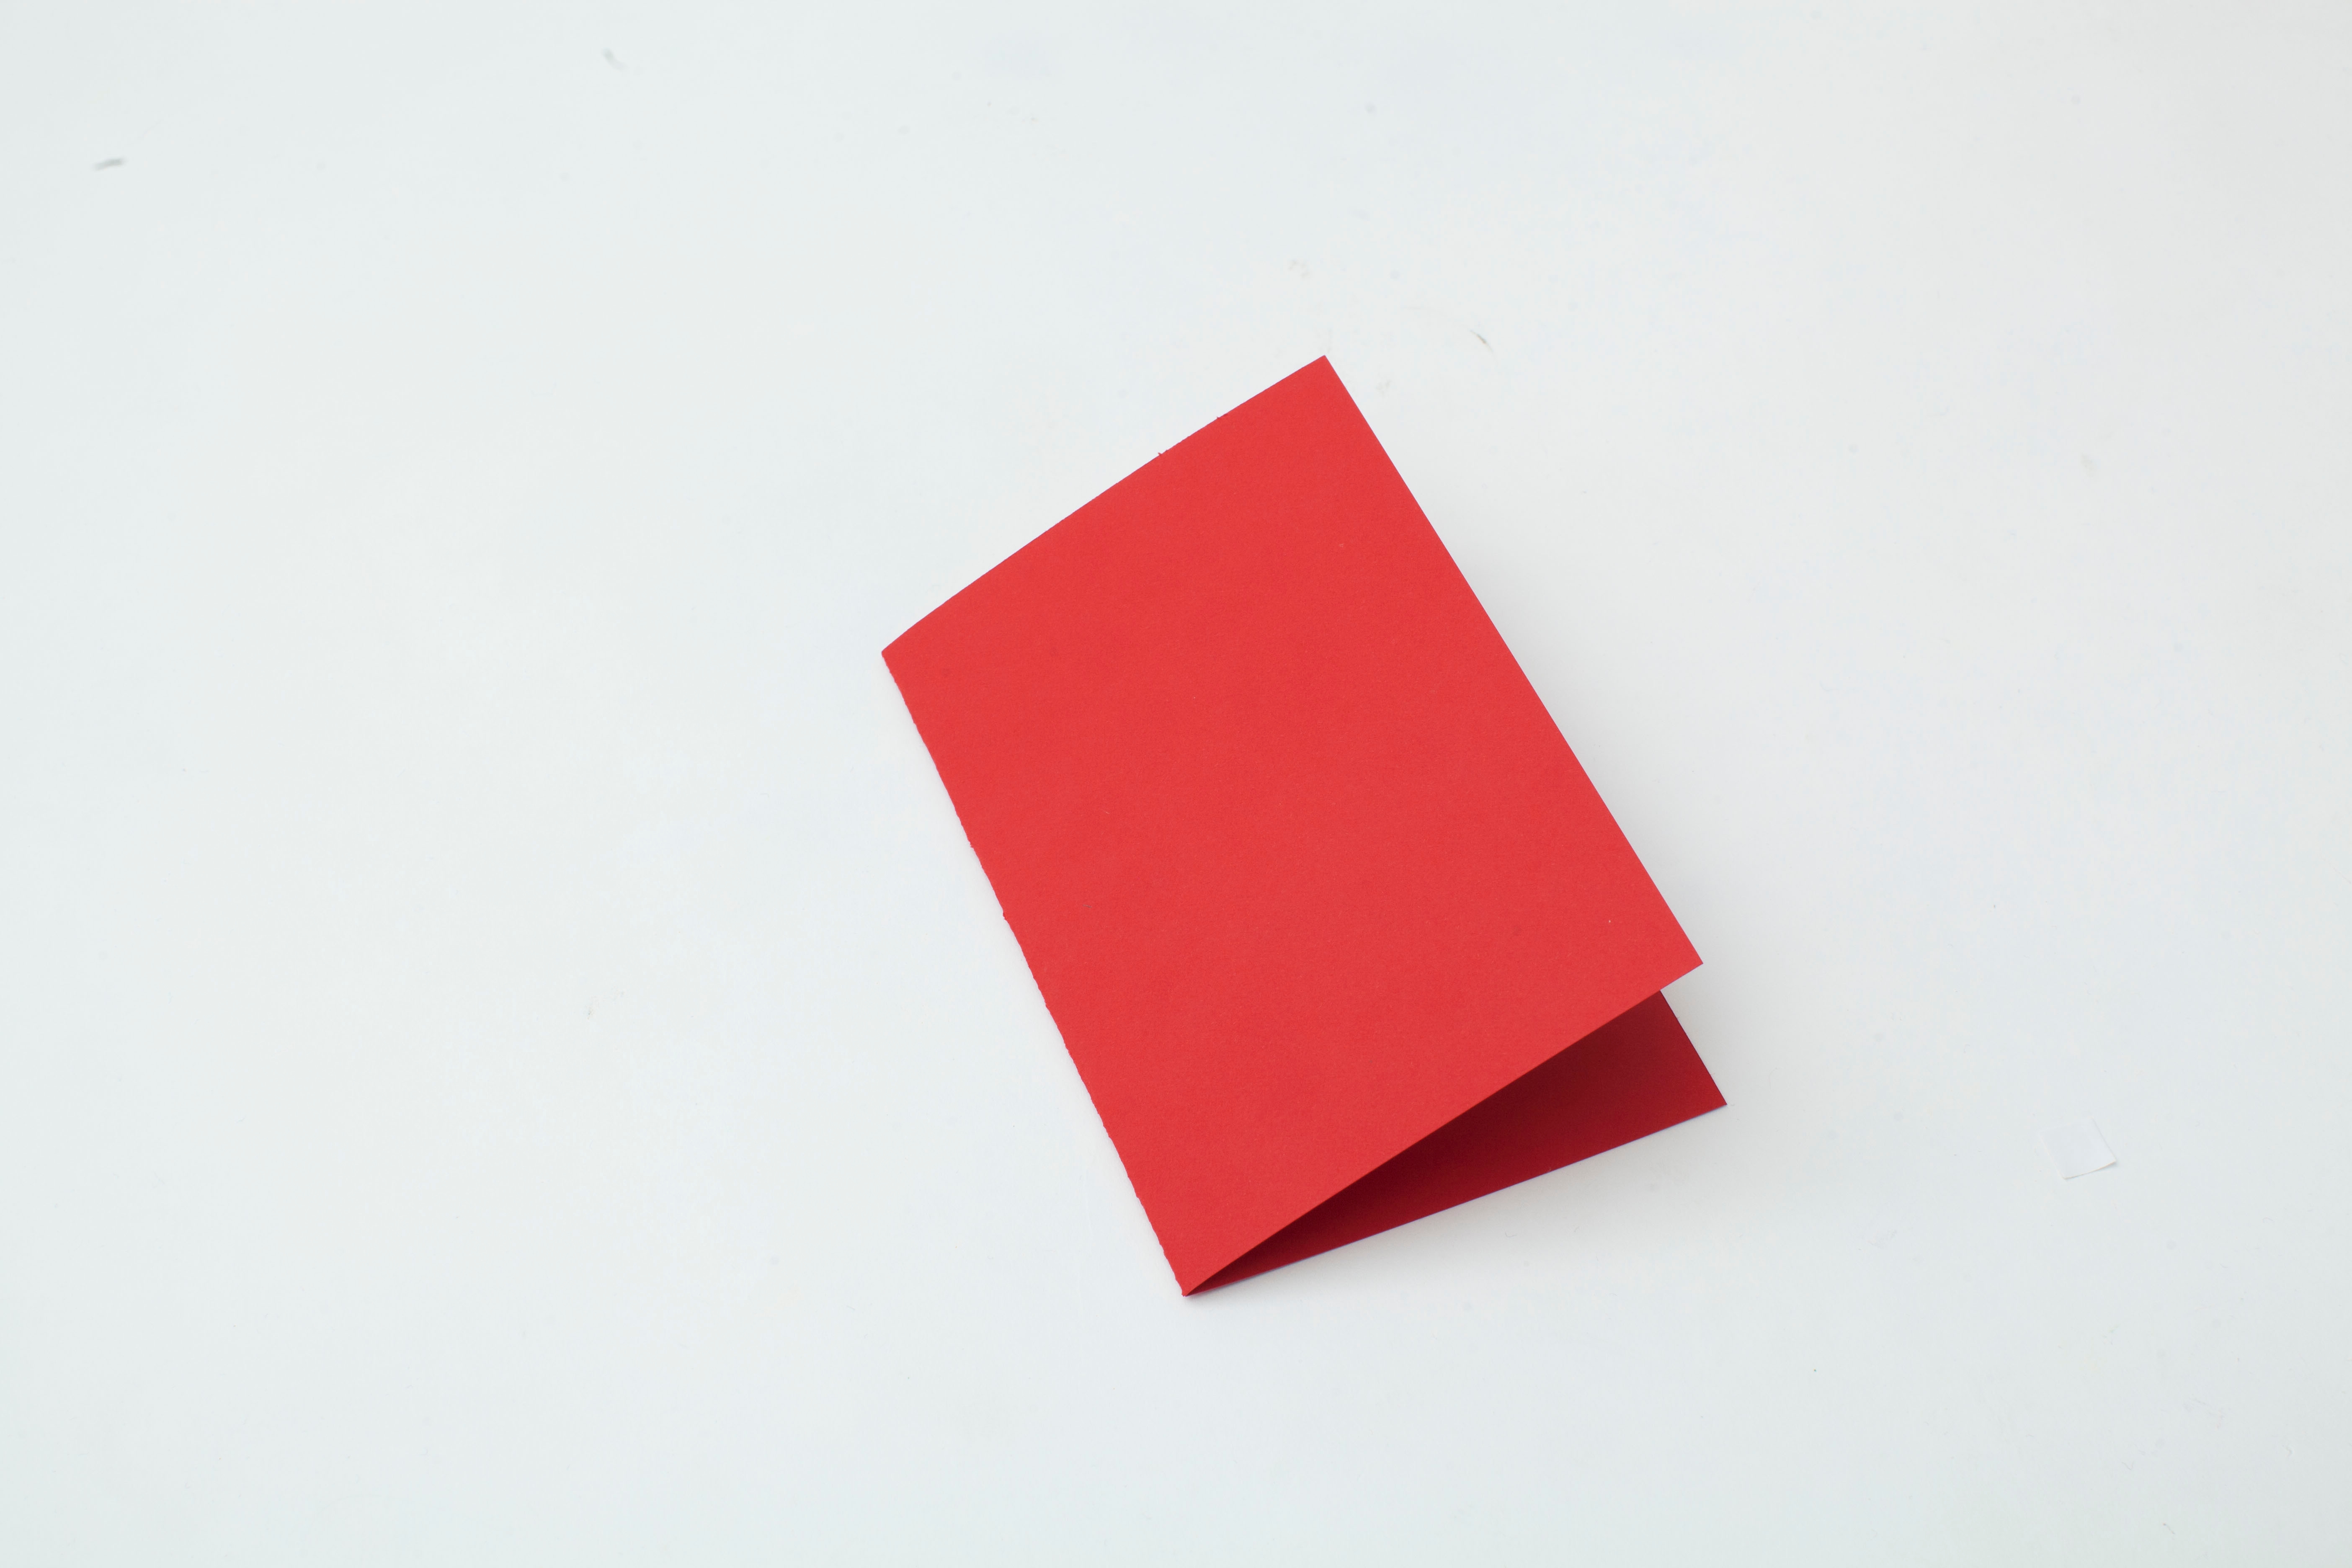
Cut an 8-inch by 6-inch piece of cardstock. Then, fold it in half lengthwise. This will be your card.
Step 3
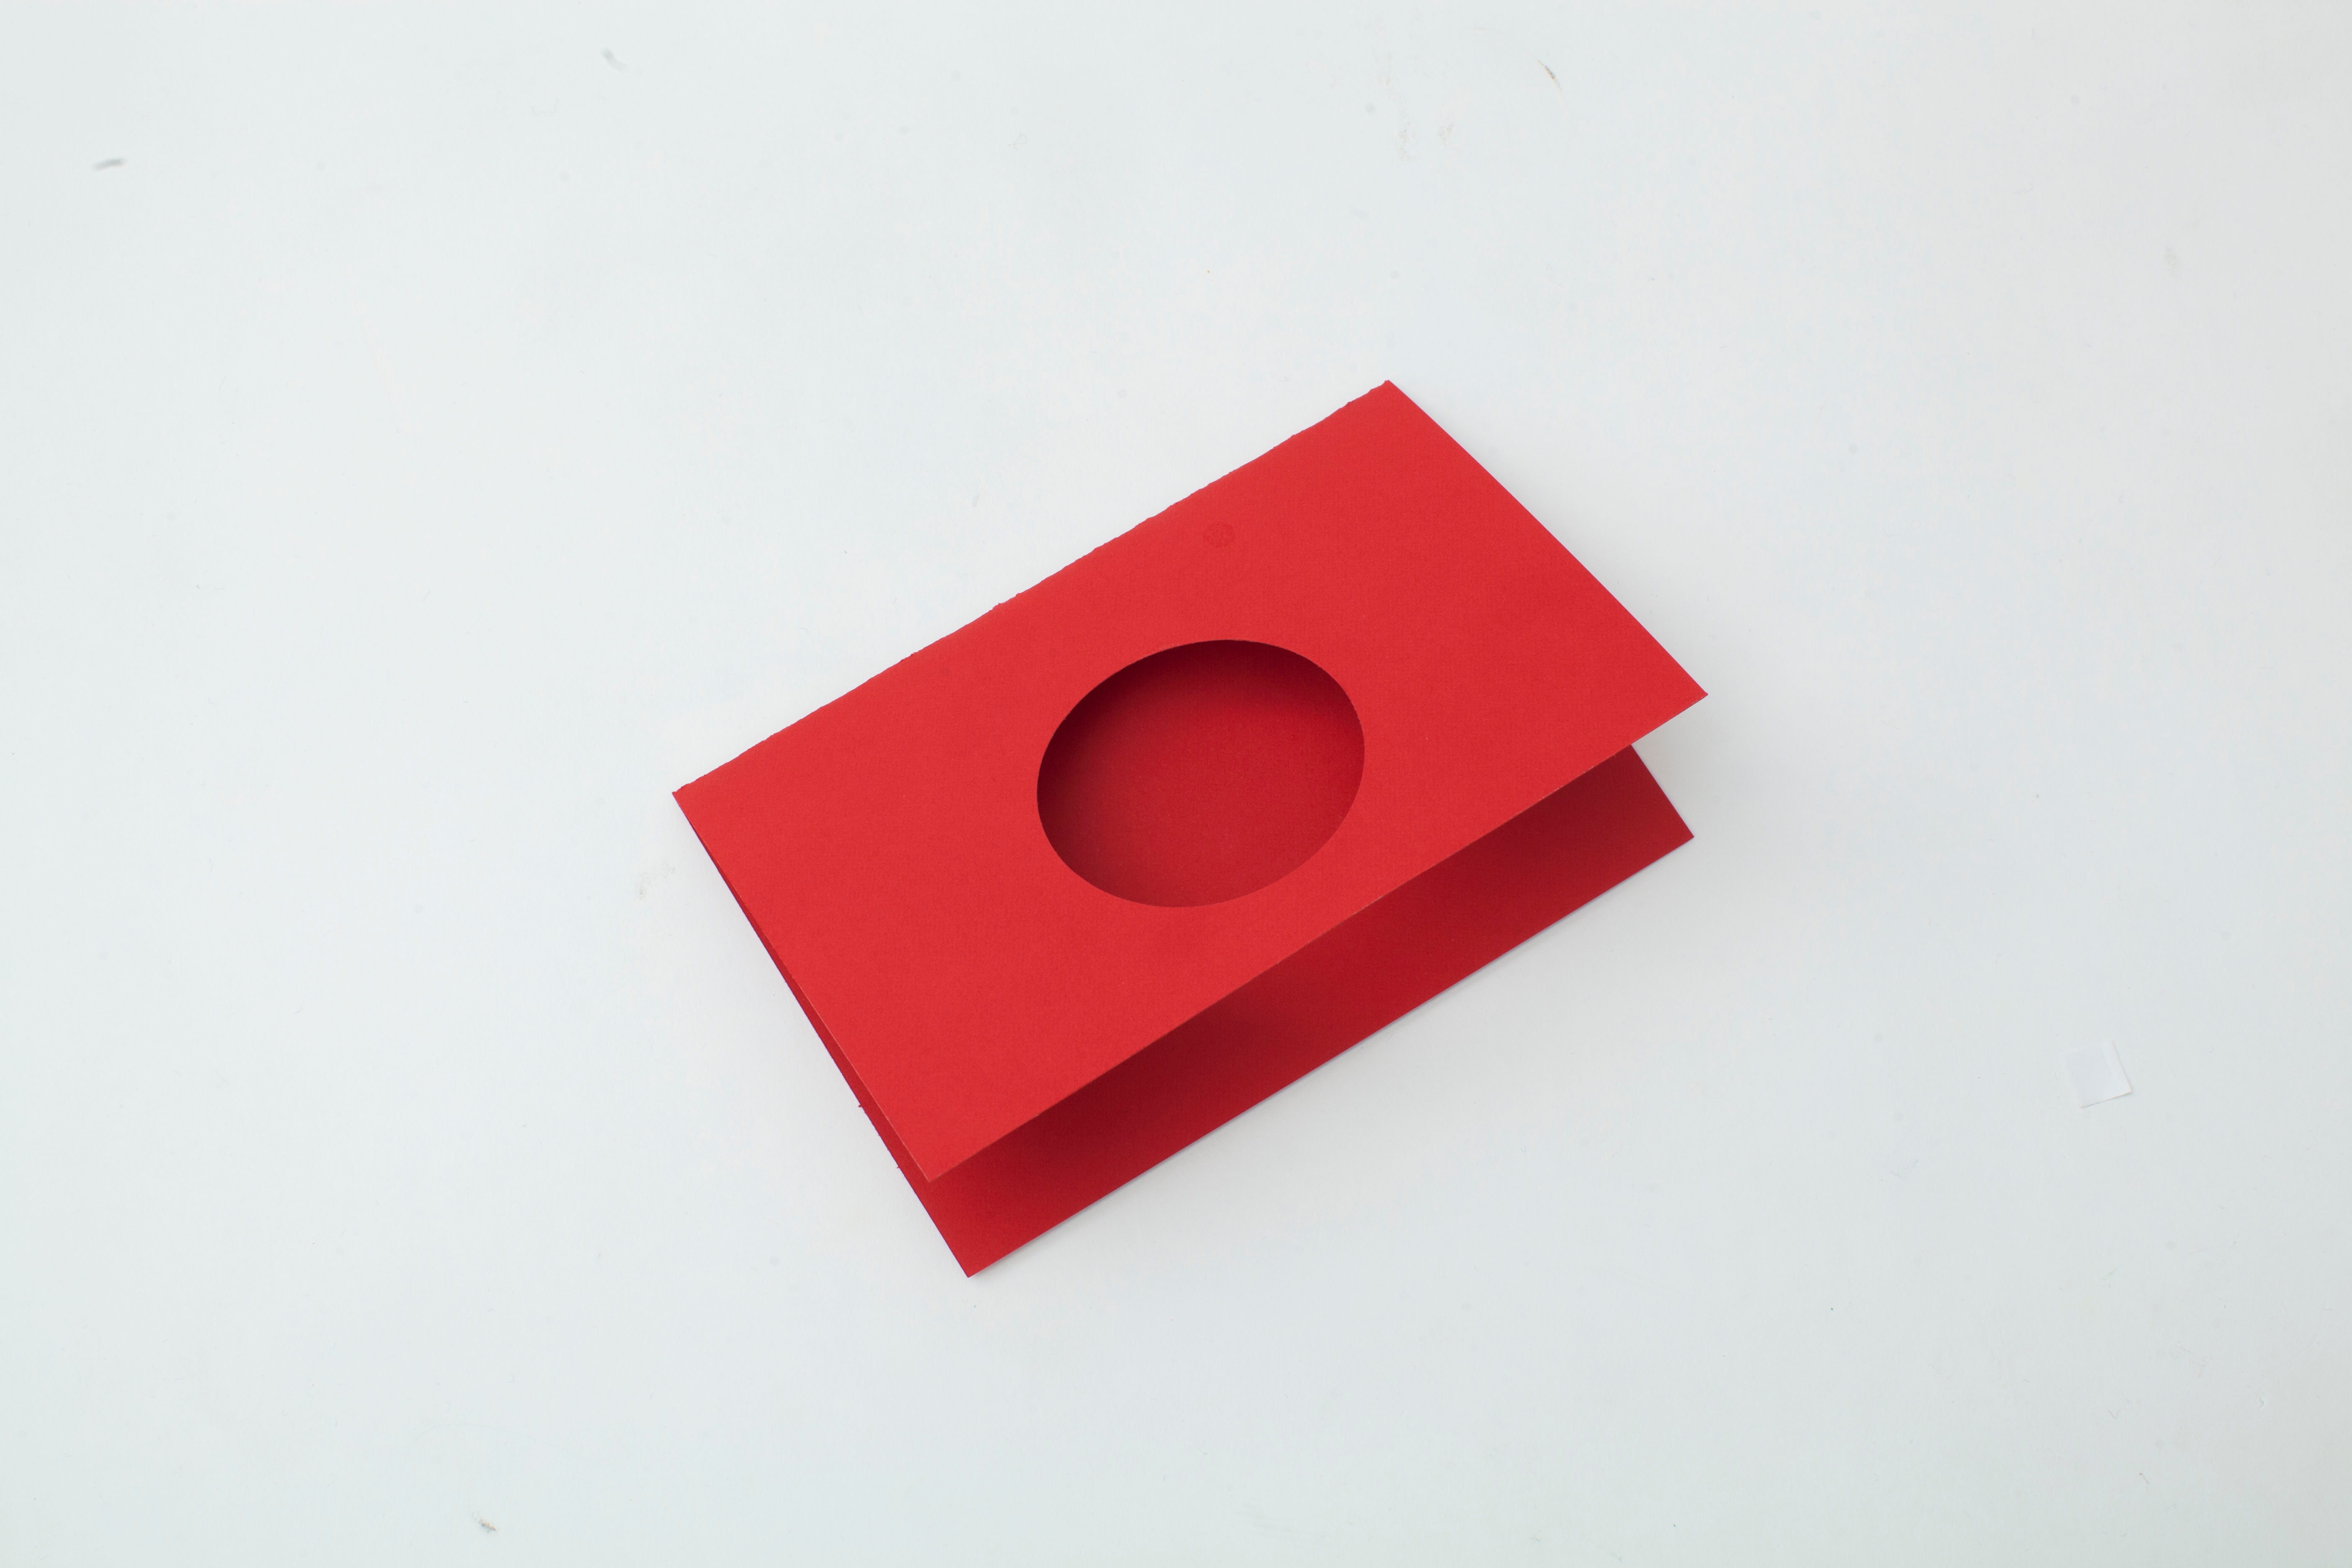
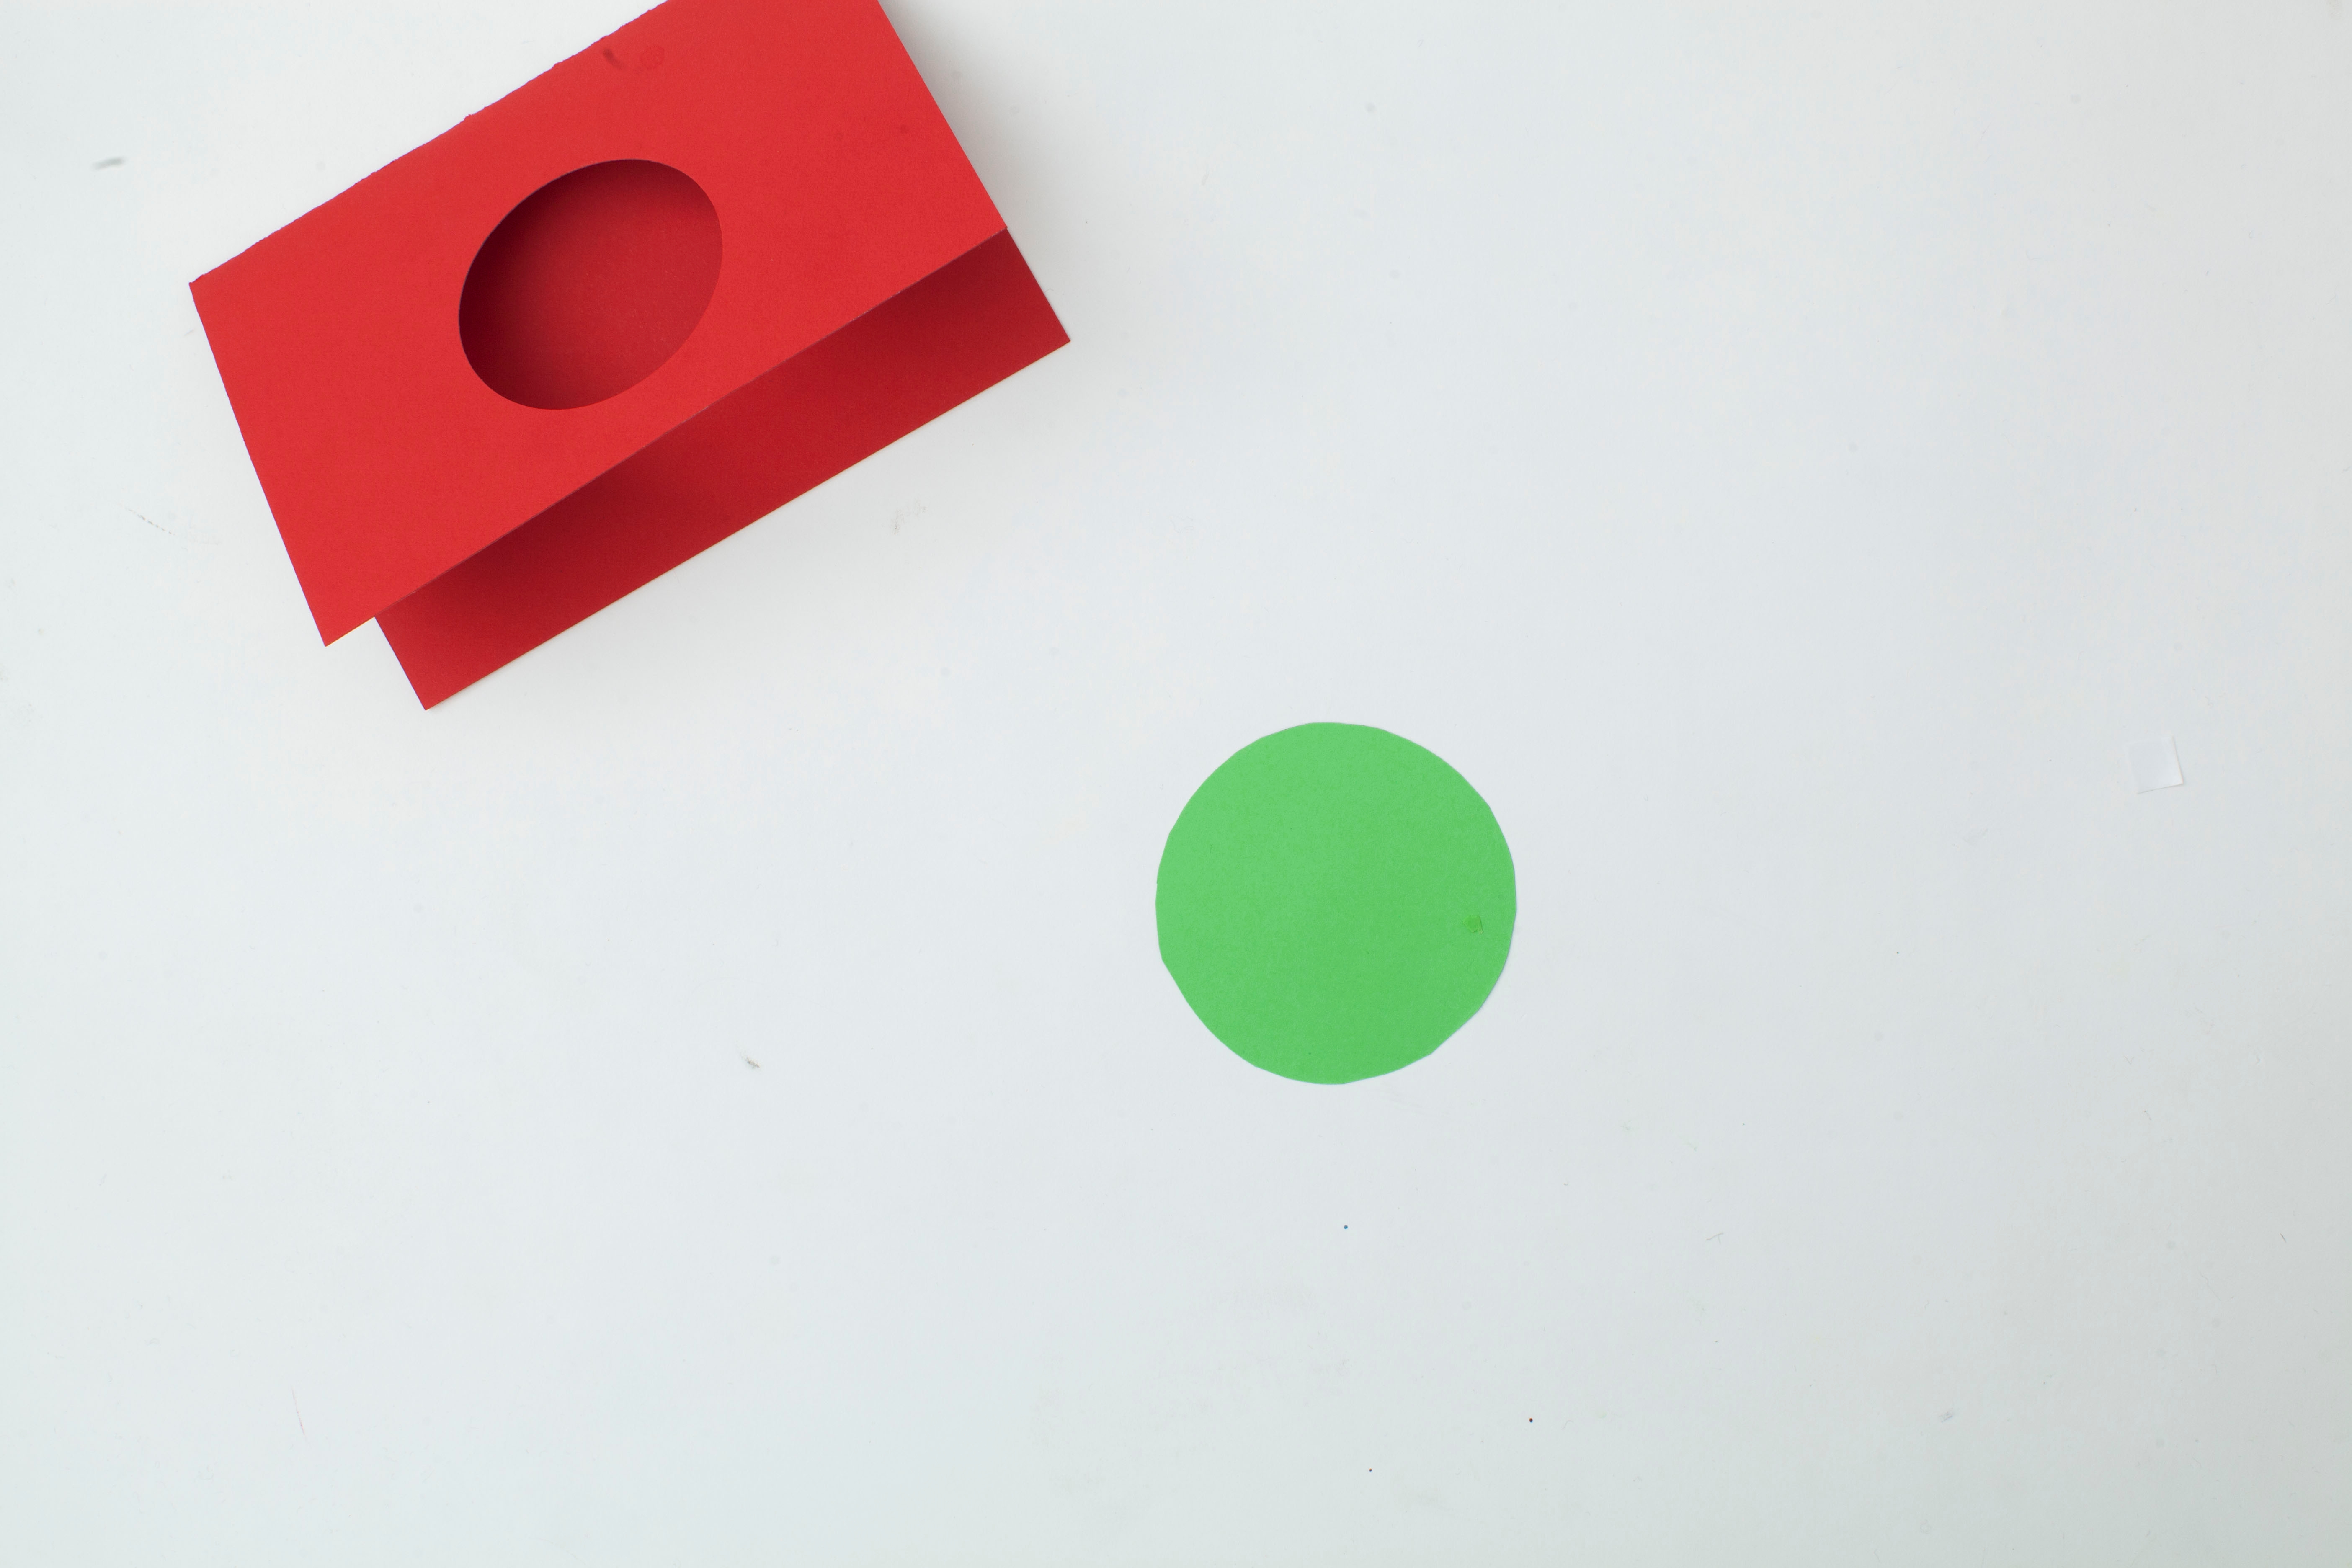
Cut a hole in the front of your card. This hole can be any shape you choose. We made a small circle.
Step 4
Cut out a slightly larger version of the shape you made in the previous step. We made a large circle.
Step 5
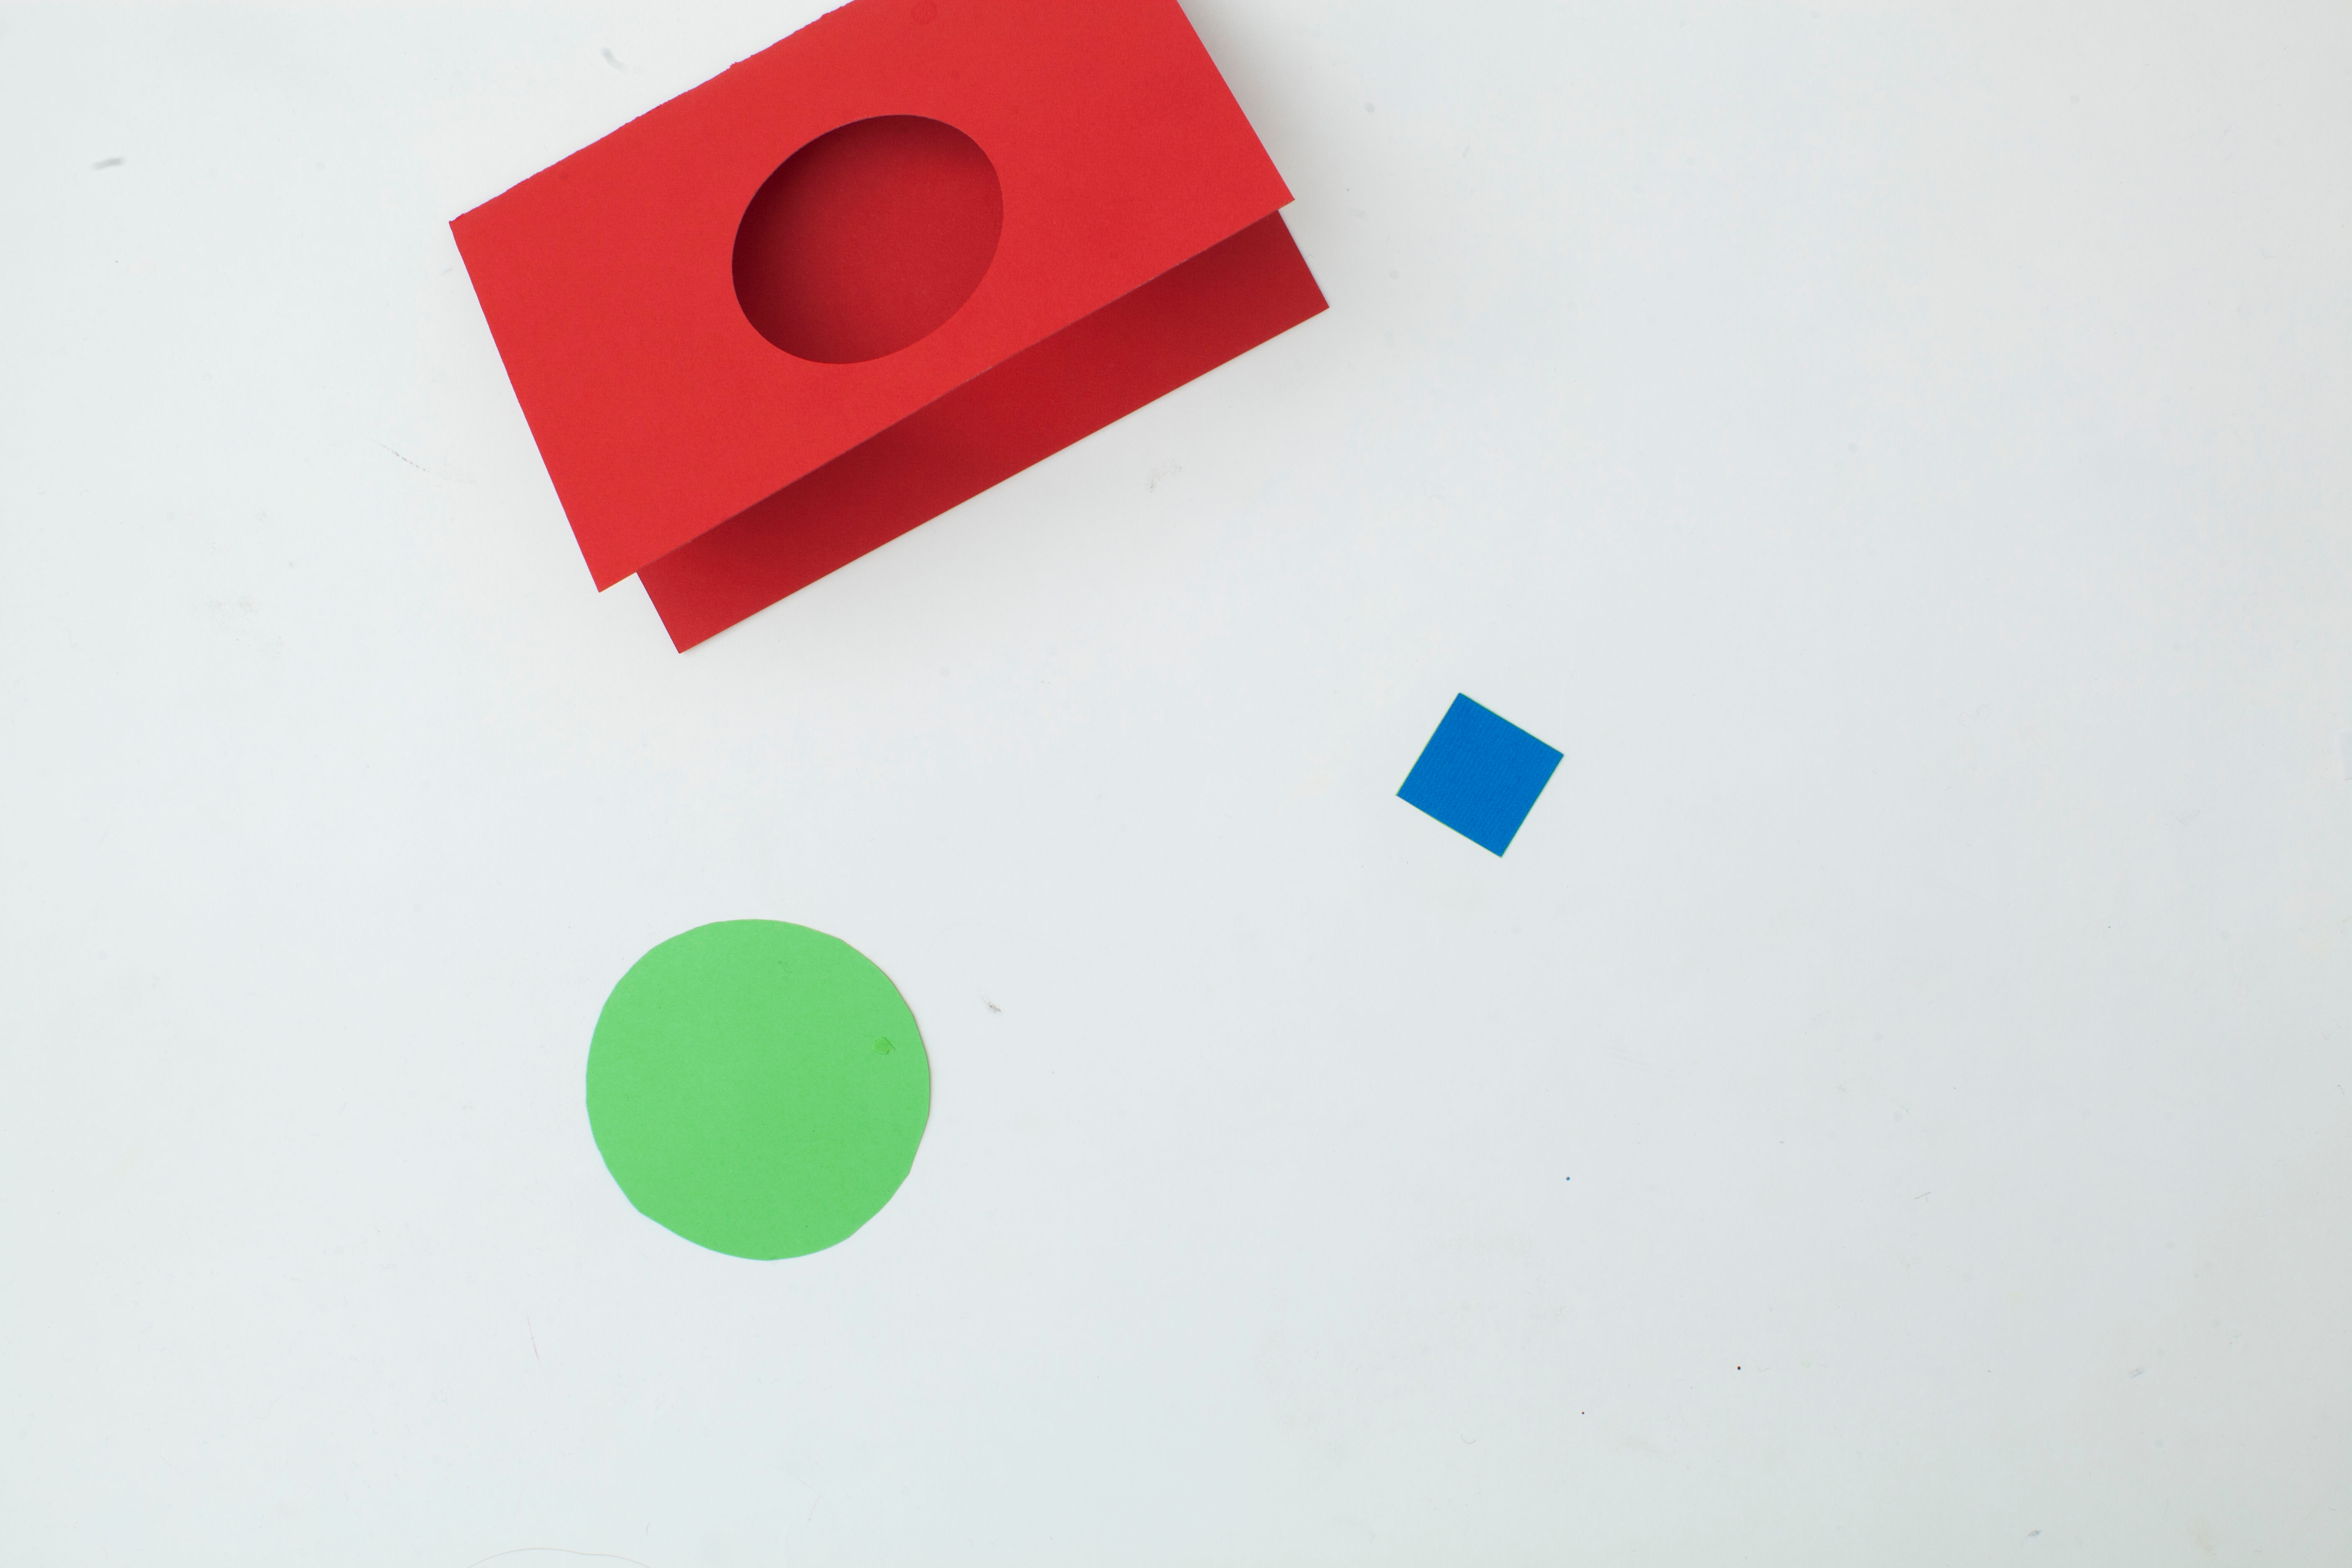
Now, cut out the shape you want to “appear” when you pull on the tab. We made a small square.
Step 6
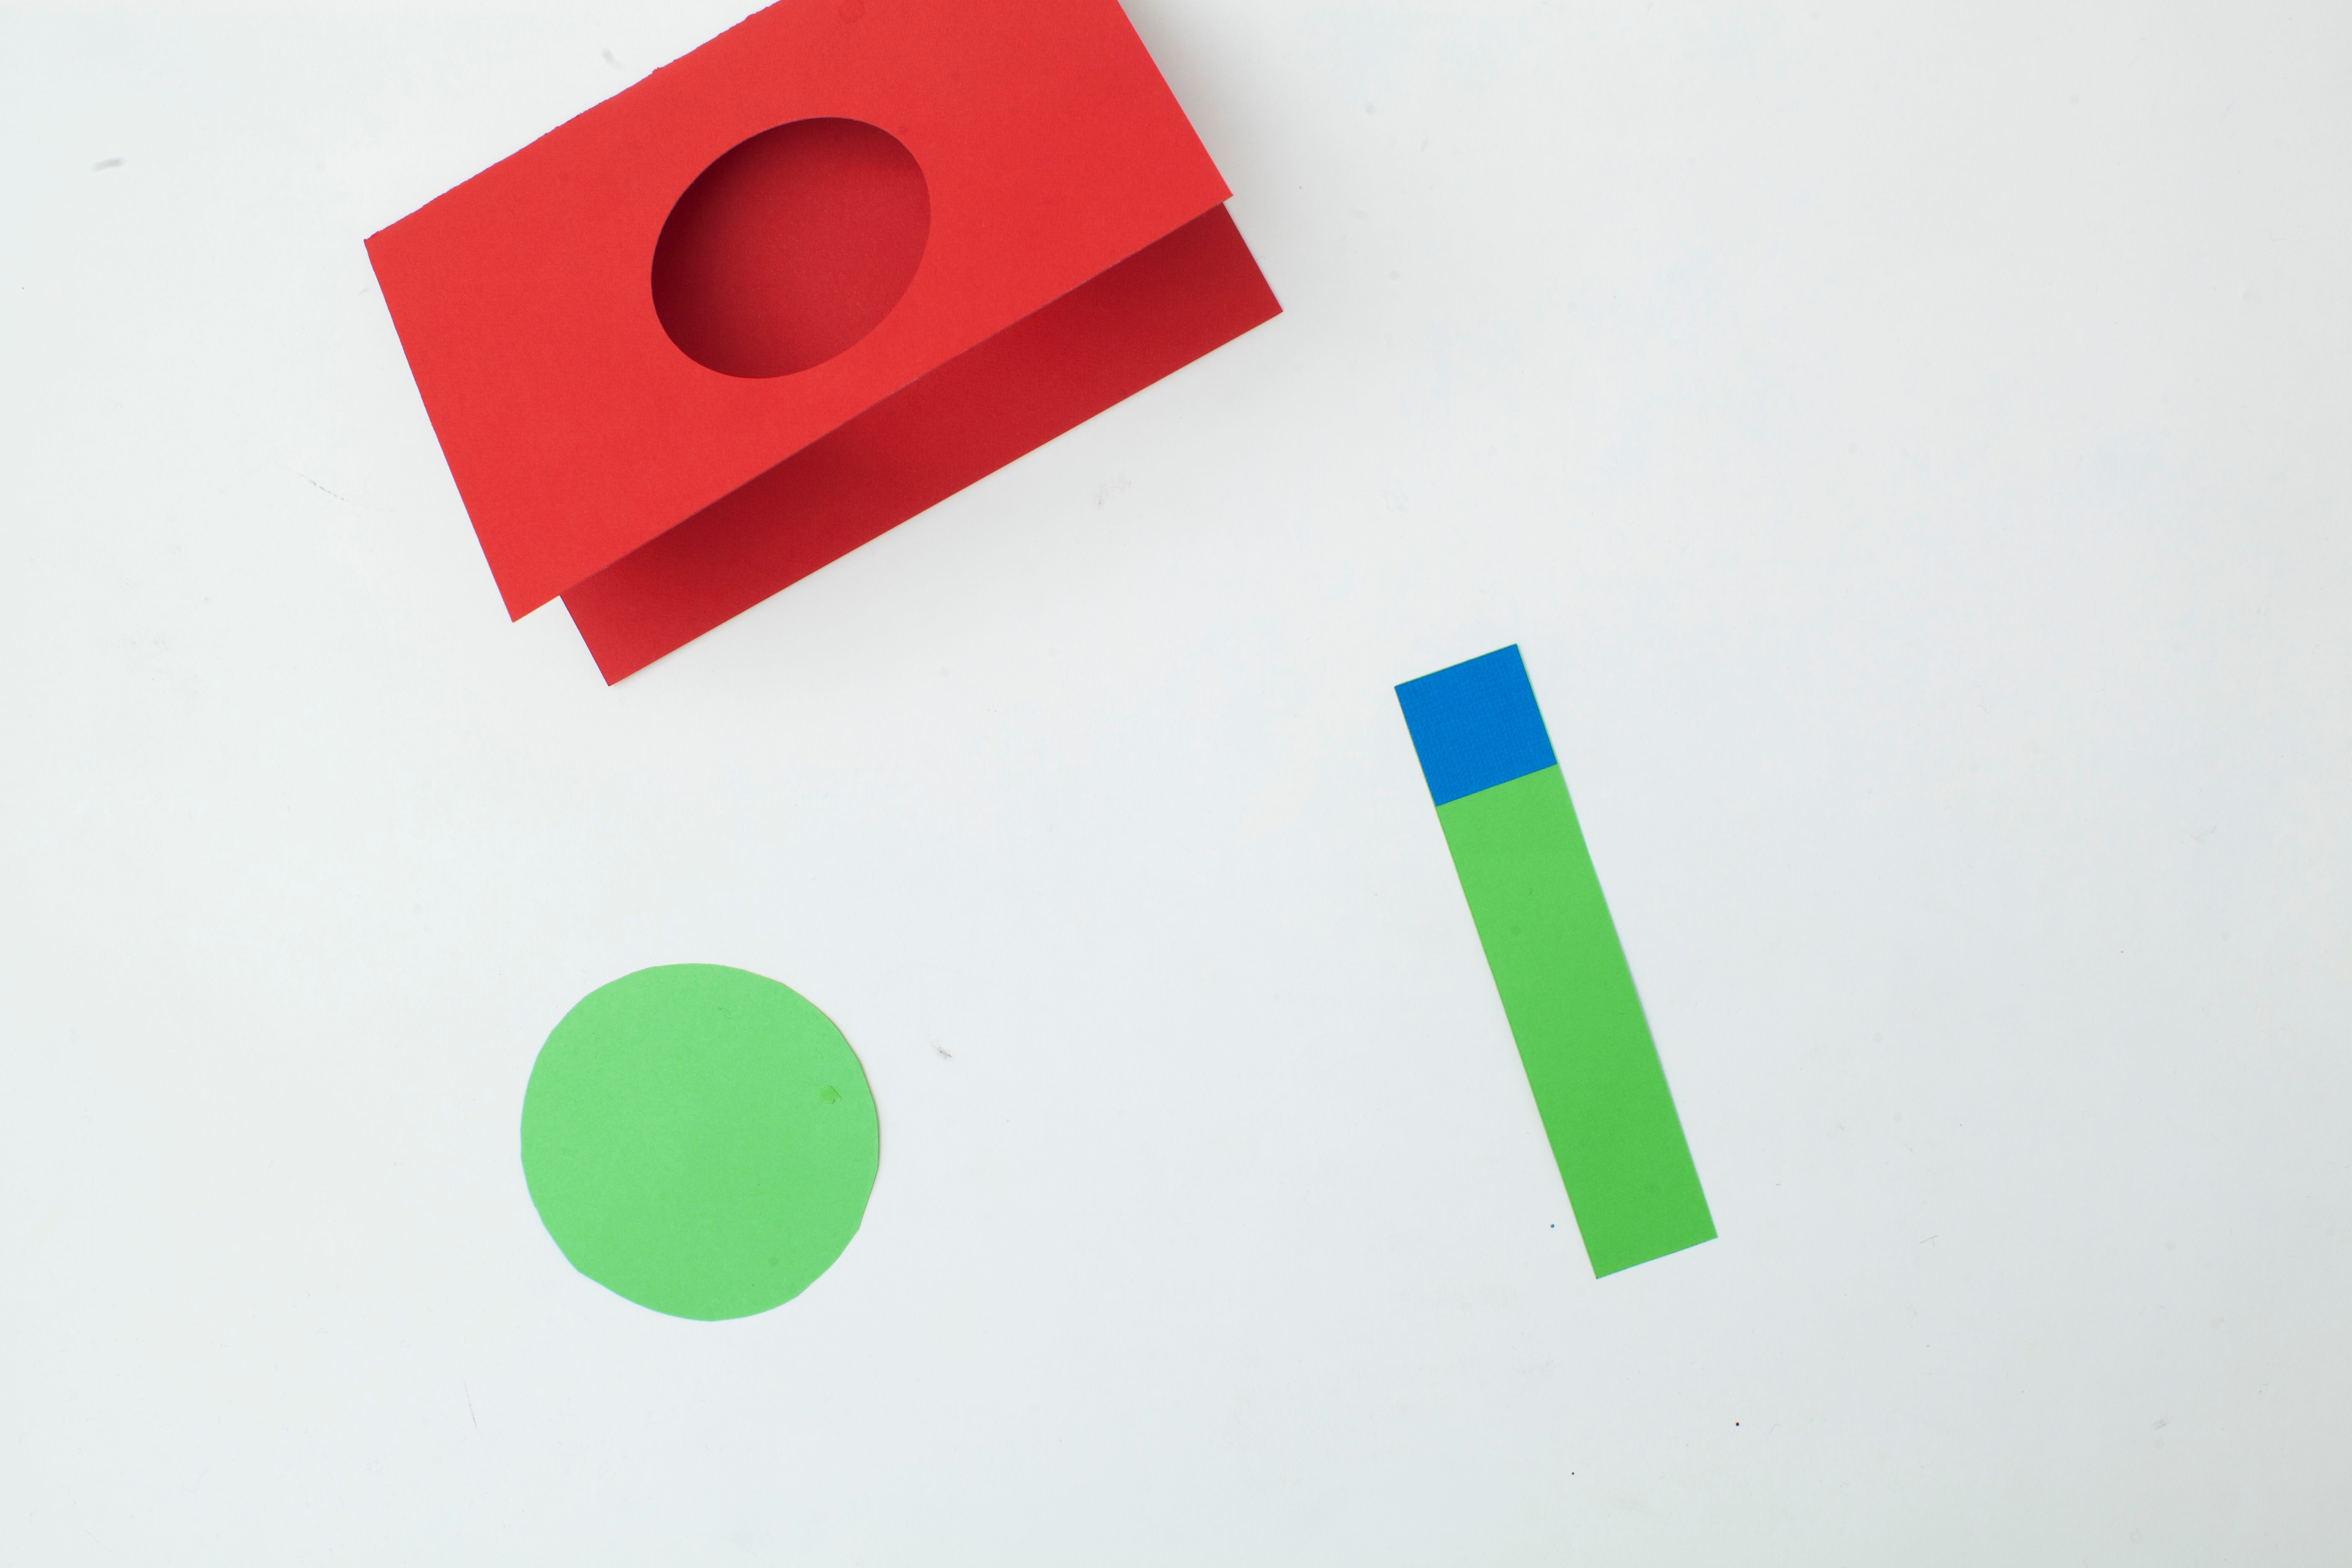
Cut out a strip of paper as wide as your shape from step 5 and about 5-inches long. Then, glue the shape from step 5 to the top of it. This will be your pull tab.
Tip
To make your pull tab blend in, make this the same color as the shape from step 4.
Step 7
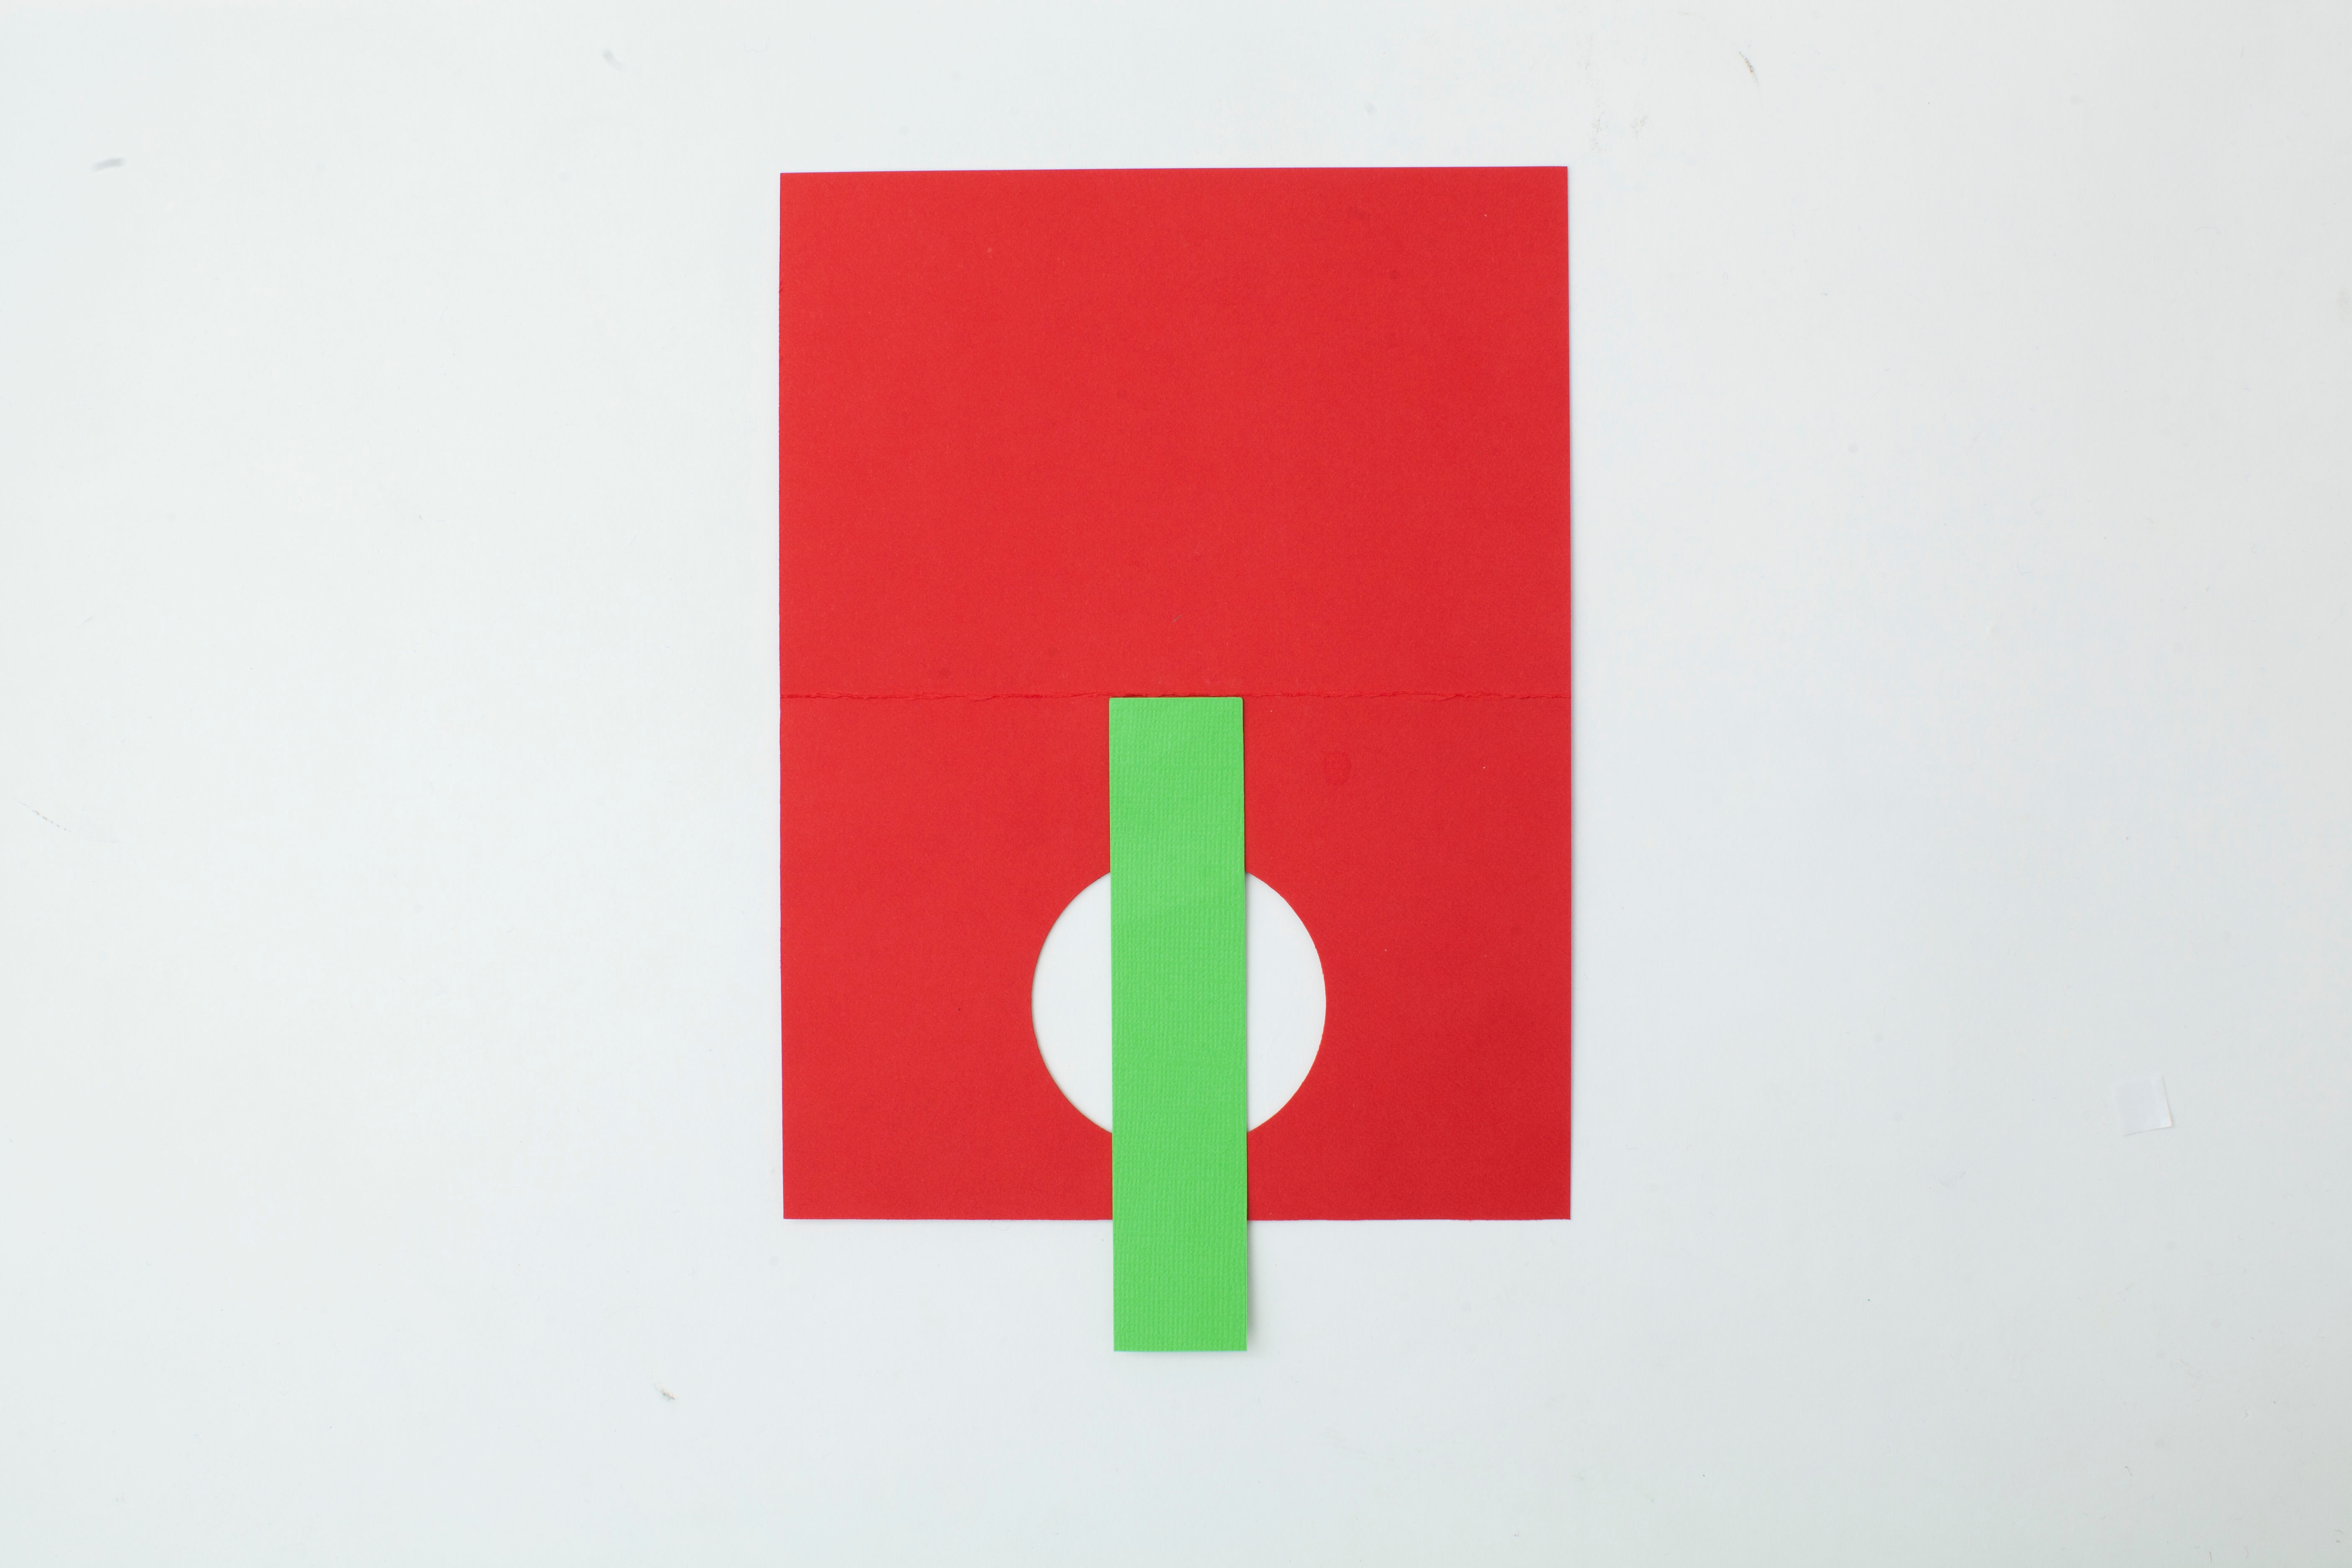
Put it all together! Open up the card so that the inside is facing up. Then, place the pull tab in the center of the hole on the card.
Tip
Make sure the pull tab is upside down, meaning that the shape is facing away from you.
Step 8
Remove one side of backing on the sticky foam squares and place them along either side of the pull tab. Then, place some sticky foam squares around the outside of the hole.
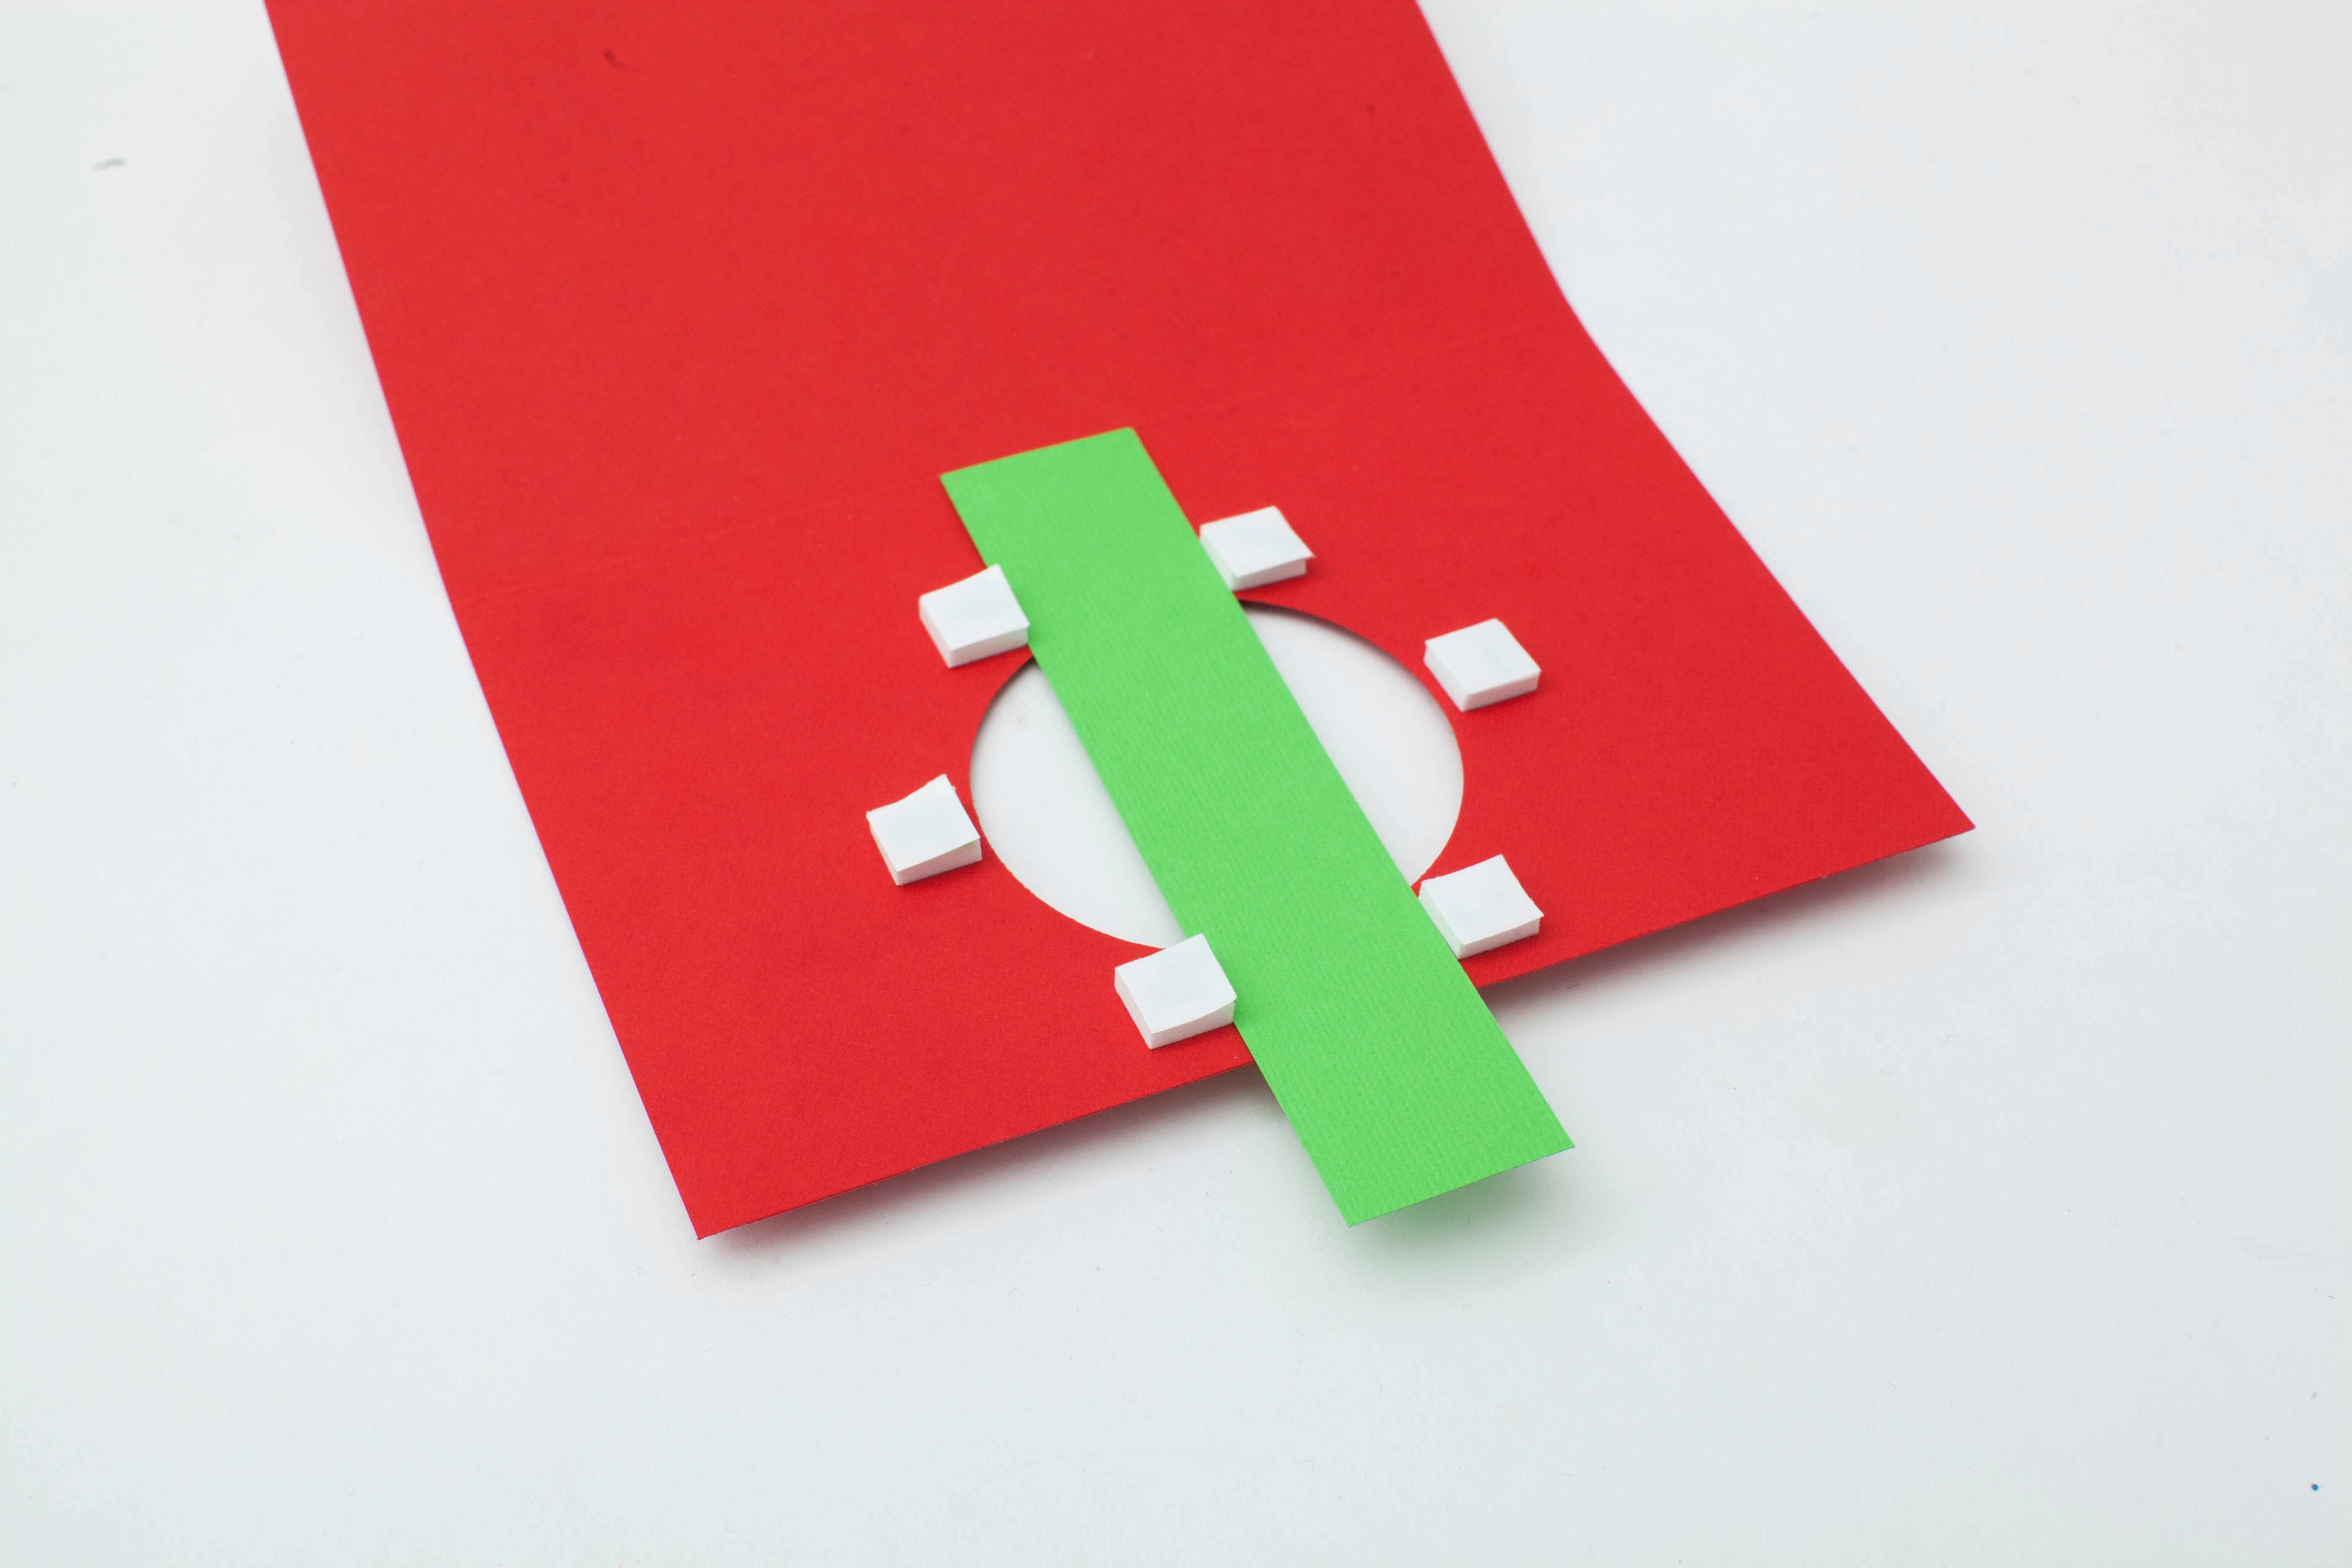
Tip
The pull tab should only move up and down or right to left.
Step 9
Leave the pull tab in place. Remove the other backing on the sticky foam squares. Then, stick the large circle down onto the sticky foam to cover up the hole on the front of the card.
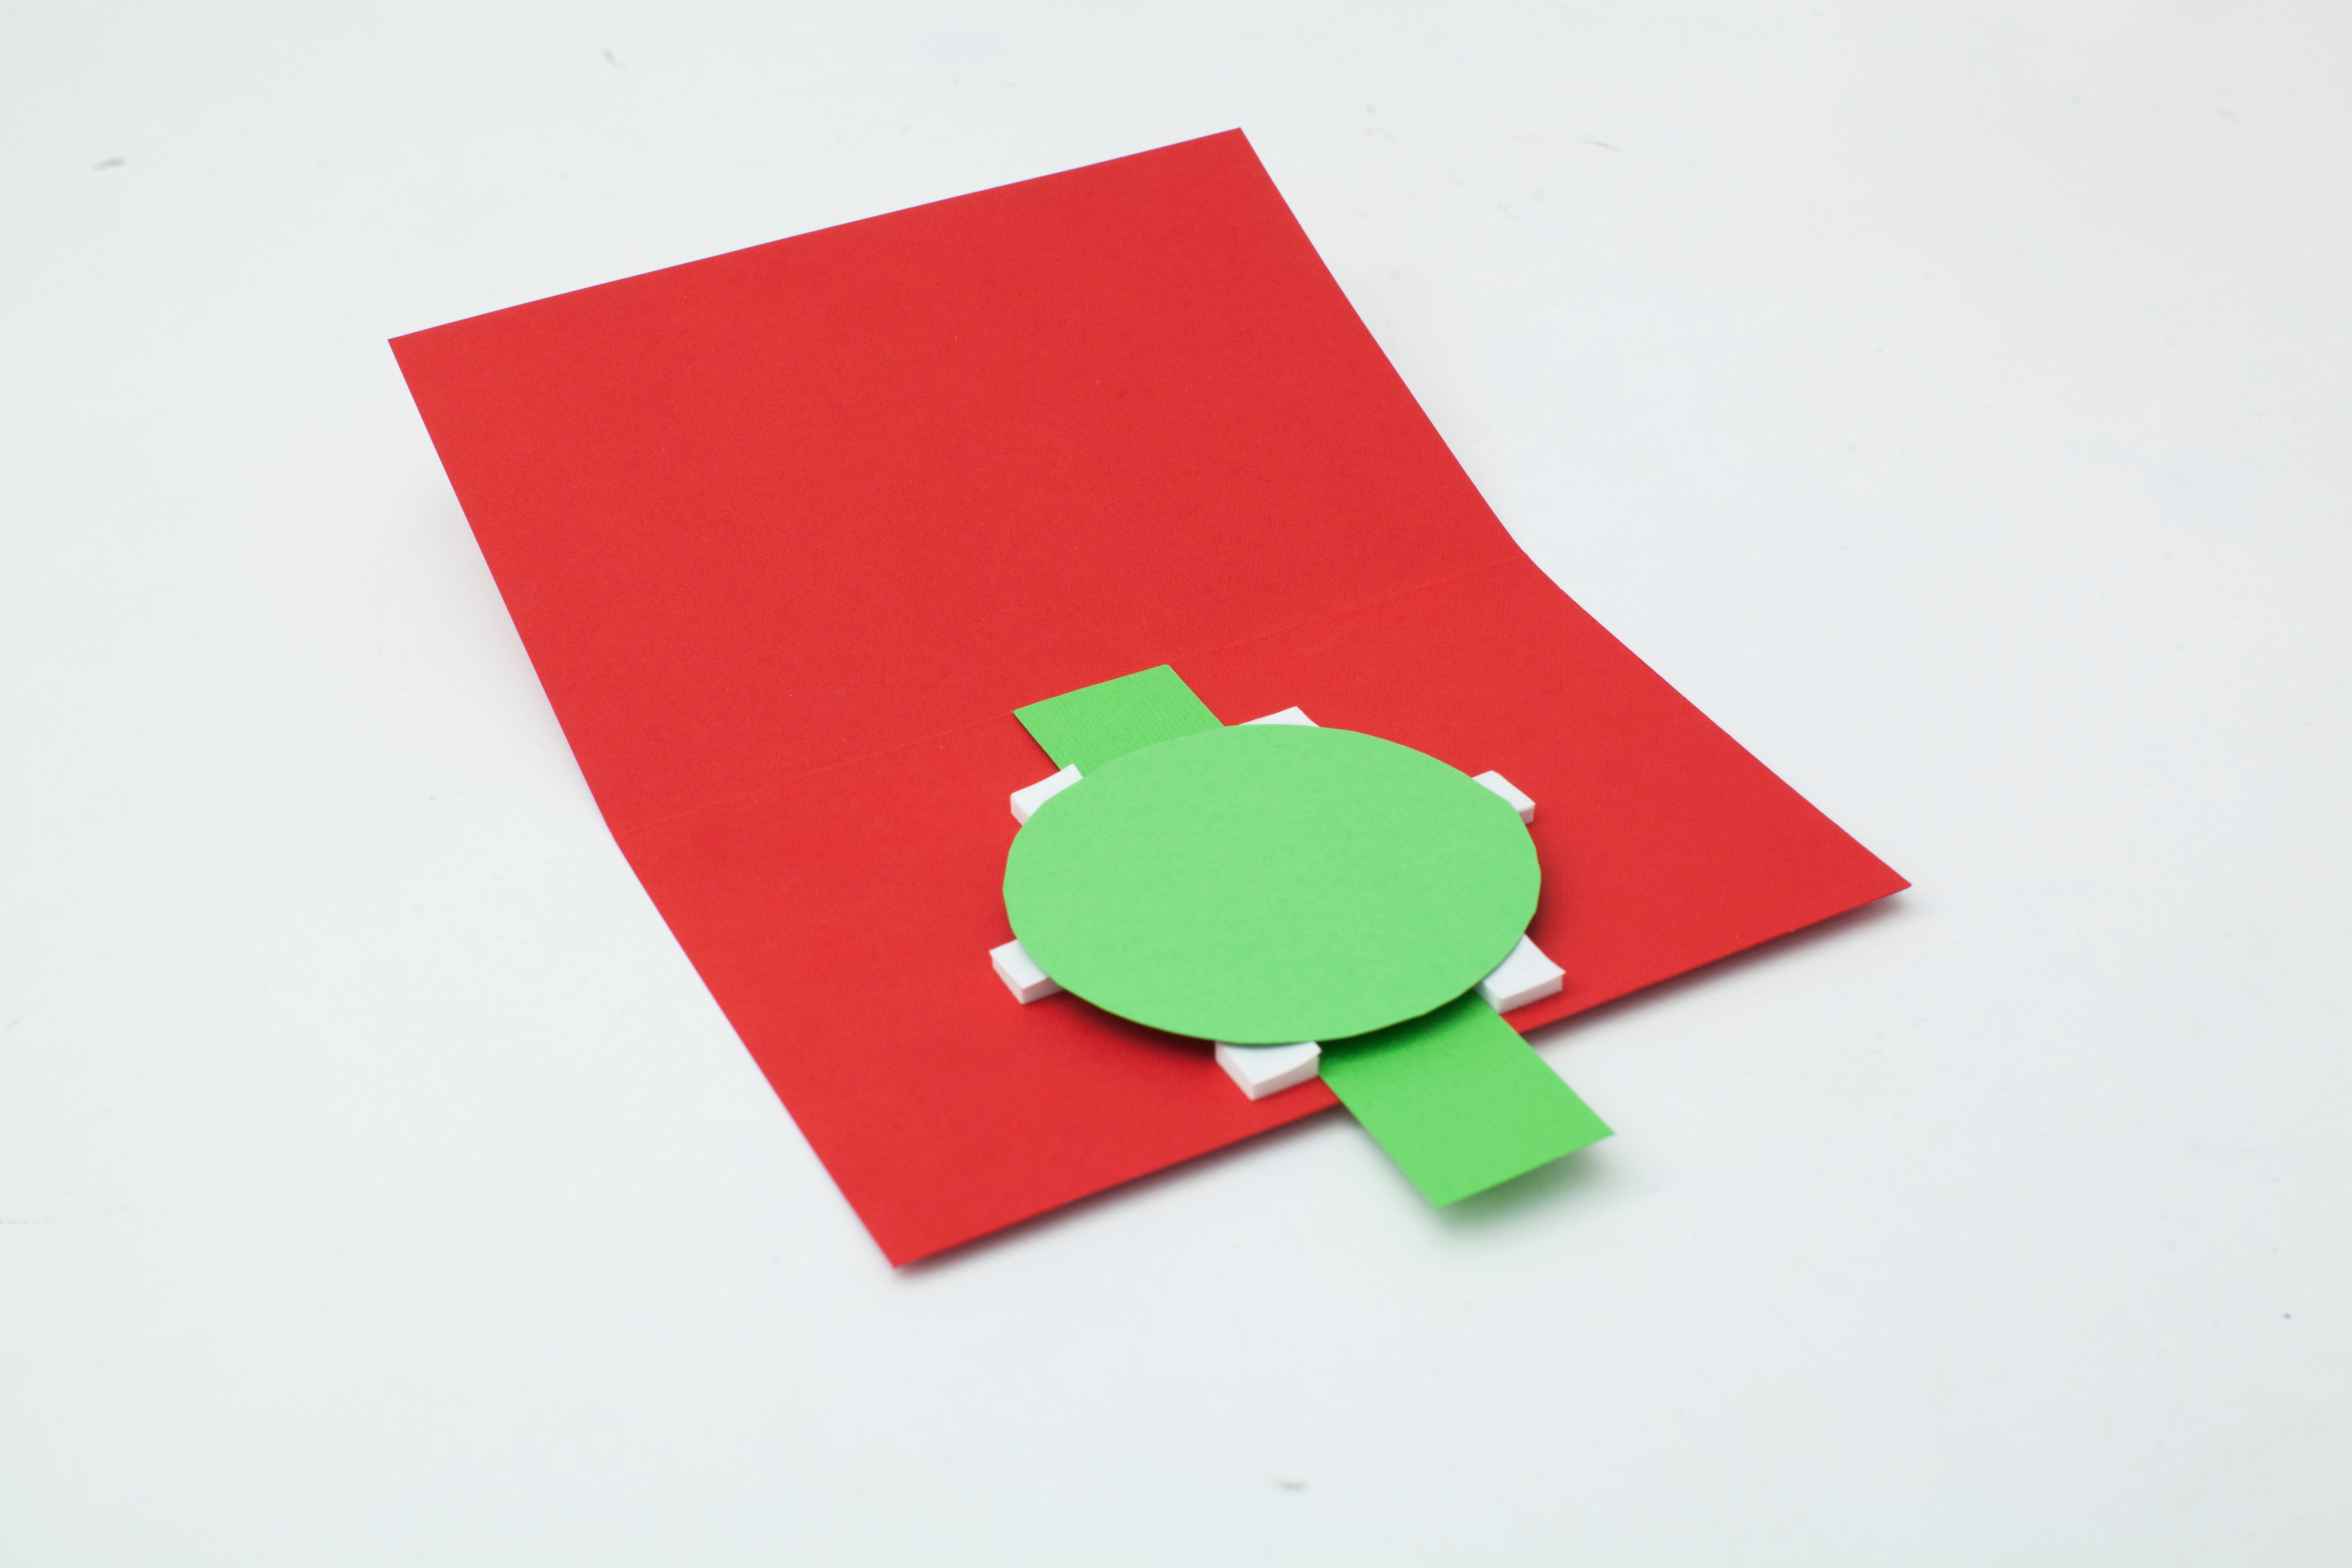
Tip
If any of your sticky foam squares are sticking out, just stick the backing back on them!
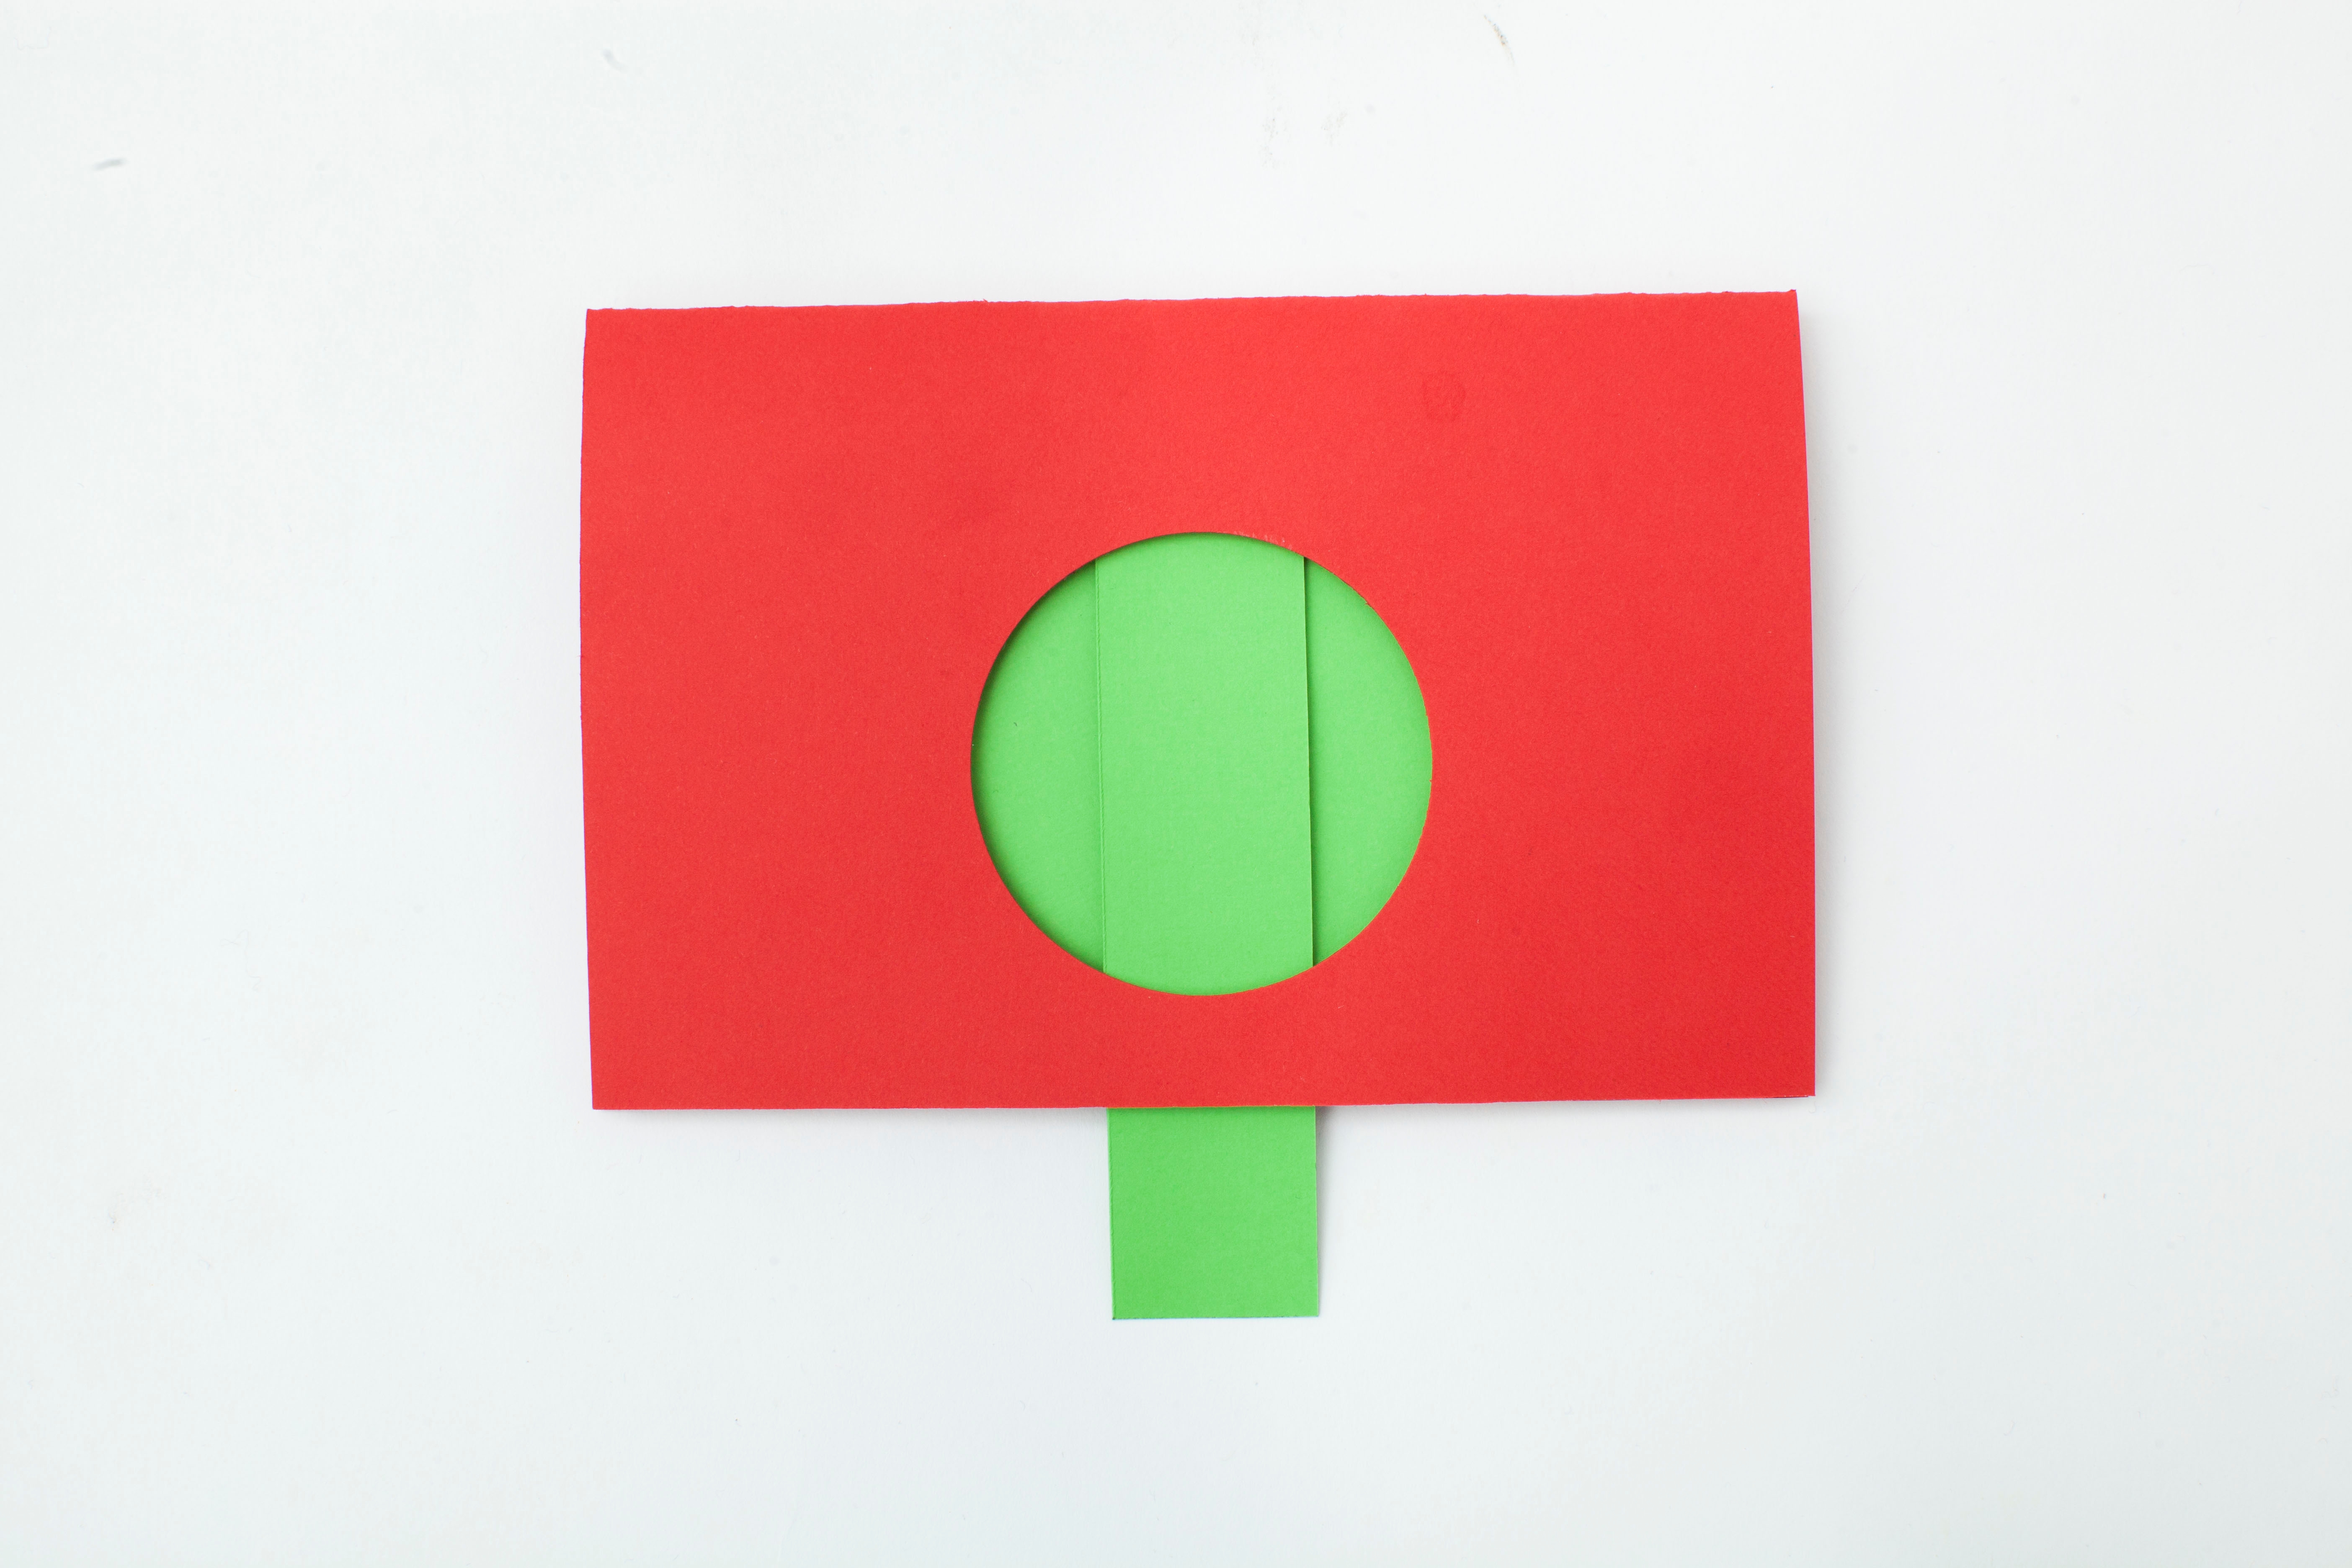
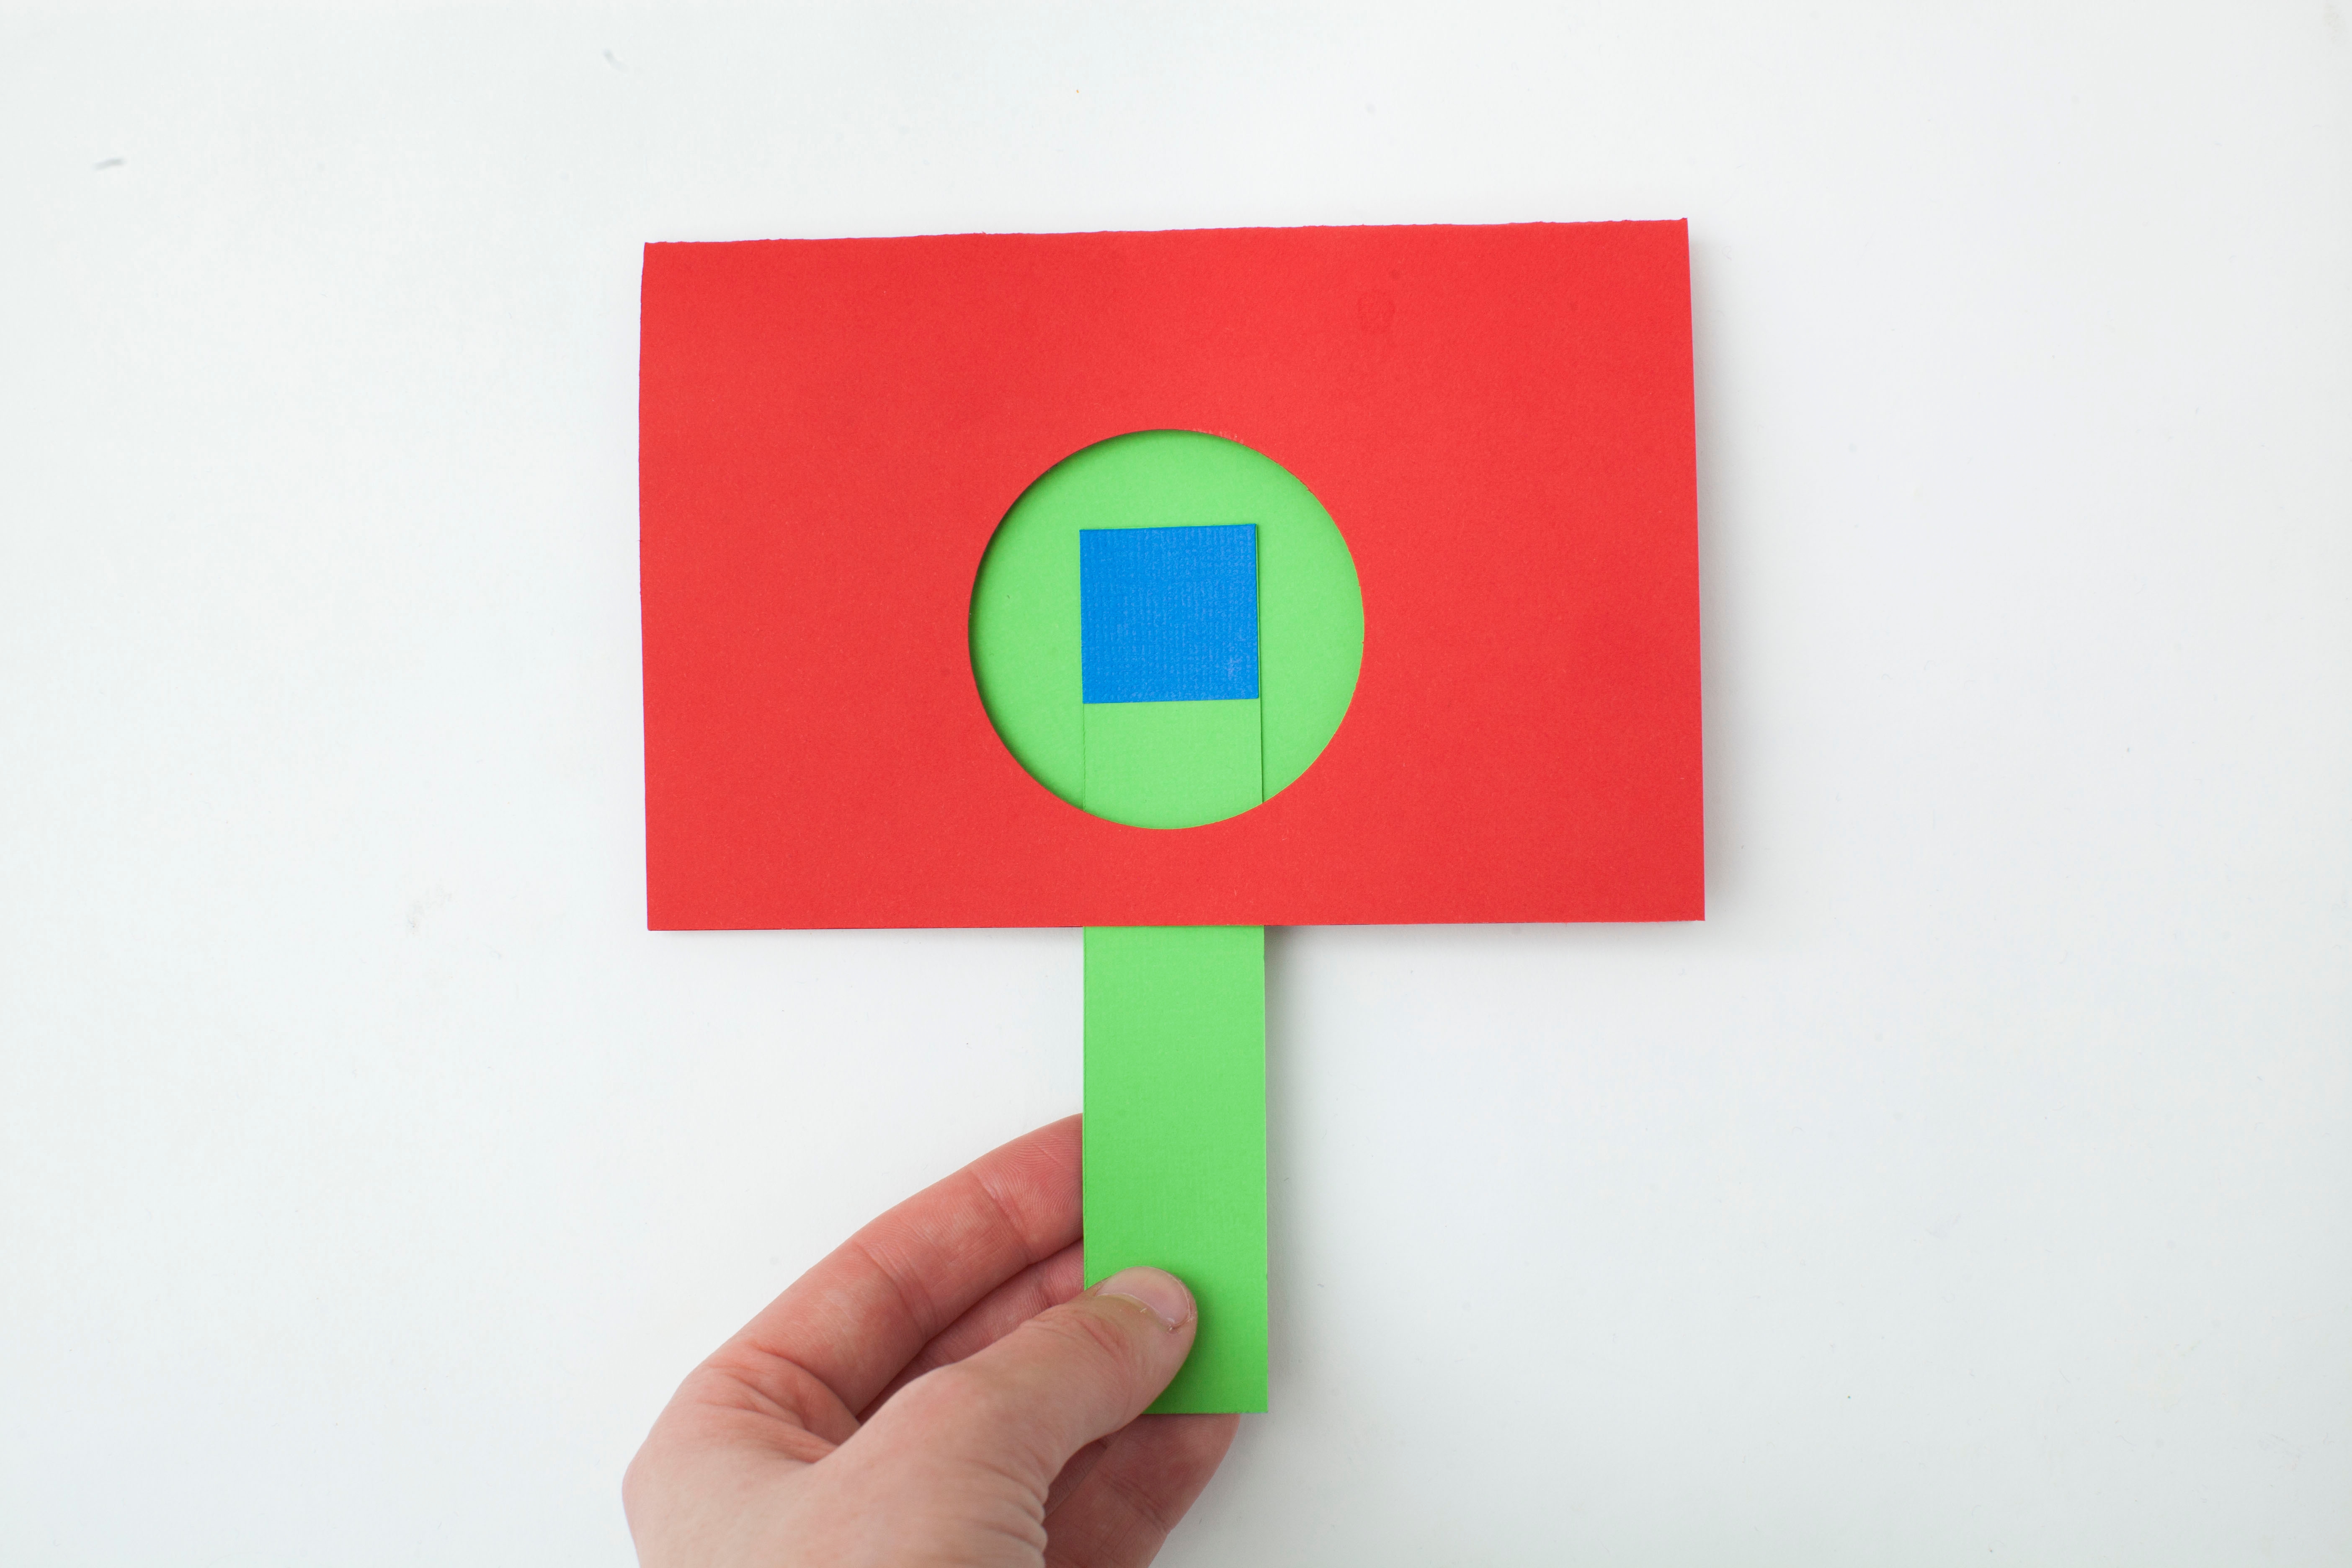
Step 10
Close the card and flip it over! You’ve just made a pull-tab card! Now try pulling on the tab hanging out at the bottom!
Done!
What else you can make using this technique?