Acrylic Sunprint T-Shirts

Make printed T-shirts powered by the sun! Paint your shirt and place objects on (while it is still wet!) The sun heats up the parts of the T-shirt that are uncovered, but not the parts that are blocked by the objects.When water gets hot, it starts to evaporate, turning from a liquid to a gas. The paint starts to dry, and the water starts to evaporate on the uncovered parts, but under the blocks, it stays wet. As the water evaporates from the T-shirt, water and paint from under the blocks moves out into the dry areas, like how the dry edge of a paper towel picks up spilled juice (or some other image). Eventually, all the paint gets drawn out from under the blocks, leaving you with unpainted shapes on a painted background. 

This project is best on a hot sunny day with little wind. To get the sharpest prints, use objects that lie flat around their edges.

  1. Ages: 5 - 16

  2. 2+ hours

  3. Messy

Tags:

Materials you'll need

Step-by-step tutorial

  • Step 1

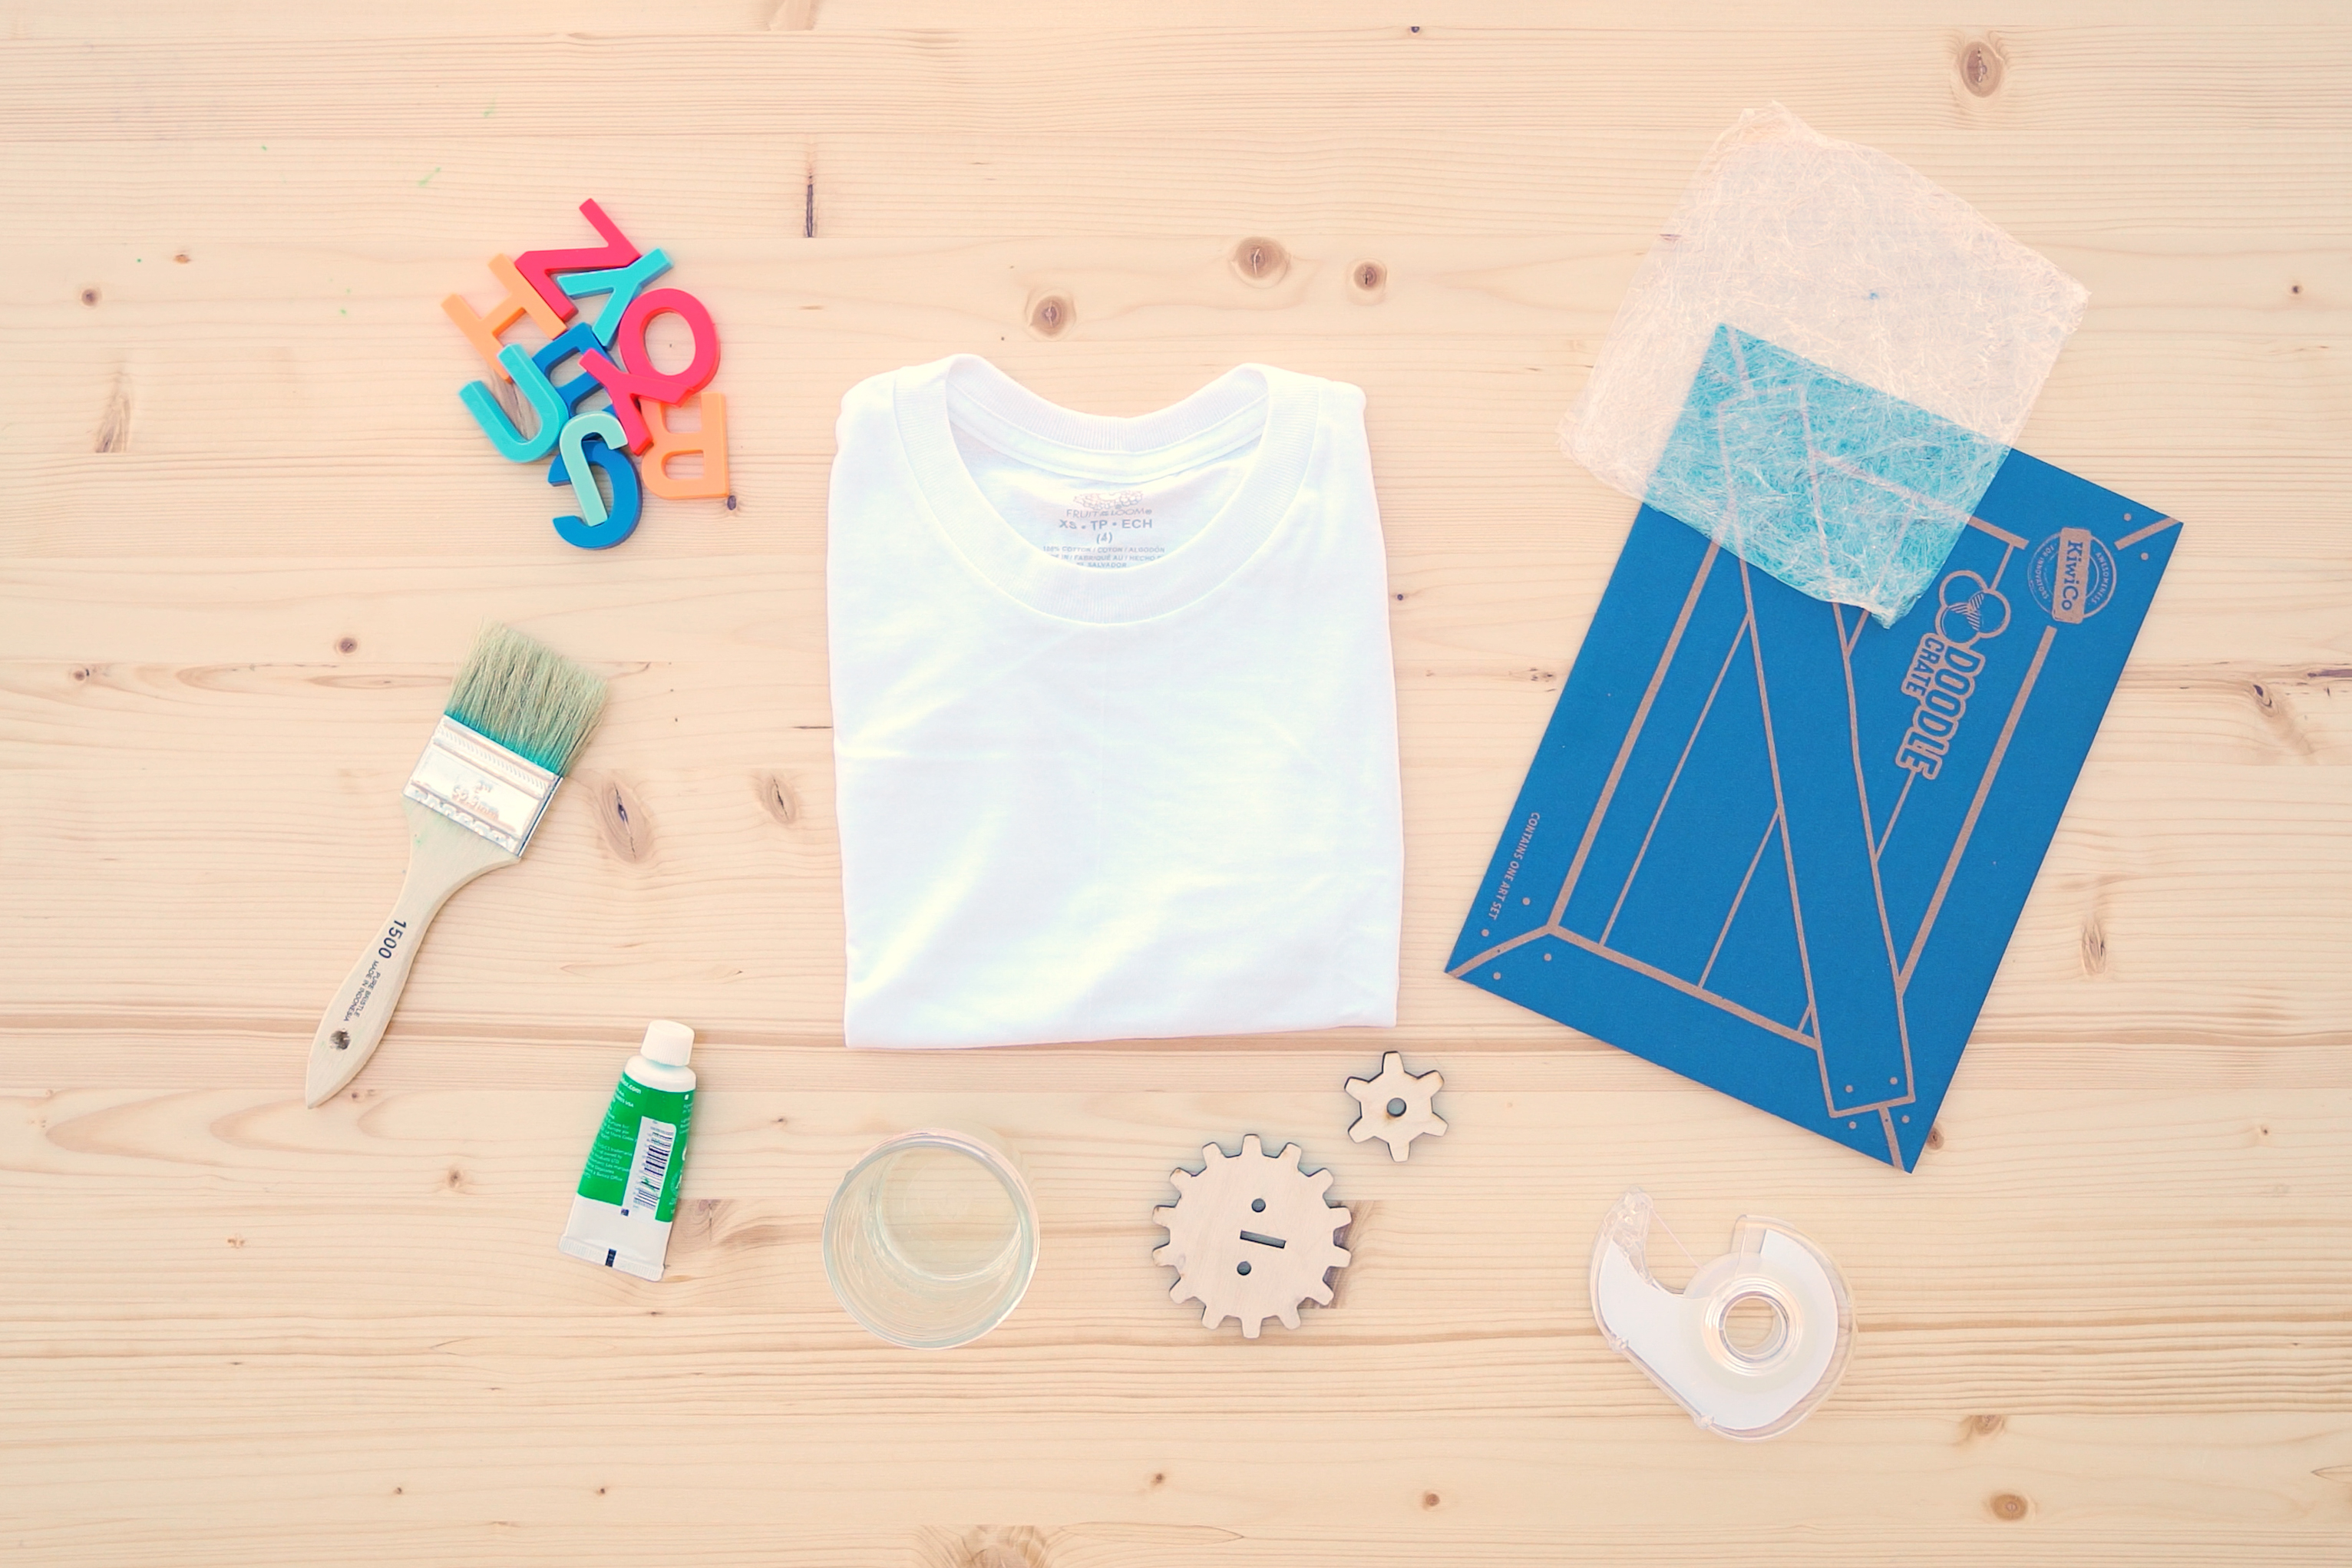
    Gather your materials.
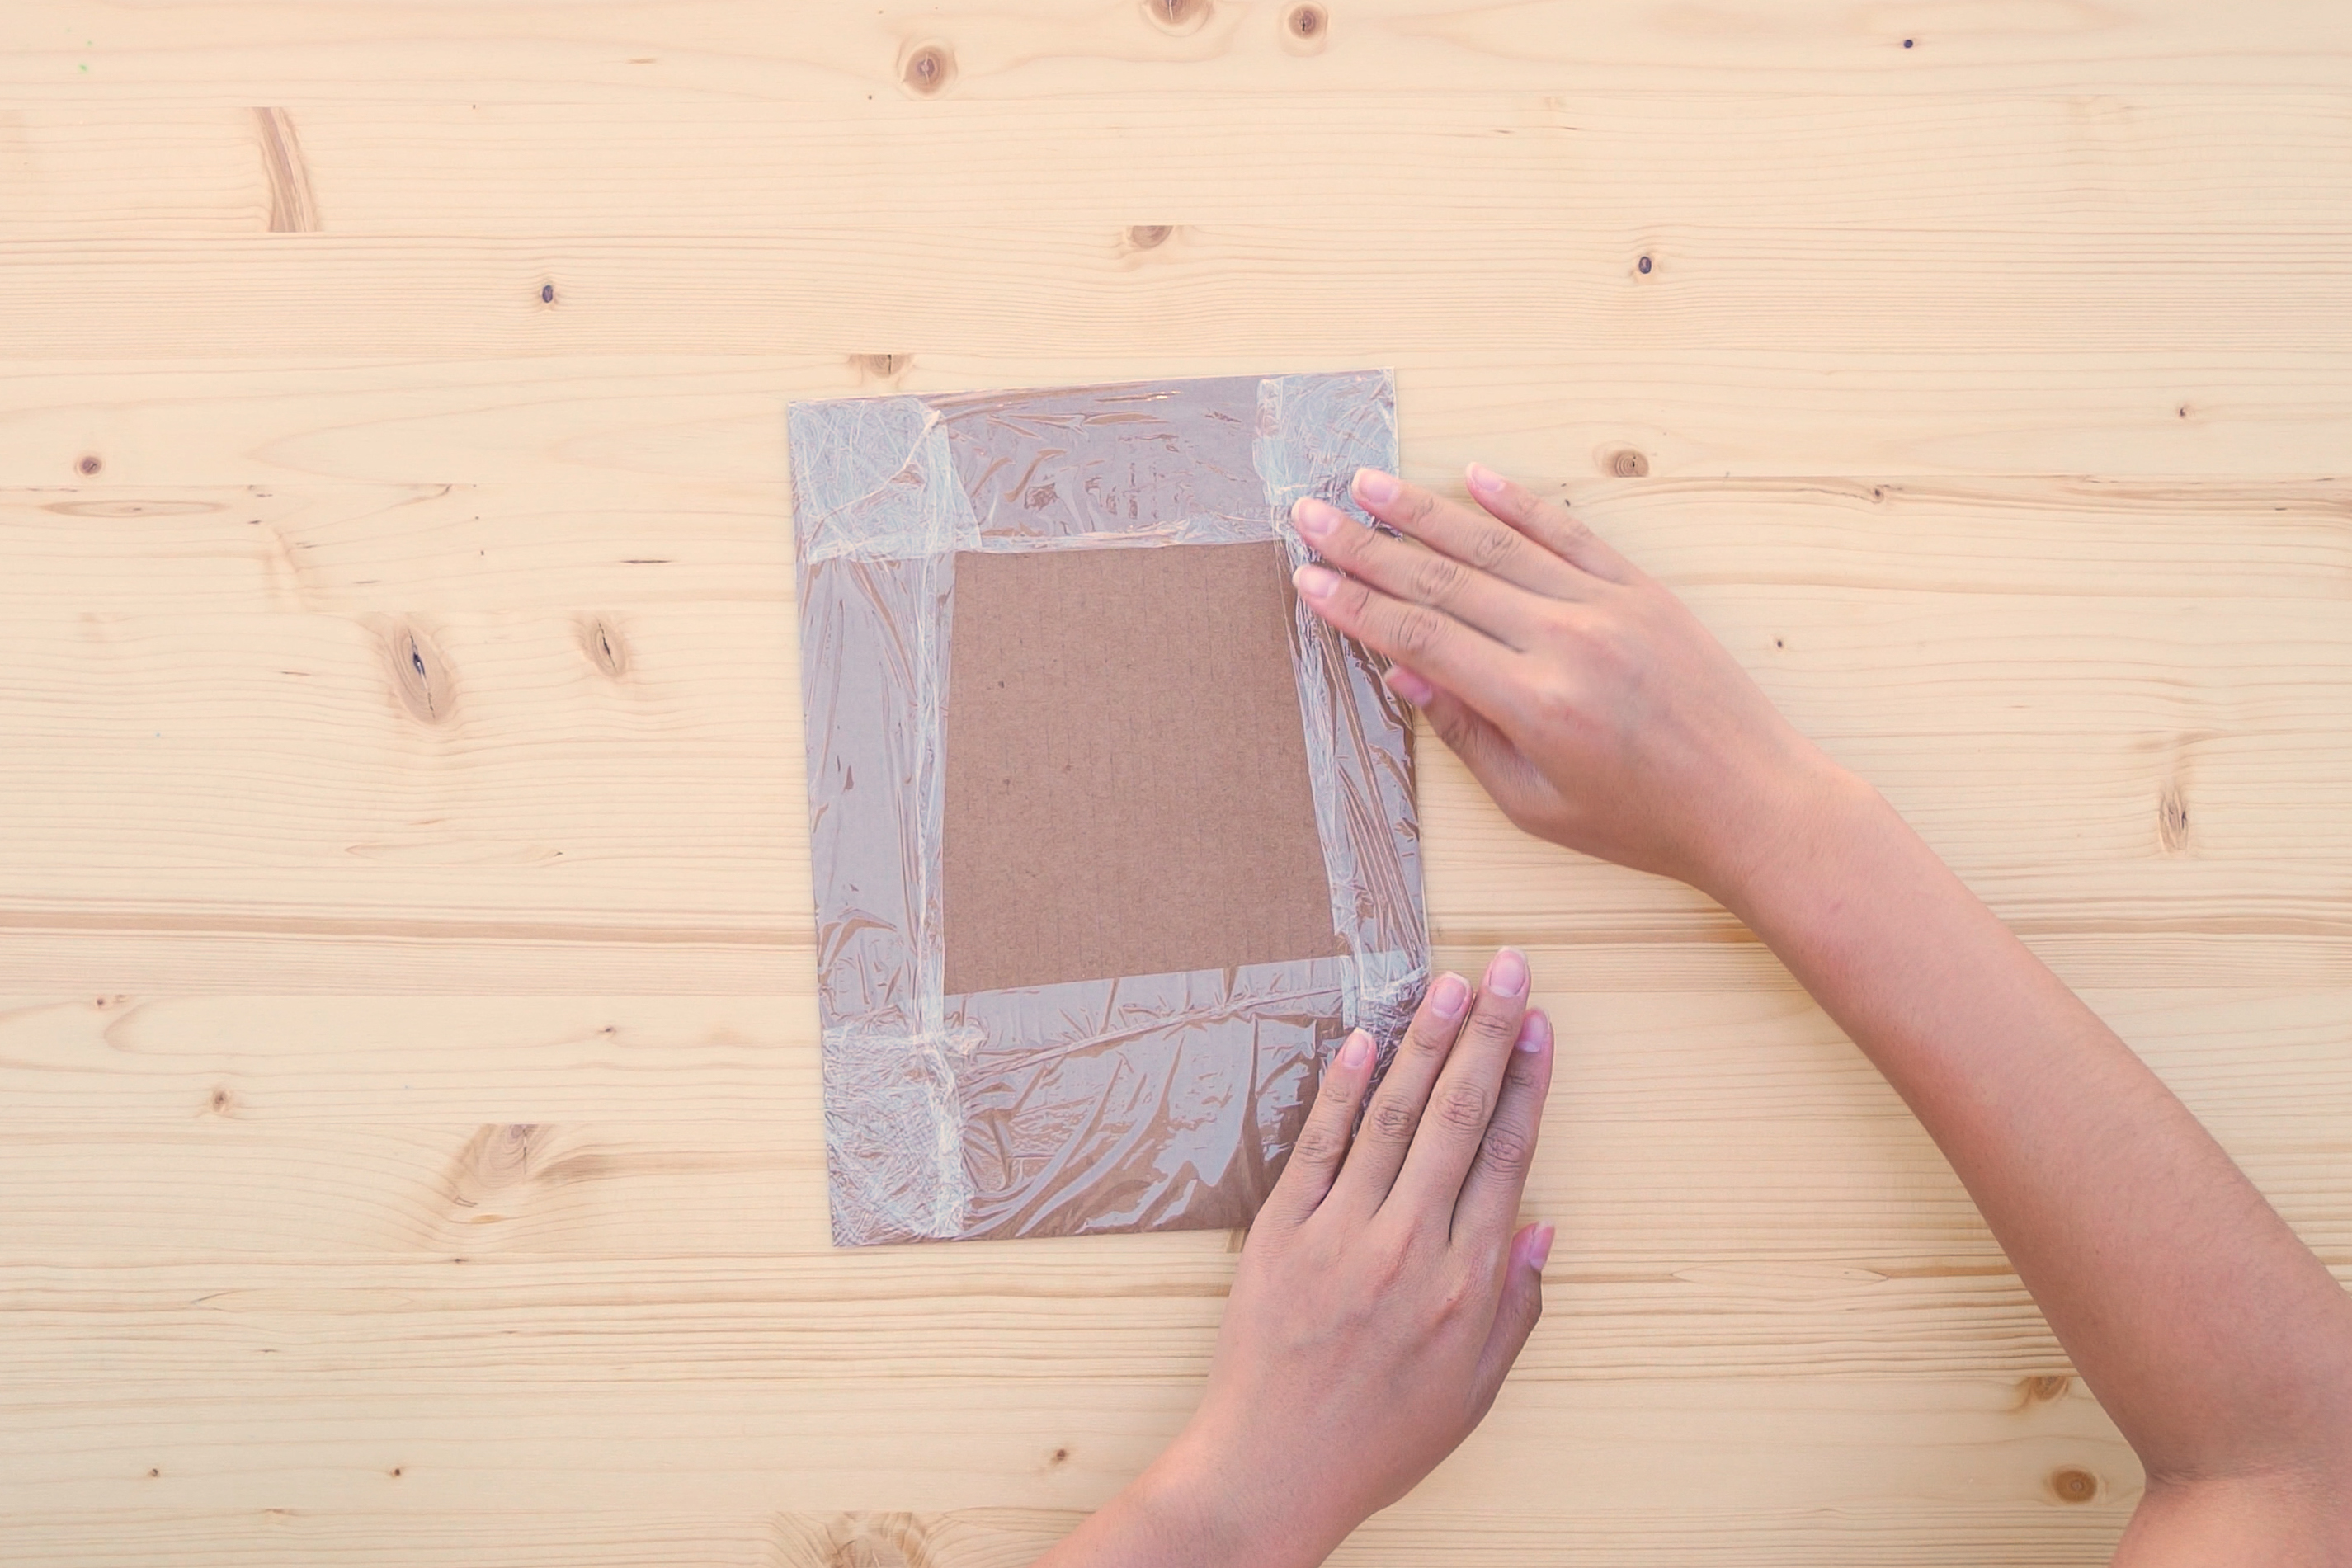
    Photo reference of how to complete step 1

  • Step 2

    Wrap the cardboard square with plastic and tape the edges down. You will use this to protect your shirt.
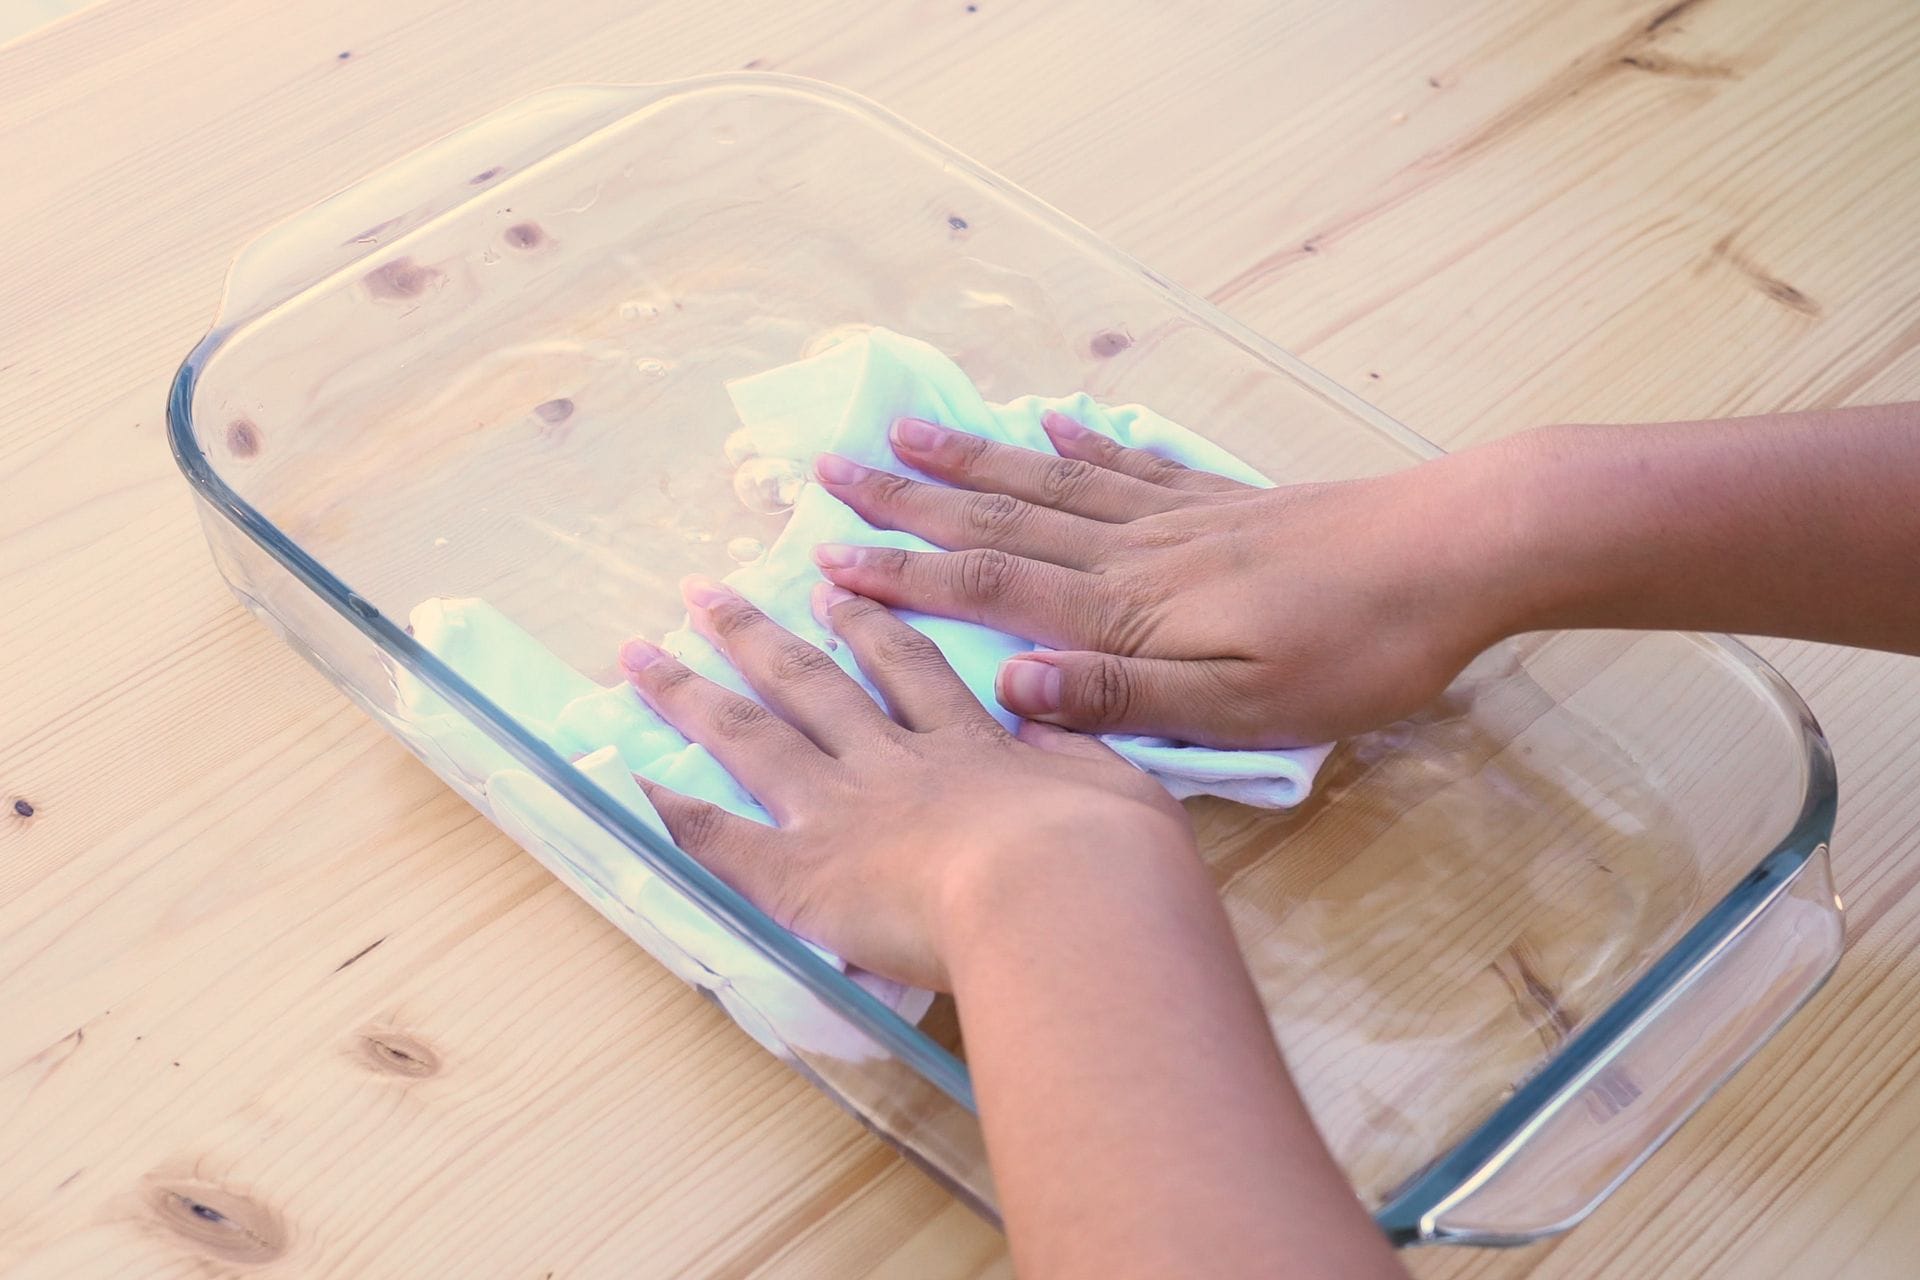
    Photo reference of how to complete step 2

  • Step 3

    Dunk theT-shirt in water to soak. Gently squeeze out just enough water so that it no longer drips.
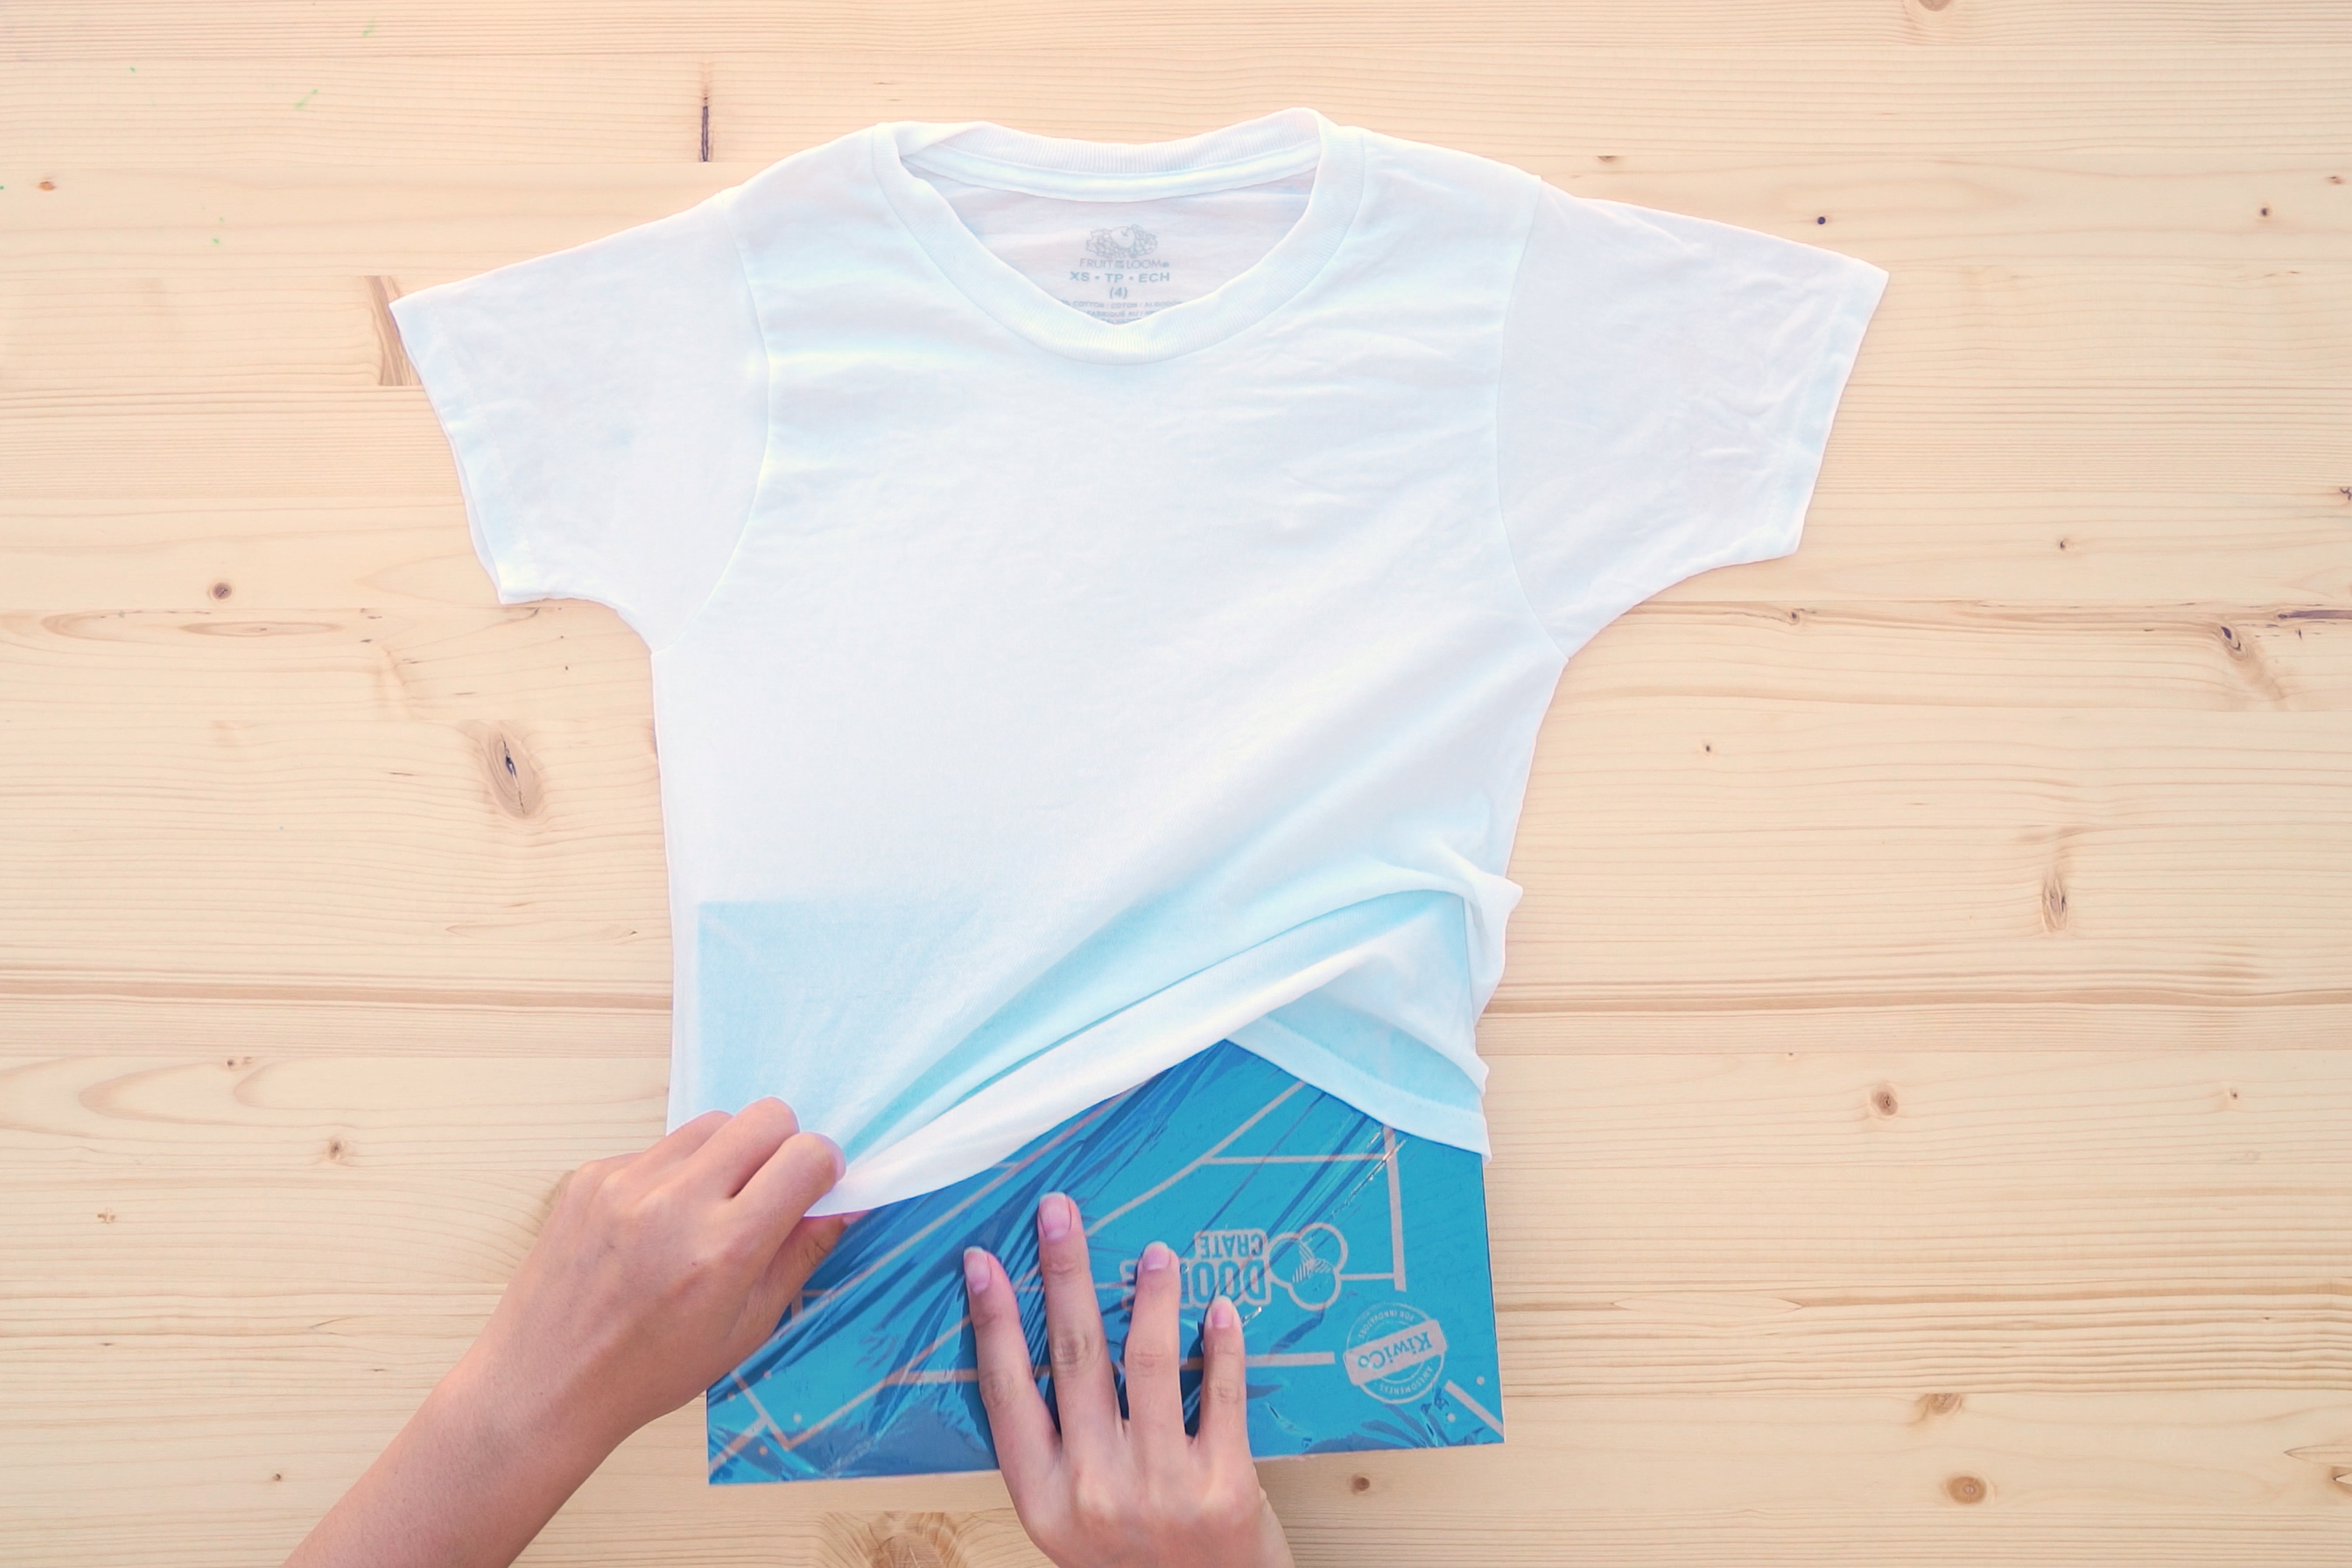
    Photo reference of how to complete step 3

  • Step 4

    Lay the damp shirt out on a flat work surface and insert the plastic-wrapped cardboard into the shirt.
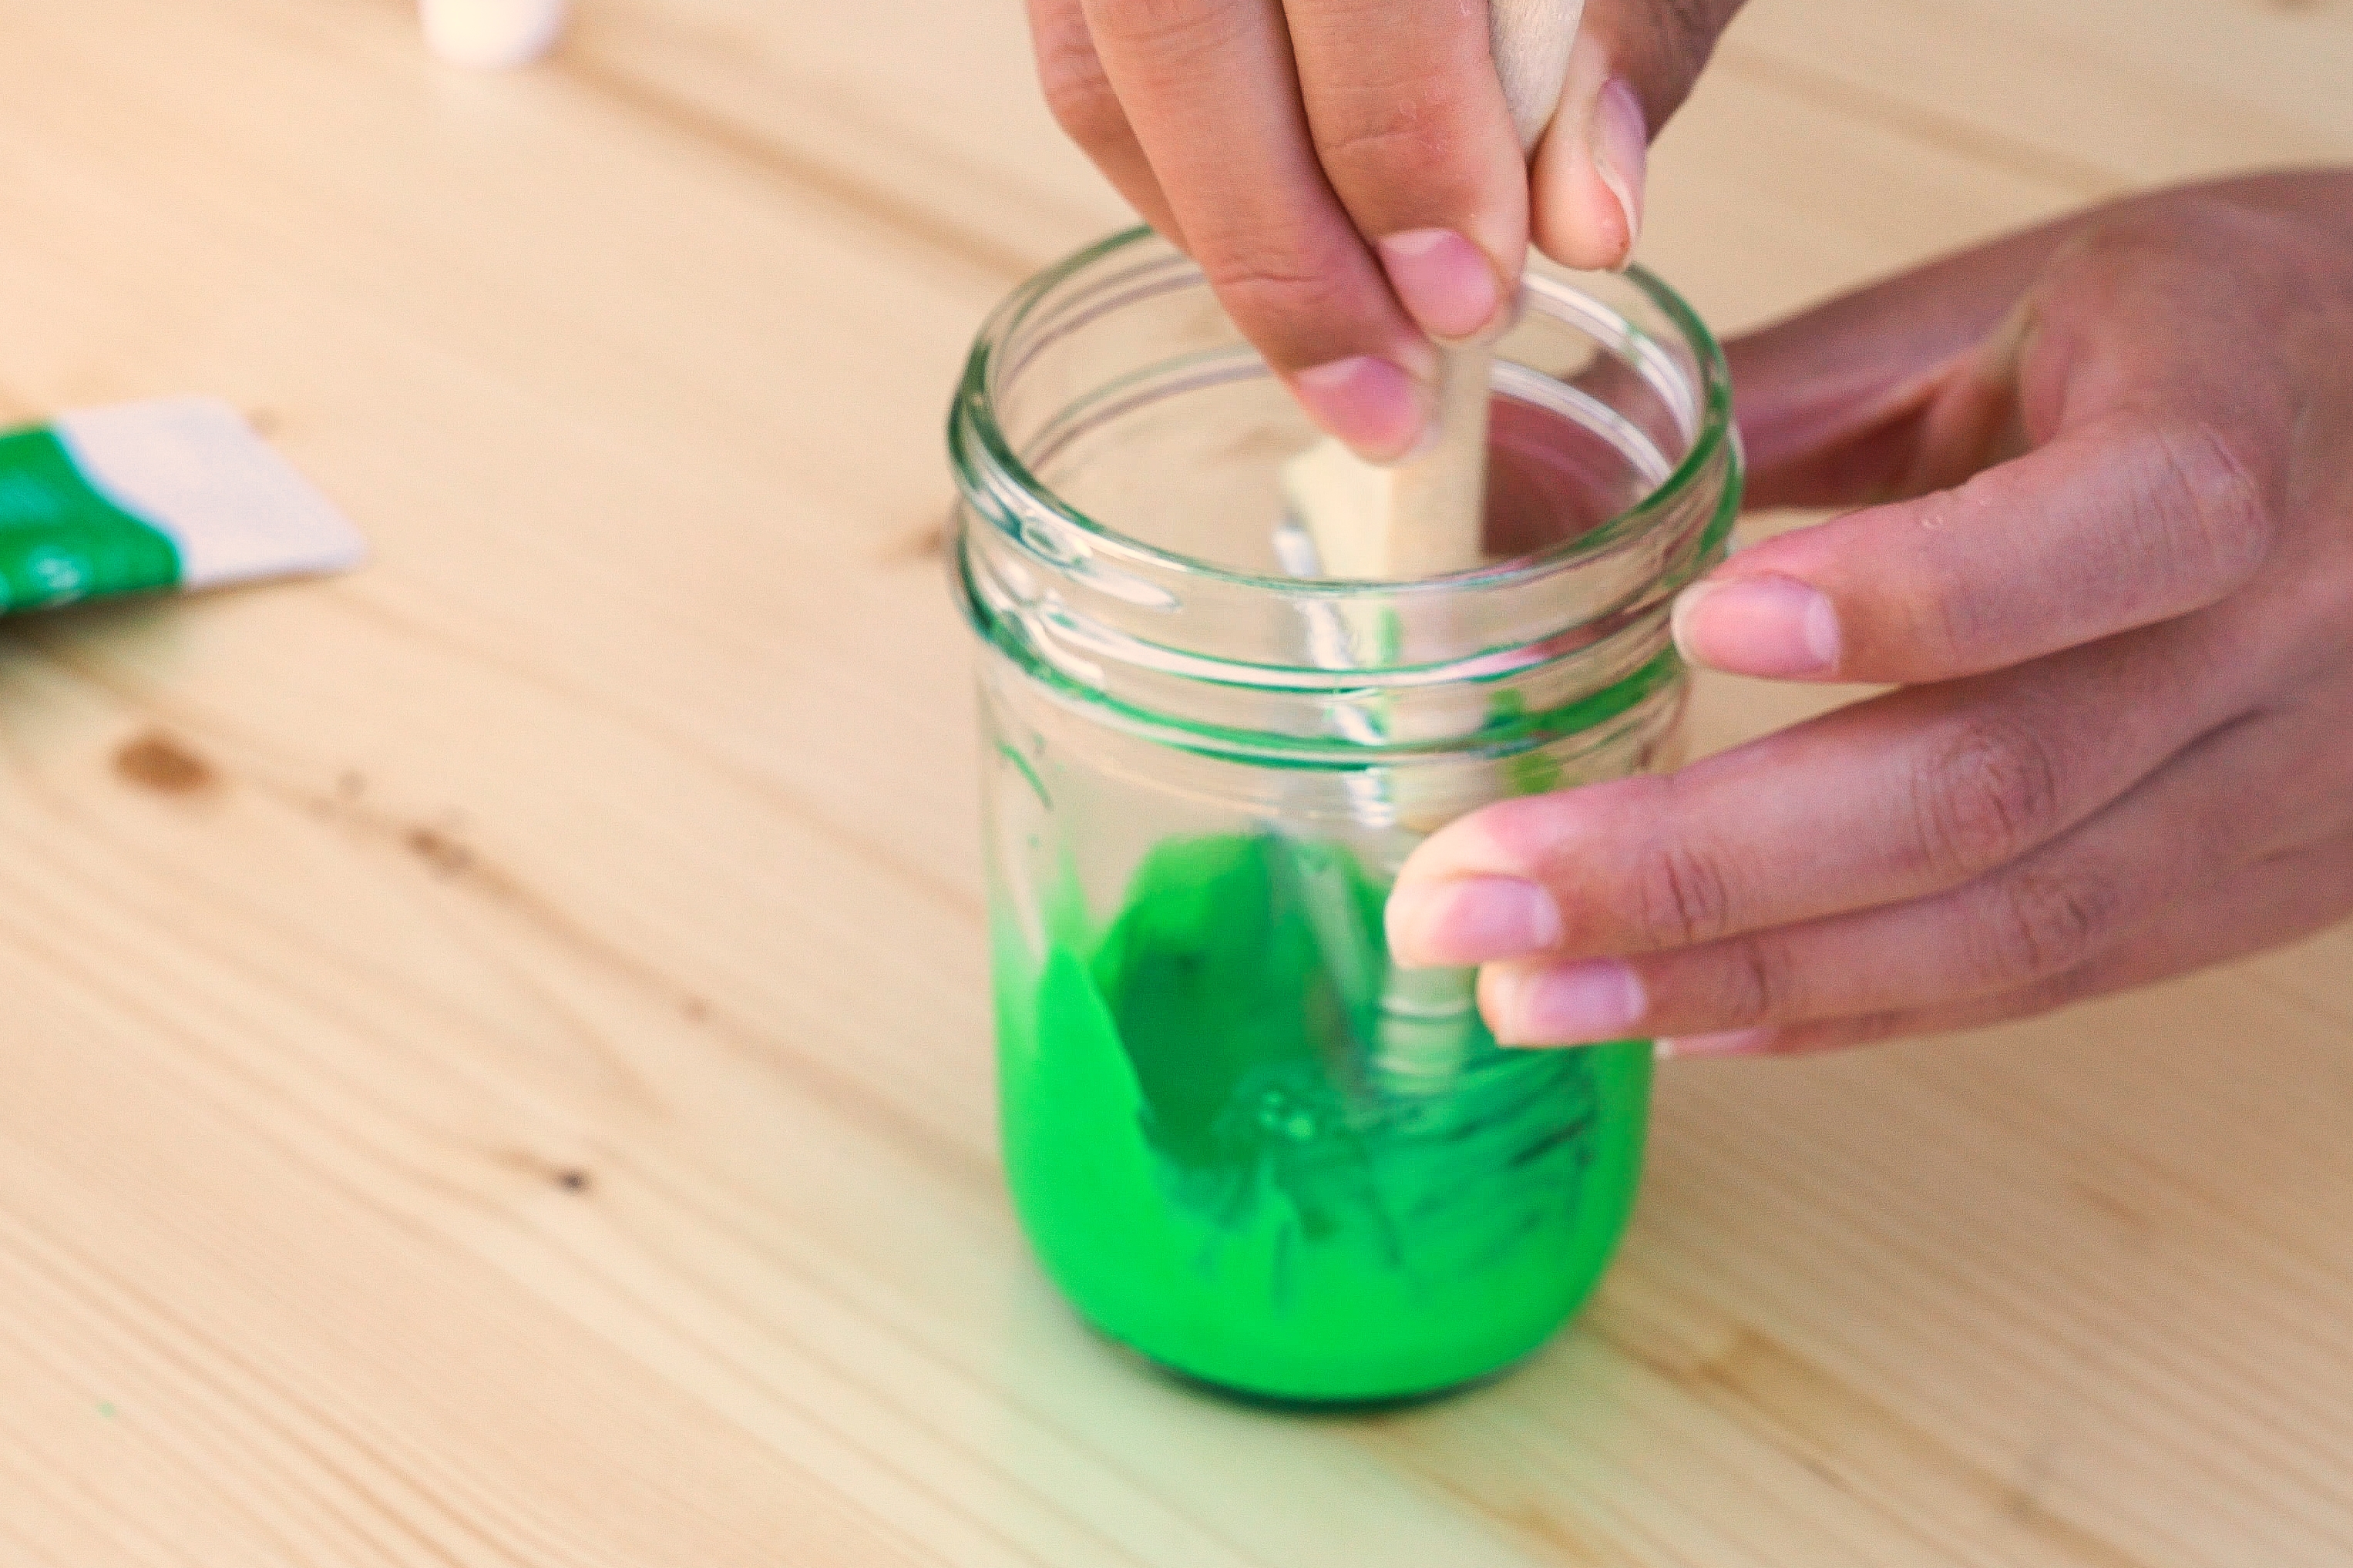
    Photo reference of how to complete step 4

  • Step 5

    For each color, mix together equal amounts of paint and water. (We mixed 2 tablespoons of green paint with 2 tablespoons of water.)
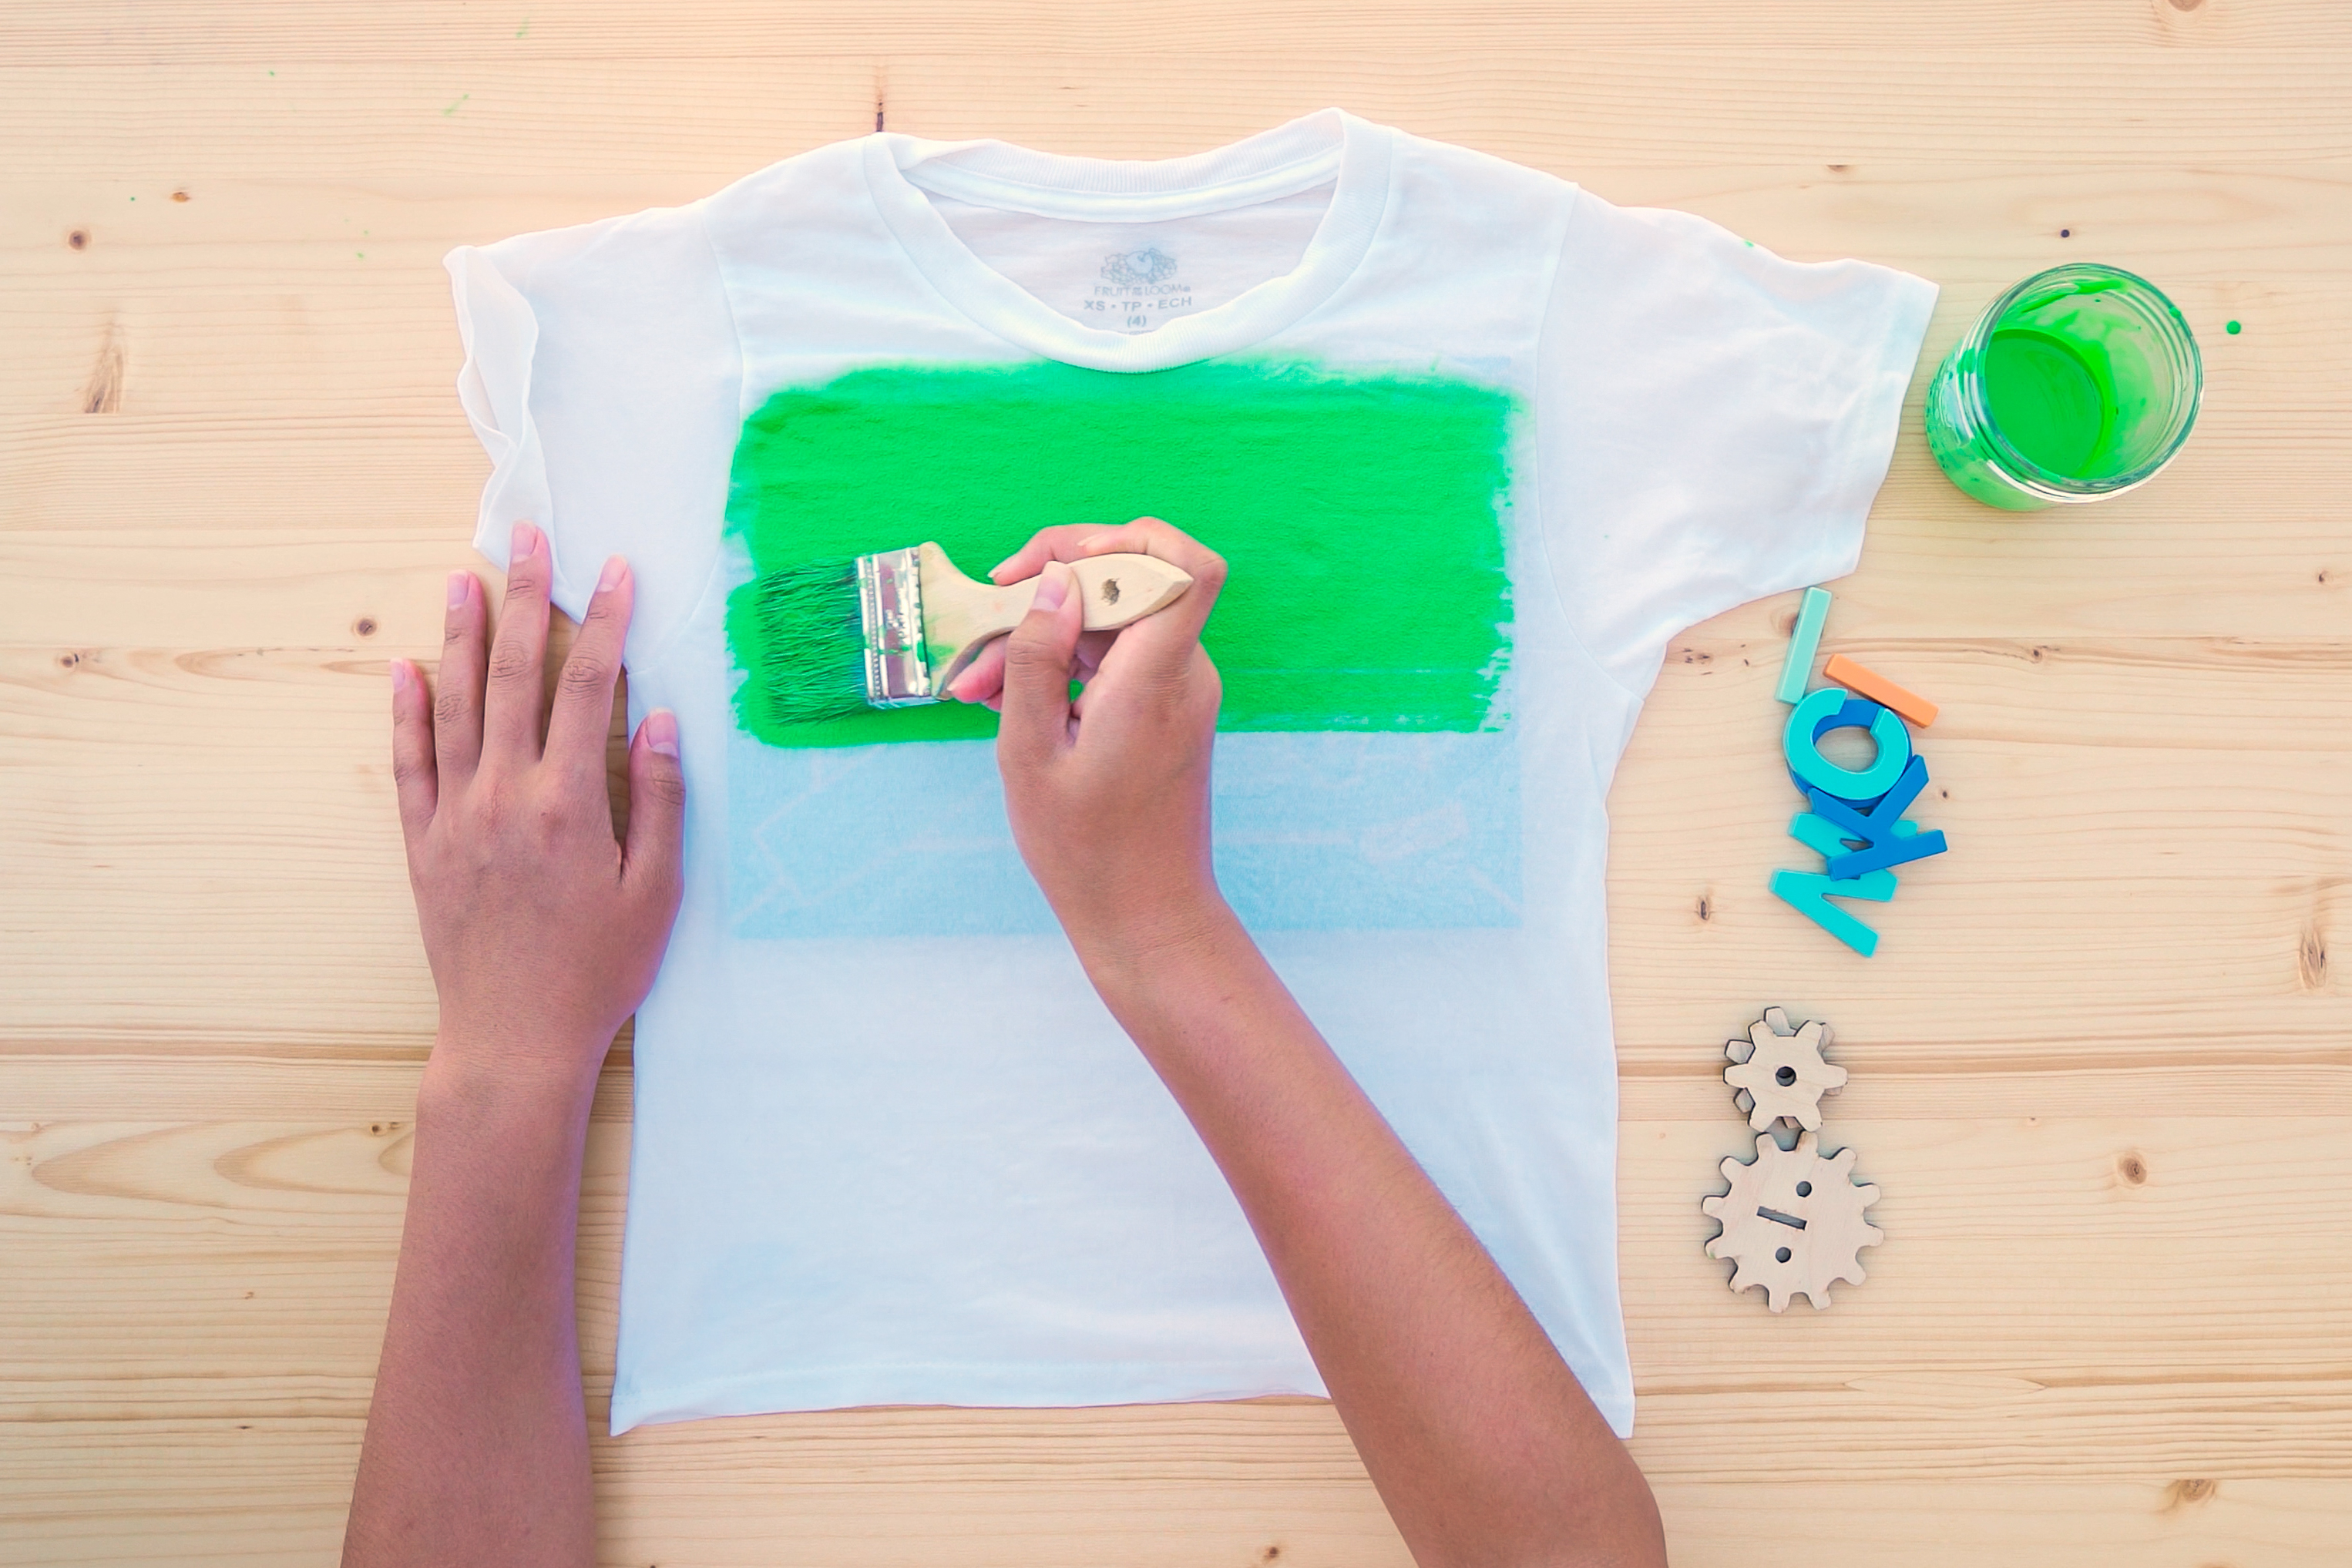
    Photo reference of how to complete step 5

  • Step 6

    Use your brush to paint the wet fabric, covering the space where you wish your design to appear.
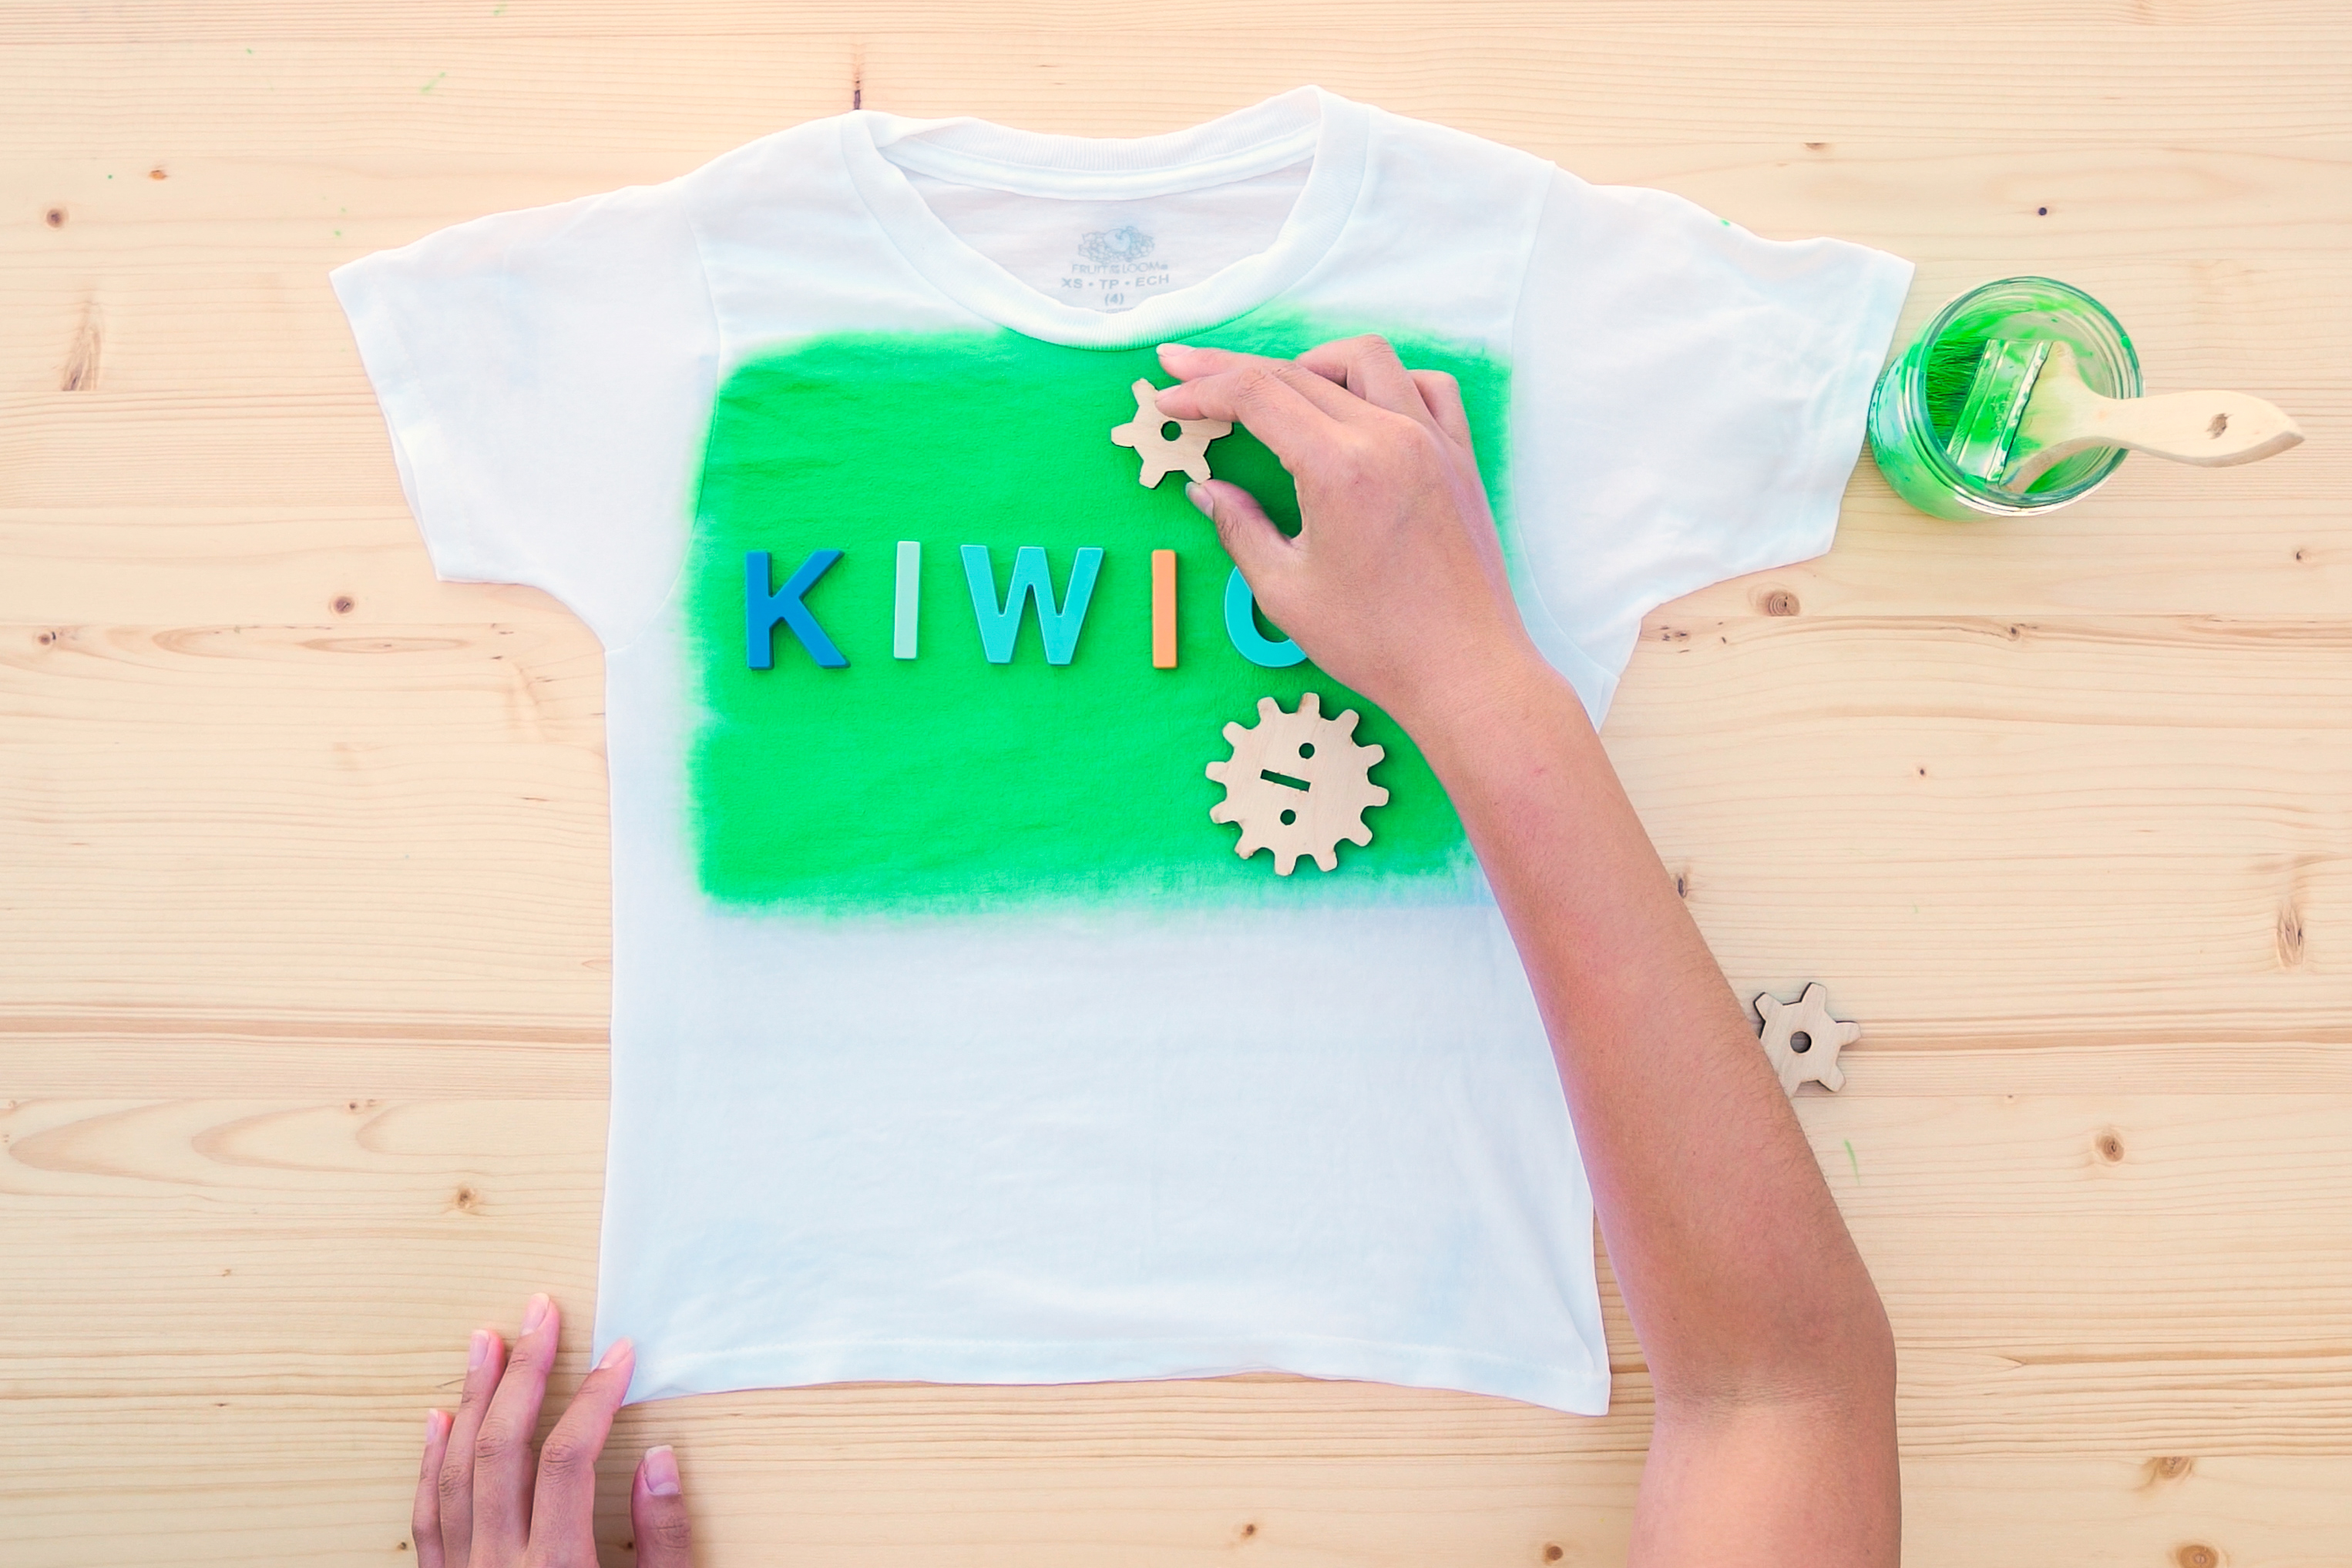
    Photo reference of how to complete step 6

  • Step 7

    Place your objects on the fabric. Press them lightly into the paint. To get a sharp image, make sure the edges make contact with the fabric.
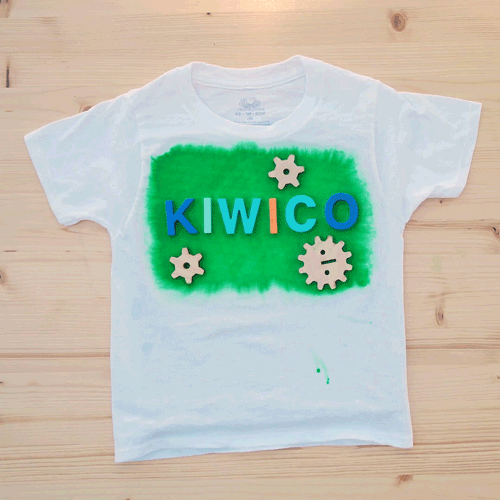
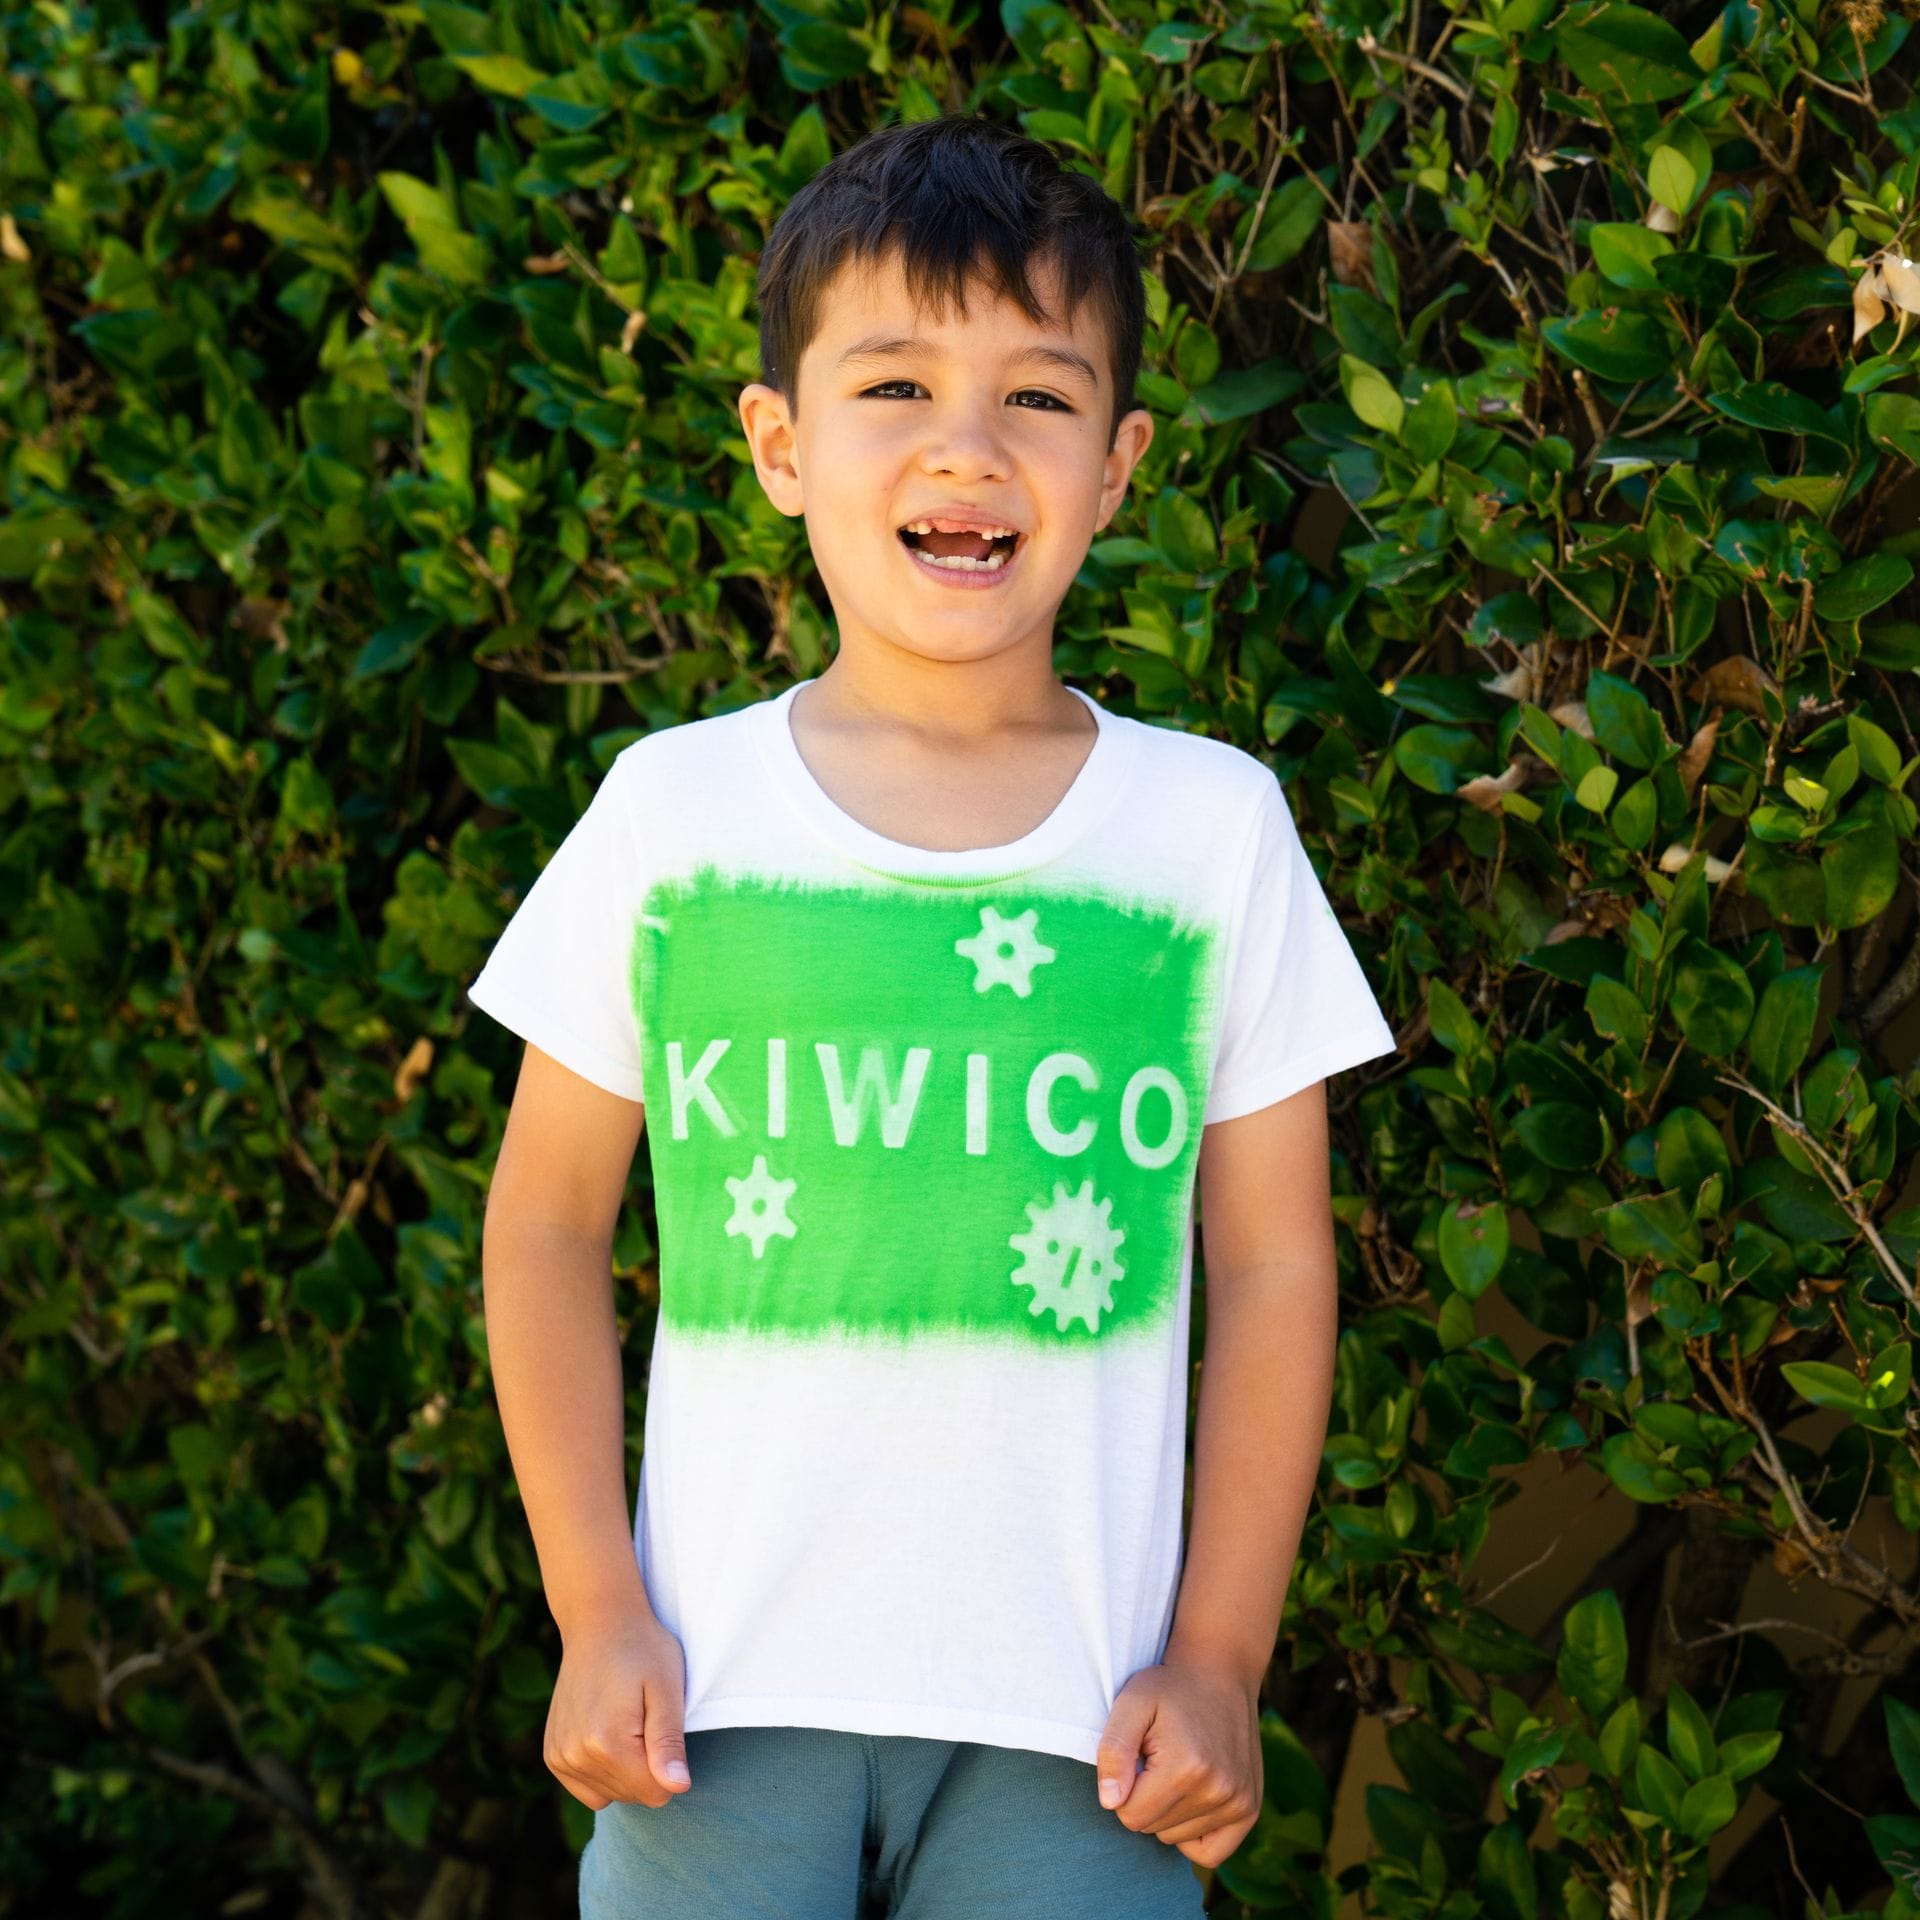
    Photo reference of how to complete step 7

  • Final result!

    Place your t-shirt out in a bright sunny spot and let the fabric dry completely (this will take several hours). Now comes the fun part ... the peel and reveal!

    Photo reference of how to complete step 8

You might also like

Top categoriesBurst graphic

Share what you made & tag us at!

;