Step-by-step tutorial
Step 1
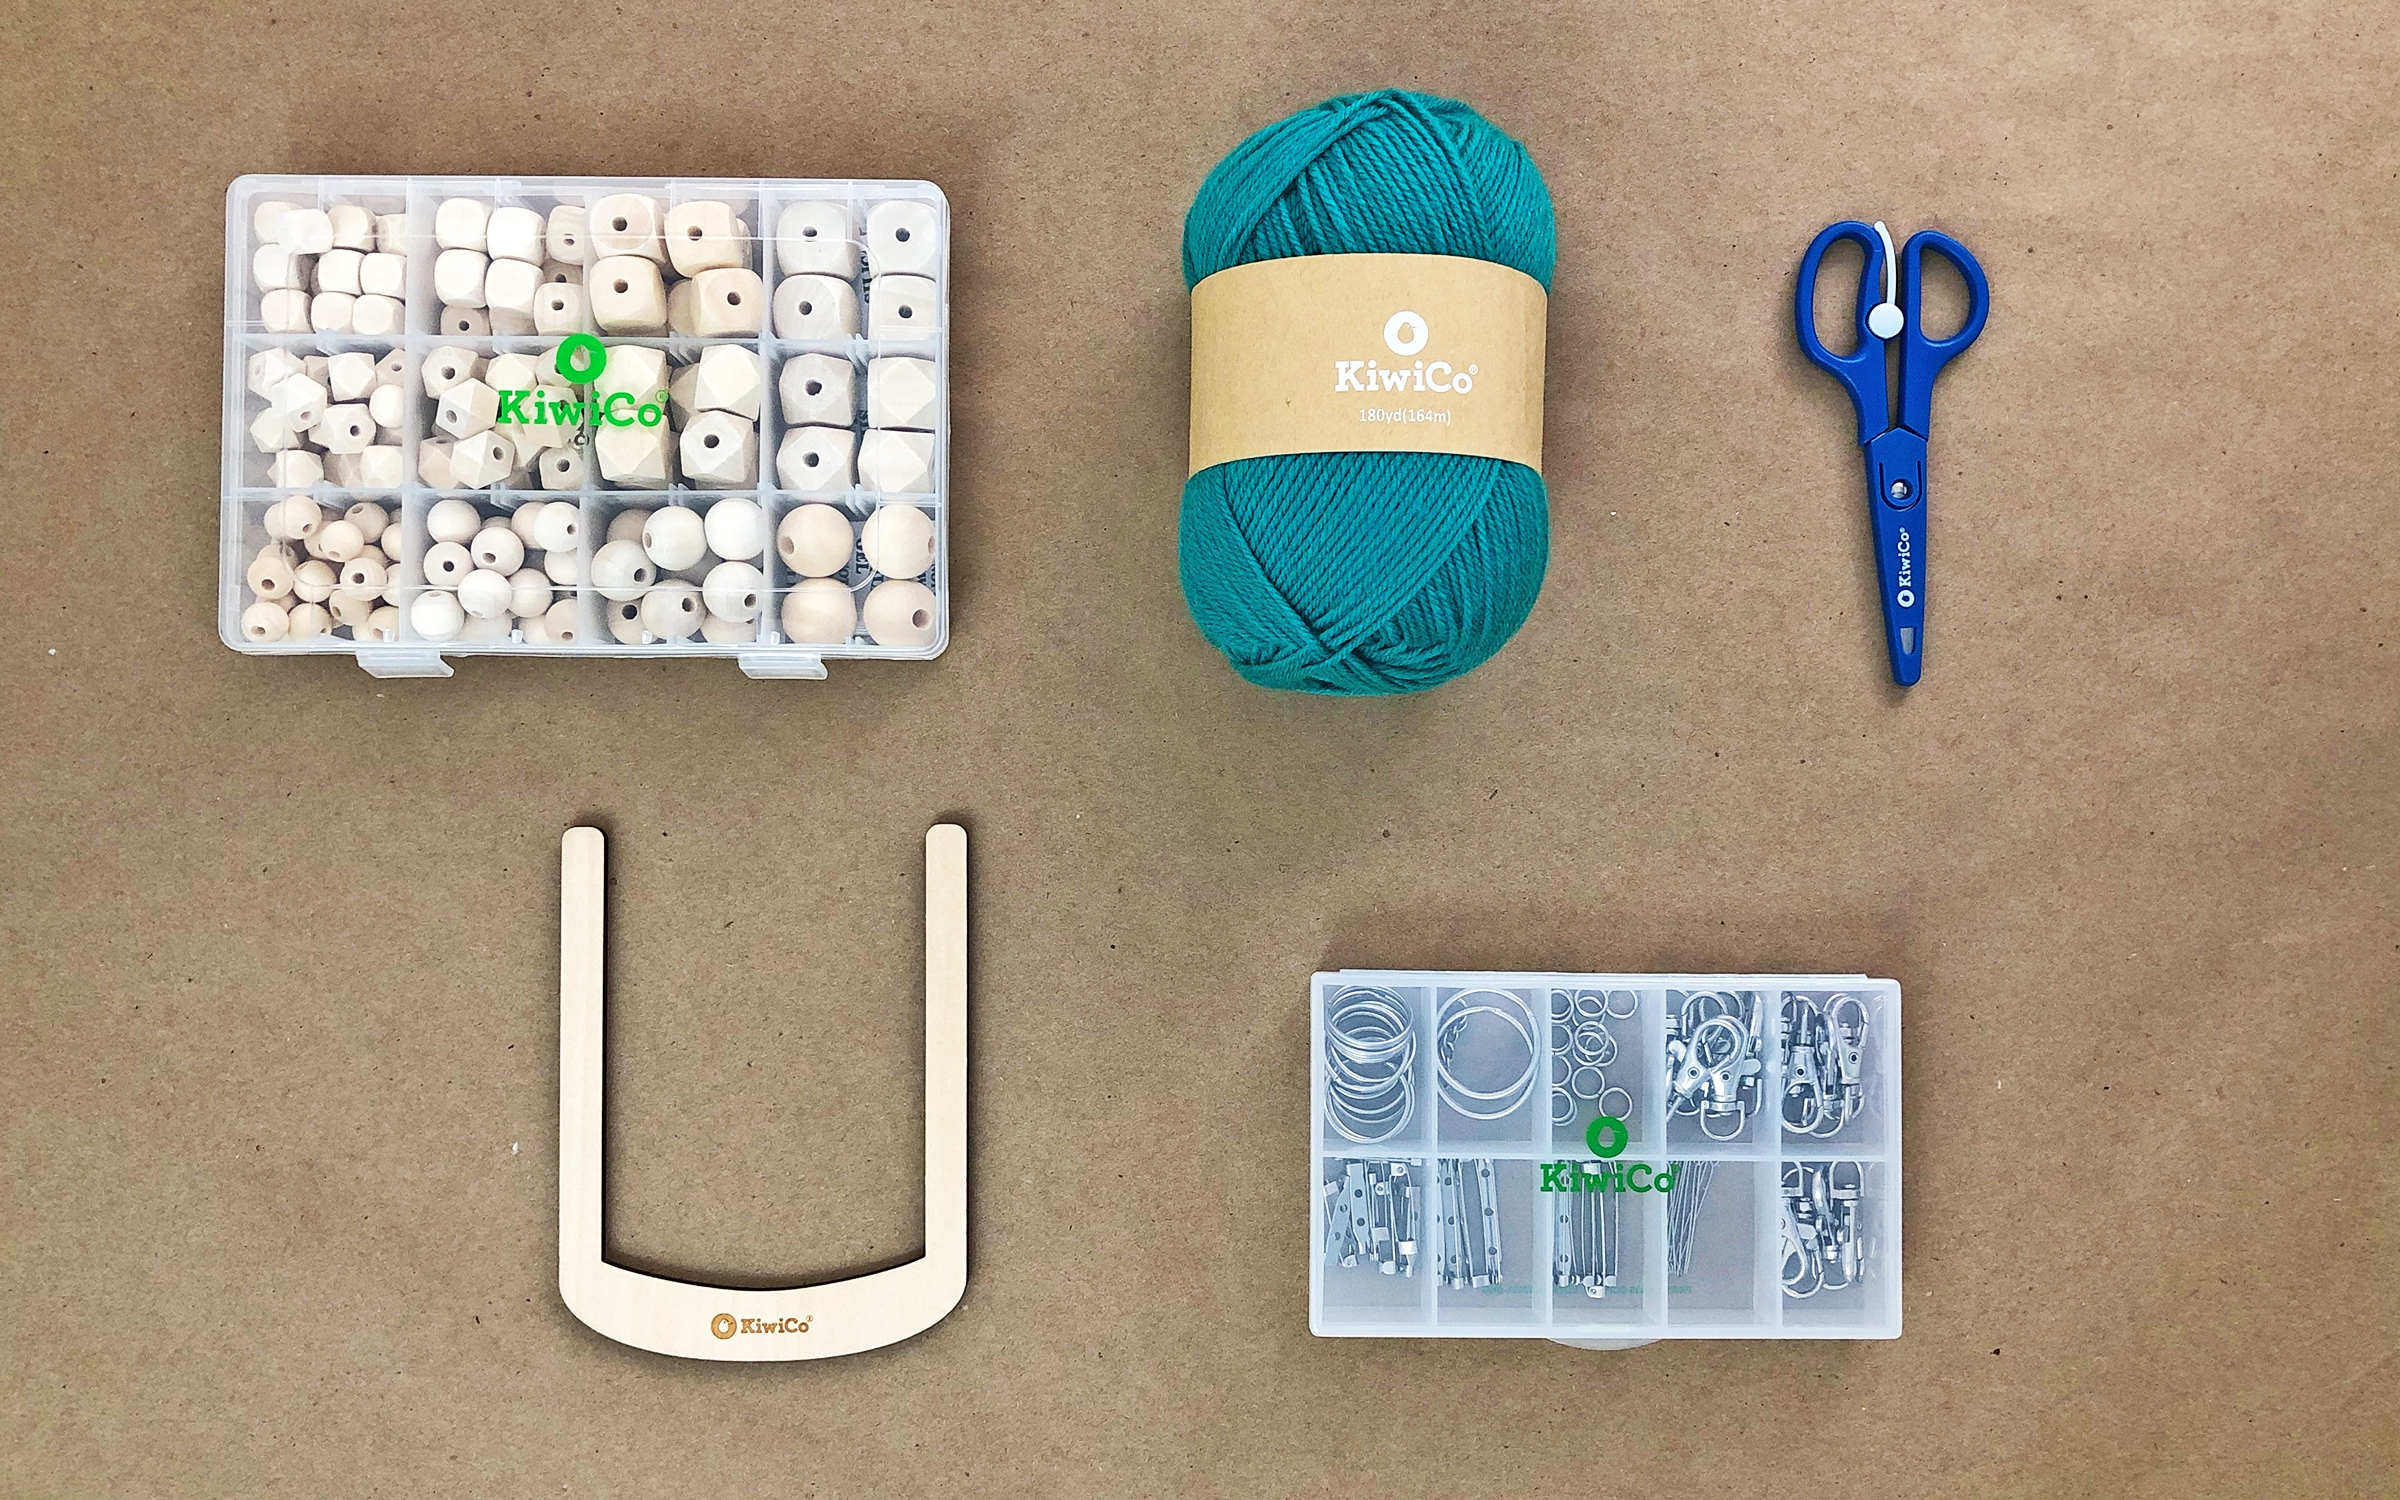
Gather your materials.

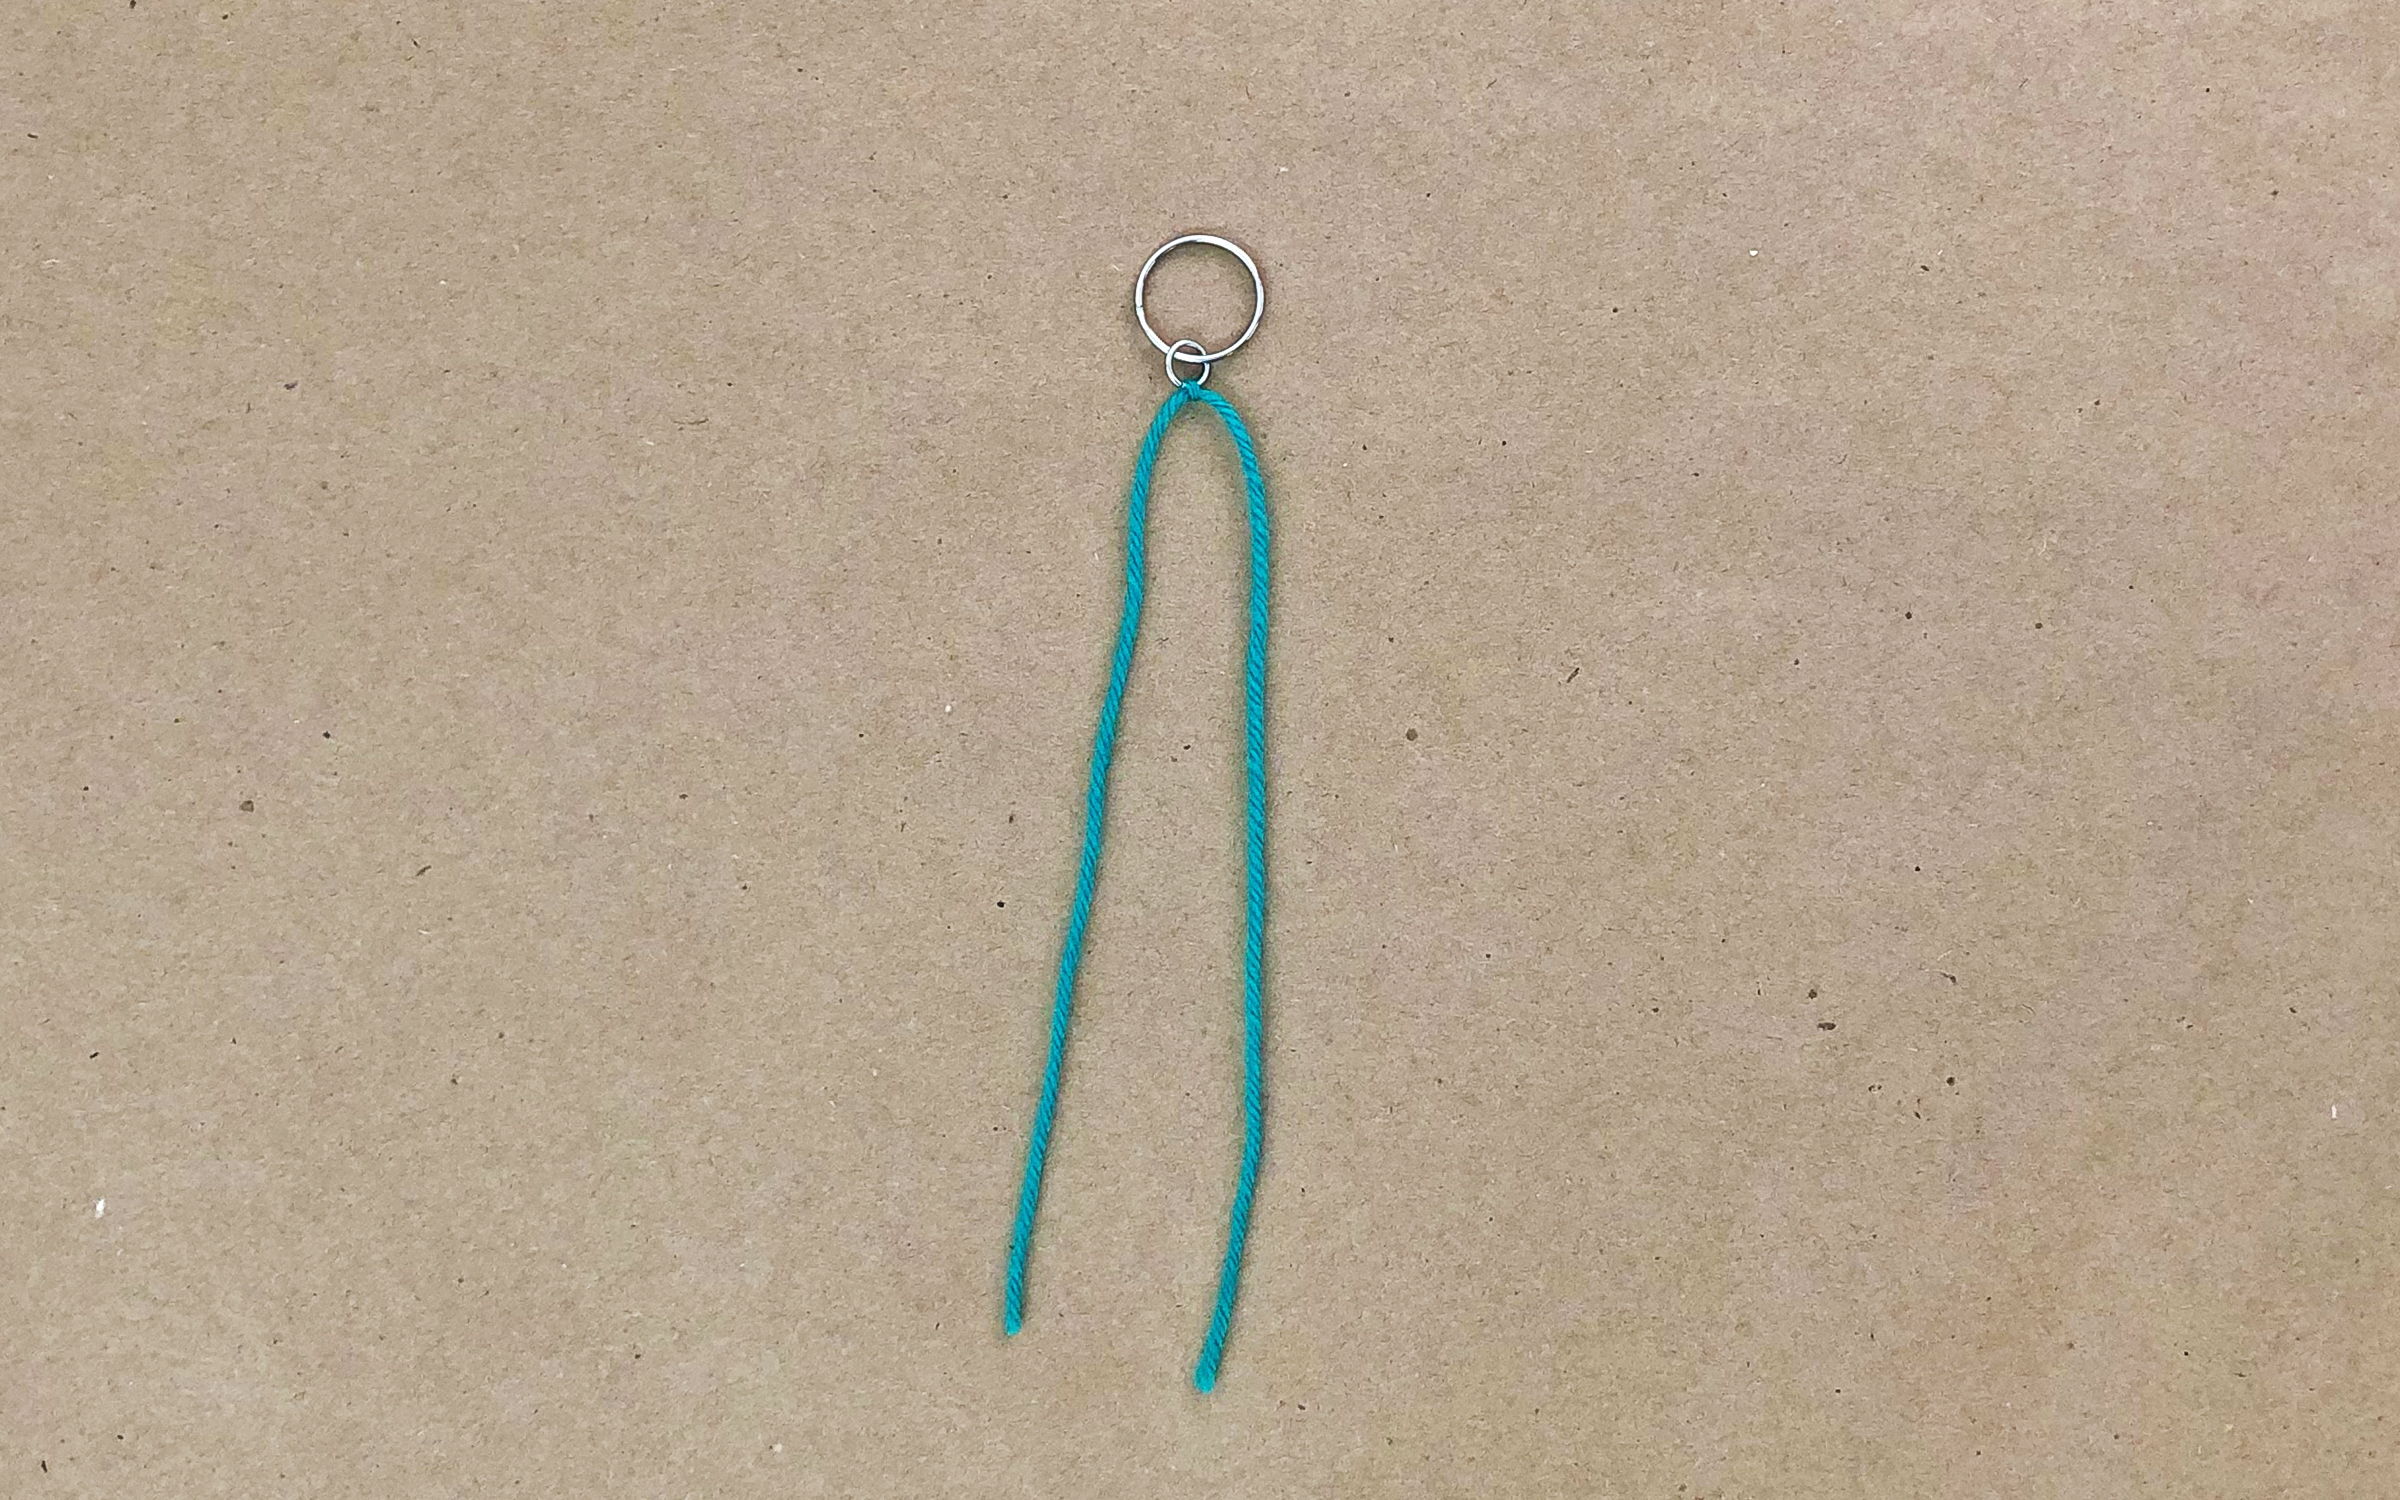
Step 2
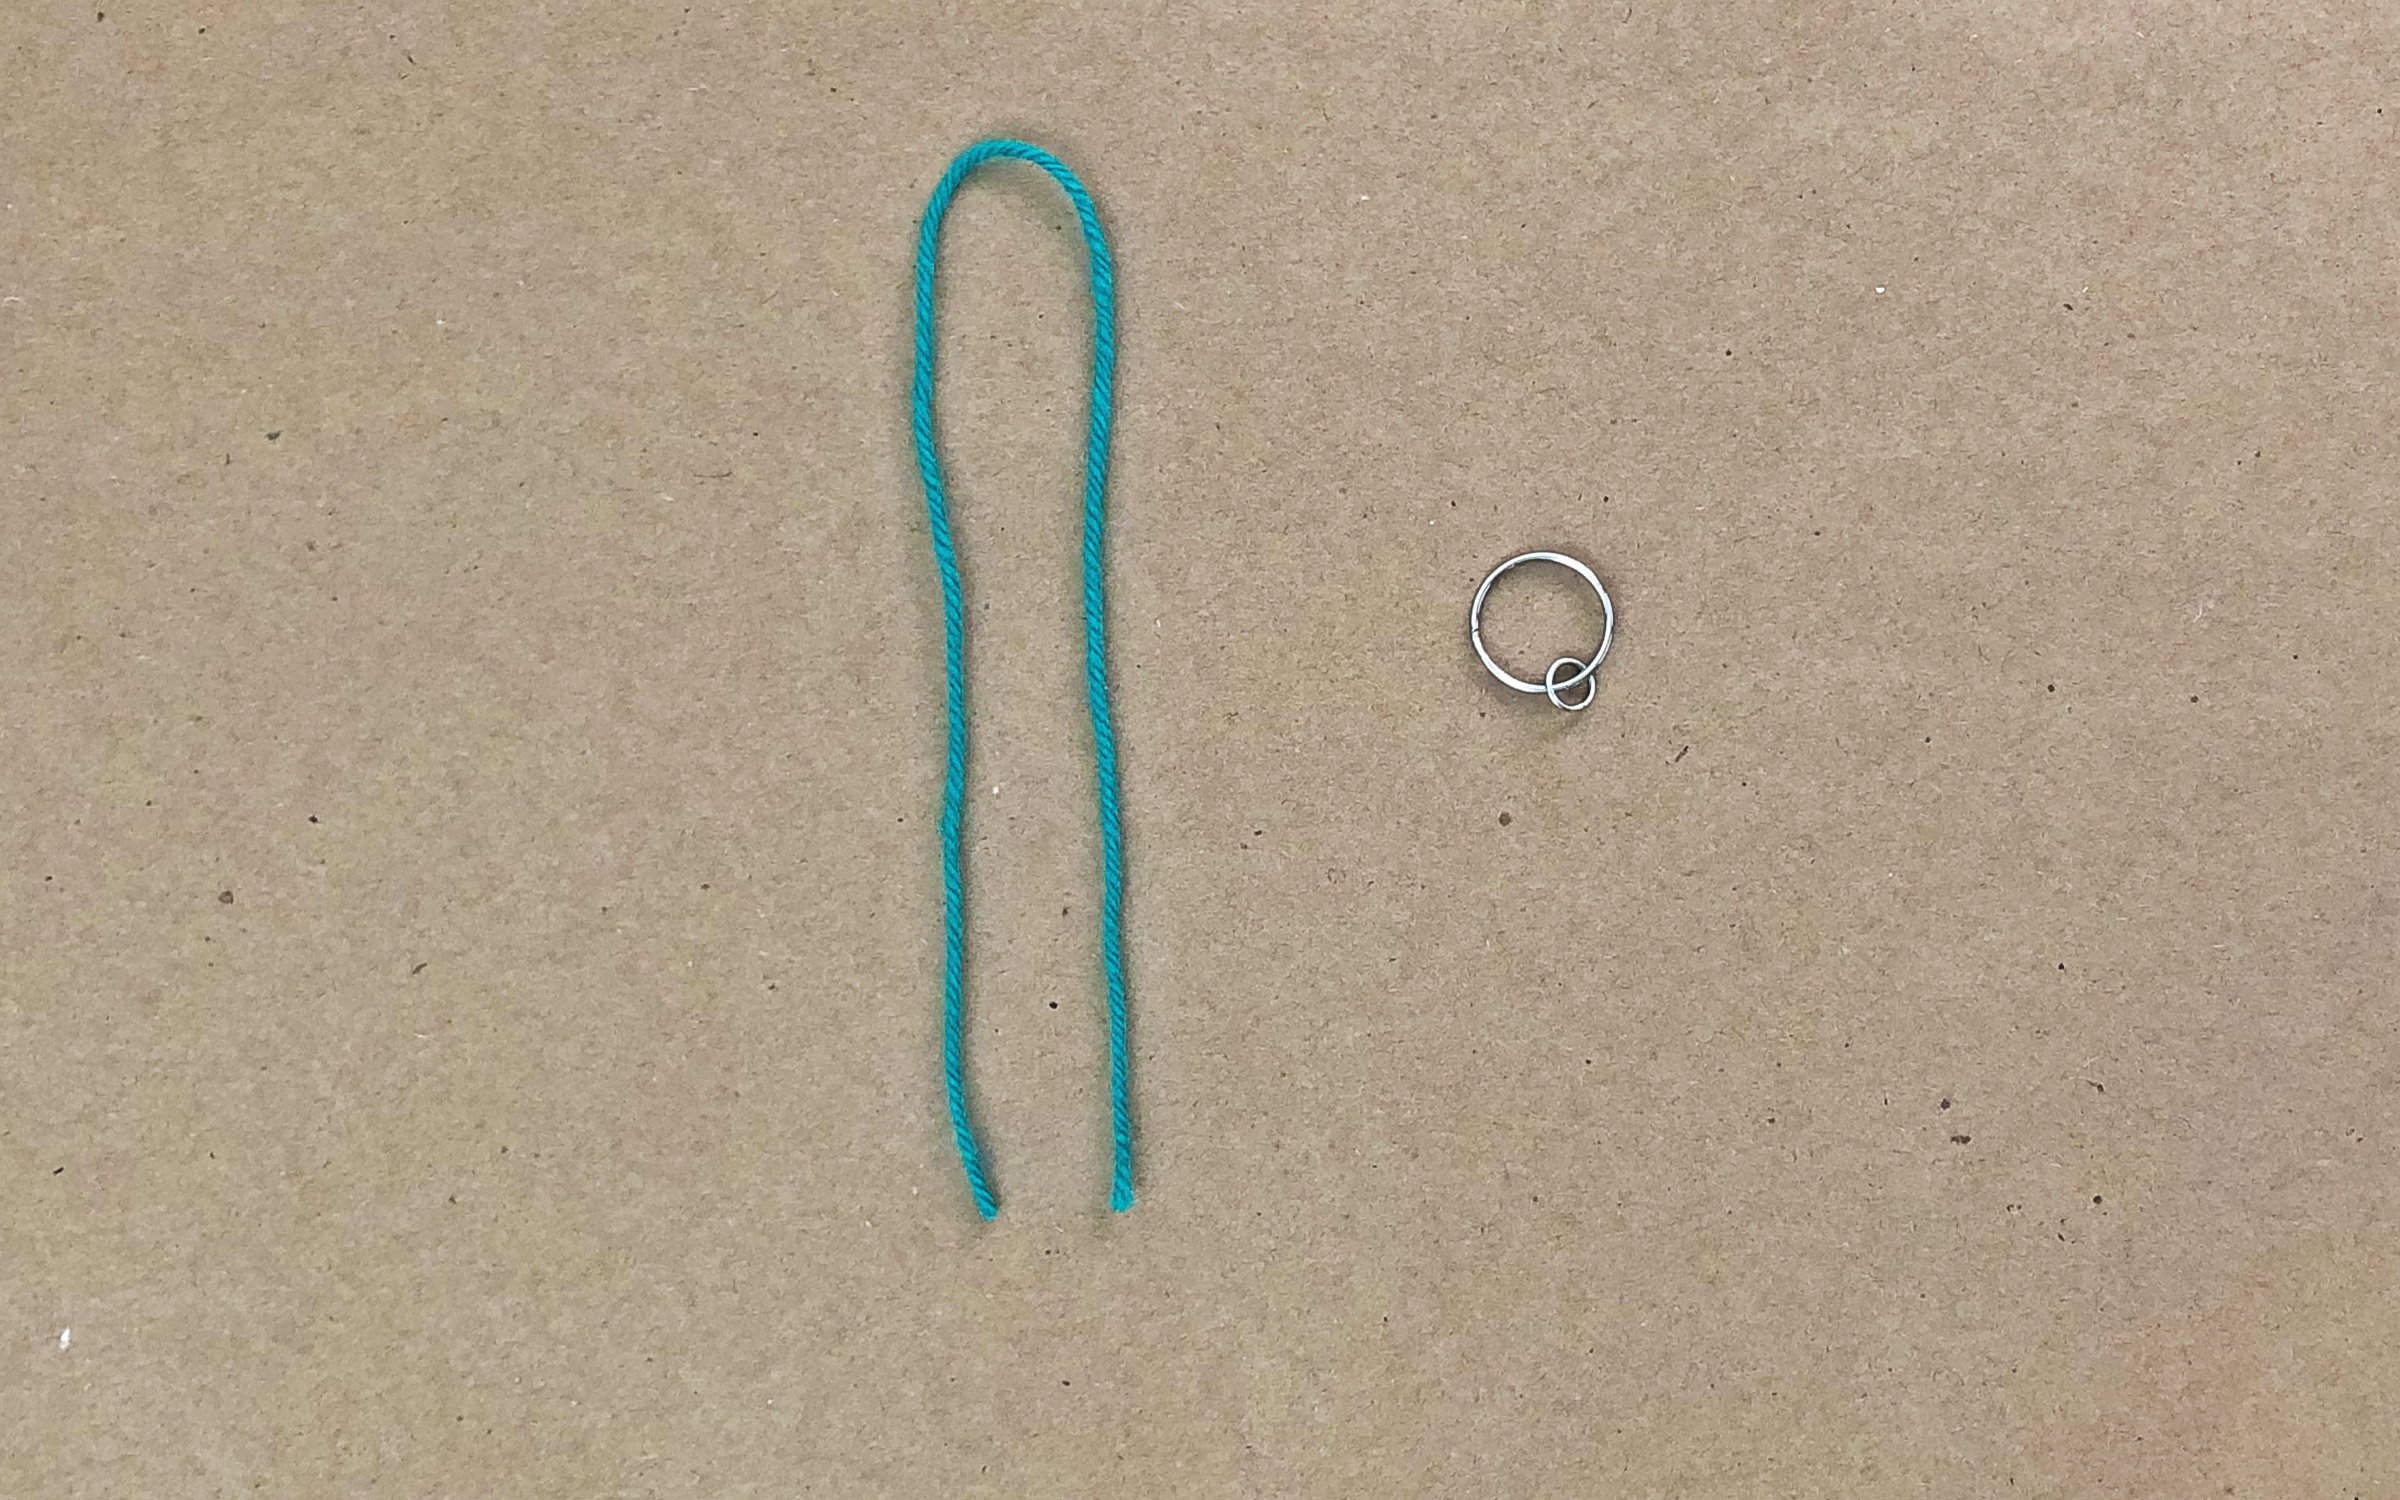
Loop the small ring onto the bigger key ring and cut a piece of yarn that’s about the length of your forearm (better too long than too short- you can trim later!)
Step 3
Thread the piece of yarn half way through the small ring and tie a knot.
Step 4
Thread both ends of the yarn through the beads in the order you’d like.
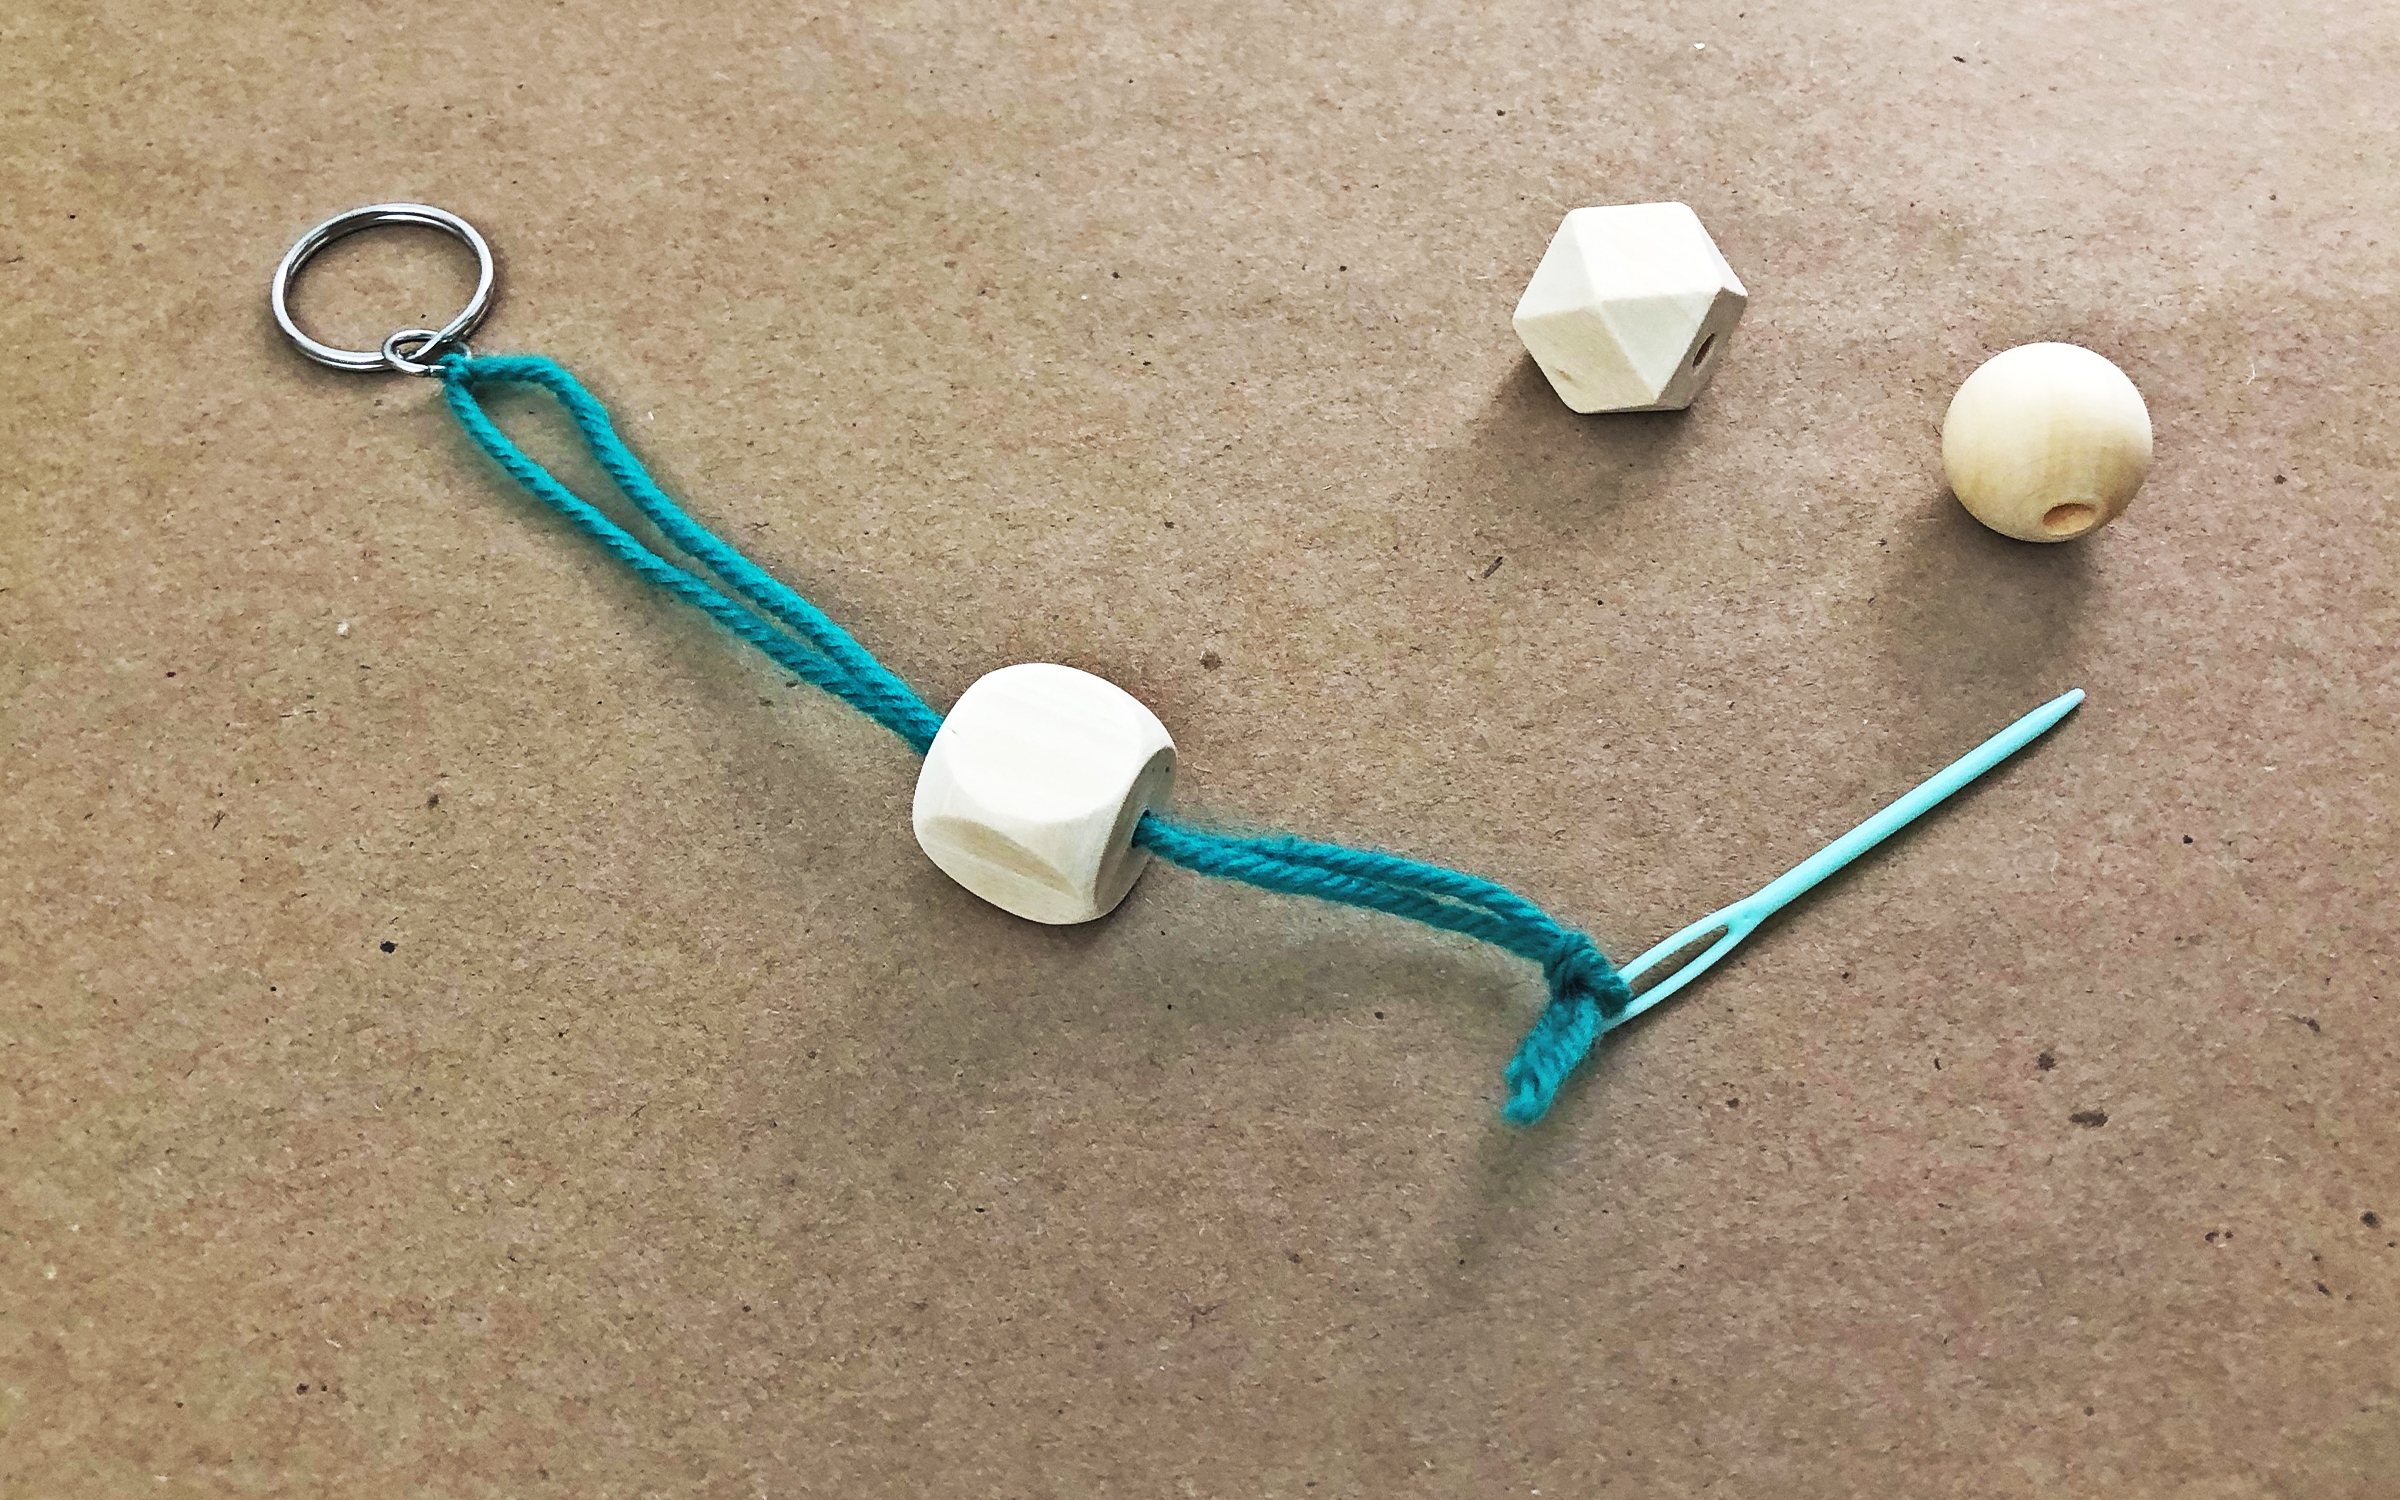
Tip
Use a needle or put tape on the ends of the yarn to make it easier to slide on the beads. You can give your beads some personality with paint or leave them natural!
Step 5
Wrap yarn around a large pom pom winder. The more you wrap, the fluffier your tassel will be.
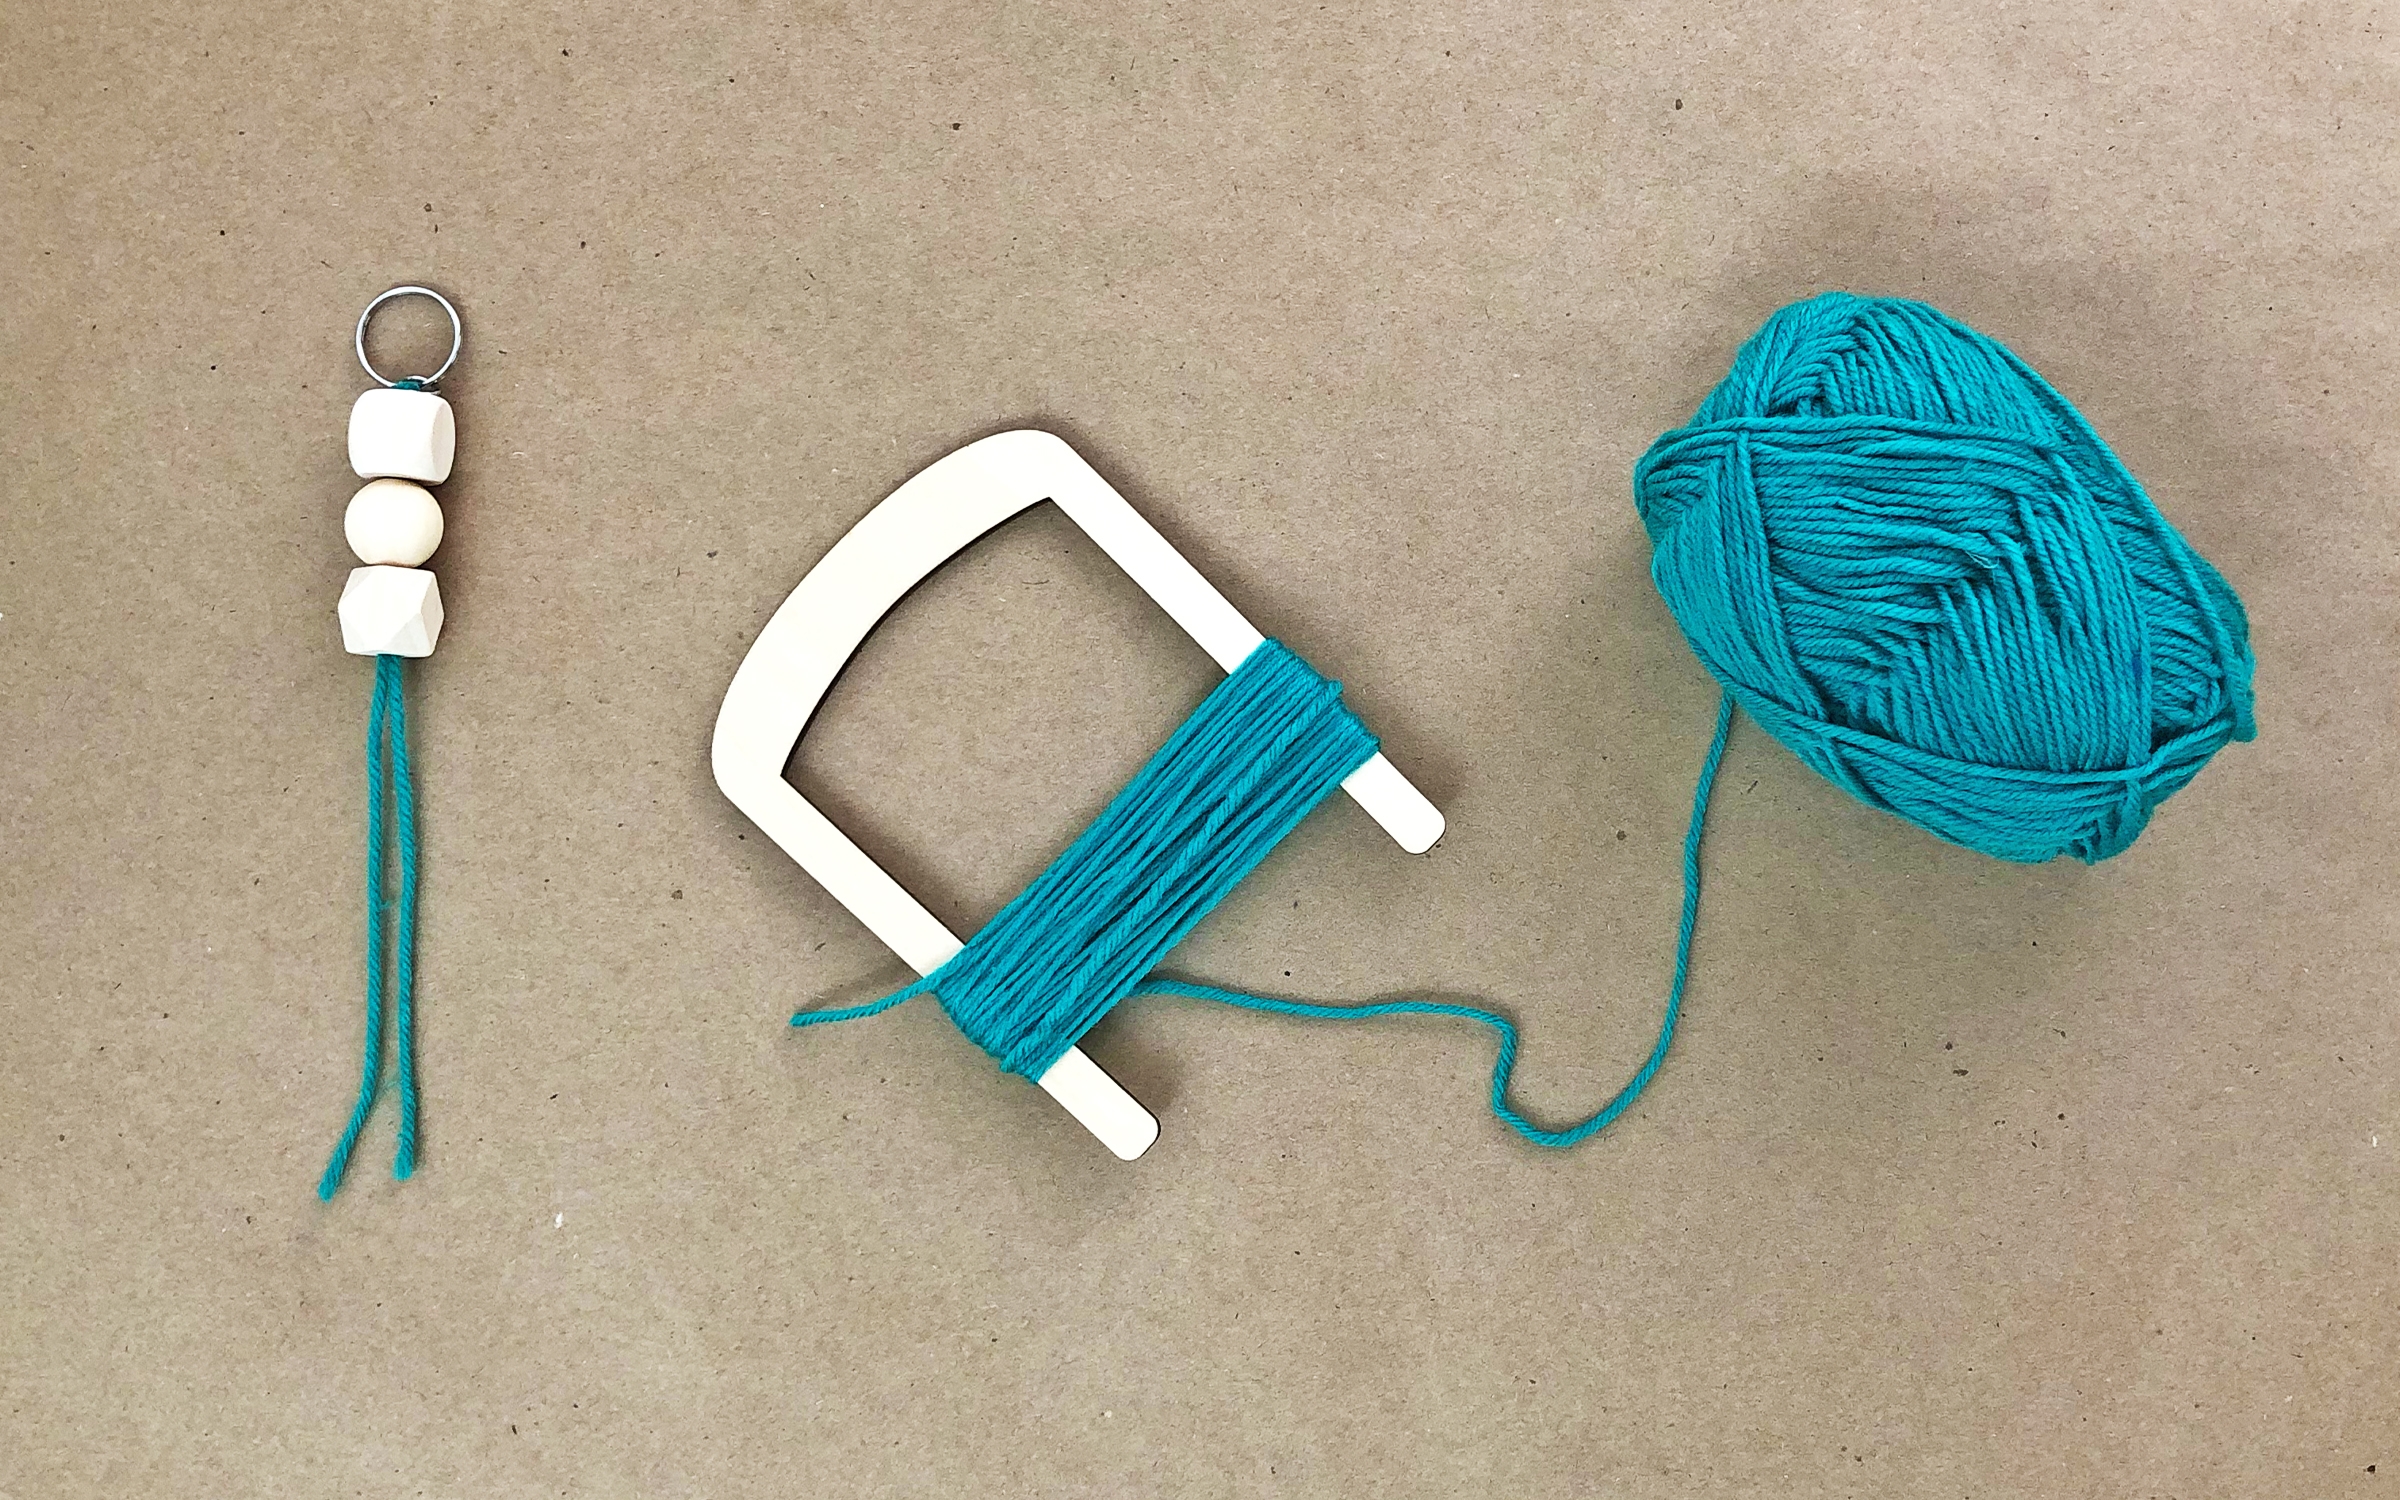
Tip
If you don’t have a pom pom winder, you can use a piece of cardboard! The length of your cardboard will be about the same as the length of your tassel so use that to determine sizing.
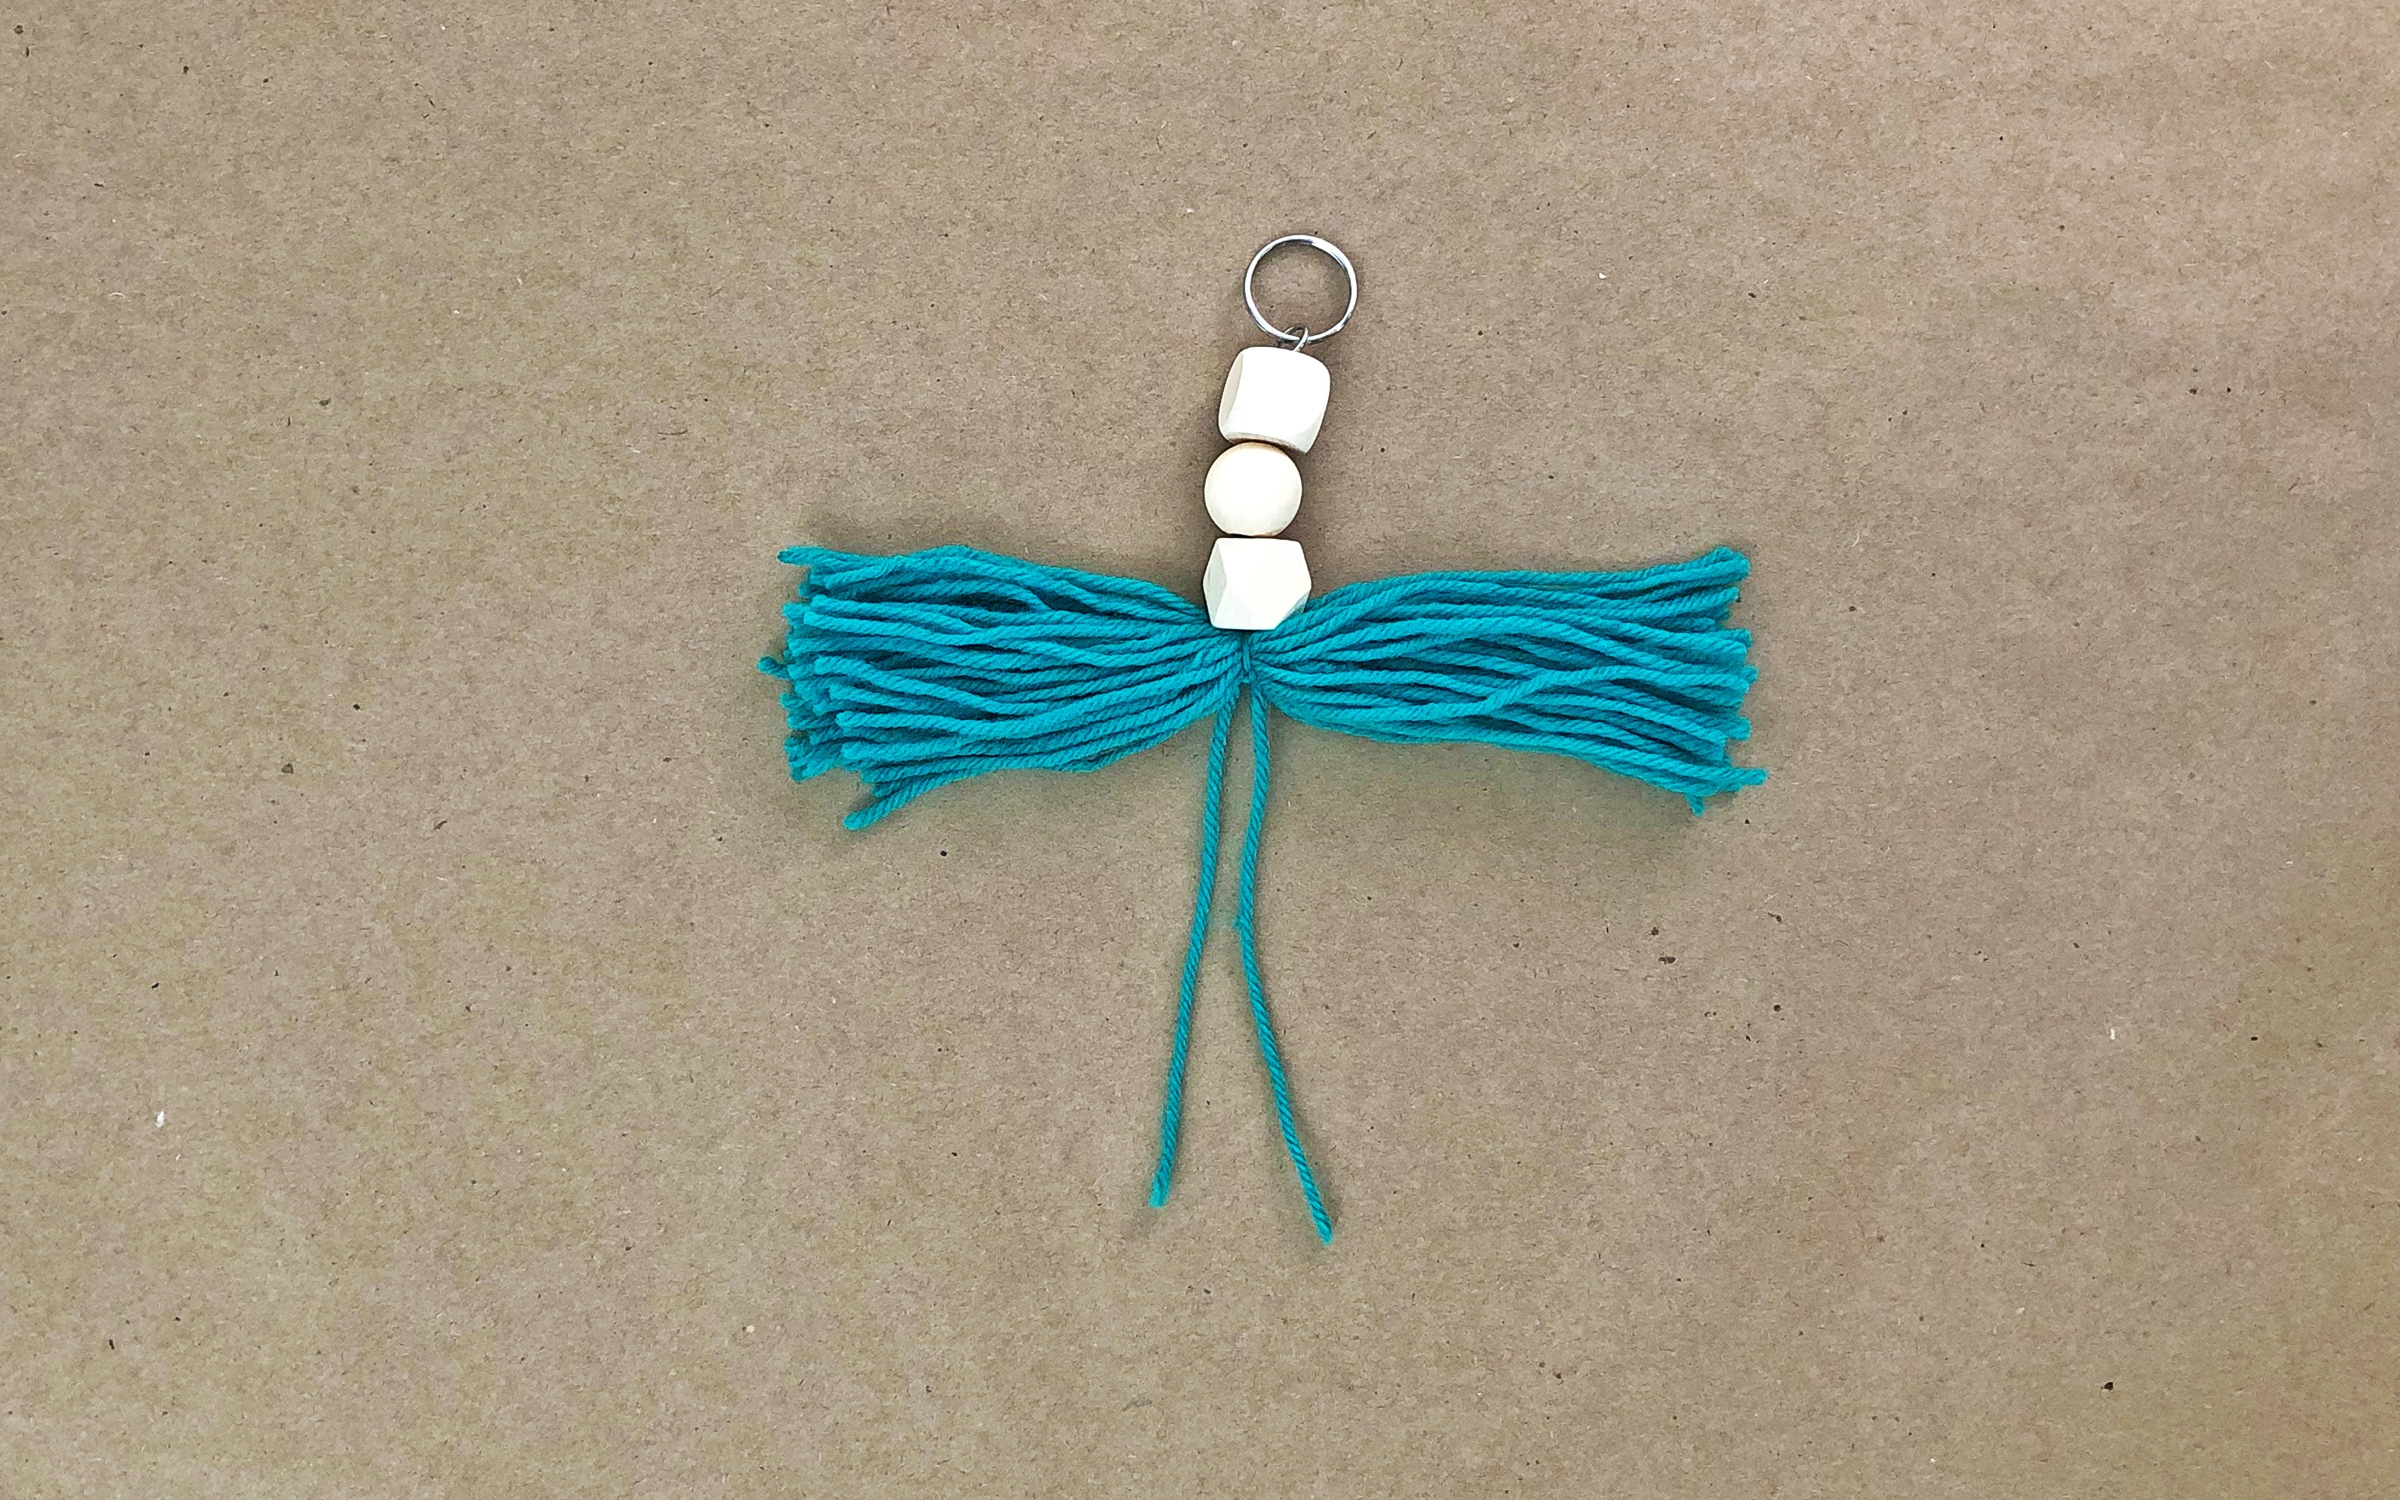
Step 6
Cut the yarn at one end of the pompom winder or cardboard. Lay the yarn bundle on the strands attached to the keyring. The keychain strands should be in the middle of your yarn bundle!
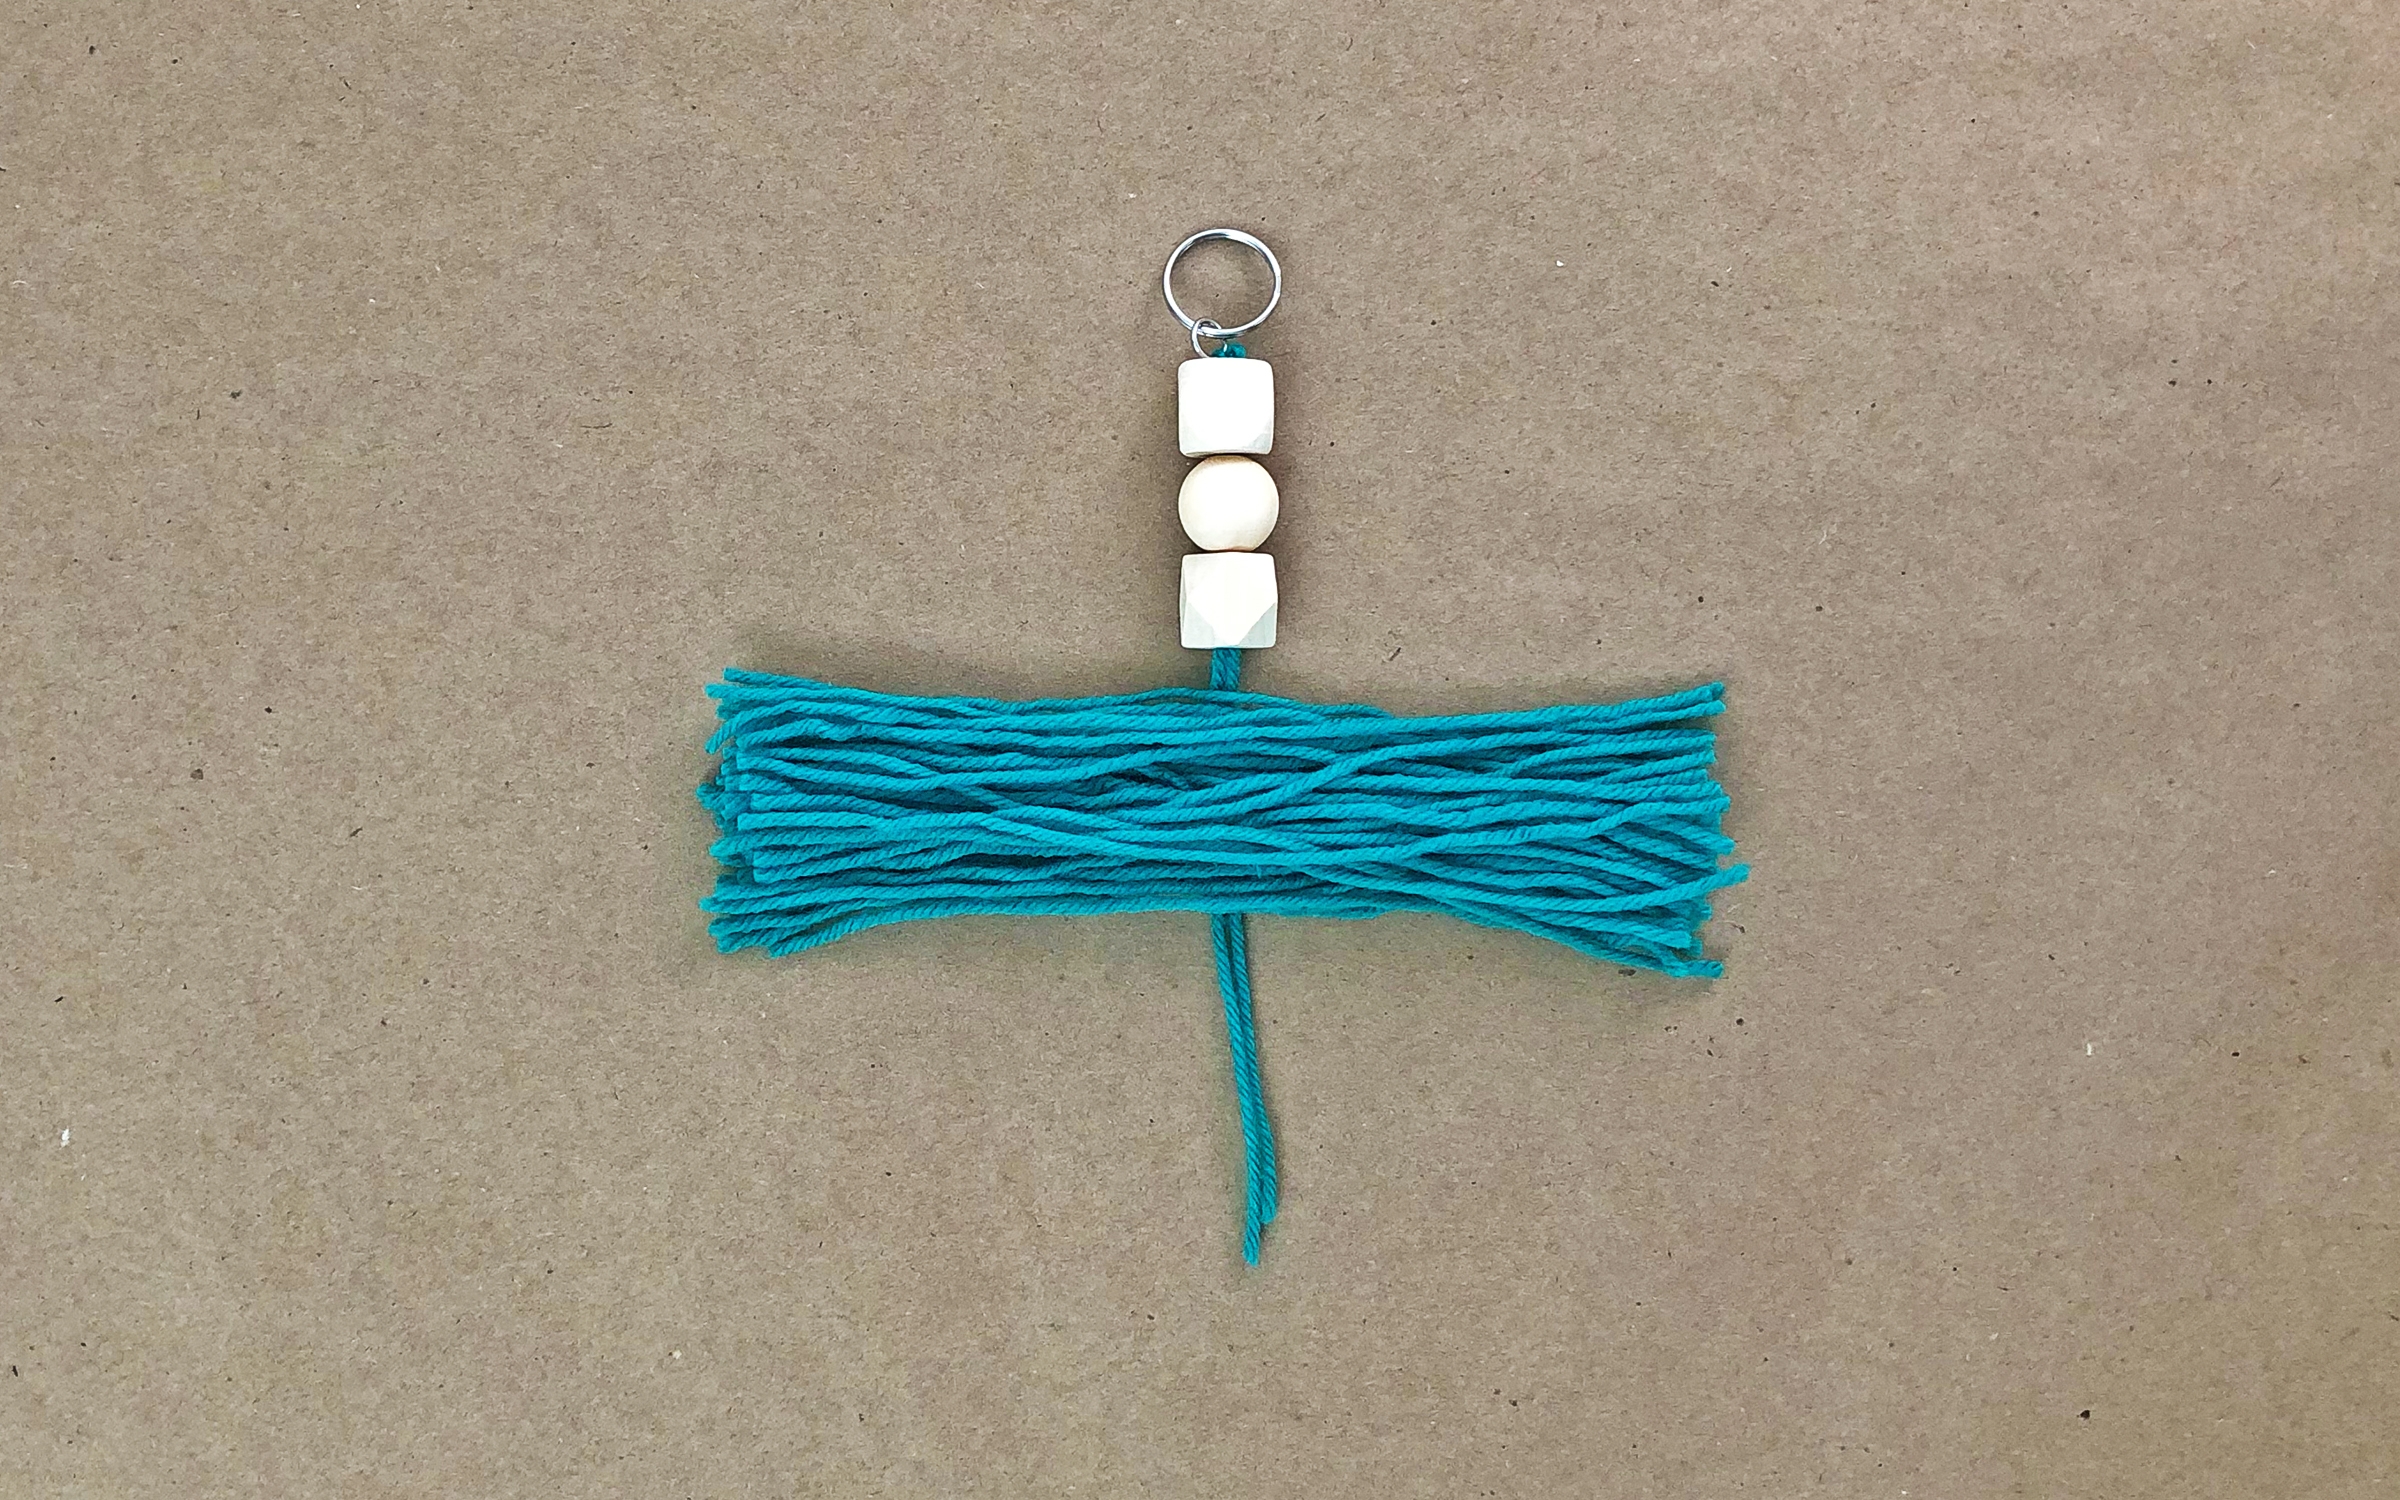
Step 7
Tie the keychain strands snugly and securely around the middle of the yarn bundle.
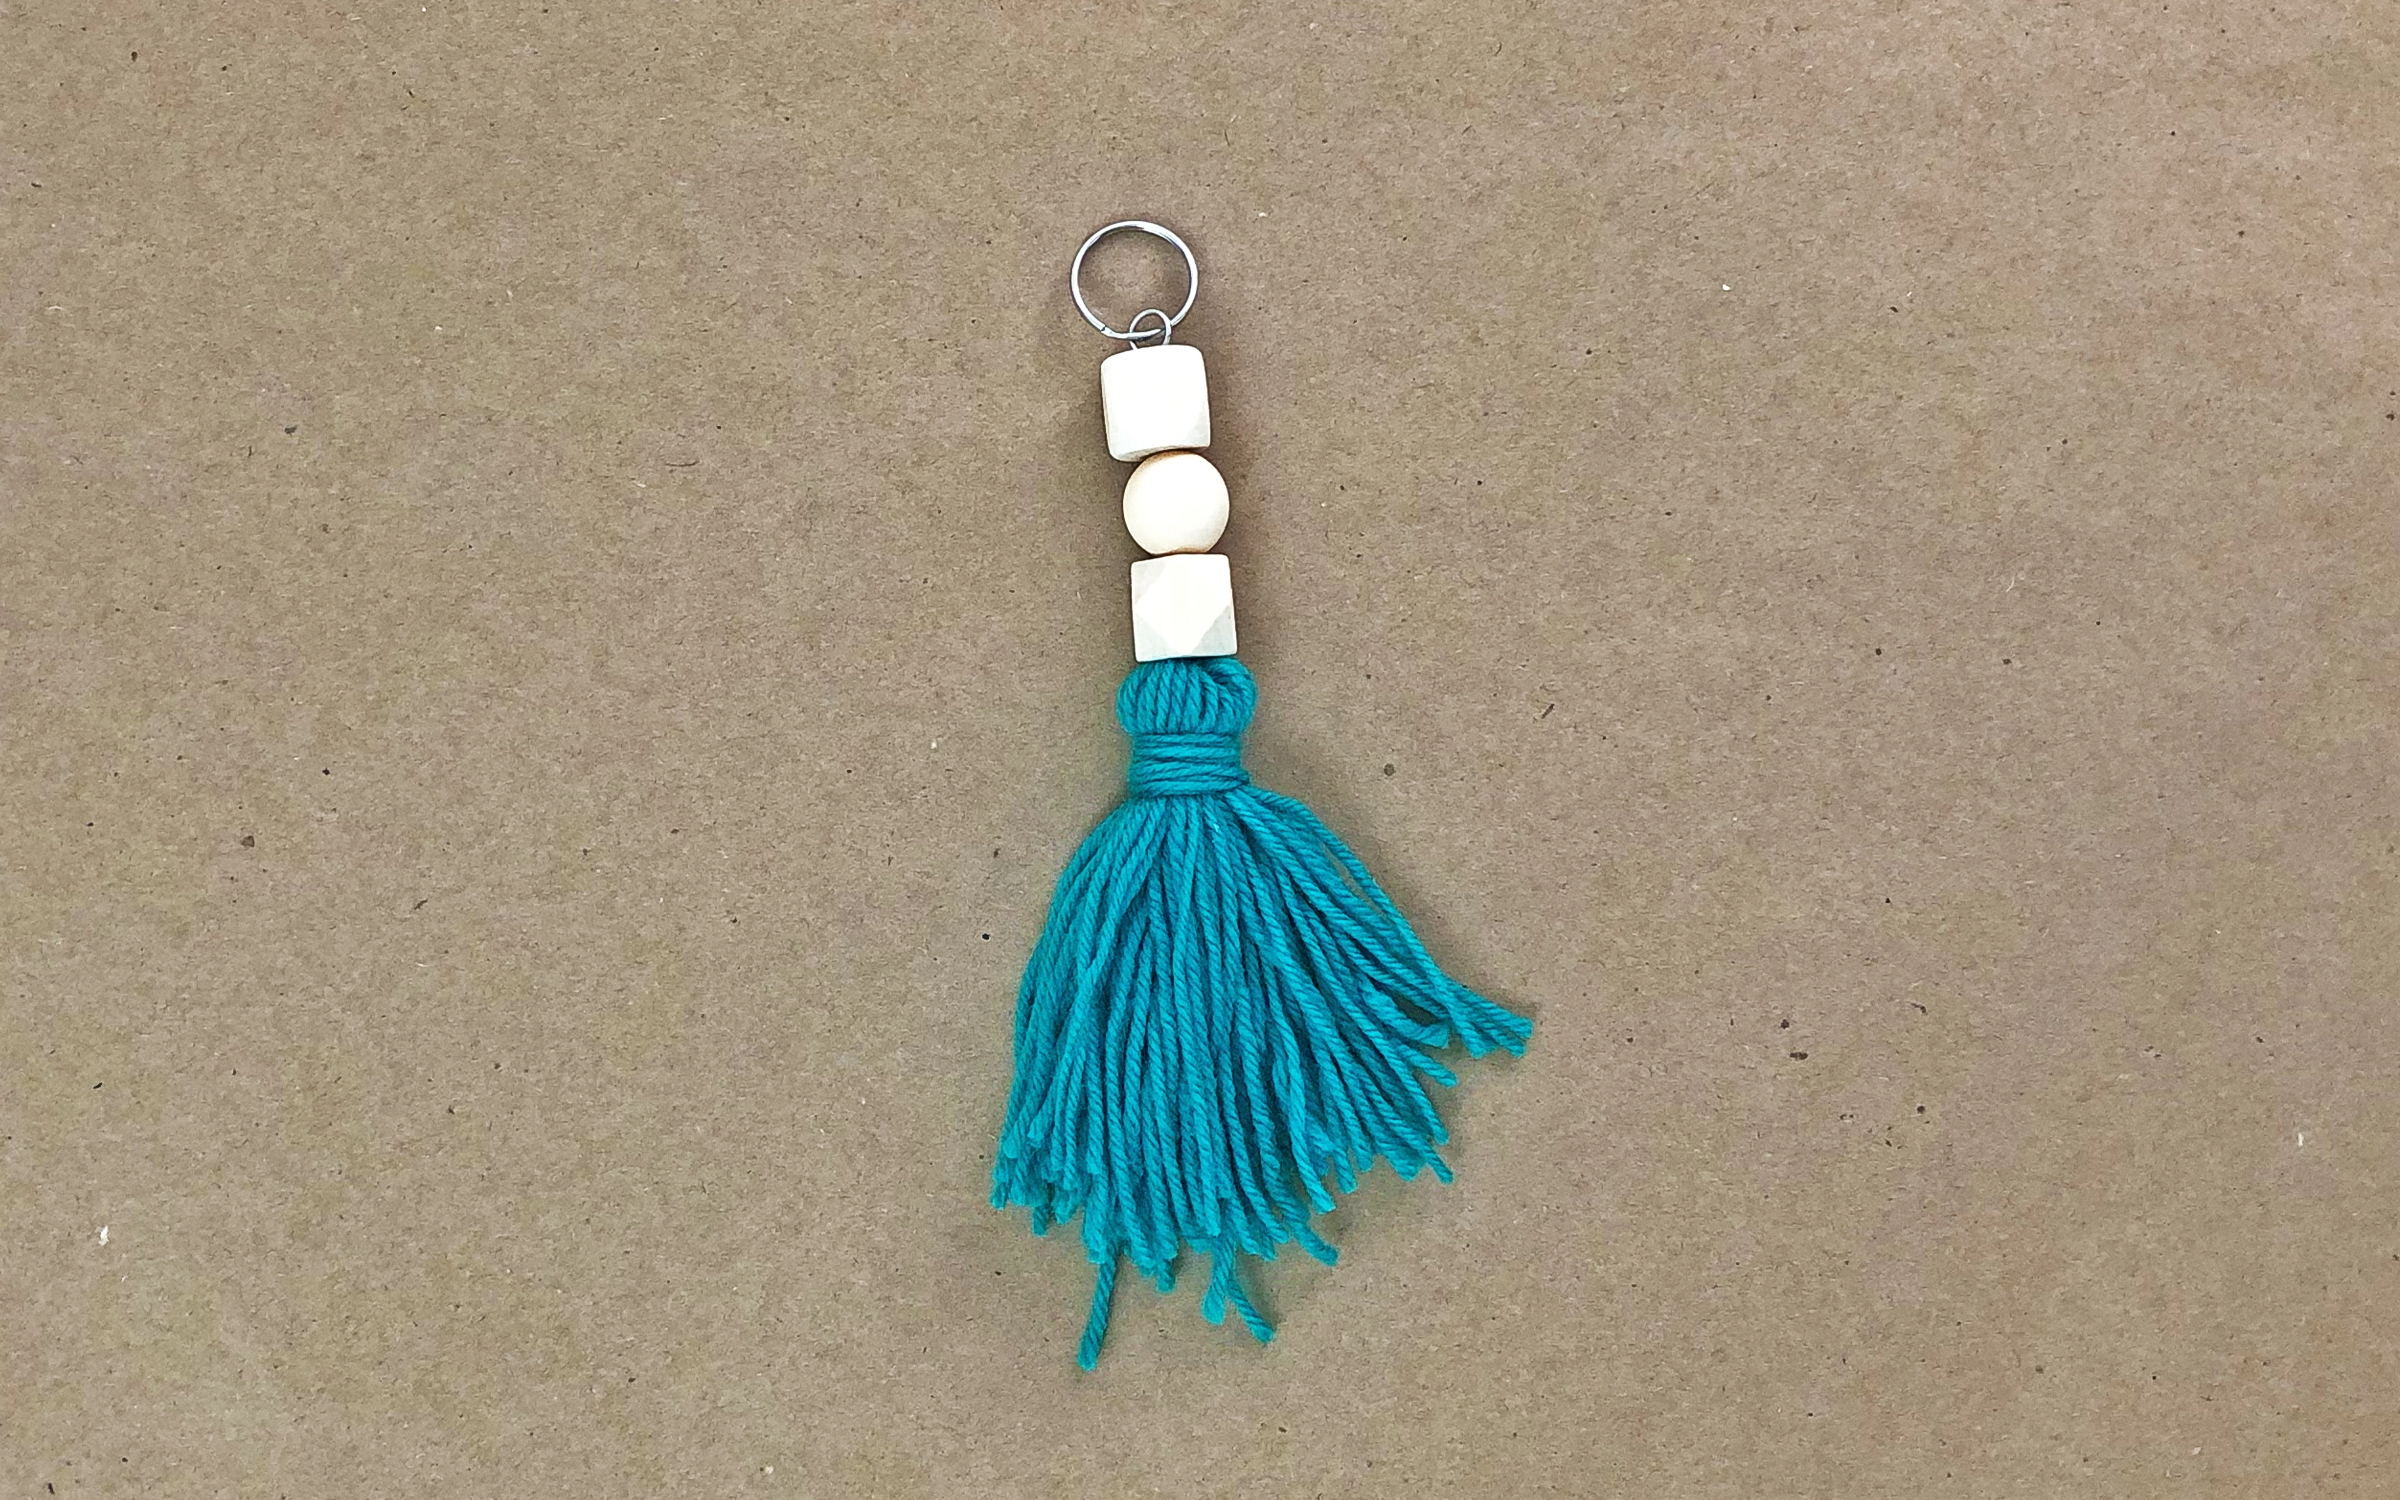
Step 8
Cut a short strand of yarn and wrap it around the yarn bundle close to the top by the beads. Keep wrapping until you achieve your desired tassel look. Tie the strand in a double knot. Then tuck the ends in and pull through!
Step 9
Hold the ends of the tassel with your fingers and trim with scissors like you are giving your tassel a haircut!
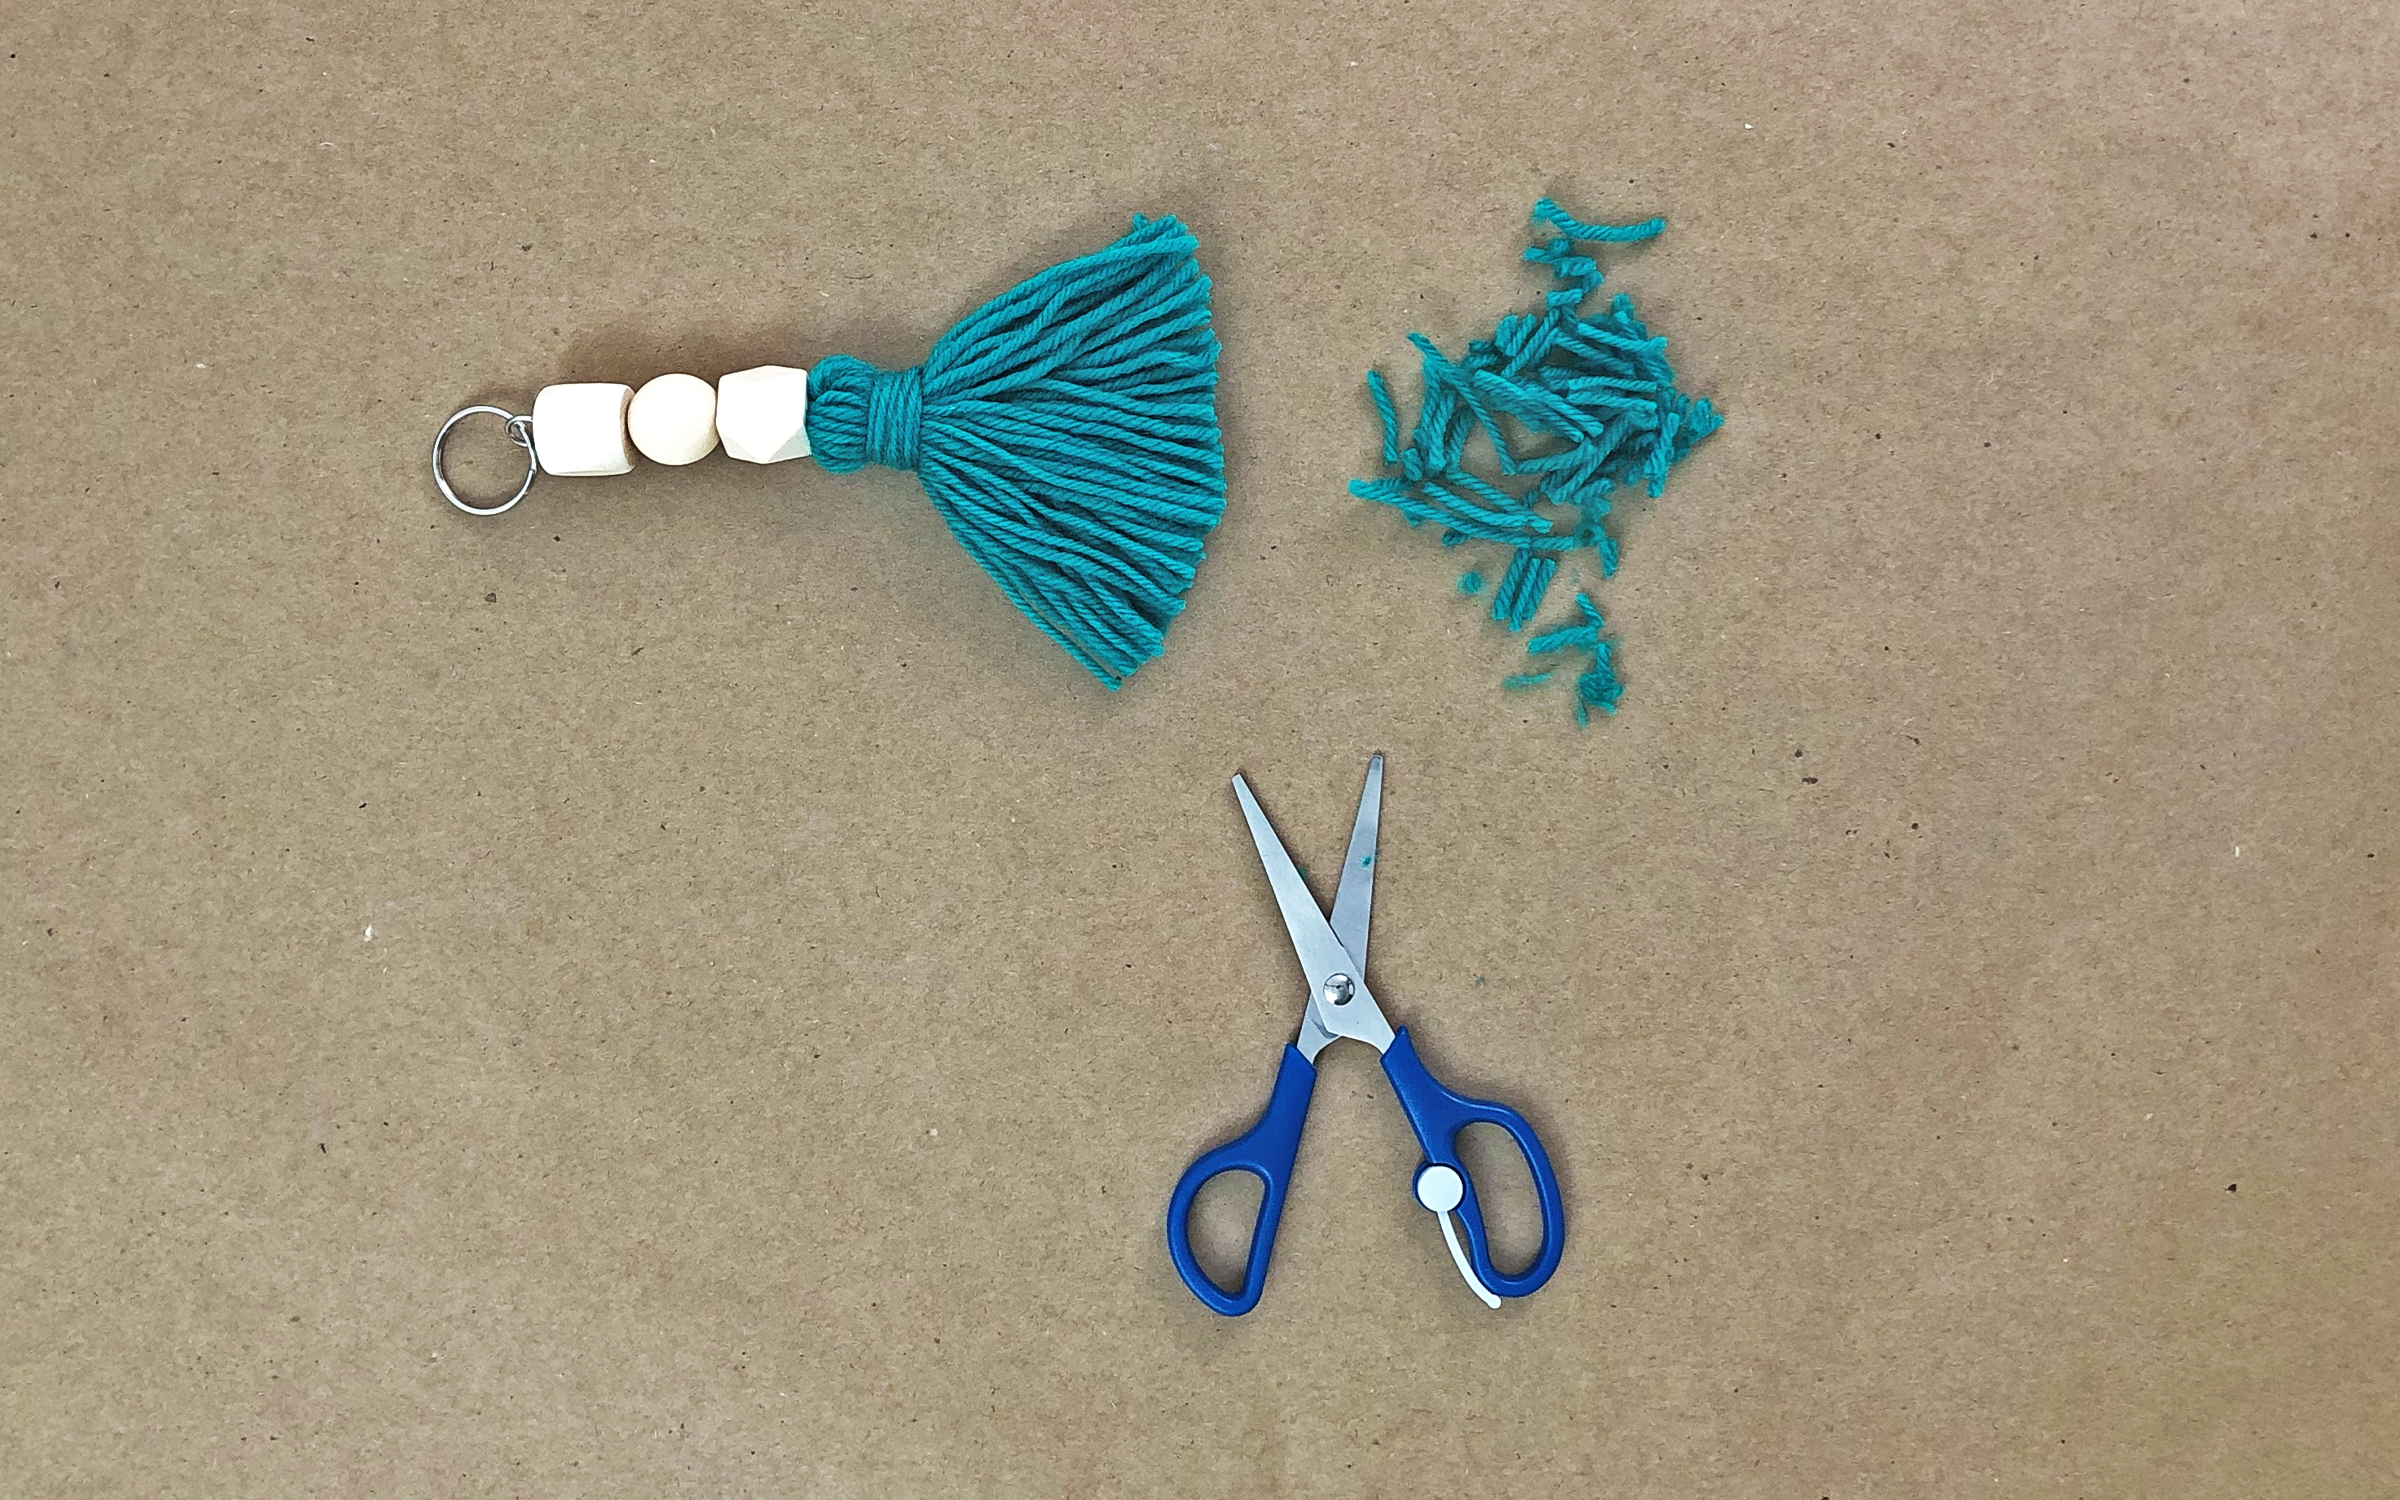
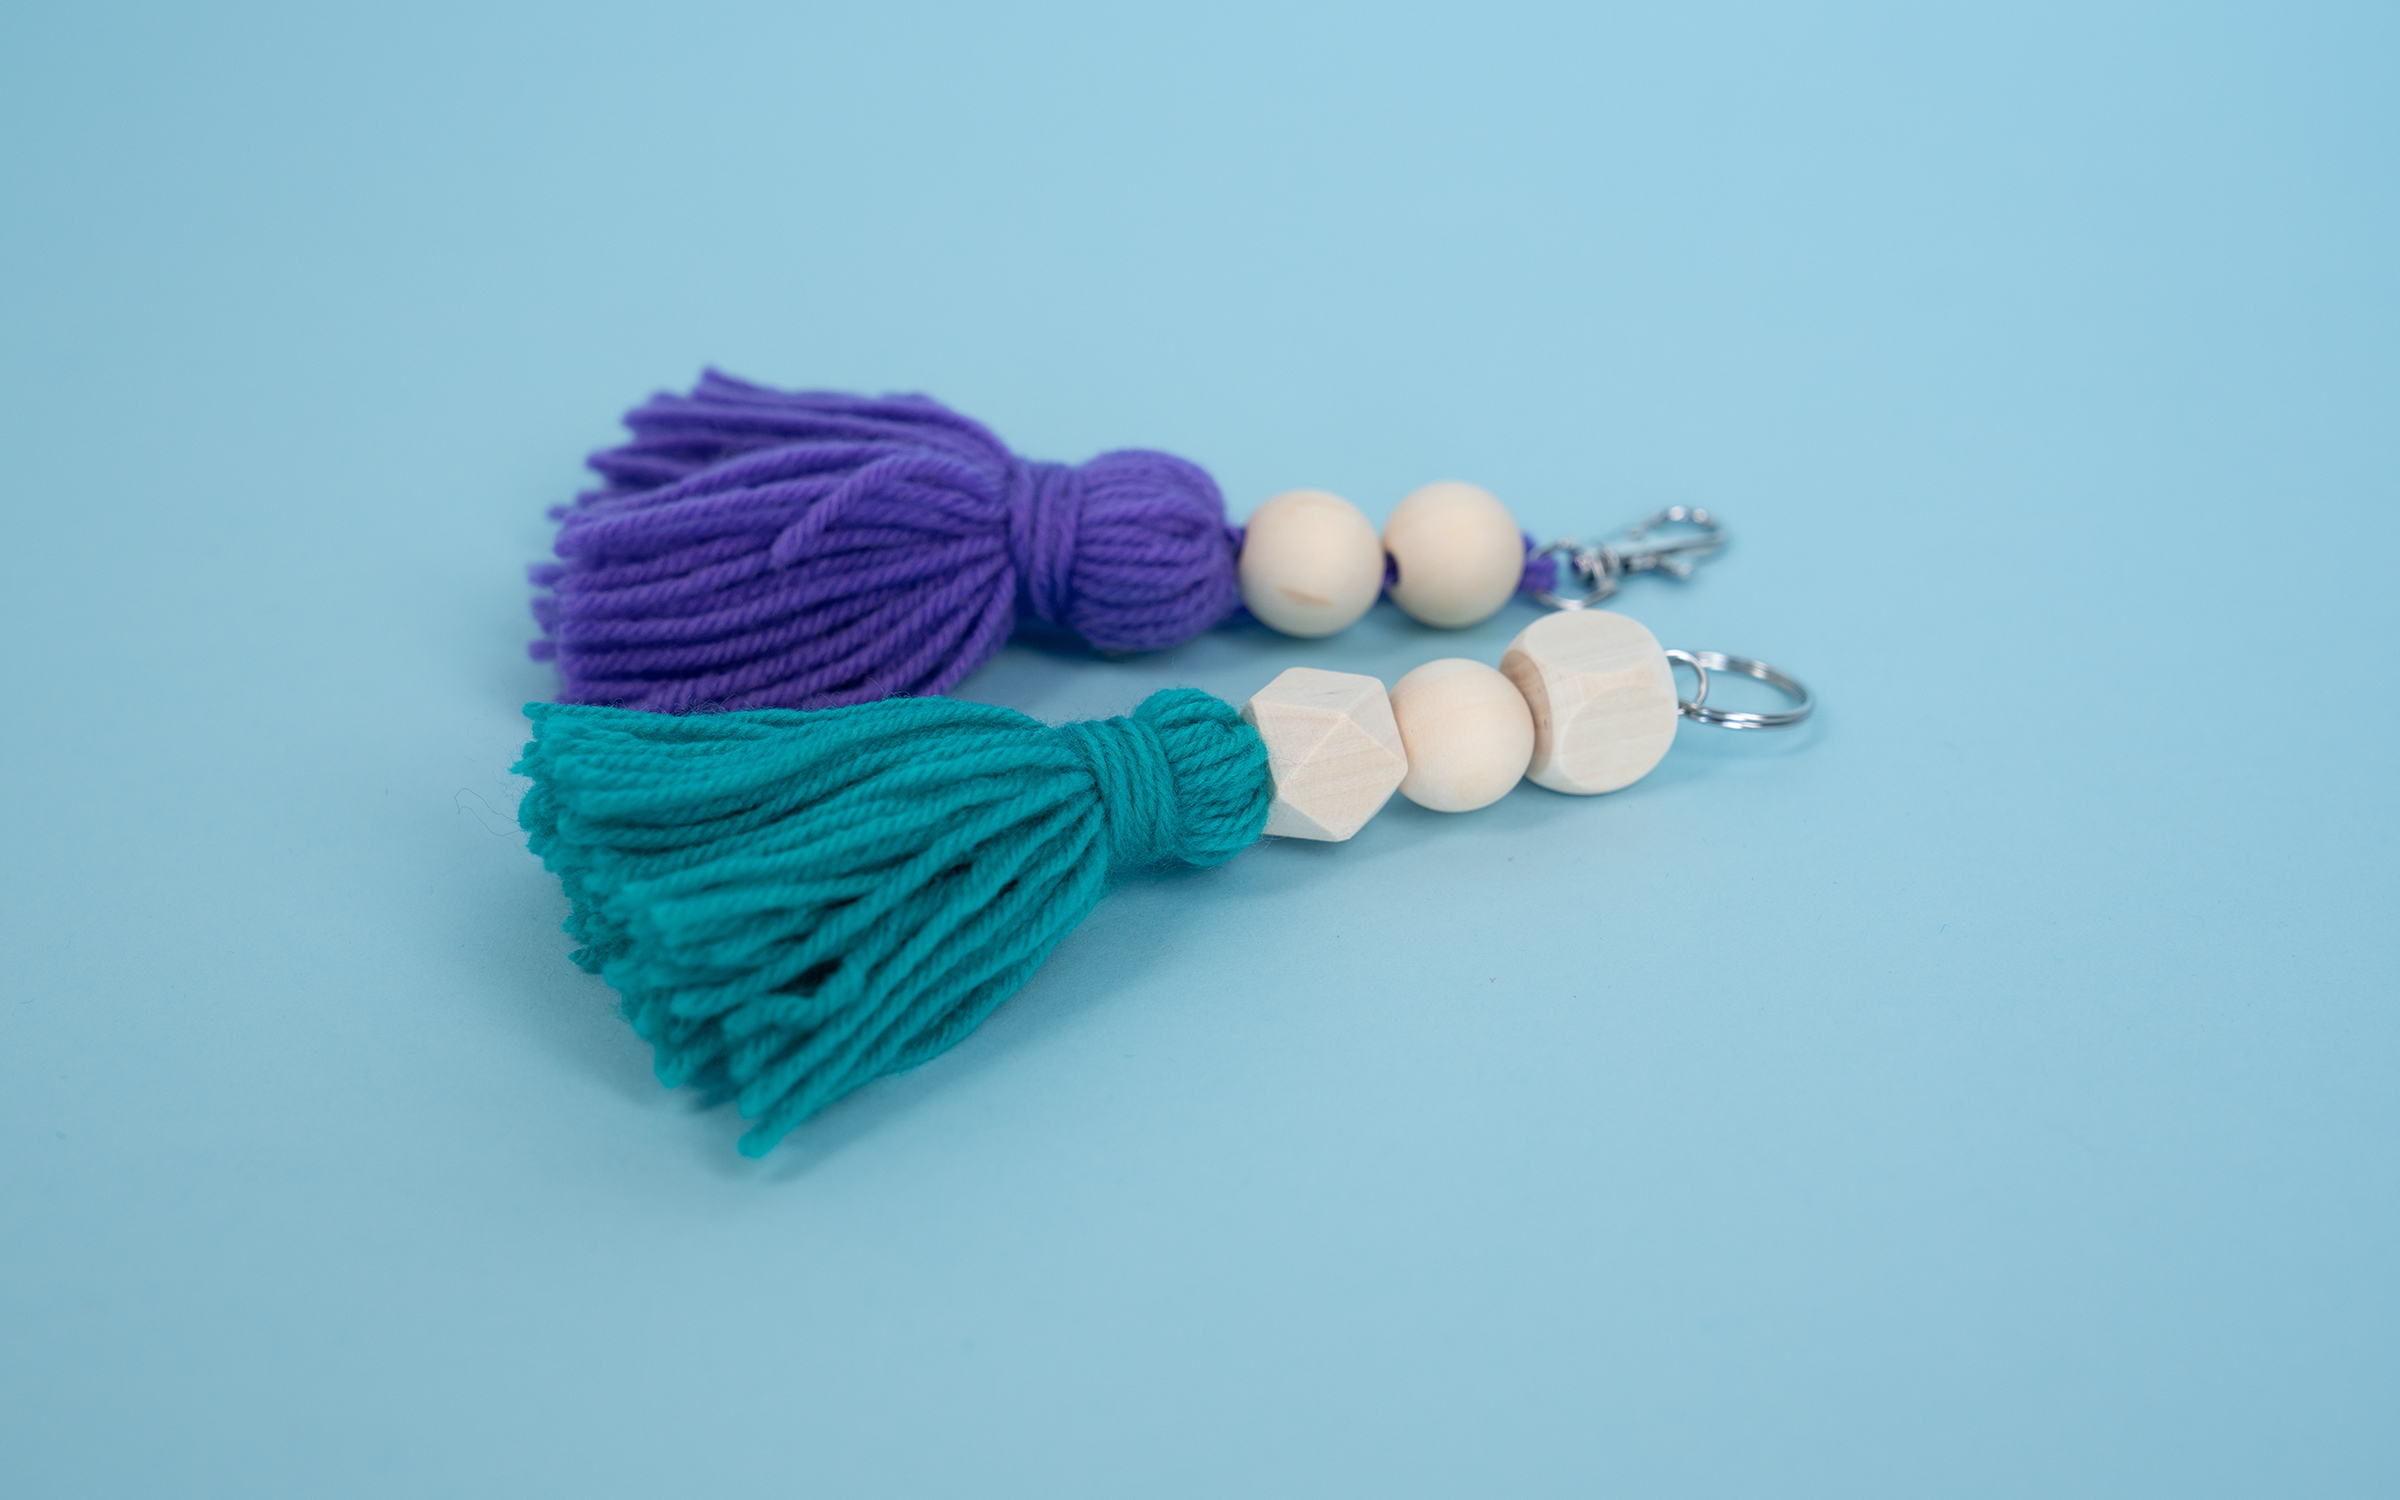
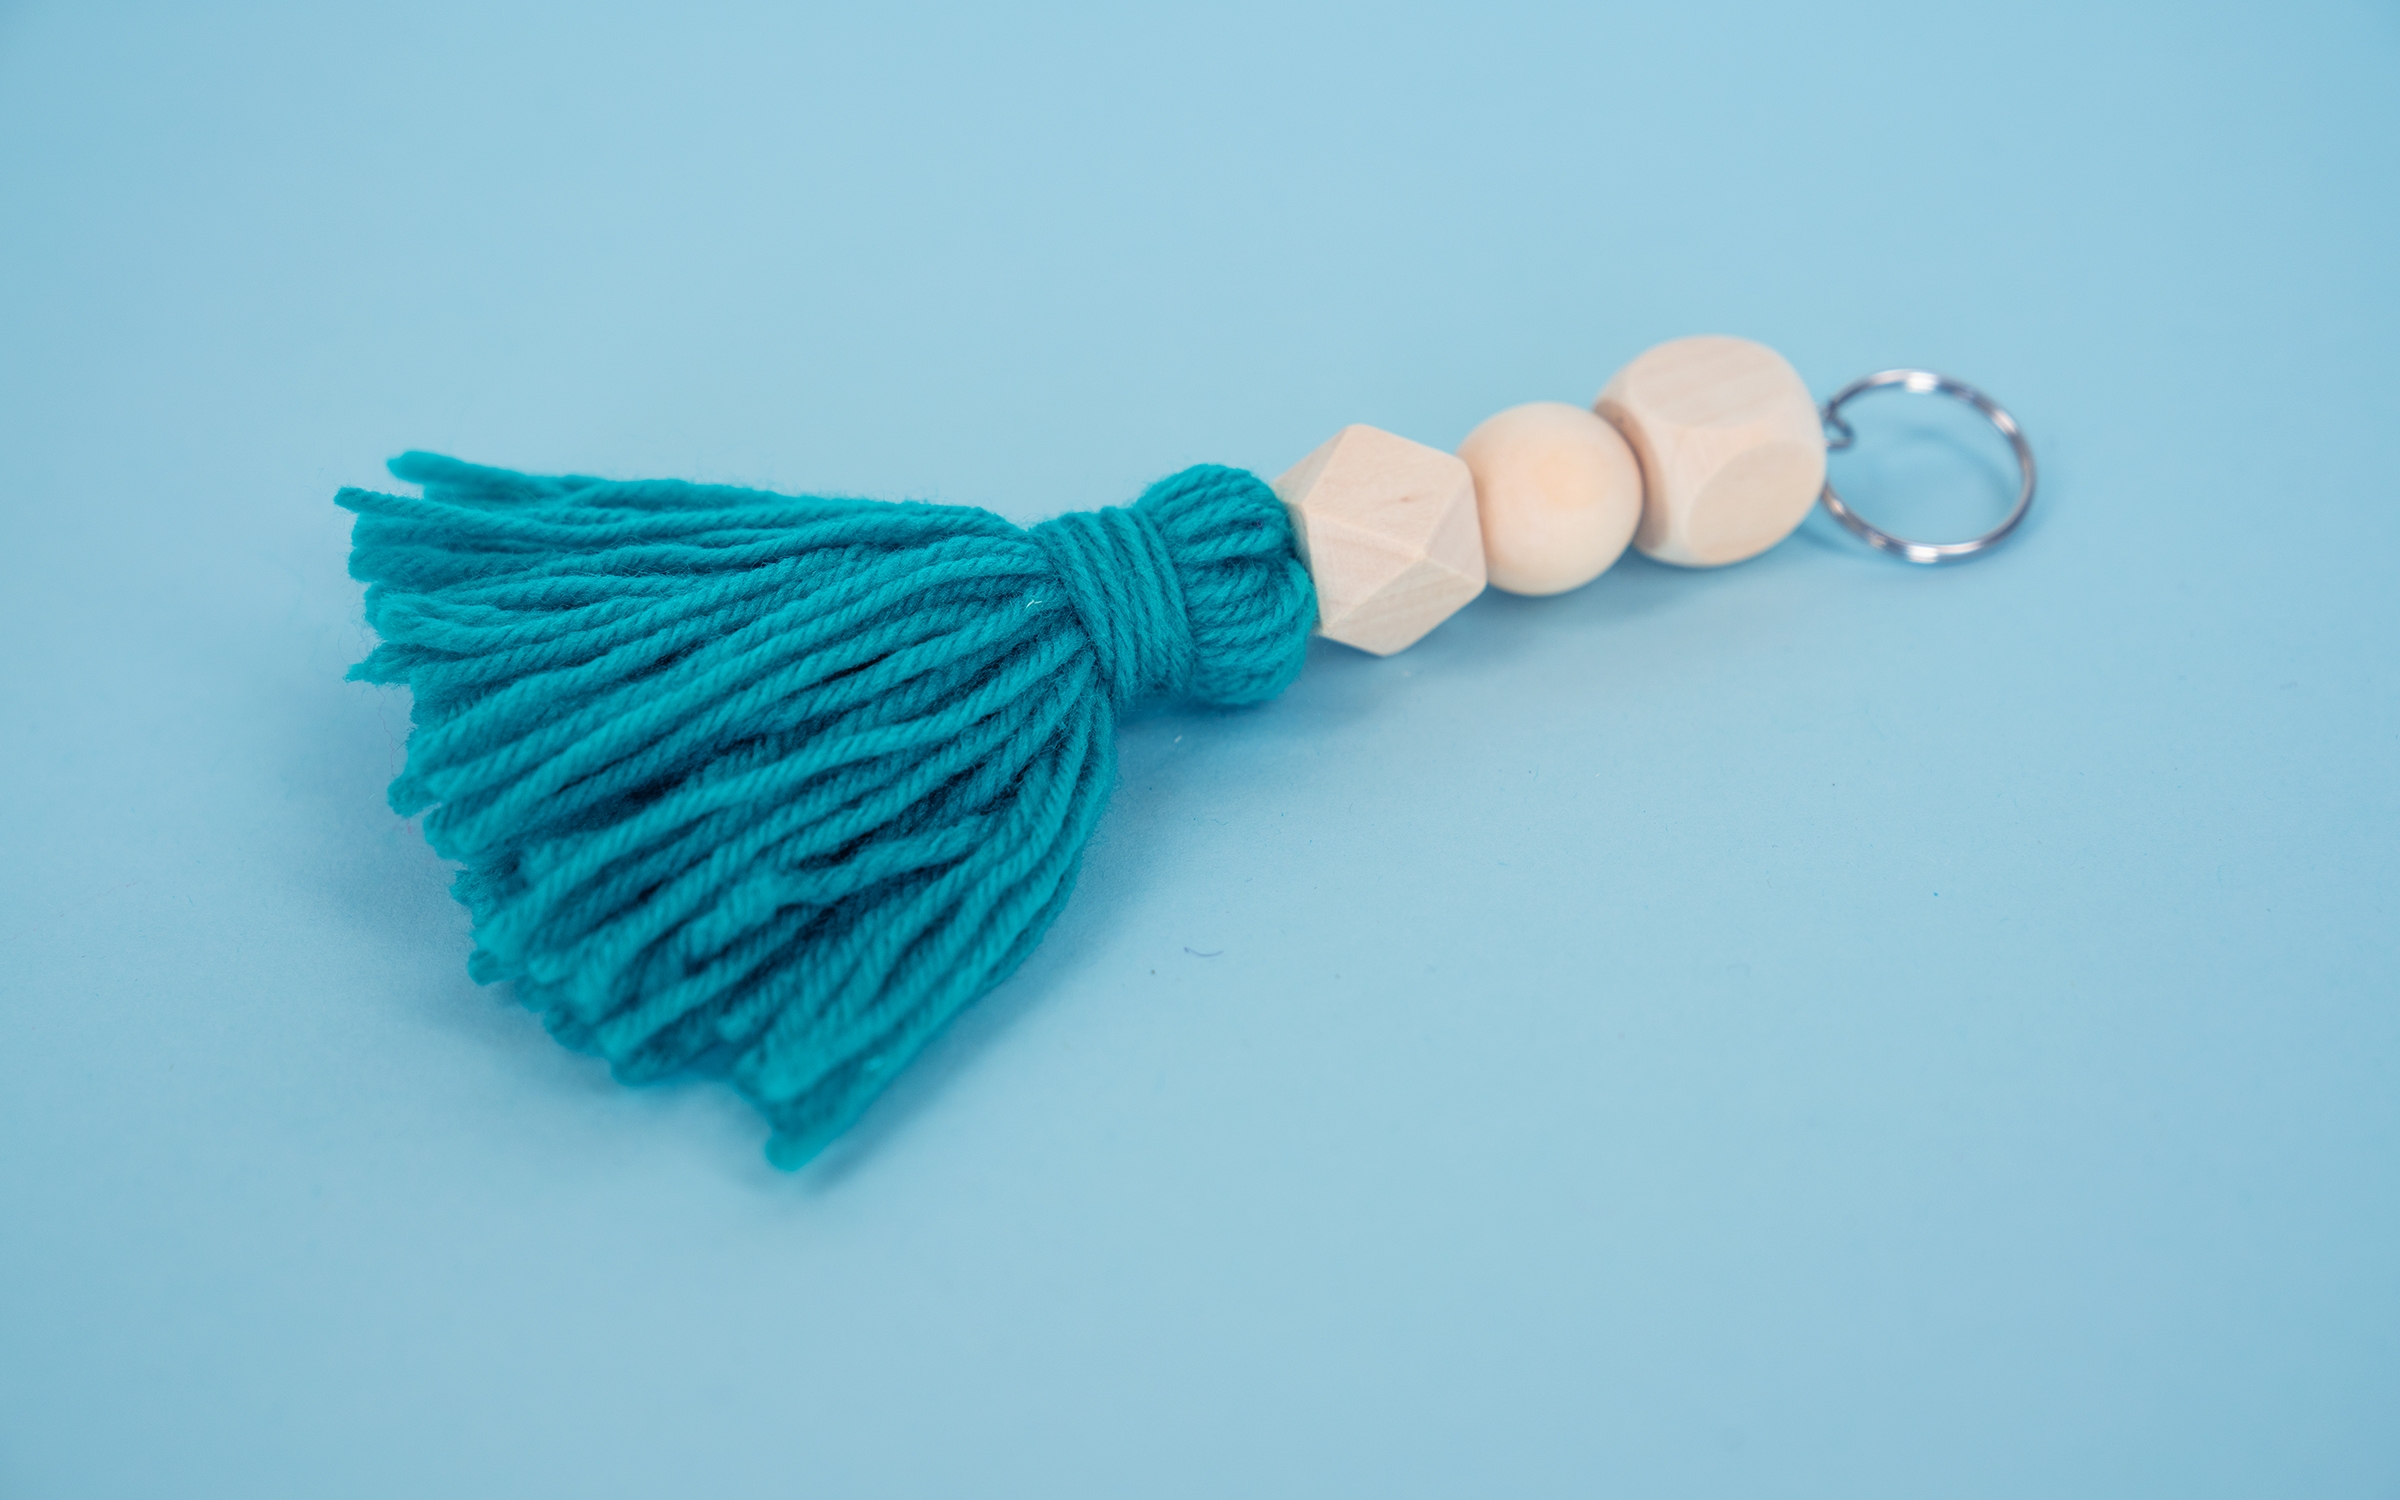
Final result!