Step-by-step tutorial
Step 1
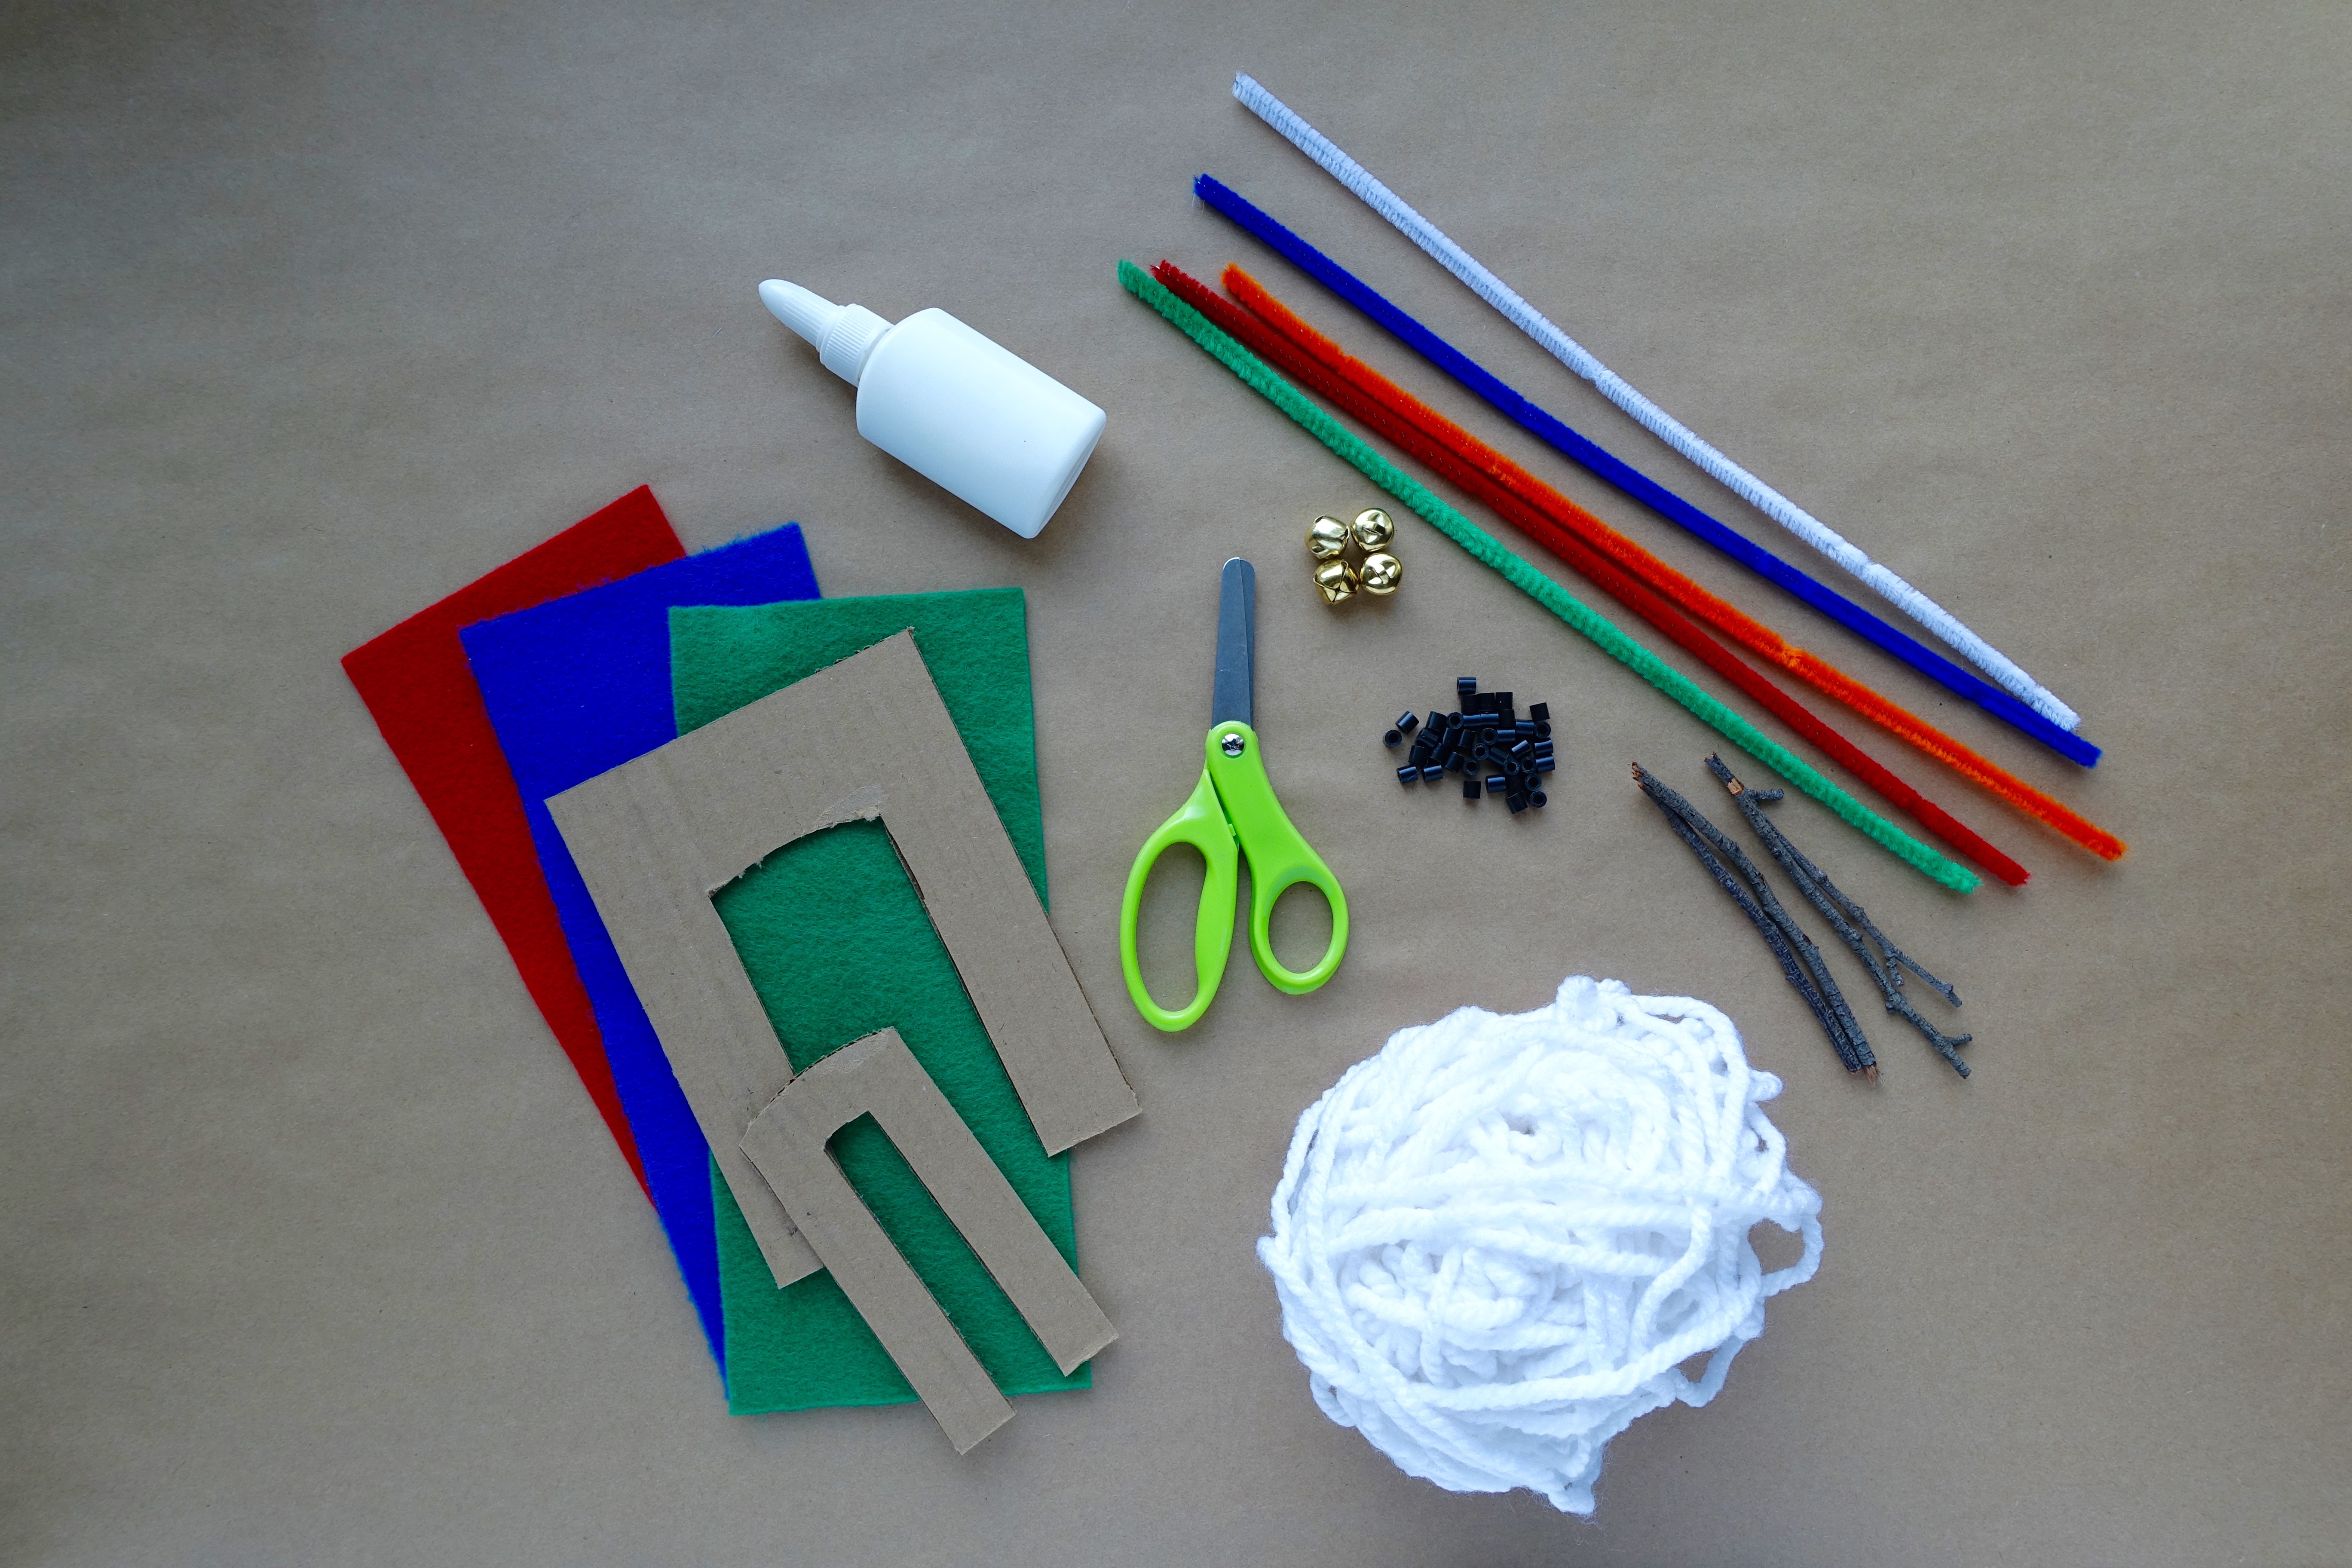
Gather your materials.

Step 2
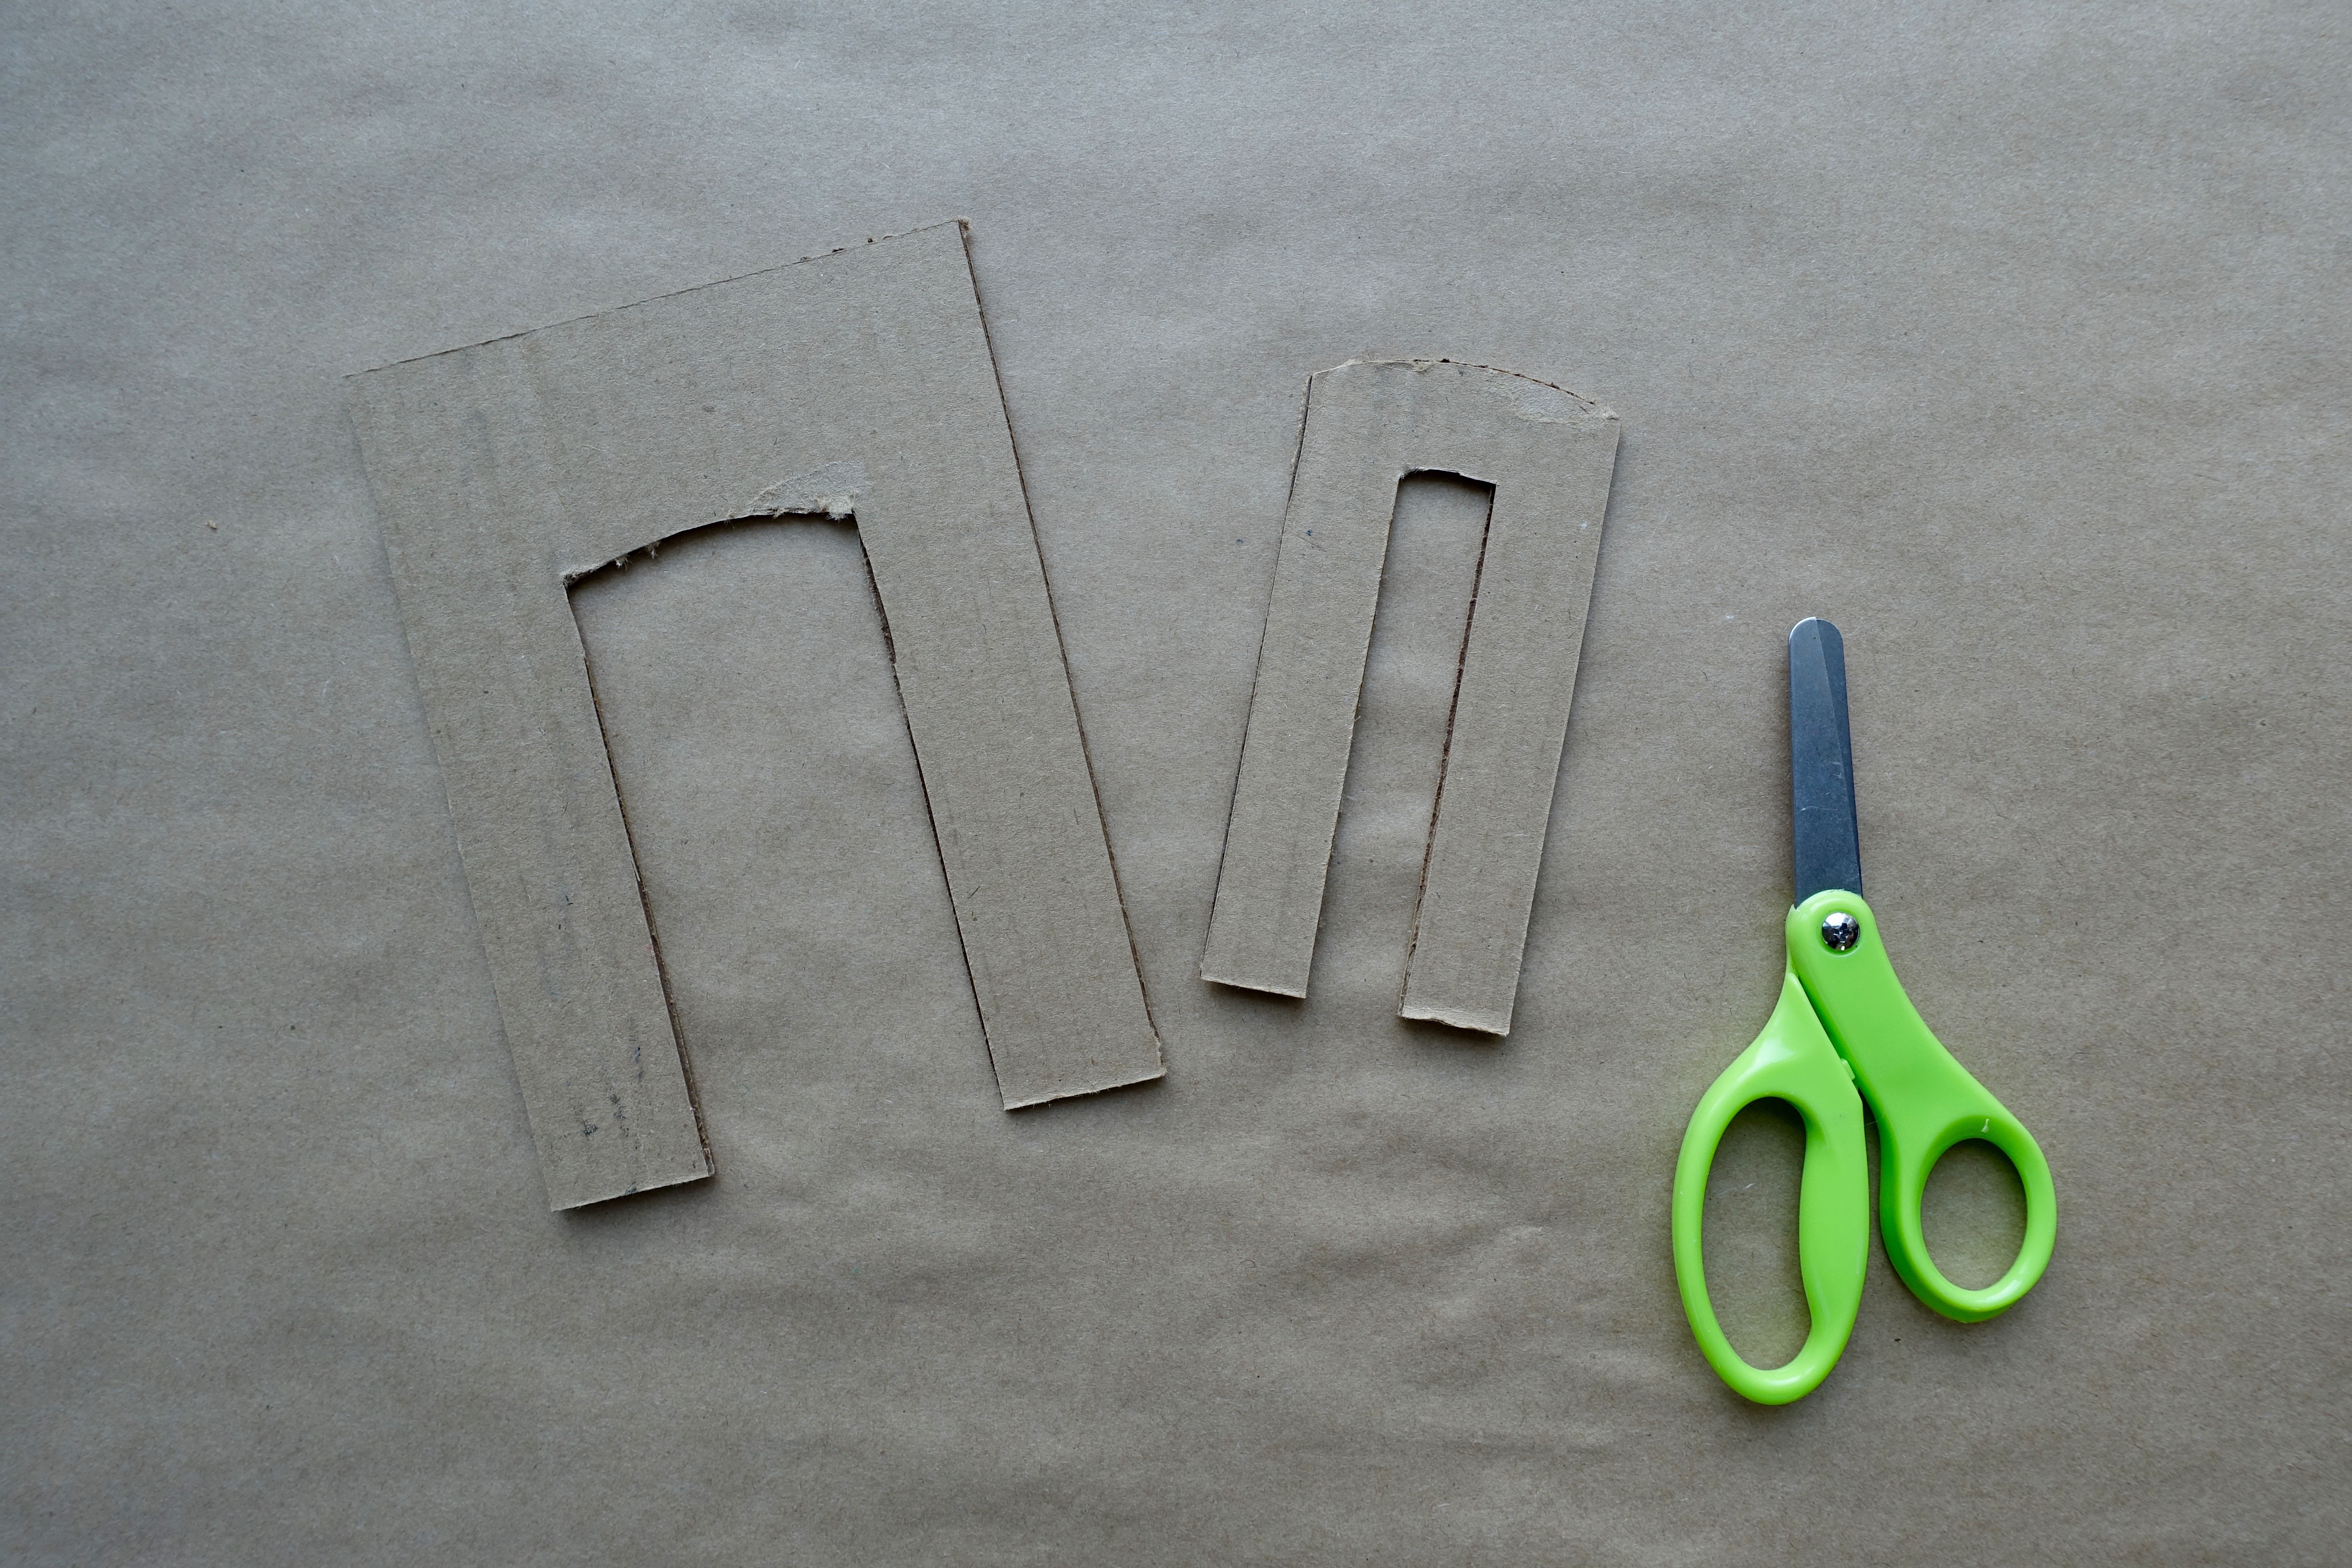
To create your snowman, you will need to make two pom poms of different sizes: one large pom pom for the body and one small pom pom for the head. If you don’t have a pom pom maker, you can create your own! Cut two “U” shapes from cardboard. We created a large one that was 4.5” (11.4 cm) in width and a small one that was 2” (5.1 cm) in width.
Step 3
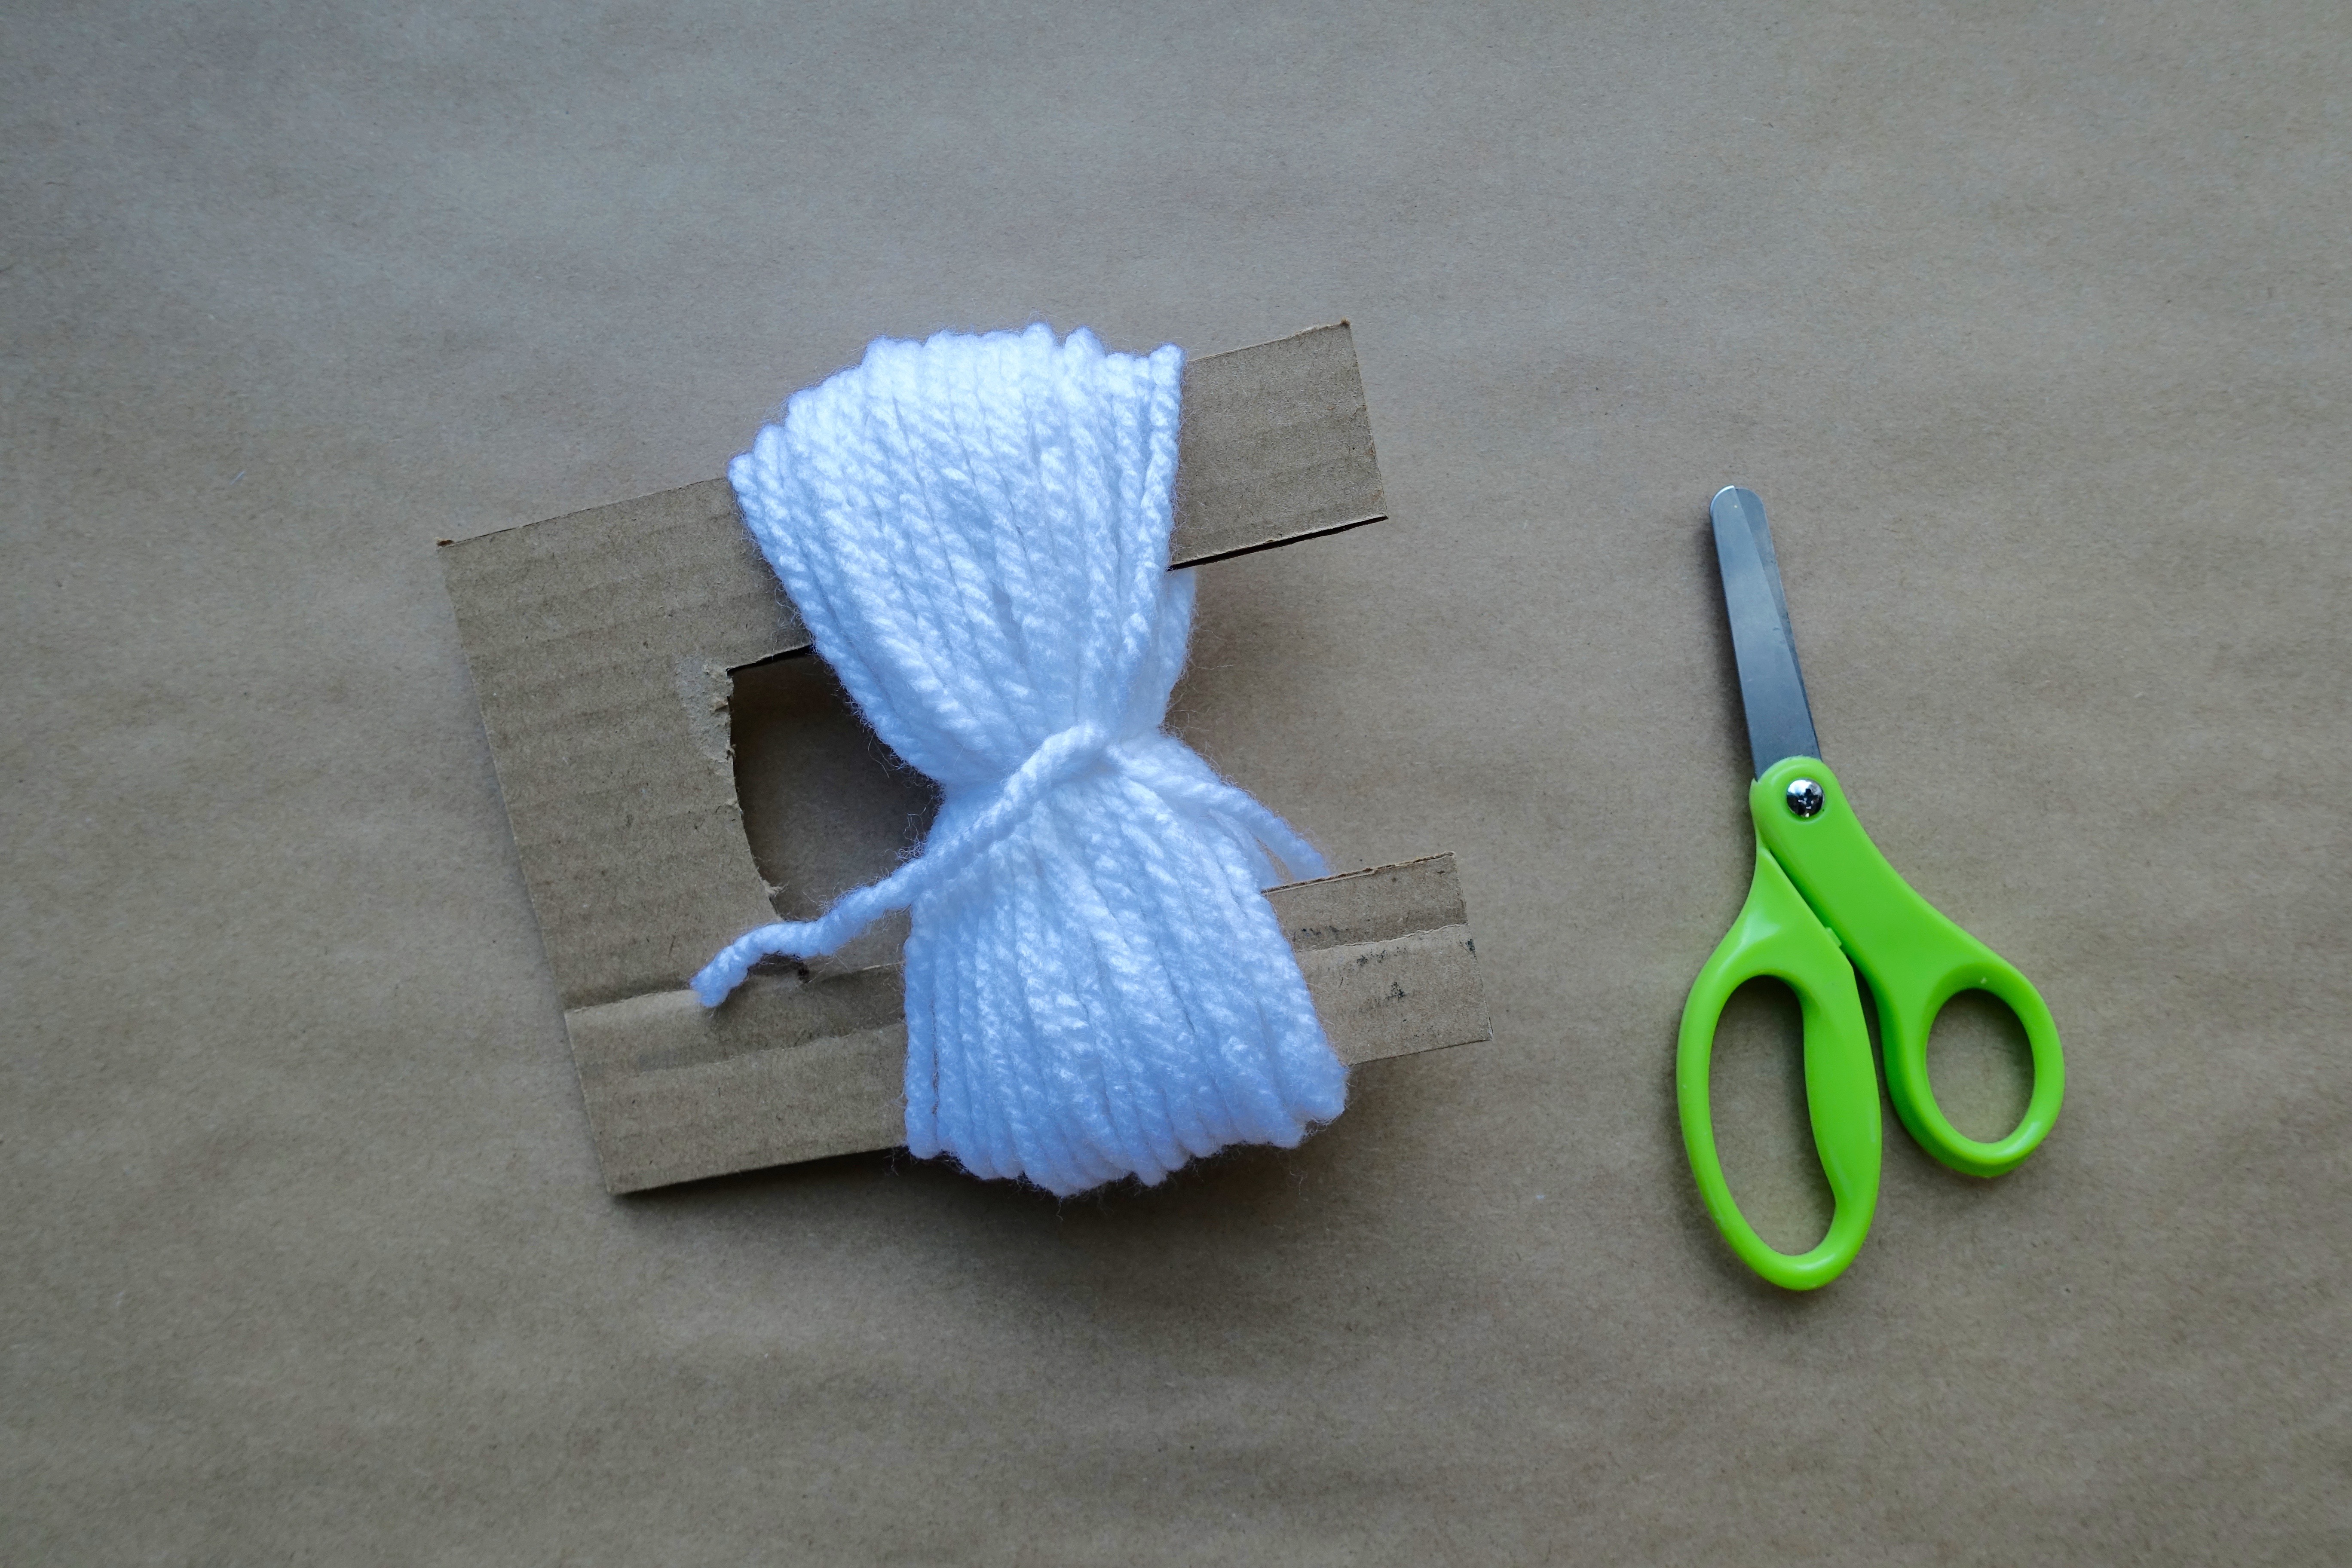
Wrap white yarn around the “arms” of your pom pom maker and make sure not to wrap too tightly. The more yarn you use, the thicker and fluffier your snowman will be! Take a piece of yarn and tie it in the center. Gently remove it from the pom pom maker. Do this with the small pom pom maker to create the head.
Step 4
Take scissors and cut the loops to create your pom poms. If needed, you can trim each pom pom to create a nice rounded shape.

Step 5
Attach the two pom poms together with a long piece of string.

Step 6
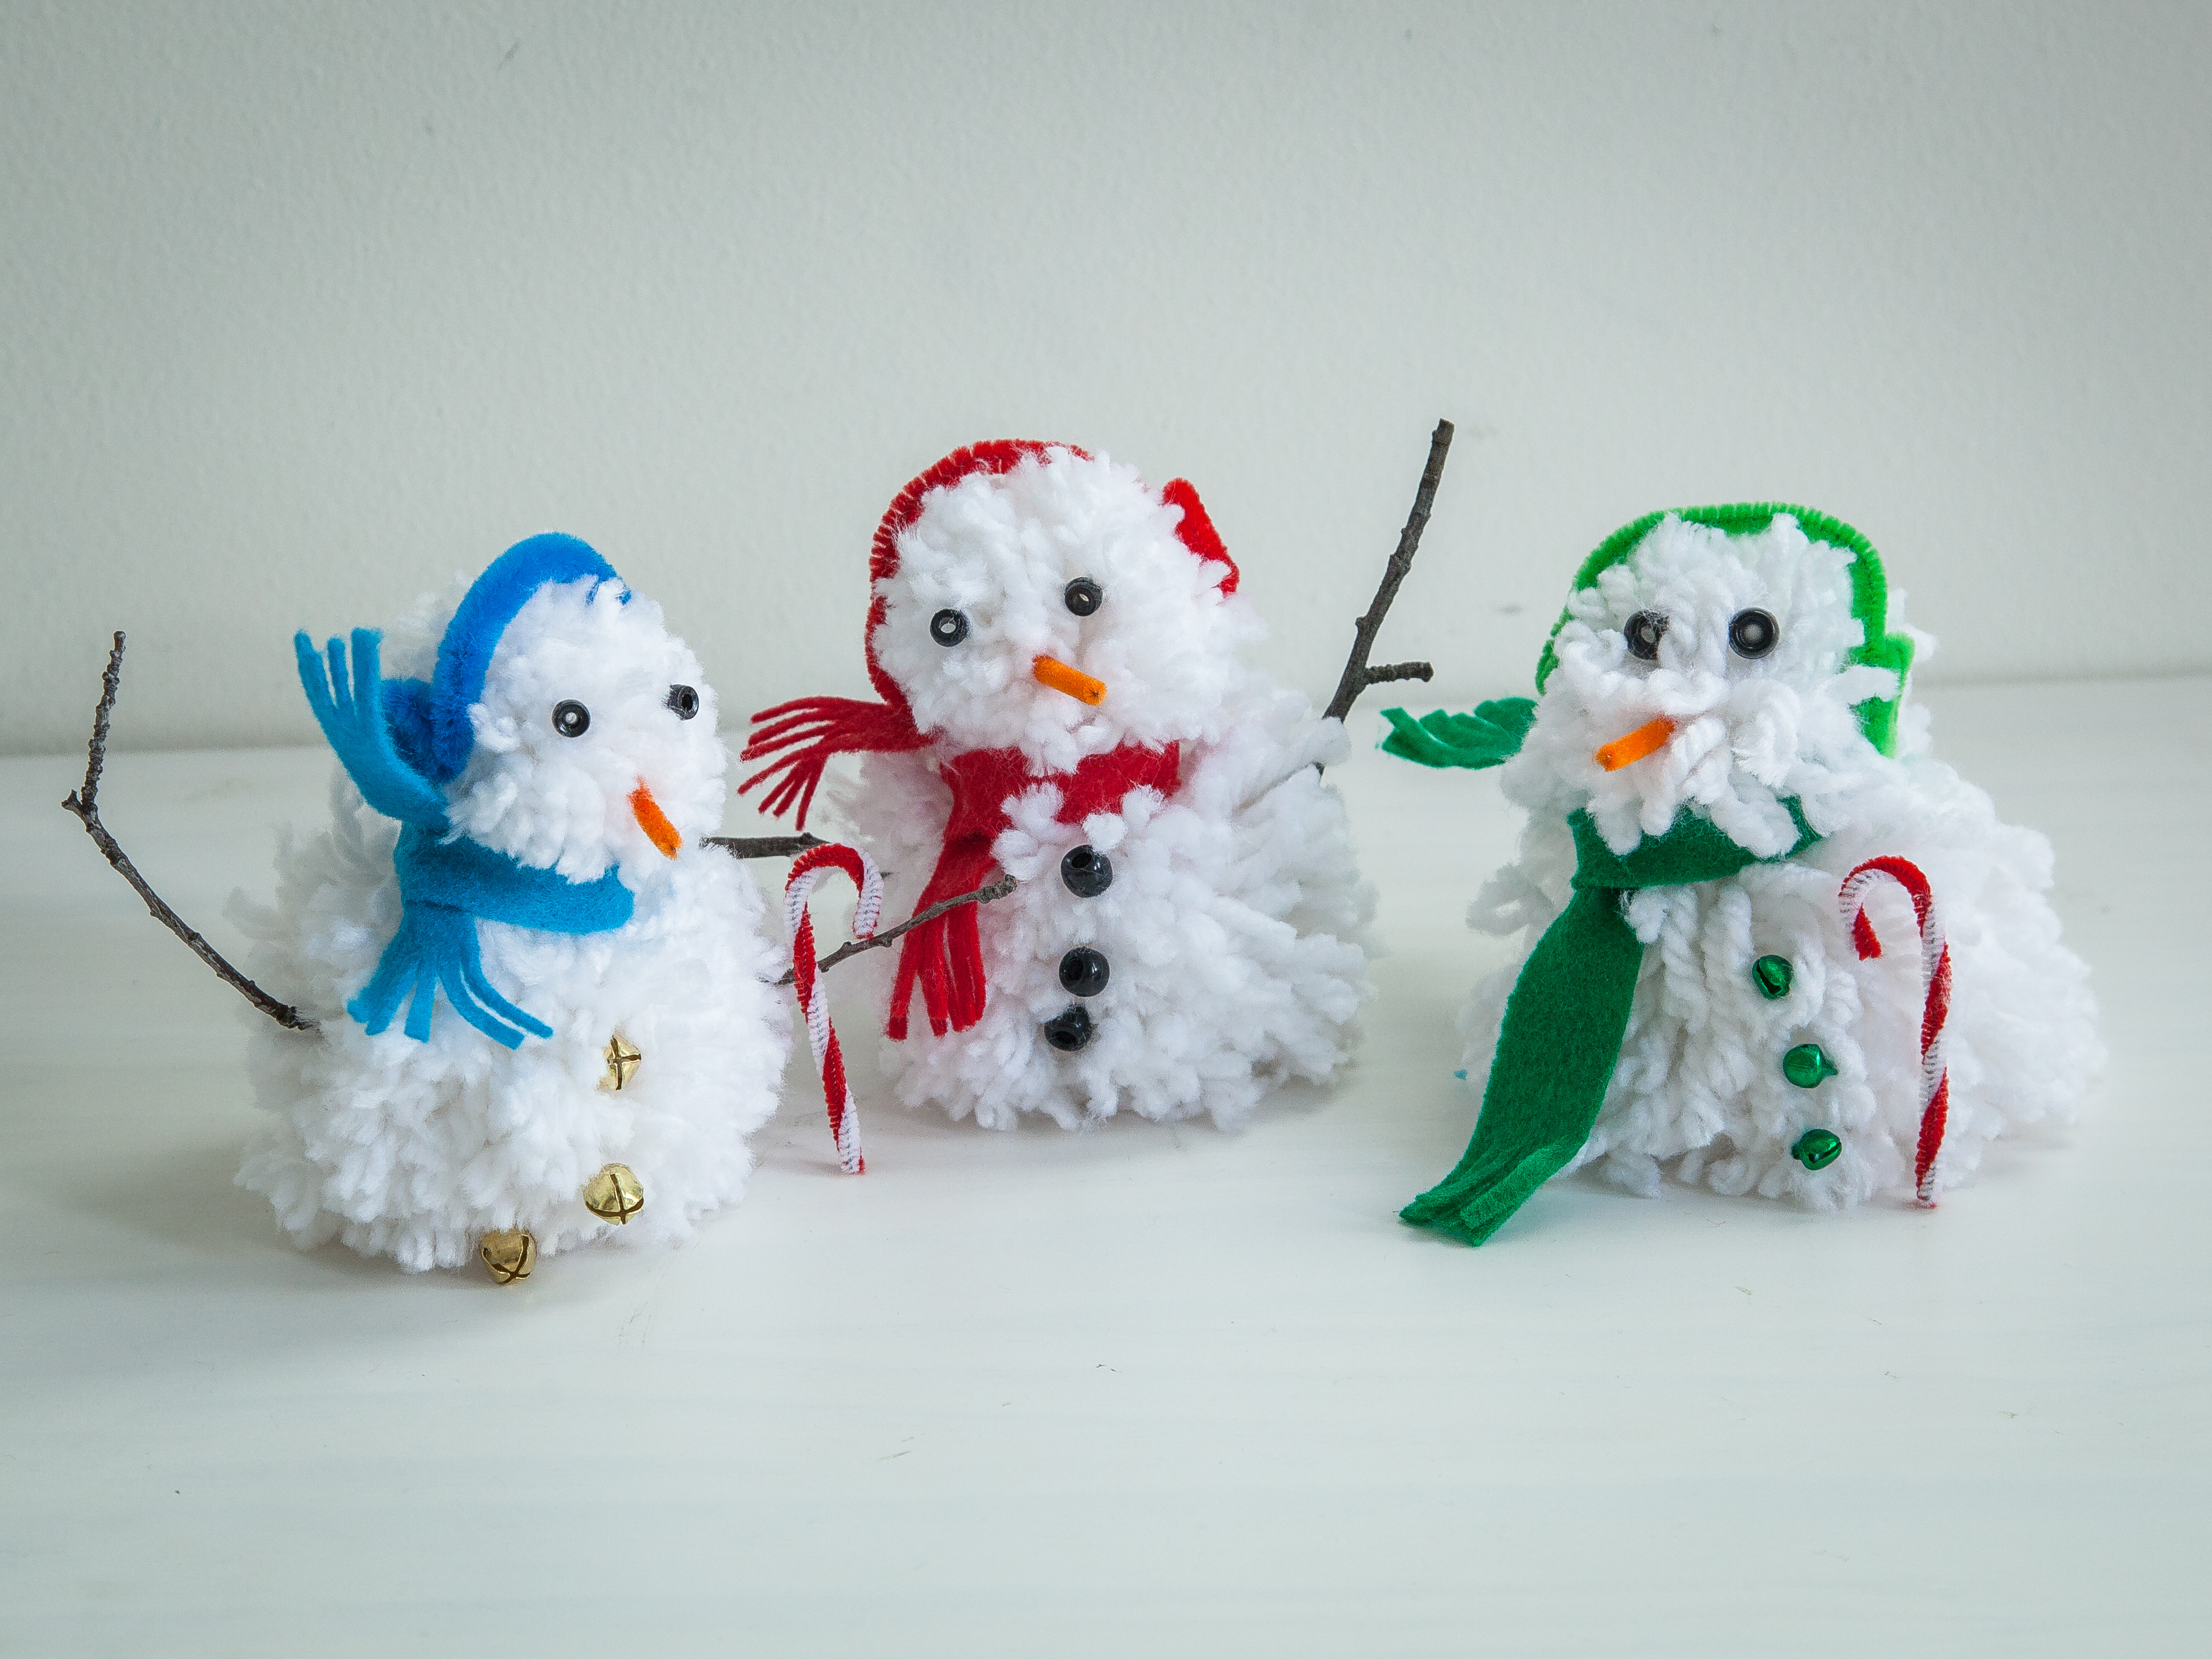
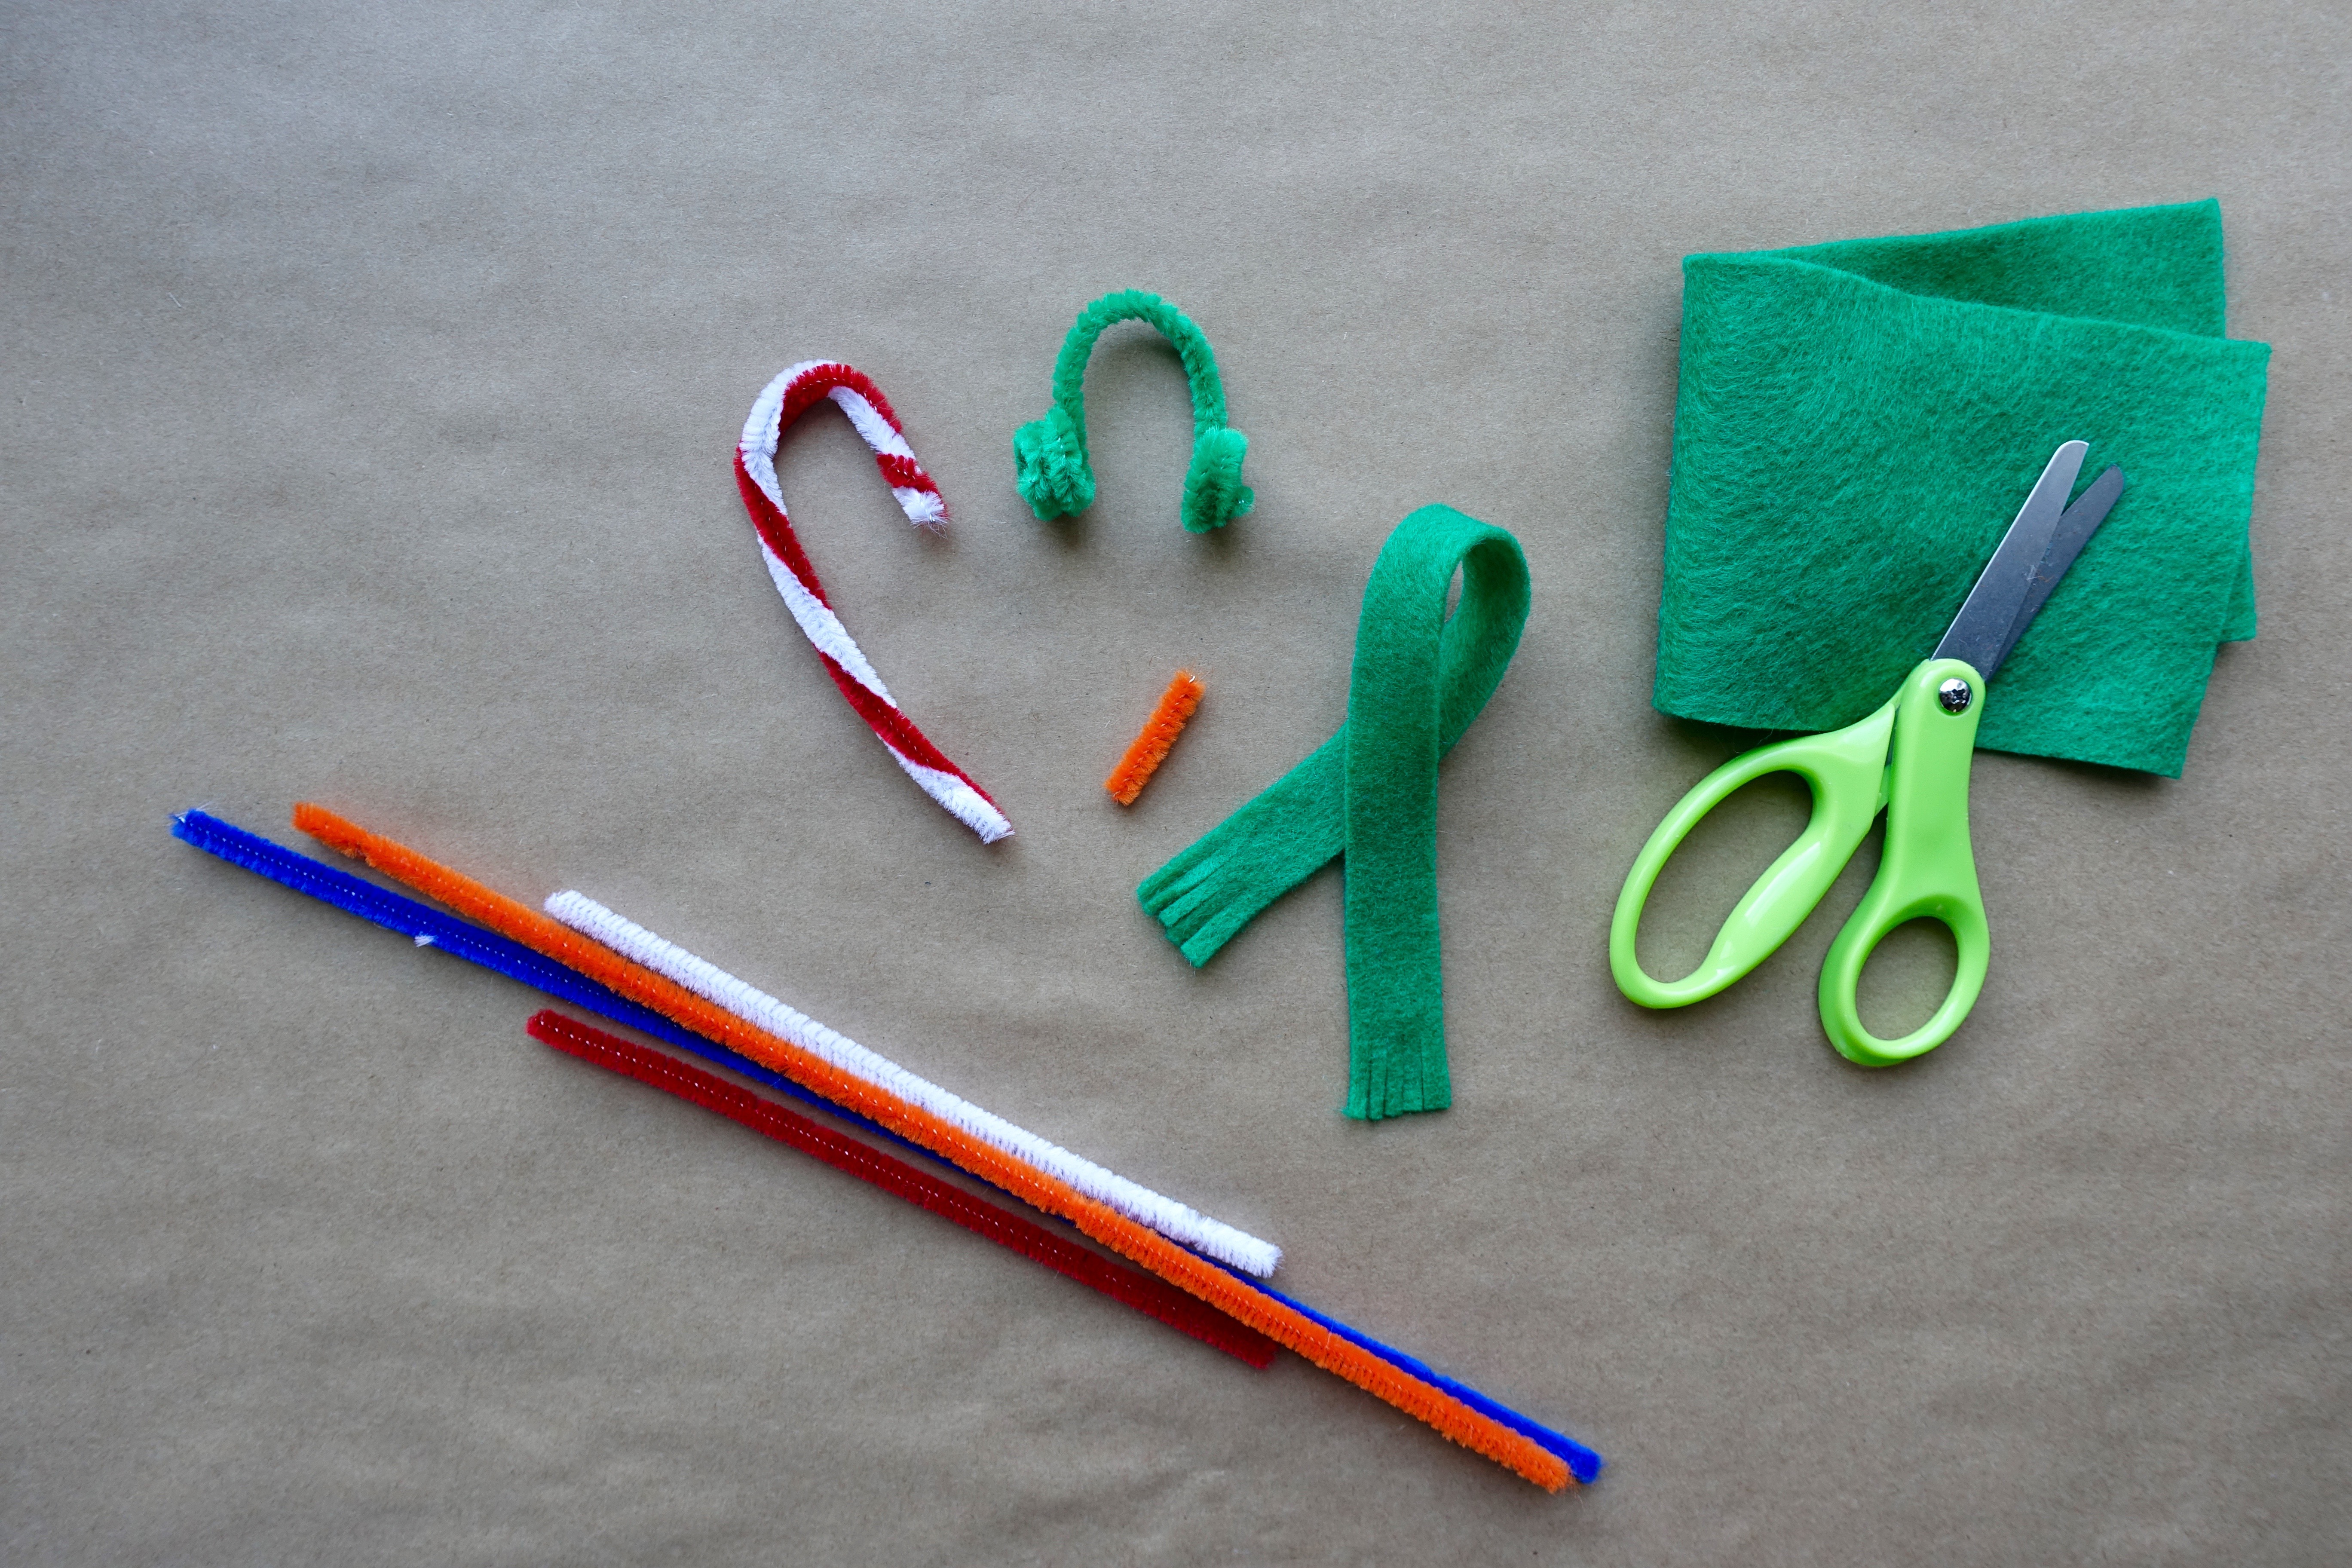
Create accessories for your snowman with pipe cleaners and felt. Twist together a set of earmuffs with a pipe cleaner. Cut out a matching scarf from felt to complete the look. Or even try making a candy cane with red and white pipe cleaners. And don’t forget to use an orange pipe cleaner for the mini carrot nose.
Done!
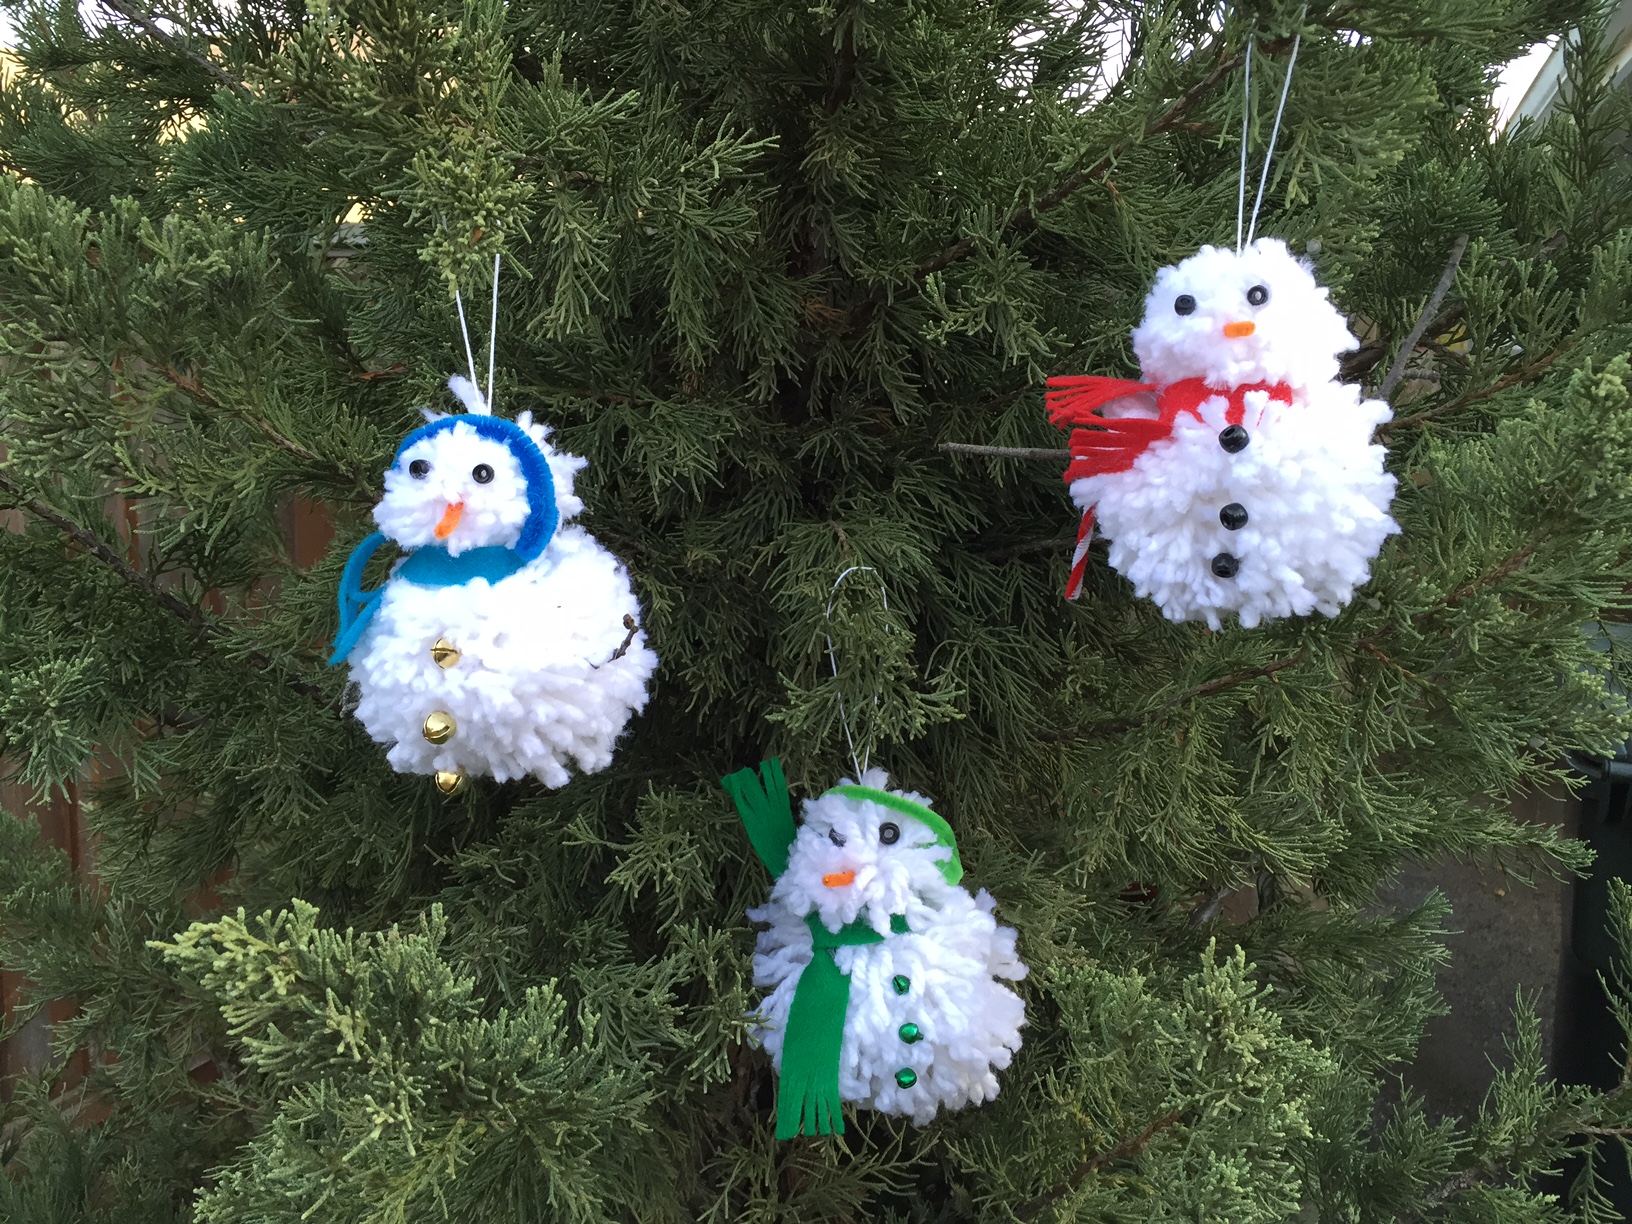
Use glue to attach your newly created accessories to your snowman. Add little twigs, beads, or bells for extra details. Tie an extra piece of yarn to turn them into ornaments and hang them on the tree.