Step-by-step tutorial
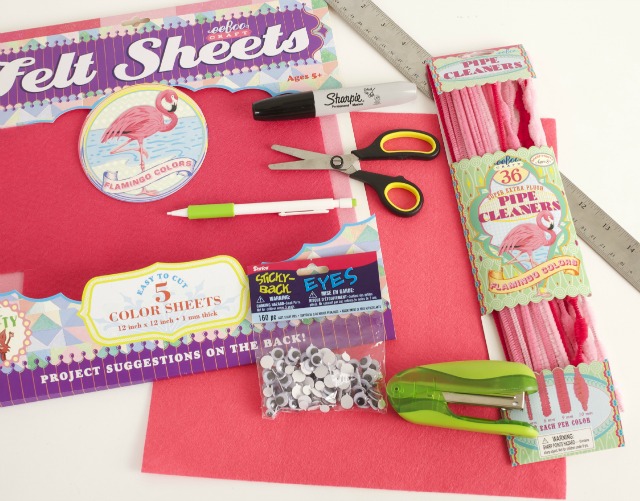
Step 1
Gather your materials.

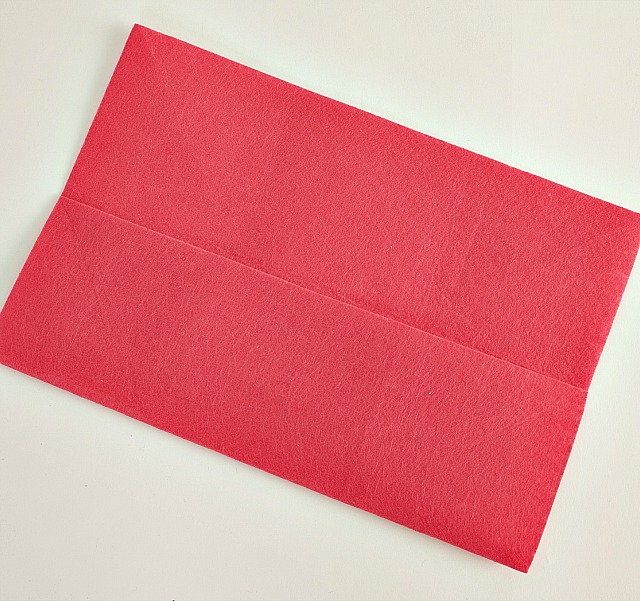
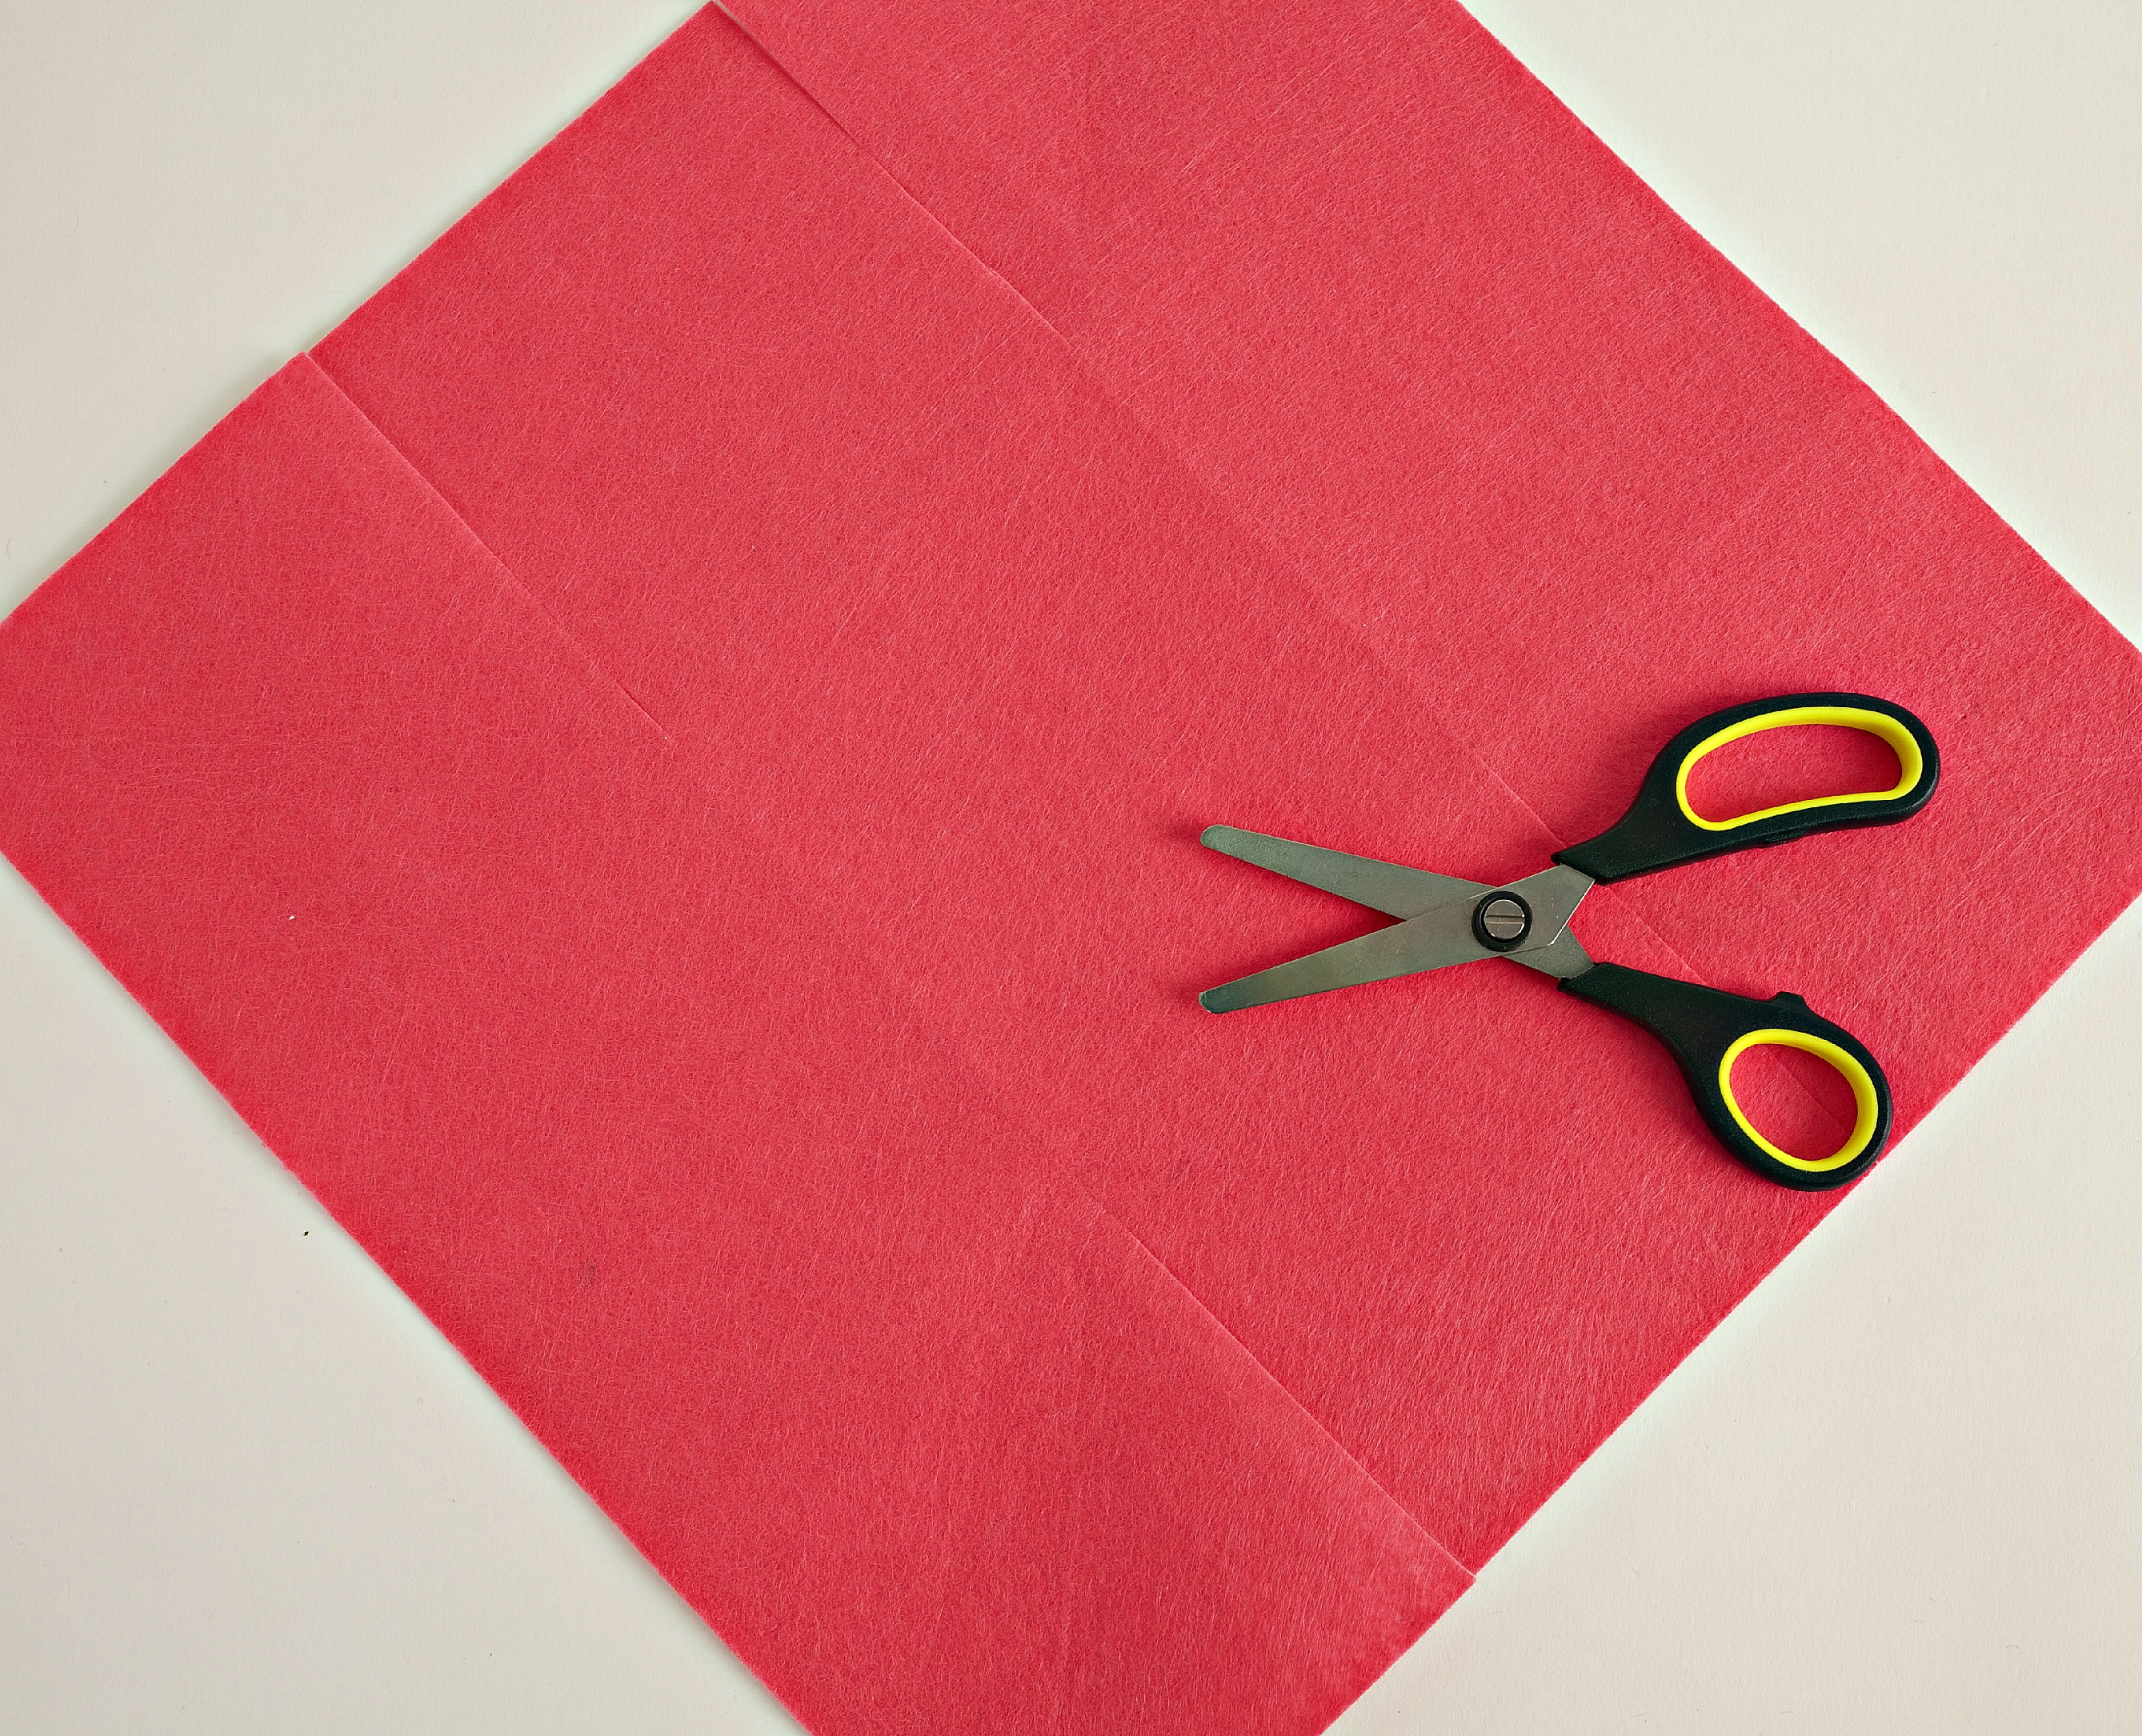
Step 2
Take your felt sheet (ours measured 12 in. x 12 in.), and fold it in thirds to create a 4 in. x 12 in. long rectangle. Press firmly along the creases. Open the sheet and fold it into thirds the other way. Press firmly along these creases as well.
Step 3
Following the crease lines, trim two 4-inch slits on opposite ends. If you need help following the crease lines, use a pencil to lightly trace the lines so you can cut more easily.
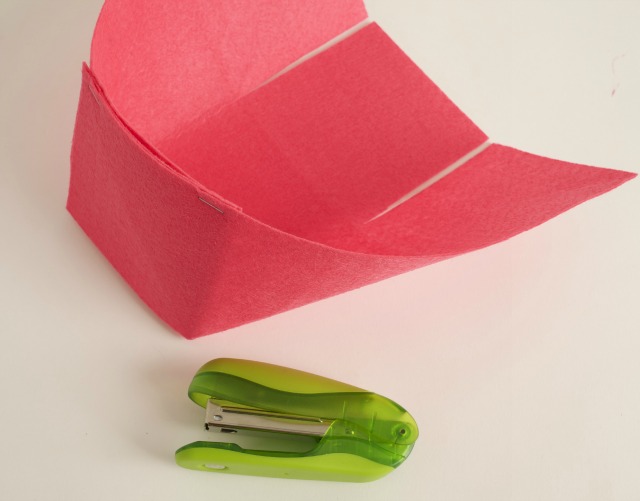
Step 4
The felt sheet should now have three square flaps on opposite ends. Align the three flaps on one end together to create three sides of the basket. Staple the felt together neatly along the top. Tuck the loose bottom flap in underneath. Adult supervision may be required!
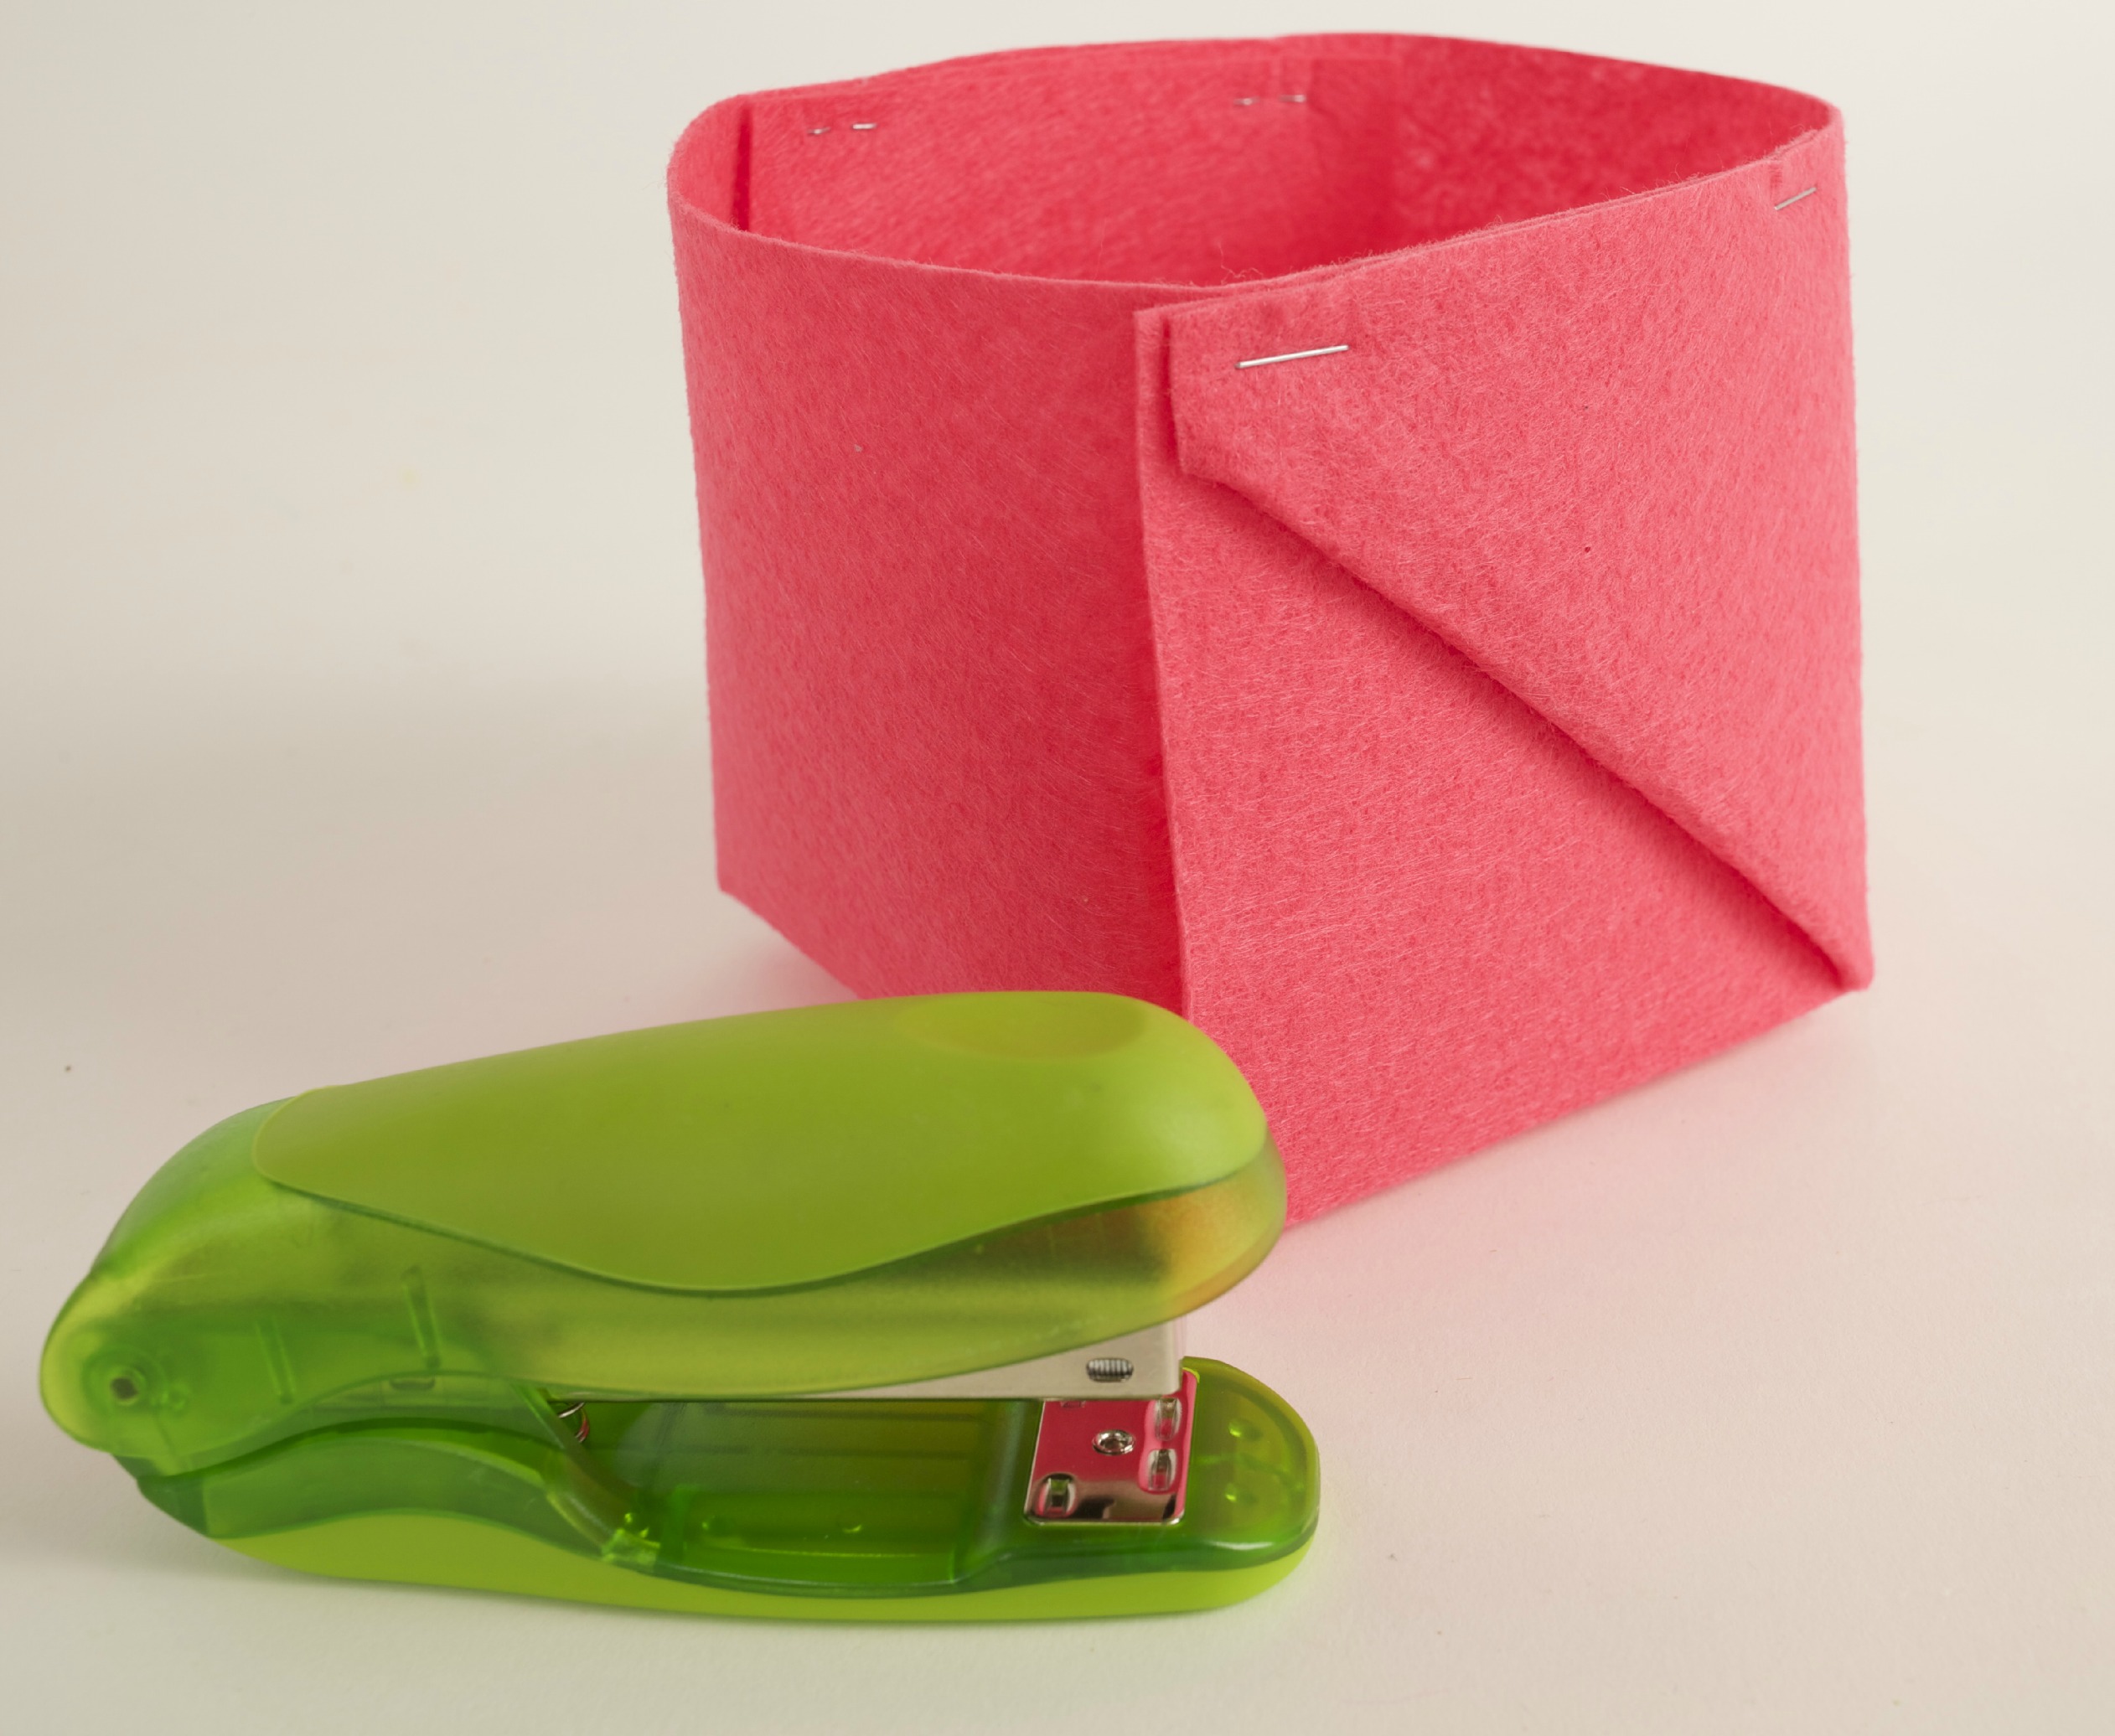
Step 5
Do the same for the opposite end. You should now have the basic bottom of the basket.
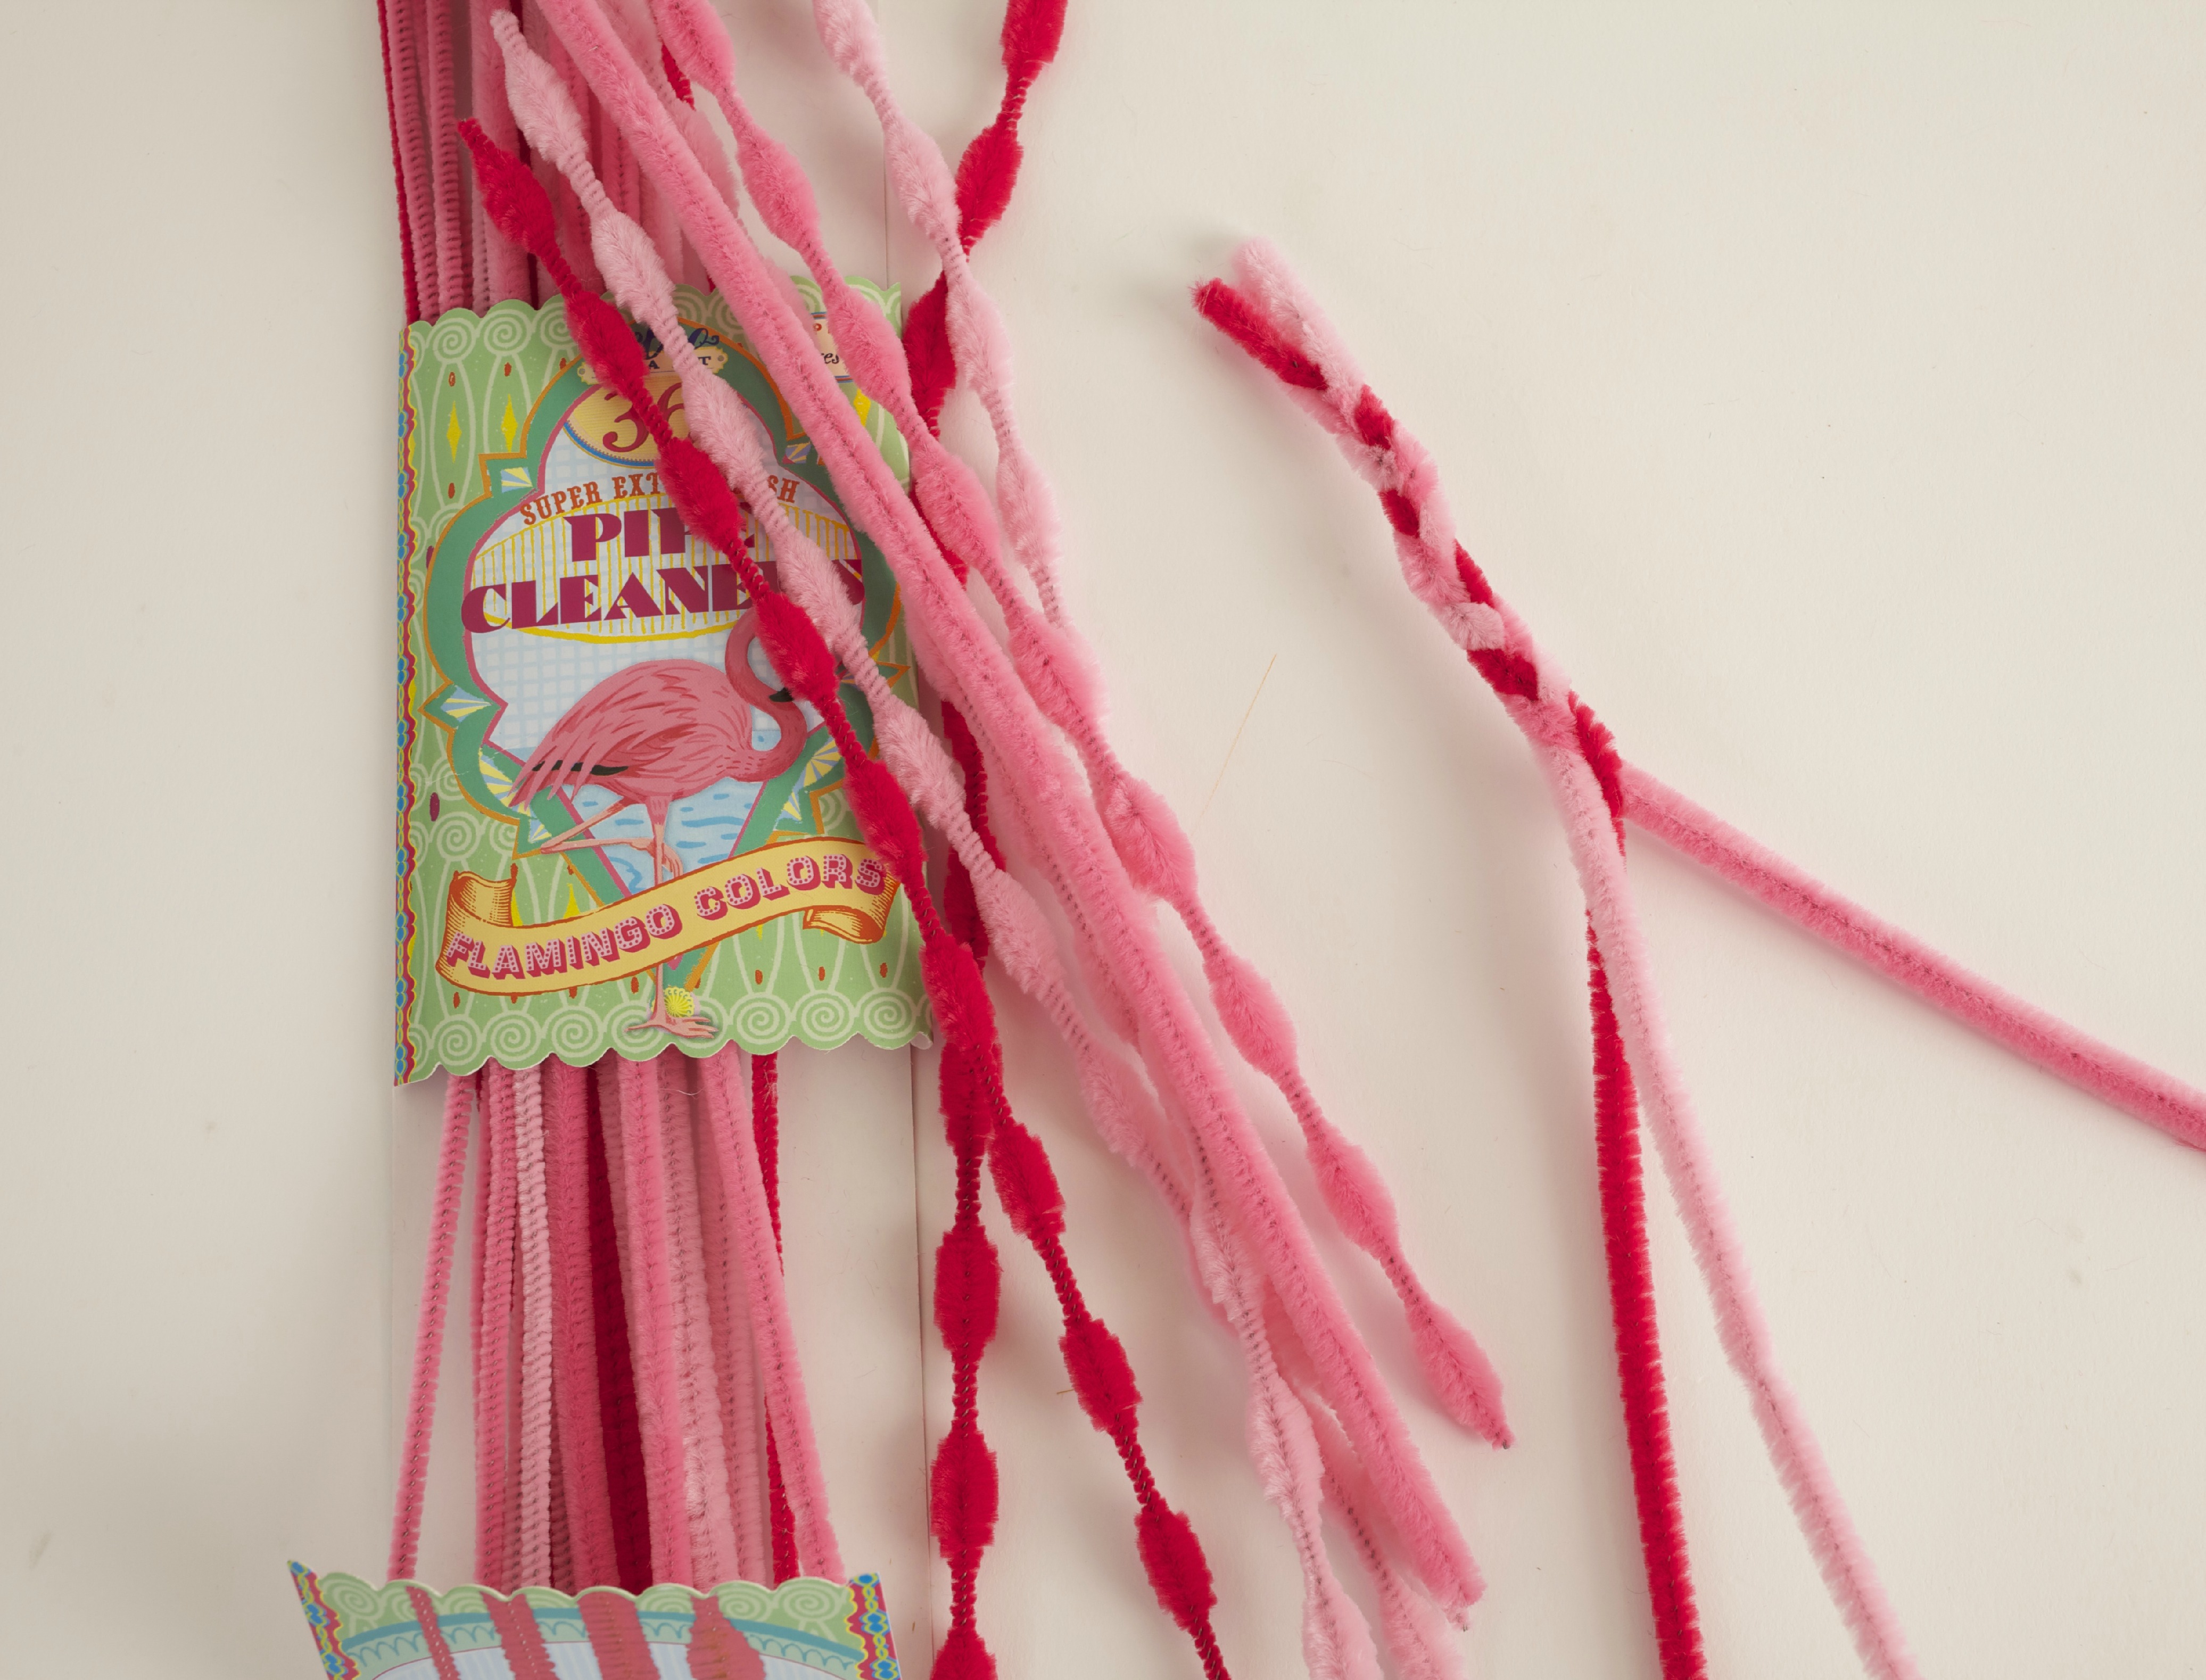
Step 6
To make the handle, pick three pipe cleaners of different colors. Braid these together.
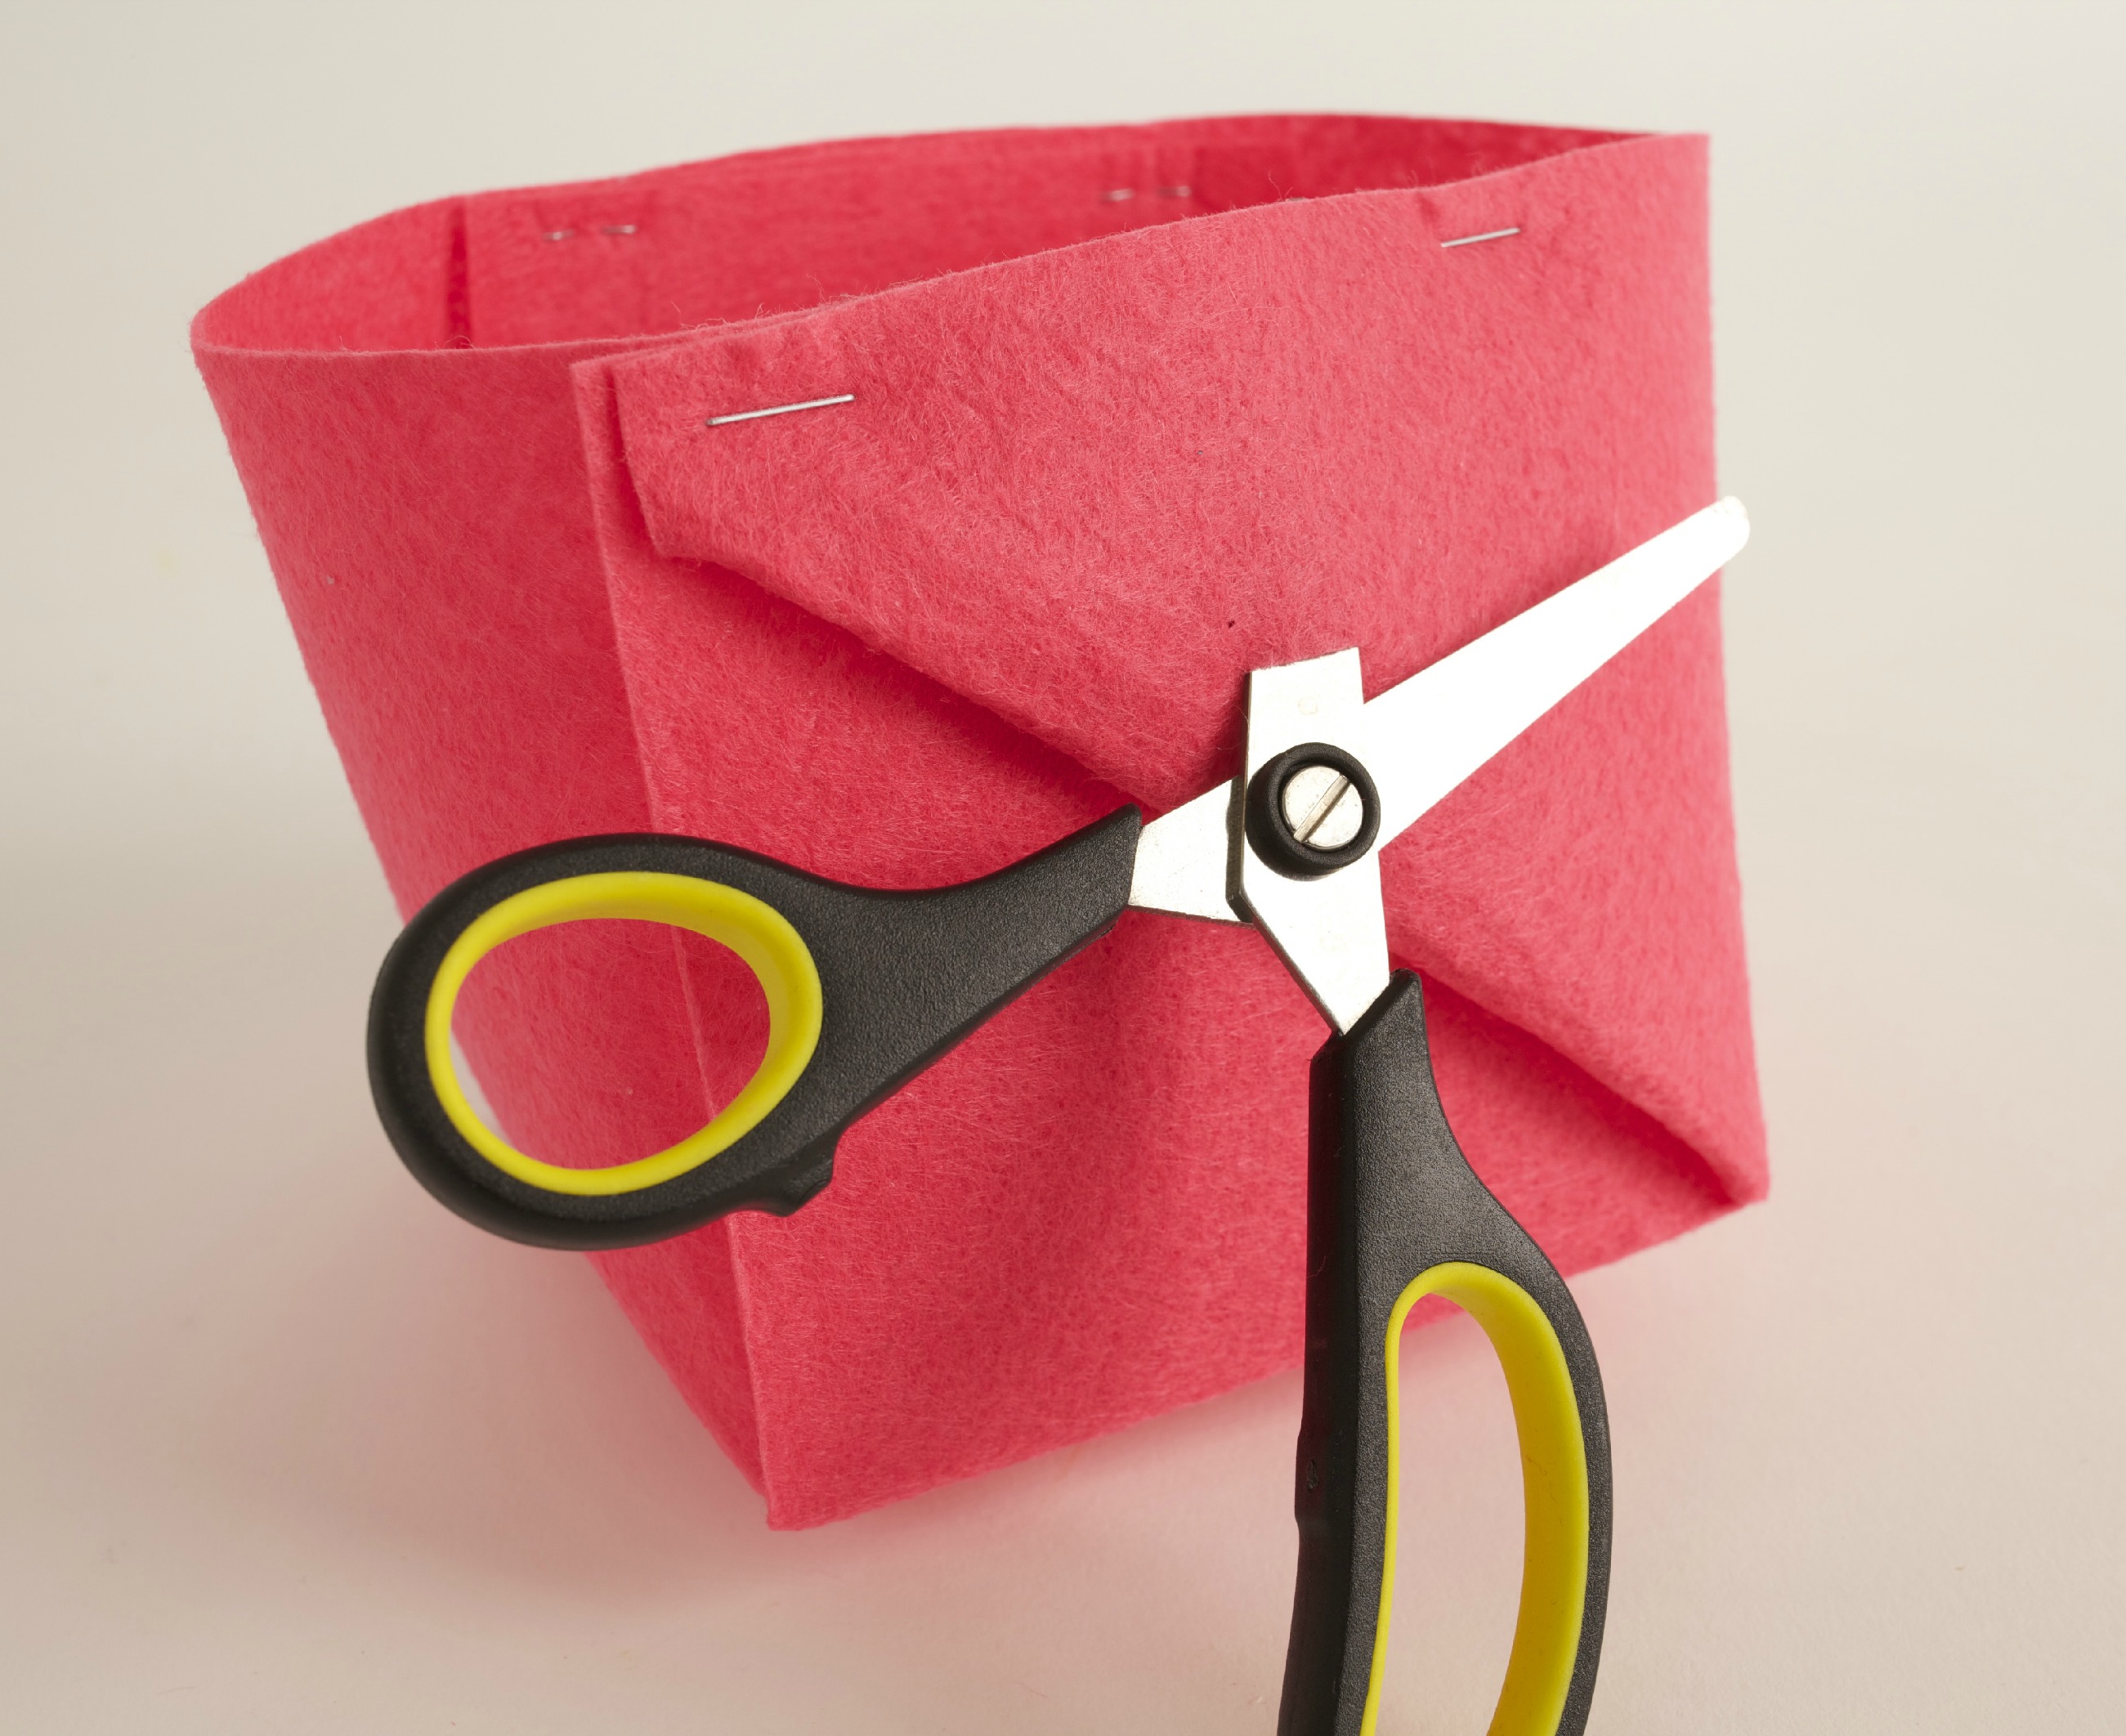
Step 7
To attach the handle to the basket, pinch together the folded flap on the side of the basket. Using scissors, make a small quarter-inch long cut about 1-inch below the edge of the basket. Do the same for the opposite end.
Step 8
Take your pipe cleaner handle and insert one end into the hole and fold up the ends on the inside to secure it. Do the same for the opposite end.
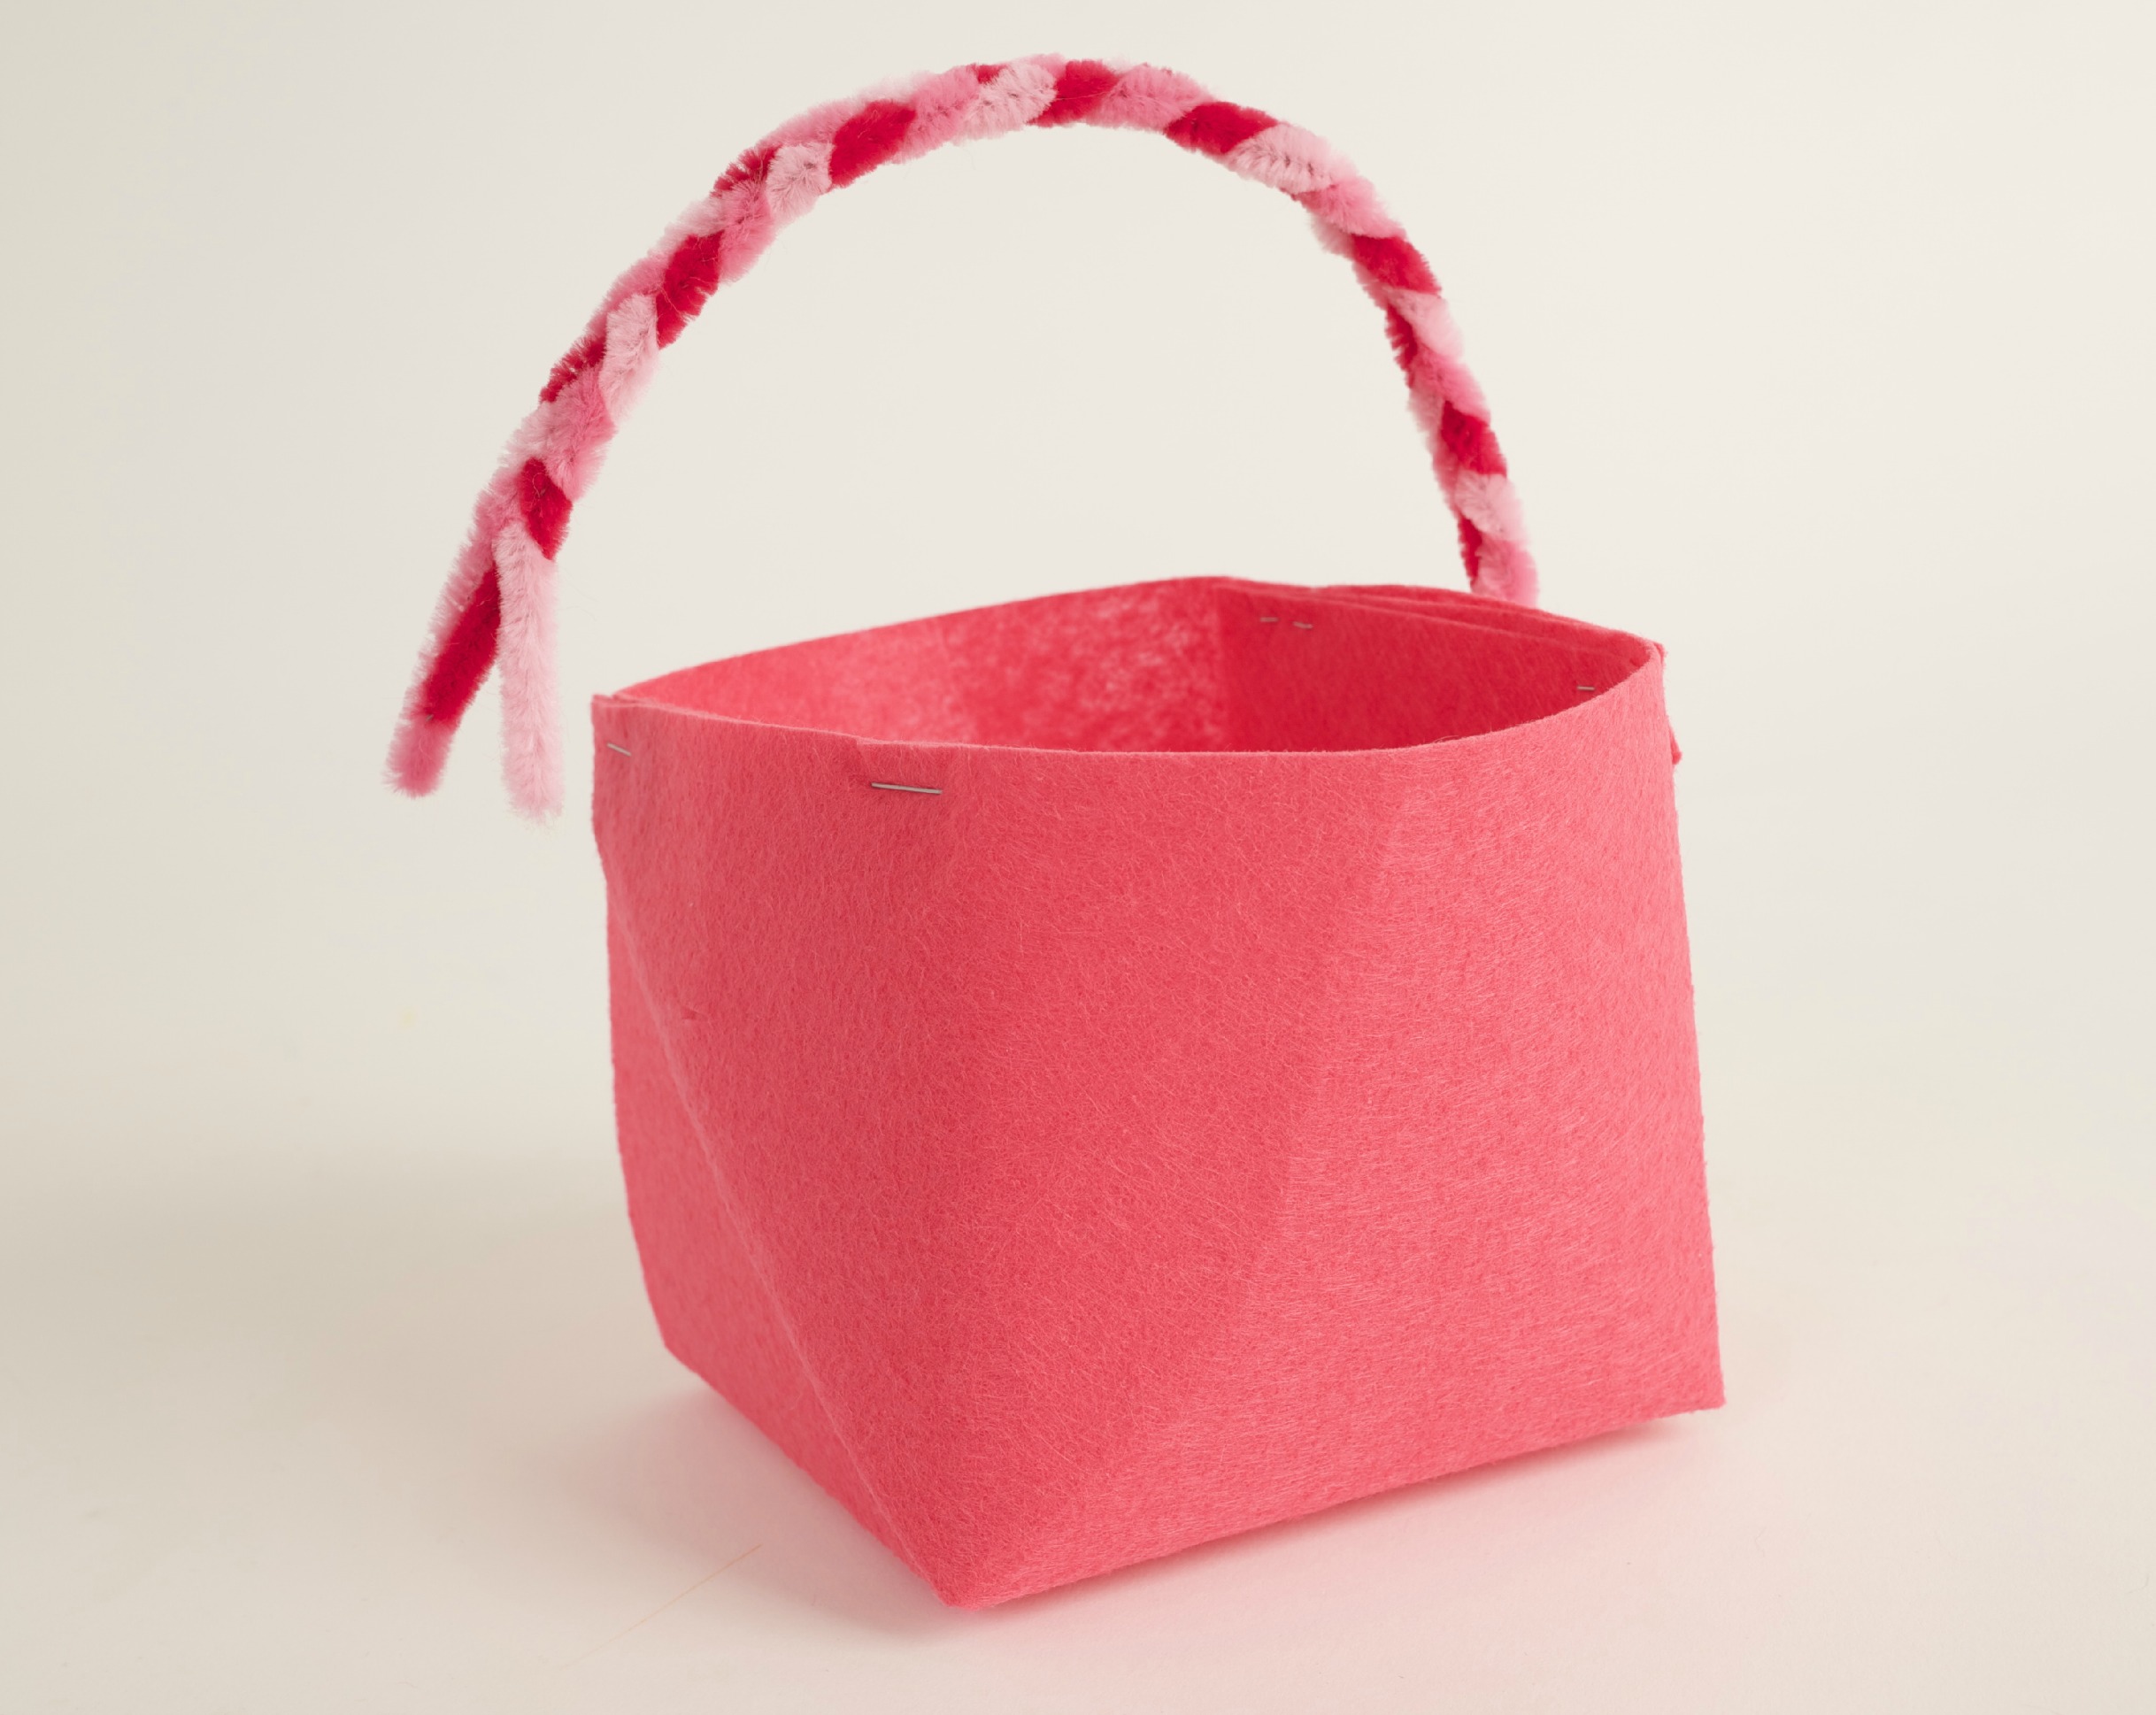
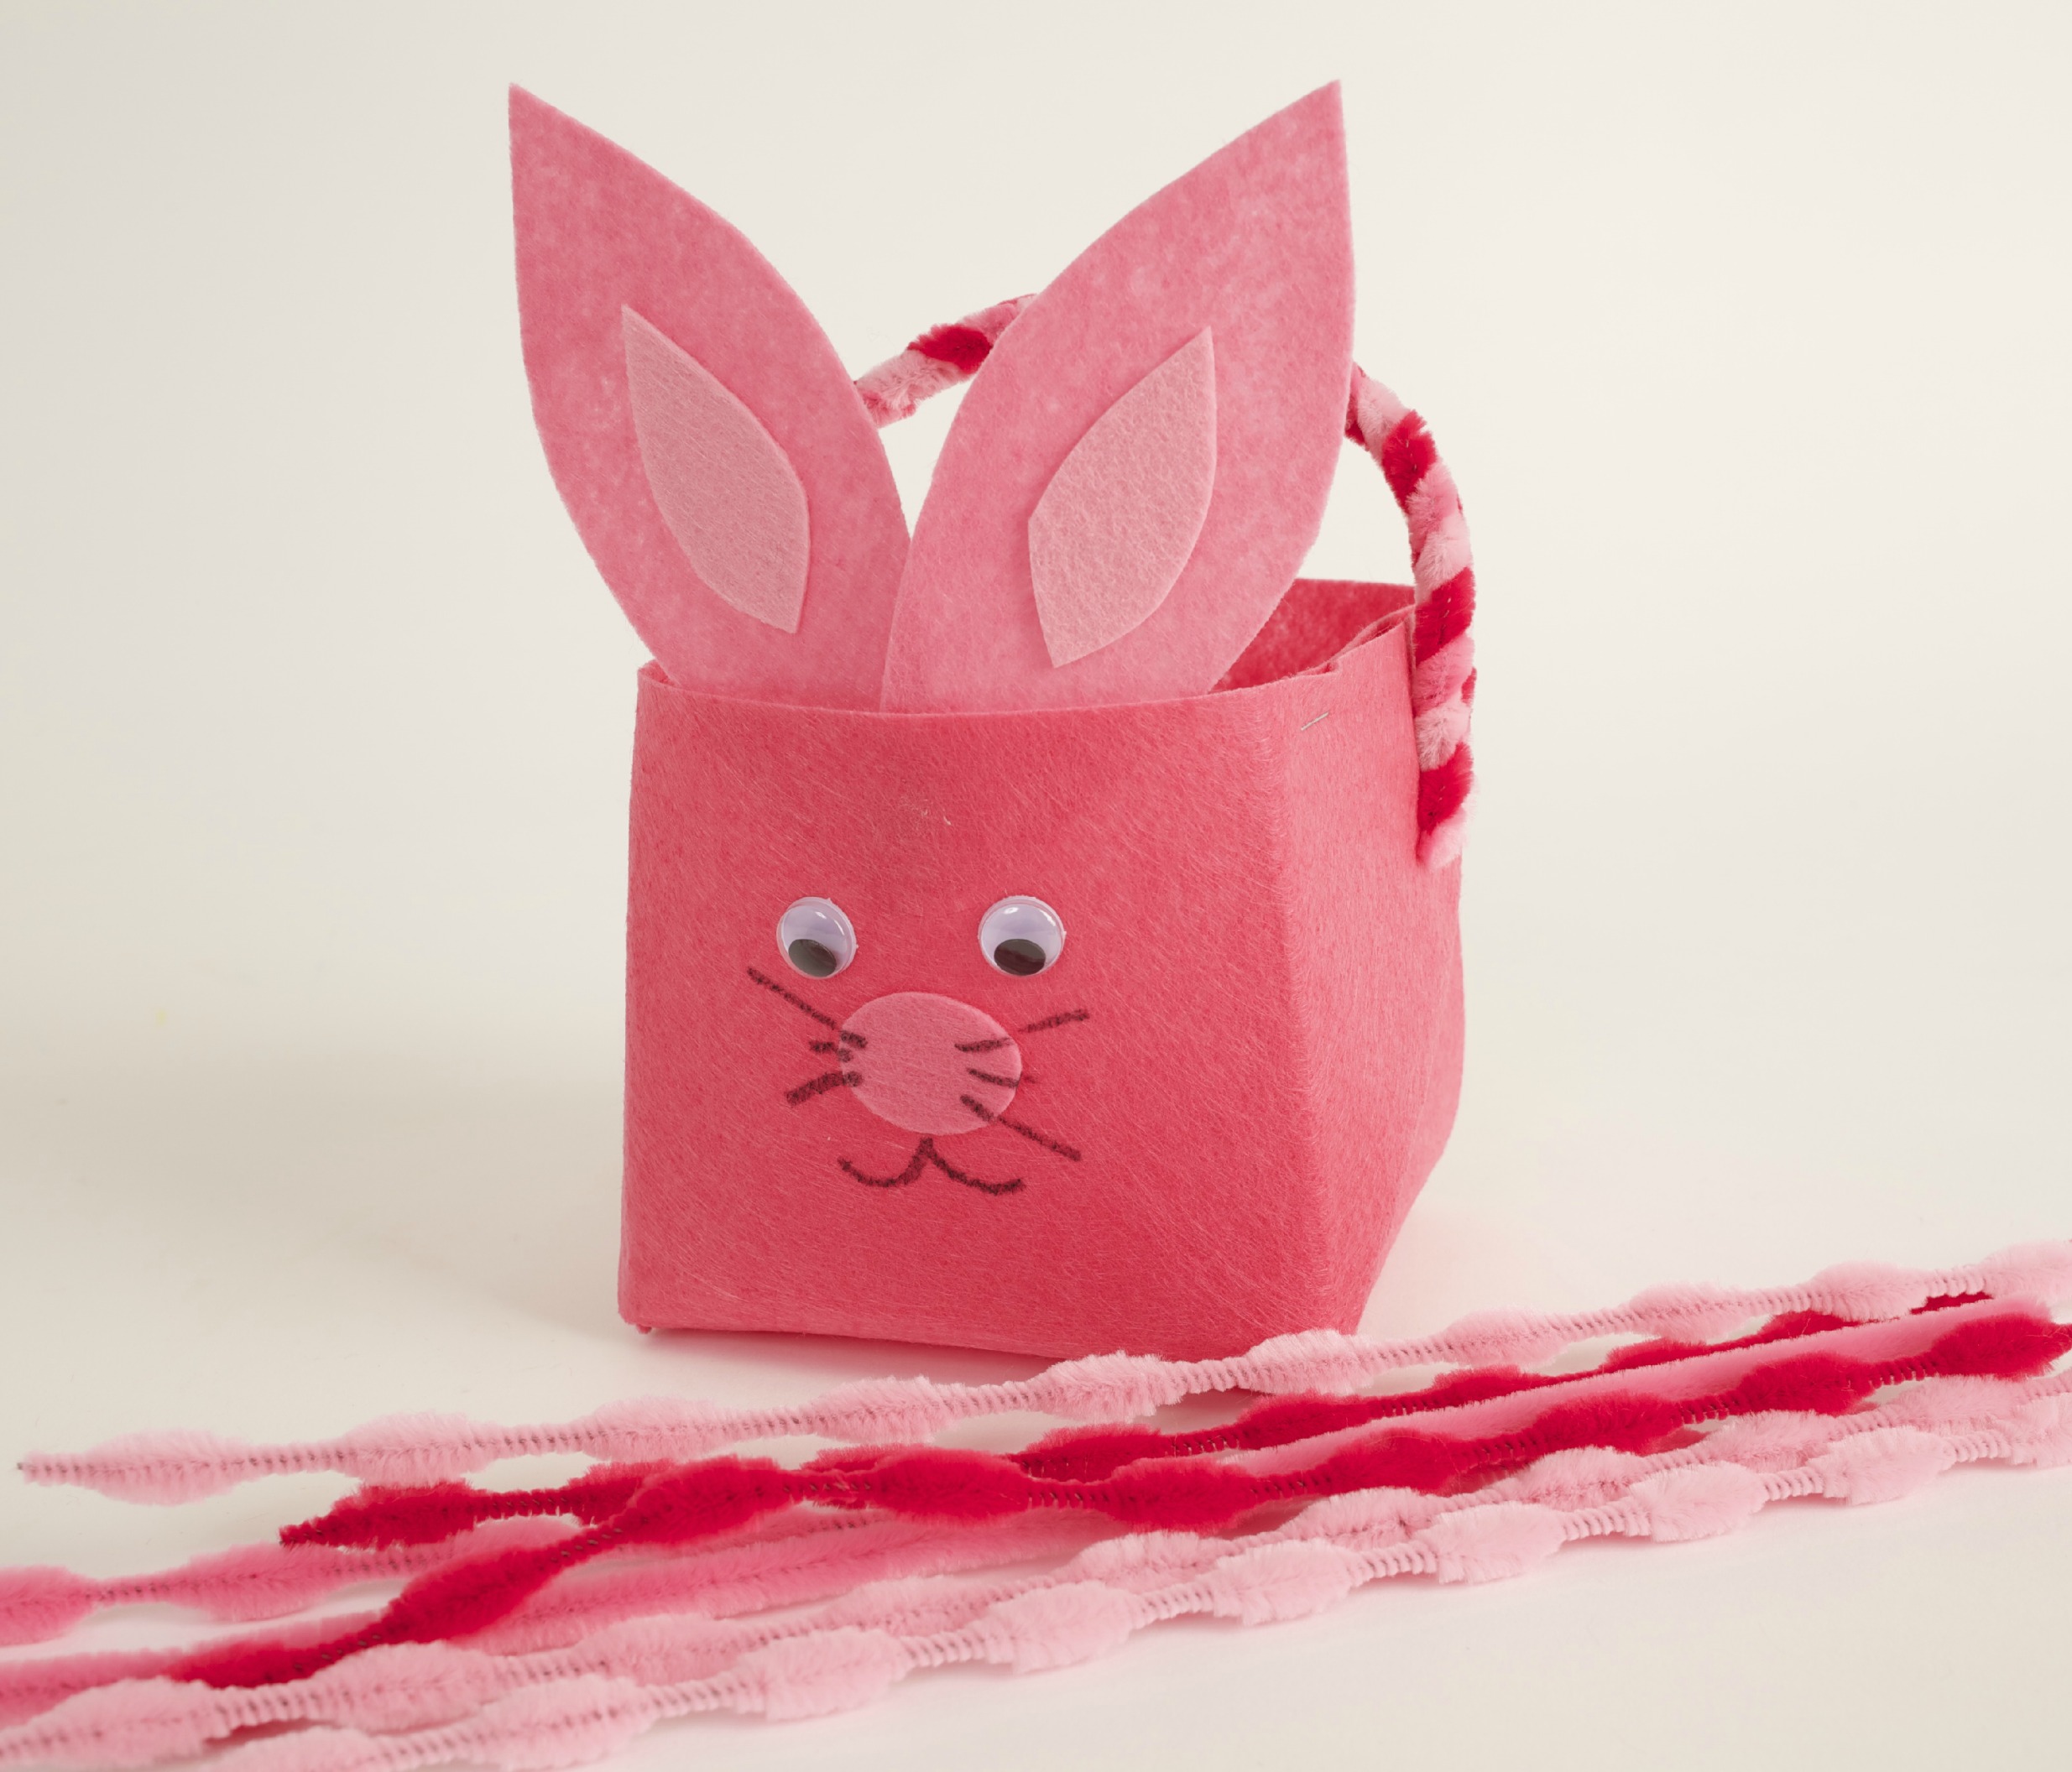
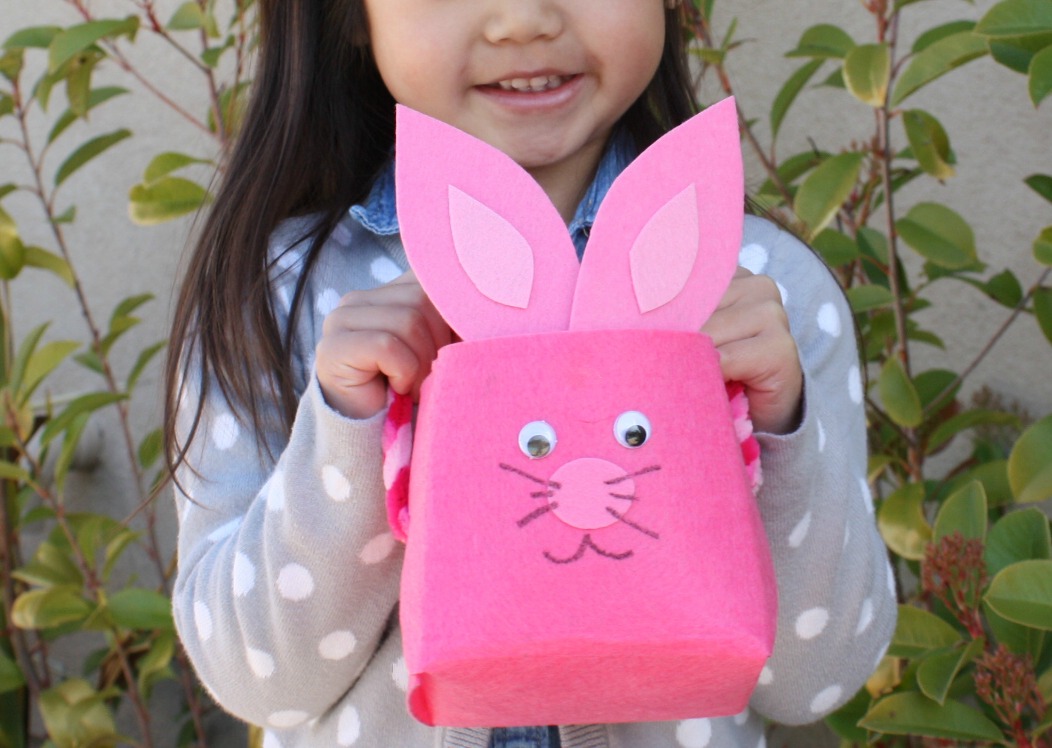
Final result!
You now have your basket! Use extra felt or pipe cleaners to decorate your new basket. Try adding ears, a nose, and a bunny tail.