Step-by-step tutorial
Step 1
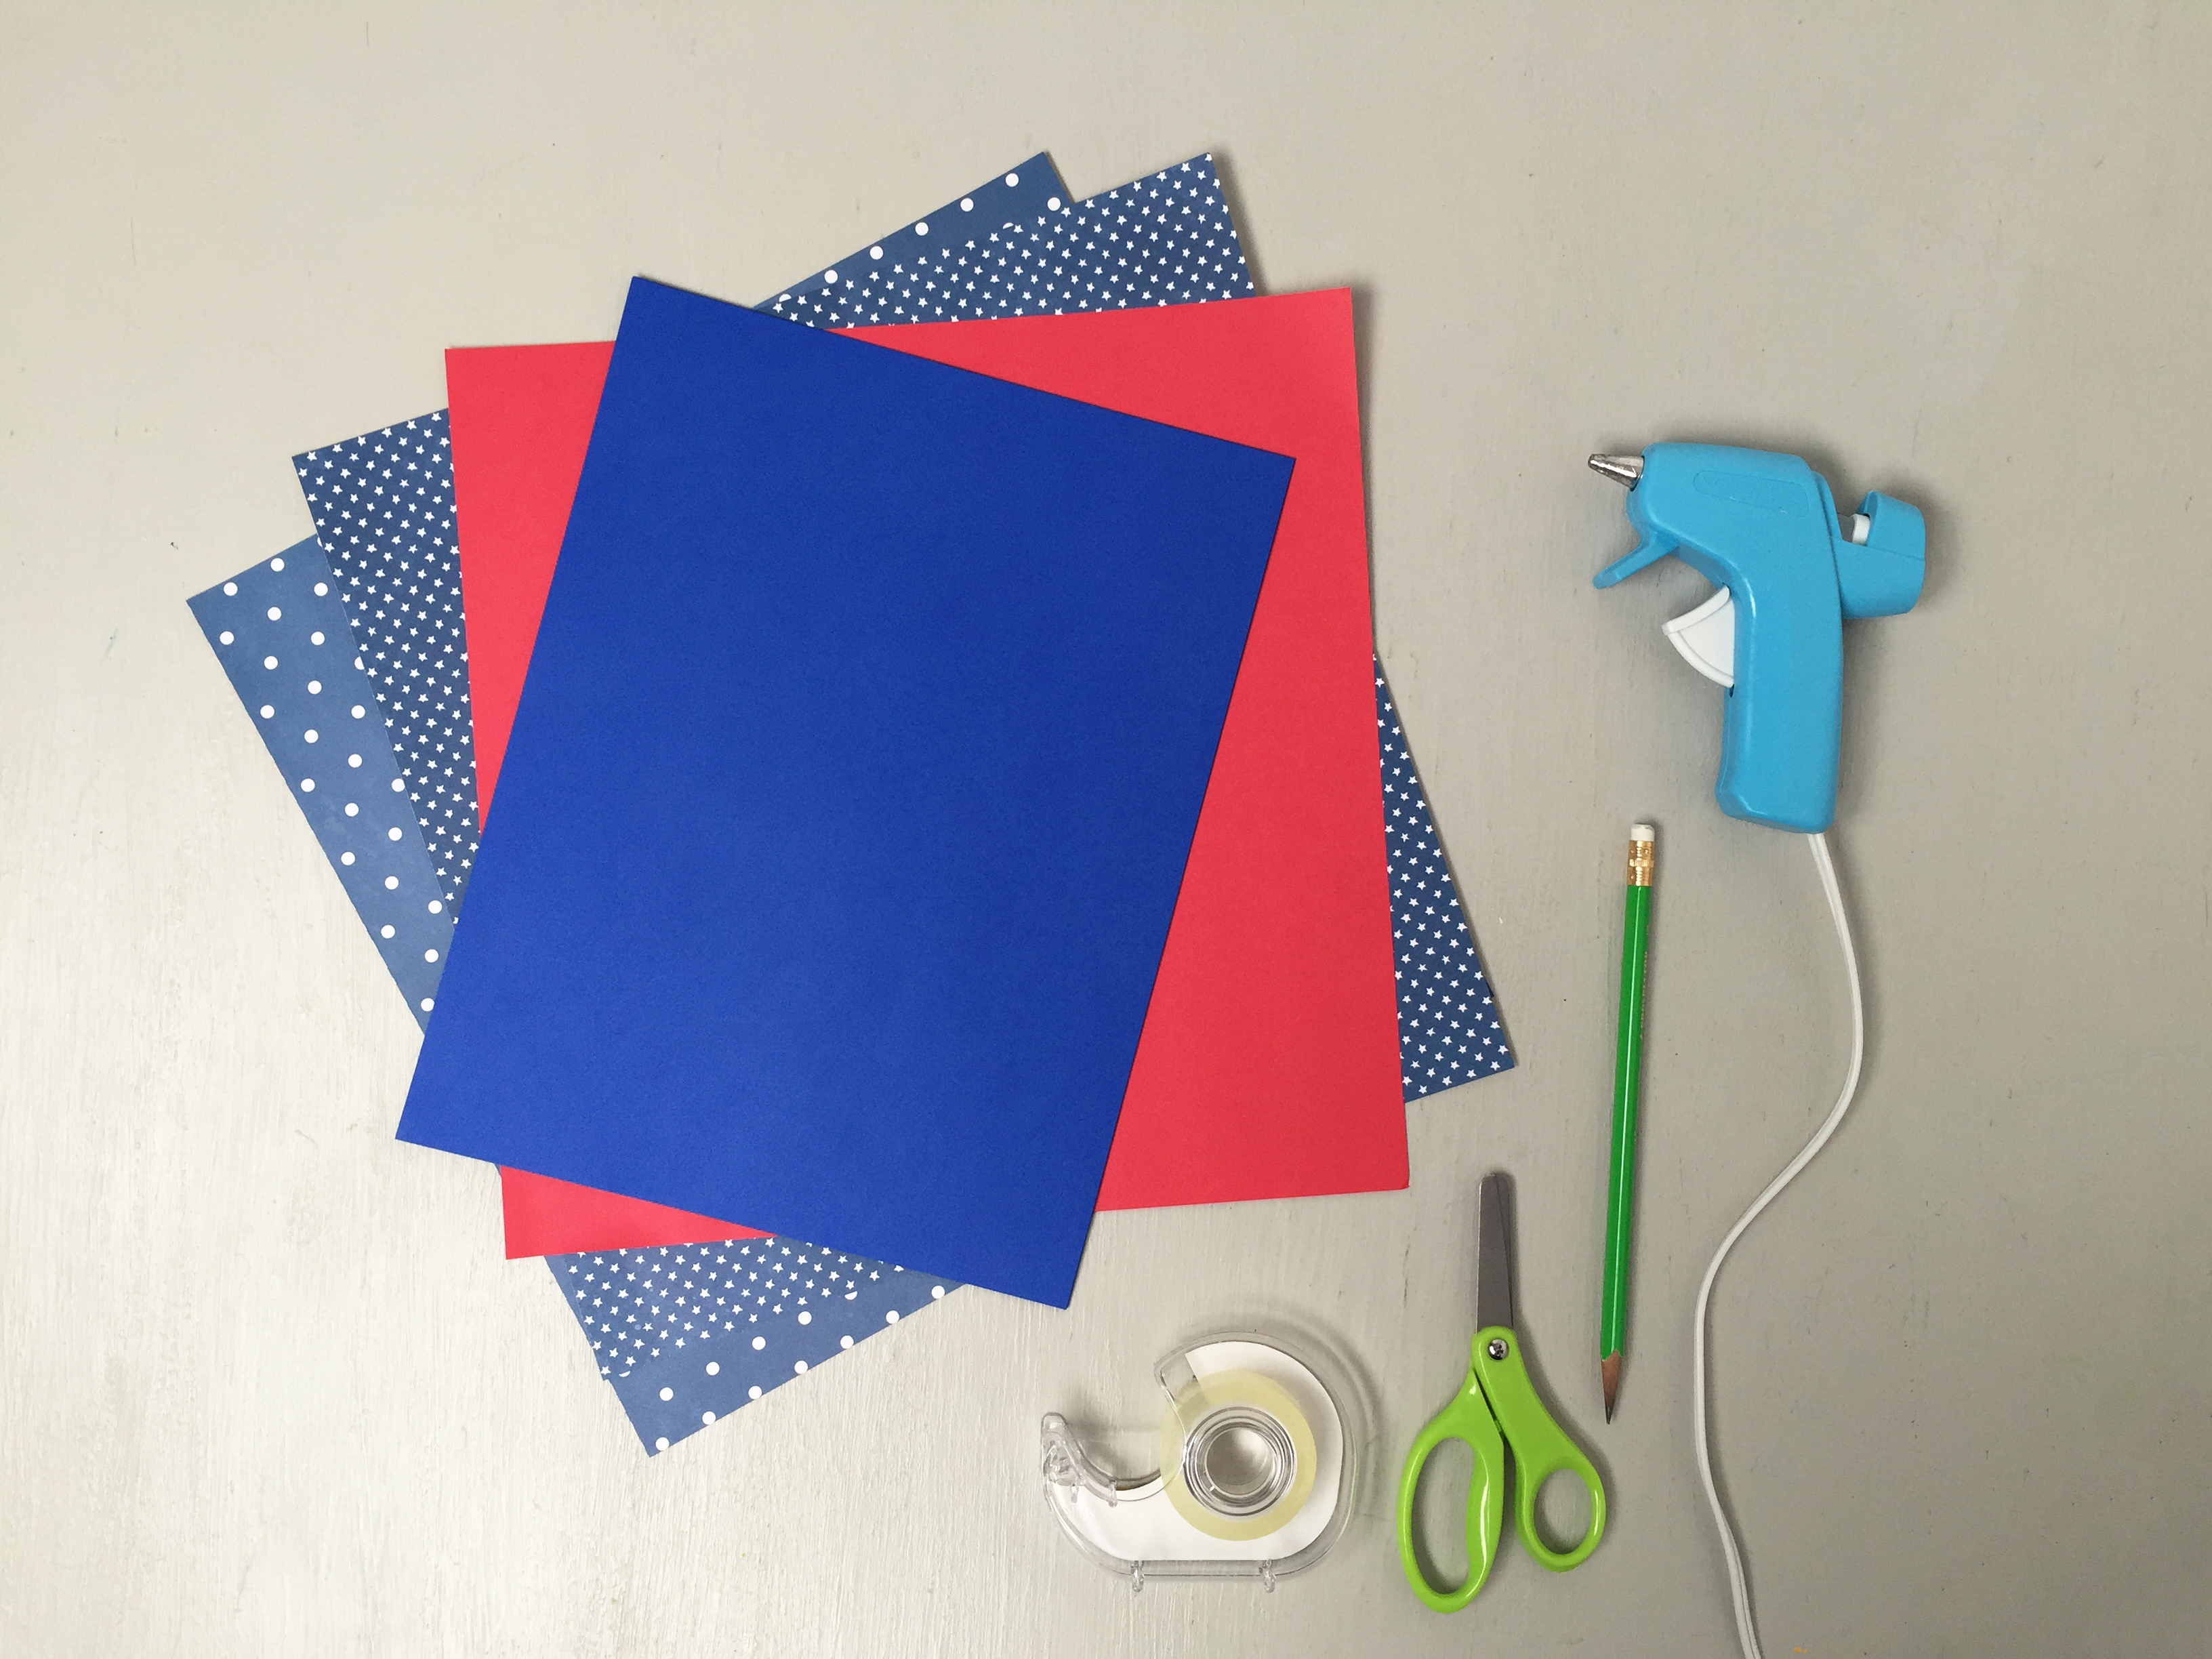
Gather the materials for your 3D stars.

Step 2
Cut your colored paper into squares. You'll need 6 squares to make a star. You can make the squares any size you want. We made 3-inch squares for our first start.

Step 3
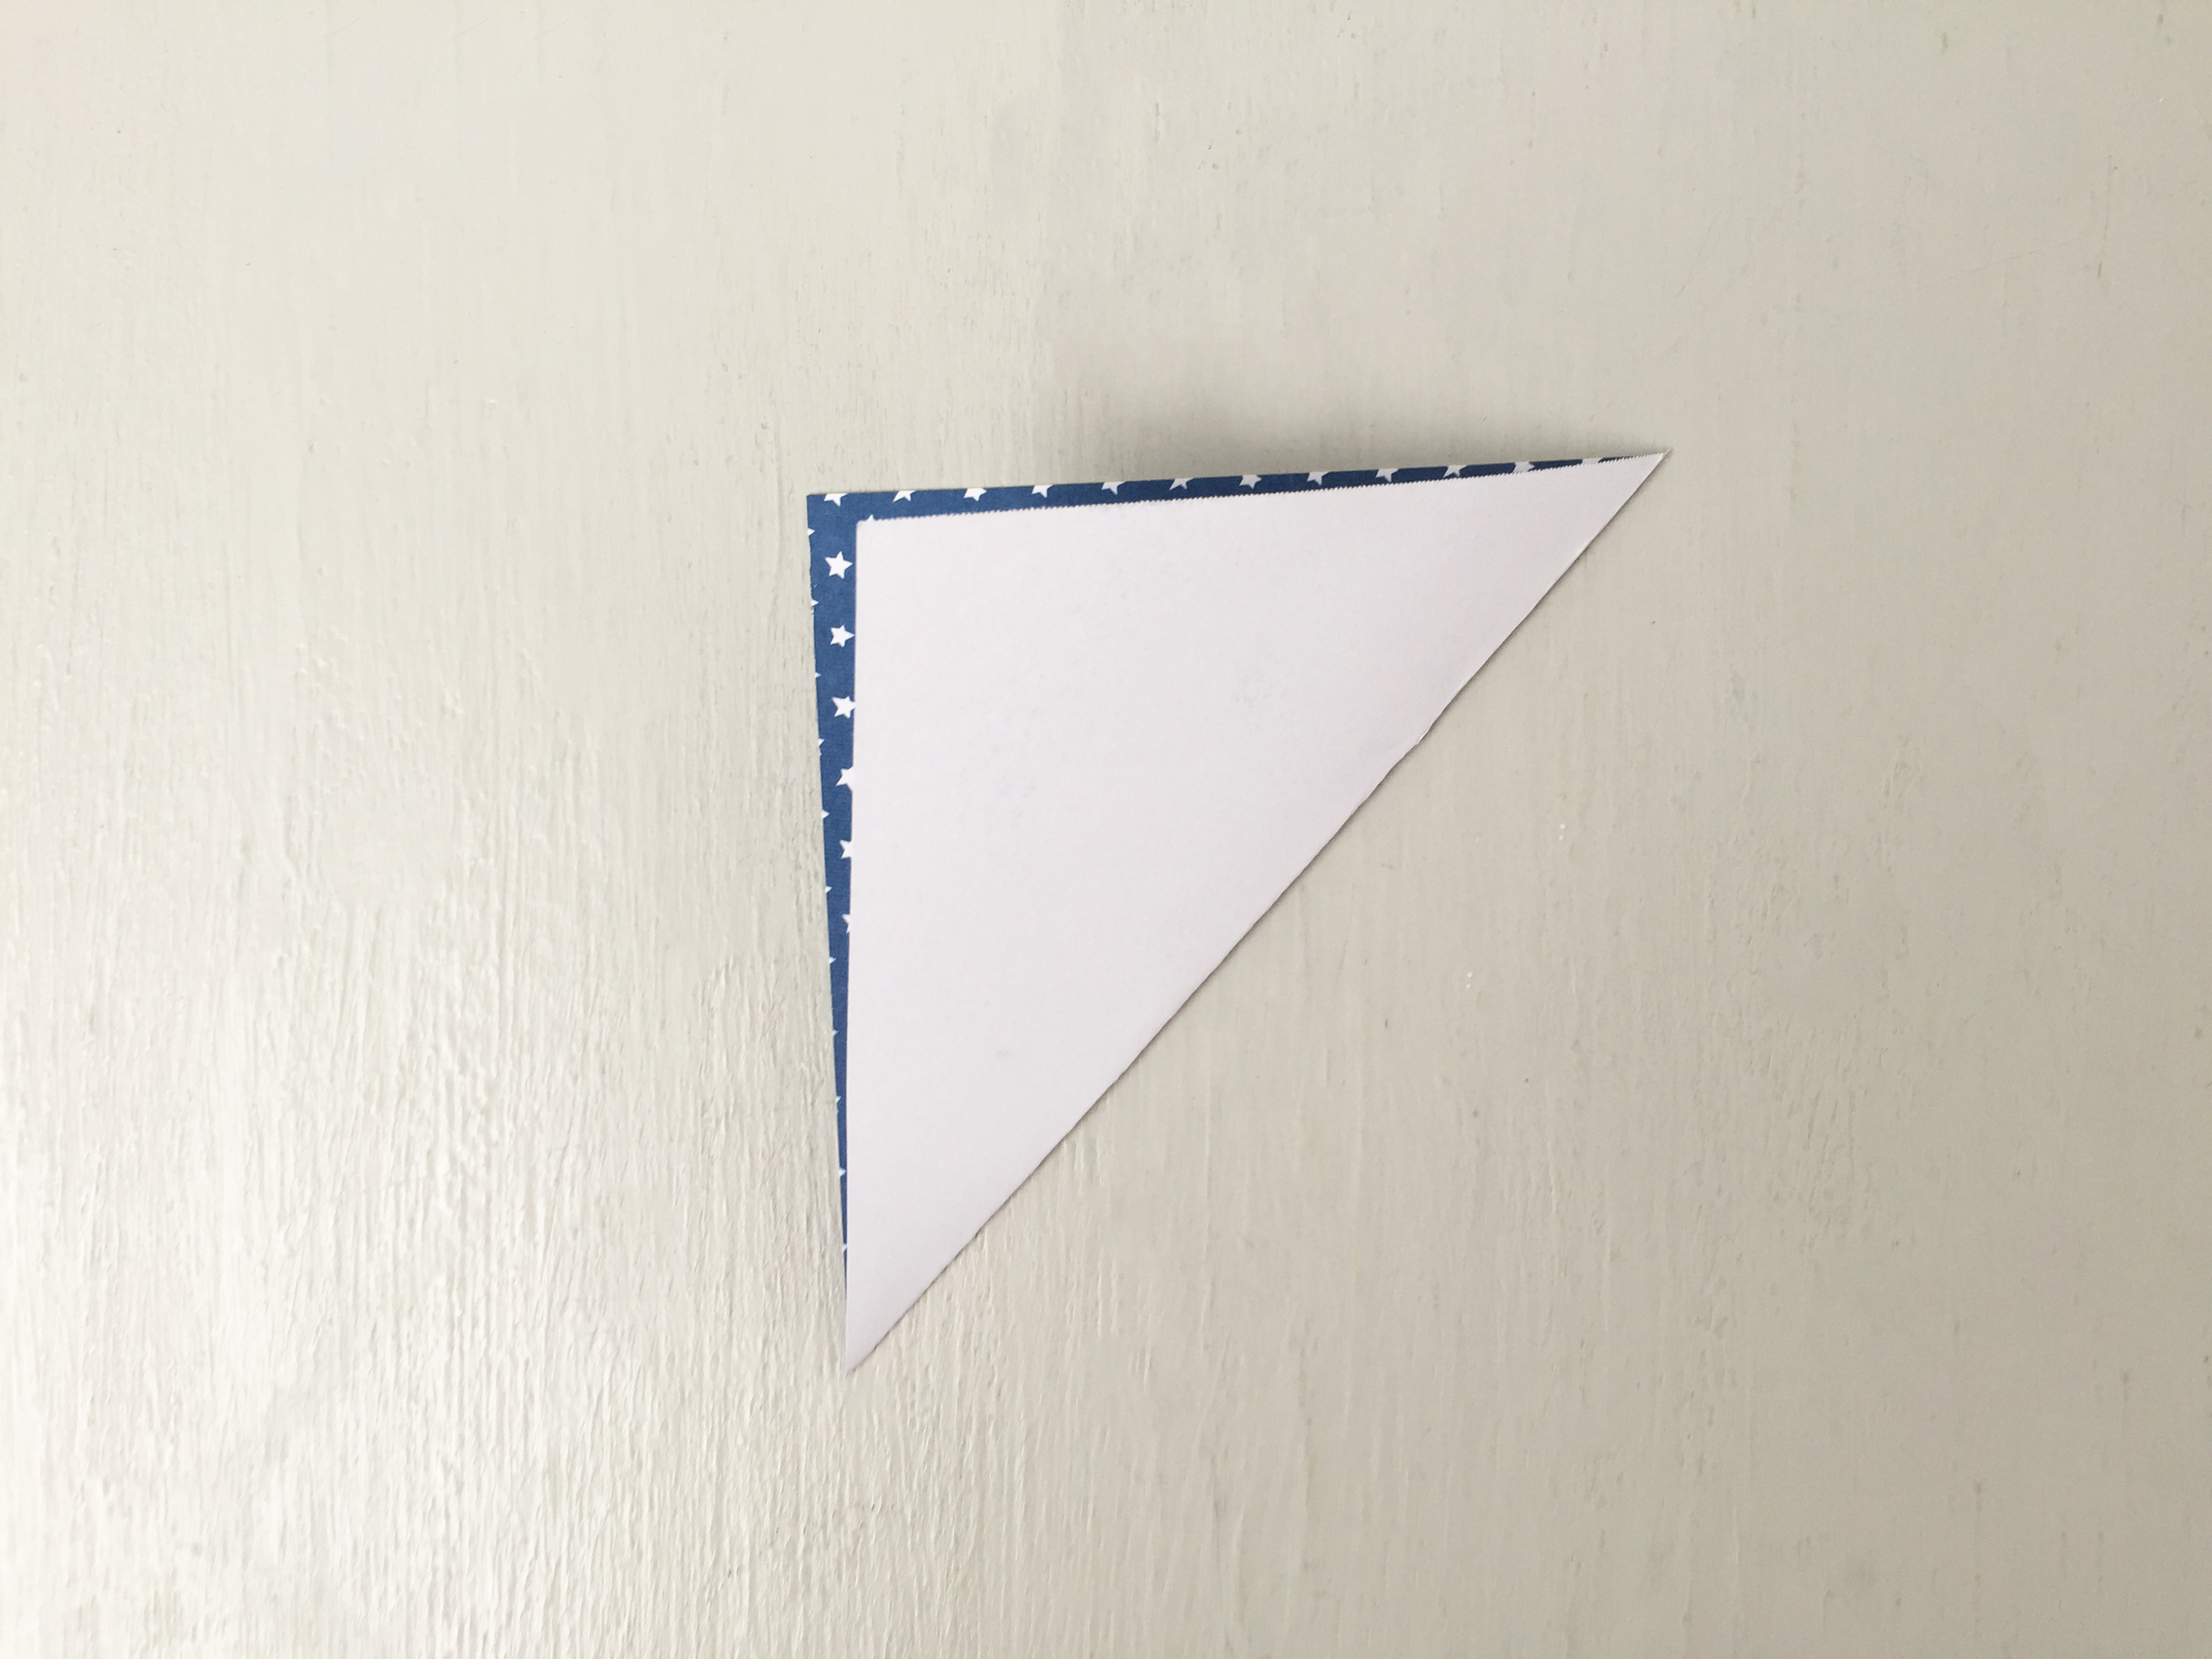
Fold your square in half diagonally.
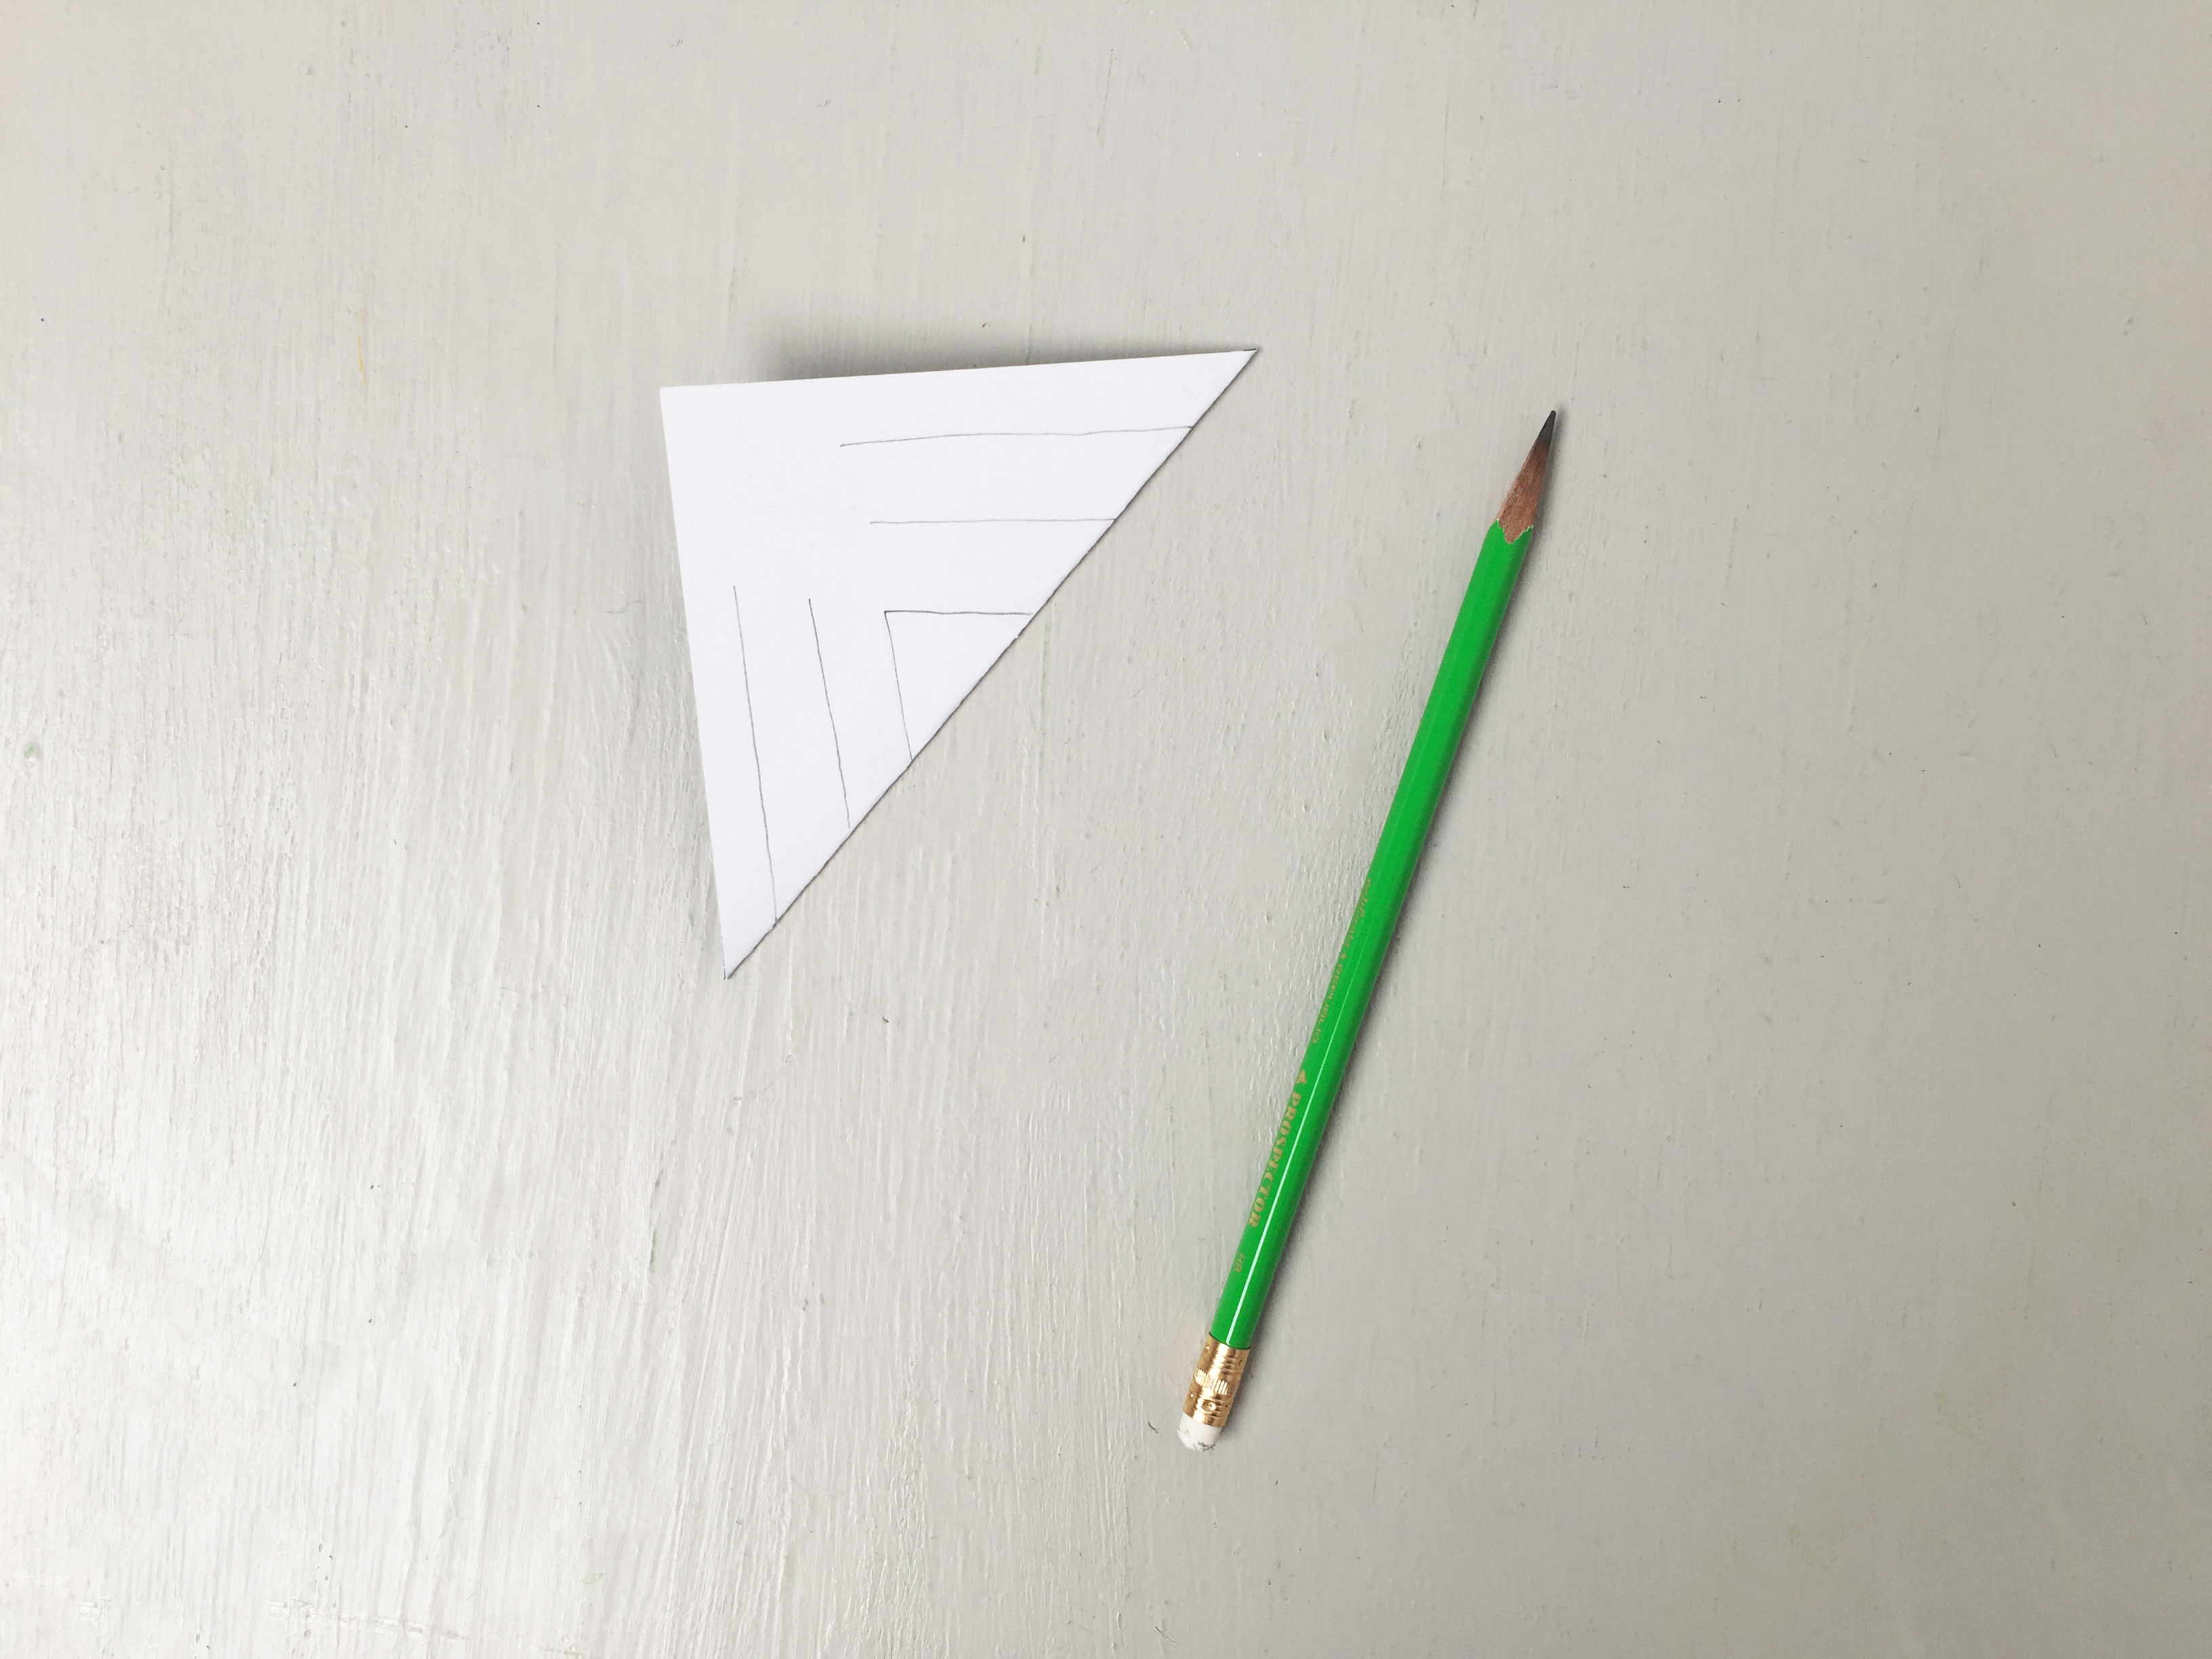
Step 4
Make your cutting guidelines by lightly sketching a small triangle in the middle. Then, draw two sets of lines on either side that do not meet in the middle.
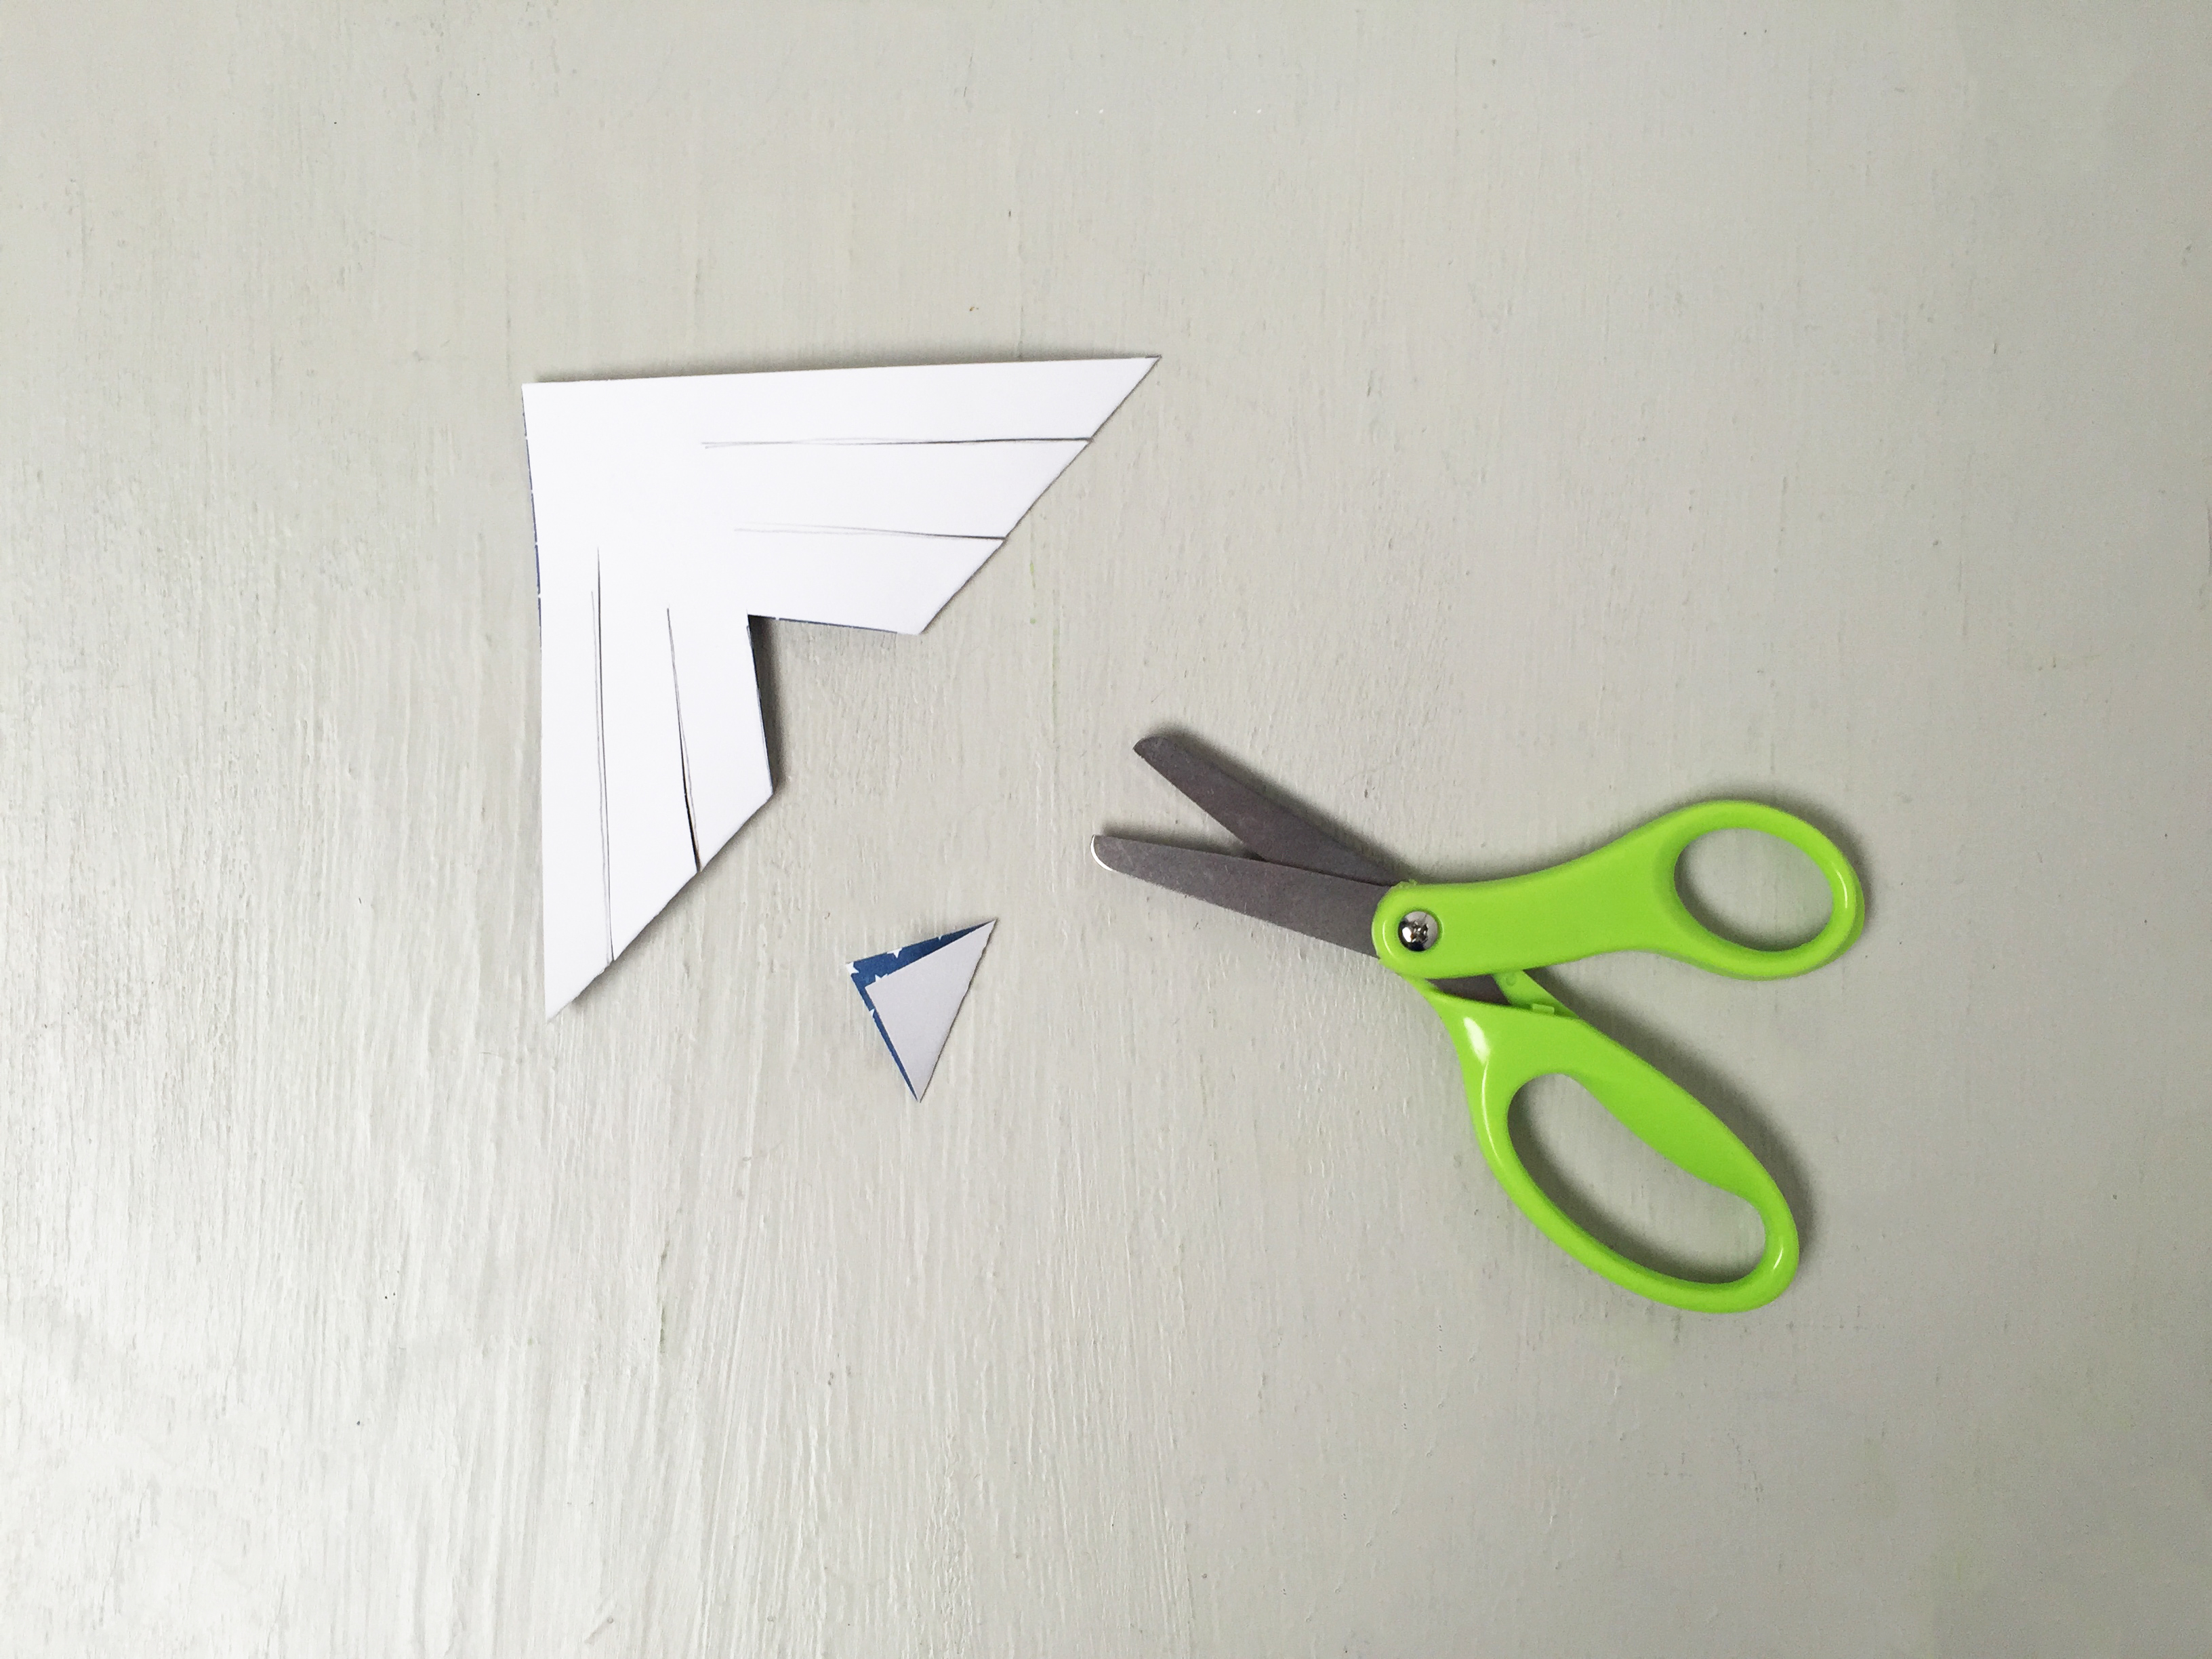
Step 5
Cut out the small triangle from the middle. Then, cut along the other lines to make two slits of each side of the triangle you just cut. Make sure you don't cut all the way to the center line.
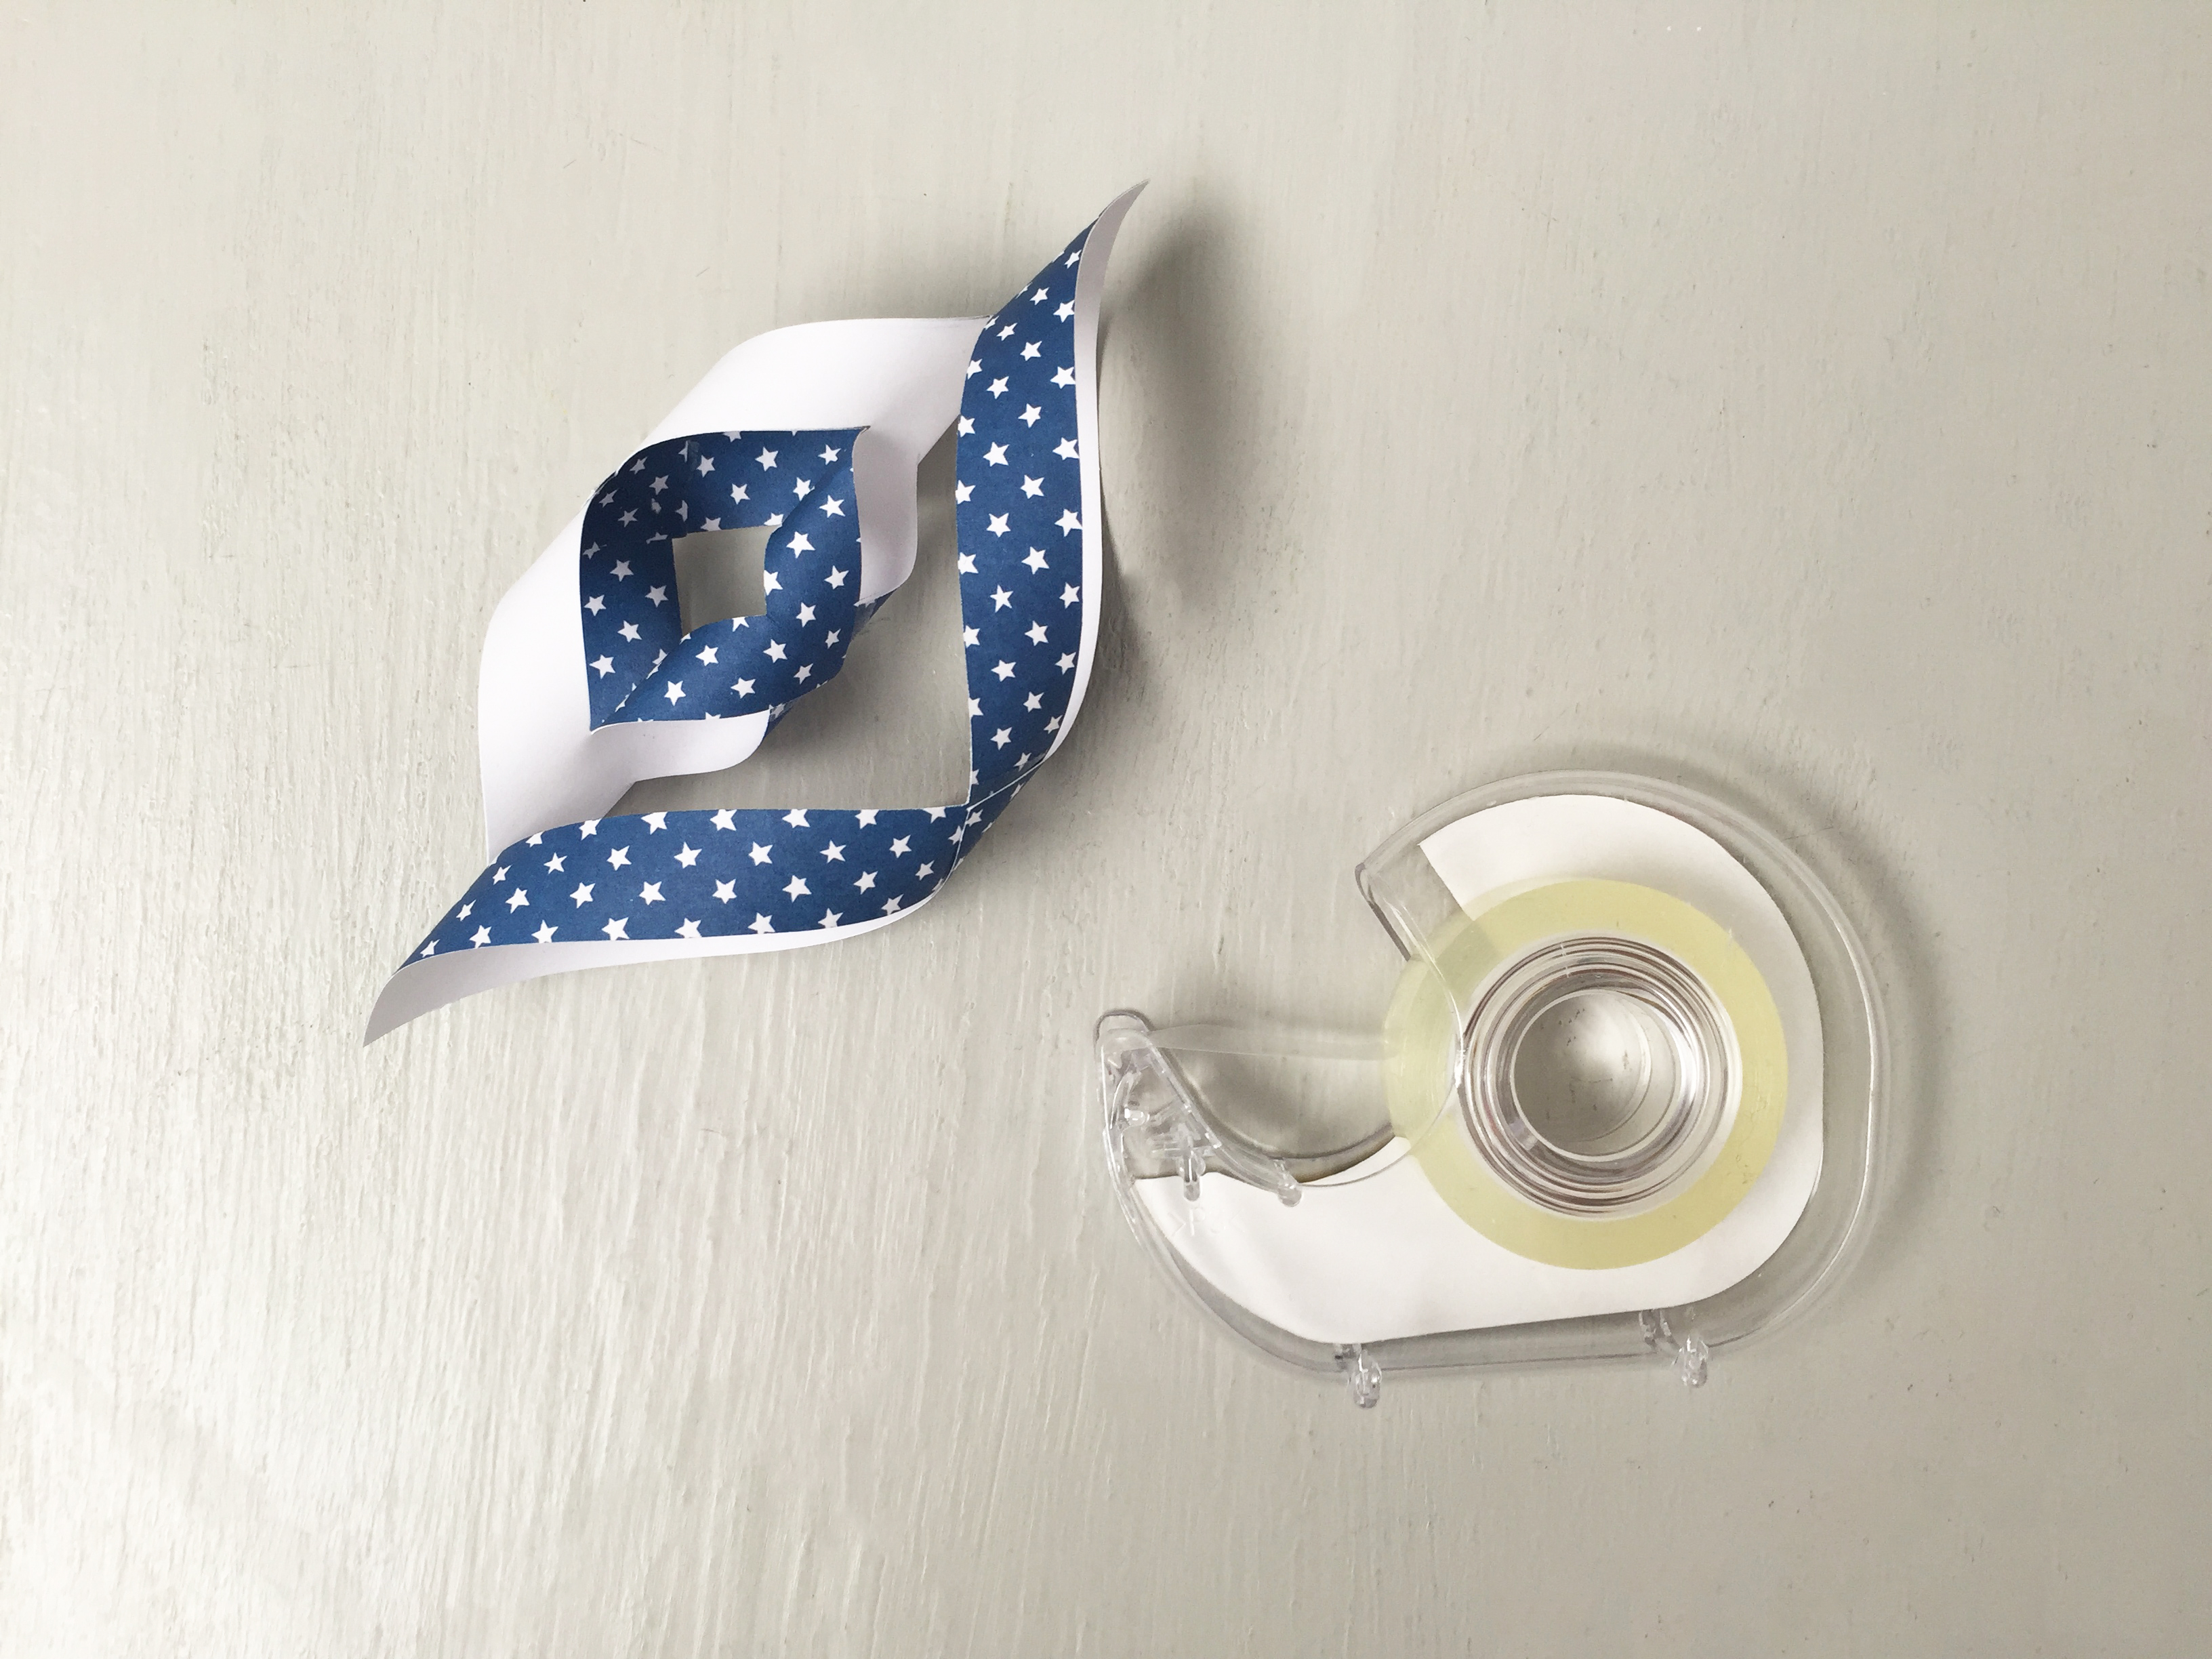
Step 6
Open the square back up. Fold the middle two corners together. Use double-sided tape to secure them.

Step 7
Flip the star over again. Tape the last two points together. You have one star petal done!

Step 8
Flip the star over again. Tape the last two points together. You have one star petal done!
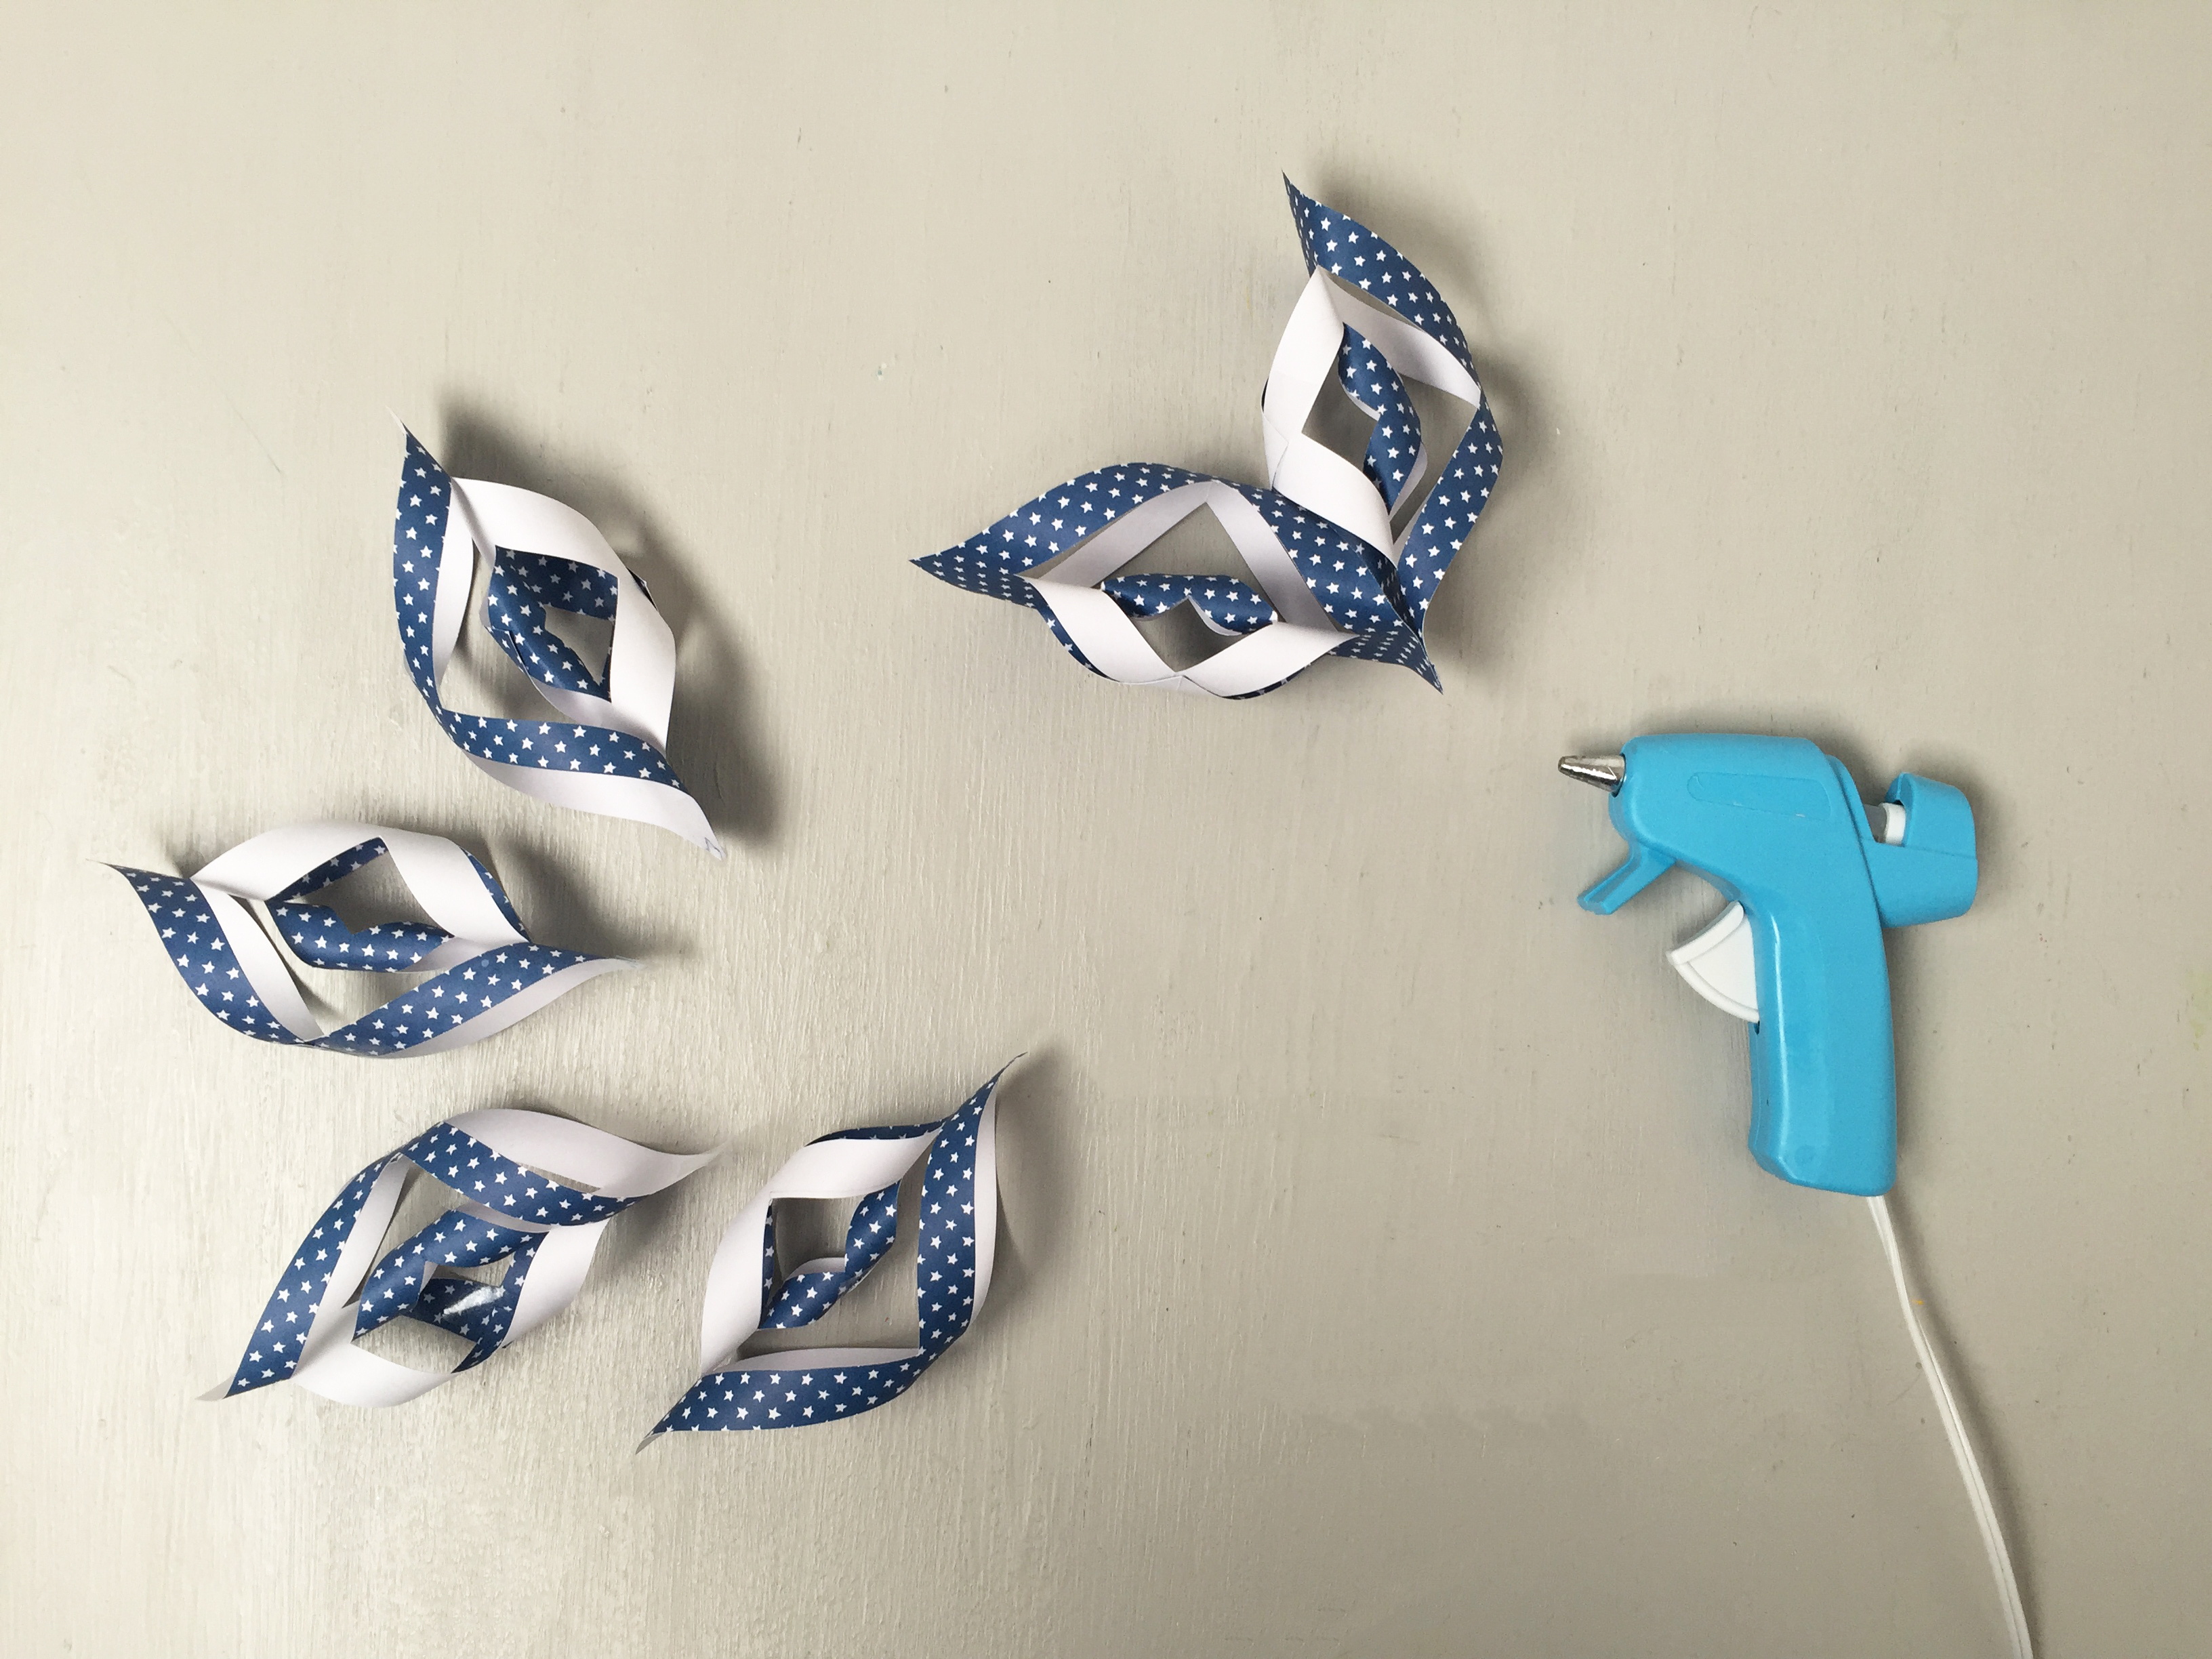
Step 9
Repeat steps 3–8 until you have 6 separate star petals.
Step 10
Now double-sided tape or hot glue to secure the points of each star petal together to create a 6-pointed star.
Done!
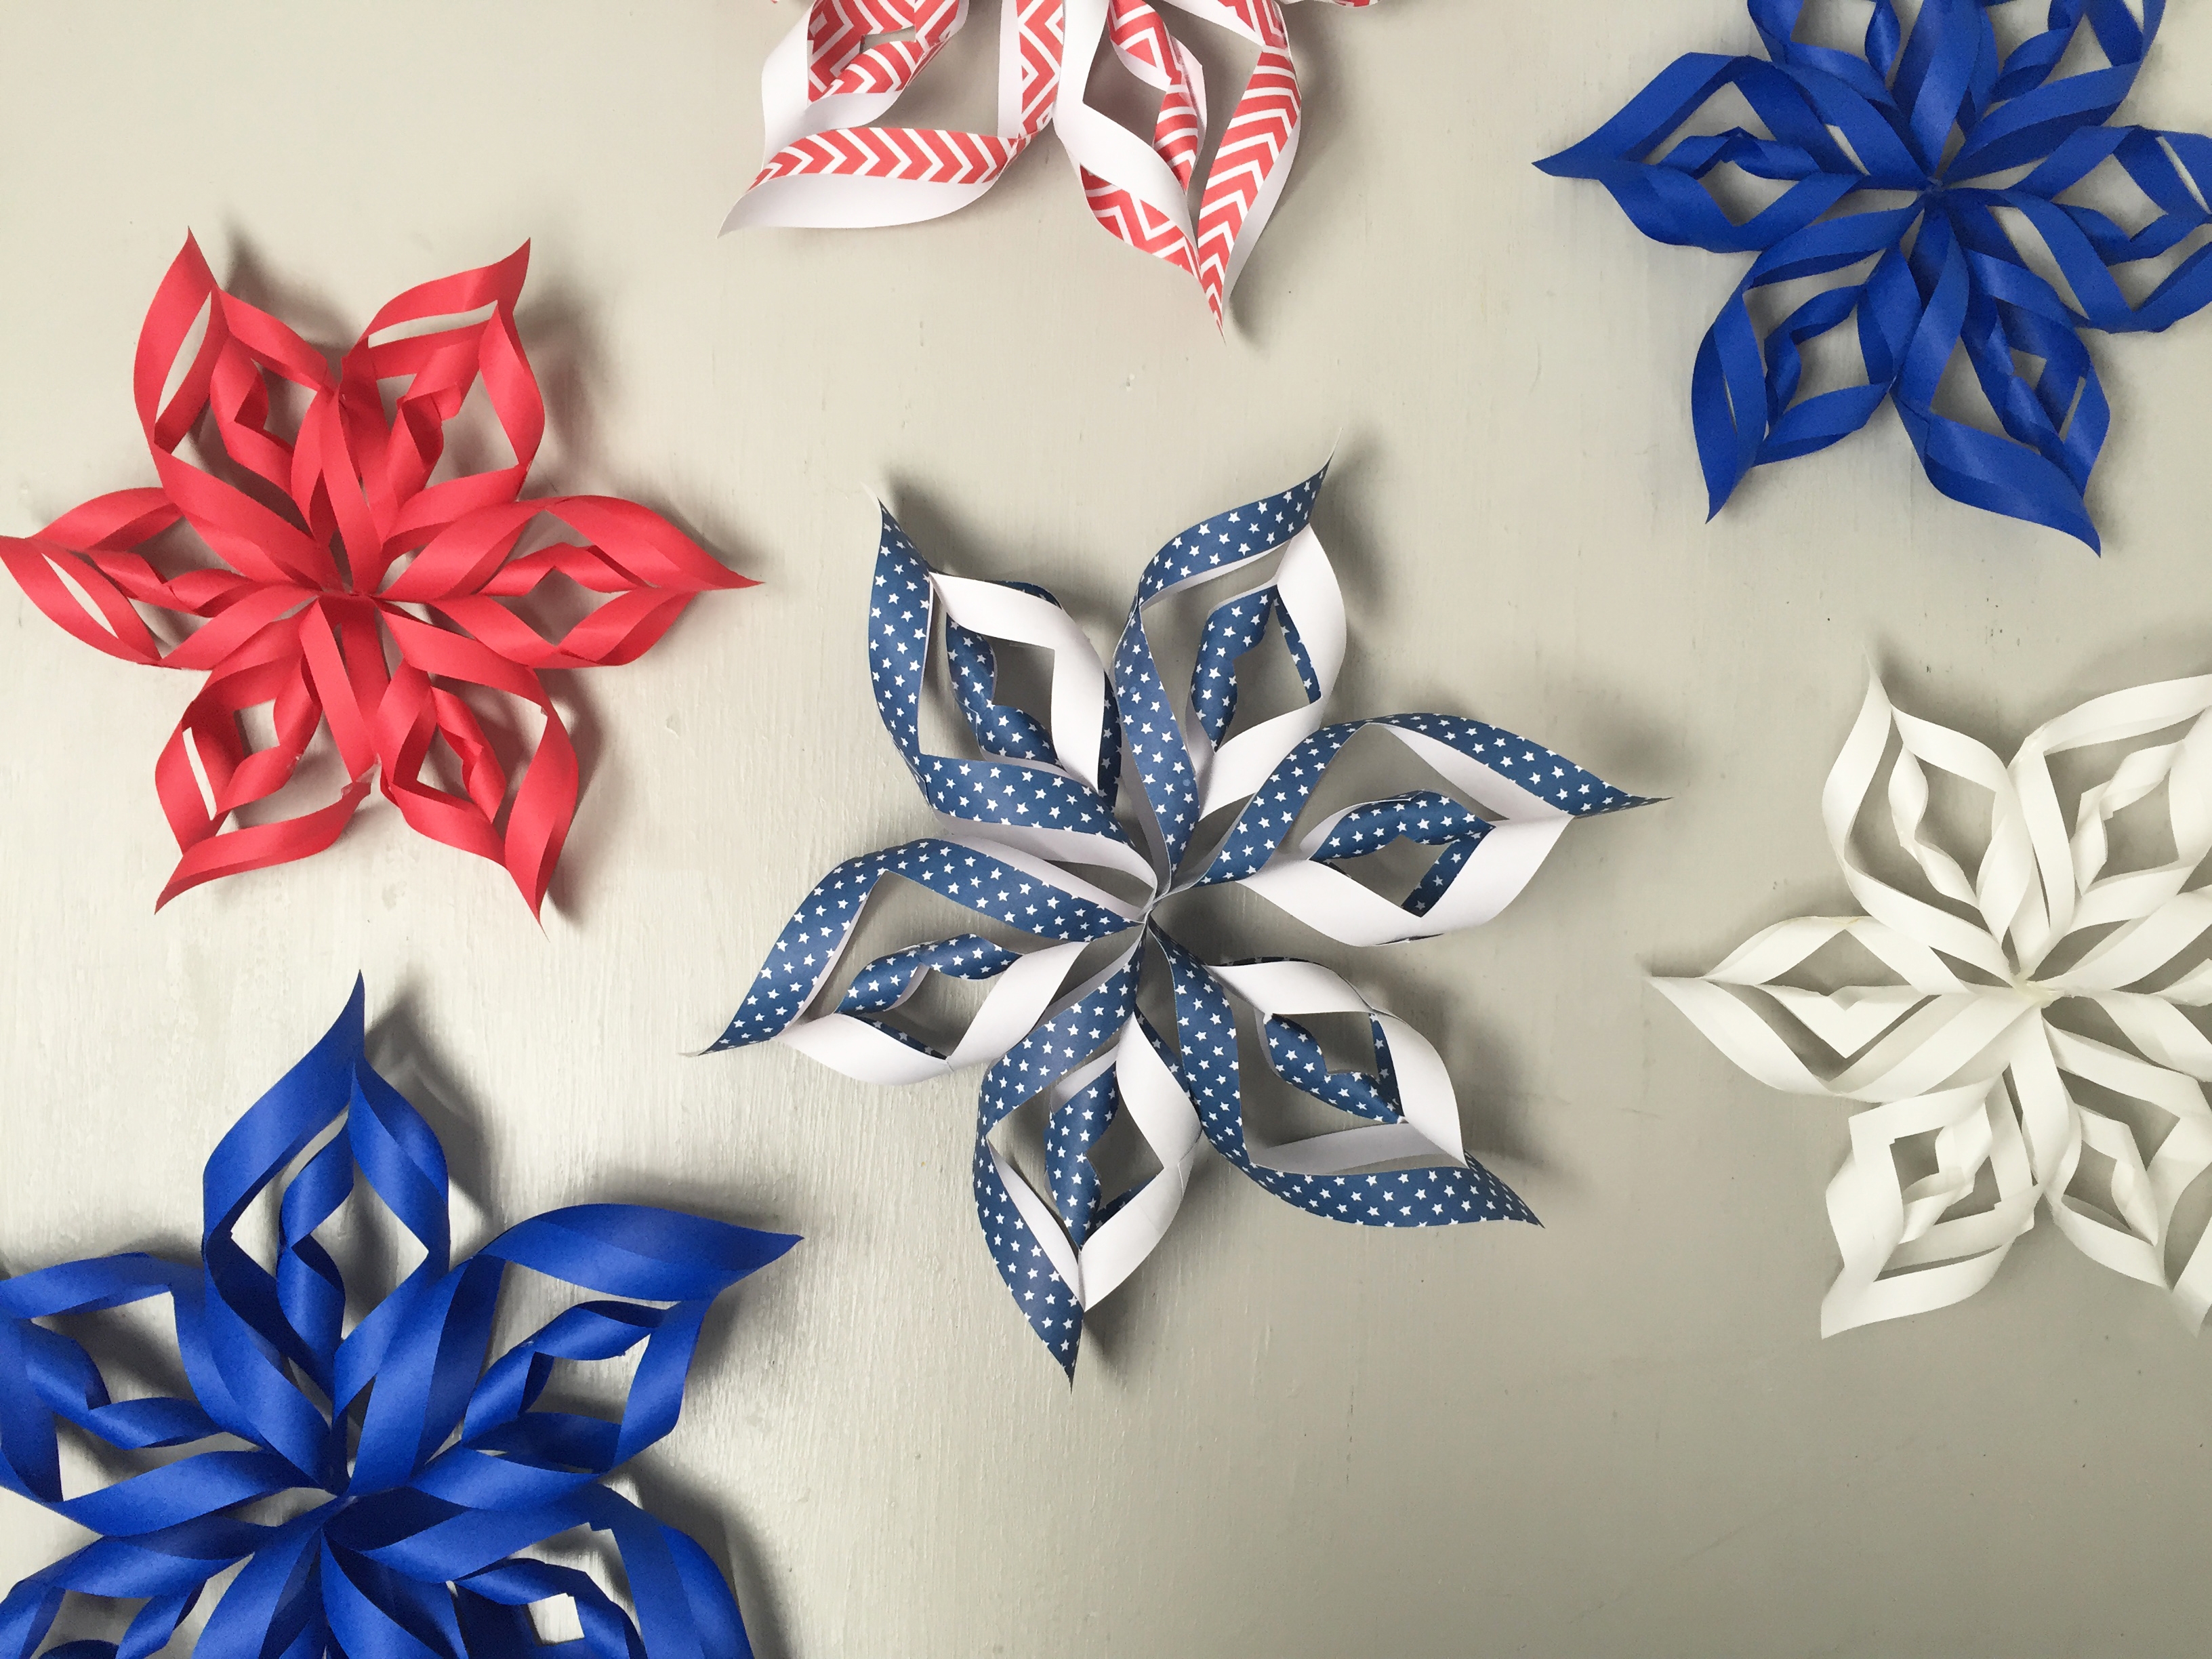
Continue making stars! Try experimenting with extra slits in step 4–5, or change the number of petals in each star. Don't forget that you can also use any colors of paper that you like!
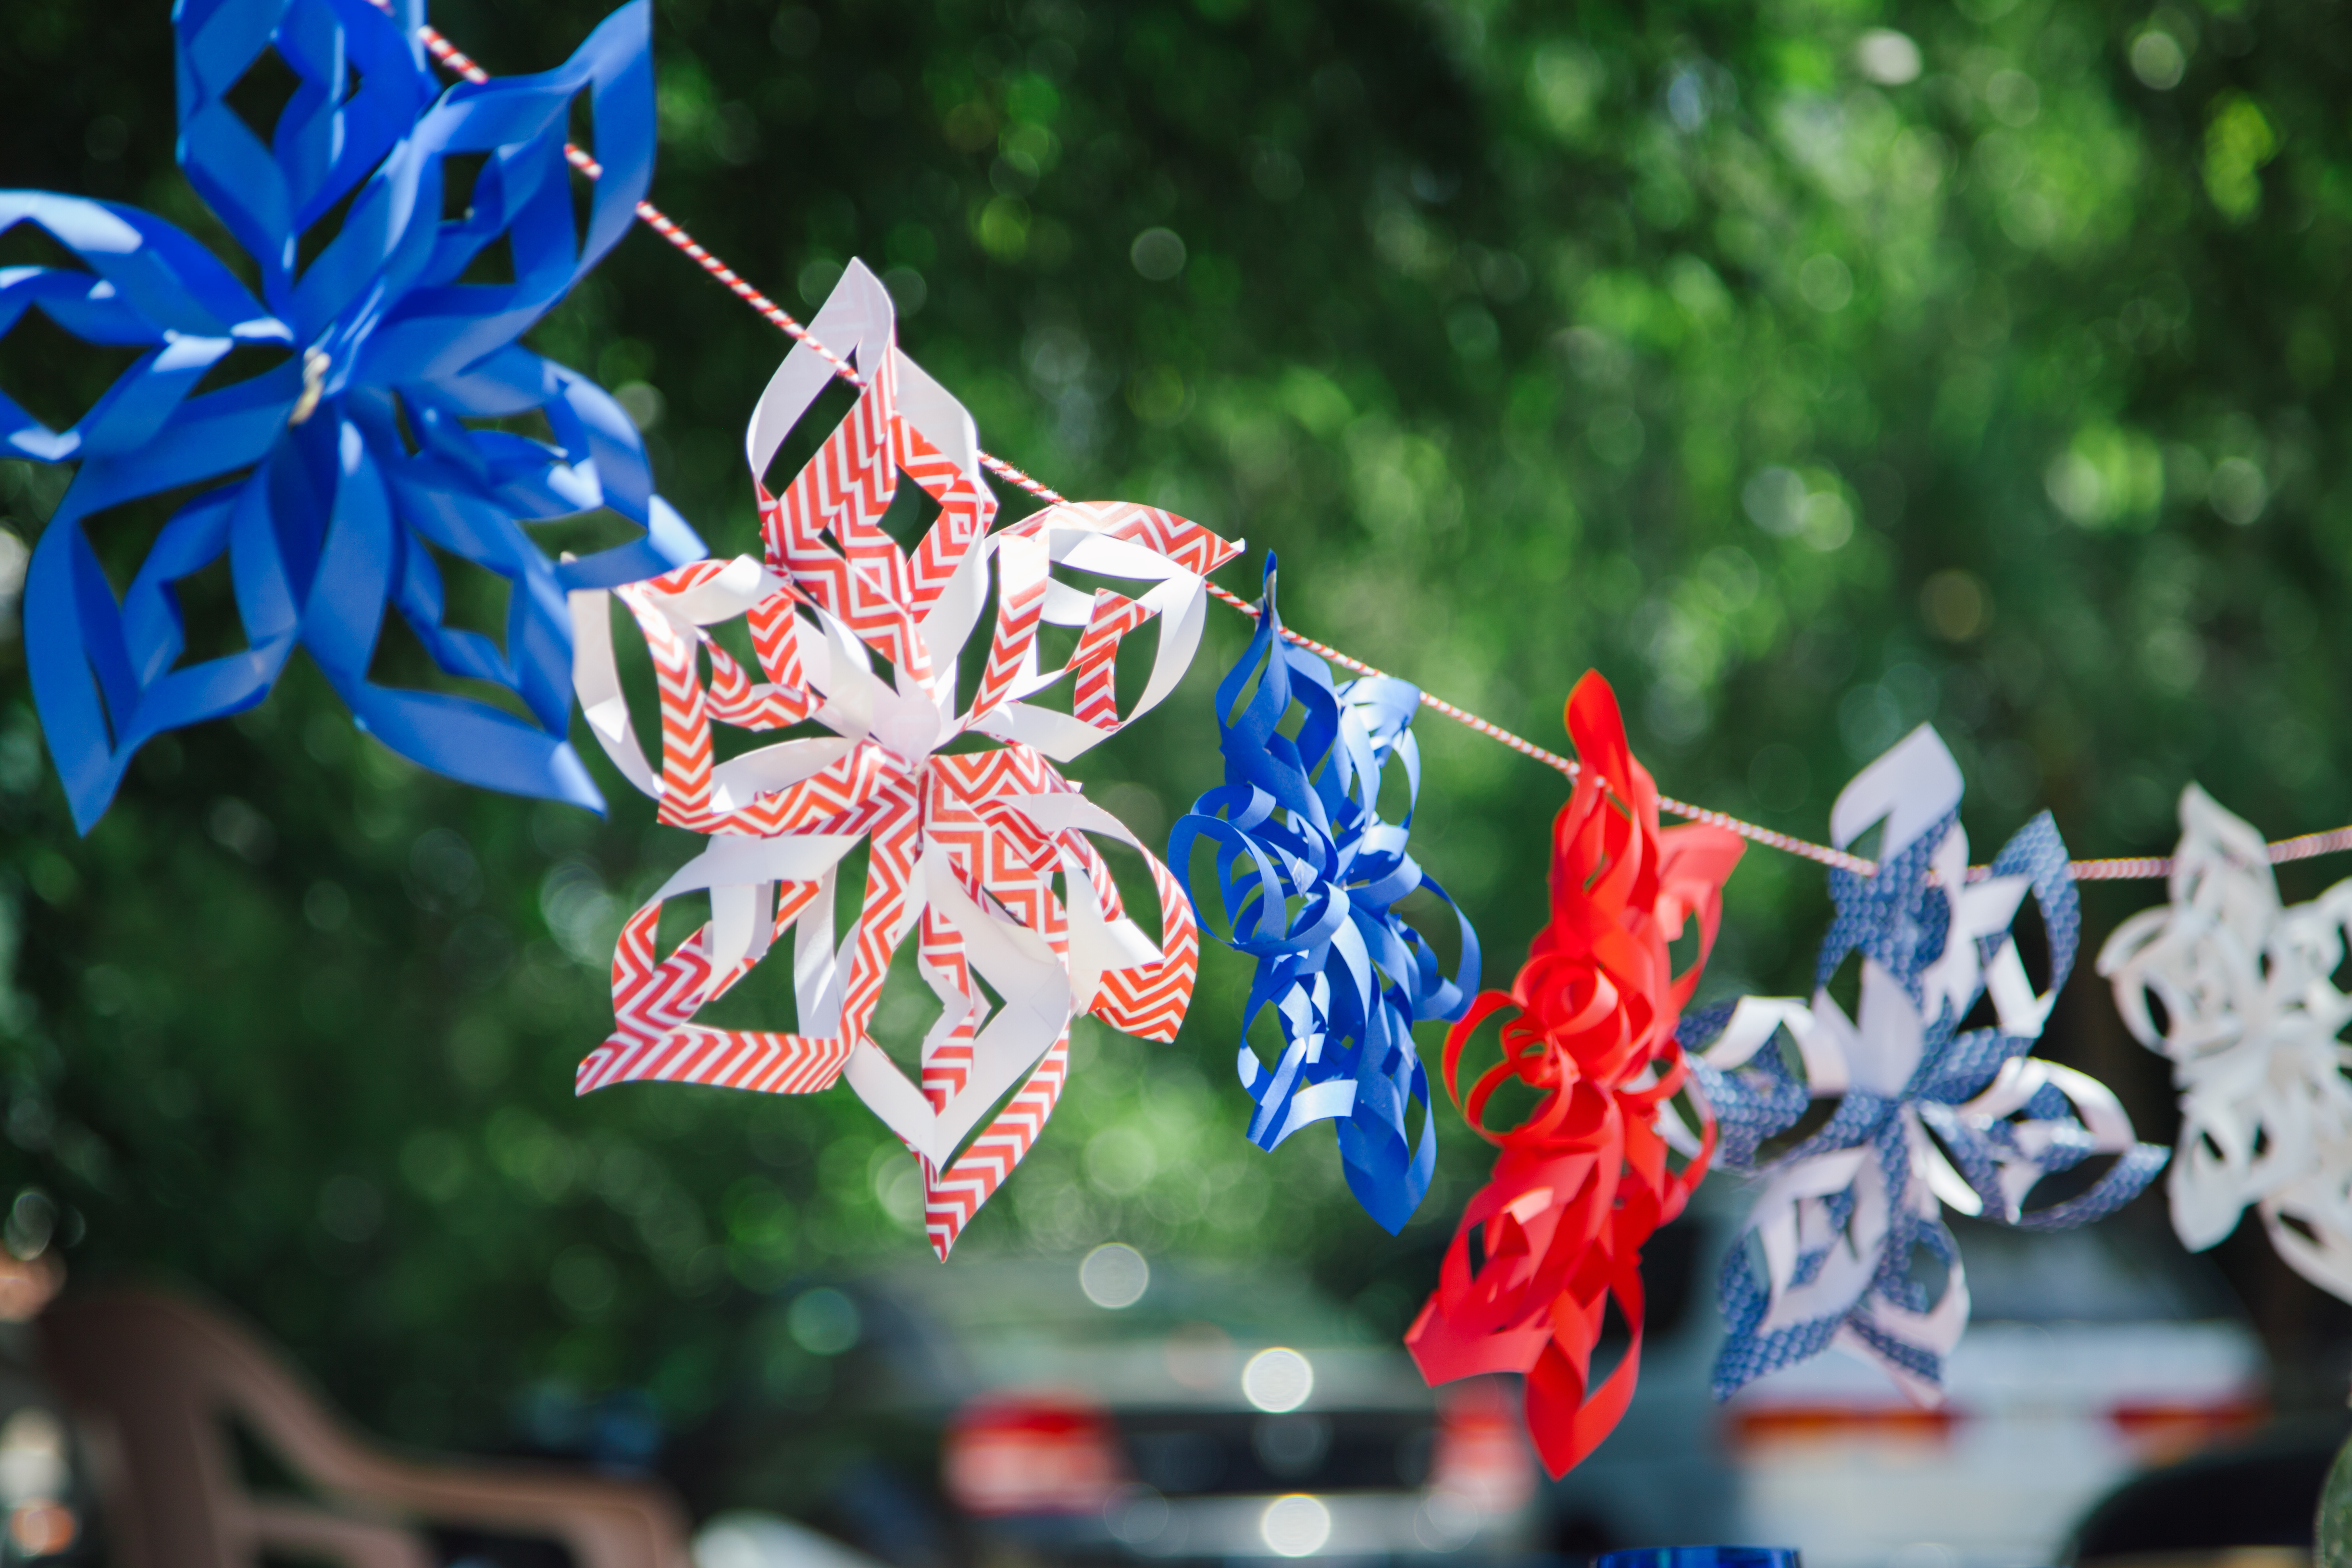
String up your stars and enjoy the festive decorations at your next barbecue!