Step-by-step tutorial
Step 1
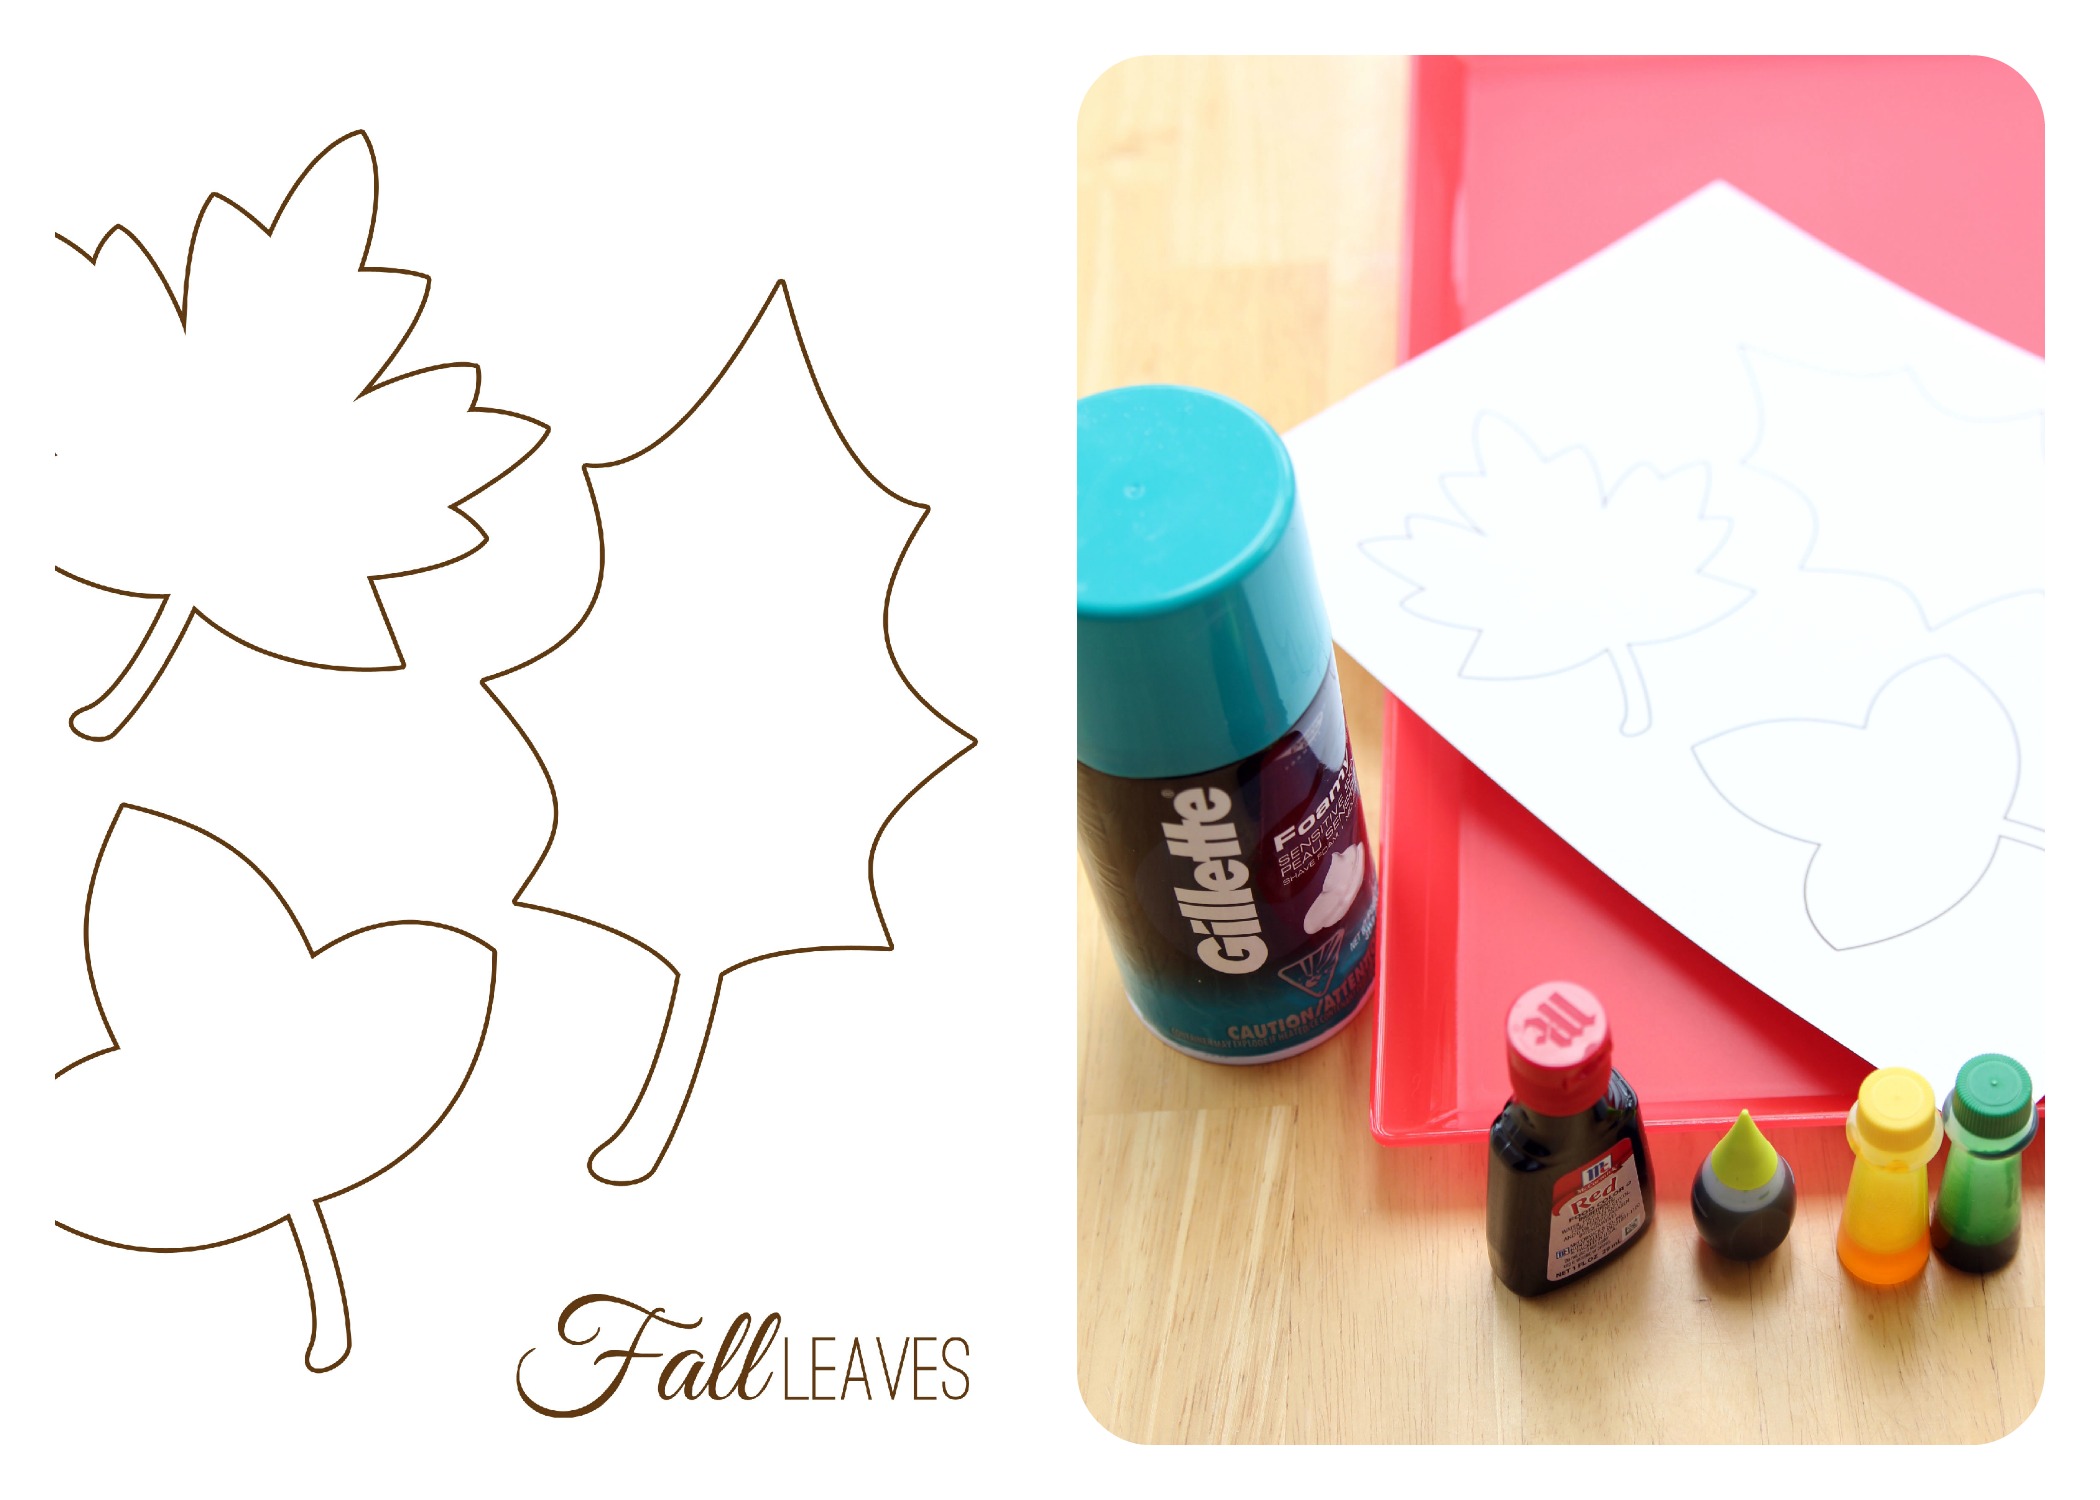
Start by printing out the leaves printable on cardstock. Next, cut out your leaves (V.'s not quite old enough for scissors yet--but of course this is a step that slightly older kids can do on their own). Then gather all materials and tools for the project.

Step 2
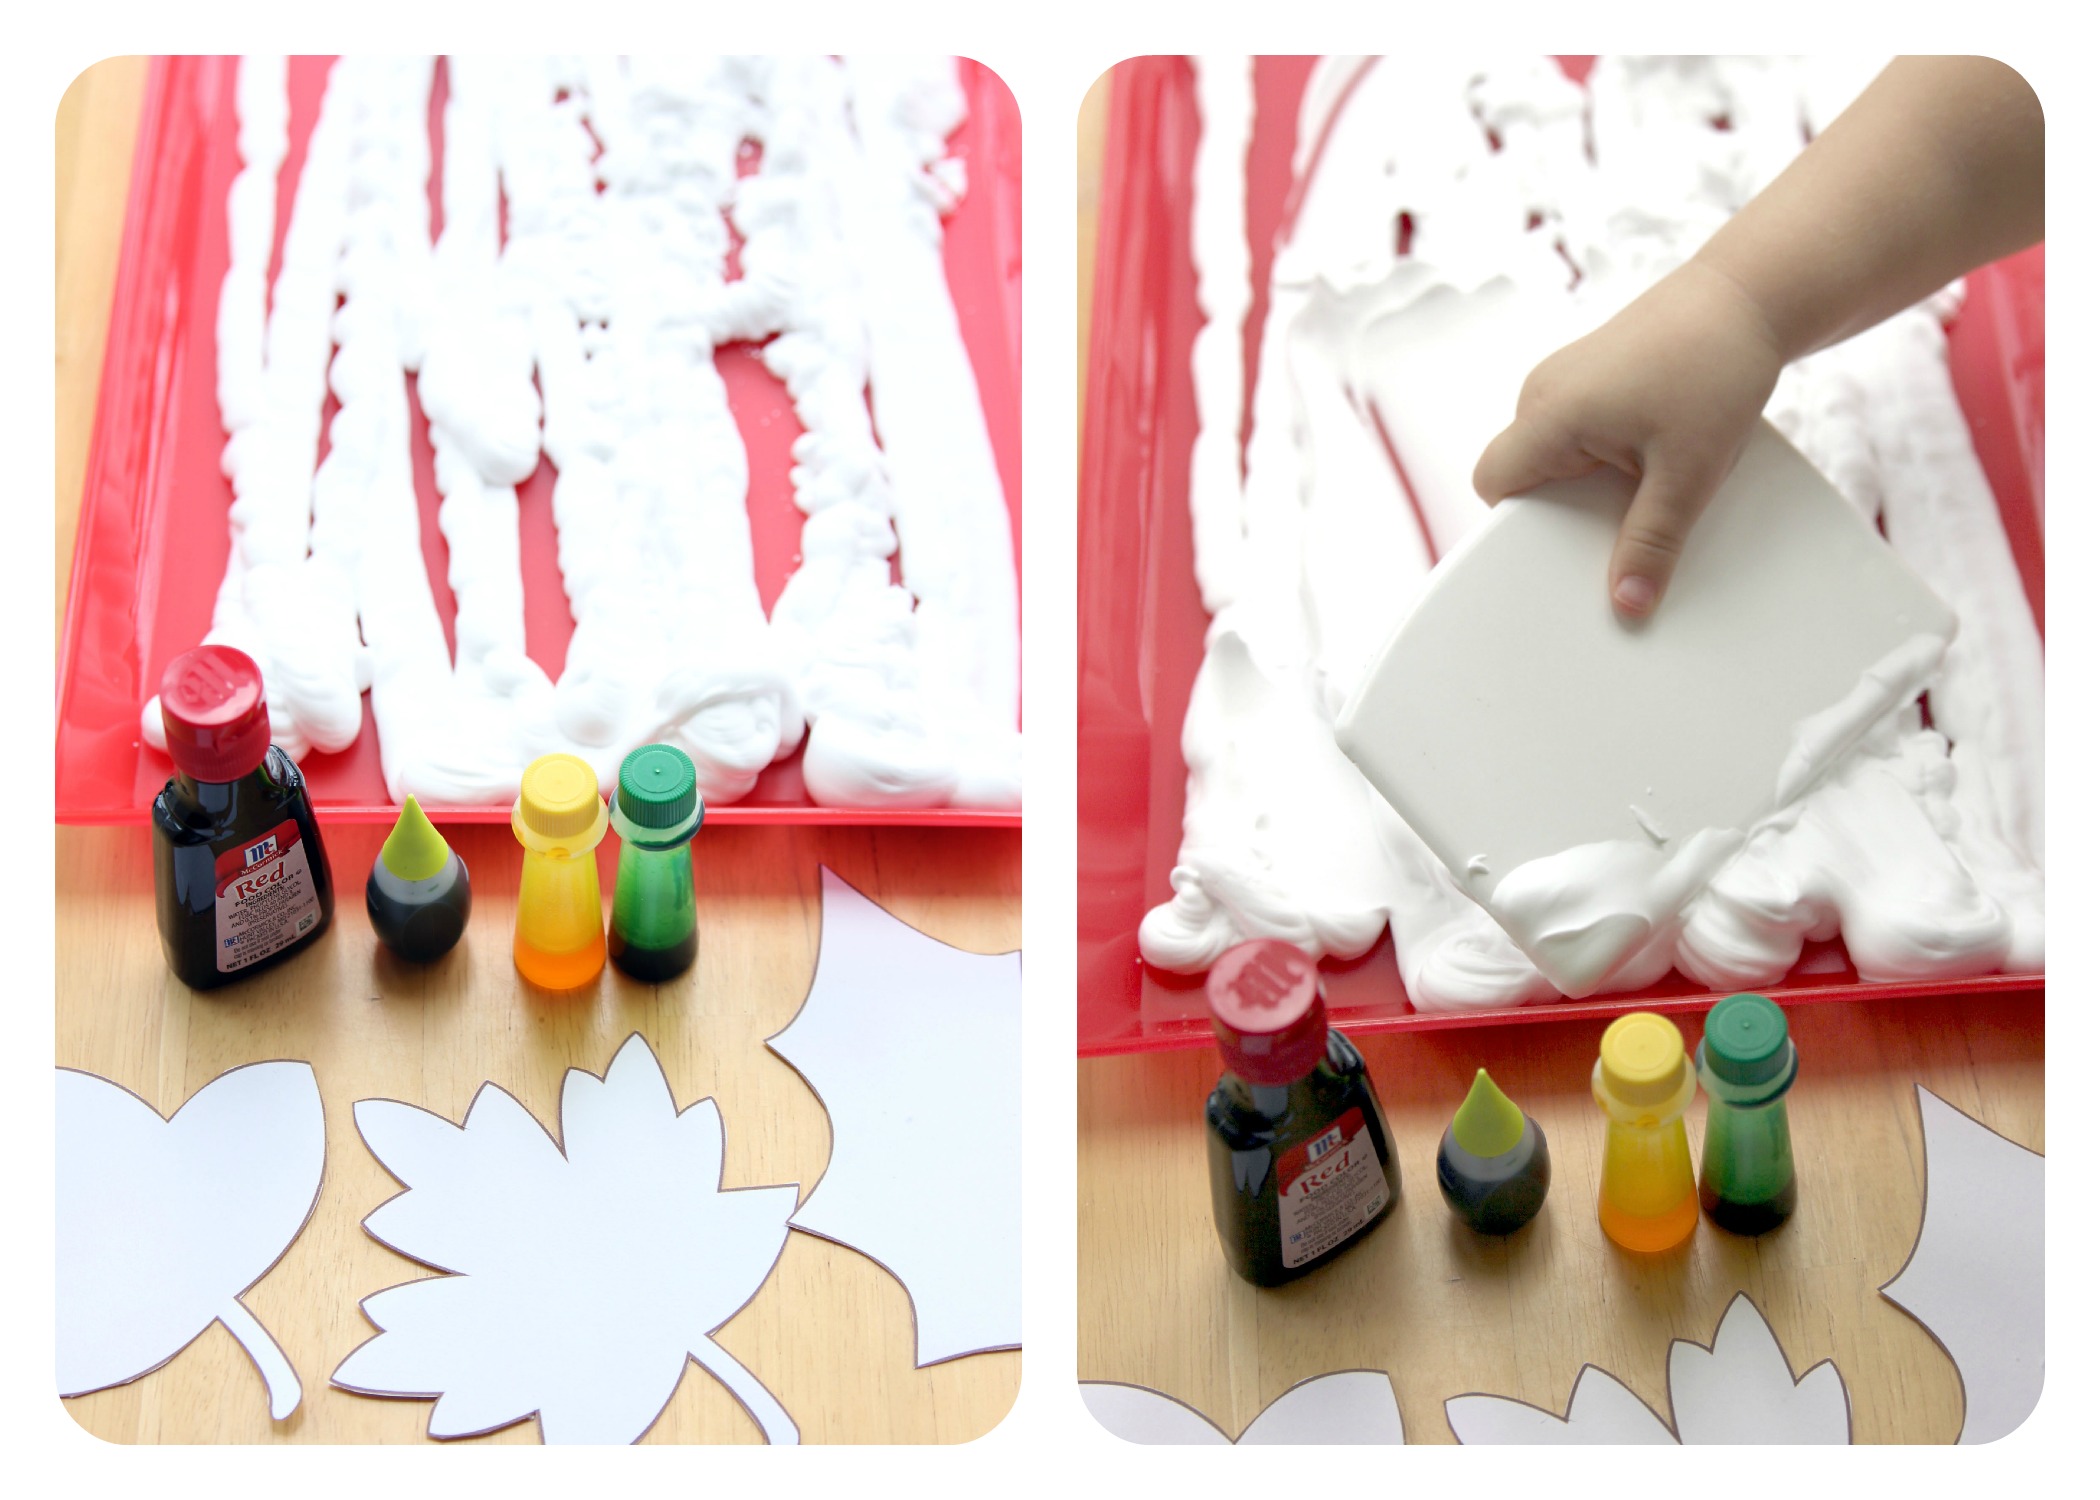
Squirt shaving cream in your tray. (This is a fun but messy part to let your child do). Have your child use the cardboard or spreader to spread out the shaving cream so it covers the entire tray.
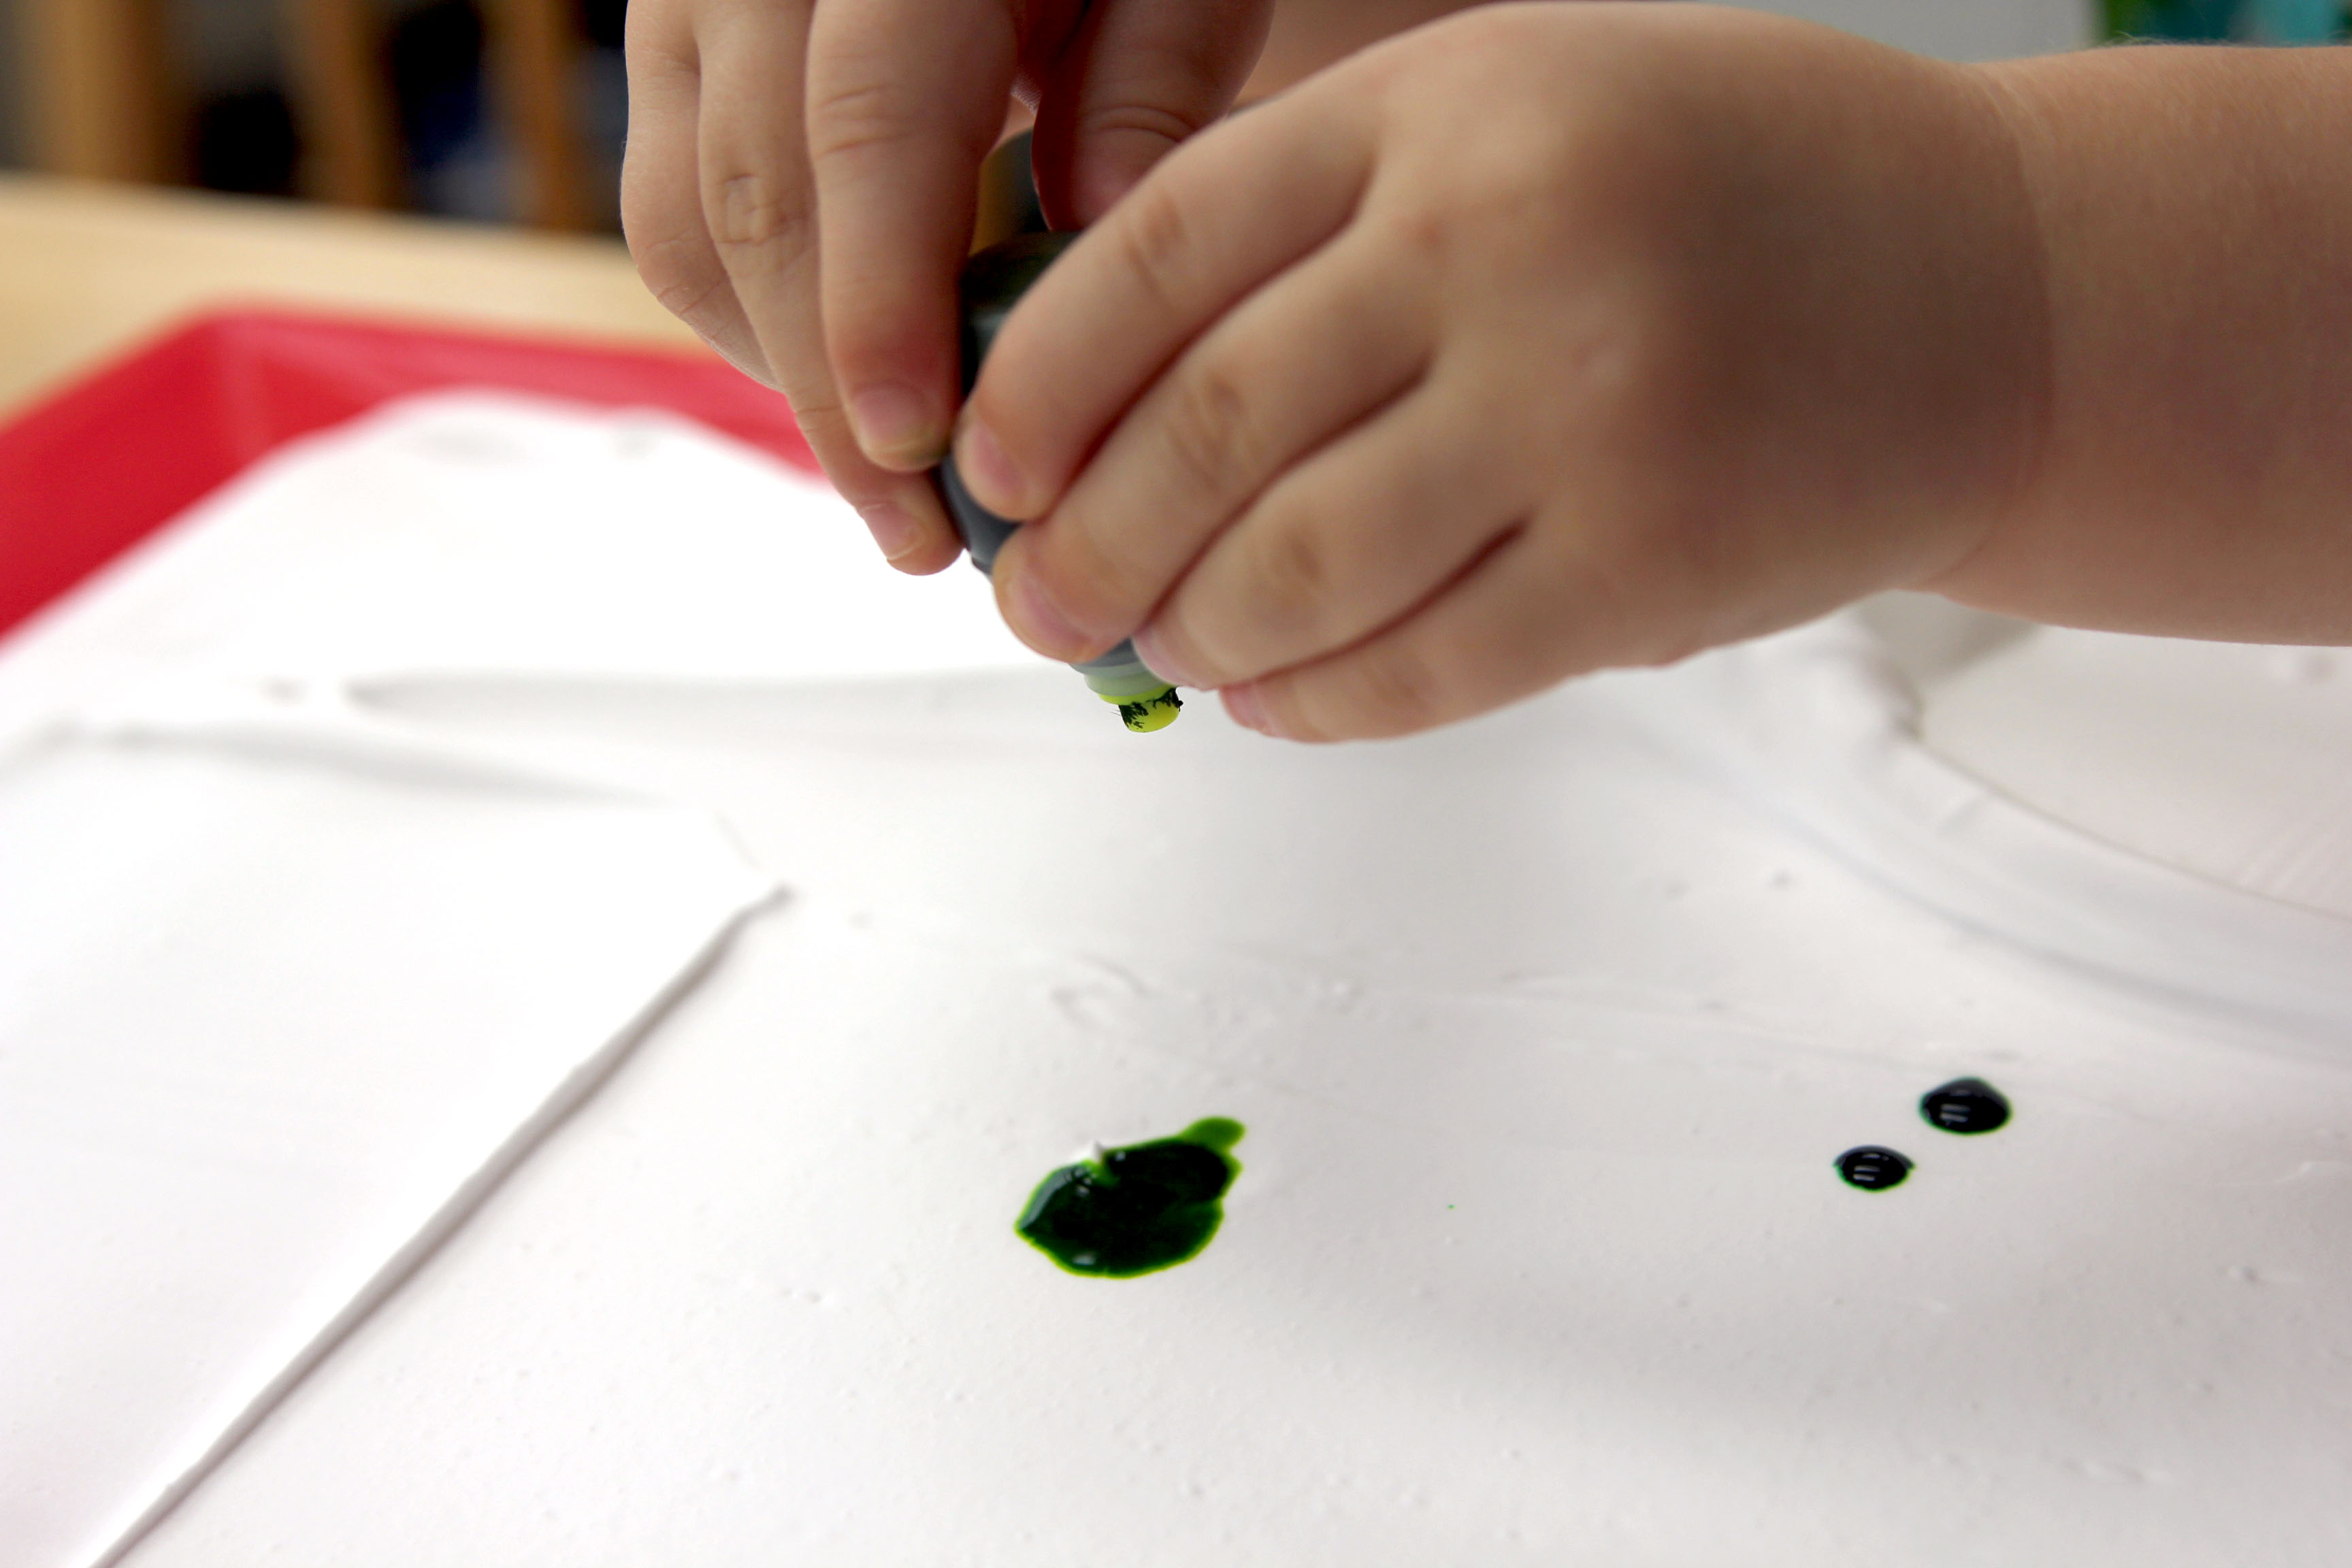
Step 3
Next, have your child squirt the food coloring onto the shaving cream. Use all the colors covering the entire shaving cream canvas with drops. This was a favorite of V's; She loved squirting the colors on the shaving cream canvas.
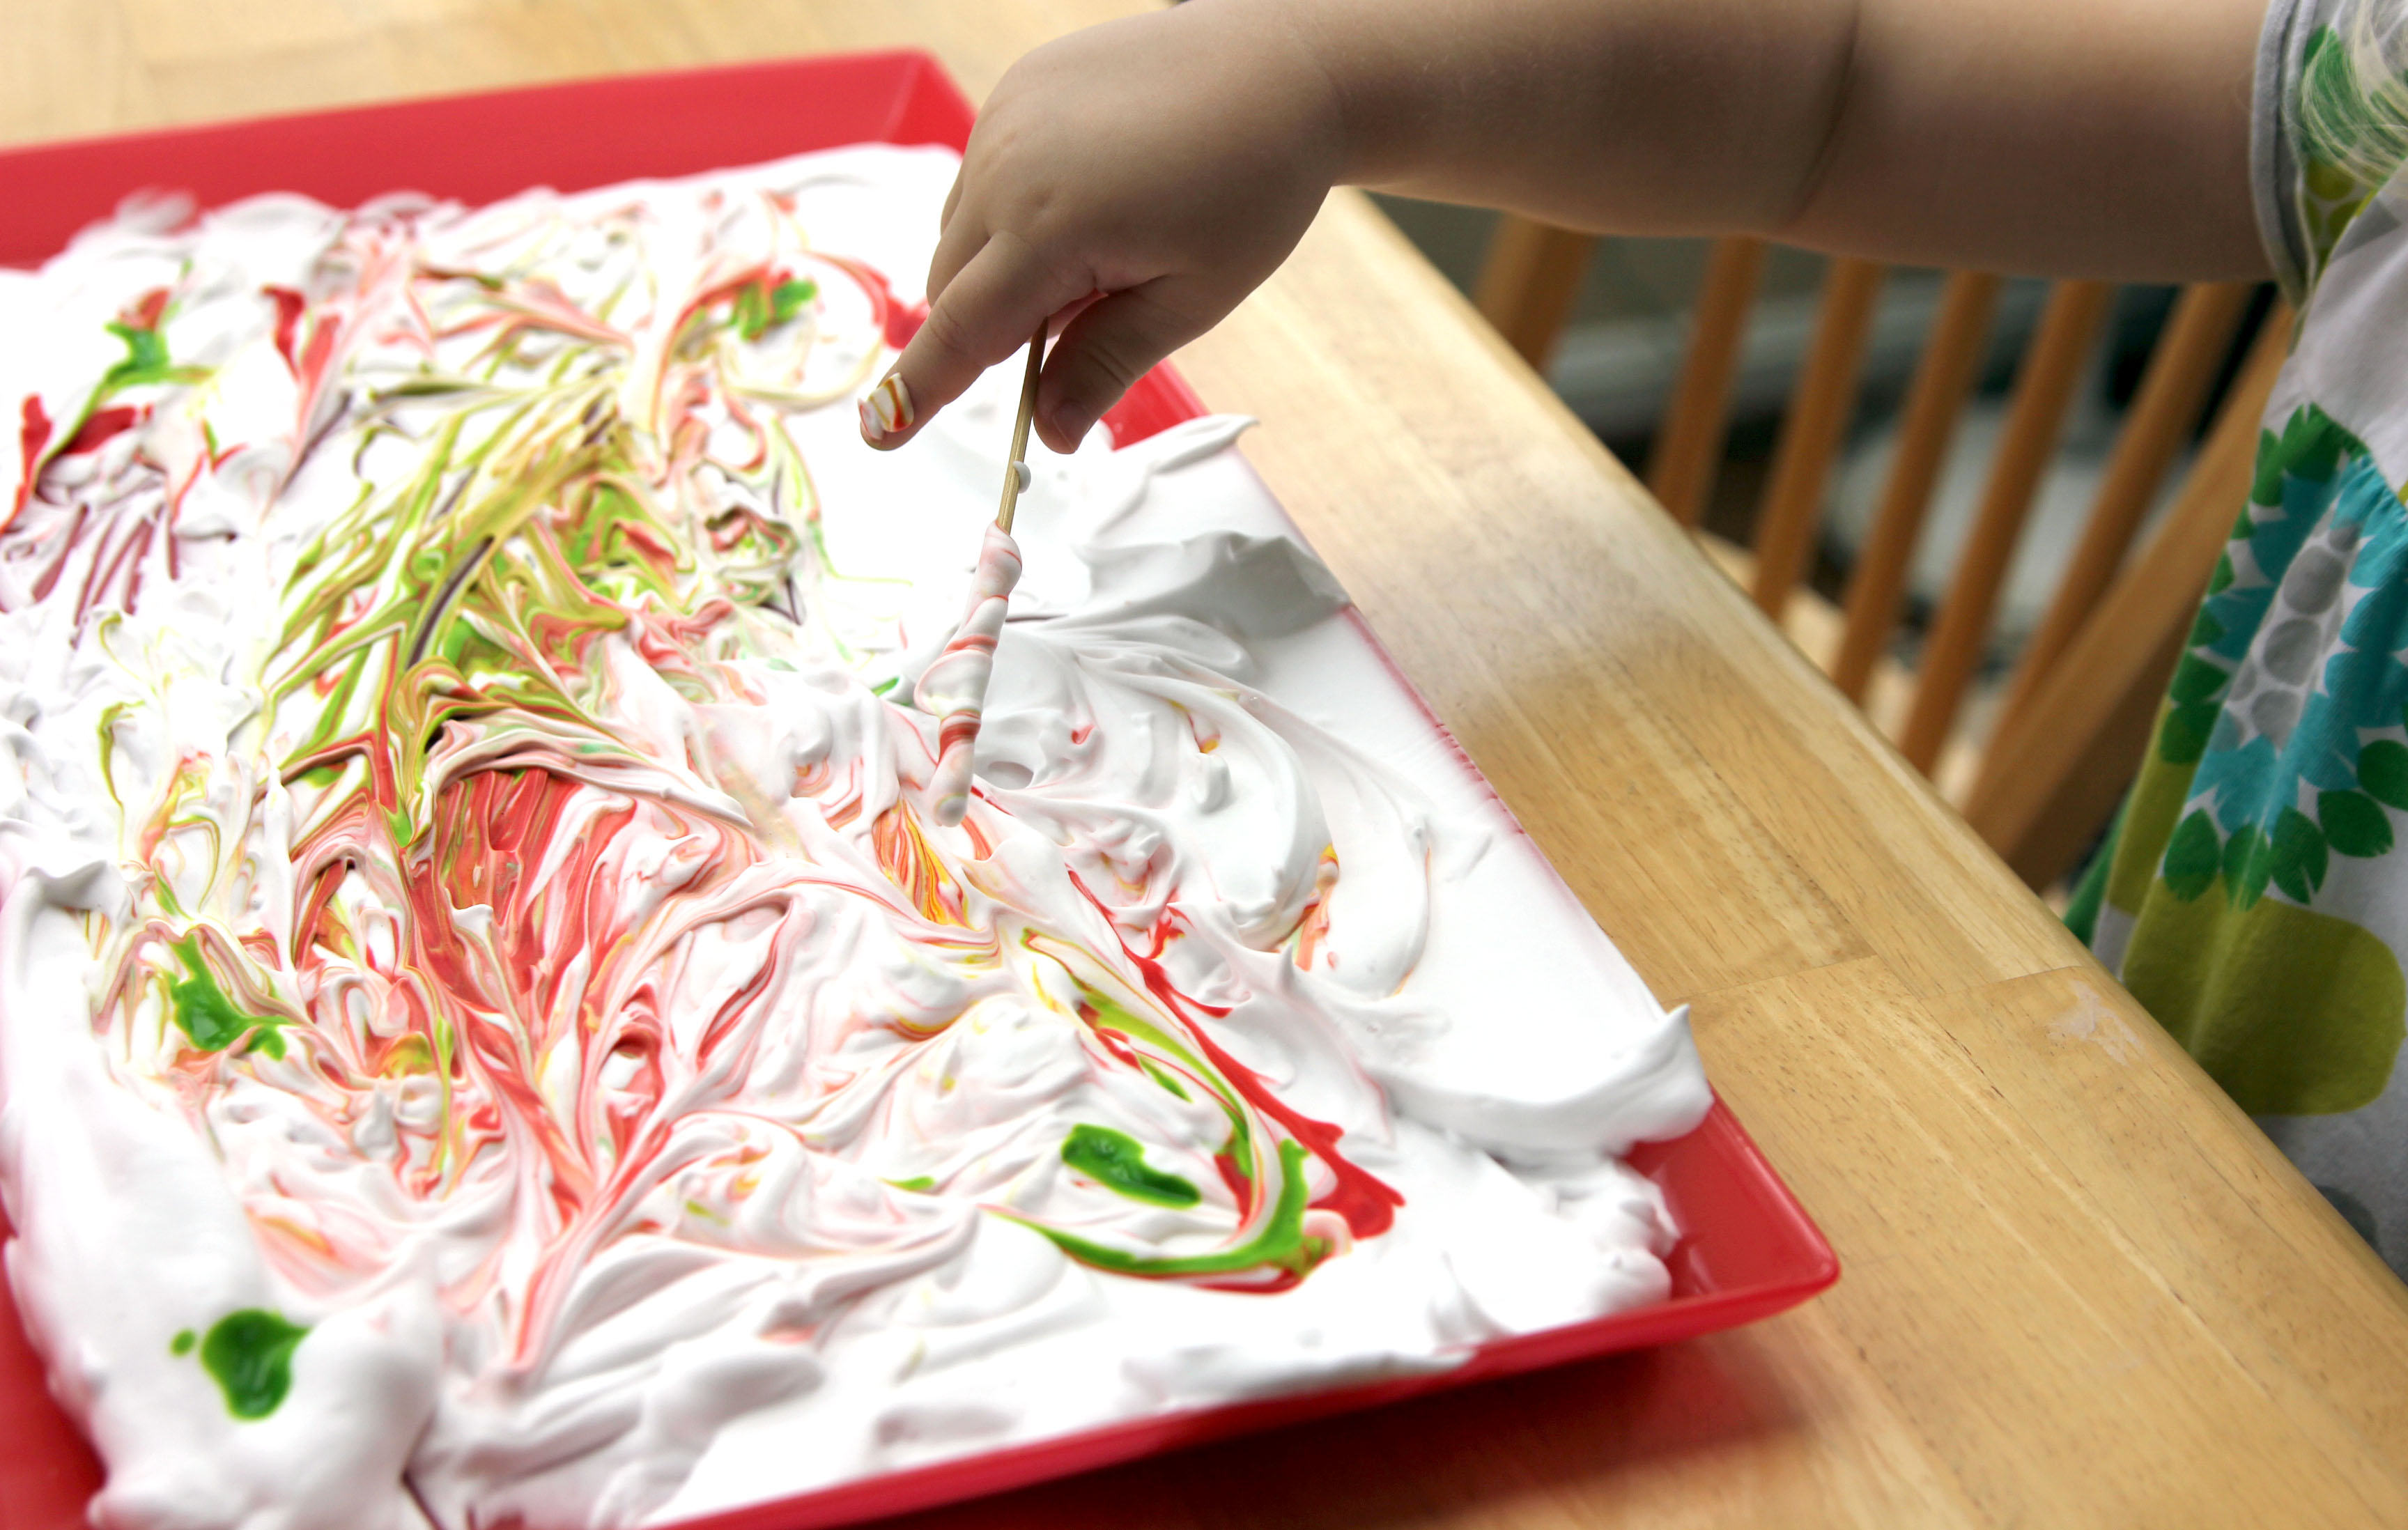
Step 4
Using the skewer or toothpick, have your child swirl the food coloring around the shaving cream to create swirls of color. V loved swirling together all the pretty colors.
Step 5
Next, have your child place the leaves down into the shaving cream.
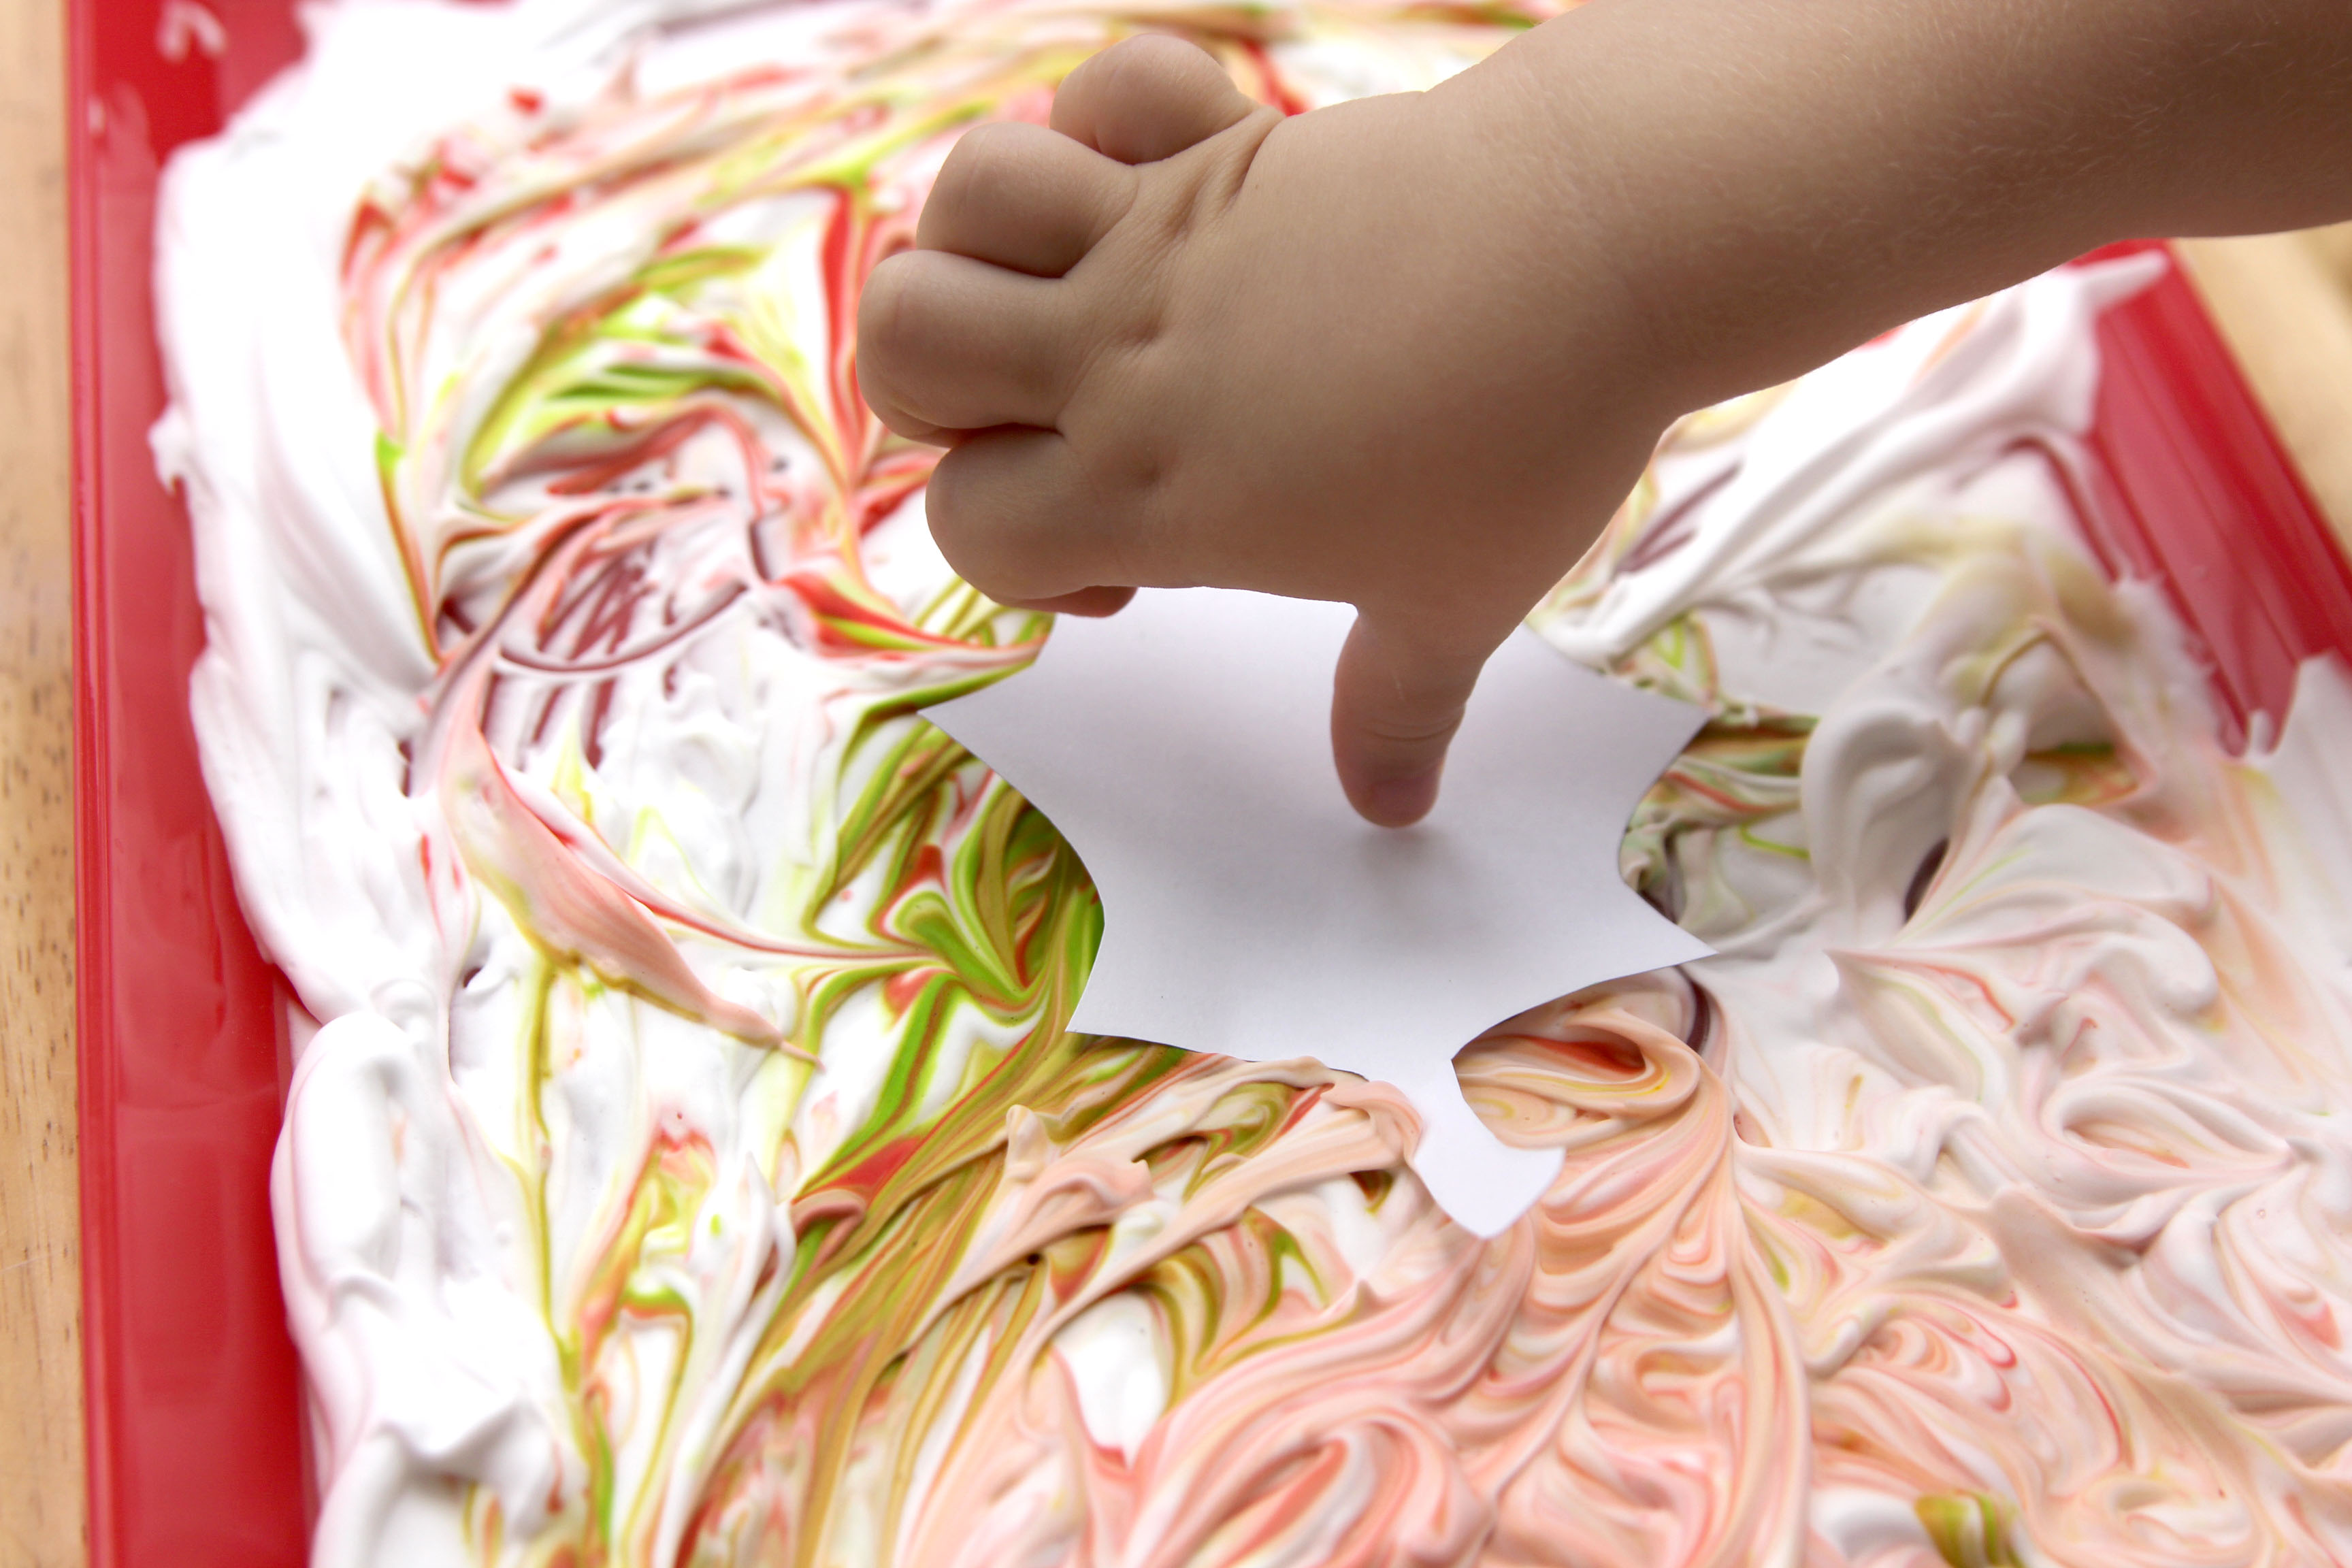
Step 6
Be sure to press down all the corners so that the paint gets on the entire leaf.
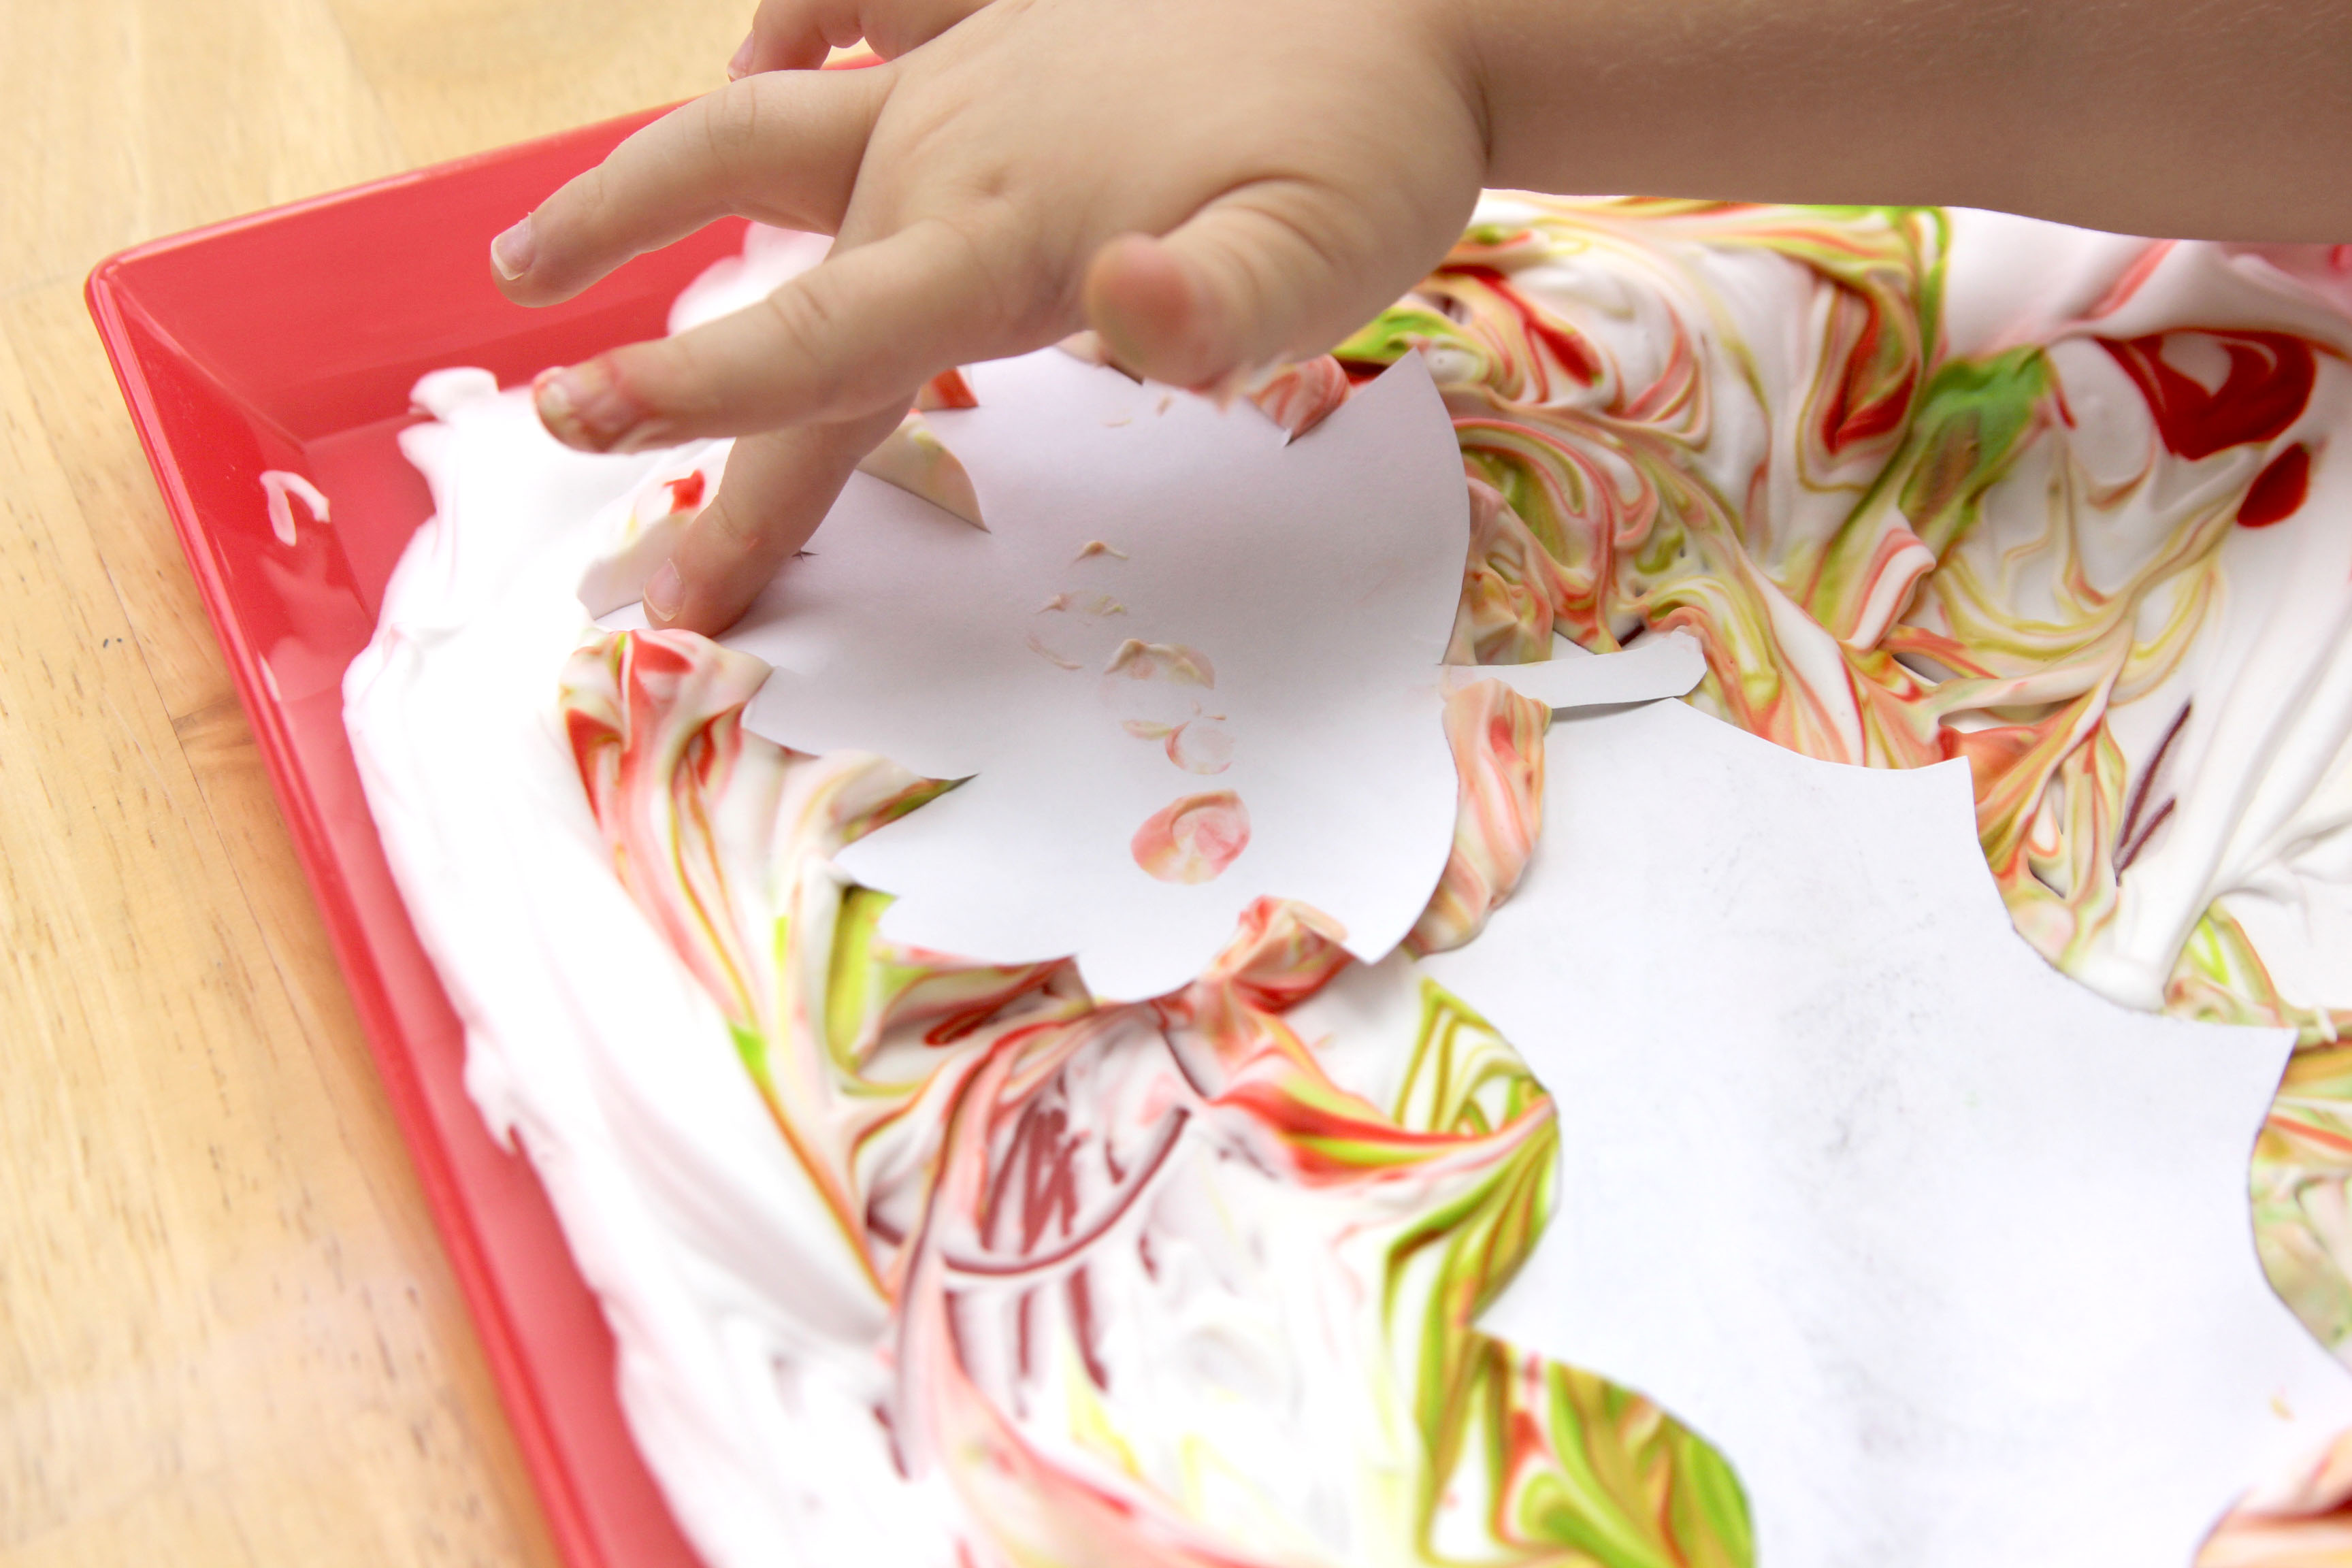
Step 7
Once the leaves have been pushed down, covering one side of each leaf, carefully remove them from the shaving cream.
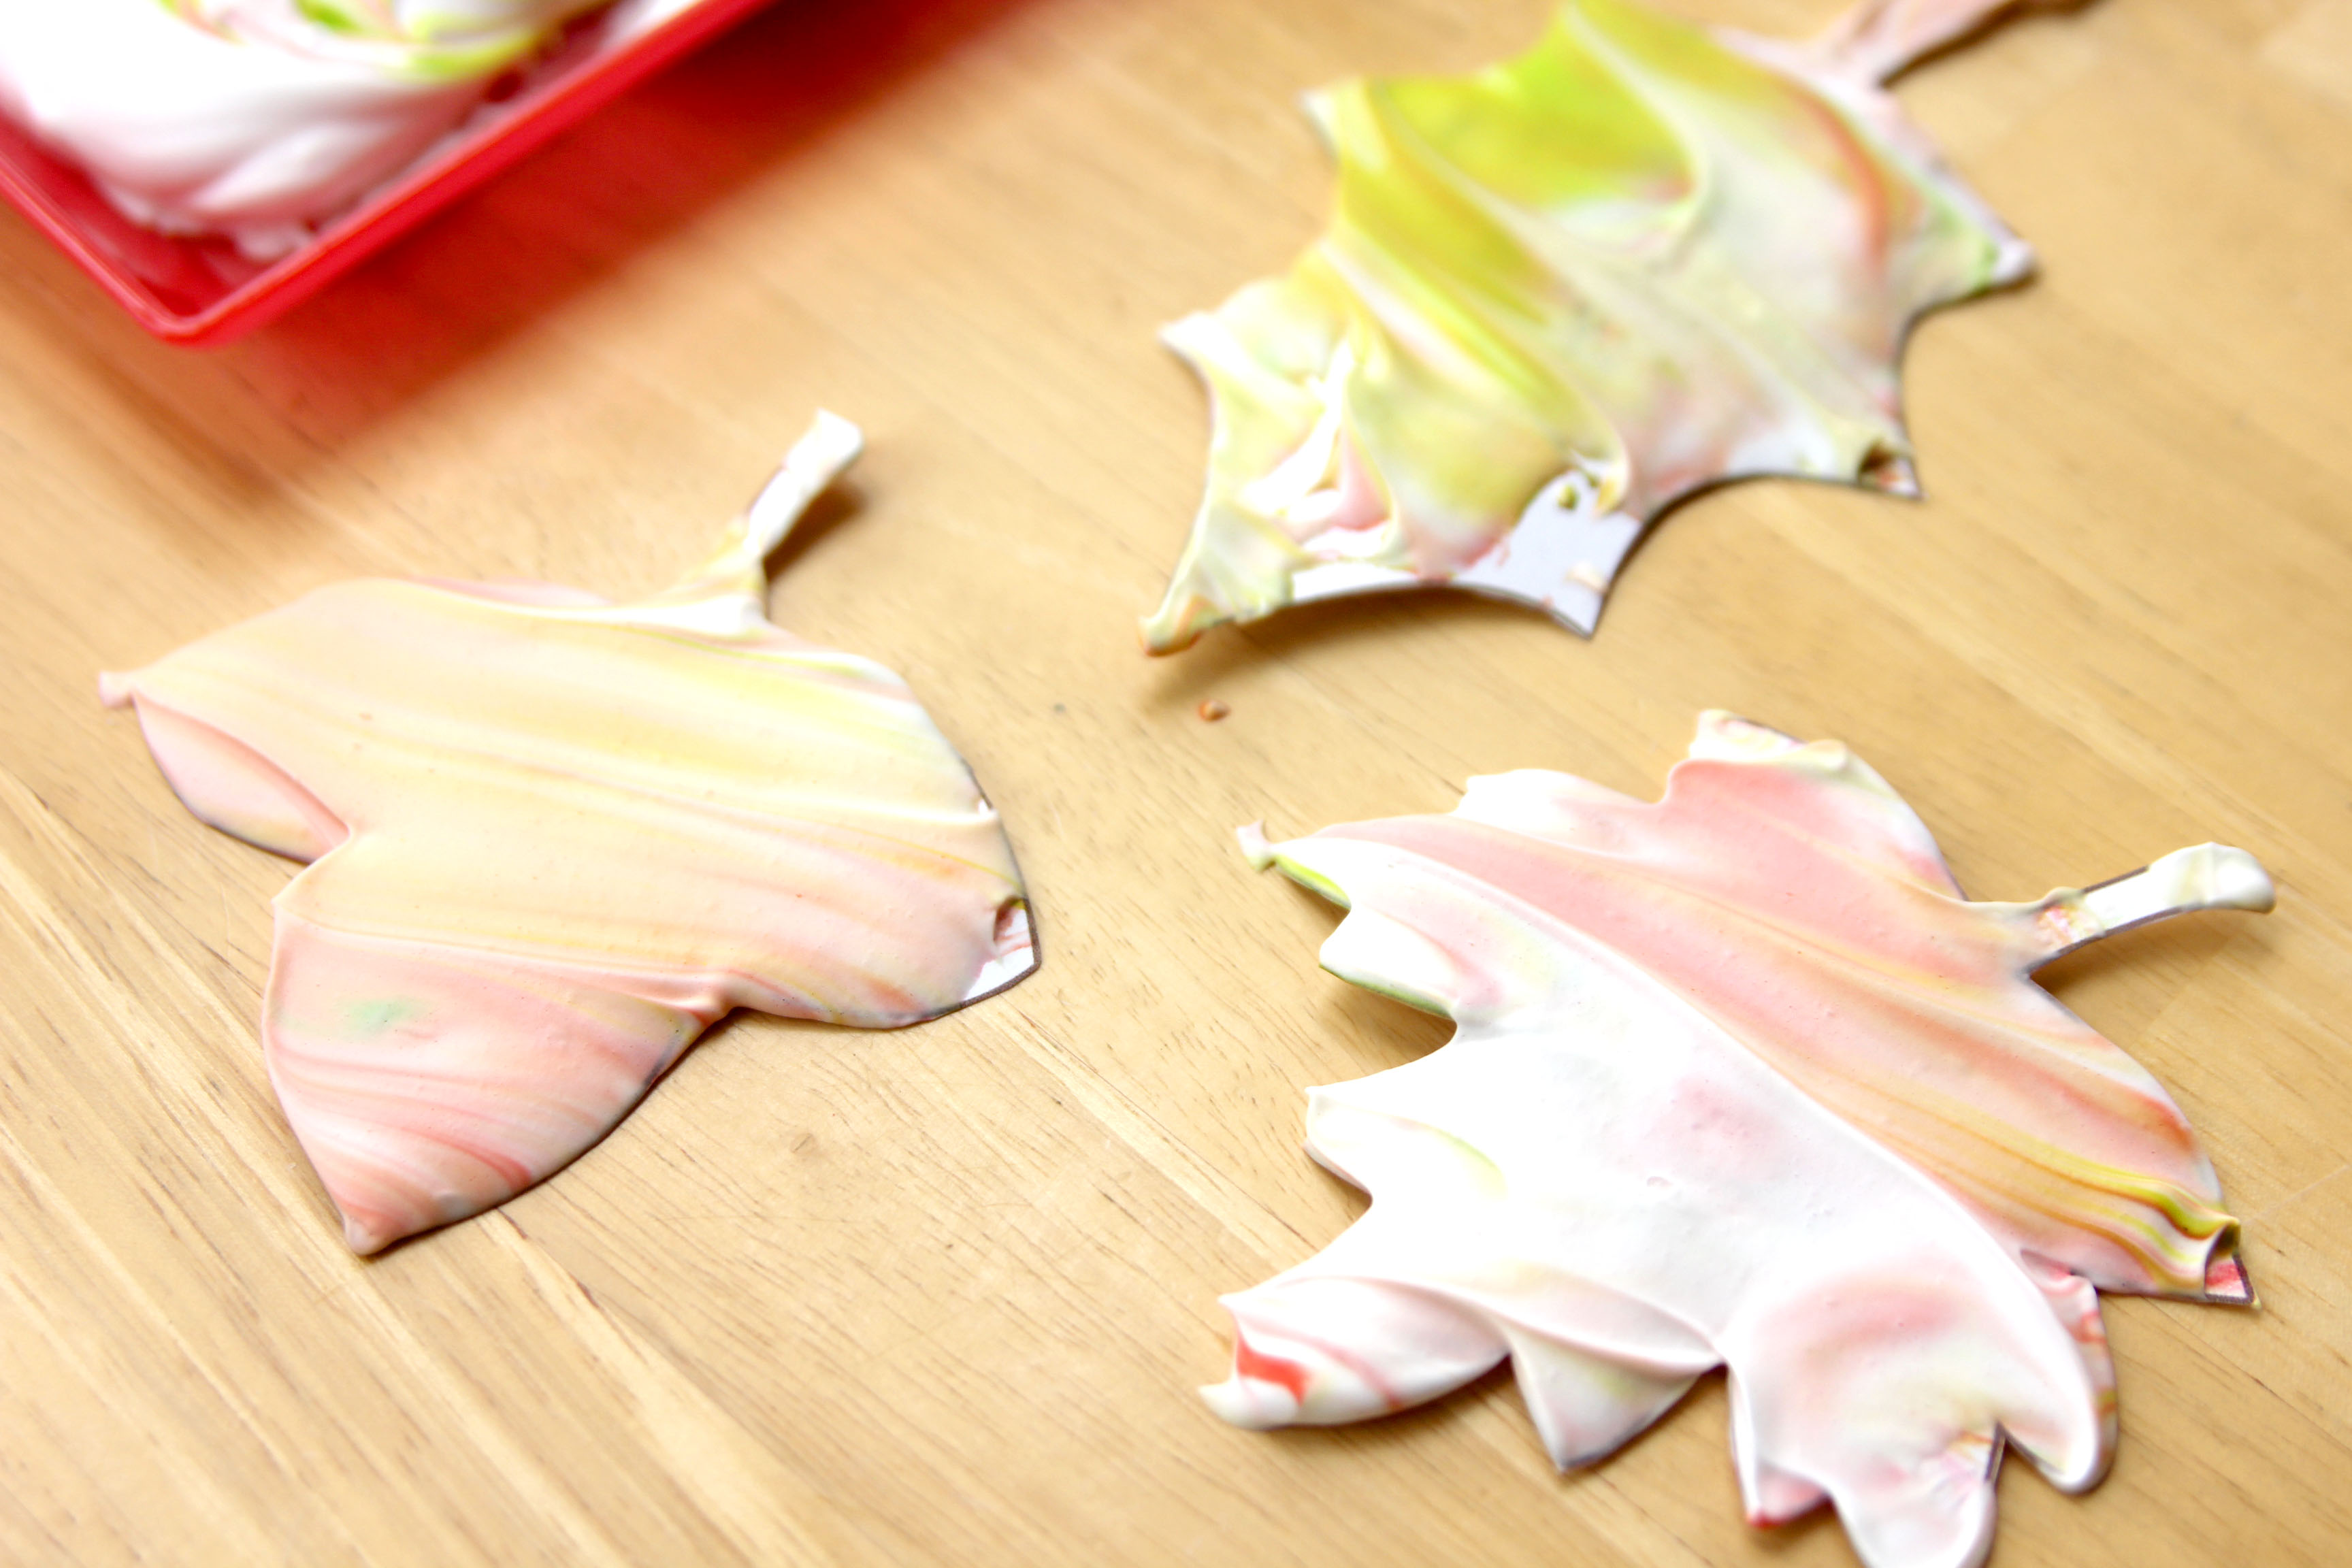
Step 8
Lay out leaves (shaving cream side up) on a paper towel. Have your child hold down the leaf and then gently wipe off the shaving cream from each leaf.
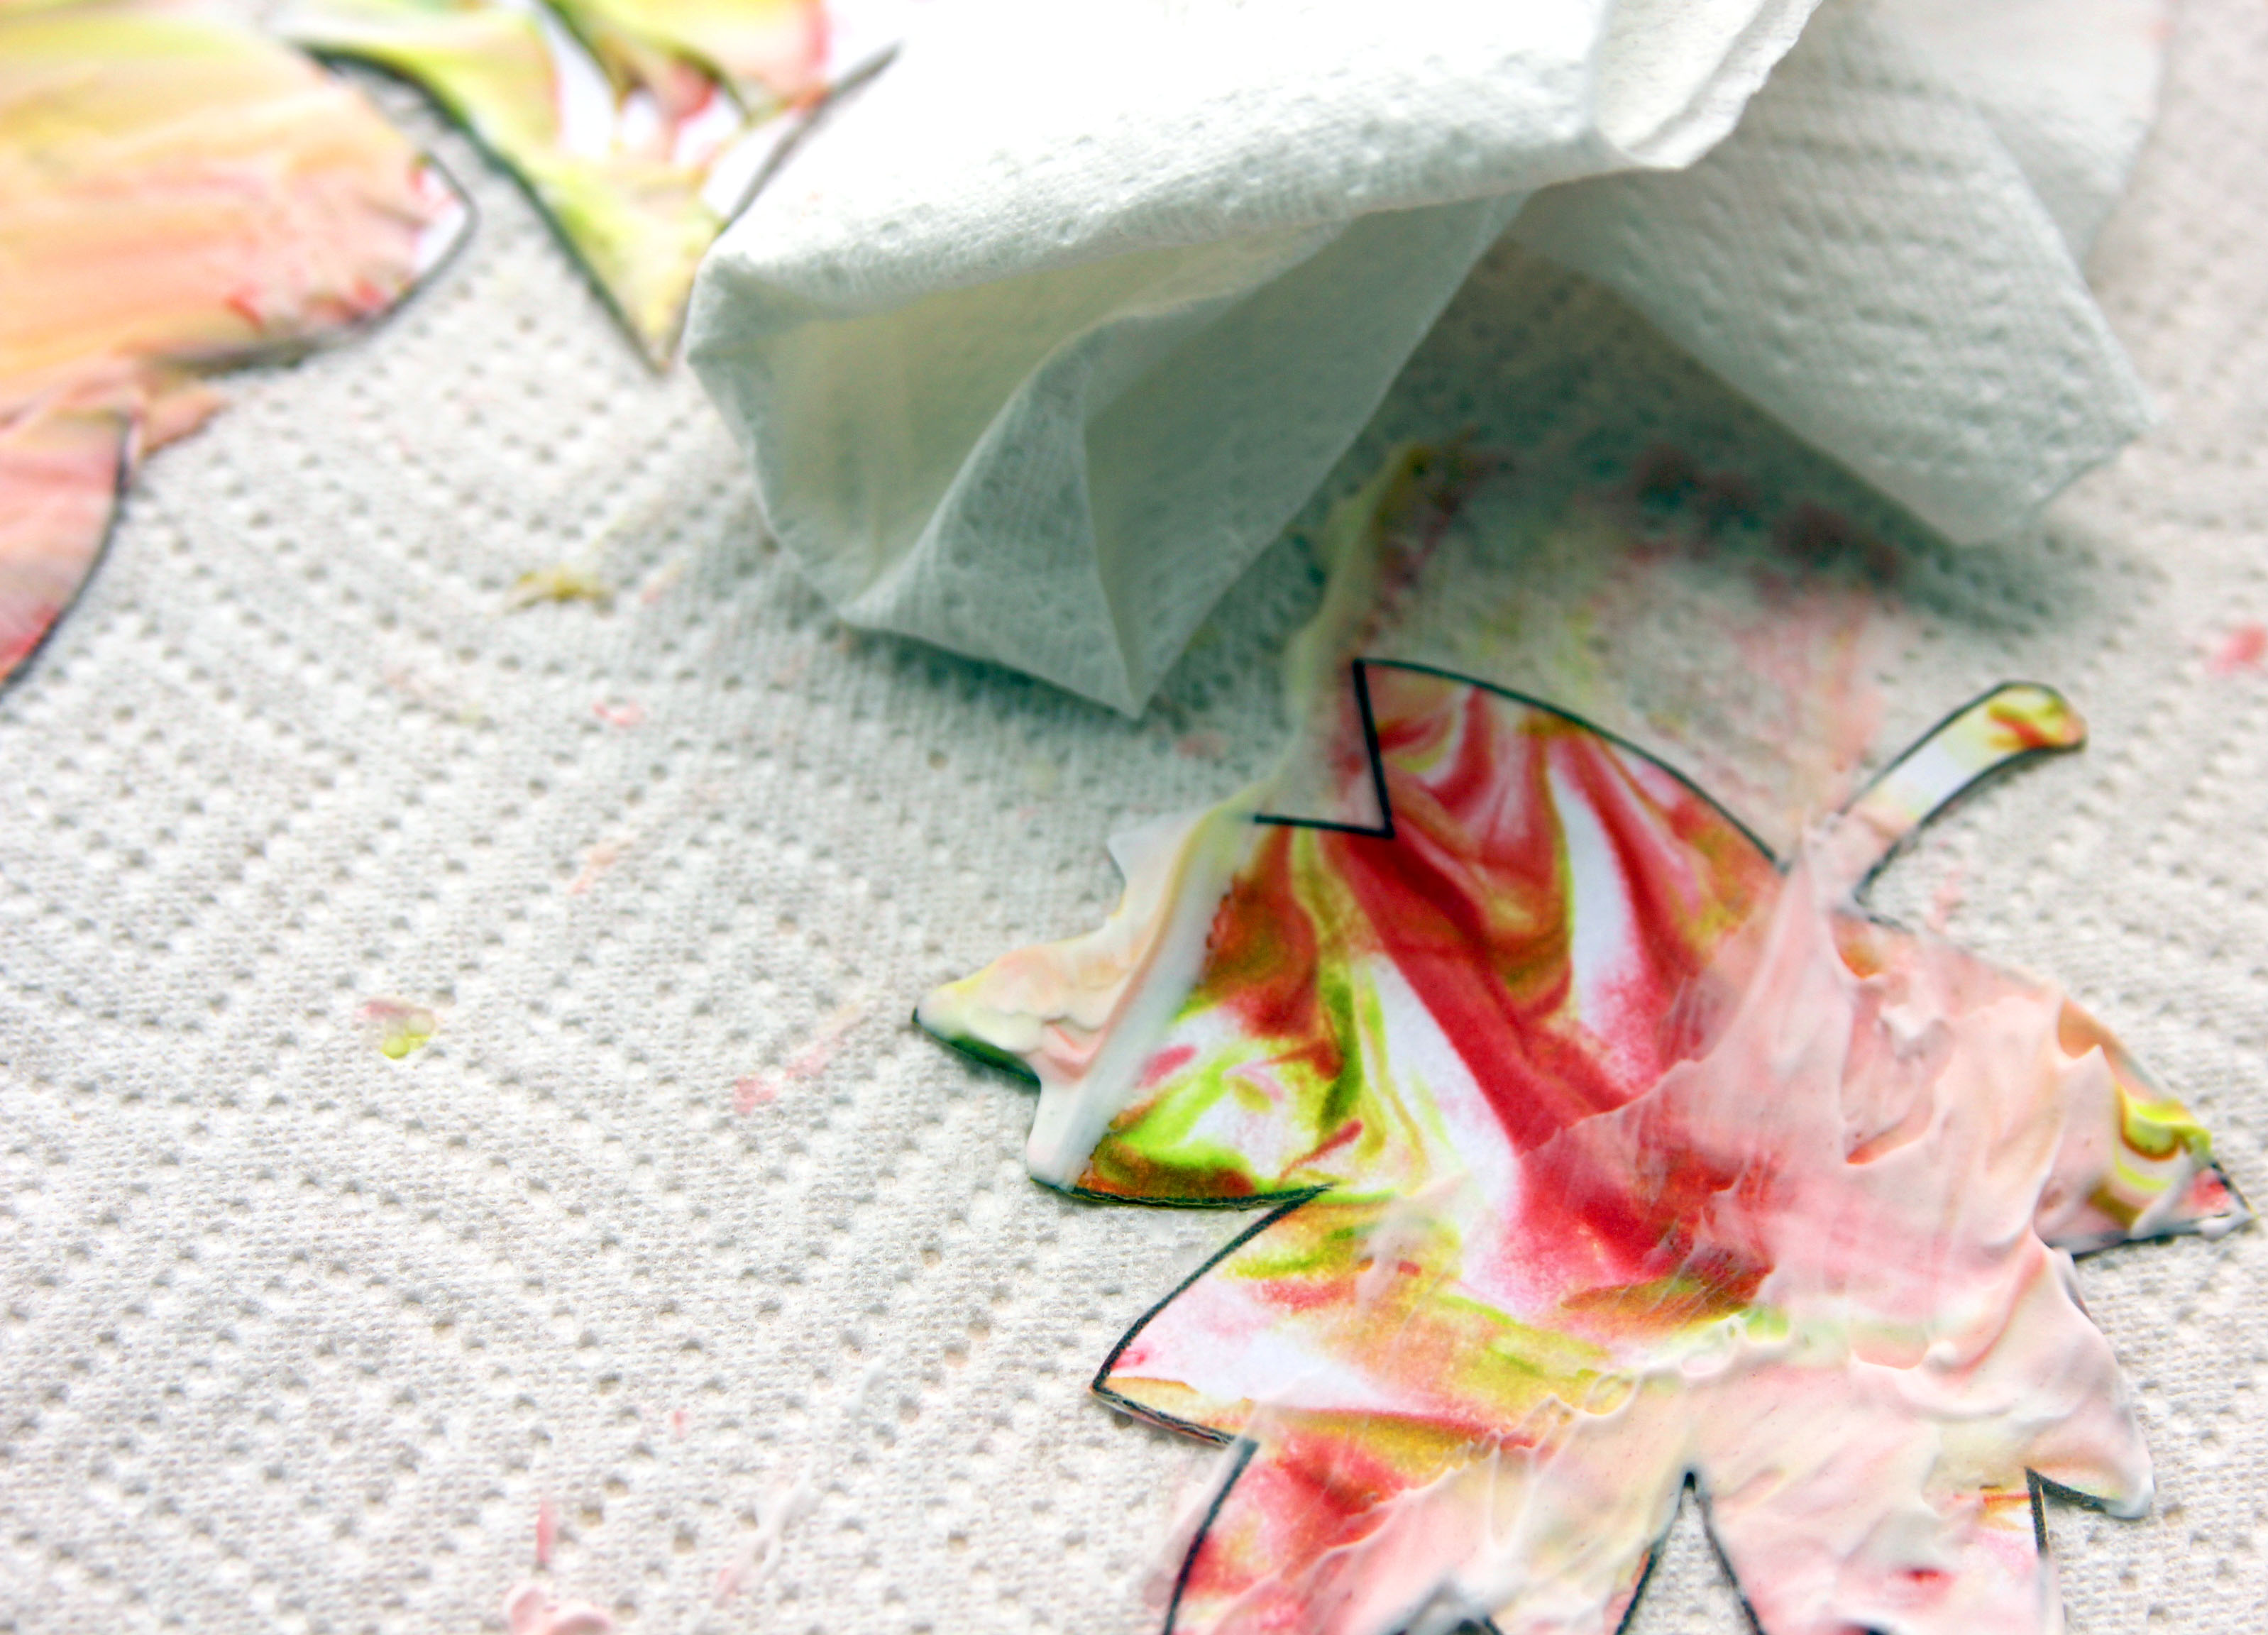
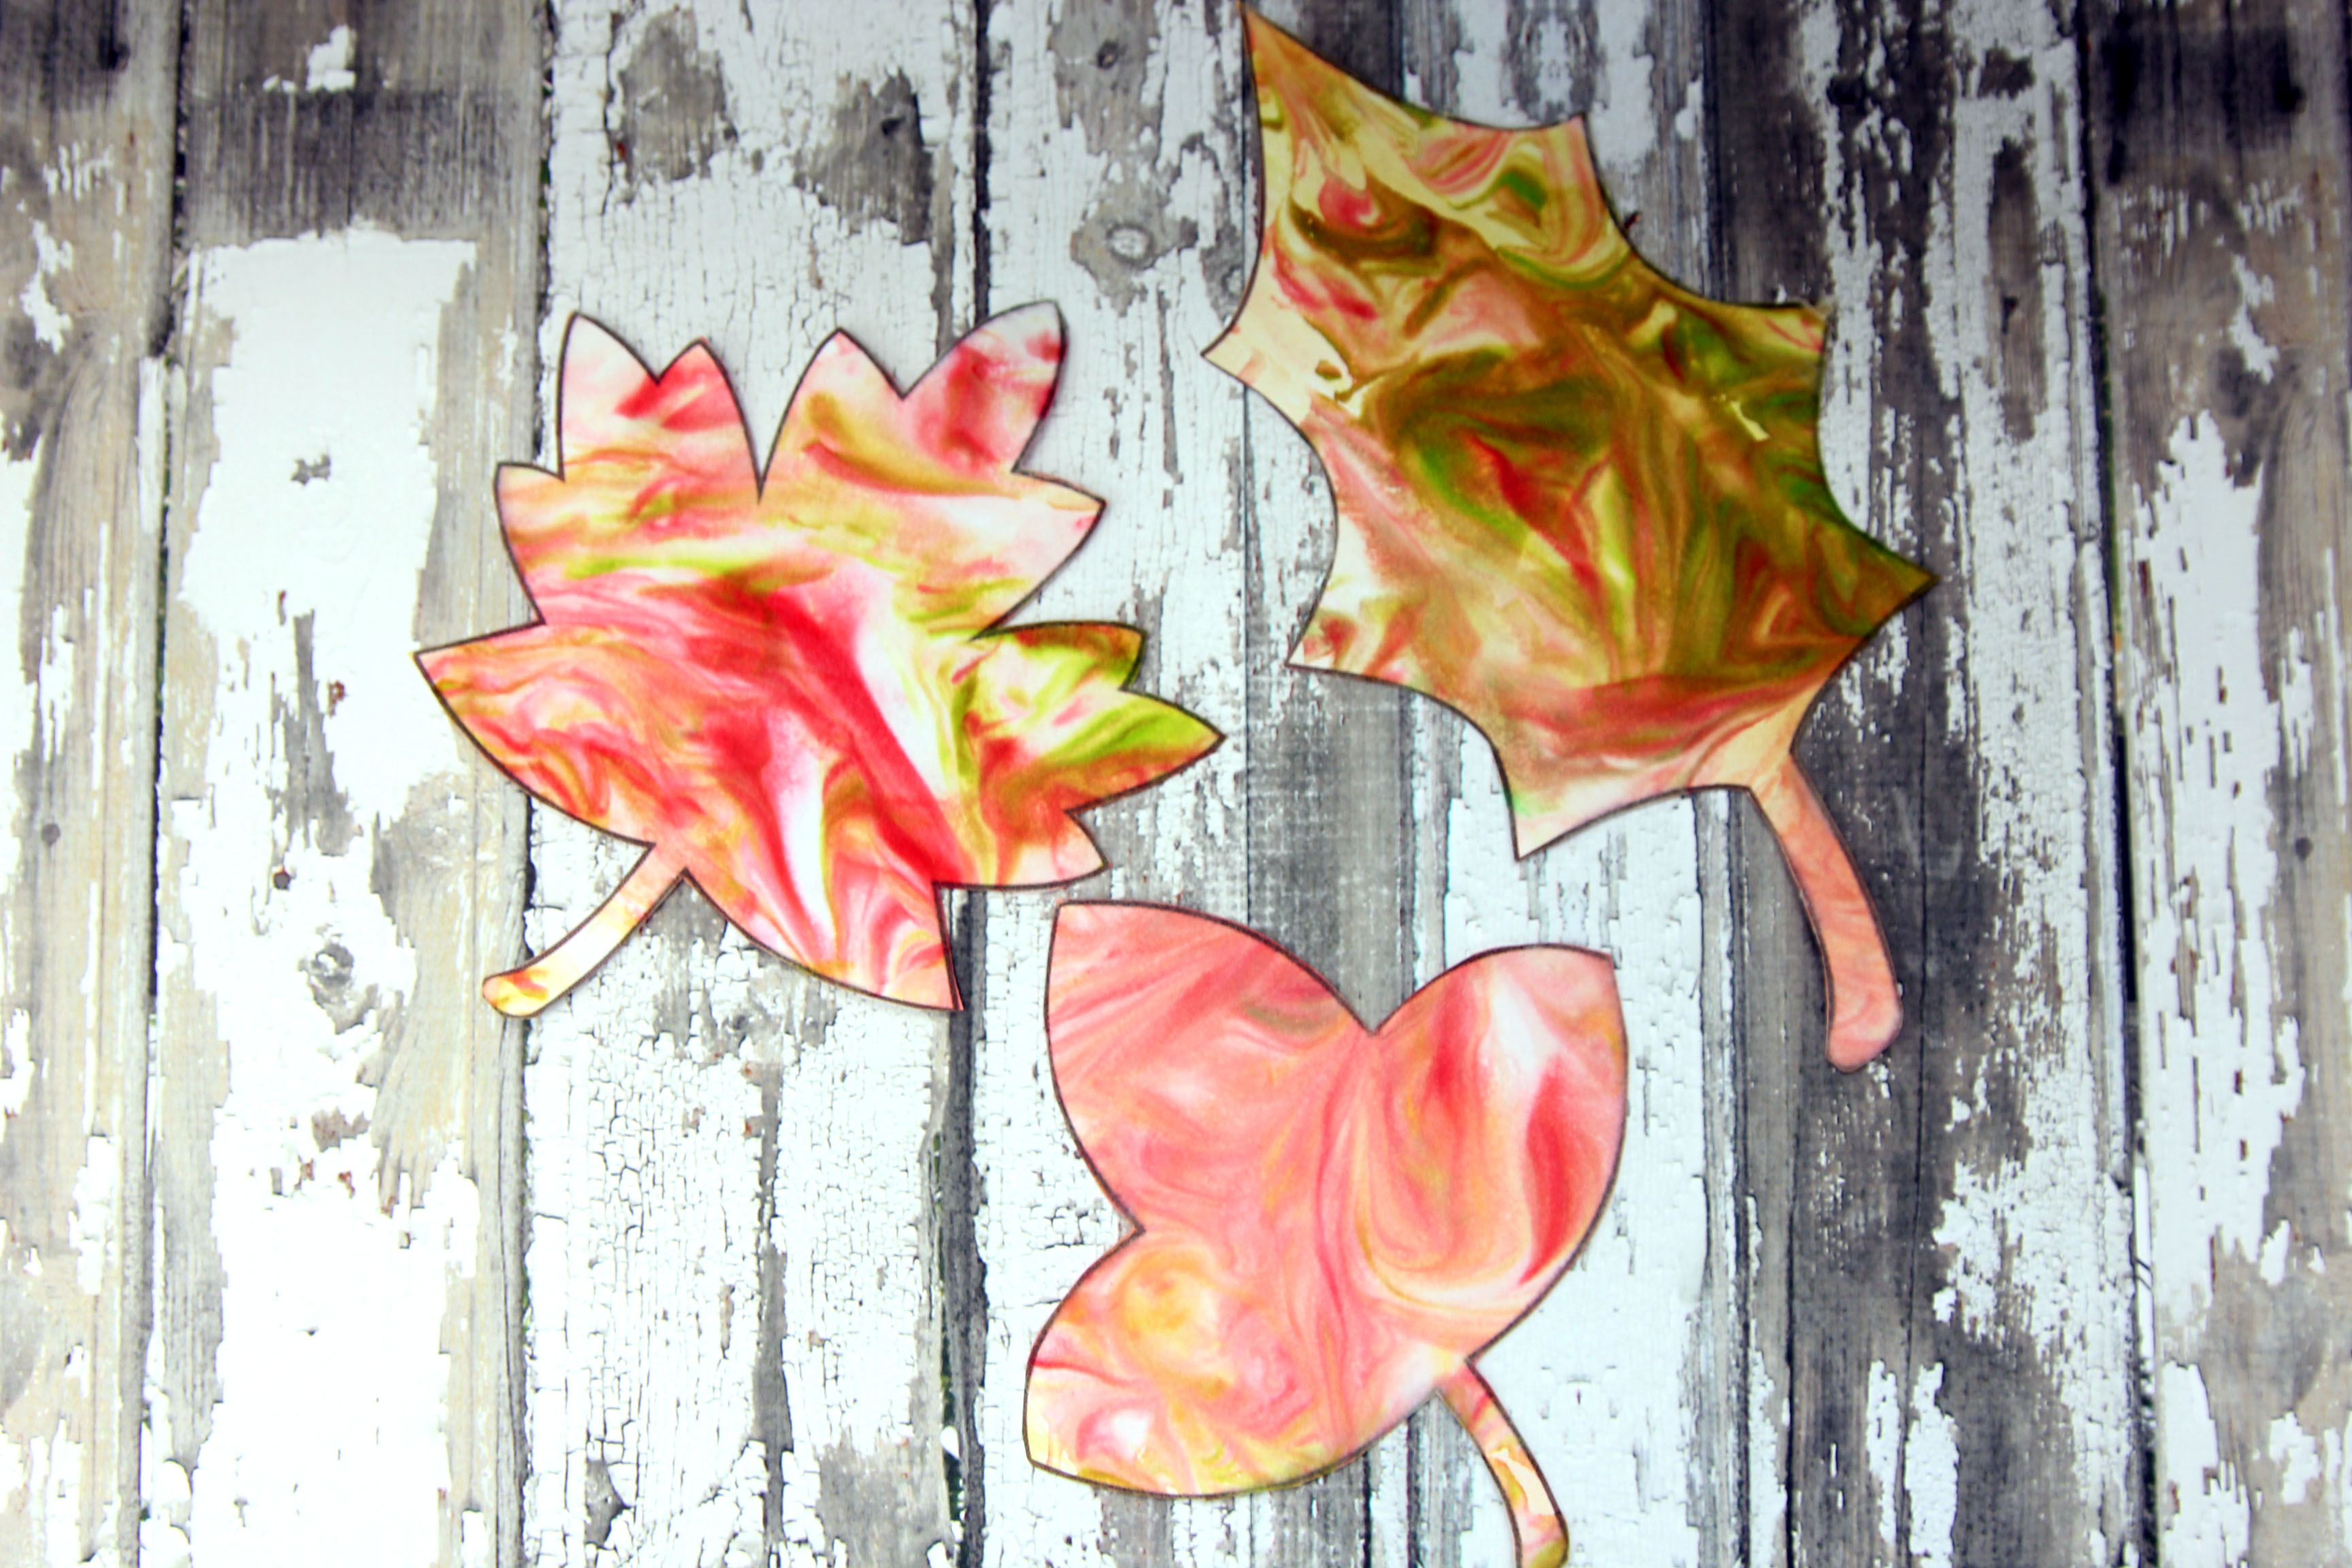
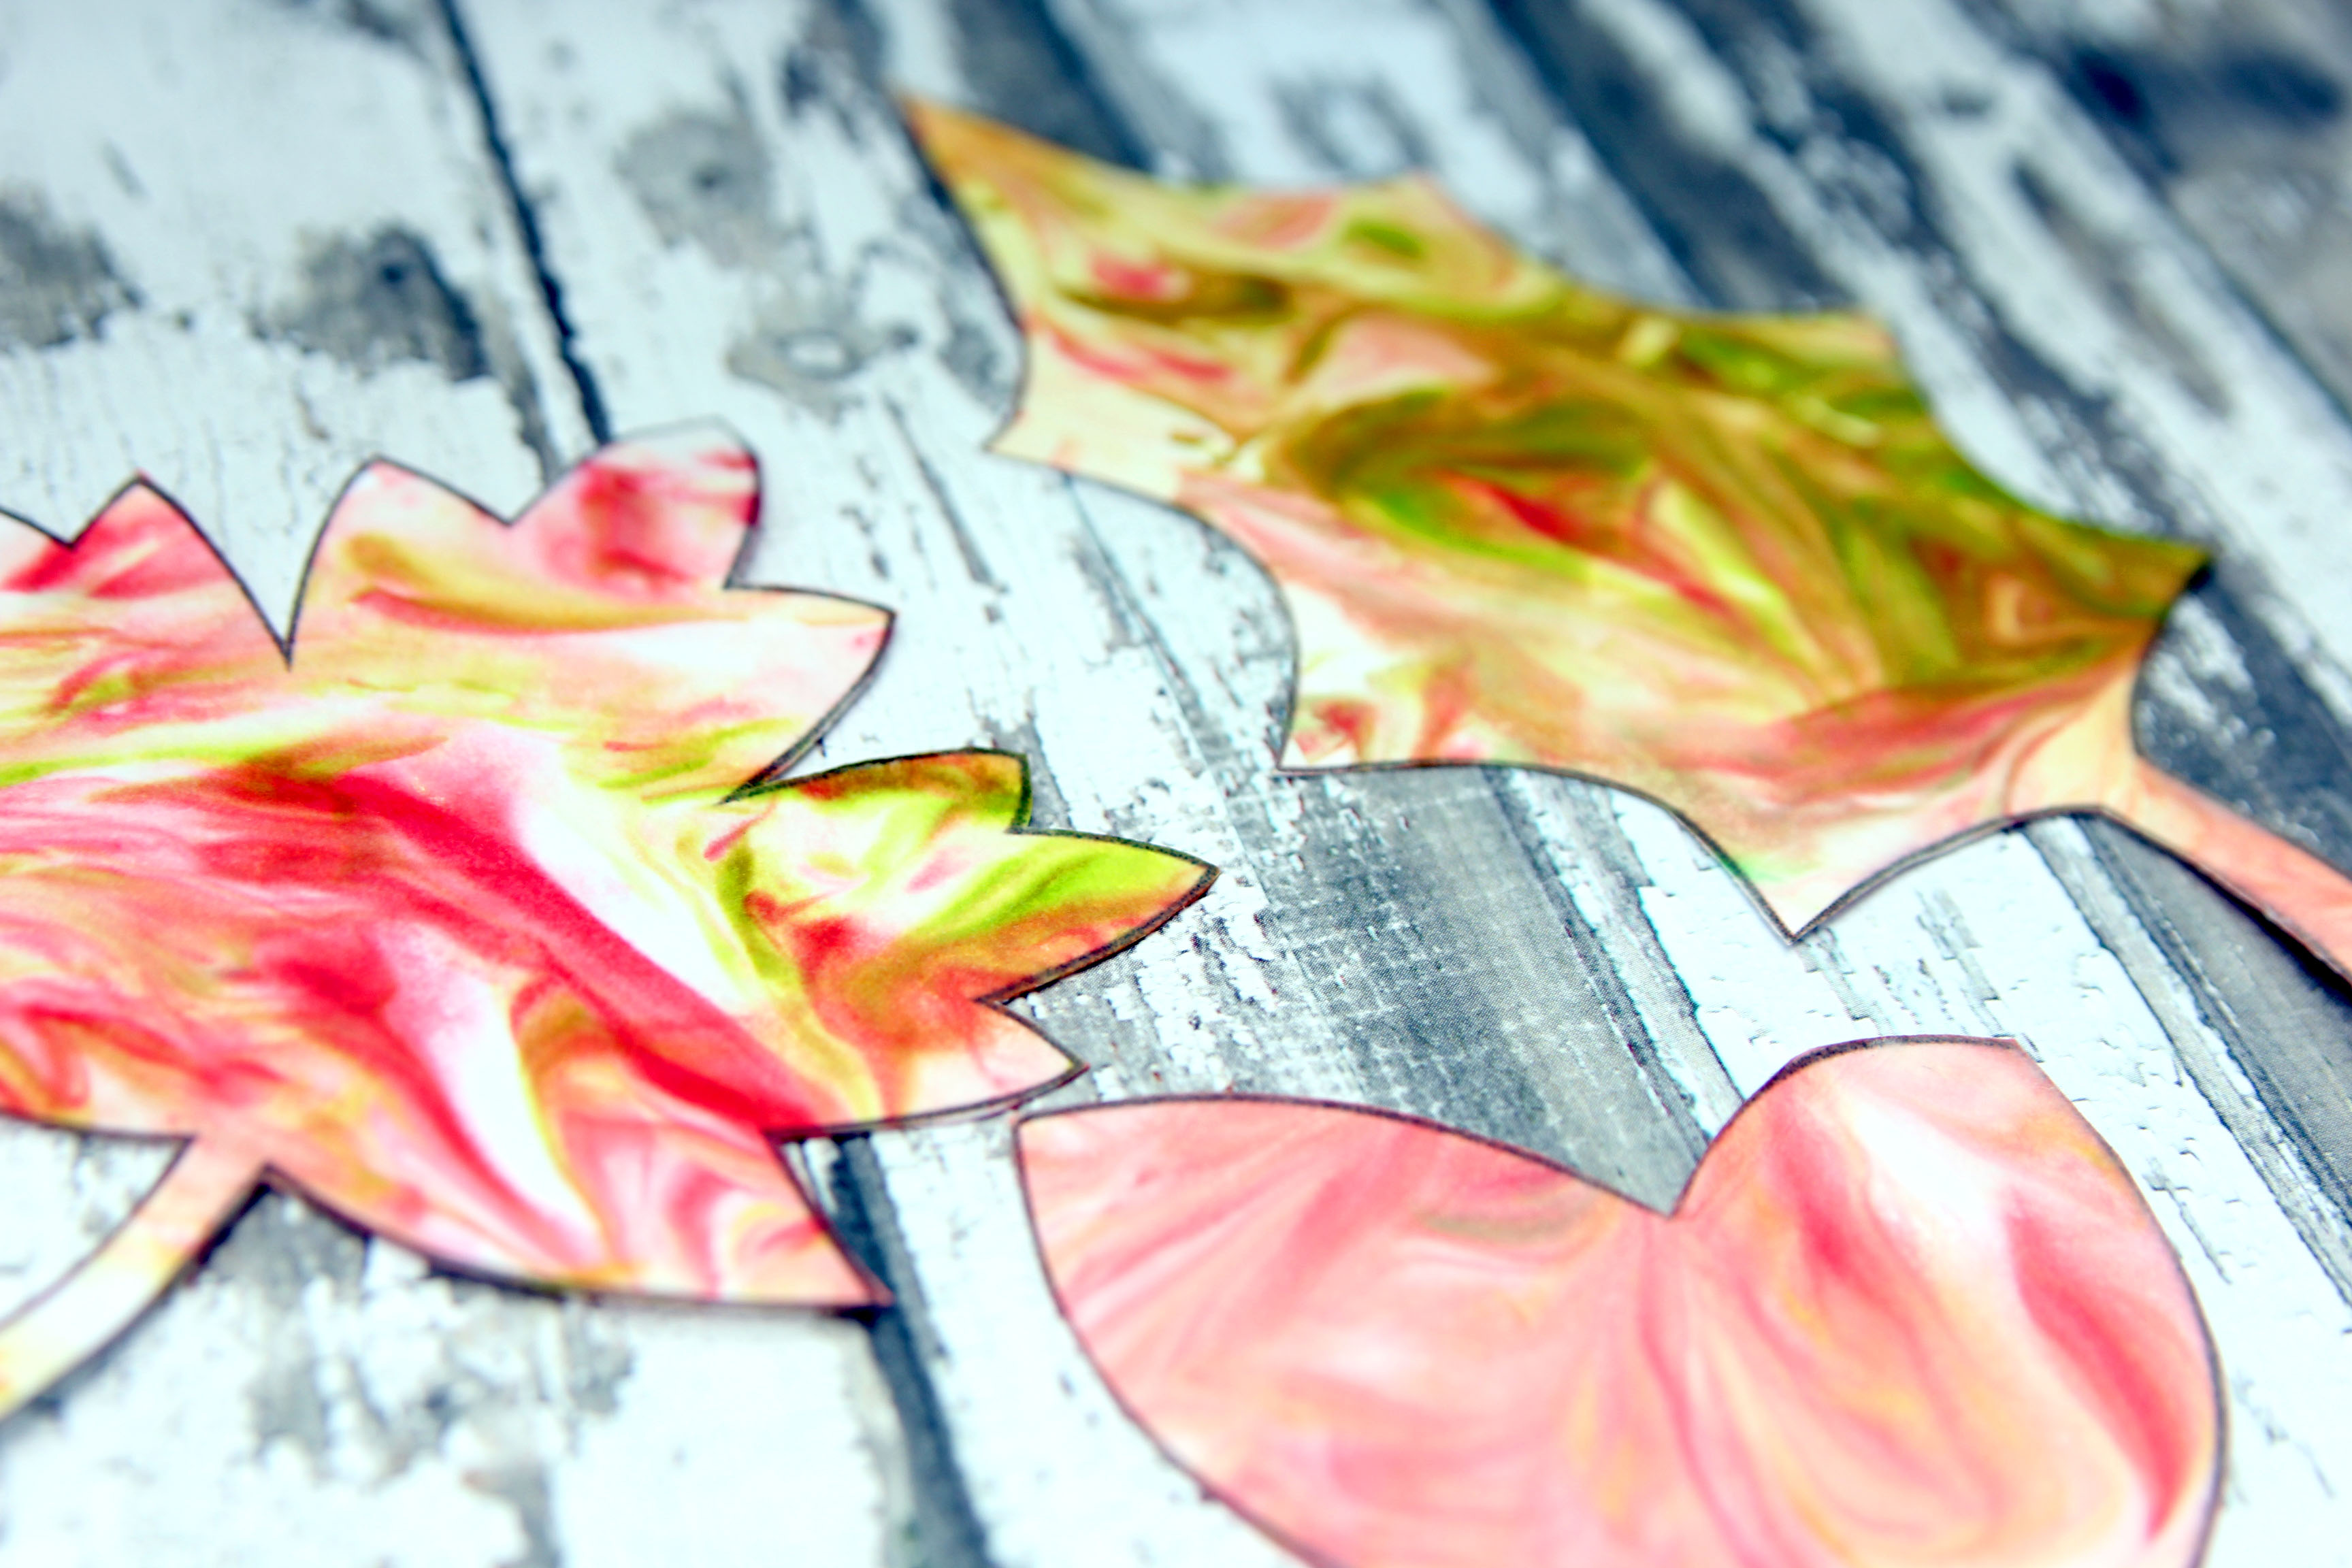
Done!
And this is the best part - the beautiful marbleized effect that appears under the shaving cream! V was super excited to see the final result. There was lots of oohing and aahing!