Step-by-step tutorial
Step 1
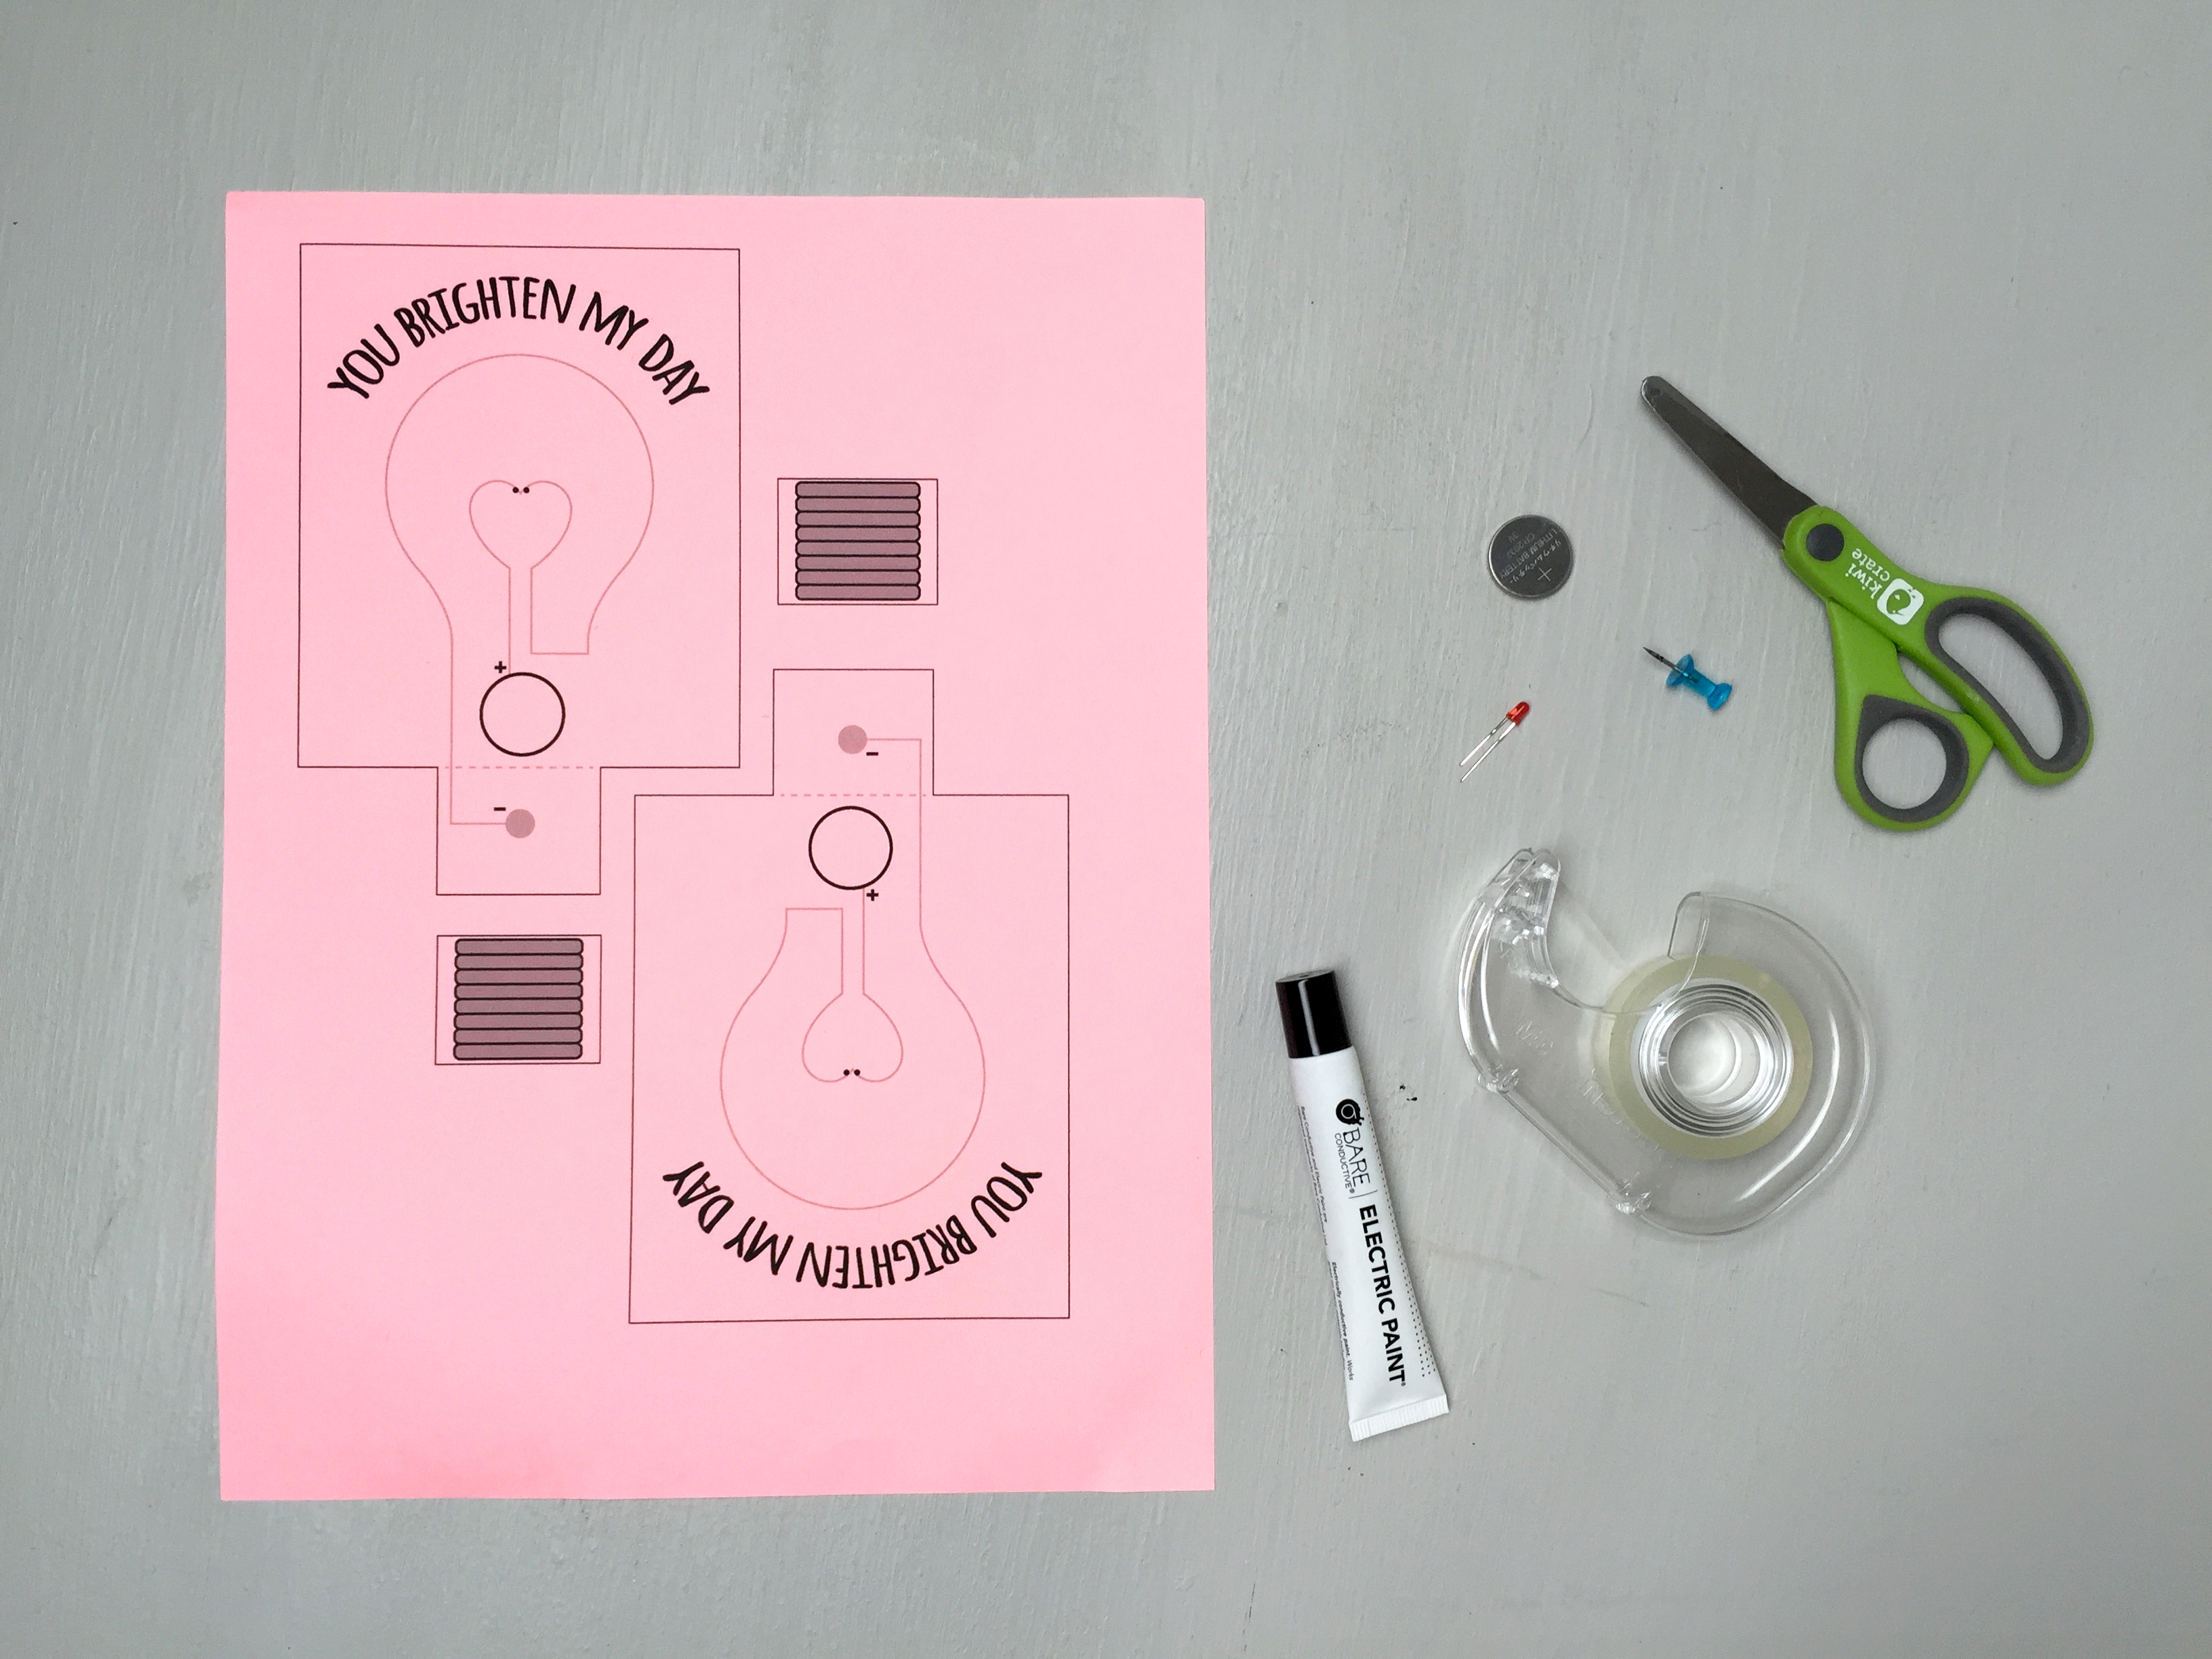
Gather your materials.

Step 2
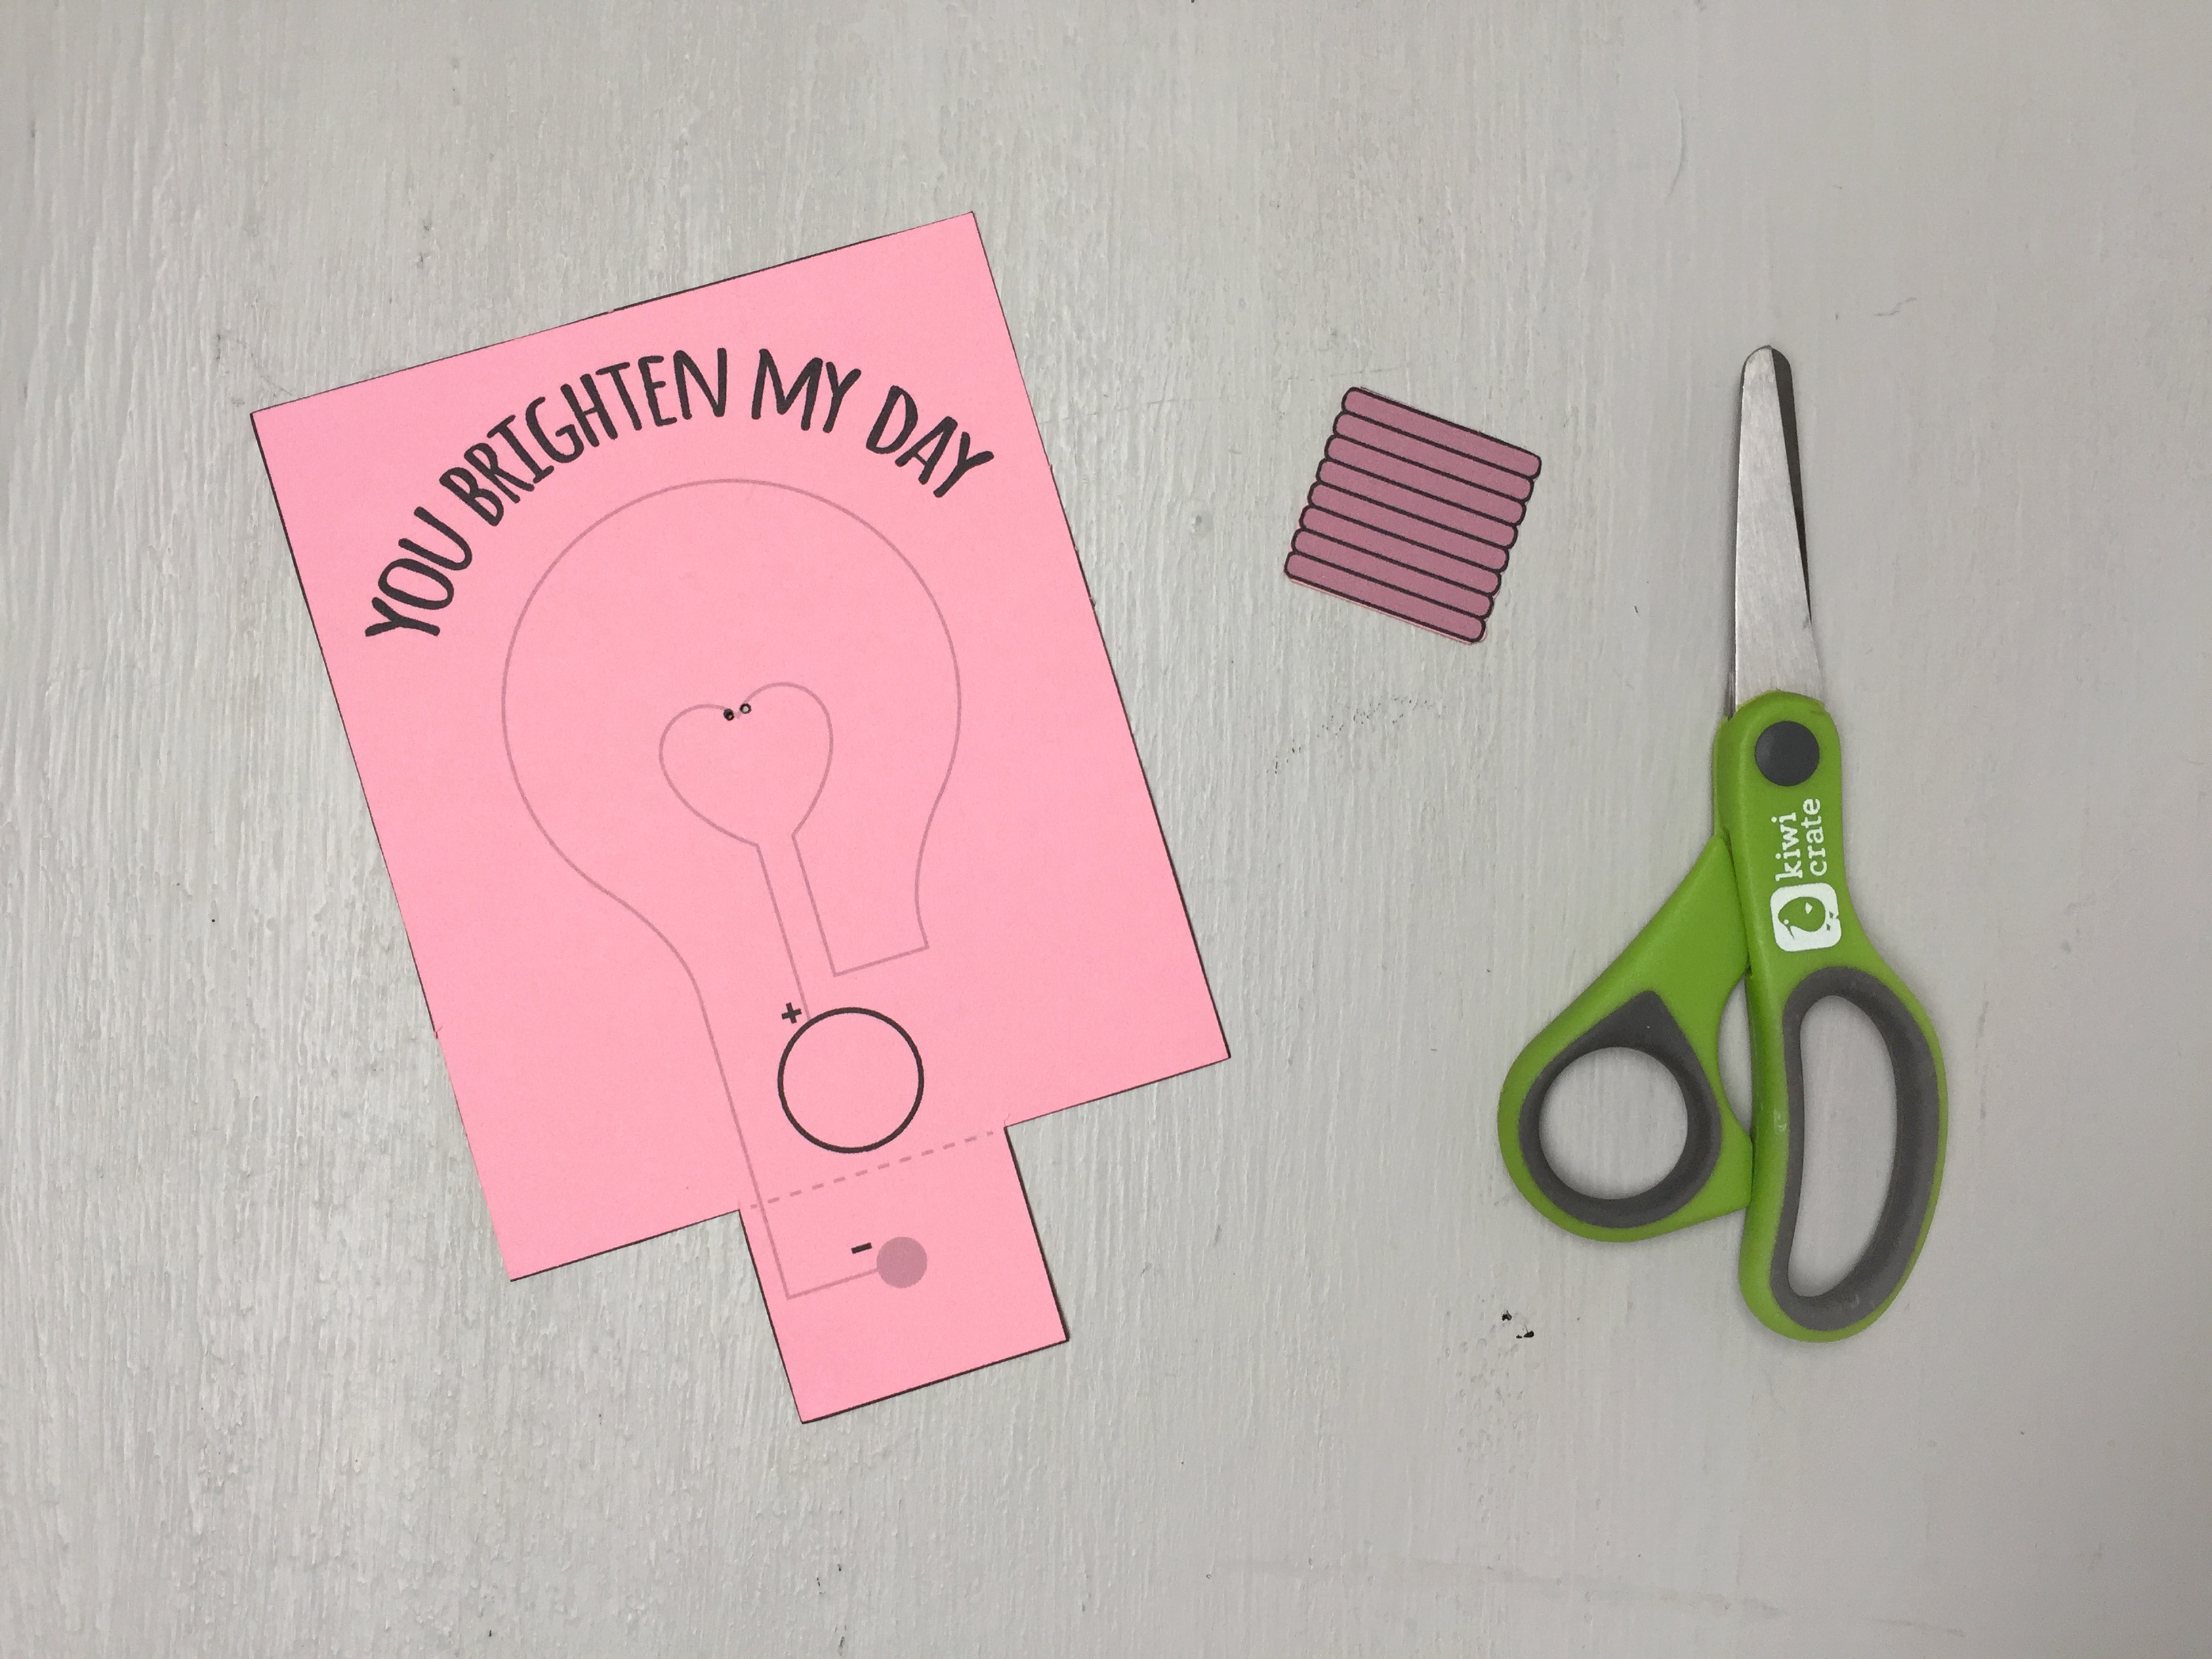
Print out the template onto colored paper and cut along the solid black lines.
Step 3
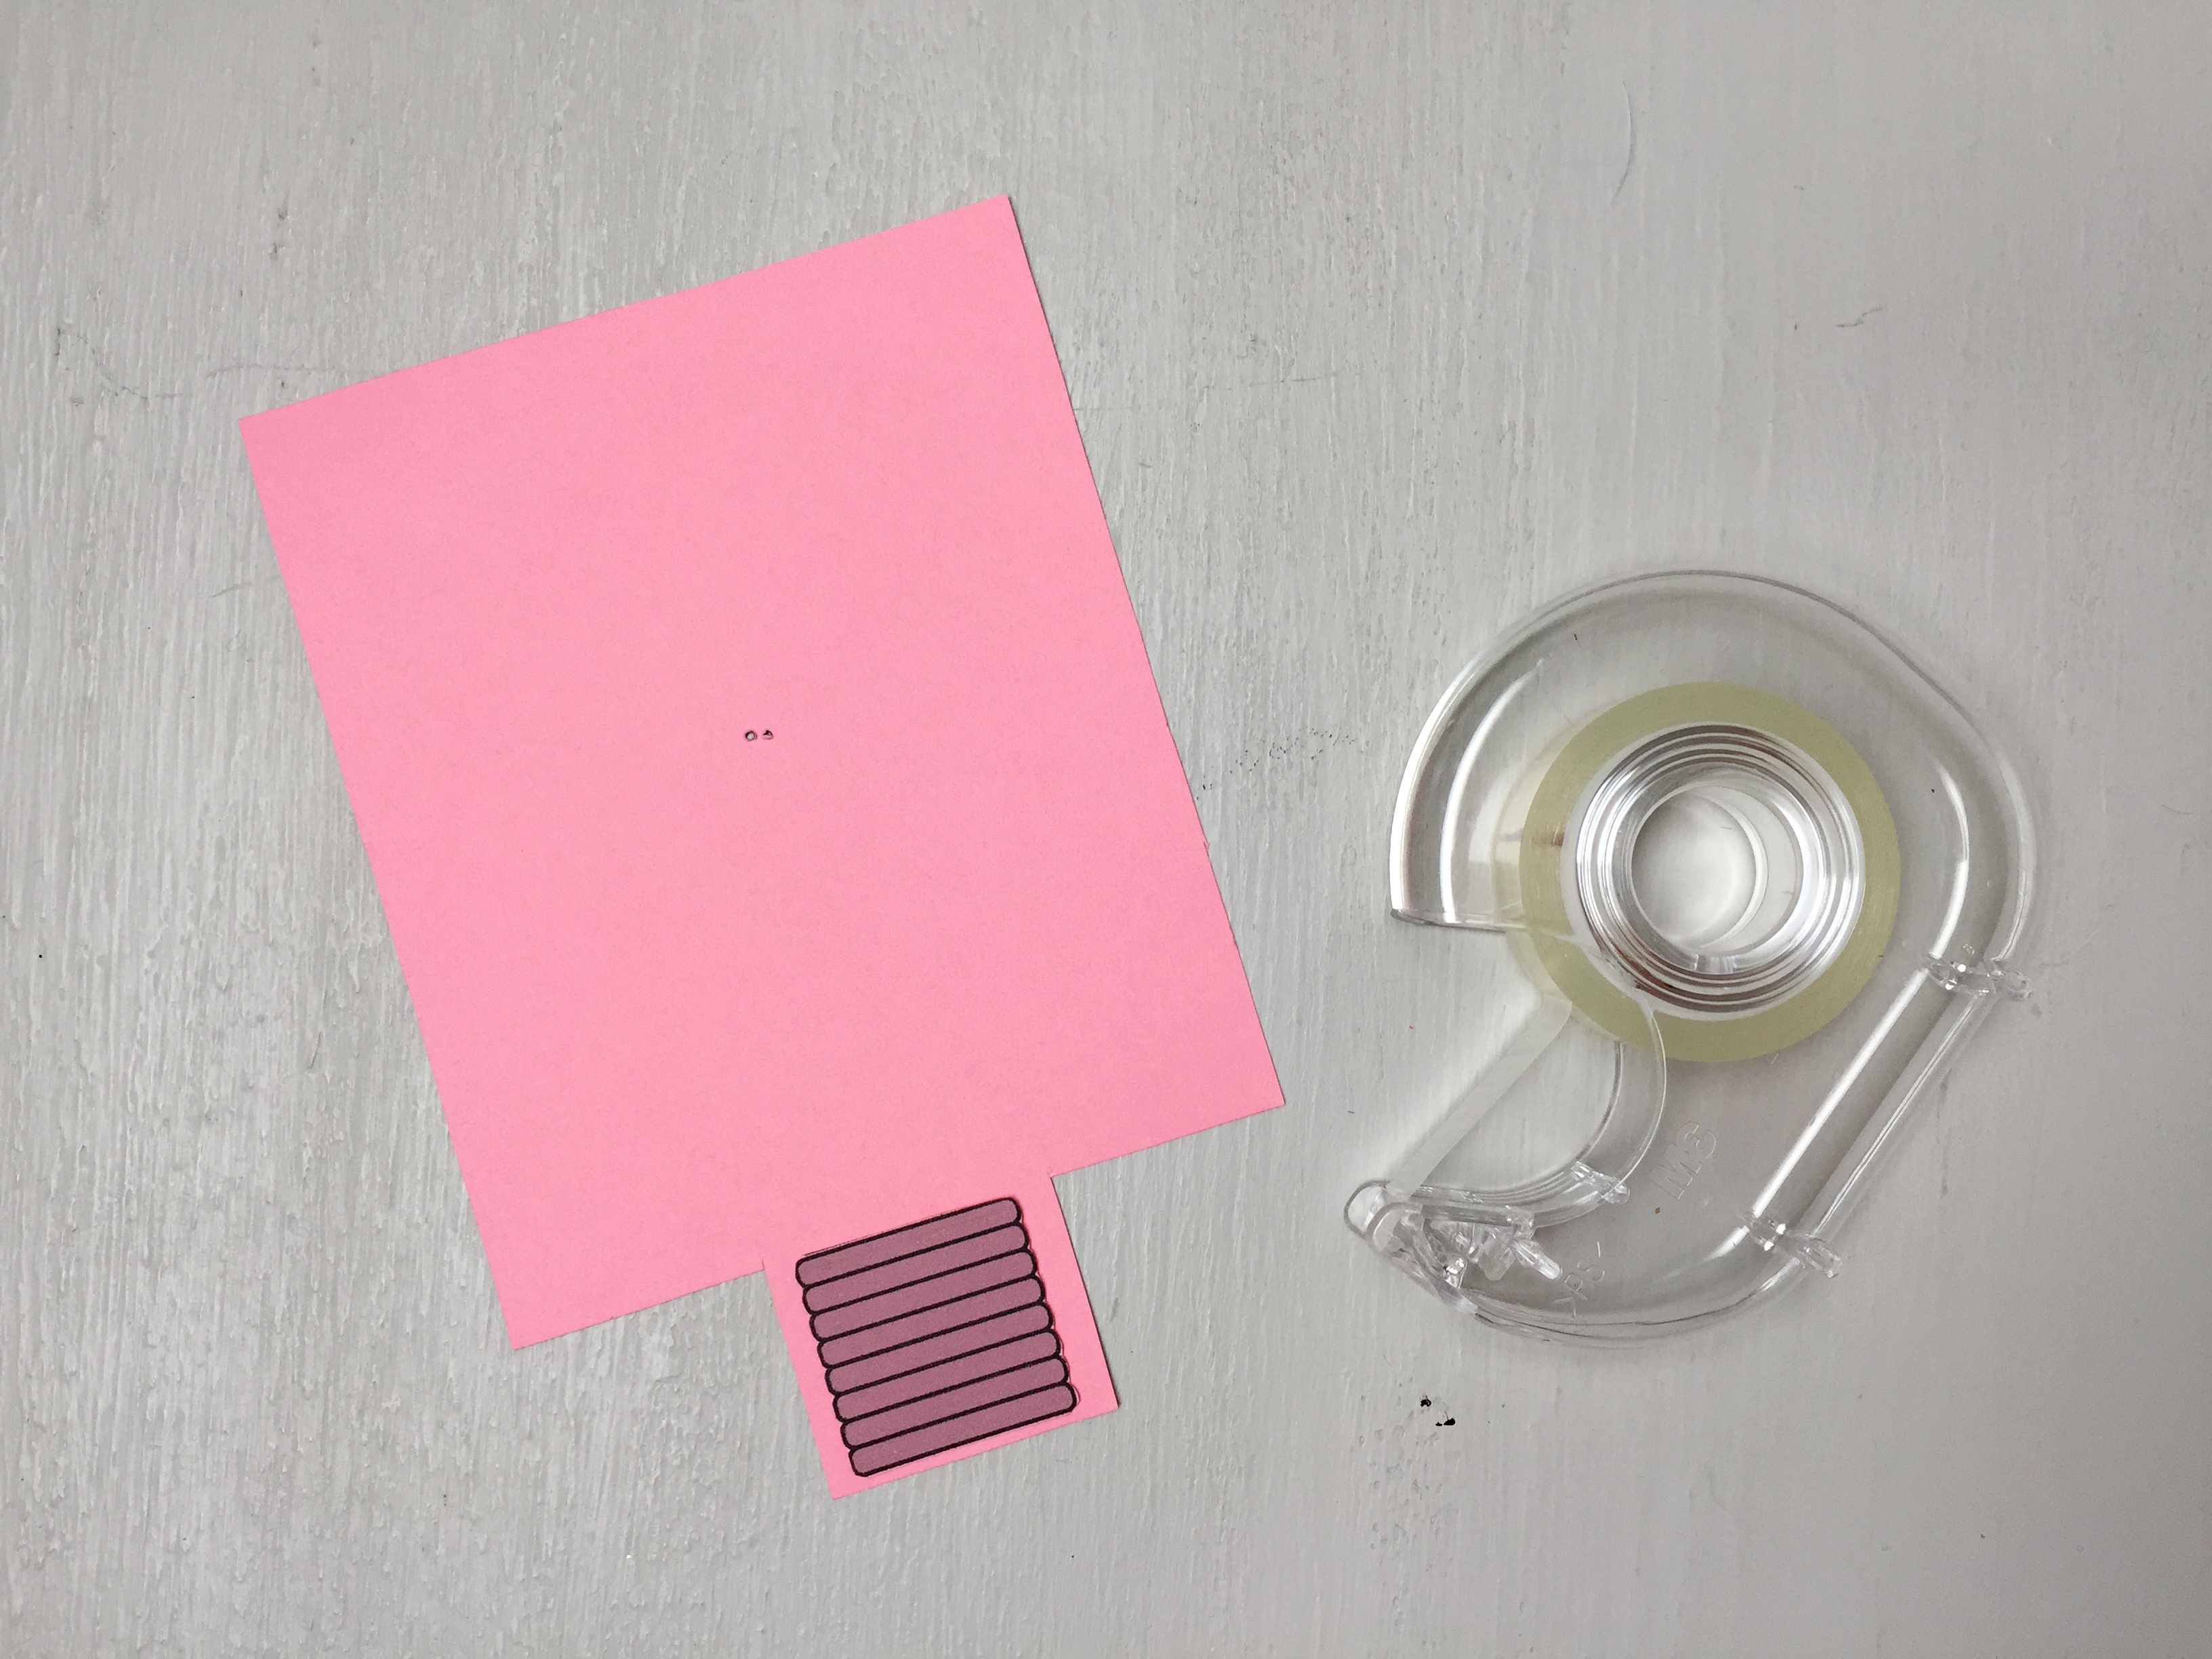
Tape or glue the small piece of paper (the bottom of the lightbulb) to the back of the switch flap.
Step 4
Fold the switch flap up towards the front of the card.

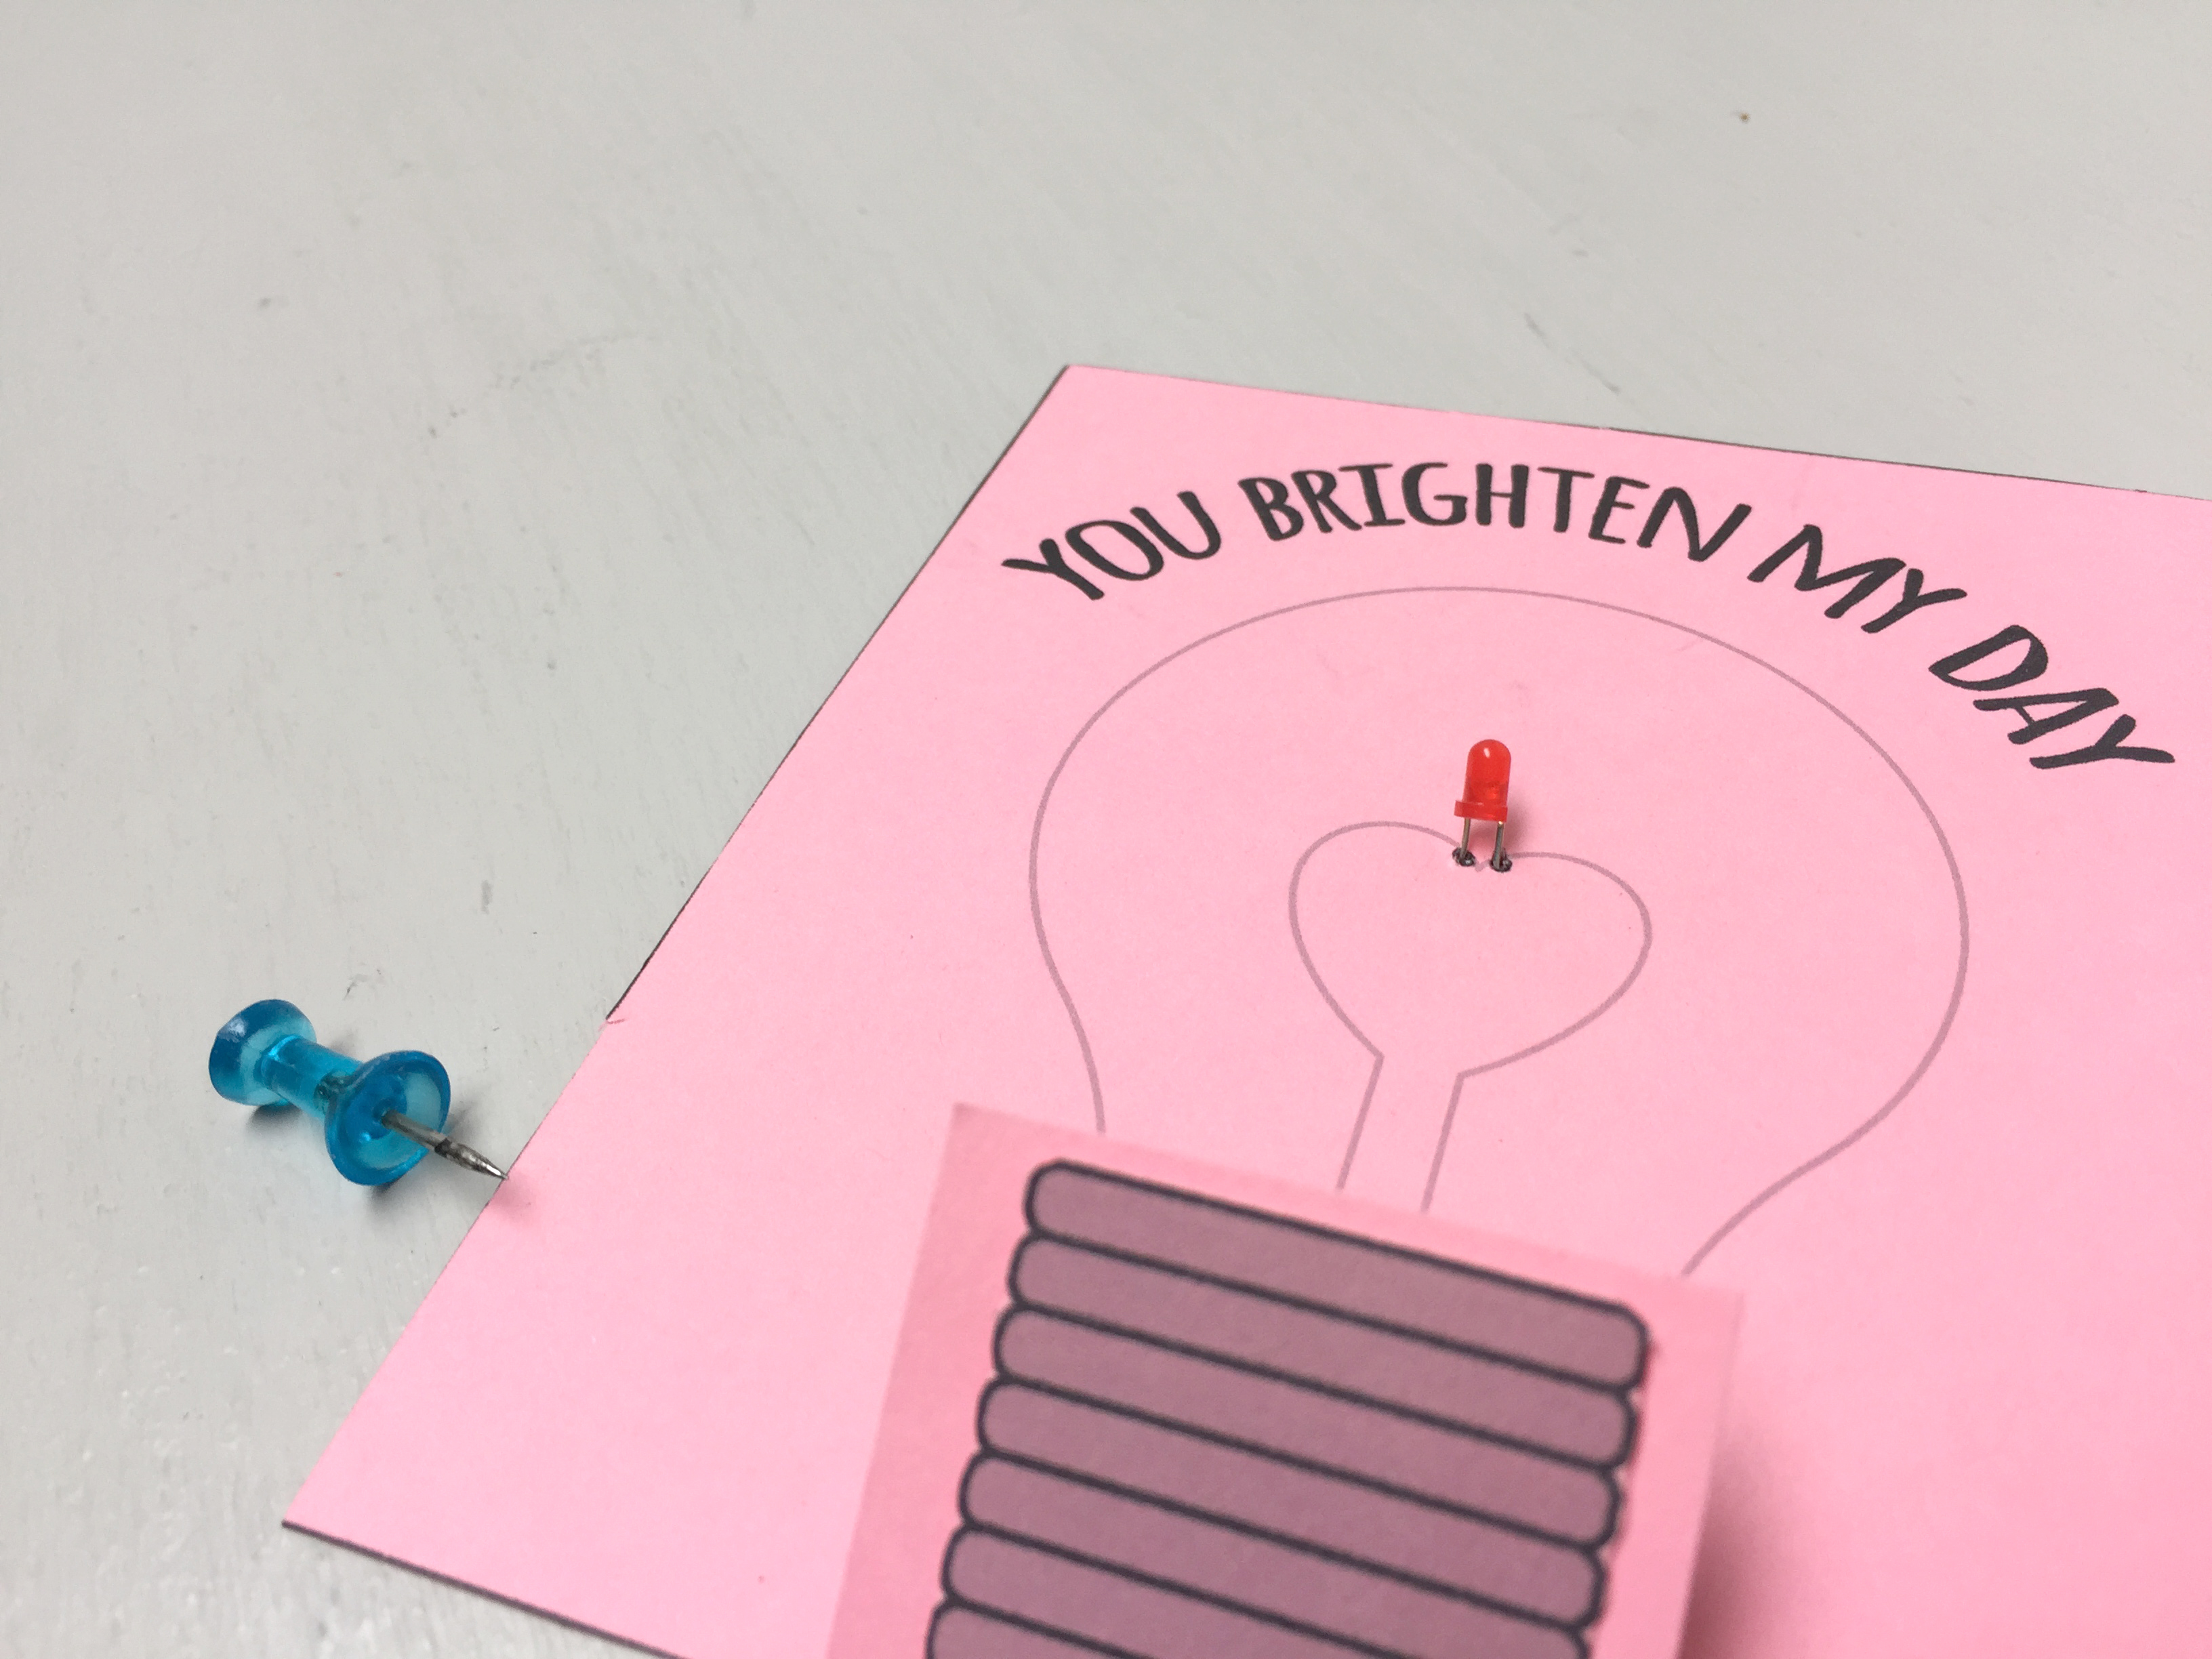
Step 5
Using the pushpin, poke a pair of holes through the two small dots in the center of the card (near the top of the heart). Insert the two leads of the LED through the holes with the longer pin (the positive side) on the left. Leave the LED slightly raised above the paper (about 1/8"), and fold the pins down flat on the back of the card.
Step 6
Time for the conductive paint! This part can get a little messy, so be careful not to smear your wet paint. Unfold the switch flap so your card lays flat. Squeeze out the paint around the LED, making sure it makes contact with the two pins. Then squeeze out the paint along the gray line
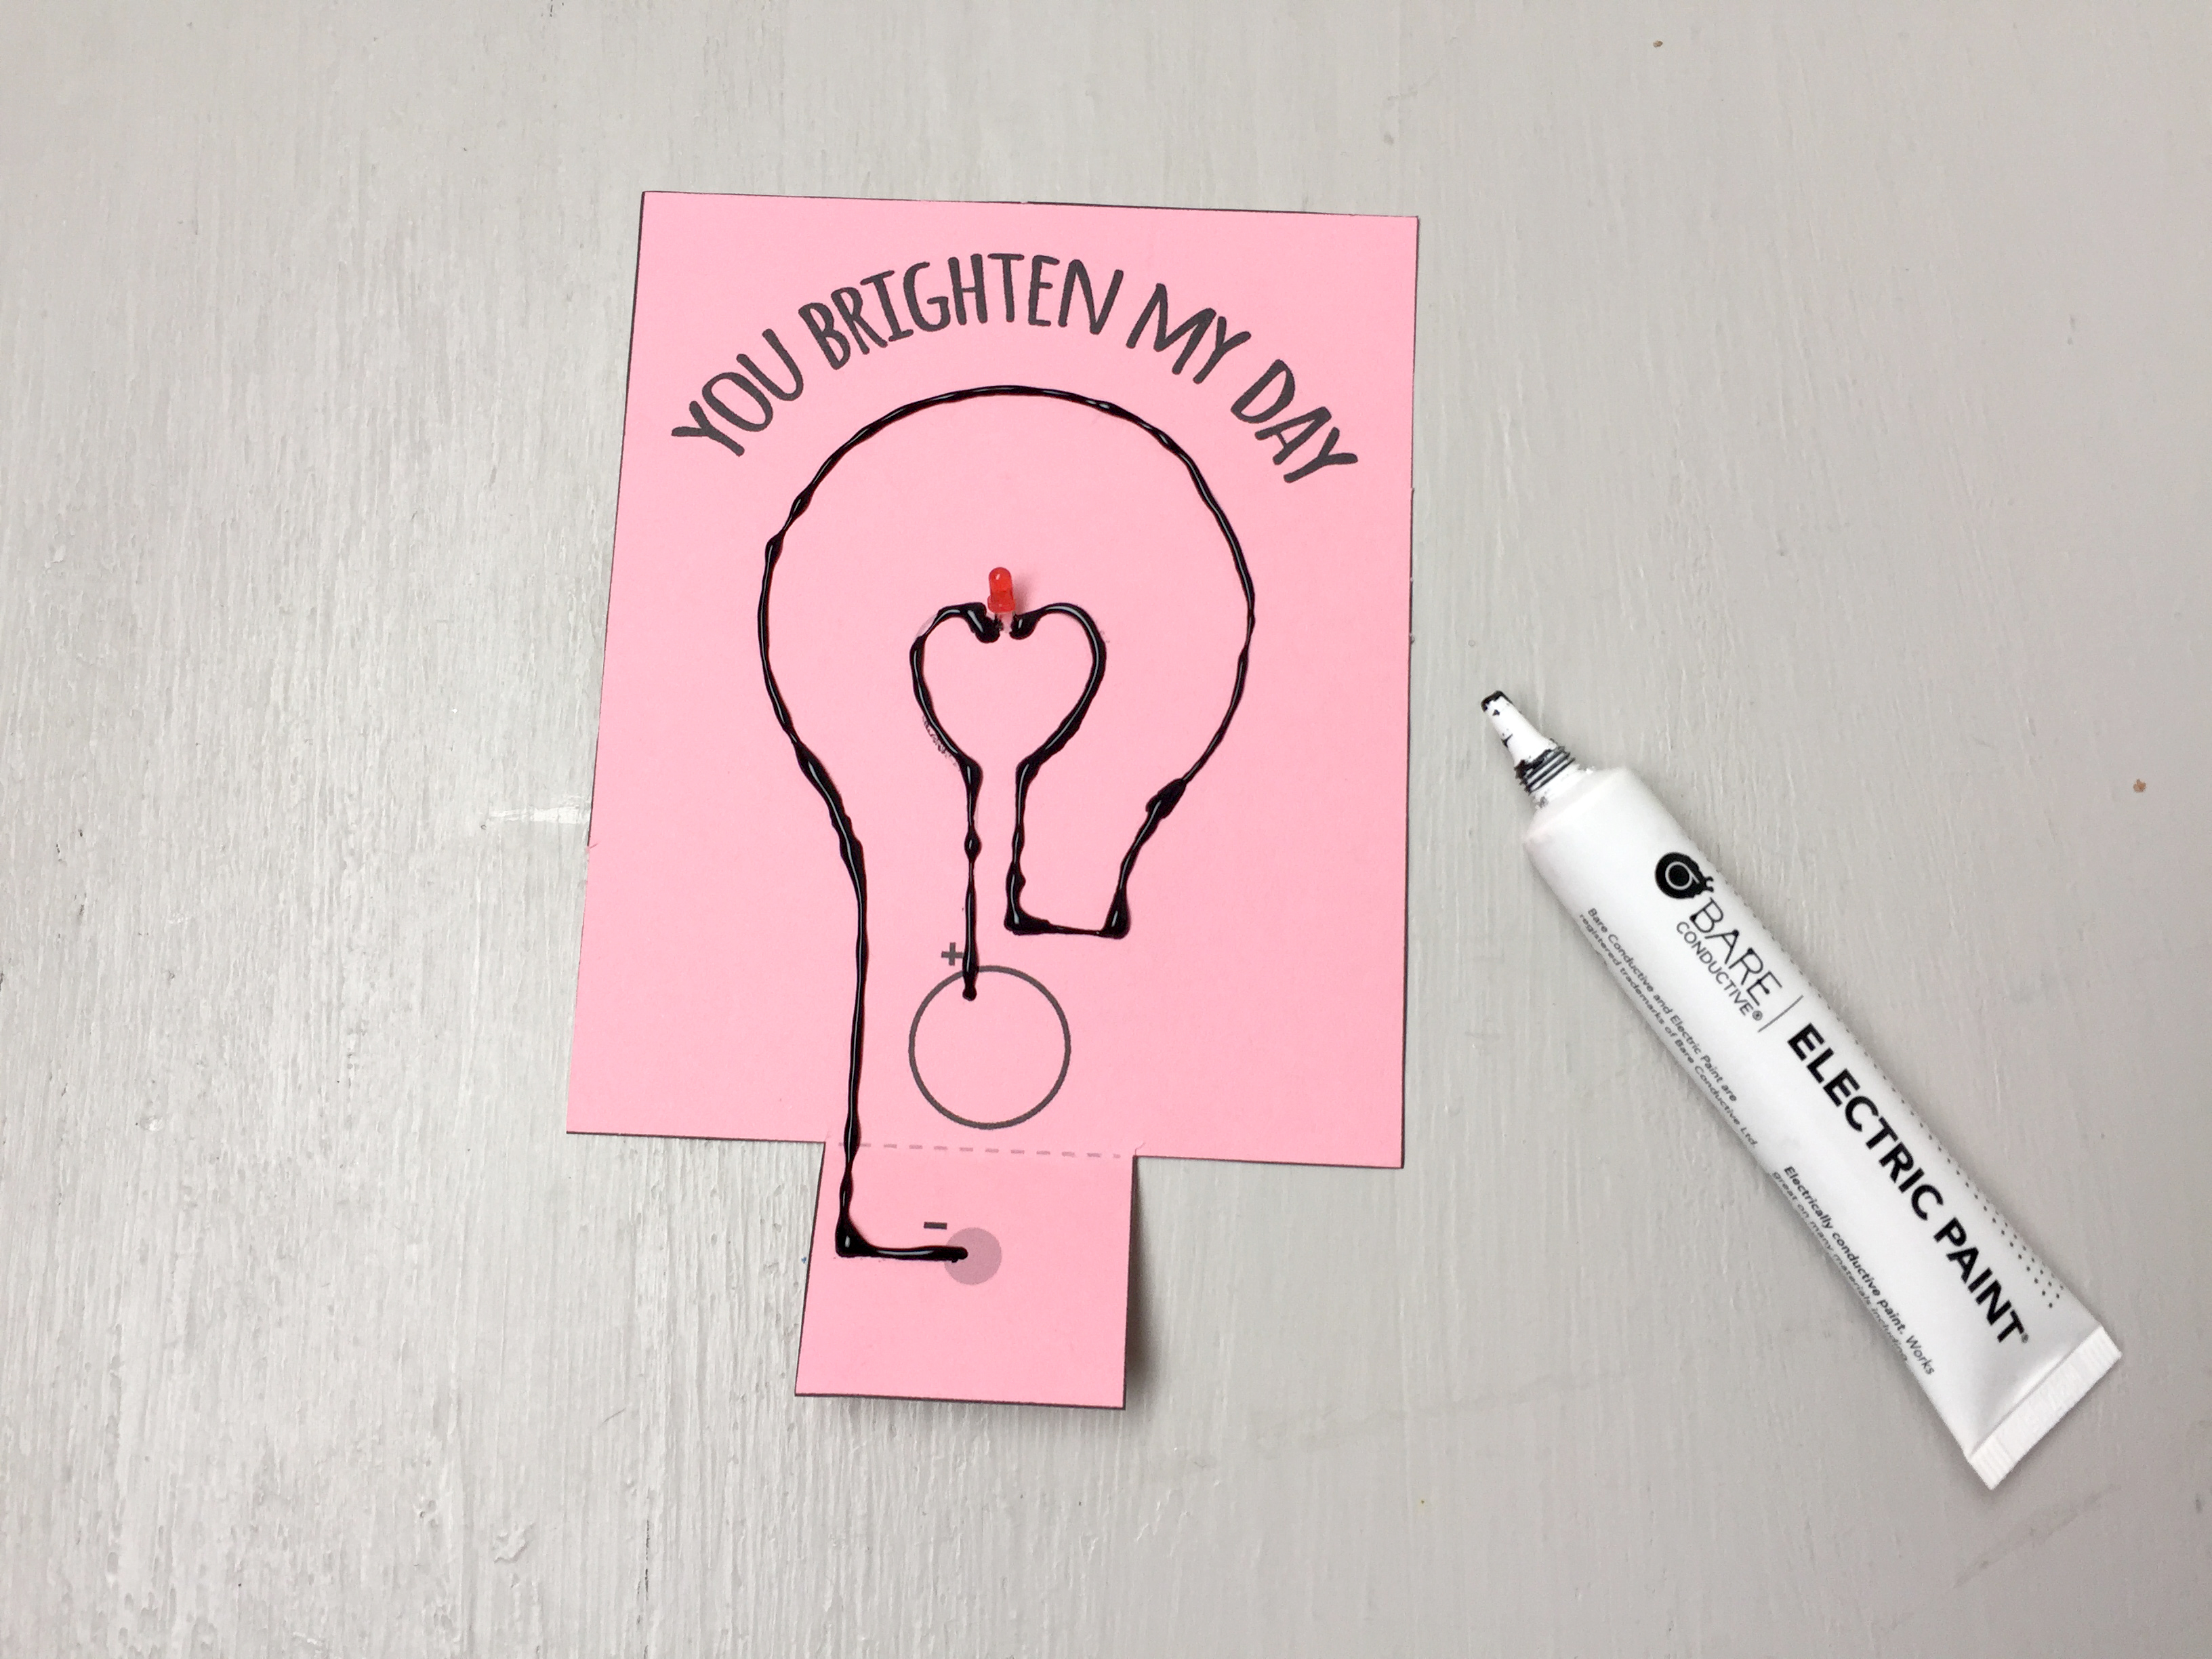
Step 7
Next, squeeze a slightly larger dot on the inside of the switch flap, and inside the battery circle. Make sure the dots are touching the paint lines.

Tip
The more paint you put, the longer it will take to dry.
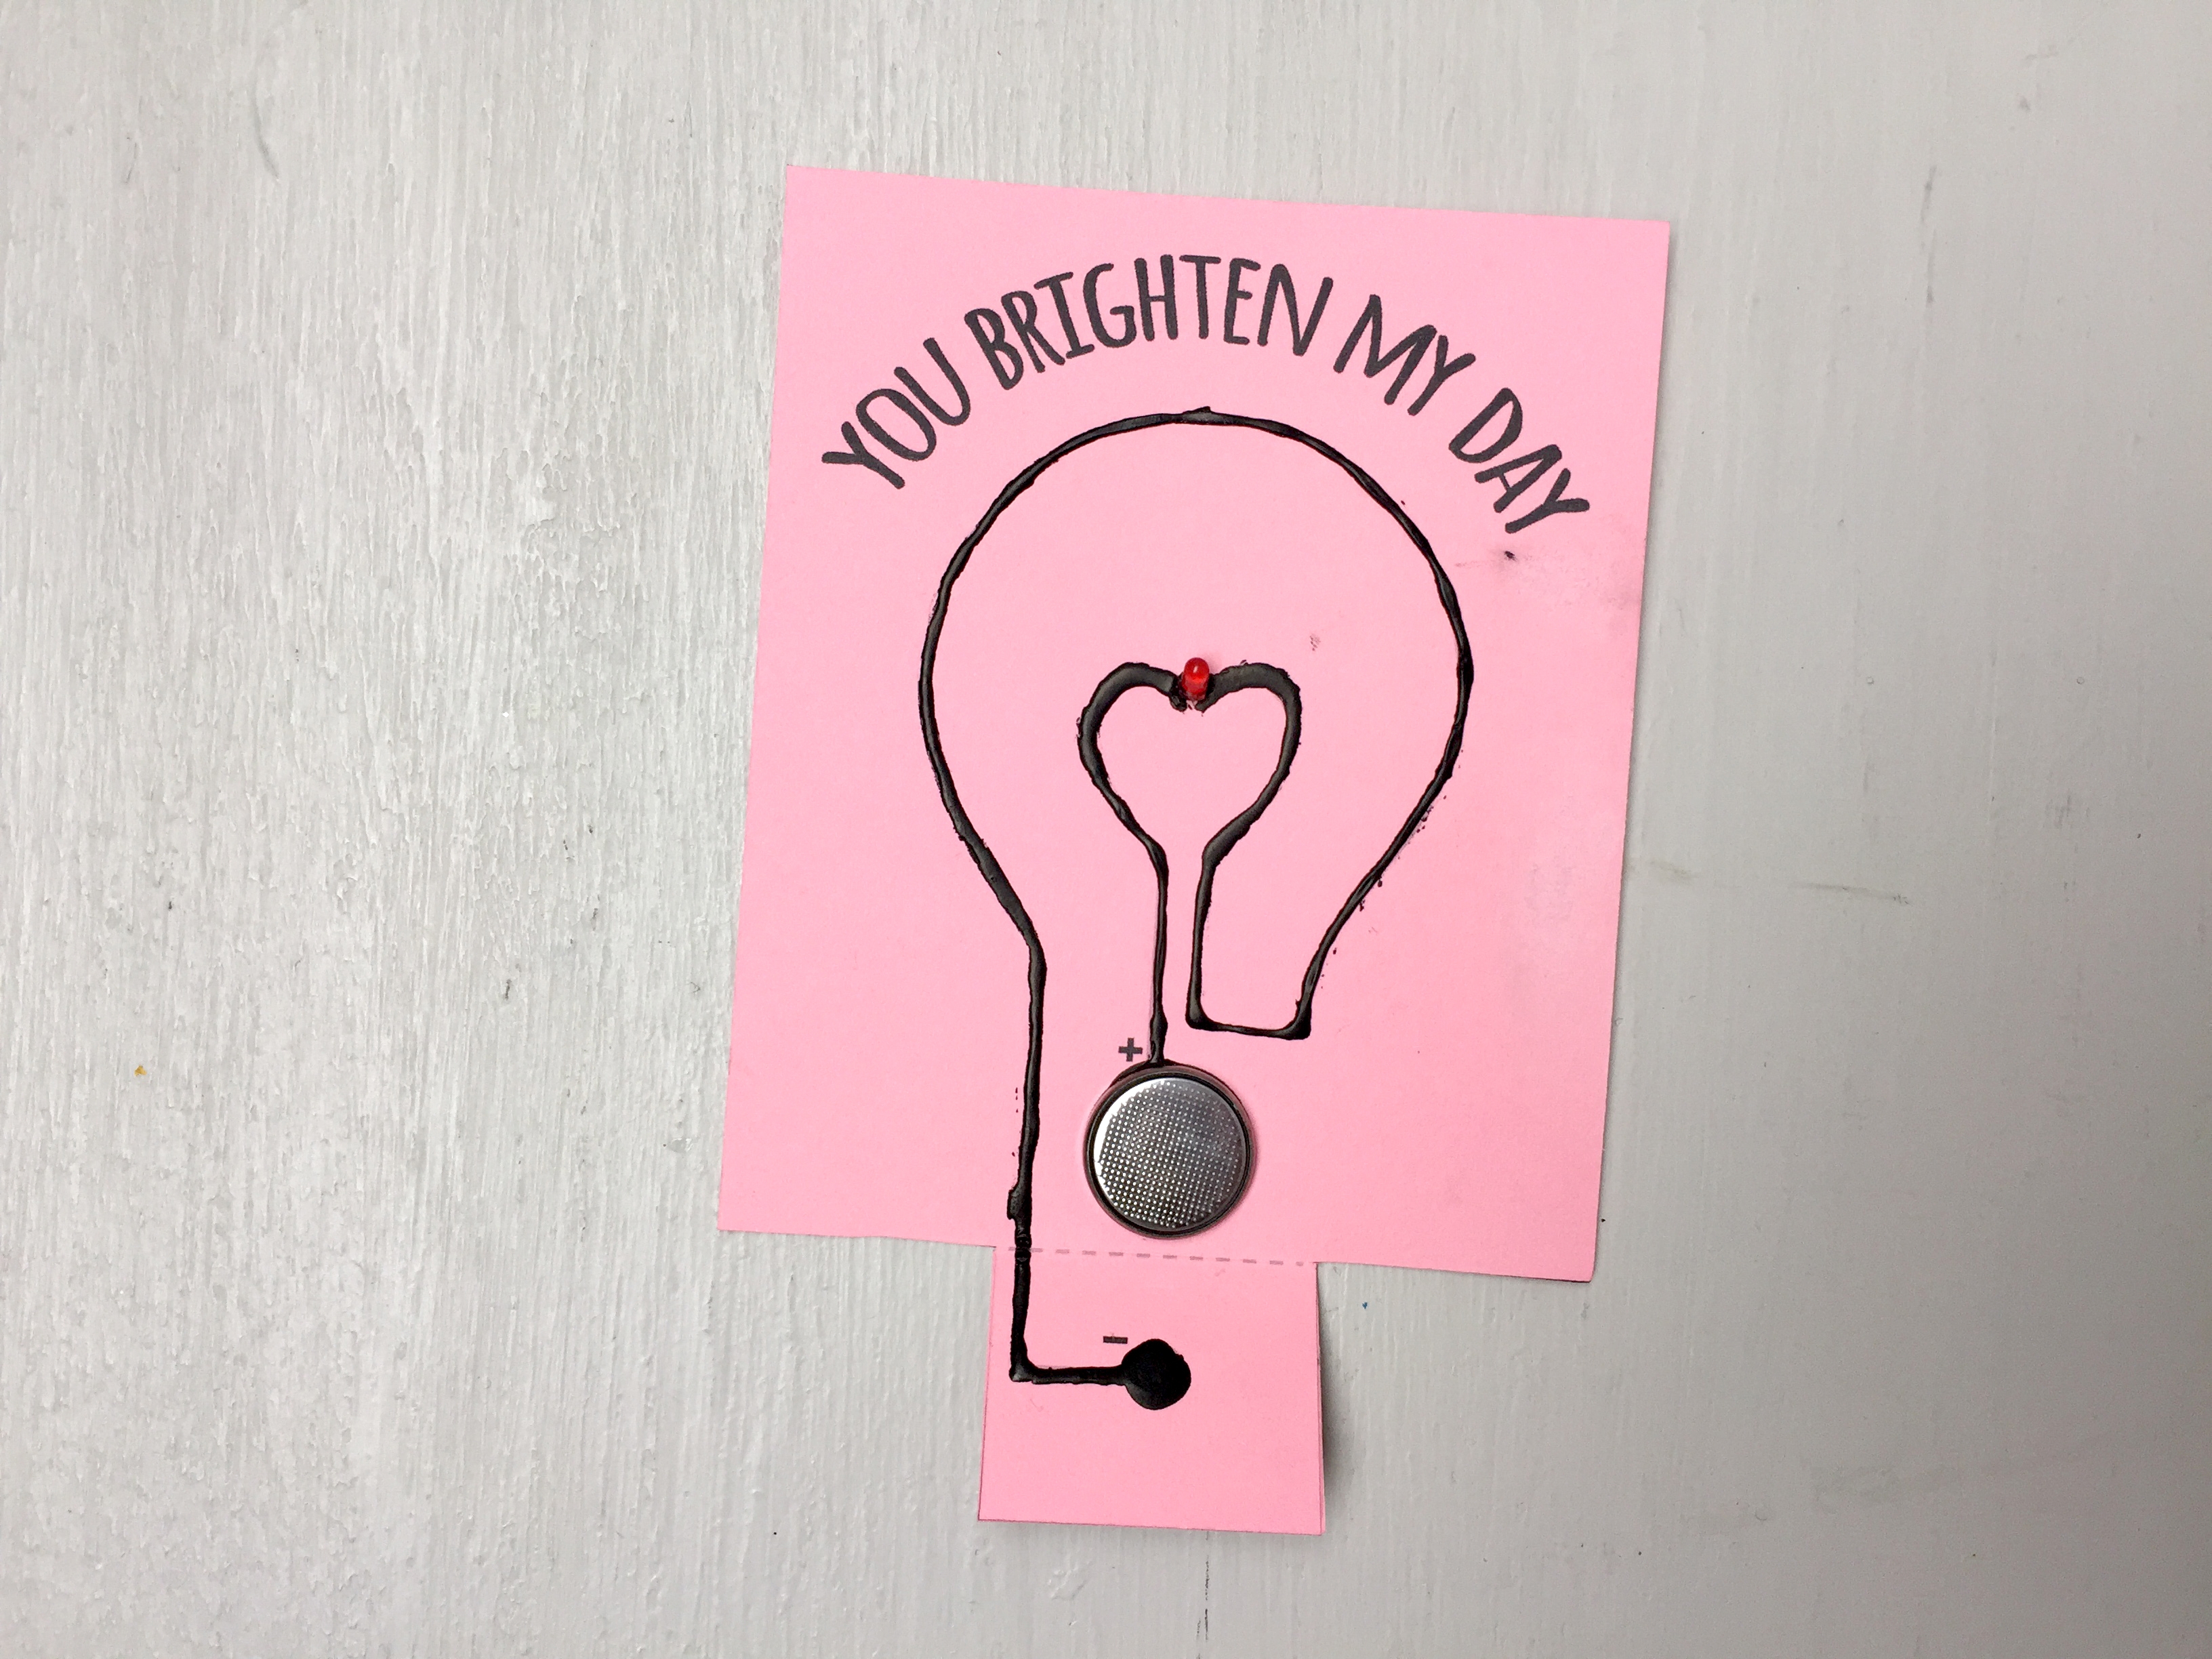
Step 8
The paint will act as a glue for your battery. Carefully place the battery positive side down, over the larger circle.
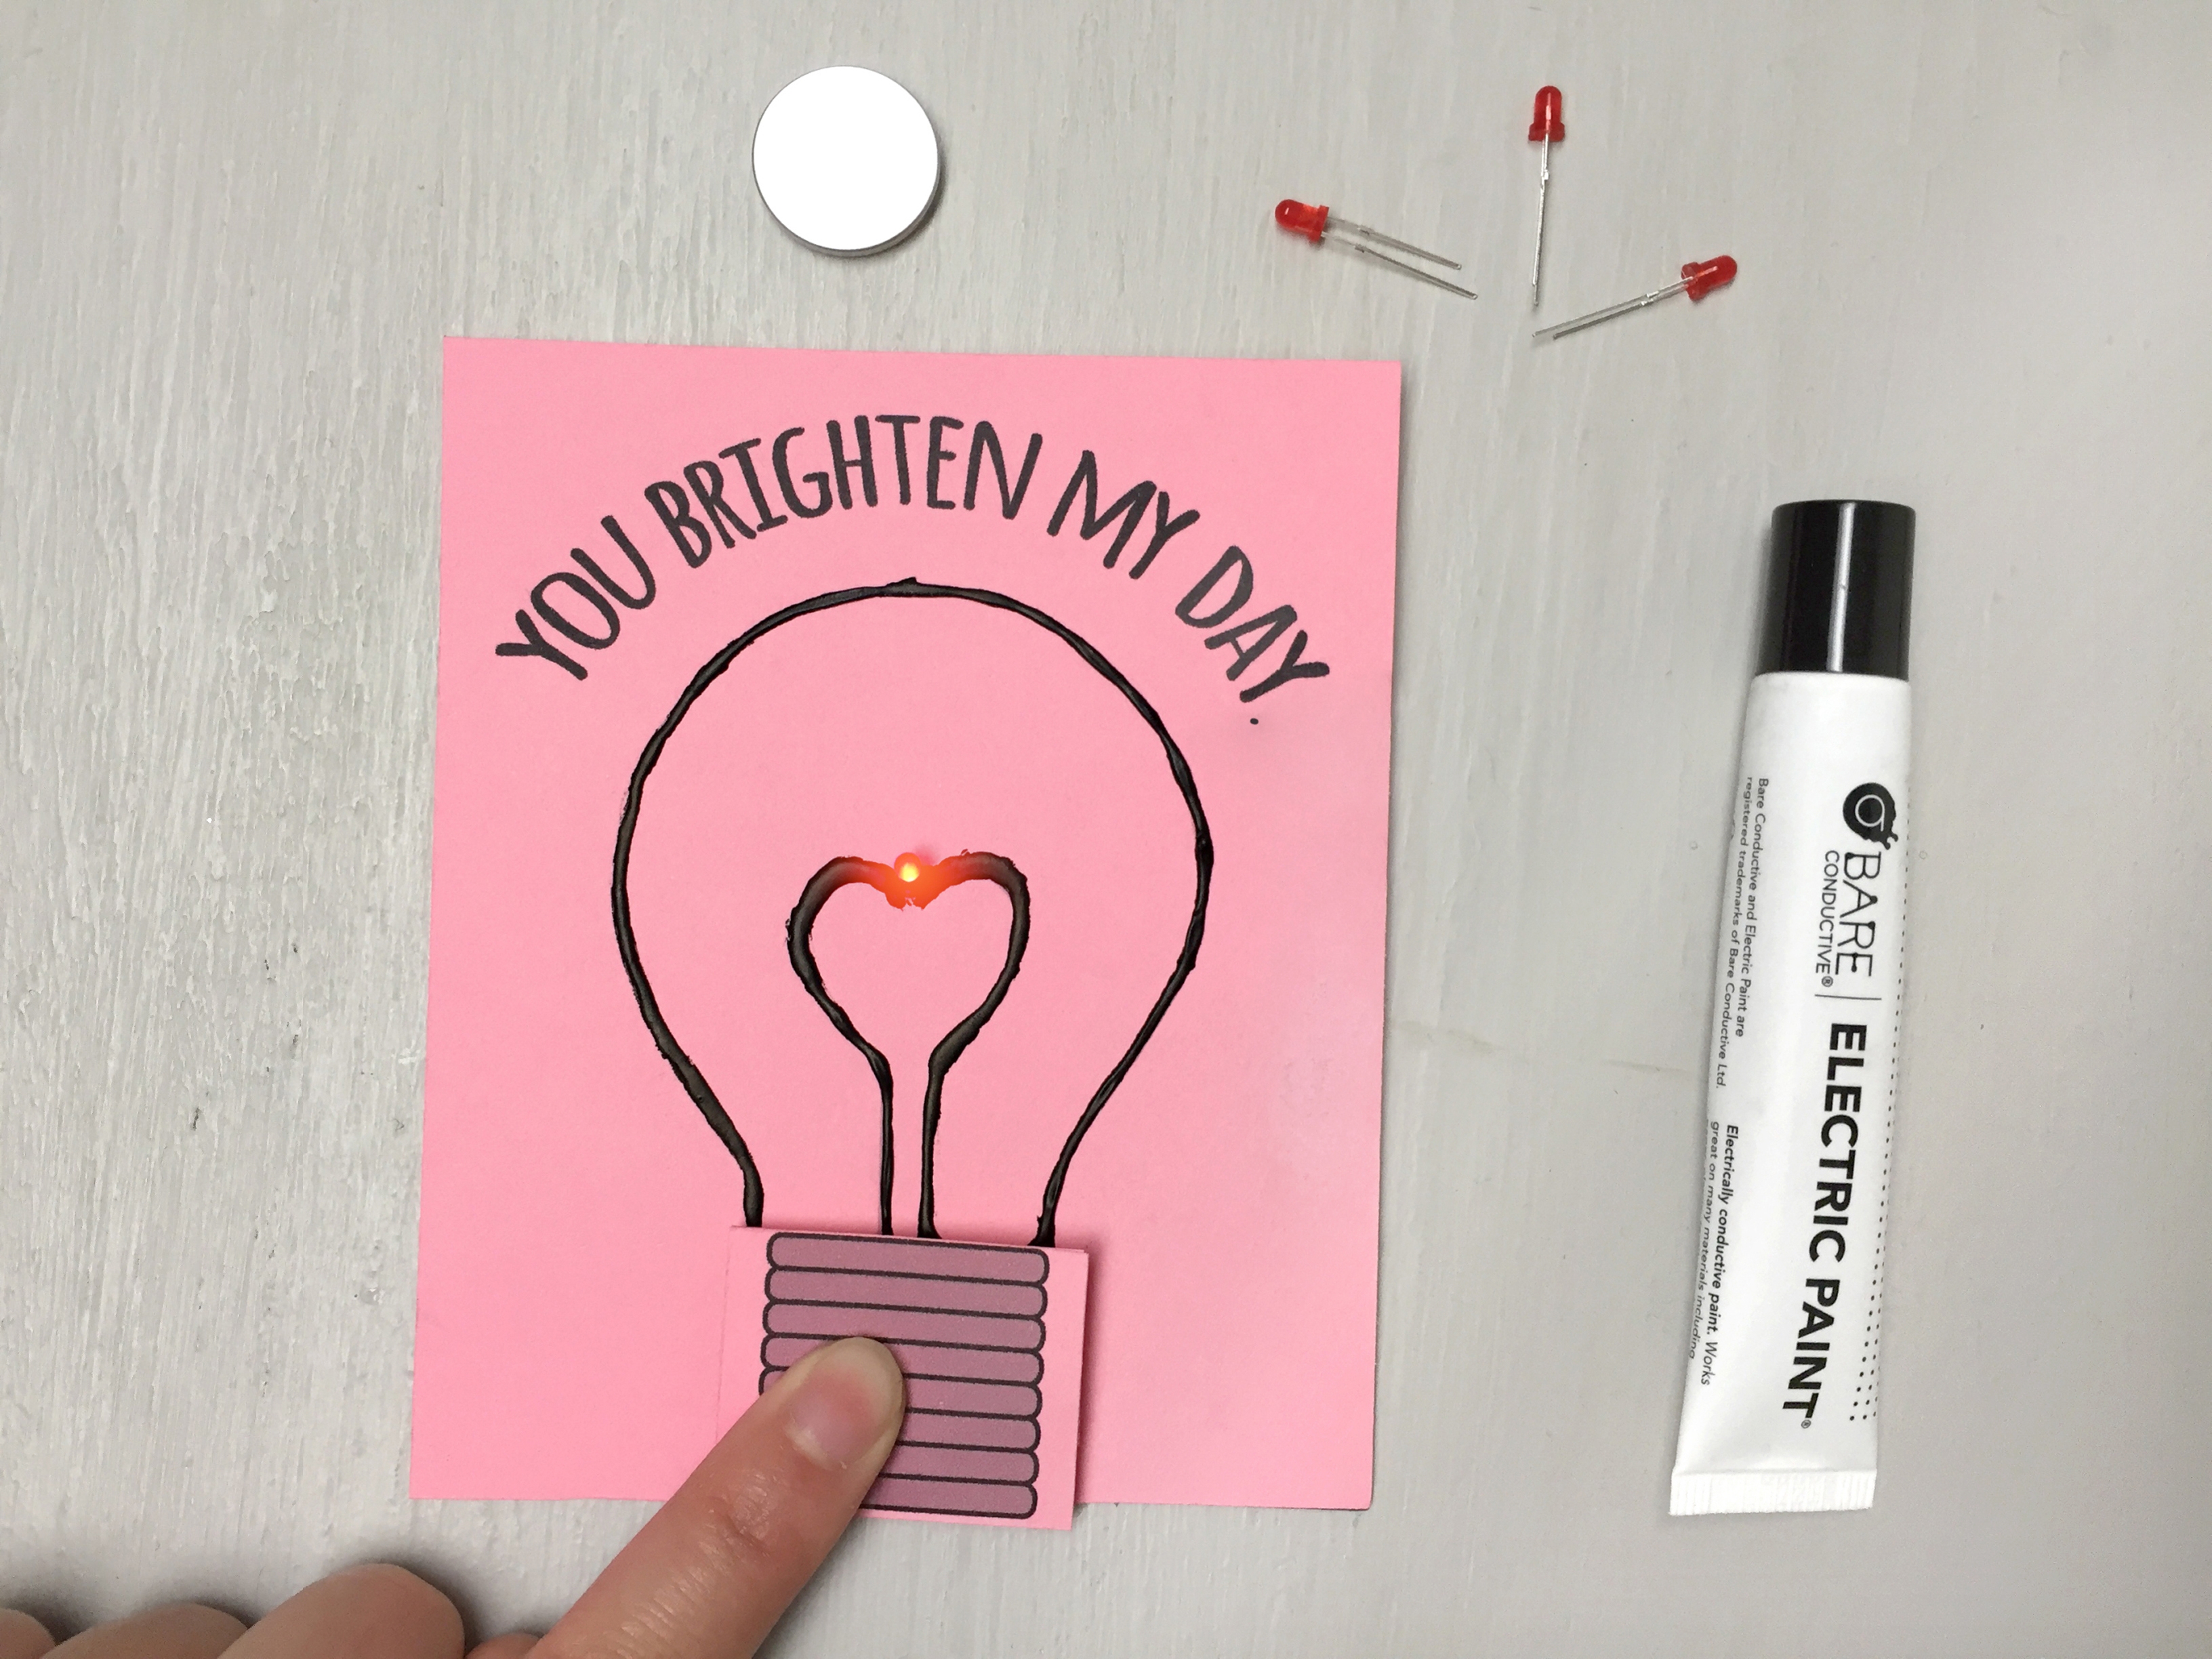
Done!
Wait overnight for the paint to dry. When it is completely dry, fold the flap and watch it light up! For a personalized touch, write your recipient's name inside the lightbulb, or create your own graphical circuits instead of using the template!