Step-by-step tutorial
Step 1
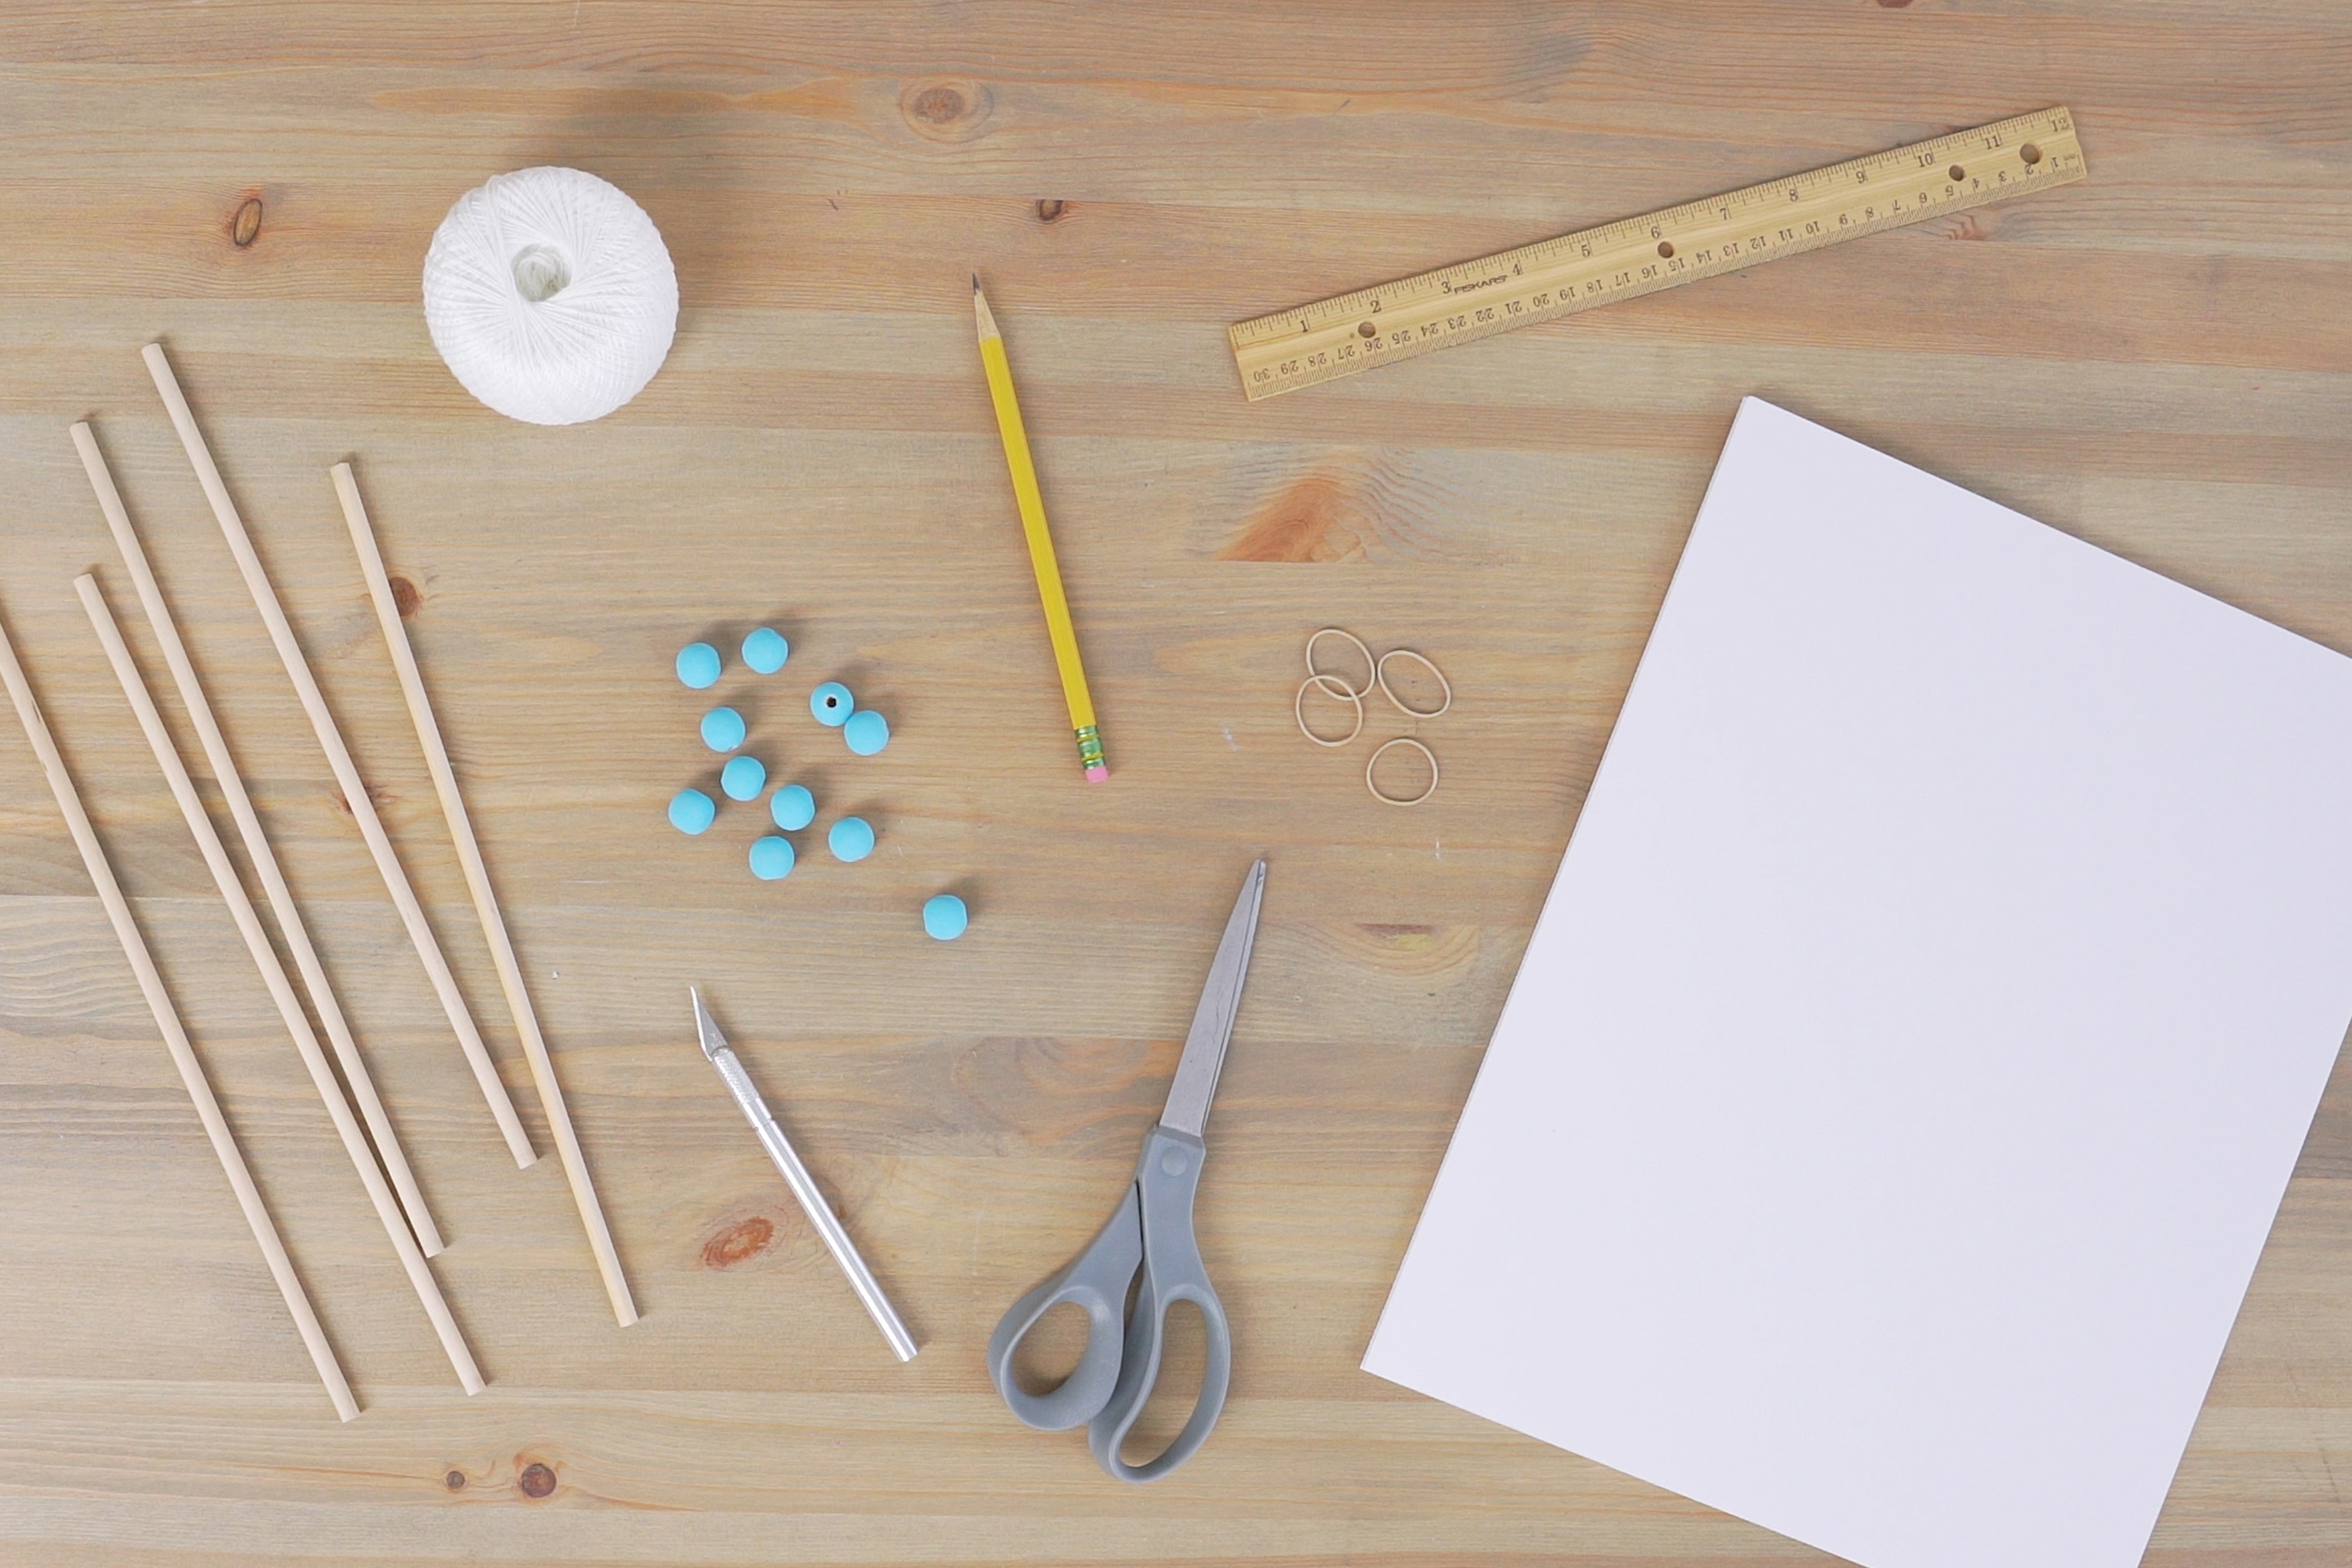
Gather your materials.

Step 2
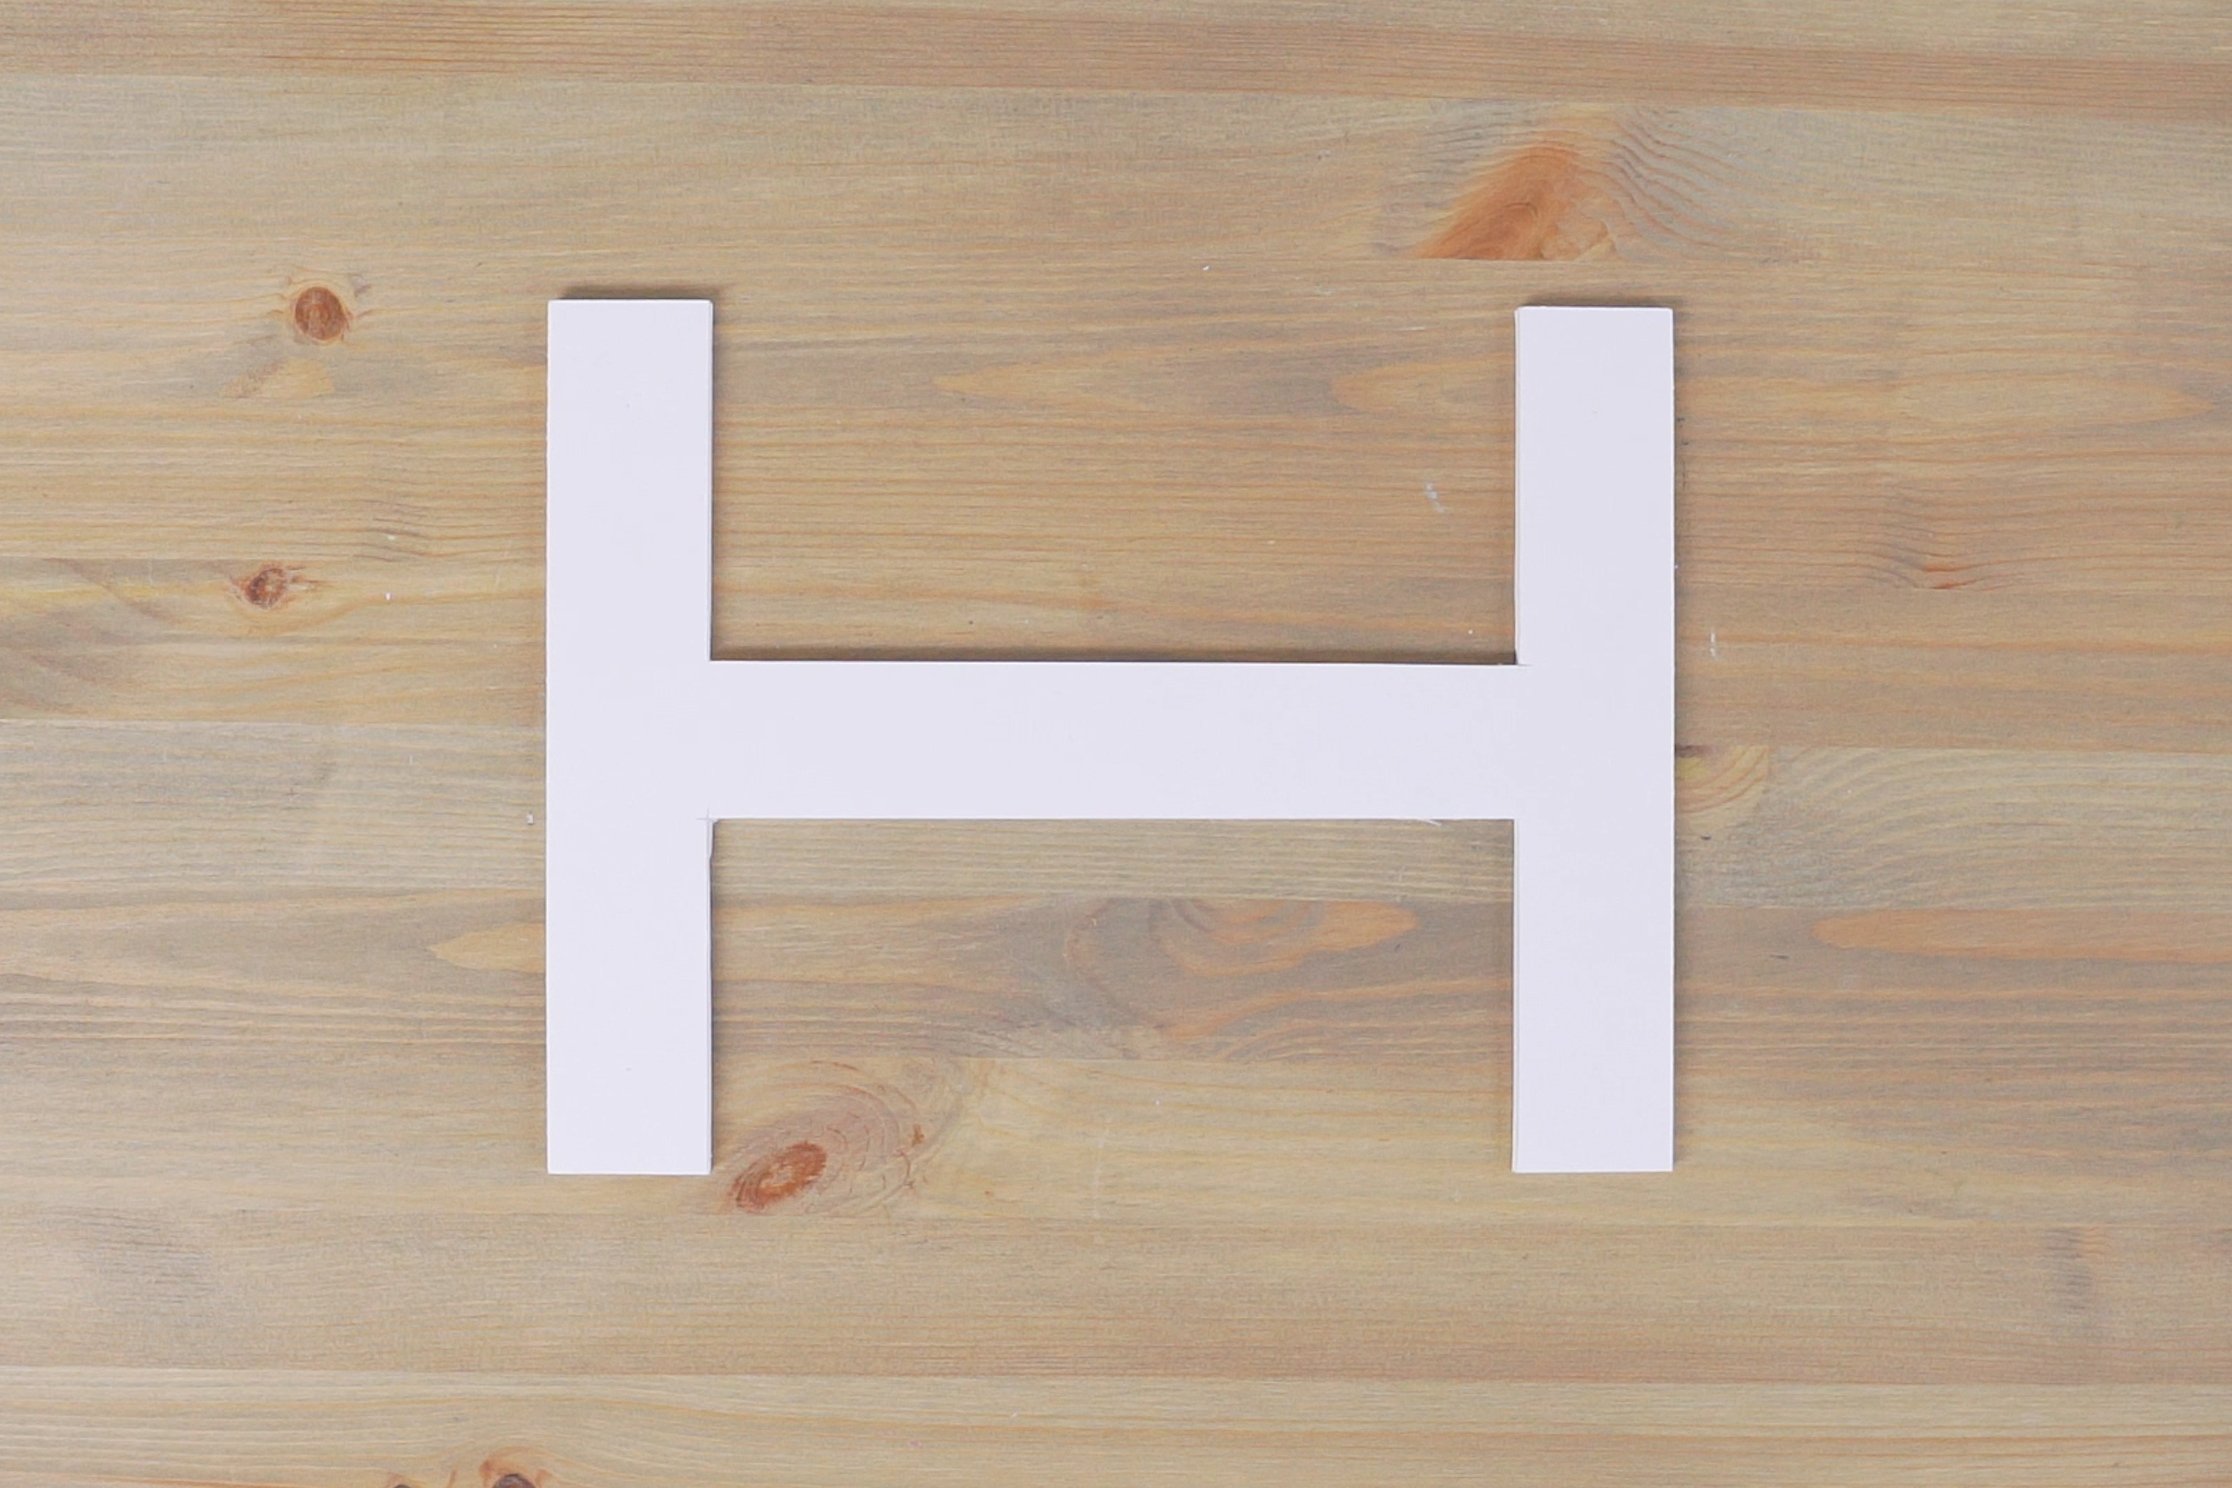
Cut the foam core into the shape of the letter "I" about 8½ inches wide and 11 inches tall.
Step 3
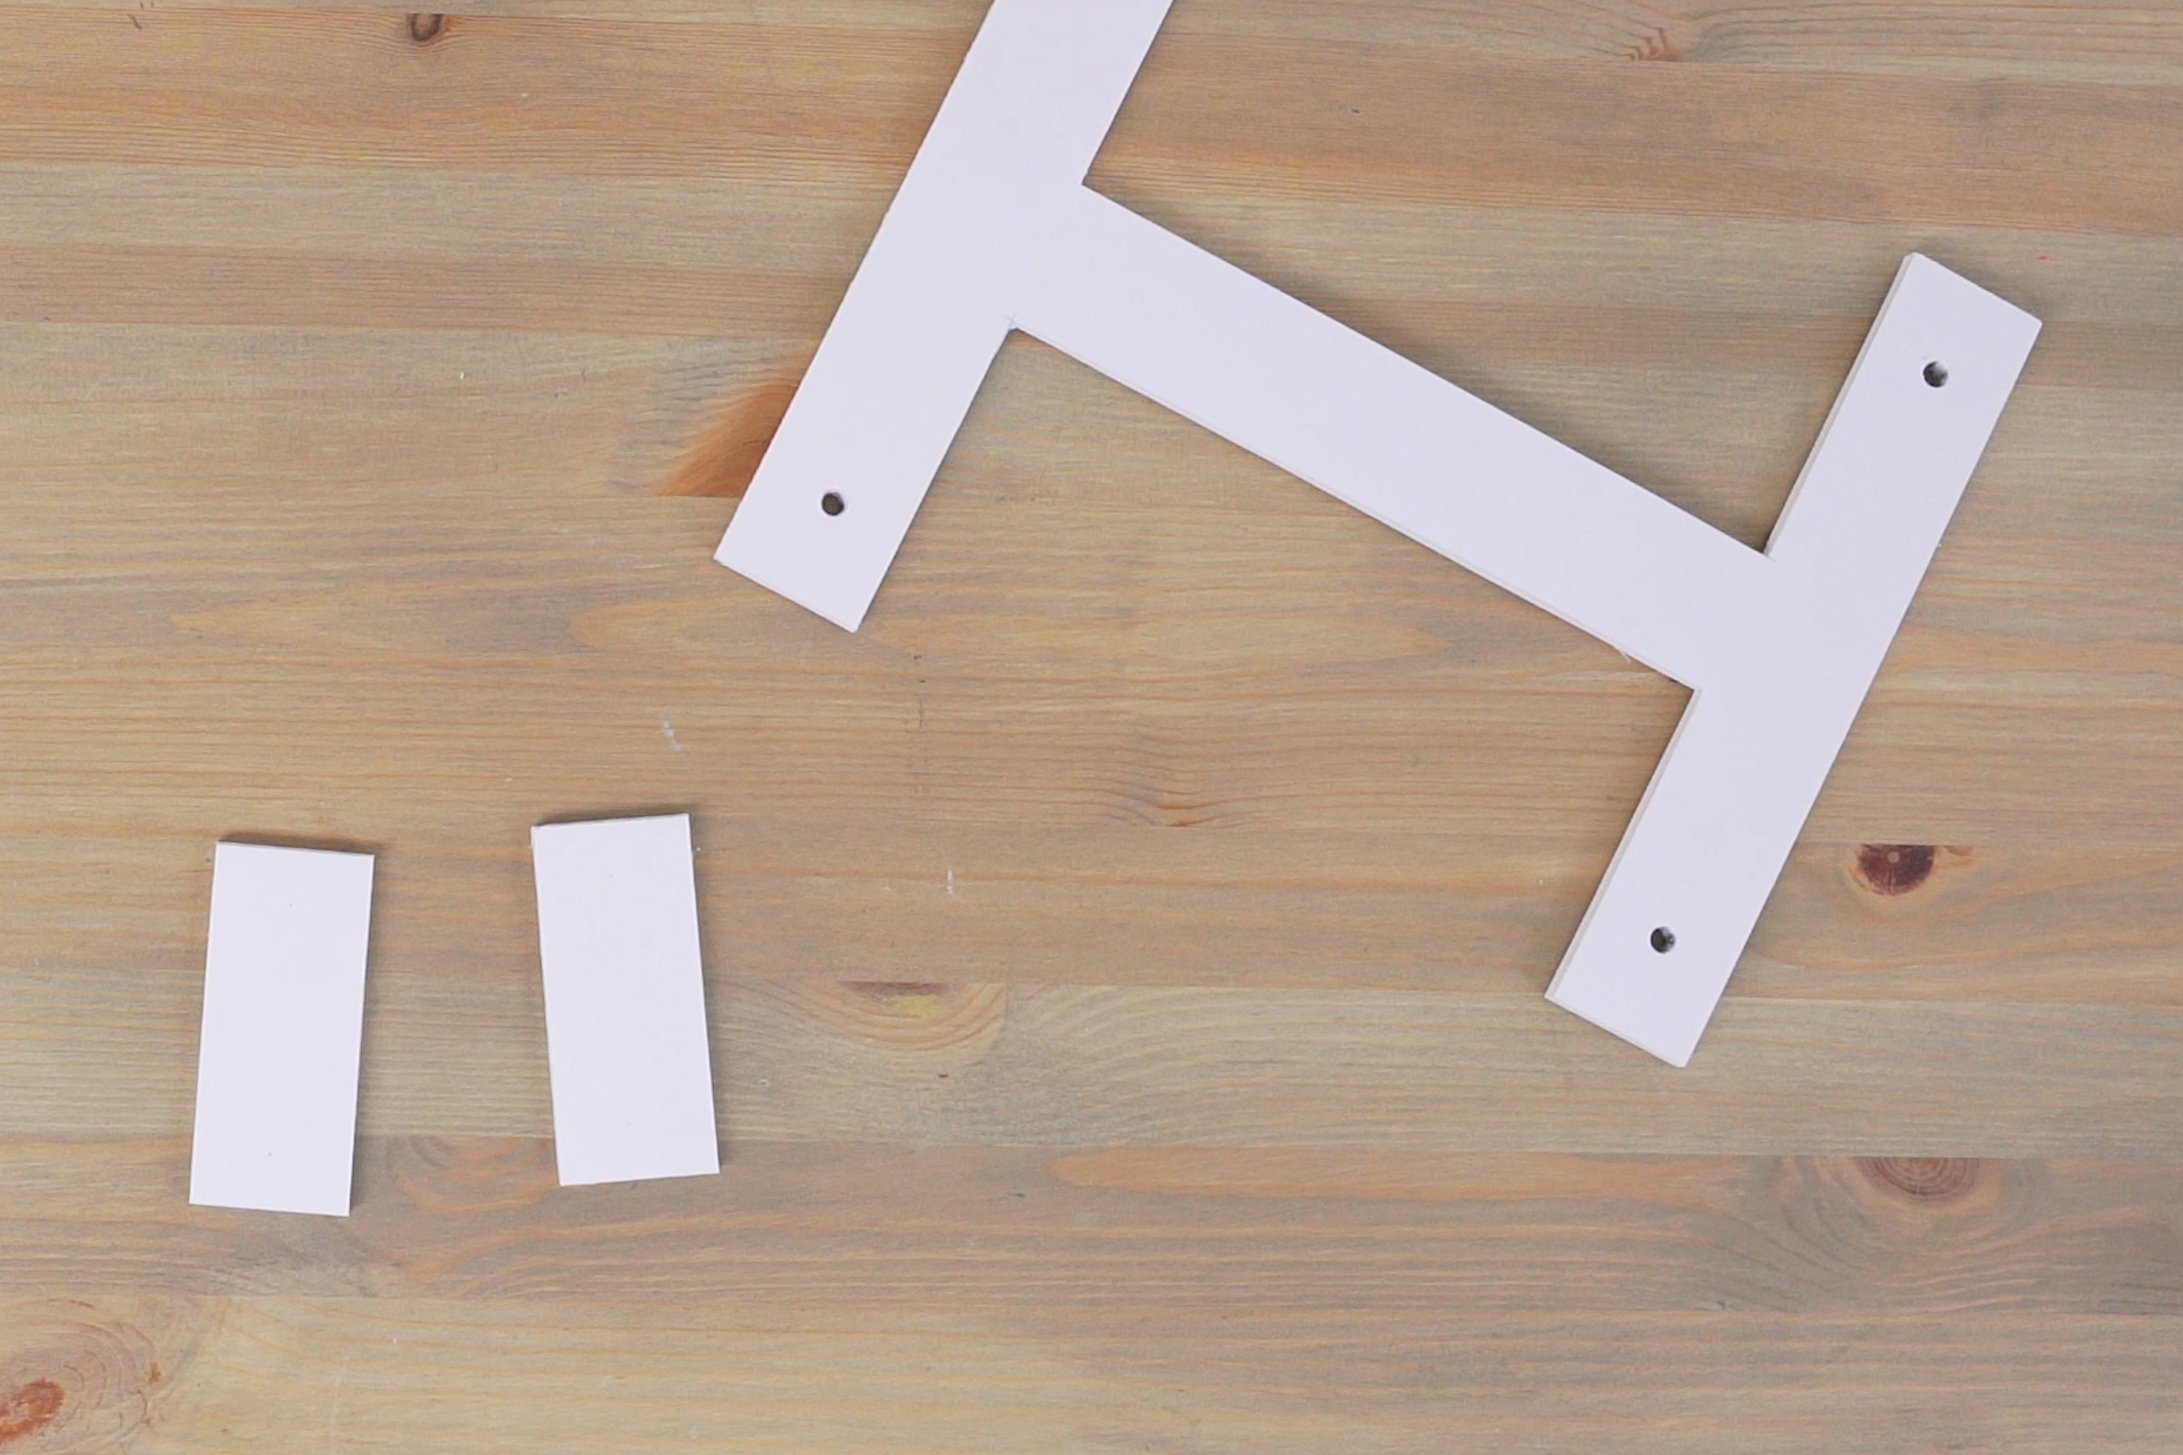
Cut two short strips from the leftover foam core.
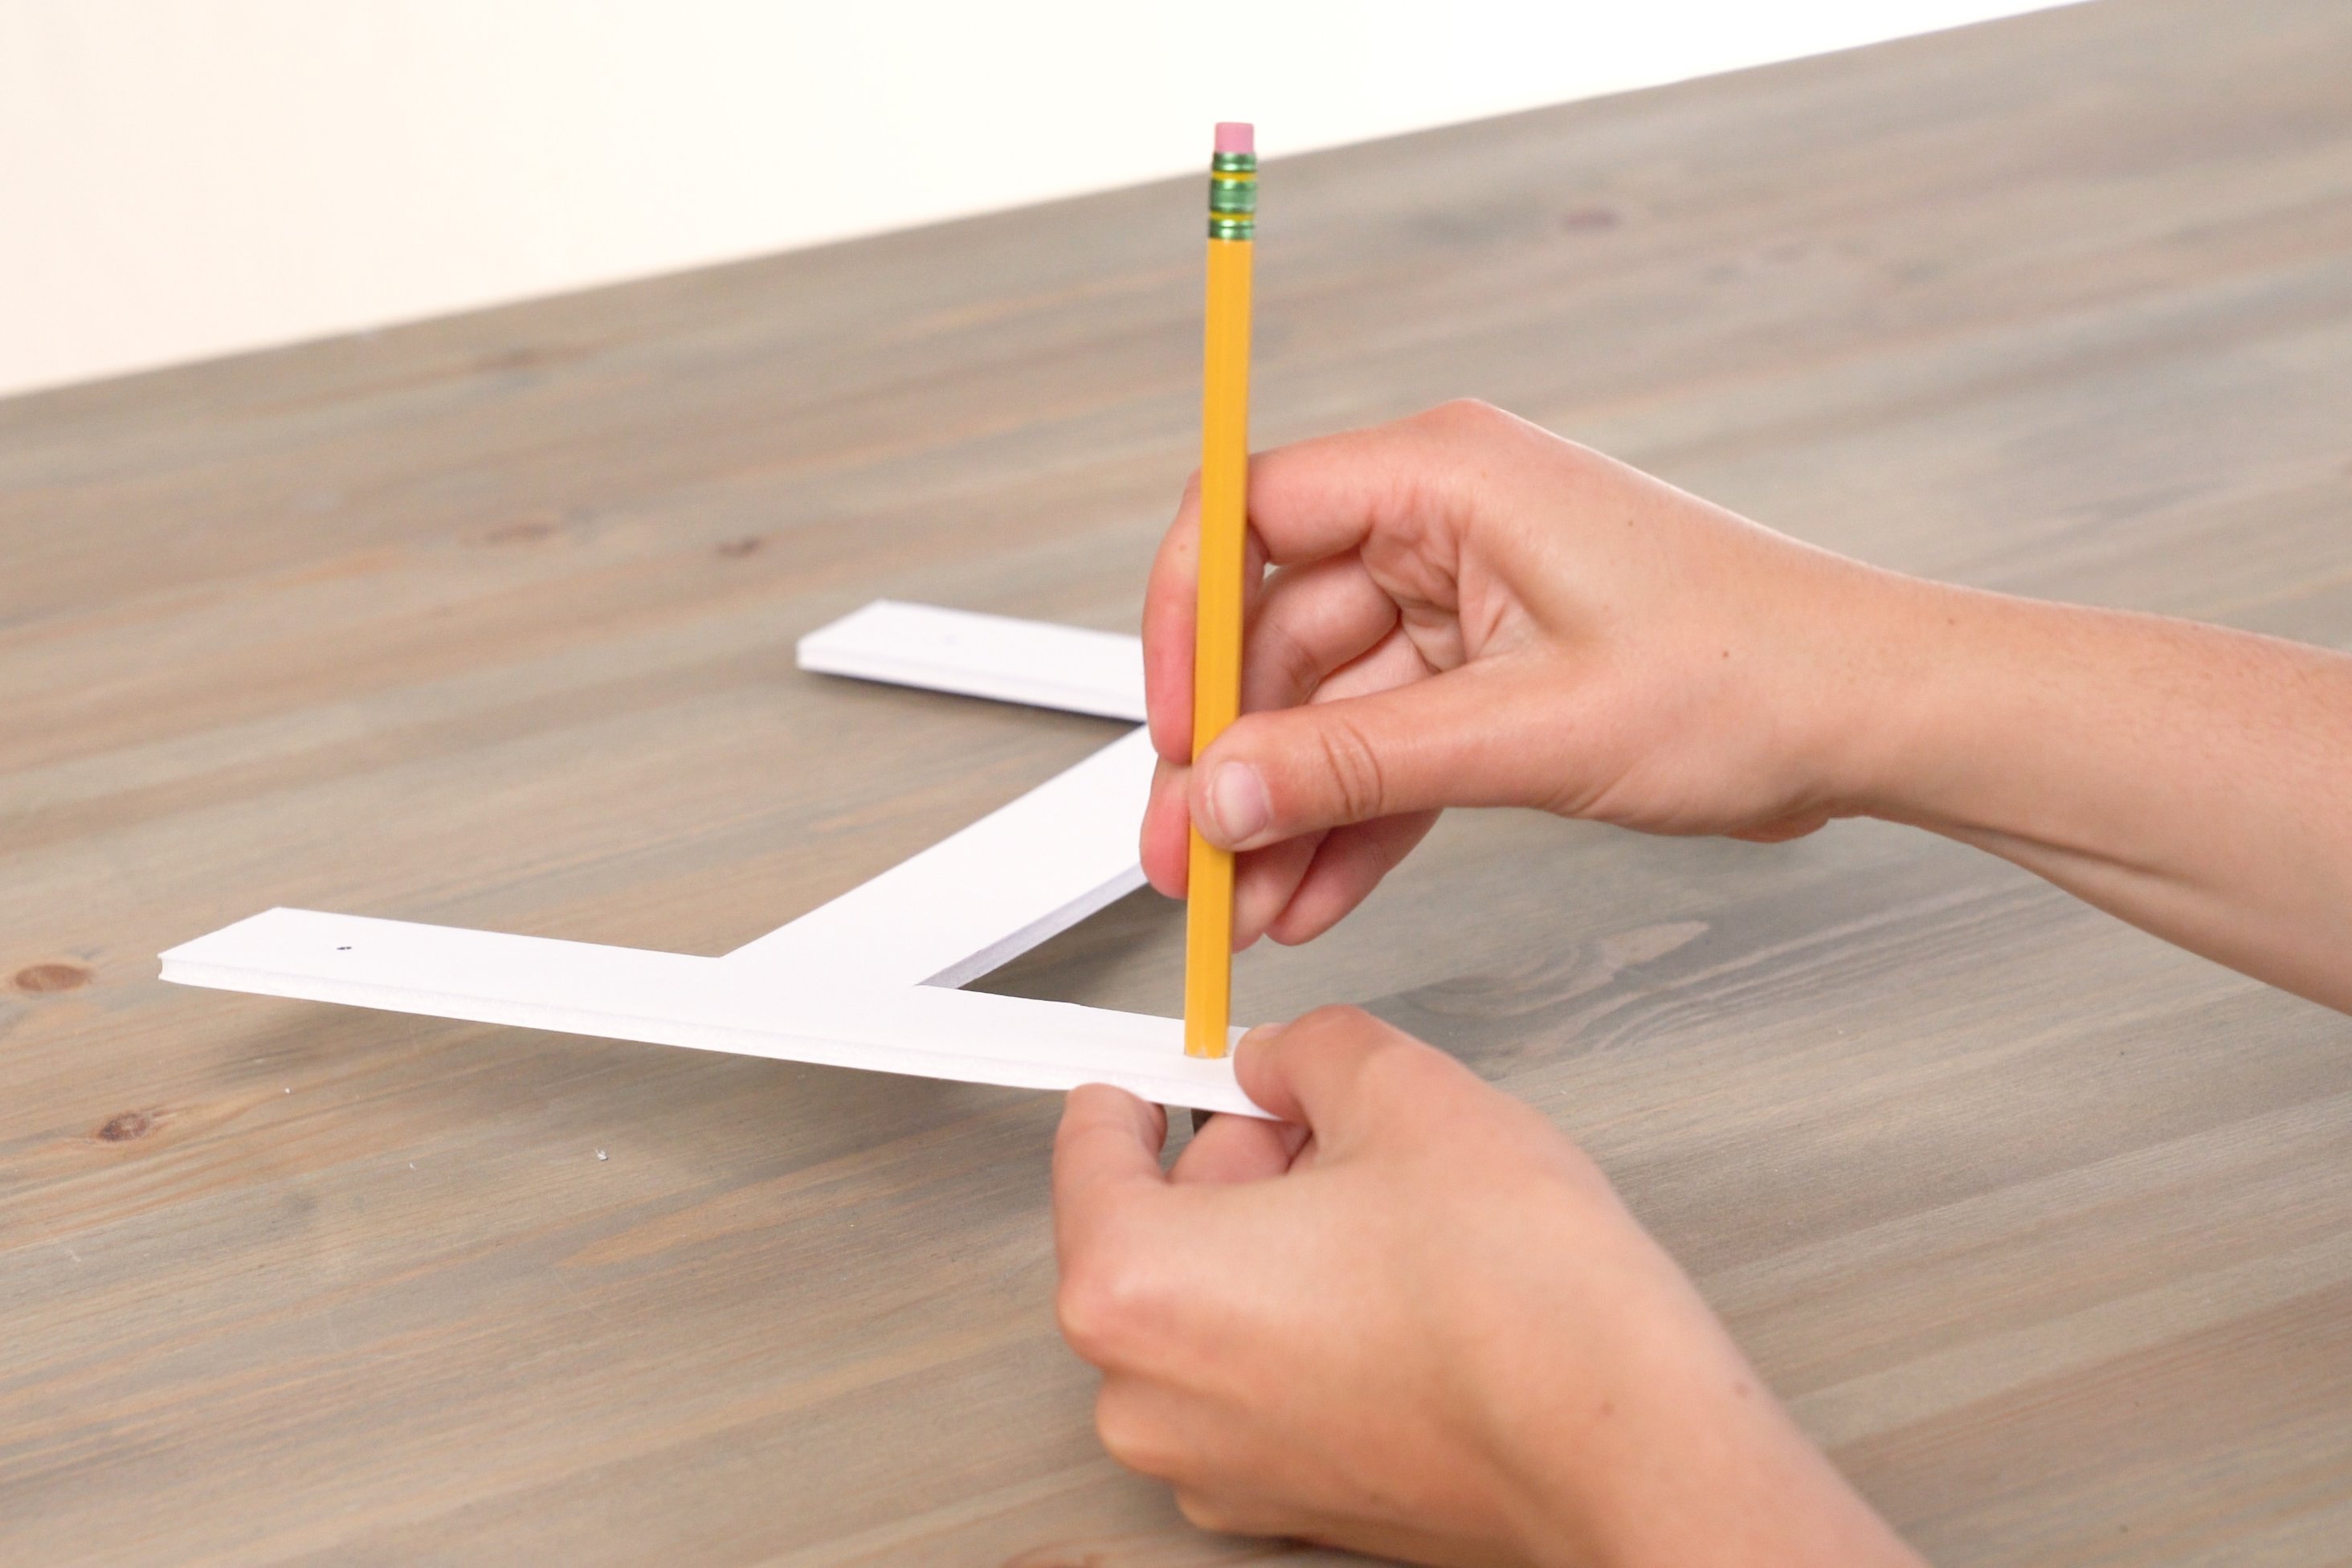
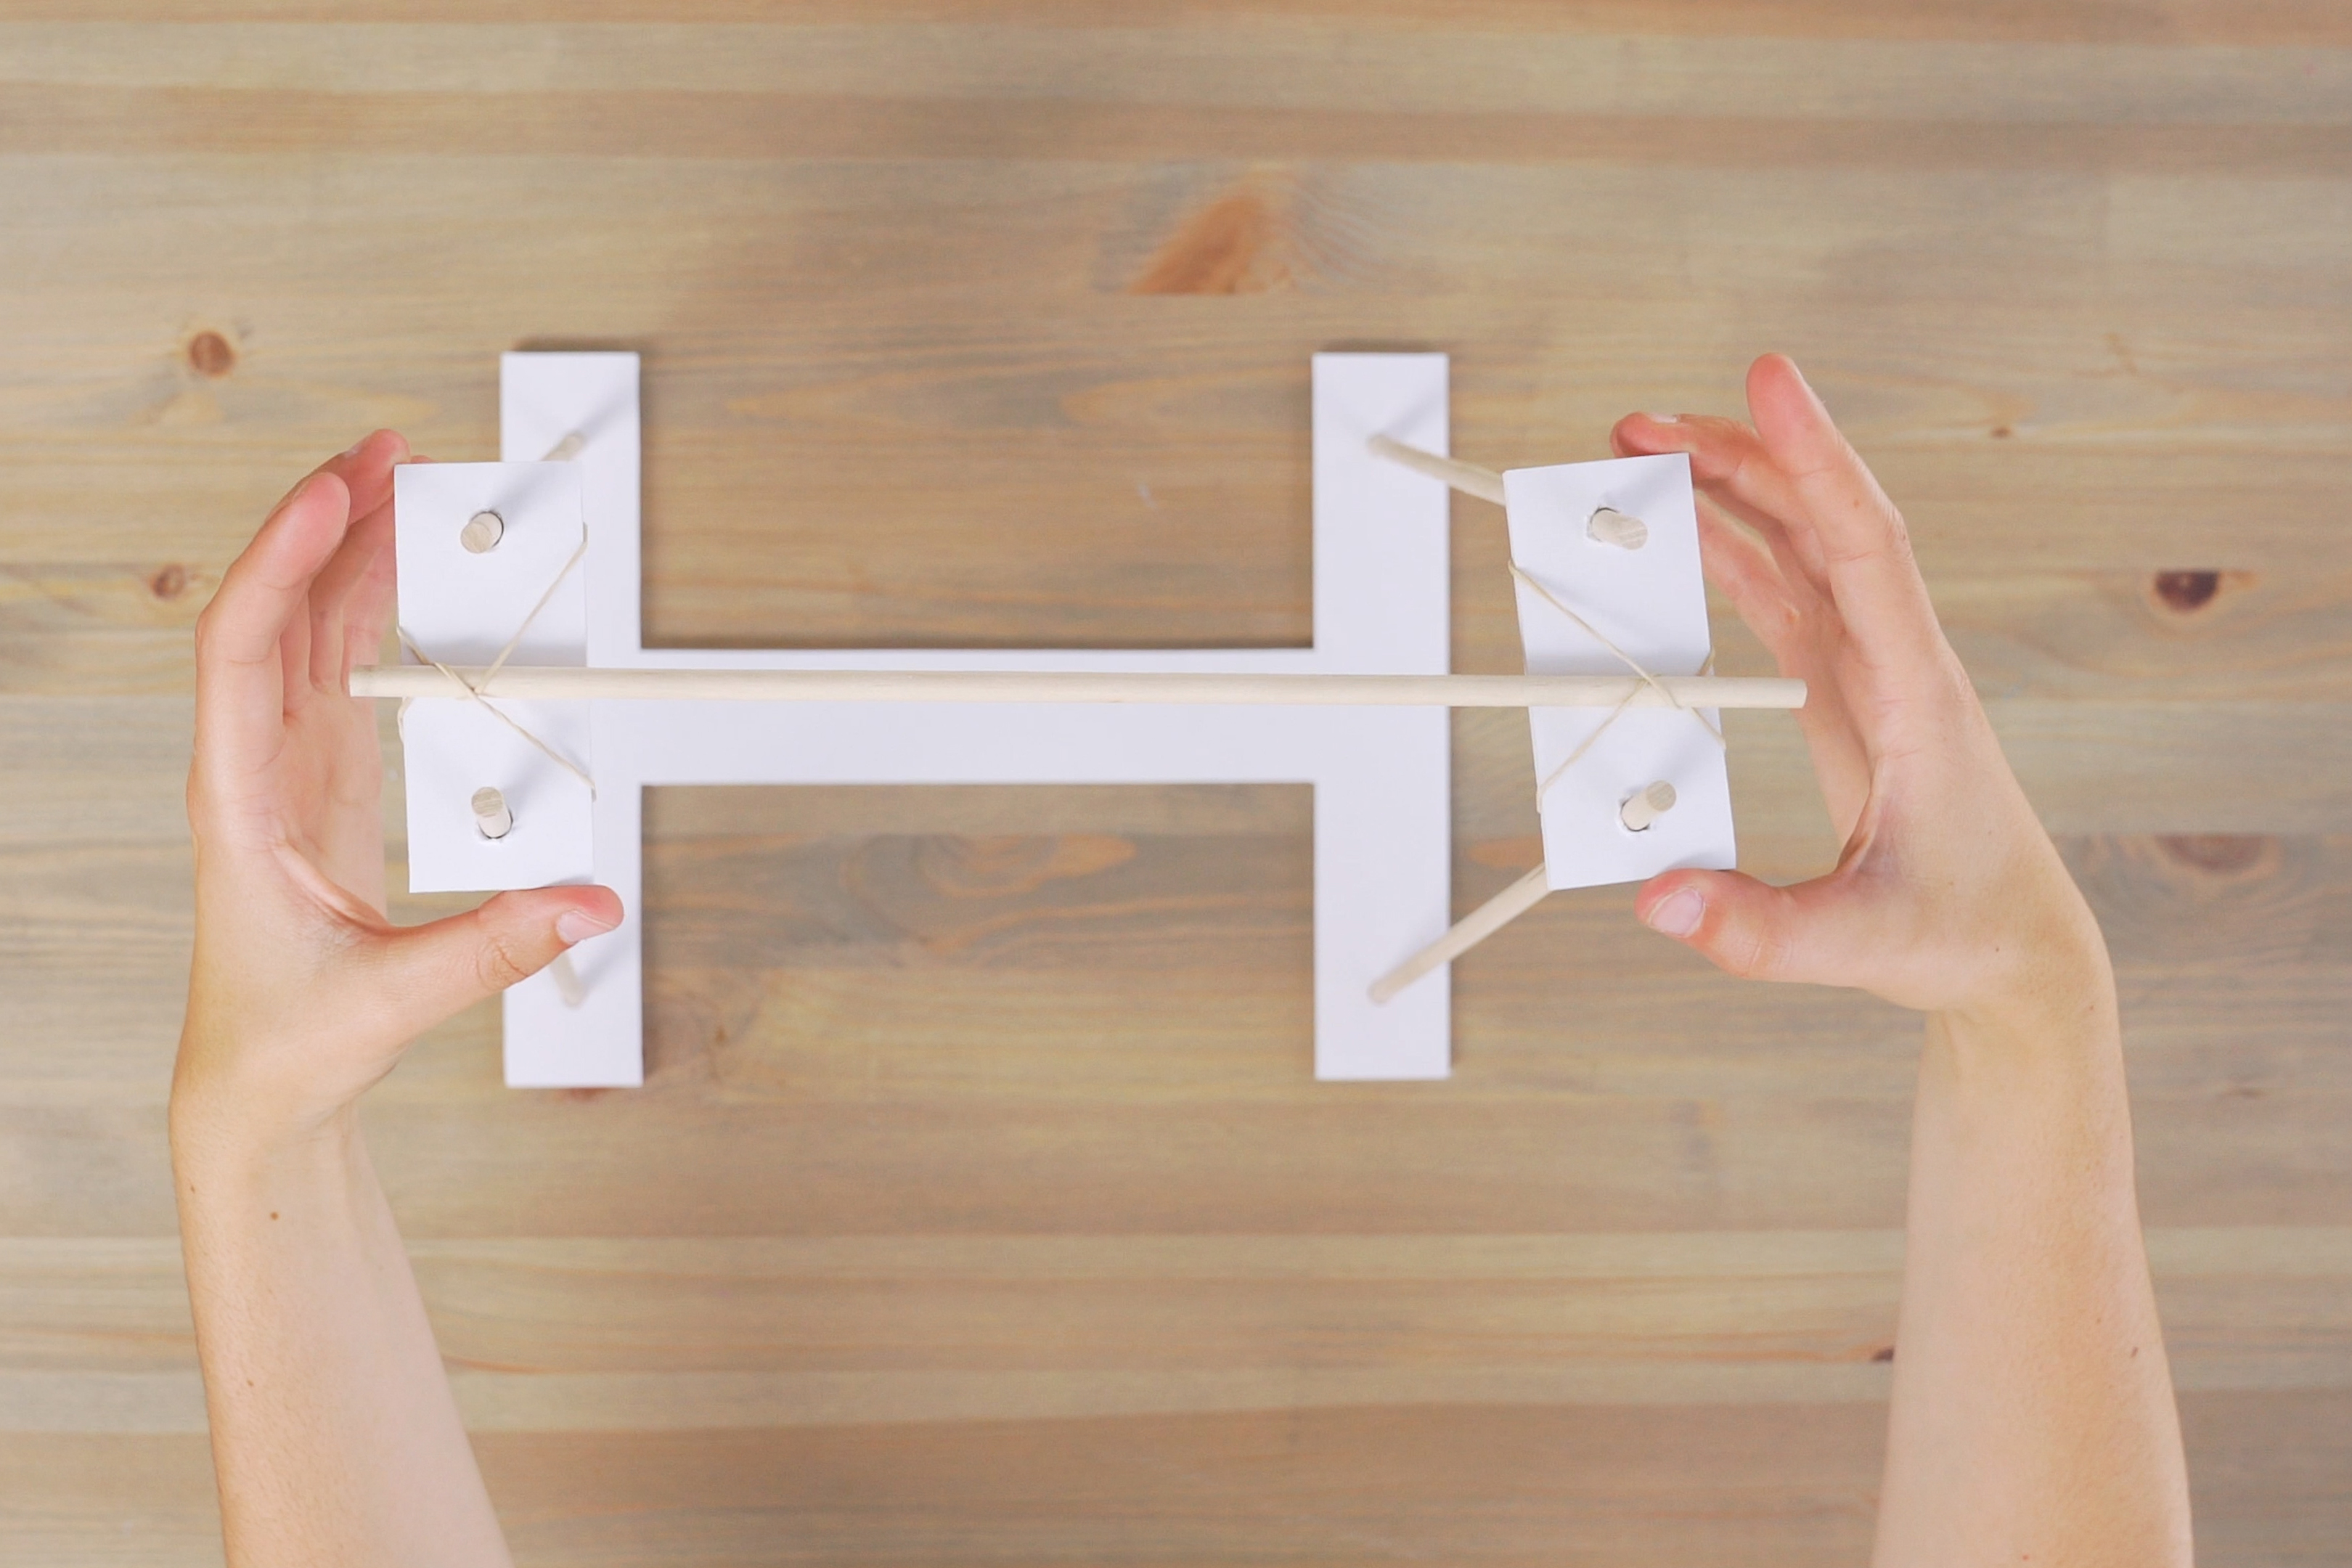
Step 4
Poke a hole in each corner of the "I" with a pencil. Then, use the pencil to widen them.
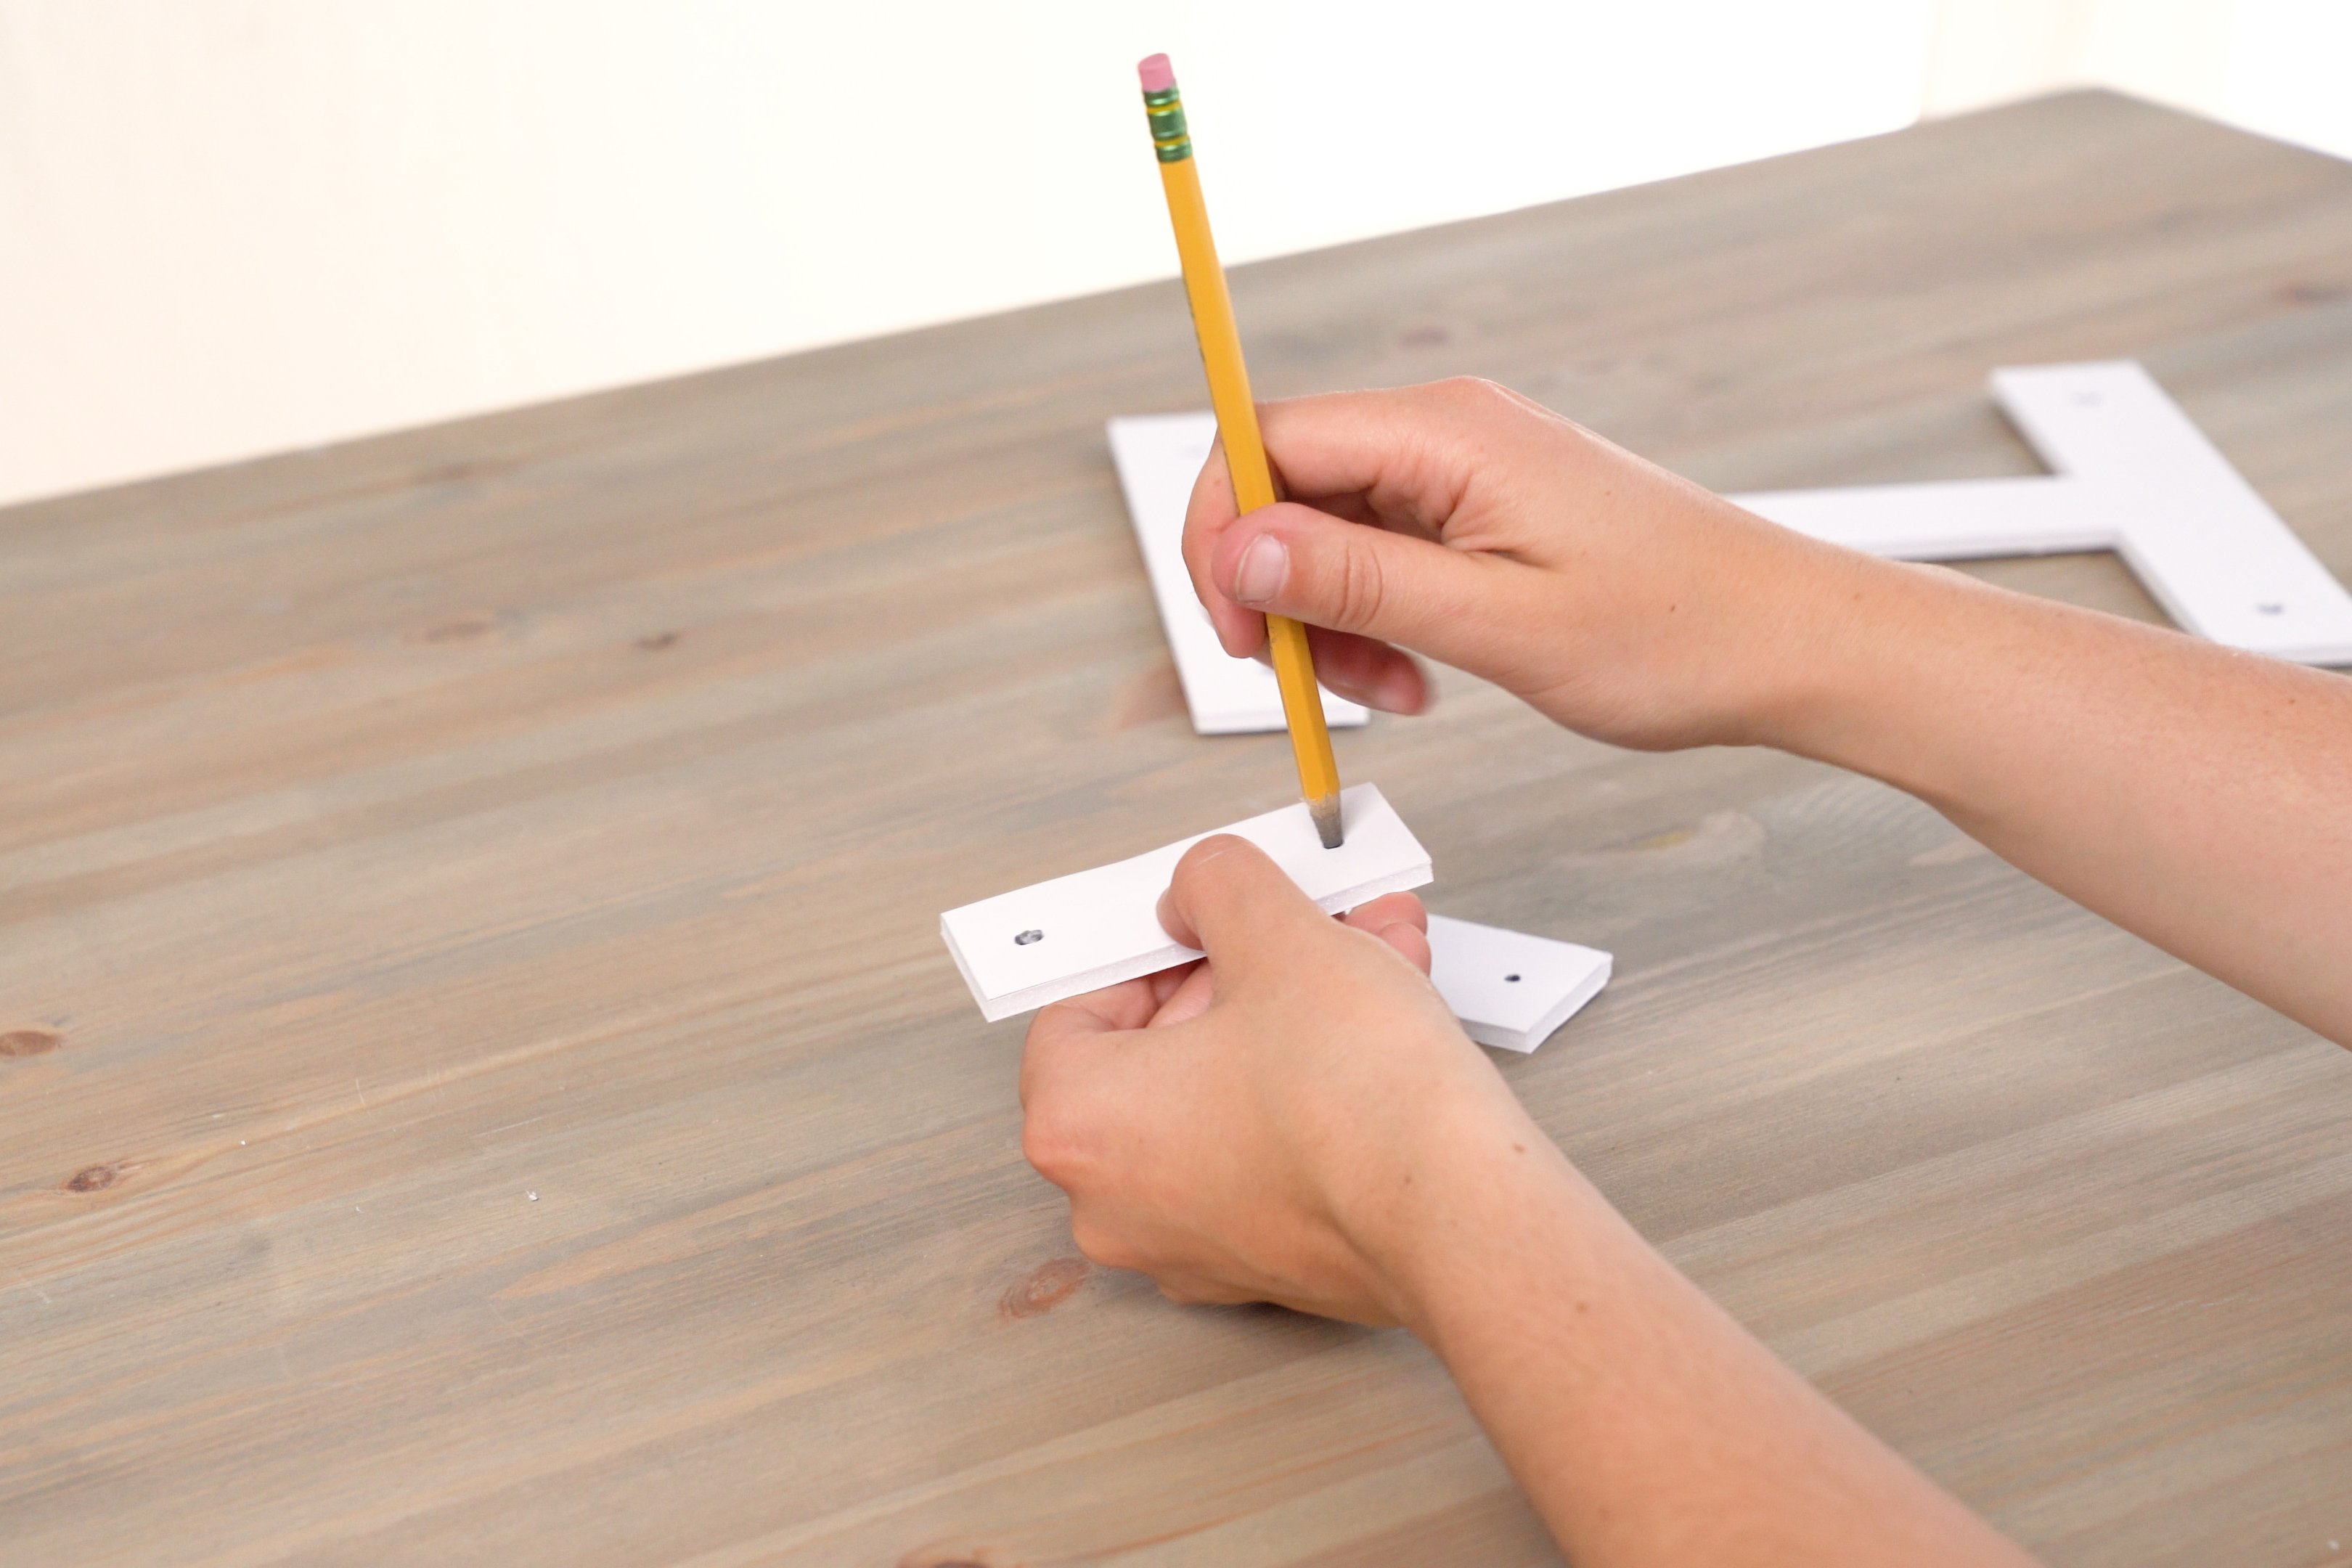
Step 5
Poke a hole in both ends of the strip with a pencil. Then, use the pencil to widen them.
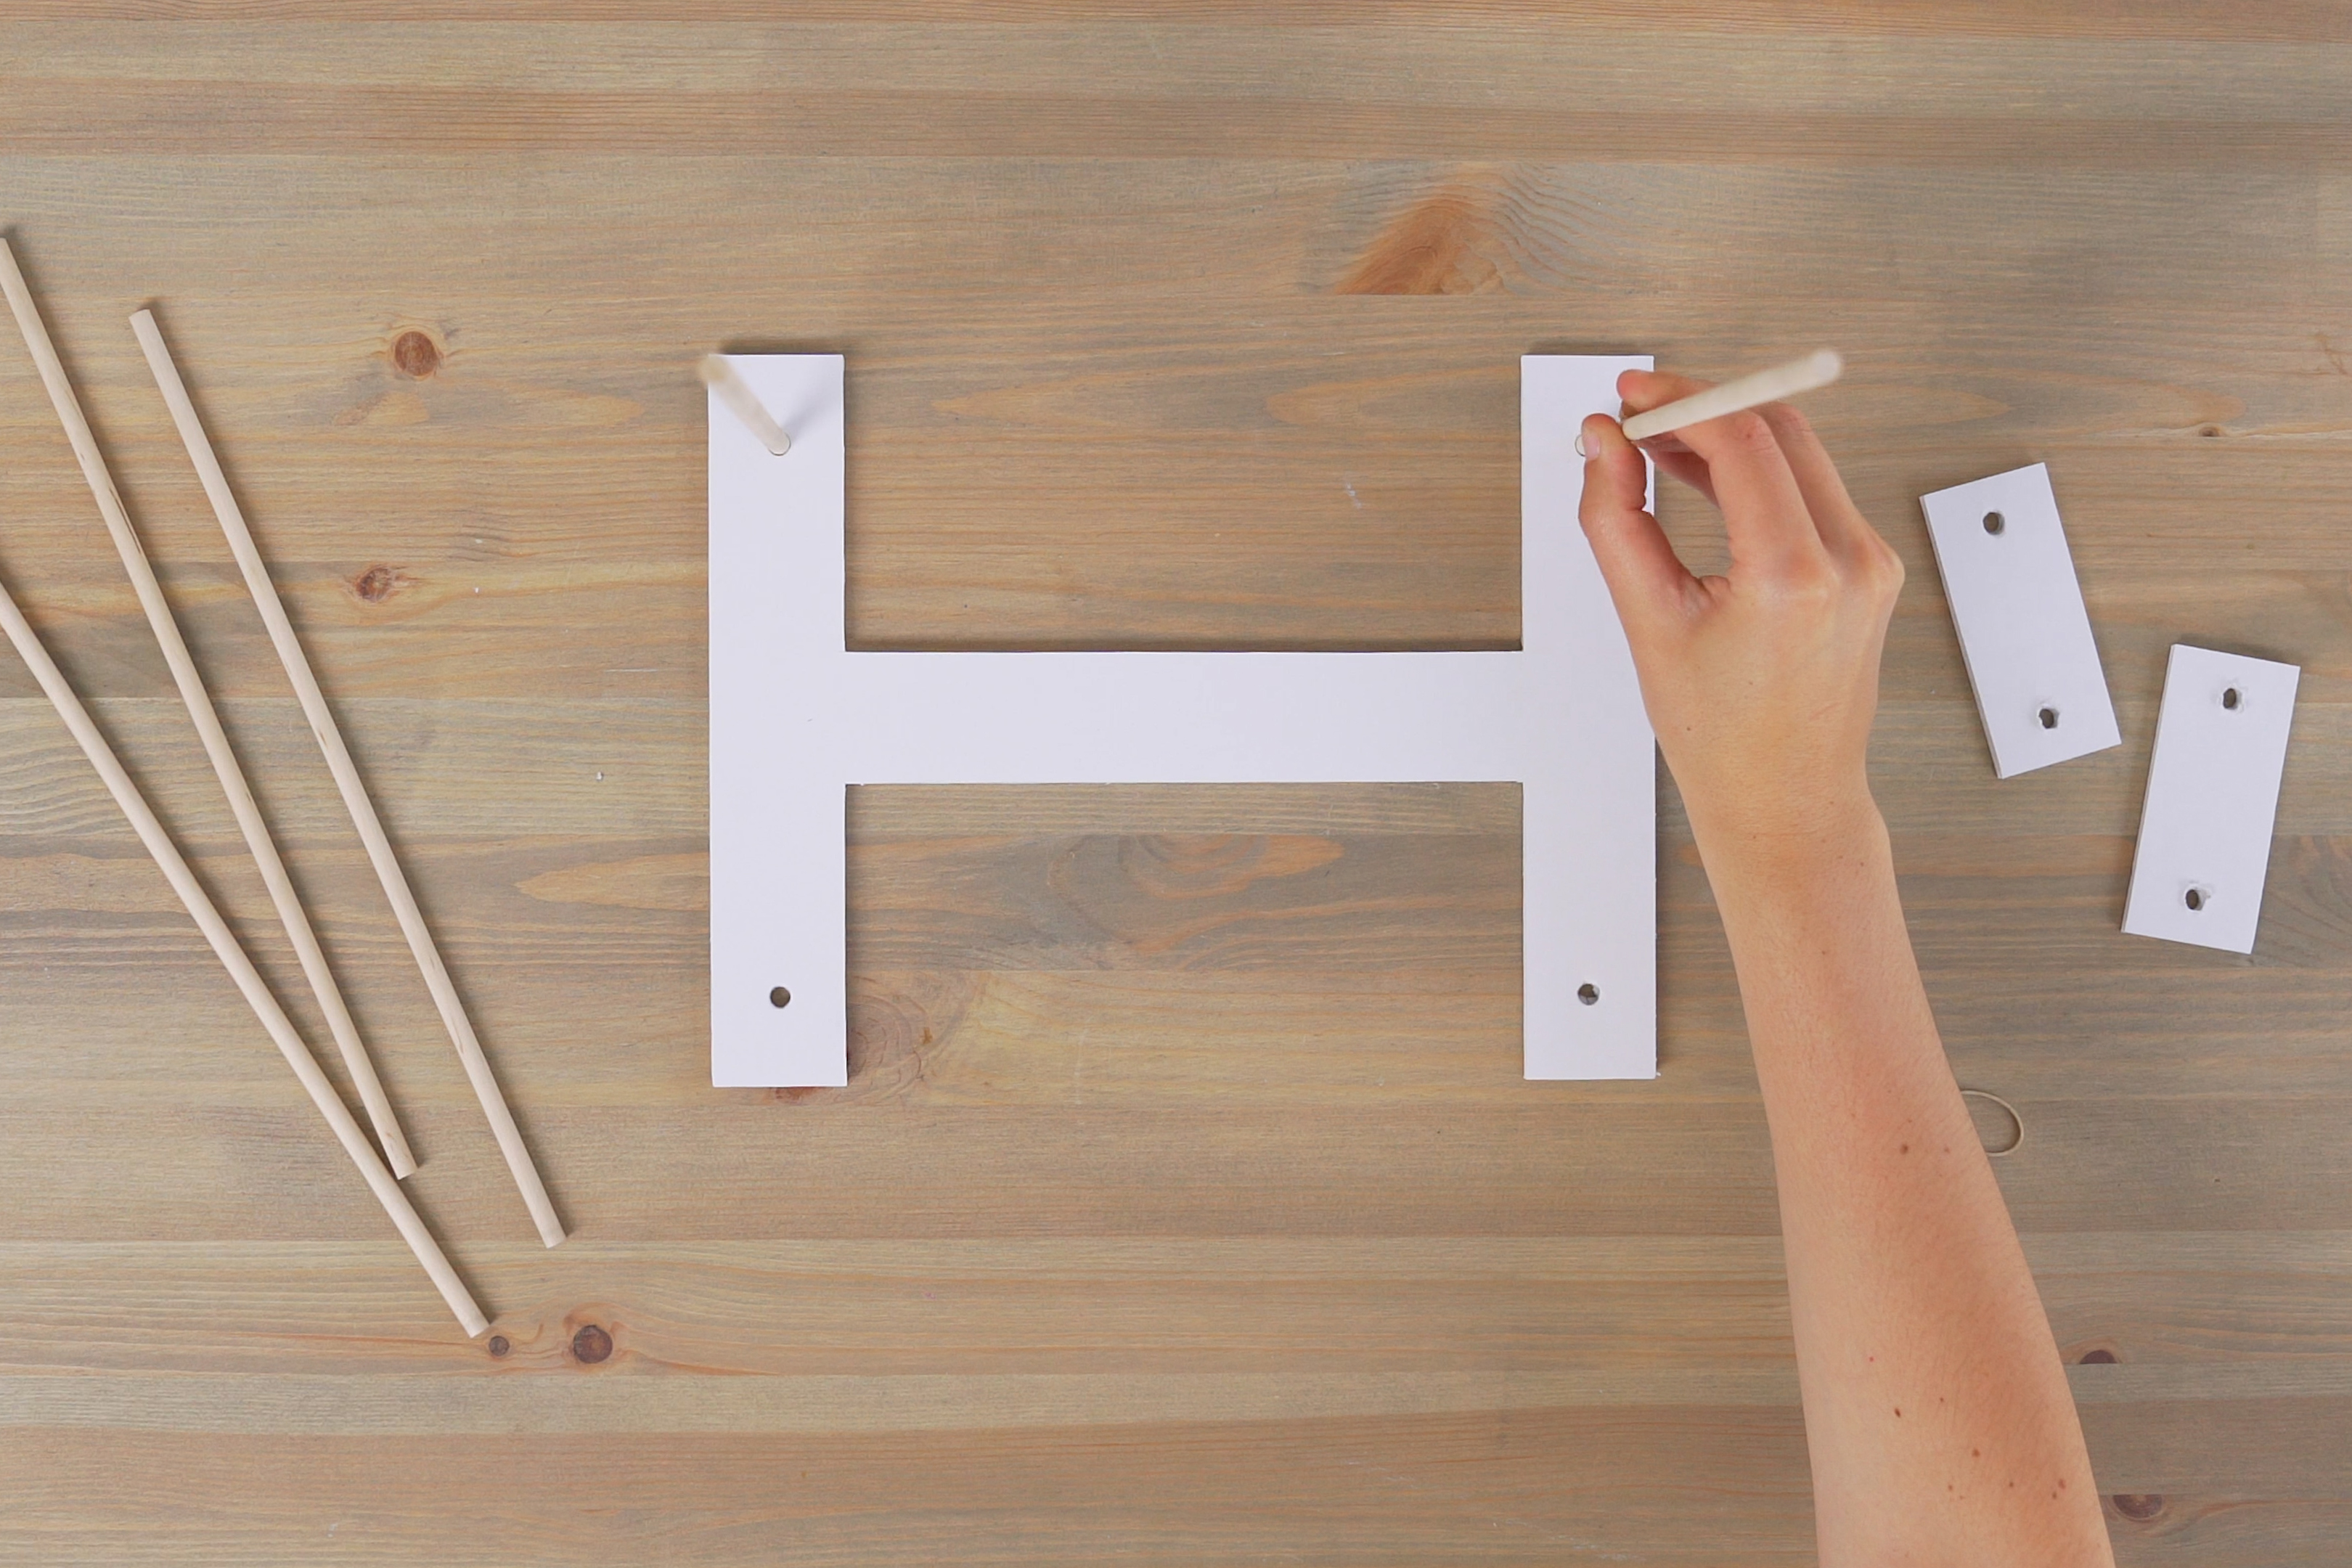
Step 6
Stick one dowel into each hole in the "I".
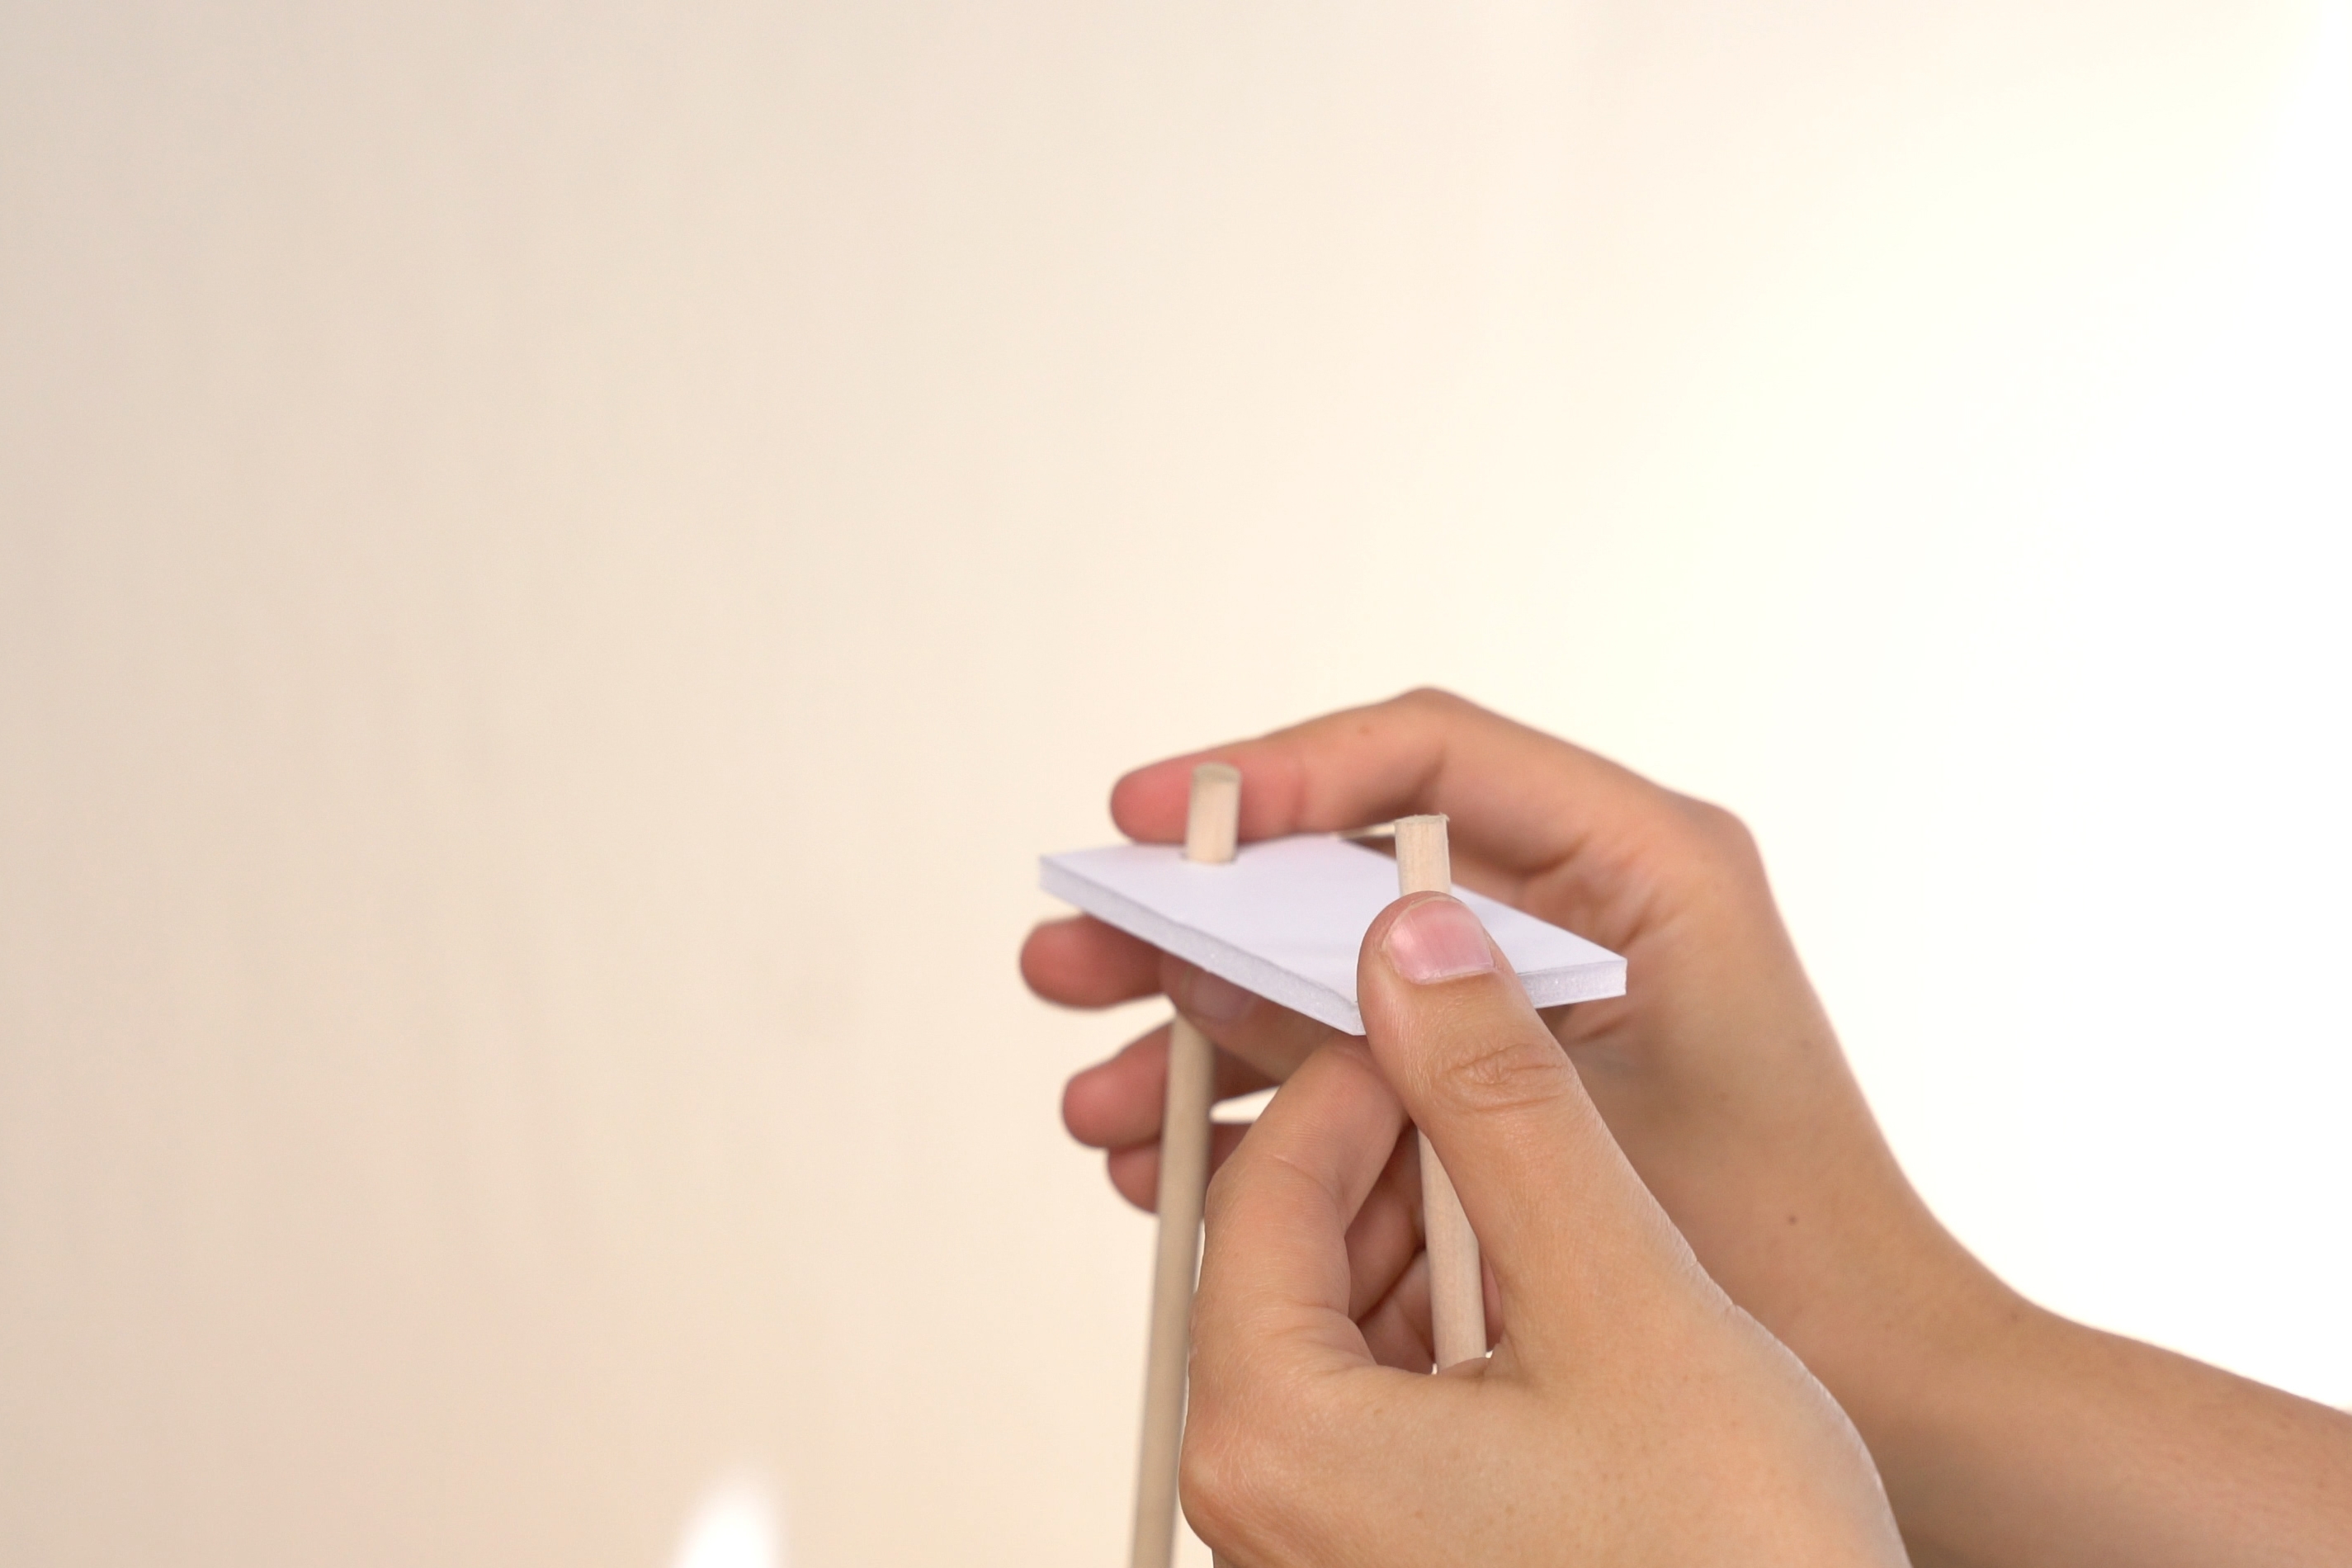
Step 7
Push the small strips on top of the four dowels.
Step 8
Lay one dowel across the top and secure it with four rubber bands.
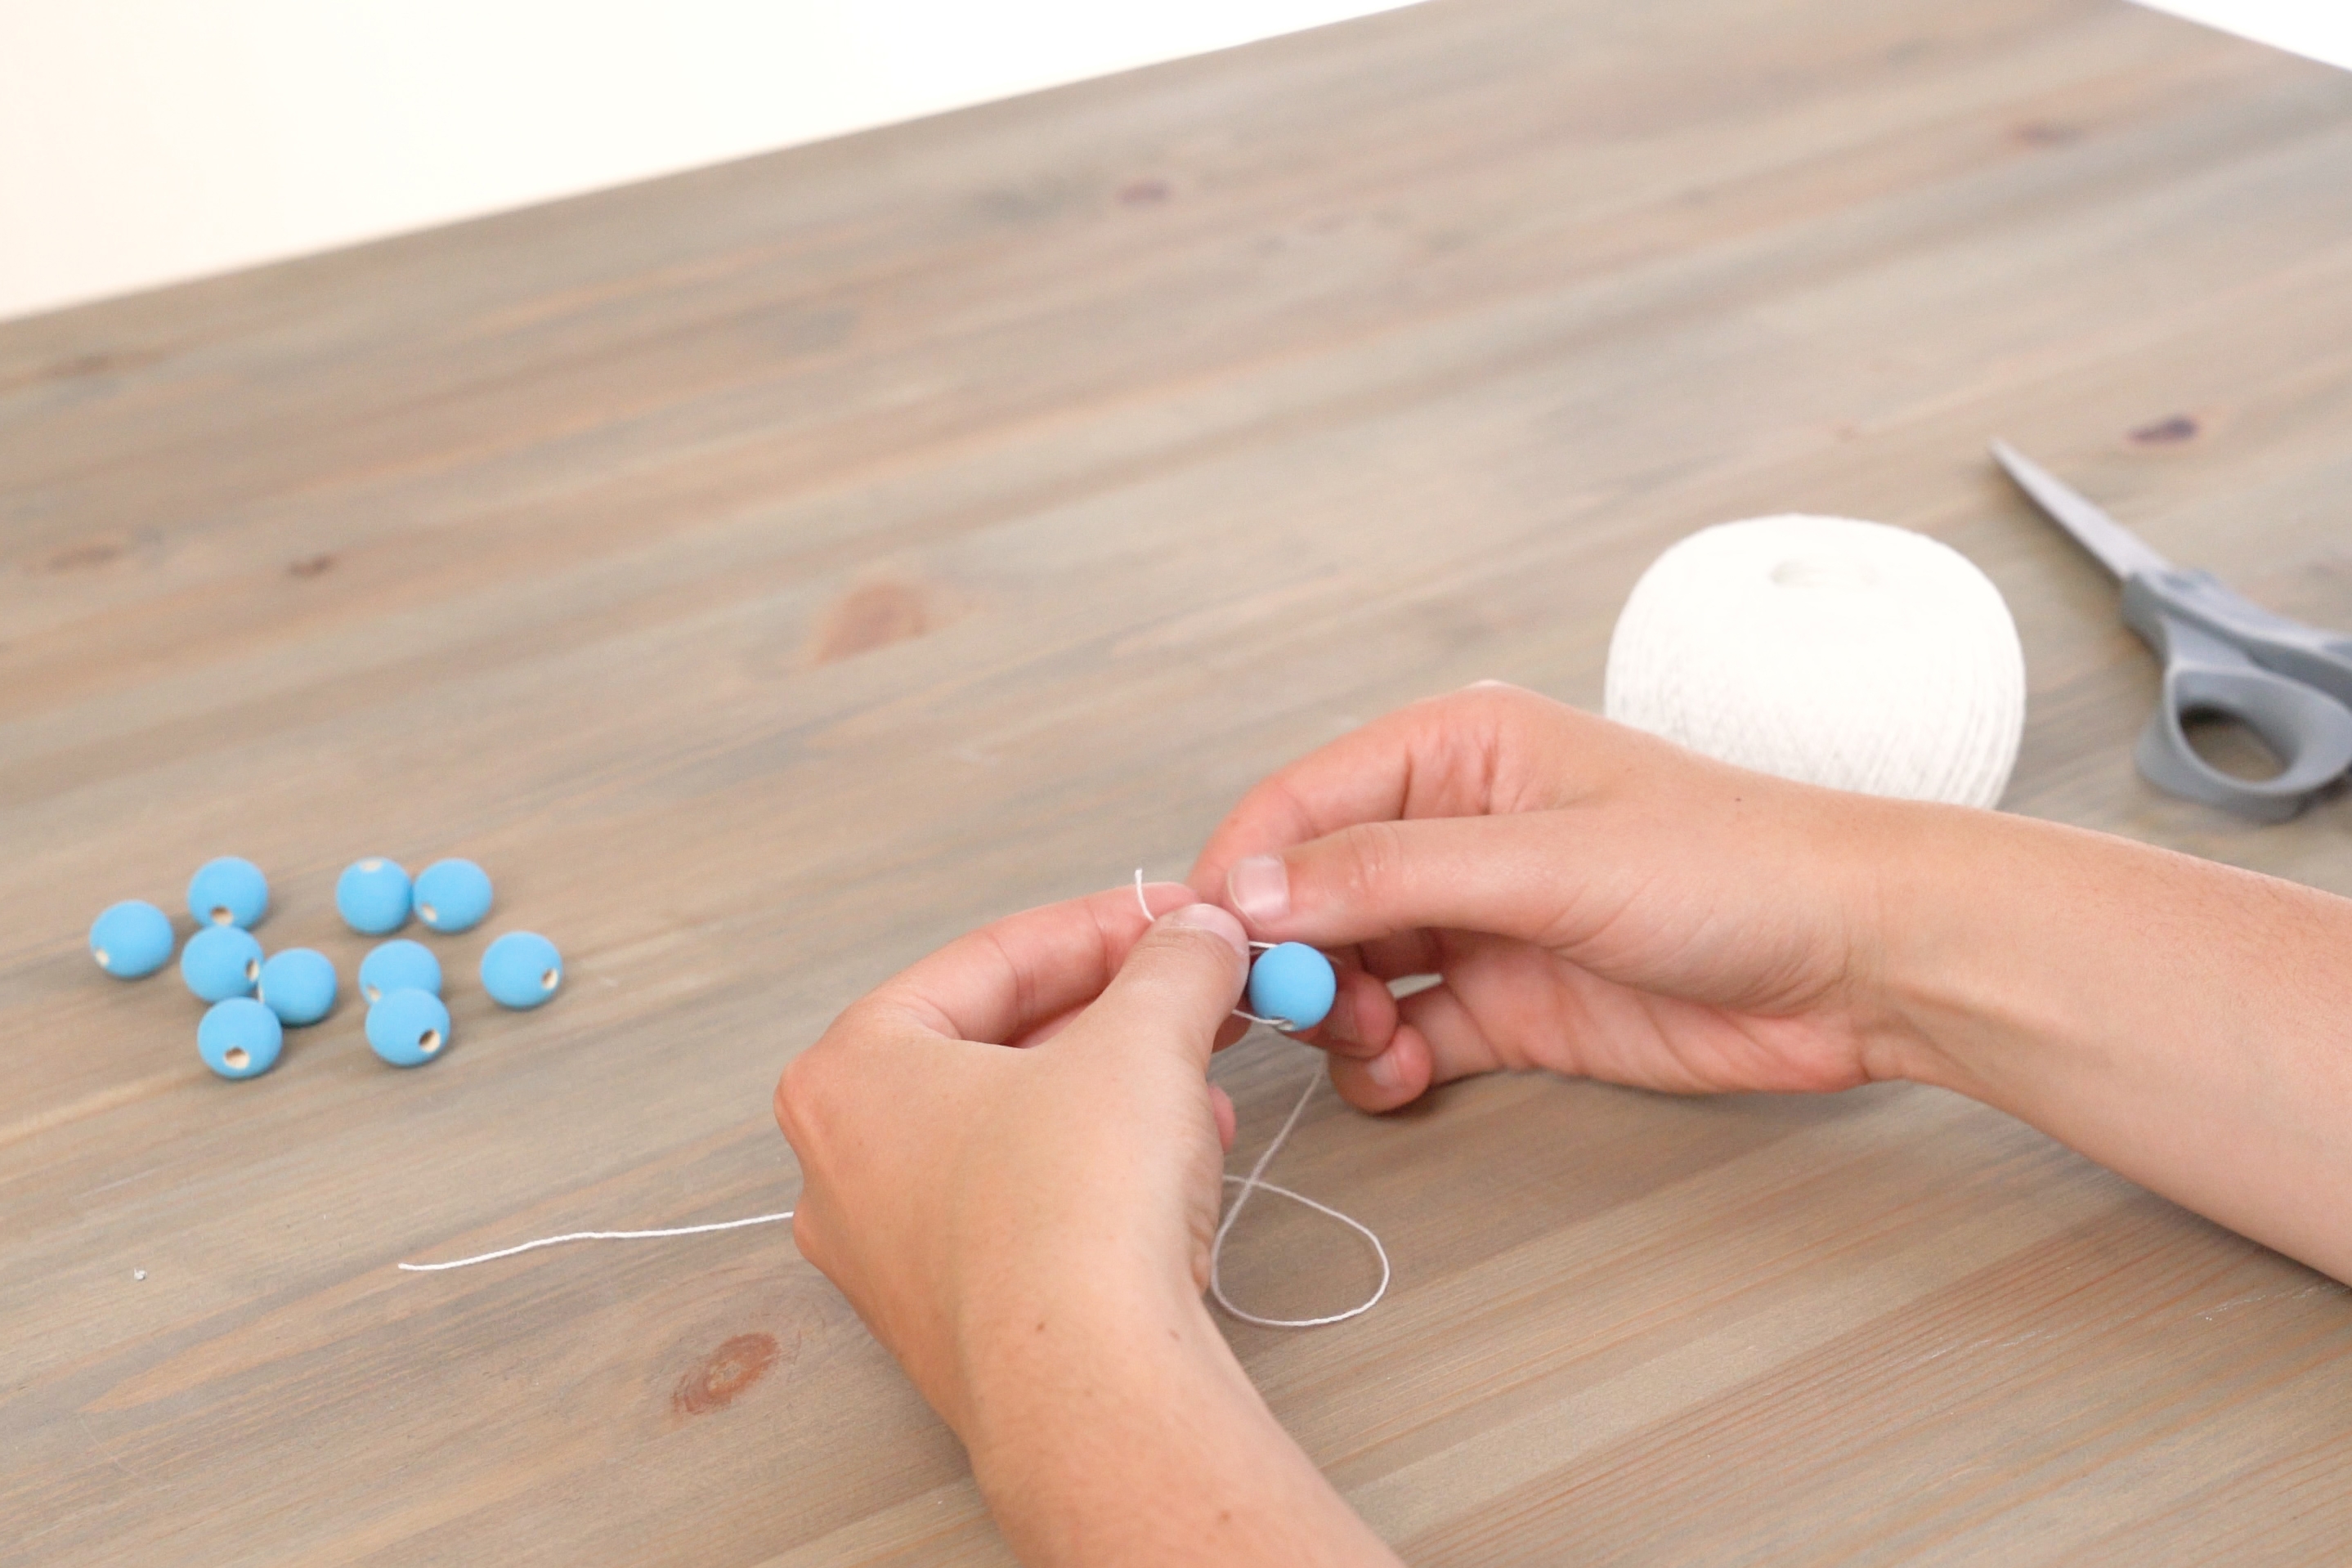
Step 9
Tie about 18 inches of string to each bead.
Step 10
Tie the first bead to the dowel.
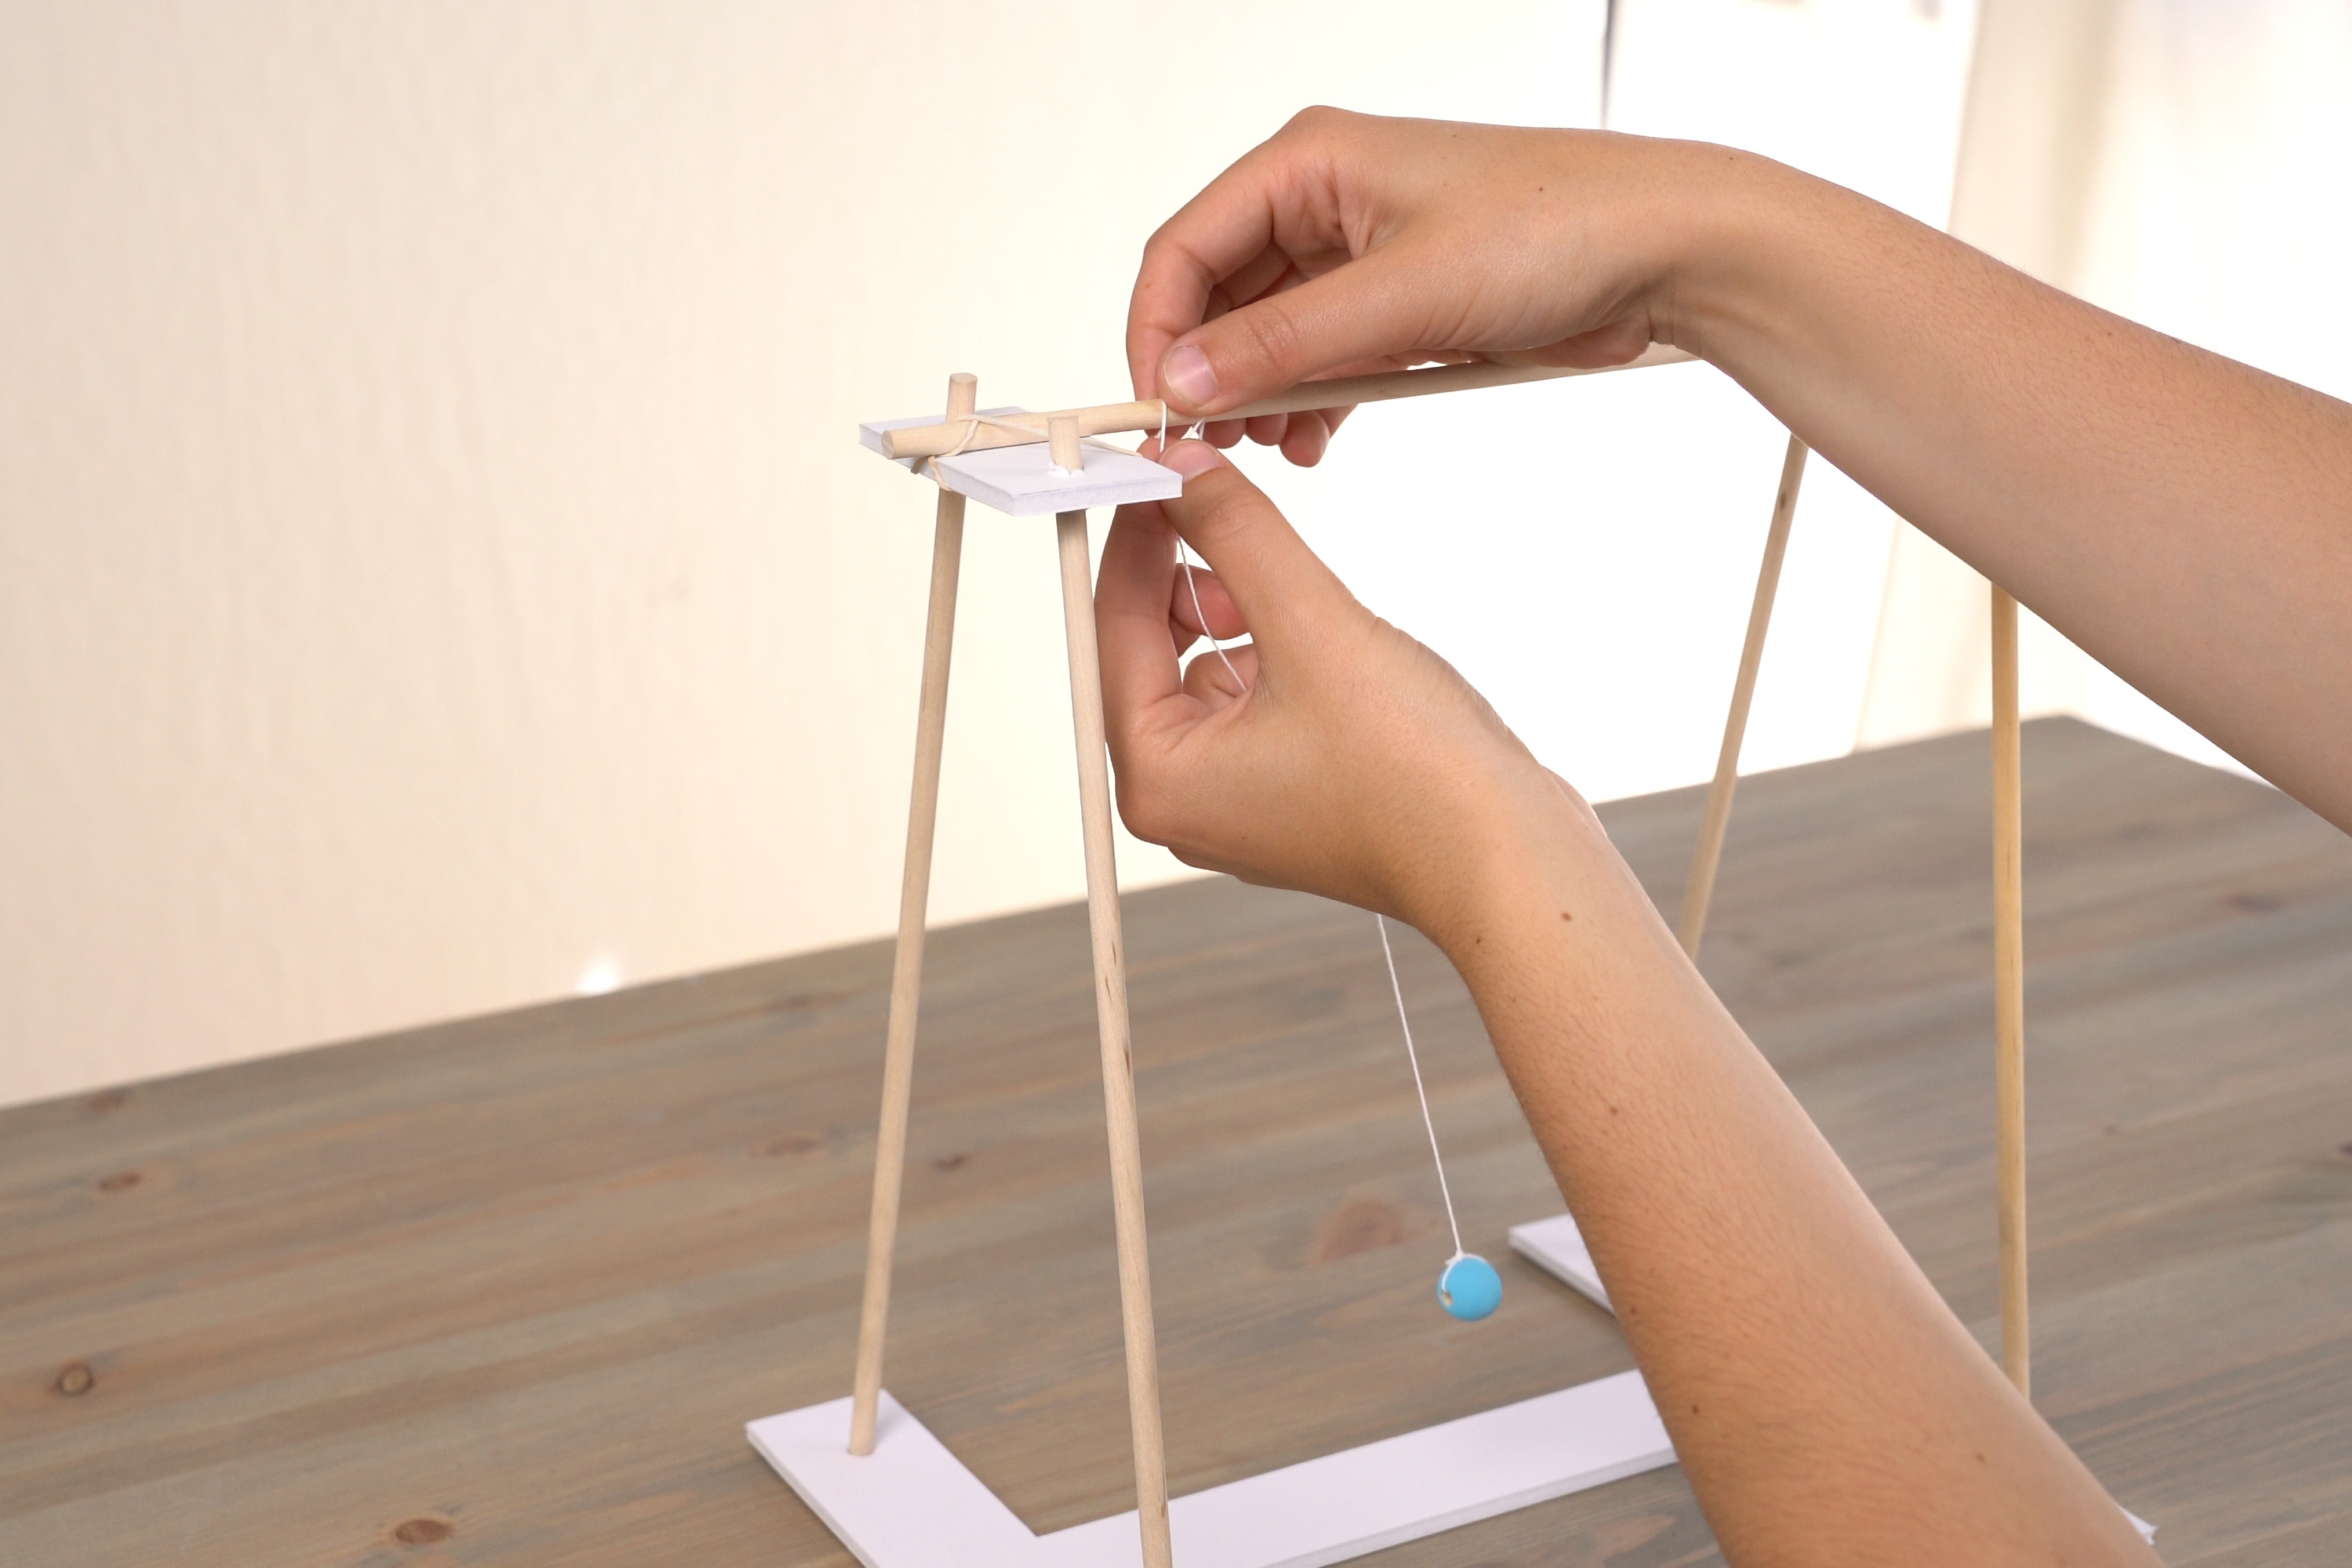
Step 11
Tie each consecutive bead to the dowel, tying each bead a little bit lower than the one before it.
Tip
Make sure the beads are evenly spaced apart.
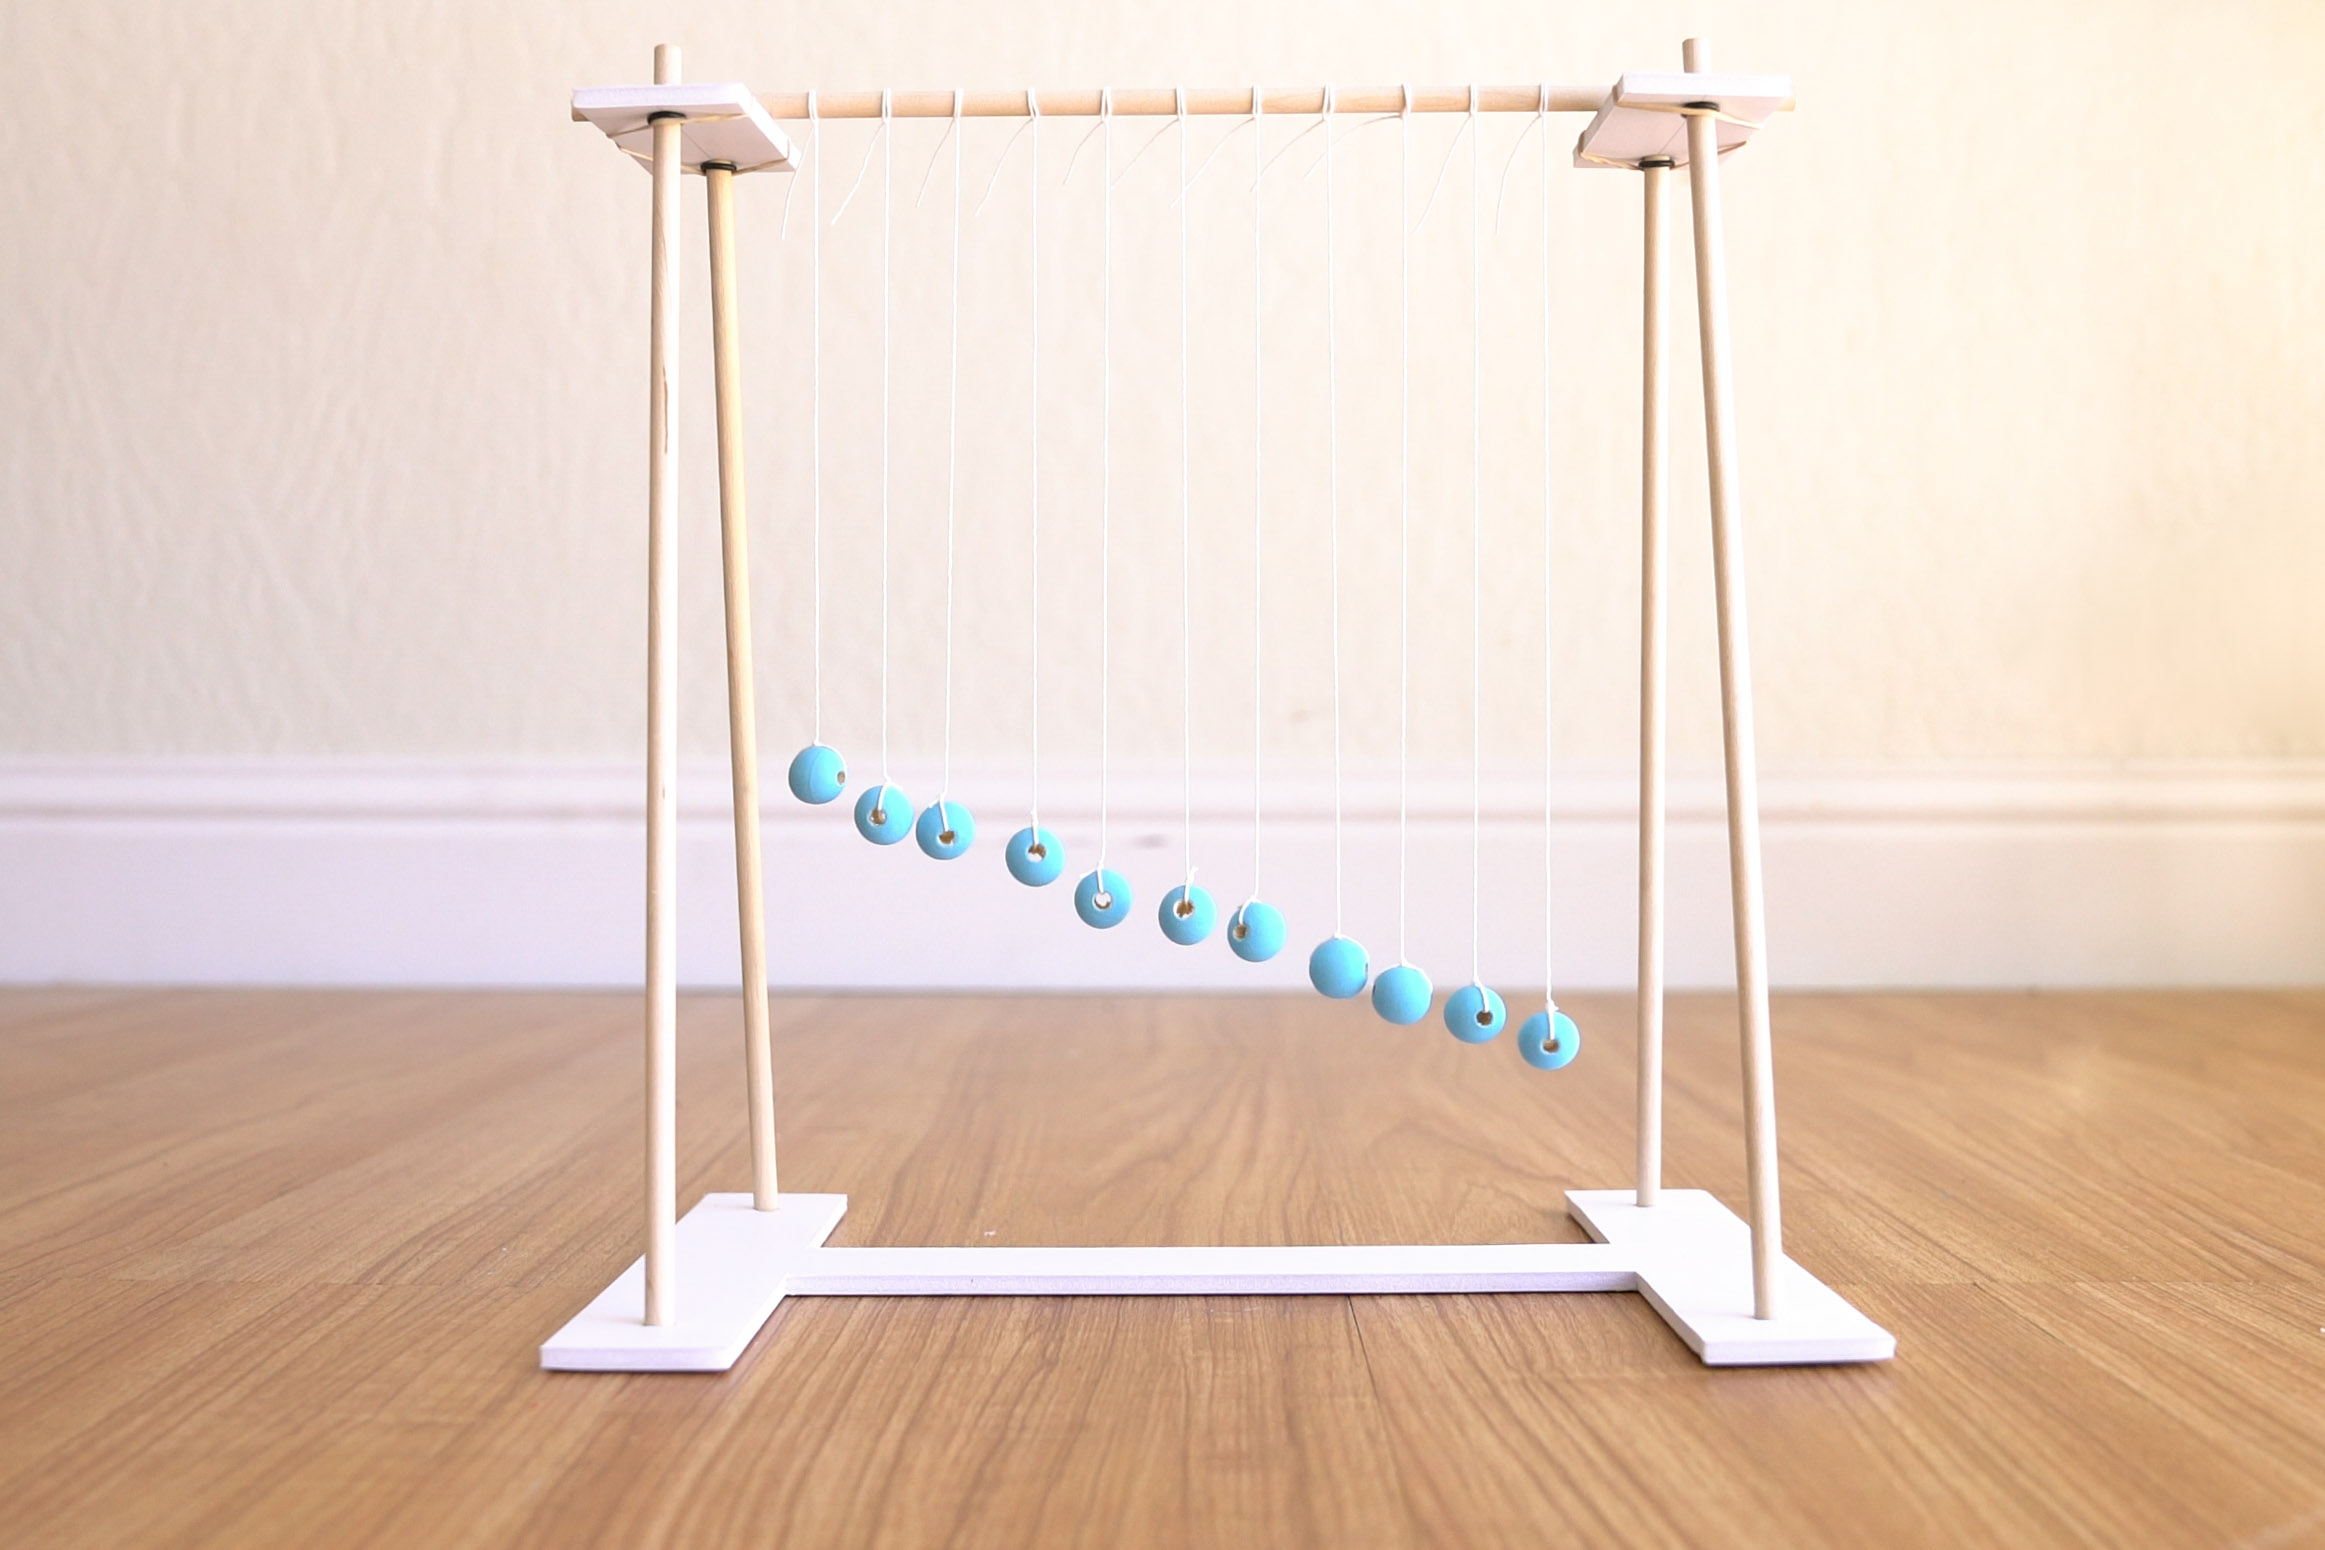
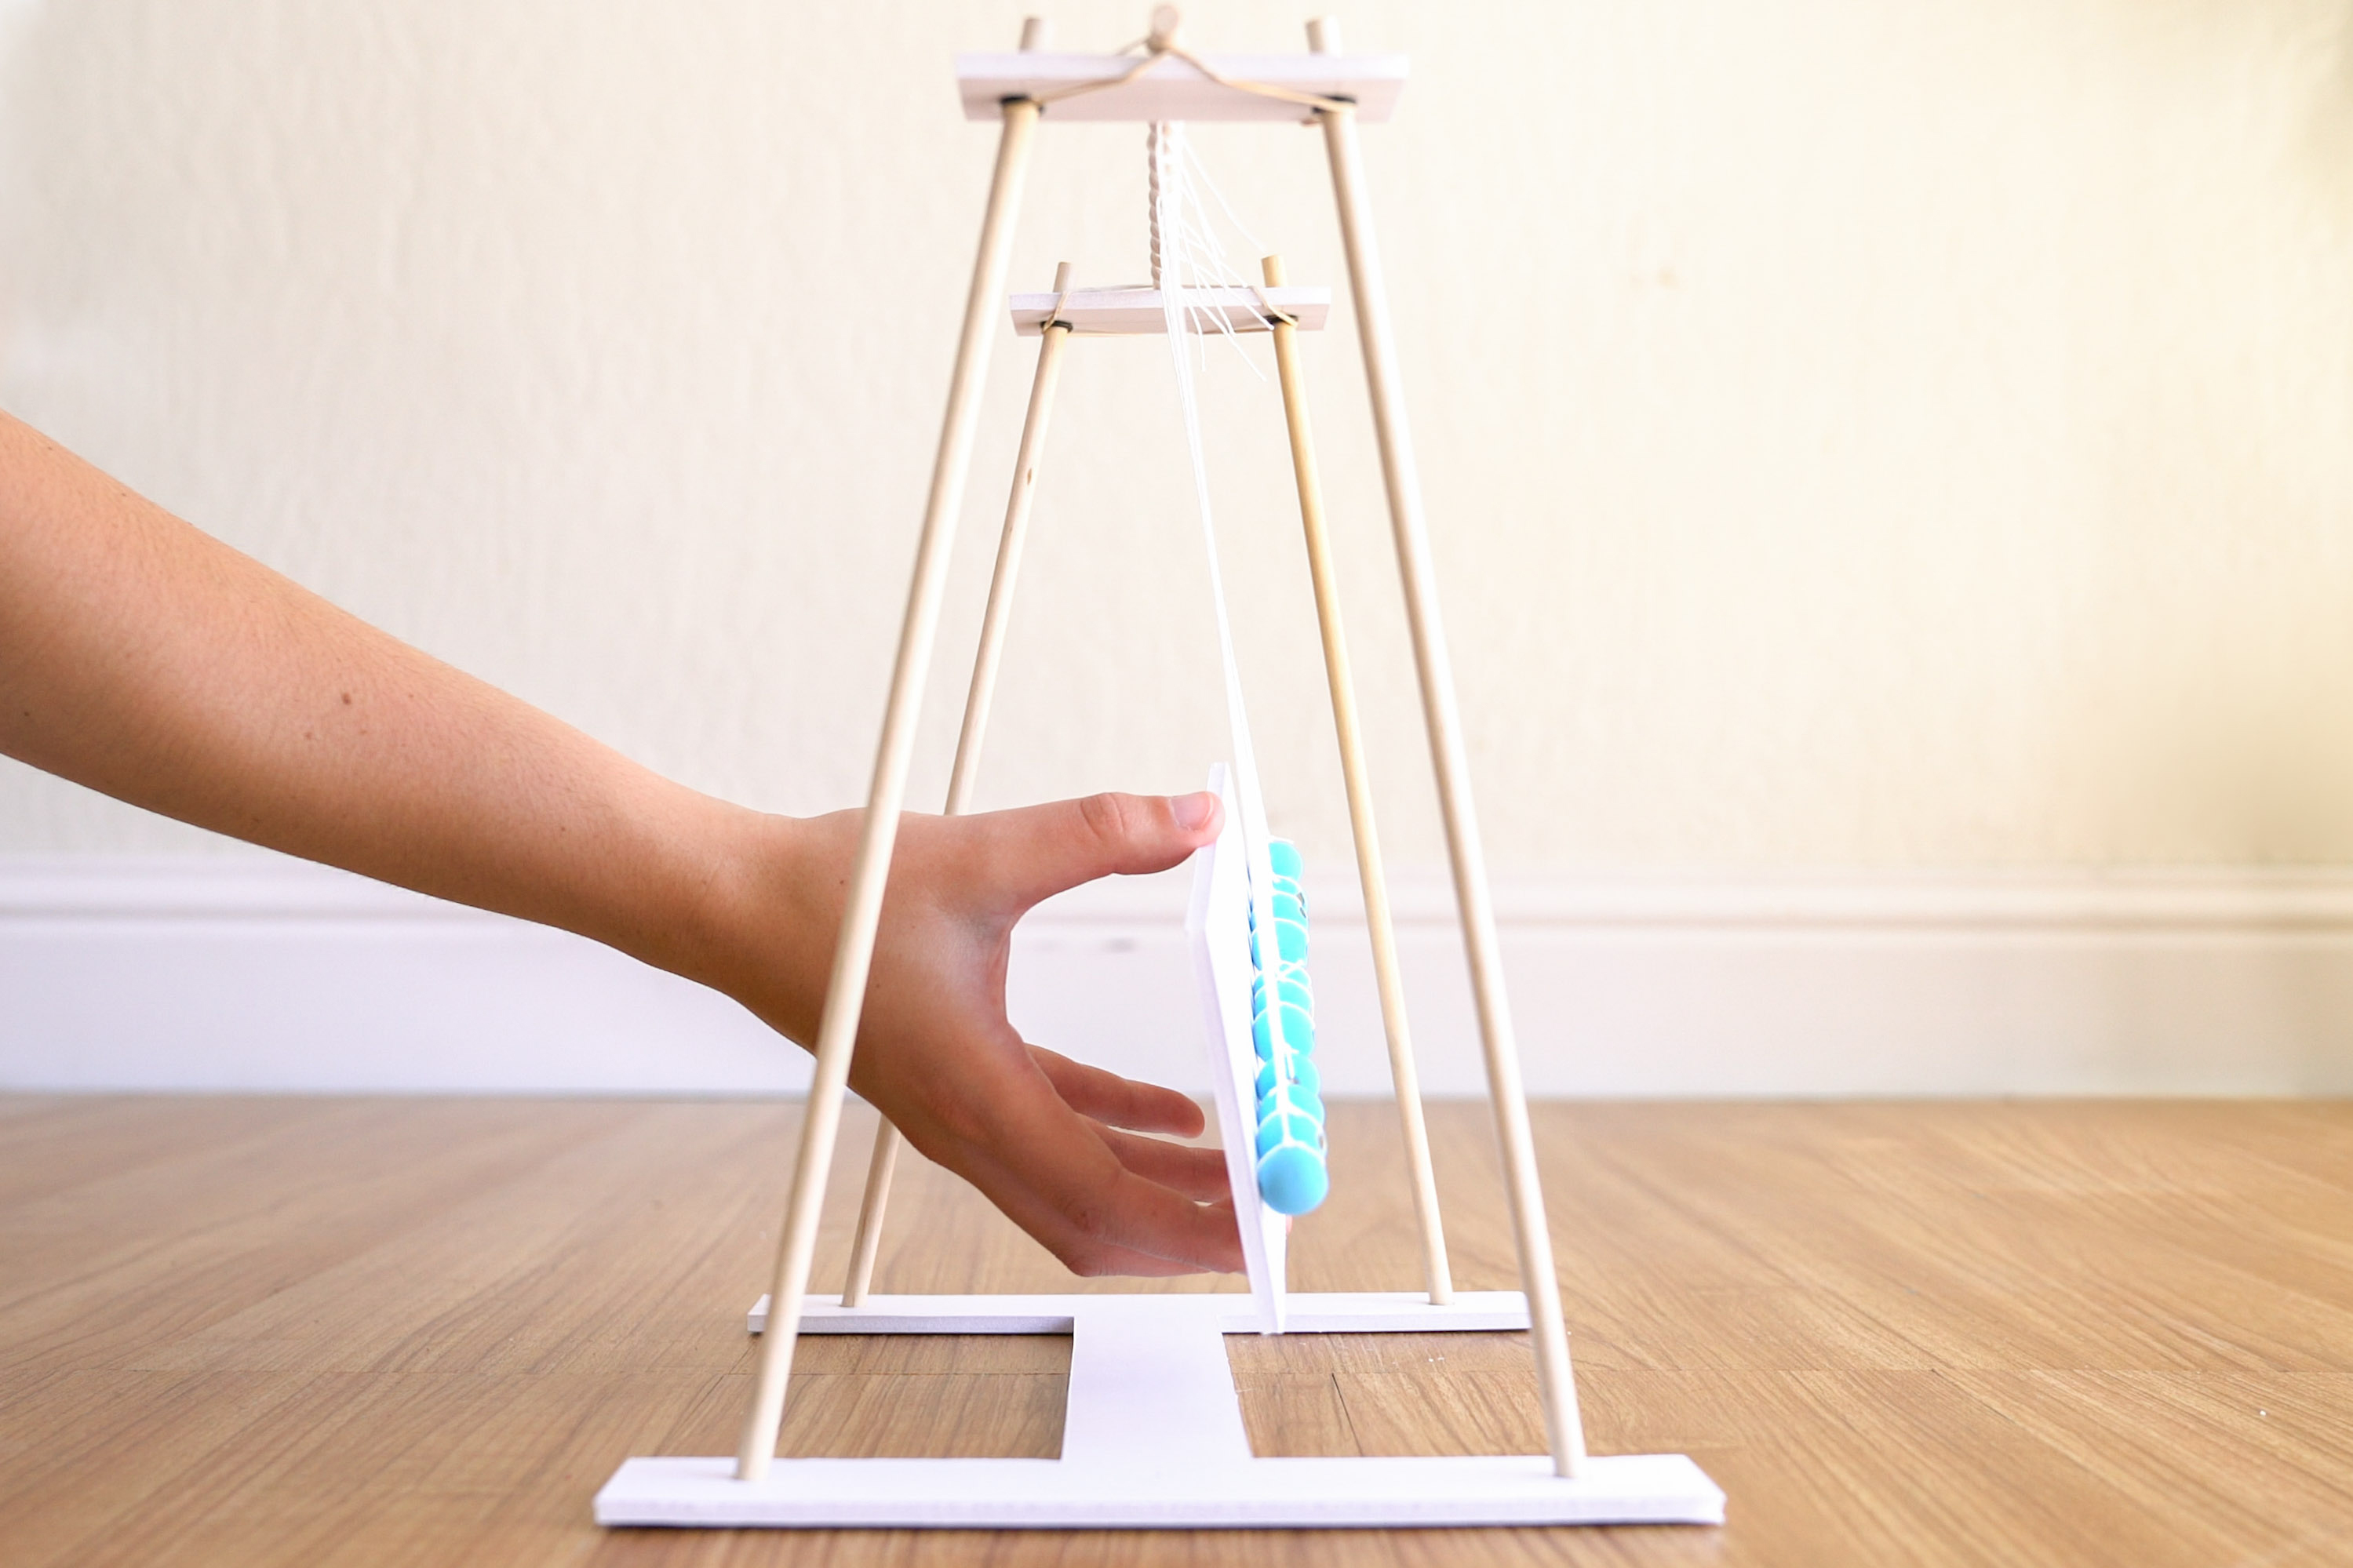
Step 12
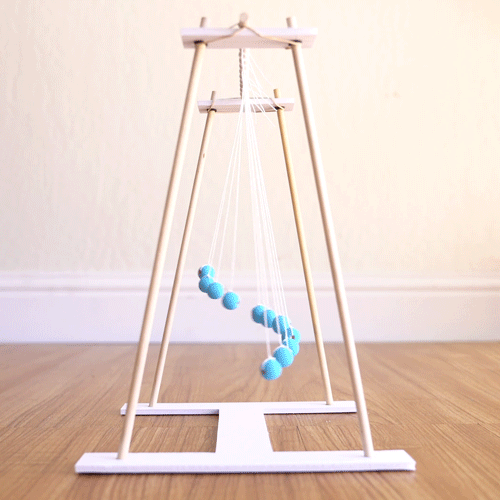
Push the beads out with an extra piece of foam core. Then, let go and observe what happens!
Learn more

As the pendulums swing back and forth, they make amazing patterns. That's because each pendulum has a slightly different period, which is the time it takes to complete a full swing. Think of the "tick-tock" of a grandfather clock. That's a period! A pendulum's period is set by how long its string is. A long pendulum has a long period, meaning it takes a long time to swing back and forth. A shorter pendulum has a shorter period, so it swings faster. Because the strings go from long to short on the pendulum toy, so do the periods of the pendulums. That means each pendulum swings a little bit faster than the one before it. So because you release them at the same time and height, their different speeds make them go in and out of sync. They swing together, then move in waves, and sometimes look completely chaotic! To experiment more with pendulums, check out our Swinging Salt Pendulum here!


