Step-by-step tutorial
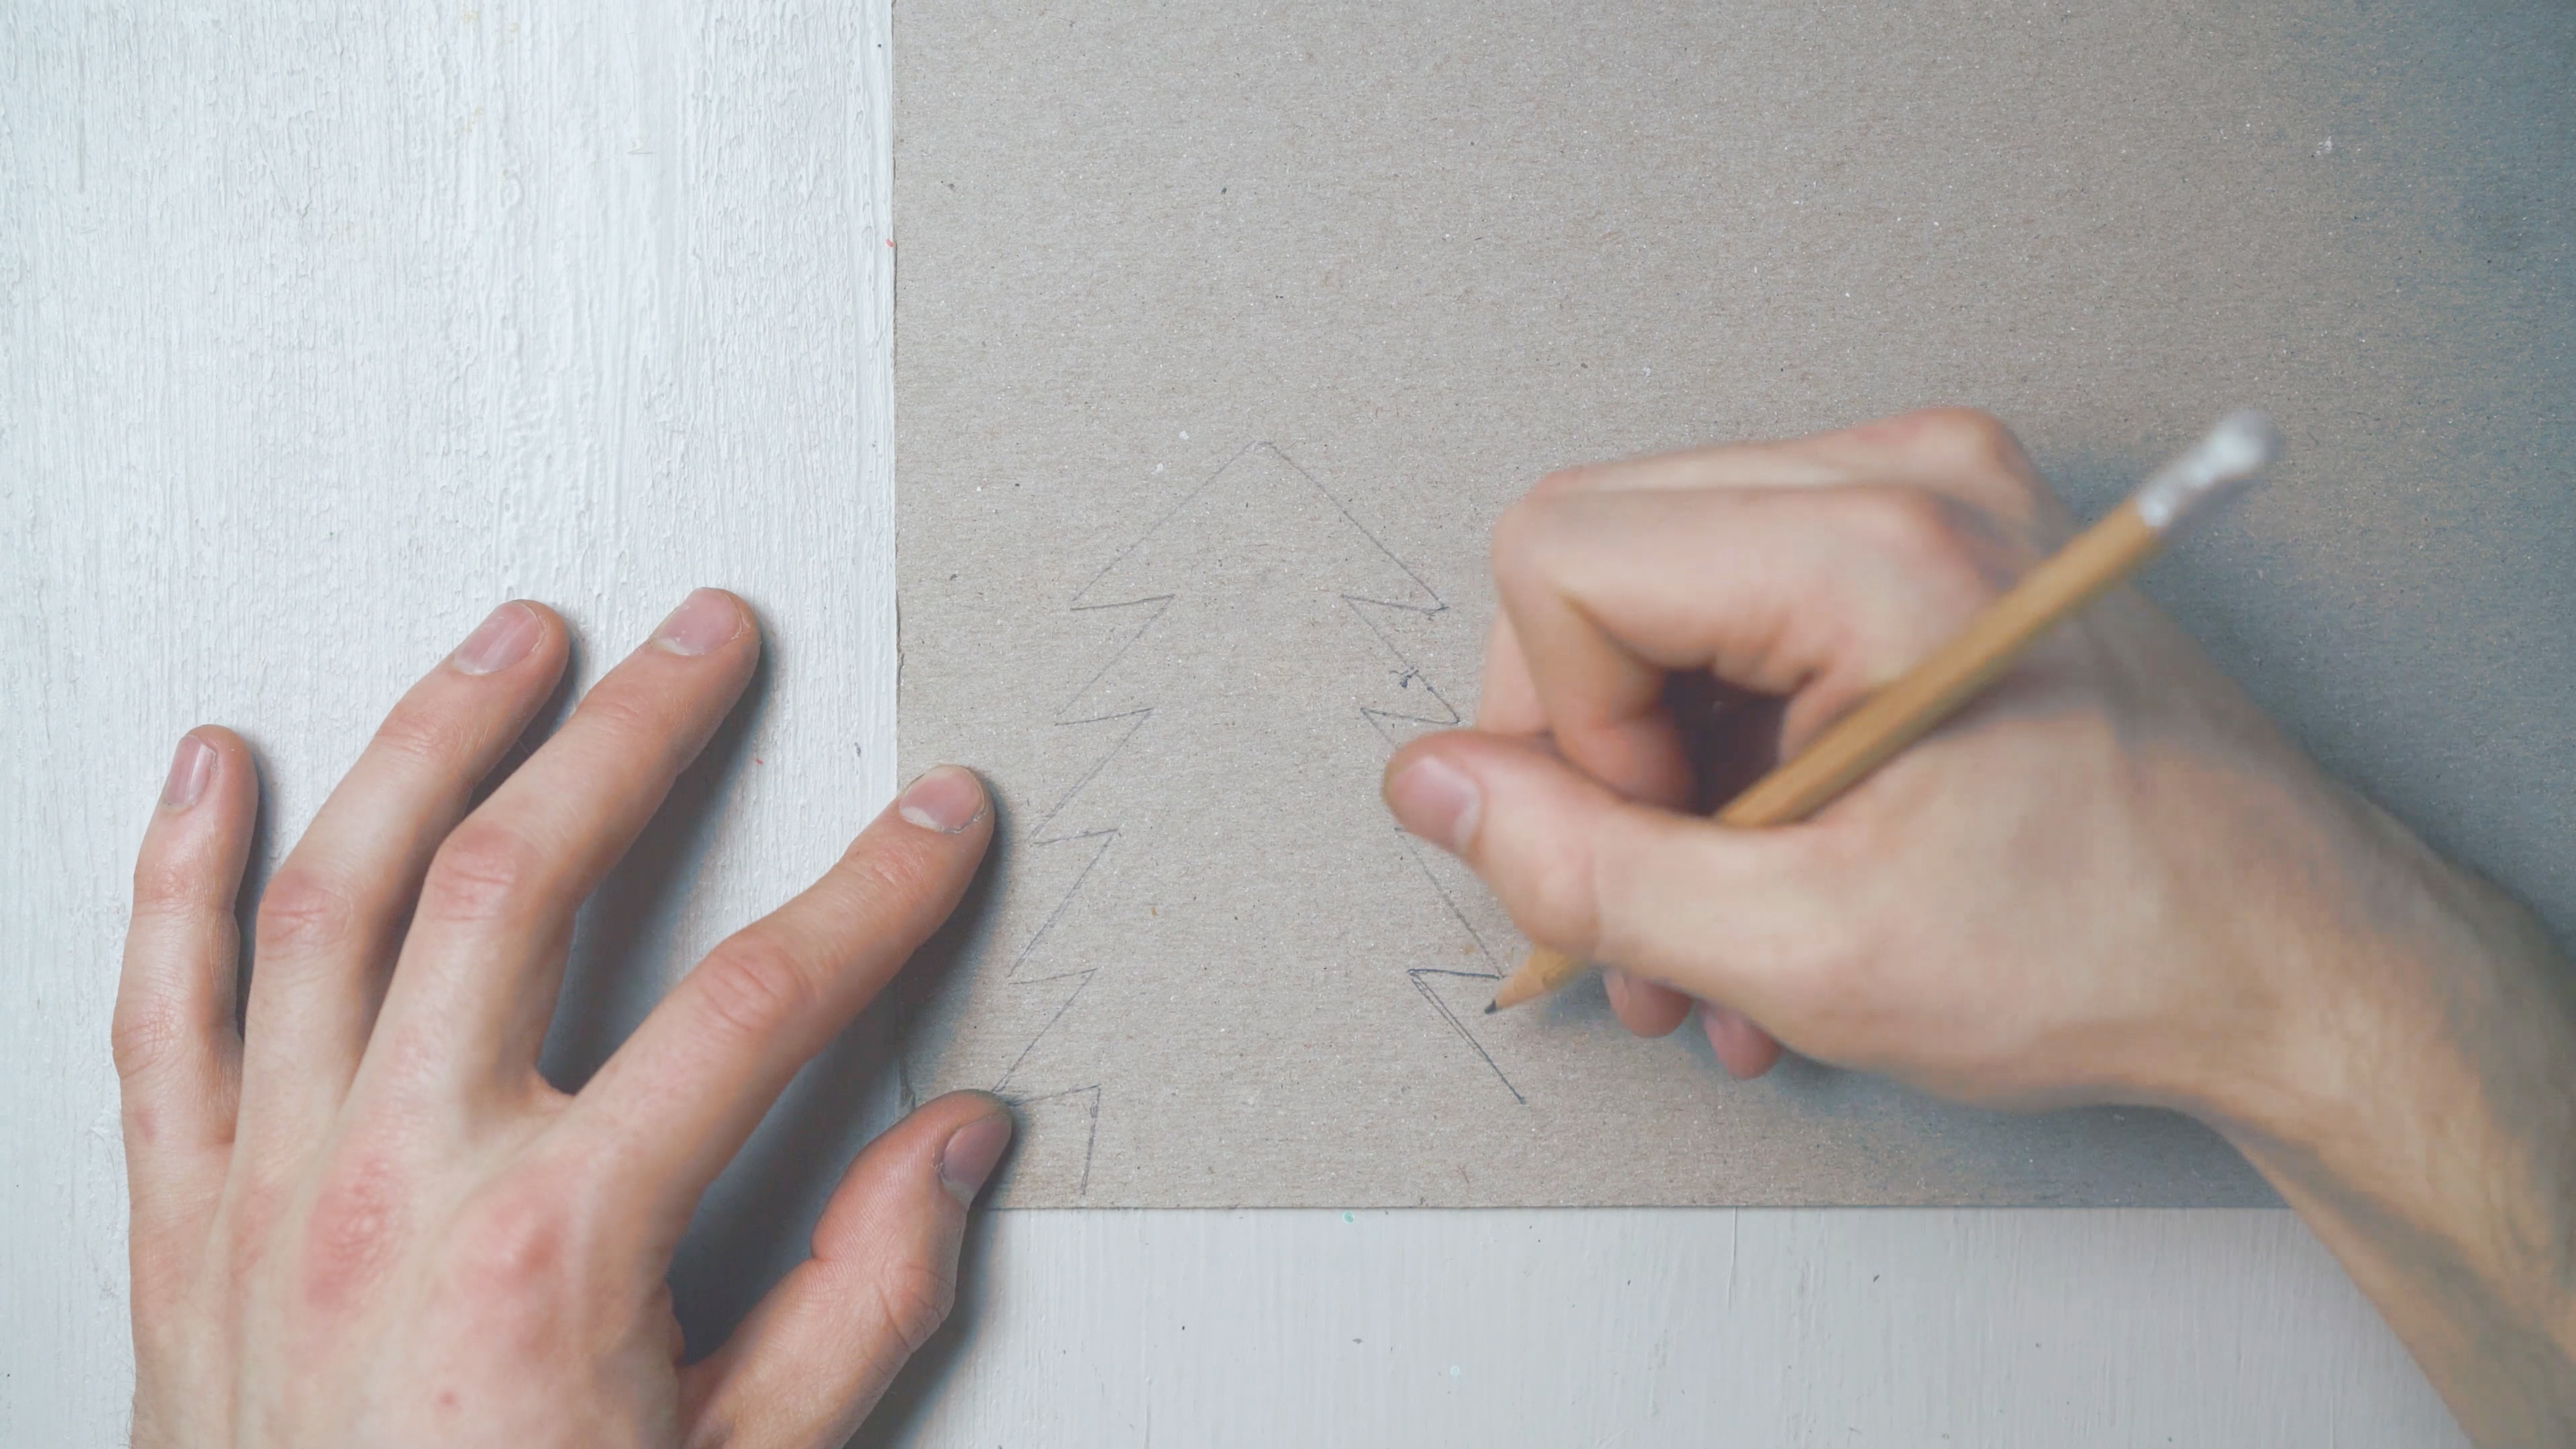
Step 1
Draw a tree shape on your paper board. Make sure it has nice points on the ends of the branches - that's where the crystals will start growing!

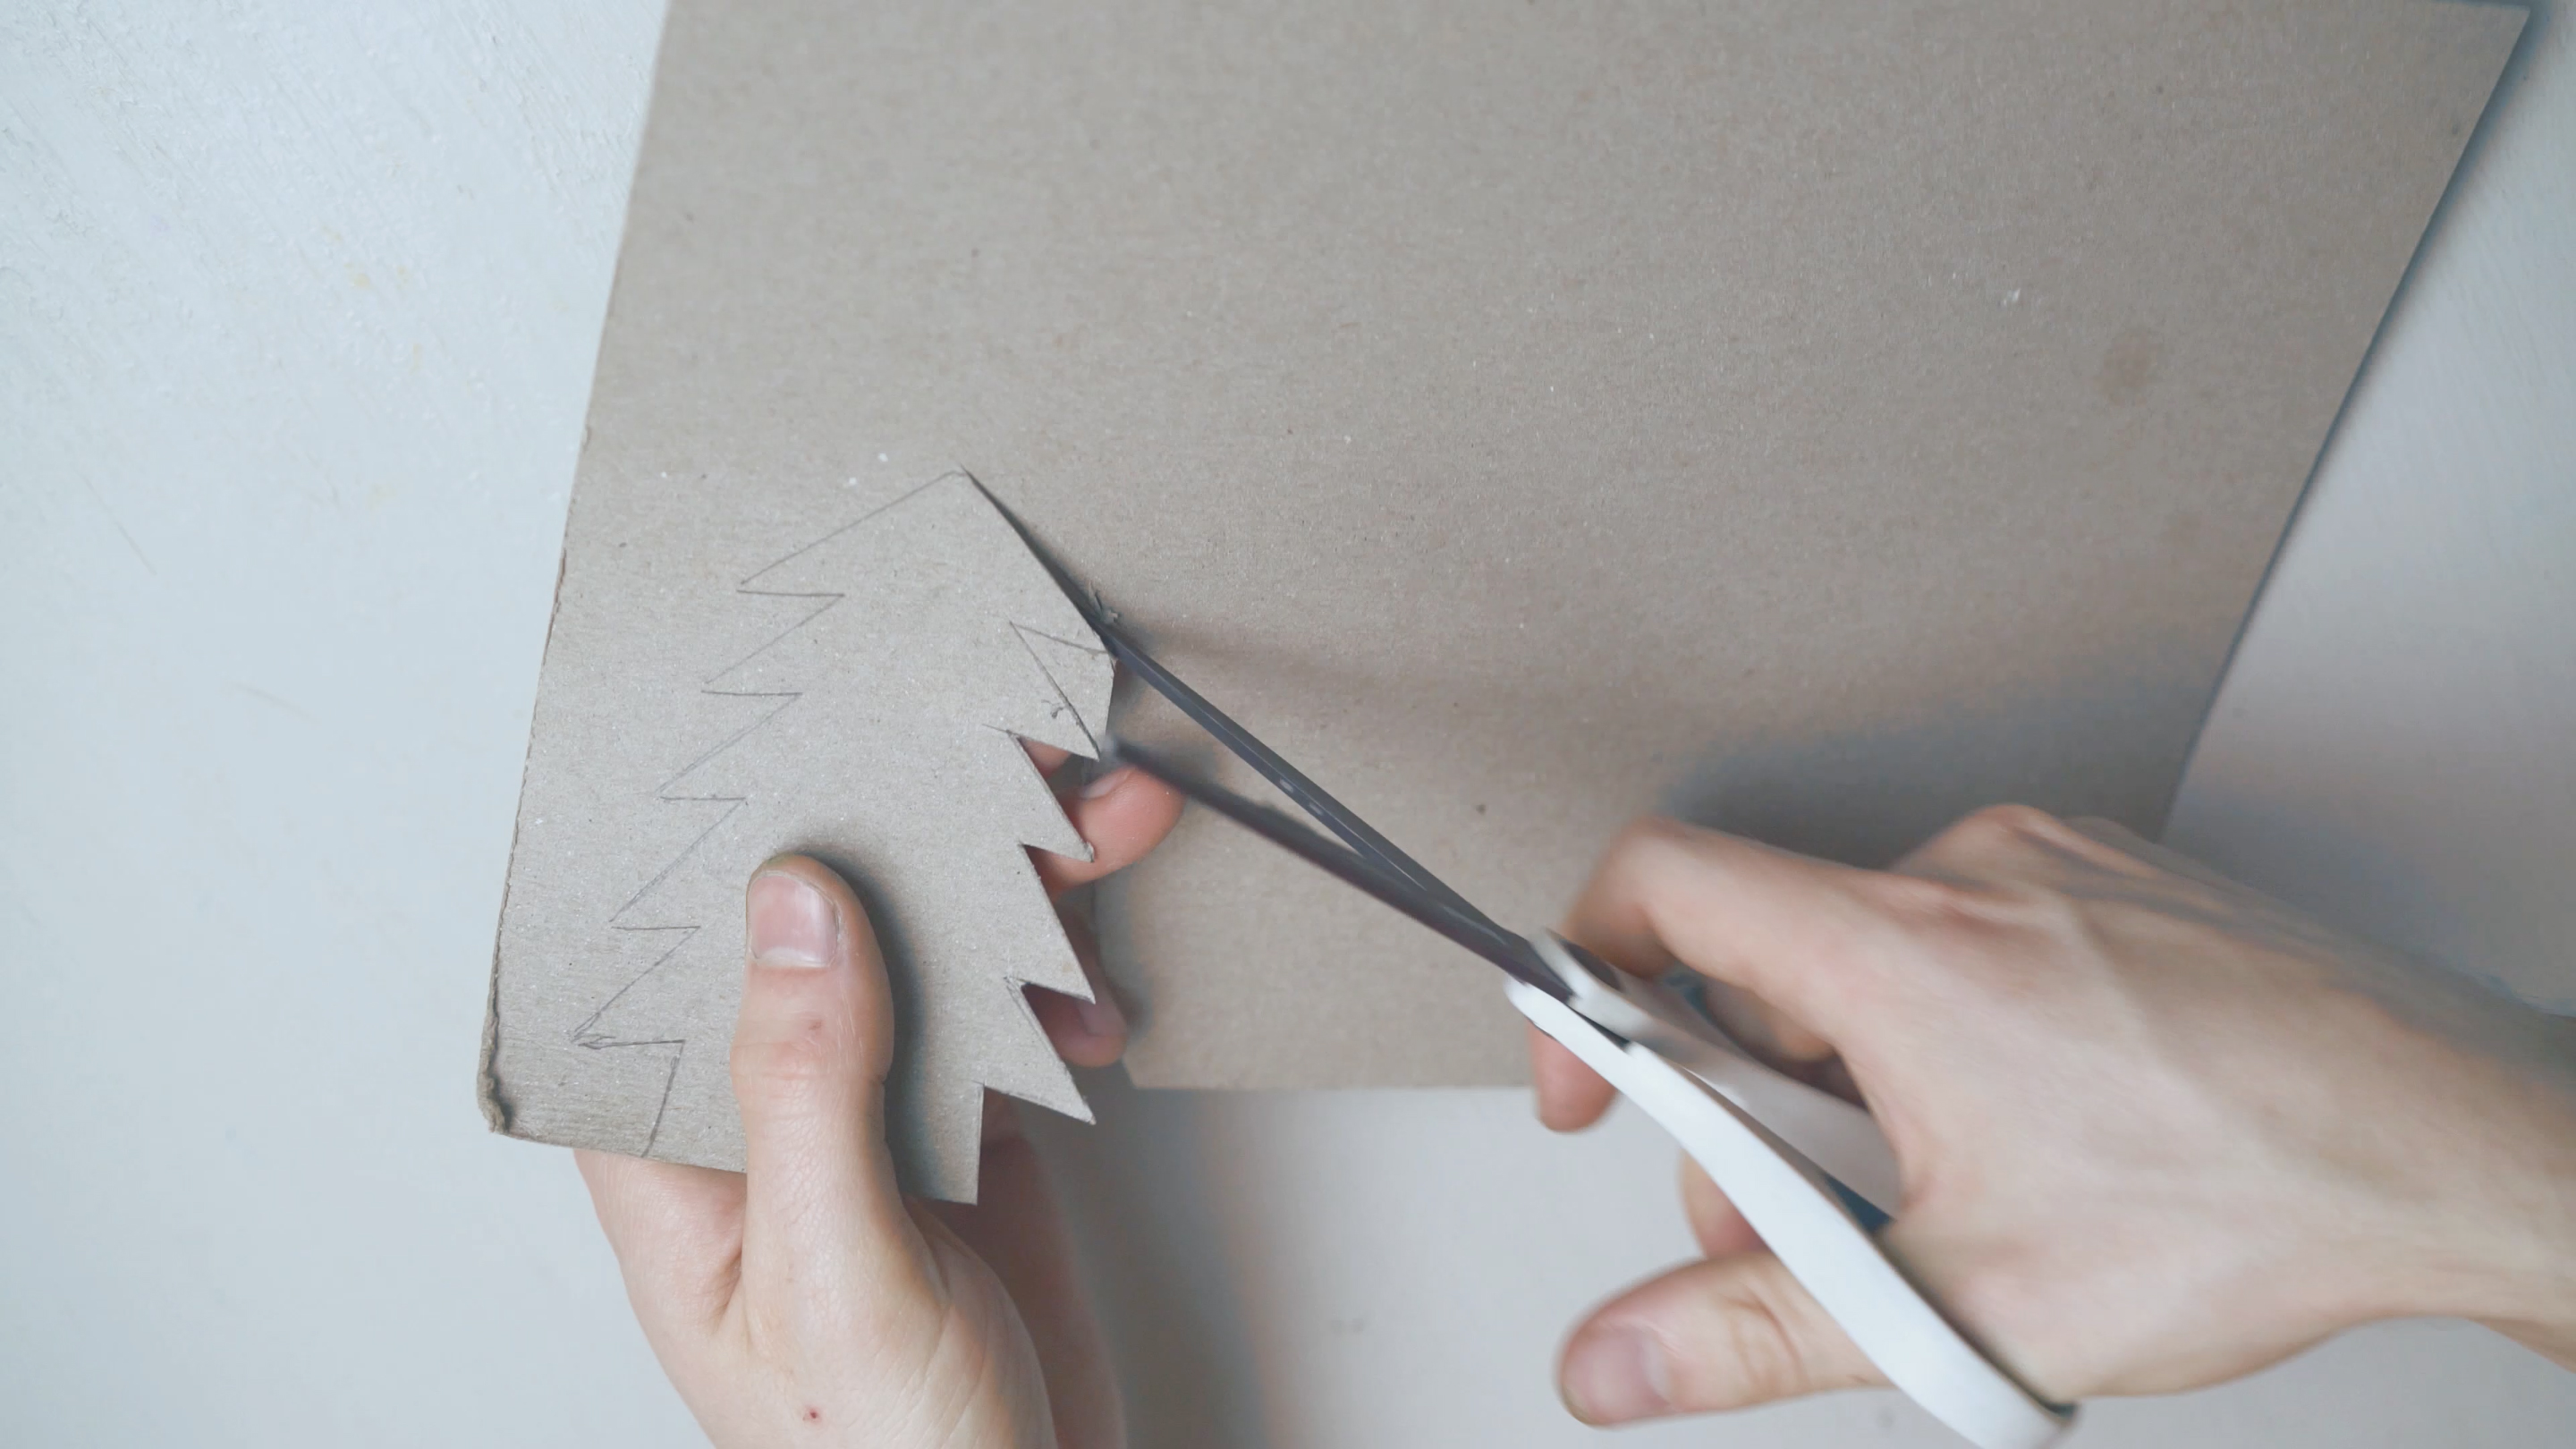
Step 2
Cut the tree out, then the tree shape two more times. Cut these pieces out, so you end up with three tree shapes total.
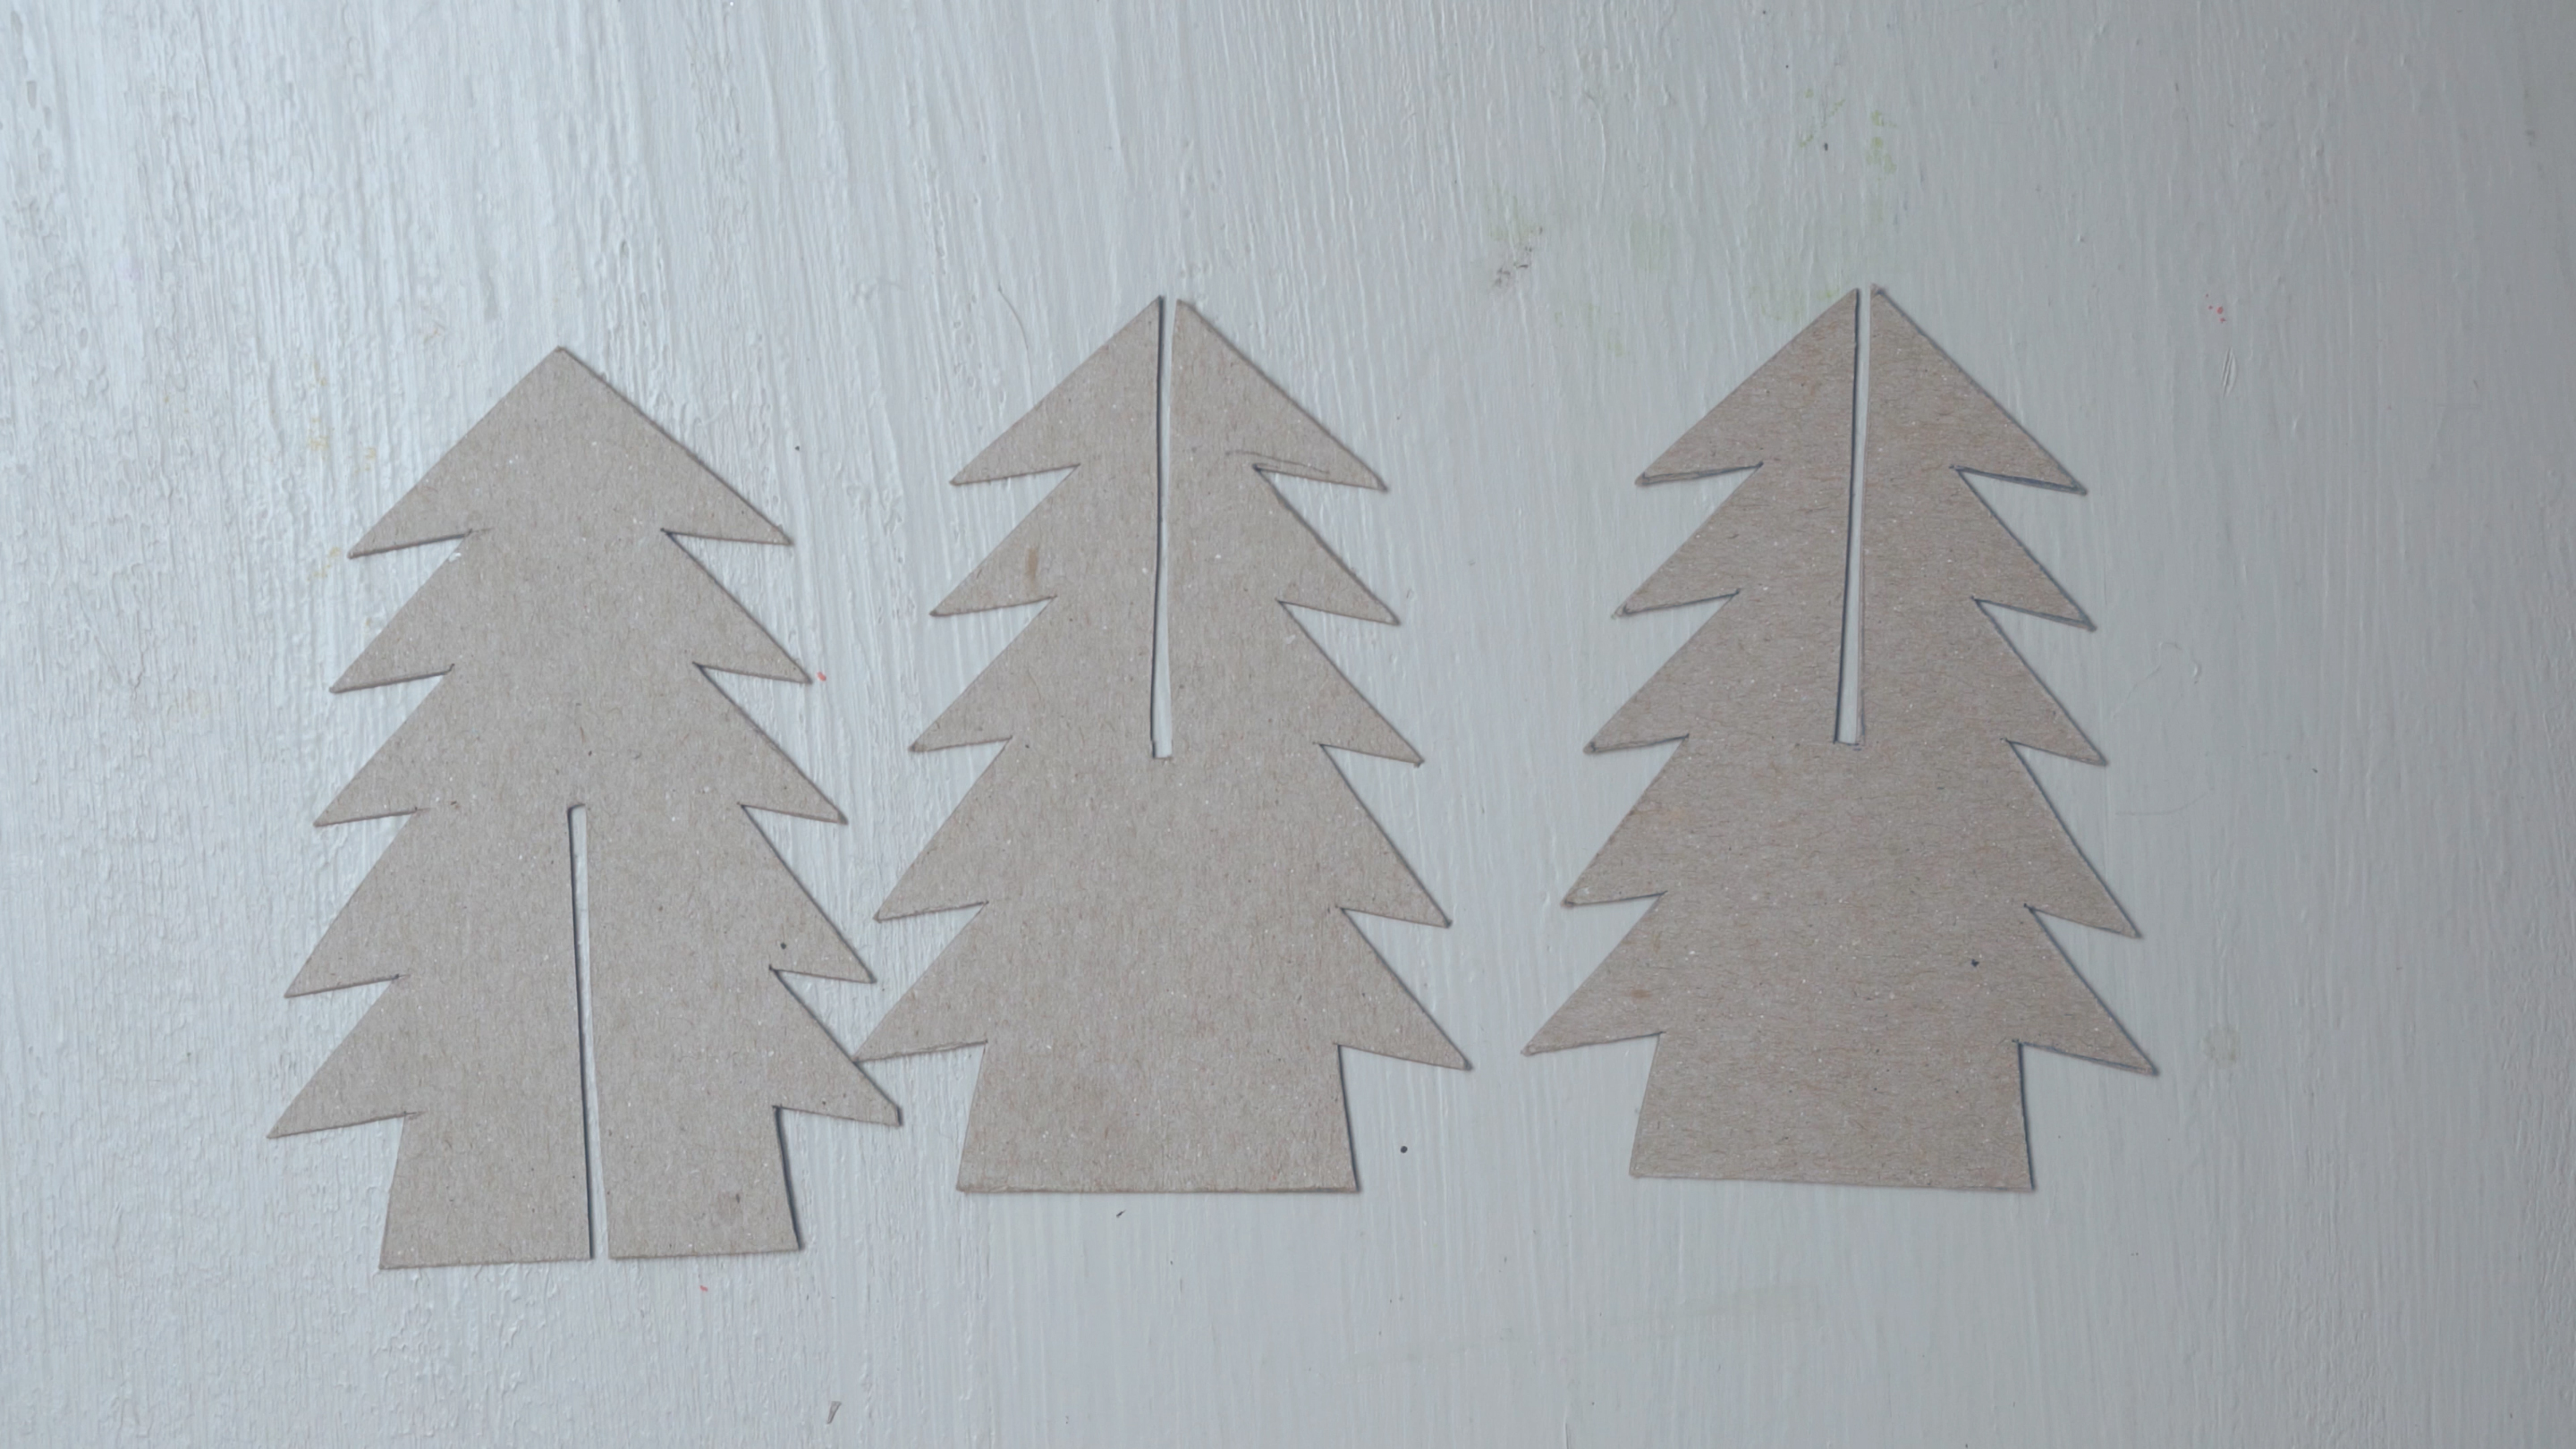
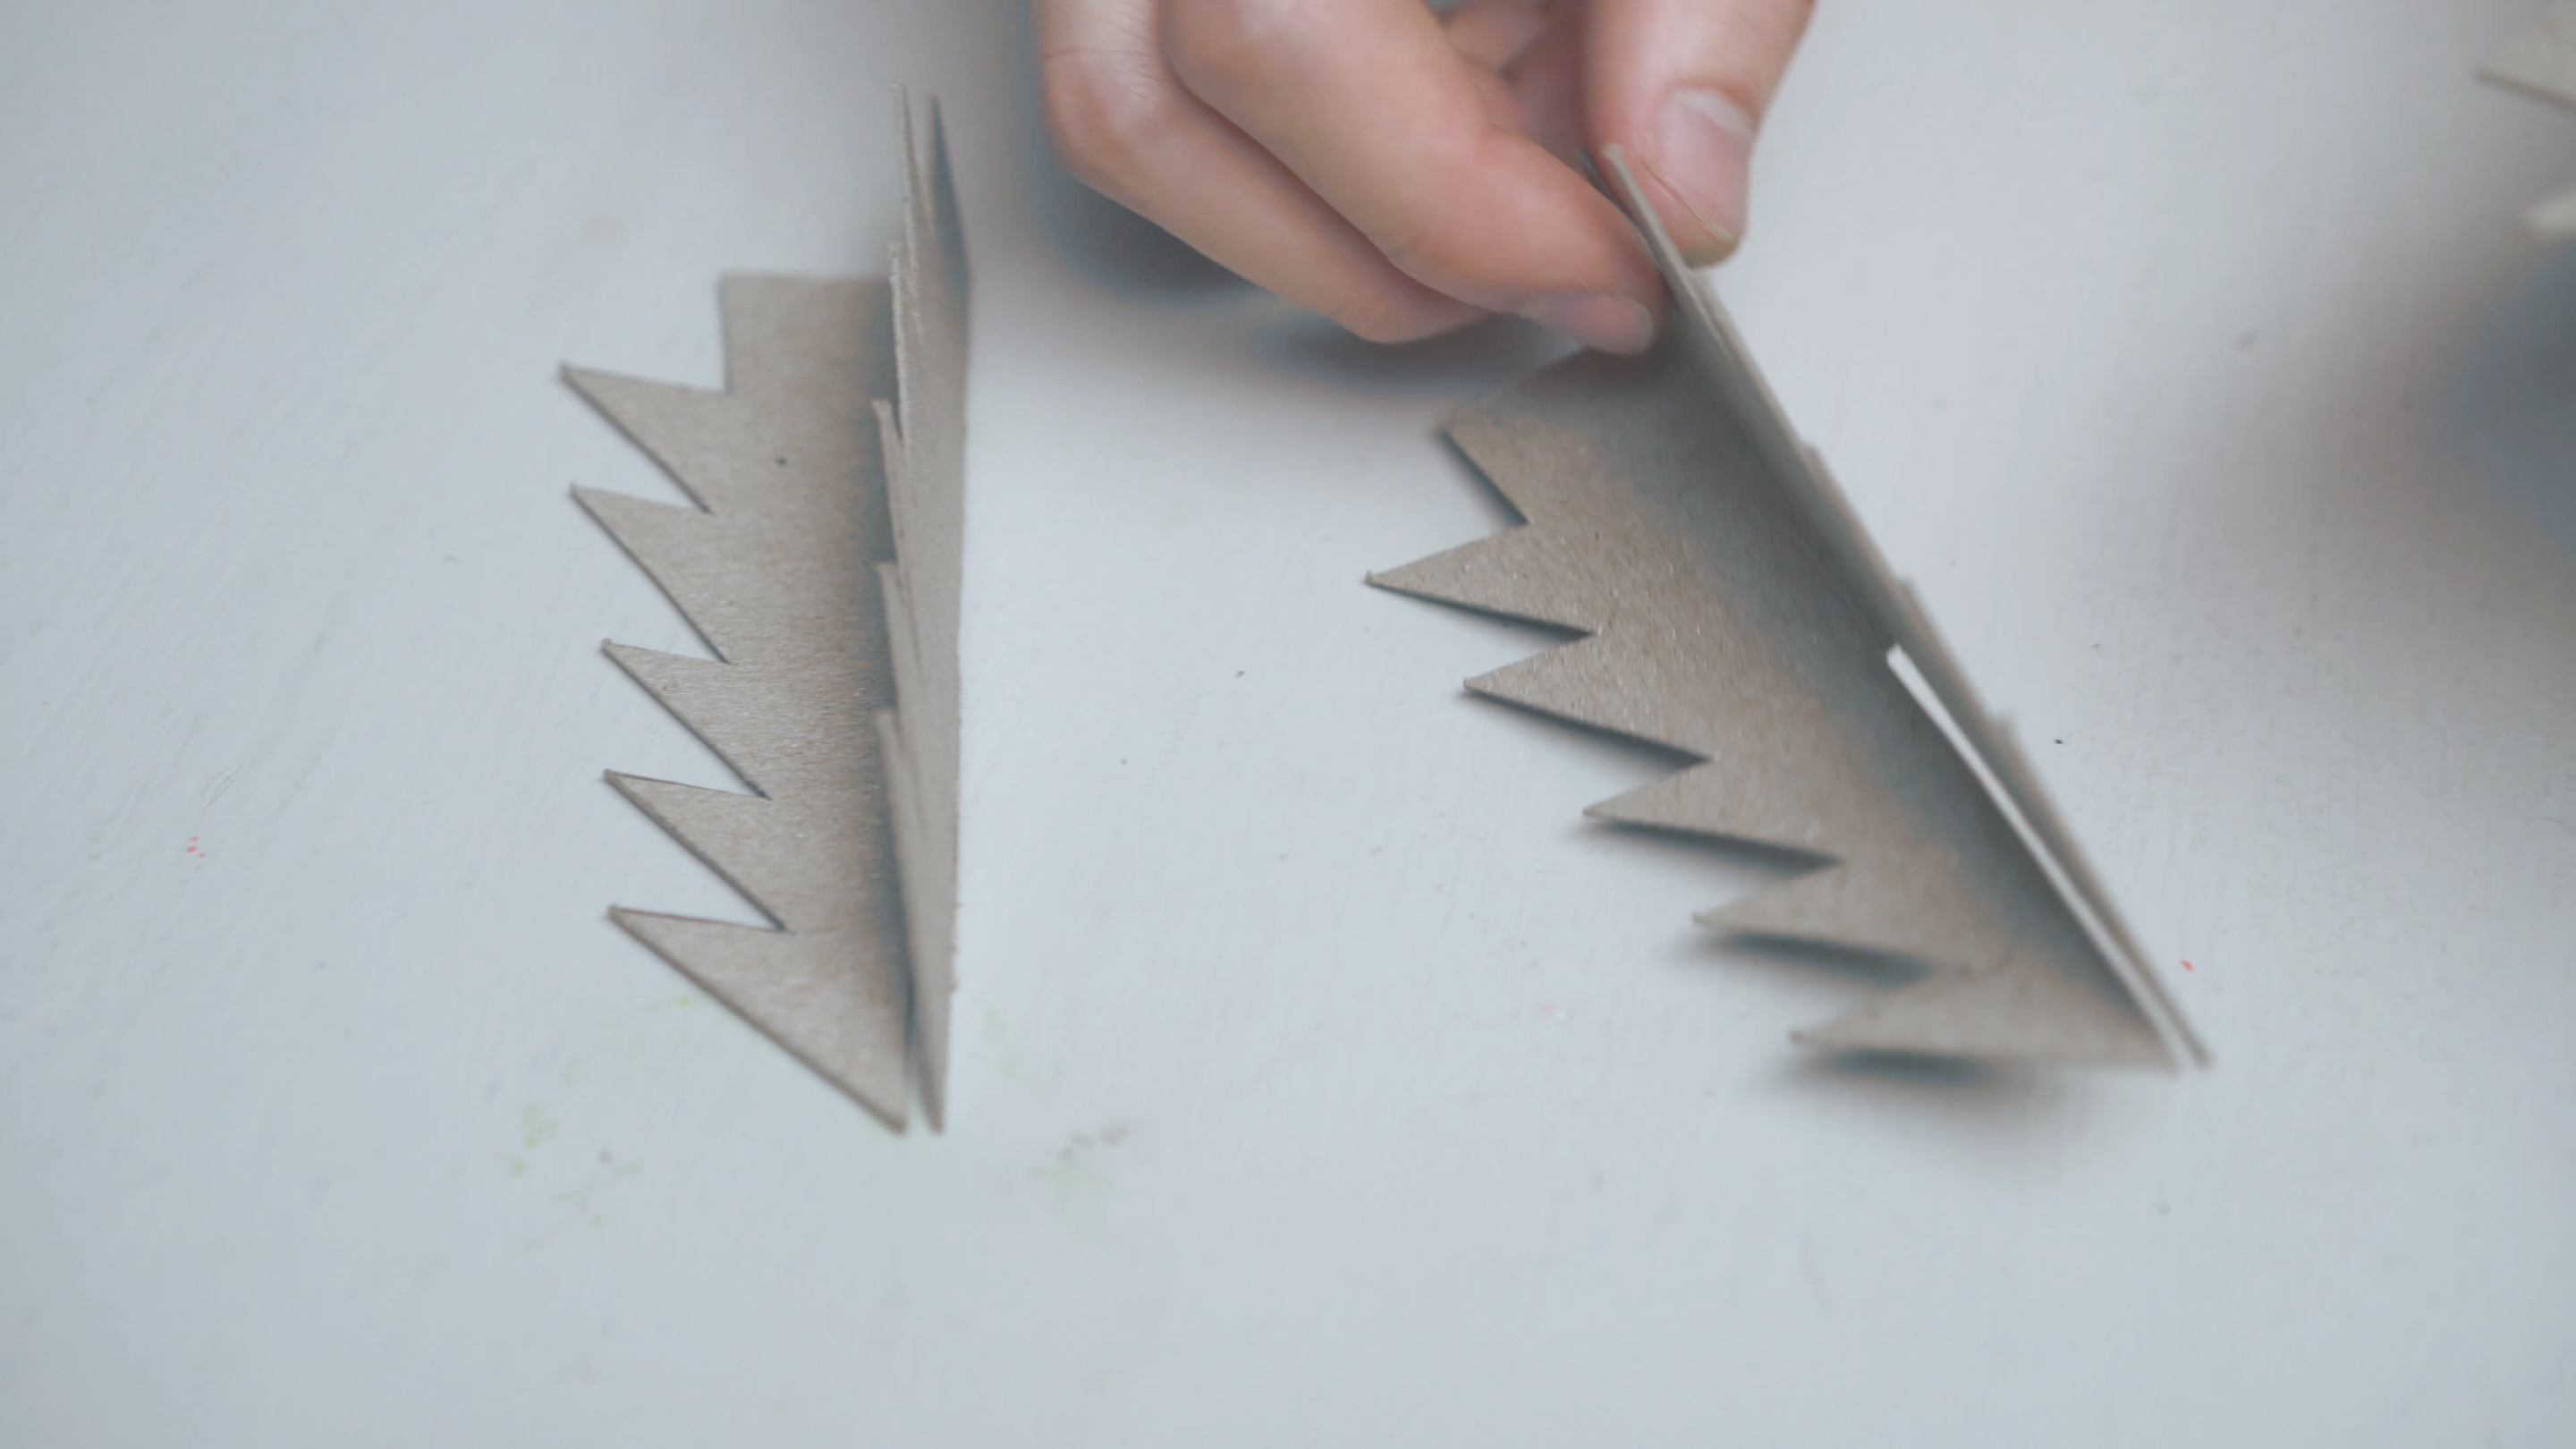
Step 3
Cut slots down the middle of your tree pieces. One piece should have a slot that goes halfway up from the bottom, and the other two should have slots that go halfway down from the top.
Step 4
Fold the two tree shapes with the top slots at 90 degree angles.
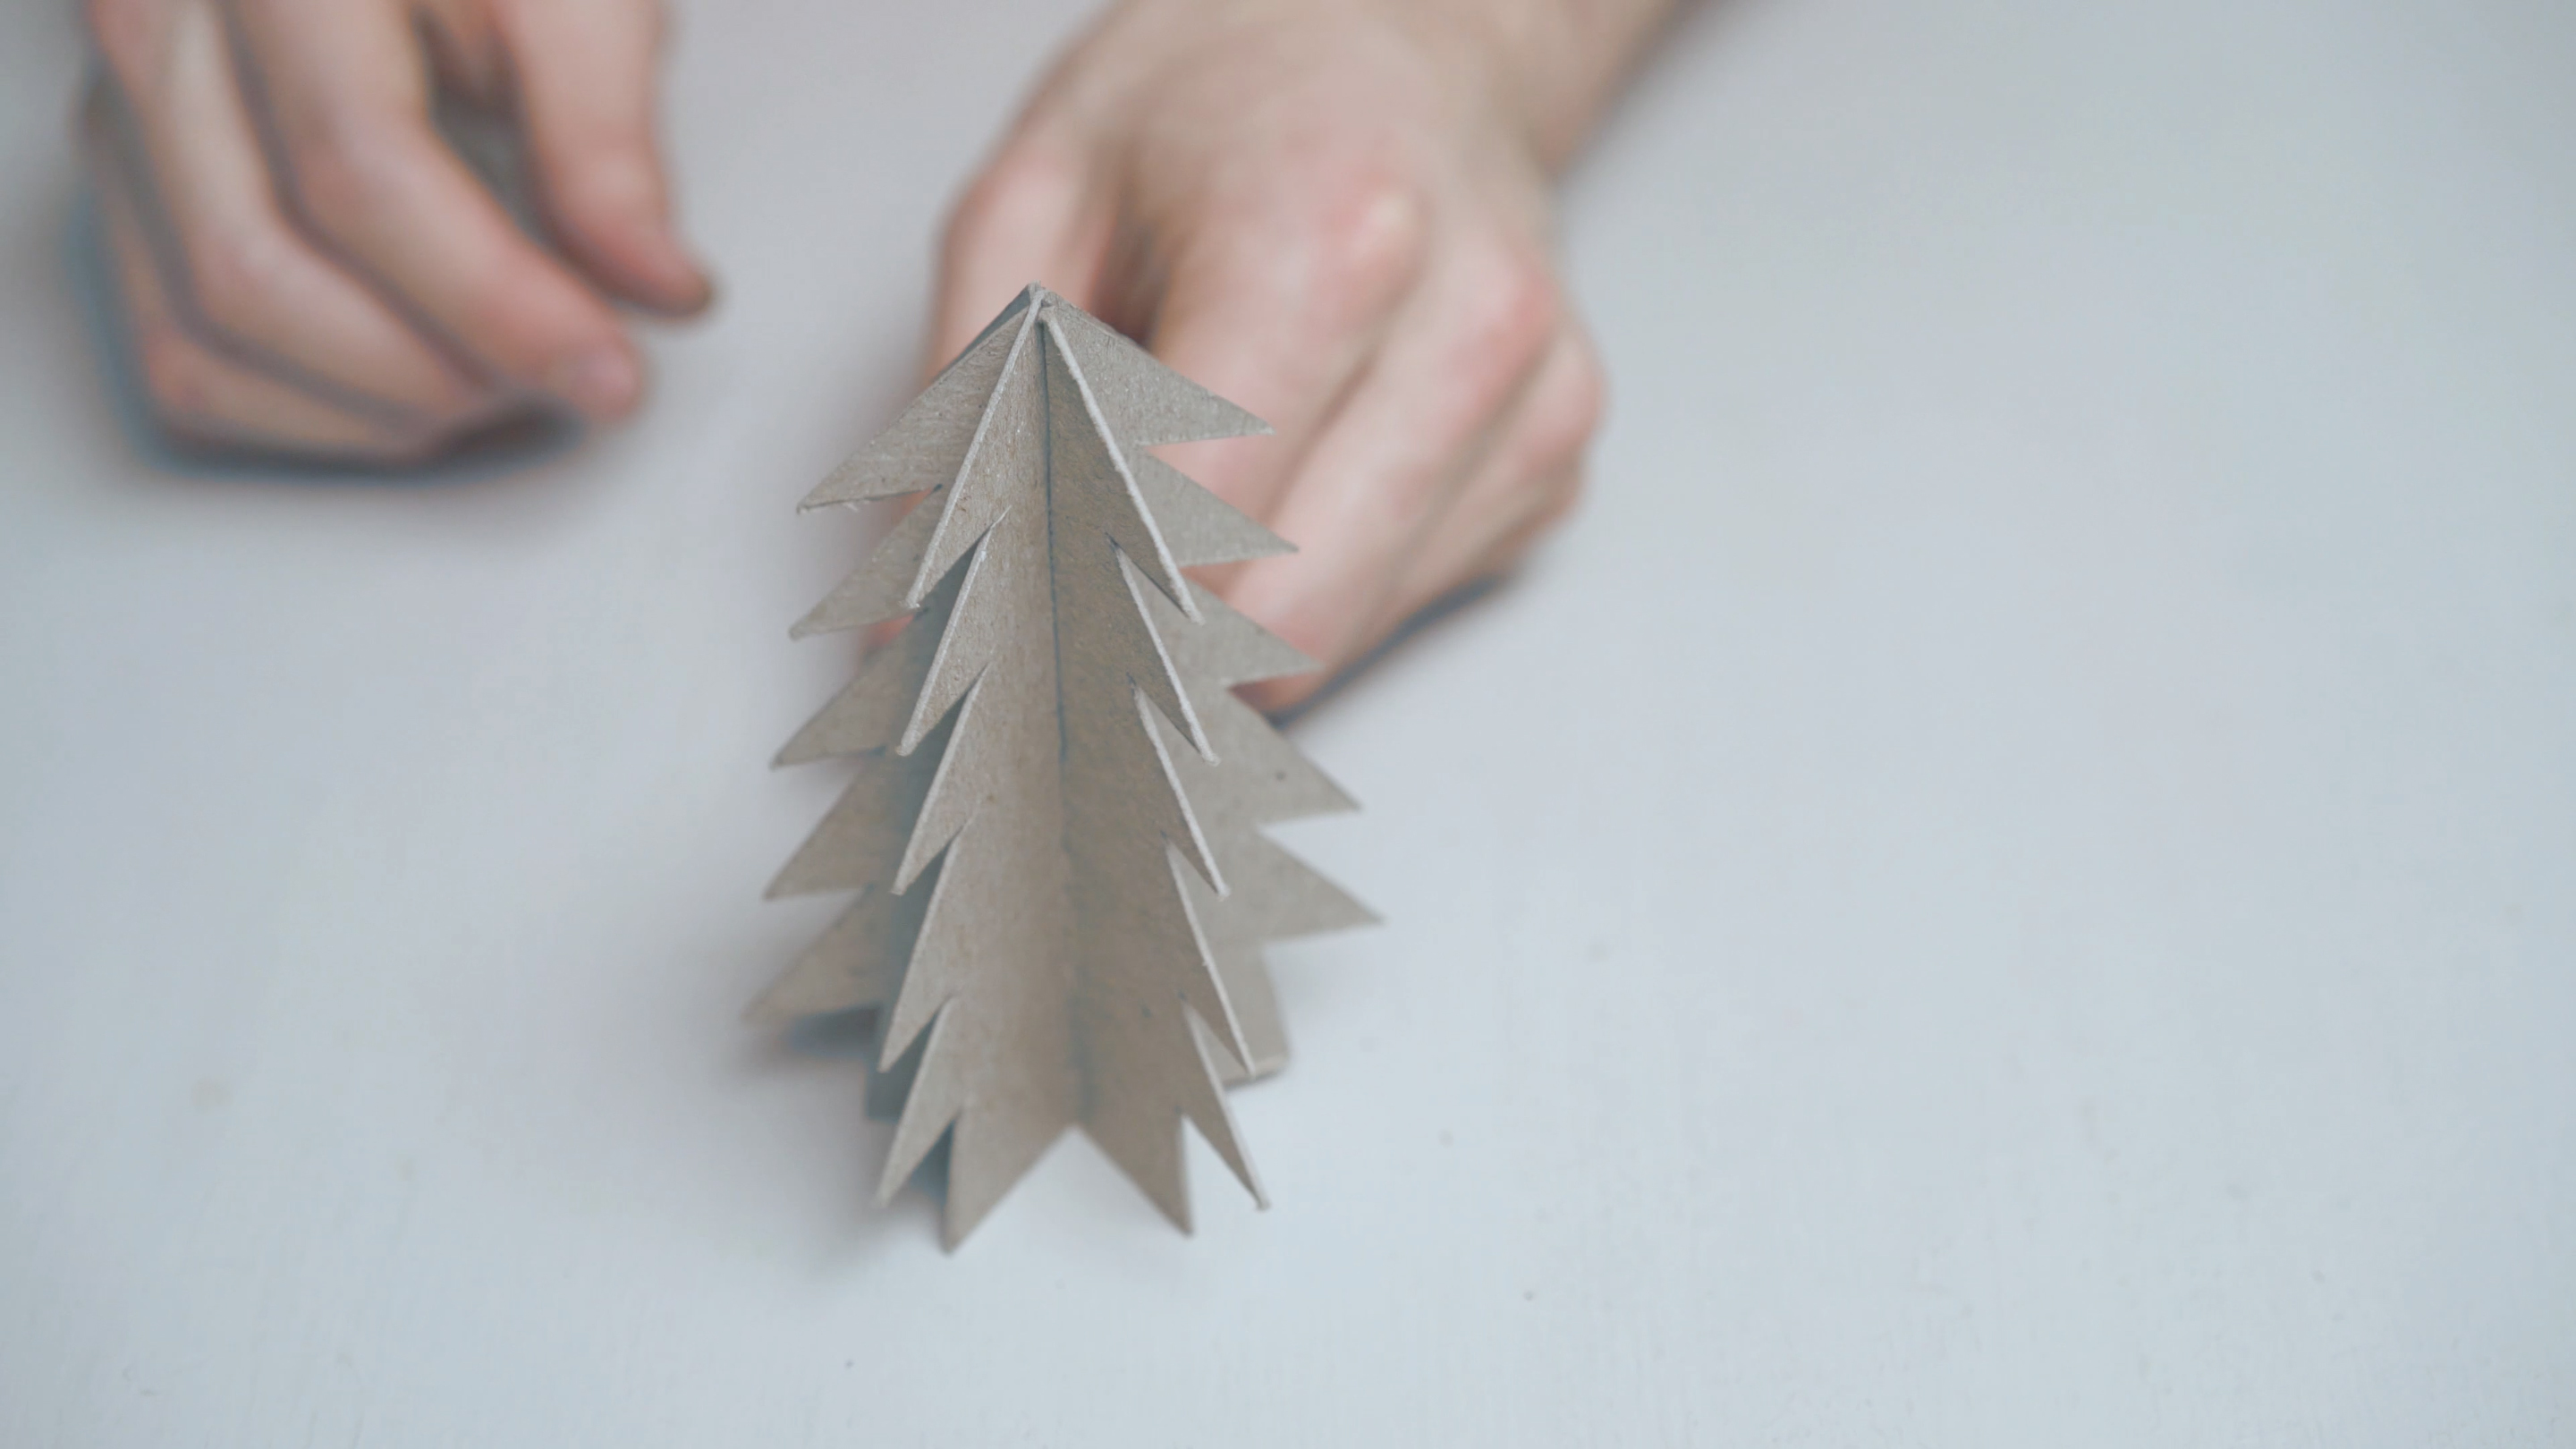
Step 5
Slot the pieces together to form a 3D tree.
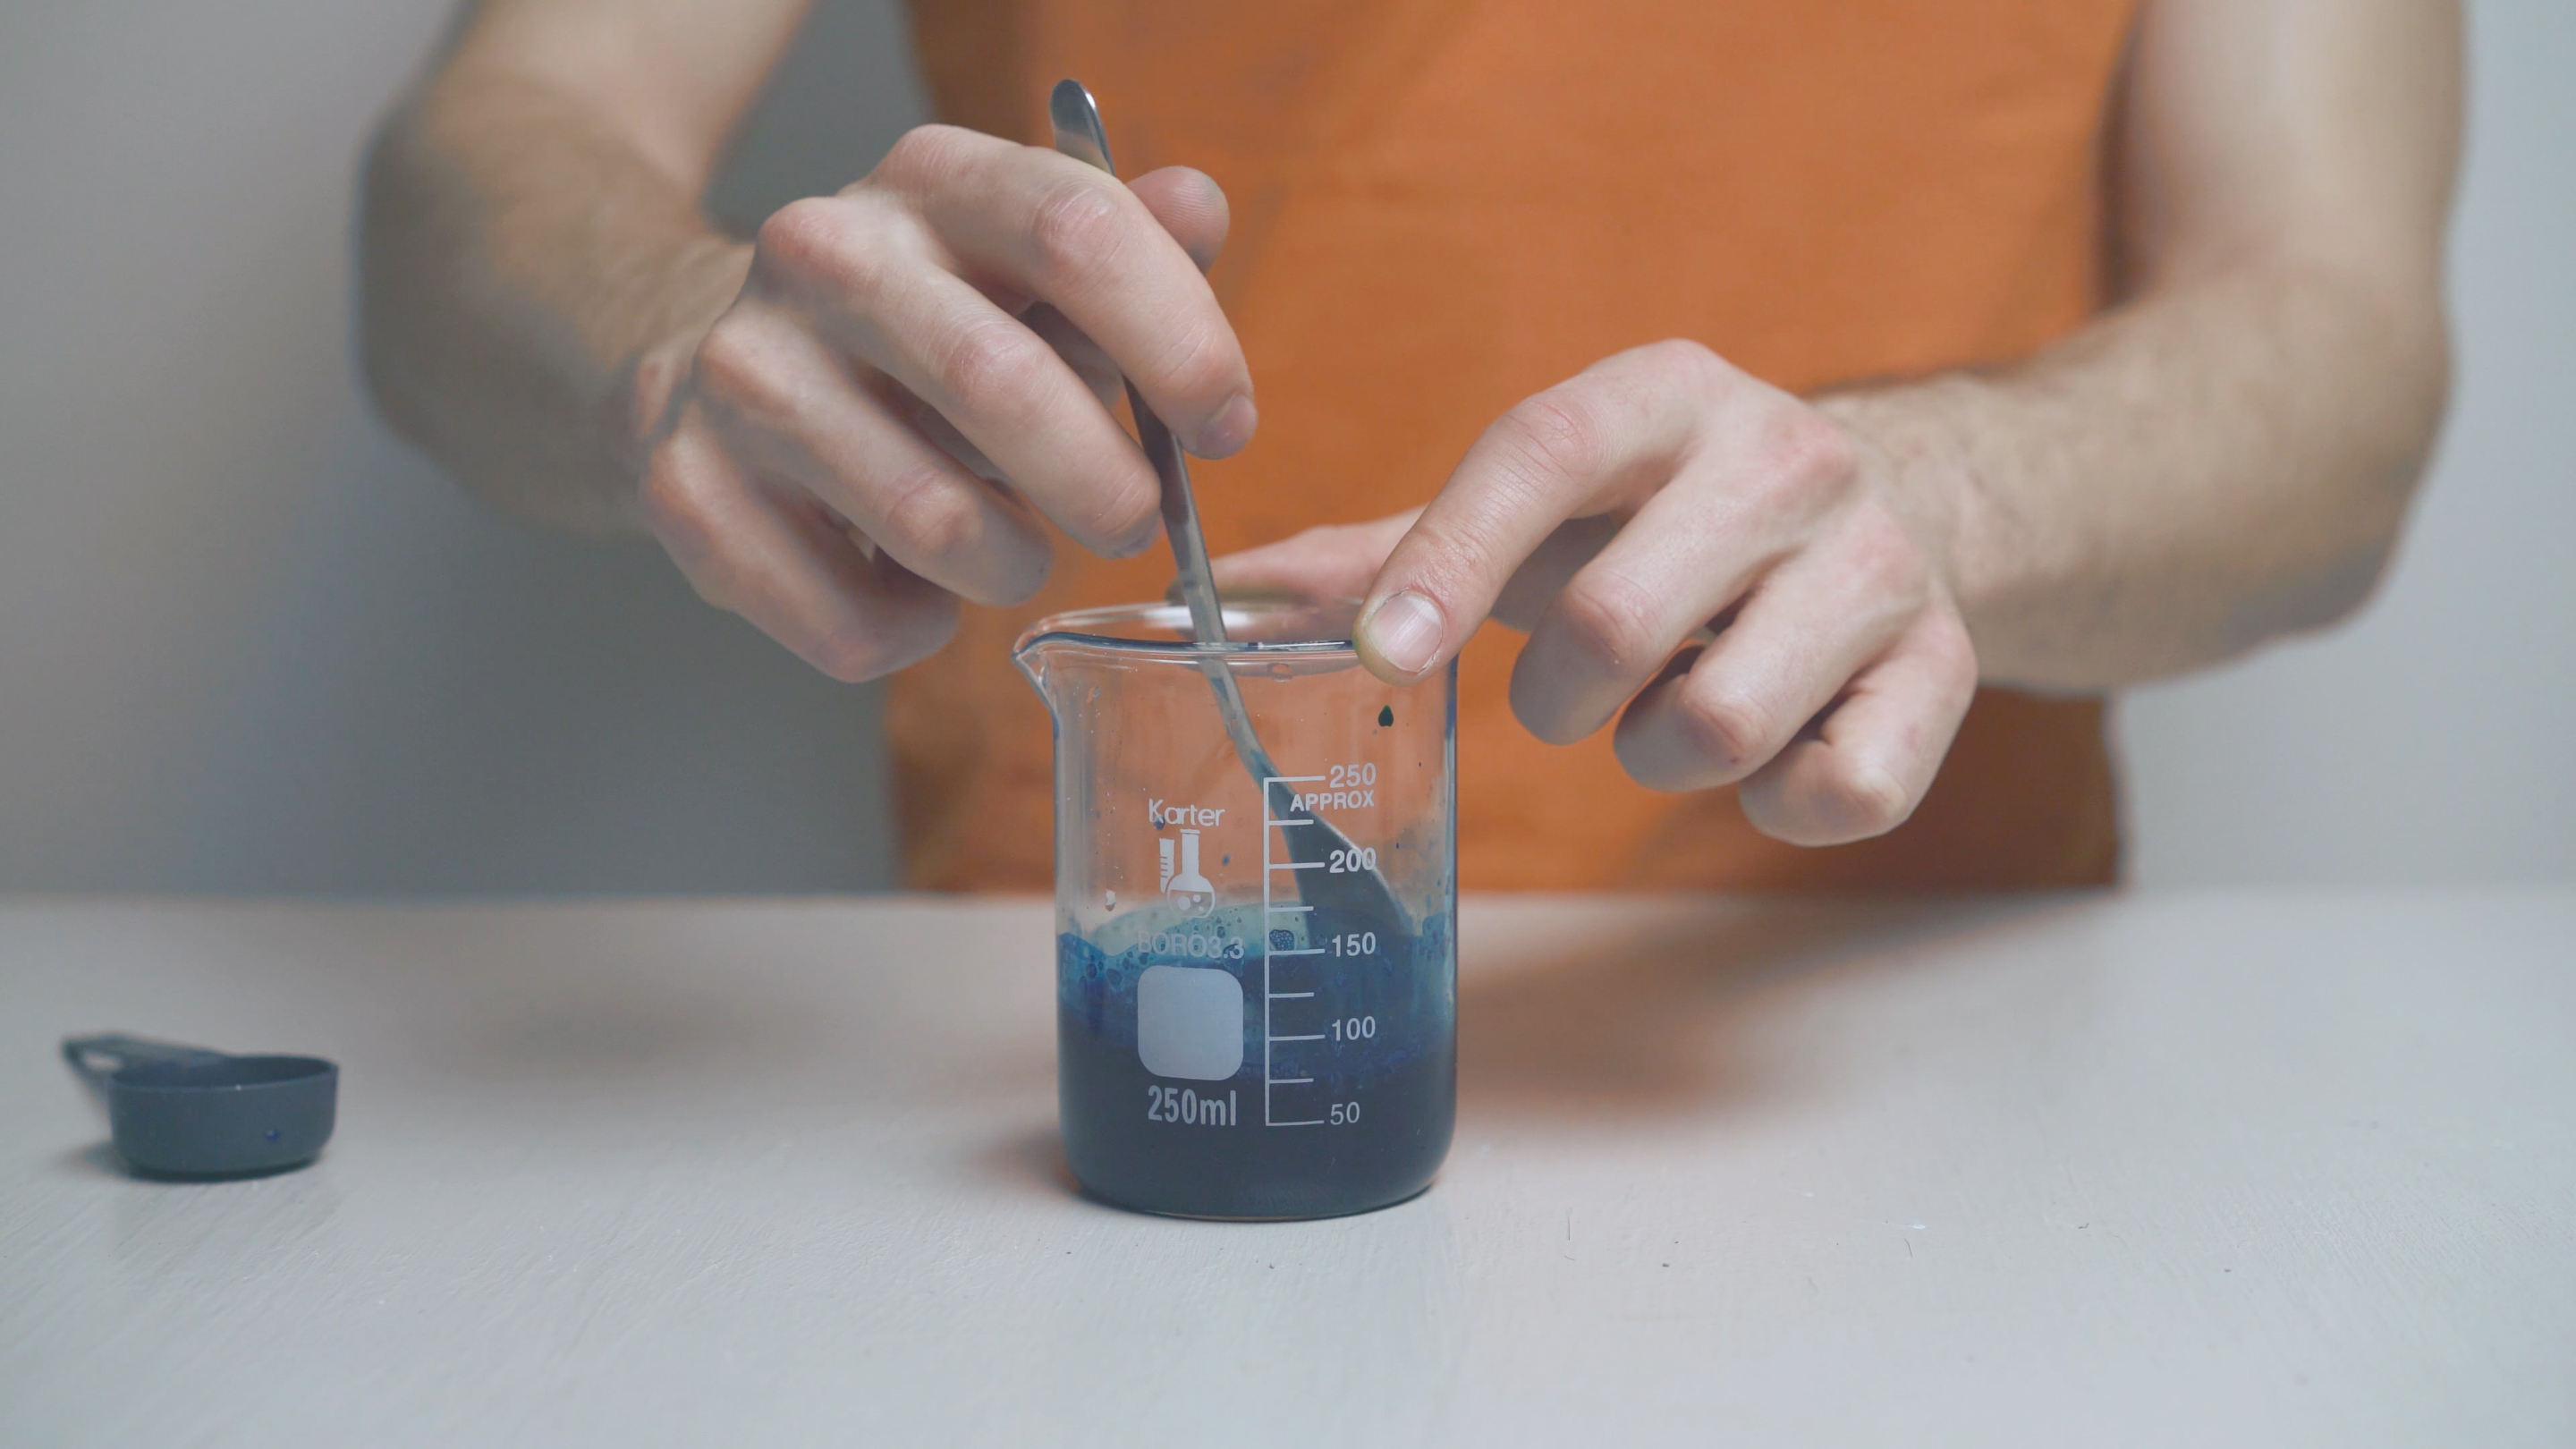
Step 6
Combine 2 tablespoons salt, 2 tablespoons water, 2 tablespoons bluing, 1 tablespoon ammonia, and several drops of green food coloring to create your crystal mixture. Stir until the salt is dissolved.
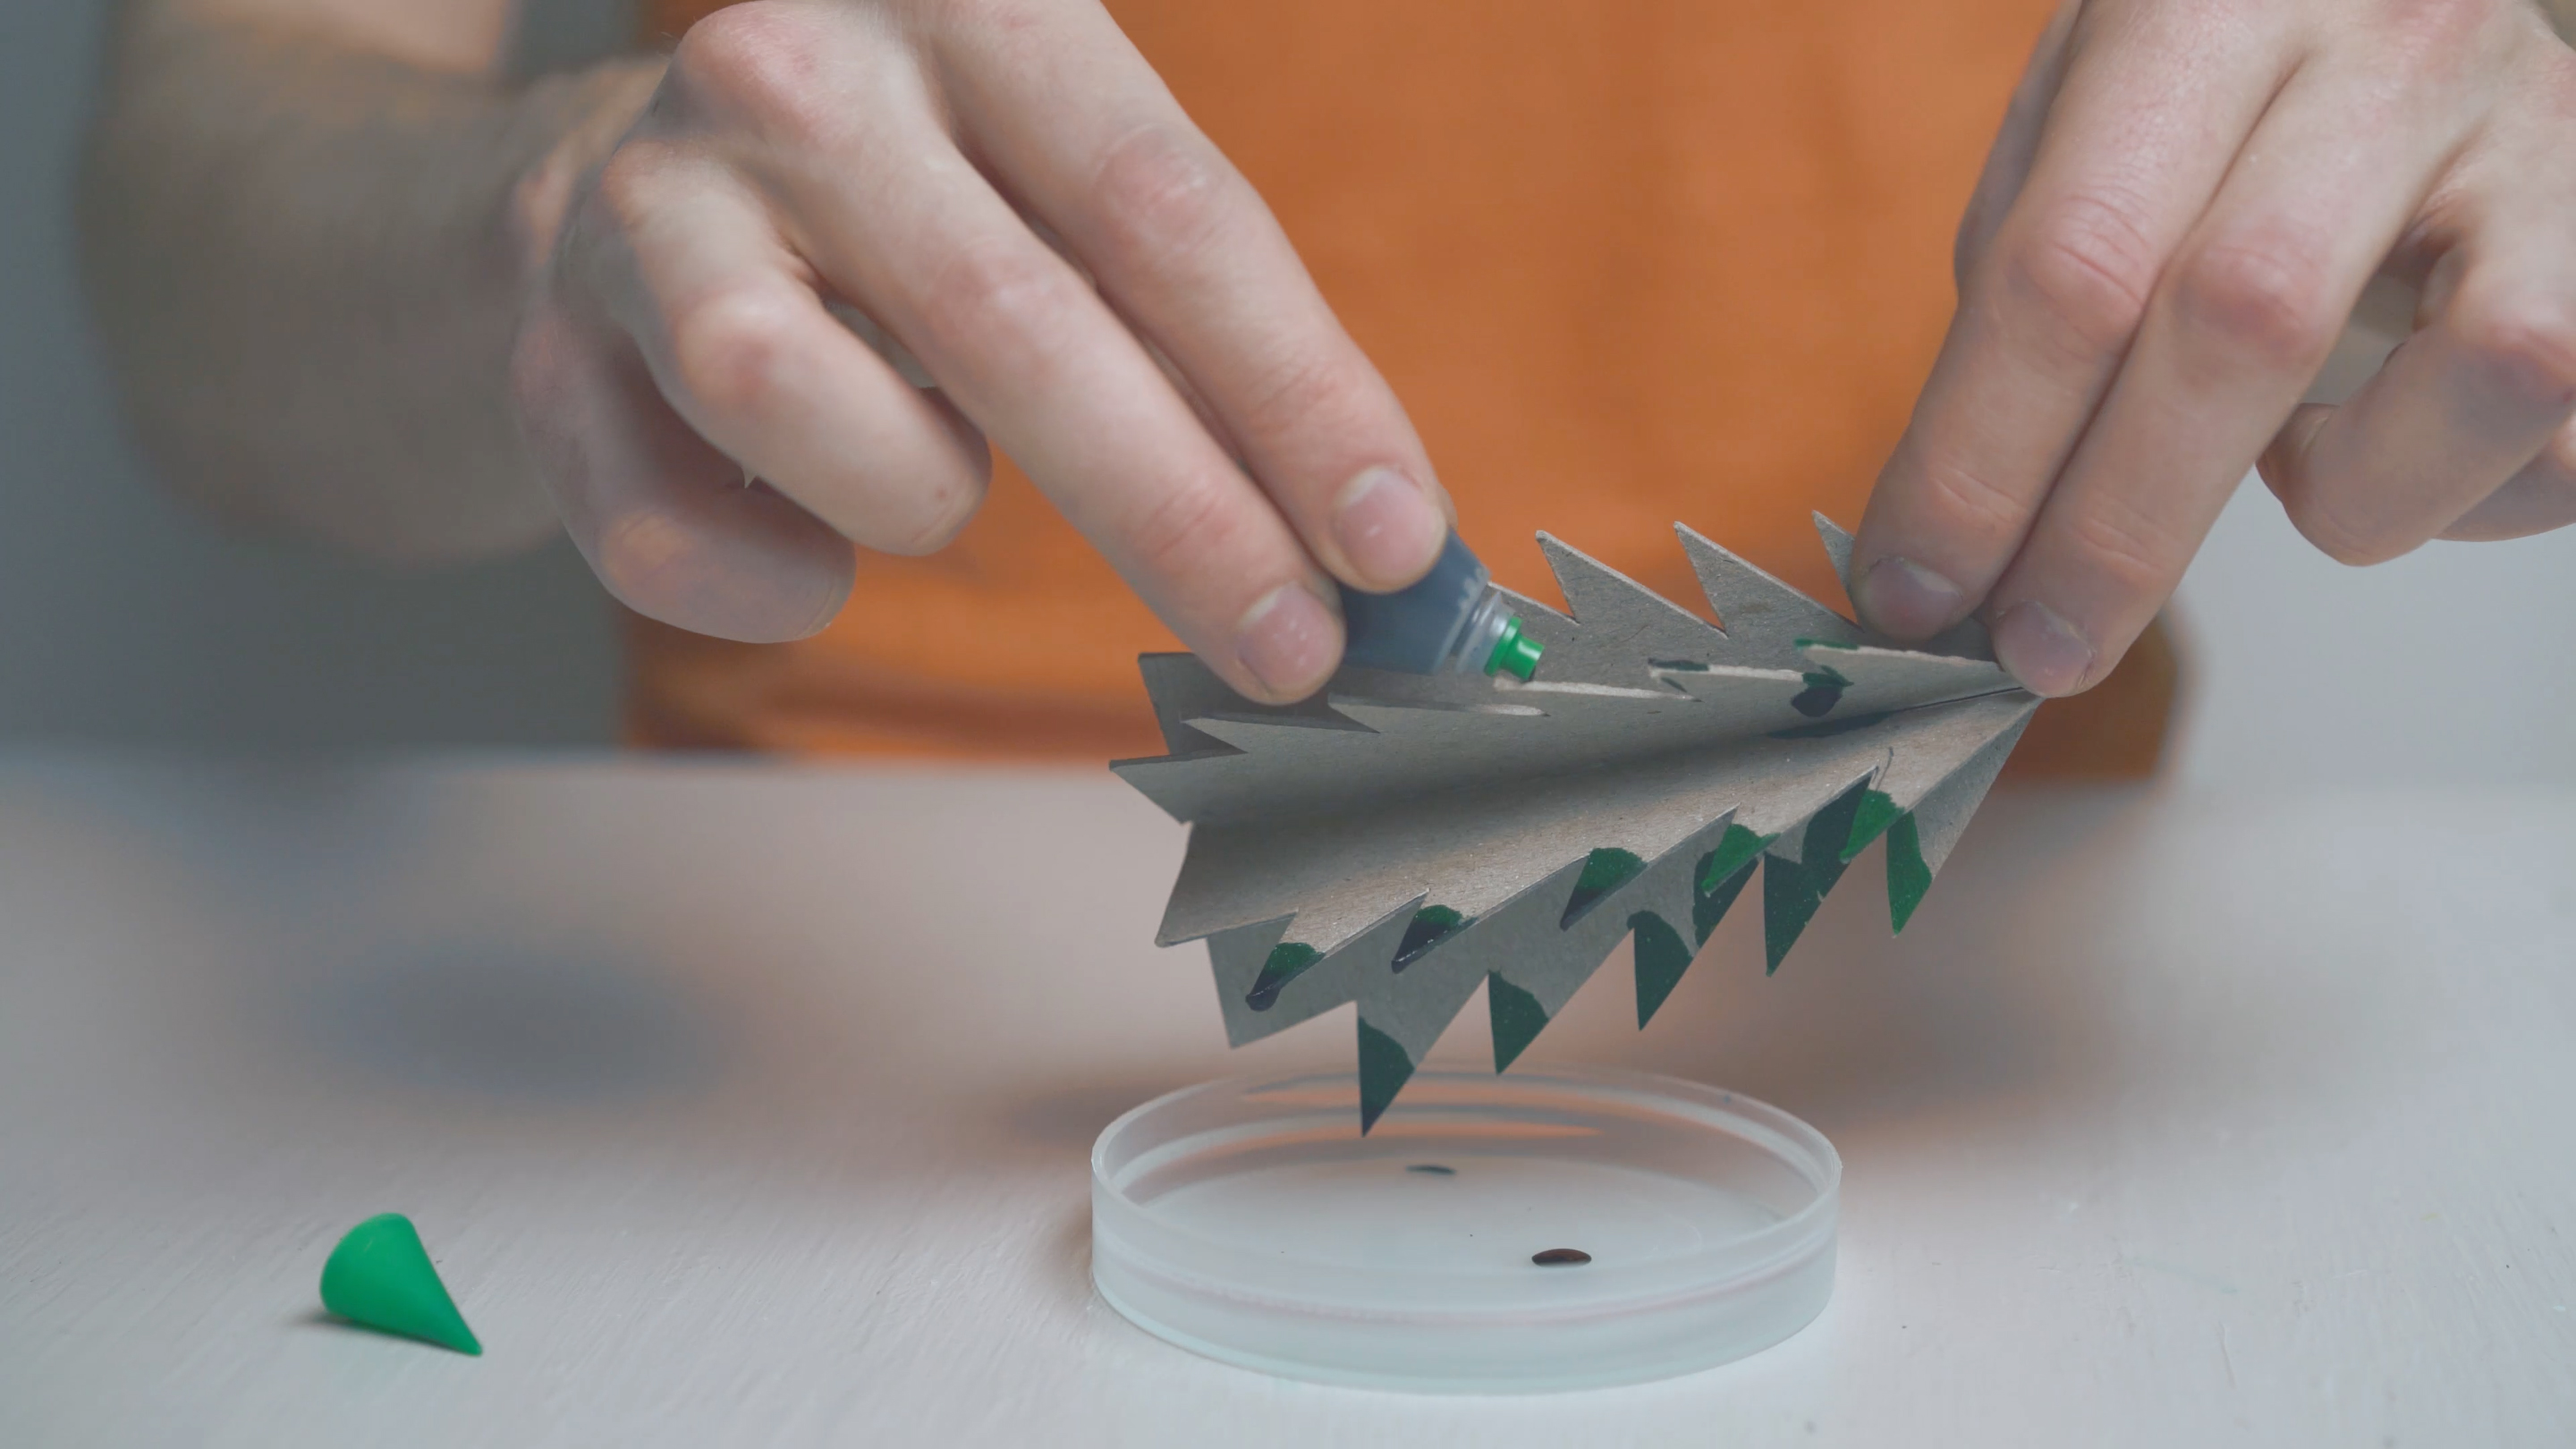
Step 7
Add drops of green food coloring to each of the tips of your tree. This will help to make sure the crystals are nice and green.
Step 8
Place your tree in the dish and pour the crystal mixture over the top of the tree.
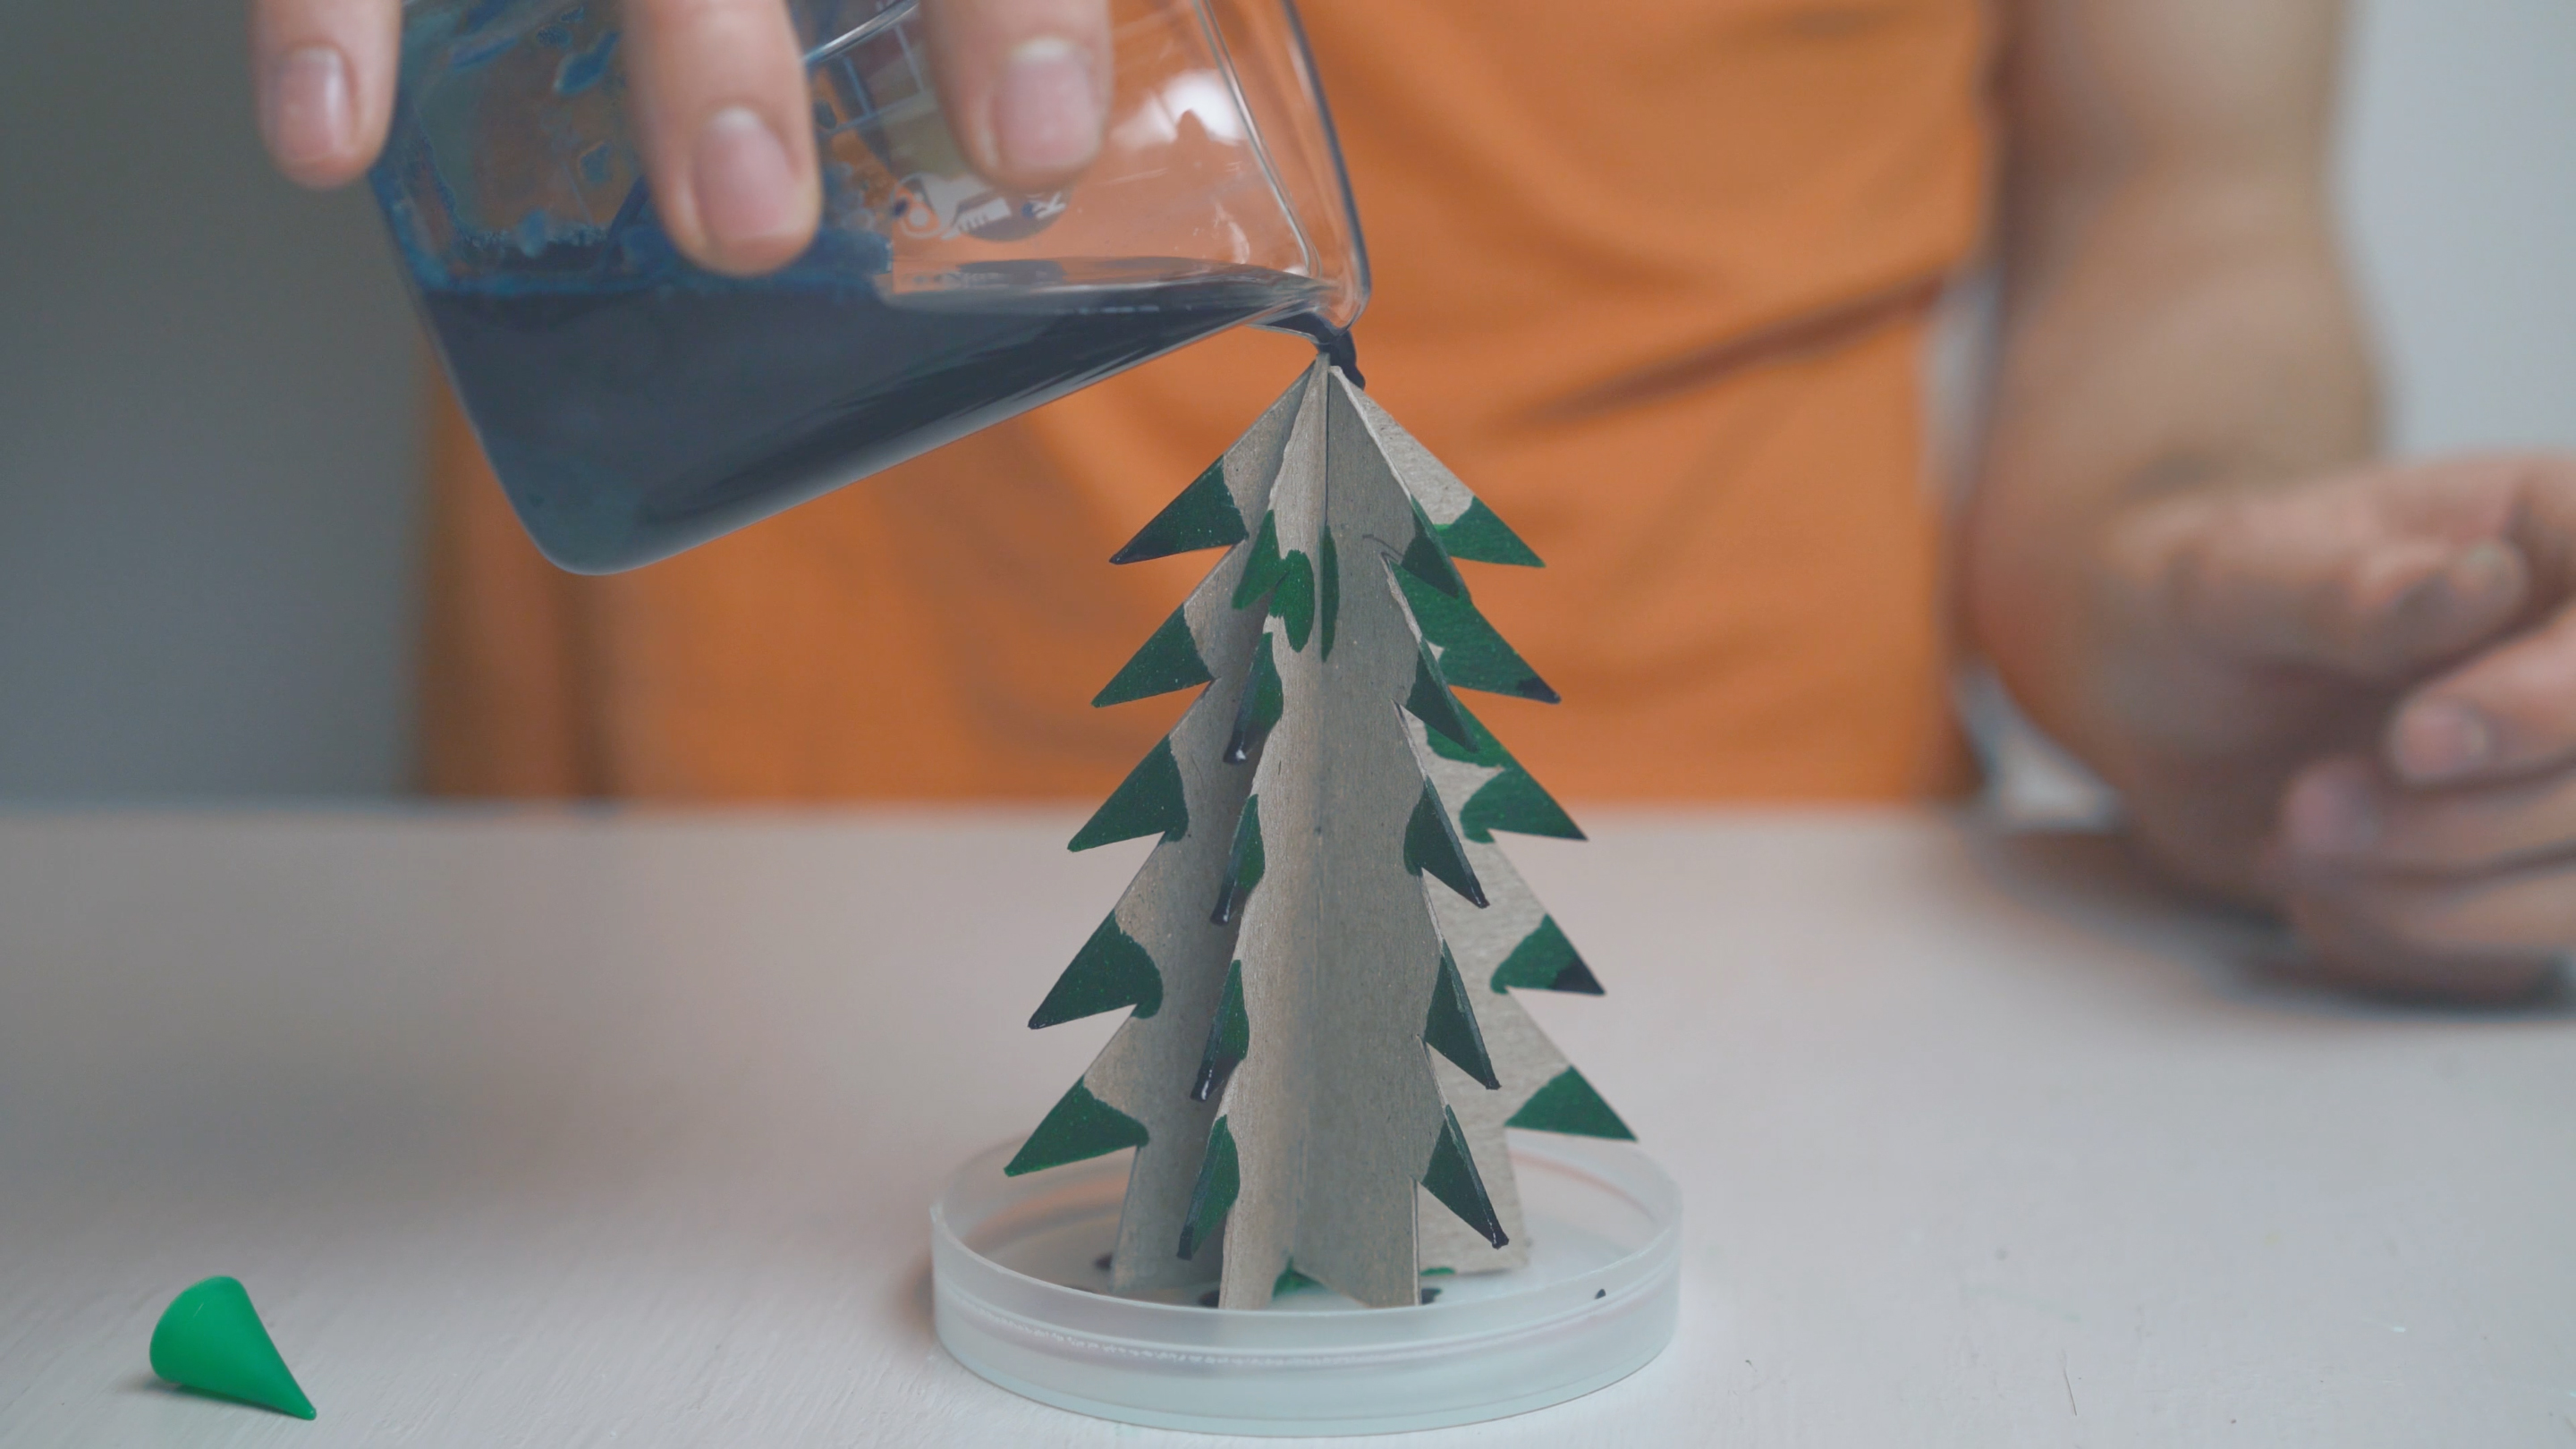
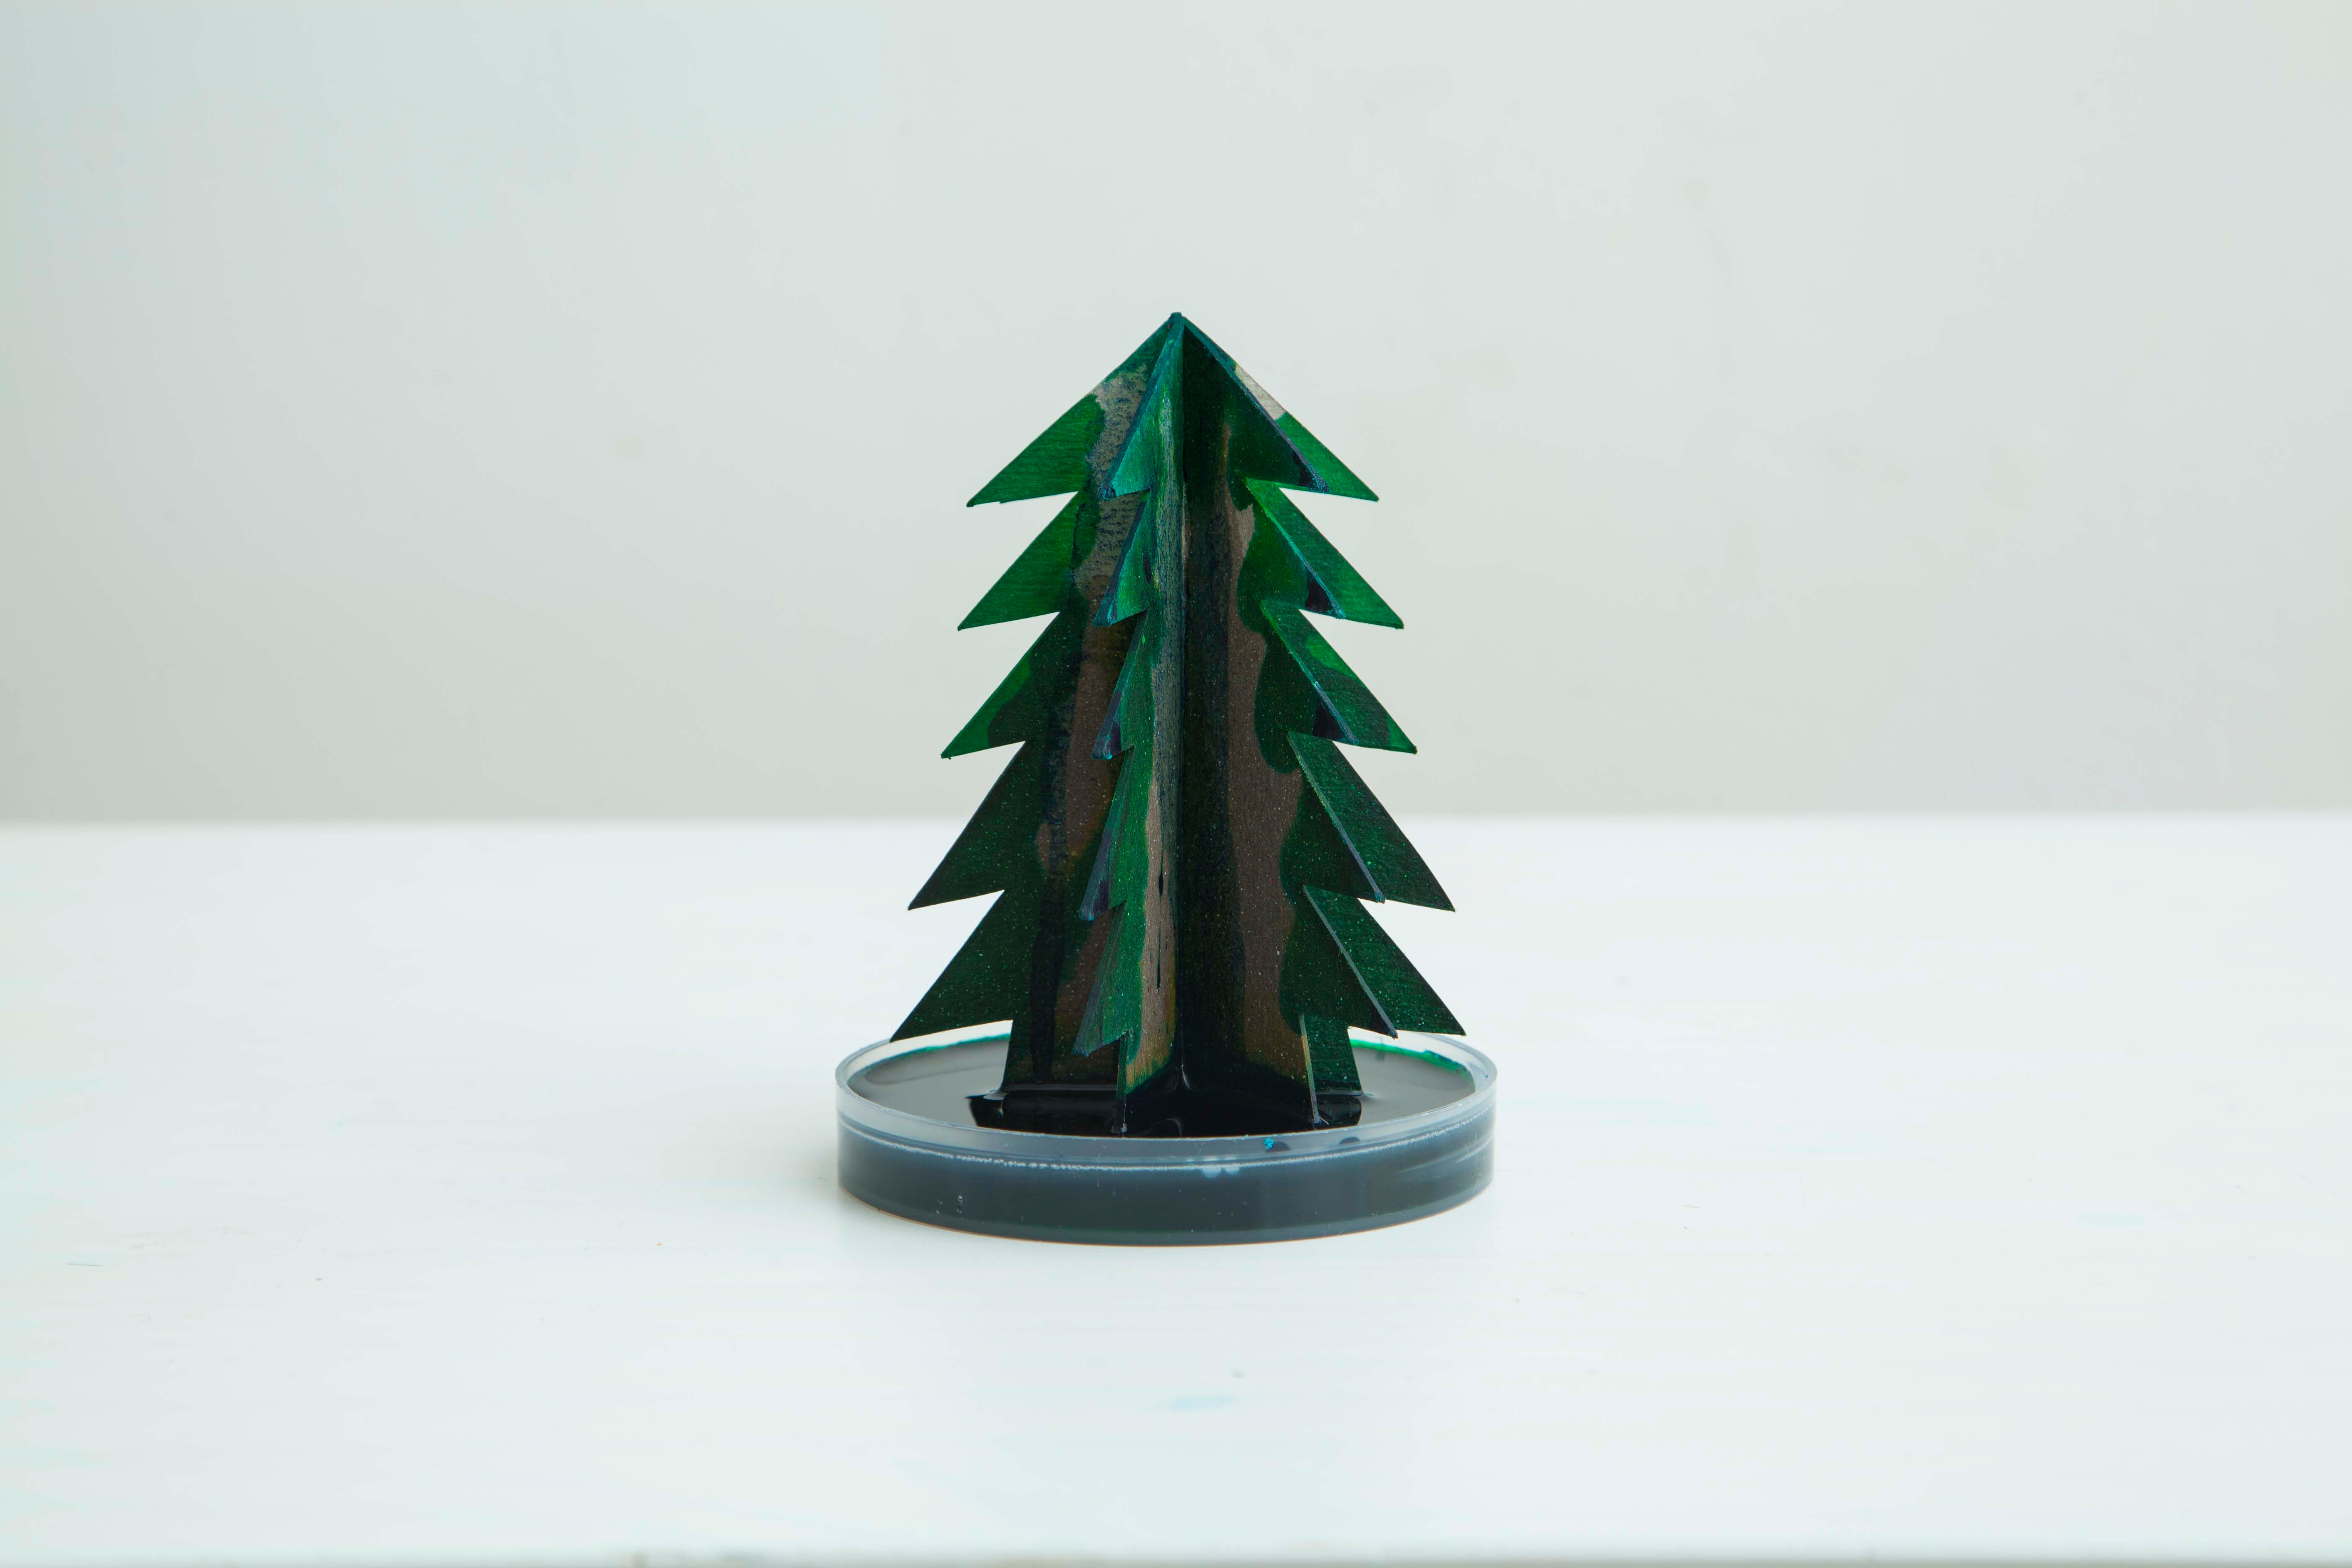
Step 9
Let your tree sit for at least 24 hours. Crystals should form on the tips of the tree!
Learn more

What's going on?
Your crystals grow because of a few different scientific phenomena! First, your paper tree sucks up your crystal solution due to something called capillary action. This is the same system that trees and other plants use to to bring water up from their roots up to their branches.
Once your tree has been saturated with the liquid, the liquid starts to evaporate from the branches. This leaves behind small particles of salt and bluing, which form the crystals you see!


