Step-by-step tutorial
Step 1
Mark each long cardboard tube with a pencil 1½ inches from the top. Then, use the pushpin to create a small hole through the mark.

Step 2
Repeat step 1 on the other side of the tube so that the two small holes are directly across from one another.
Step 3
Using the electric hand drill and a ¼” bit, drill a hole into each of the small holes that you have made. You may need an adult to assist you. Be very careful when using an electric hand drill! Wear safety glasses, place your hands as far away as possible from the drill point, and make sure that what you are drilling into is stable.
Step 4
Insert the straws through each of the long cardboard tubes.
Step 5
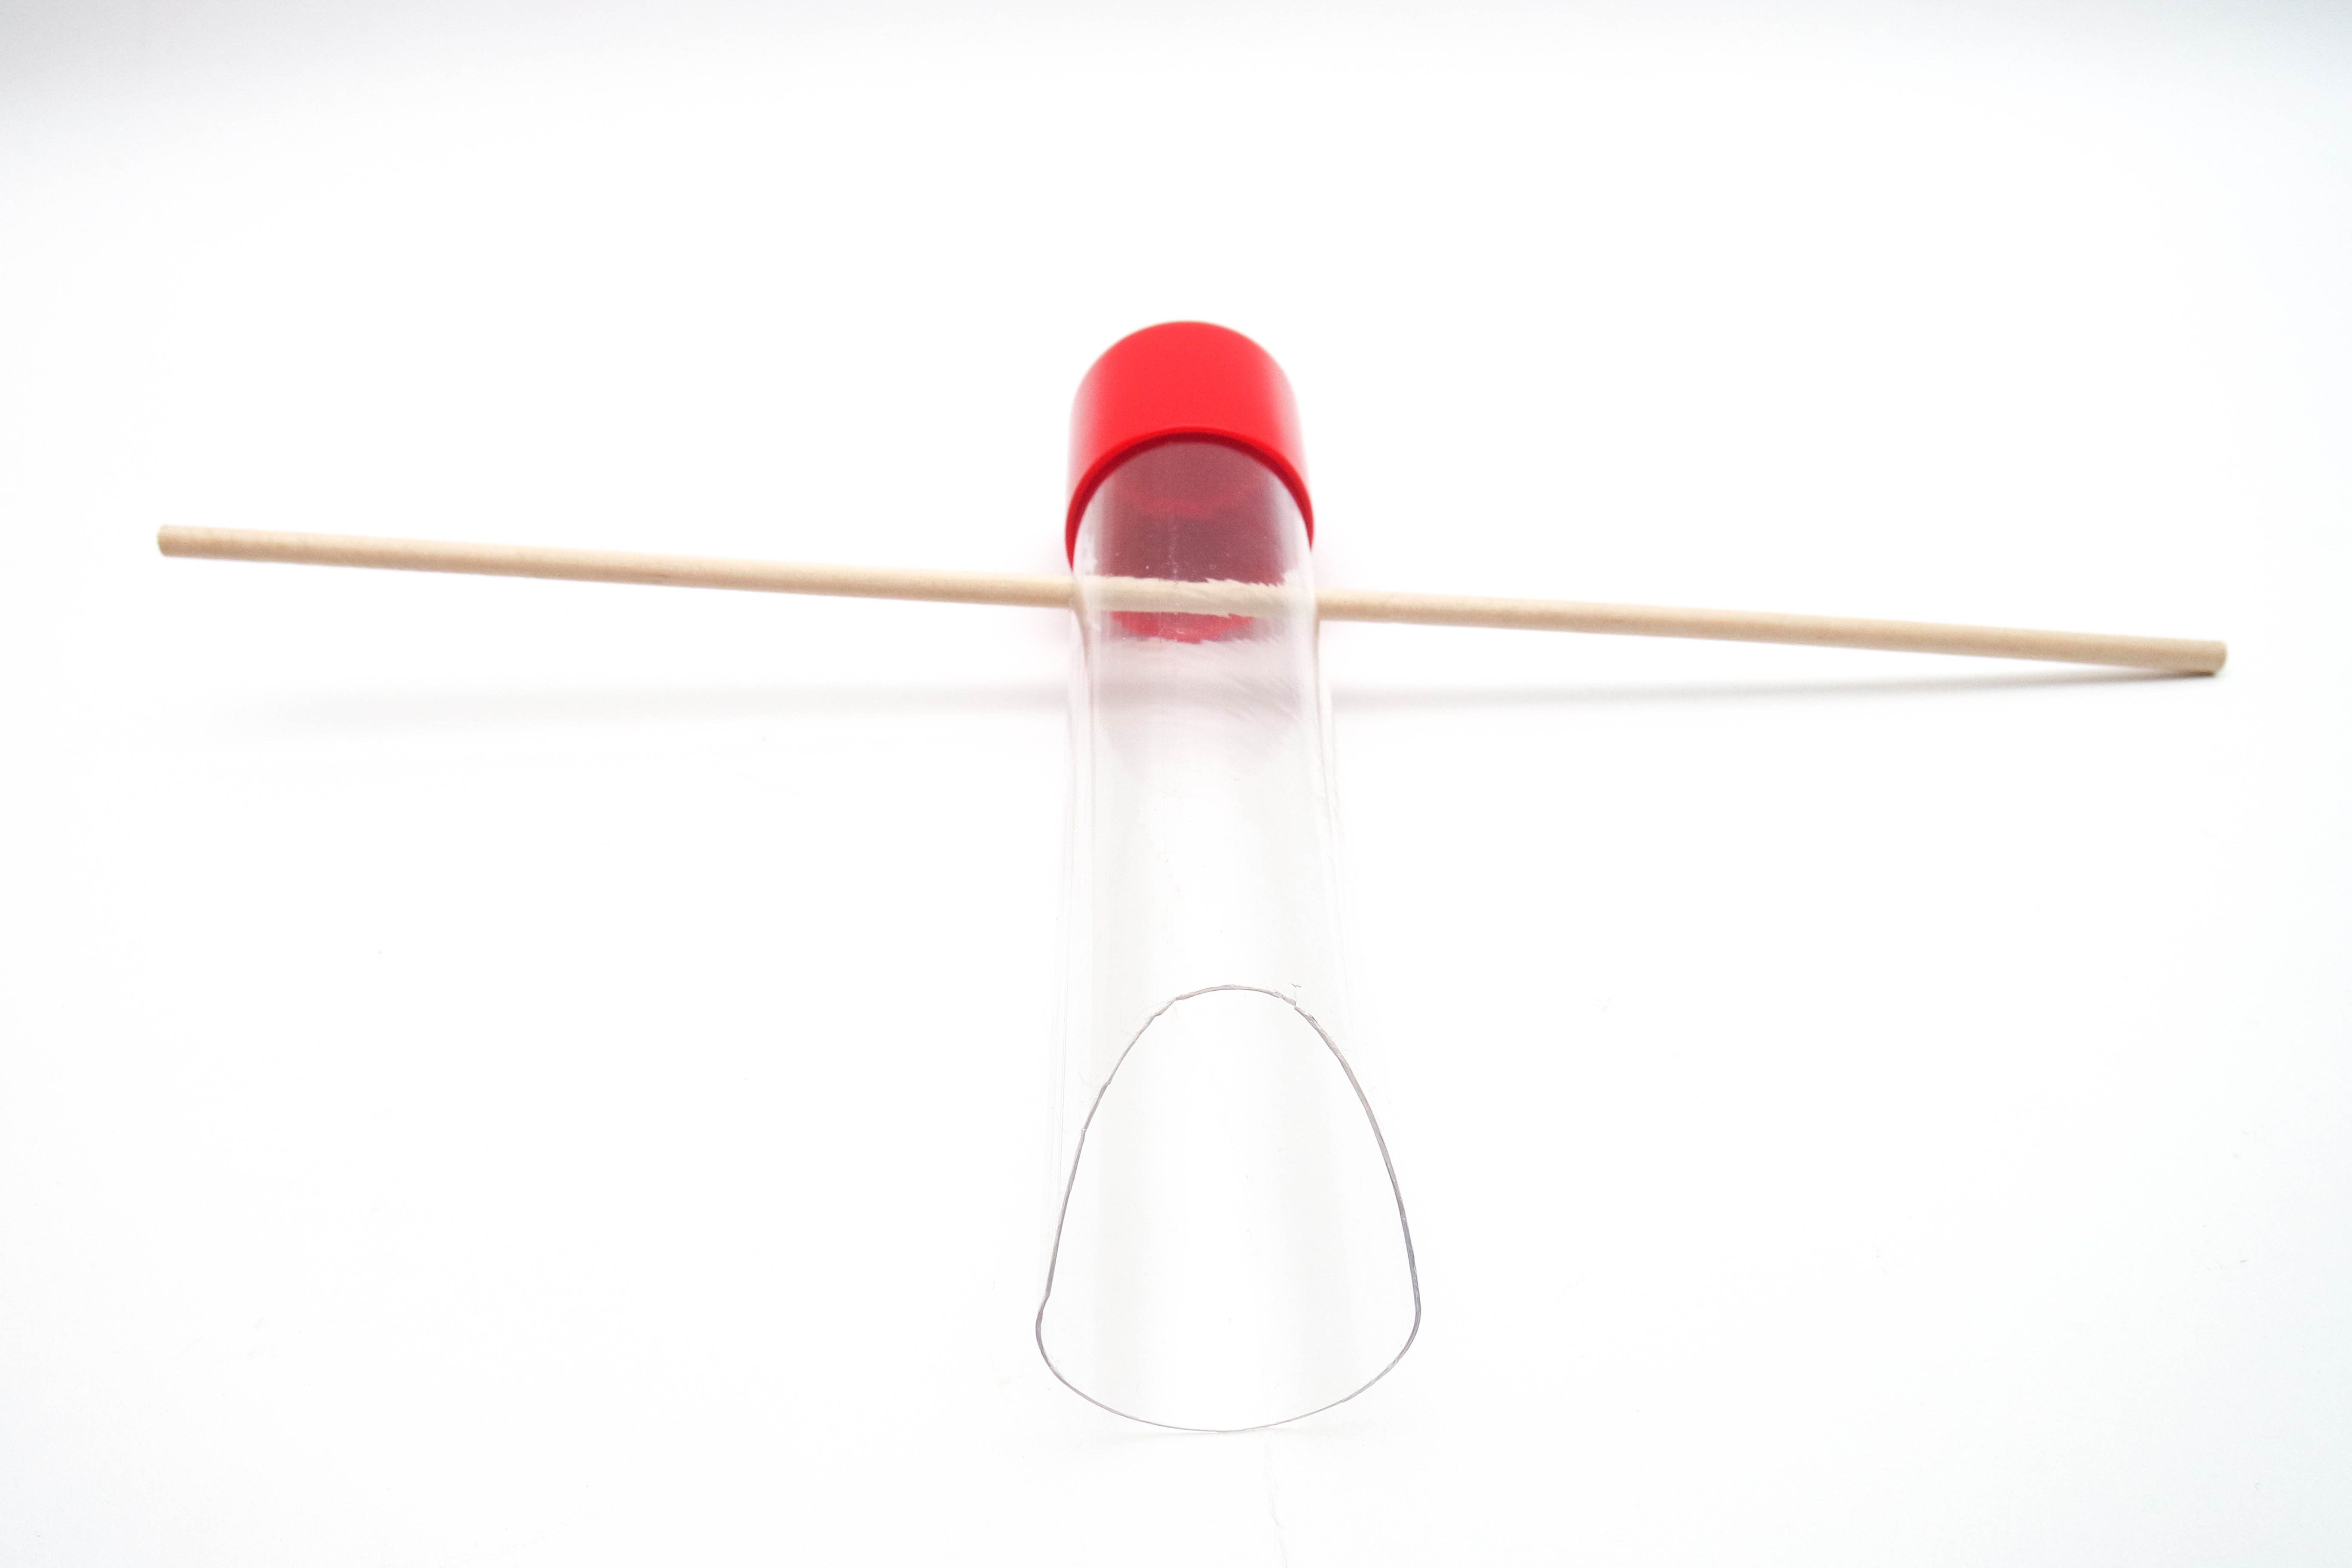
Cut the plastic tubing so that you have one piece of tubing that is 6” in length. Then, mark the tubing with a marker about 2” from one end. Use the pushpin to create a small hole through the mark.
Step 6
Repeat step 5 on the other side of the tube so that the two small holes are directly across from one another.
Step 7
Using the electric hand drill and a 3/16” bit, widen the holes in the plastic tubing so that the dowel fits snuggly through the holes. You may need an adult to assist you. Then, secure the plastic tubing cap onto the end of the tube that is closest to the holes you just made. Be very careful when using an electric hand drill! Wear safety glasses, place your hands as far away as possible from the drill point, and make sure that what you are drilling into is stable.
Step 8
Cut a “U” shaped hole on the open end of the tube.
Step 9
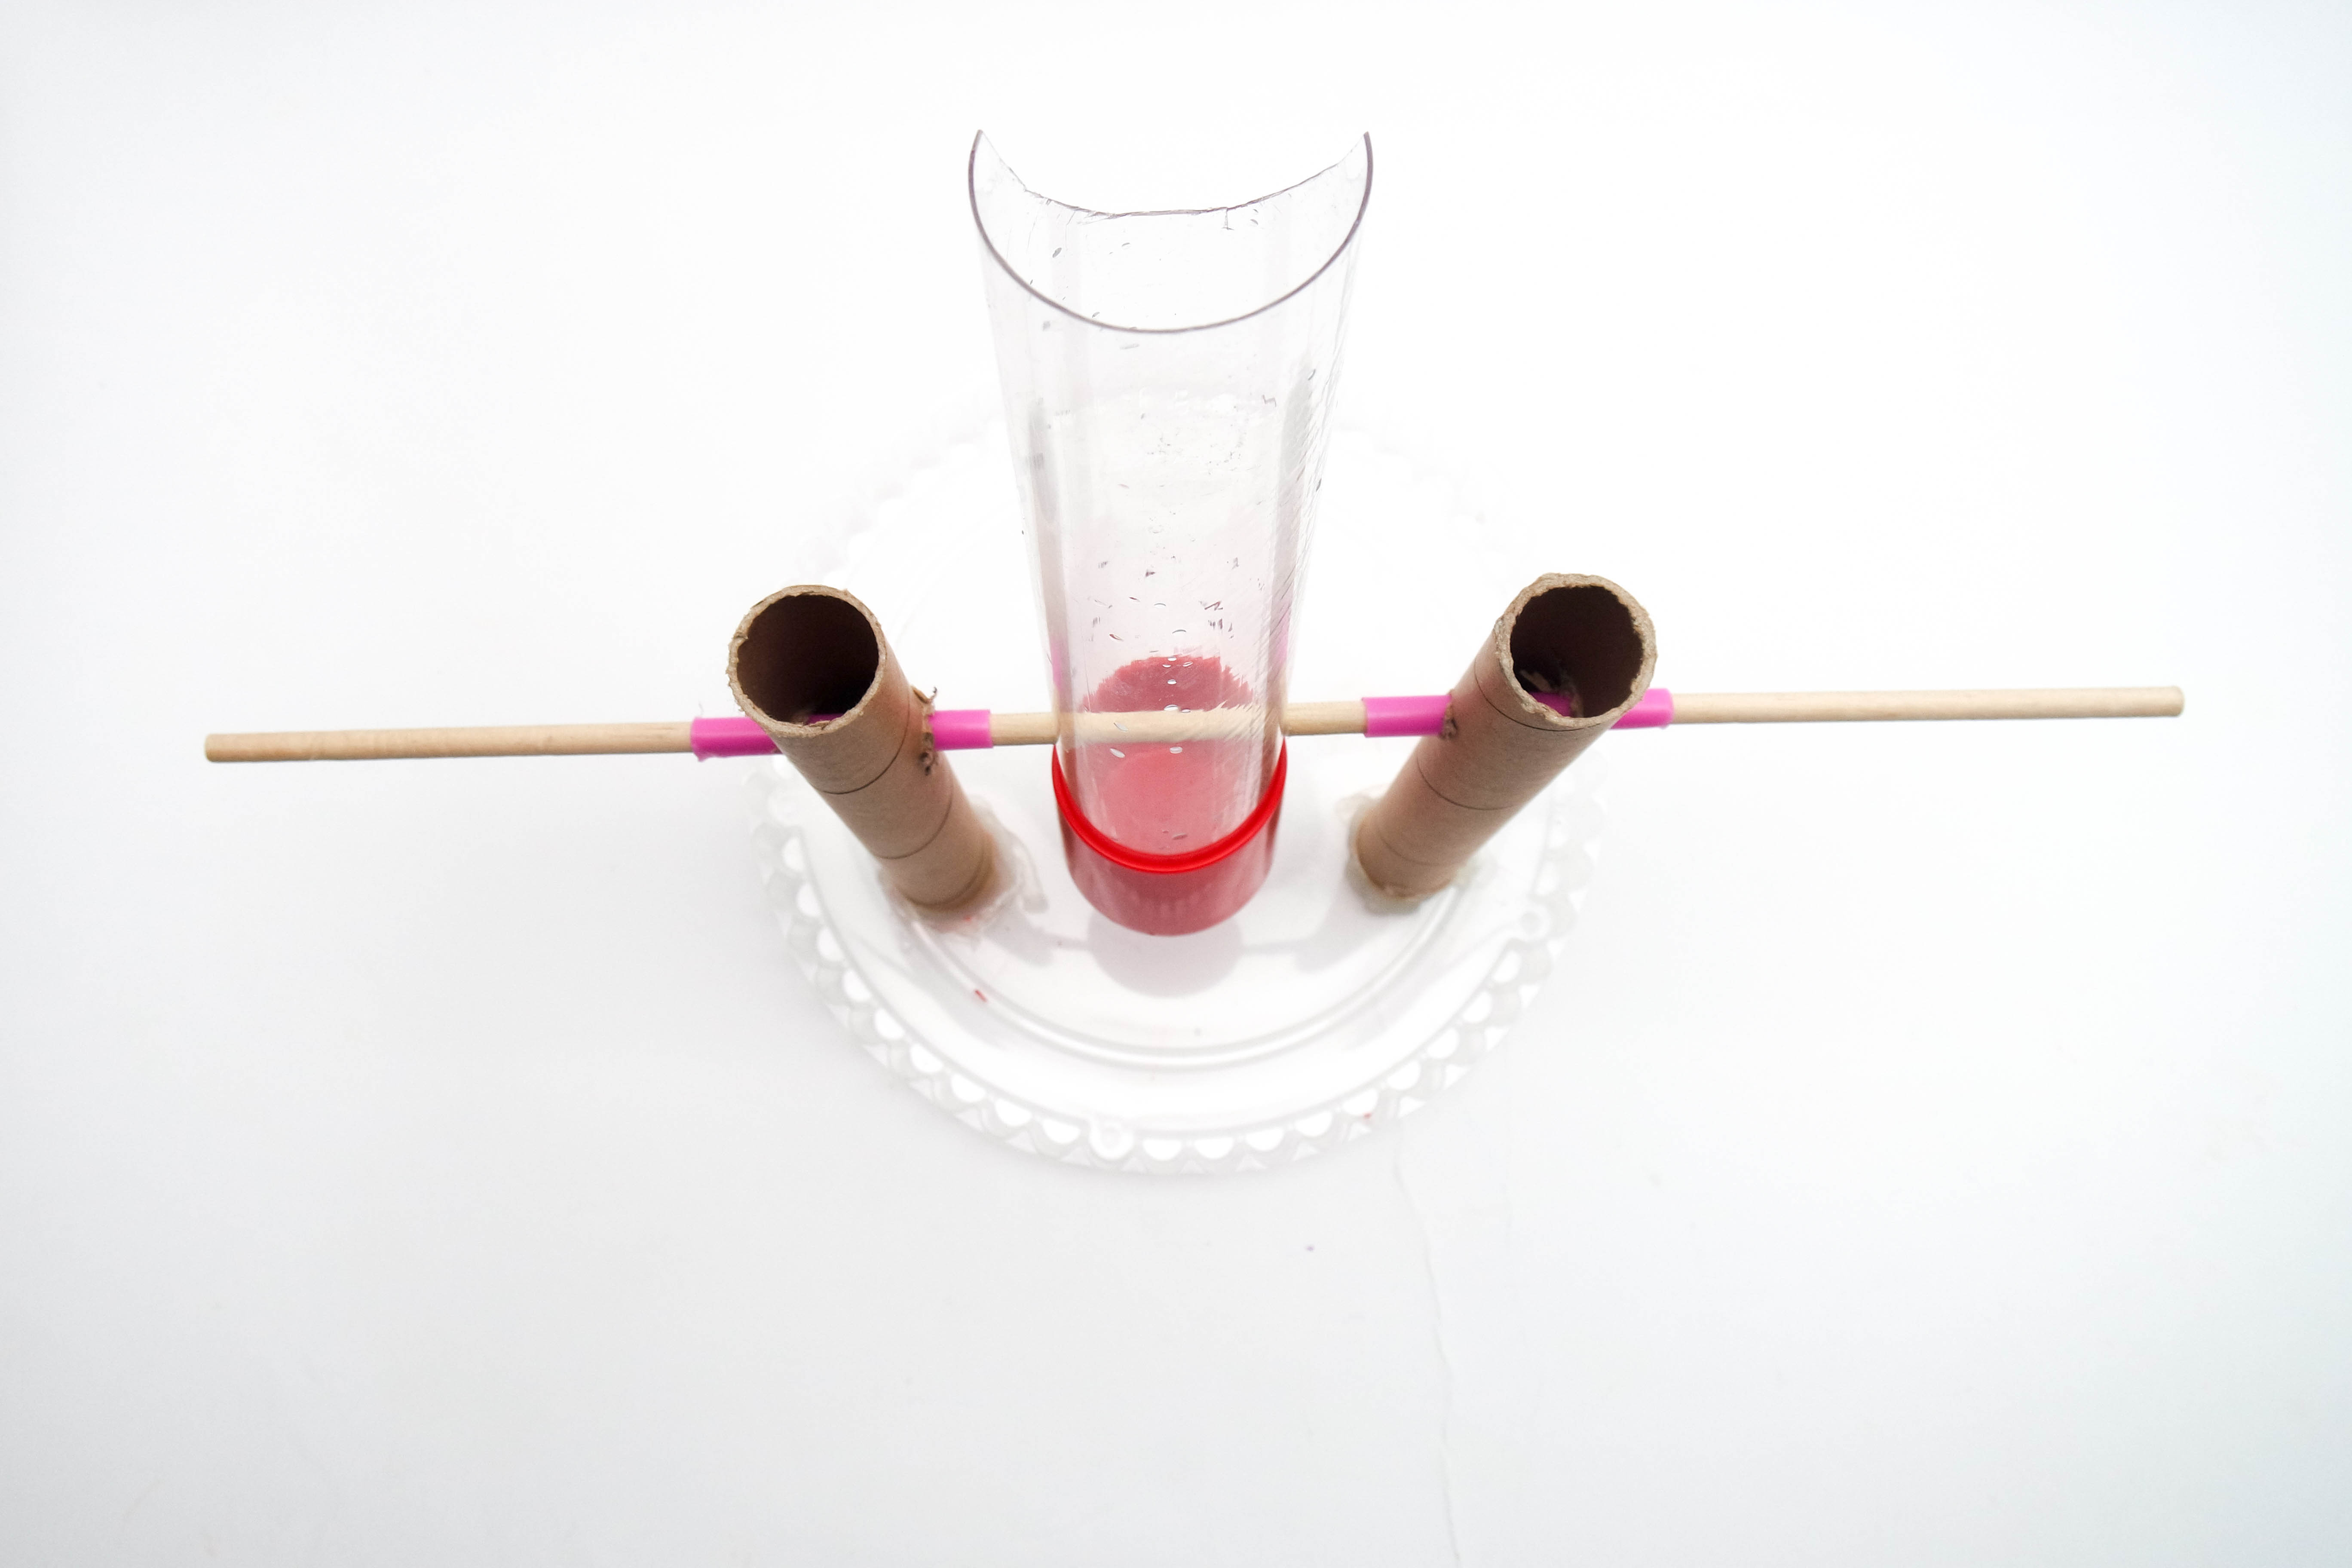
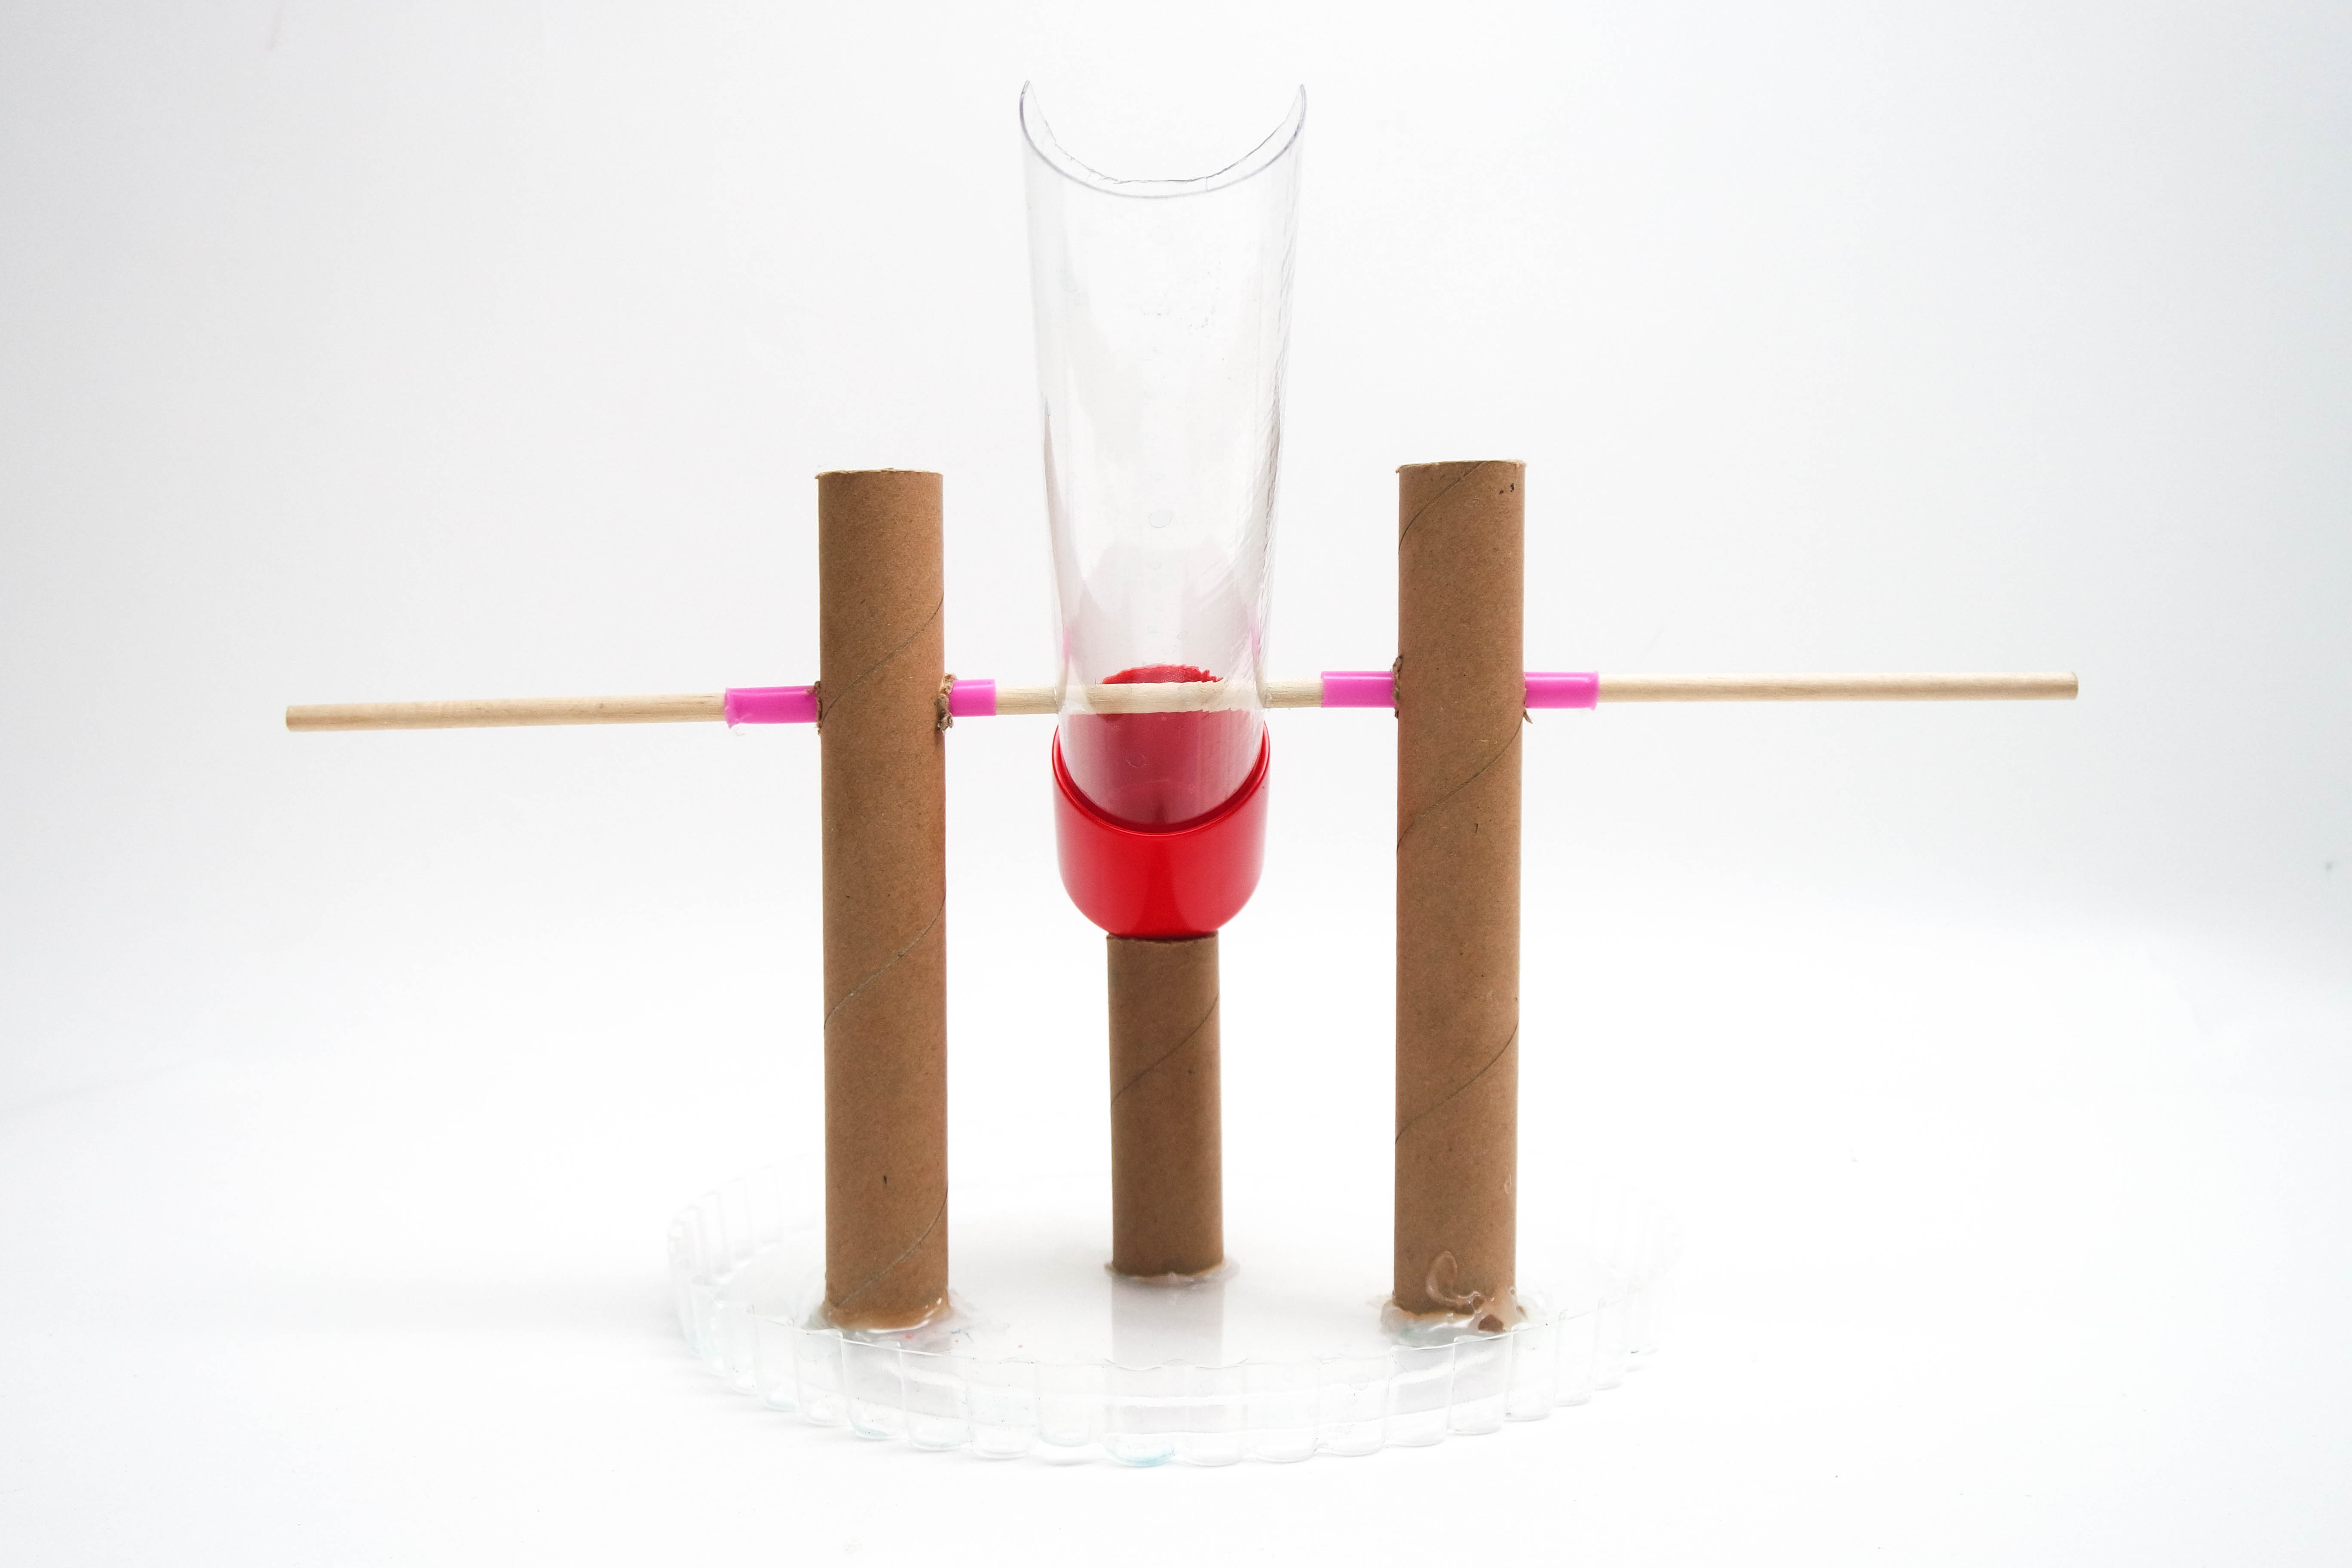
Slide a long cardboard tube onto one end of the dowel. Slide the other long tube onto the other end. Then, hot glue the two long tubes to a plastic container lid about 3” apart from each other.
Step 10
Place the short cardboard tube in between the longer two, about 1” behind them, and hot glue it to the lid. This is your stopper.
Tip
Make sure that the capped end of the plastic tubing touches the stopper in its “resting position.” If it doesn’t, hot glue pennies to the back of the cap until it does.
Step 11
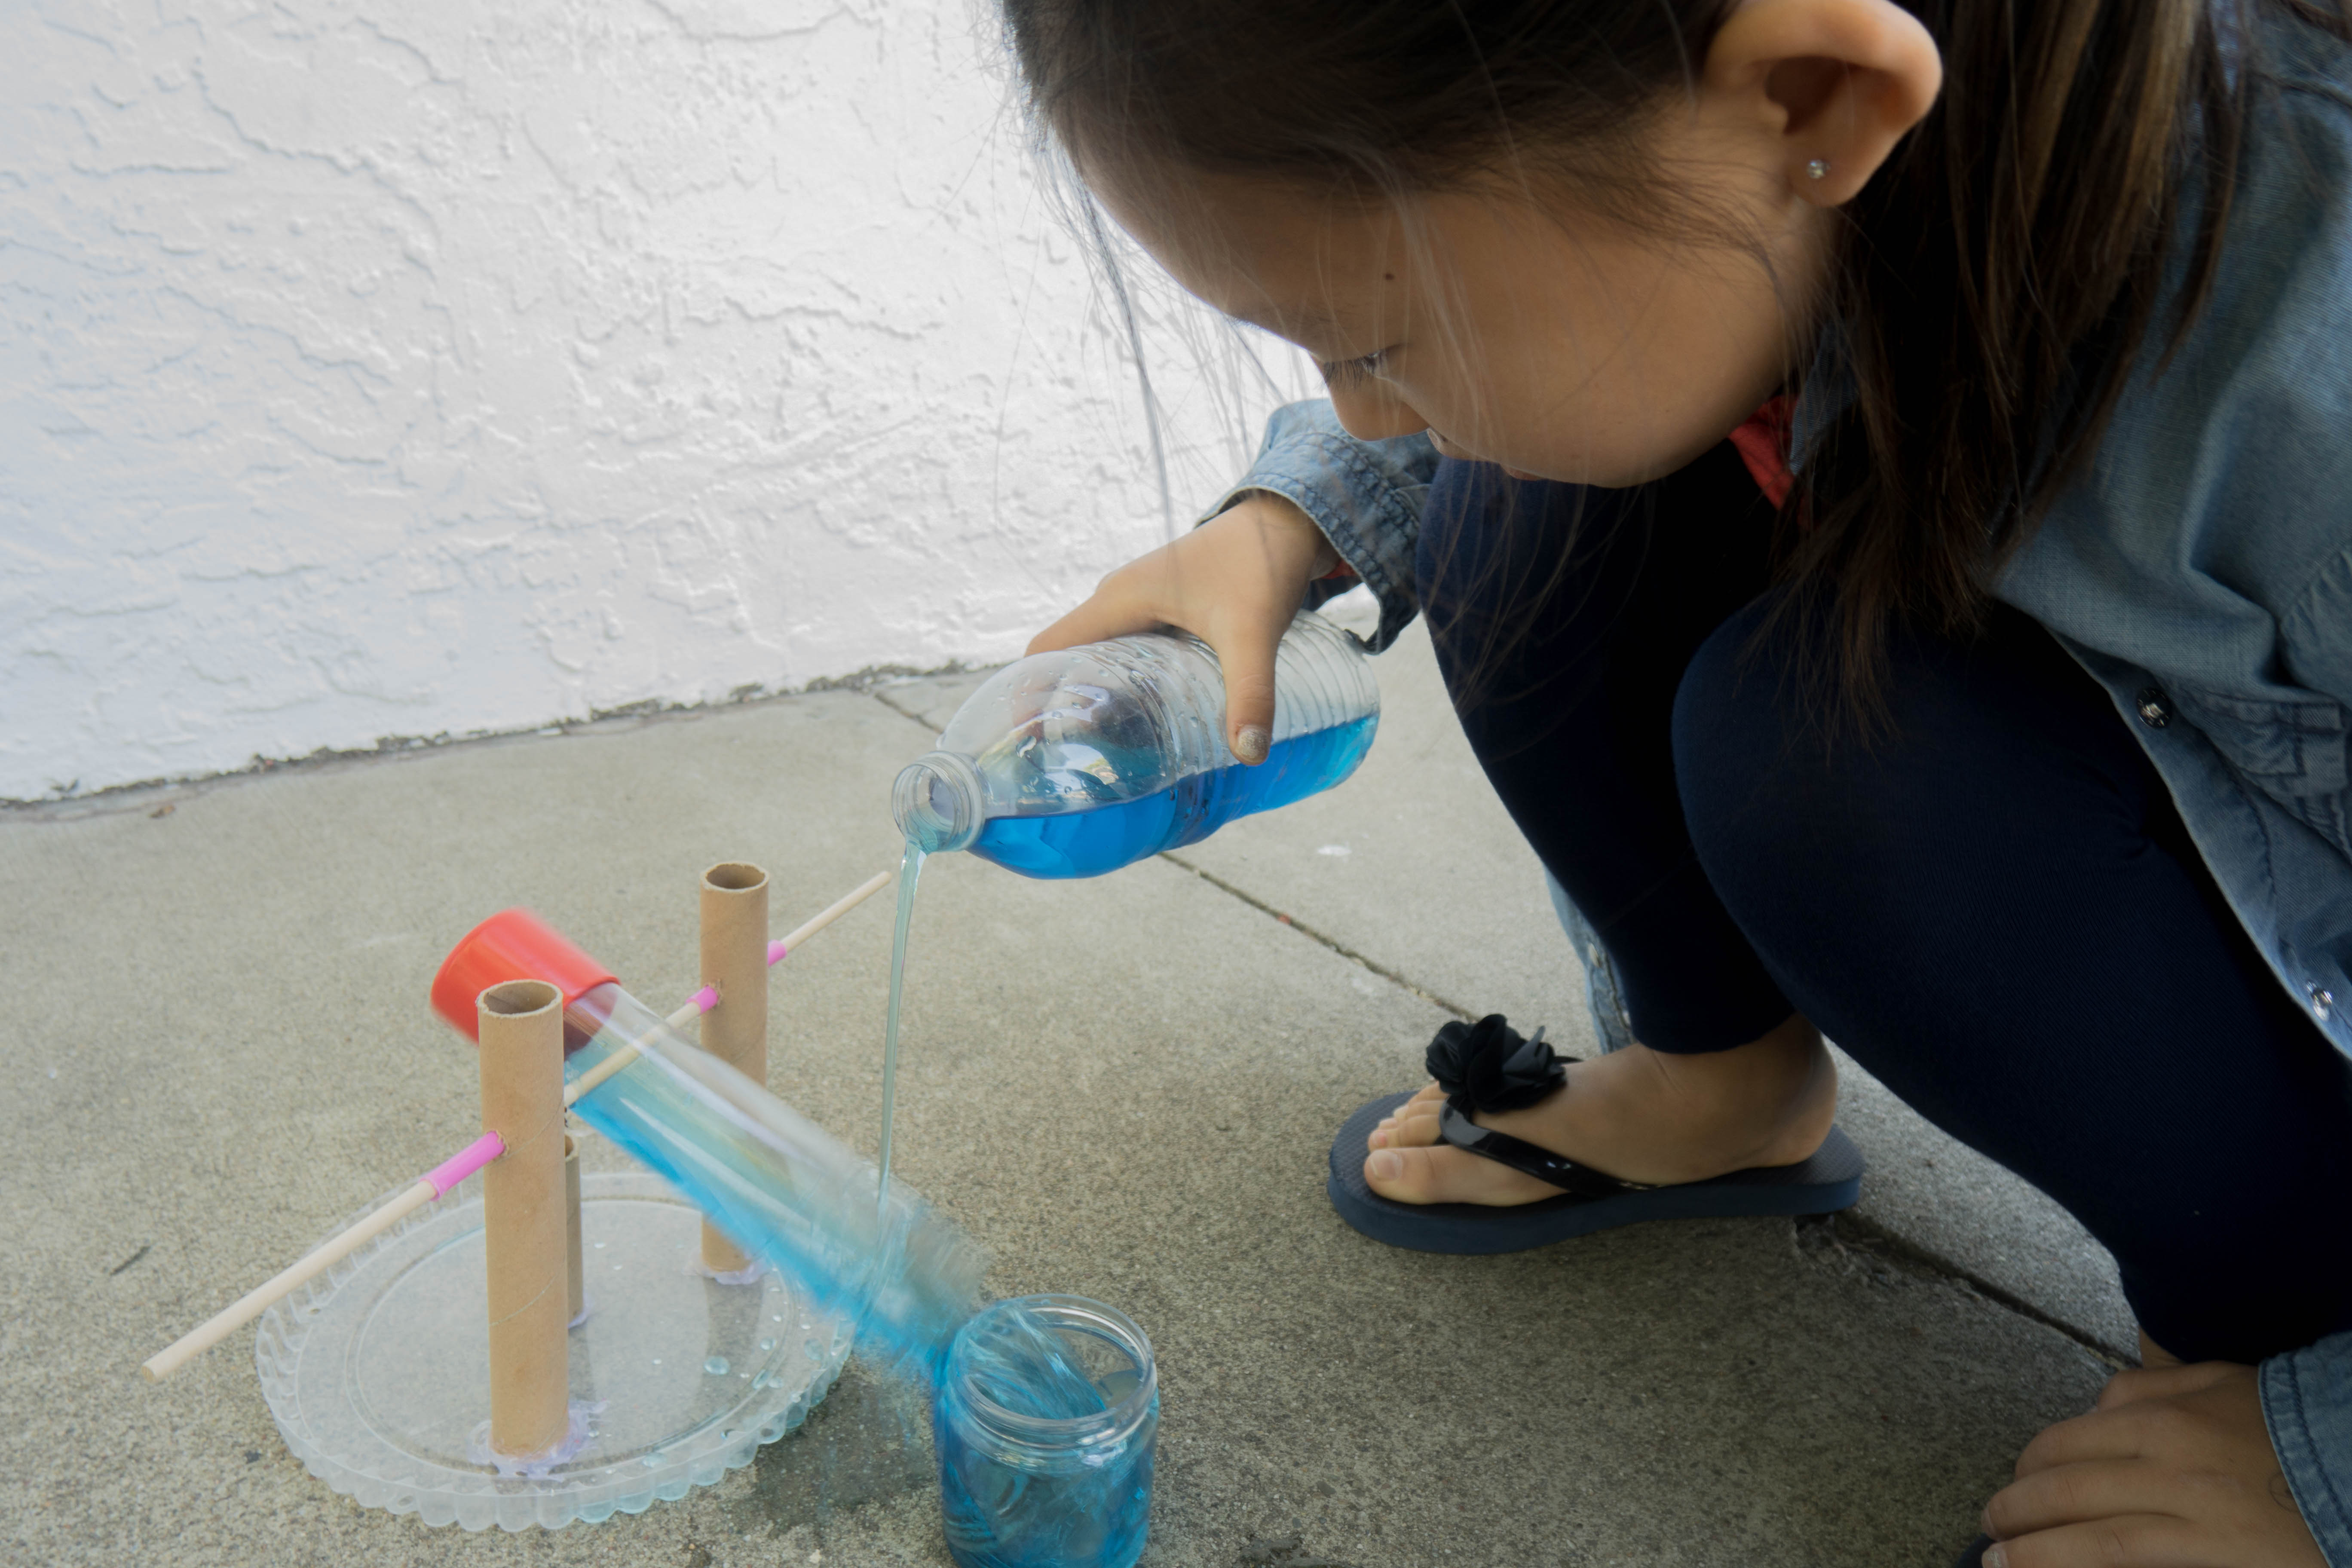
Now, you are ready to experiment with your tipping fountain! Position a cup underneath the plastic tube, pour some water in, and watch what happens!
Tip
To make sure your cup doesn’t move, drop some coins into the bottom of it.
Learn more

What's going on? The tipping fountain originated in the rice paddies of Japan, where it is known as the shishi-odoshi, or "deer scarer." The science of the tipping fountain is straightforward: as the plastic tube fills up with water, its center of gravity moves from near the red cap over to the tube's opening. When this happens, the tube tilts forward, spilling the water out. Without water, the center of gravity of the tube moves back towards the red cap. The tube now tips back into its original position, hitting the cardboard stopper and making a small noise. This noise scares away birds, deer, and other animals that could damage a garden or field. Today, Buddhist monks and garden enthusiasts sometimes find the repetitive, soft clacking of the tipping fountain to be soothing, and even worth meditating on.


