Step-by-step tutorial
Step 1
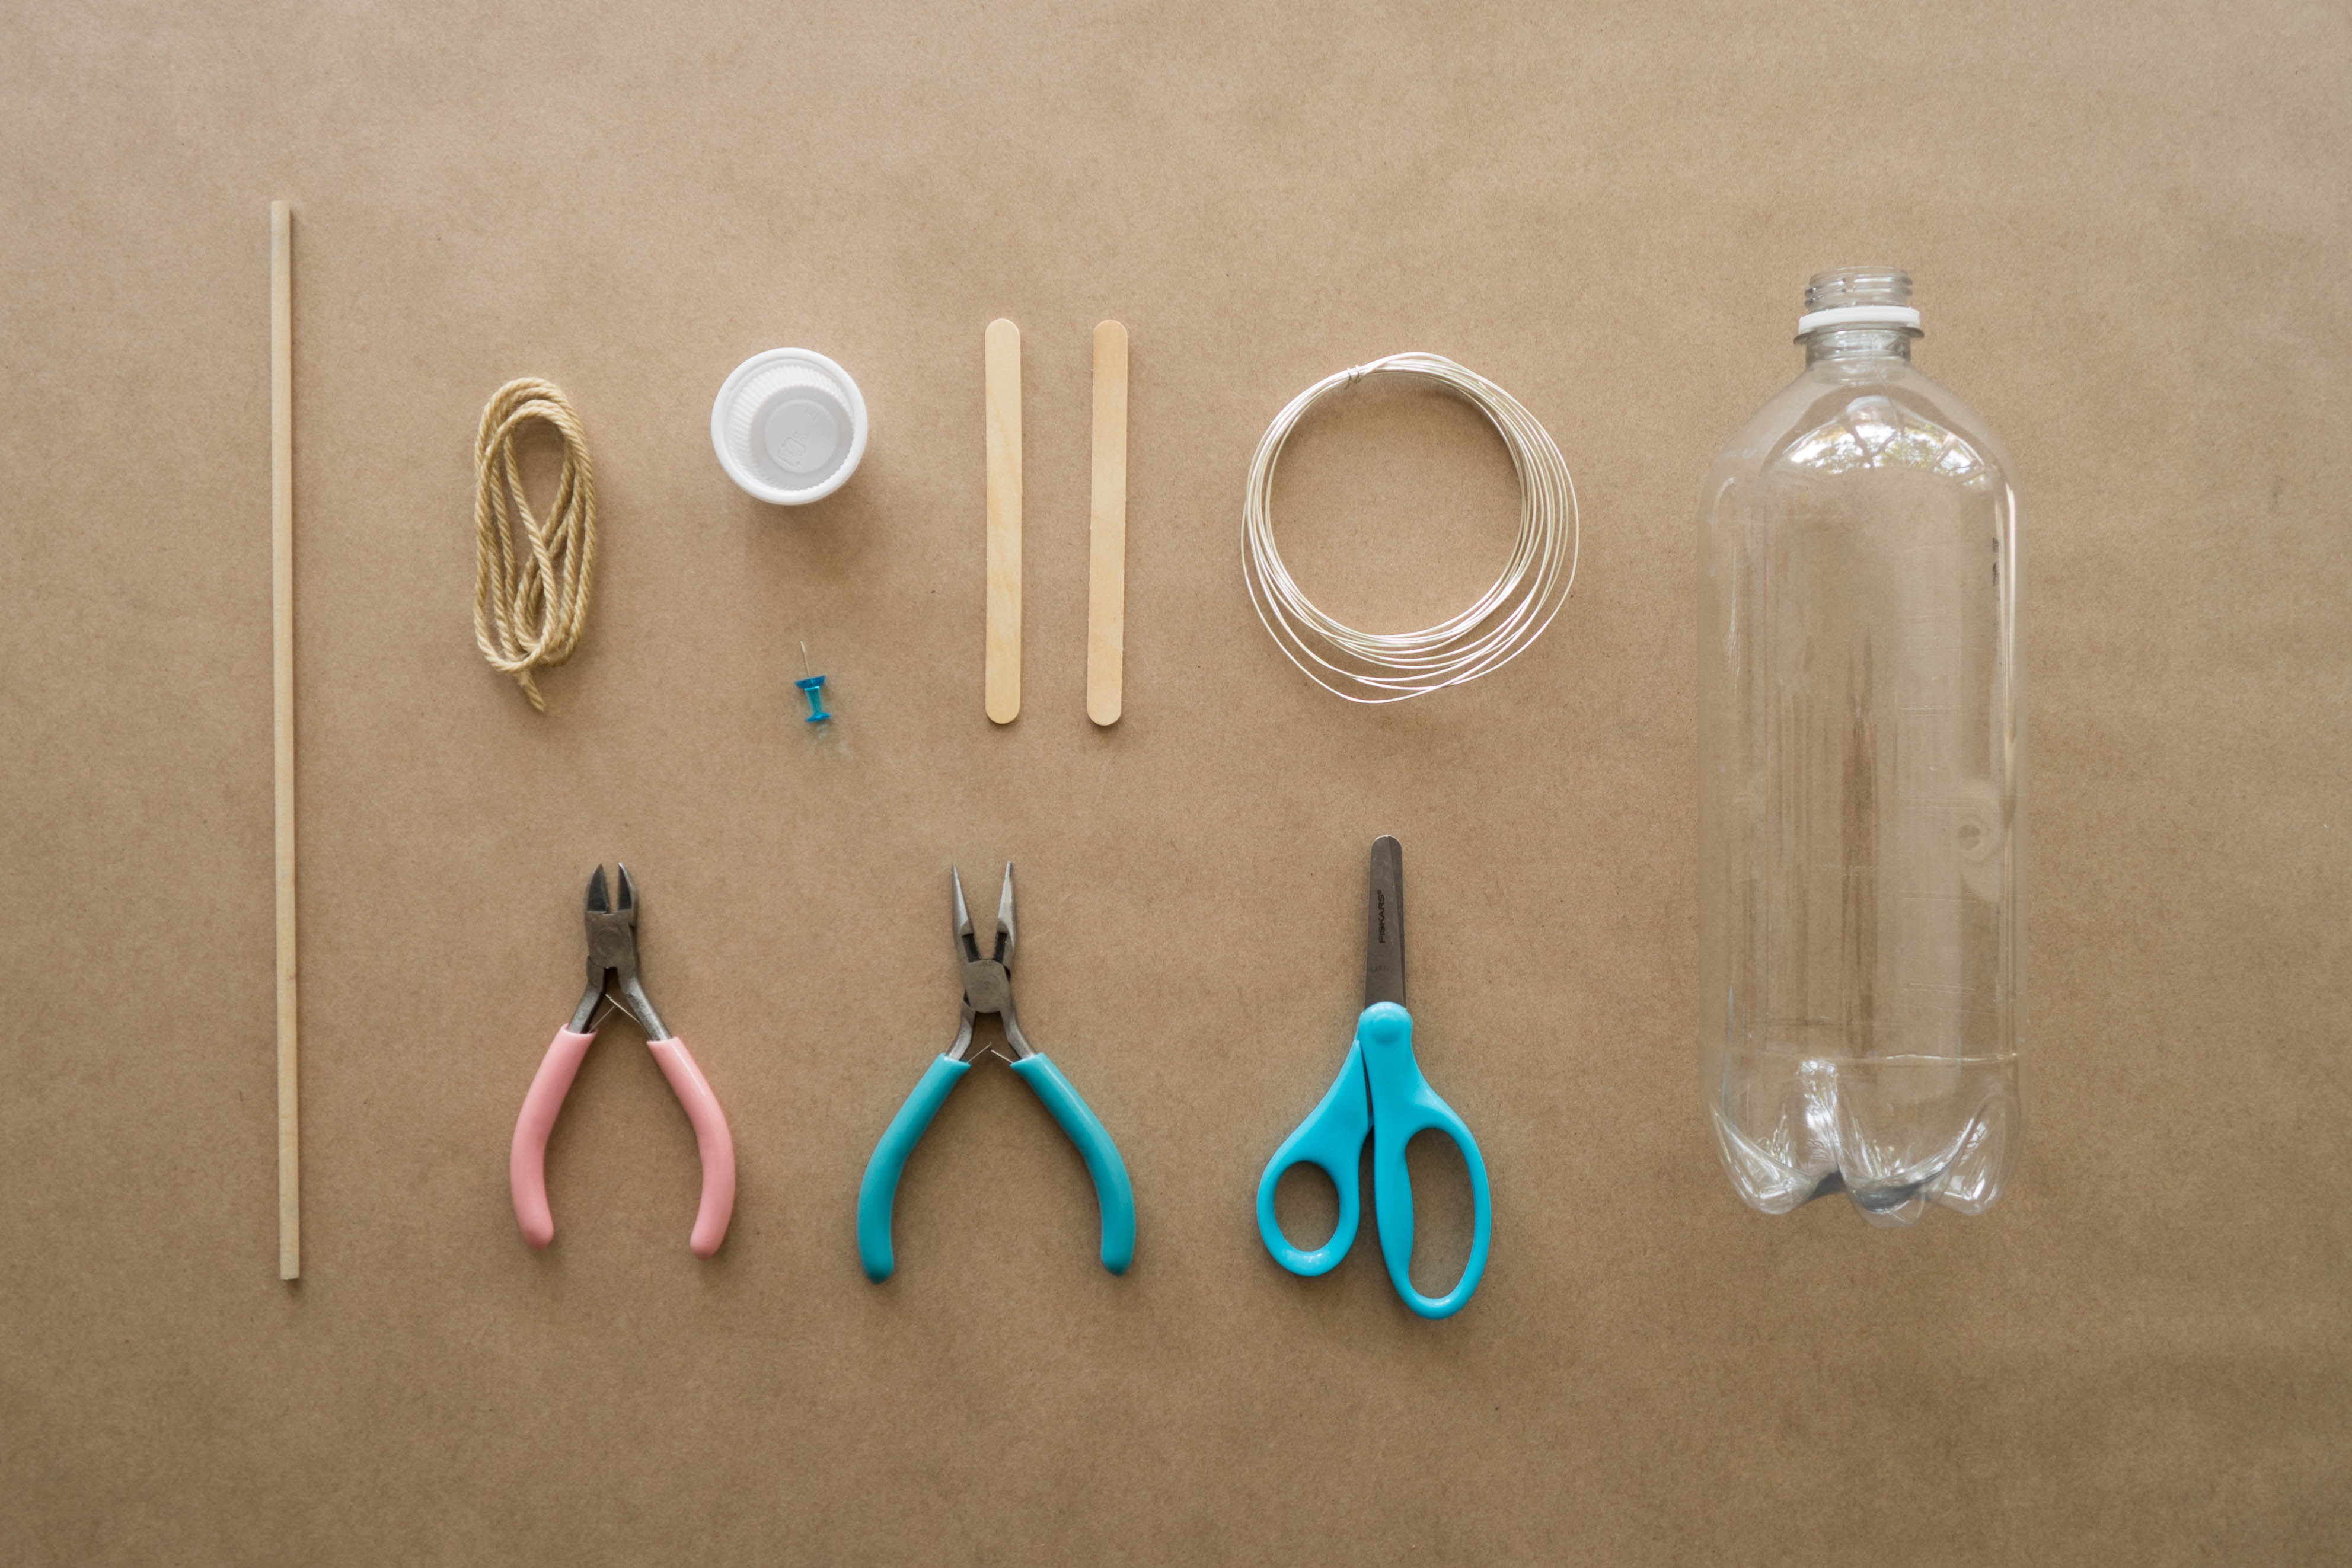
Gather your materials.

Step 2
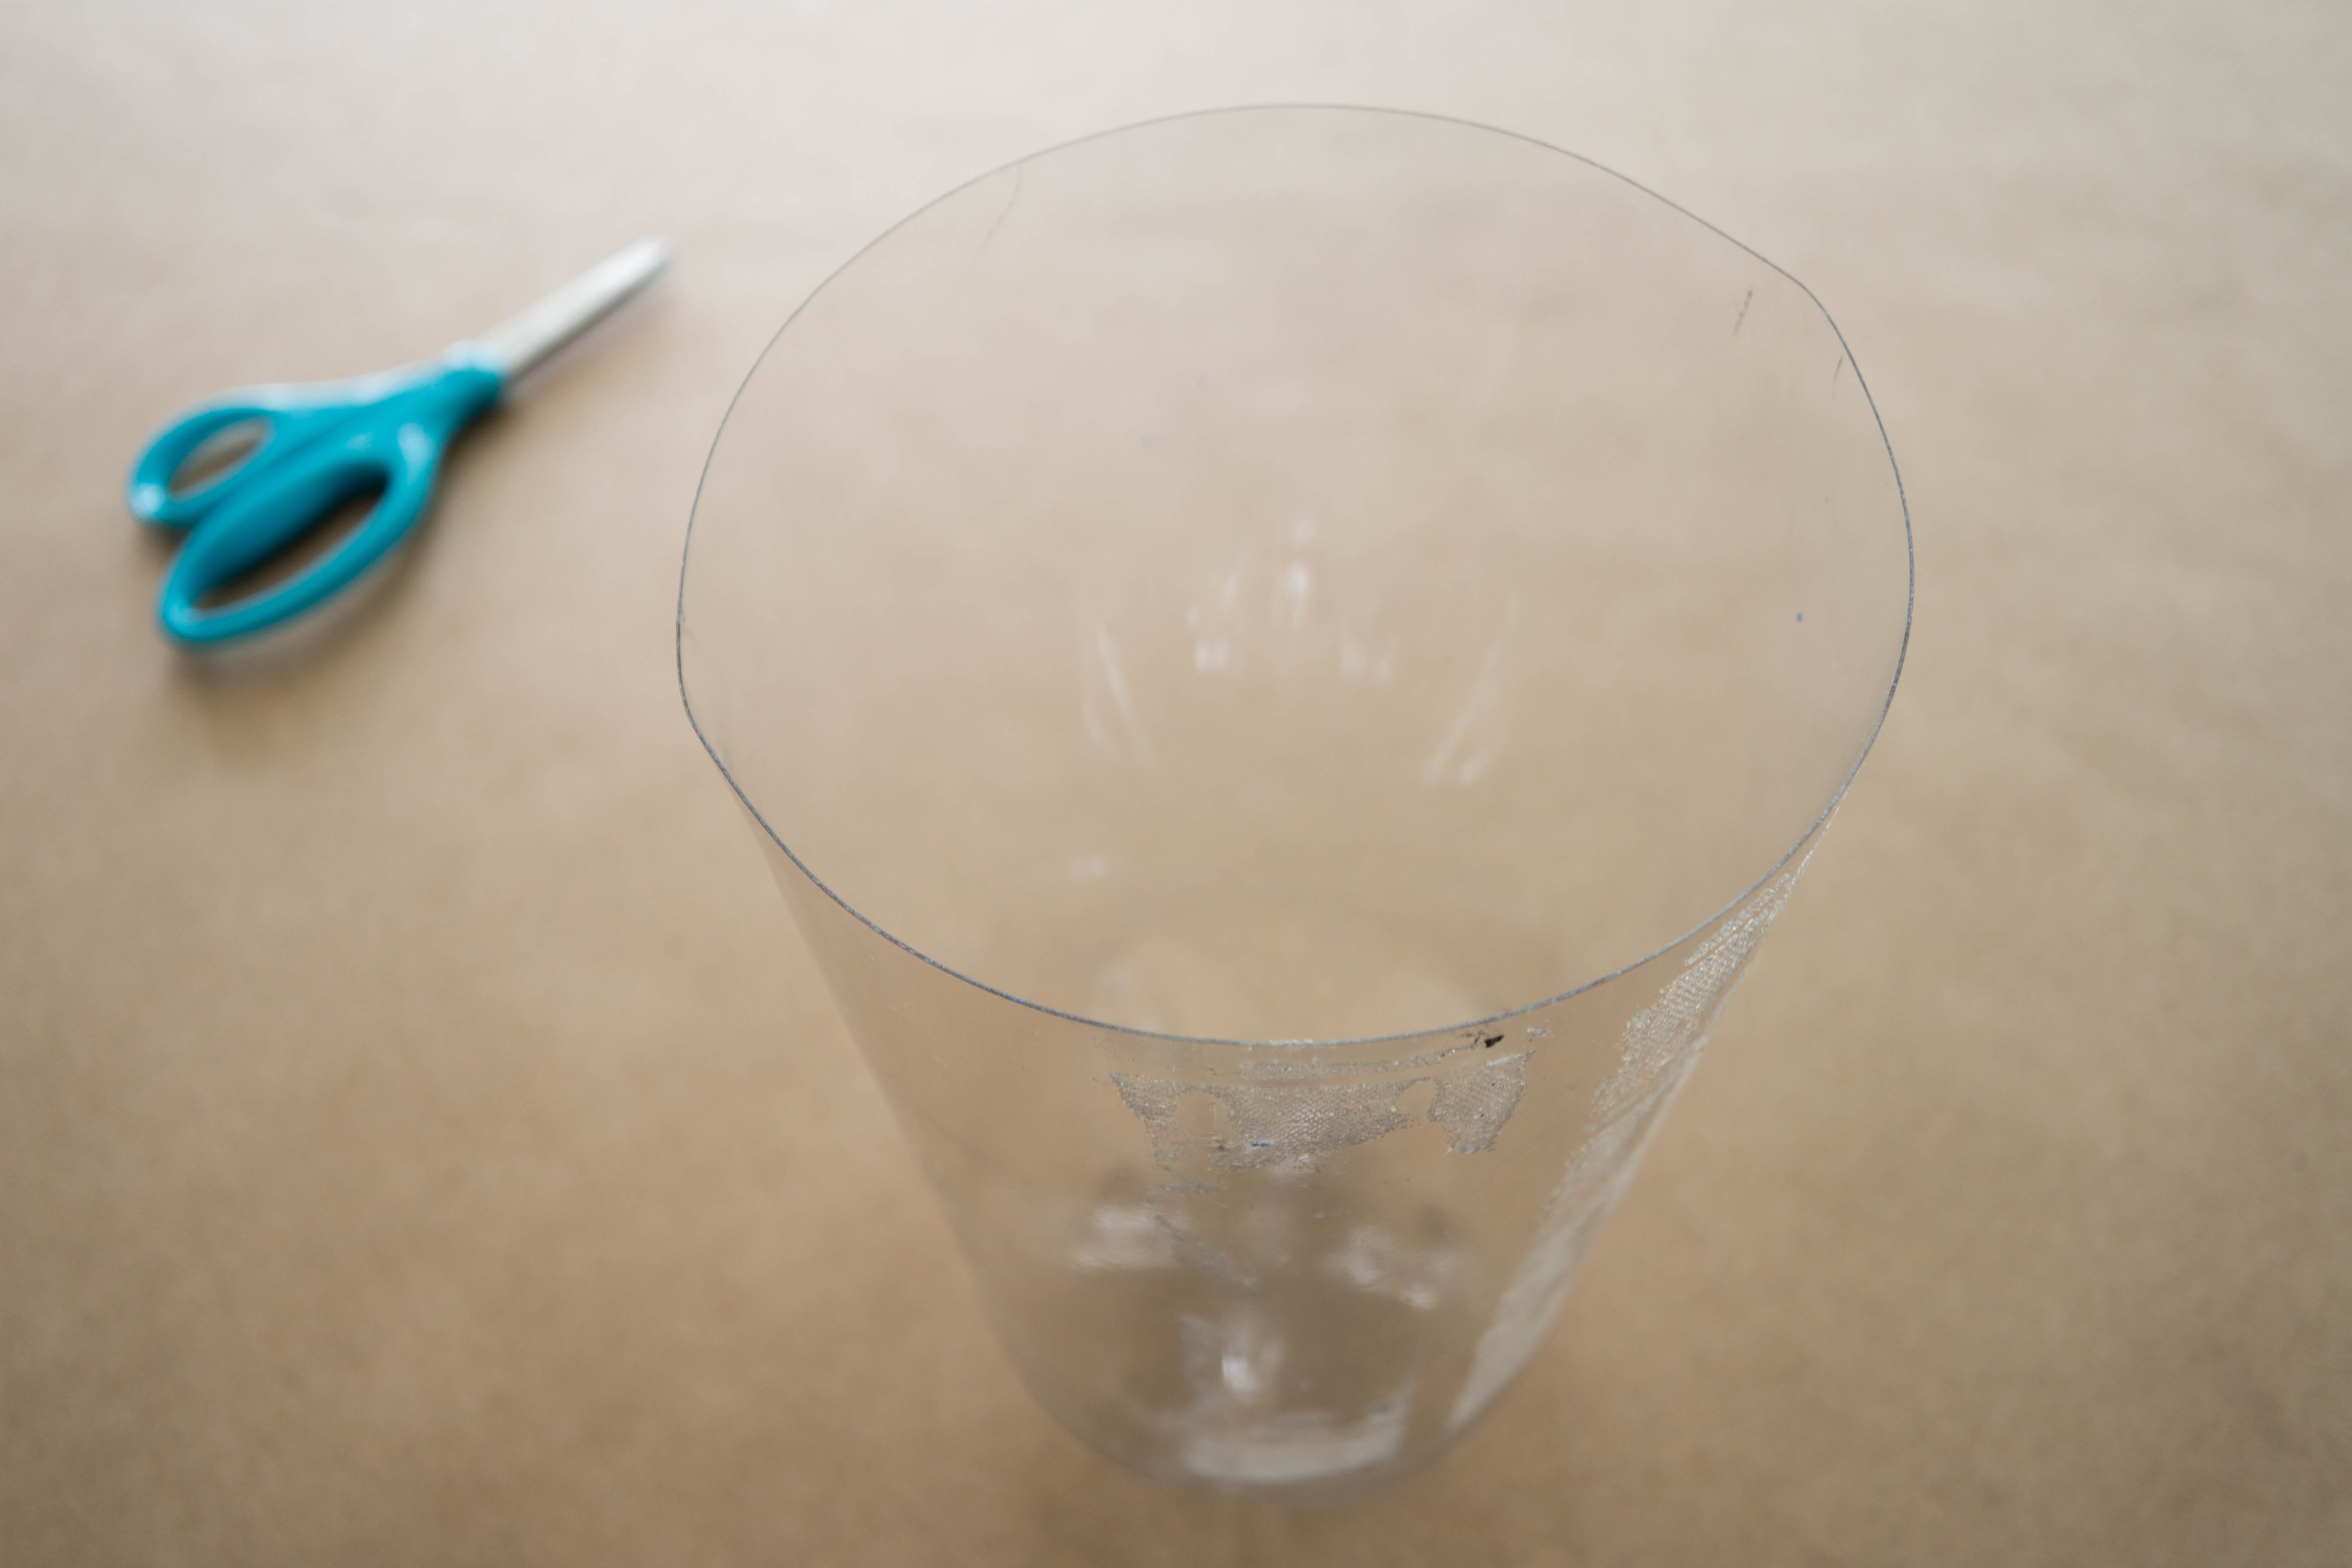
Cut off the top of the bottle.
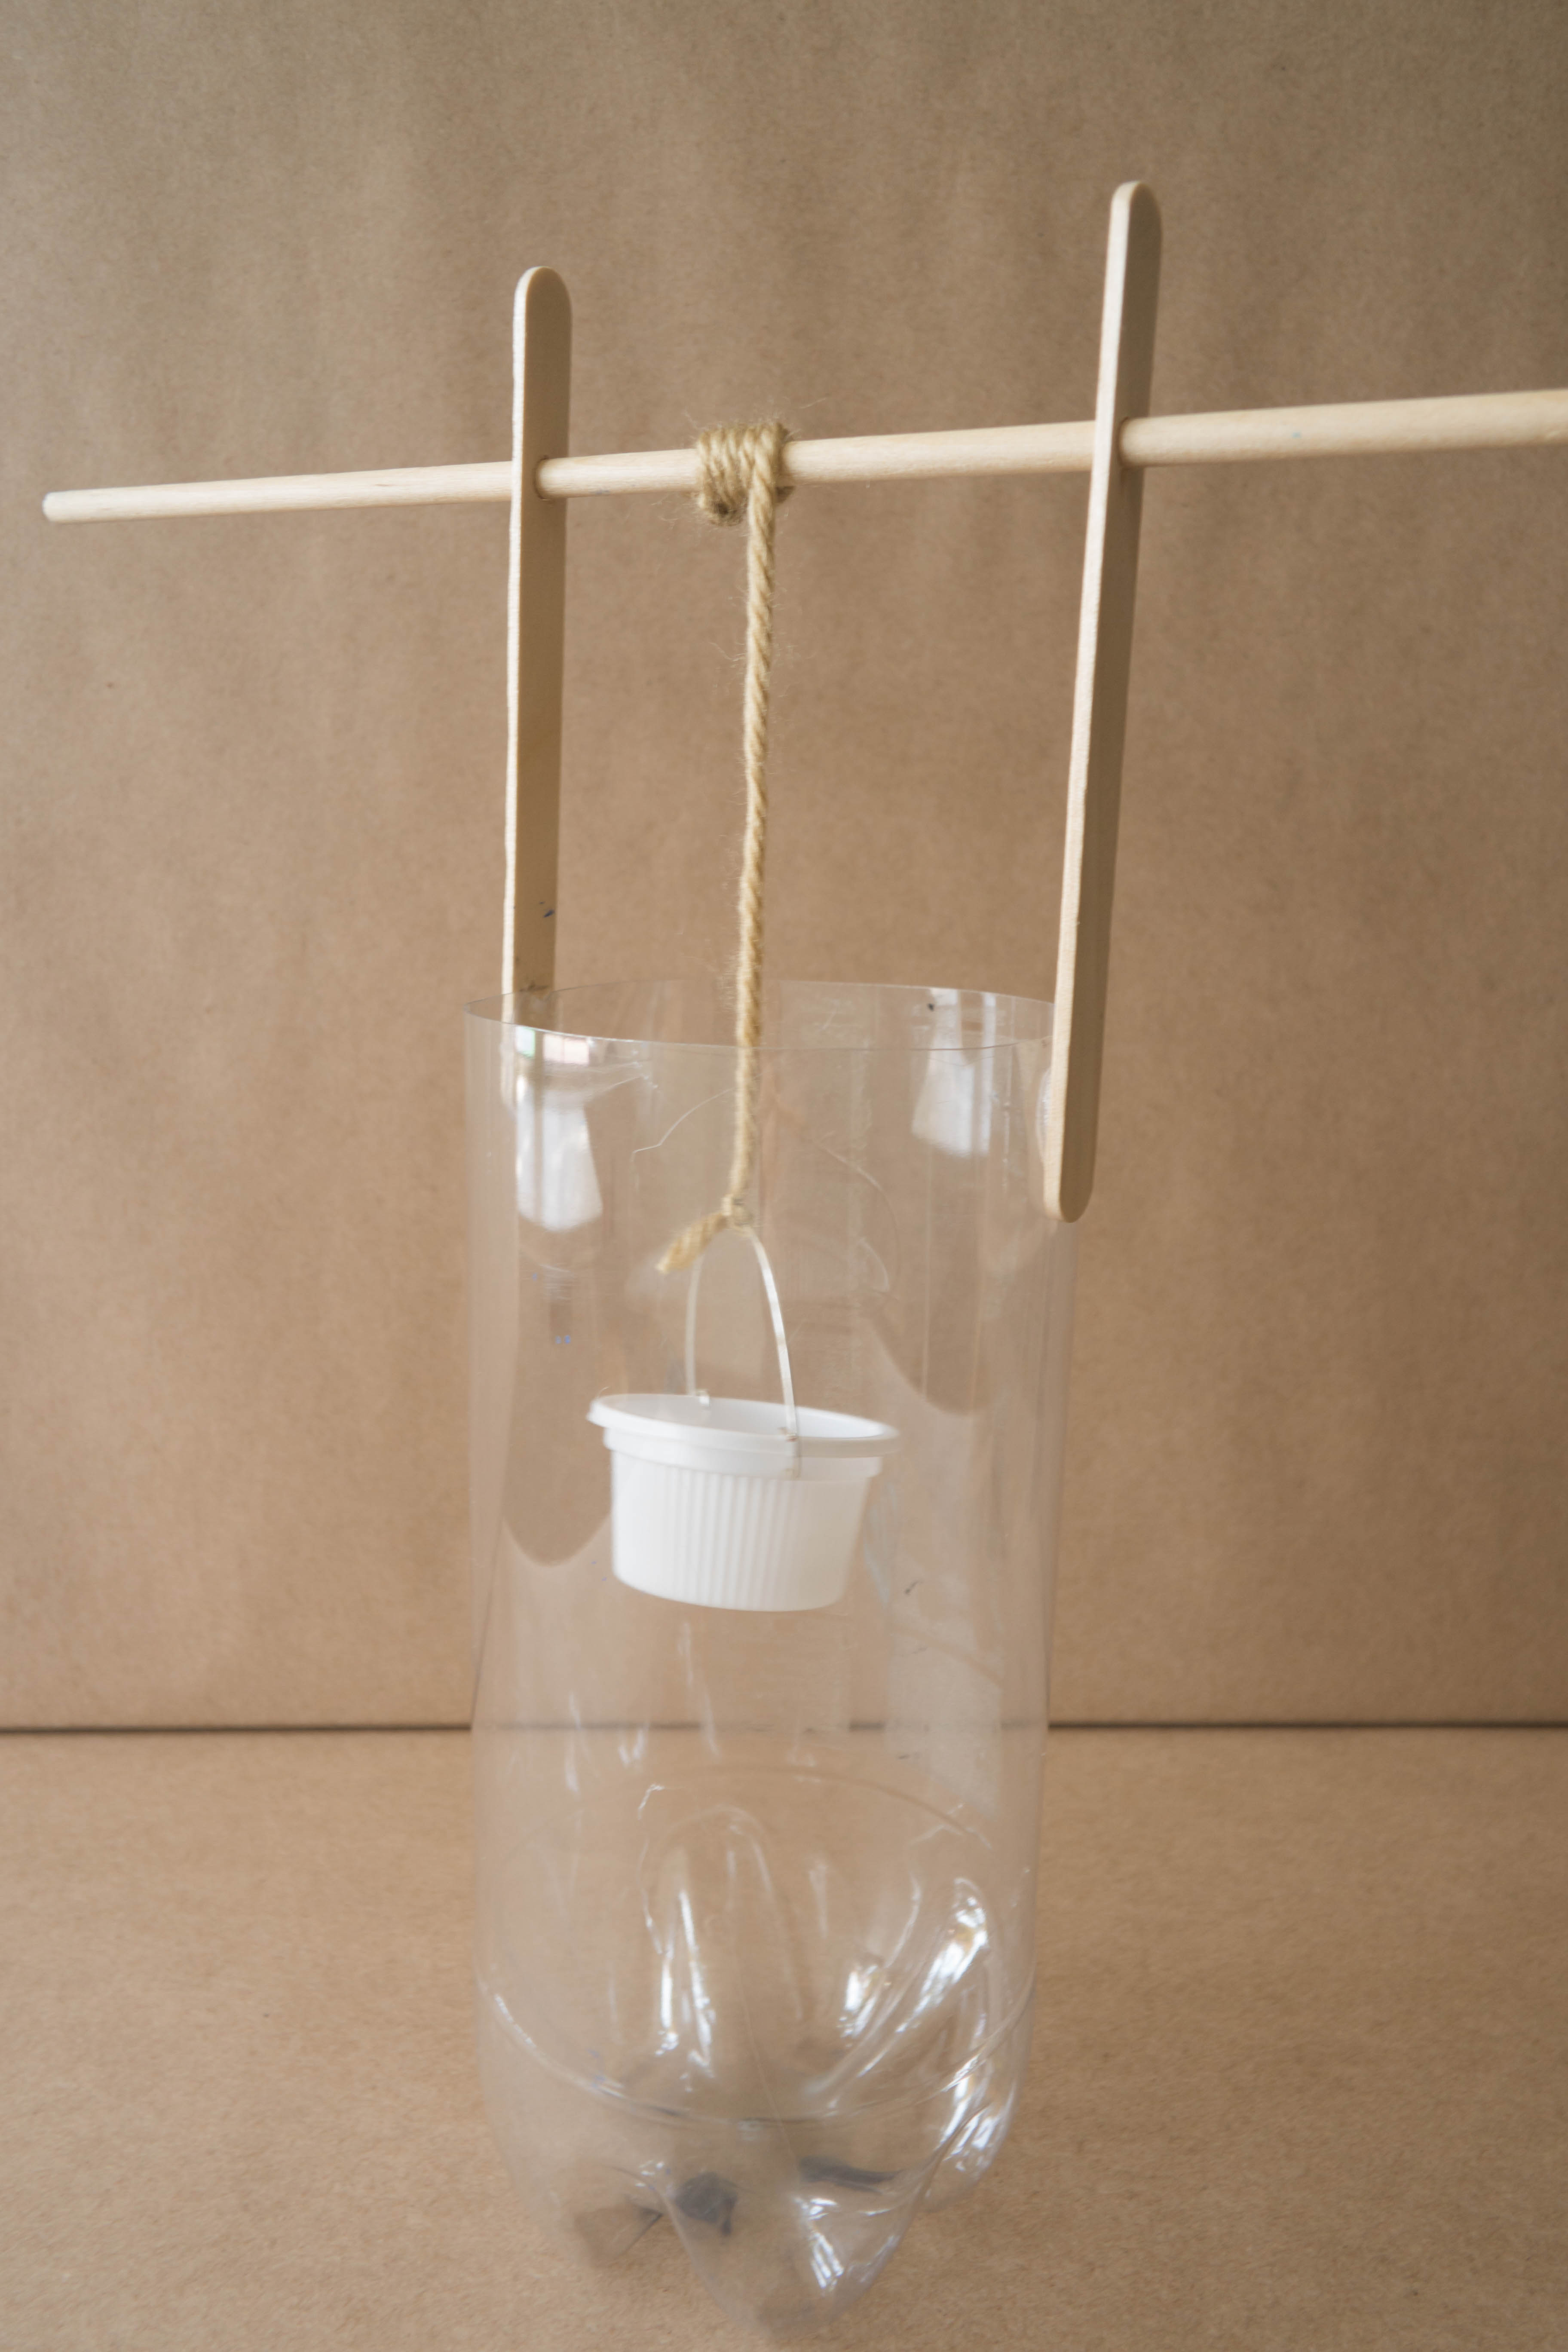
Step 3
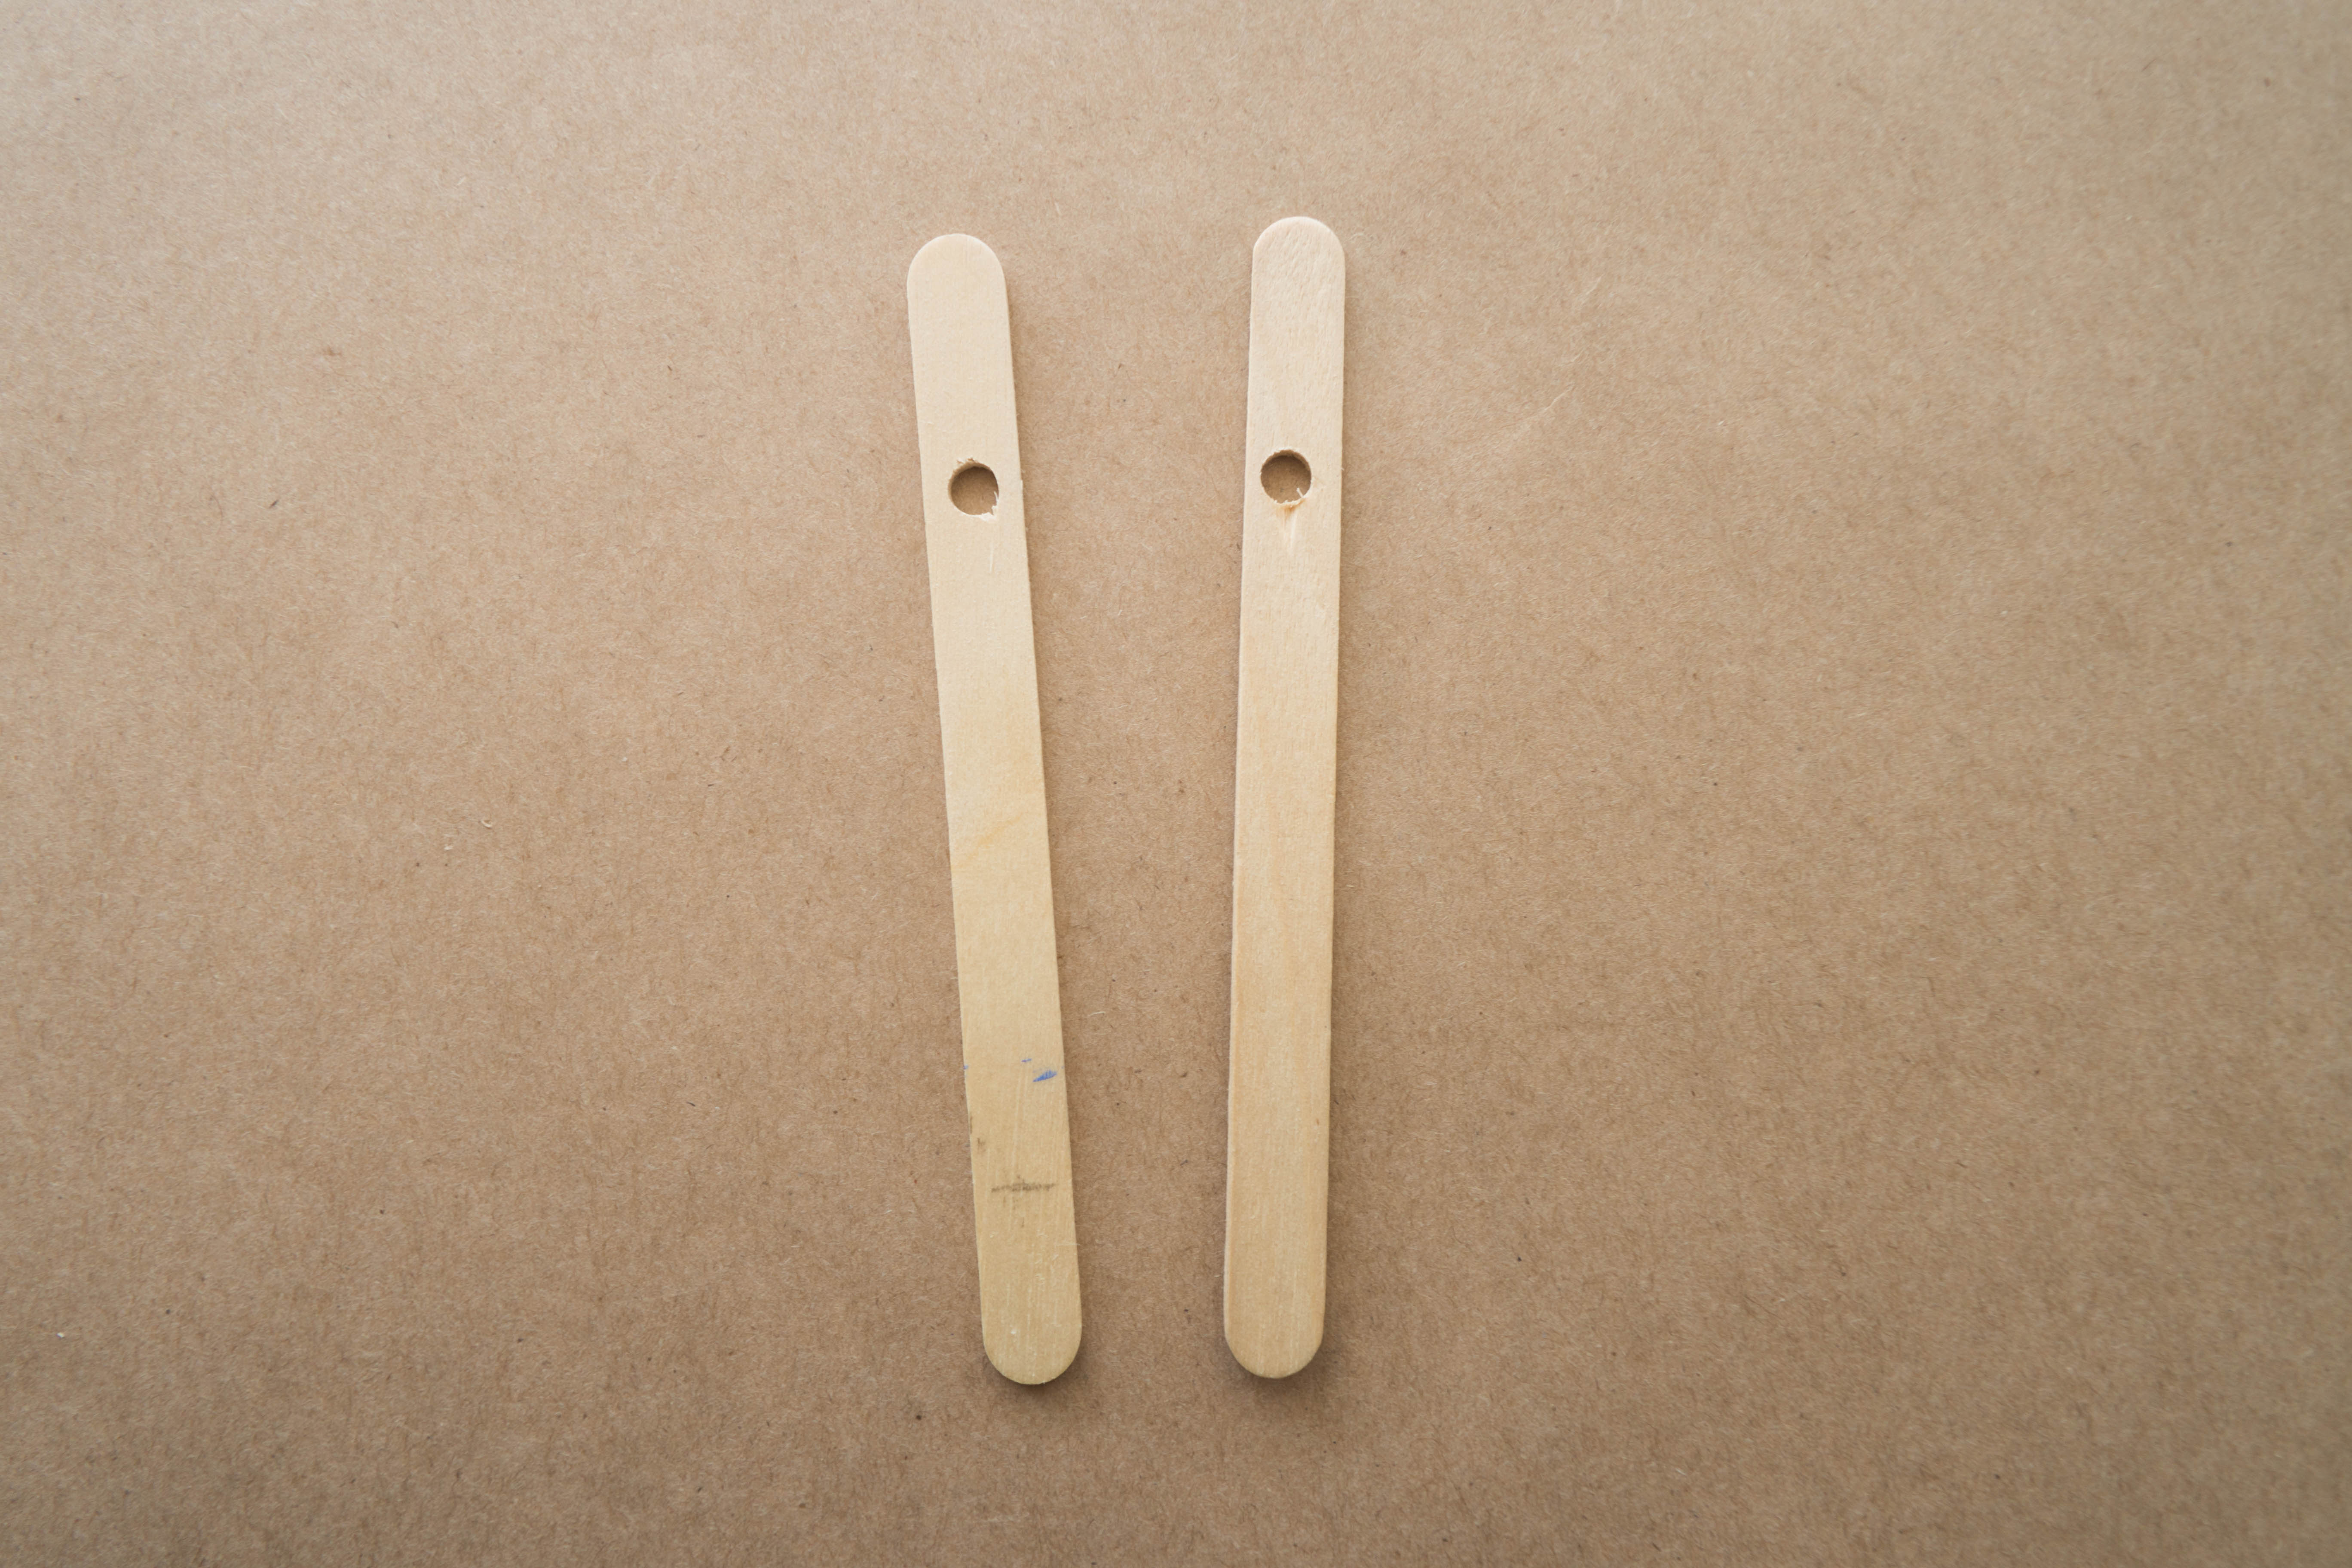
Drill a hole the size of your dowel into each of the popsicle sticks about 1” from one end. You may need an adult to assist you.
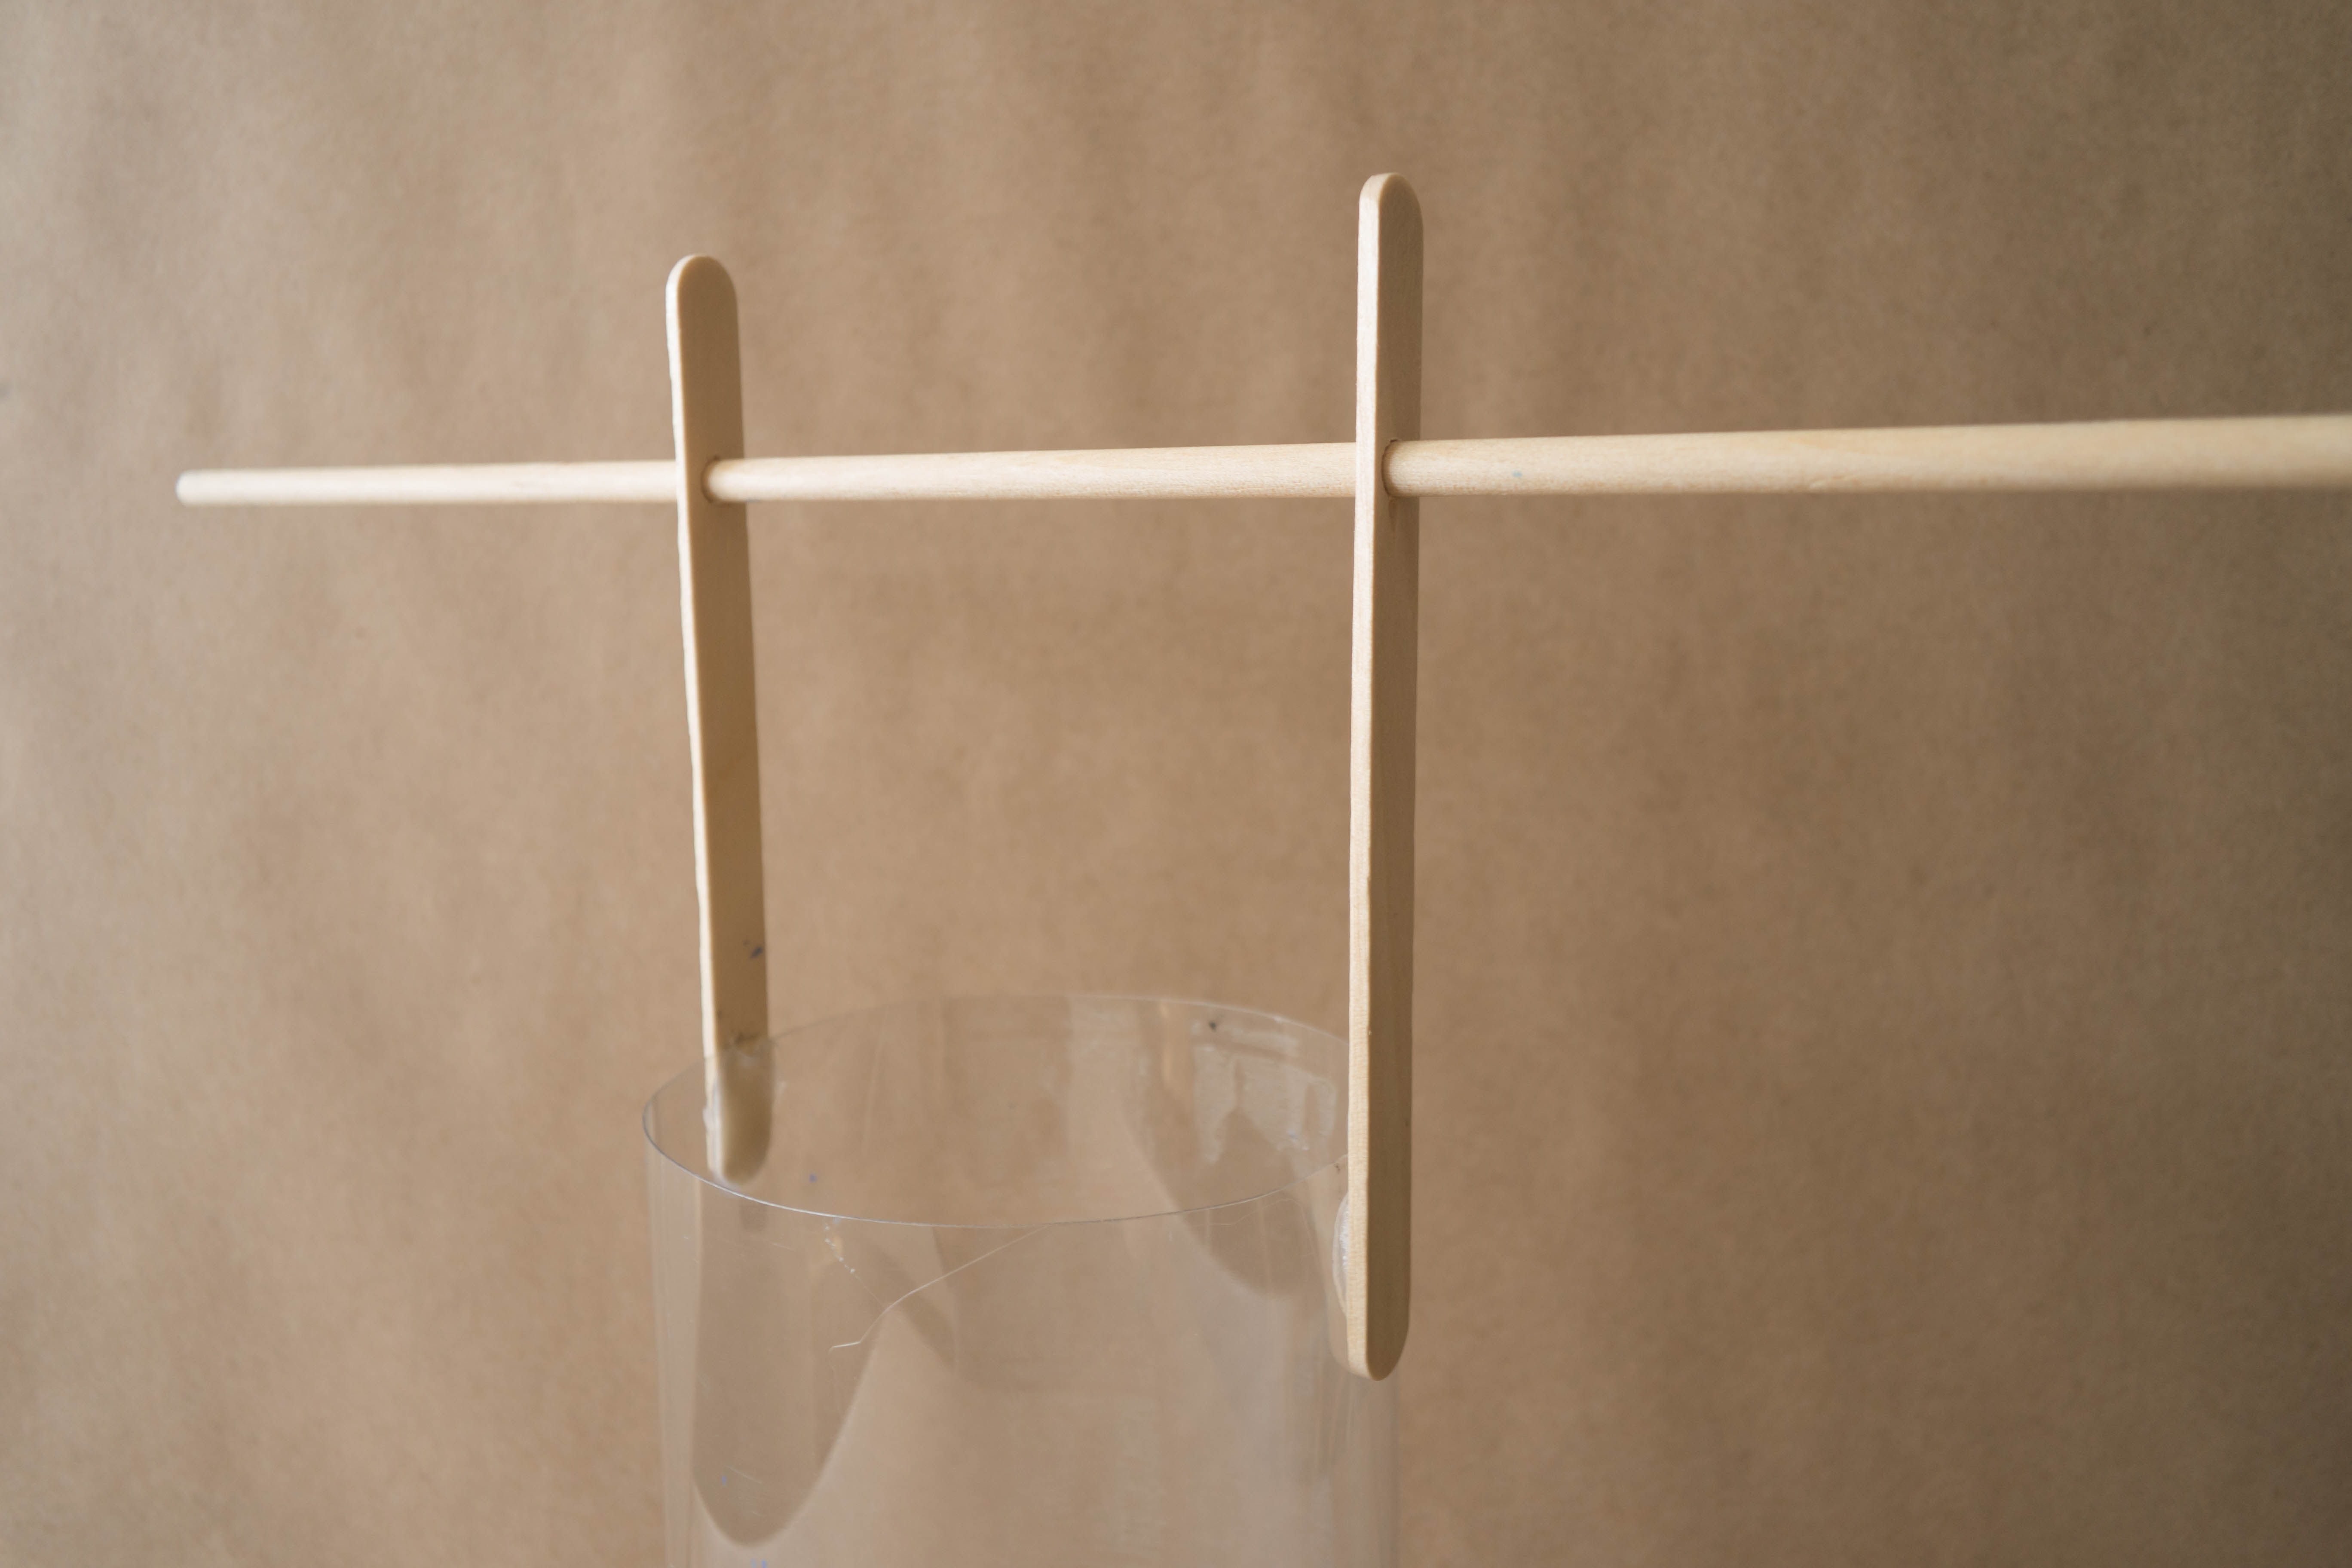
Step 4
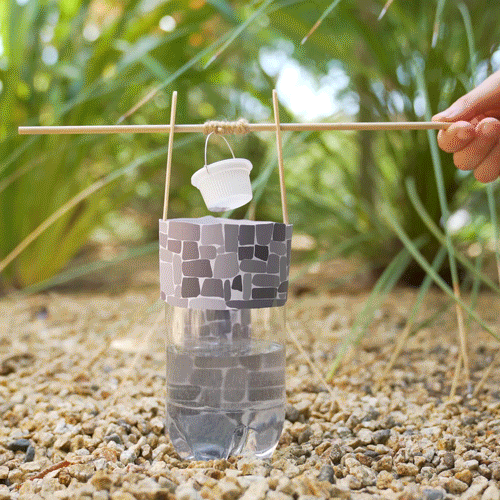
Hot glue the popsicle sticks on the outside of the plastic bottle, near the top and on opposite side. Then, stick the dowel through them.
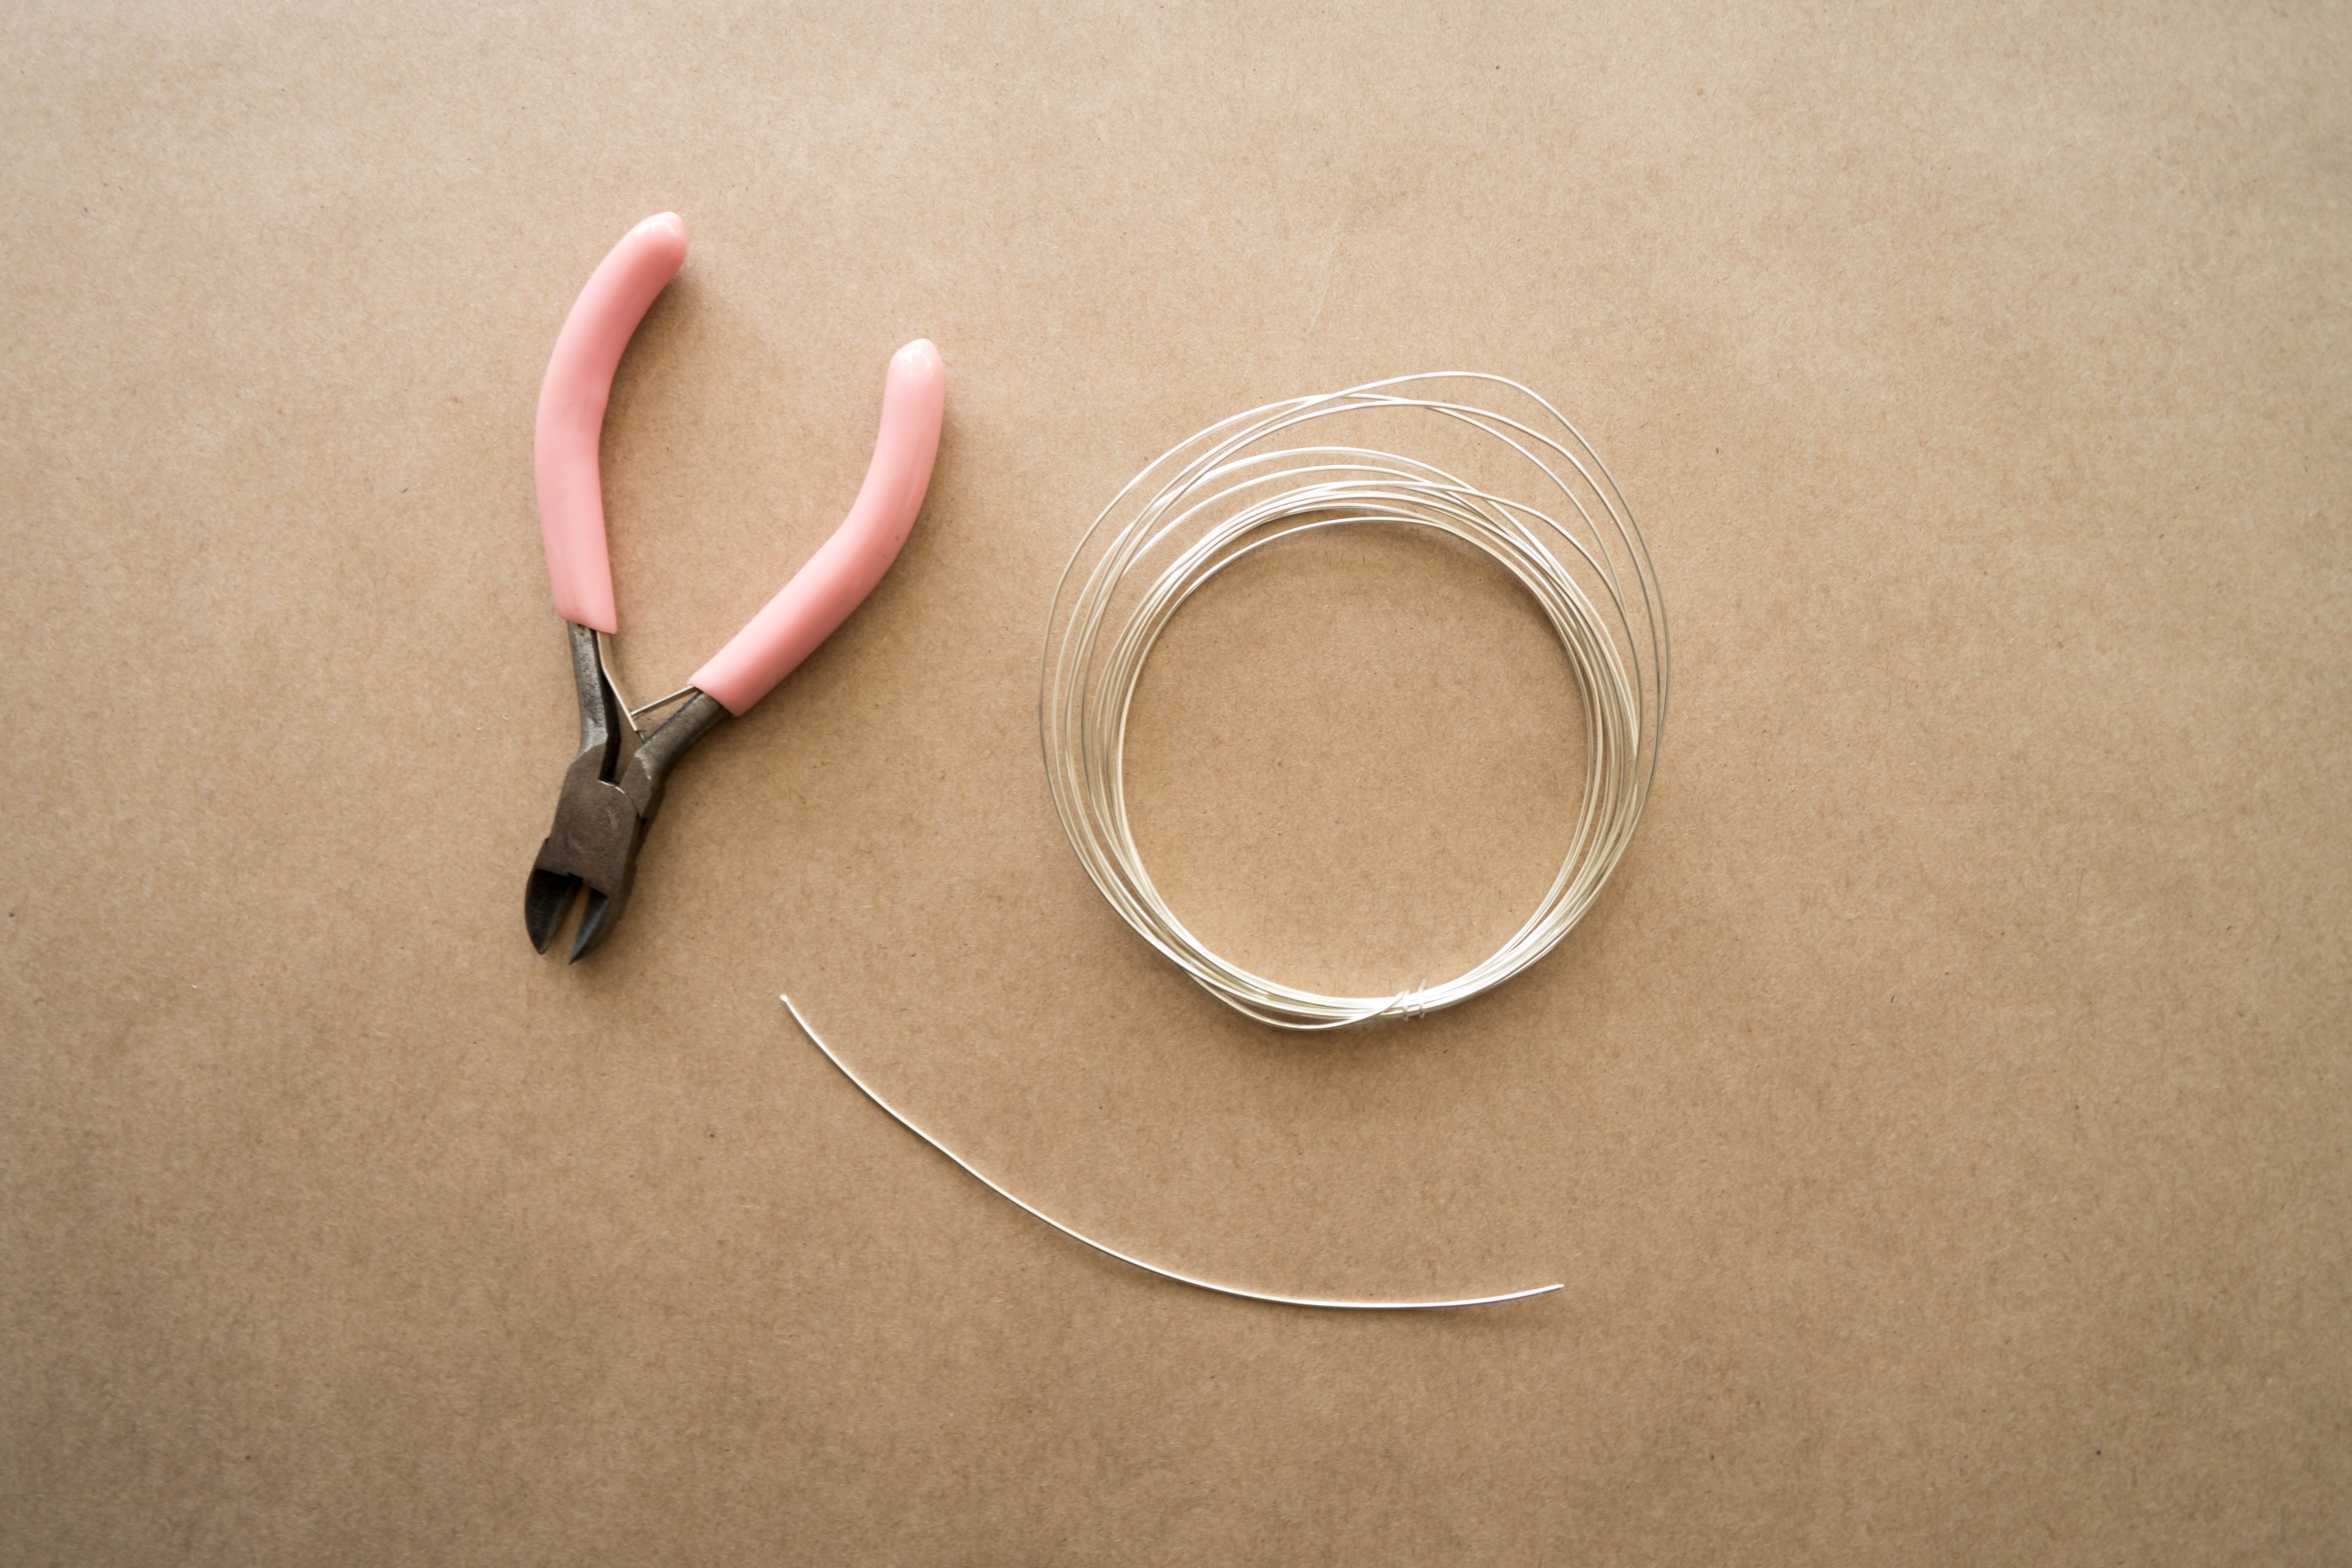
Step 5
Cut a short length of wire about 3 inches (7.6 cm) long.
Step 6
Make a small hole on opposite sides of the small plastic container. Then, make a handle using the wire. This will be your bucket.
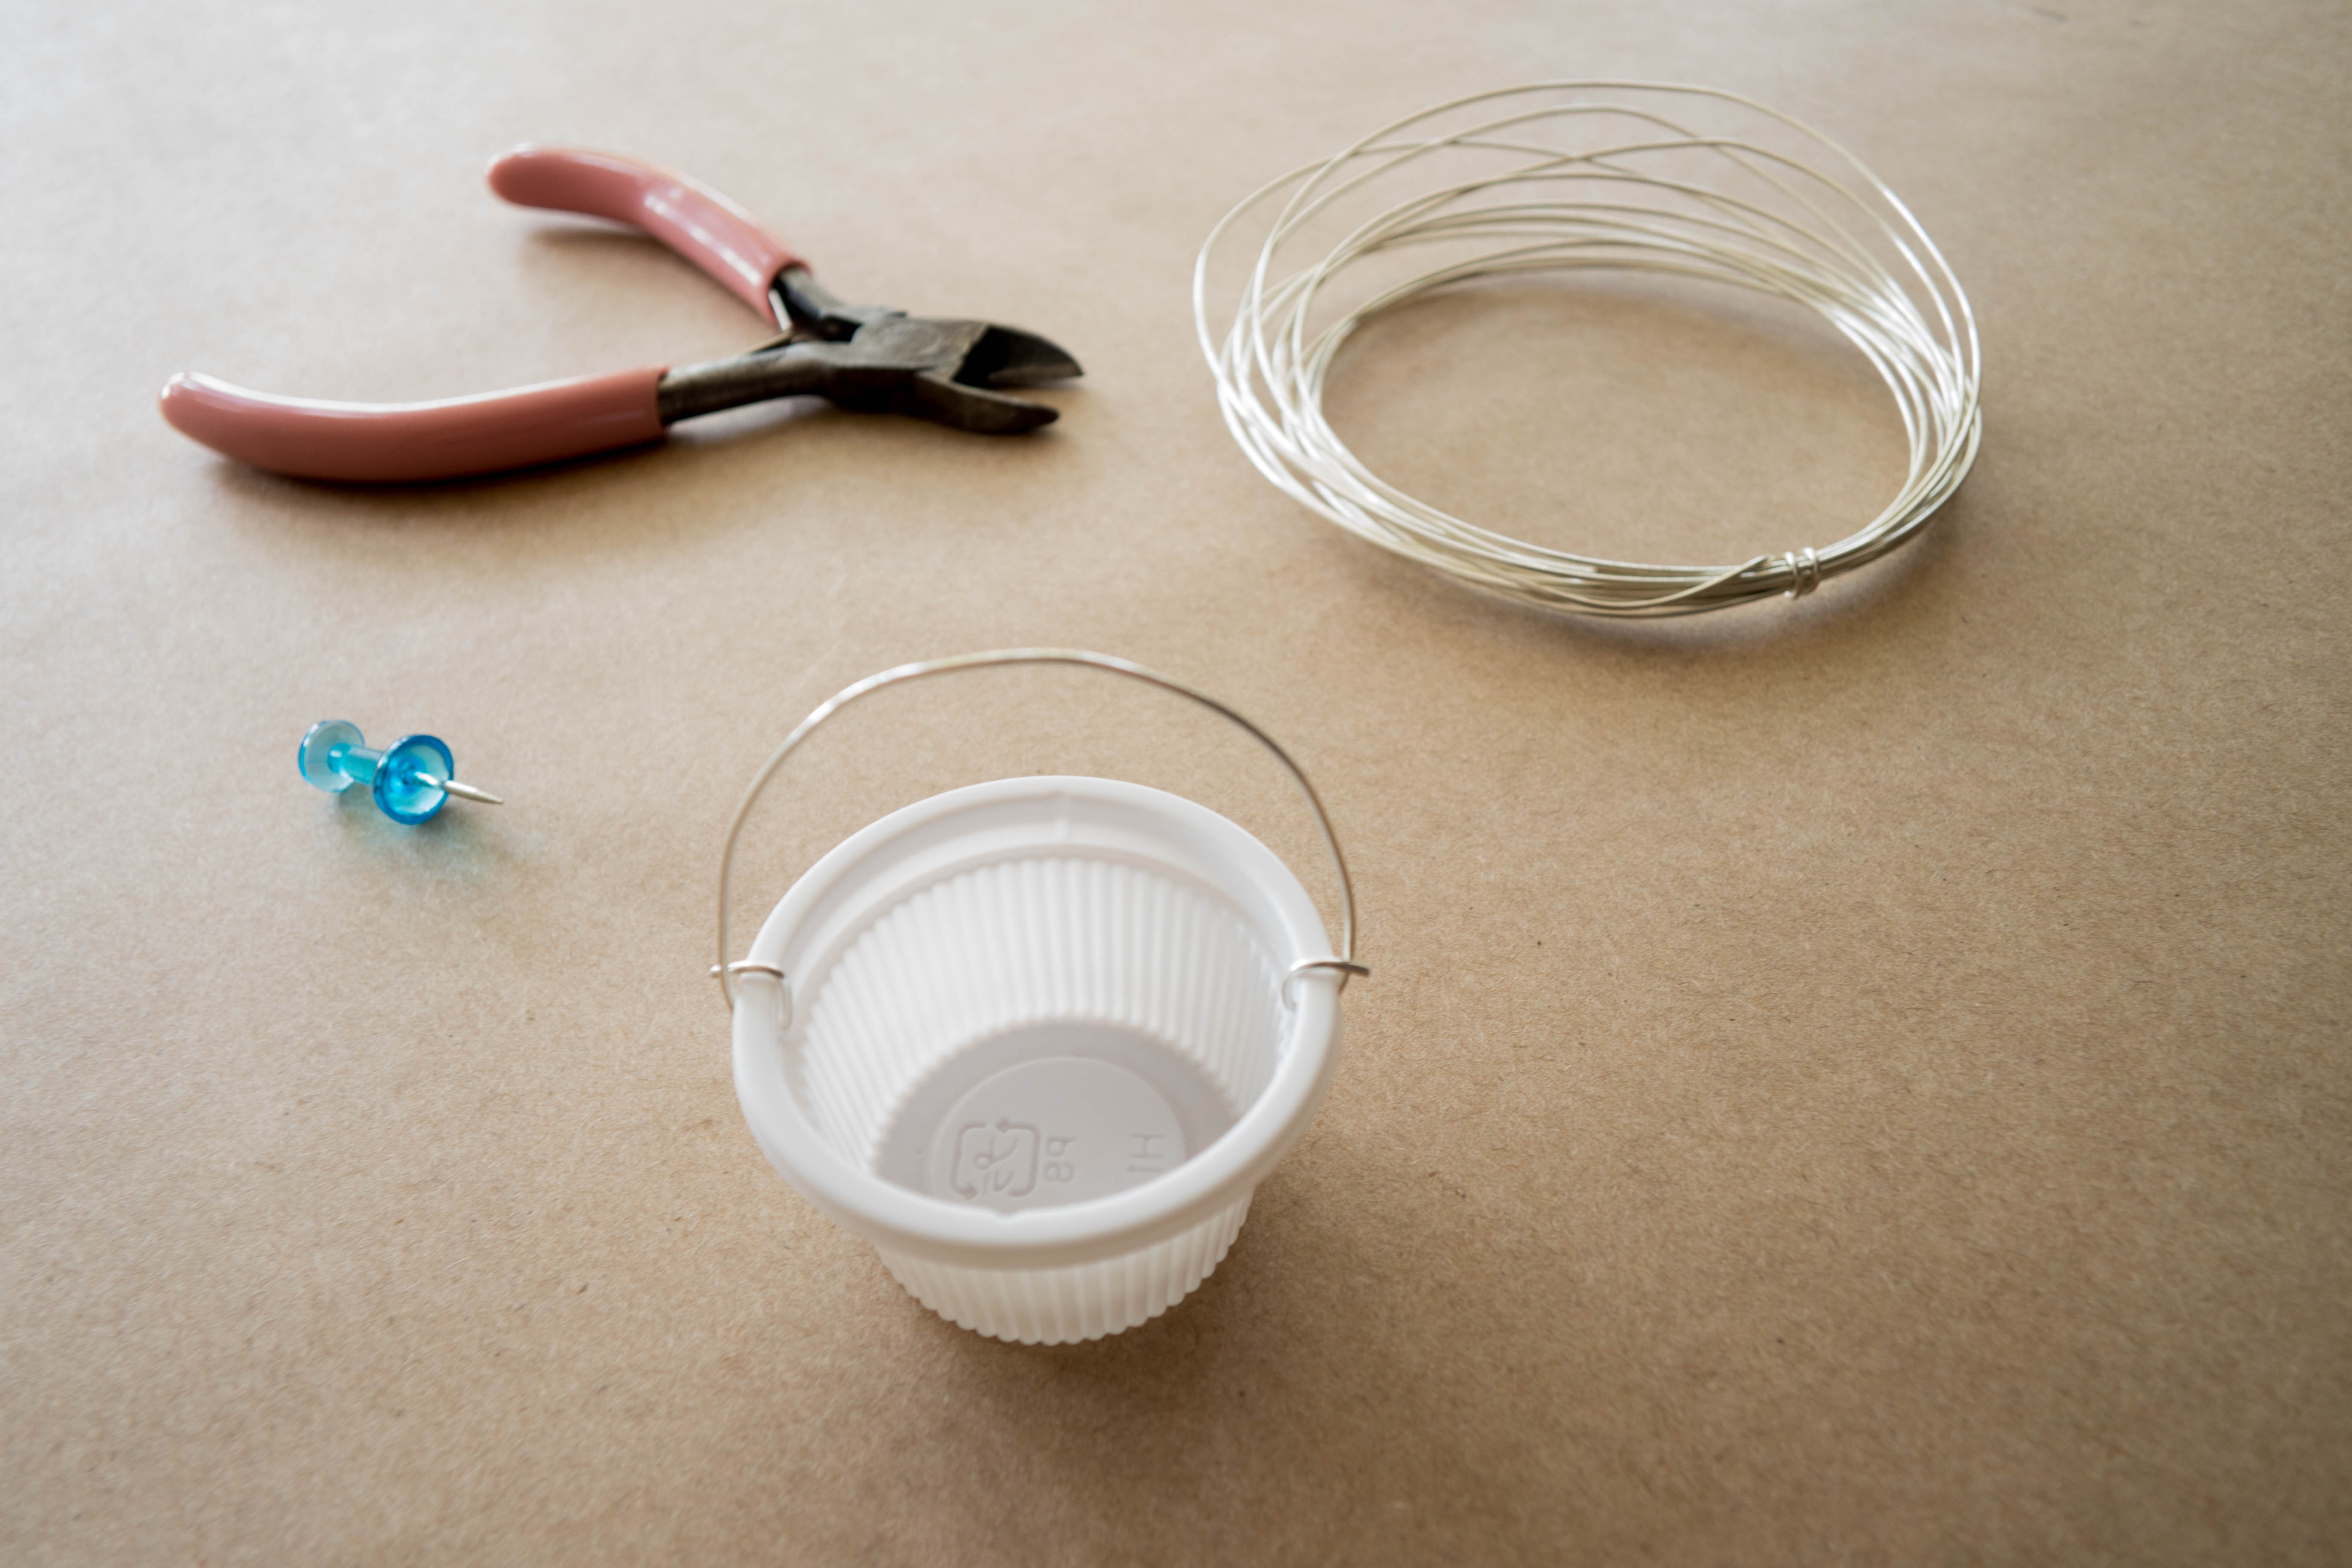
Tip
It may help to use pliers to make the handle of the bucket.
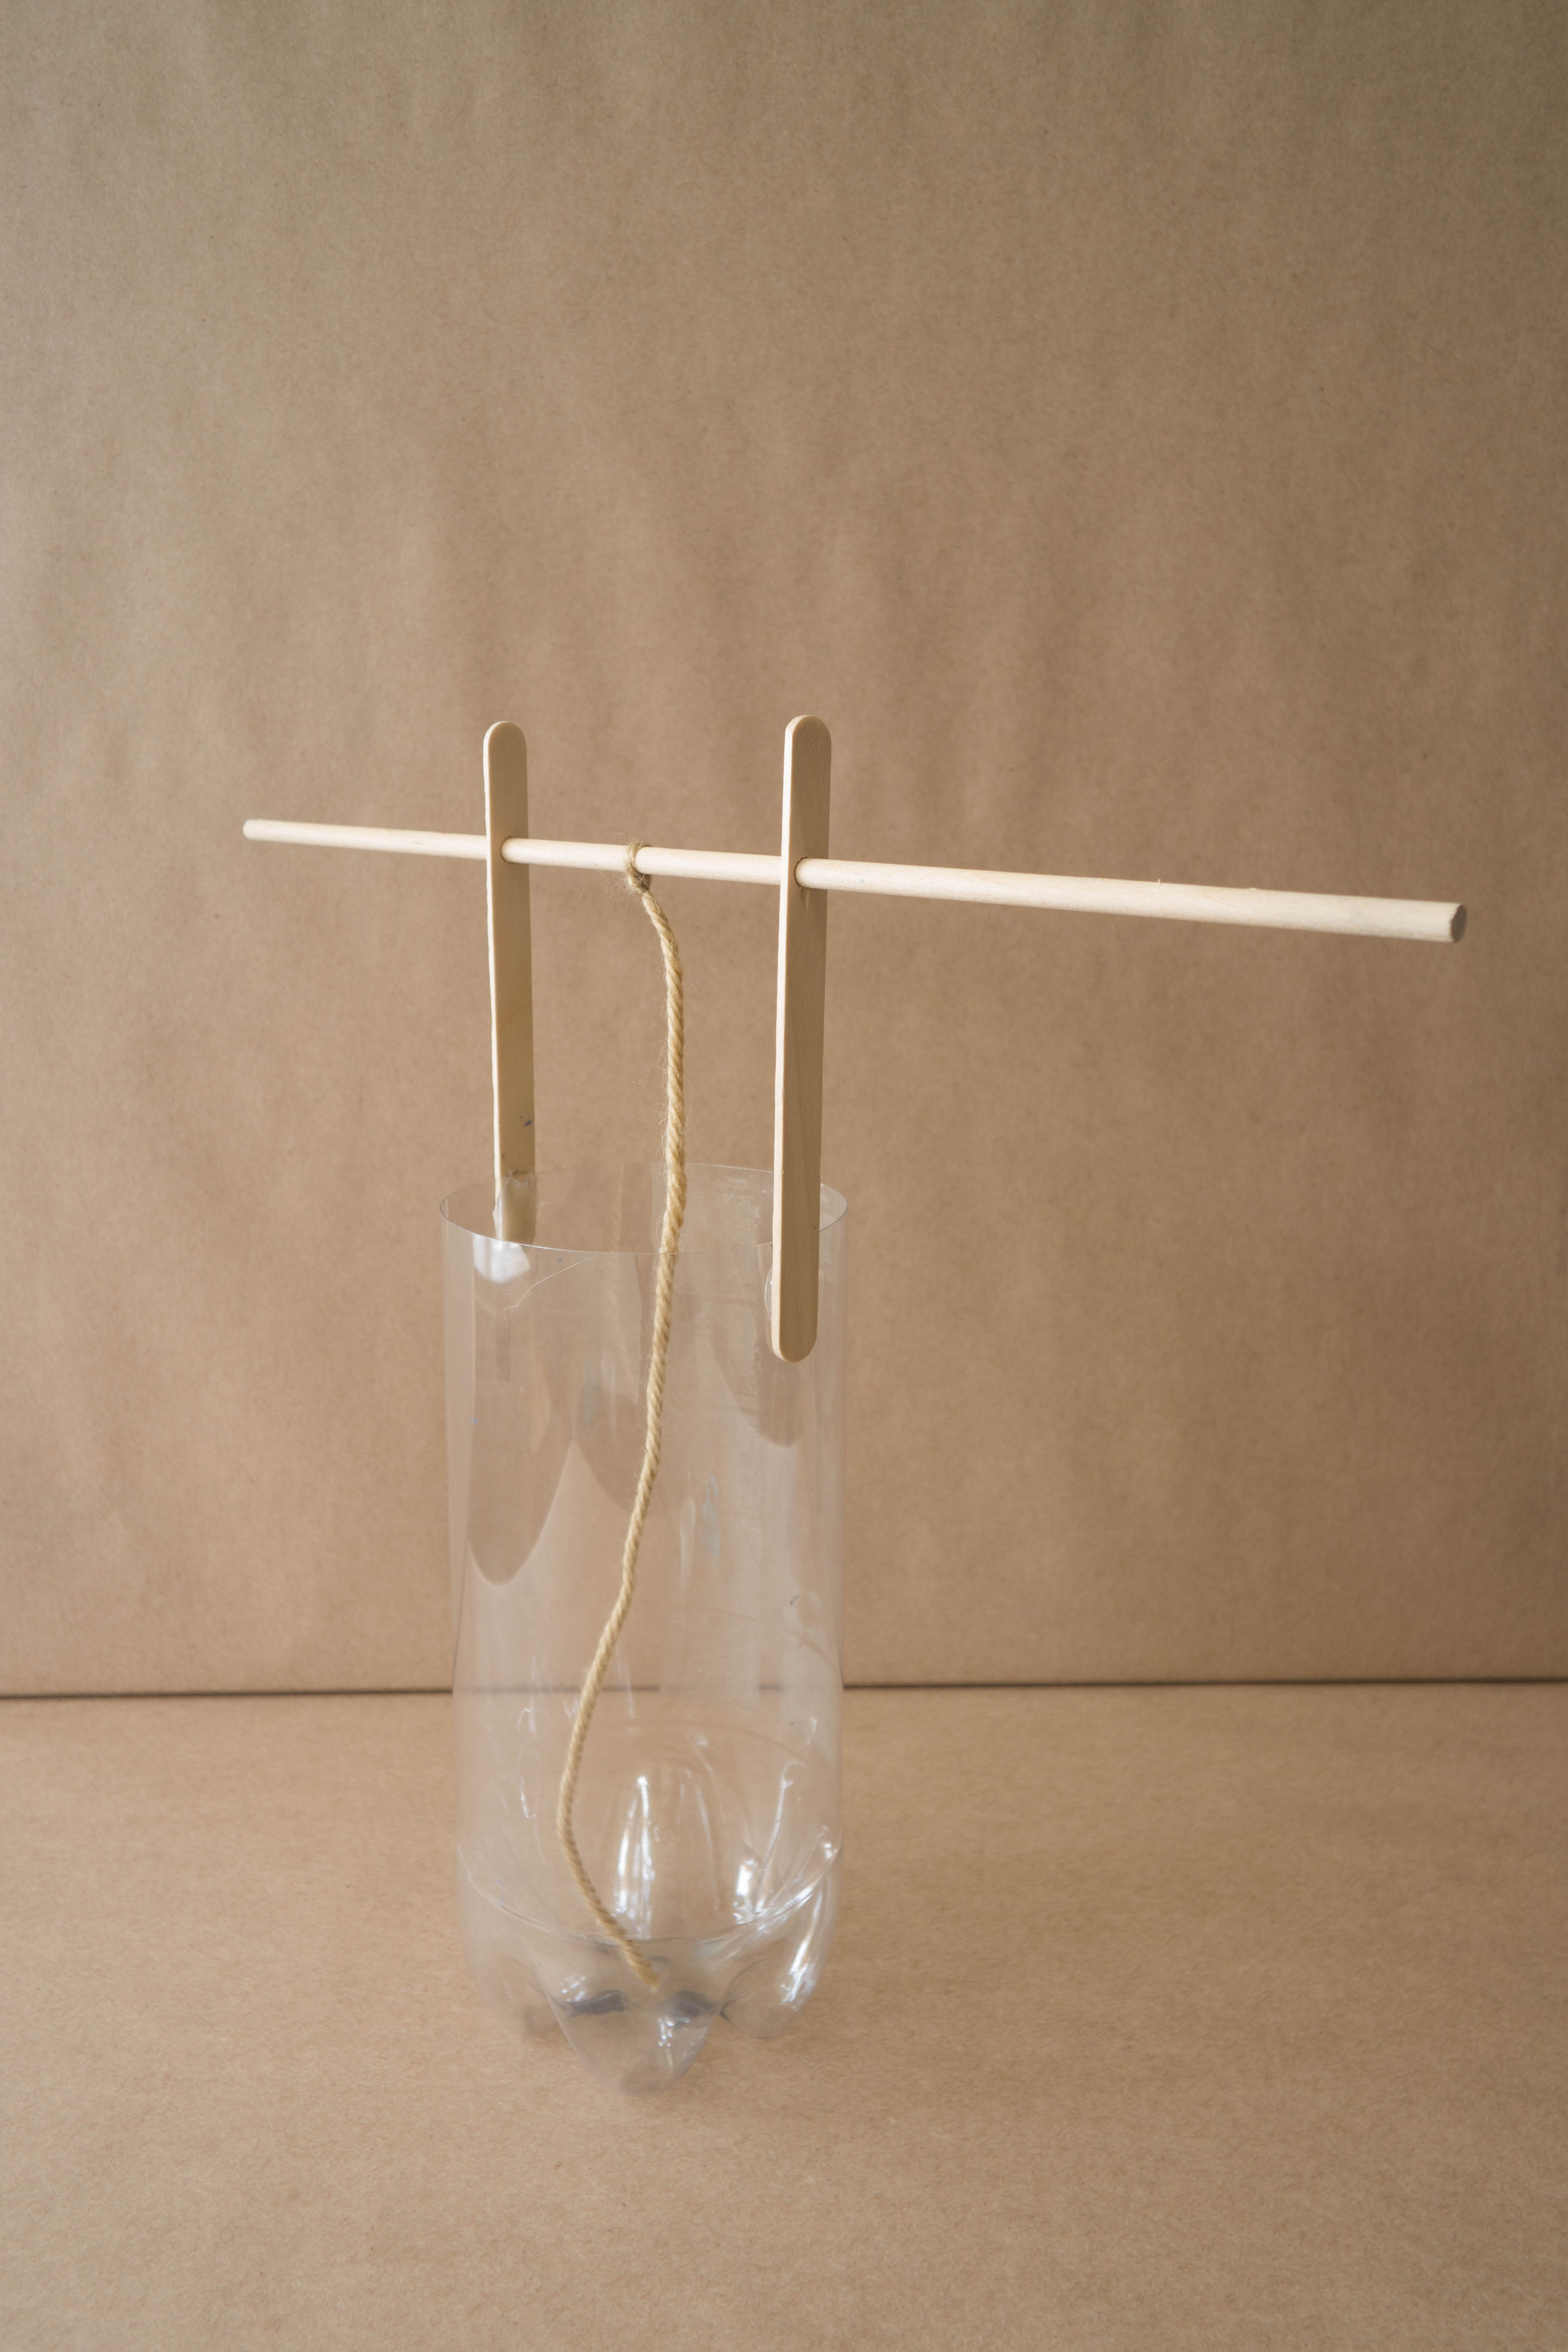
Step 7
Tie the end of the yarn to the center of the dowel. Then, cut the yarn so that the end of it just touches the bottom of the bottle.
Step 8
Tie the loose end of the yarn to the handle of the bucket.
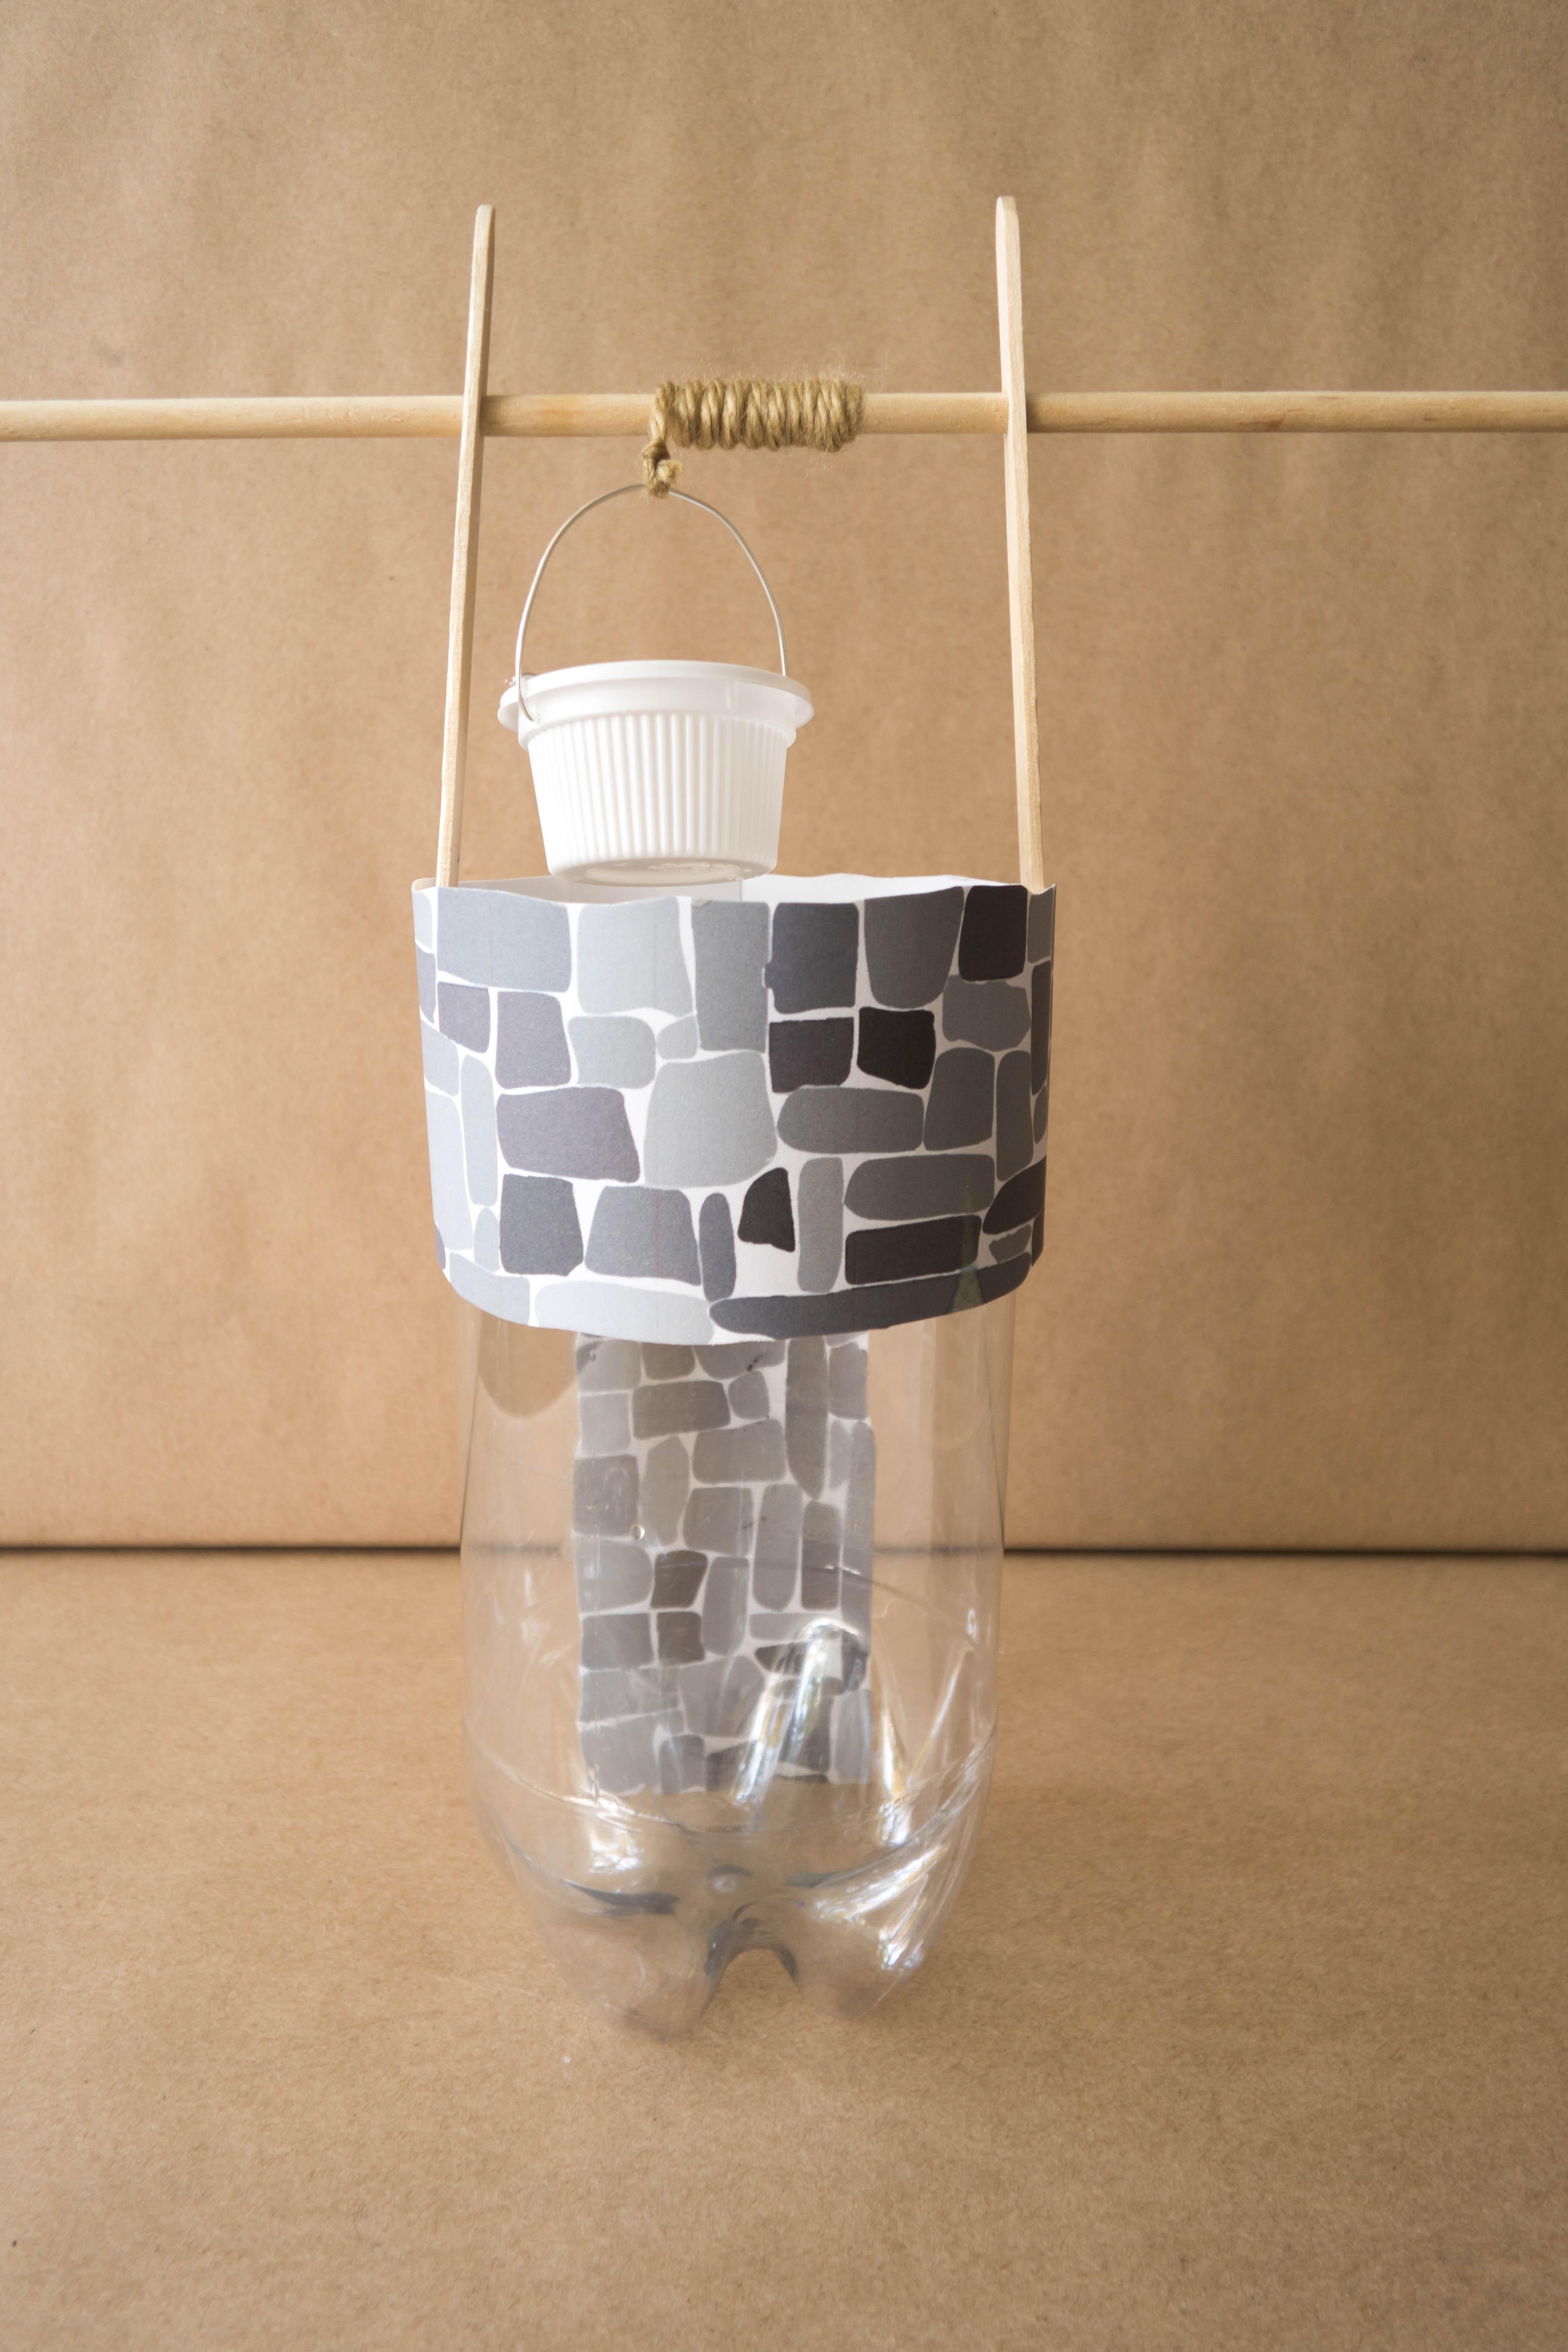
Step 9
Decorate your well!
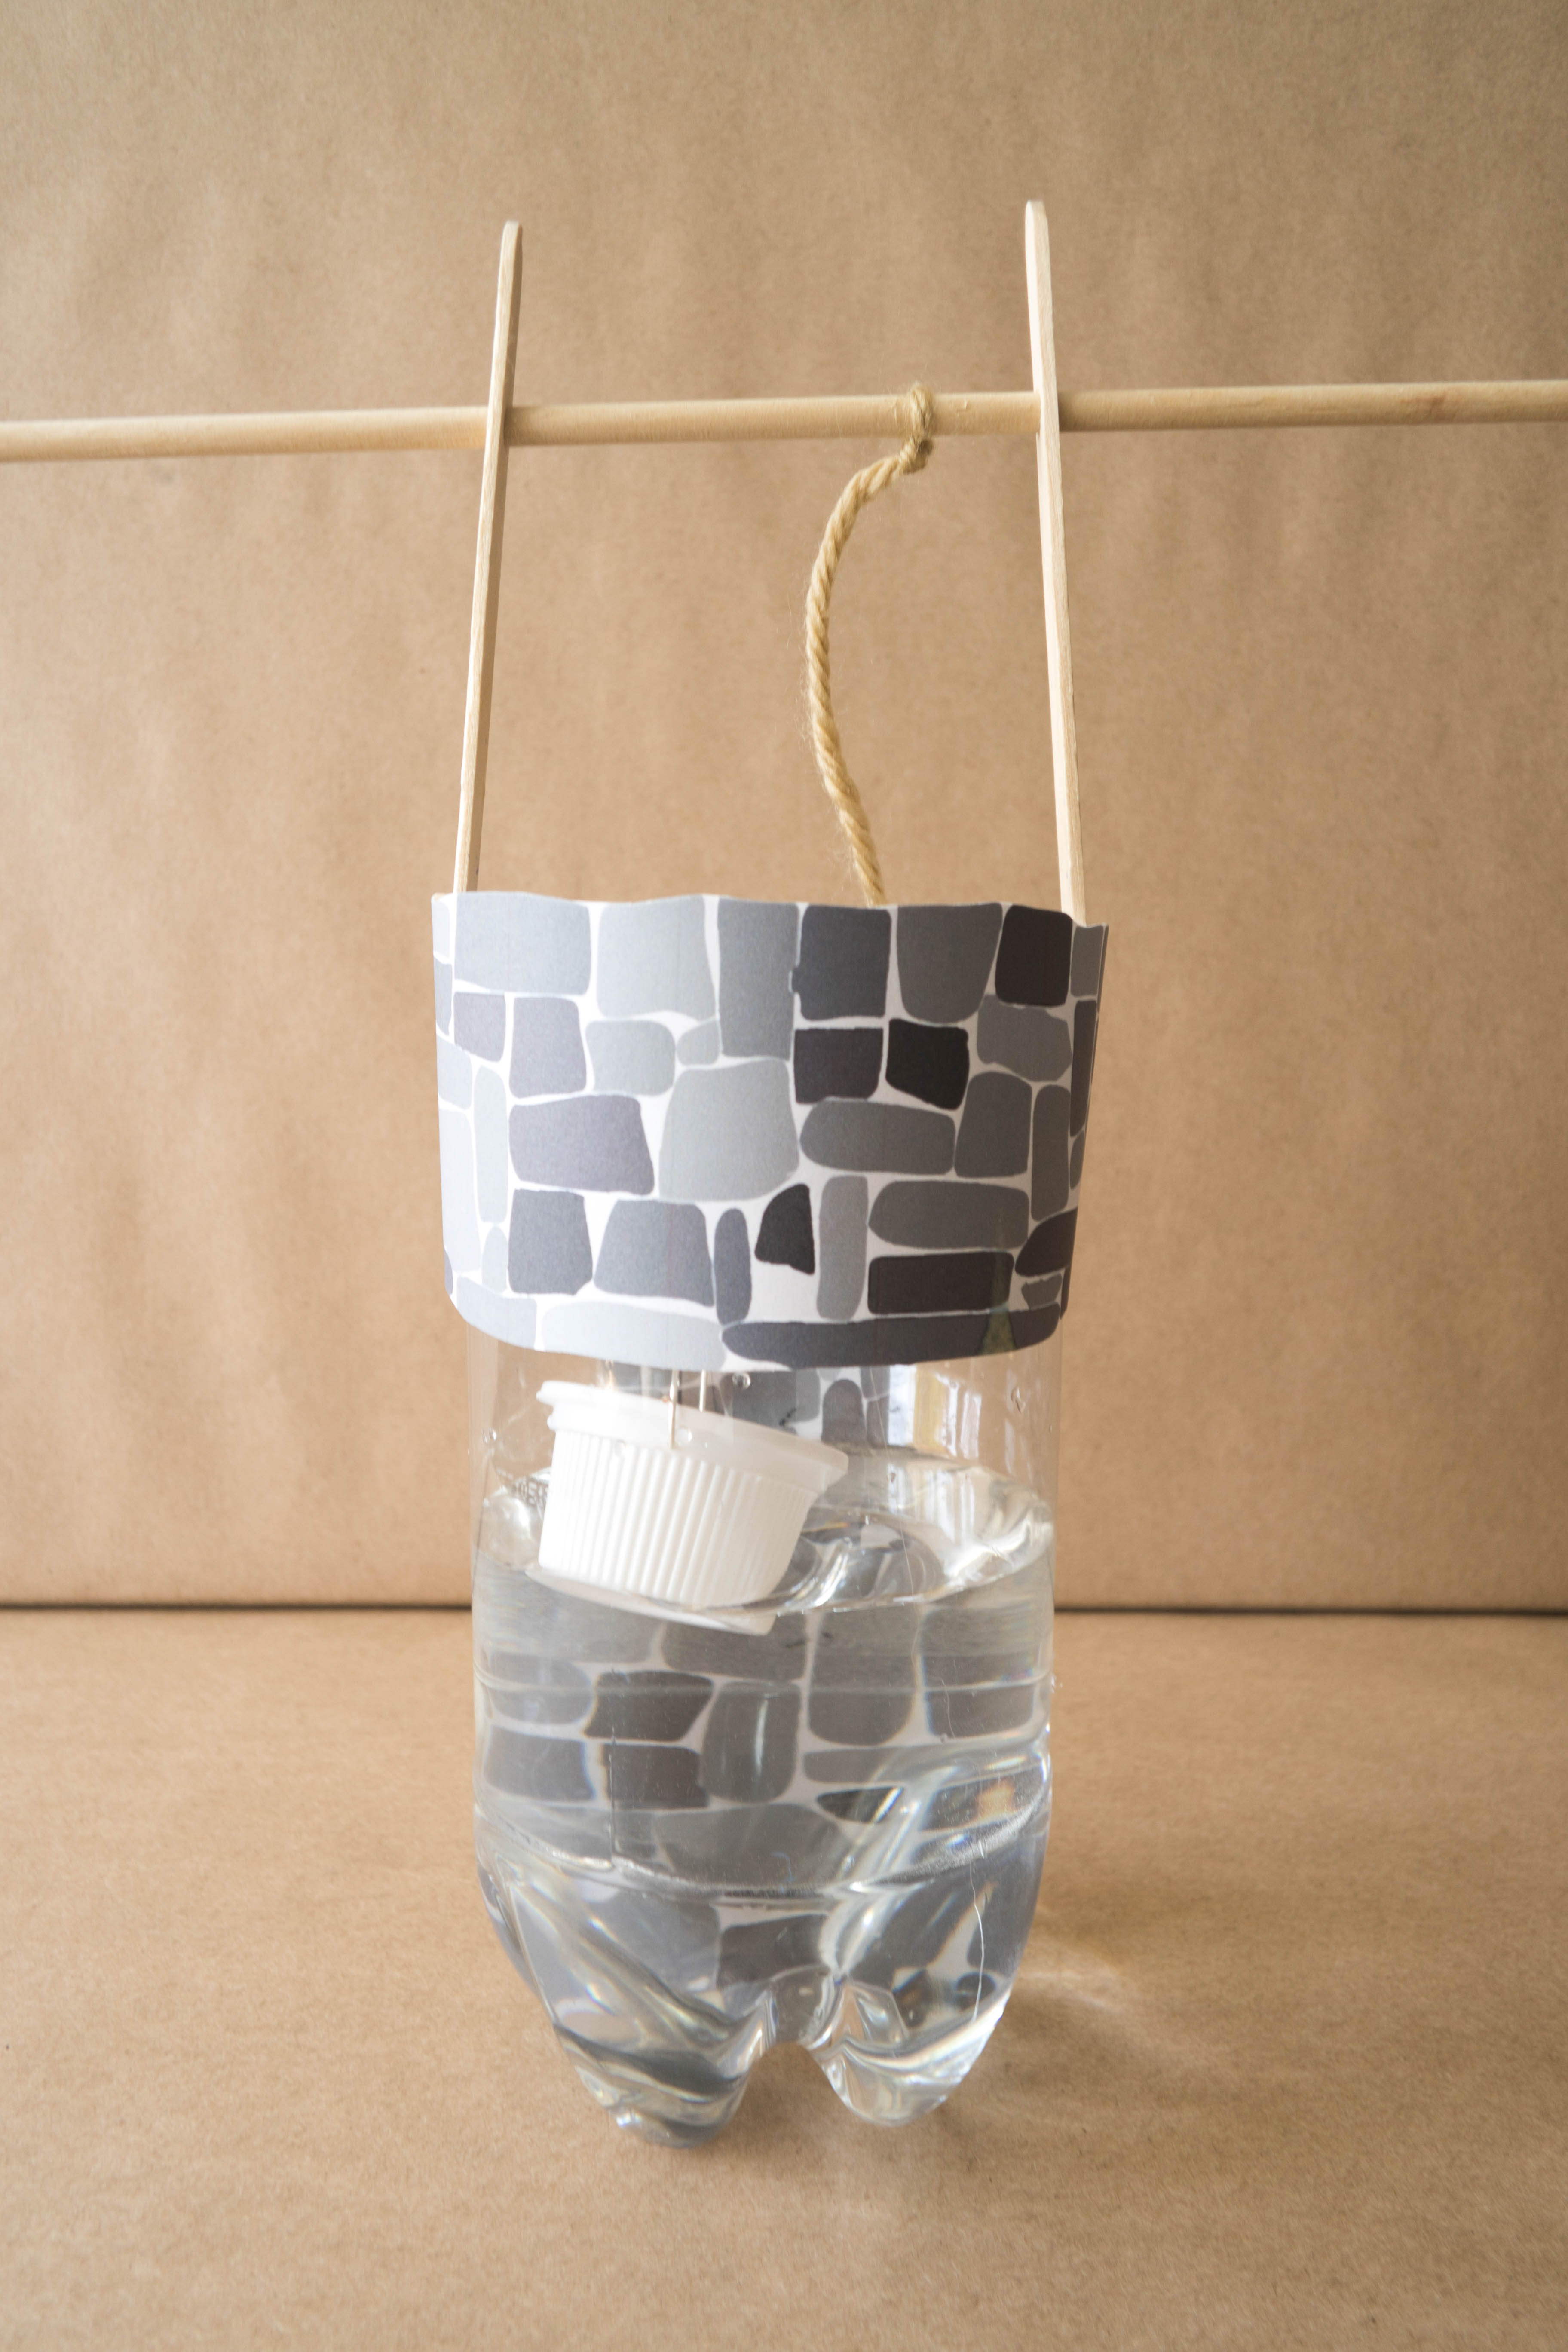
Step 10
Now, you’re ready to test your well! Fill the bottle up about a ⅓ full with water. Then try to lower your bucket into the well. What happens? Does it fill with water?
Step 11
Try putting two pebbles towards one side of the bucket. Does it fill up now?
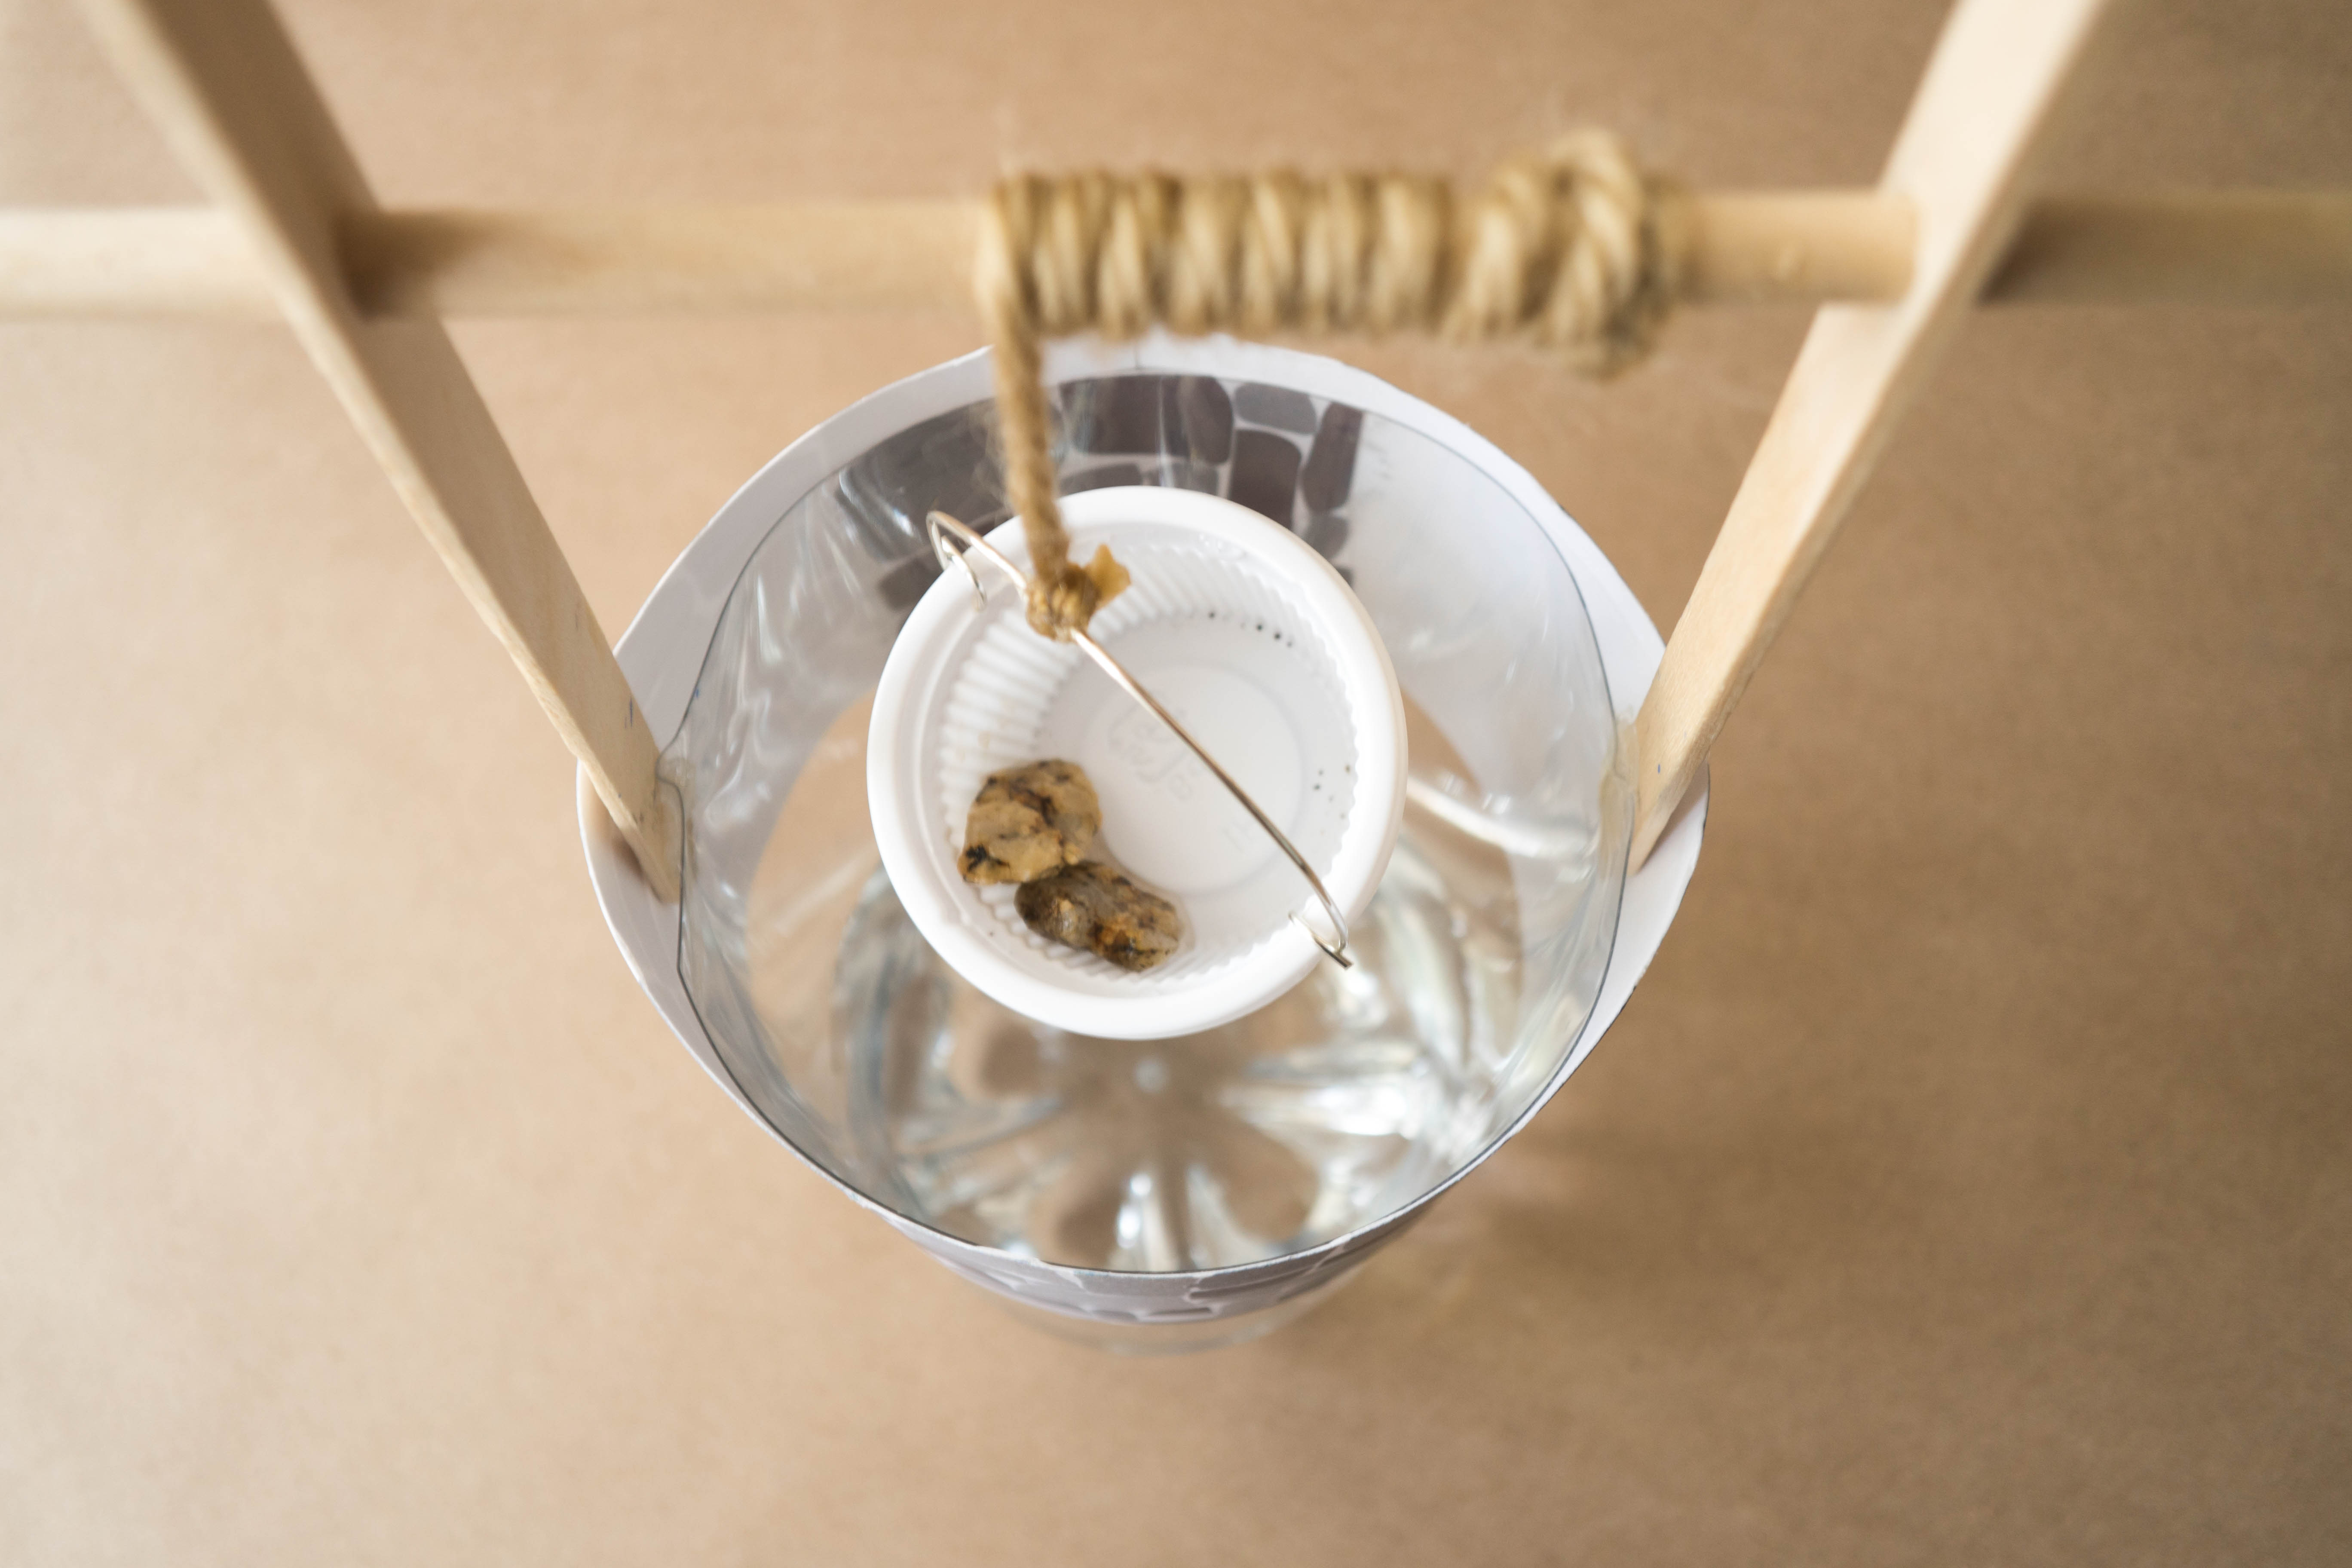
Tip
Try putting other objects into your bucket to see what helps it sink and what lets it float. How many buttons do you need for your bucket to sink? How many paper clips? How many other objects? You can use this to figure out the strength of the buoyant force on the bucket.


