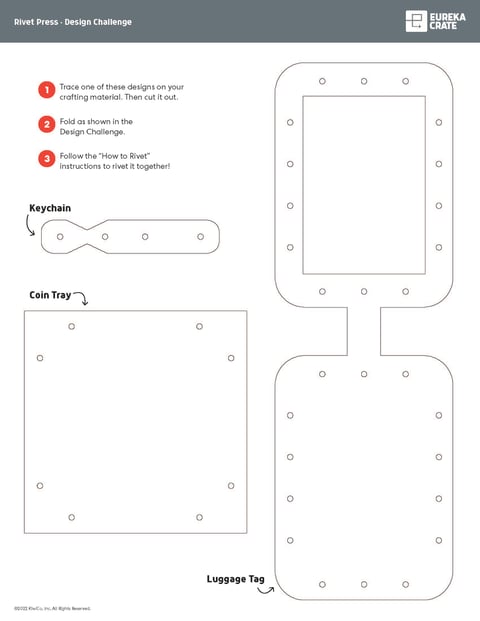
Rivet Press
In this crate, you'll explore the science, engineering, and history behind rivet presses while building one of your own!
Explore:
- Linkages & Levers
- Manipulating Metal
- Rosie the Riveter
Behind the design
Peek into the KiwiCo product design studio and the design process behind the Eureka Crate Rivet Press.
- This smaller prototype was our first press that could move the ram (the part that moves the die) up and down. It turned out that was about all it could do, though. The lever arms weren’t long enough to press very hard, and if a rivet was hard to press, the parts would bend and flex instead of staying rigid and stable. It needed more leverage and more stability — but it was a good proof of concept!
Starting Small
- As we continued to prototype, our designs still had the lever pushing on the ram directly. Check out the rolling-wheel-on-a-bump connection: it’s how most heavy-duty rivet presses work, so we thought it’d work for our prototype too! But unfortunately, the wheel skipped off the lever if we pushed too hard. This prototype had good leverage, but it needed even more stability.
Pushing Our Luck
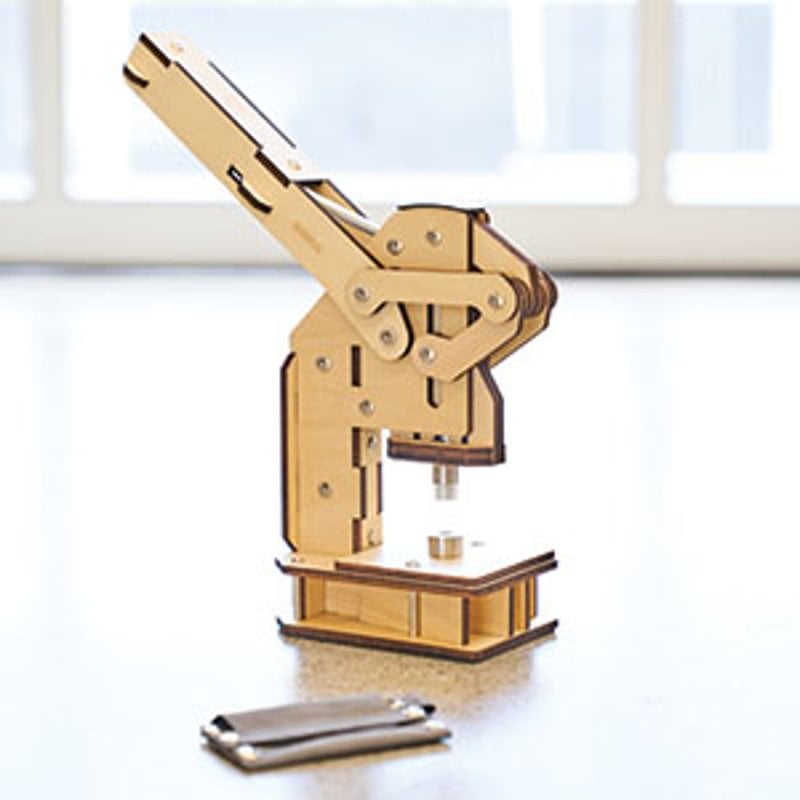
- This photo looks pretty similar to the press you built, but if you look closely, you’ll see the wood pieces are a lot bigger and there are even more bolts. At this point in the design, we just wanted to make a working press, so we went a little overboard on the stability. And thankfully, this press worked great! From here, we were able to scale back some of our additions so the press still had solid leverage but was easier to put together.
All the Stability