Step-by-step tutorial
Step 1
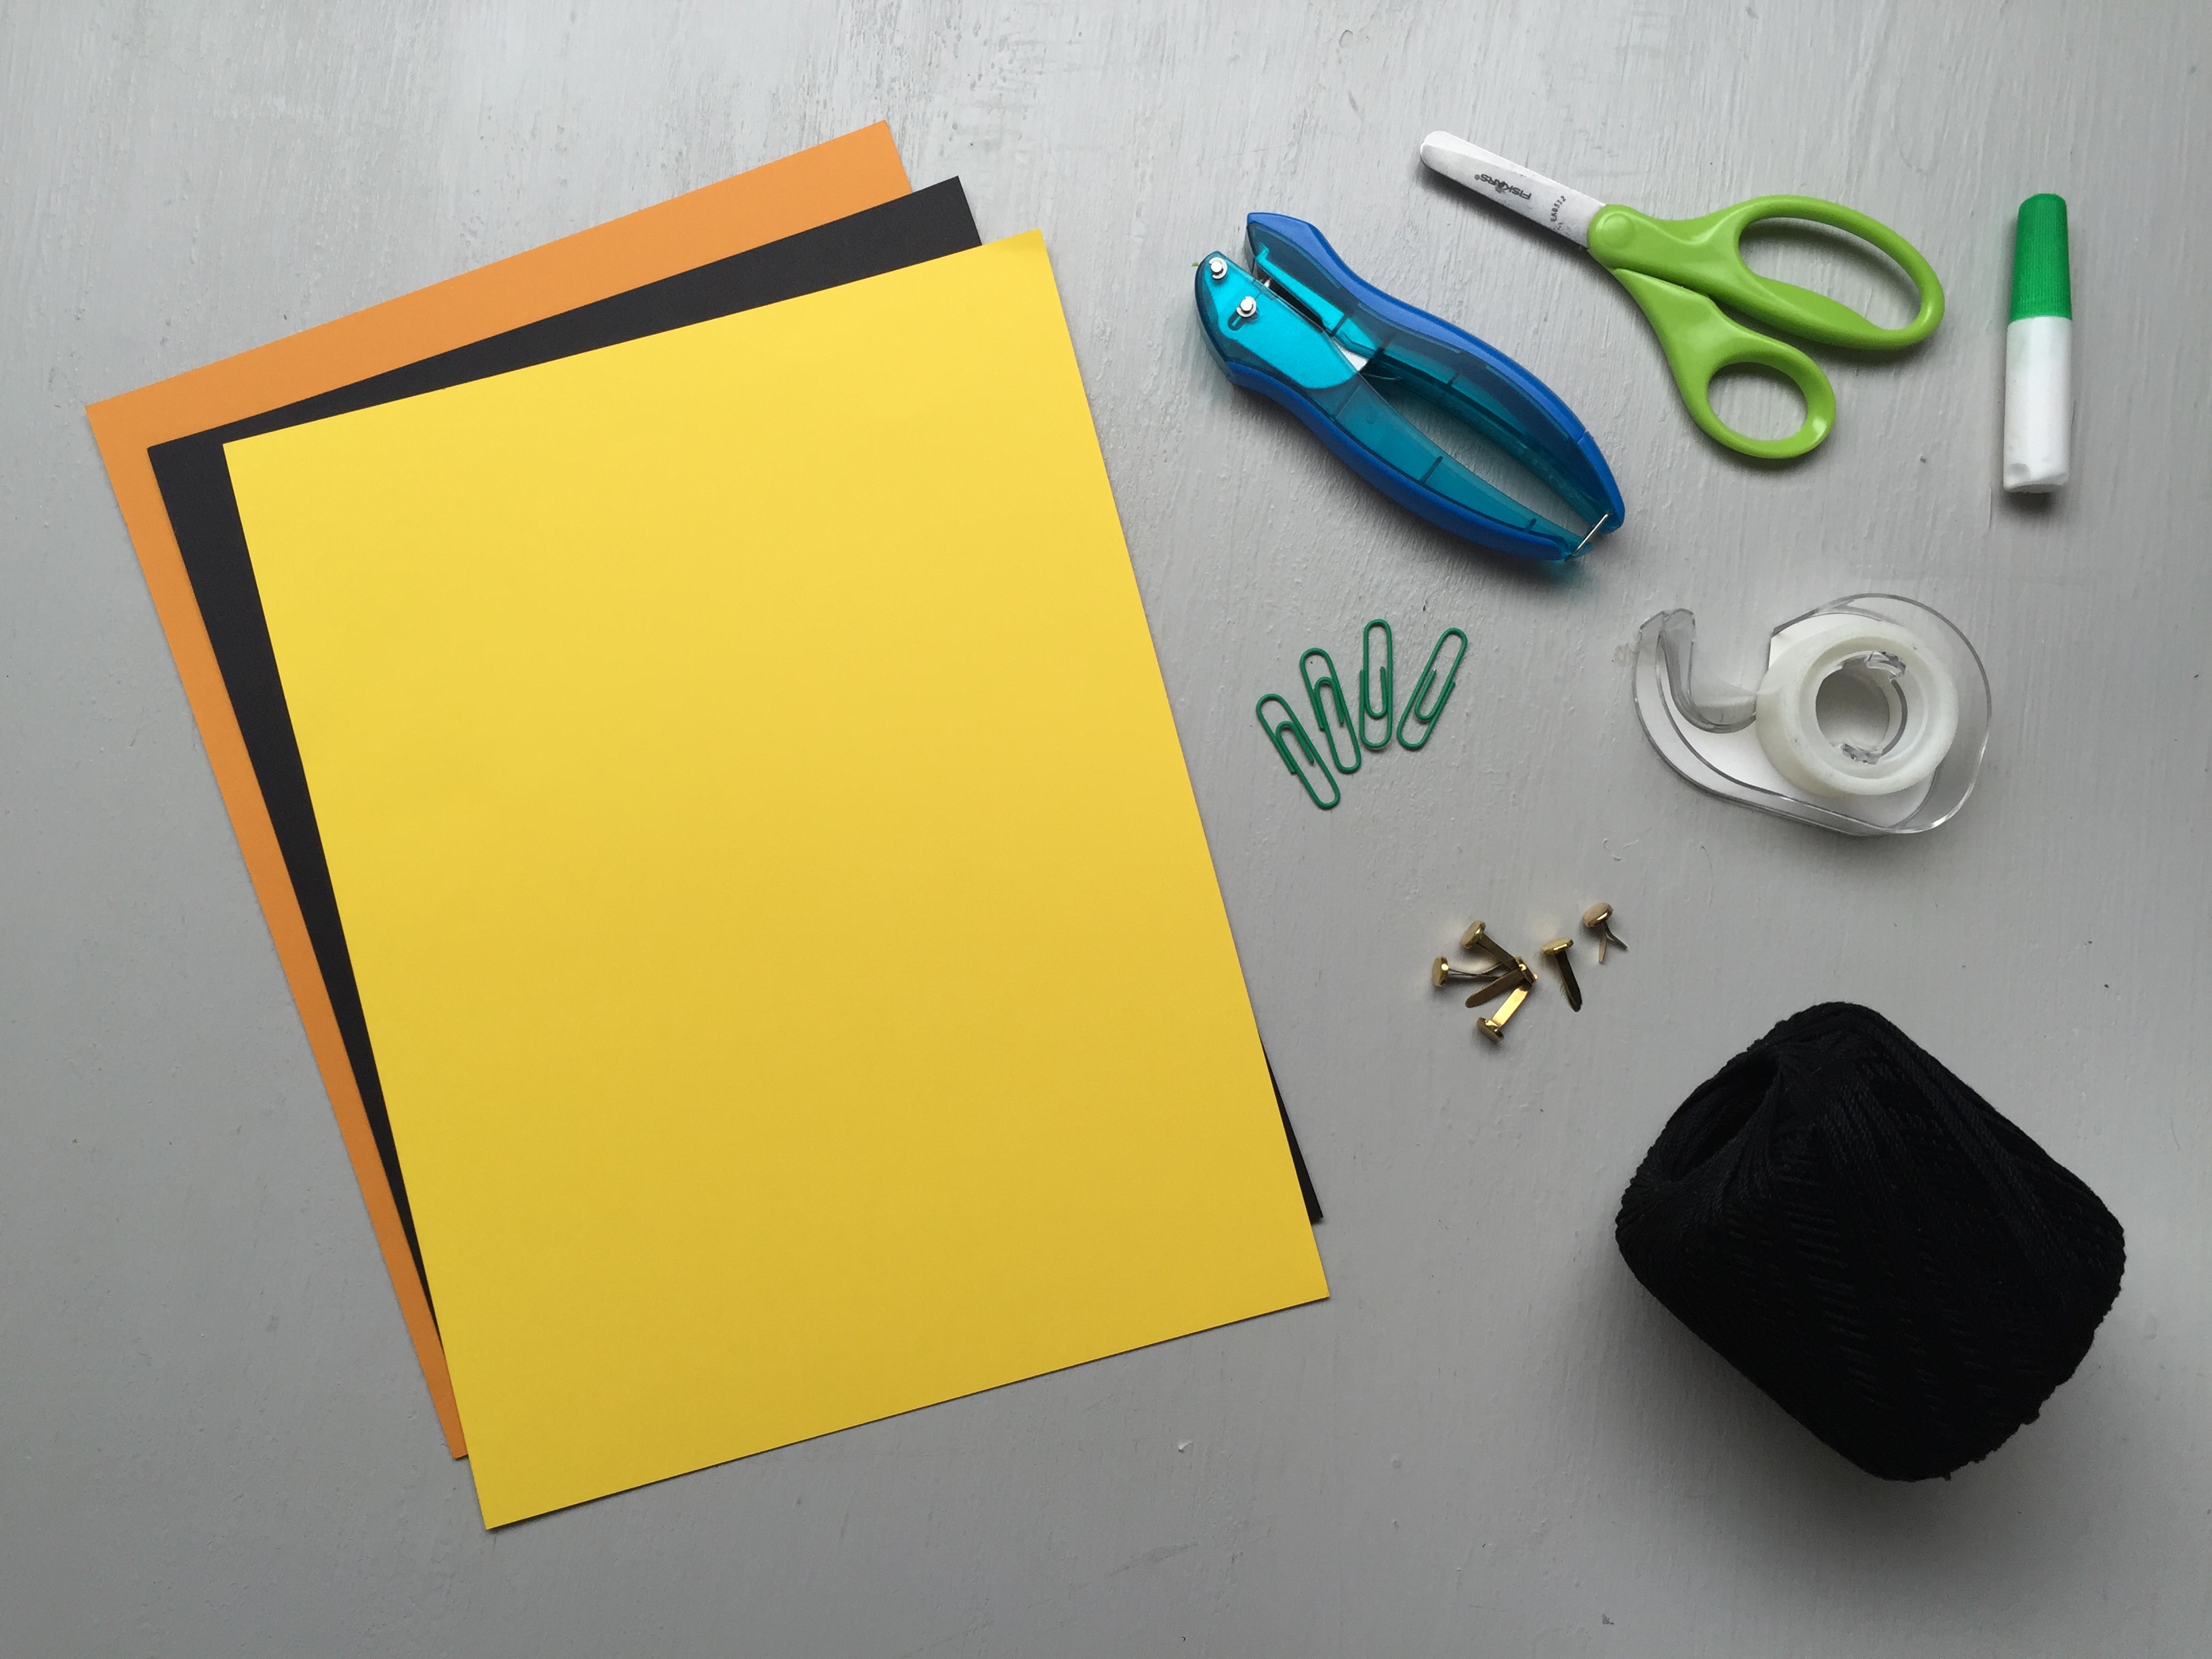
Gather your materials!

Step 2
Print out the flying bird toy template here.
Your paper color will be the base color of your bird!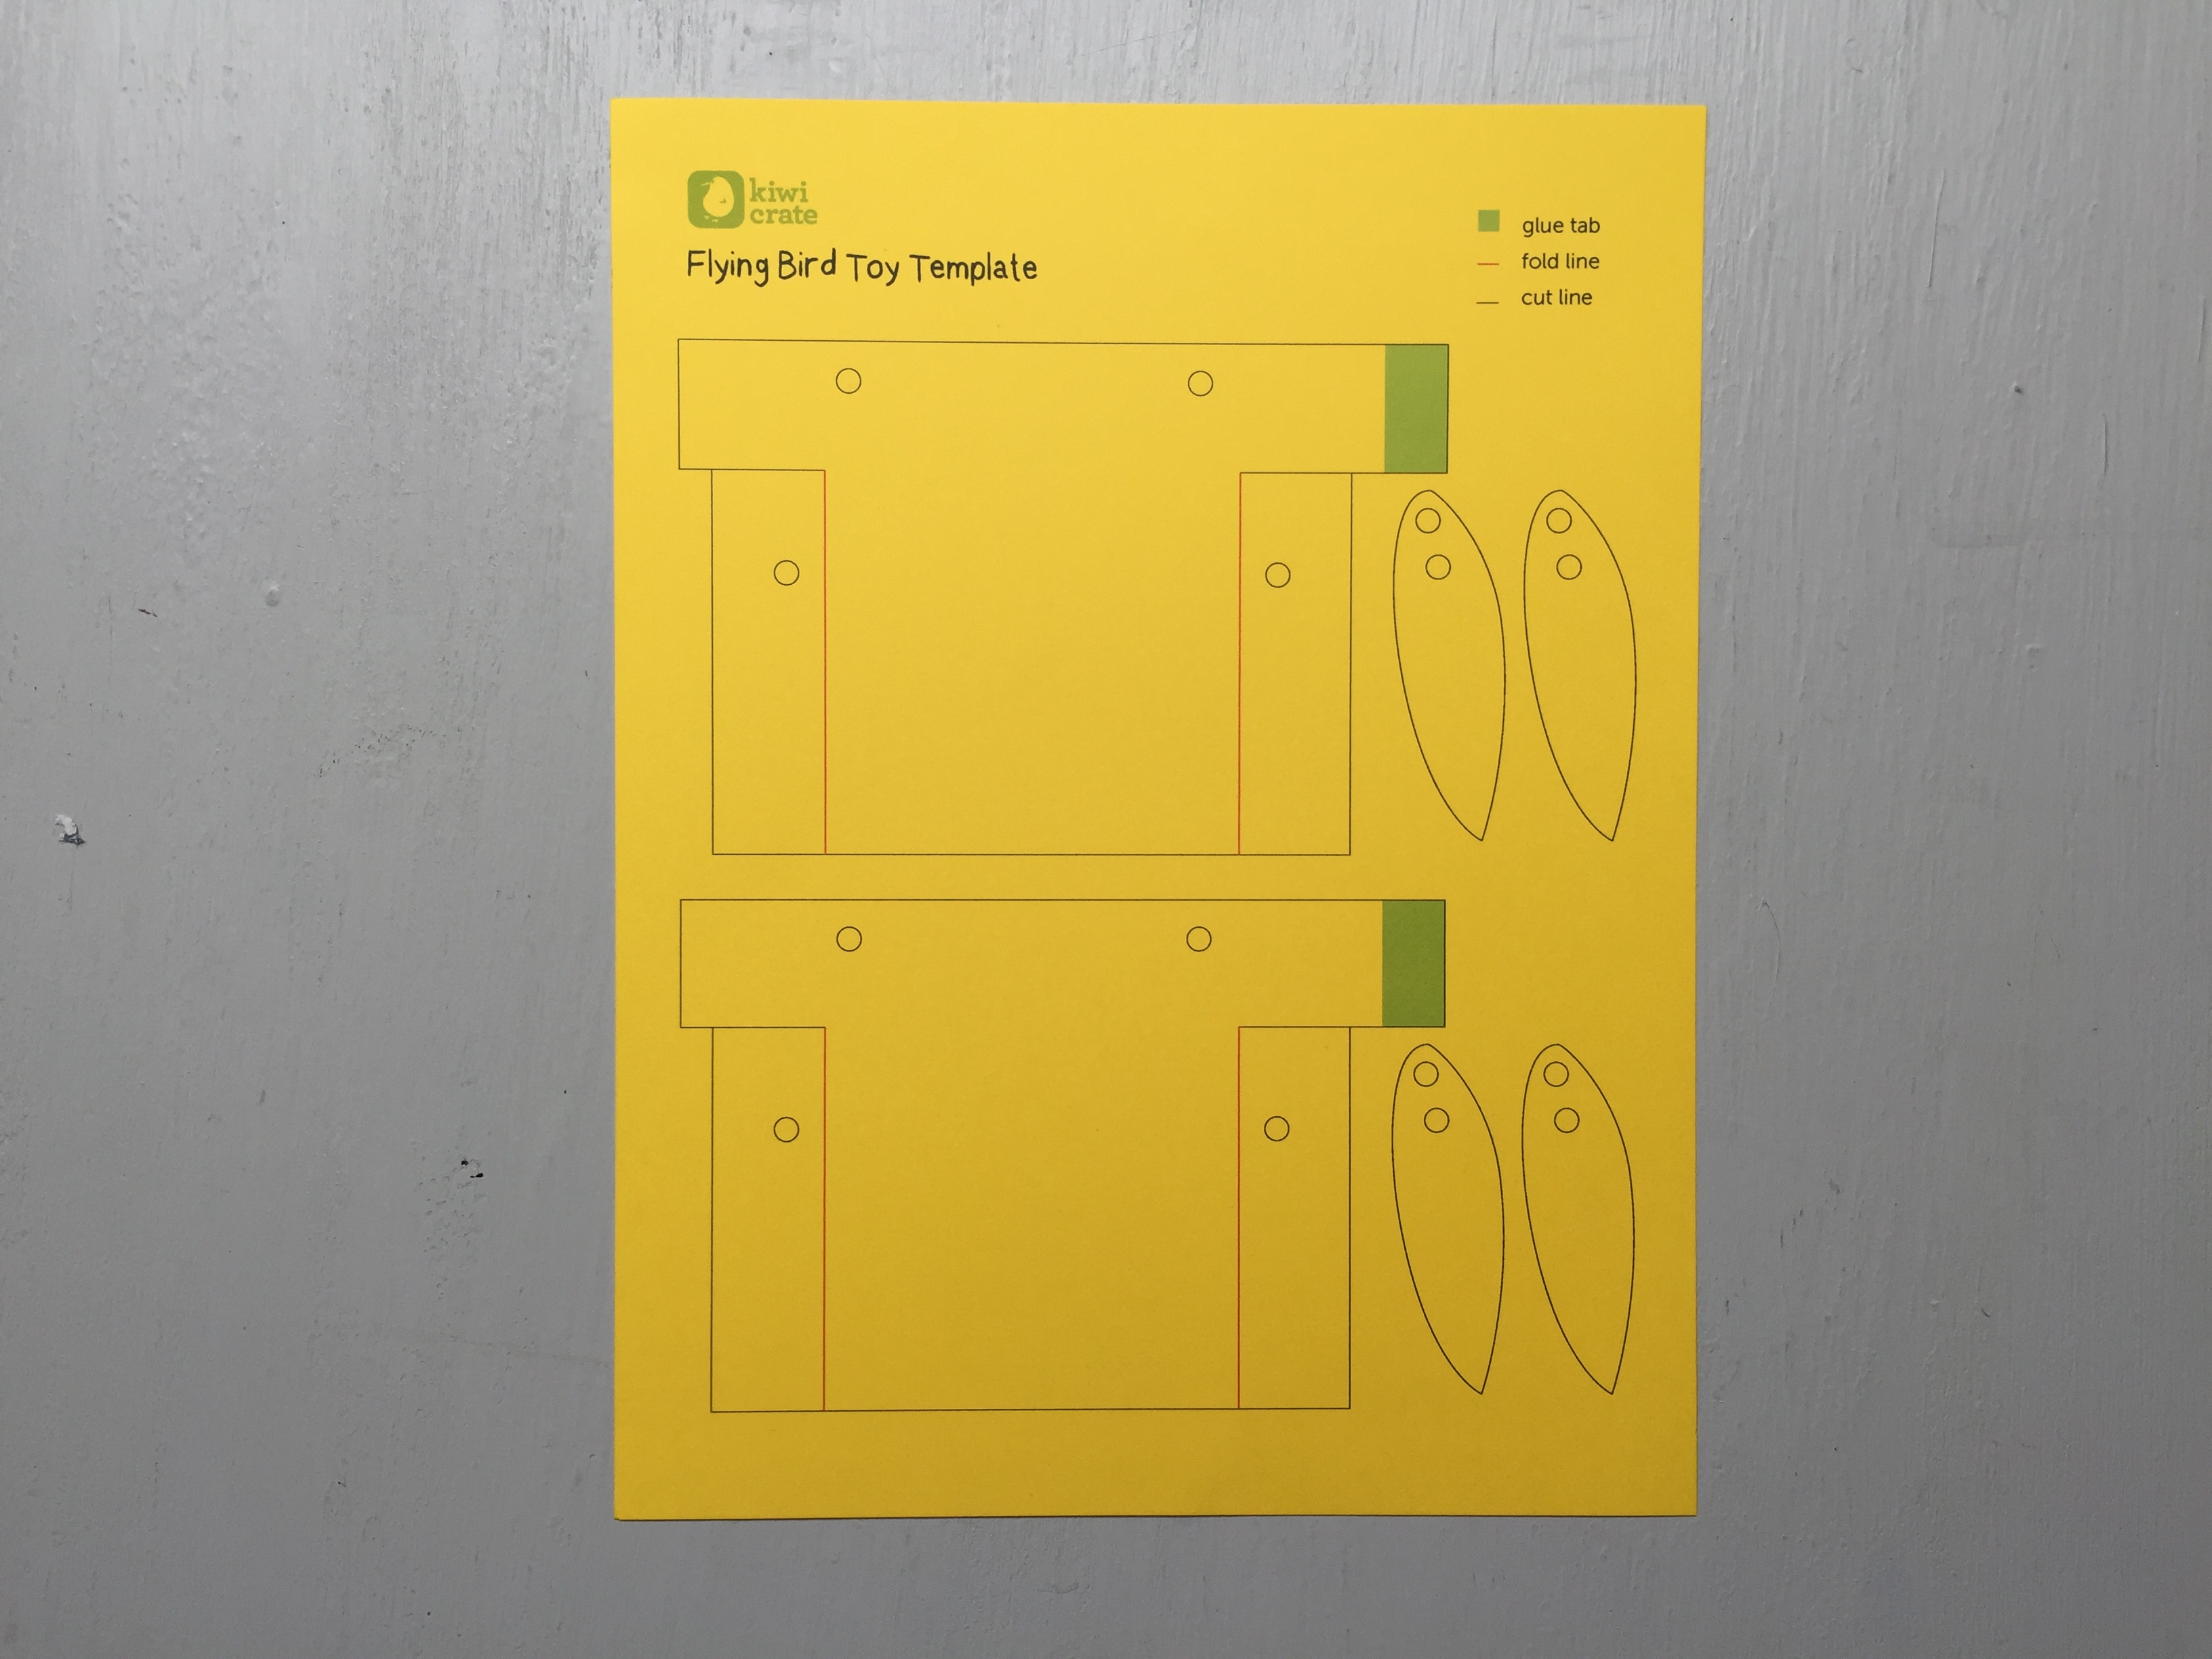
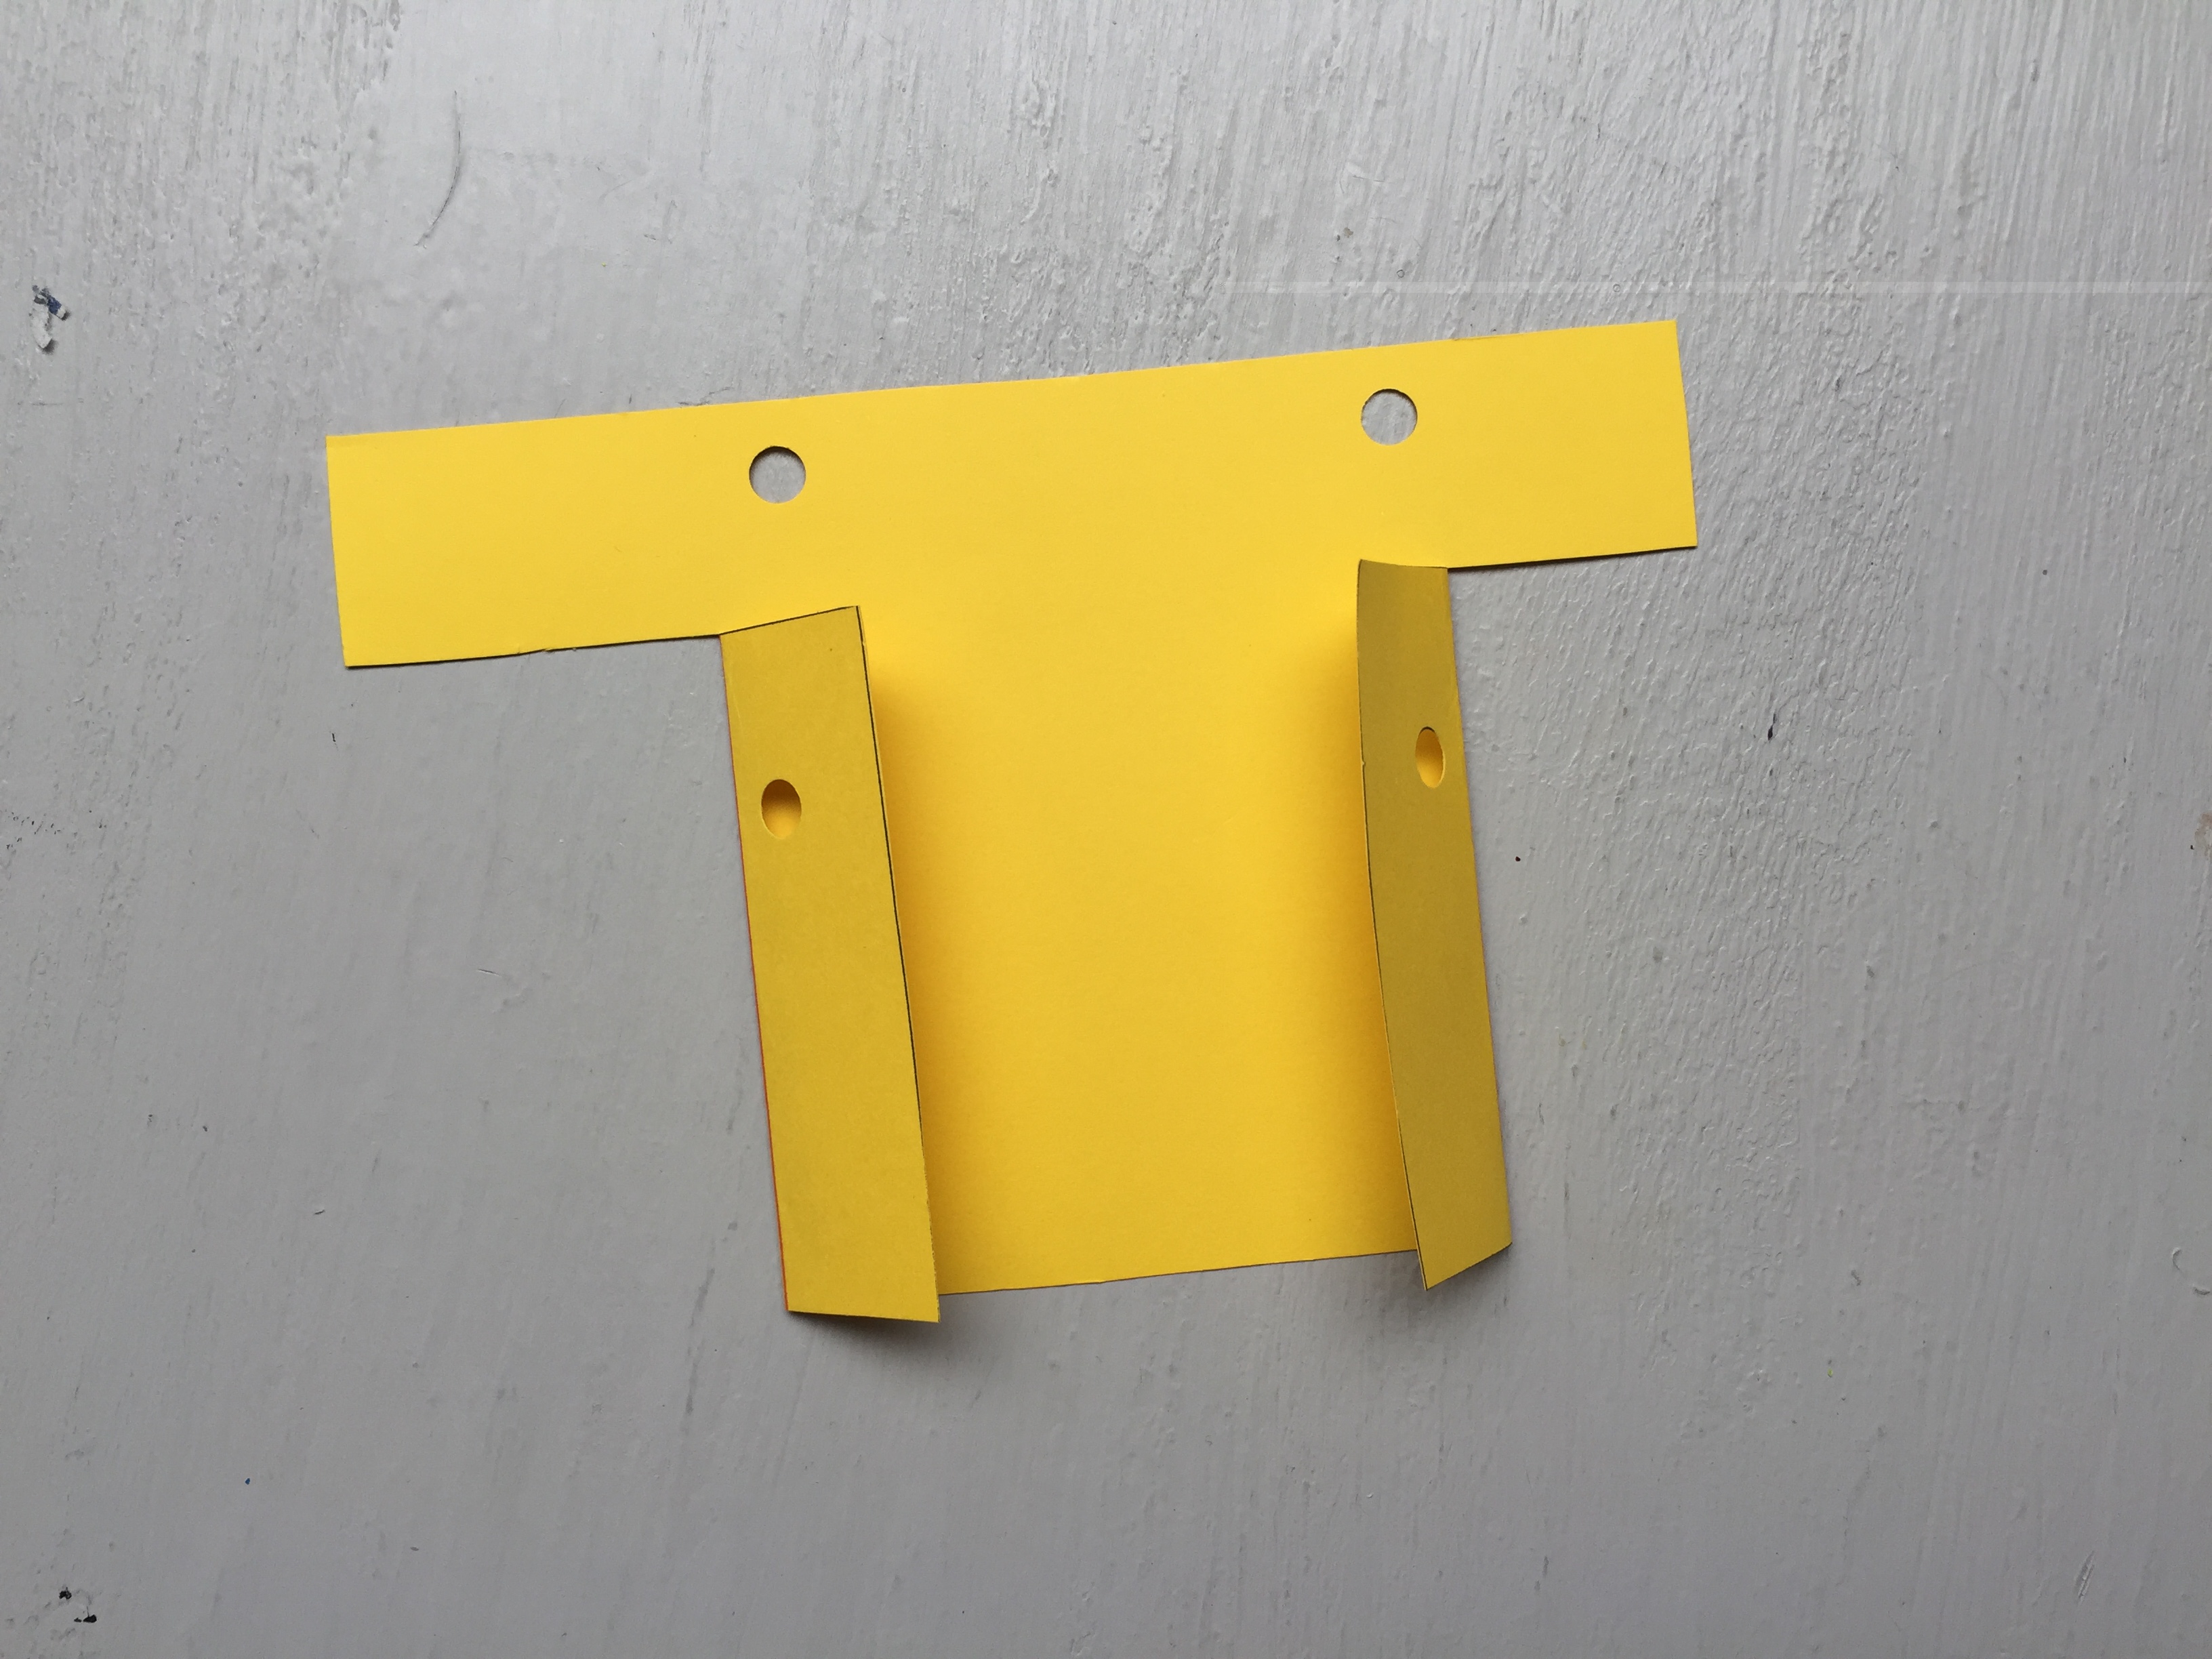
Step 3
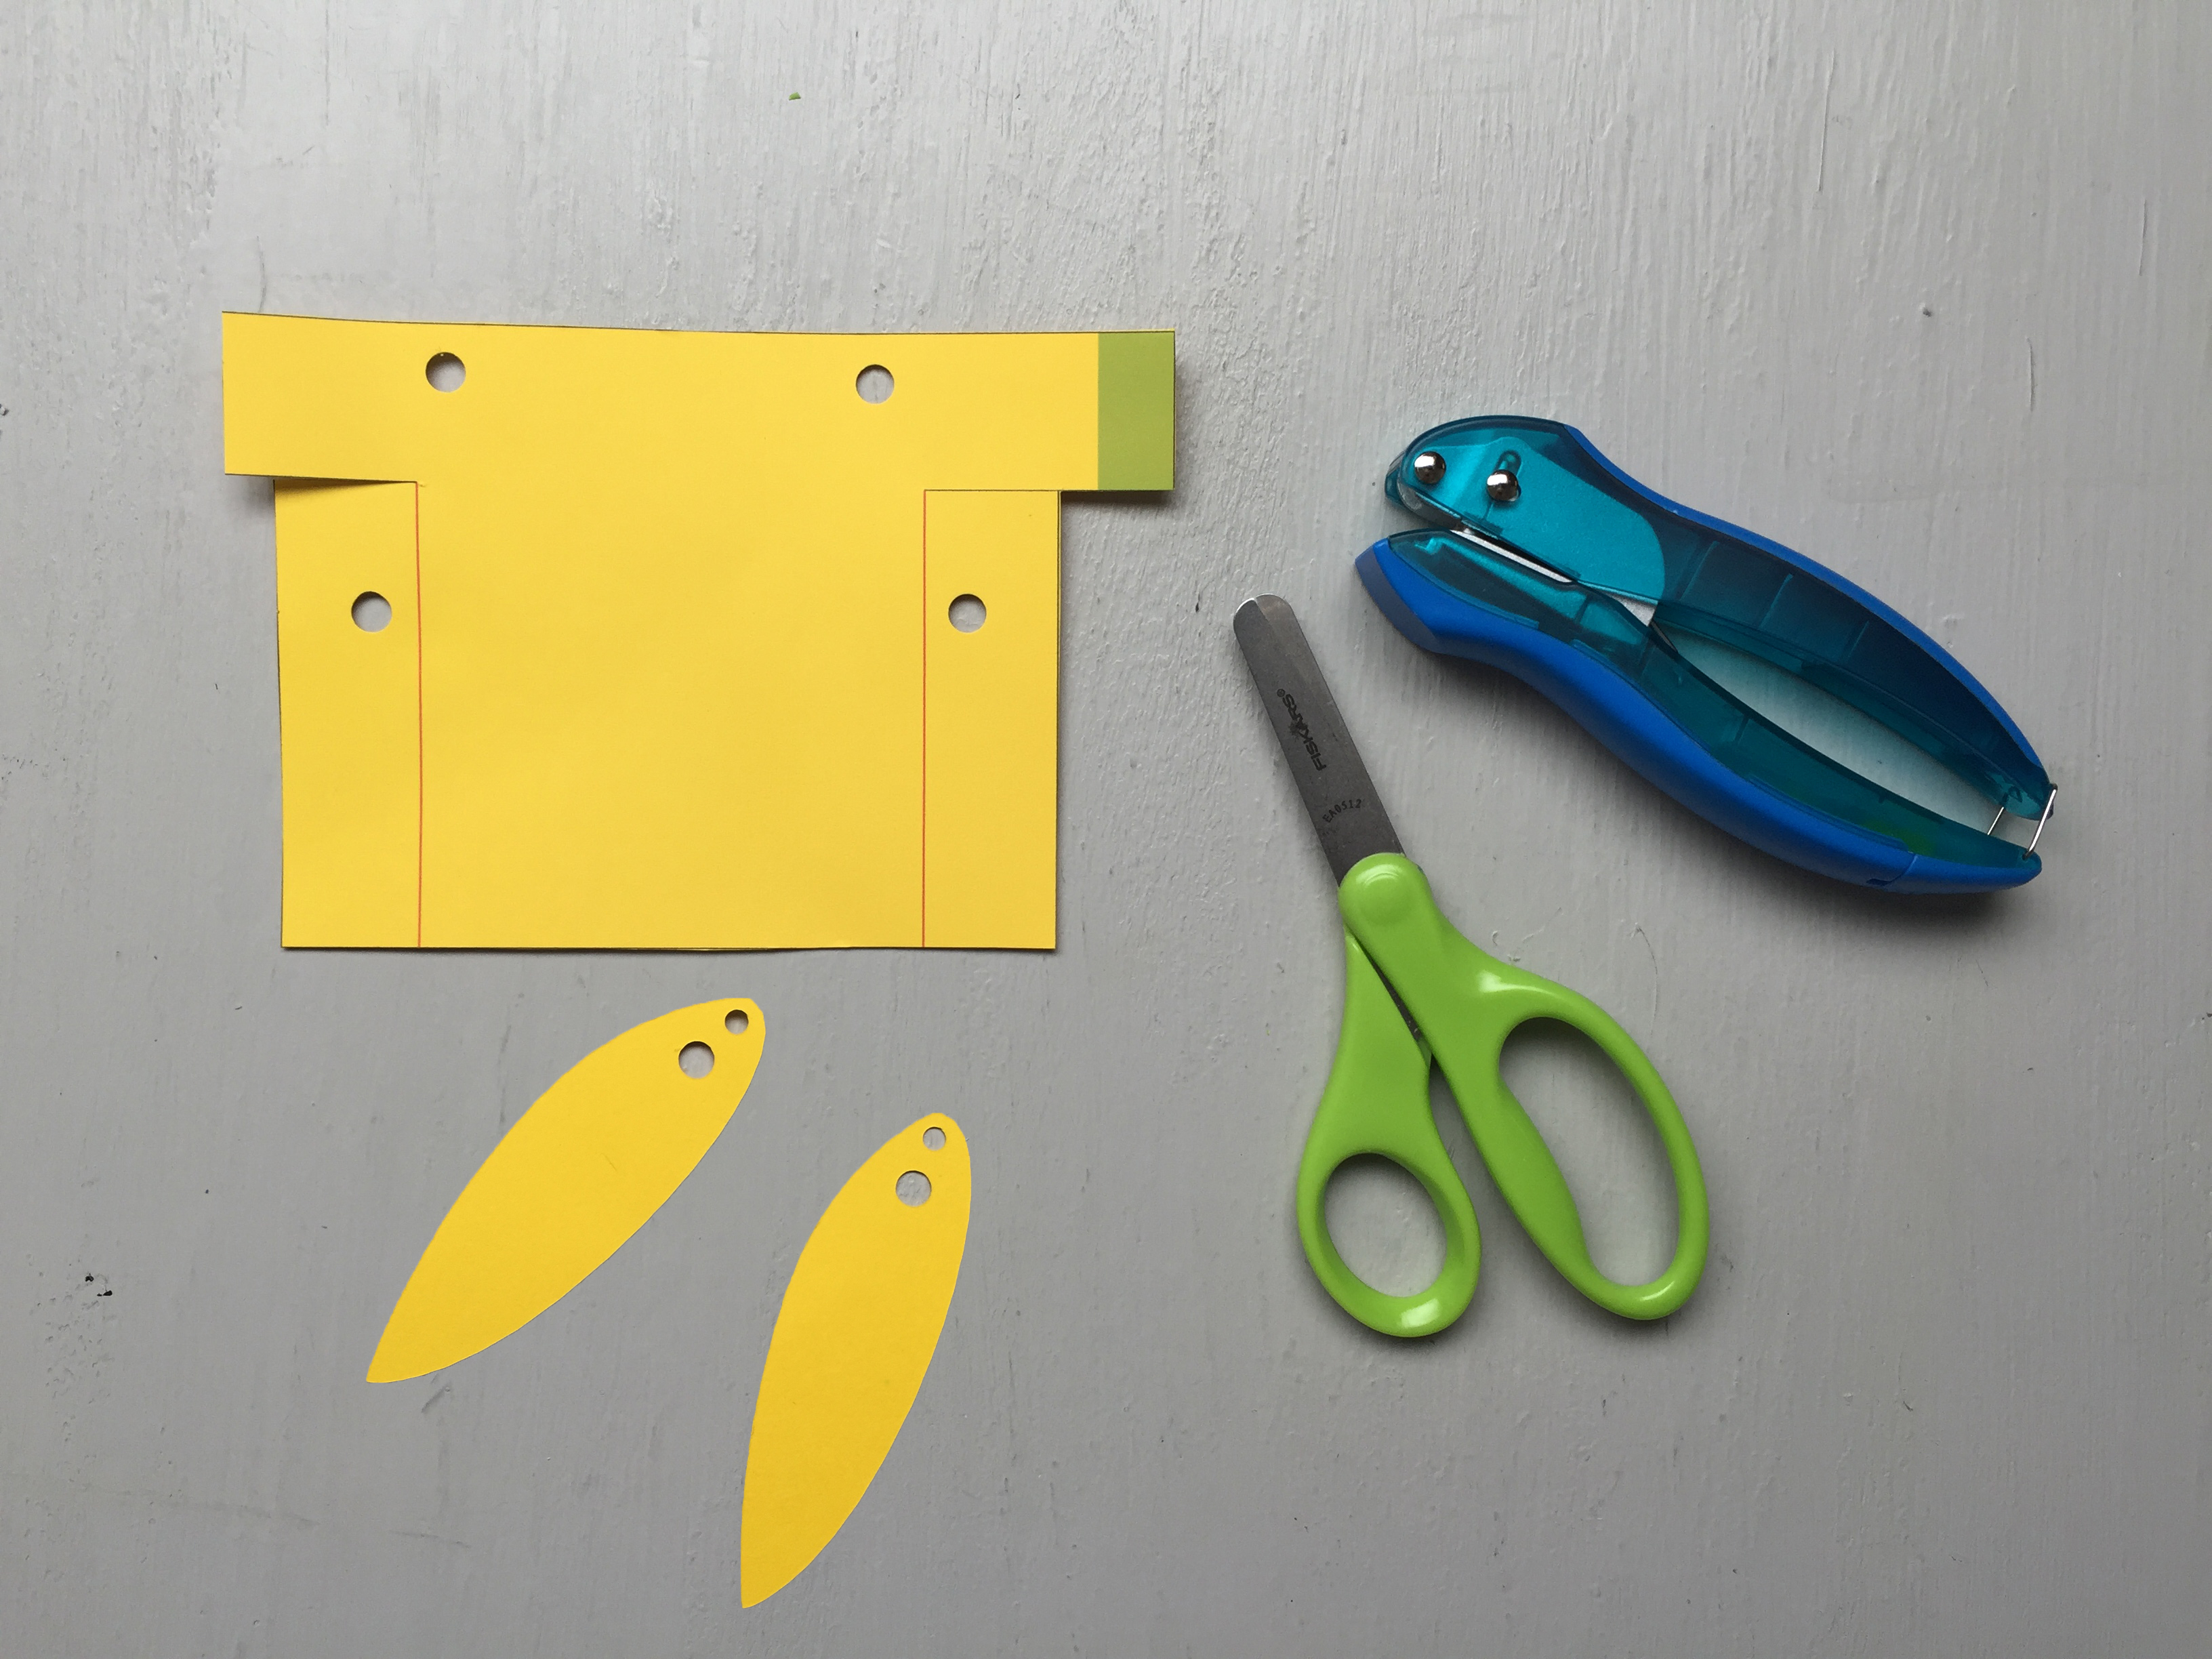
Cut out the template along the black lines. Use a hole punch to punch out the circles.
Step 4
Fold the two flaps back along the orange lines.
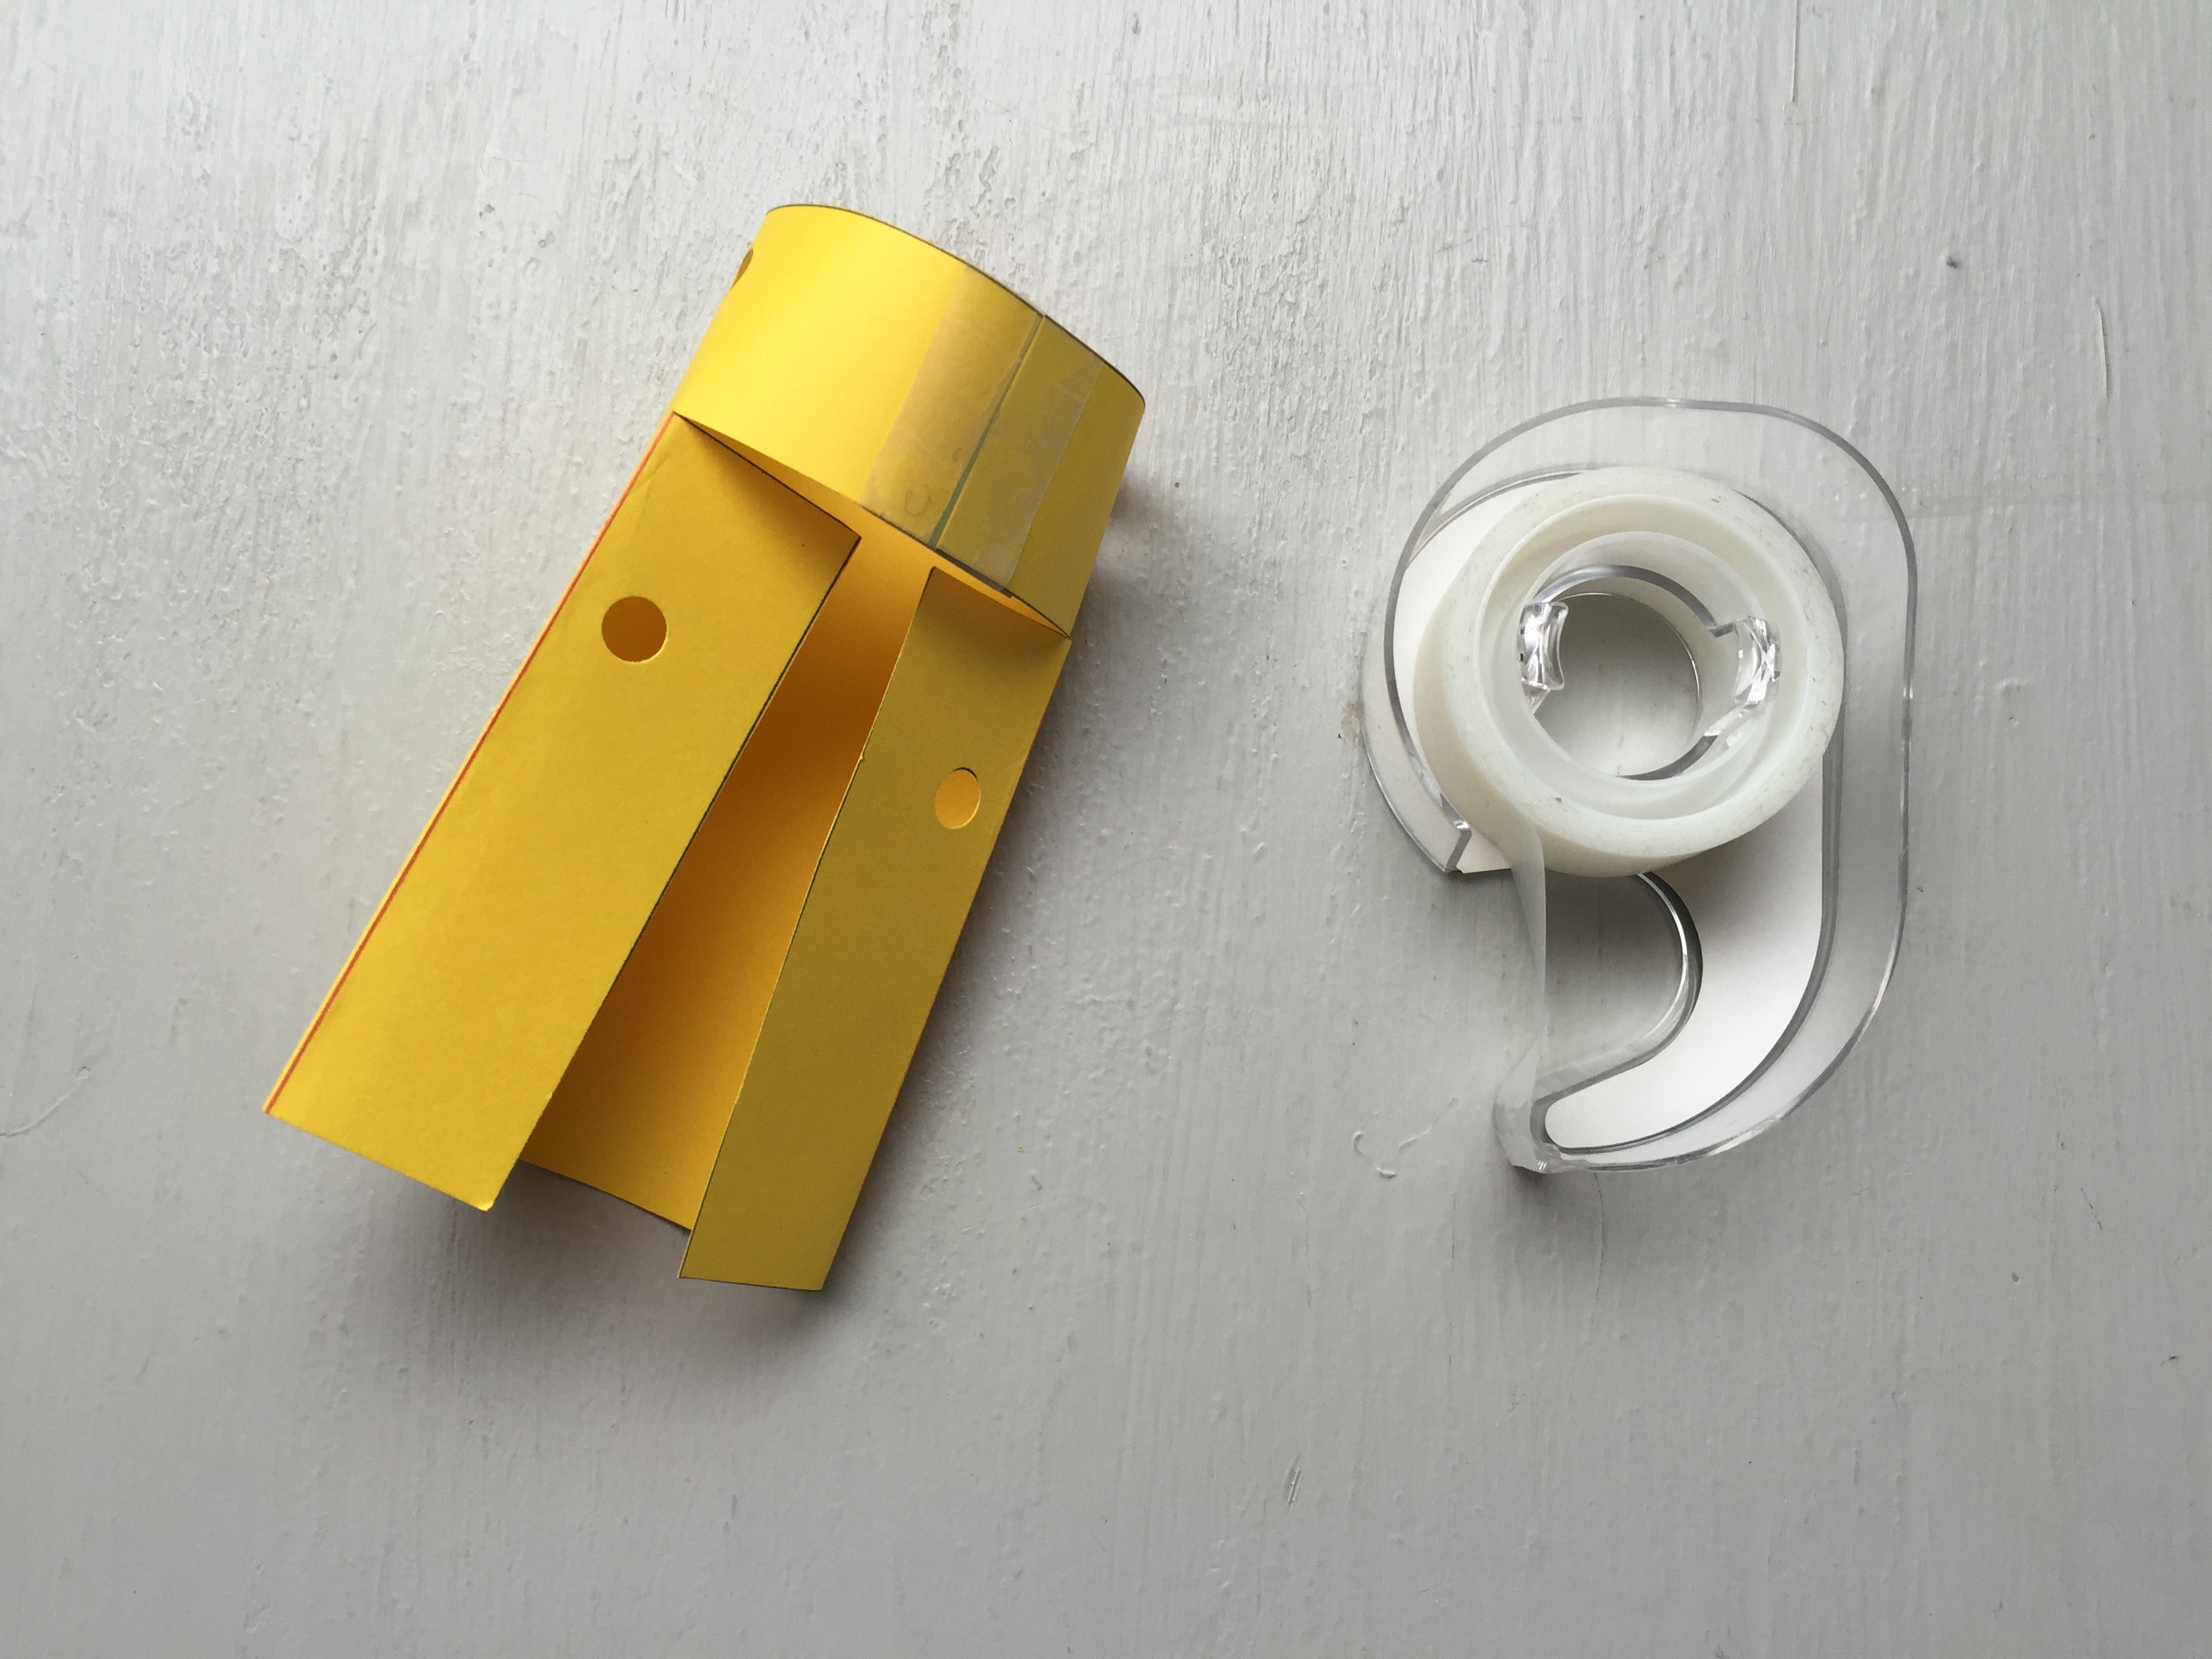
Step 5
Overlap the two top tabs so the blue area is covered. Secure it with a piece of tape.
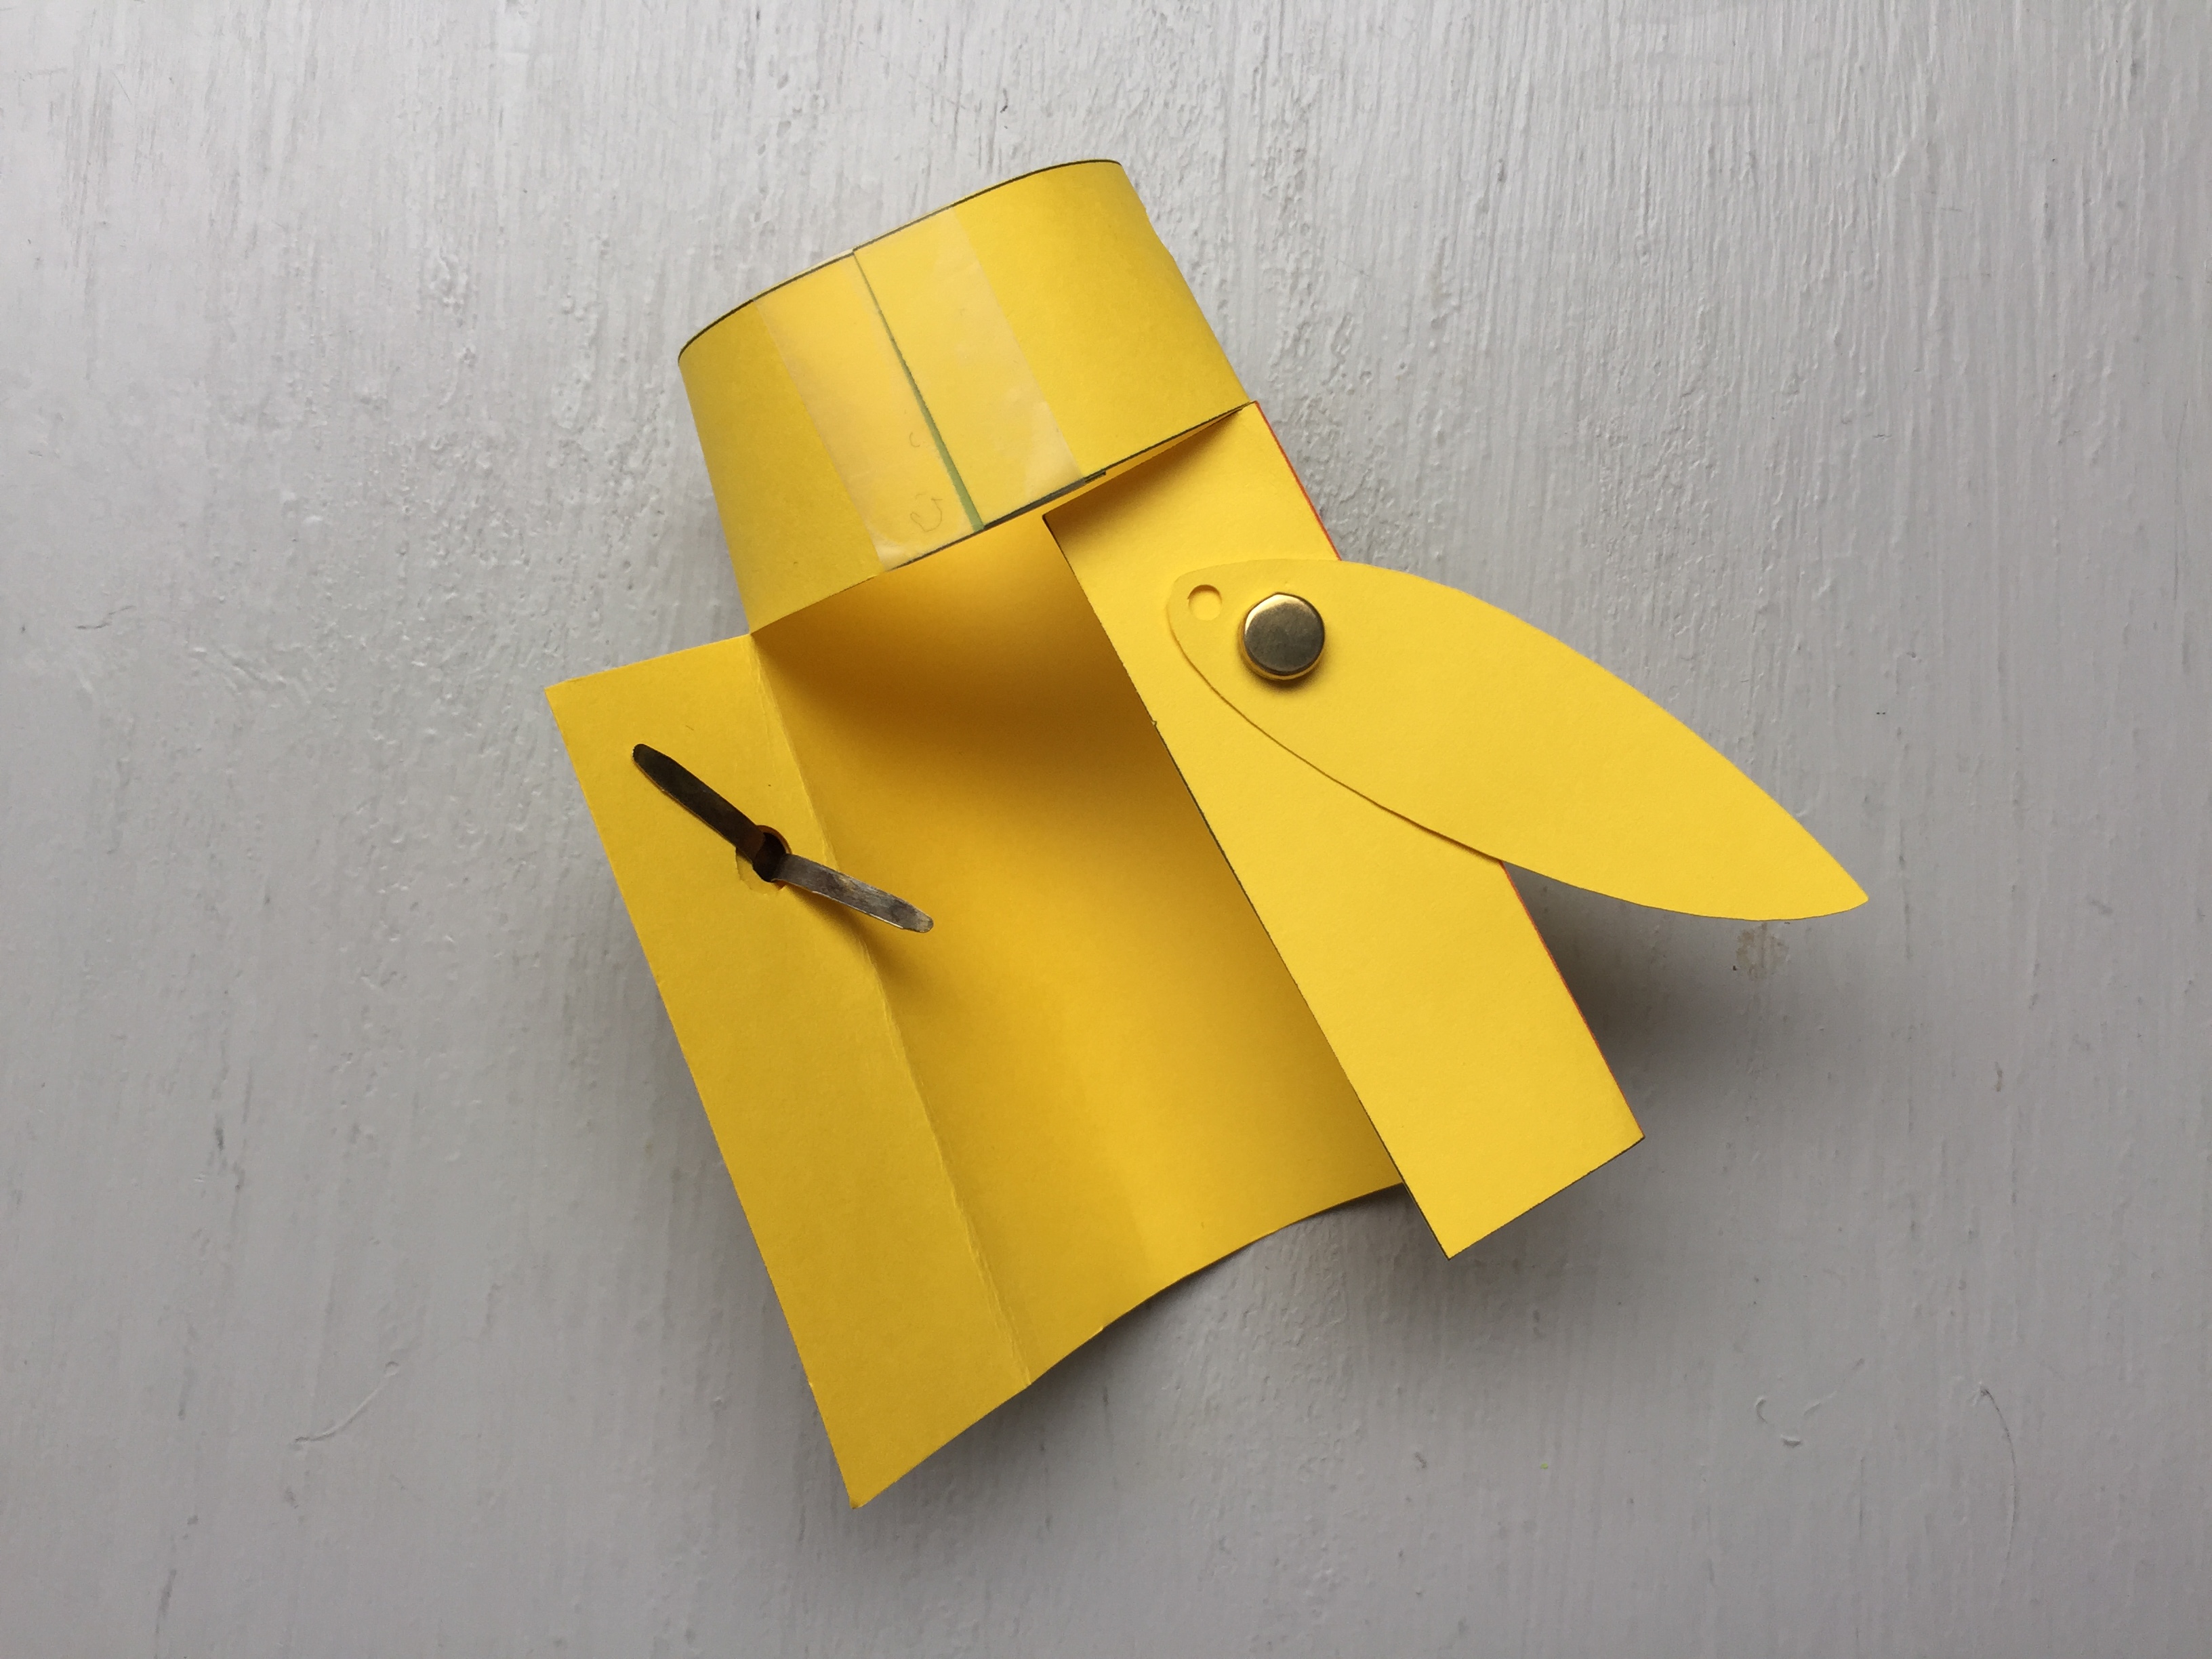
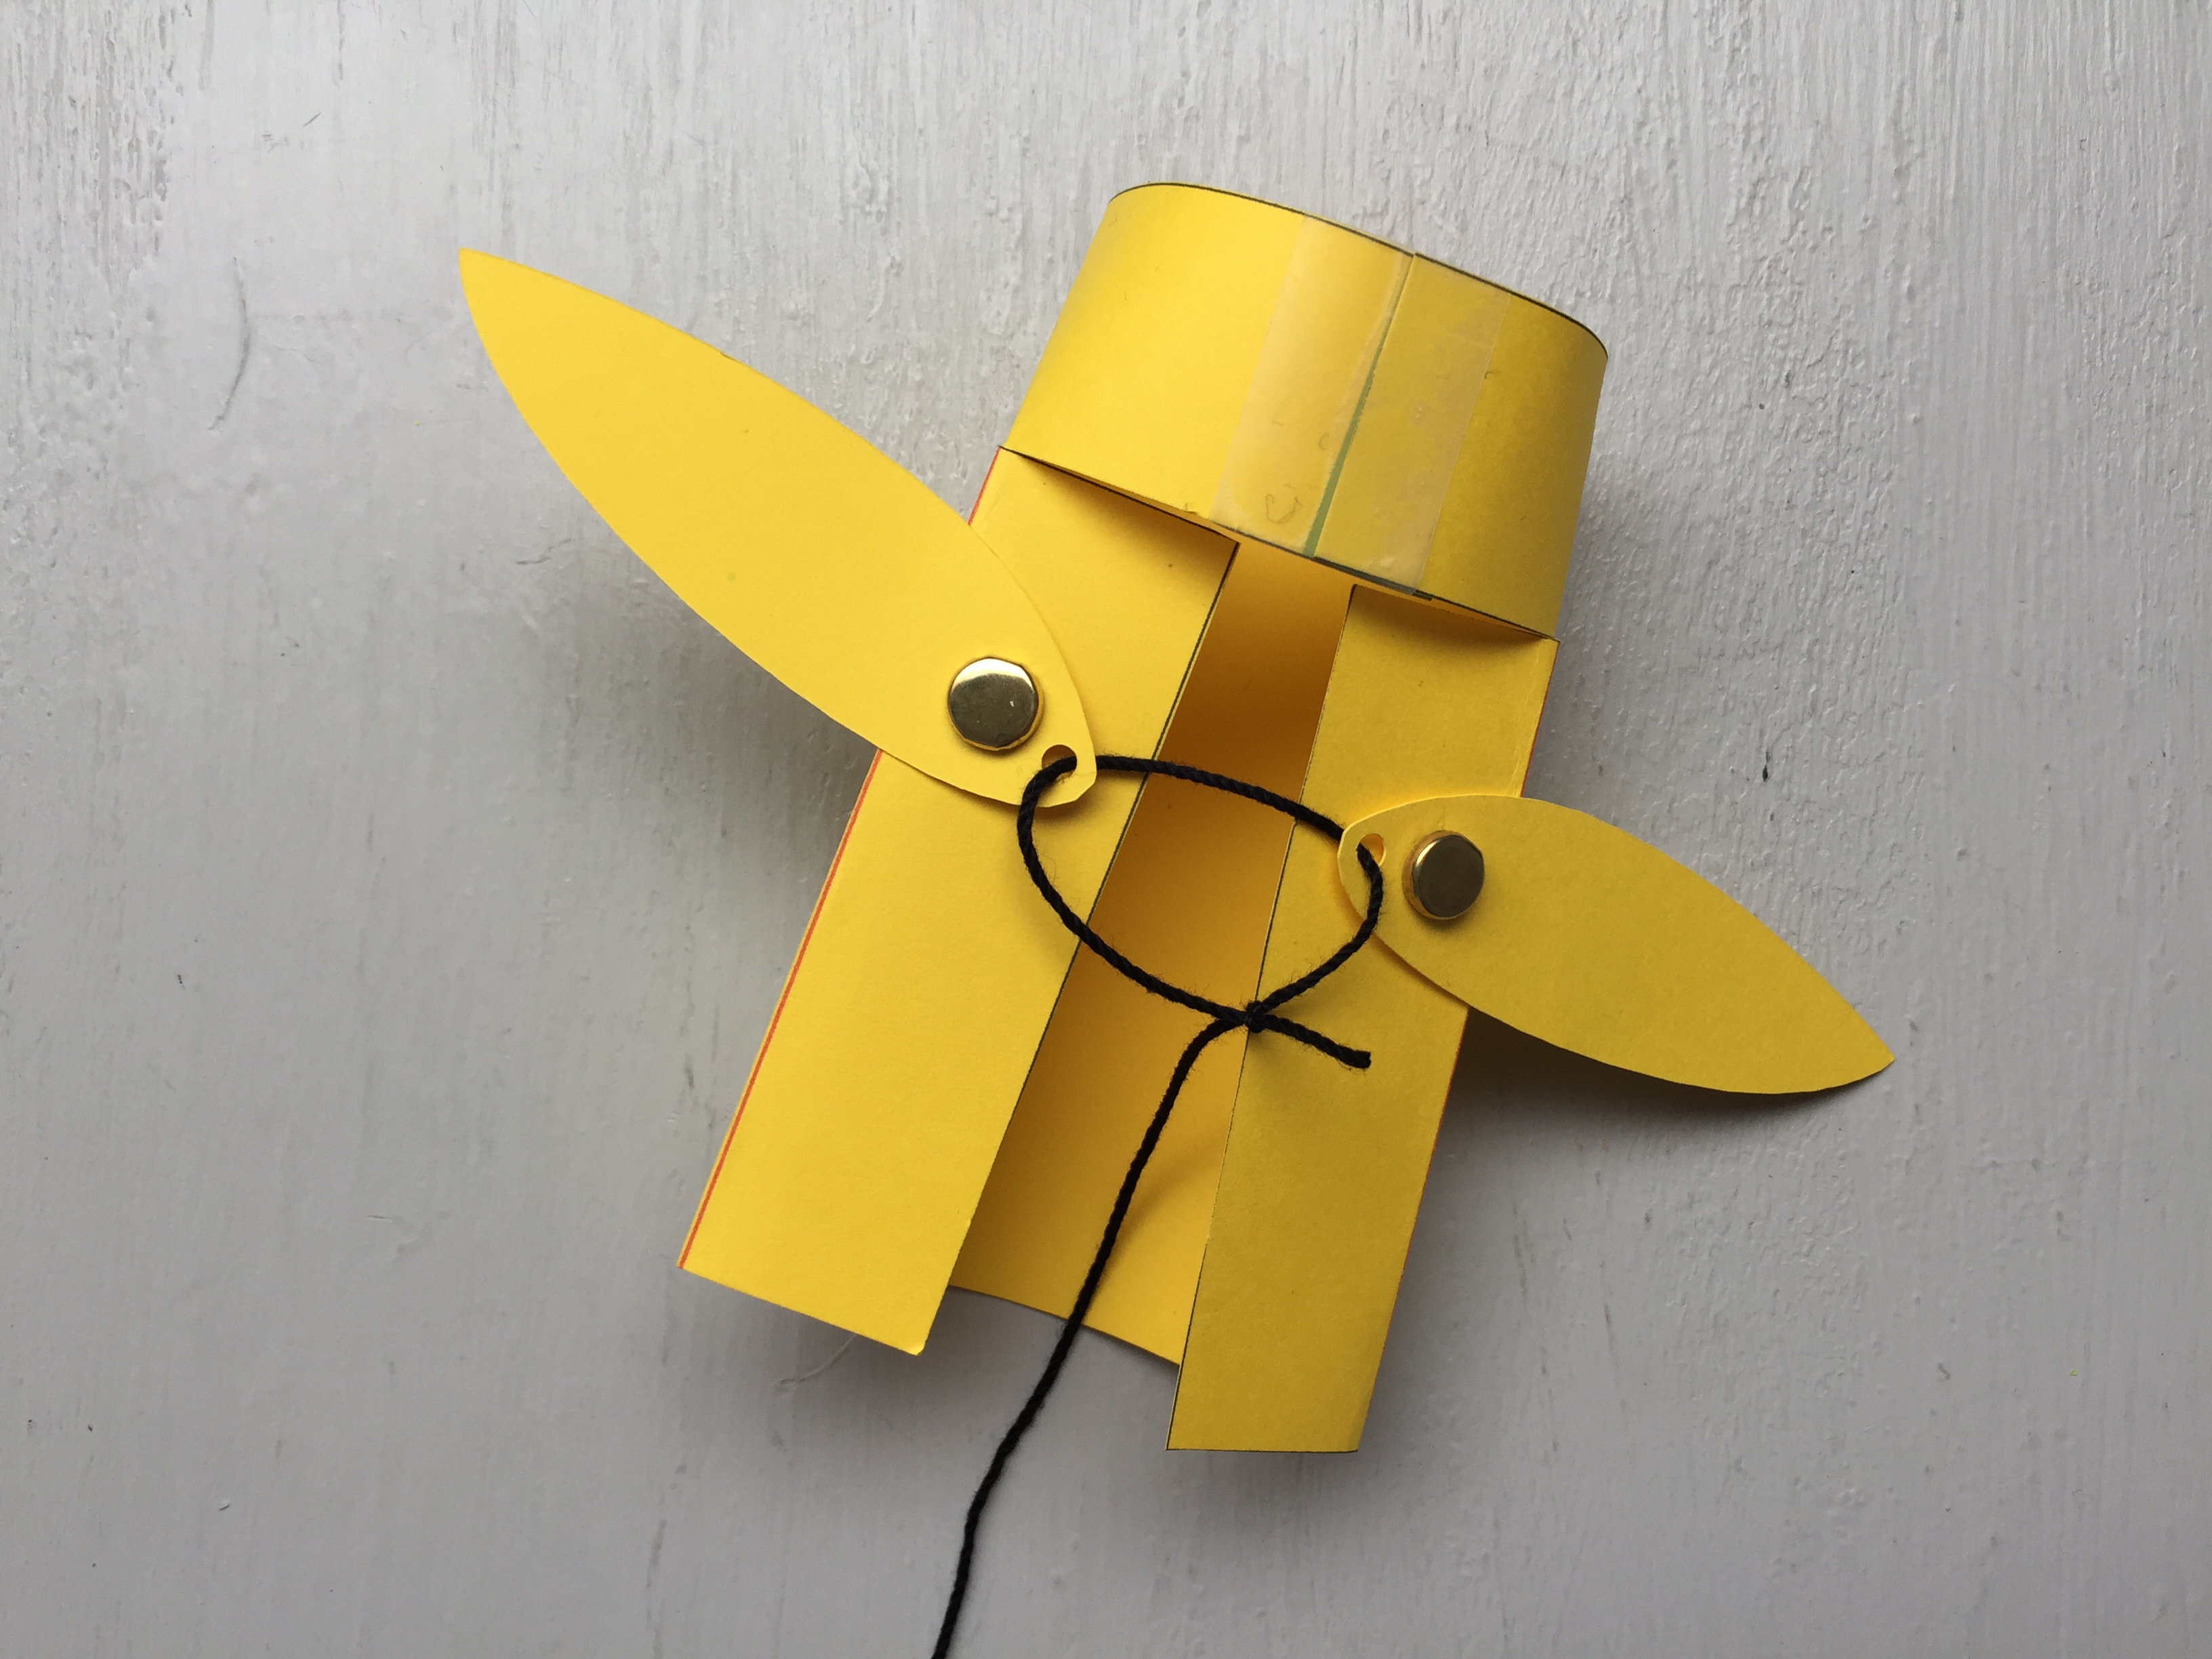
Step 6
Grab a wing and align the hole closer to the center of the wing to the holes on the body flap. Use a brad to attach the wing in place. Repeat on the other side.
Step 7
Loop some string through the holes on the wing tips. Then, tie the string. Make sure not to over tighten the loop or the wings may tear!
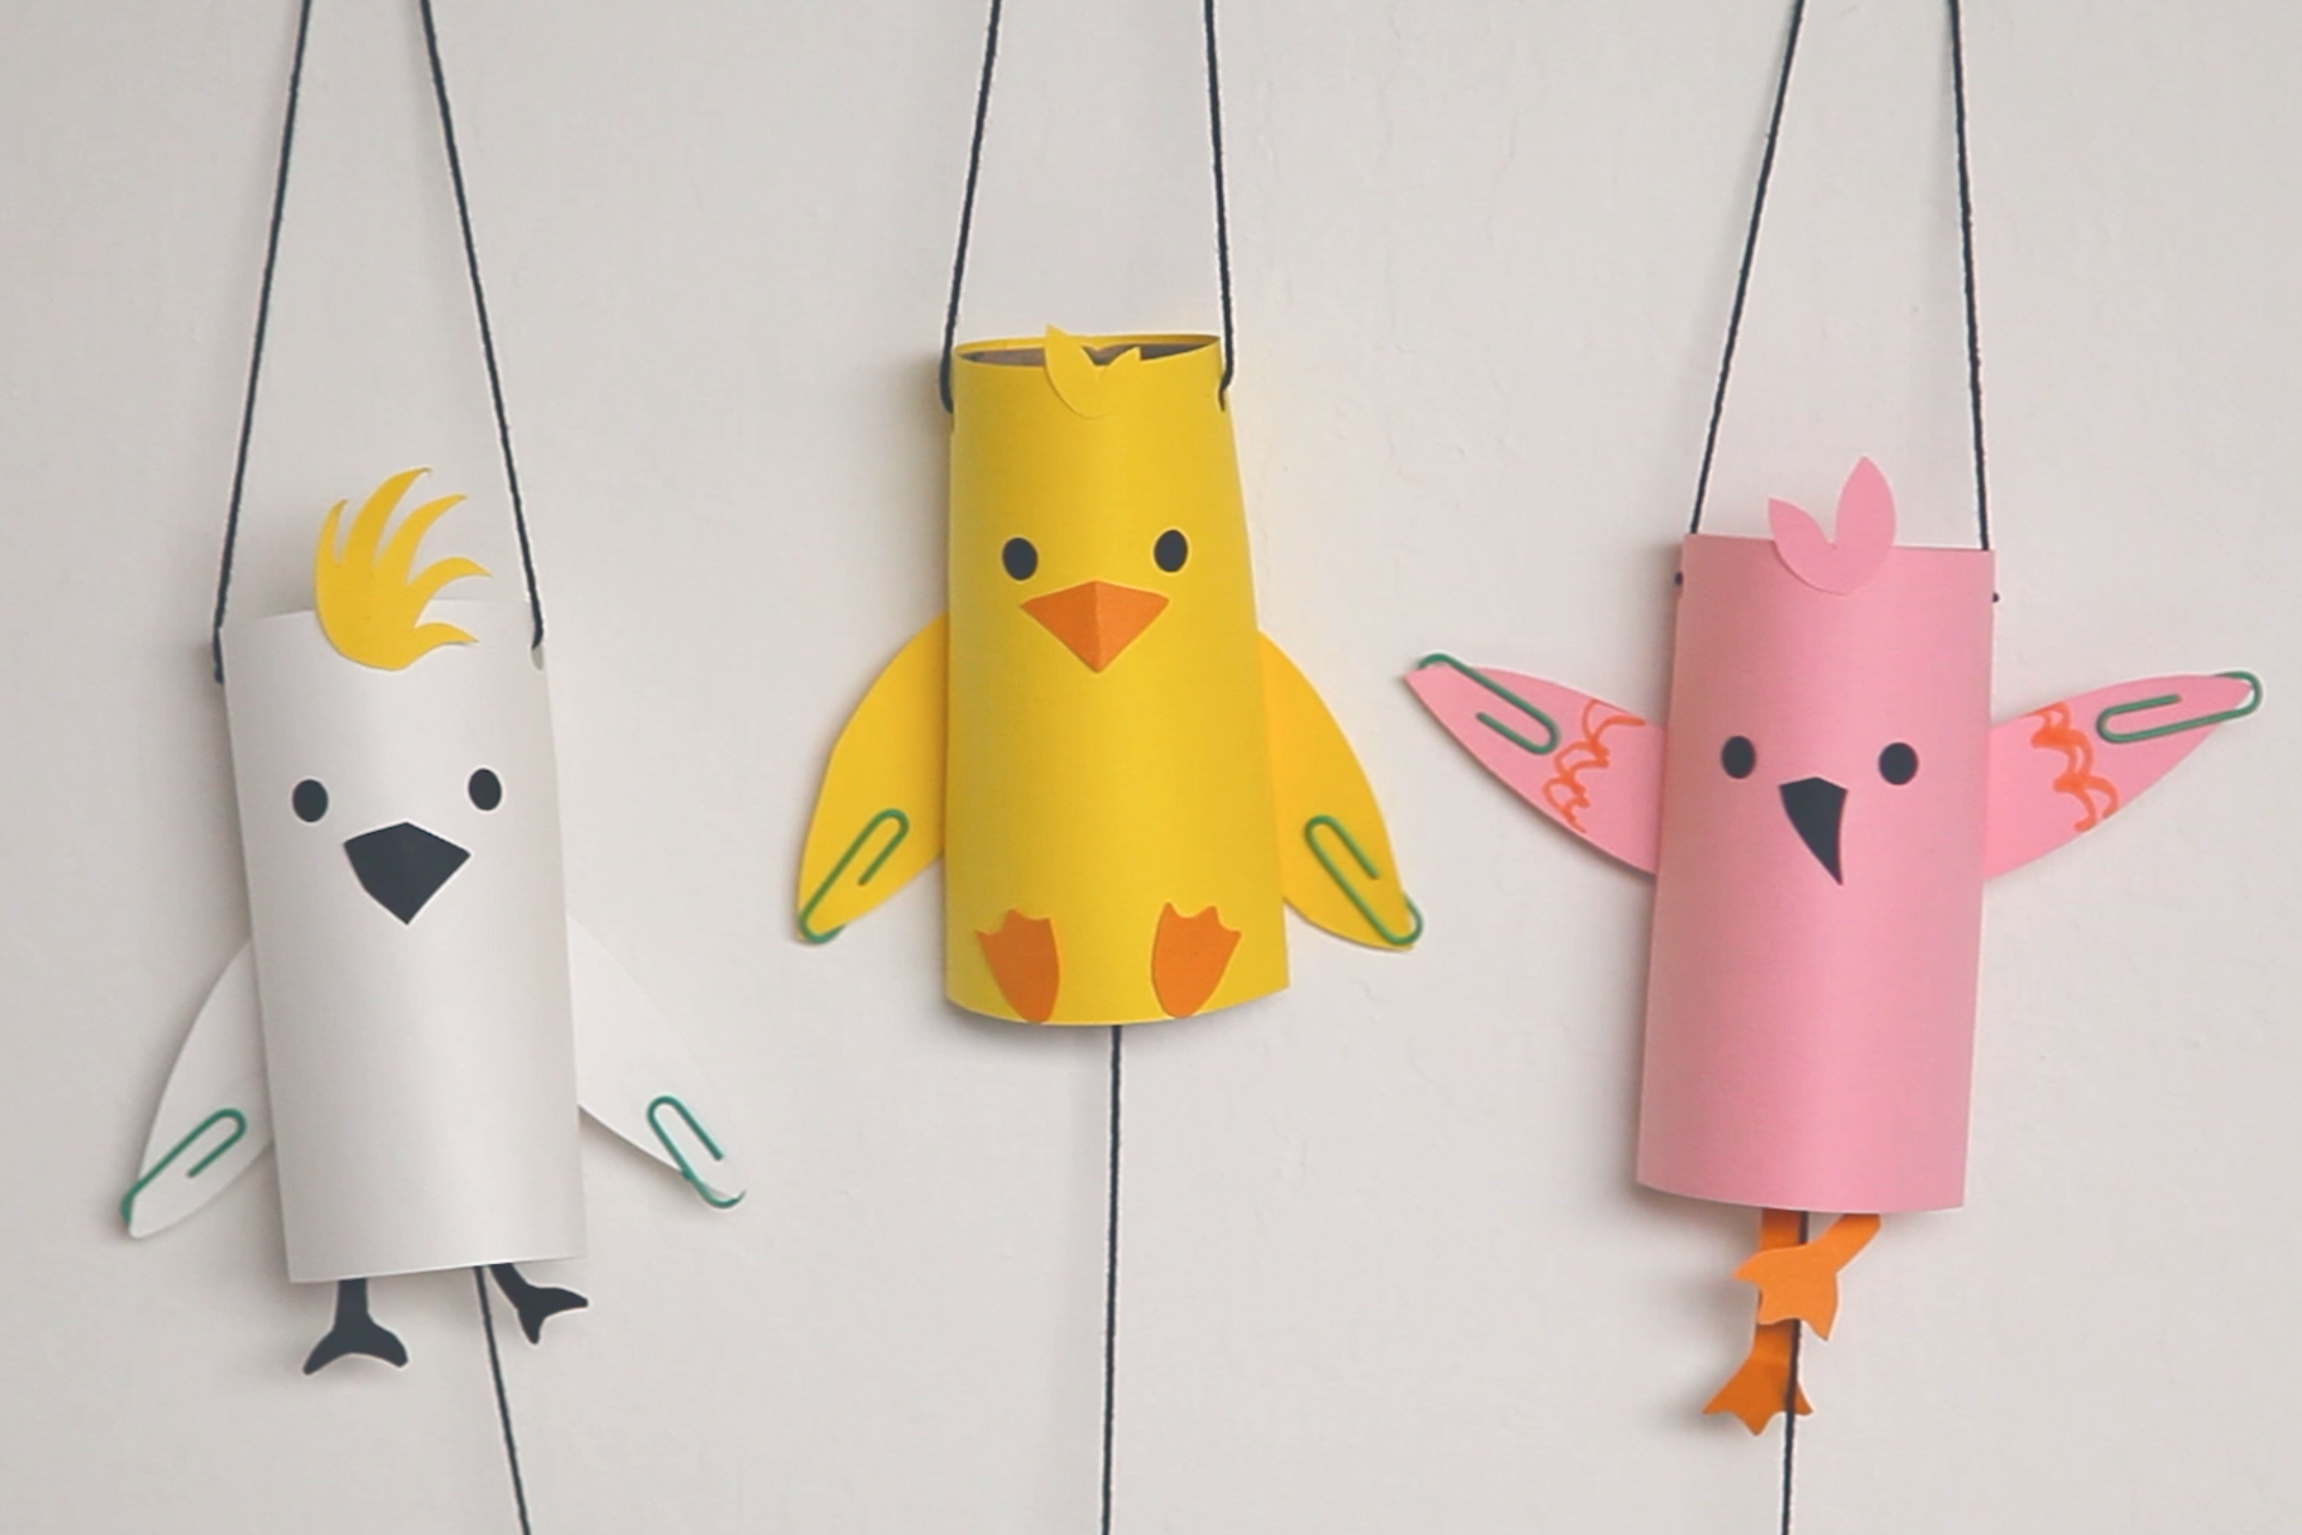
Step 8
Add a face to your bird! We cut out and glued on some eyes, a beak and feet.
When we did this project with our kid testers, they created some aliens and little monsters. Get creative and see what creature you create!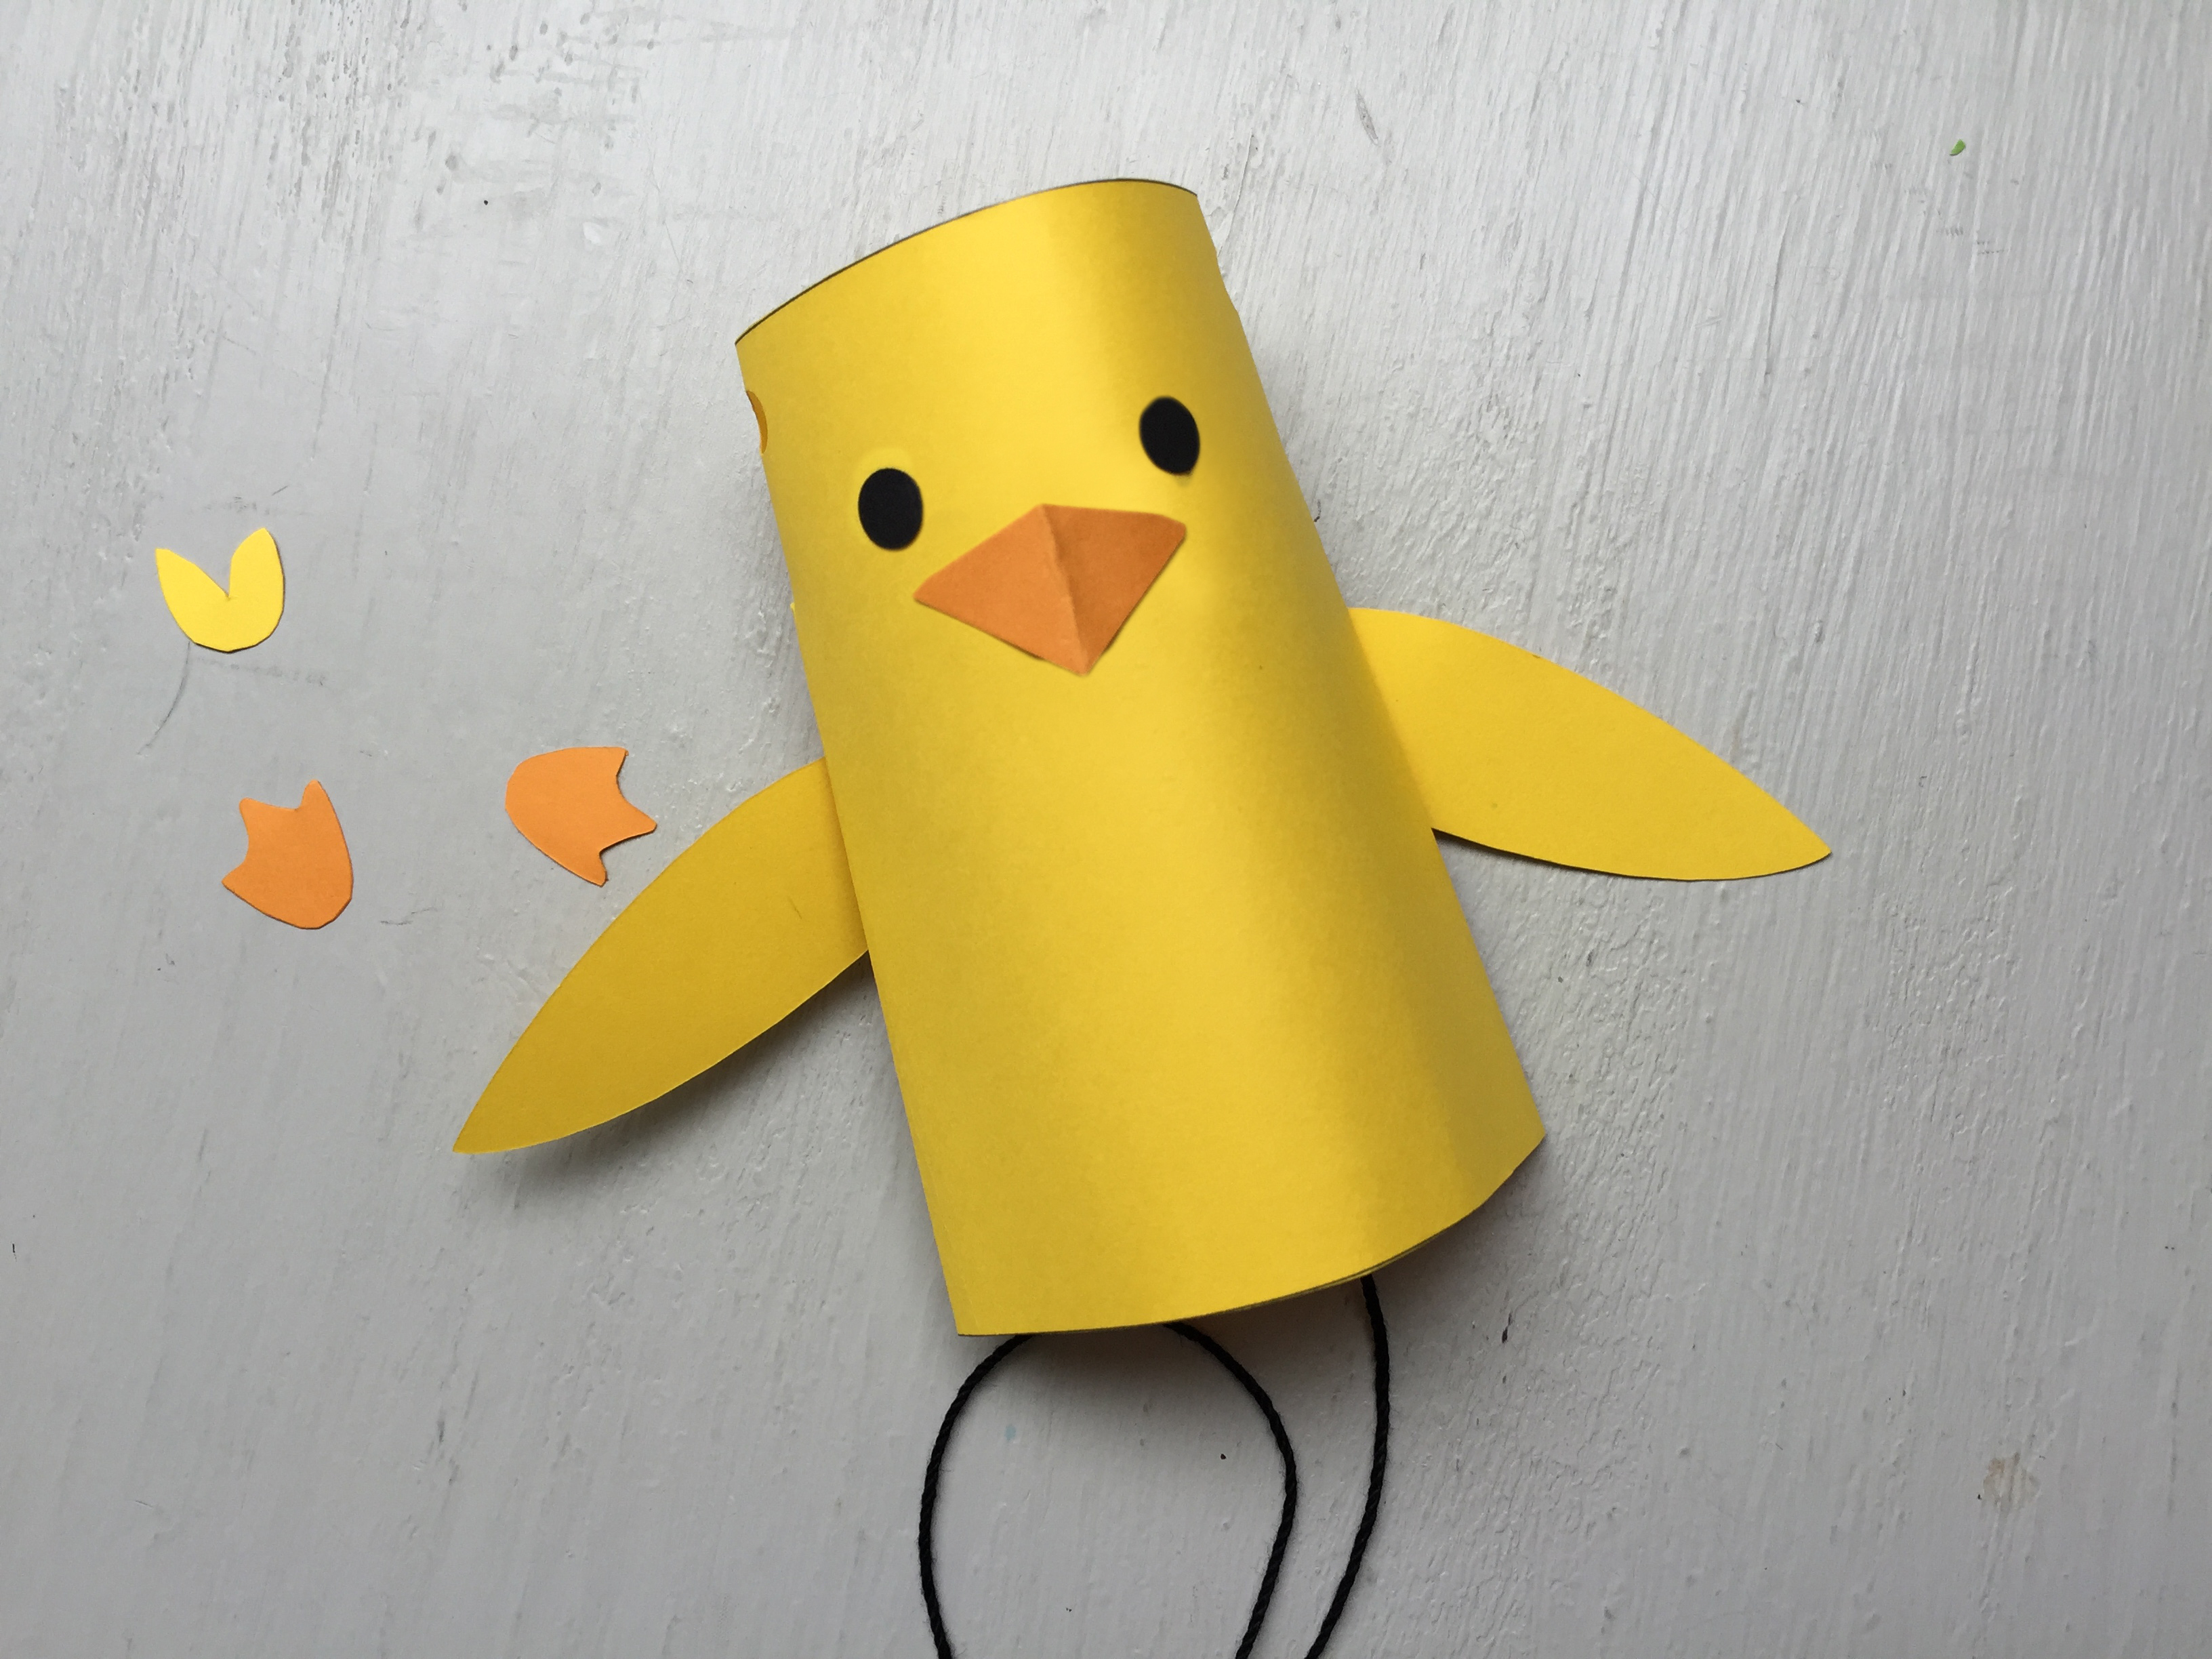
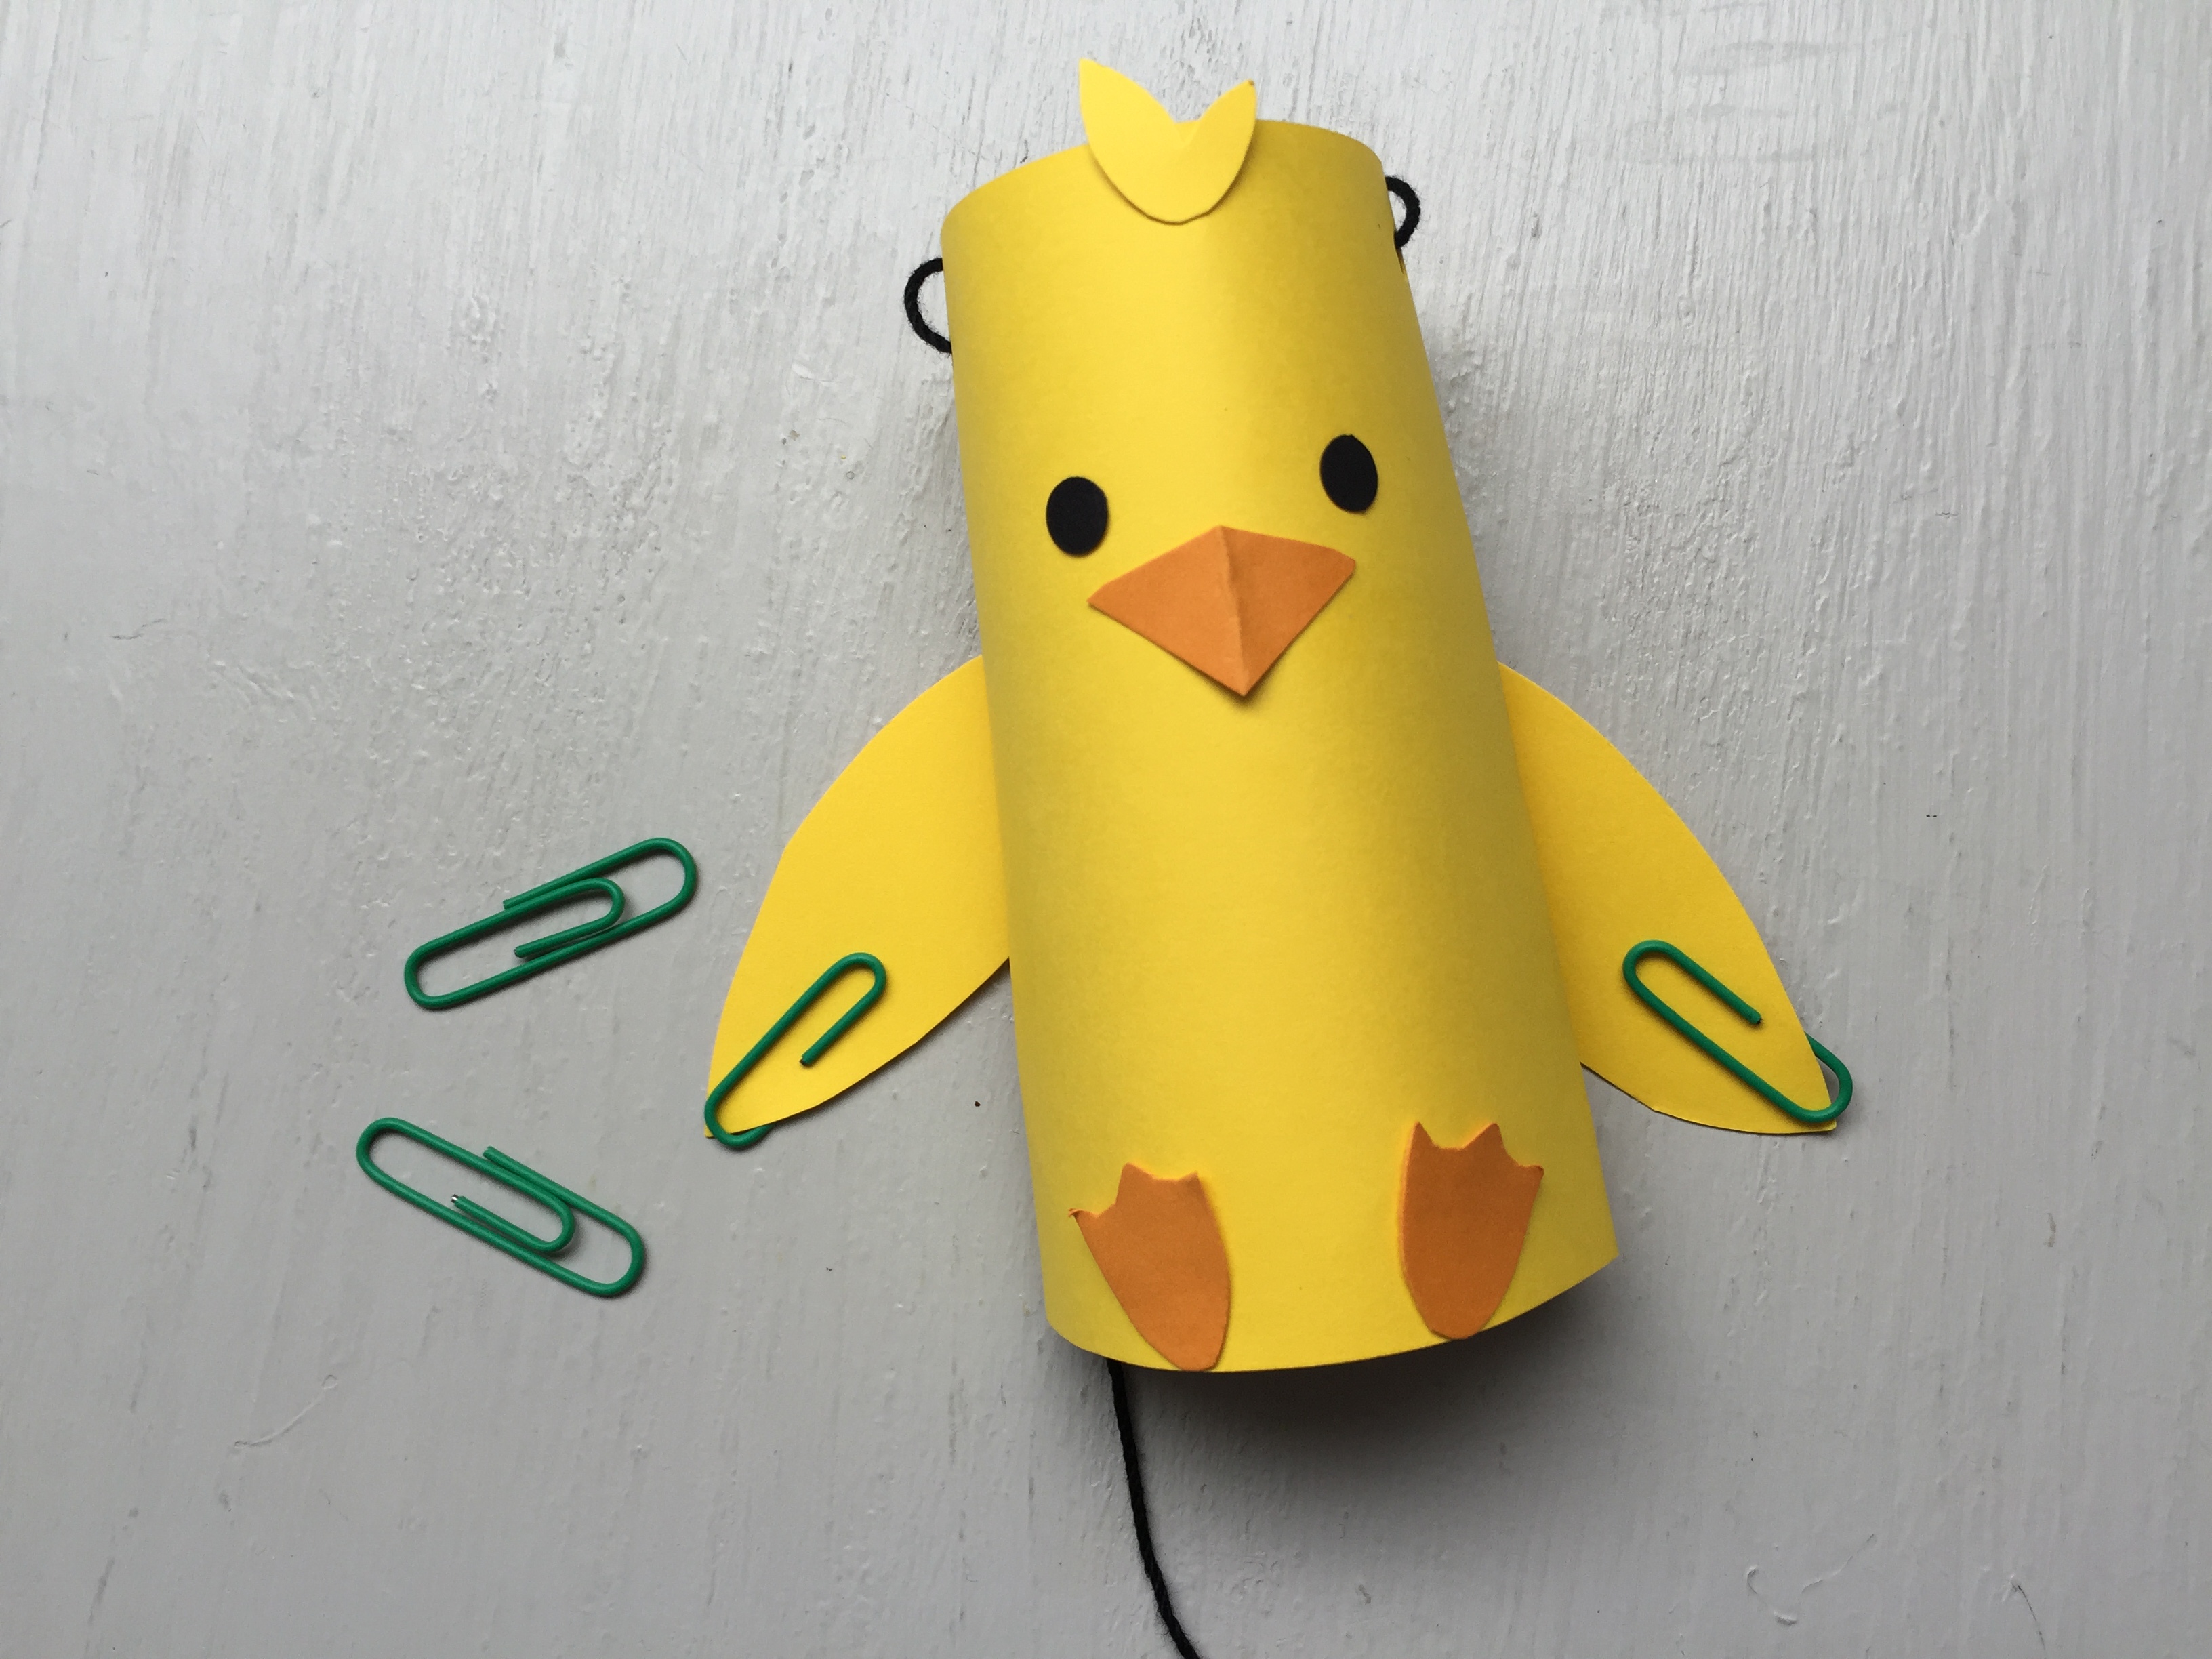
Step 9
Add a paper clip on each wing tip. This will bring the wing back down after each flap.
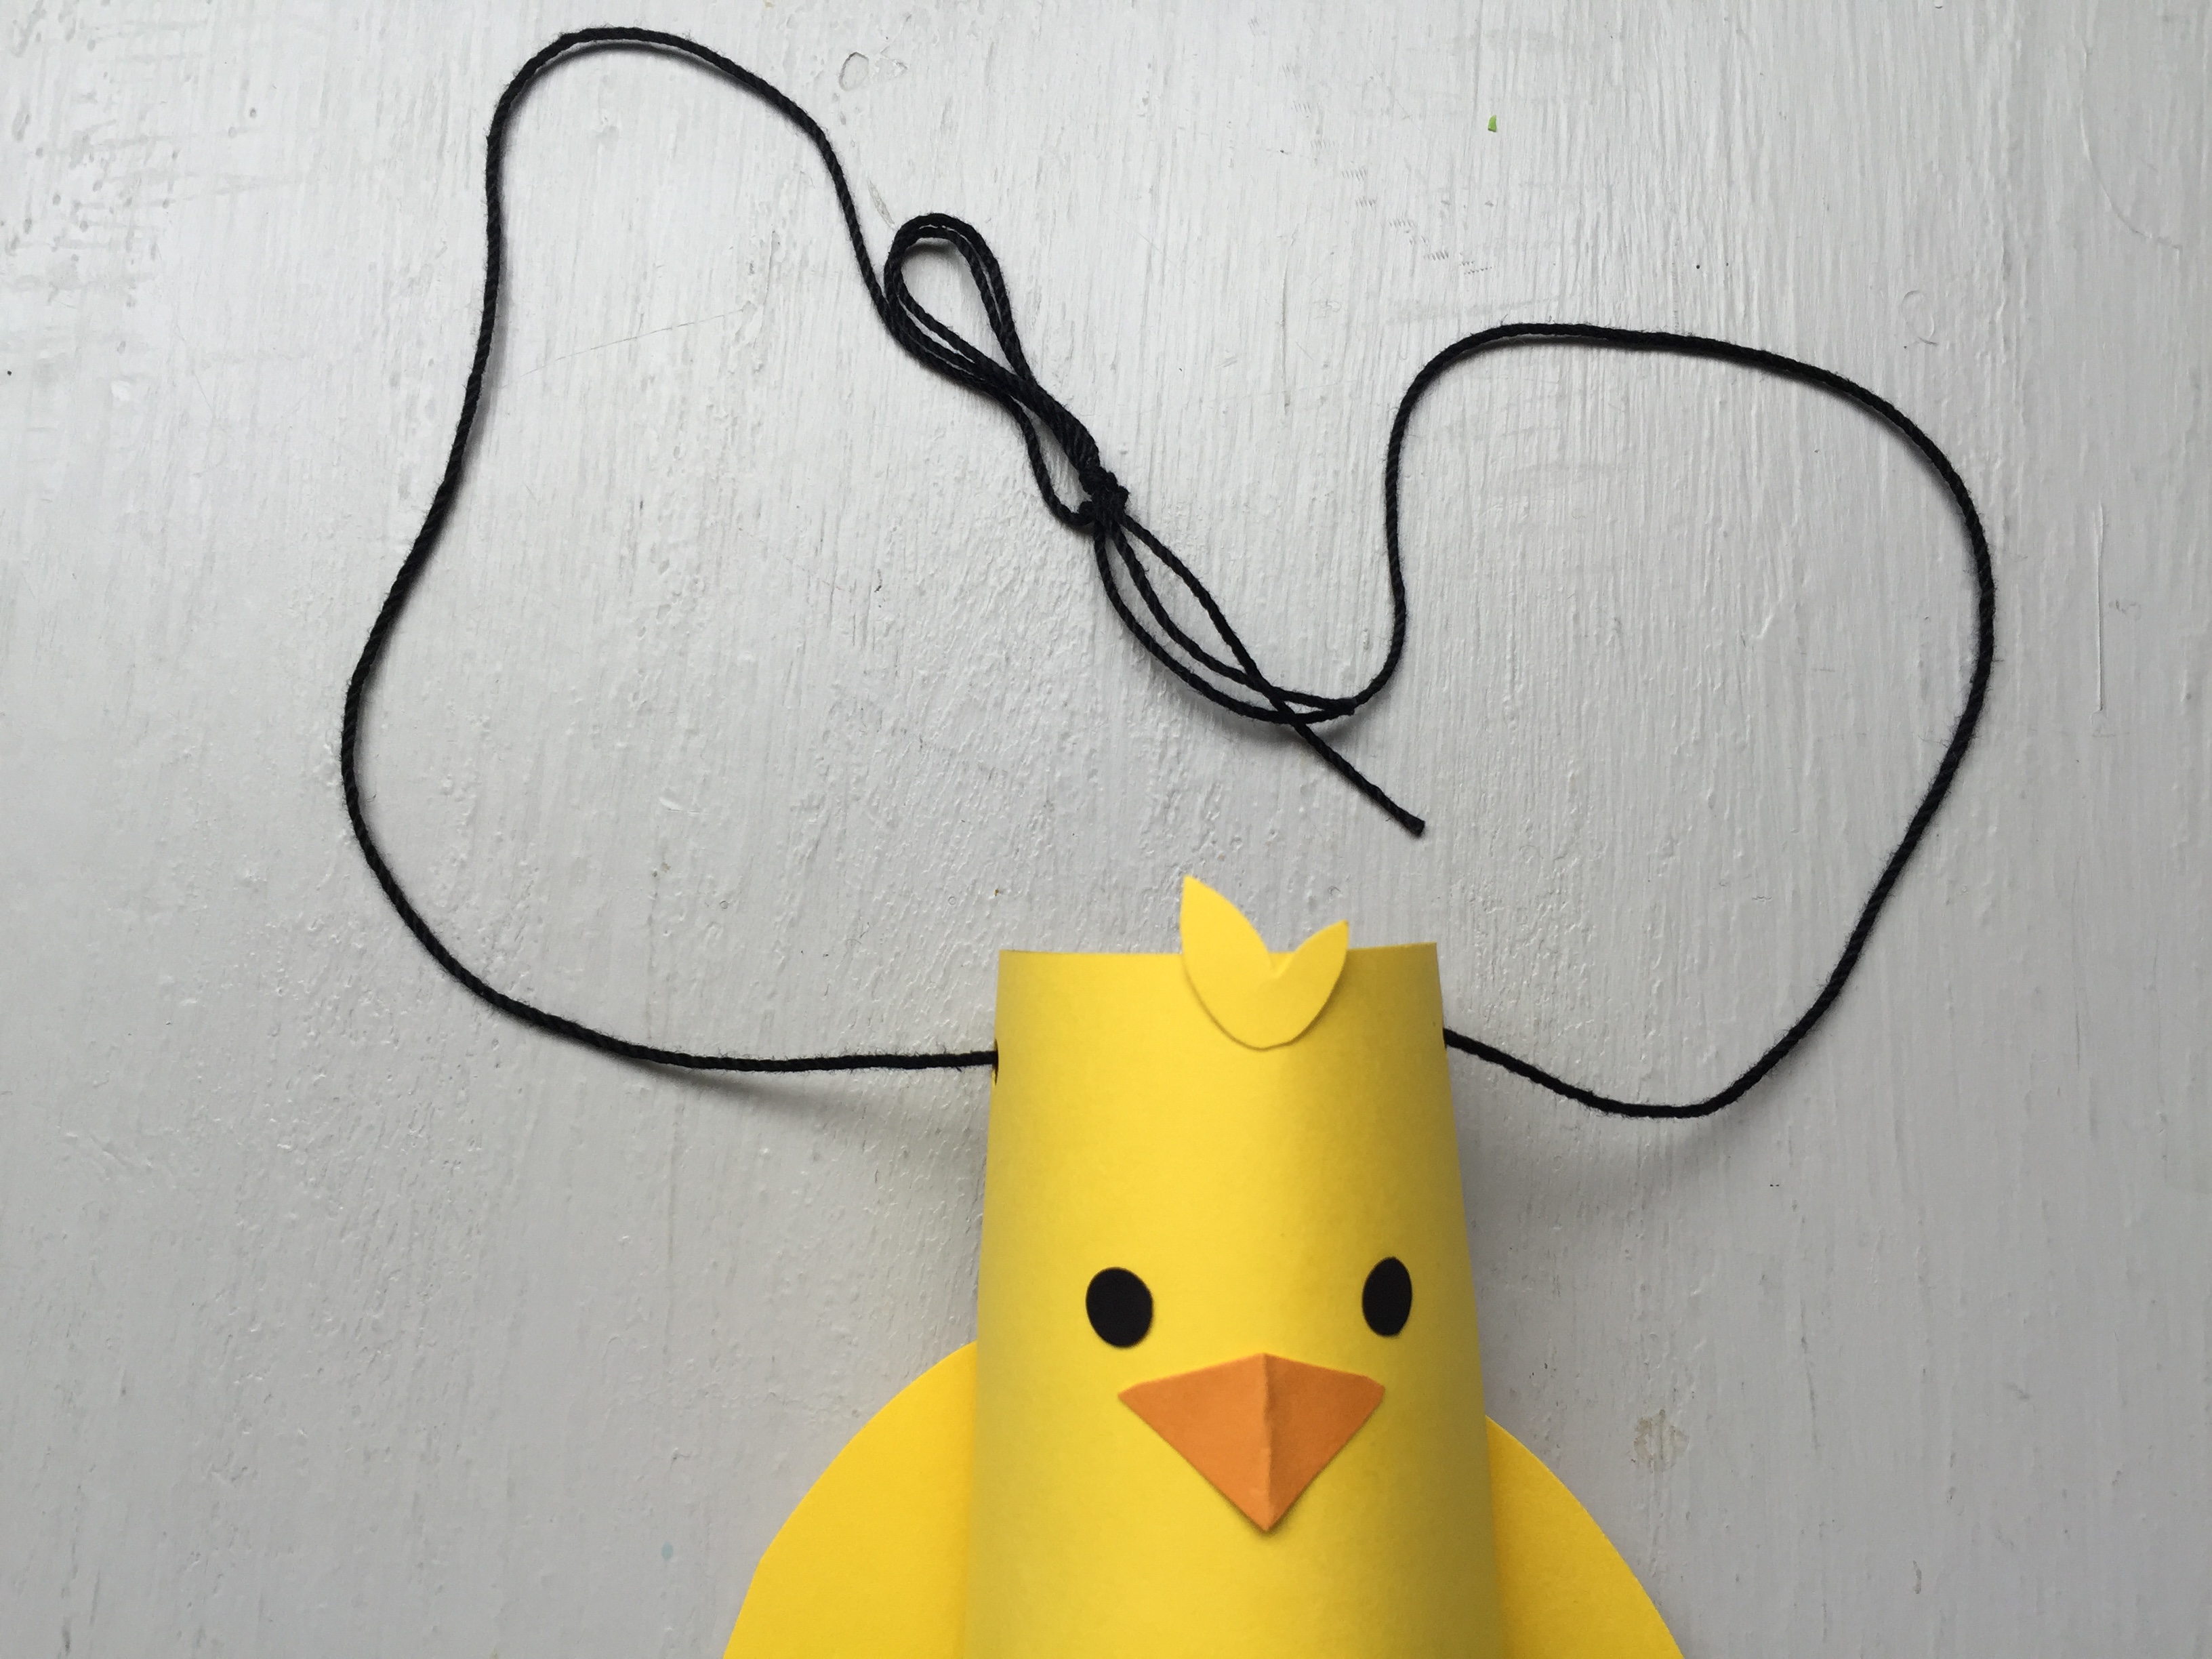
Step 10
Place a string through the top two holes and tie.
Done!
It's time to start flying! Hold onto the top loop and gently pull down on the bottom string.
If your wings are having trouble dropping back down, check to make sure your brads are not too tight and that your paperclips are still in place.


