Step-by-step tutorial
Step 1
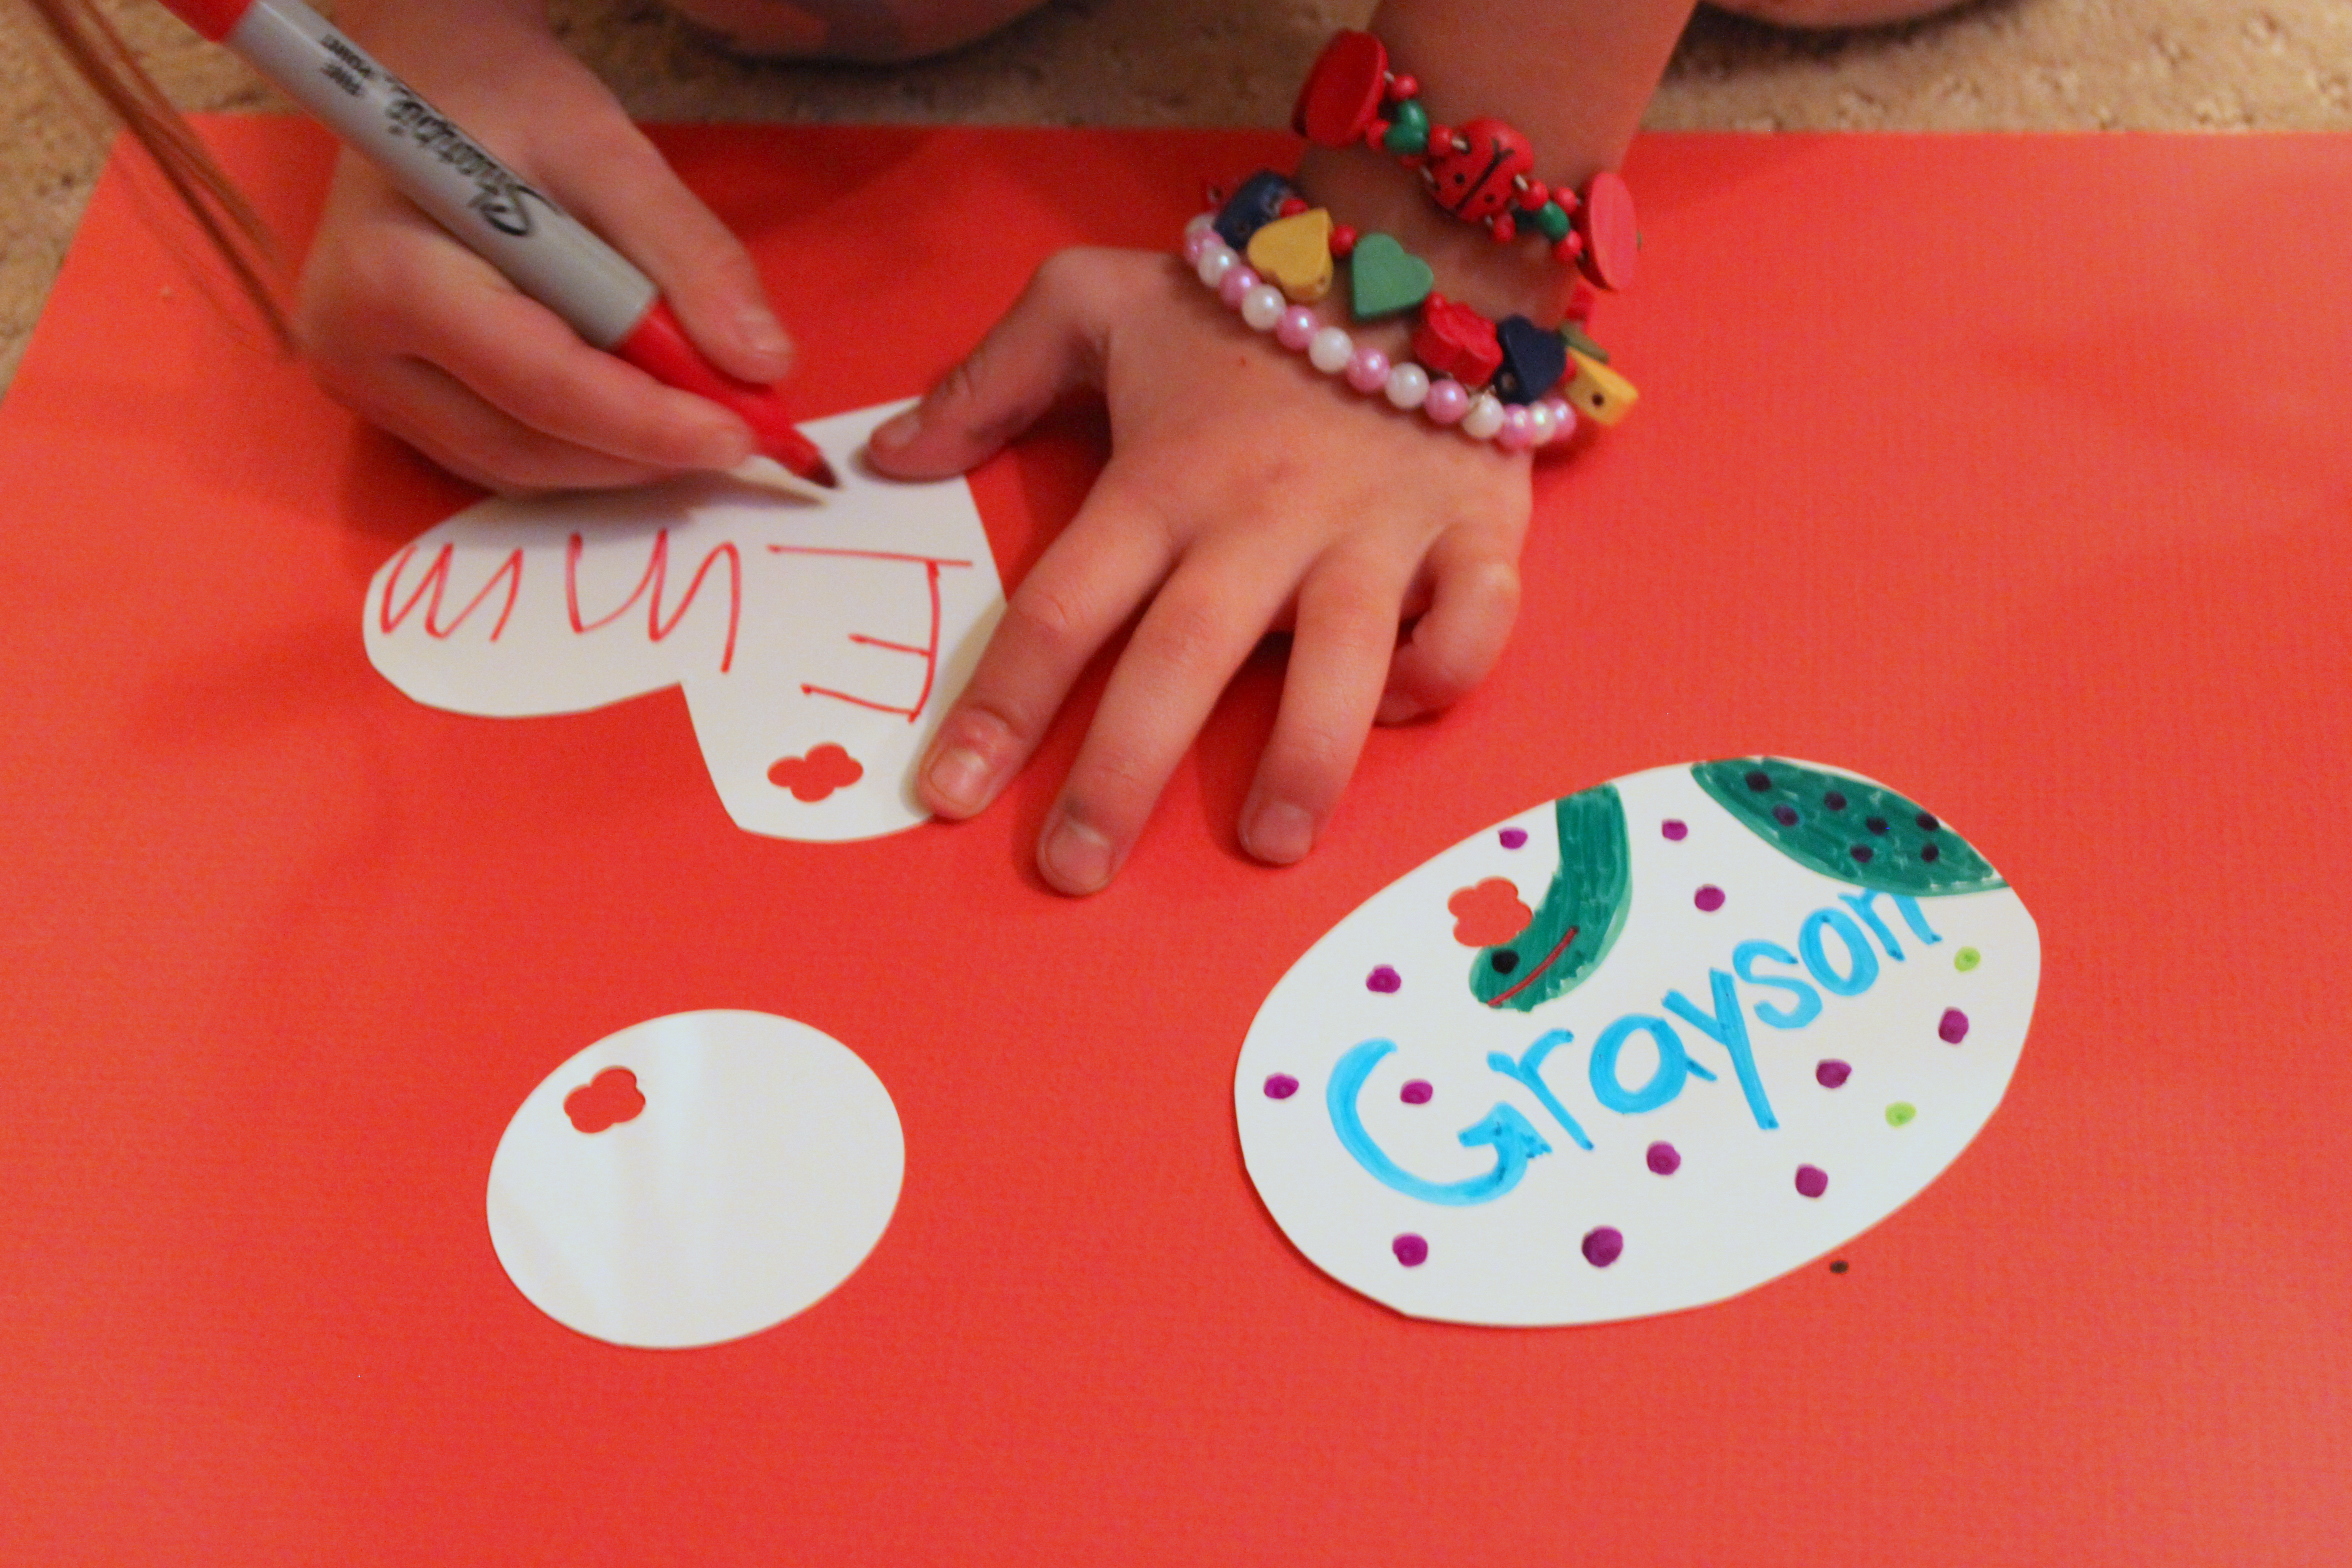
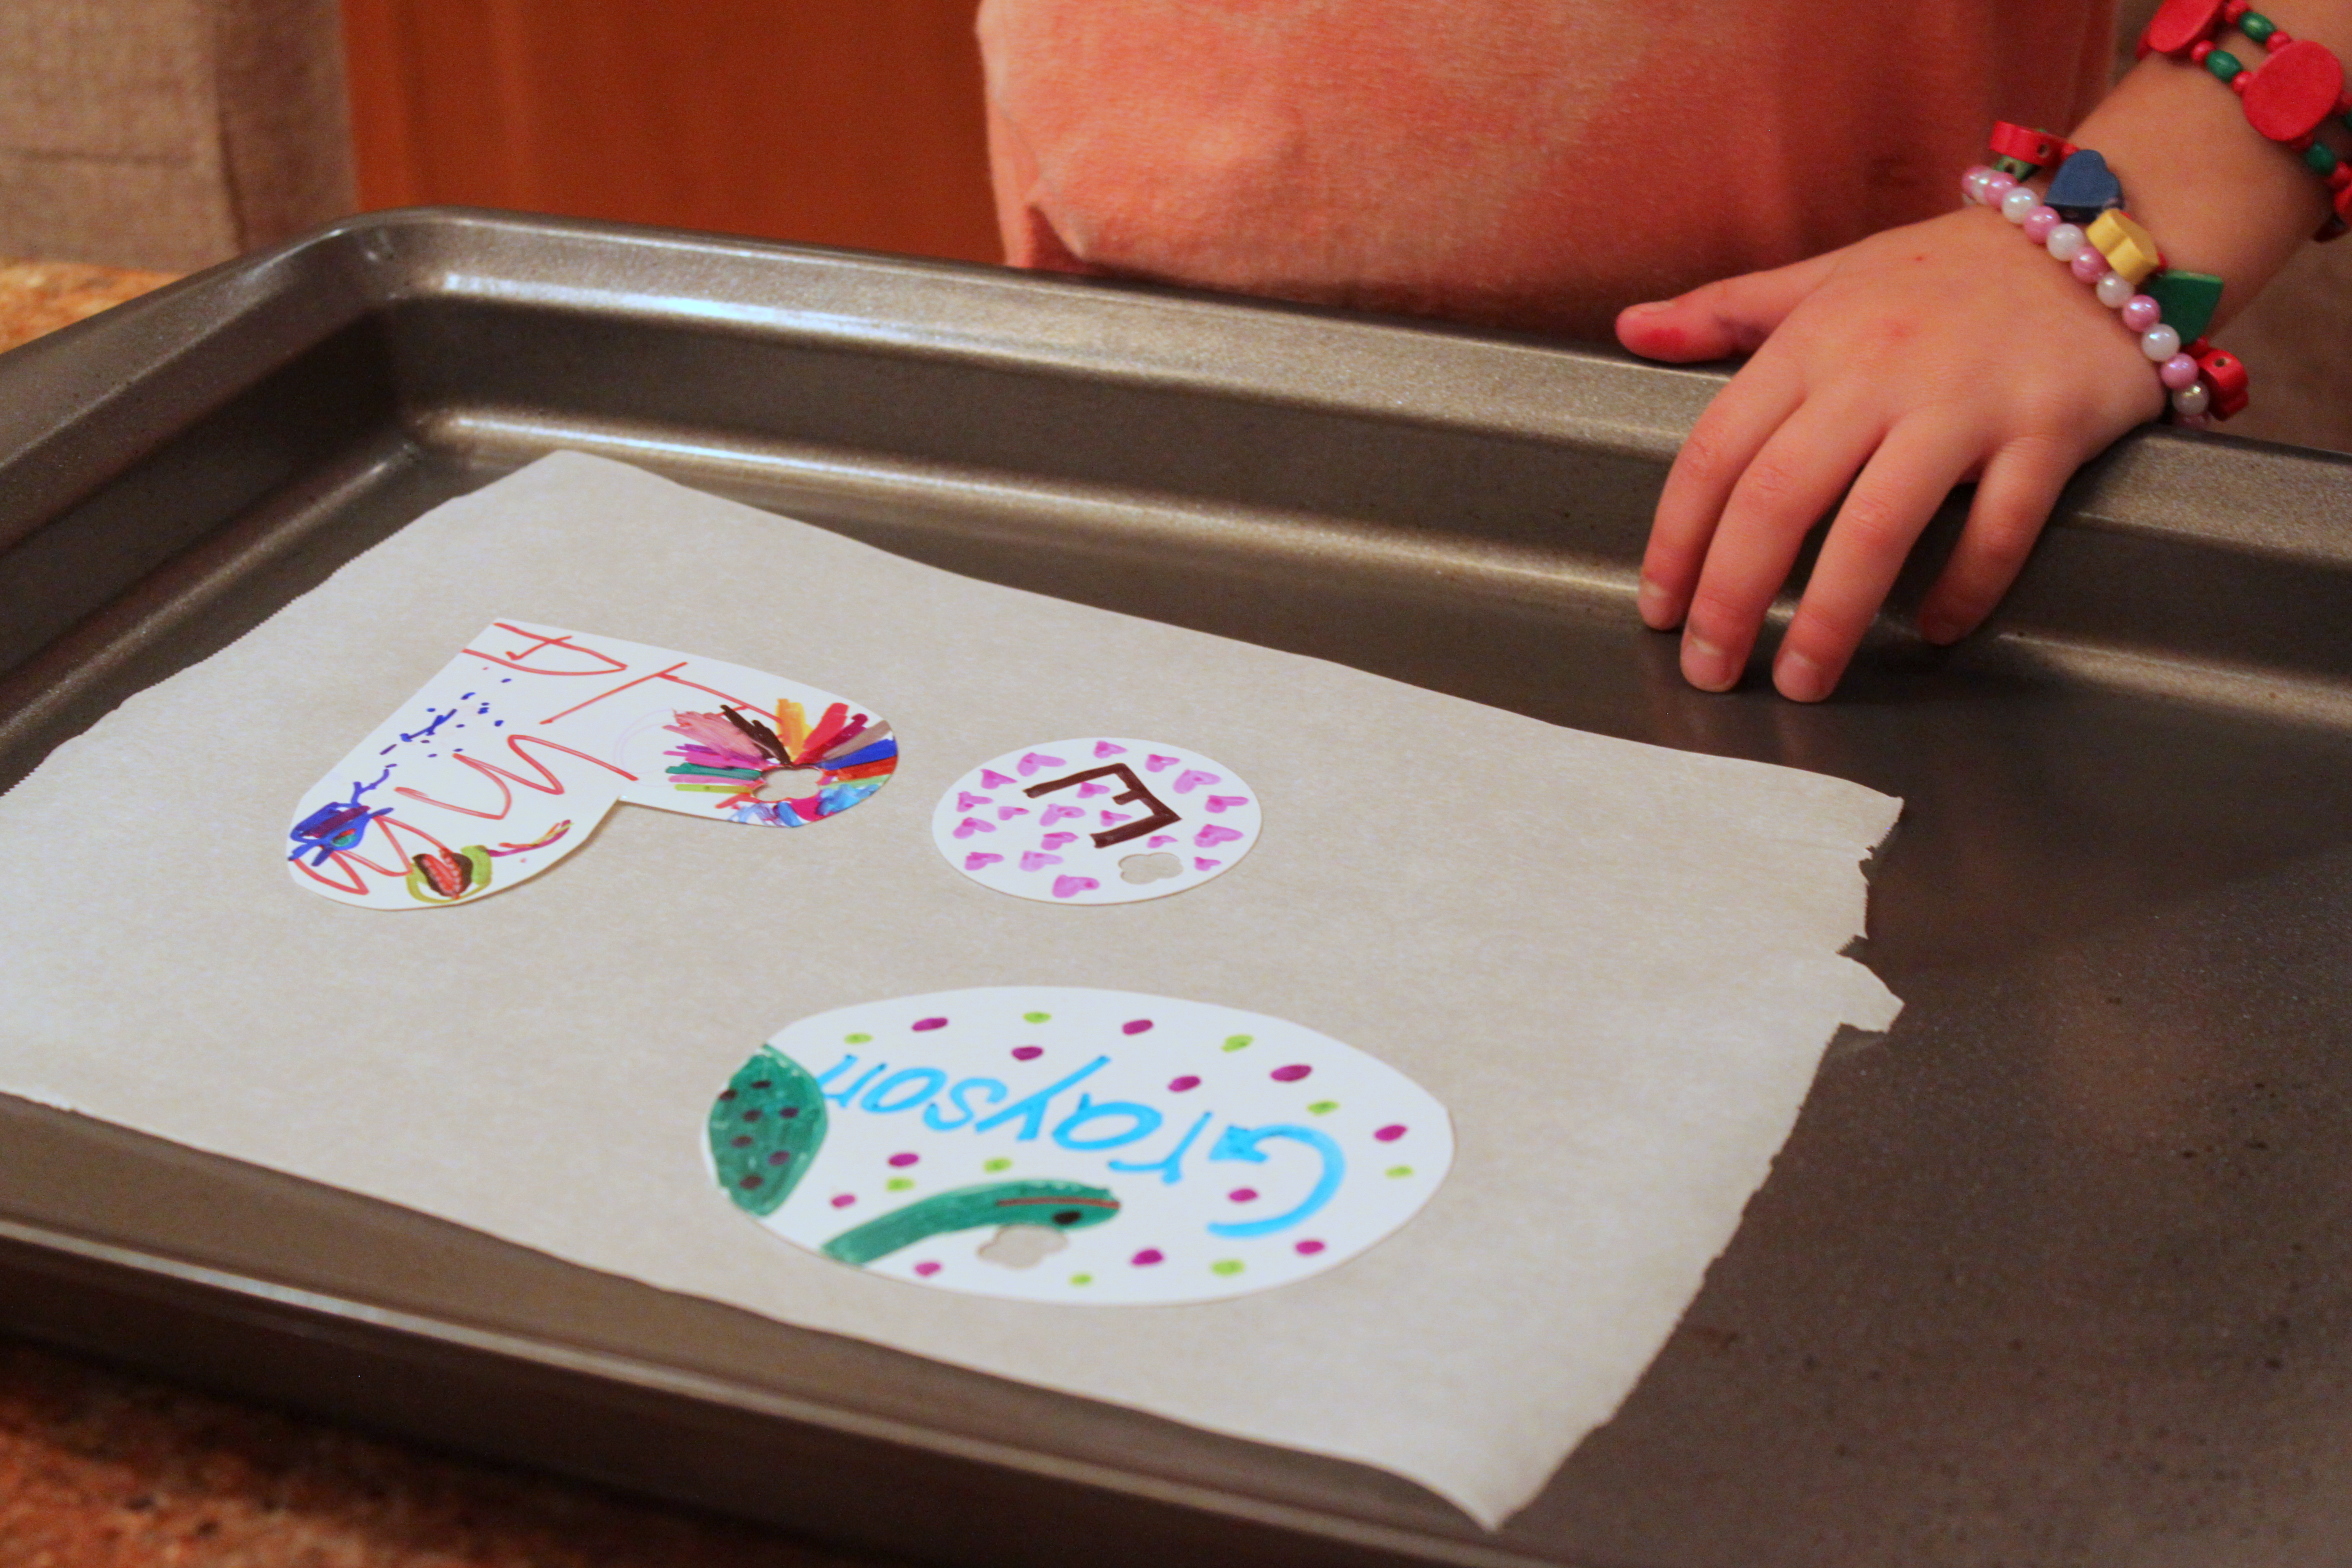
Shrink plastic sheets can be cut into anything your little ones can imagine. We cut a few different shapes to use for our name tags. I punched holes in them all so we could put a key ring through them. Because these shrink so much, you need to punch several holes to make sure the shrunken hole is large enough to put a key ring through.

Step 2
The kids decorated the forms with permanent markers. I placed them on parchment paper and put another sheet of parchment right on top. I put them in a preheated (325 degrees) oven for a few minutes. (I suggest one to three minutes.)
Step 3
The plastic will curl up while shrinking and then lay flat again. Once they are flat, they are done. This happens quickly so stay close by!
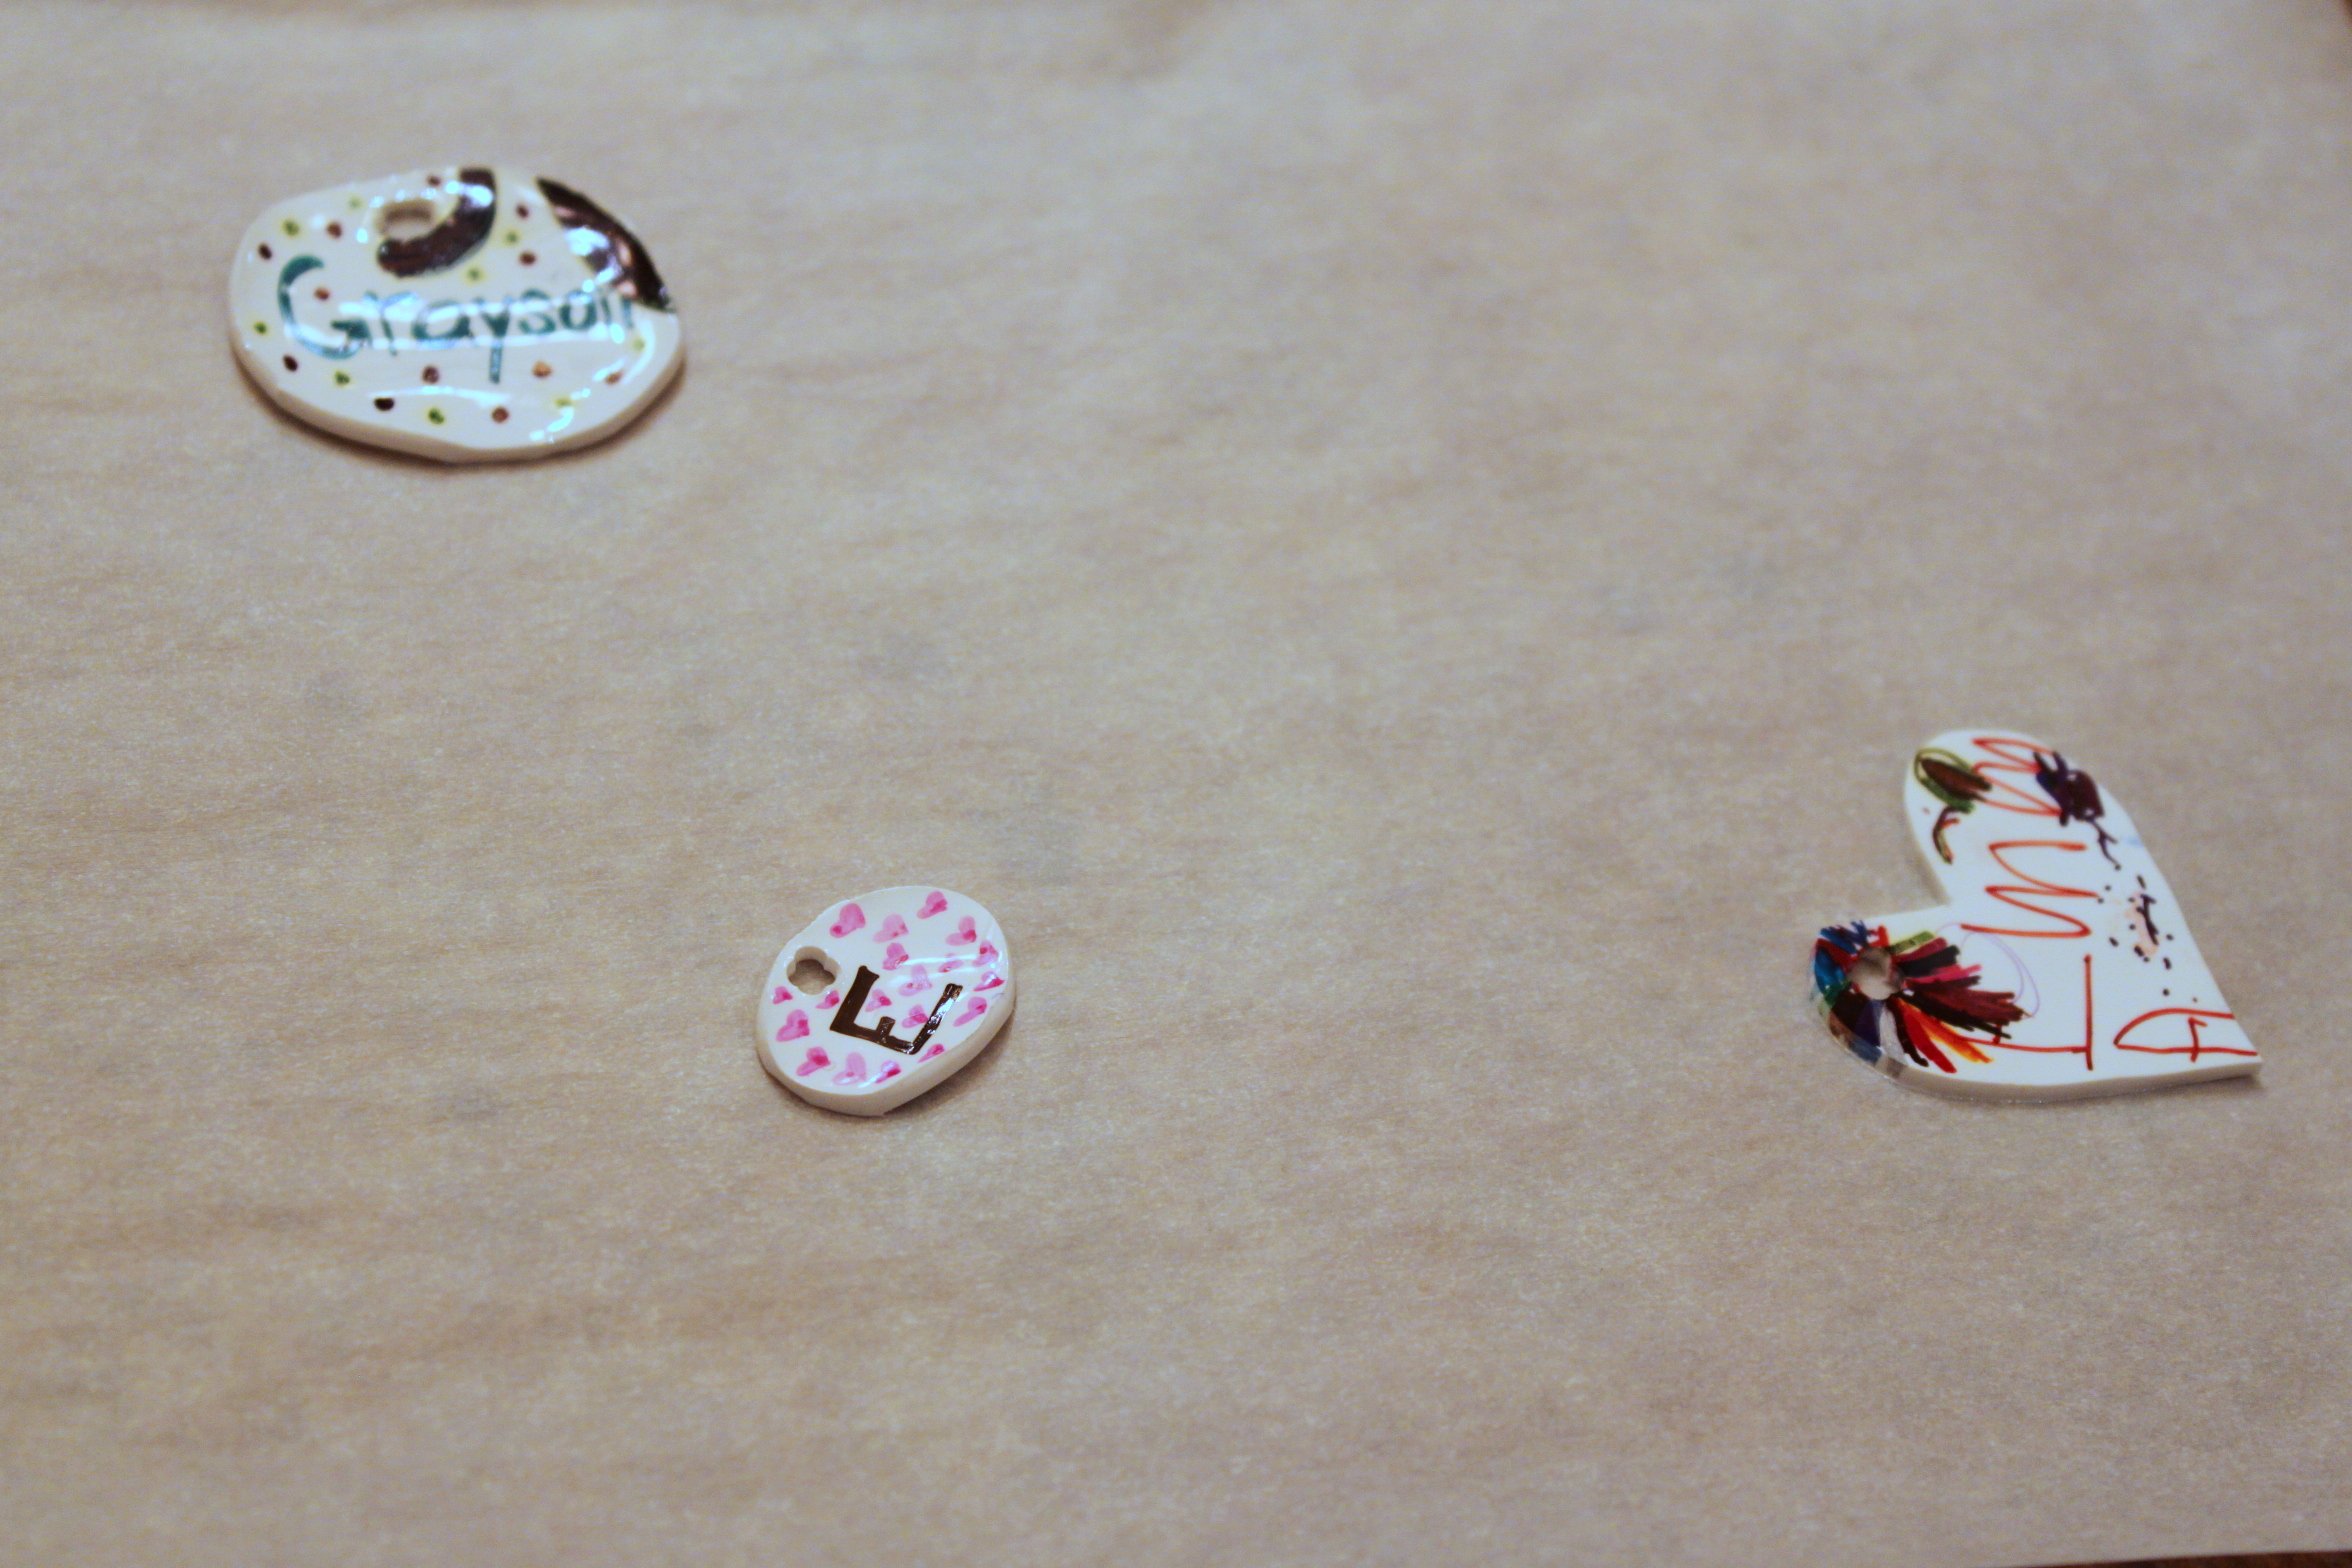
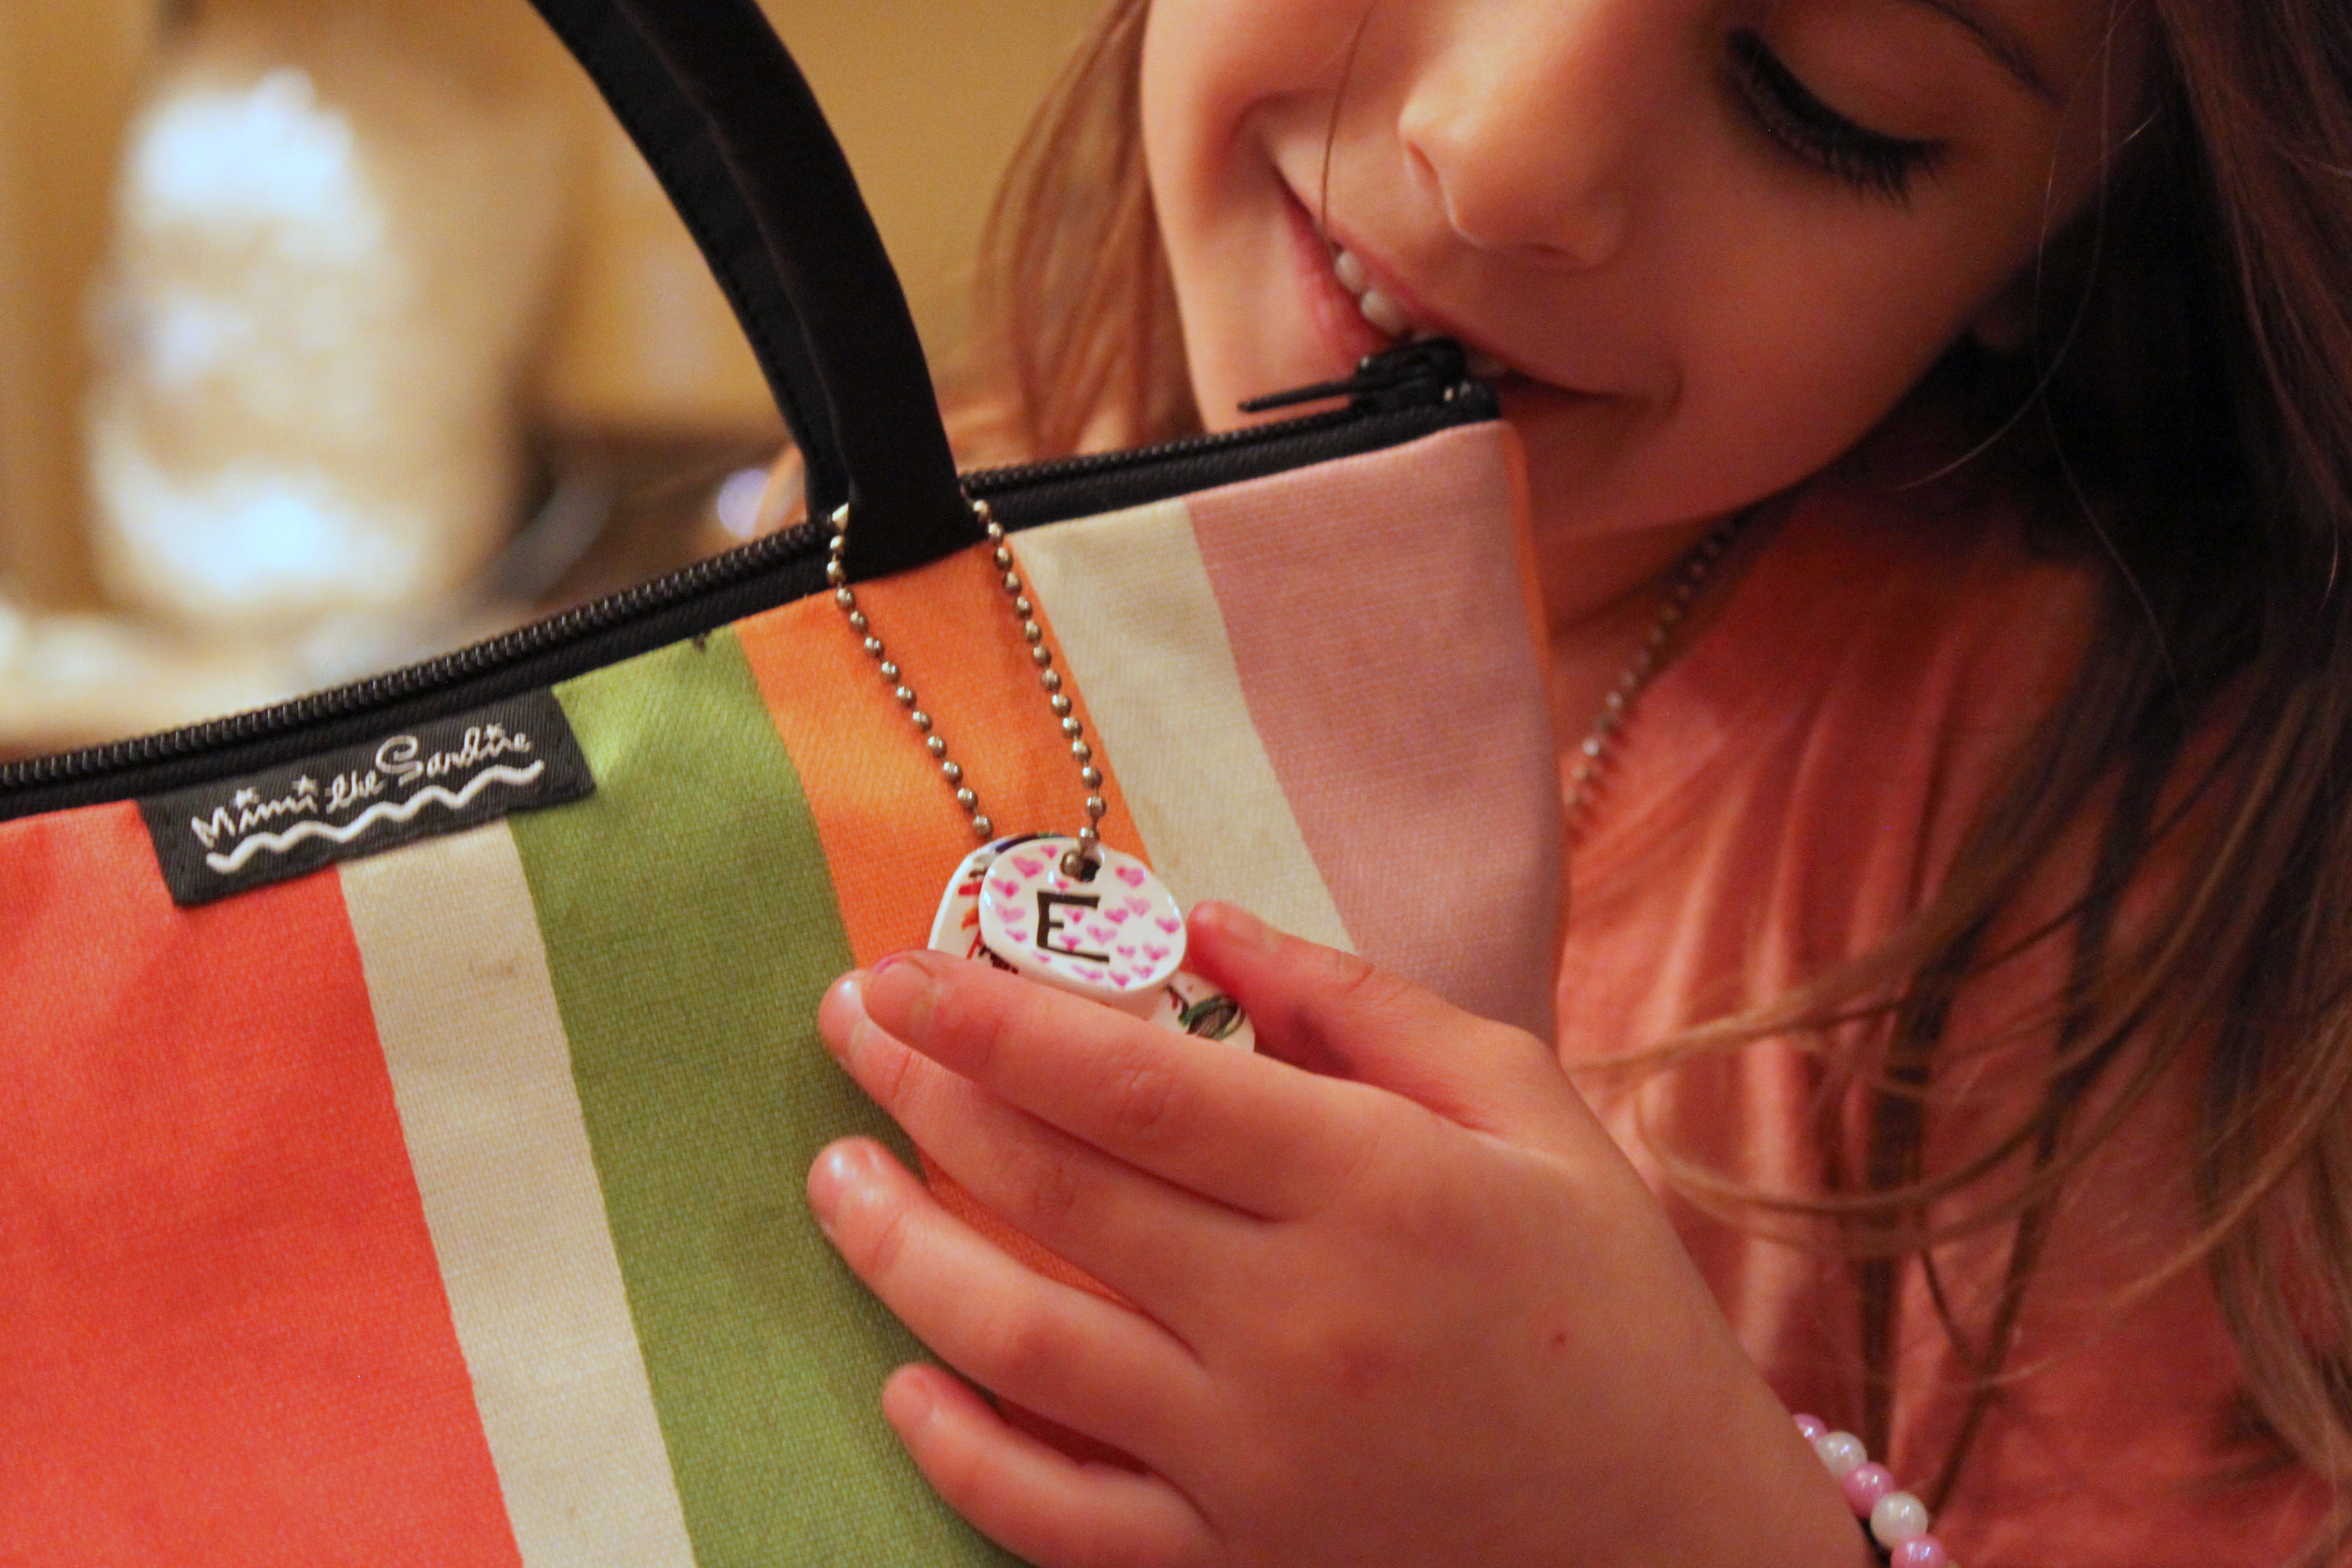
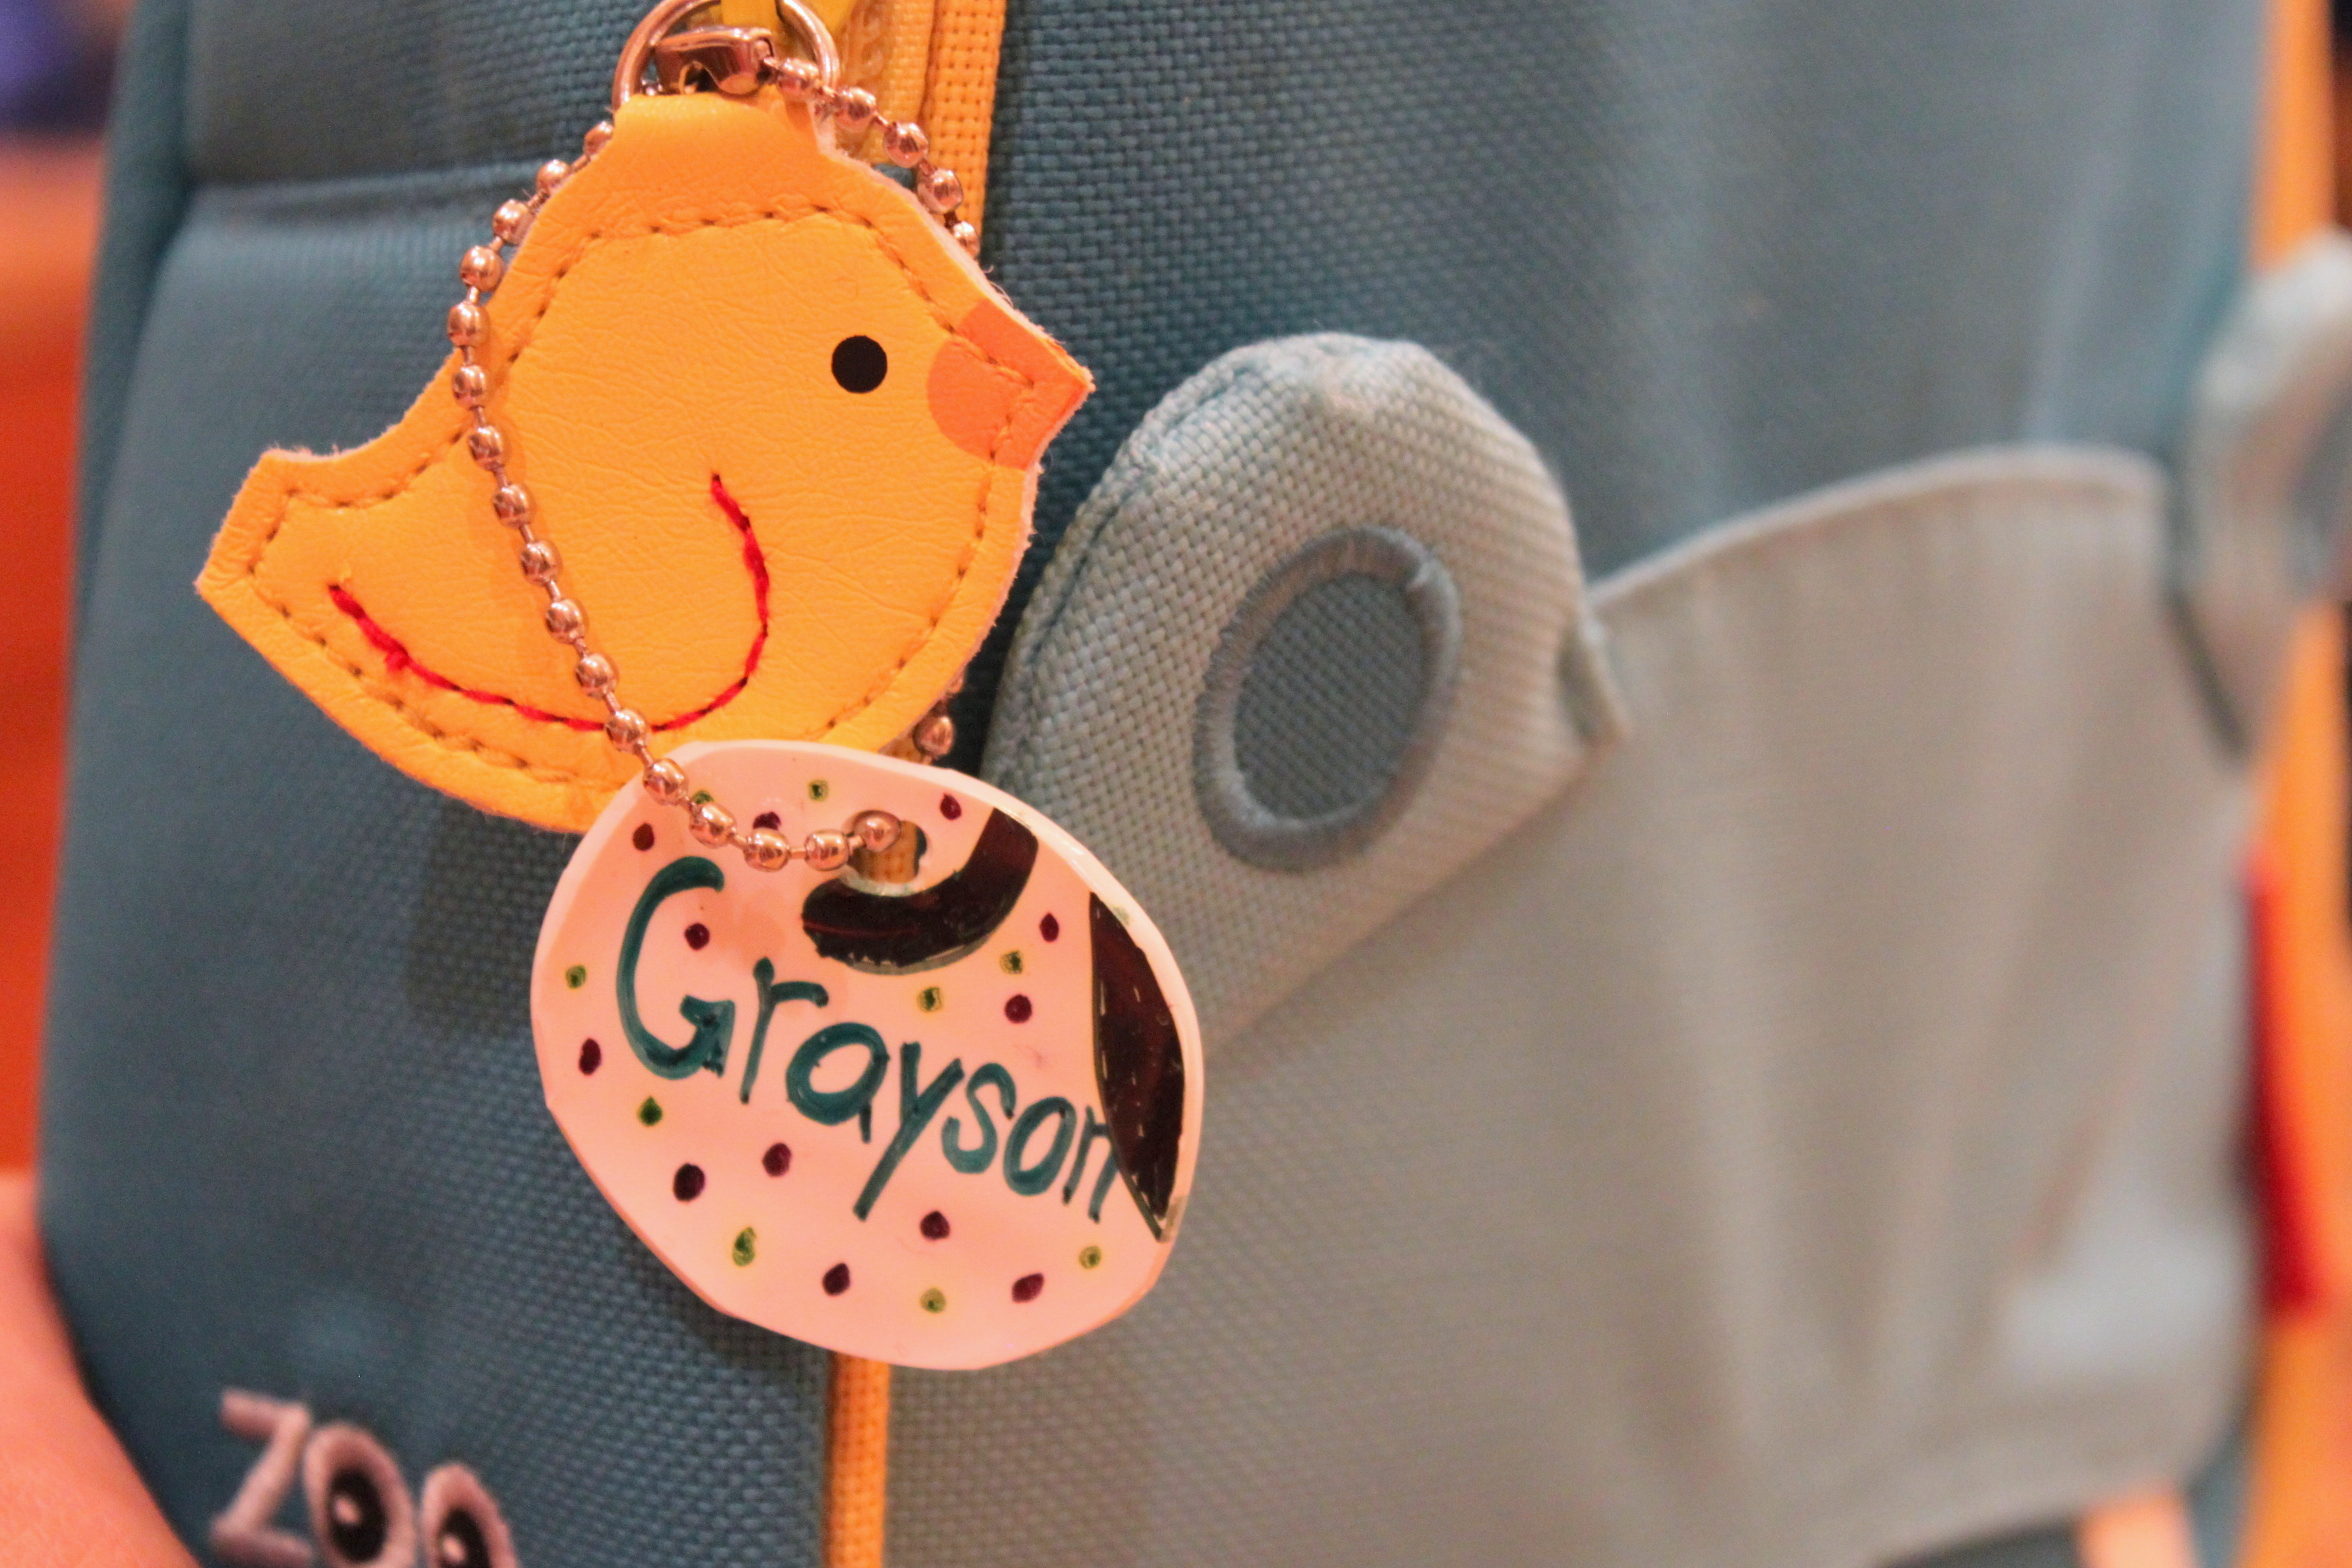
Done!
We have used shrink plastic more times than I can tell you and it never fails to bring so much excitement to my children and me!! My kids are loving their new name tags, too...