Step-by-step tutorial
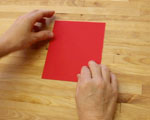
Step 1
Start with a rectangular piece of paper, colored side up (if you're using colored paper). If you're using origami paper, you will first need to cut ~1" from one edge to form a rectangle.

Step 2
Fold the paper in half to form a crease, and then open it.
Step 3
Fold the paper in half downwards.

Step 4
Bring the corners to the center crease.
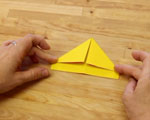
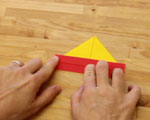
Step 5
Fold the uppermost layer on the bottom up, then turn over and do the same on the back. Now you have a pirate hat!
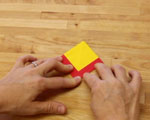
Step 6
Push the corners of the pirate hat in toward each other to form a square. You'll need to tuck one edge of the paper border behind the other so you can flatten the square.
Step 7
Fold the bottom corner of the square up to the top, then turn over and do the same on the back.
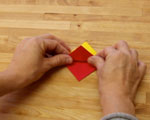
Step 8
Take the edges of your triangle and bring them to the center to meet again, forming another square. Press the creases firmly to flatten.
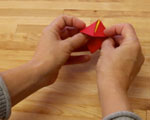
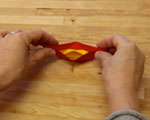
Step 9
Gently pull the top corners outward. Pull it all the way flat and crease the folds.
Step 10
Then open your form out again, forming a boat.
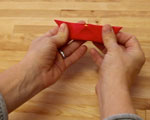
Step 11
You may need to pull apart the folds a tiny bit on the bottom to form a more stable base for your boat to rest on.

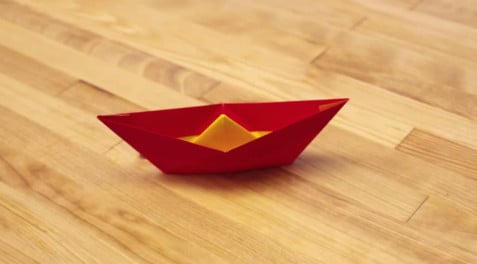
Final result!
Ta-da! Your very own tiny origami boat!
