Step-by-step tutorial
Step 1
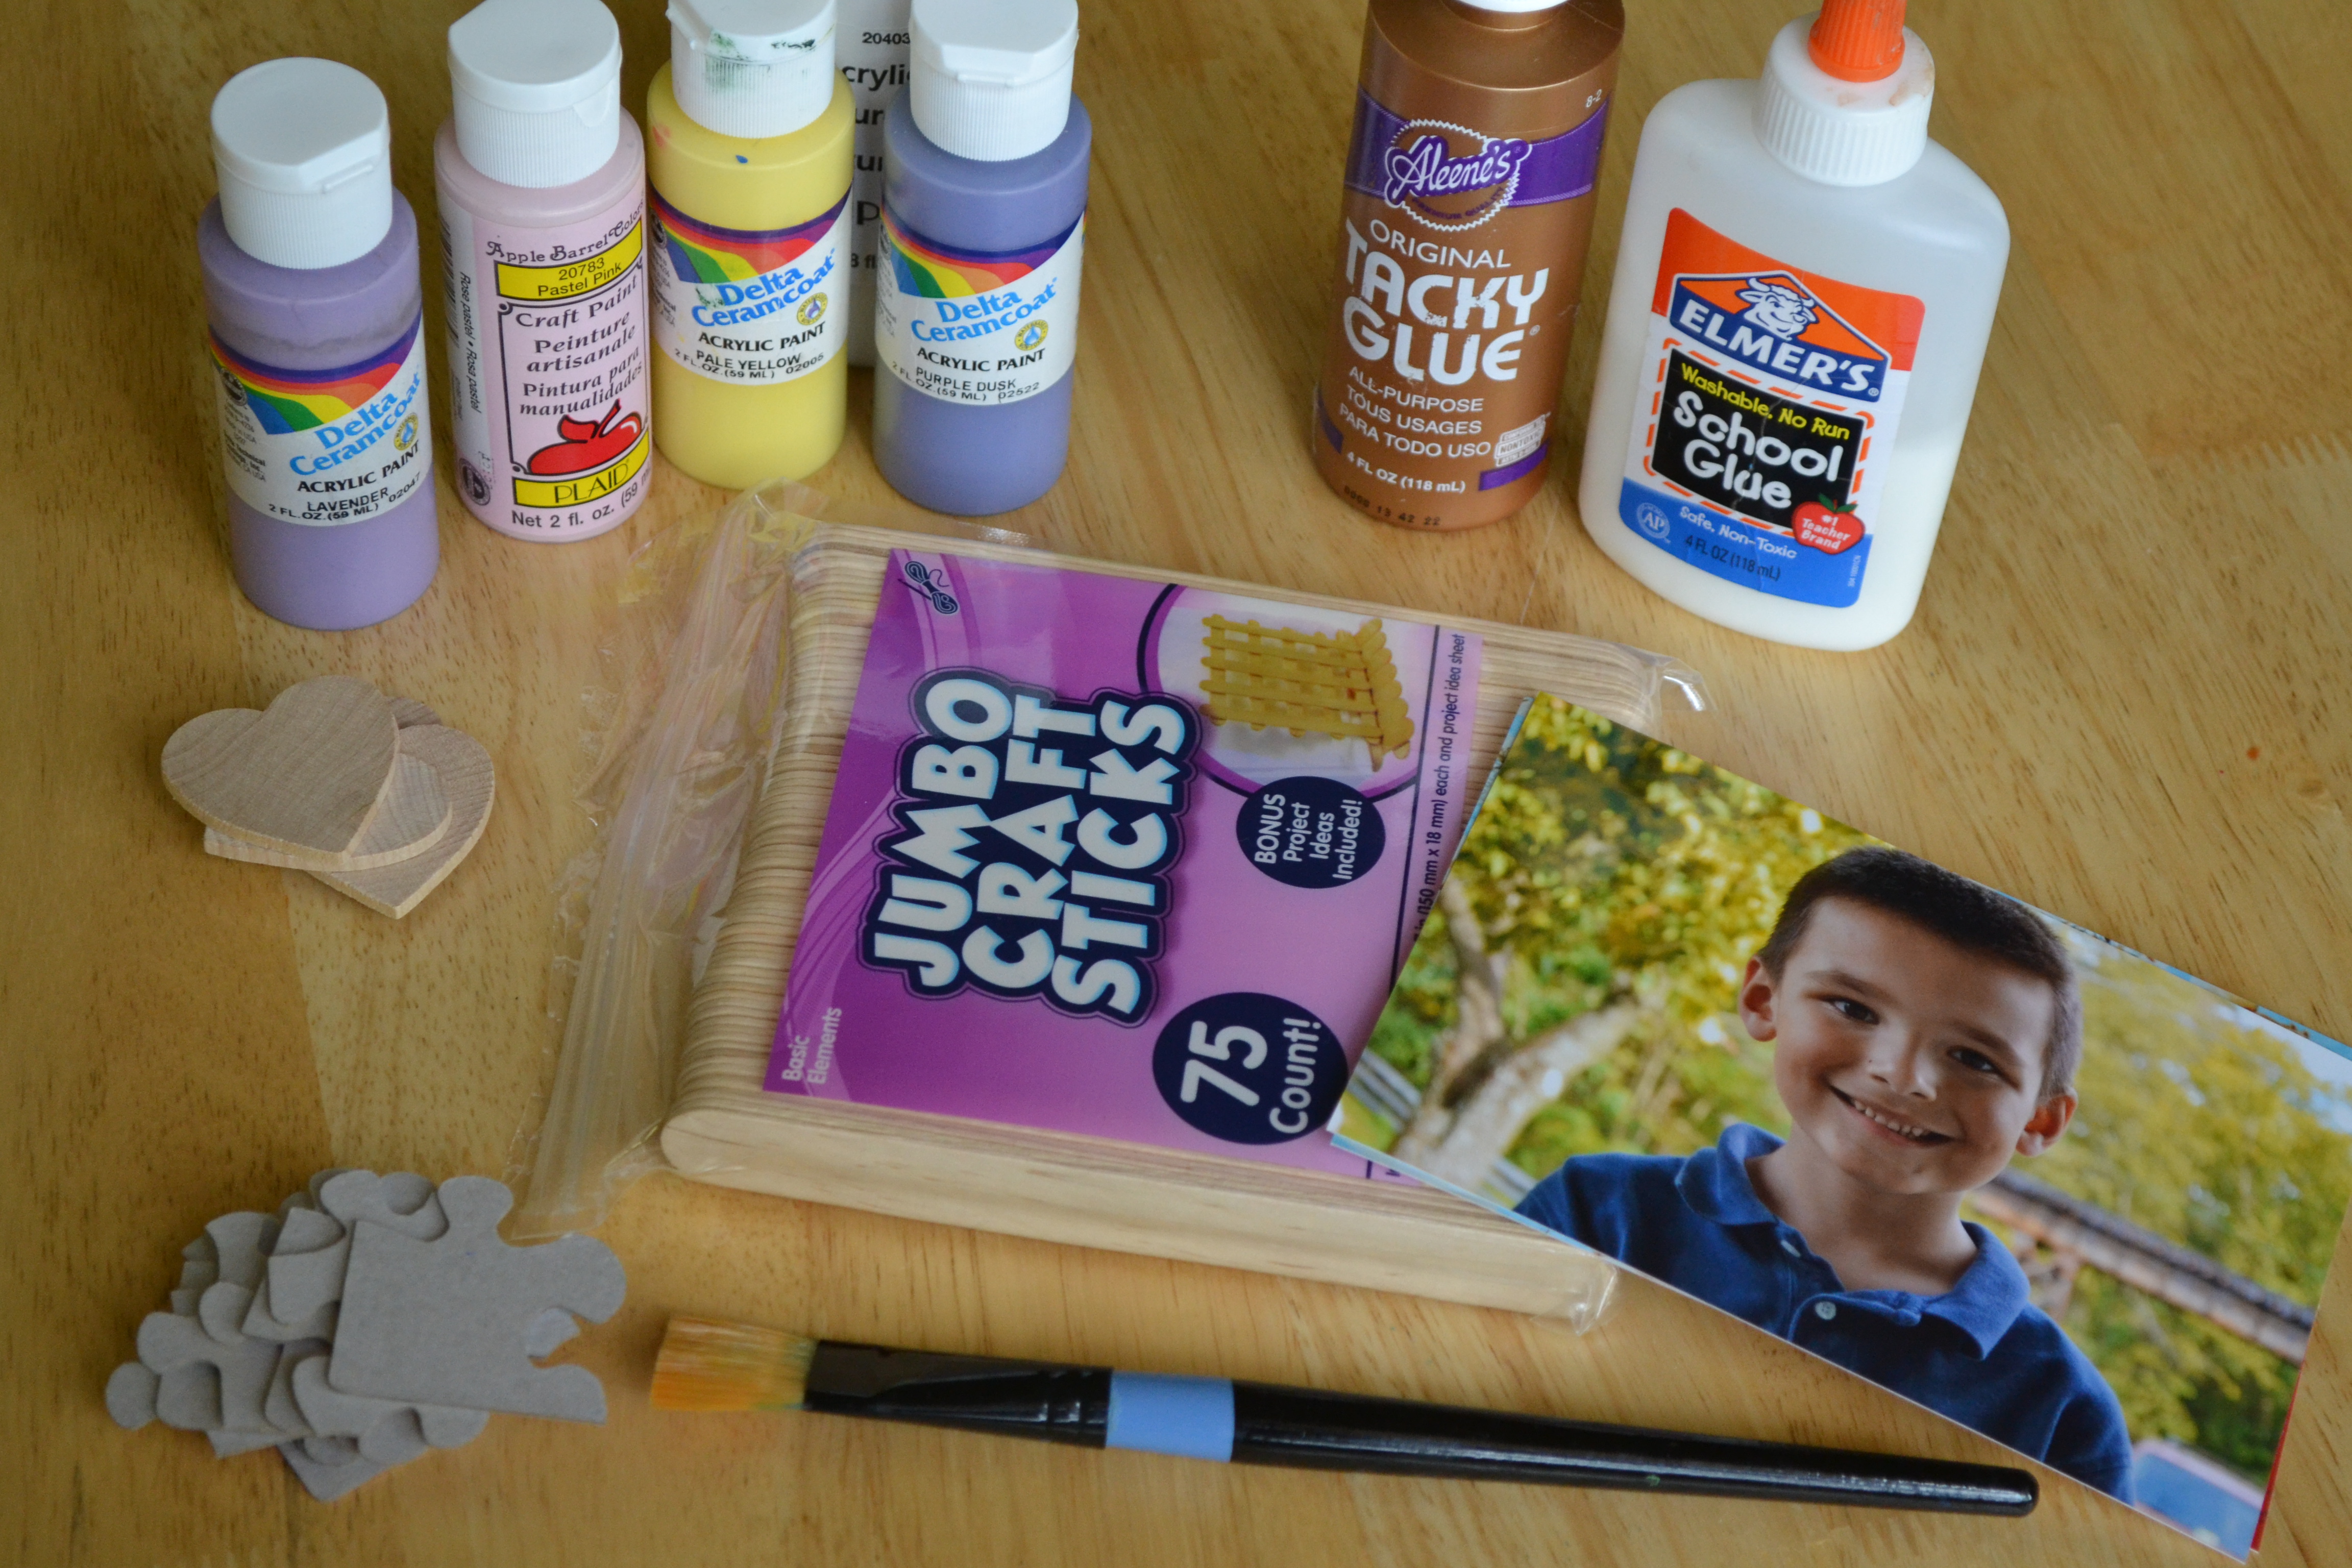
Gather all materials. We have tons of puzzles that are missing pieces, so we used this opportunity to use up some of them without throwing them away. We also used special scrapbooking markers, but a black sharpie would work just as well.

Step 2
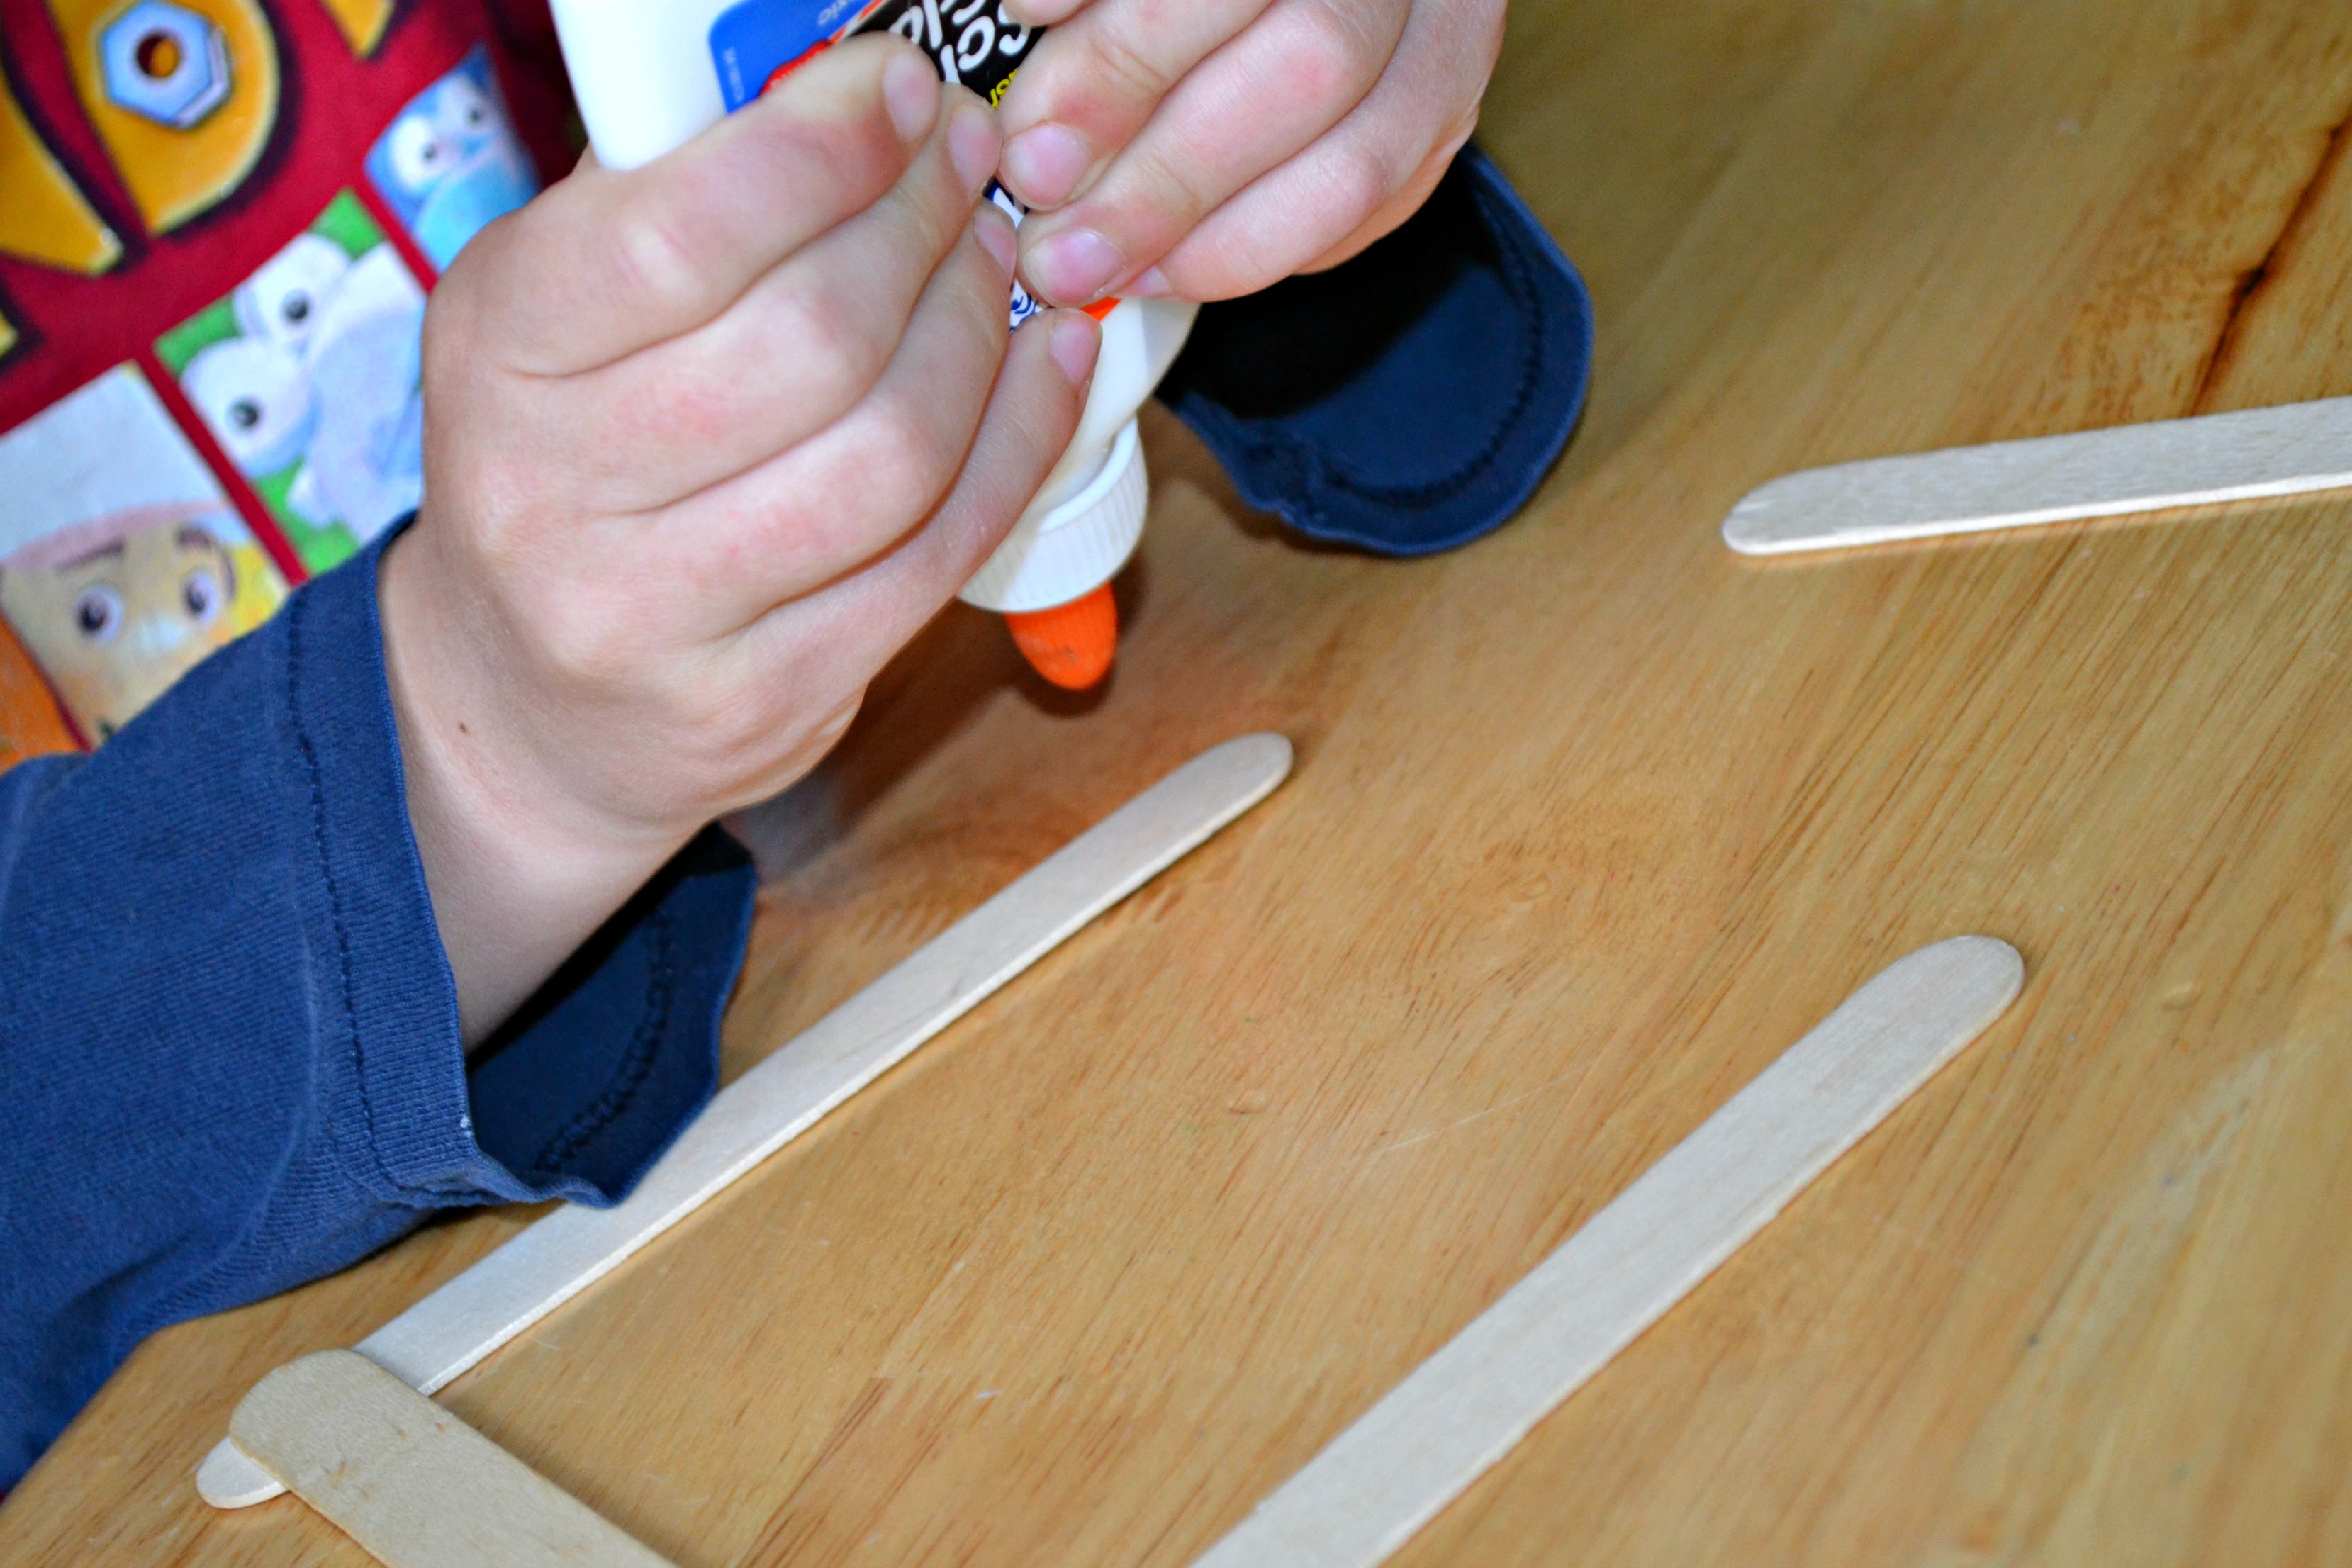
We glued the jumbo craft sticks in the shape of a square to create our frame. My 2-year-old's frame was a little slanted, but I thought that would add to the charm for Father's Day.
Step 3
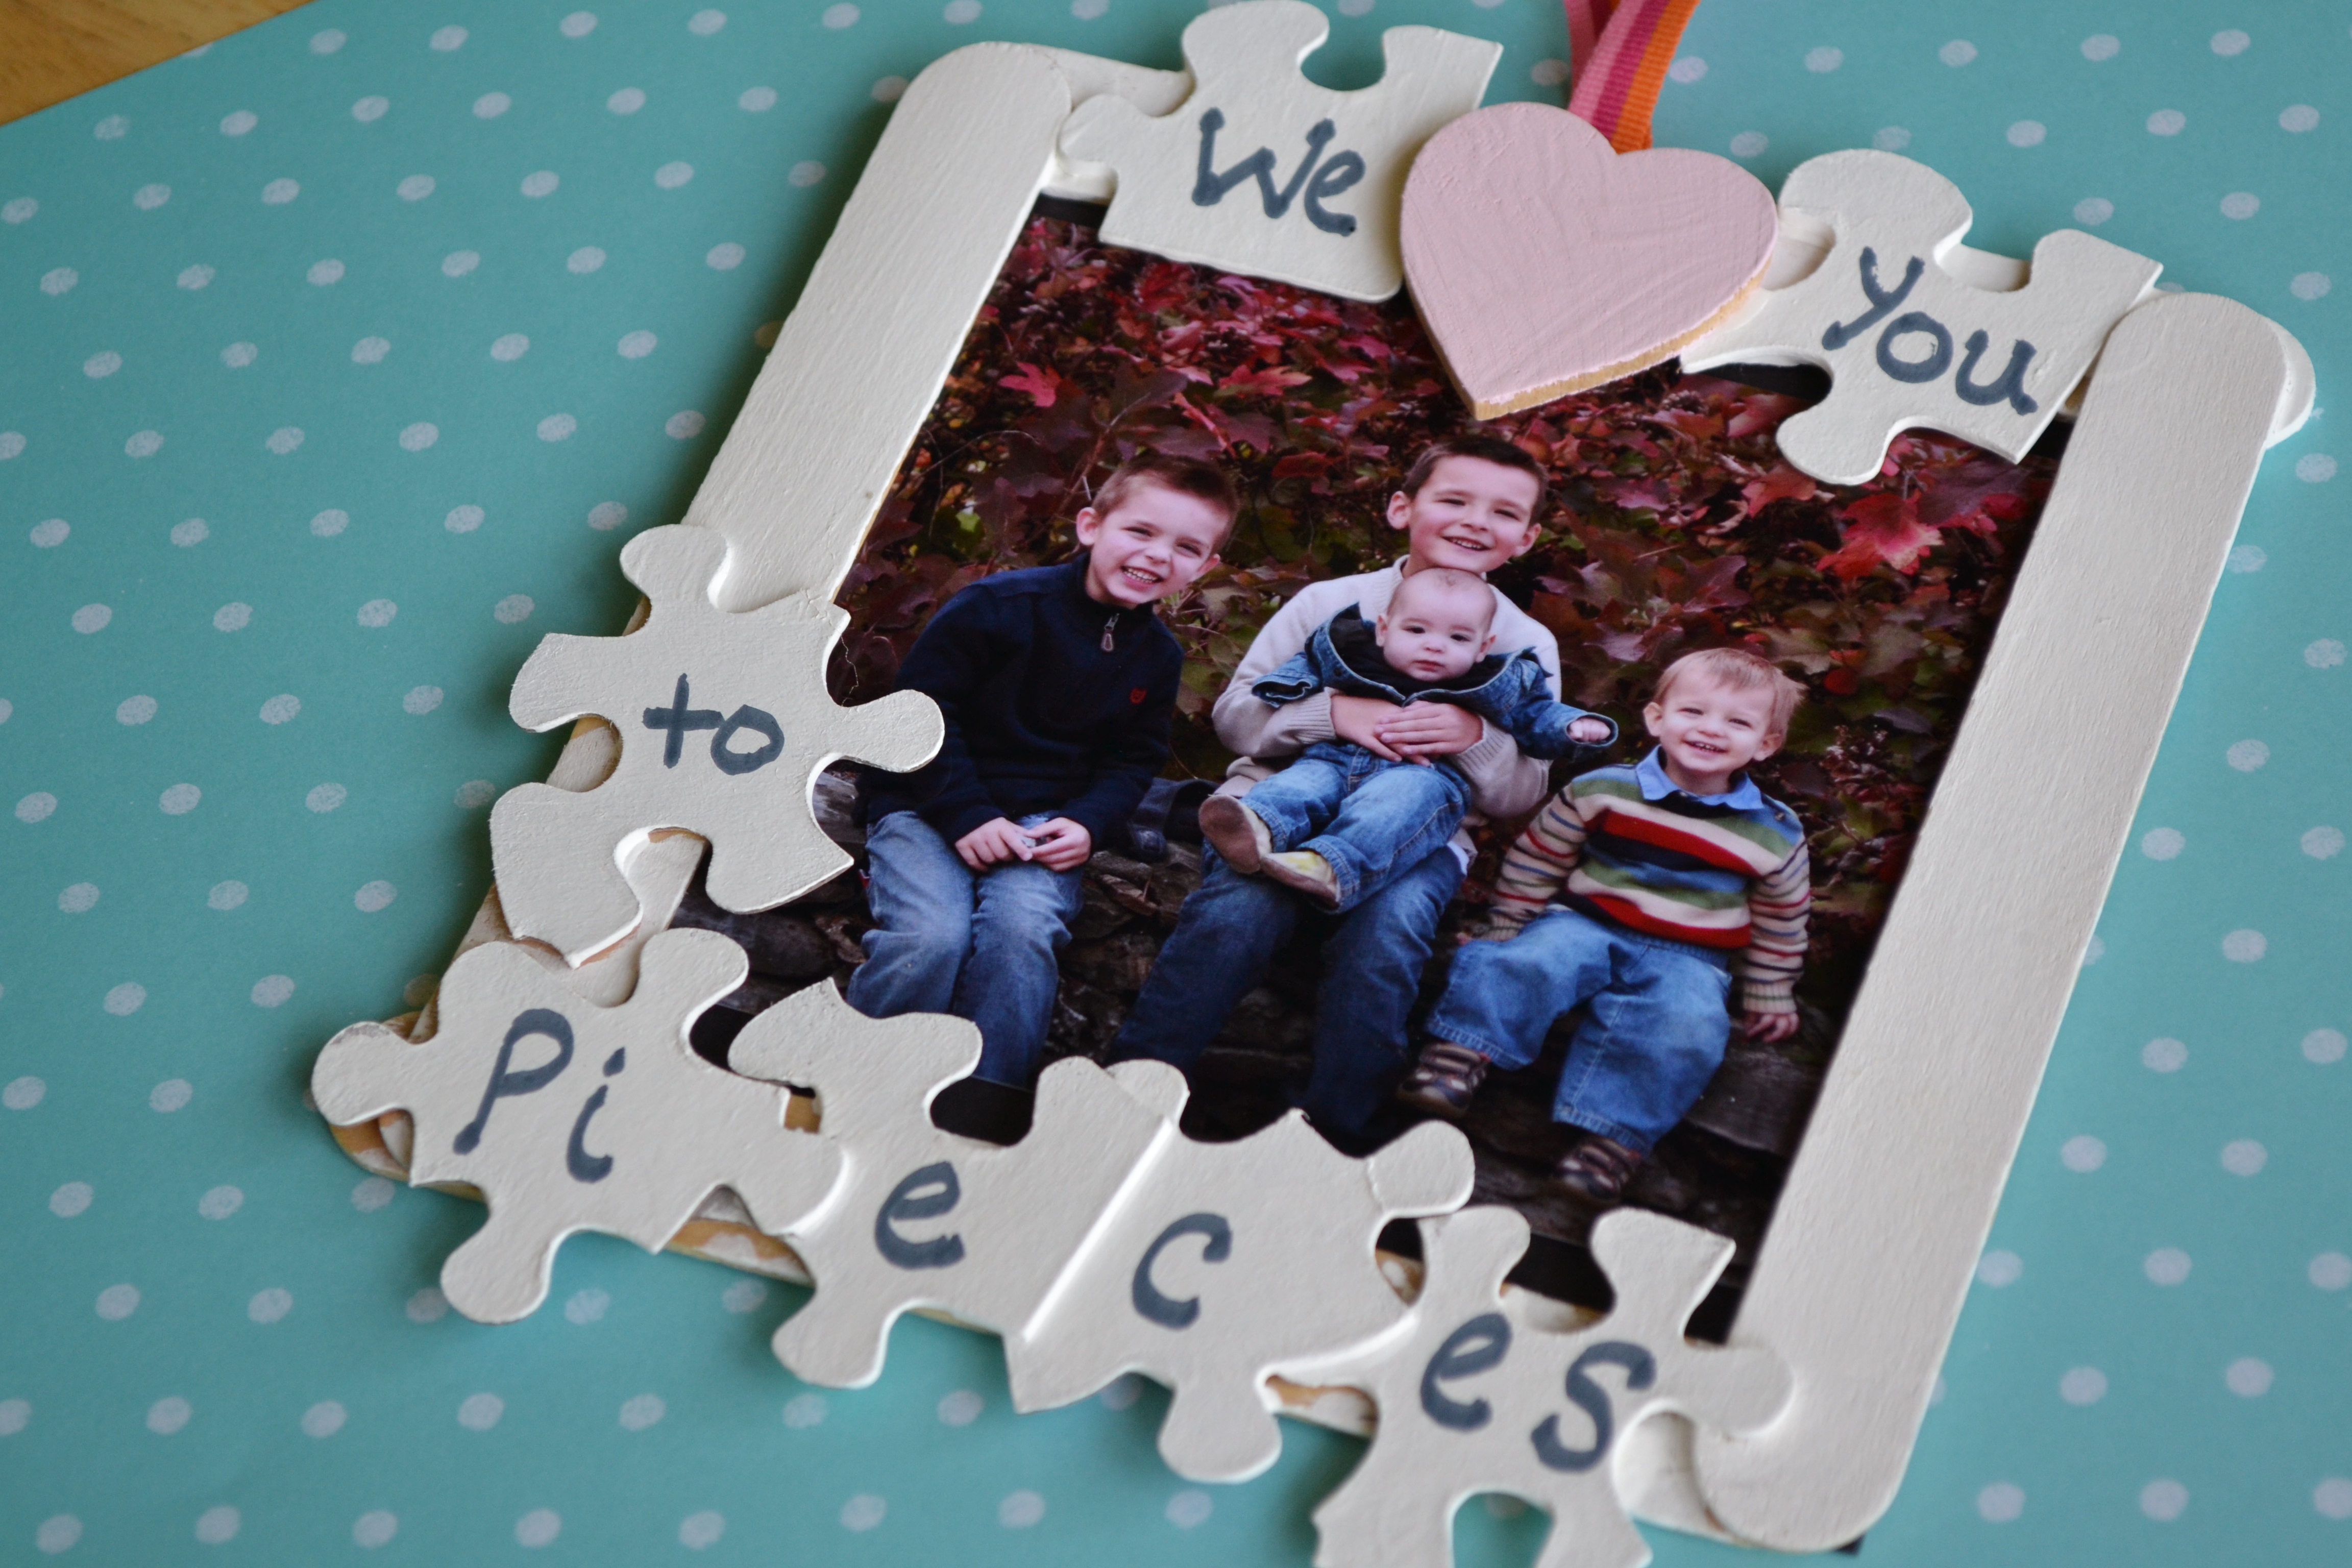
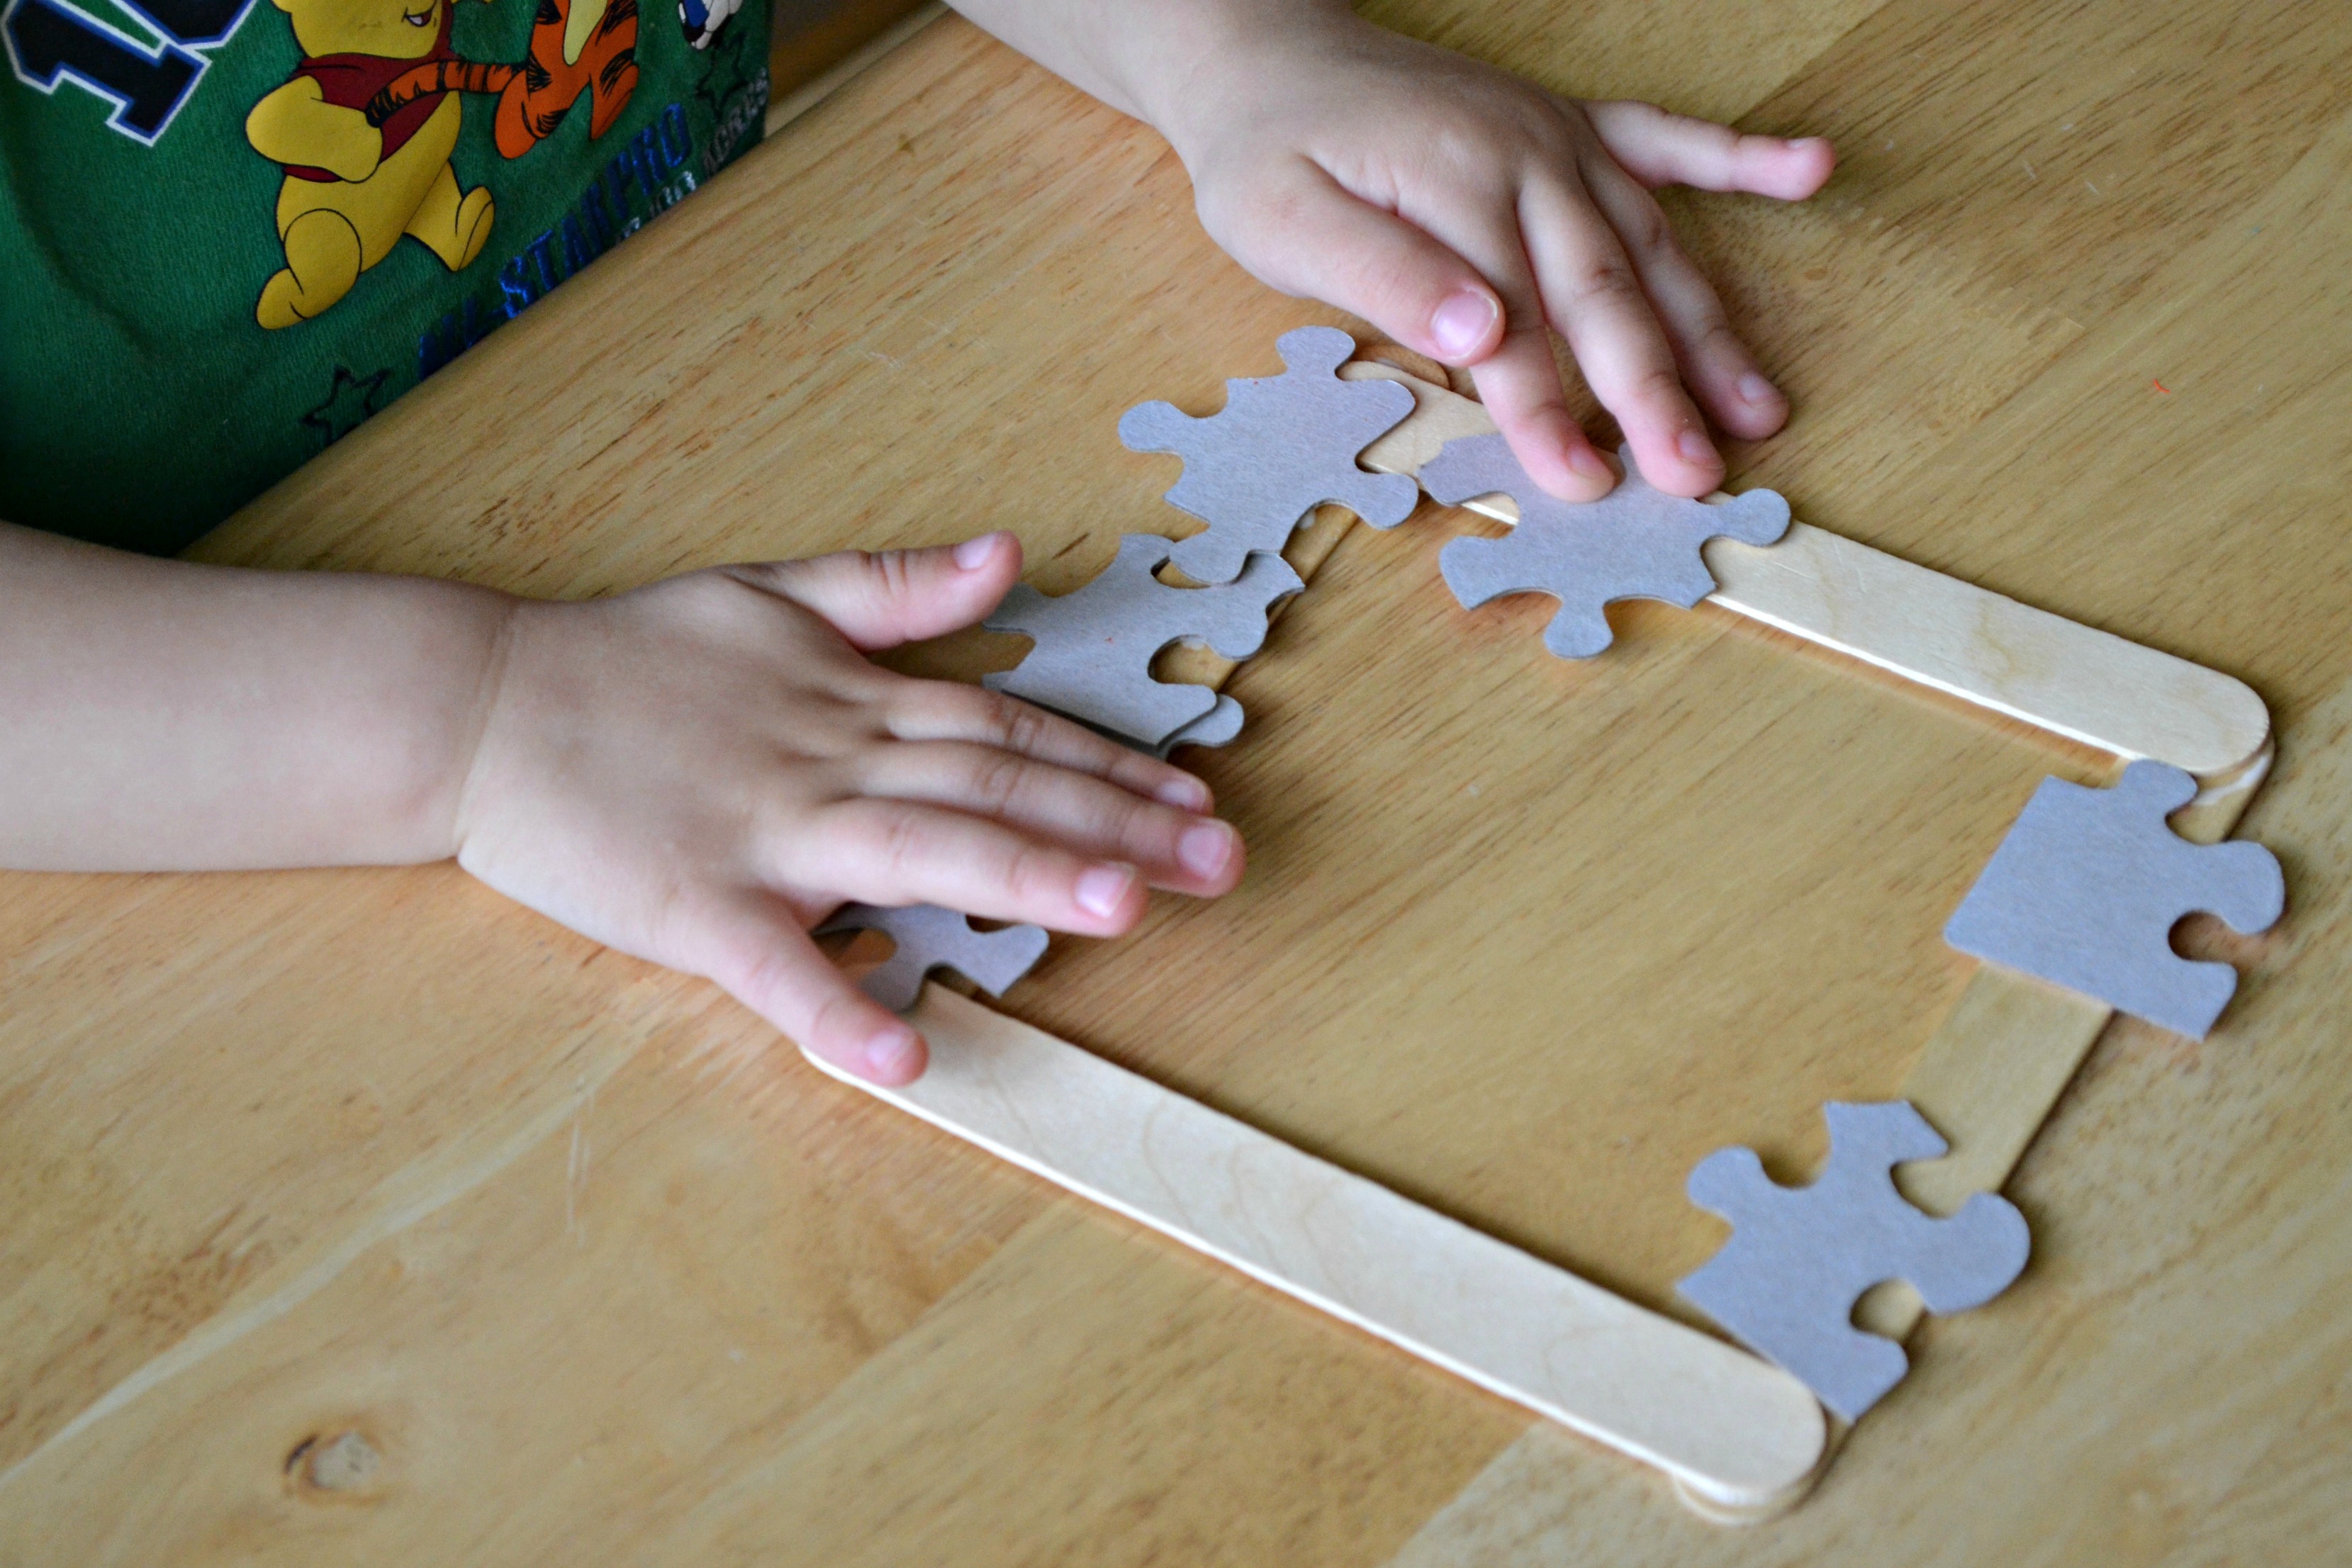
Once the frames dried, the kids glued puzzle pieces along the bottom and one on each corner on the top. Some of them added pieces to the sides, as well. I made sure each of them left room for the wooden heart in middle of the top stick so we could add our Father's Day message.
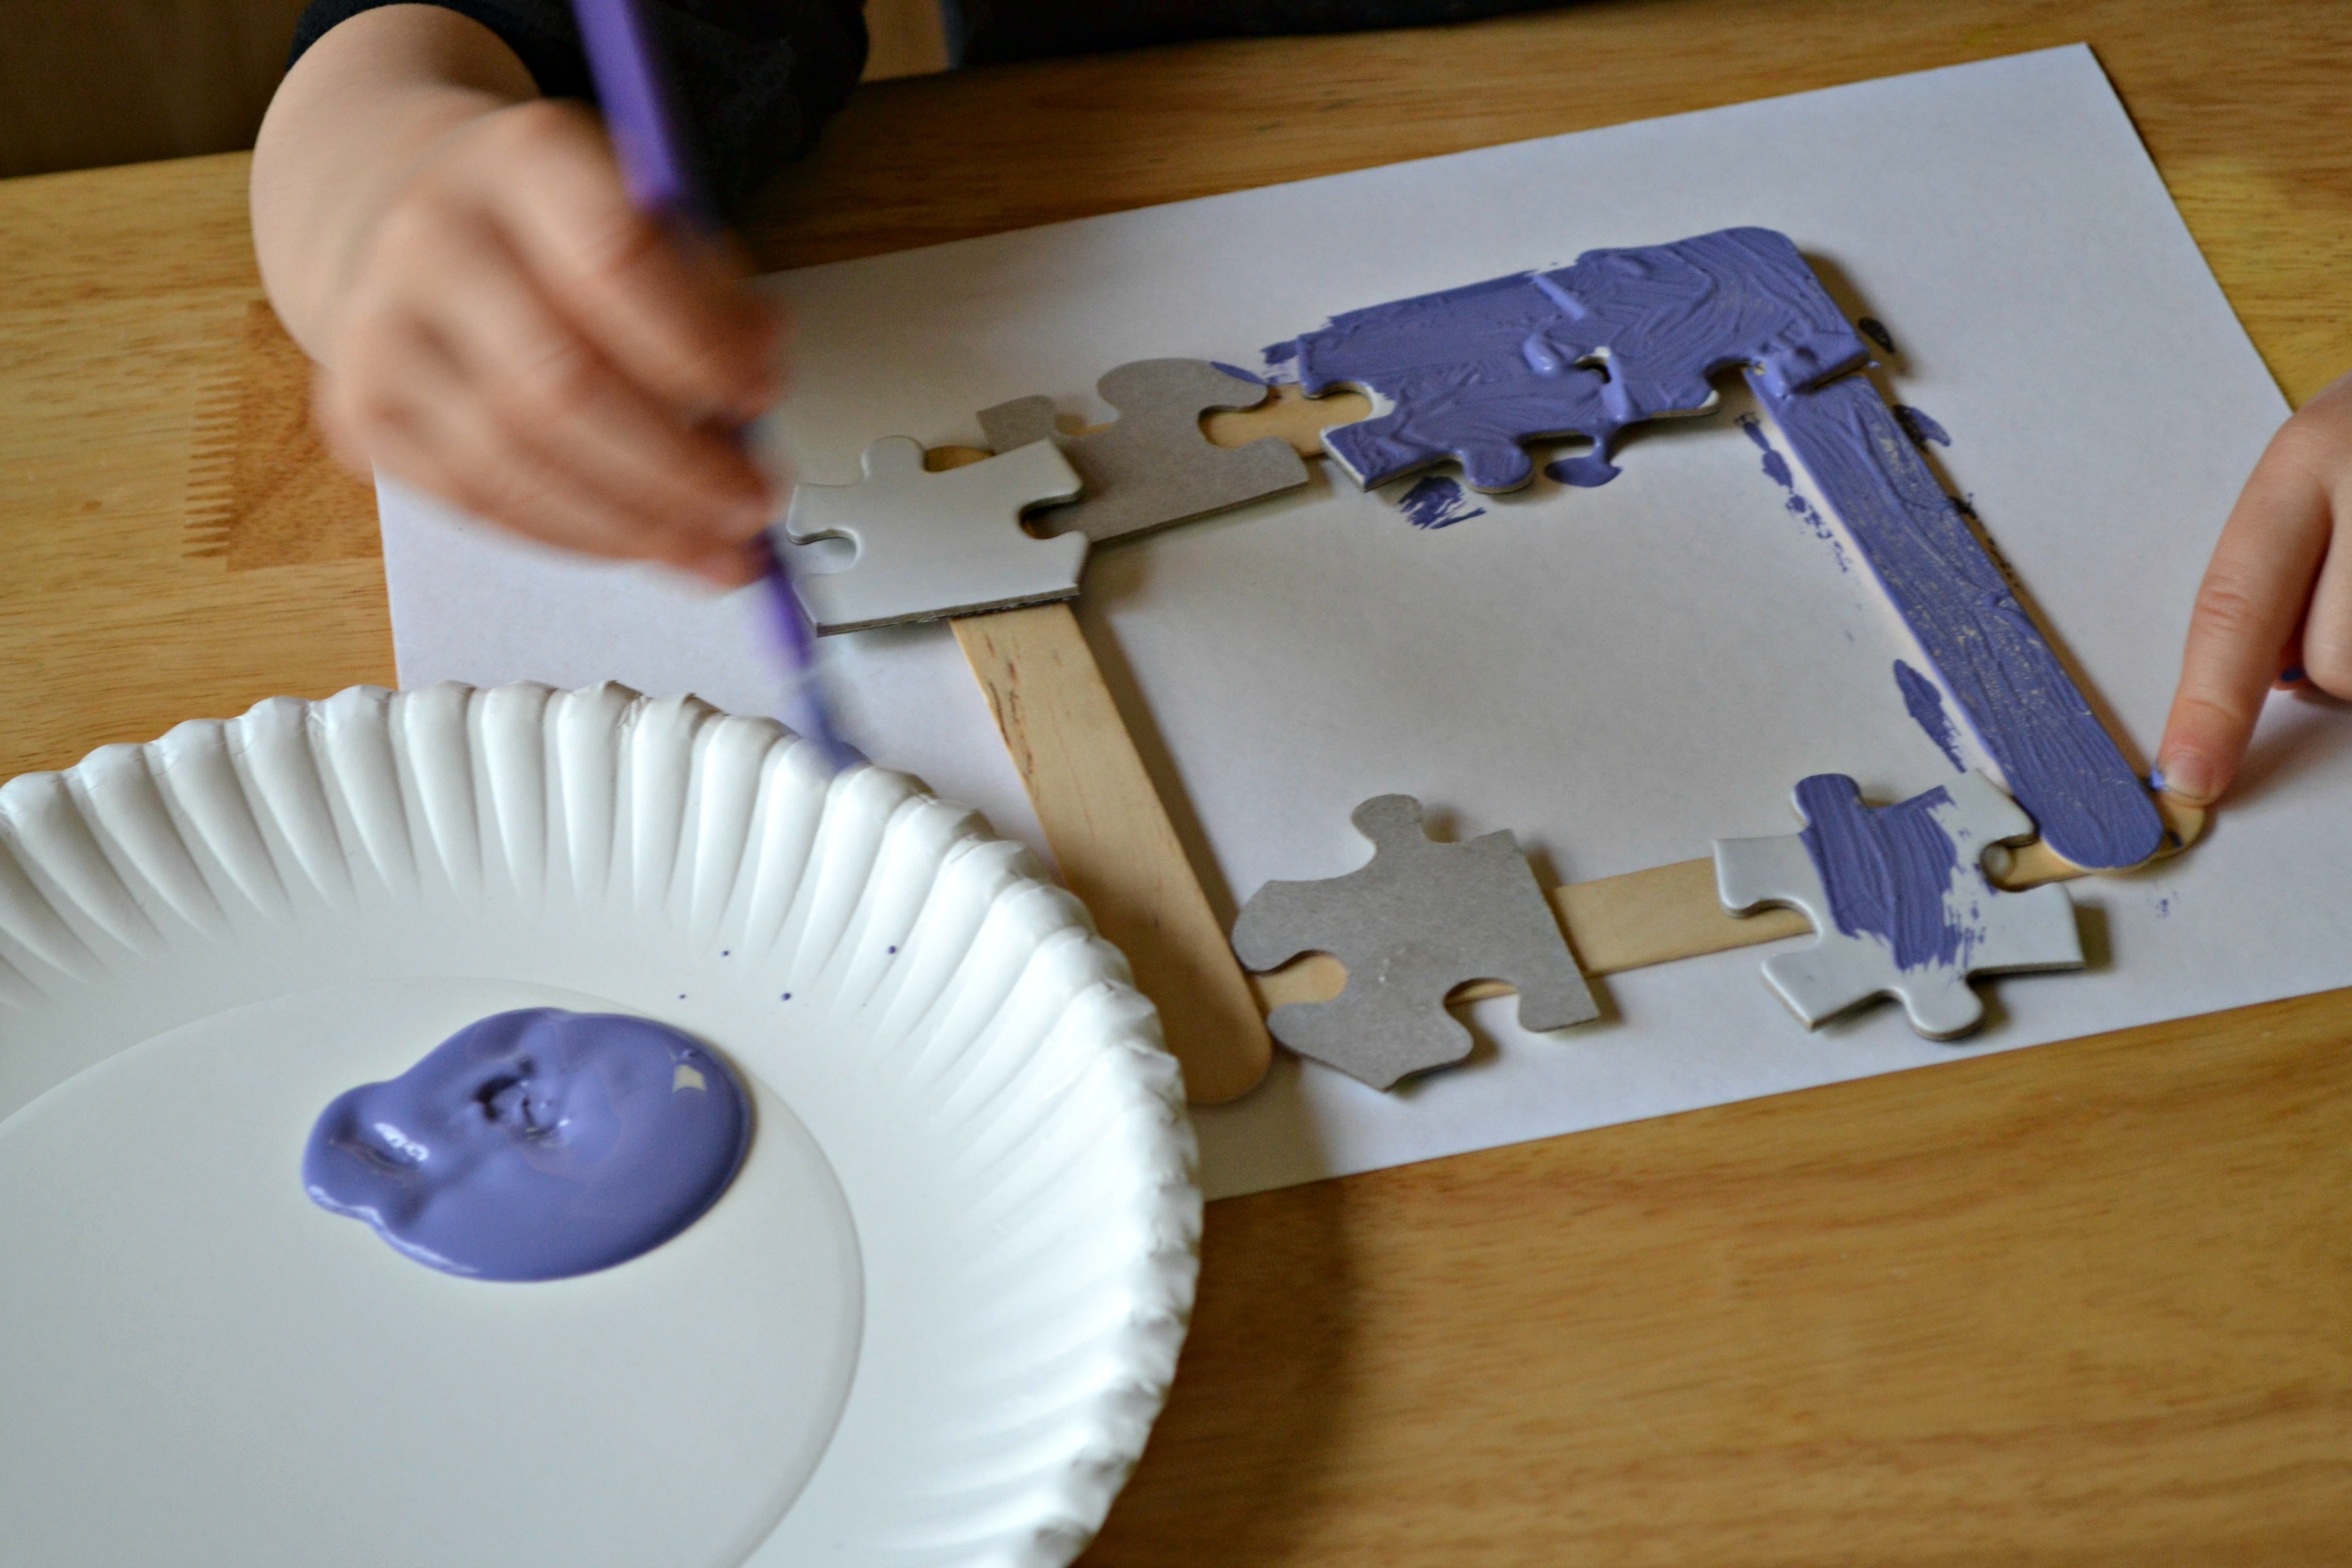
Step 4
Once all the pieces were dry, the kids painted their frames. We used acrylic paints and they covered the puzzle pieces beautifully. They also painted their wooden hearts in a different color from the one they chose for their frames. I would recommend using a large sheet of construction paper to protect your table and putting an old shirt on the kids if you have messy painters!
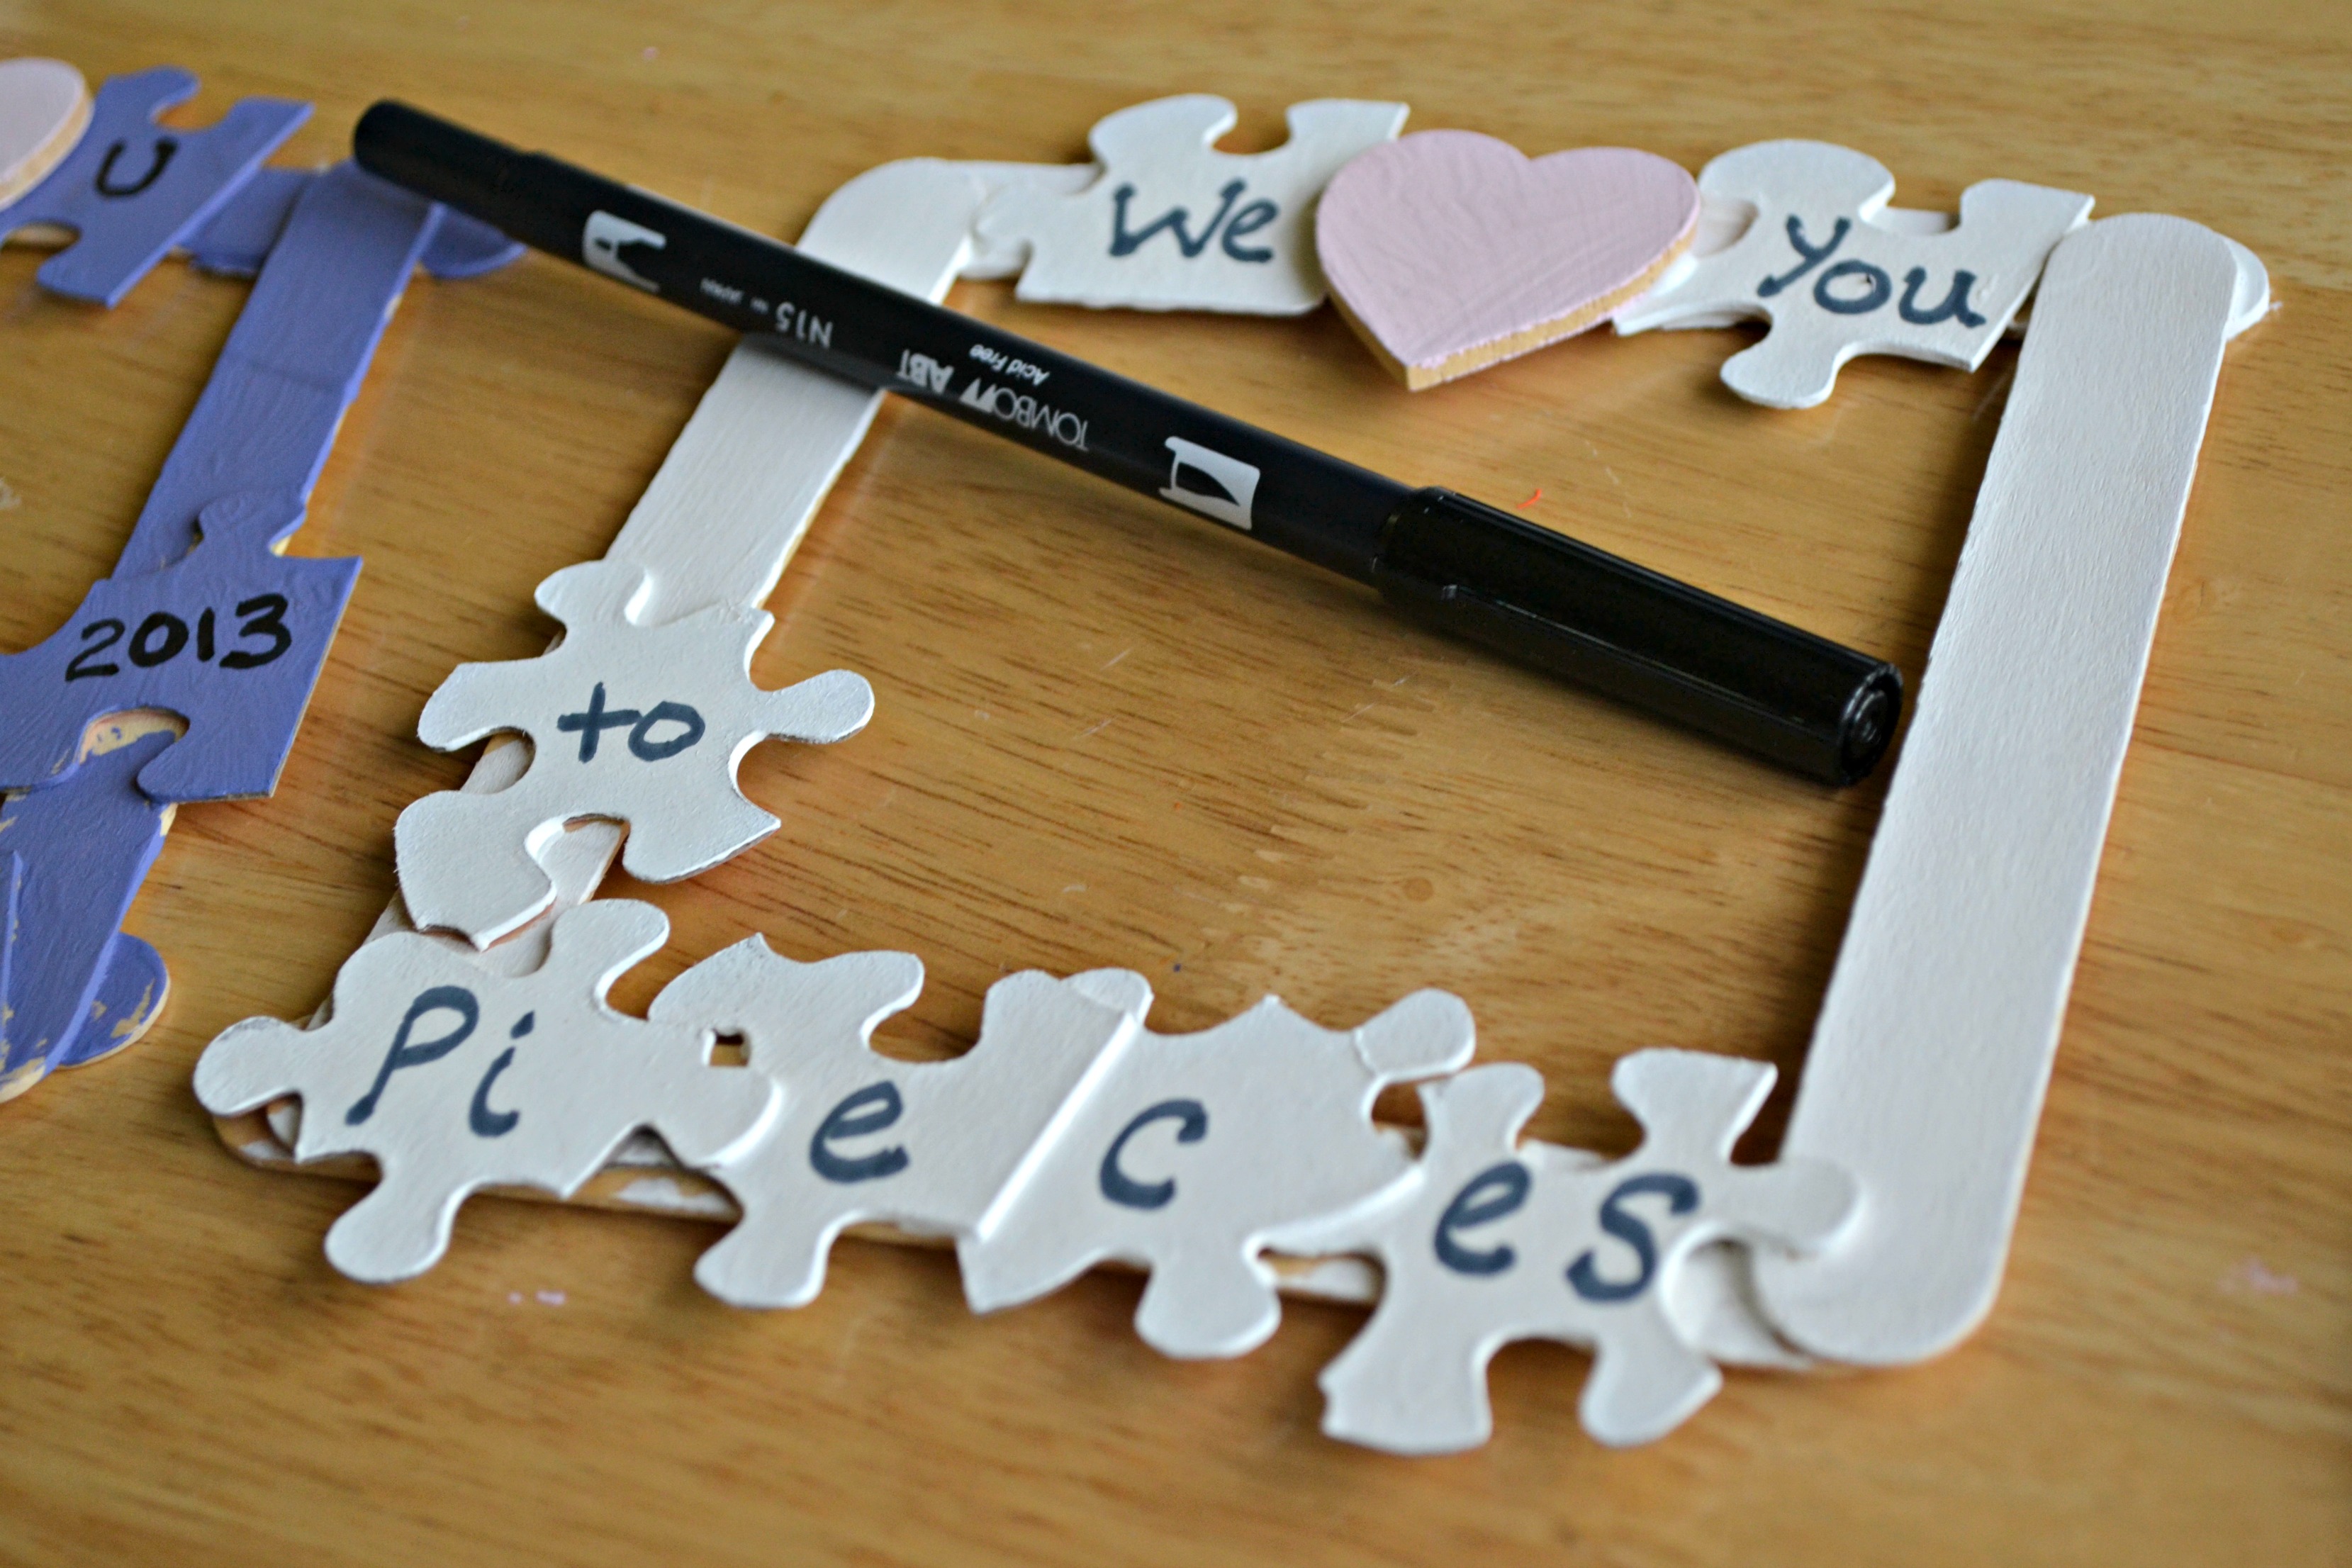
Step 5
The kids glued their hearts on and then I used the black marker to write "We love you to pieces" or "I love you to pieces" depending on the picture we wanted to put inside the frame. If the kids glued extra pieces to the sides, I used them to add their names and the year to their projects.
Step 6
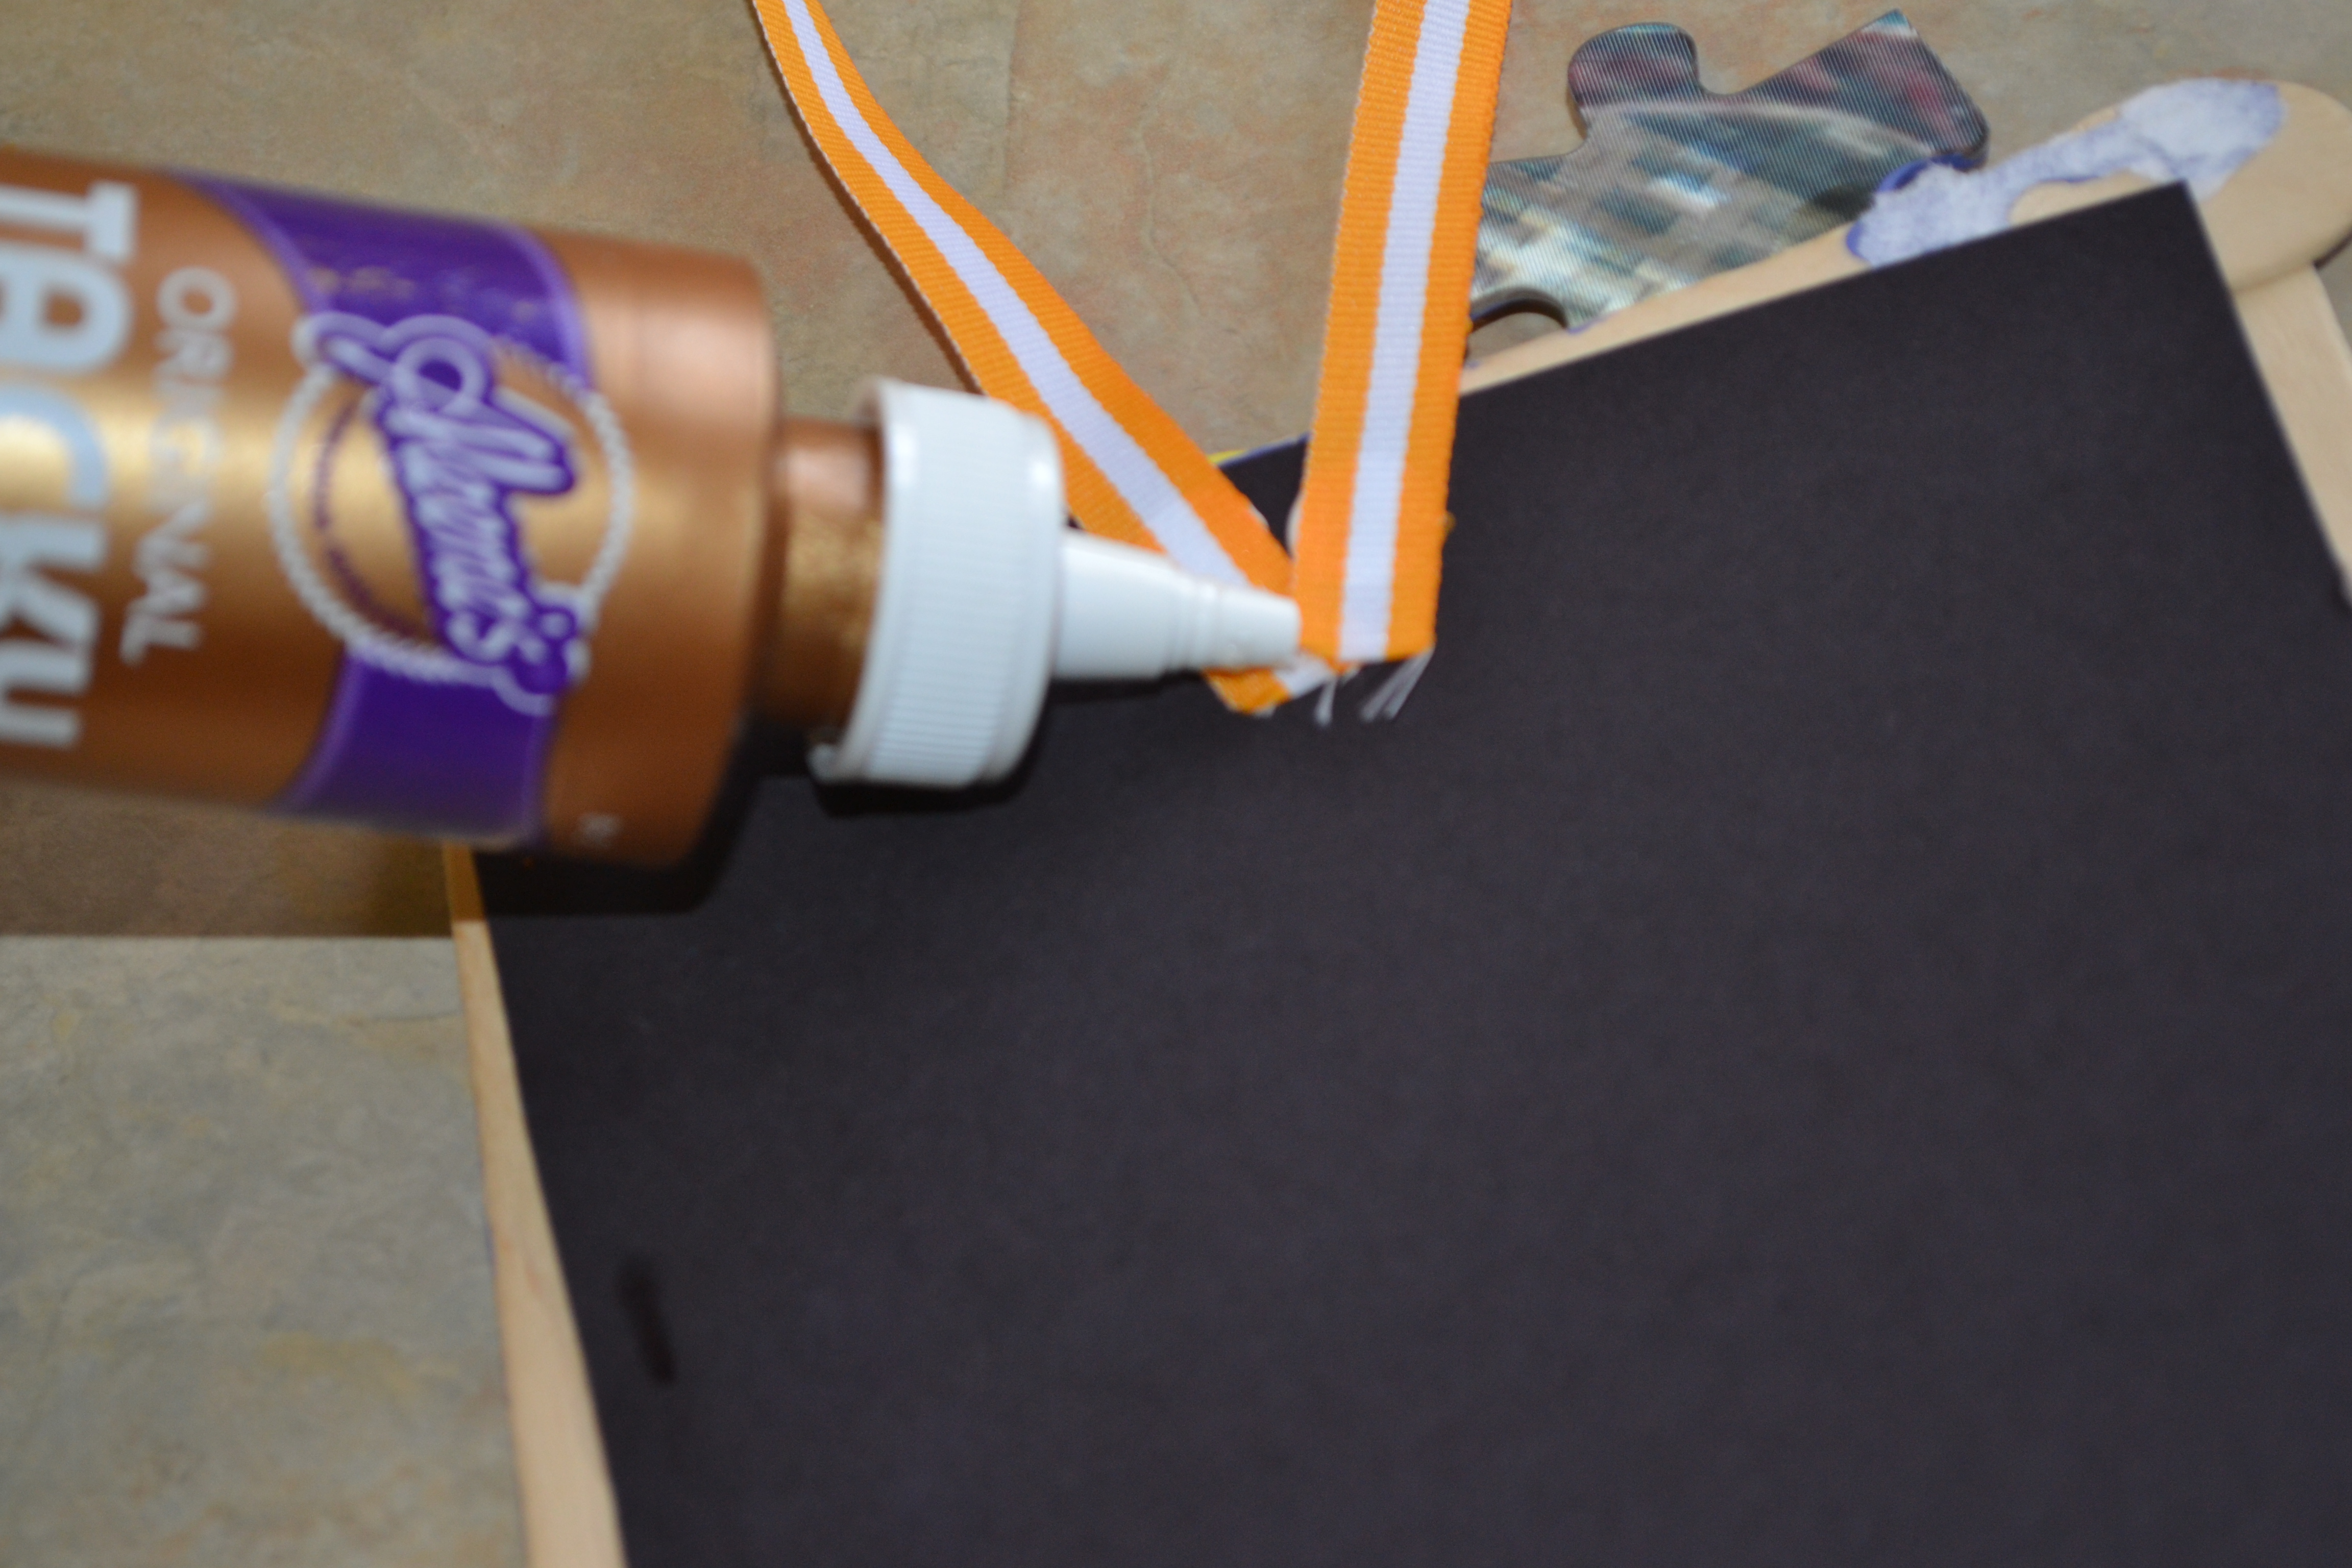
We cut black construction paper and glued it to cover the back of the frame. We glued the sides and bottom of the paper, but left the top open so we could add and switch photographs. I would recommend using card stock, though, because it's more durable. We also used tacky glue to add a fun piece of ribbon to hang our frames.
Done!
For the final touch, each of the kids picked a favorite picture to add to their frames. The kids were so proud of their finished projects, and they had a beautiful gift to give their Dad and Grandfather for Father's Day!


