Step-by-step tutorial
Step 1
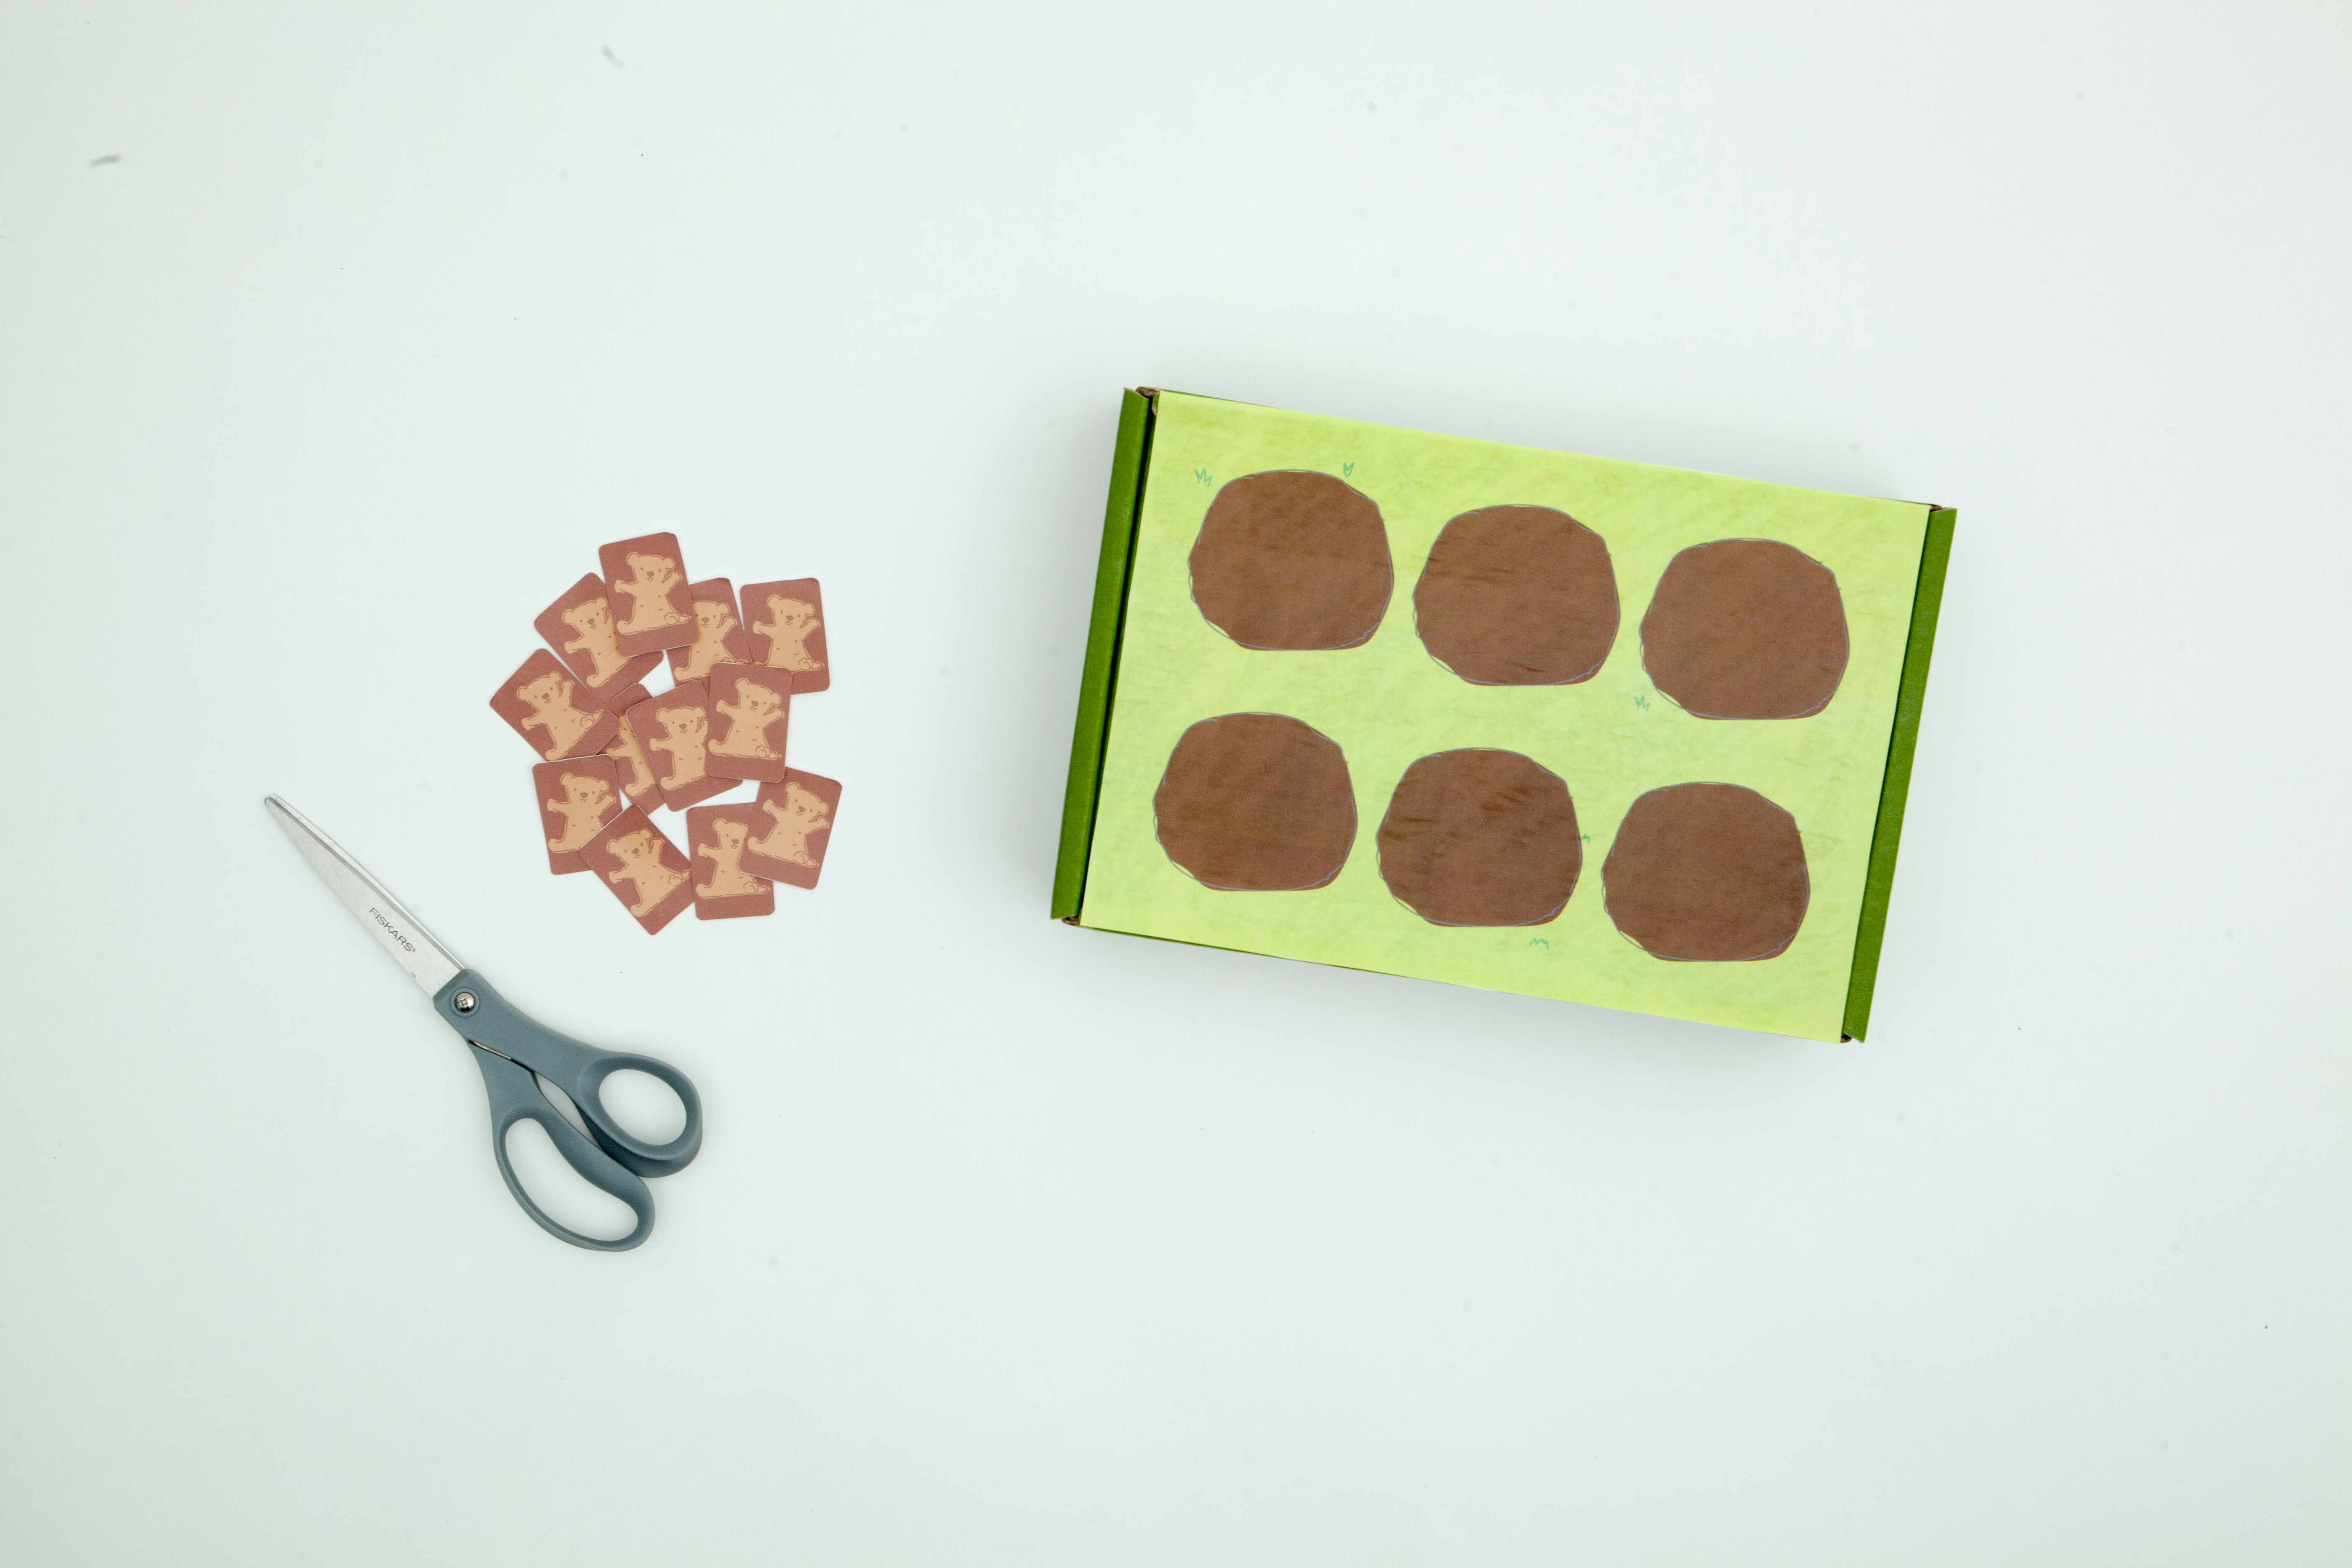
Gather your materials.


Step 2
Cut out the objects on the printable. Then, set the groundhog cards aside and glue the gameboard to the top of the crate box.
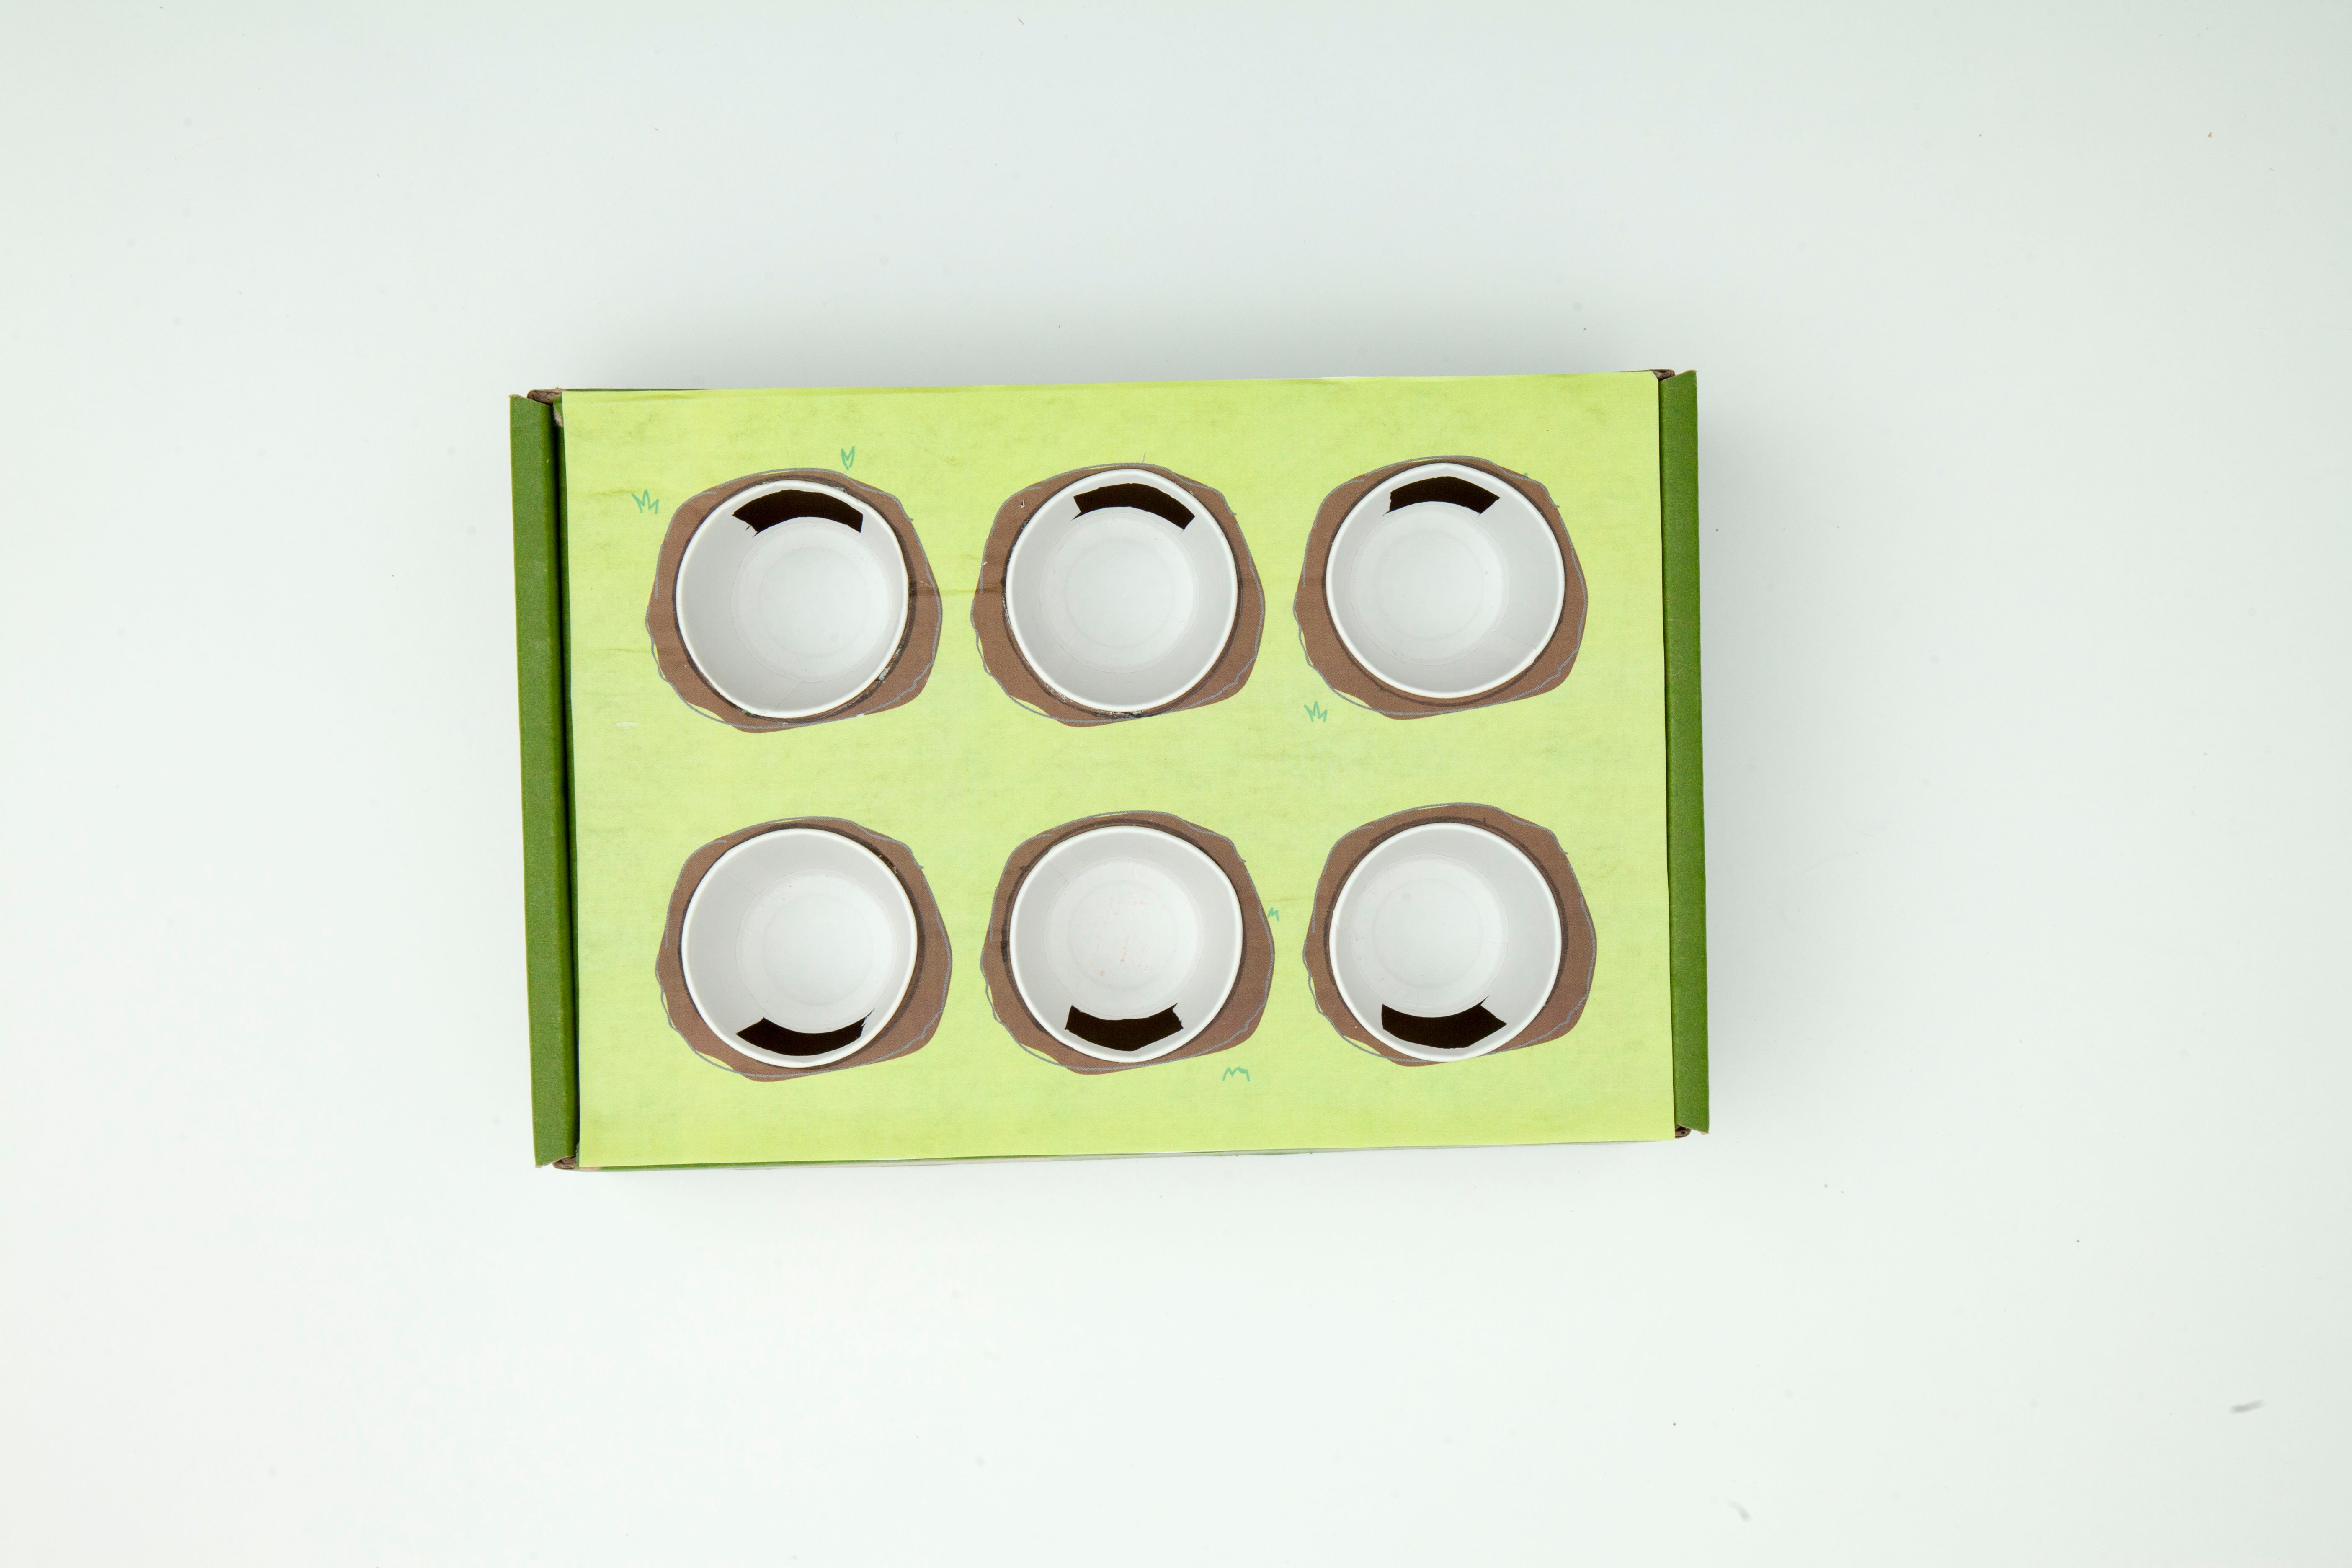
Step 3
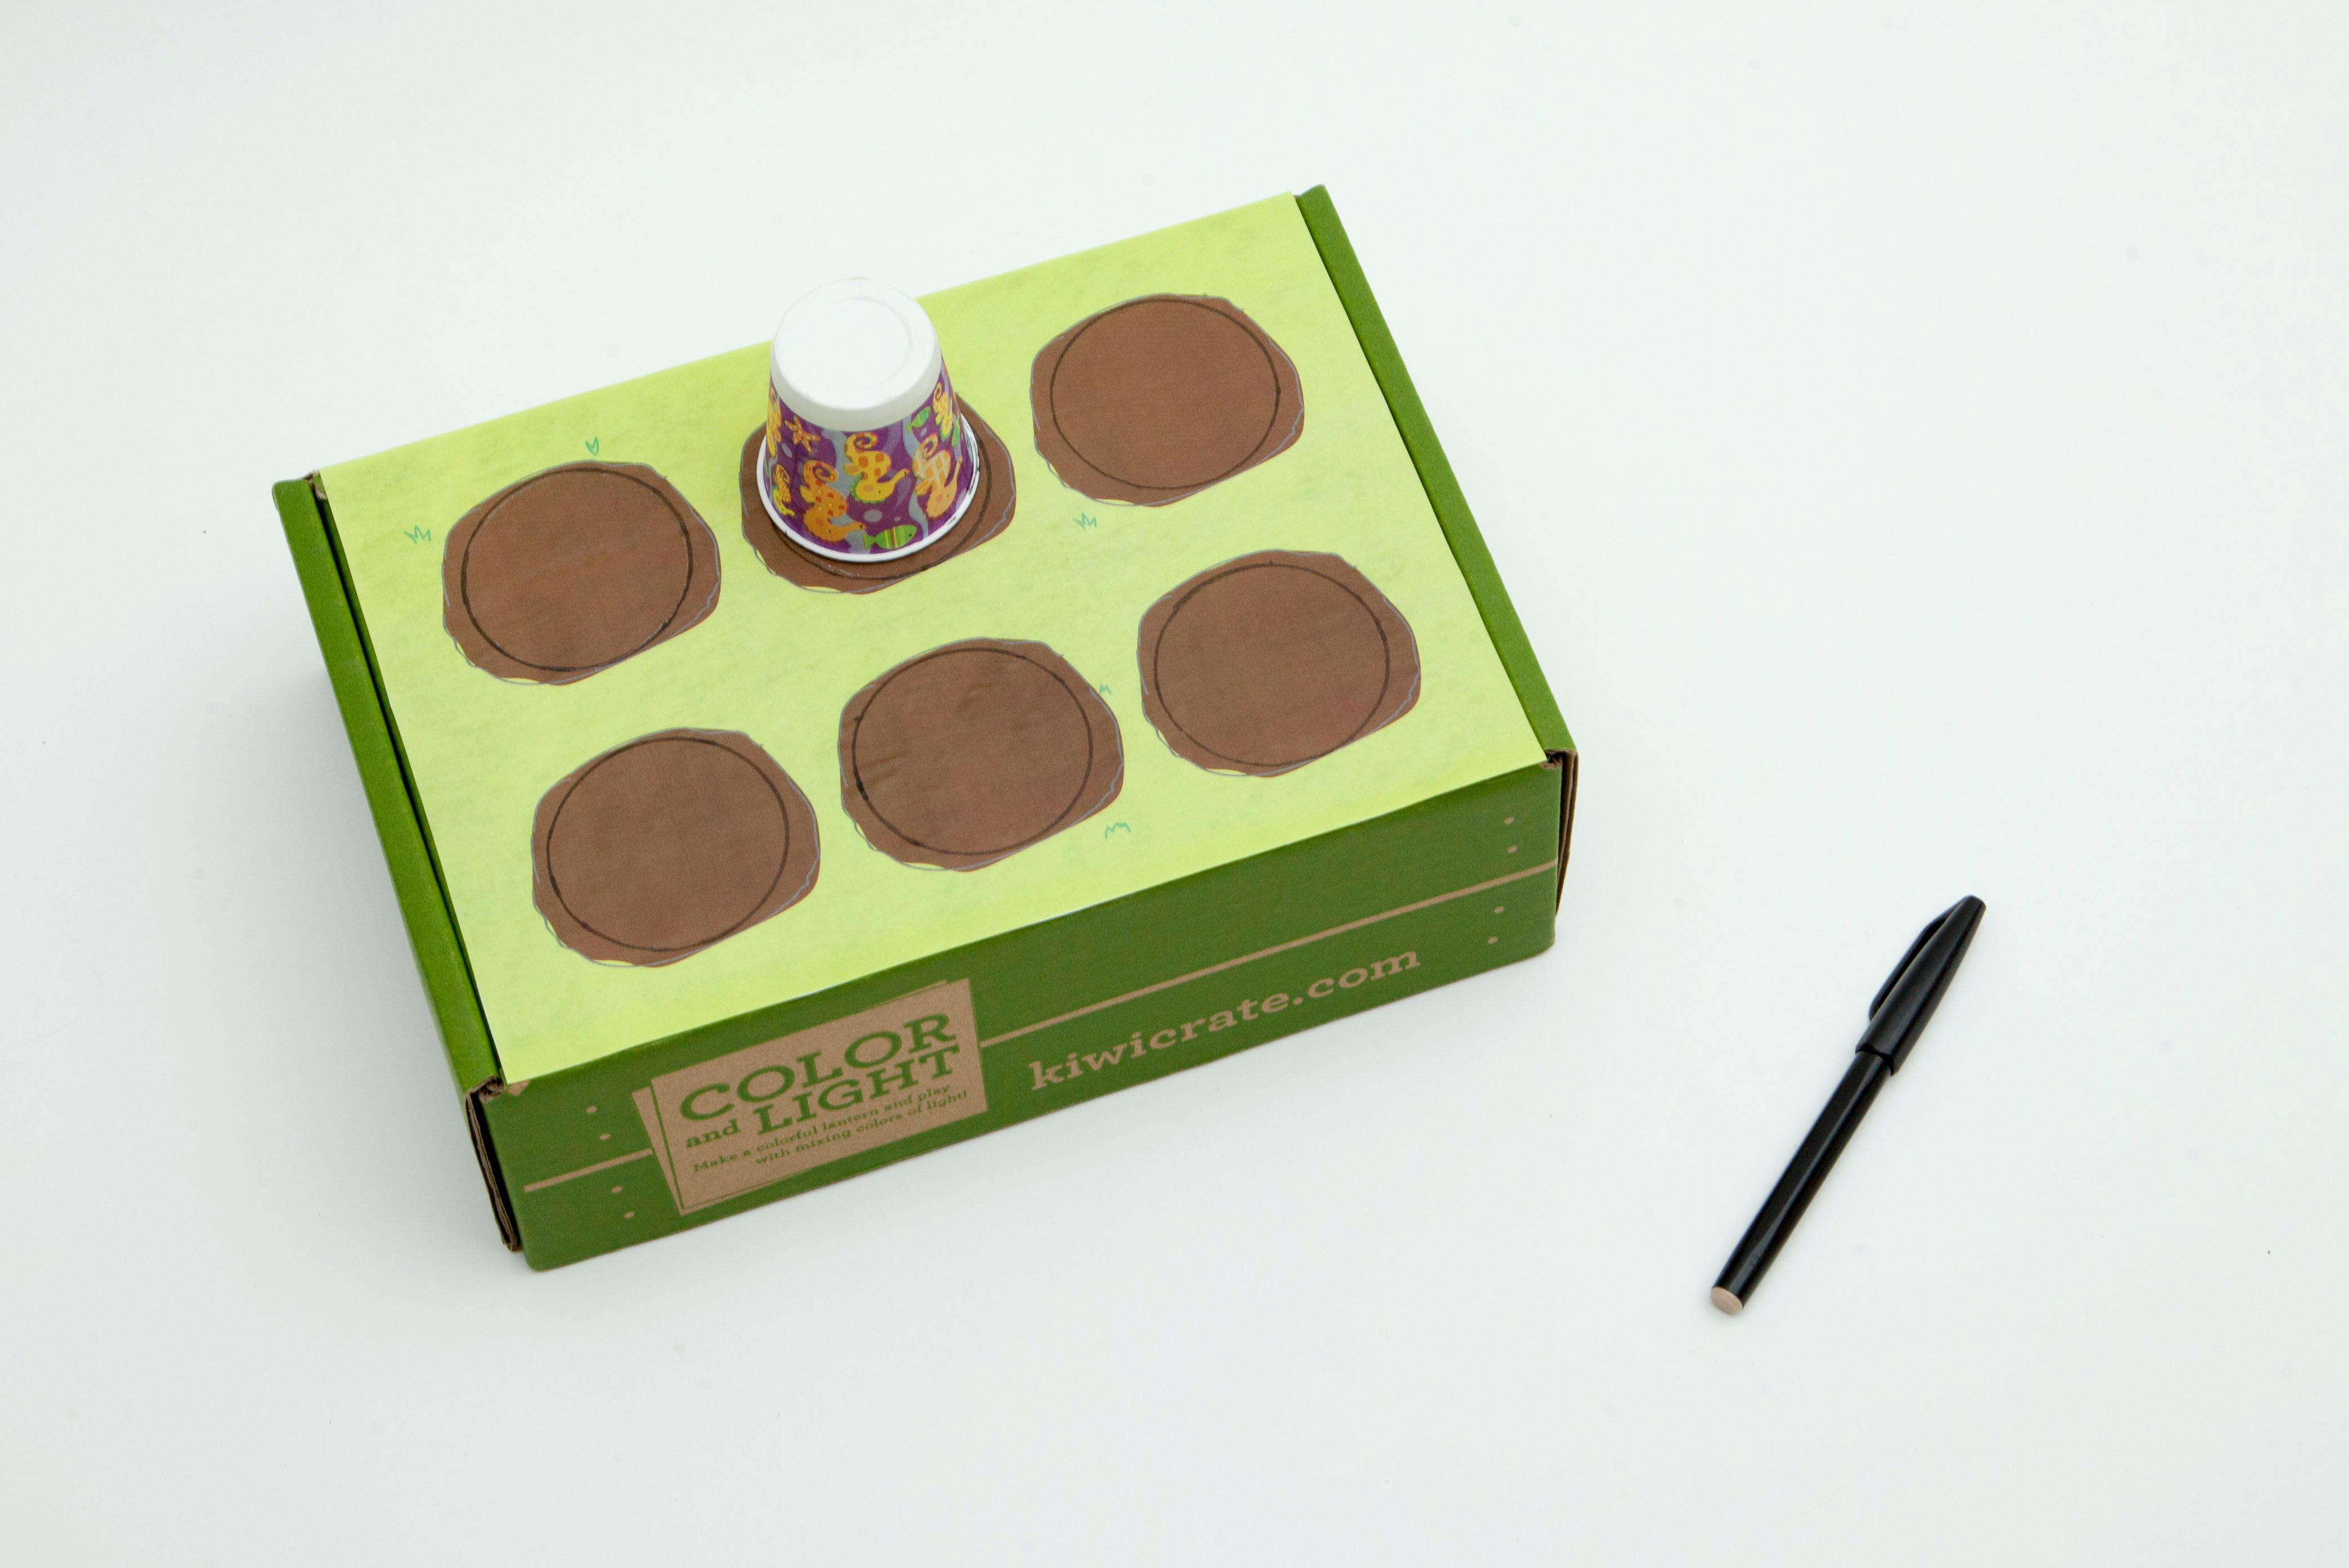
Use the lip of the cup to trace a circle in the middle of each of the holes.
Step 4
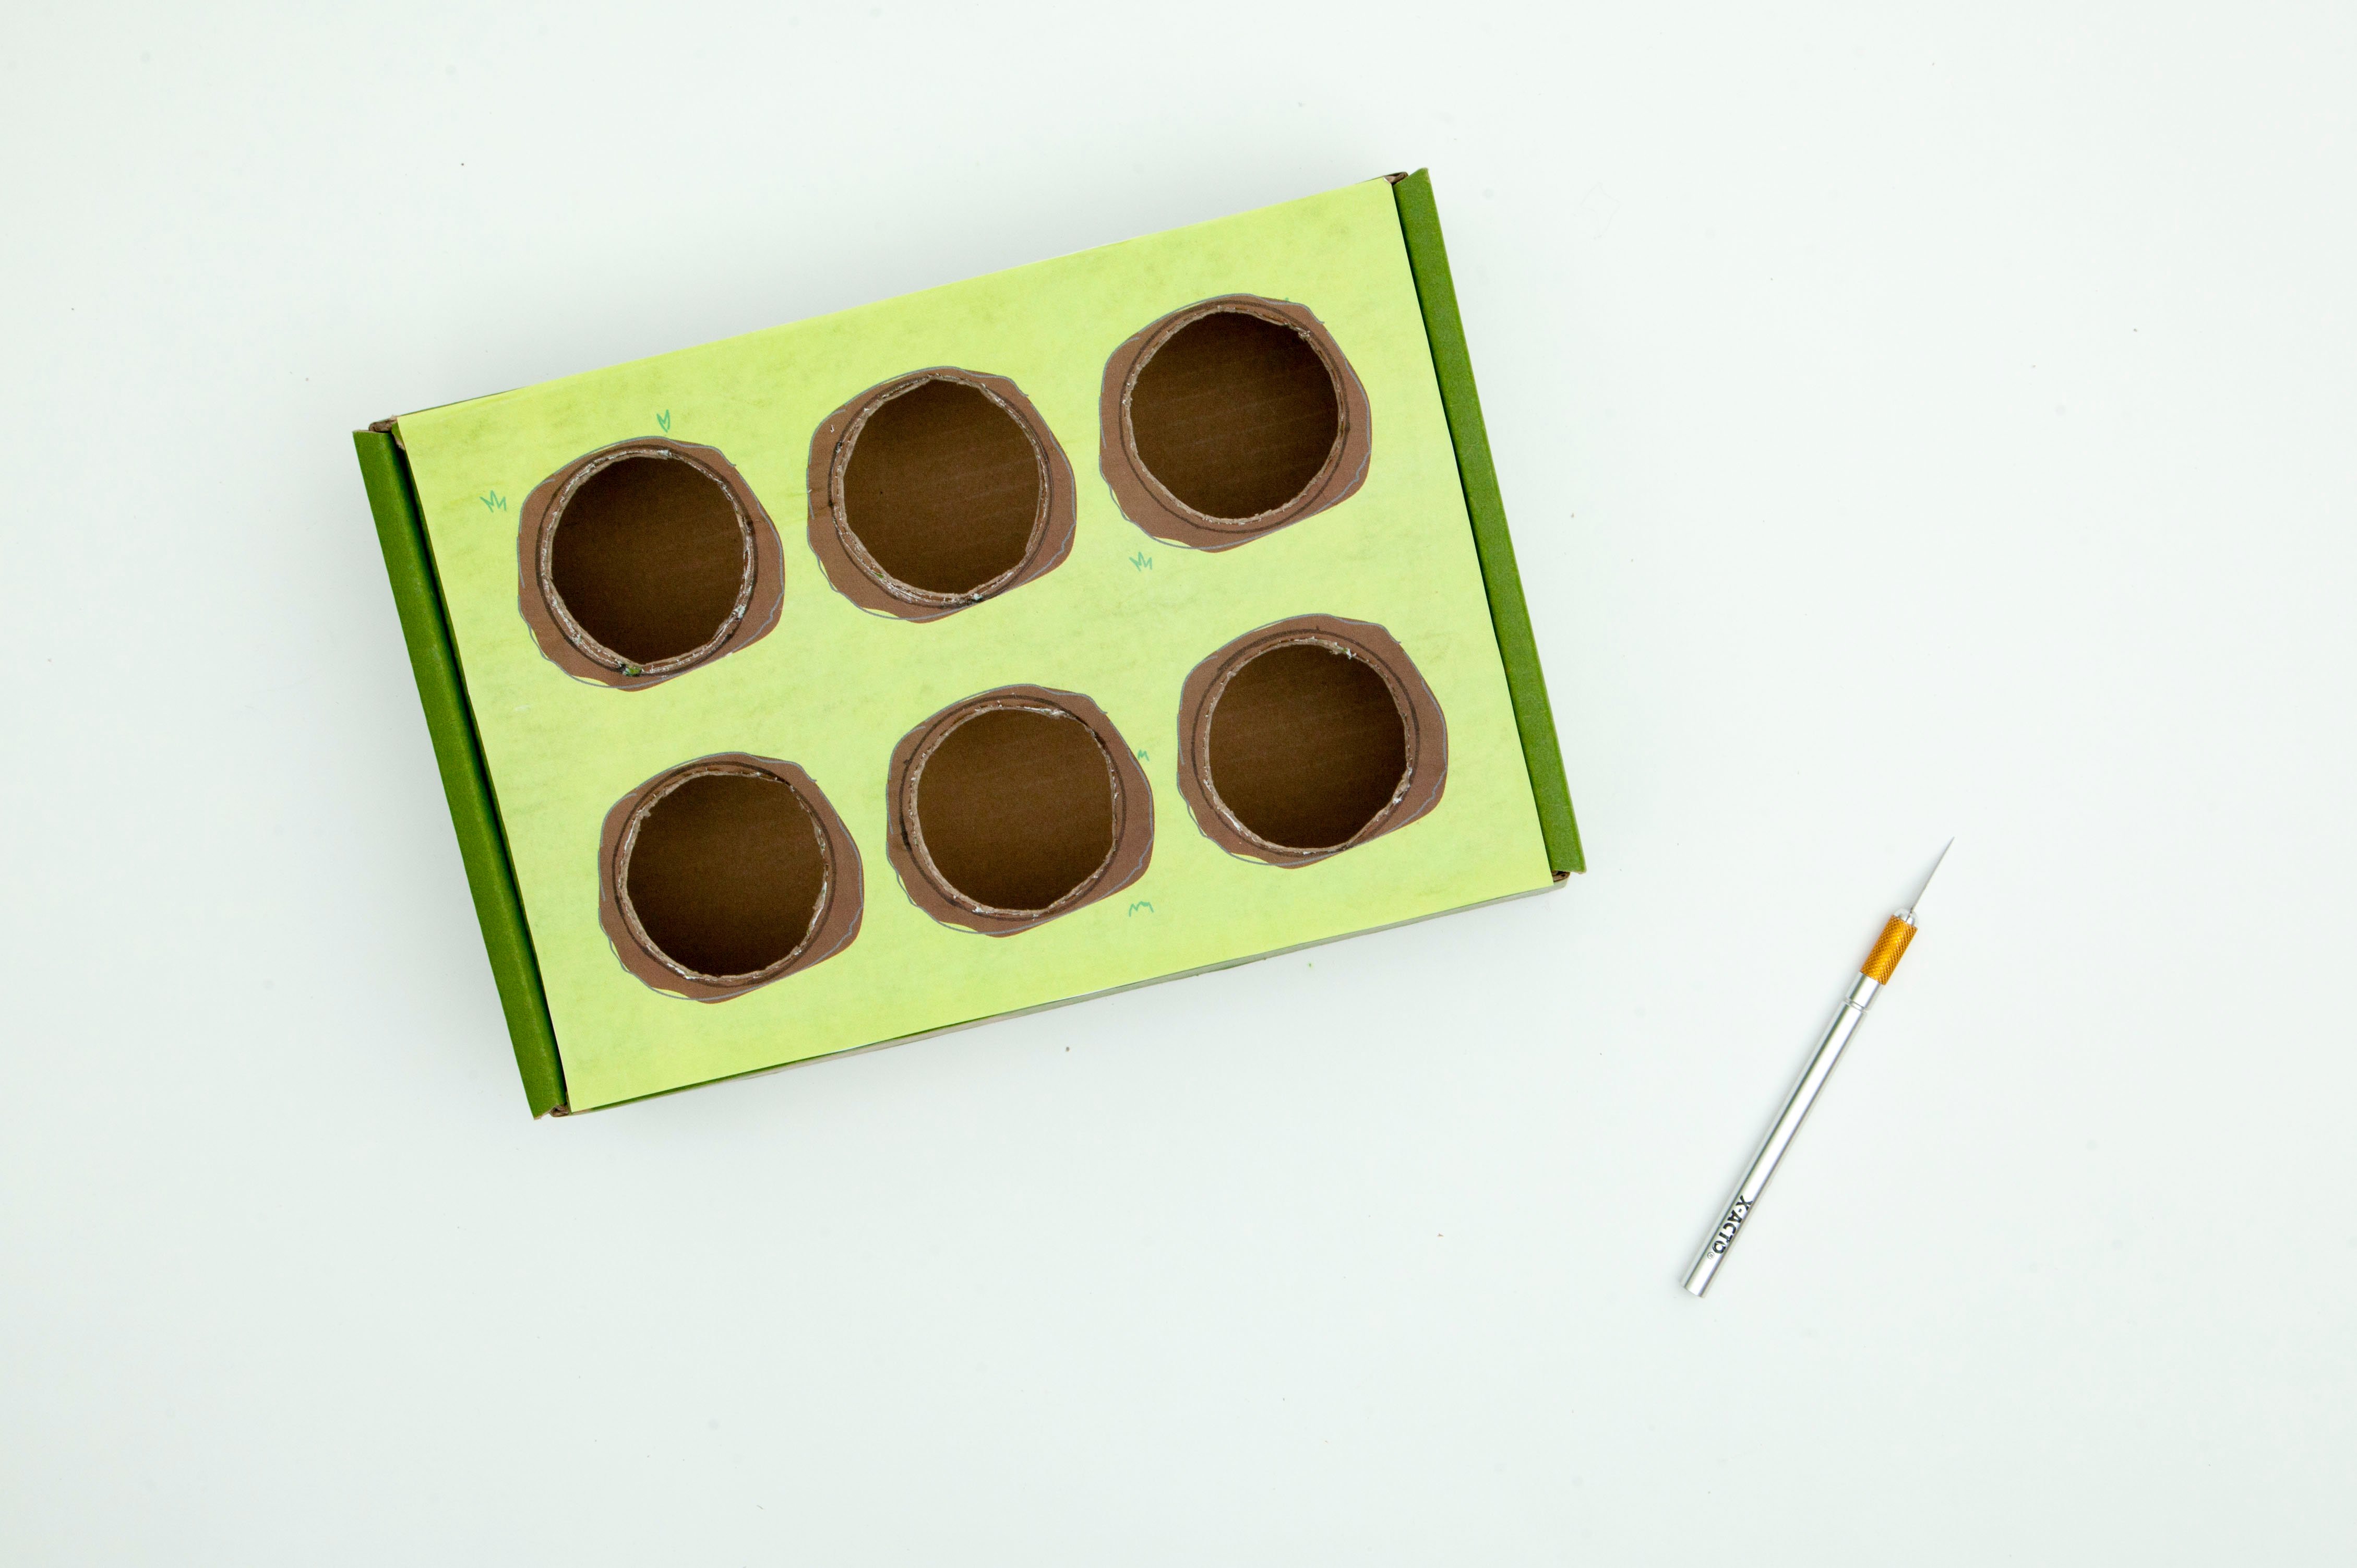
Cut out the circles on the top of the box with an X-acto knife. You will need a grownup assistant to help you.
Tip
Cut slightly inside the marked circle so that when you place a cup into the hole it doesn’t fall through.
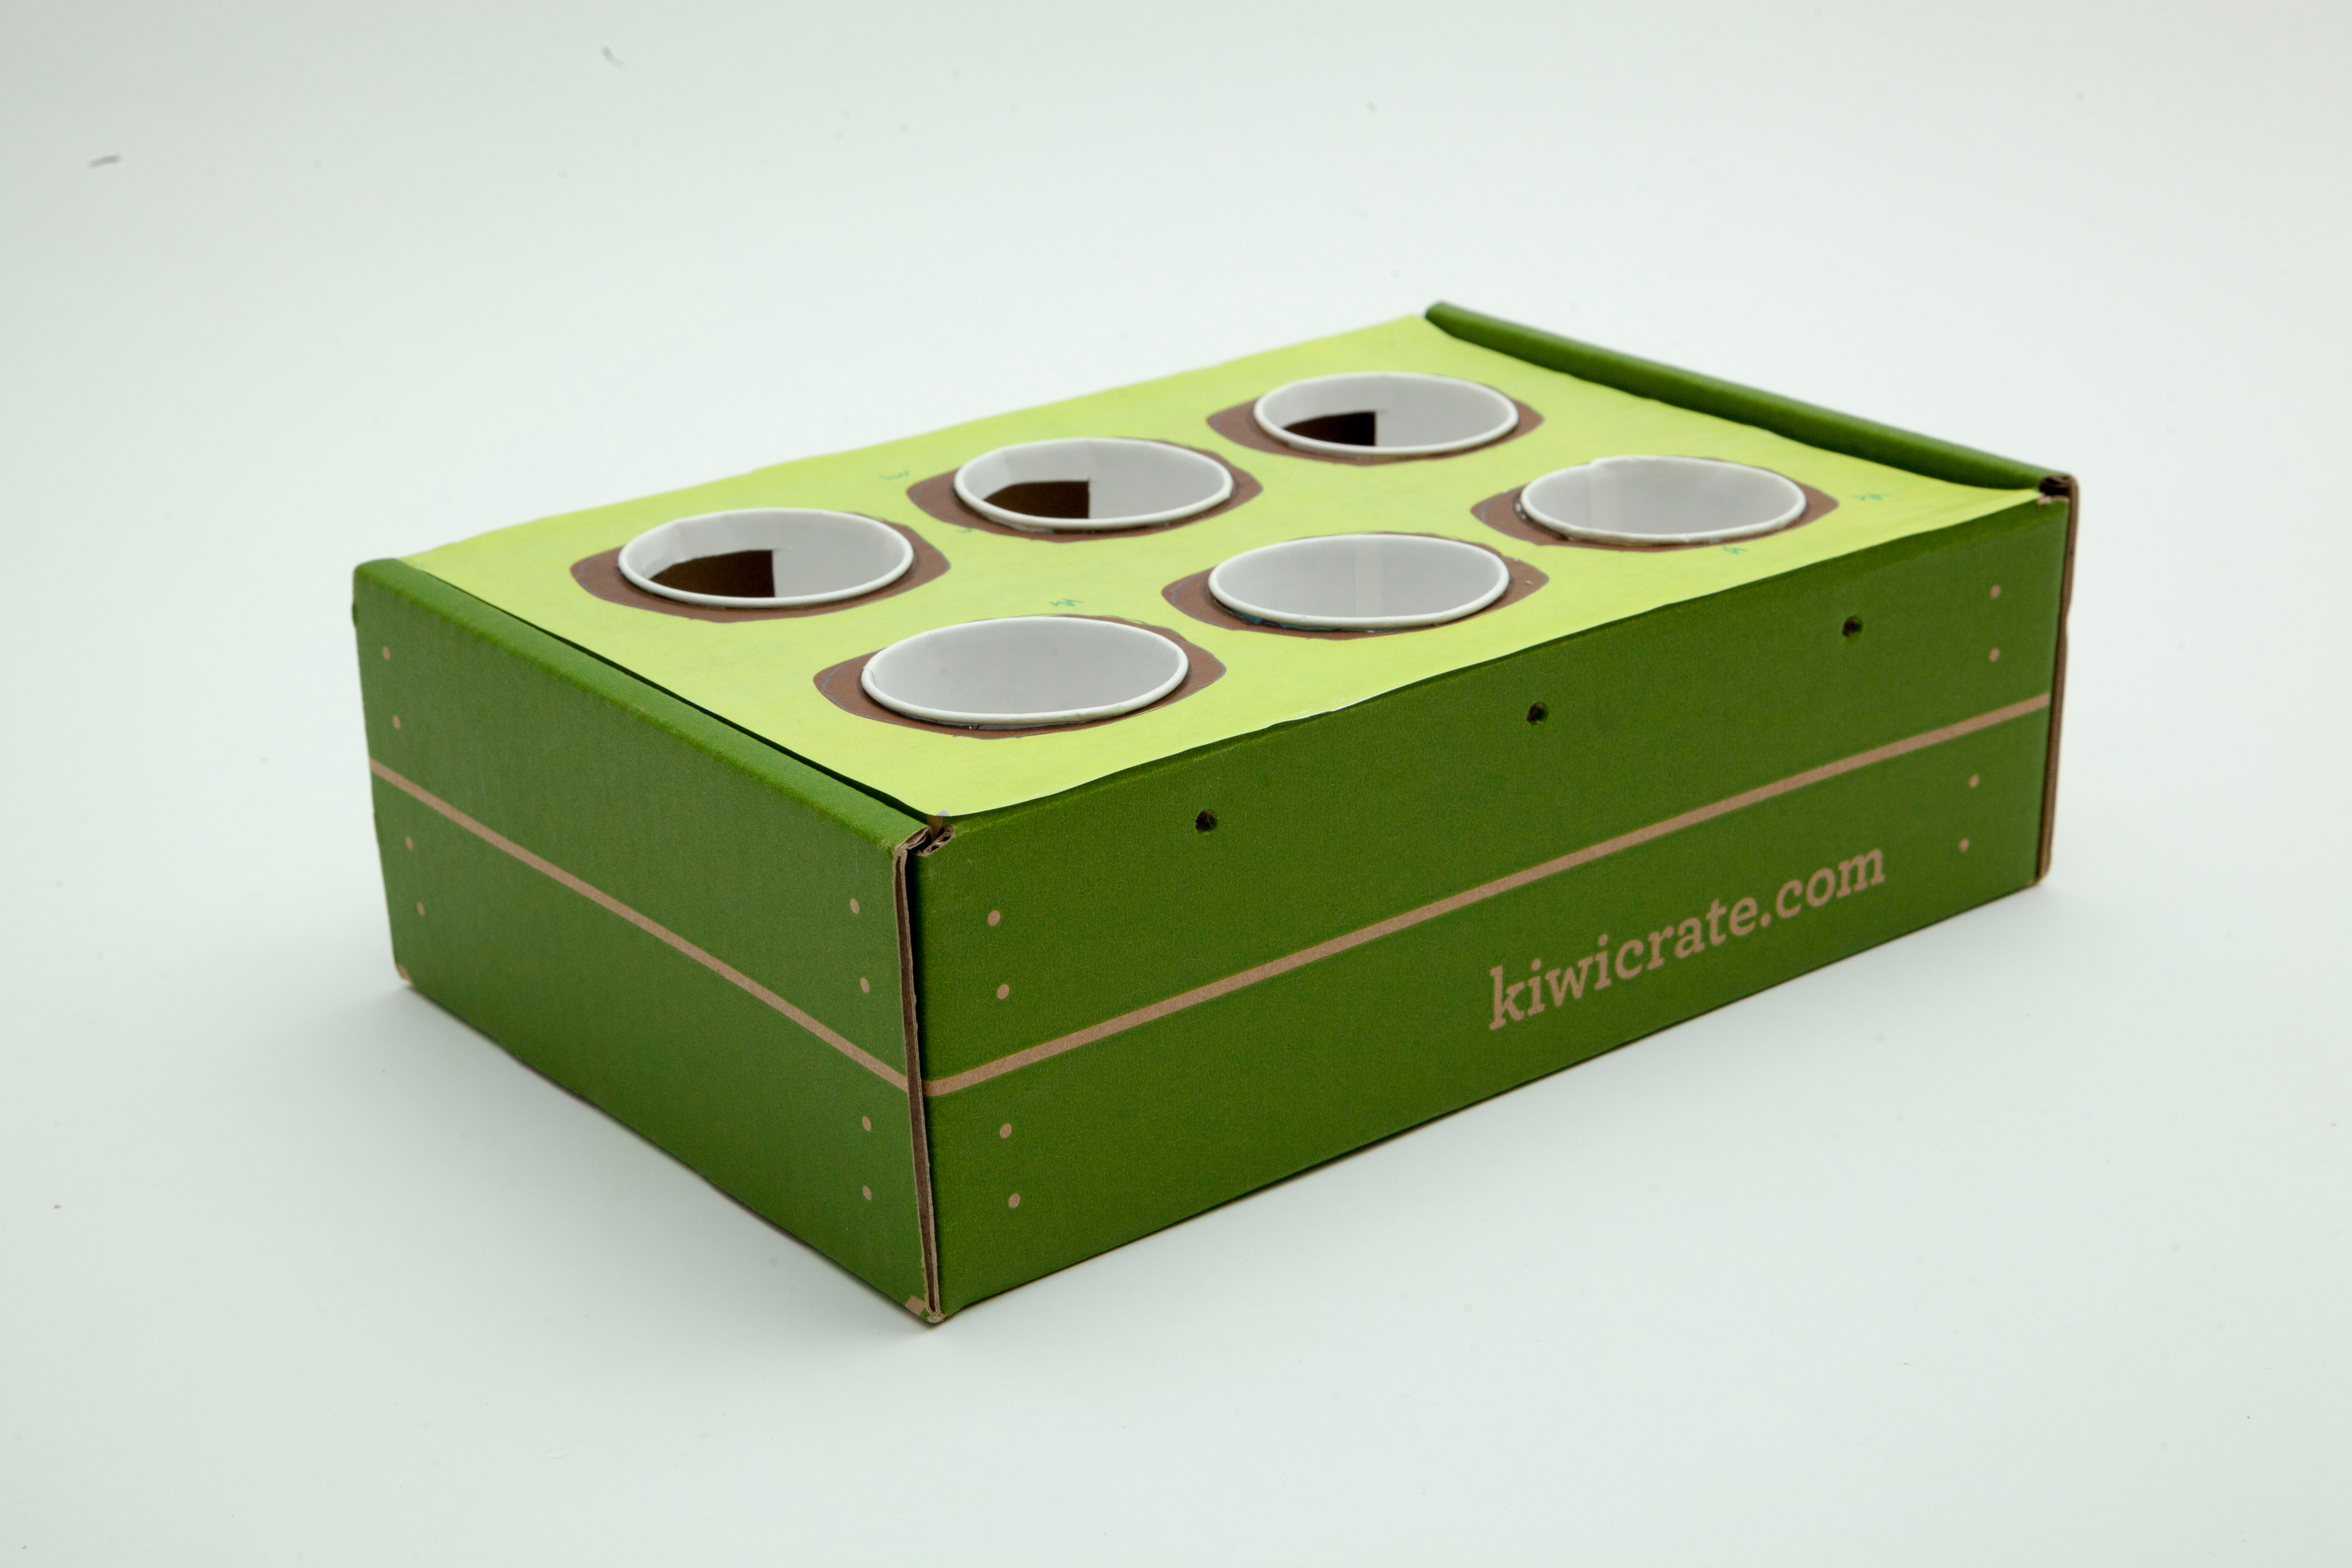
Step 5
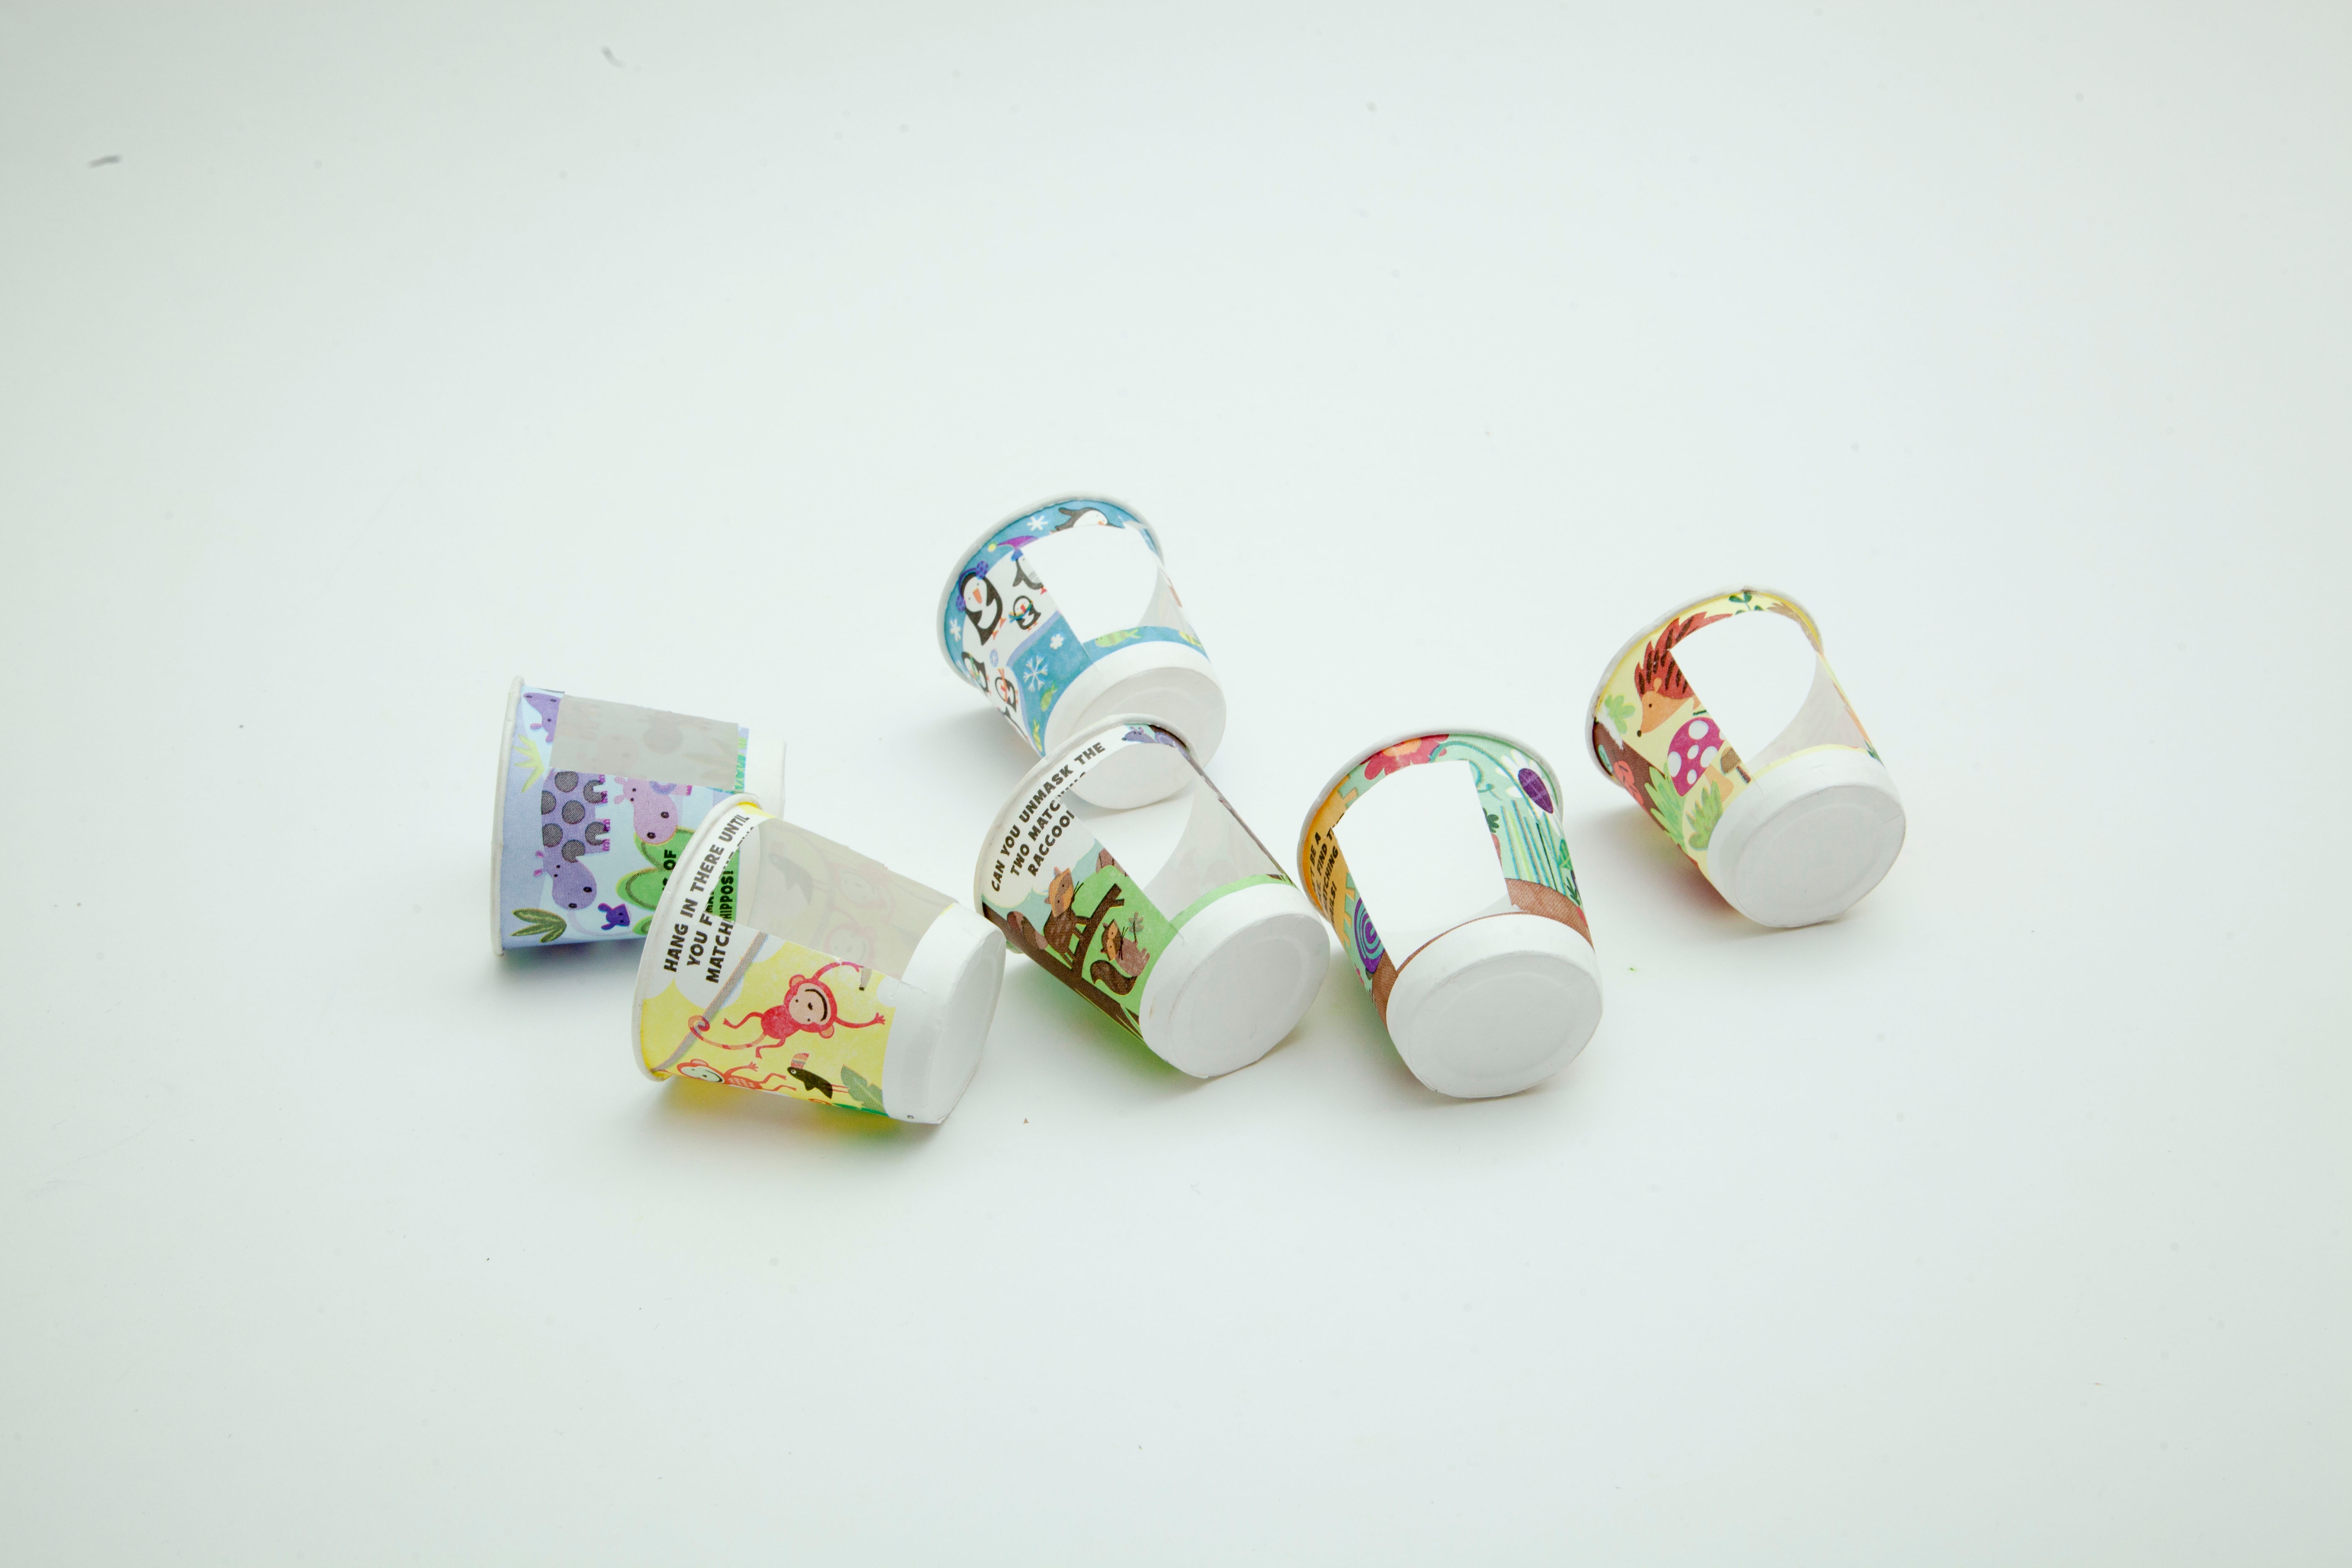
Cut a rectangle into one of the sides of a dixie cup. Do this to six cups.
Step 6
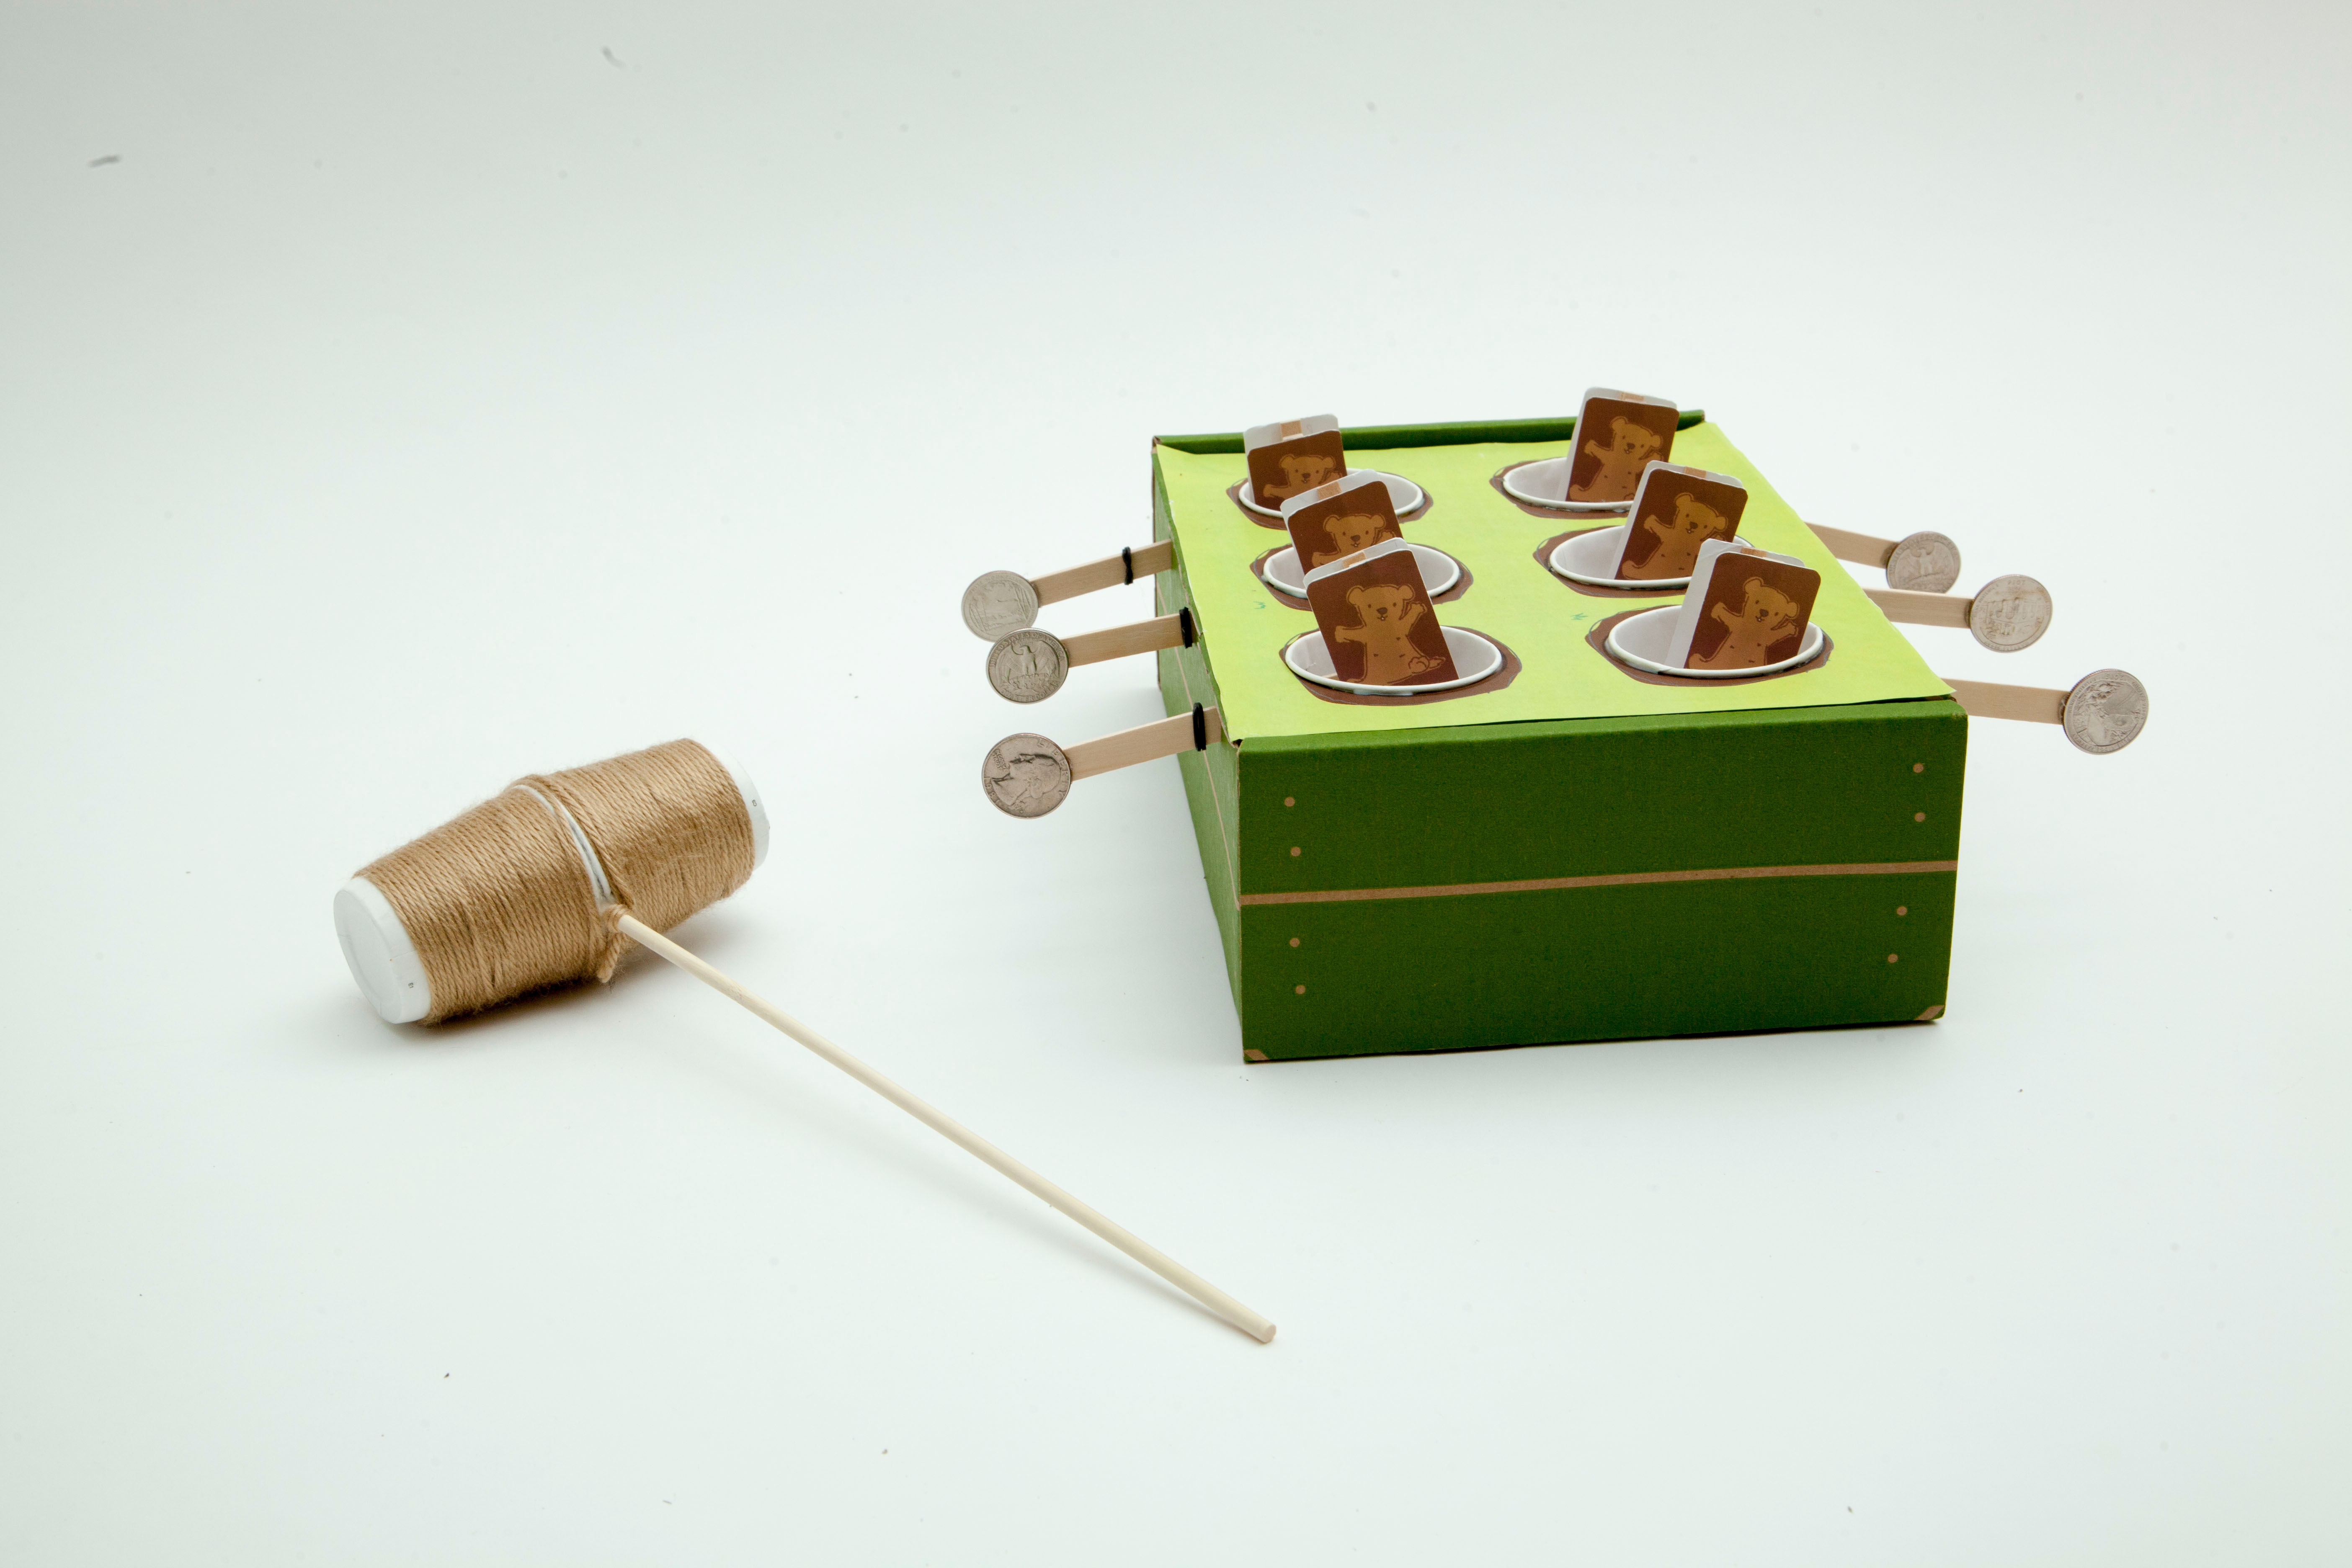
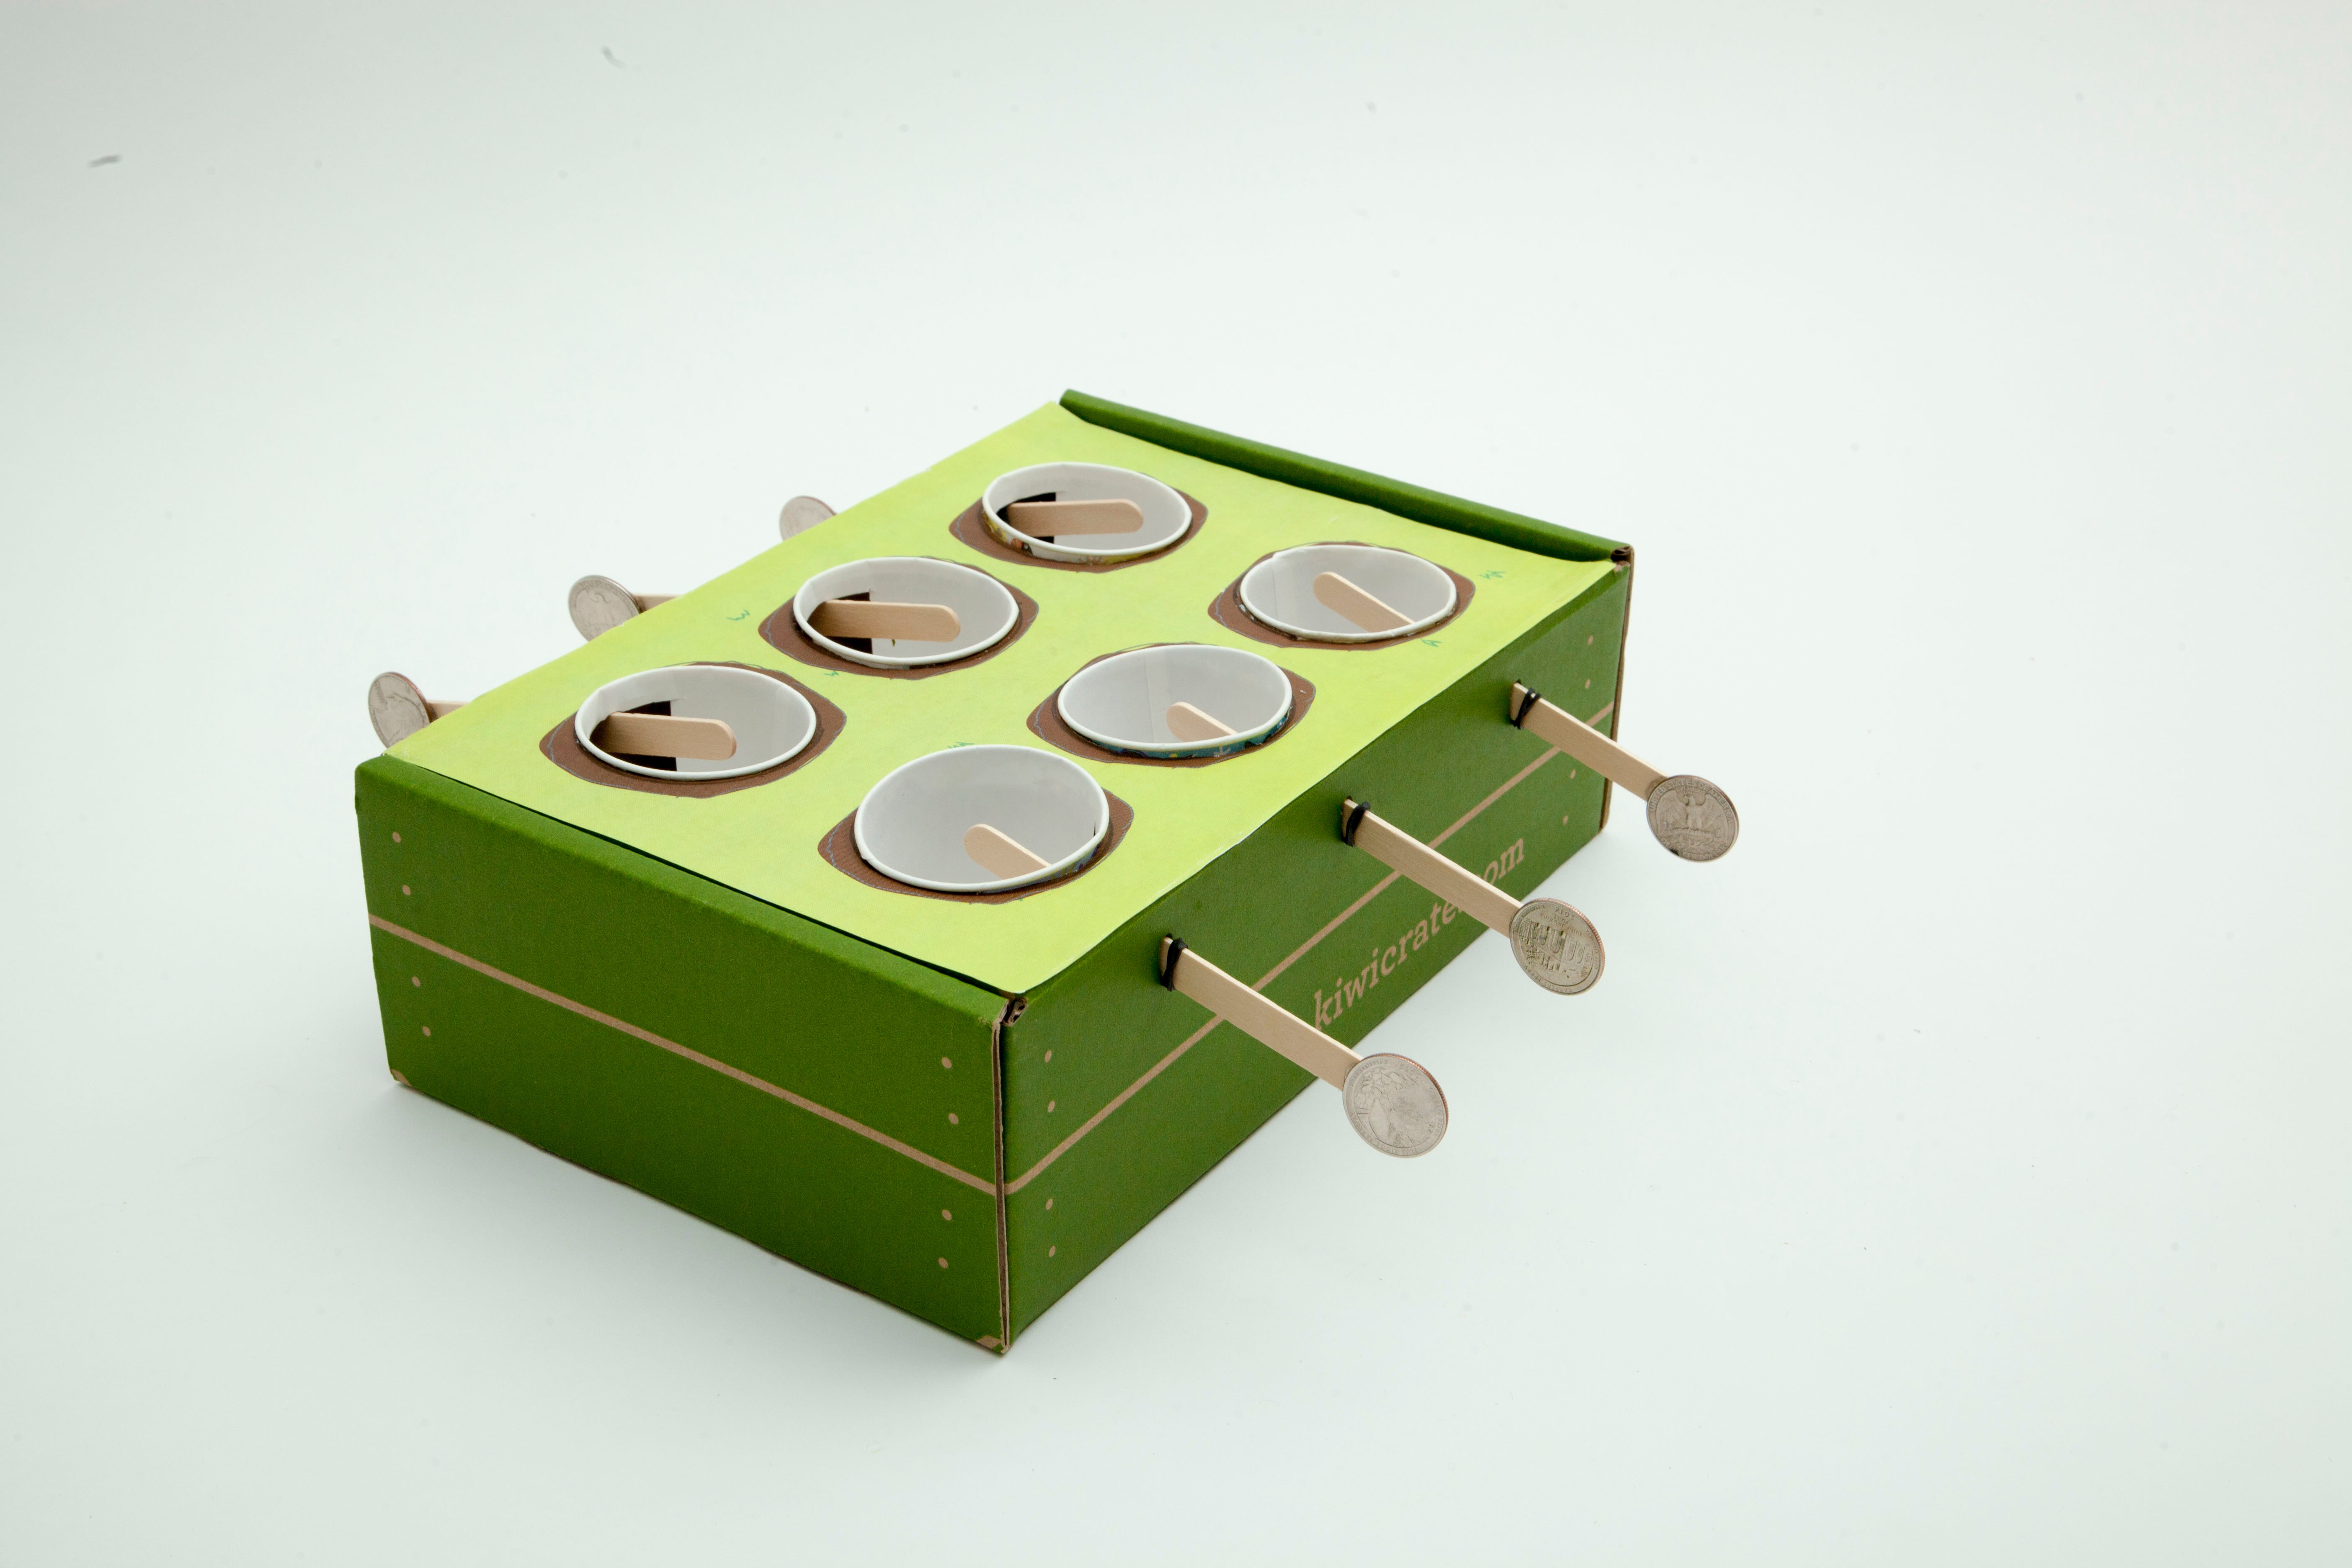
Place the six cups into the holes on the top of the box. Then, glue them in place so that the holes you cut into the cups face the long sides of the box.
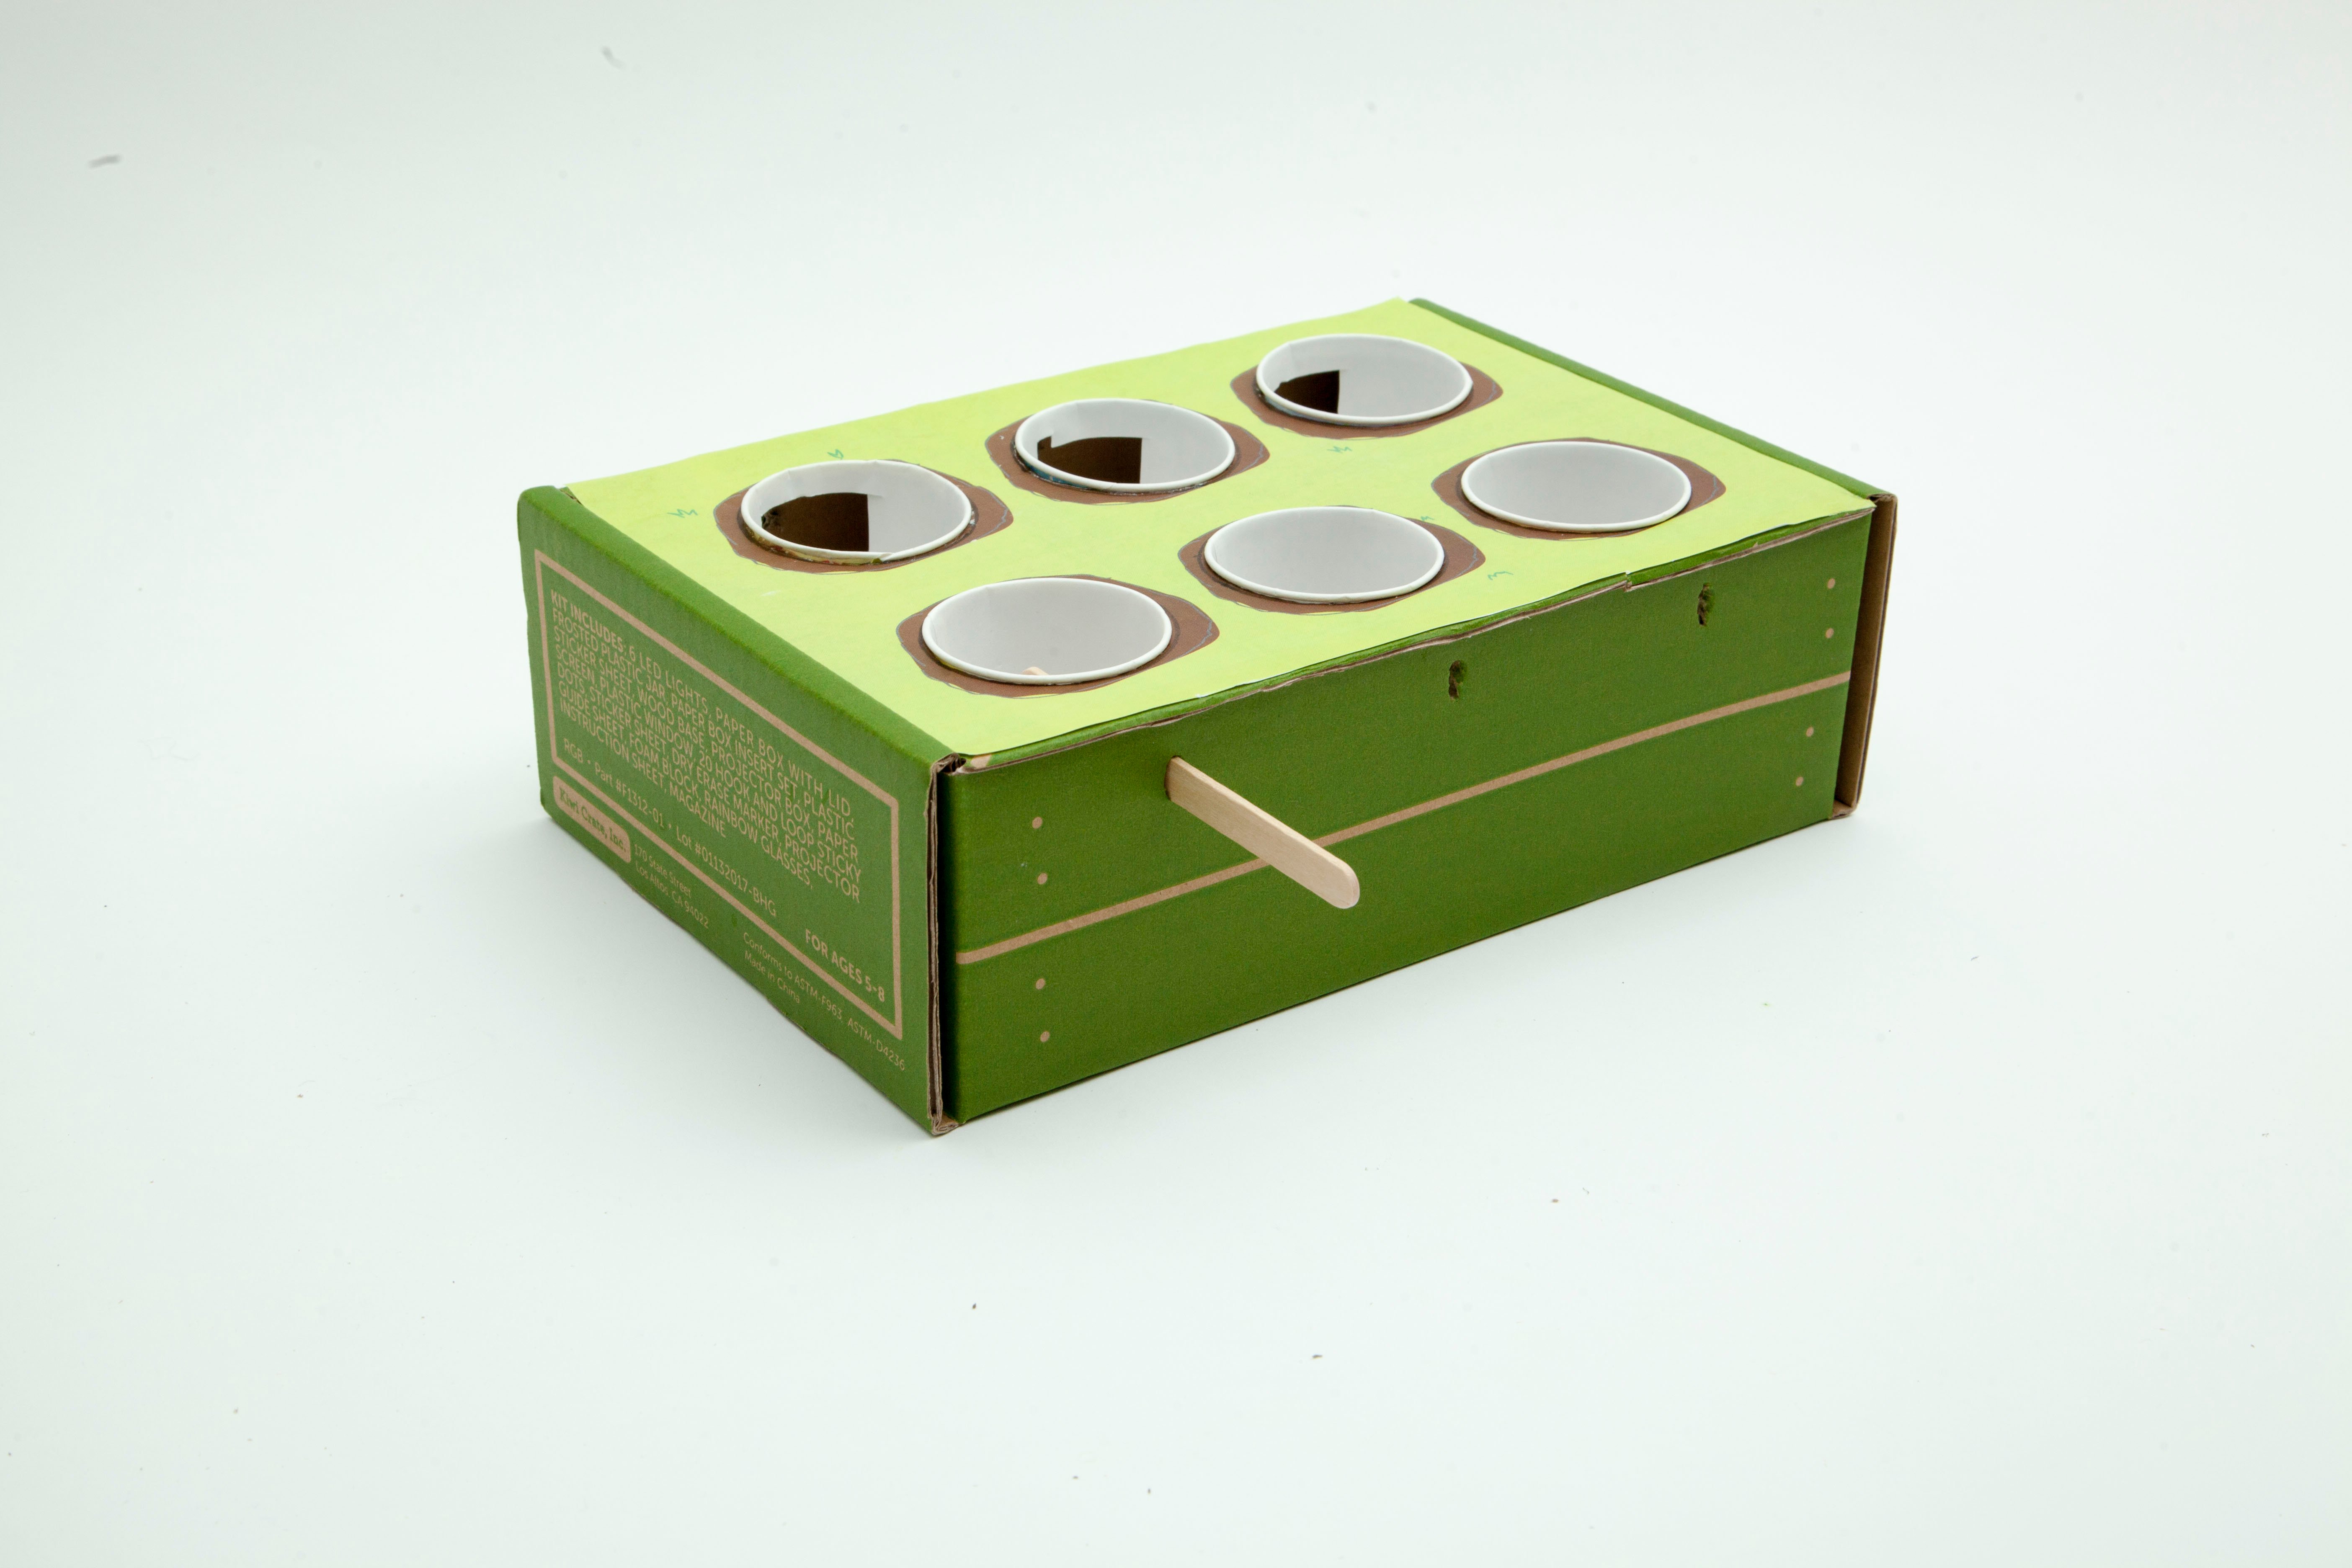
Step 7
Cut the flap pictured here off.

Step 8
On the long sides of the crate, use a skewer to make holes that line up with the center of each of the cups and is about half inch from the top of the crate.
Step 9
Widen these holes just enough so that a popsicle stick fits through them.
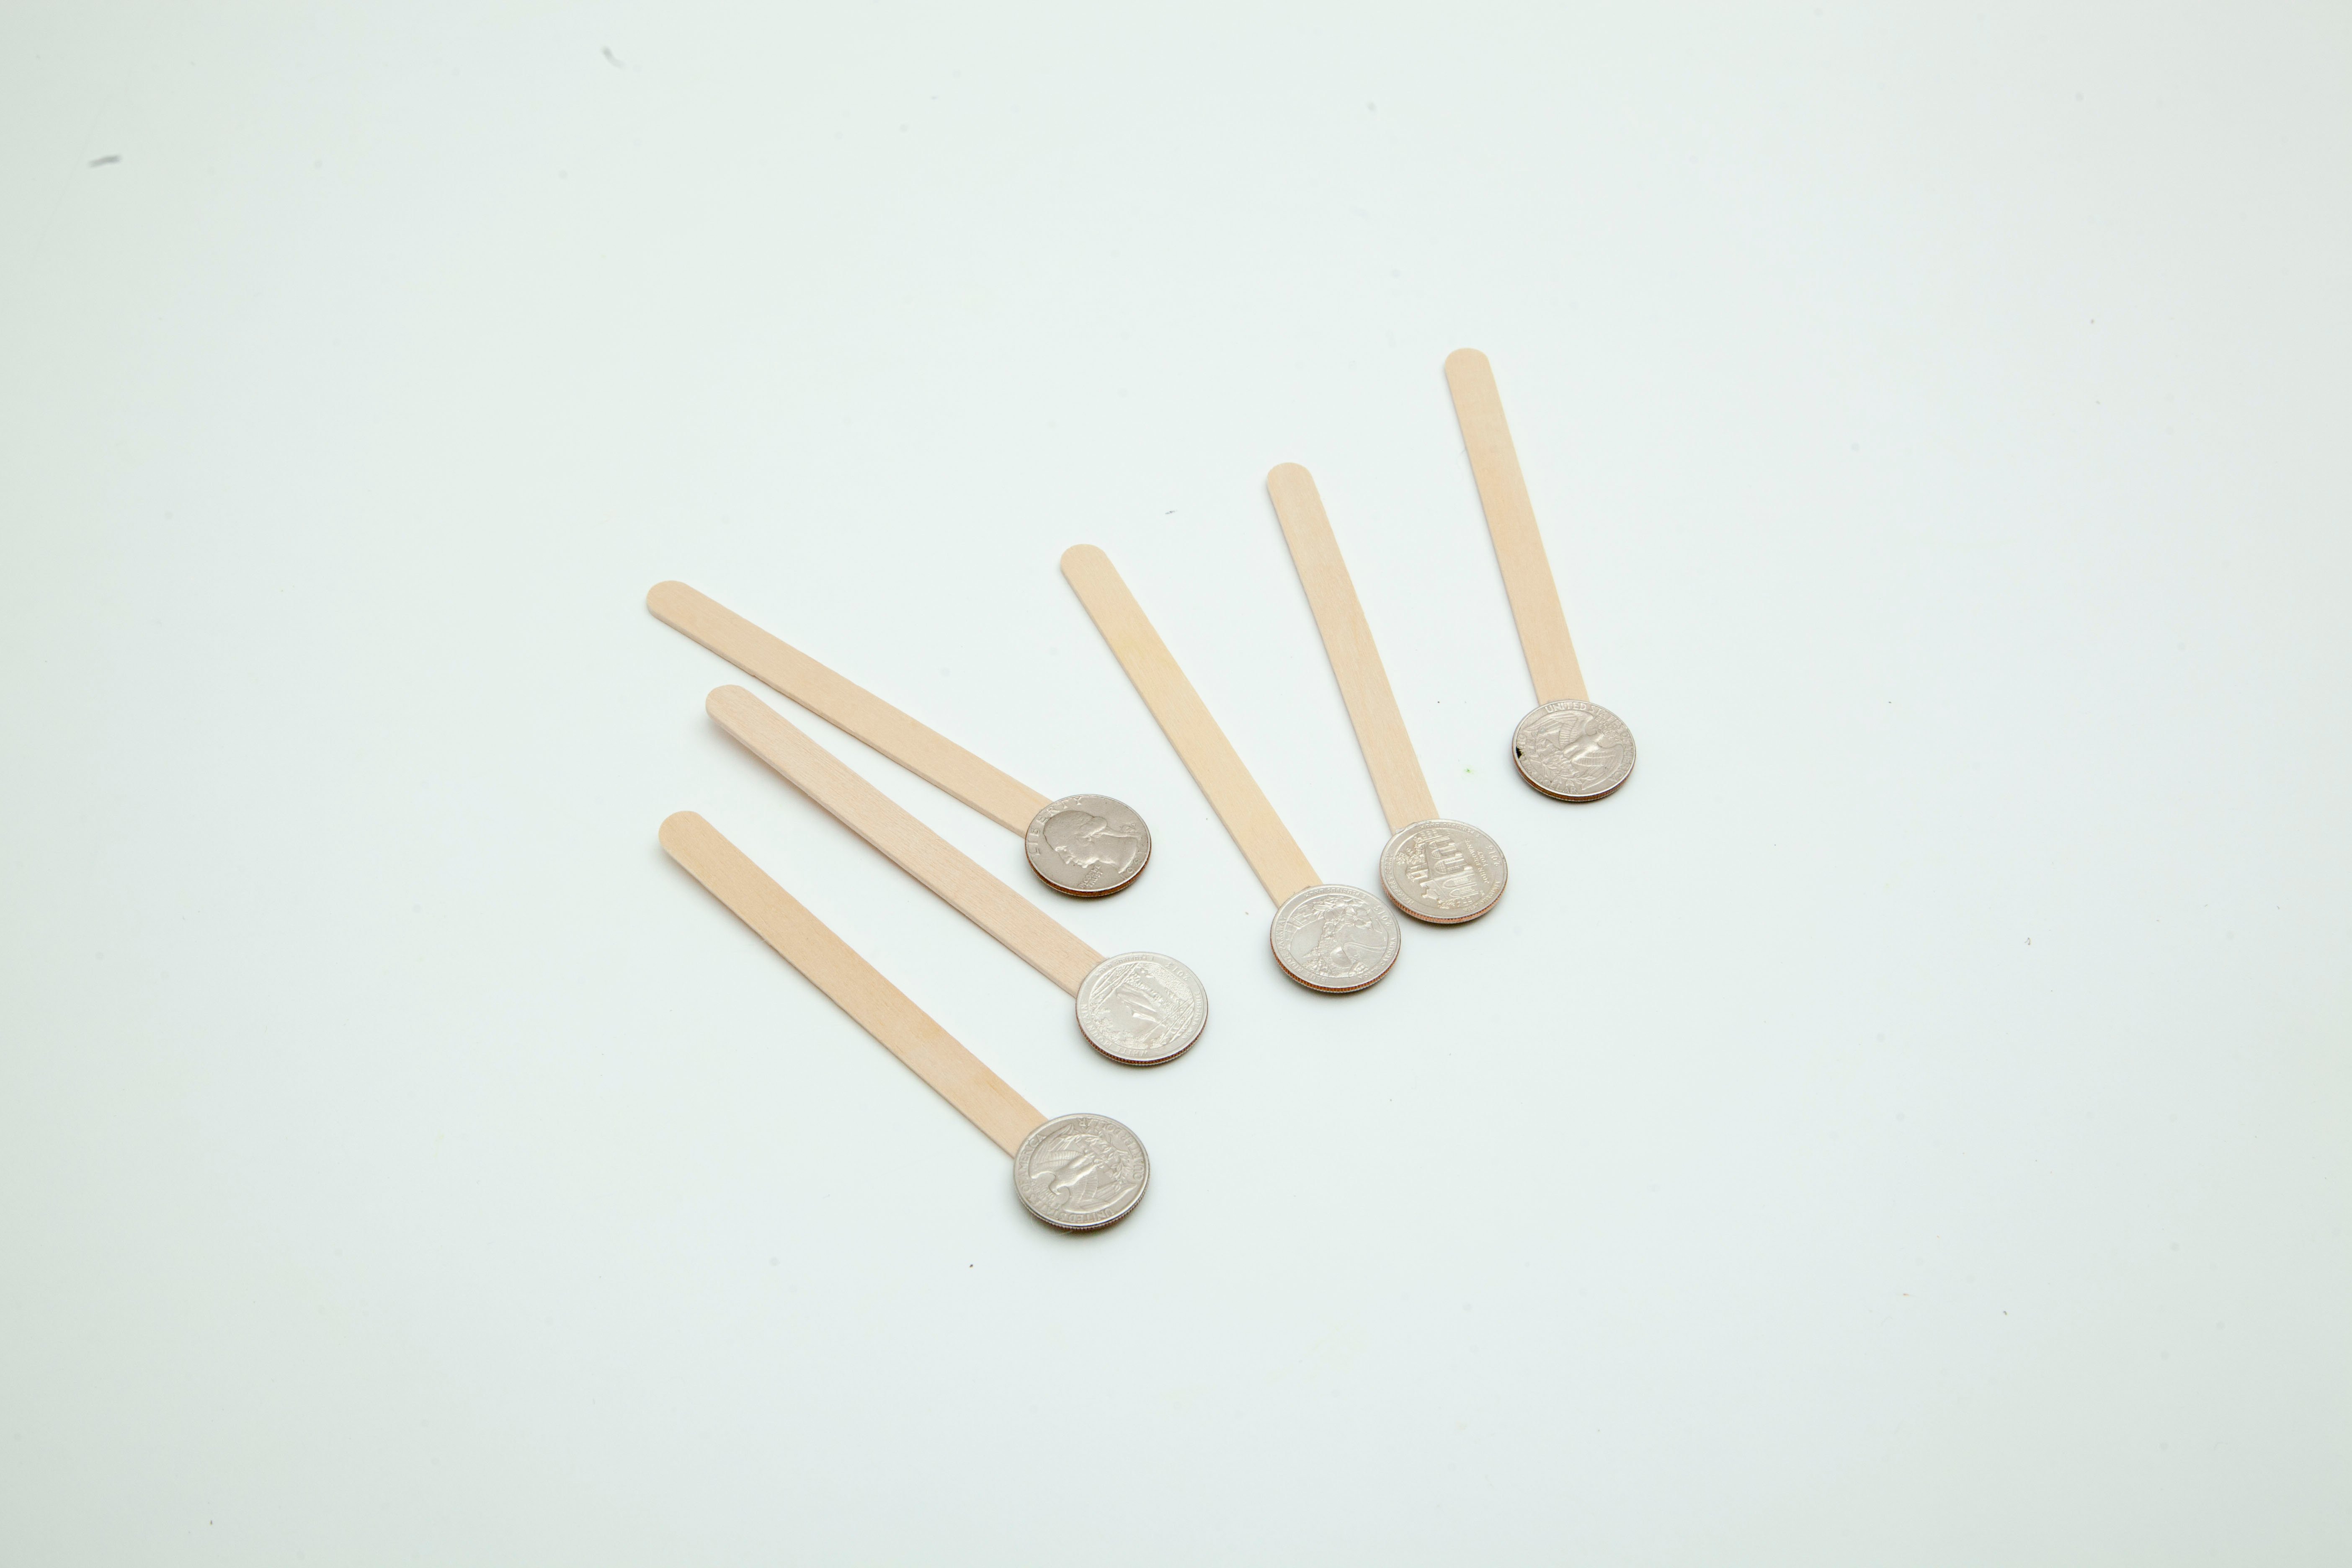
Step 10
Glue quarters to the ends of the popsicle sticks. Let them dry.
Step 11
Slide the popsicle sticks into the holes on the side of the box as pictured. Then, double wrap rubber bands on both sides of the popsicle stick.
Step 12
Push the rubber bands towards the middle of the popsicle stick so that they “hug” the side of the box. This will help keep the popsicle stick from sliding forward and backward when playing!
Step 13
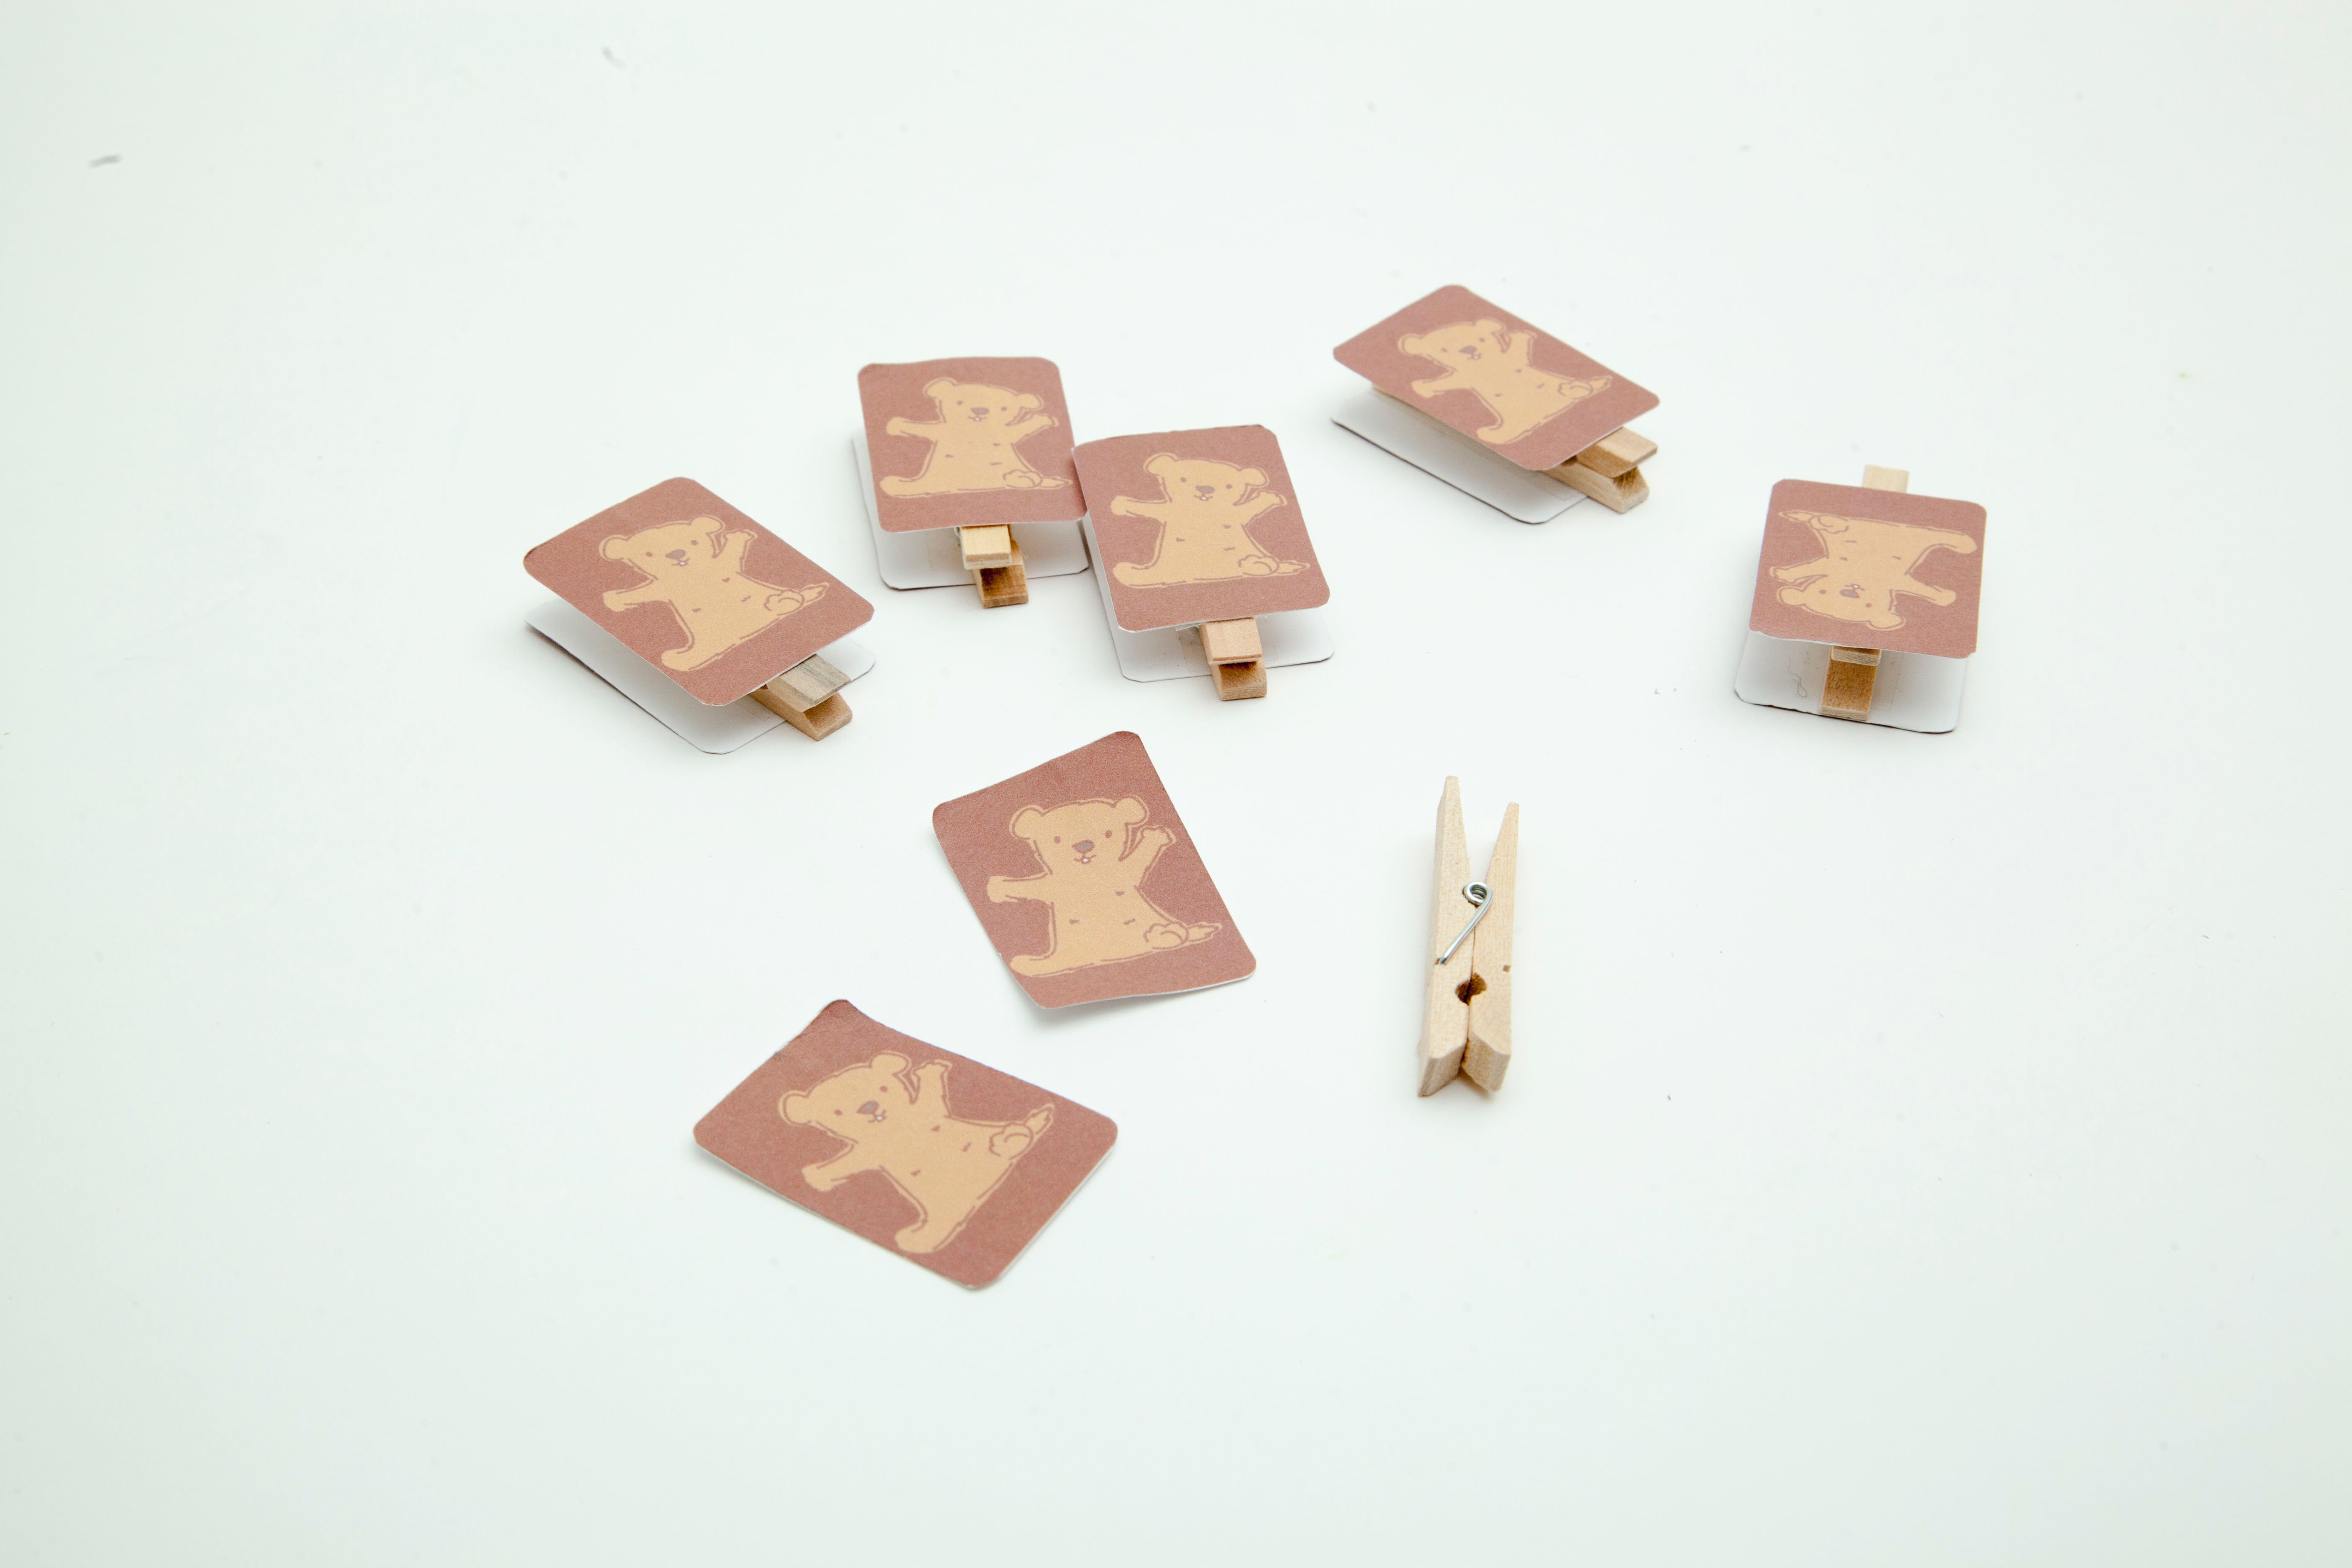
Glue the groundhog cards to either side of the clothespins.
Step 14
Clip the clothespins onto the ends of the popsicle sticks in the cup.

Step 15
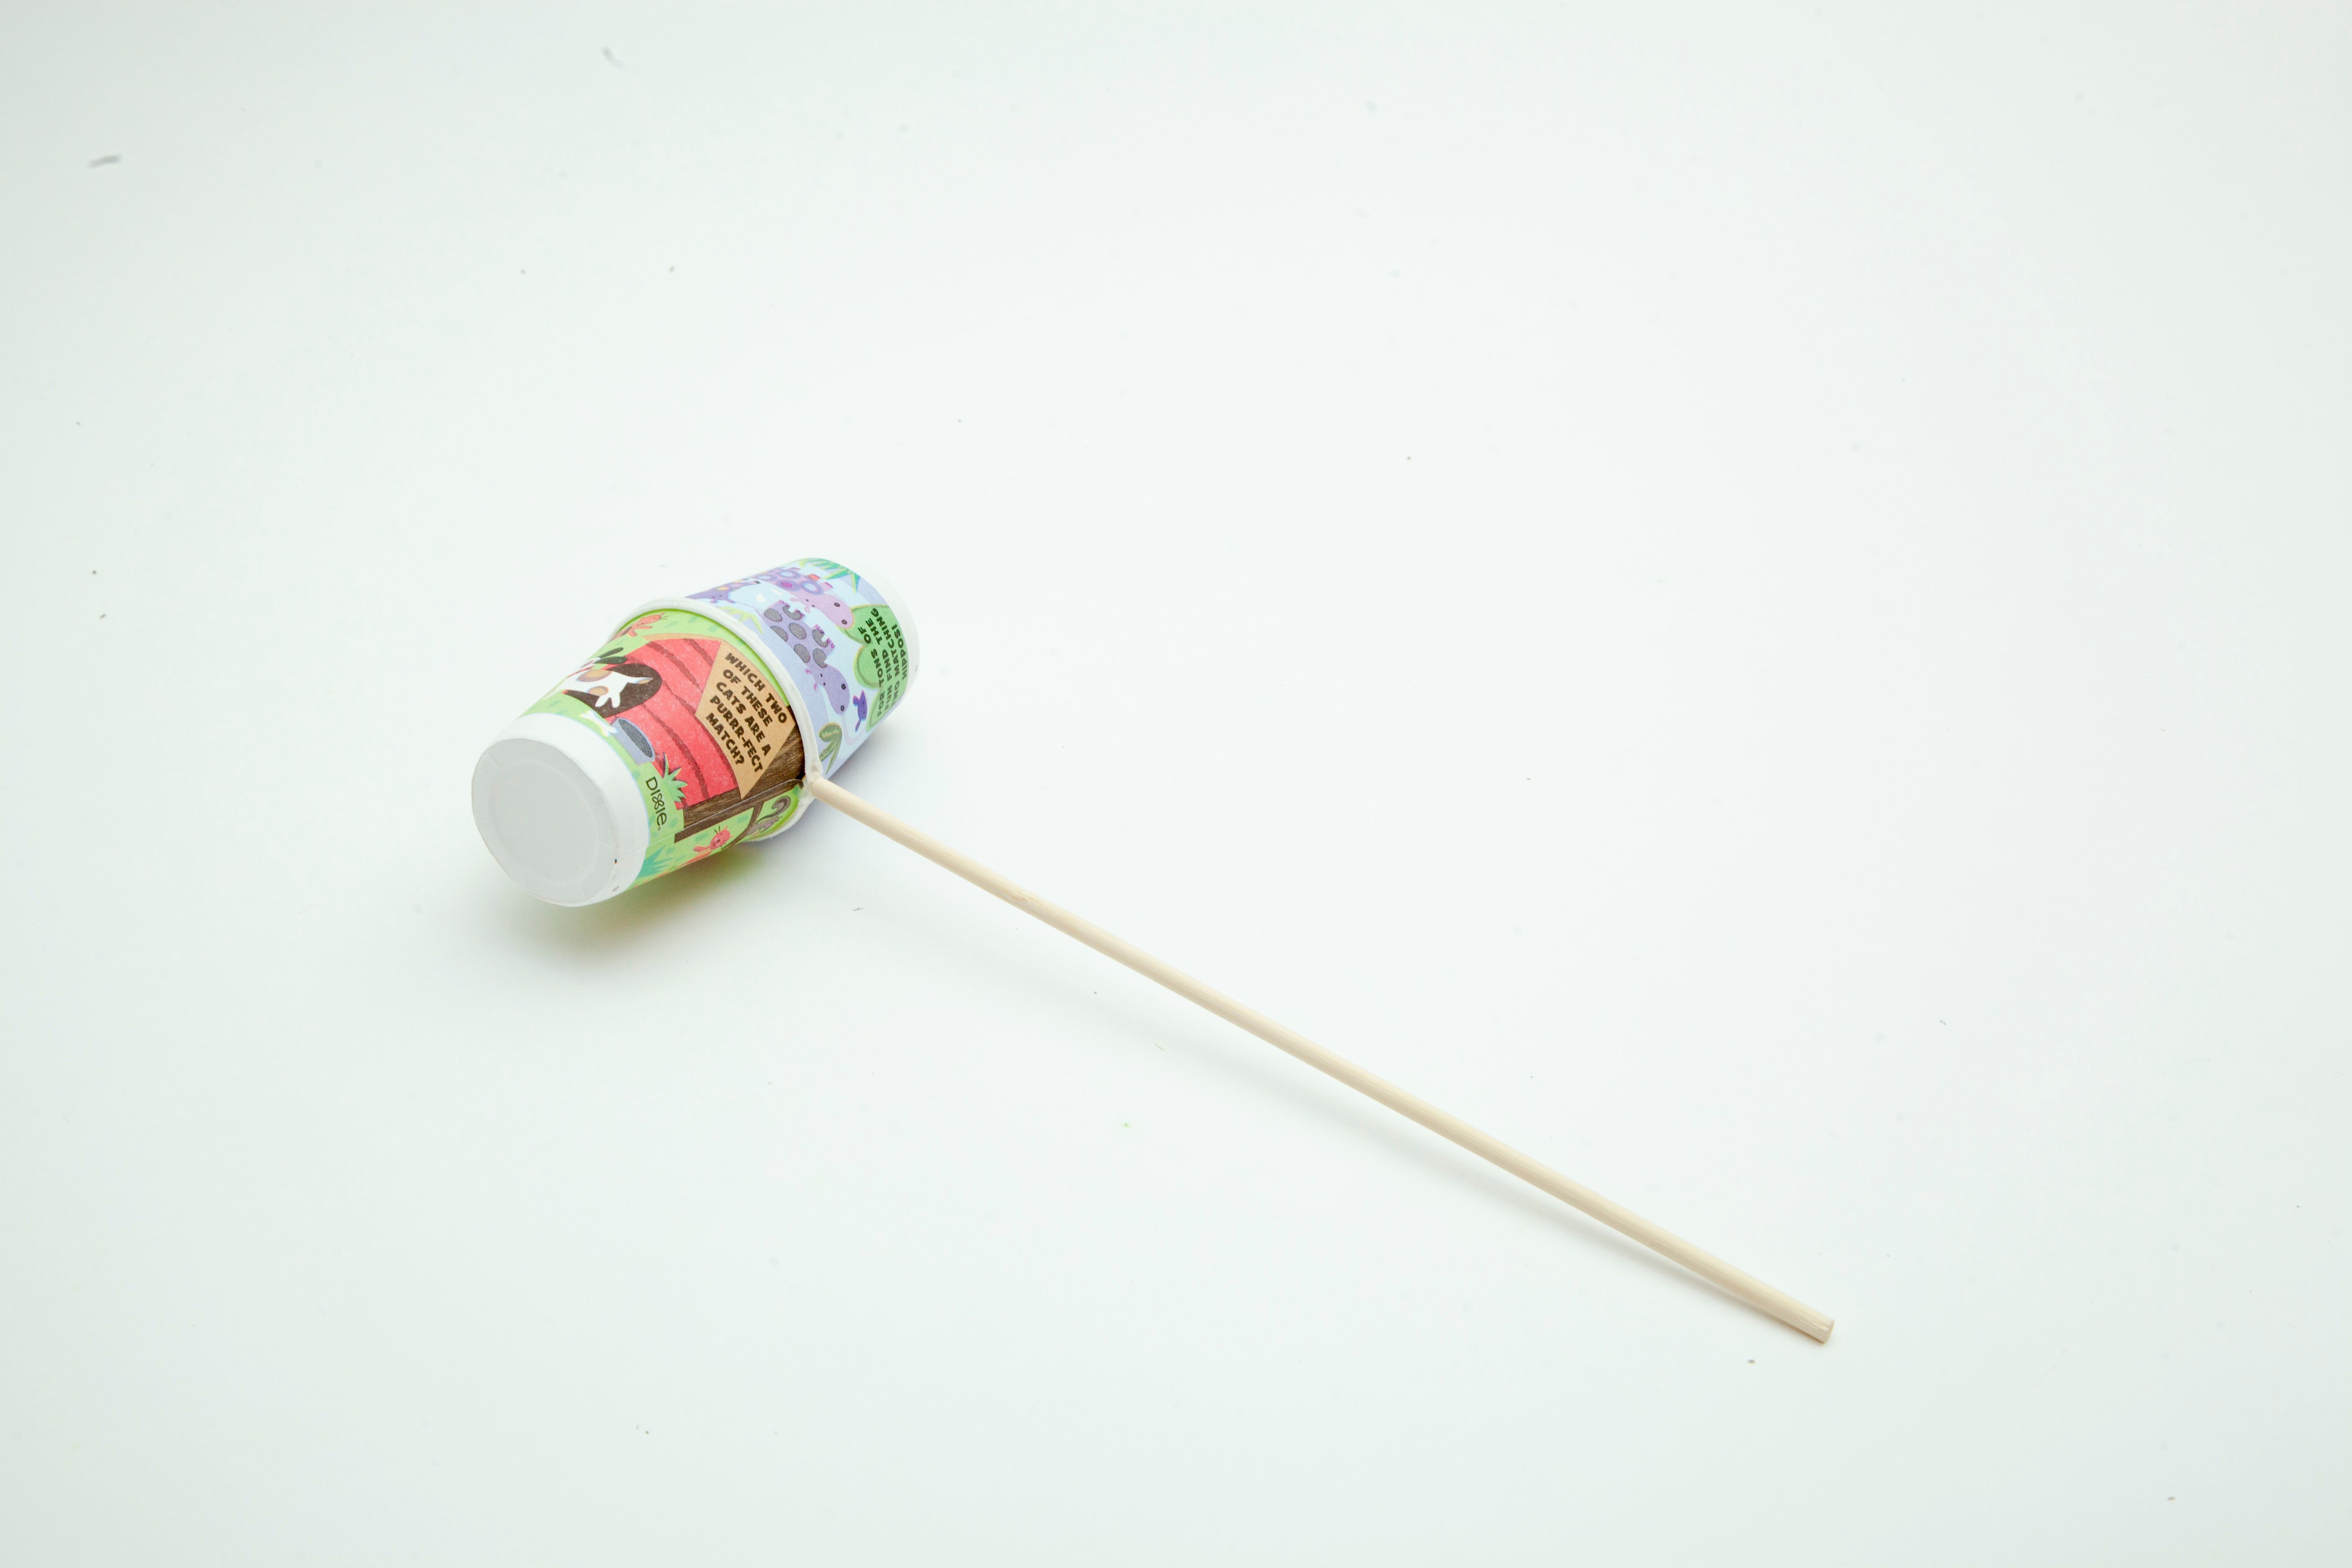
Glue two cups together, sandwiching the pointy end of the skewer in between them. This will be your mallet.
Step 16
Wrap yarn around the mallet until it is completely covered.

Done!
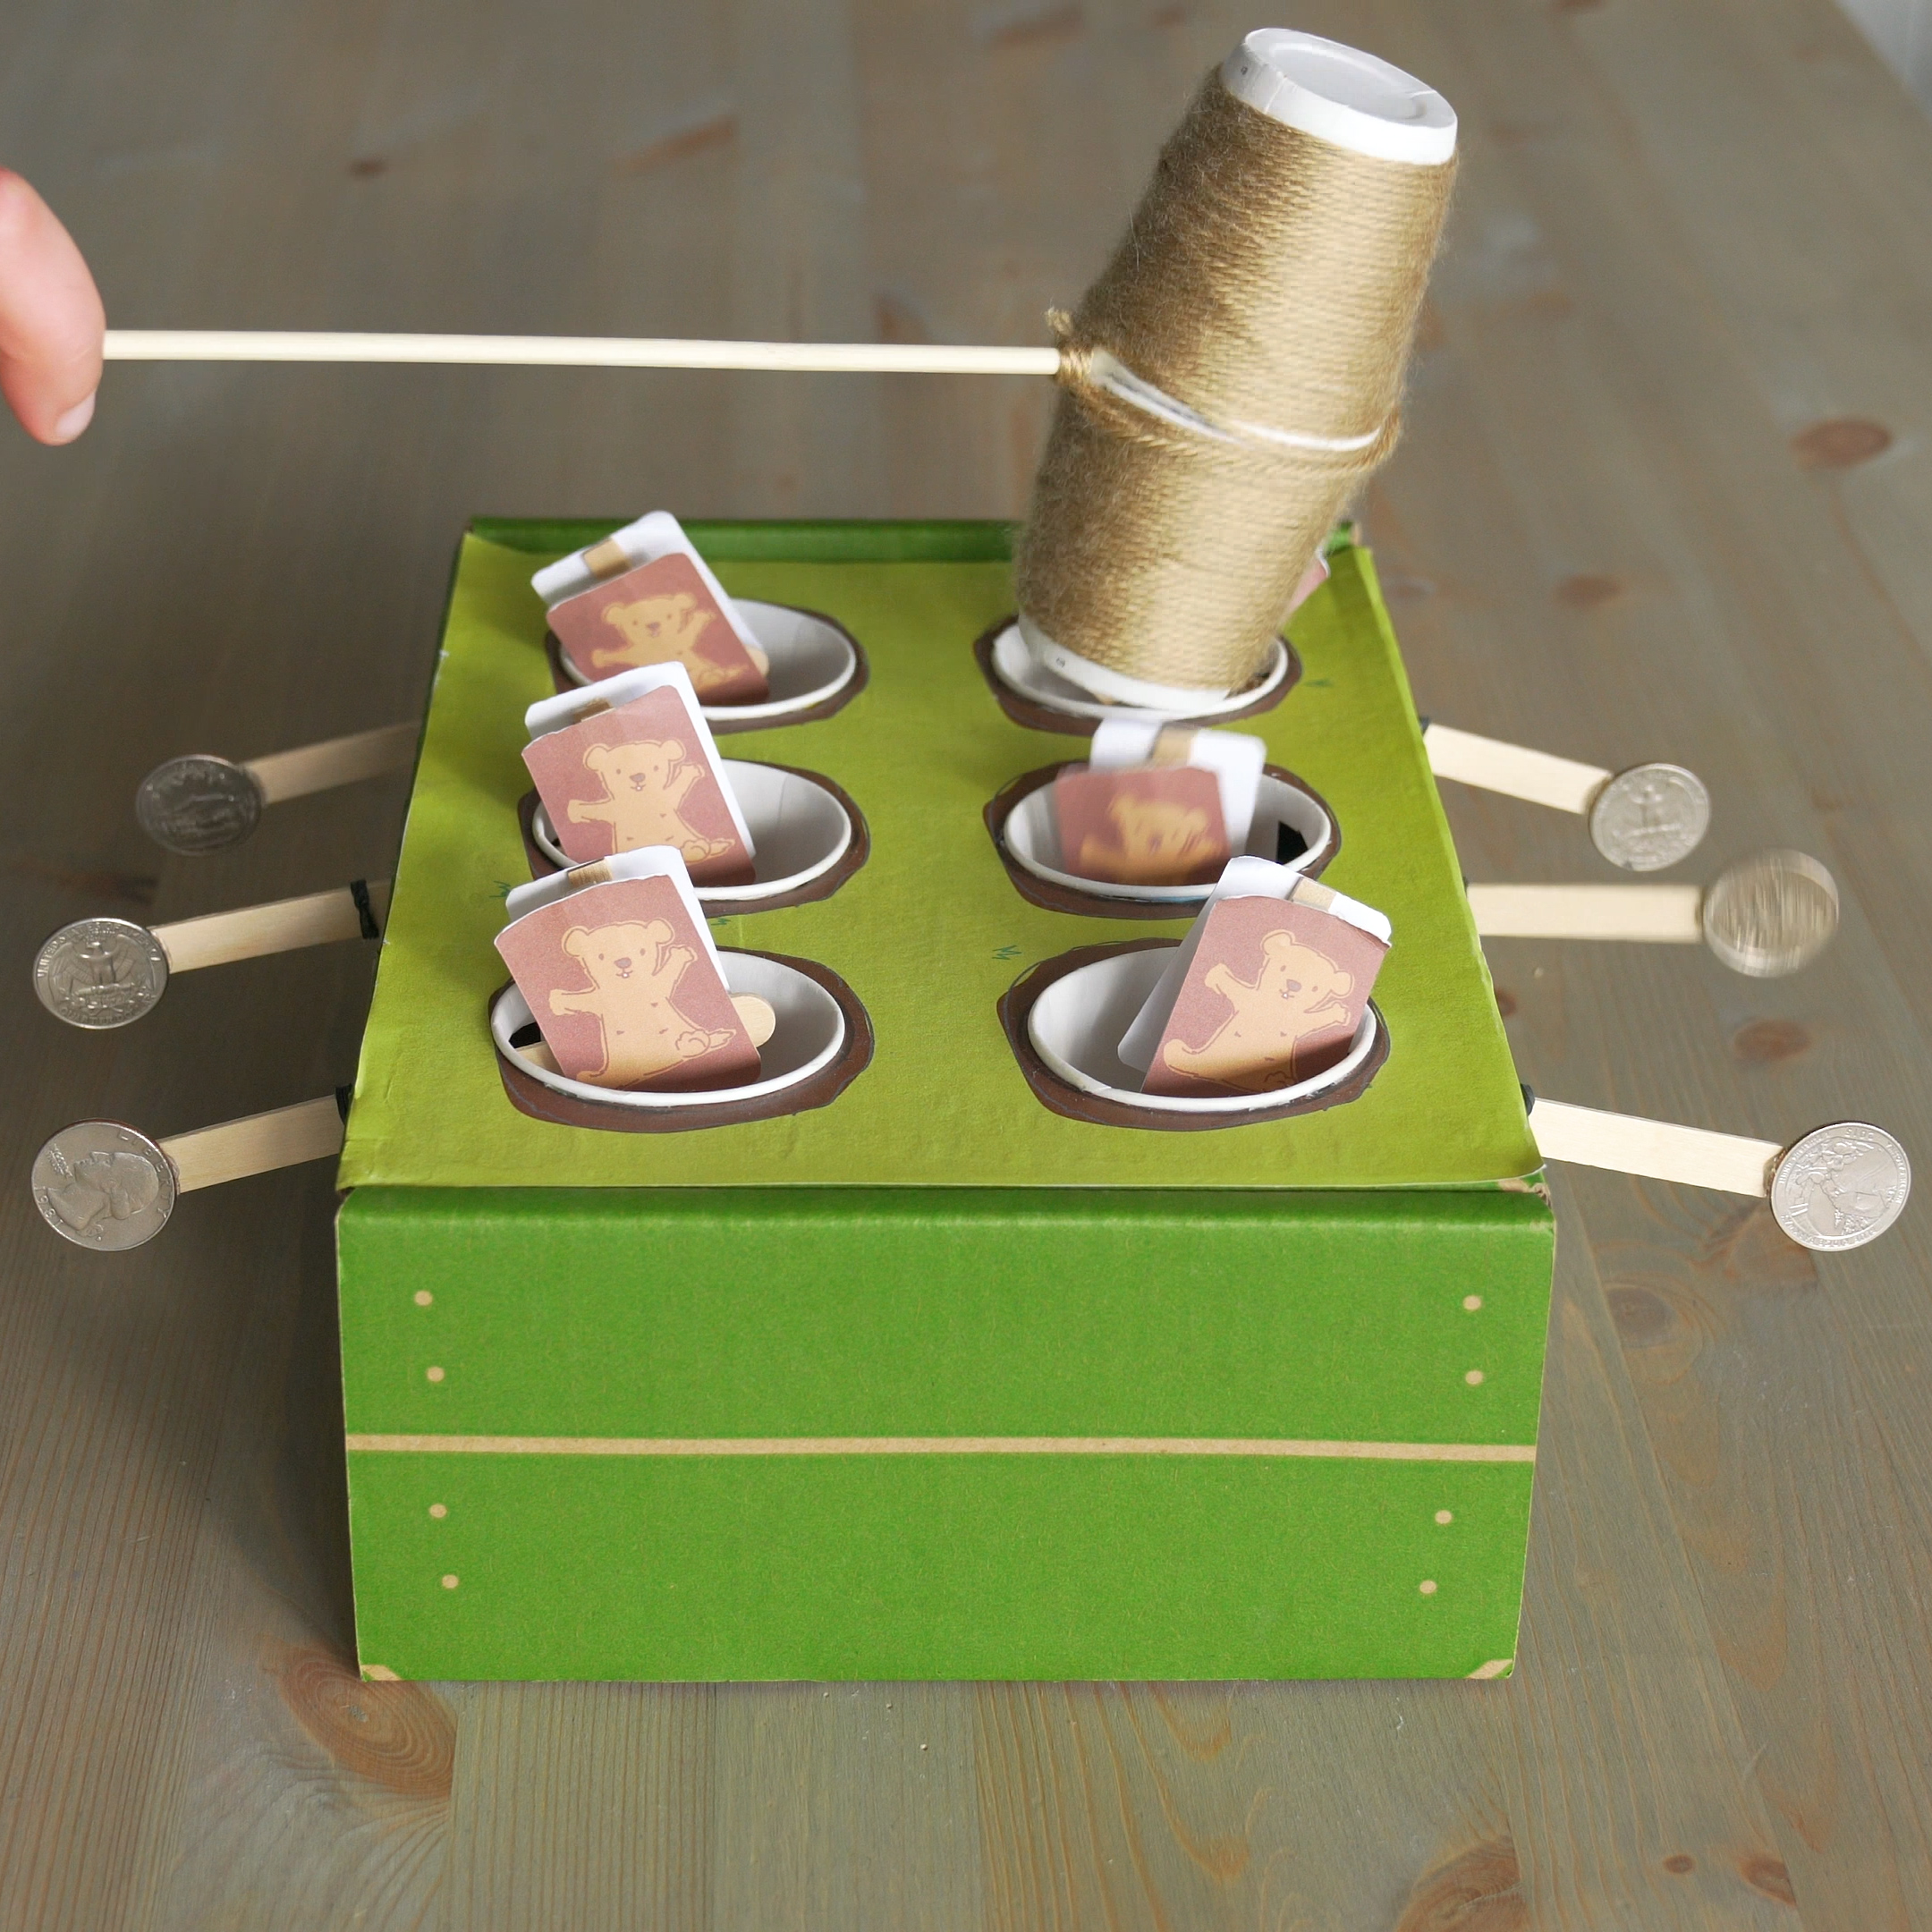
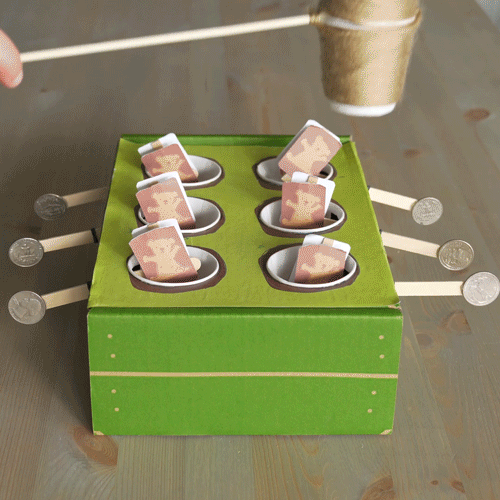
Play with your whack-a-mole! The quarters serve as weights to keep your groundhogs popping up even after you whack ‘em down.