Step-by-step tutorial
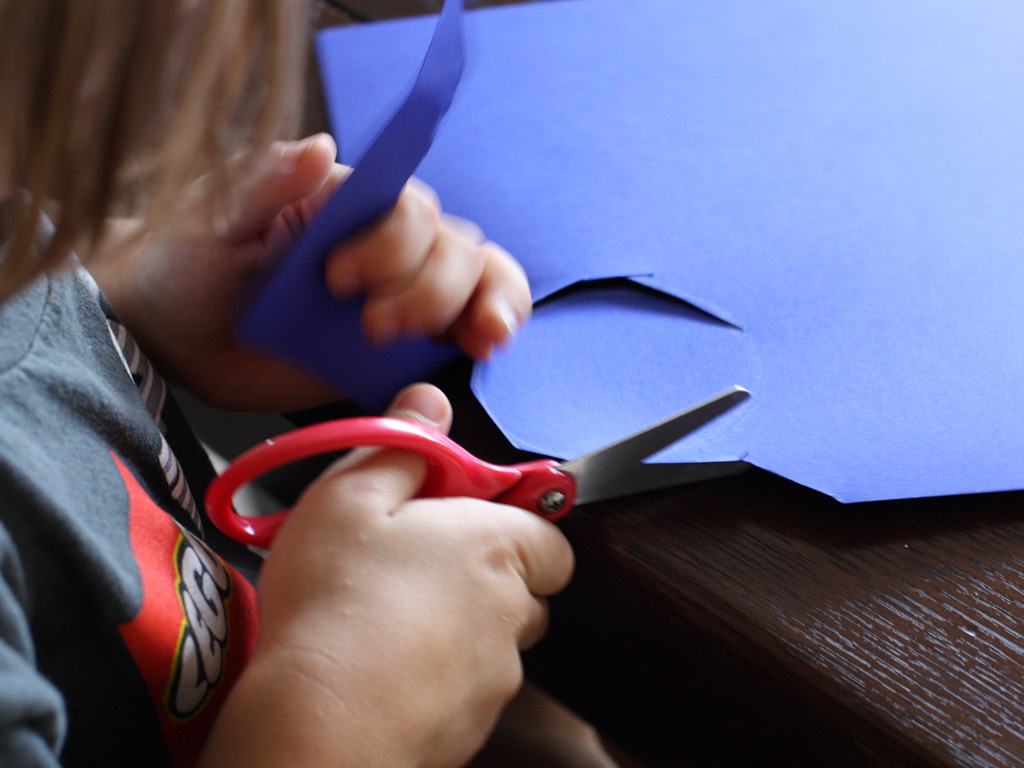
Step 1
We started building the top of our rocket first. Jackson cut a circle out of a piece of construction paper (about 3" or 4" in diameter or 7.6-10.2 cm). Feel free to try different shapes, colors, and sizes--it's your rocket!

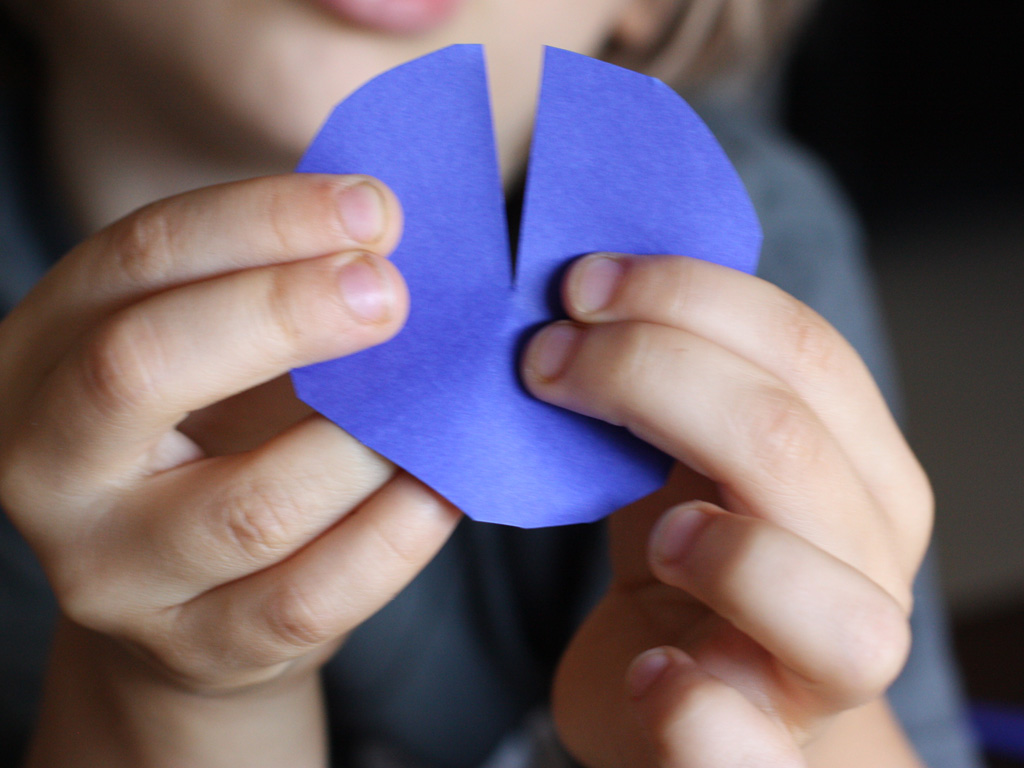
Step 2
Jackson cut a line into the center of the circle...
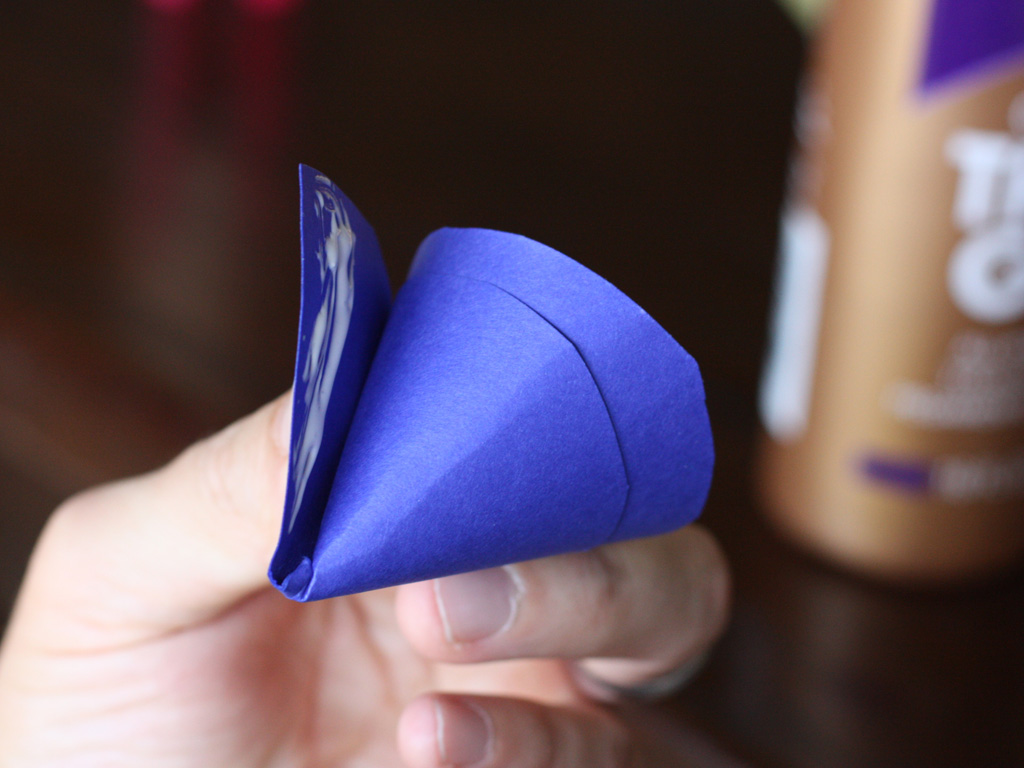
Step 3
...then made a cone out of the paper. We used some glue to attach the ends together. (If the glue is not holding you can take a cloths pin and clamp it down so it can dry.) It is important to make sure that the cone fits and looks cool on your rocket before the glue dries.
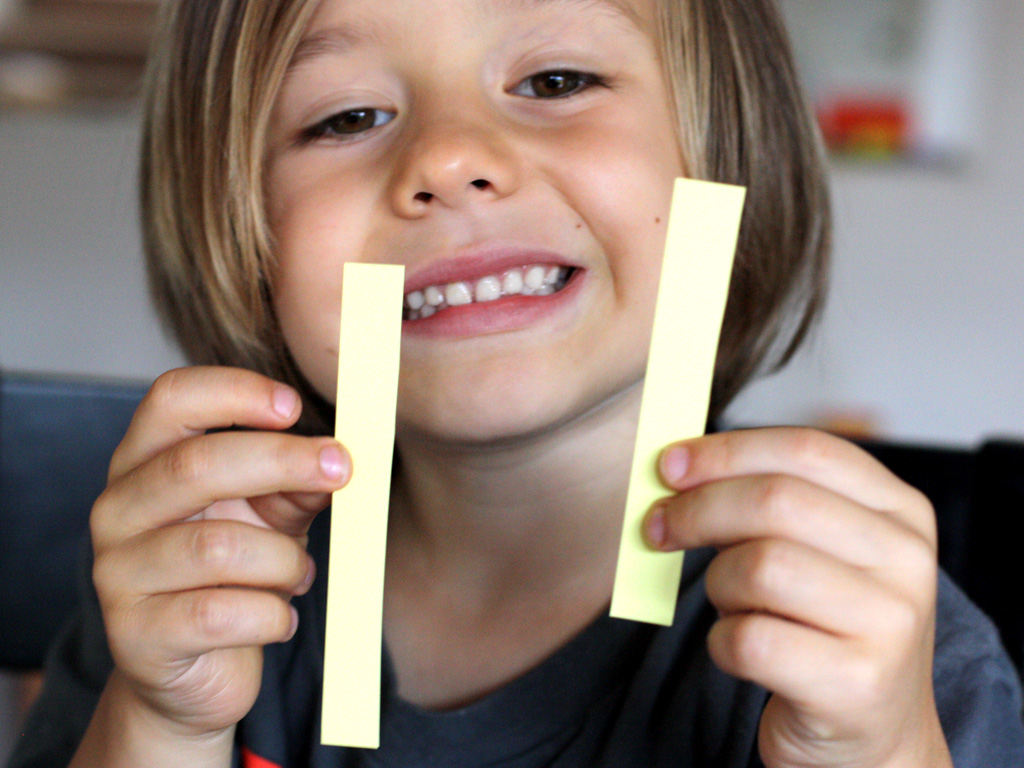
Step 4
Next Jackson cut two strips of paper about 4" (10.2 cm) long and 0.5" (1.3 cm) wide.
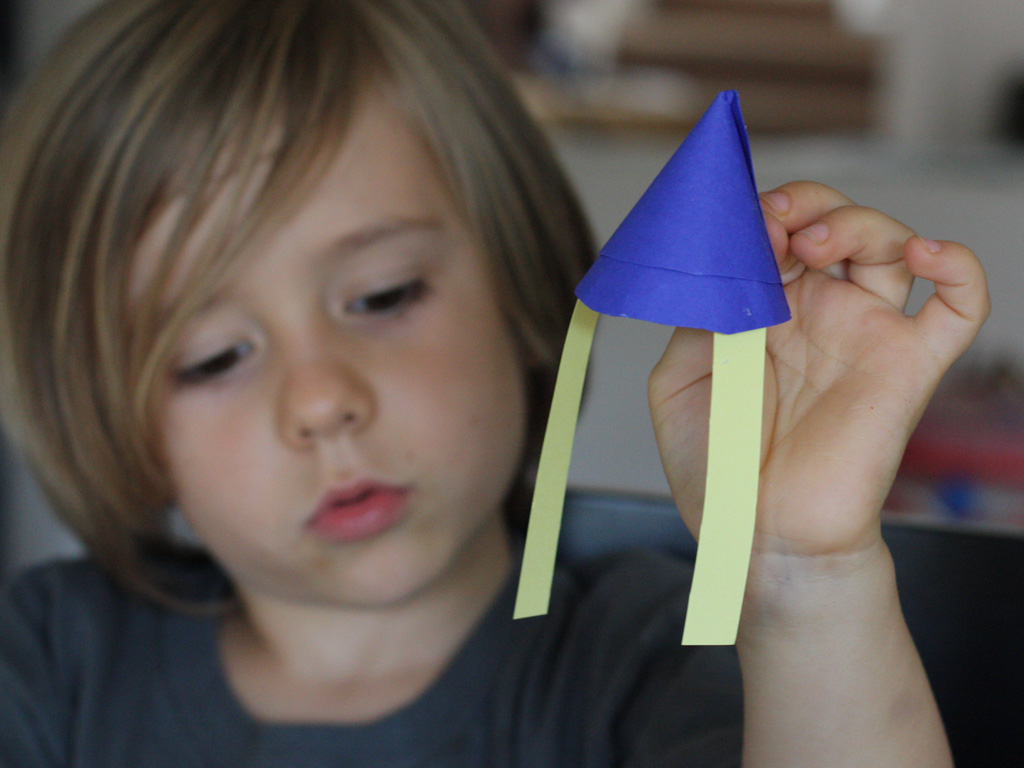
Step 5
We took some glue and attached the strips of paper to the inside of the cone.
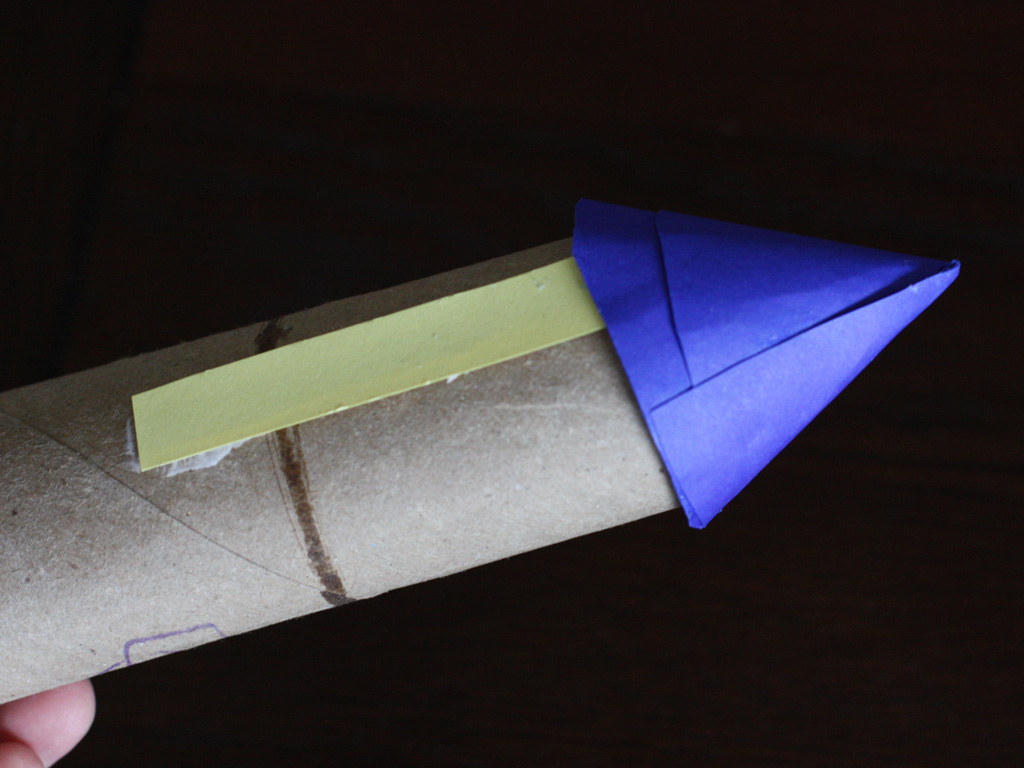
Step 6
Then Jackson glued the cone and the strips of paper to the toilet paper roll. At this point you could really see the rocket coming together.
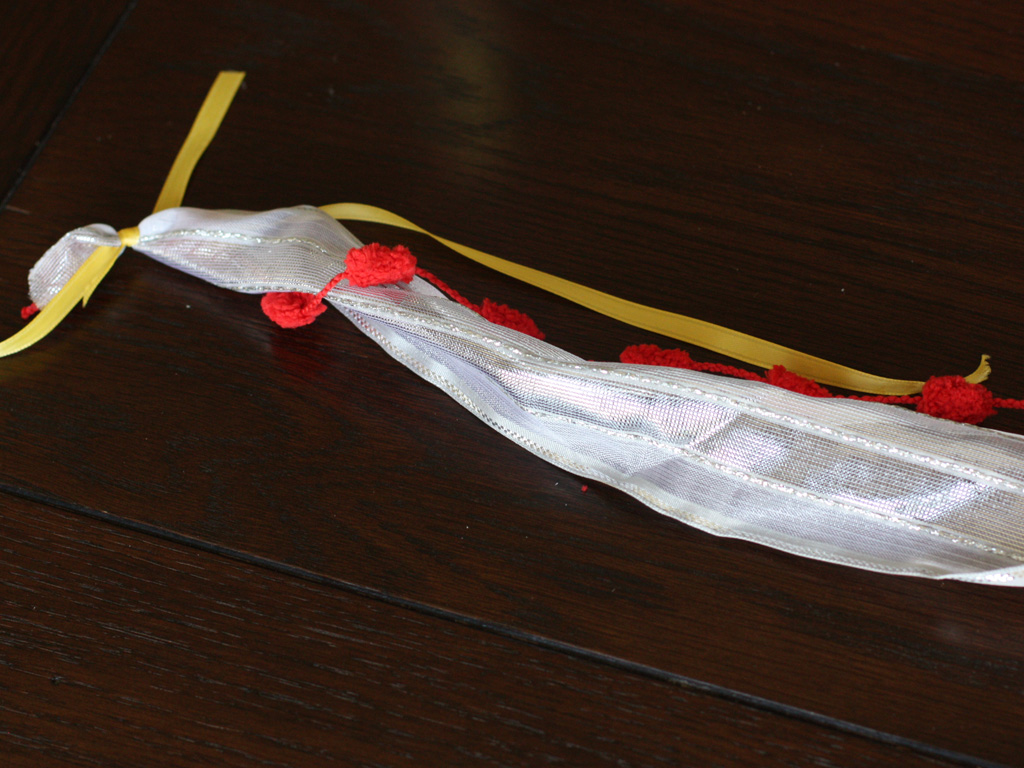
Step 7
As the glue was drying, we cut some fire-colored ribbon, 2 to 3 feet (0.6-0.9 meters) long. Then I helped Jackson tie them in a knot at one end. Everyone knows that the fire is the best part of a rocket so try and make this part fun. We used some sparkly red and yellow ribbon.
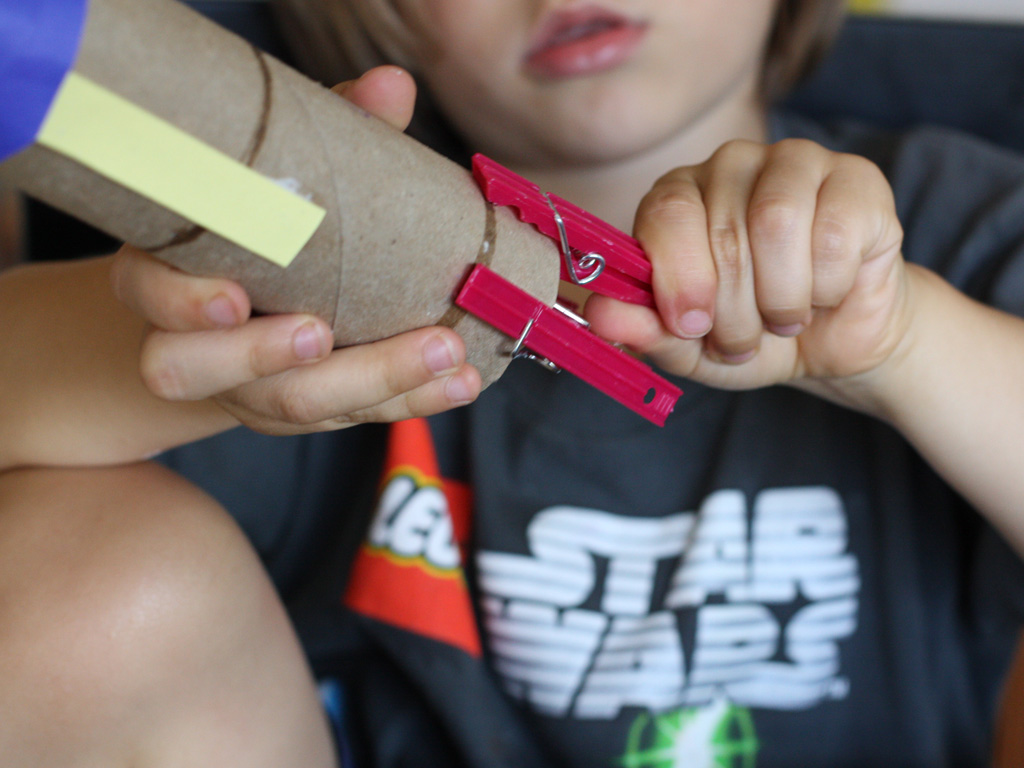
Step 8
Then we took our 3 clothespins and attached them to the bottom of our rocket. We found some cool red clothespins at the grocery store but the normal wood ones will work fine.
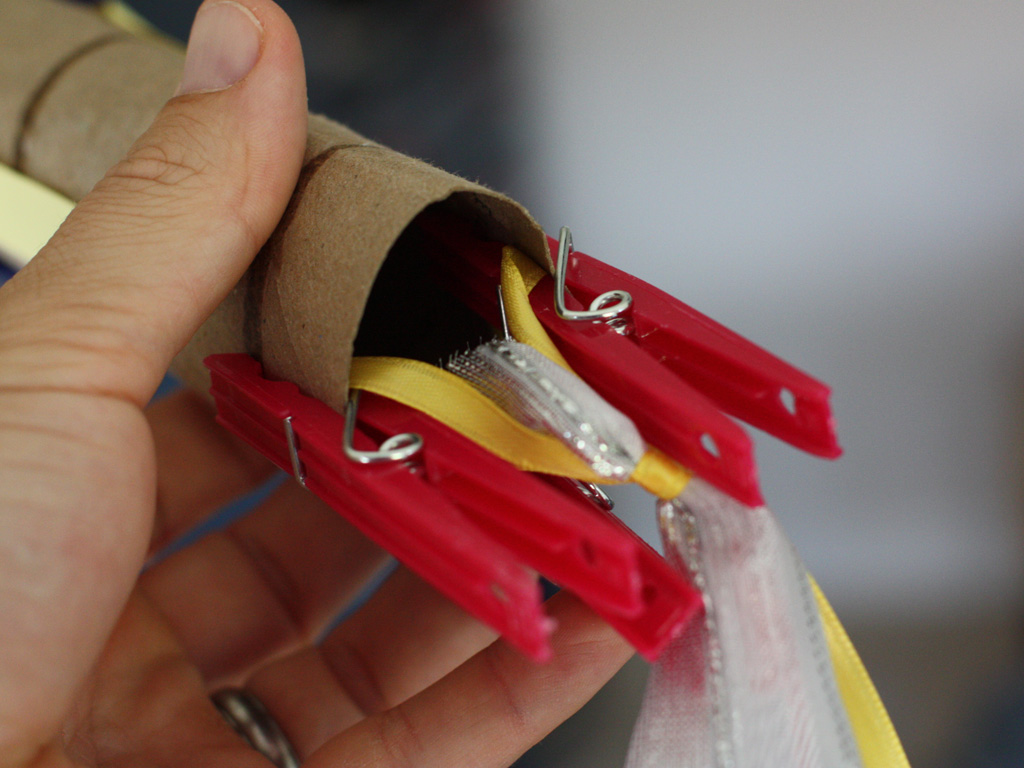
Step 9
The last step is to attach the fire ribbon to the bottom of the rocket. Just clip the ribbon to the rocket using the clothespins.
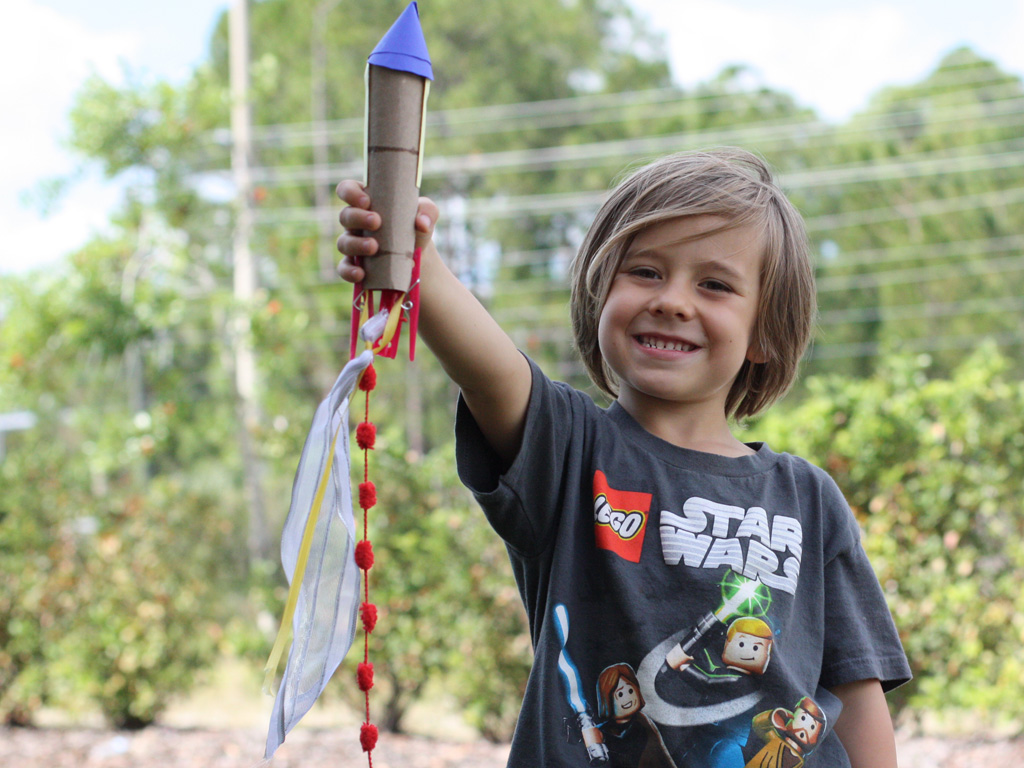
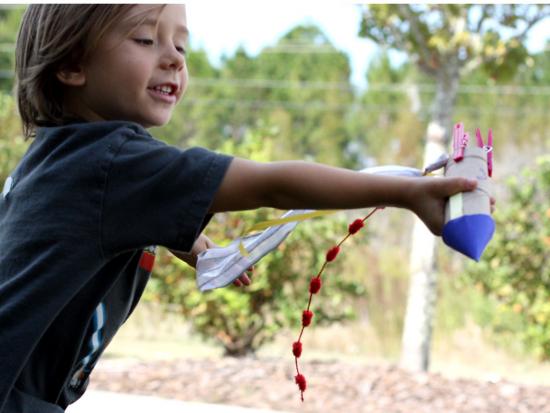
Final result!
Now that your rocket is finished, it's time for launch! 10, 9, 8, 7, 6, 5, 4, 3, 2, 1--blast off! Watching Jackson gleefully running around with his toilet paper rocket: truly a sight to see!