Step-by-step tutorial
Step 1
Create Powerful "Bonding" Moments
It's time to celebrate Christmas in all its colorful glory with your adventurous Christmas helper! All your child needs this Christmas is some chemical reactive ingredients and this quick instruction guide to add a little sparkle to the many wonders of the holiday season. Here's what to grab for a Christmas Slime that smells and looks like a holiday party waiting to happen!
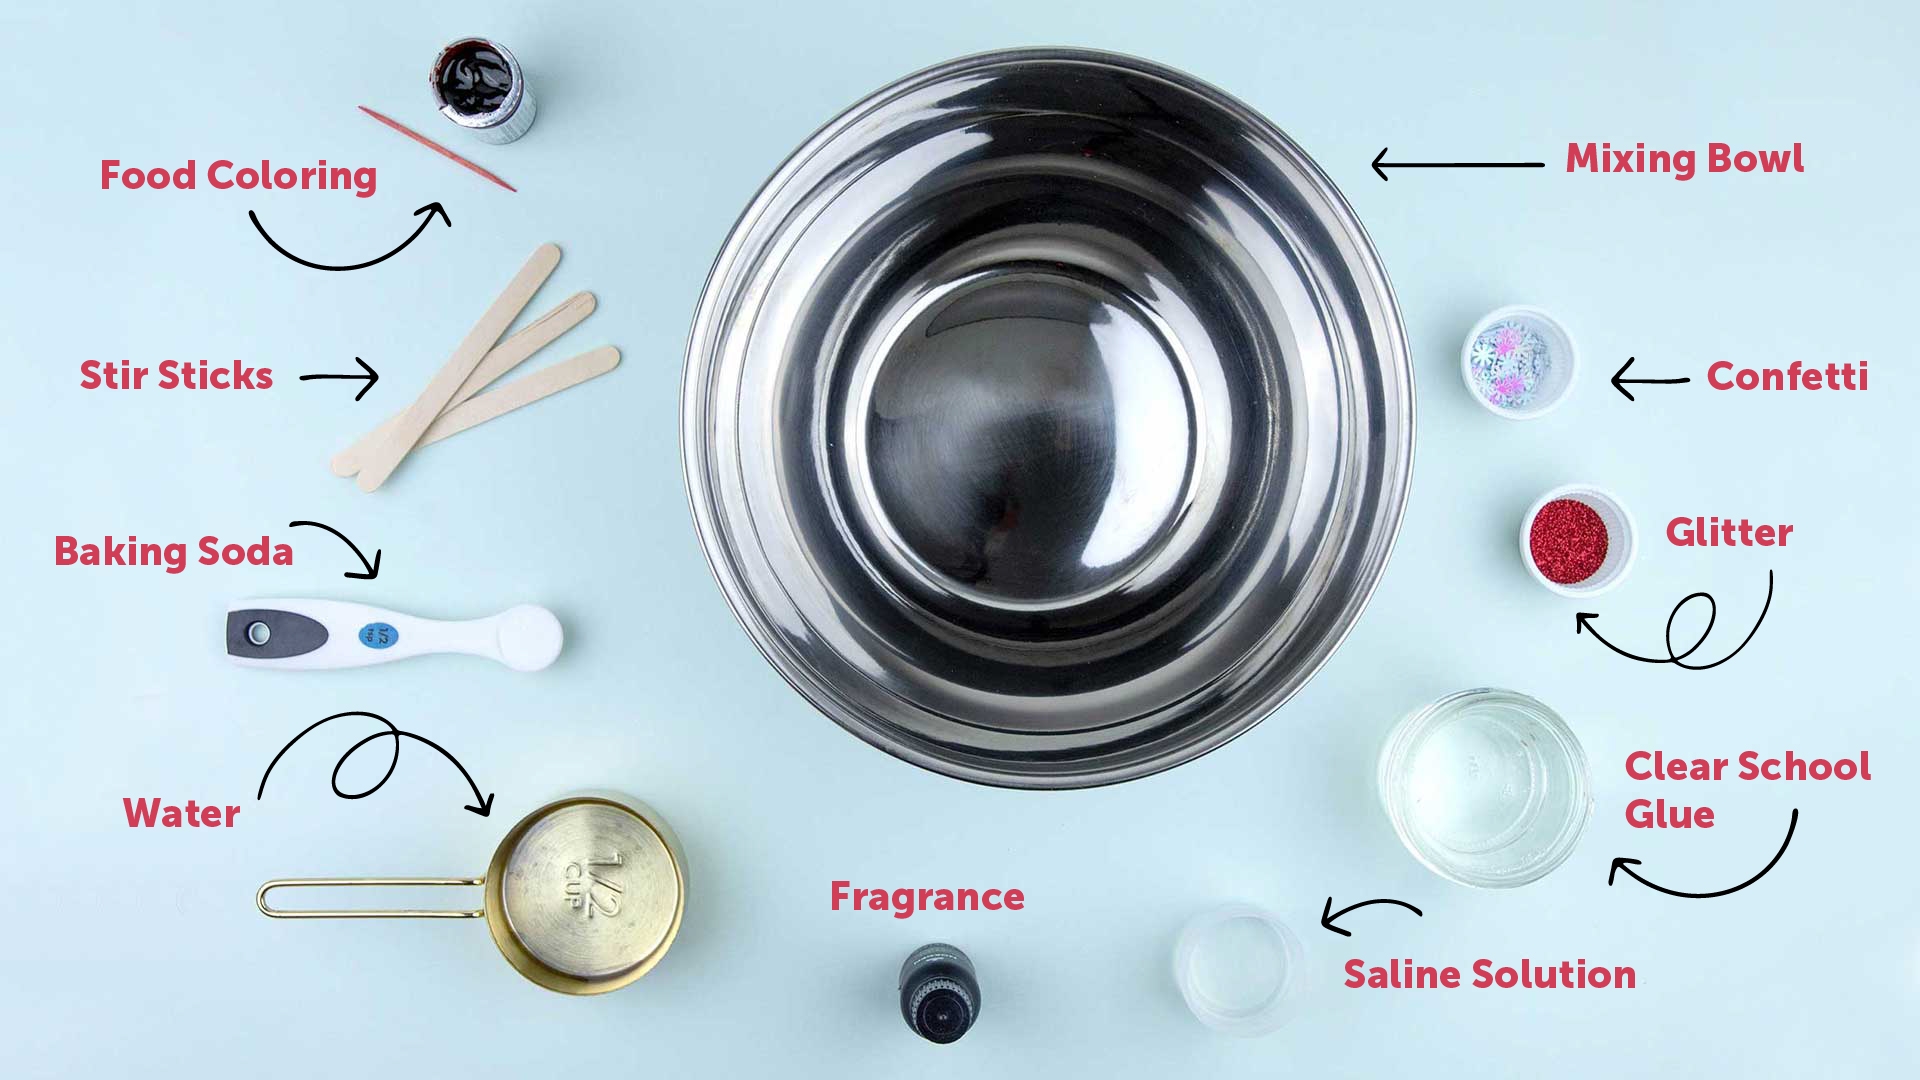
(Serving size: 1 batch of festive slime!)
1/2 cup of clear washable school glue
1/2 cup of water
1/2 or 1/4 teaspoon of baking soda
1 tablespoon of saline solution
mixing container or bowl
stir sticks (popsicle sticks work well)
food coloring (your choice color)
glitter or Christmas confetti (optional - you are welcome parents)
holiday spice or scented oil of your choice (optional)

Tip
Add 2 to 3 drops of peppermint oil, a cinnamon stick or small amount of gingerbread spice blend to your slime mix for a Christmas scent.
Tip
If you don't have a saline solution and baking soda within reach to trigger the necessary chemical reaction, other recipes call for 1/2-1/4 cup of liquid starch or 1/4 tsp of Borax powder as an adequate replacement option. They are all a part of the Boron family and react in similar ways.
Step 2
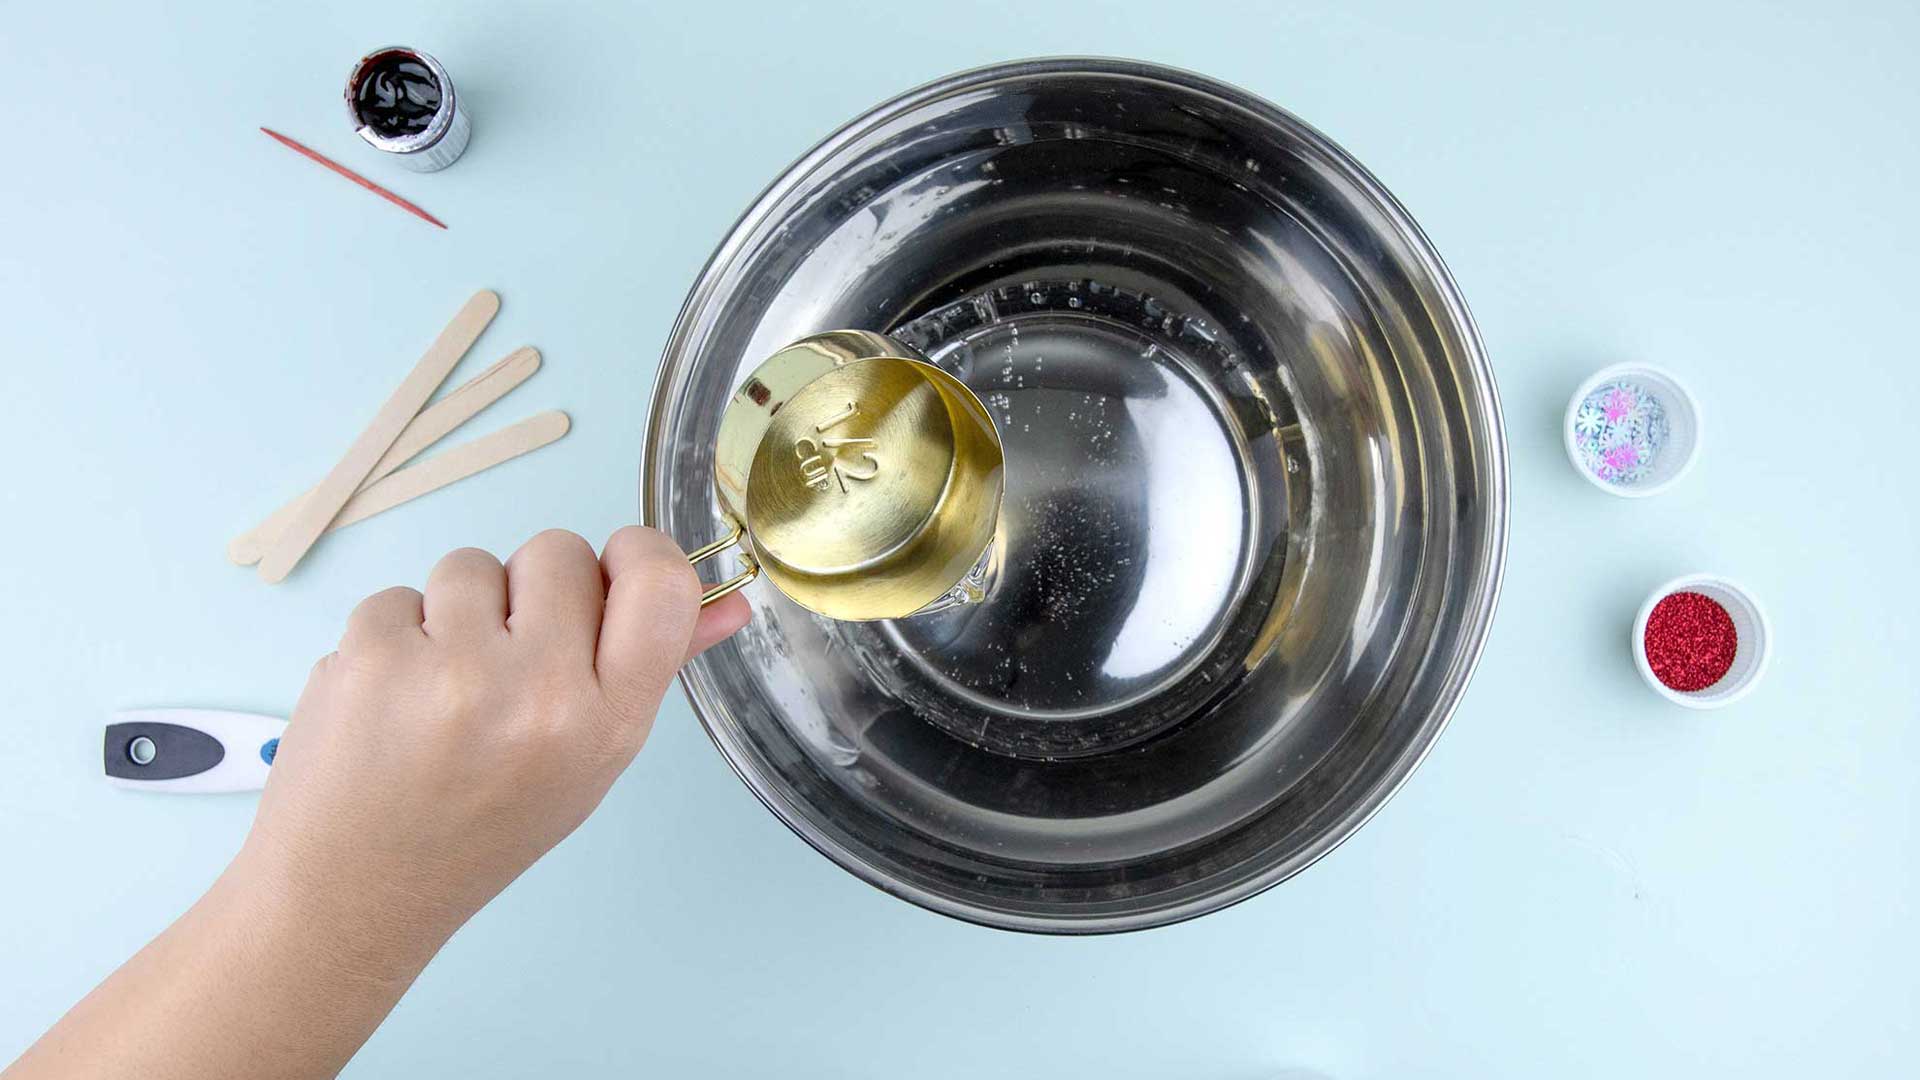
Pour On The Sticky Stuff.
It's time to get started! Slime makers, take your 1/2 cup of clear washable glue and pour it into the bowl. This will be the base of your Christmas slime.
Learn more

Washable clear school glue is known in the science world as polyvinyl-acetate.
Step 3
Add In Some H20
Now it's time to add some water to the mix! Add 1/2 cup of water.
Step 4
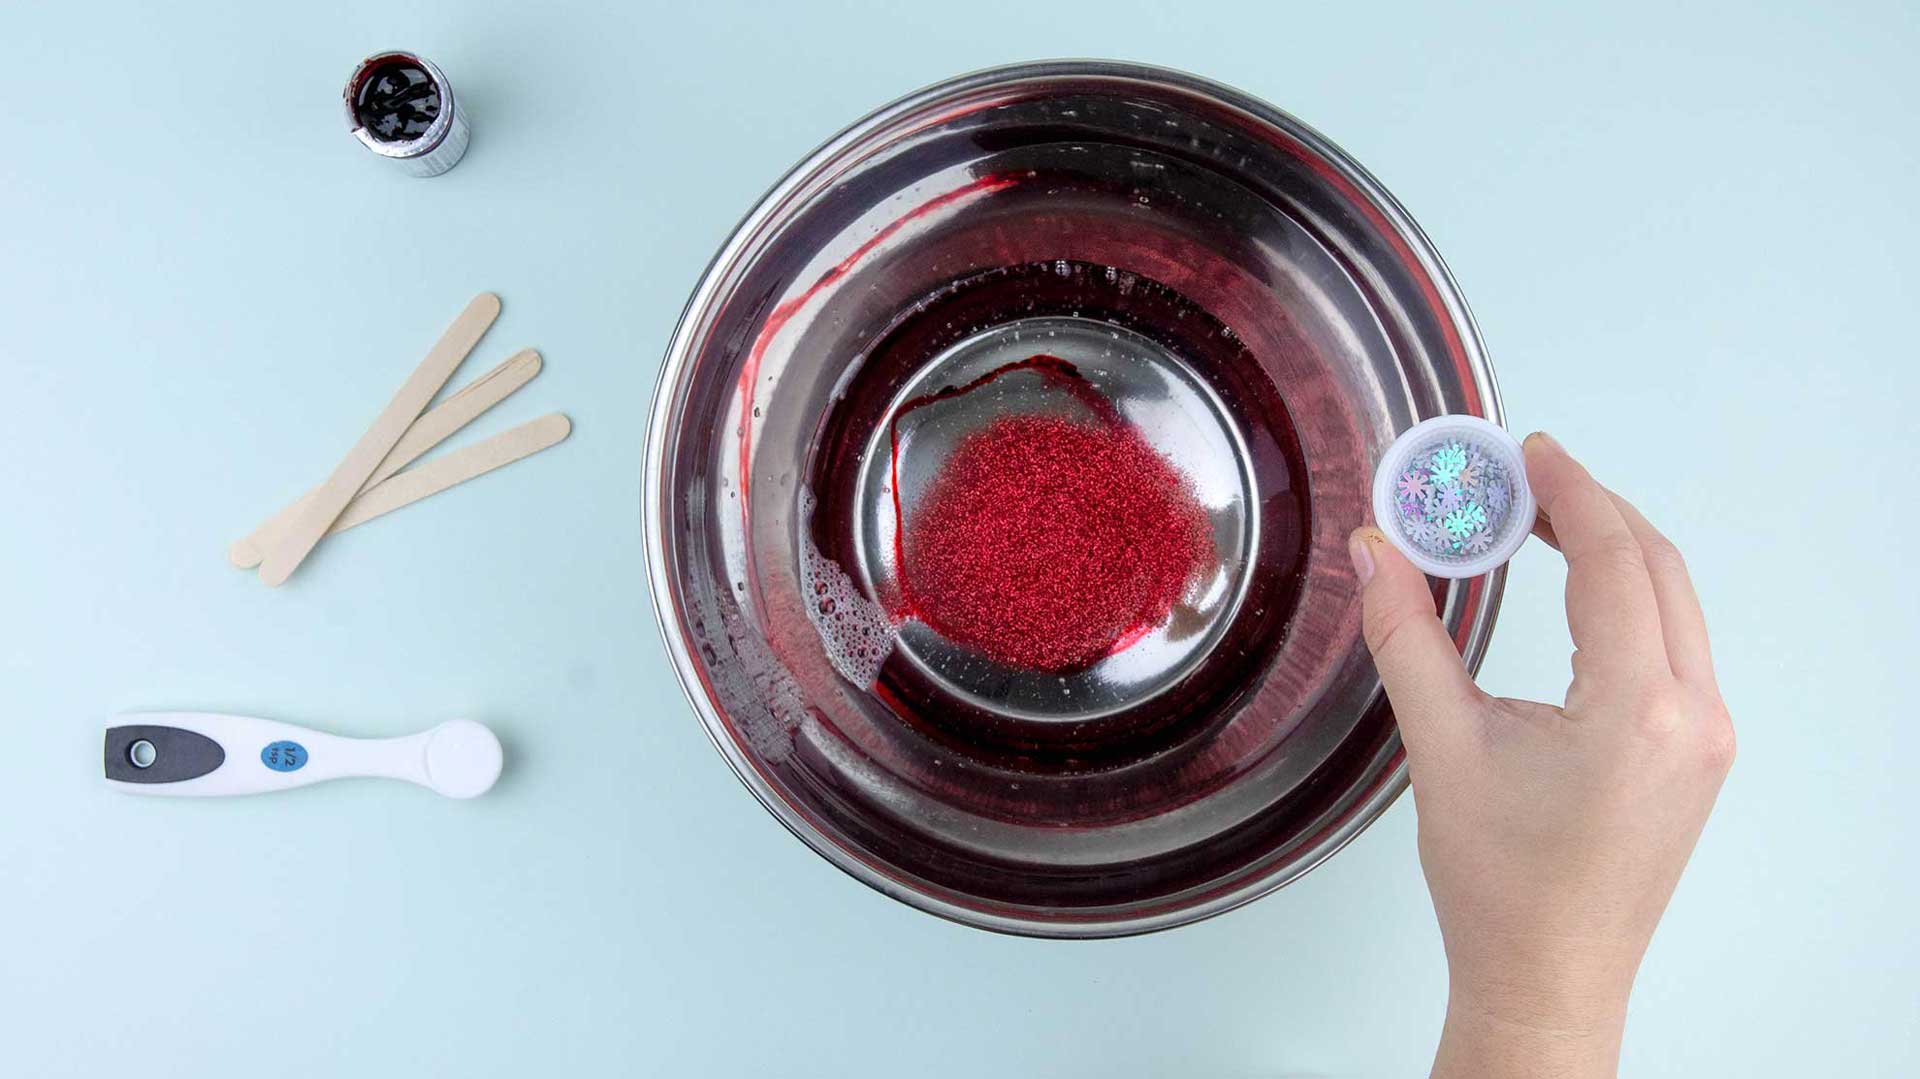
Get Out Your Color/Glitter Cannon!
Here comes the creative part! Bring out your inner artist and splash in a dash of food coloring. If you want to add some extra sparkle, this is where glitter or confetti comes in. During this step put on your prediction cap. Ask questions like these:
How much food coloring do you need to add to get the particular color you want?
What happens when you add two different colors into the slime?
What is the texture of the Christmas slime after a teaspoon of glitter is added? How about a tablespoon?
And Voila! Next thing you know, you've got your own custom slime creation!
Step 5
(Optional) It's Time To Get Scent-sational!
Before you put your slime activators (baking powder & saline solution, or Borax, or liquid starch) to the test, try adding a fun scent like peppermint oil, cinnamon or a gingerbread mixture of 1 teaspoon of ginger and 1 teaspoon of cinnamon. Stir it into the water and glue already in the bowl. This will help to spread the Christmas scent through the slime. It can really help boost the holiday experience!
Step 6
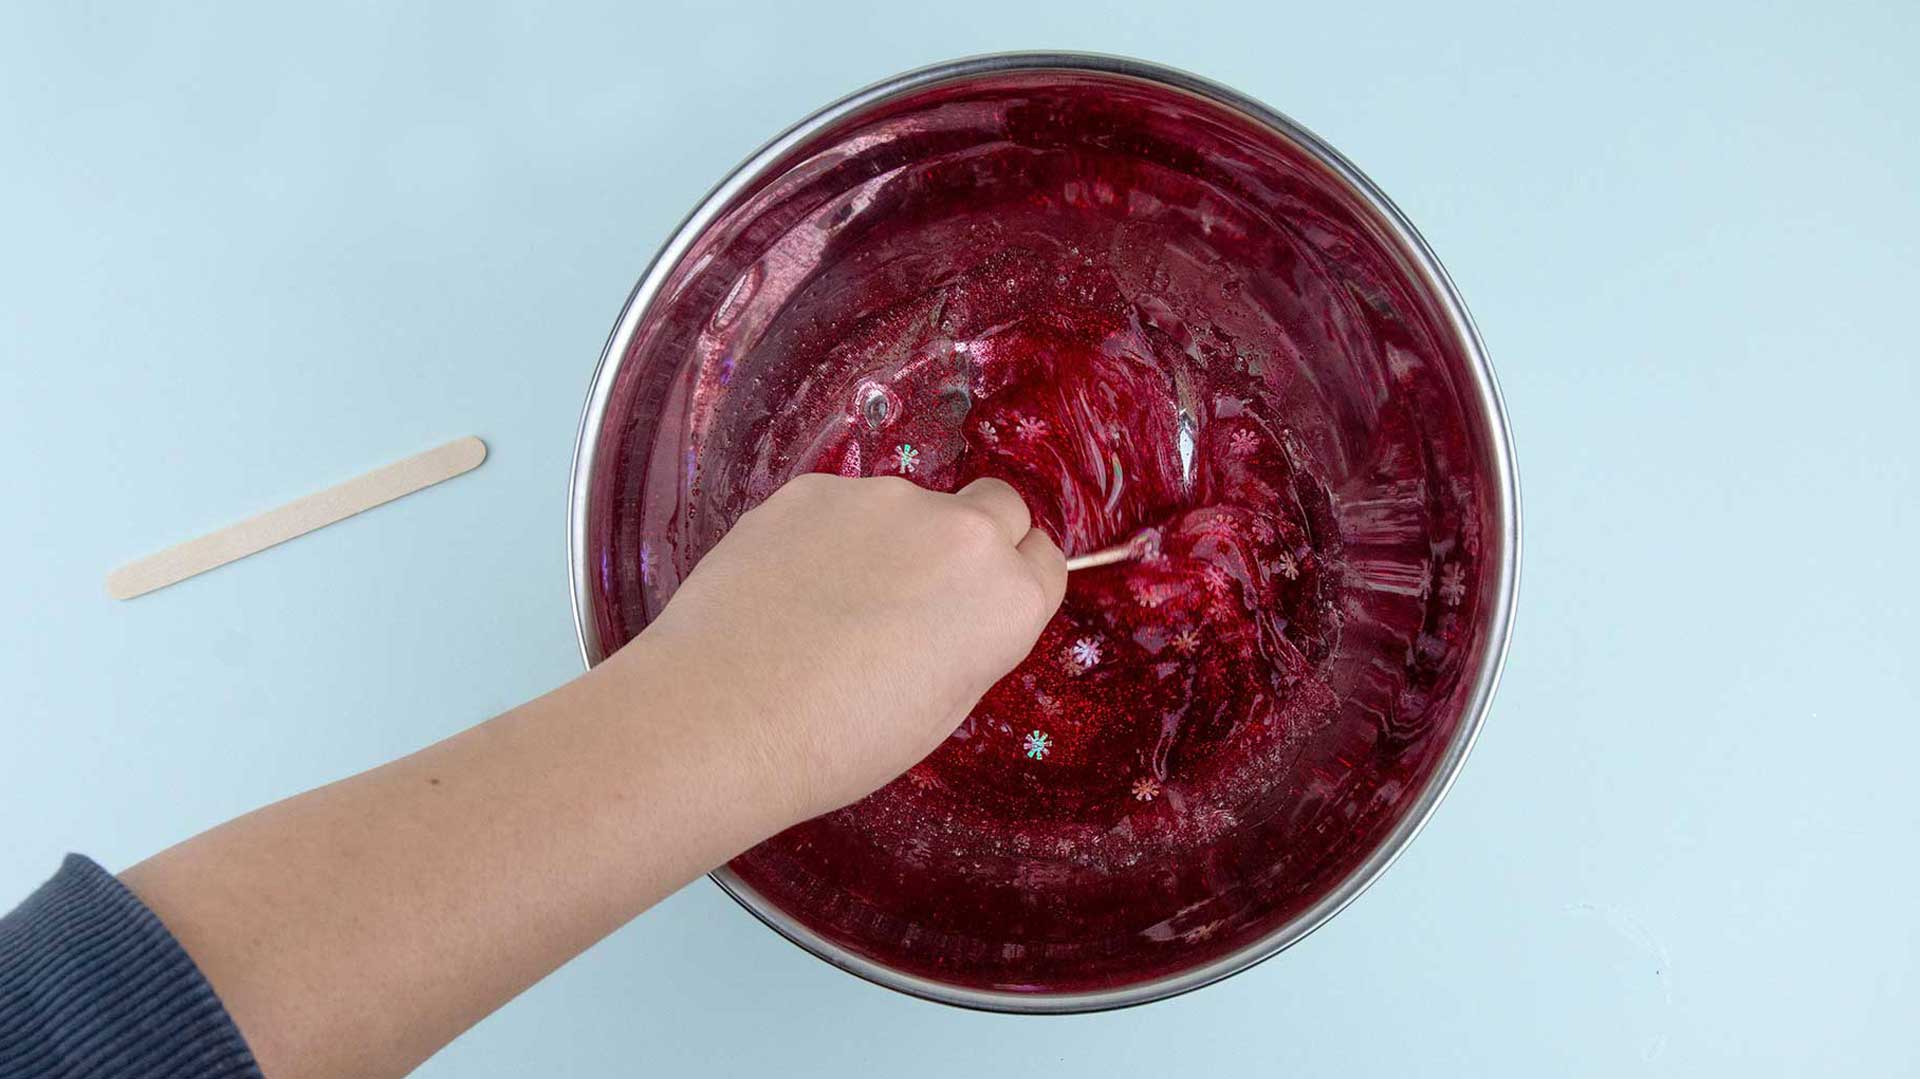
Activate The Powderous Pouring!
Get the stir sticks out it's almost time to watch as molecules tango together in what's known as the cross-linking process. Add 1/4 or 1/2 teaspoon of baking powder into the colorful glue and water mixture. Give it a generous stir, it's about to get salty in here!
Step 7
Dribble In Your Salty Solution
After you've thoroughly stirred the baking powder, 1 tablespoon of saline solution is next. You've already exercised your brain muscle now it's time to exert some force using your arm muscles. Use your stir stick to mix the Christmassy concoction into a slimy consistency. You can stop stirring once the slime pulls away from the sides of the mixing bowl.
Fact
So what just happened? The borate ions in the saline solution reacted chemically to the polyvinyl-acetate (aka the glue) creating slime!
Step 8
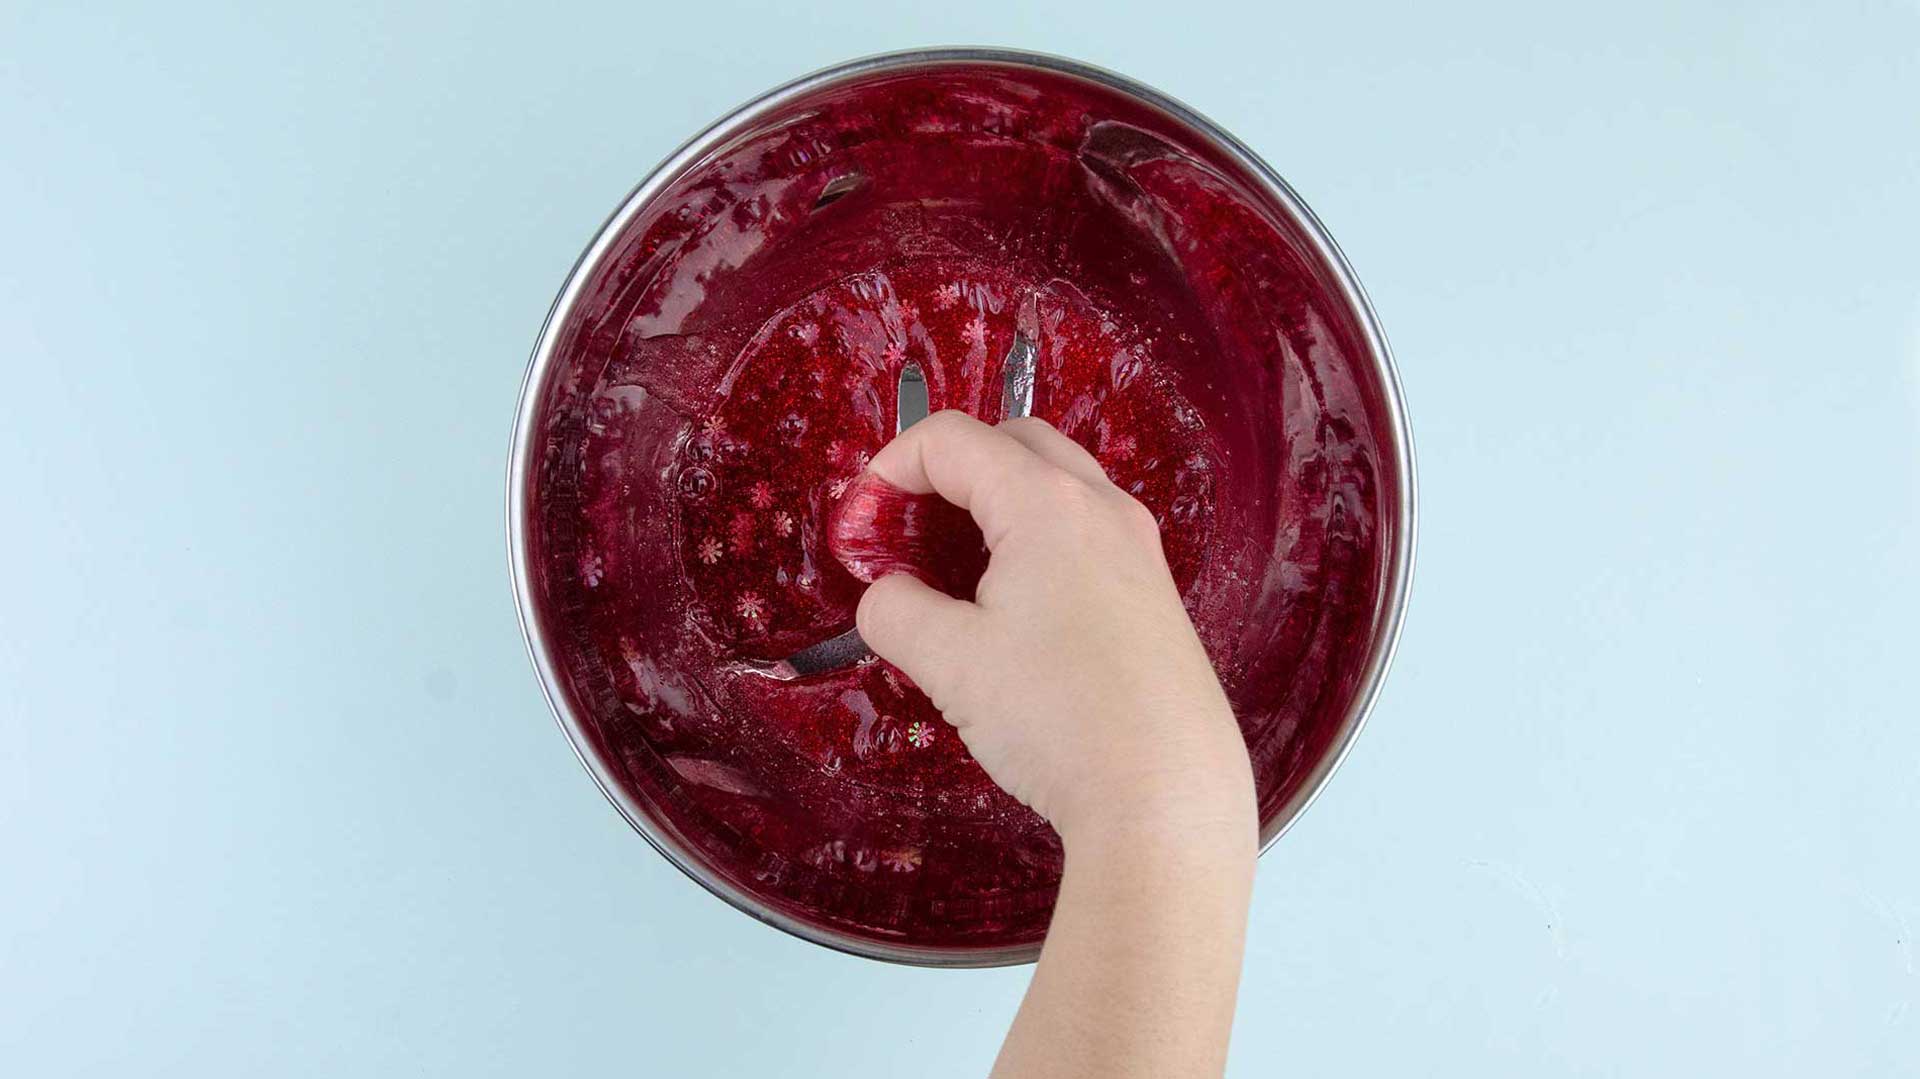
Display The "Knead" To Step It Up
Does your chemistry experiment feel a little too sticky to handle? Yes, Christmas Slime is messy but it shouldn't be overly sticky. By adding a little more saline solution onto your hands and kneading the slime, it can help those dancing molecules bond more tightly to each other.
Step 9
Put Christmas Slime To The Test
What kind of slime do you like best? Do you think viscous (thick, stretchy) slime is the best kind out there? Or do you prefer a thinner more soupy kind? Make a few batches of slime to determine what slime type you prefer to help you create many more lasting Christmas memories.
Tip
Try adding different amounts of saline solution to the slime. You may be surprised at the results!
Step 10
Have A Chemical Comparison Session
There are many types of slime. What makes one batch of slime different than another? Does borax react any differently than the saline solution? How does liquid starch react in contrast?
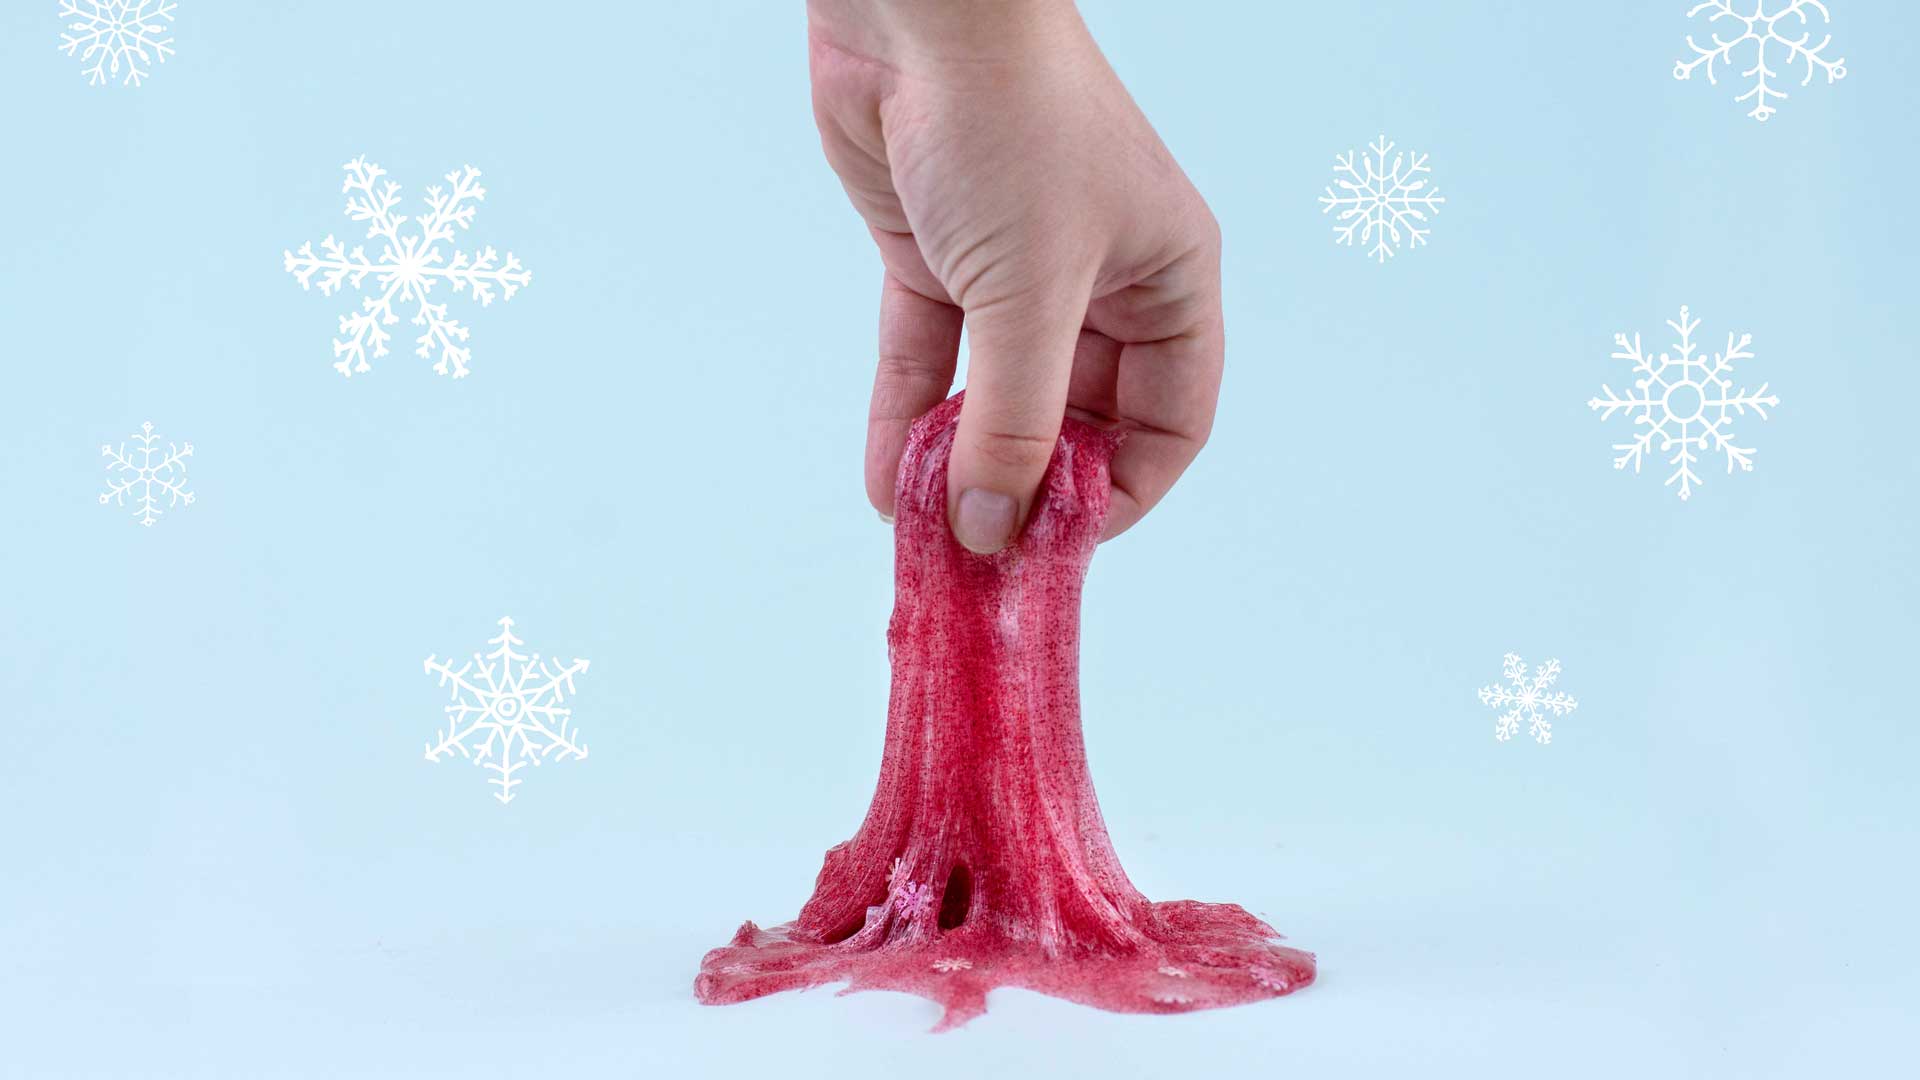
Step 11
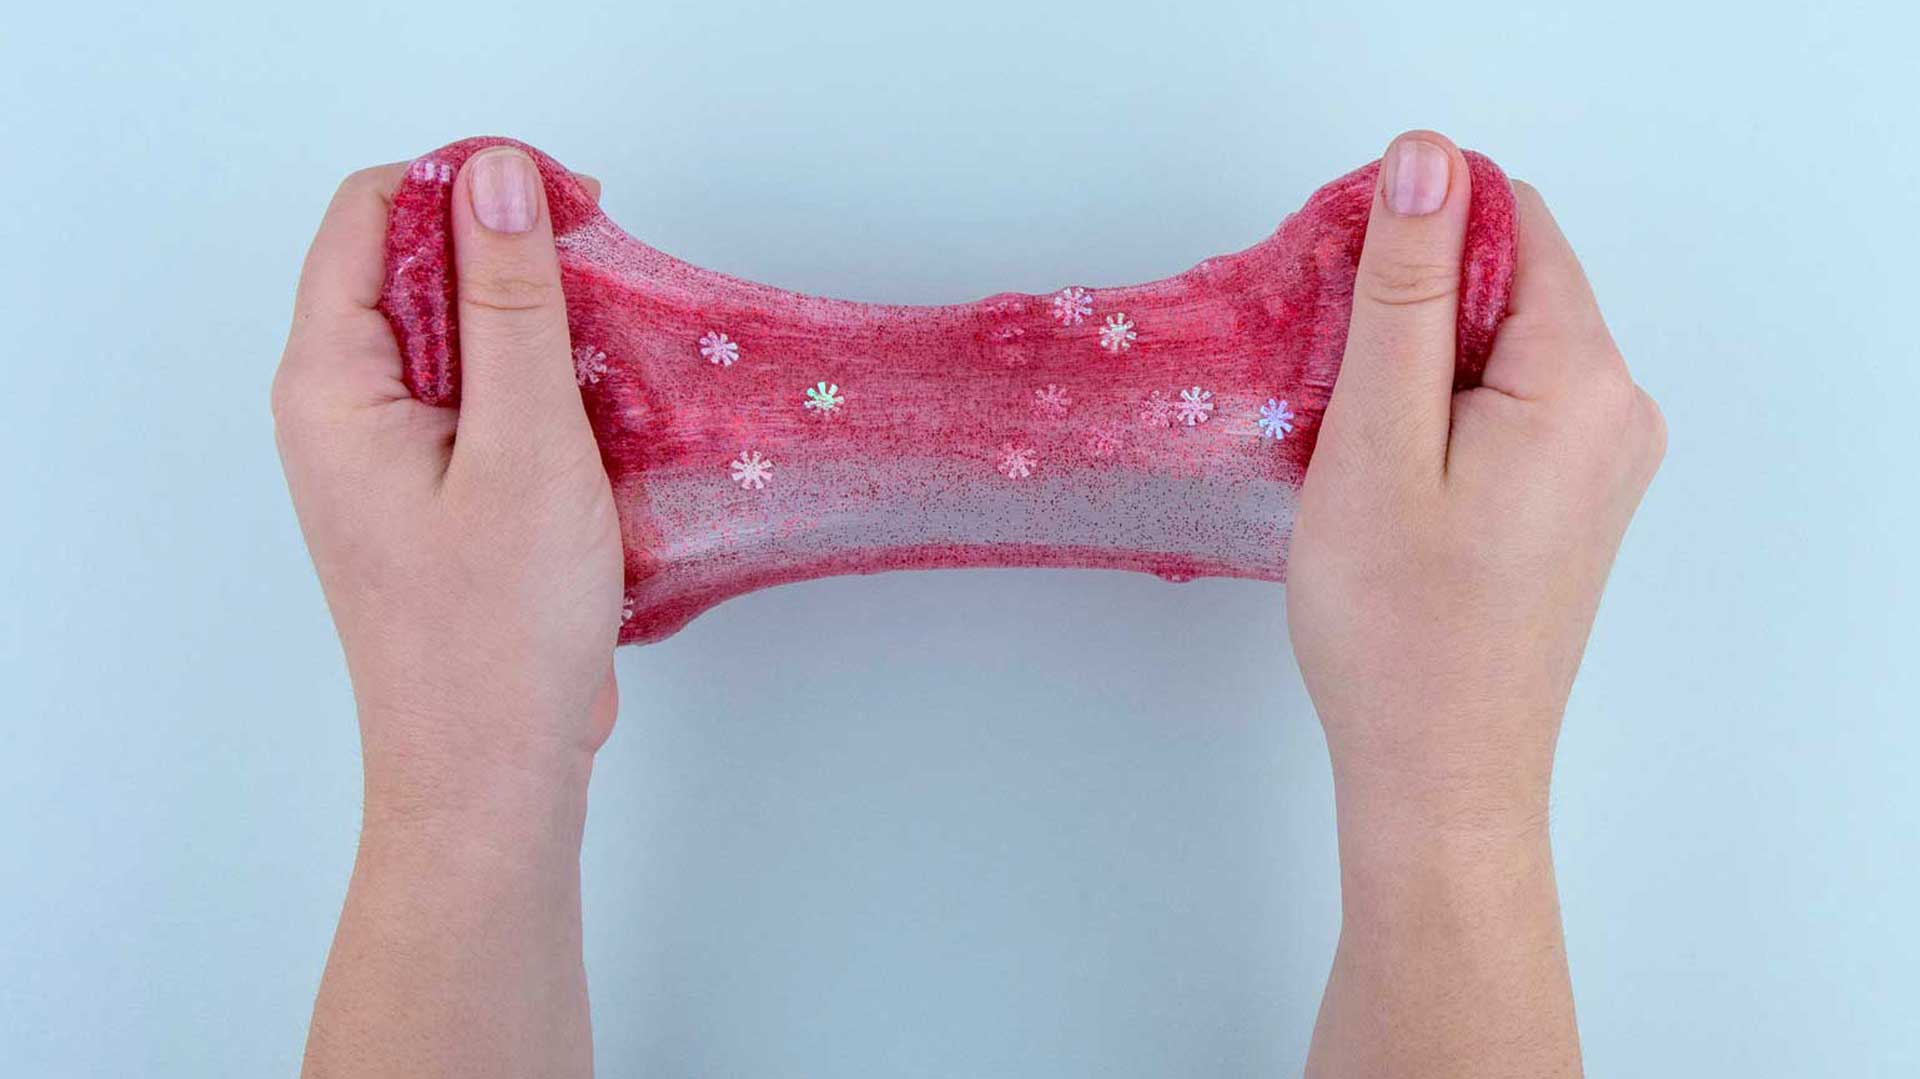
It's Time For Sensory Slime Play Time!
You've created your slimy masterpiece, now what?! Stretch your slime to the breaking point. How far will it stretch? The texture of it makes it fun to hold. Some sensory scientists like to play search and rescue with their slime by placing tiny objects inside it (parent-approved objects of course.) Then they let others seek them out or guess what objects are hiding.
Step 12
Clean Up Time
Christmas Slime is fun to work with but can be a bit tough to clean off clothes and even tabletops. Every good scientist knows that when you or your lab station is a mess, play time may be far off in a distant galaxy. The key to cleaning slime is to get to it in time! Wipe or pick slime off the surface it is attached to quickly. Vinegar is the ingredient many slime makers use to keep slime out of the hair and where it belongs!
Tip
If slime gets on furniture or clothing that you value, before using vinegar on it, add just a small dab of vinegar to see how it reacts before using it in large quantities.
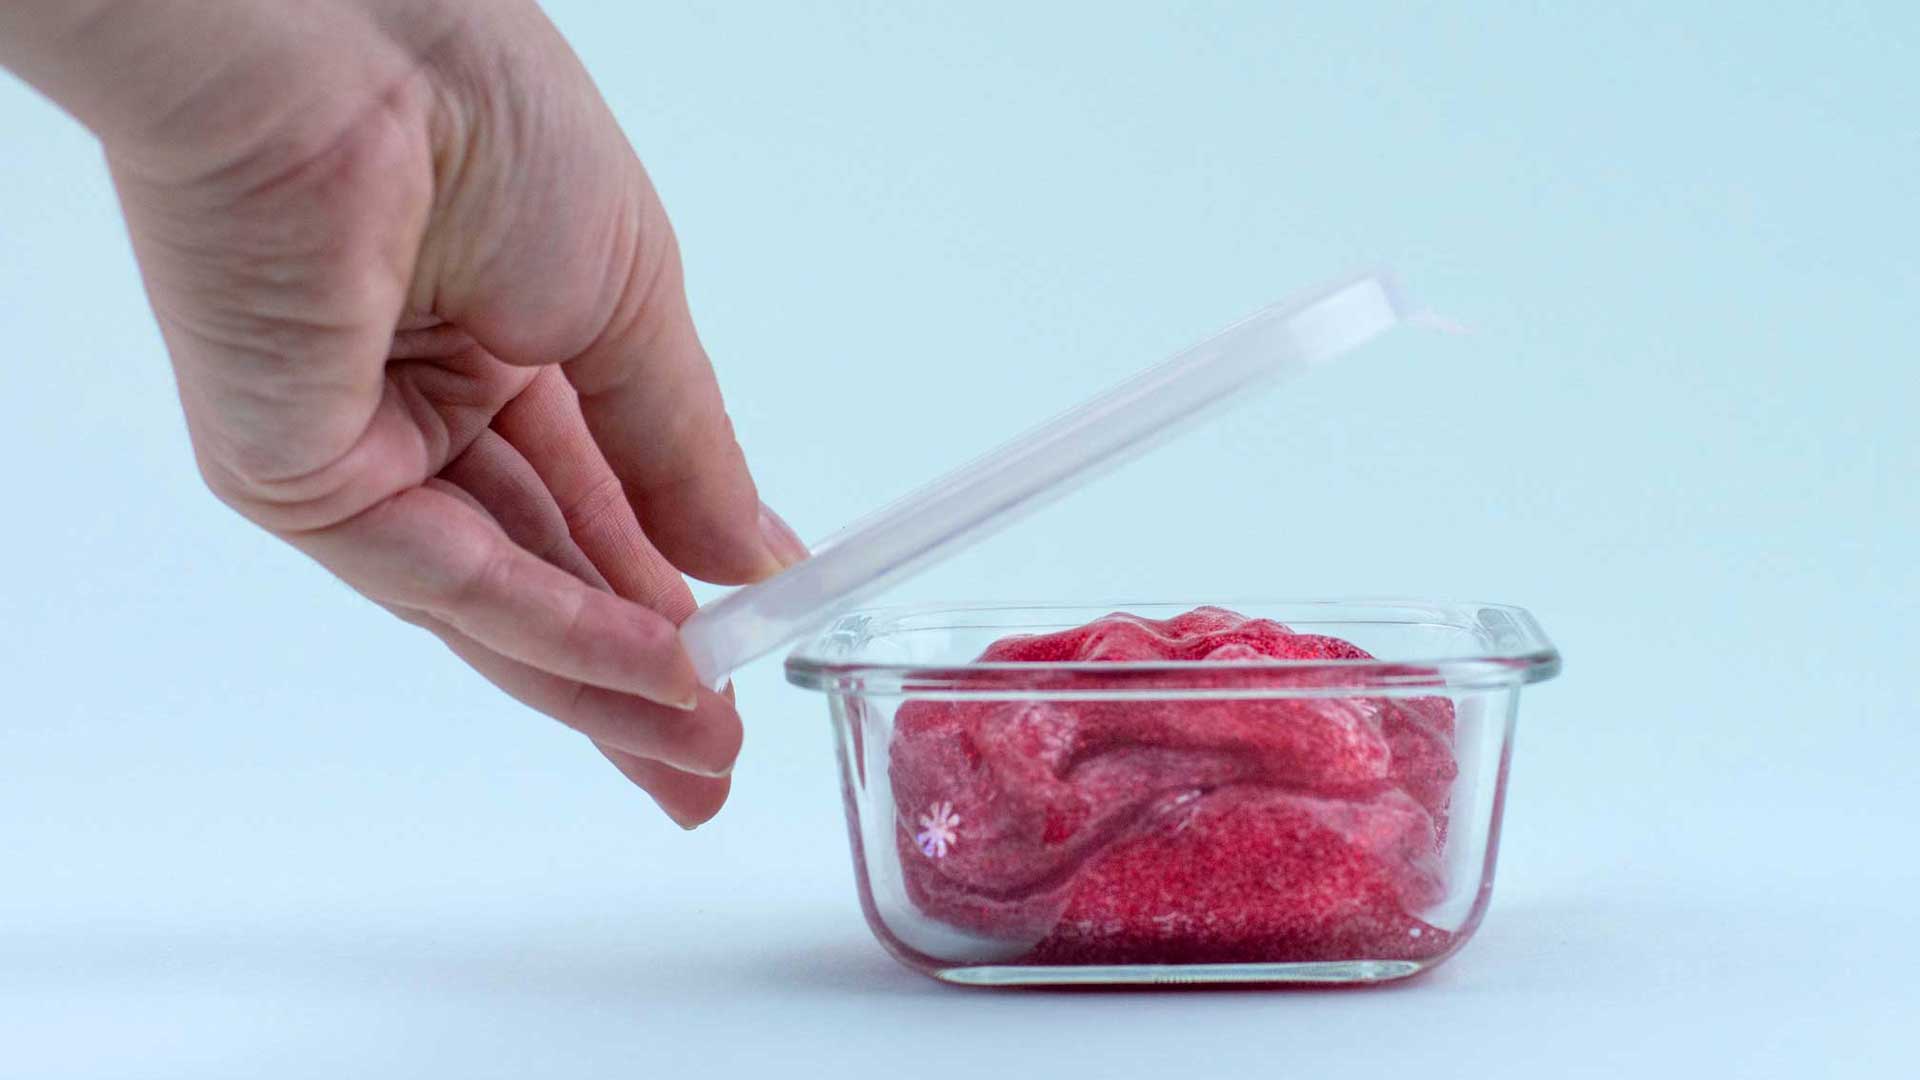
Done!
Keep Your Slime Safe
Slime can last for weeks if it is properly stored. If you place Christmas Slime in a container that is air-tight, it is less likely to dry out. Reusable plastic and glass containers can help your slime stay fresh. Just make sure to keep your slime clean before storing it away.
This holiday season, let this chemistry experiment make you smile from ear to ear! No stretch of the imagination is required, only a lot of colorful stretchy slime!