Step-by-step tutorial
Step 1
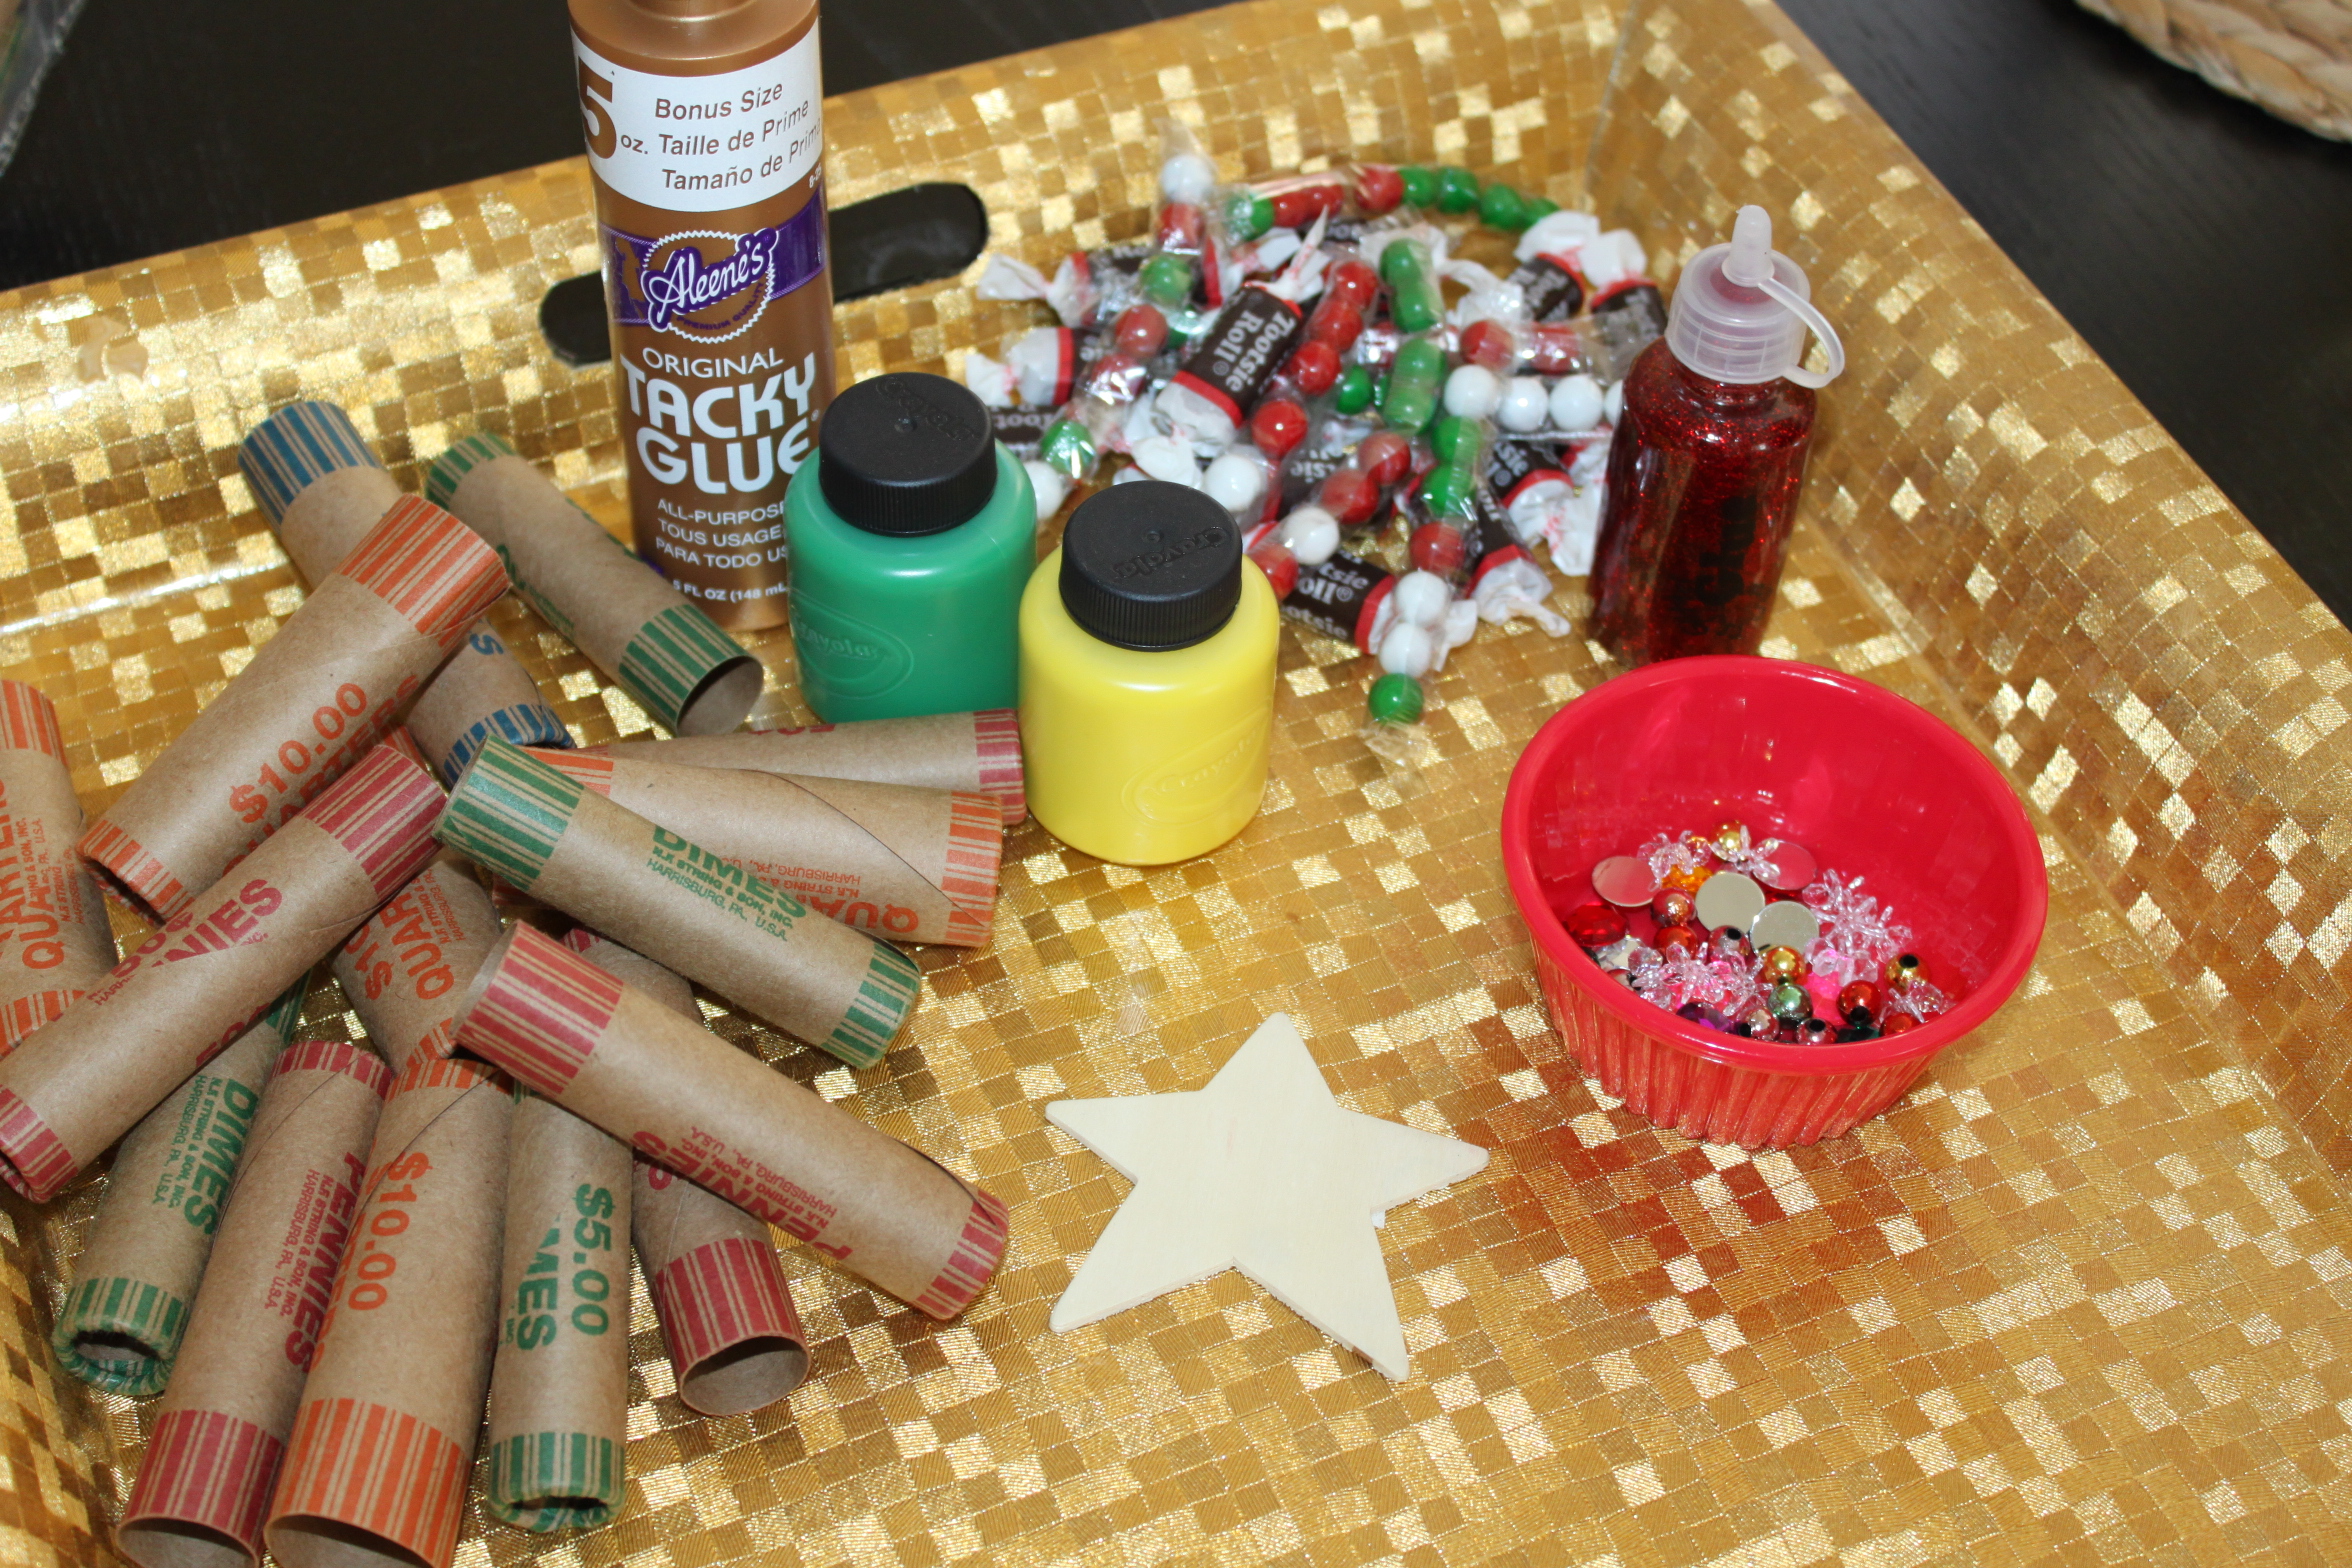
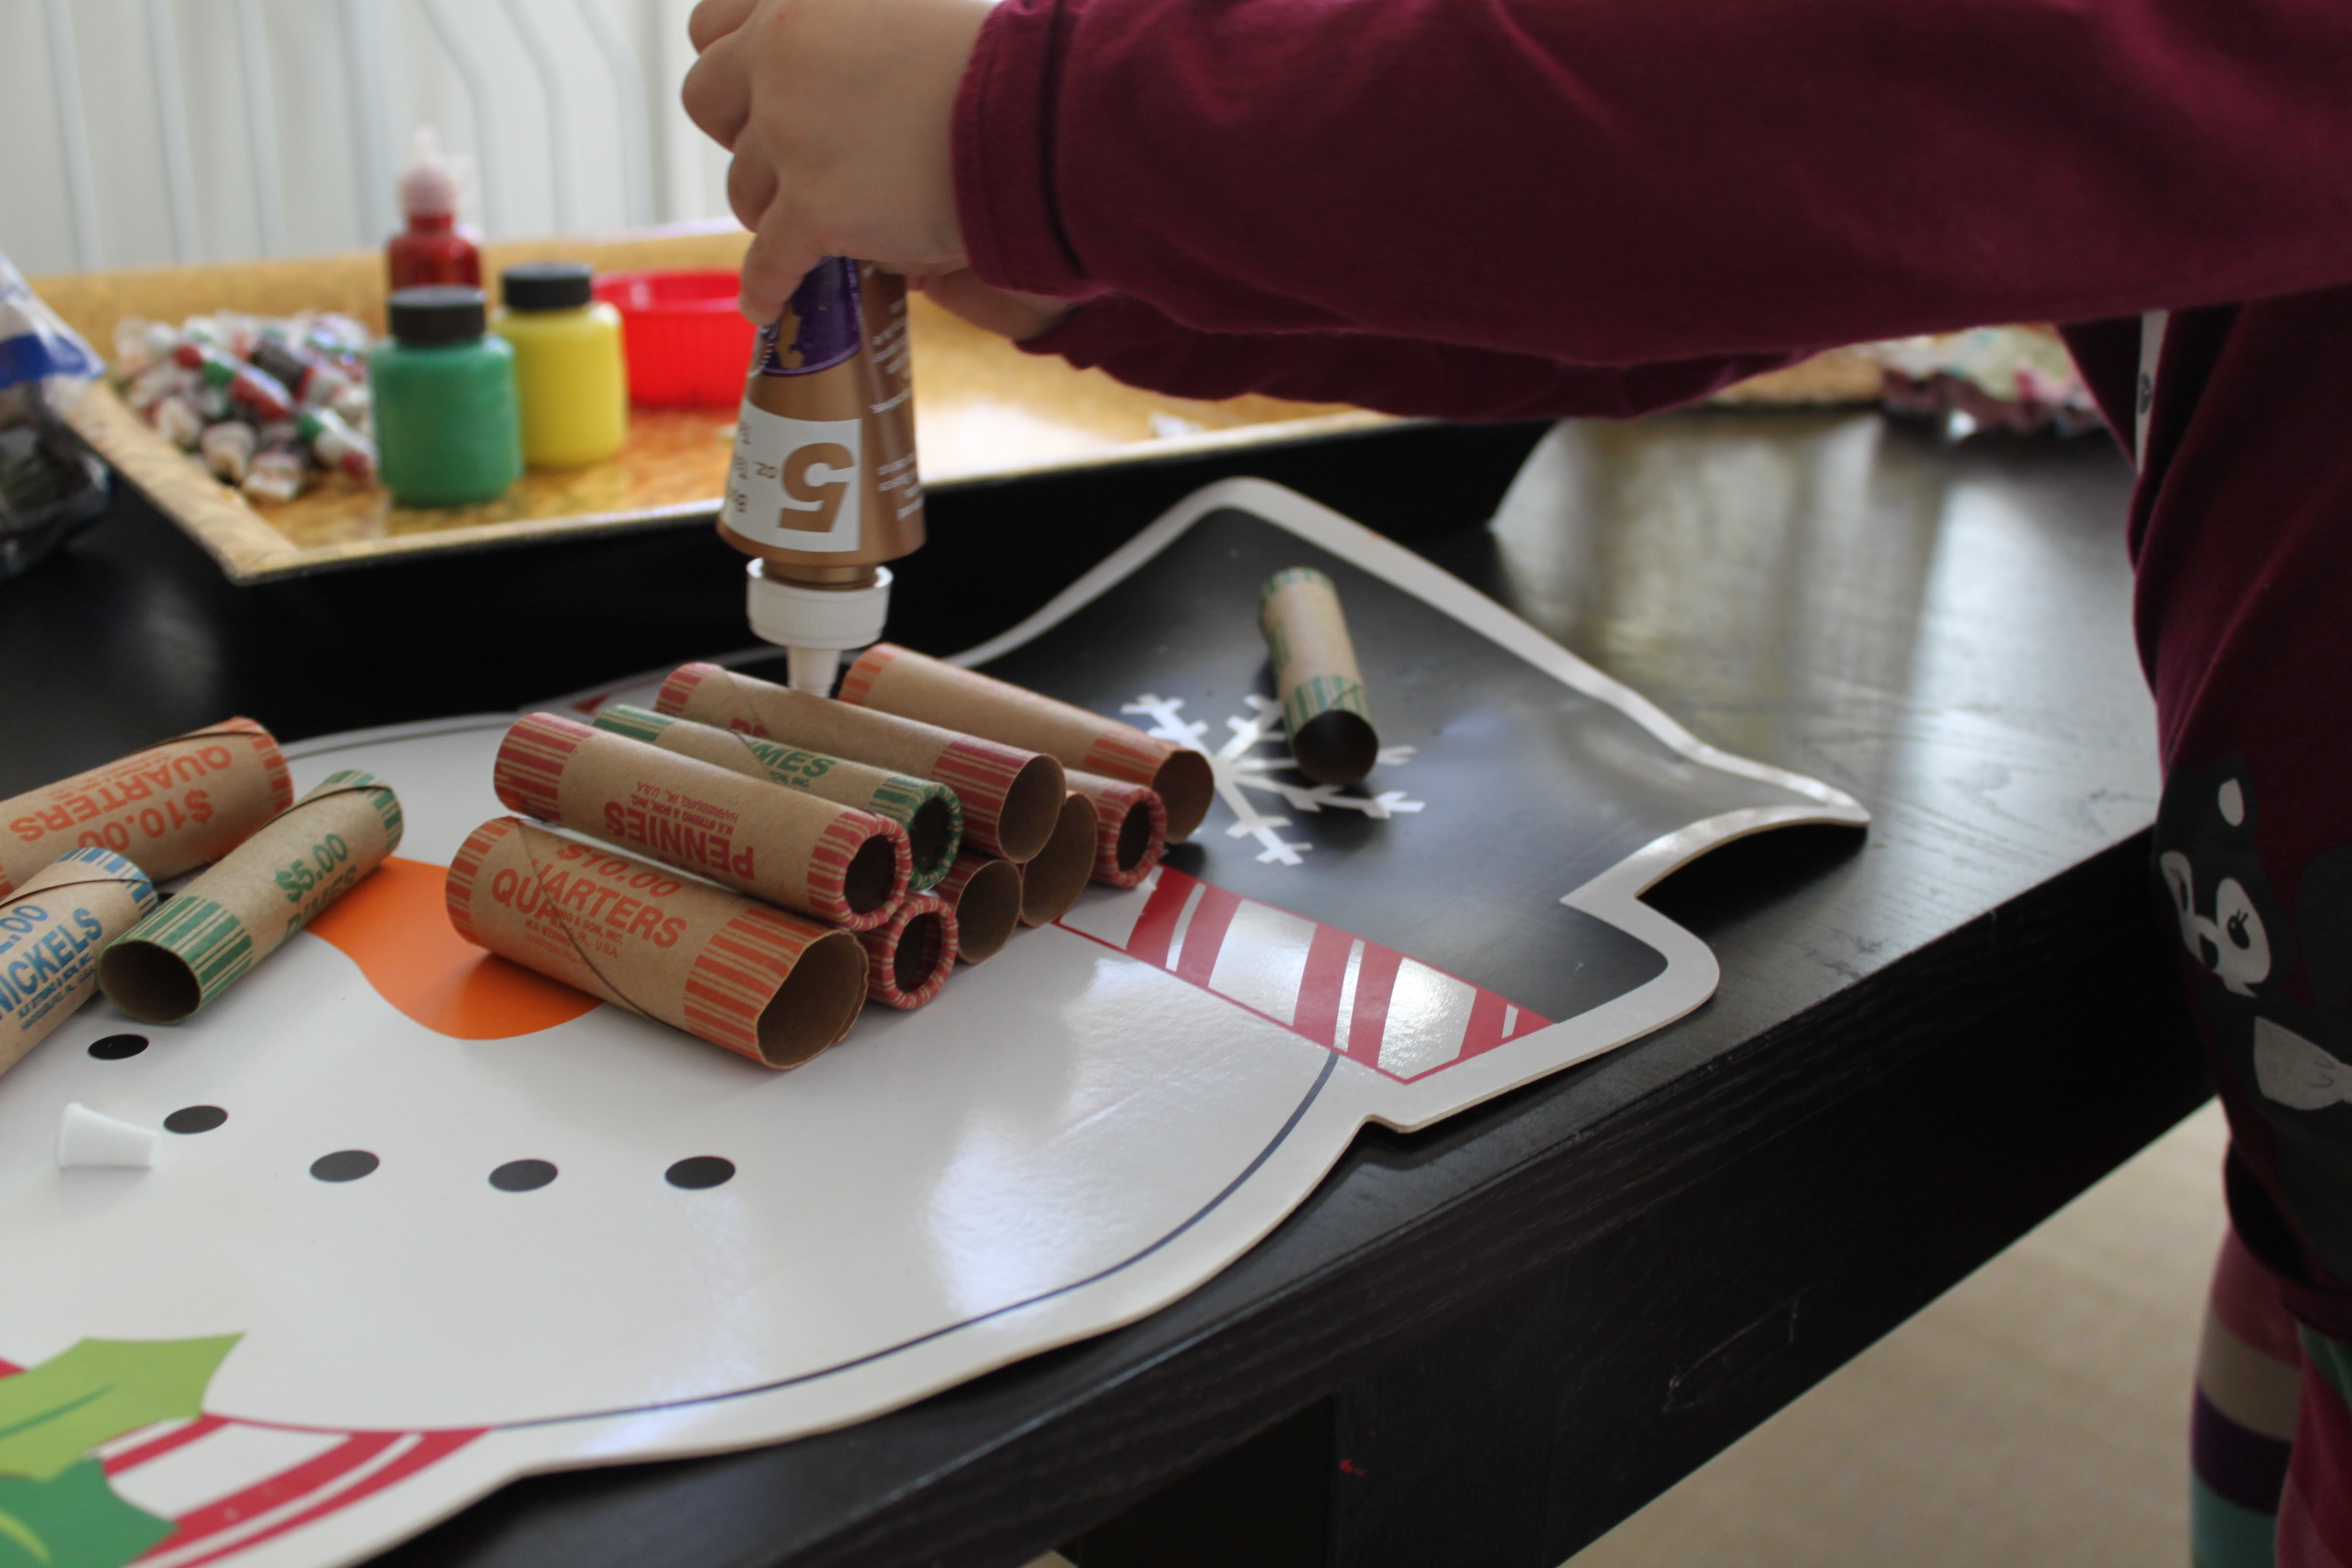
When picking out your 24 coin wrappers, I would suggest using the larger ones and trying to avoid the dime wrappers. If you choose to add a star to the top, you can use a wood one like we did or just cut one out of a piece of cardboard.

Step 2
Your first step is to glue the wrappers in a tree form with tacky glue. (It's important to use tacky glue for this since it holds the best.) Once they are all piled together in a very imperfect tree shape, let it sit for an hour or so before painting.
Step 3
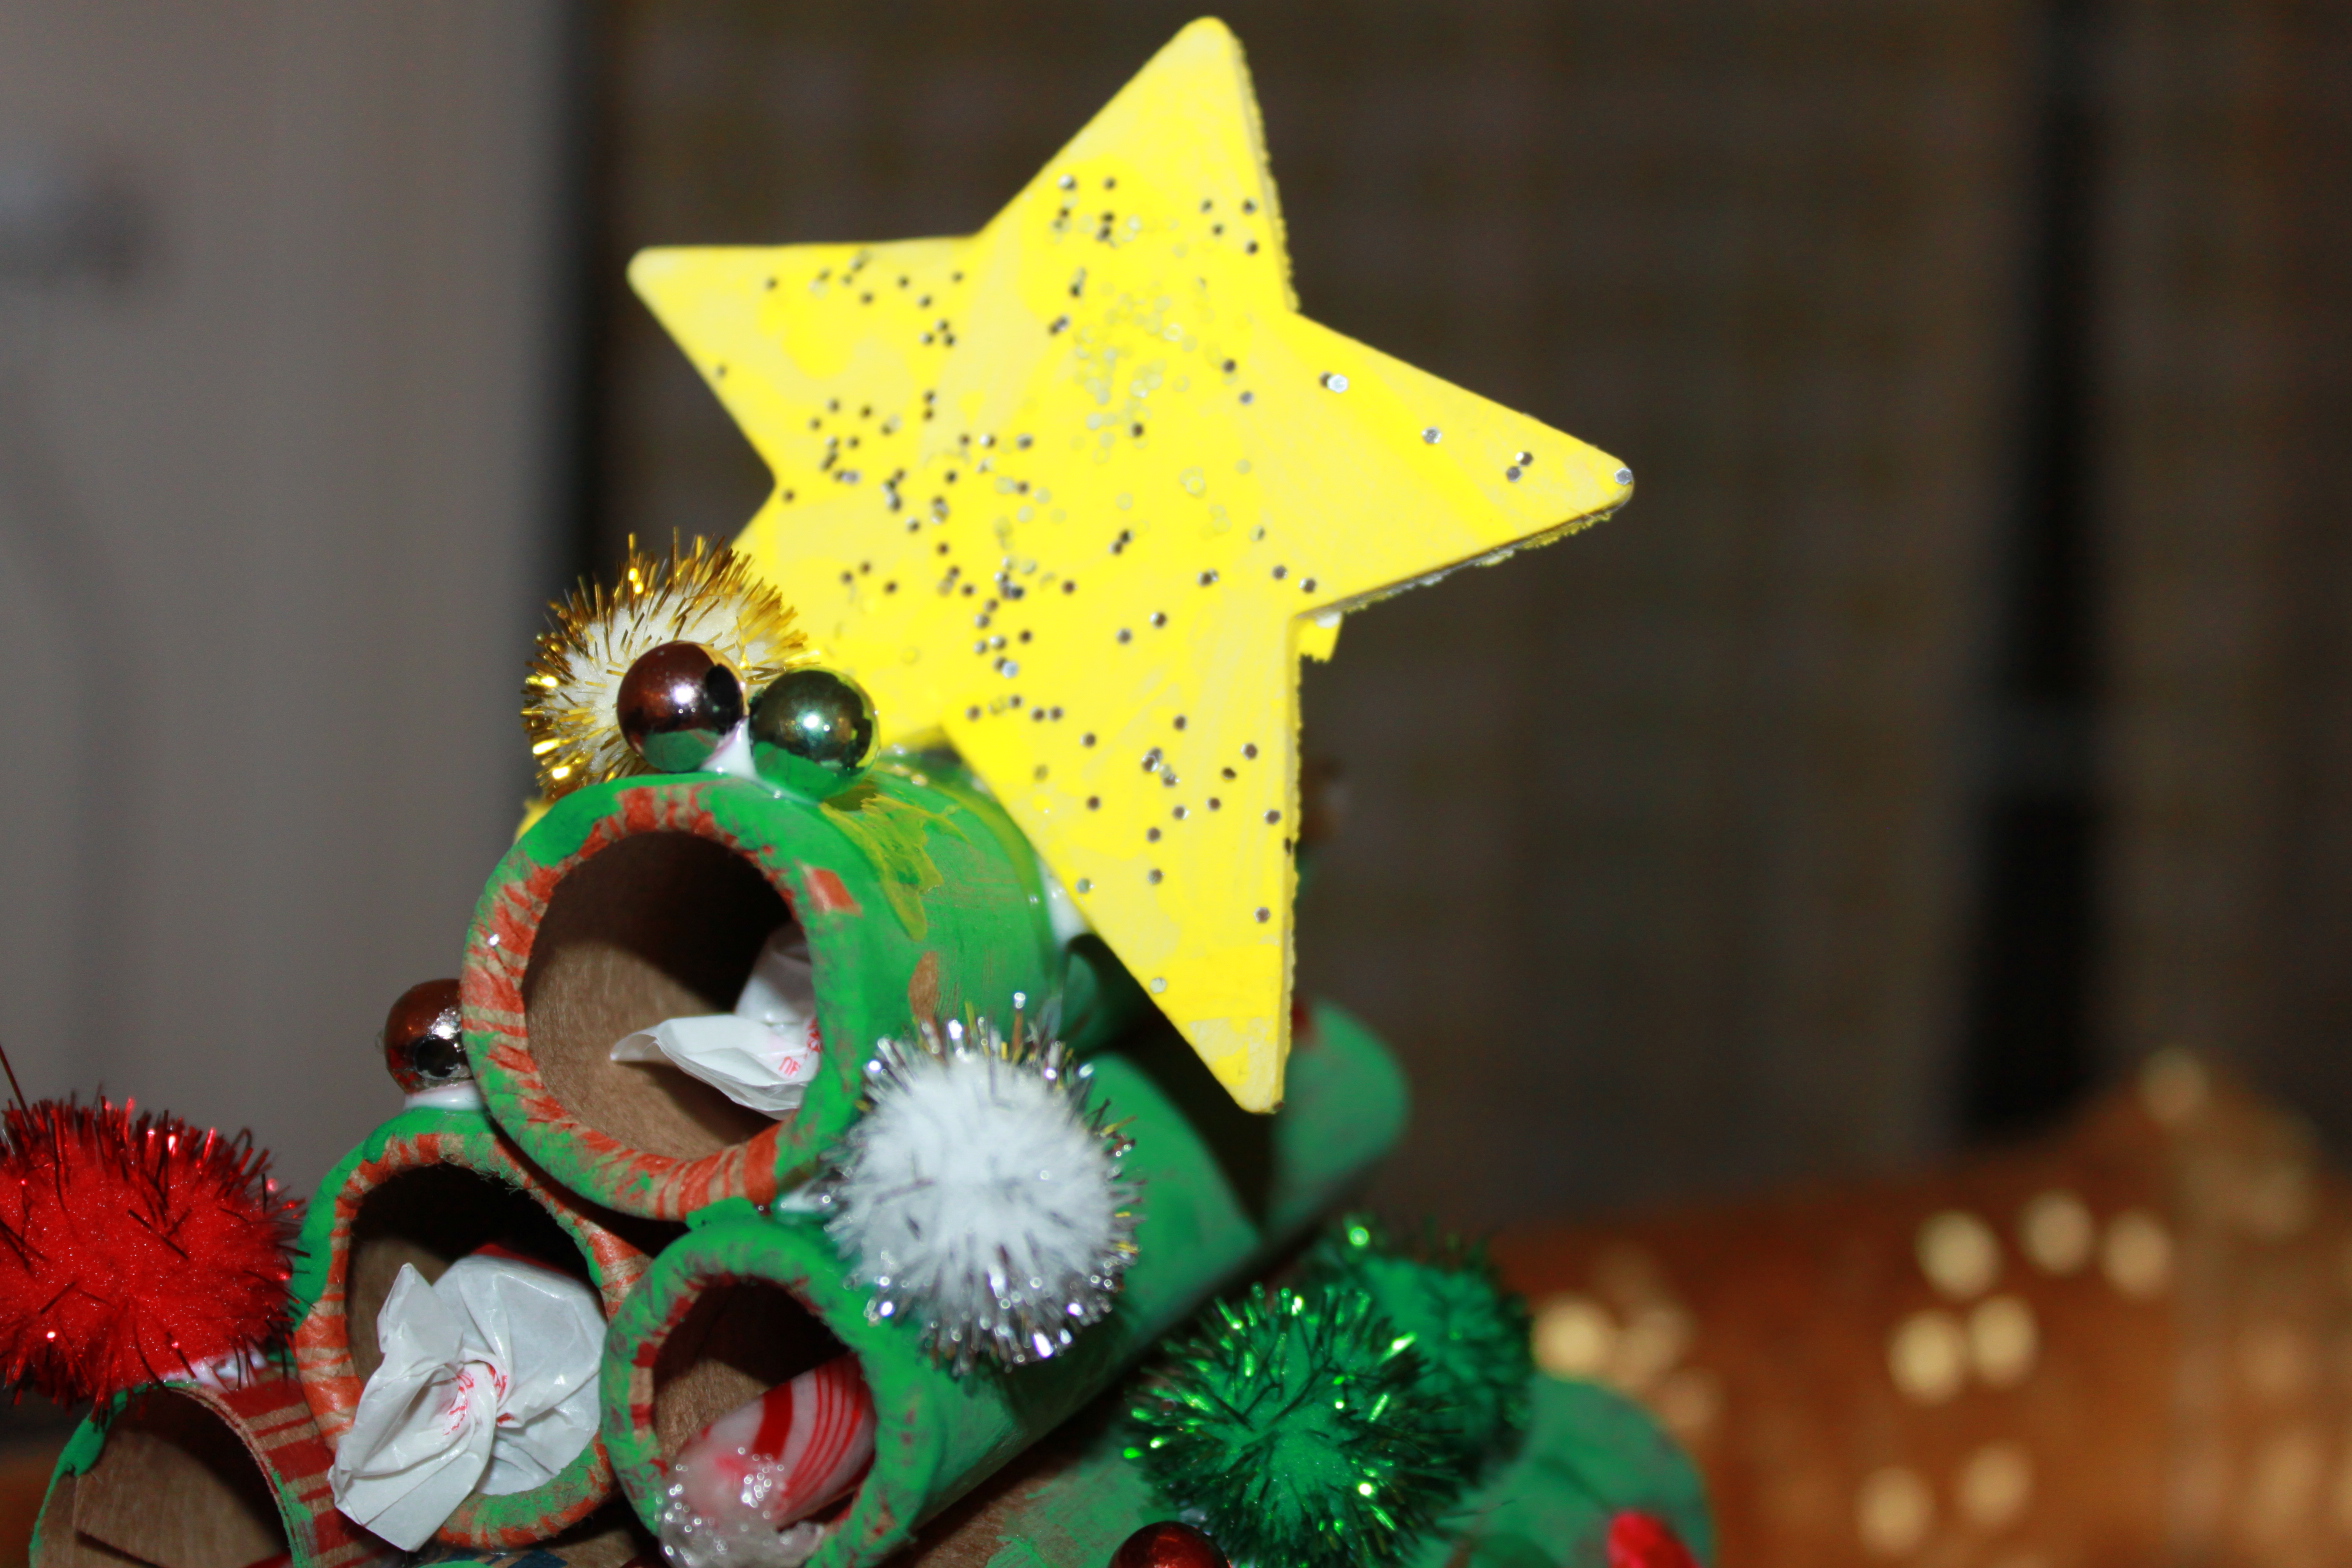
While the glue was drying, my five-year-old got to work painting the star. She added a touch of glitter to give her star some sparkle.

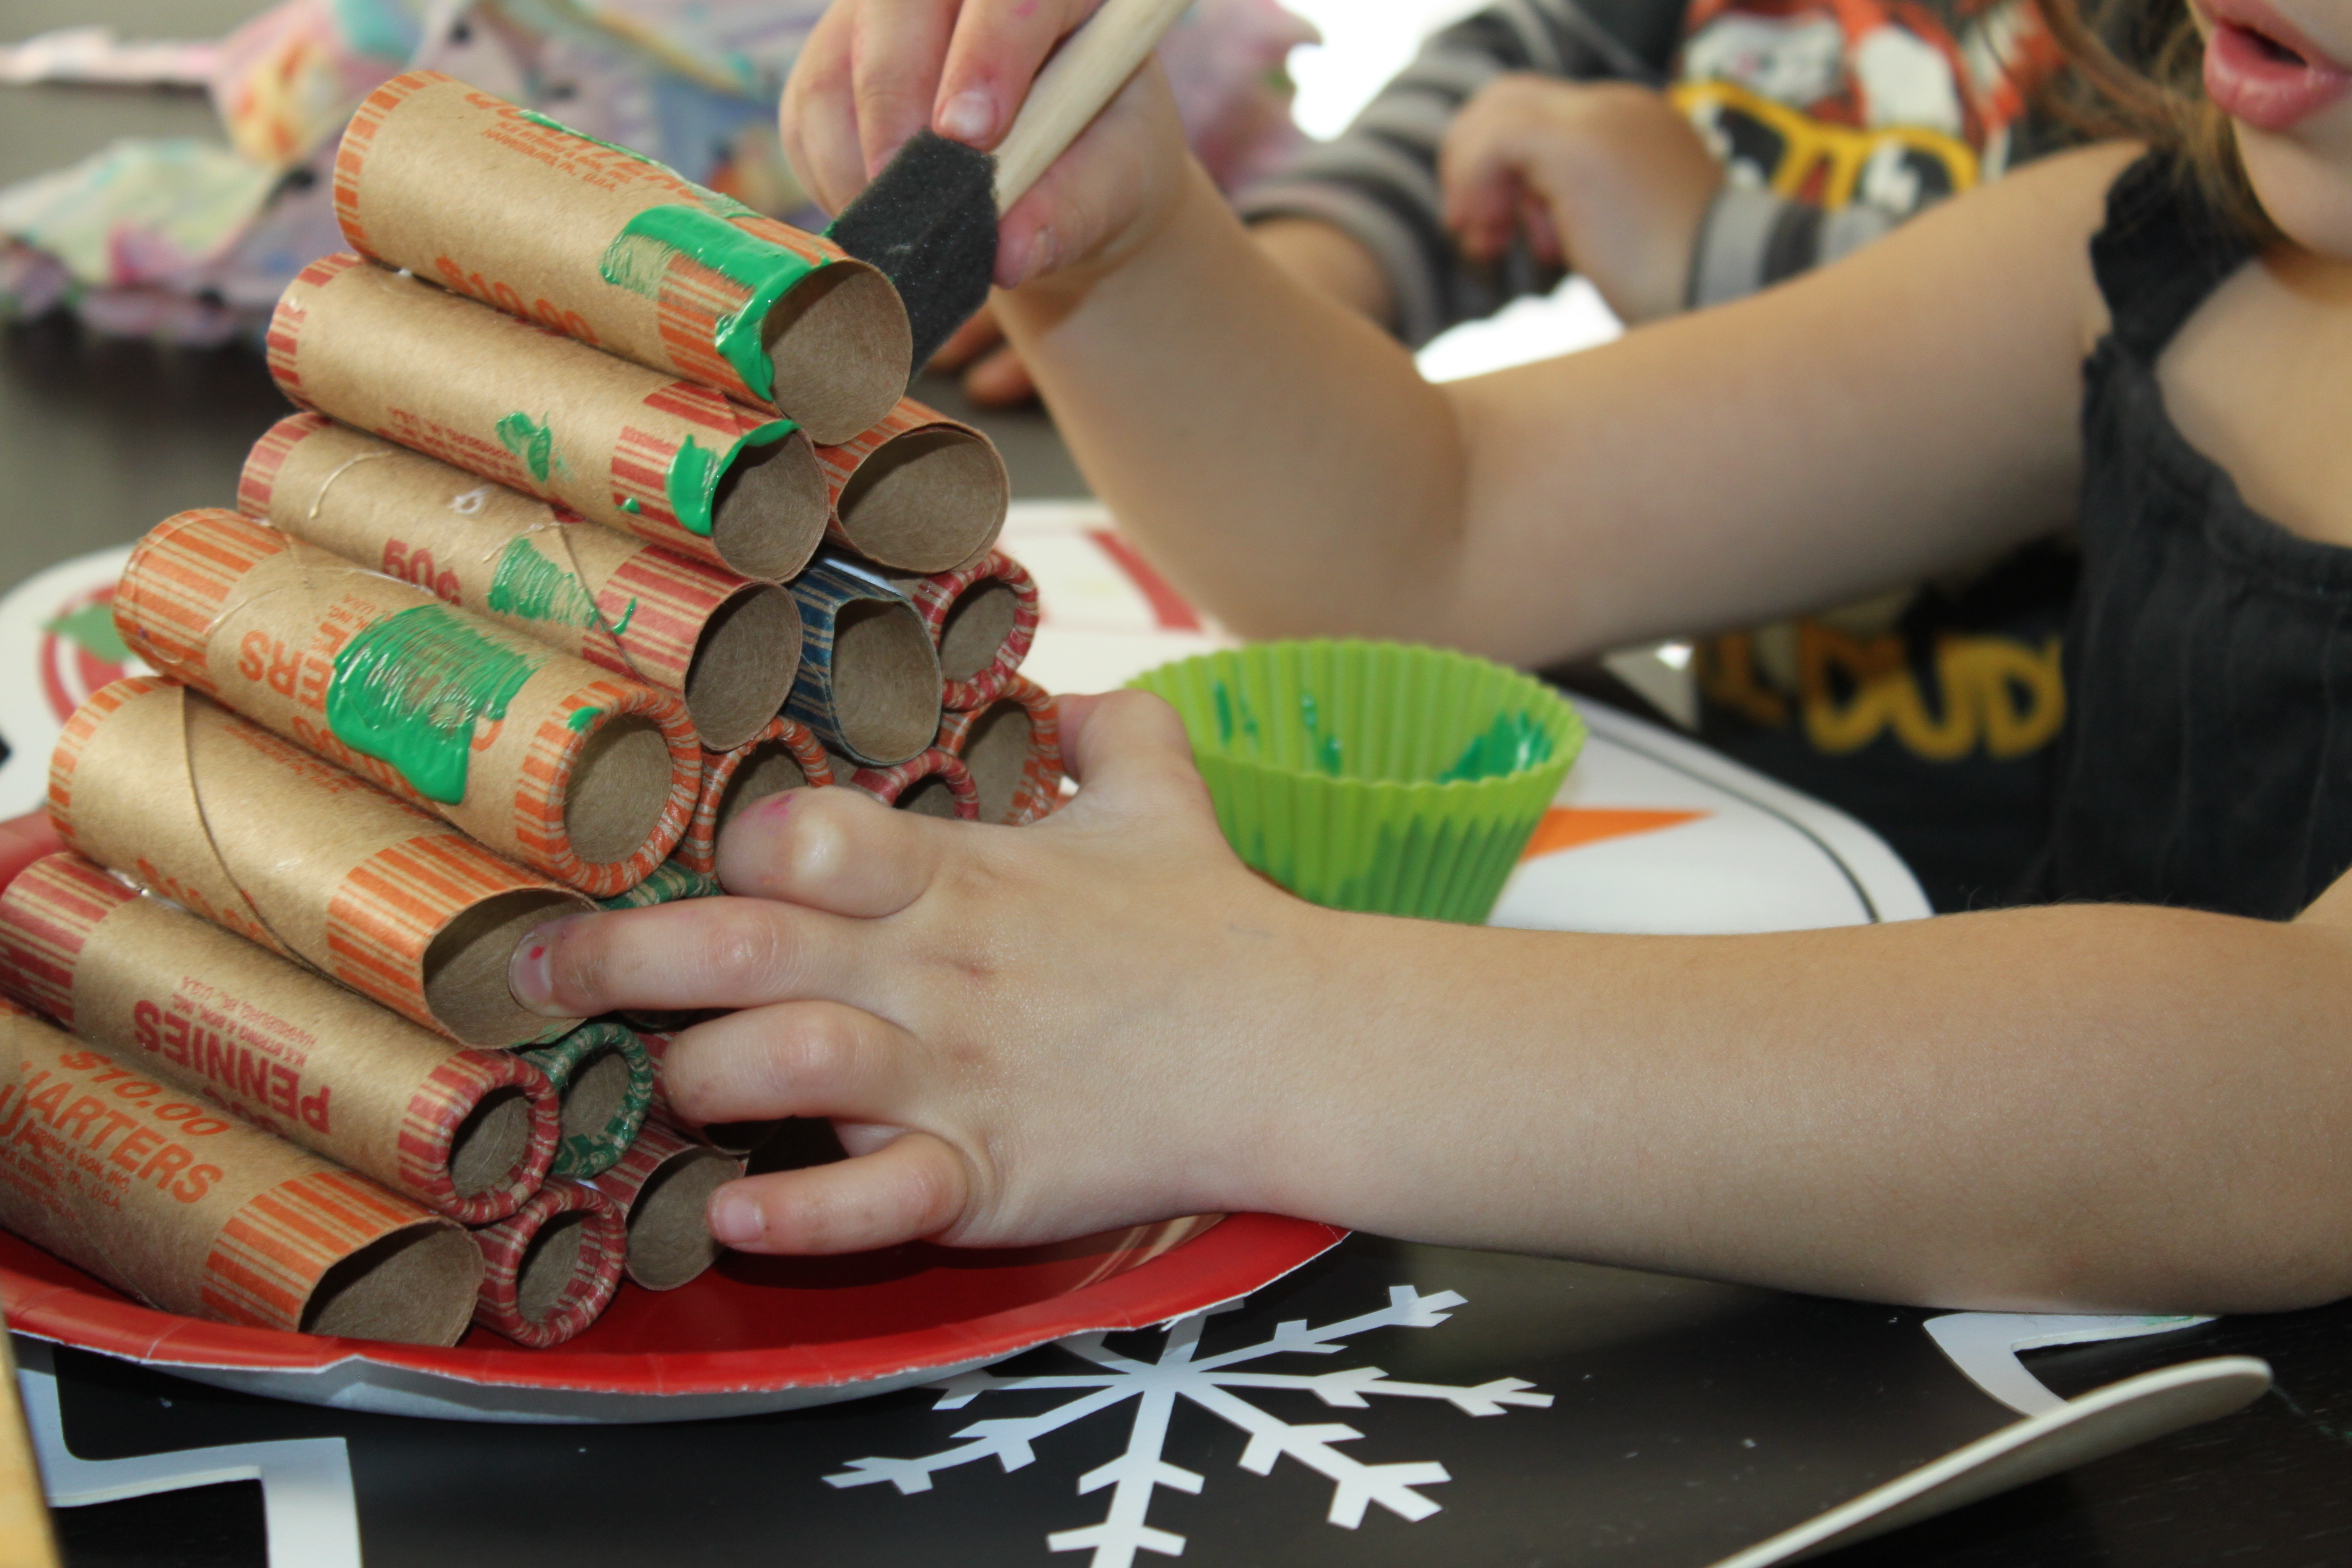
Step 4
Once the glue is set, it's time to paint those wrappers. My kids went for the traditional green, but any color will do.
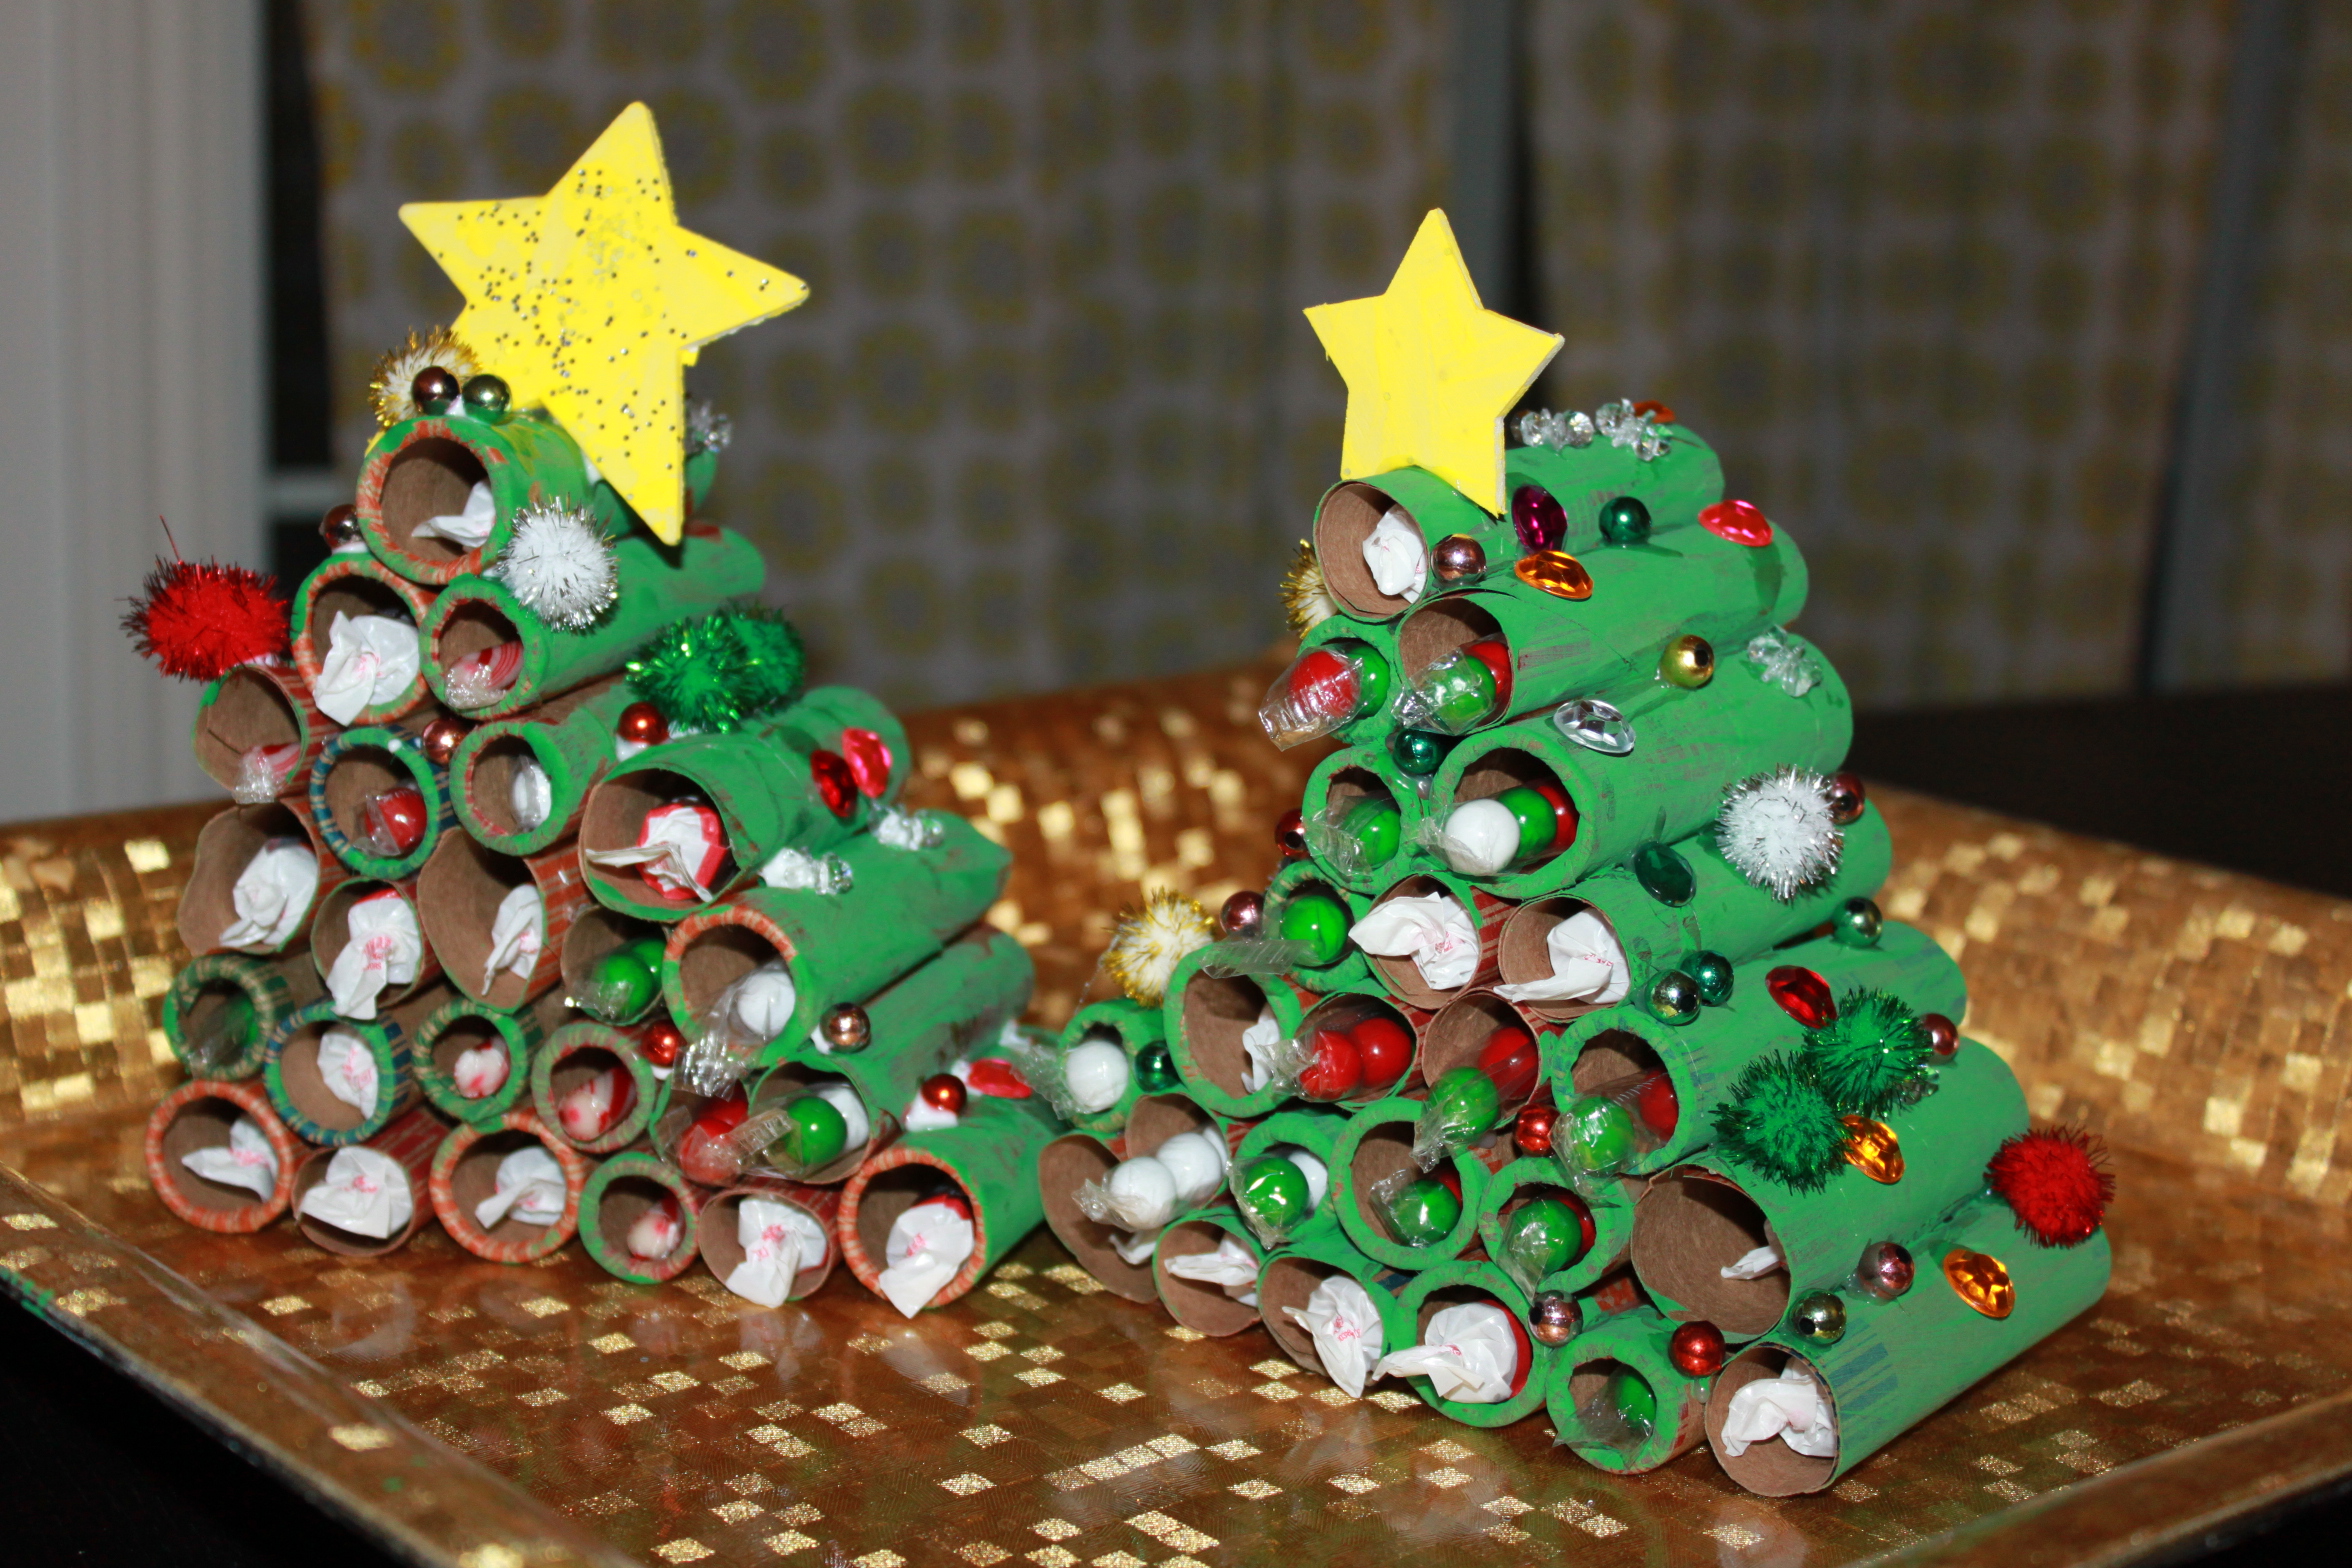
Final result!
With some more tacky glue, we decorated the tree with beads and pom-poms and topped it off with our star. There was only one more step left and that was to fill each day with a special treat. This year I think I will place a little piece of paper in each spot with a holiday-themed activity to do. (Some simple suggestions: sing your favorite Christmas song, make a paper snowflake, make a Santa bubble beard in the bath, and bake cookies.) Now we're all geared up for a memorable countdown!