Step-by-step tutorial

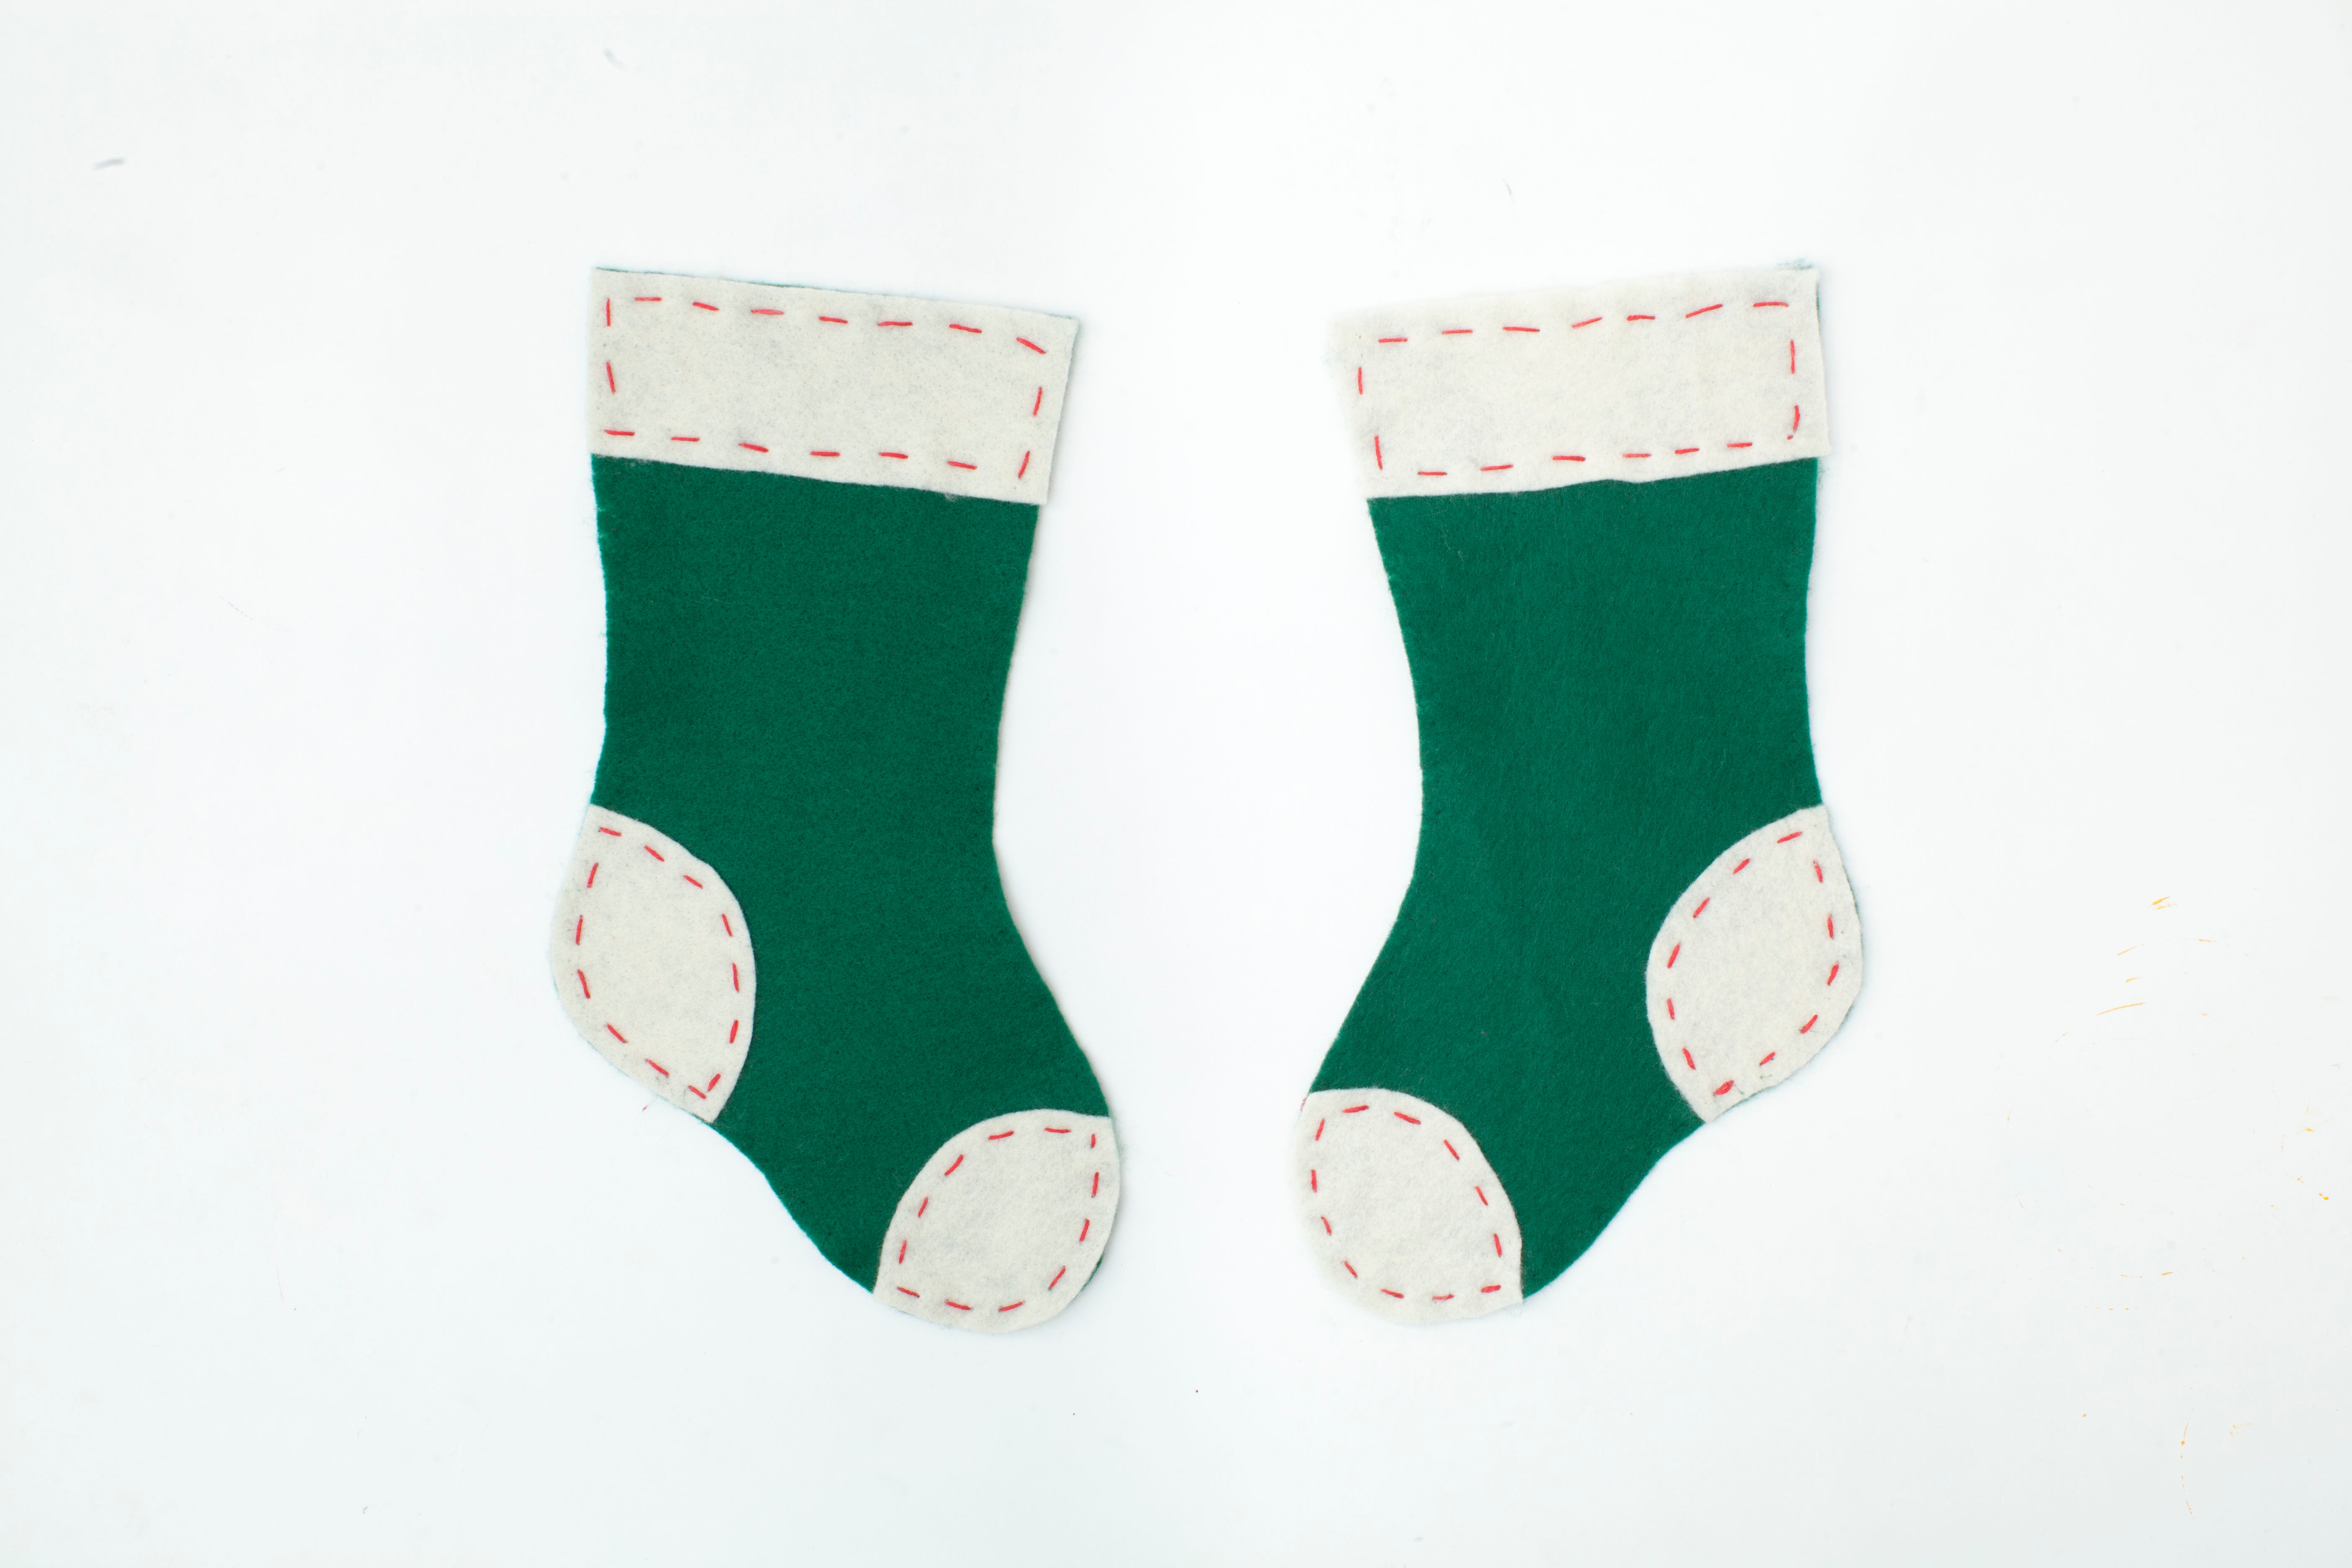
Step 2
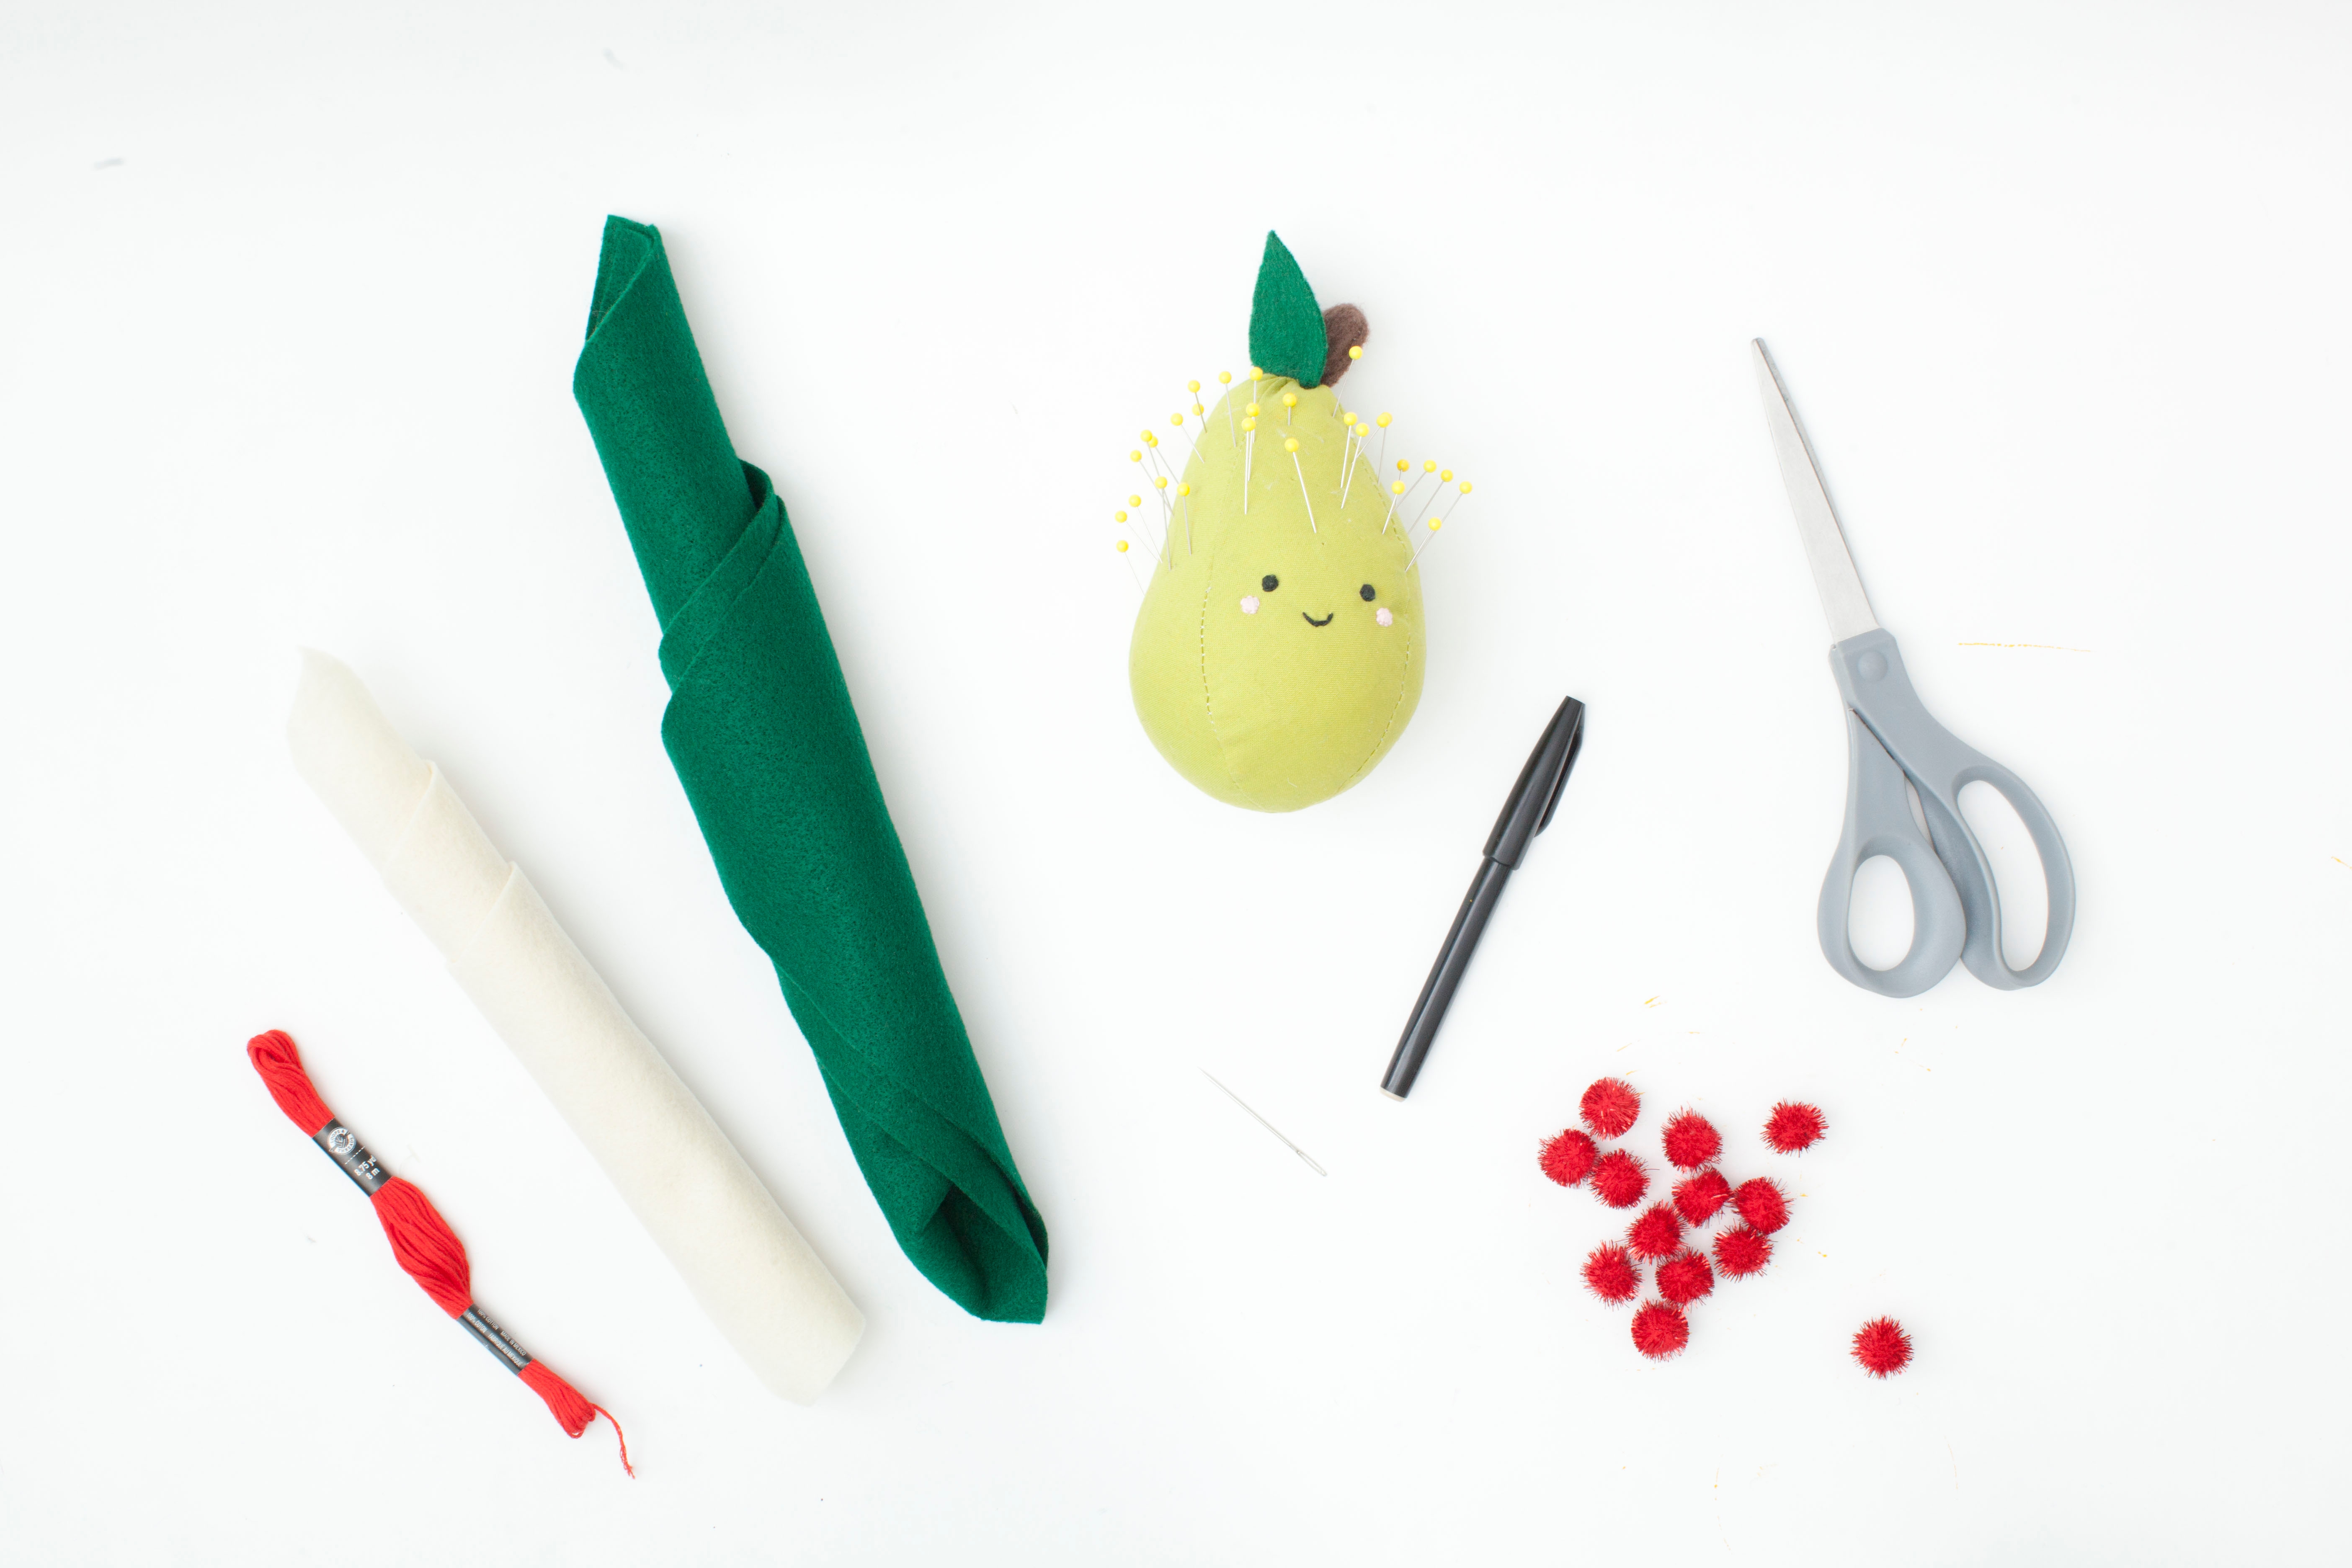
Draw two stocking shapes and any decorations you want onto some felt. Then, cut them out.

Step 3
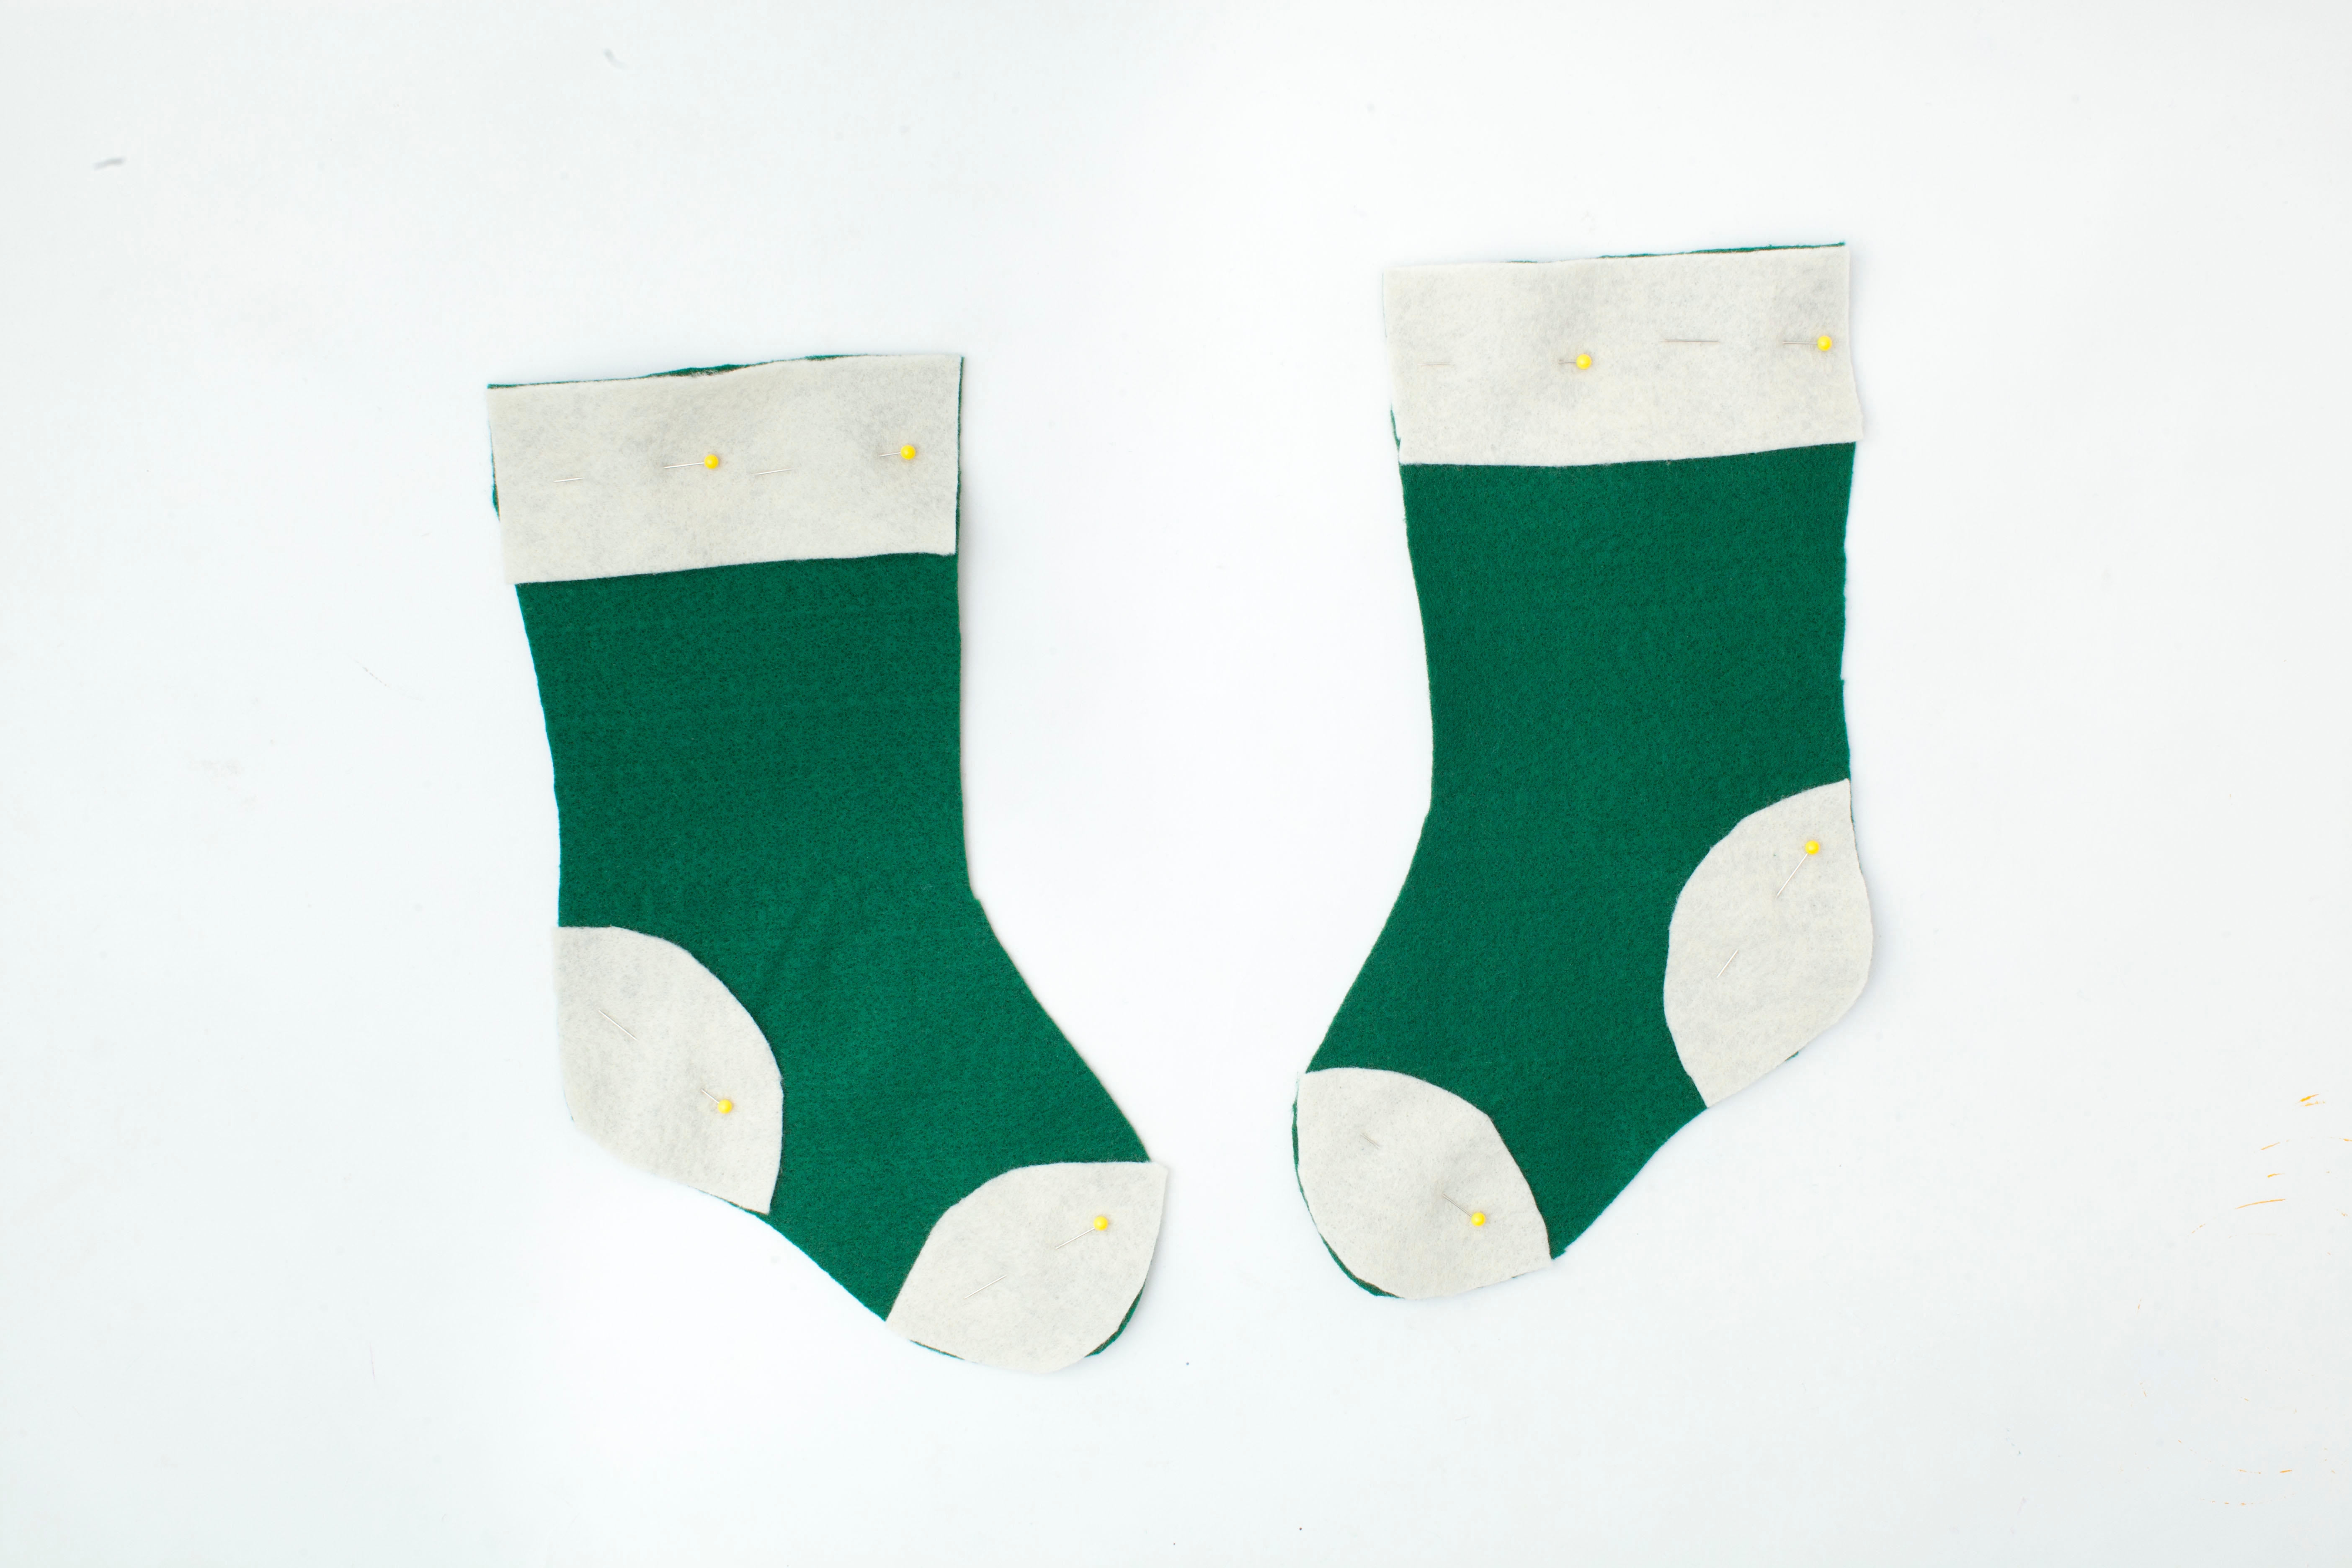
Position the felt cutouts onto the stockings. Then, use pins to secure them in place.
Tip
One stocking shape will be the front of your stocking and the other will be the back. Make sure the back stocking is “backwards.”
Step 4
Thread the needle! Tie a loop knot on one end of your embroidery thread. Poke the other end through the eye of the needle.
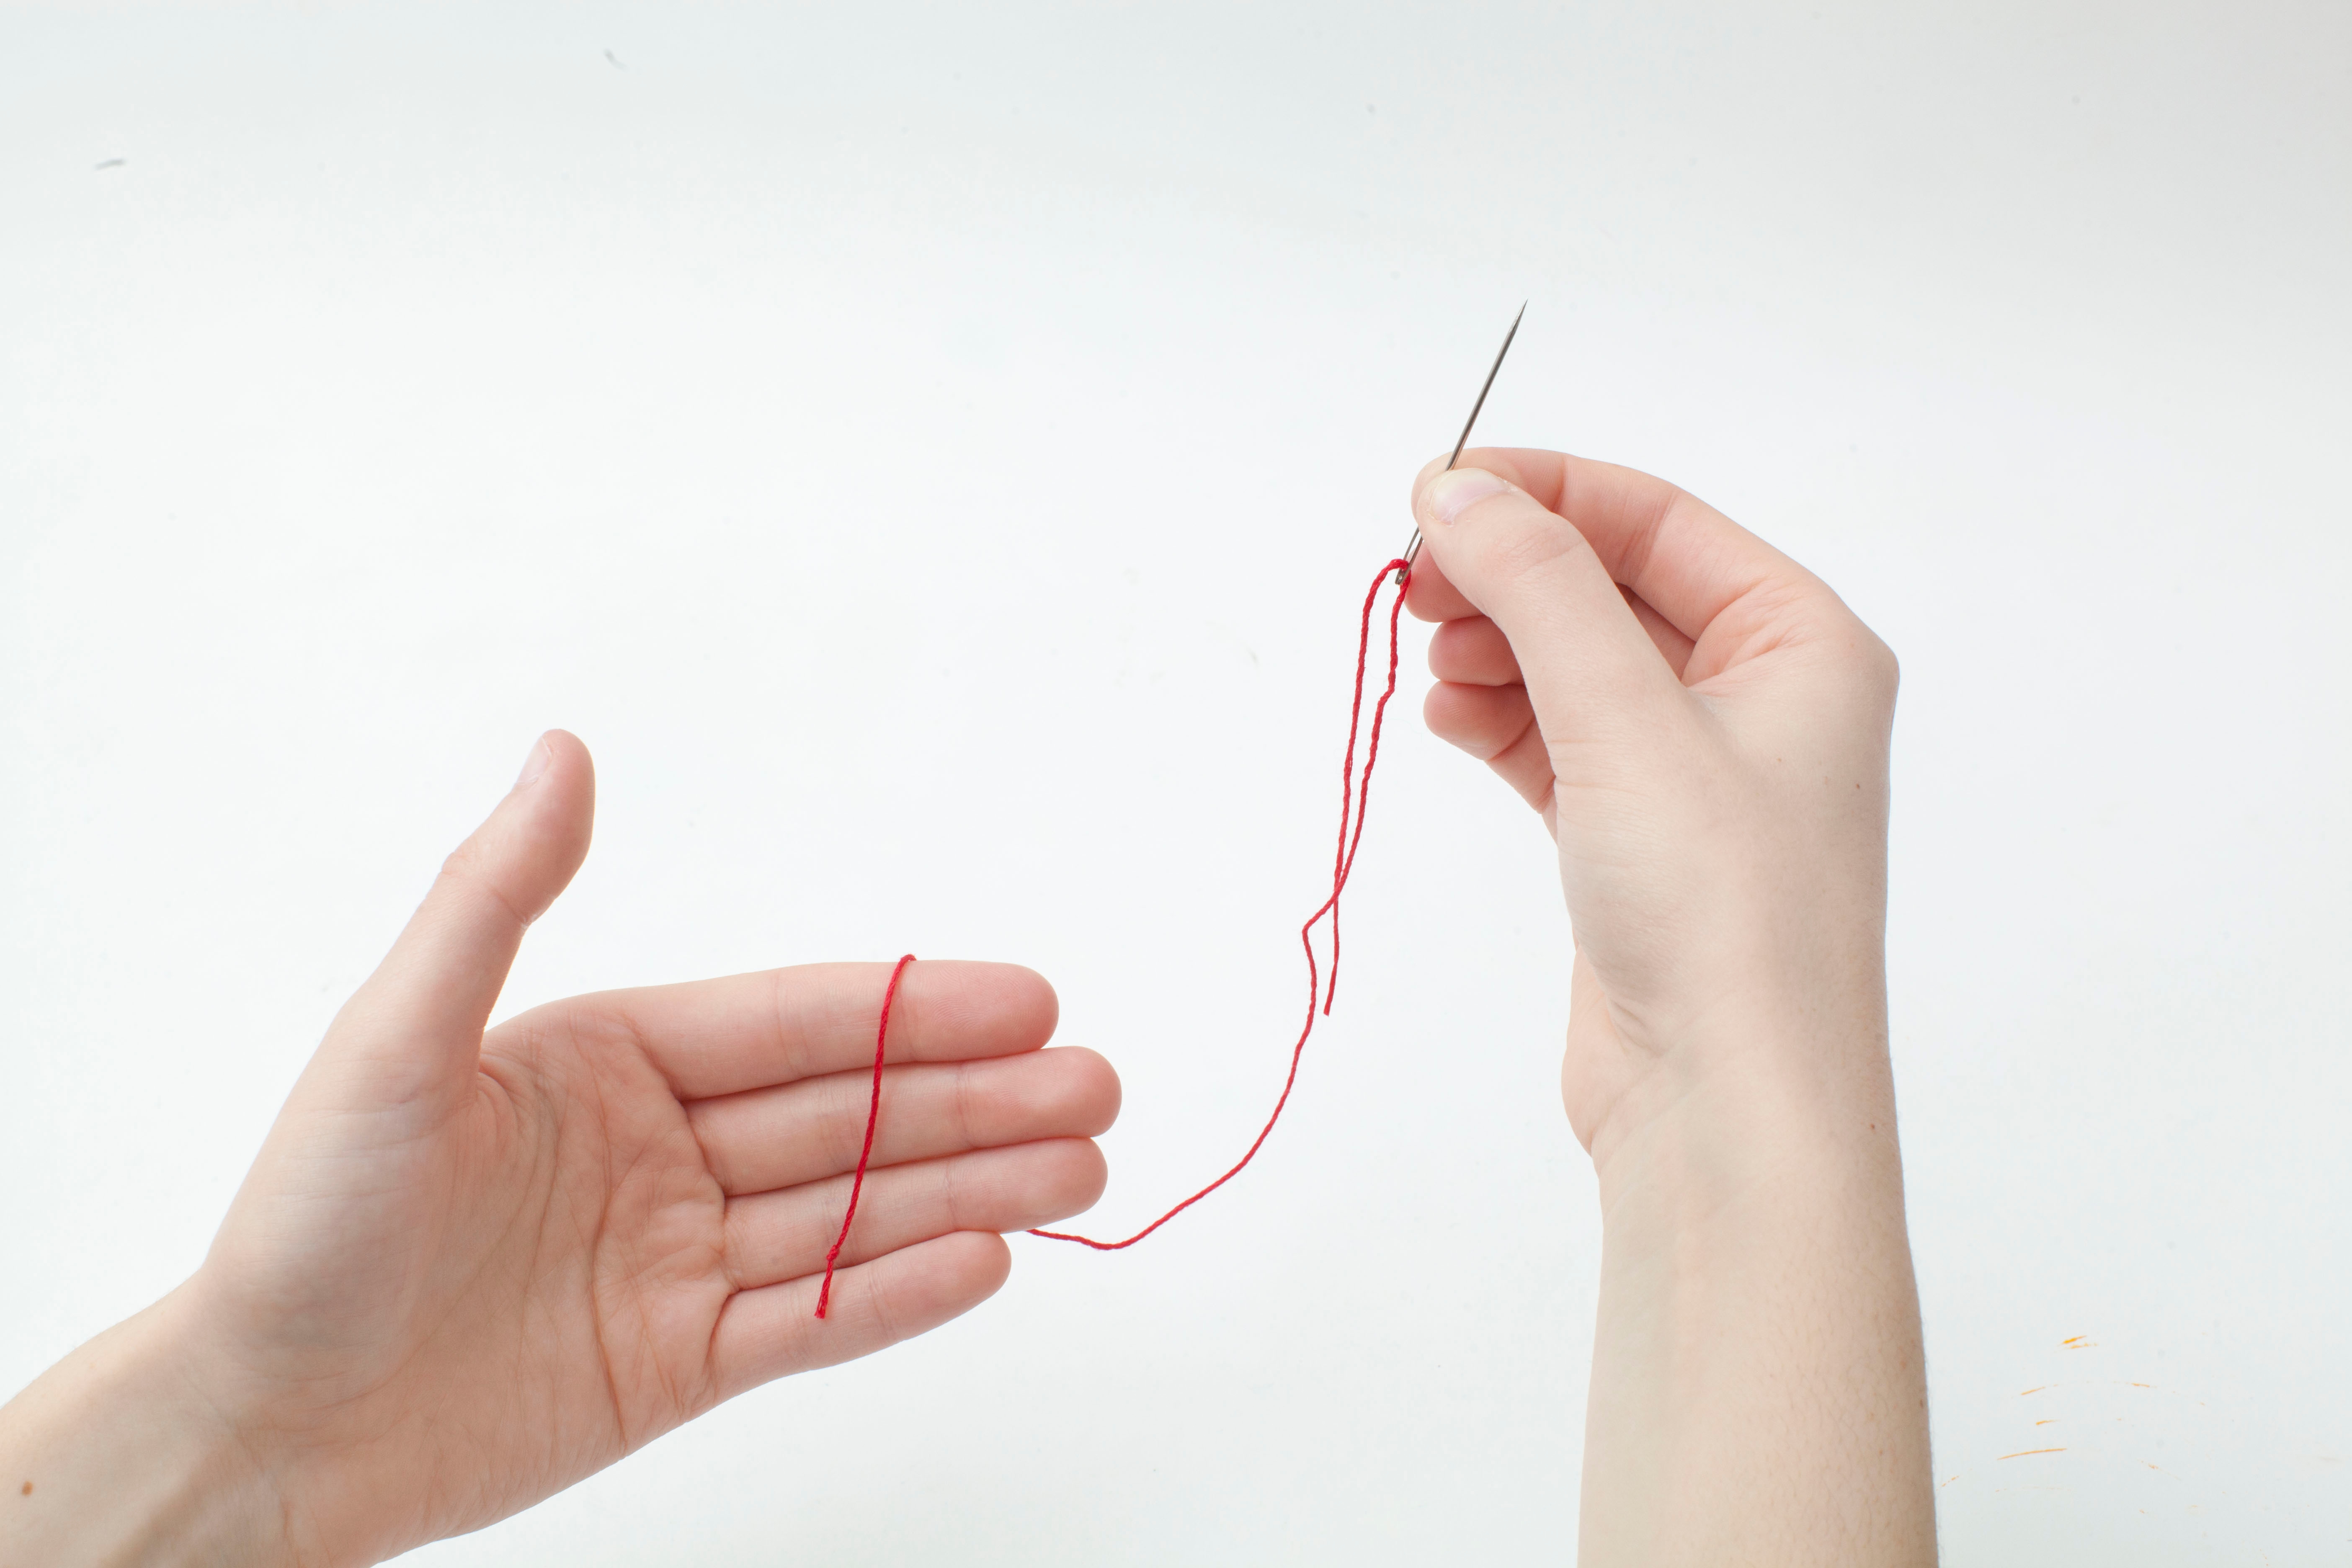
Tip
You may need a grownup assistant to help you.
Step 5
Begin hand-sewing the felt cutouts onto on stocking piece by poking the needle up through the back of the felt until it hits the knot. You should go through two layers (one felt stocking and one of the felt cutouts).
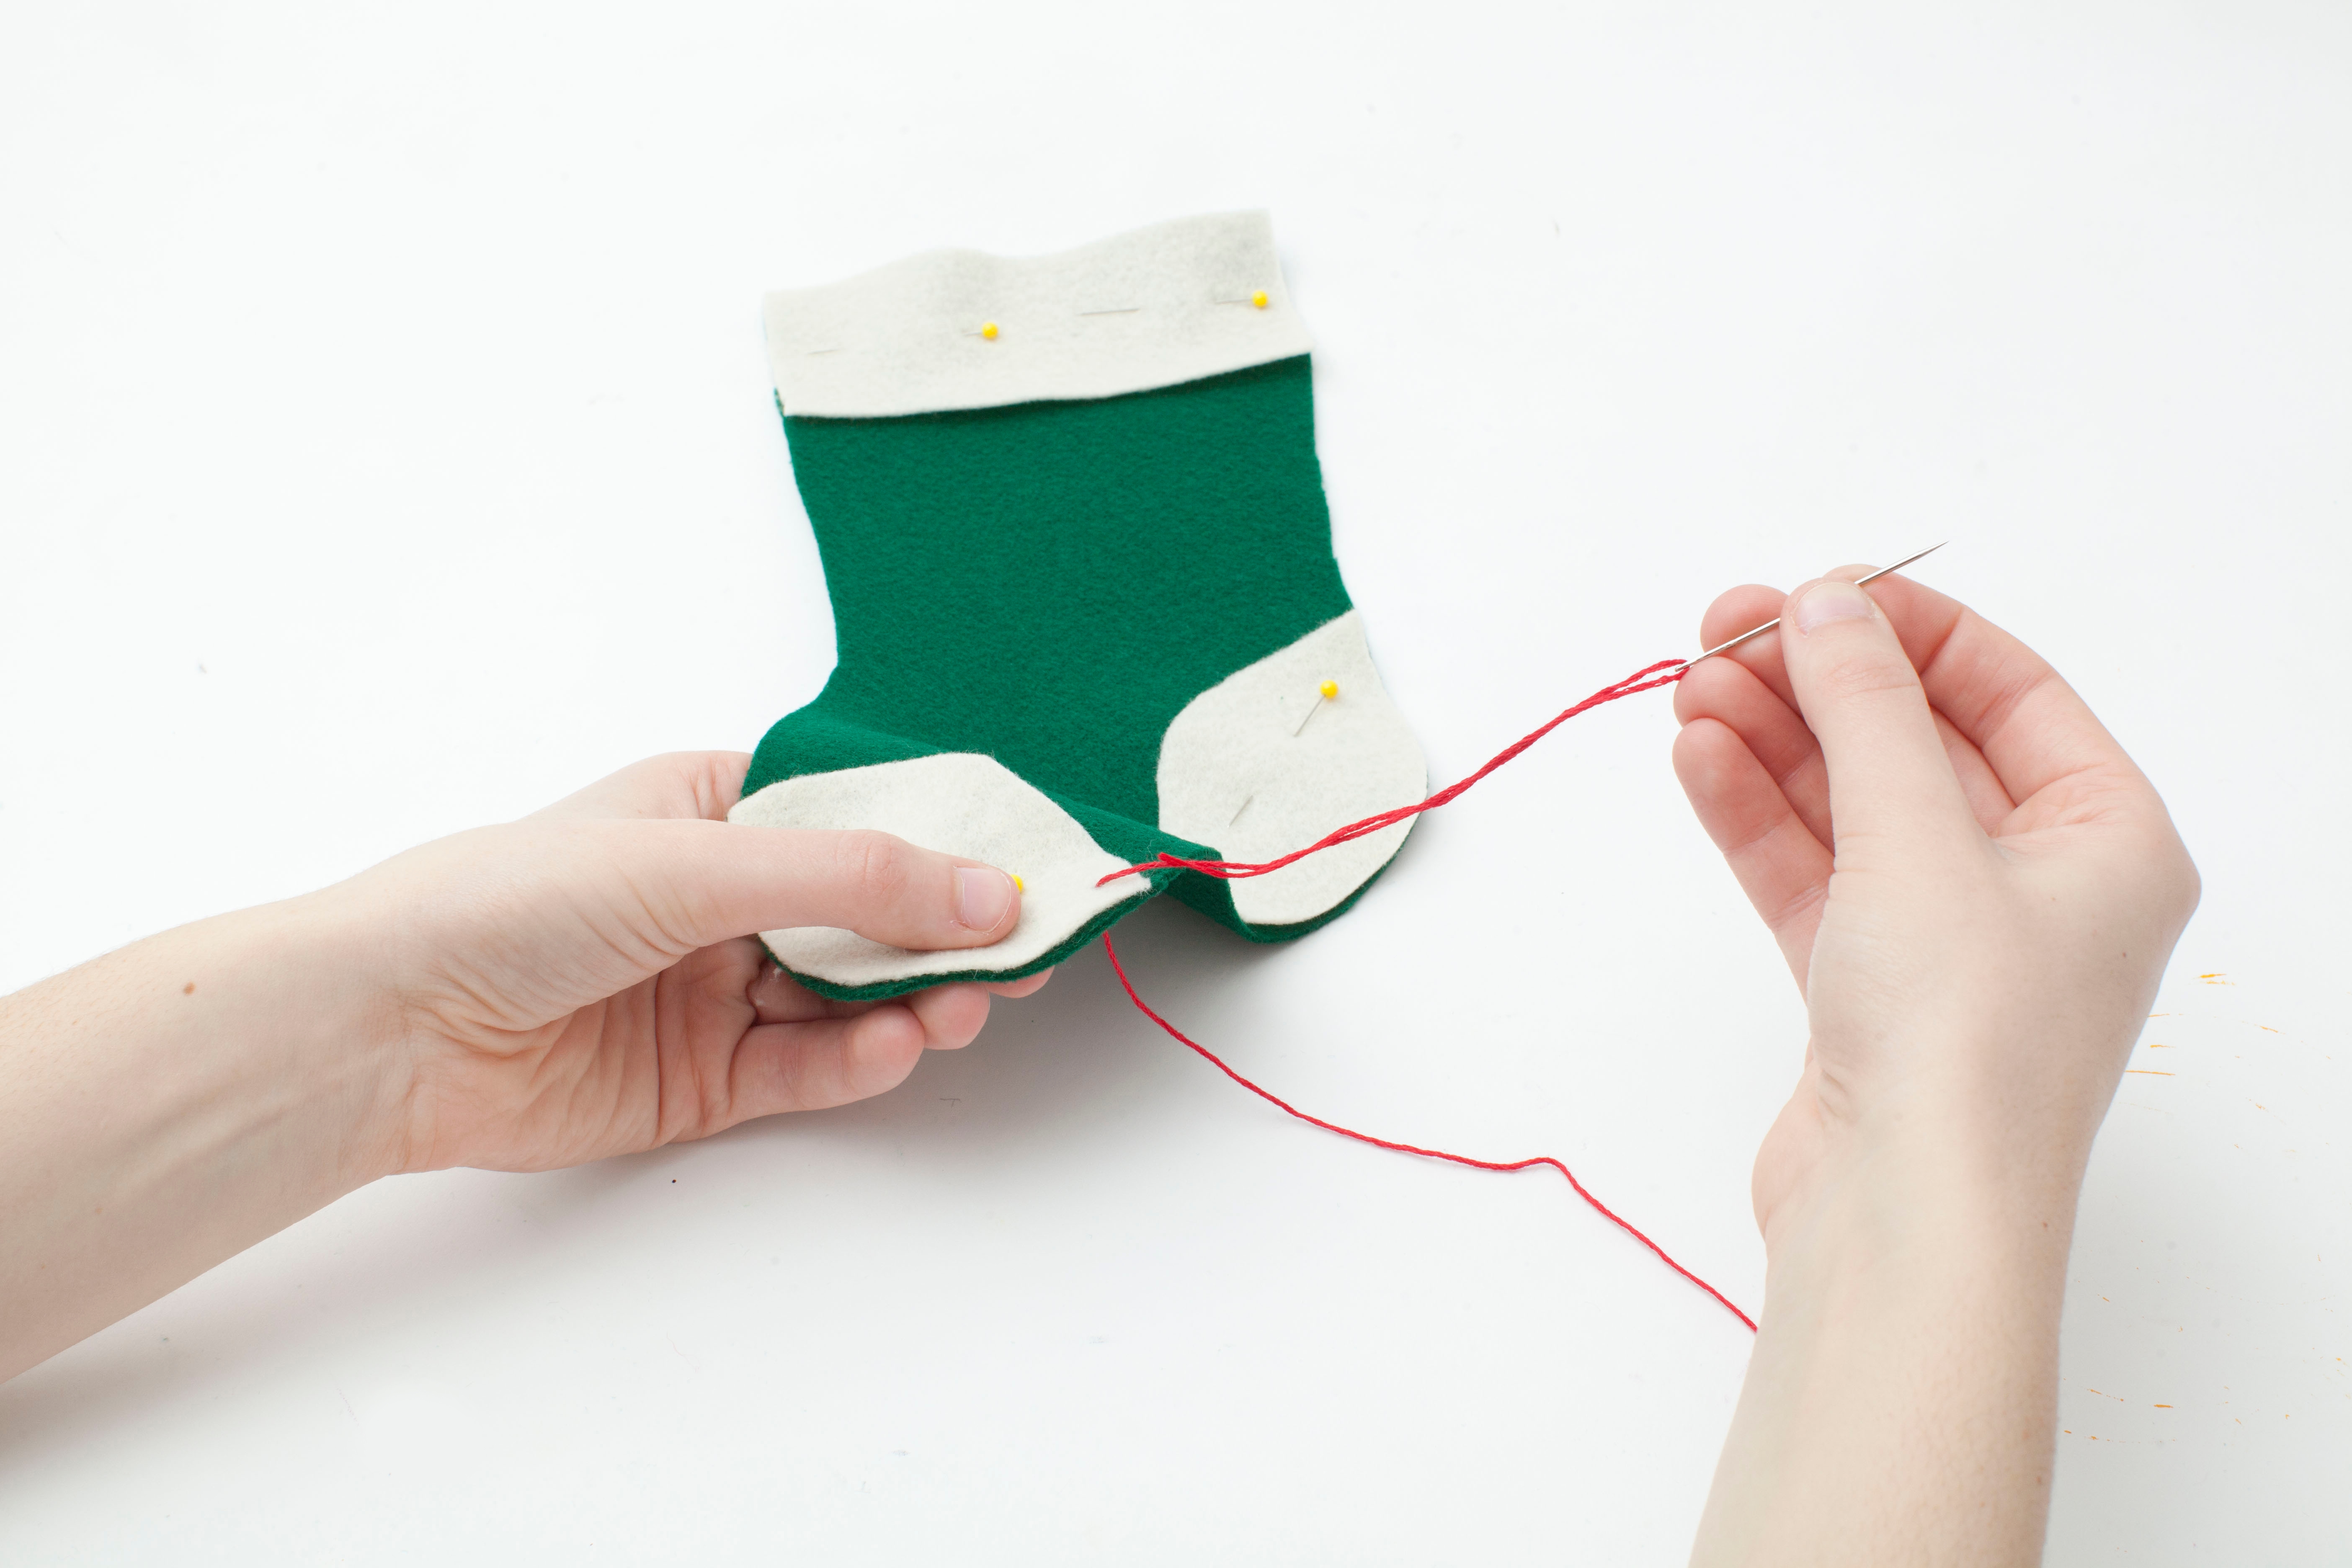
Step 6
Poke the needle back through the front of the felt.
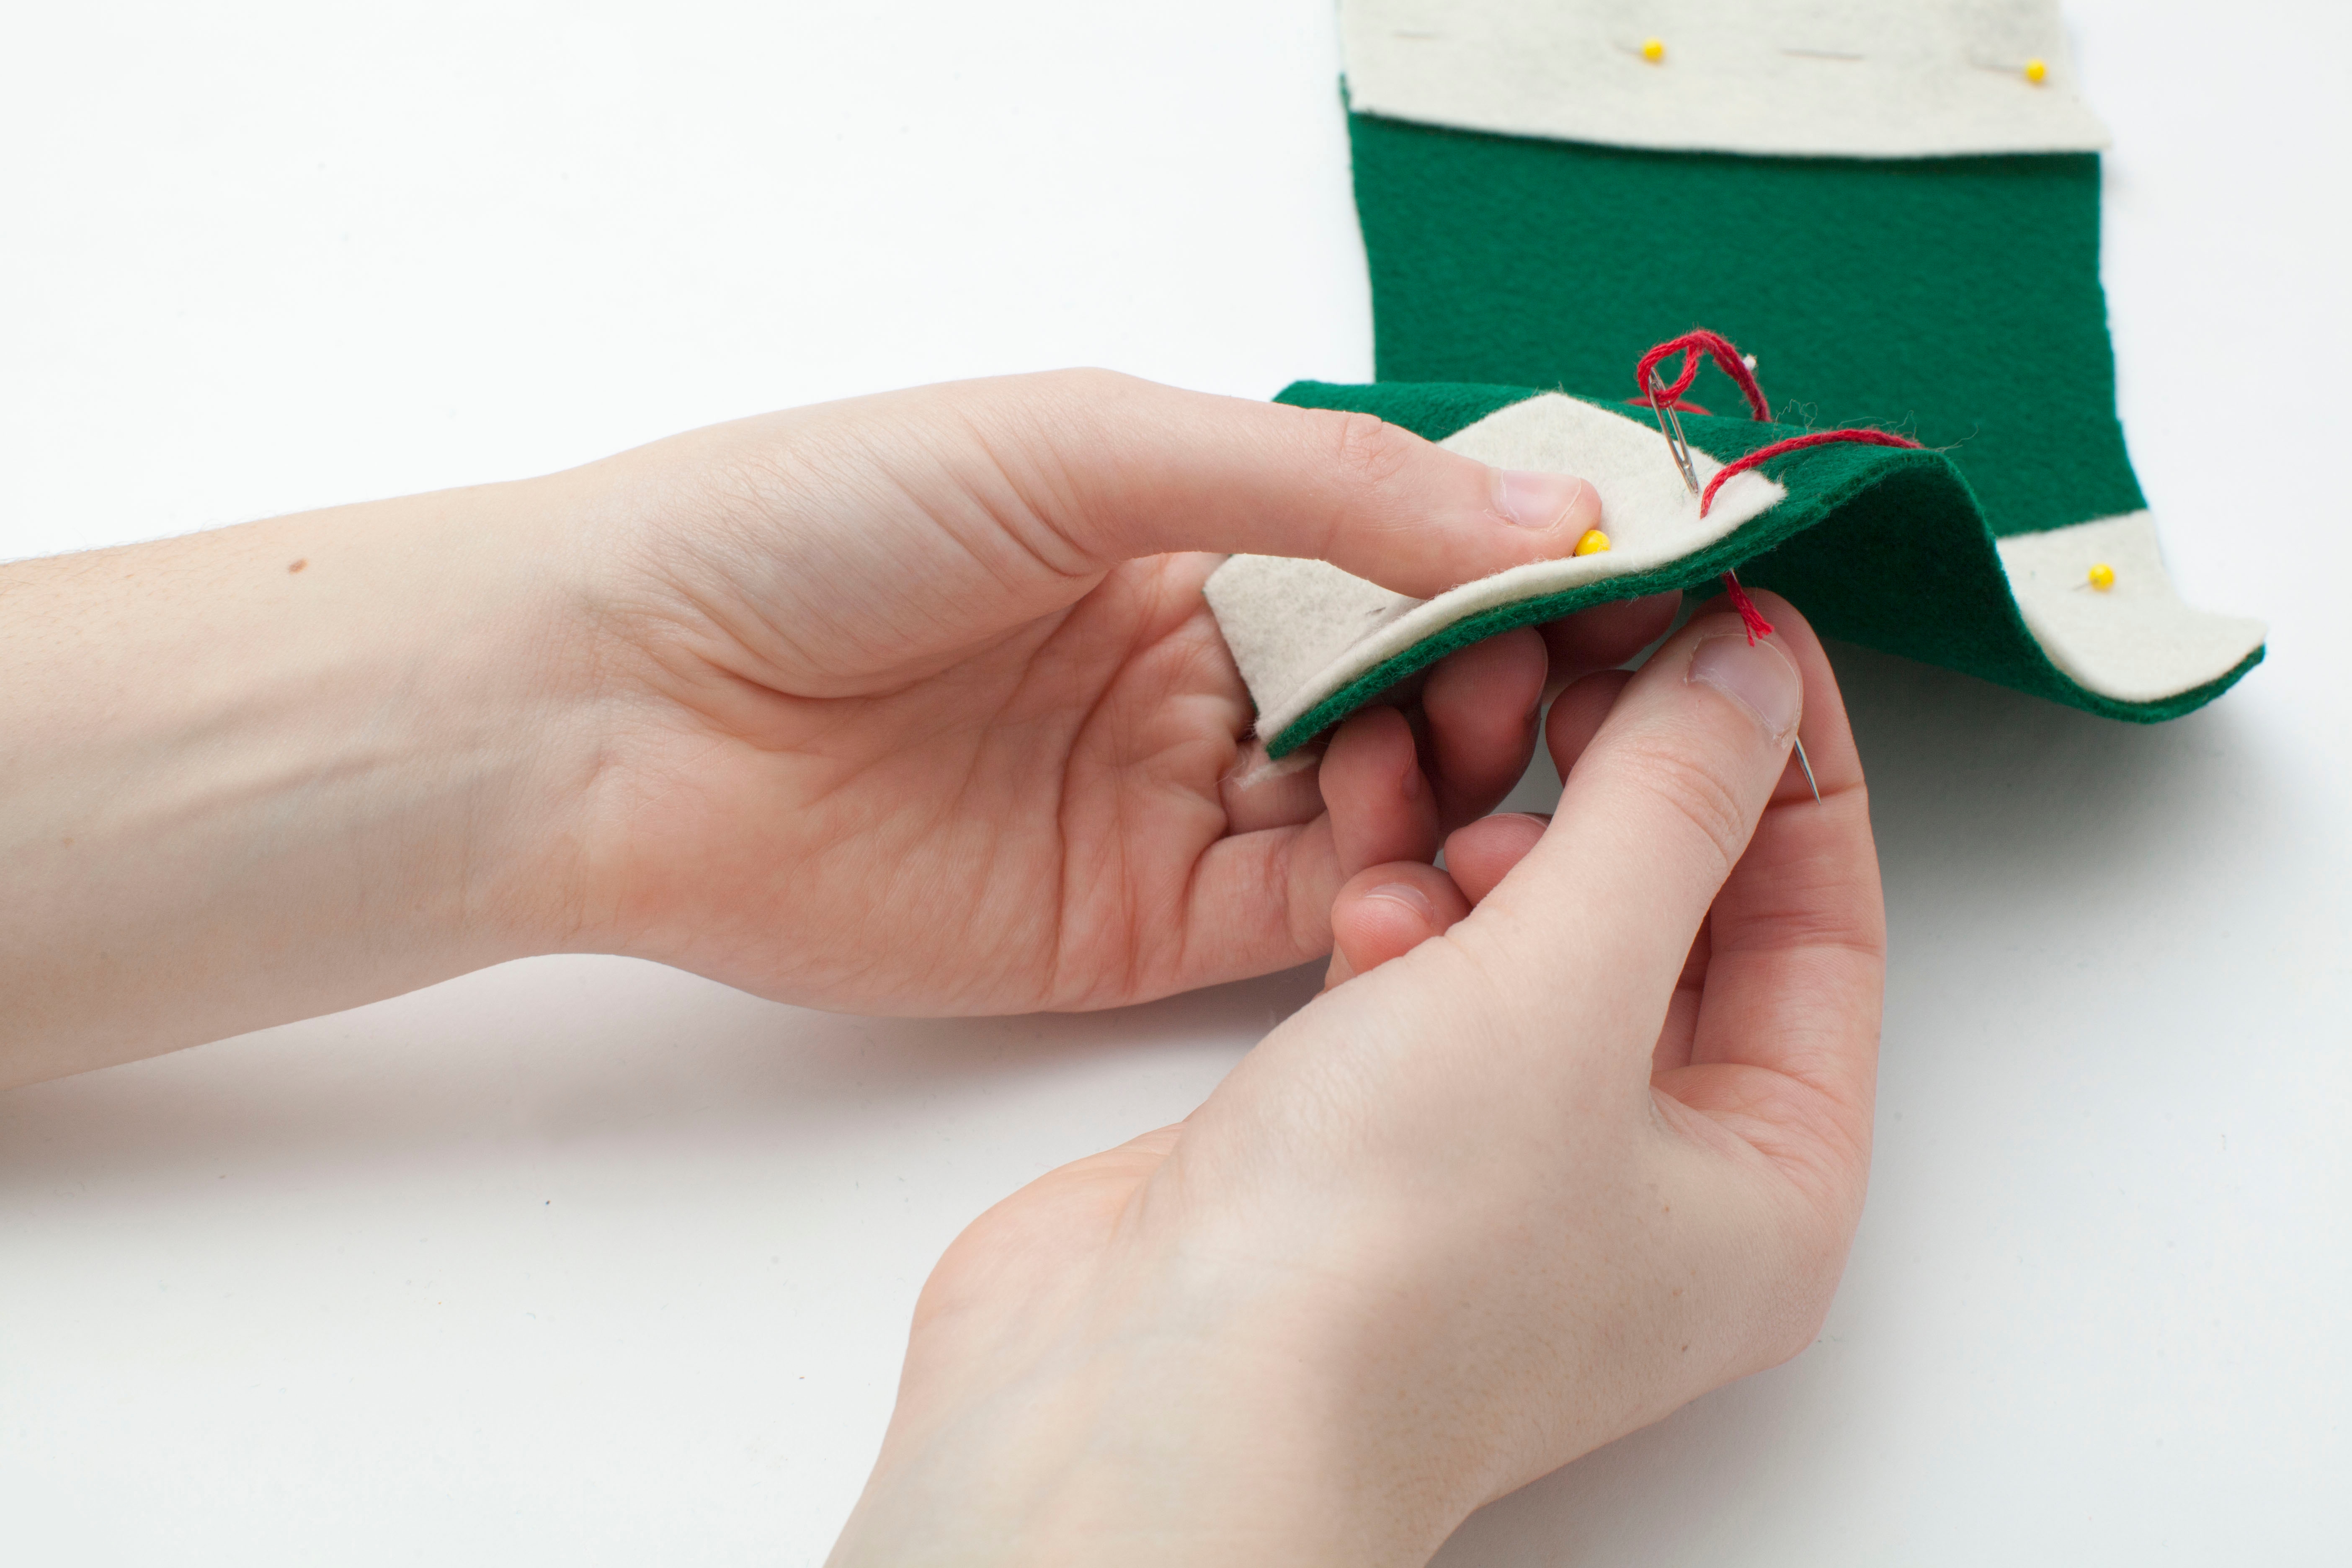
Step 7
Continue to poke the needle up and down along the entire edge of the cutout. Then, turn the felt over and tie a loop knot as close to the felt as possible.
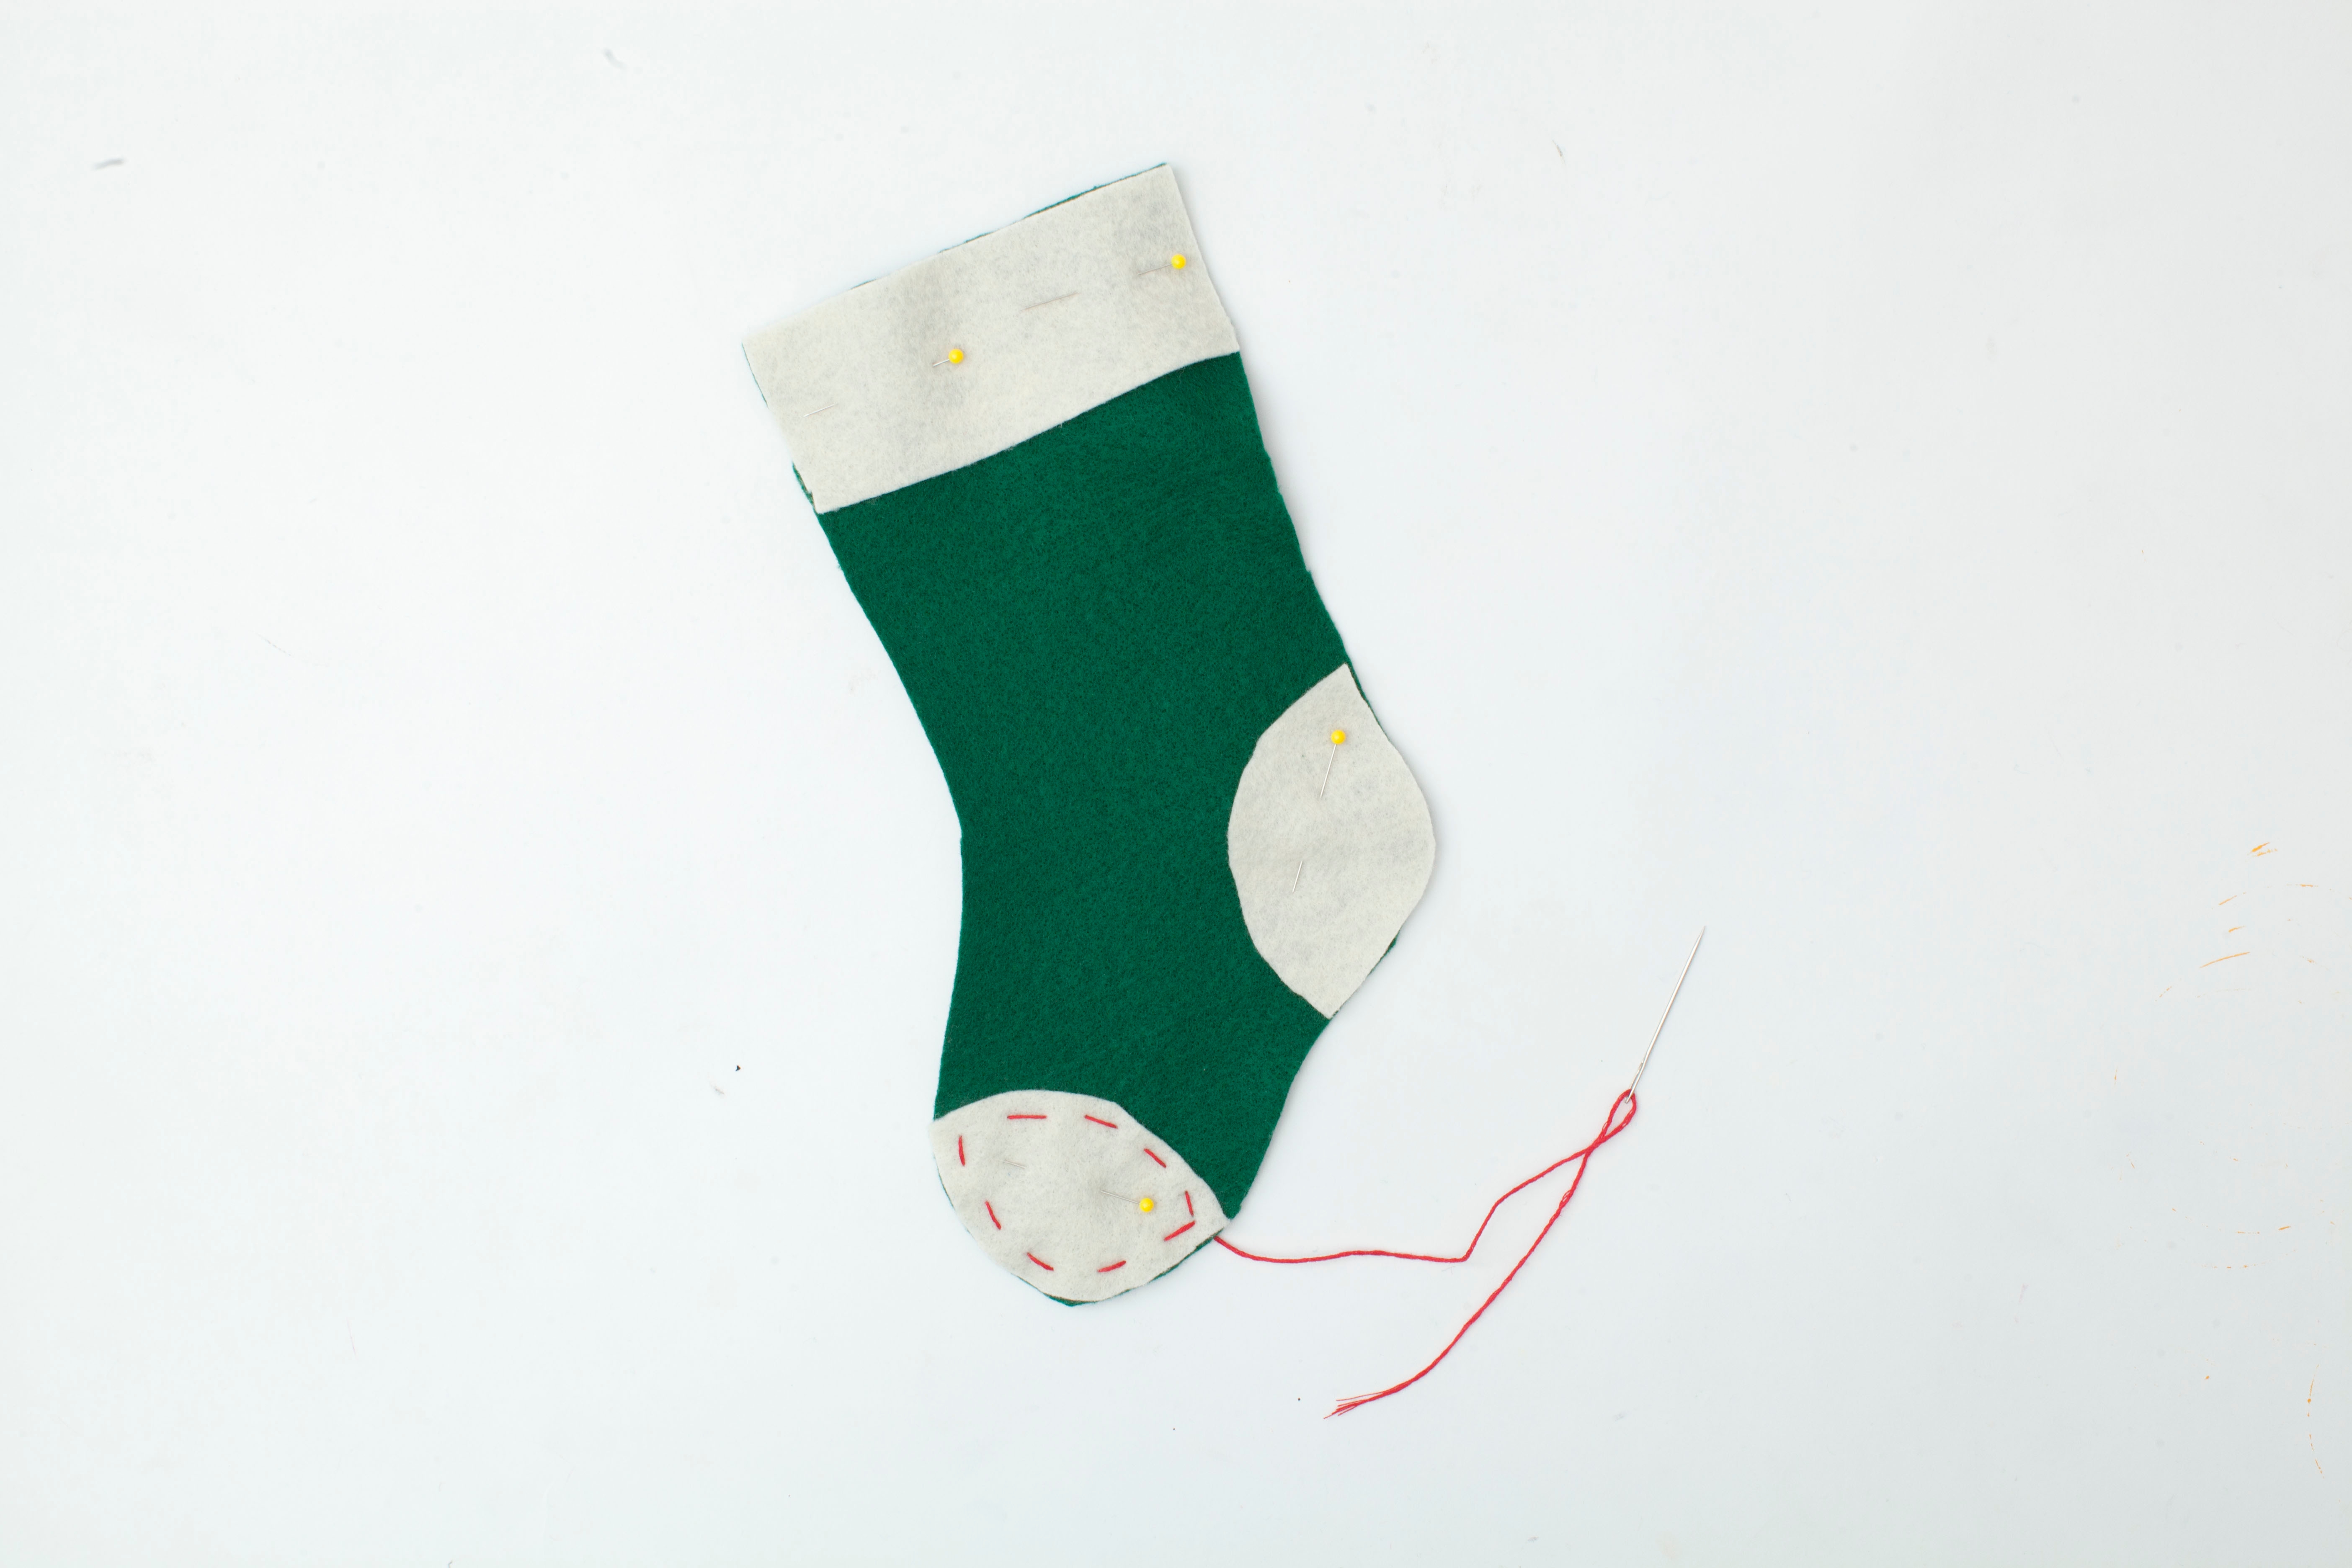
Step 8
Repeat steps 4 through 7 until you have sewn all of the cutouts onto the stockings.
Step 9
Lay the front stocking on top of the back stocking with the decorations facing out. Then, use pins to secure them in place.

Tip
We also added a little tab that you can hang your stocking up by! To do this, simply fold a piece of felt and stick the loose ends into the stocking. Then, pin it in place.
Step 10
Start sewing at the top left corner of the stocking, following all the way around the stocking back up to the top right corner.

Tip
Don’t sew the top of your stocking closed or you won’t be able to stuff it with goodies!
Step 11
Add items like pom-poms or glitter to decorate your stocking! Remember that you can only sew decorations on before you sew the stocking together.
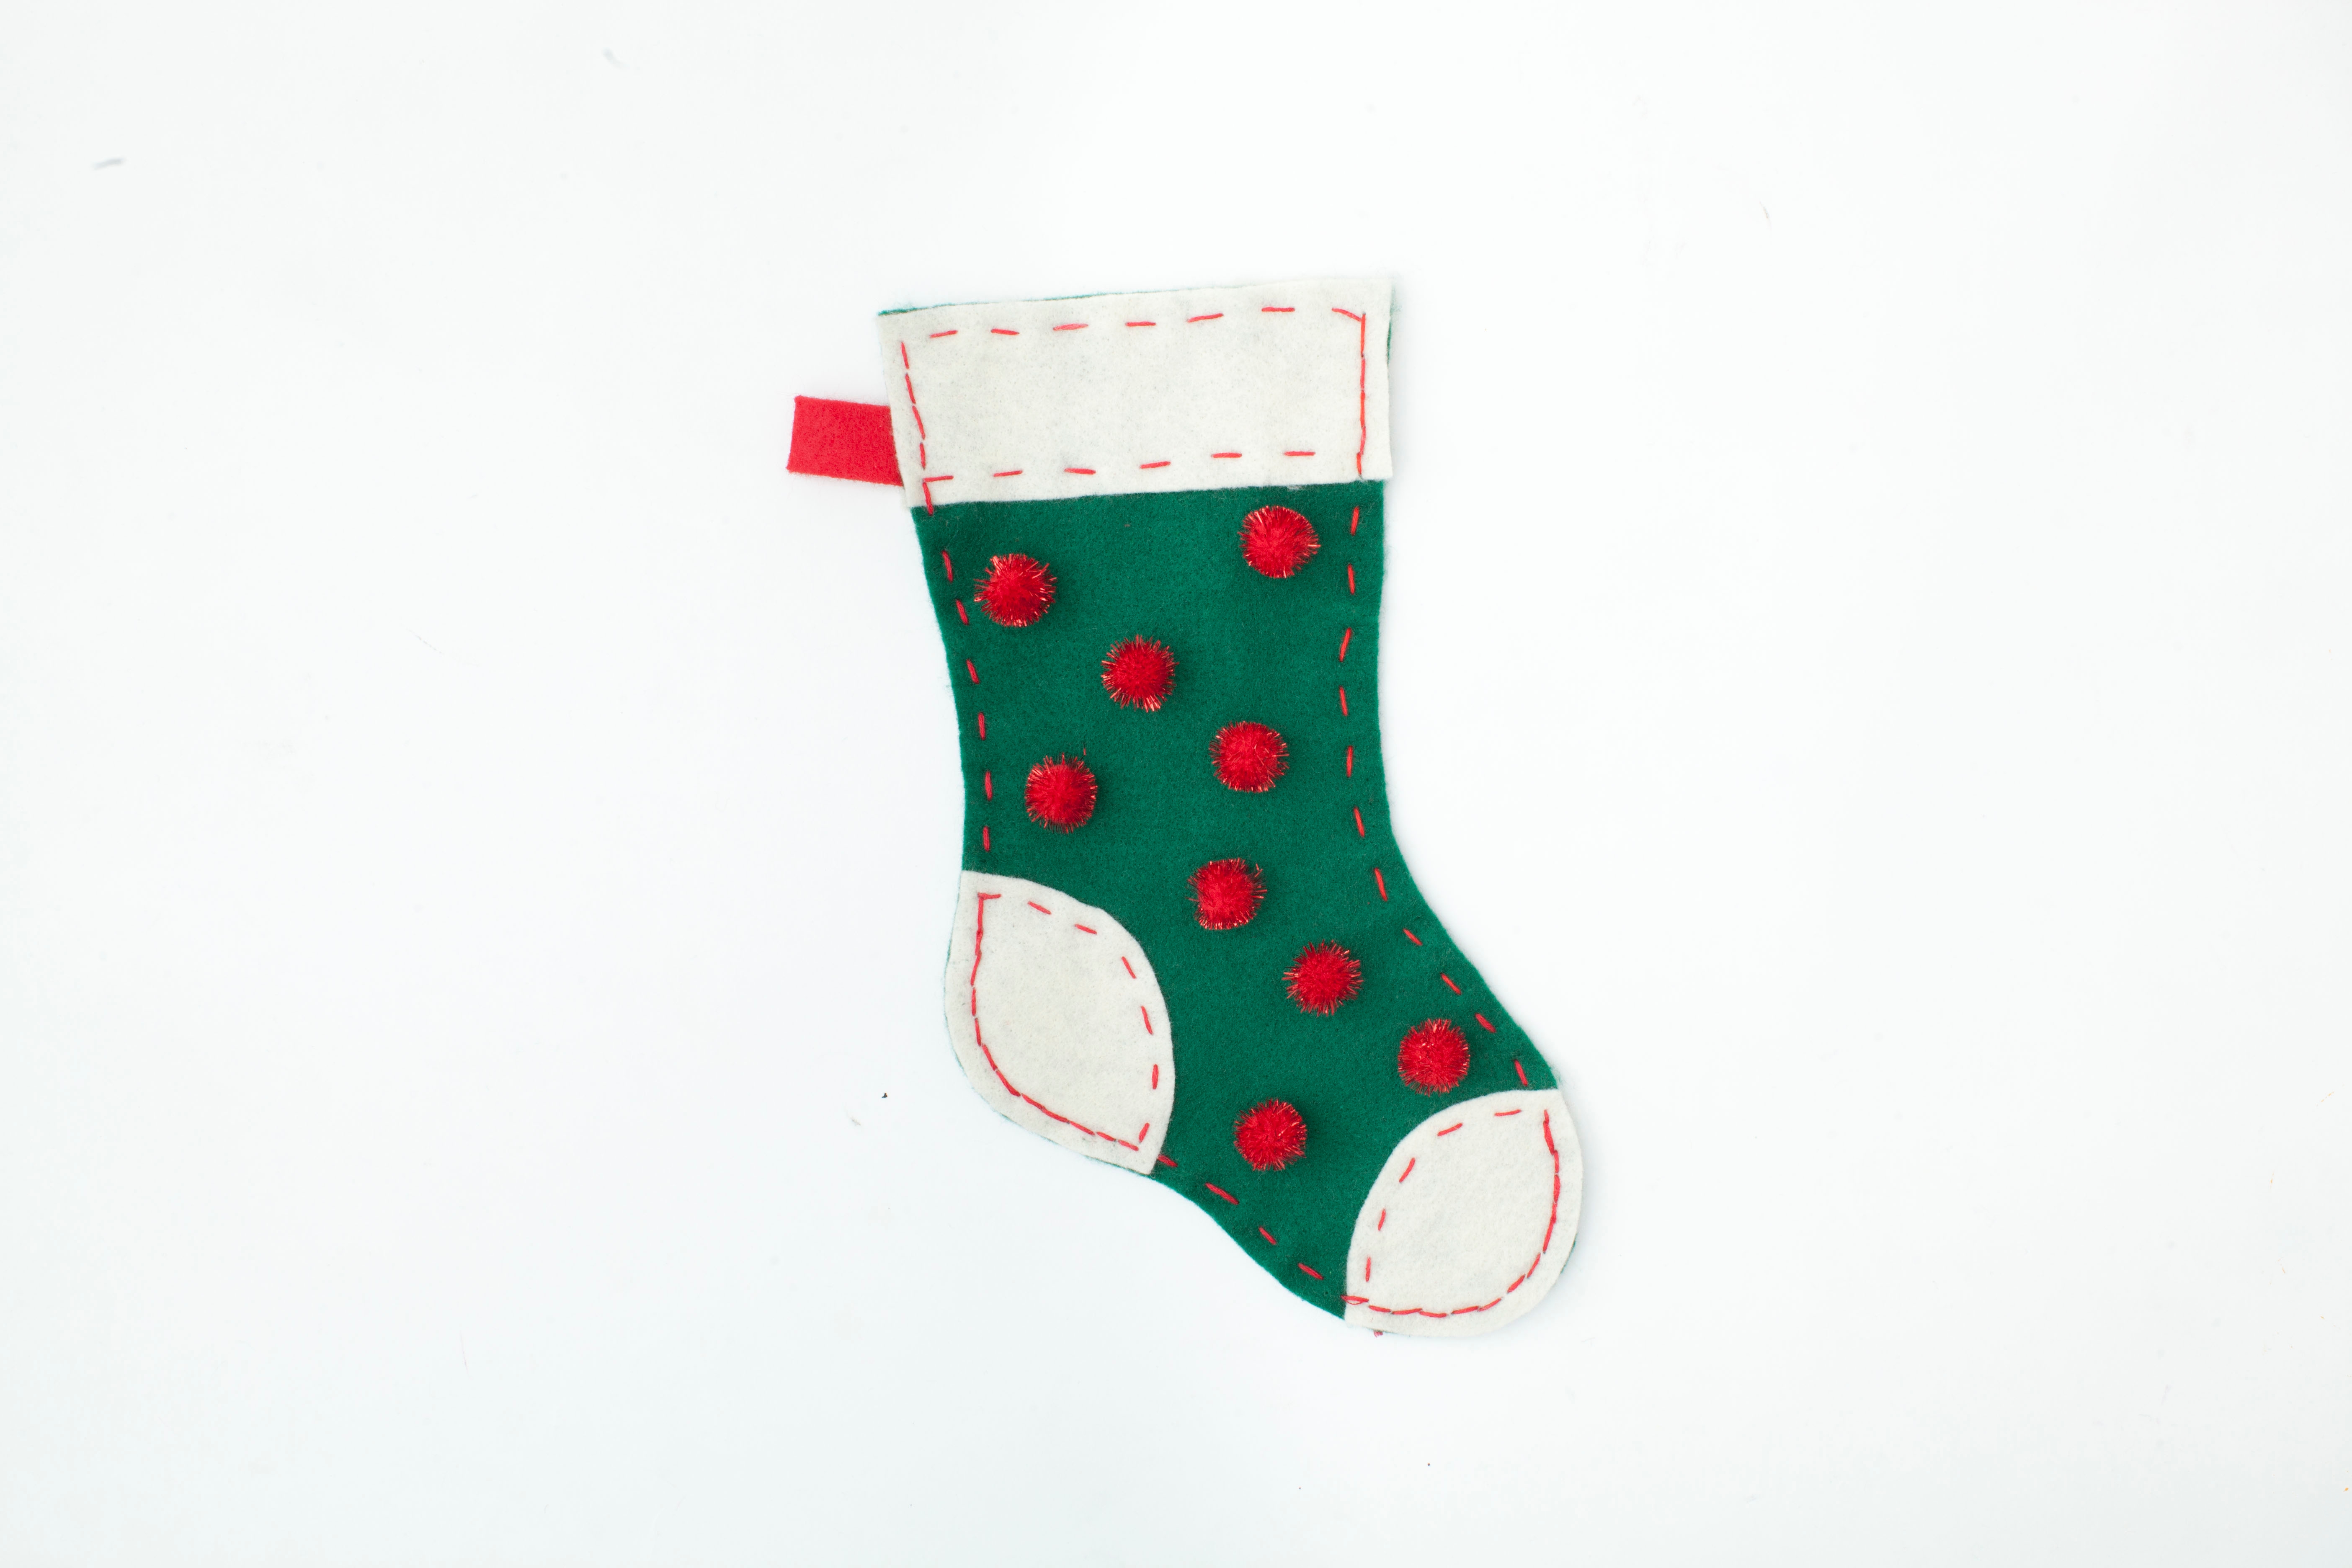
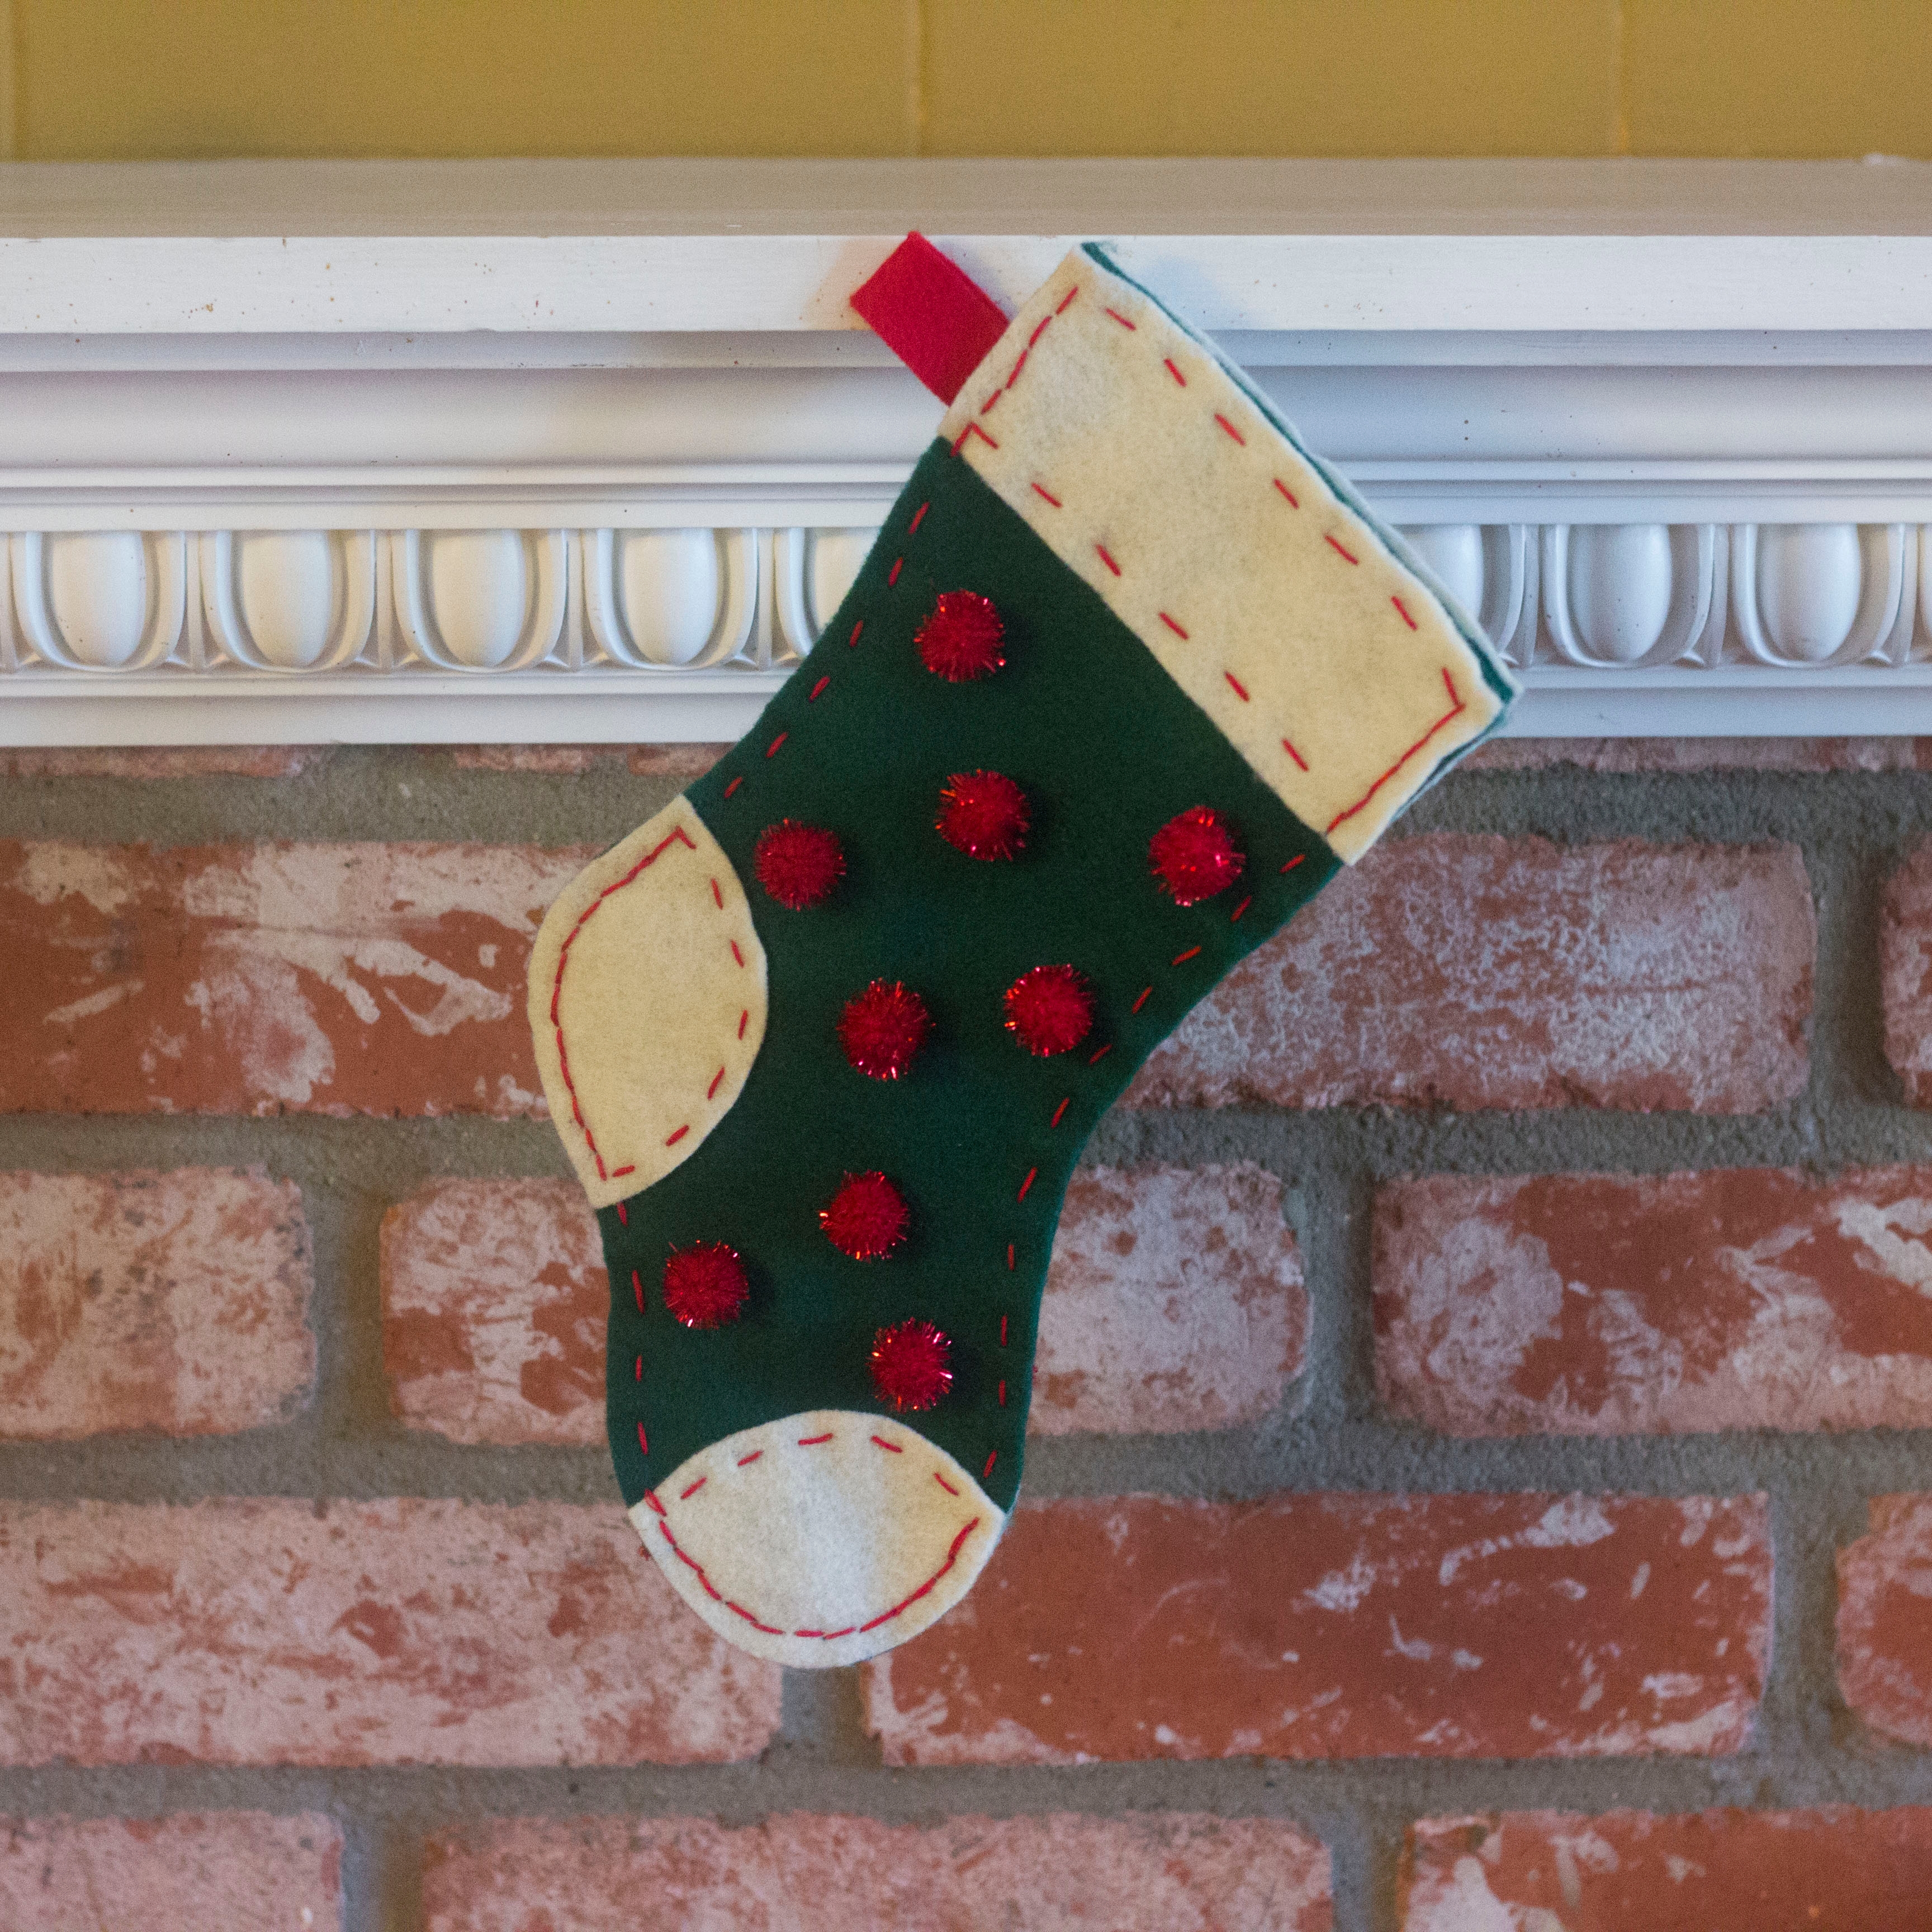
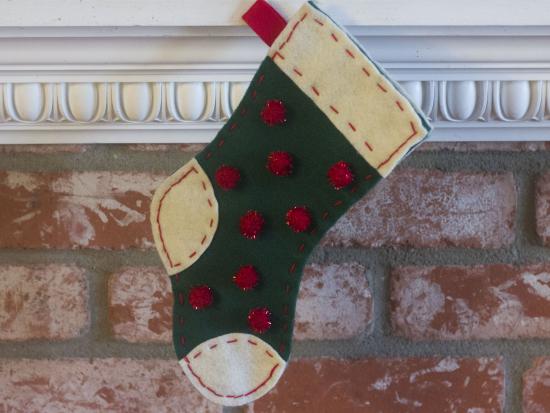
Done!
Hang up your stocking and stuff it full of holiday sweets and treats!