
Step-by-step tutorial
Step 1
Gather Your Materials
Paper Snowflake Creating Materials
one piece of printer paper (or copy paper)
scissors (safety scissors are optional)
protractor or ruler (optional)
pencil (optional)
Tip
The materials listed above are enough for one large snowflake. If you want to turn your ceiling into a fantastical snowflake skyline, just add more paper sheets!
Step 2
Create a Snow Crystal Square
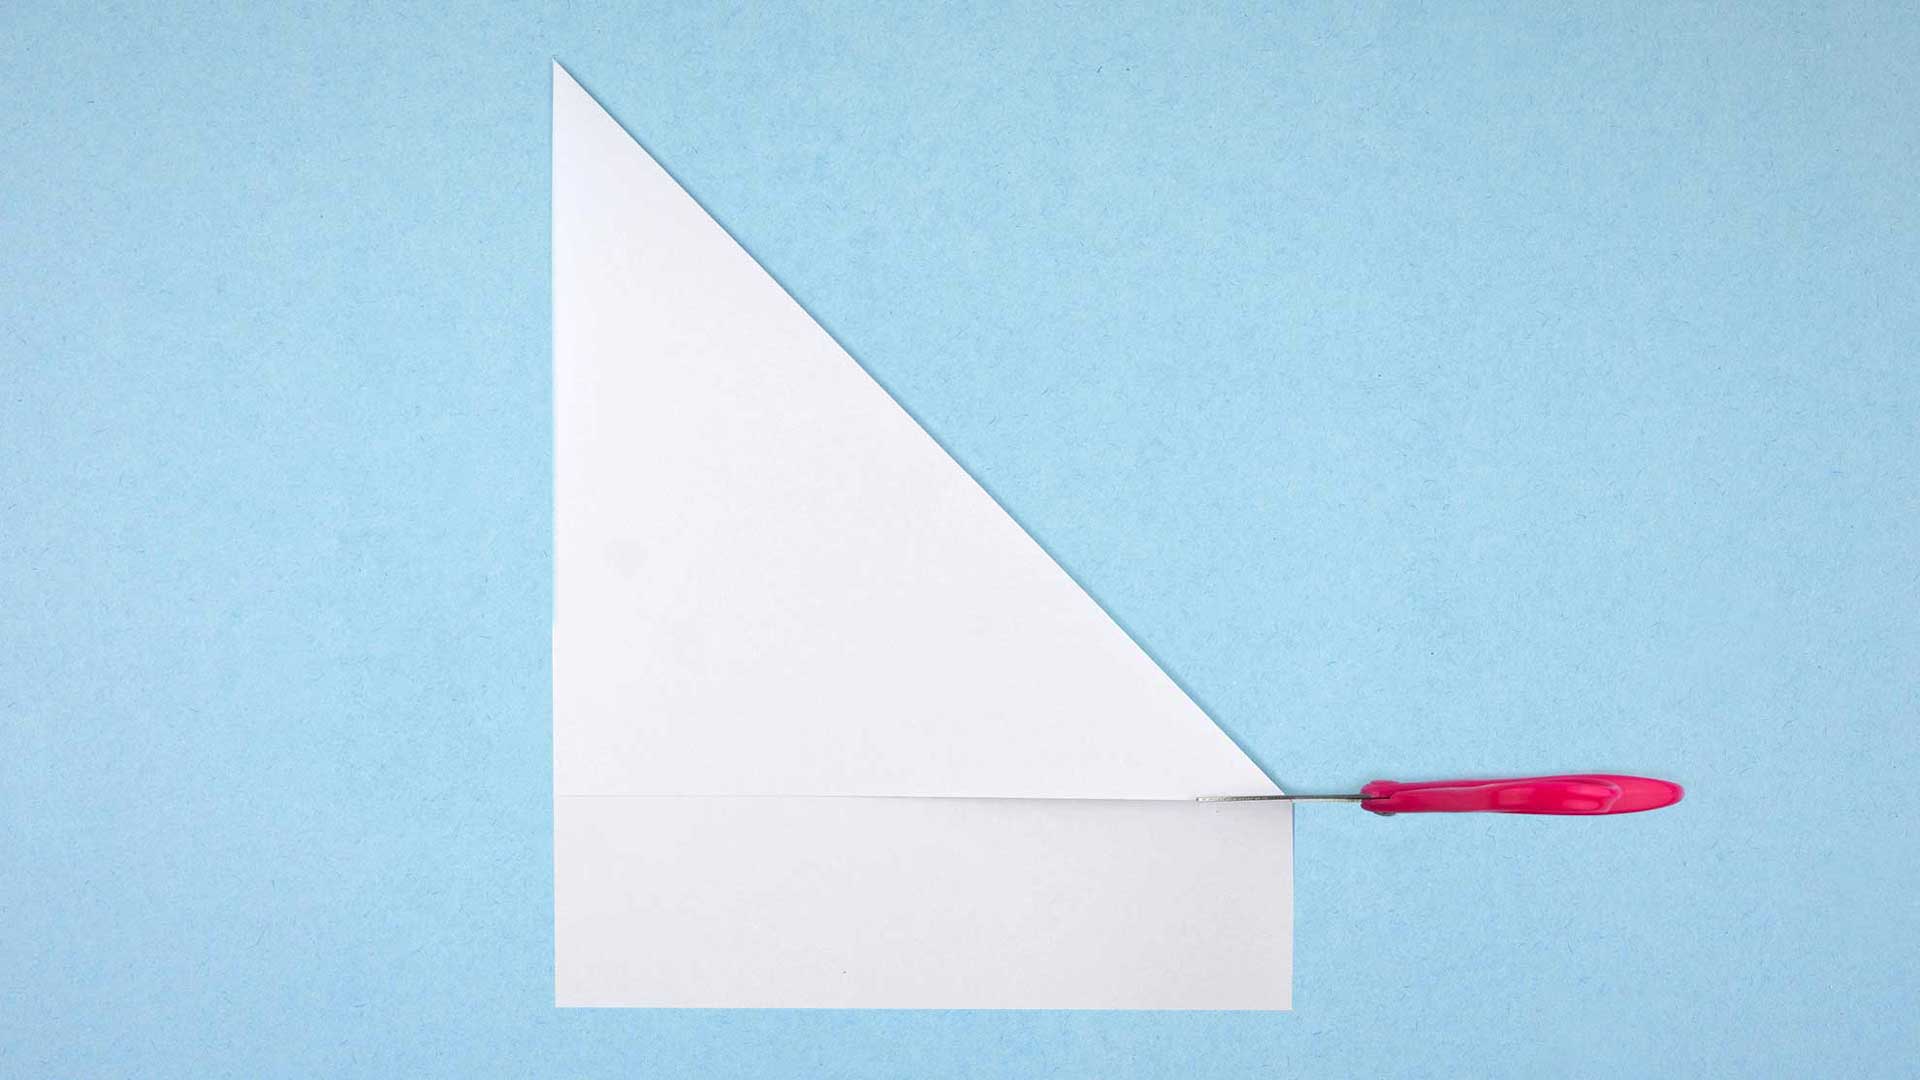
Every paper snowflake needs a paper square to start off with. If you don't have any square cut paper sheets, there is an easy remedy for that. Take the 8.5" x 11" paper you are going to use and fold a corner down. This will form what's known as an isosceles triangle. Now take your scissors and trim off the excess below the triangle shape.


Tip
Side Note: The excess you cut off should form about a two-inch-wide strip of paper that is 8.5" lengthwise. You'll want to recycle the strip because it isn't needed for this experiment.
Step 3
Fold and Refold
If you've already folded your paper over to form a triangle and cut off the excess paper, you are ahead of the game! Now fold the large triangle in half. This should make a smaller triangle. Try your best to make clean and straight creases!

Step 4
It's Time to Divide and Conquer Your Triangle!
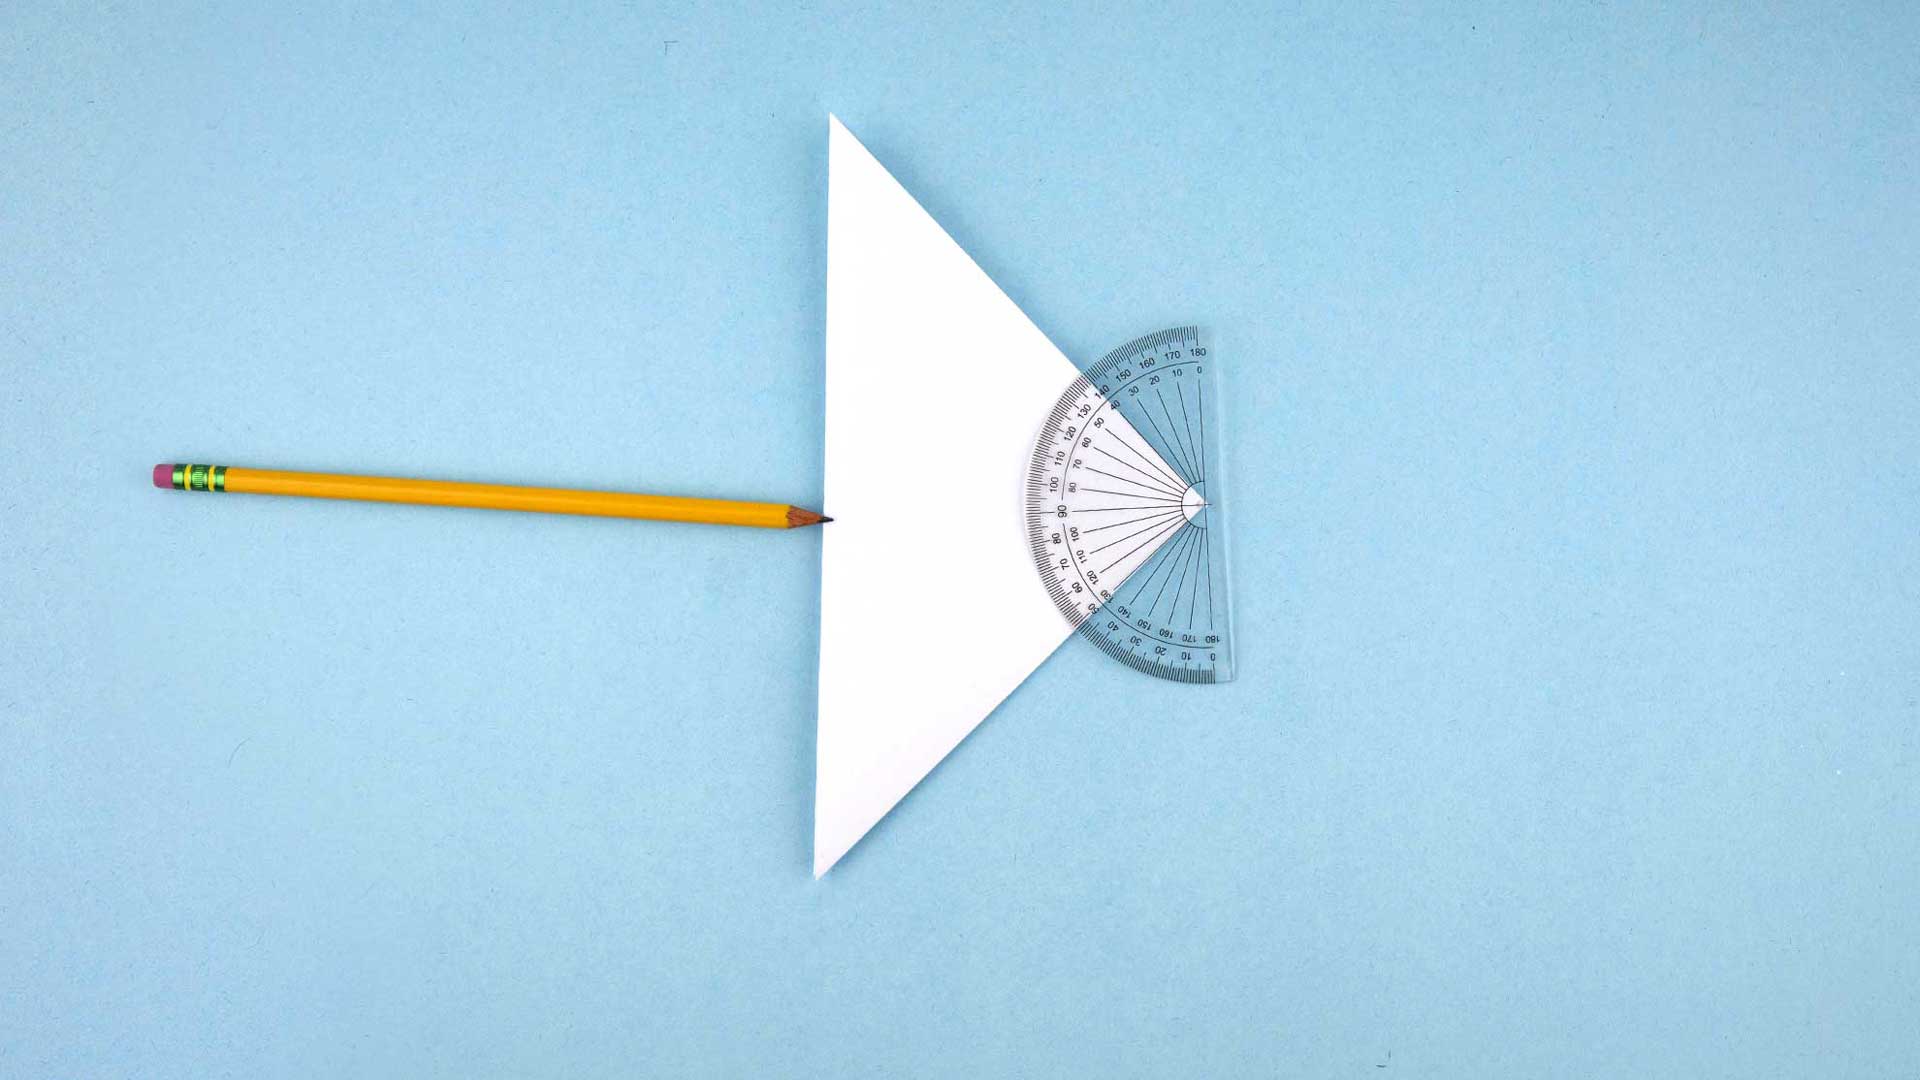
Now, the smaller triangle needs to be divided. How do you do that? Some snowflake makers use a protractor. It's time to use your imagination (or a pencil.) Visualize what the triangle would look like divided into thirds. For accuracy using the protractor find the apex of the triangle, the corner opposite the longest side of the triangle to divide it into three equal parts. When using the protractor each third is a 30-degree angle. If you feel confident in creating even section divisions without a protractor you can draw on the sectional lines. (This helps make it easier to get the cleanest fold.)
Step 5
To the Left
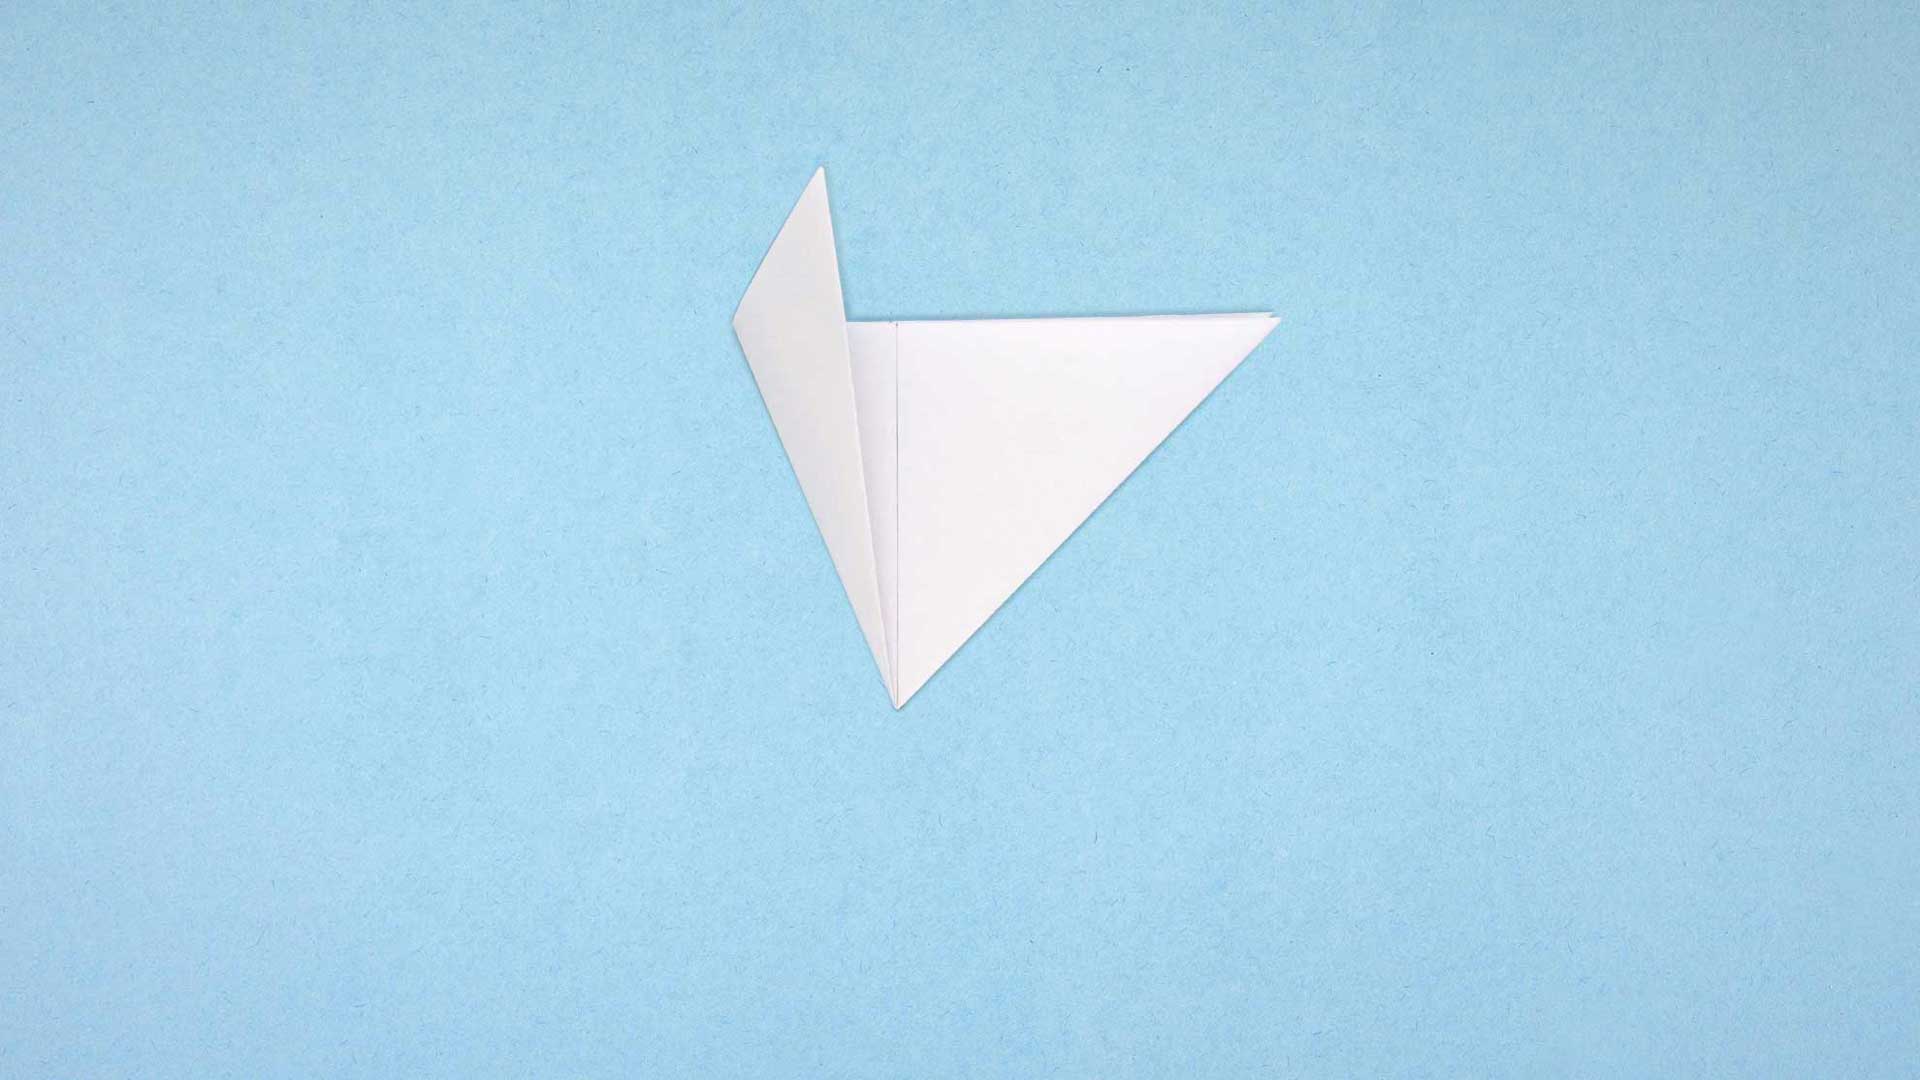
After you've divided your triangle evenly, it's time to fold. As mentioned before snowflakes have symmetry. Folding your triangle correctly creates a kind of symmetry, a uniformity, a balance. Take the far left fold and fold it over the middle section.
Step 6
Now to the Right
Now what you've done with the left fold, do with the right fold. The paper should look like an arrow pointing downward.
Step 7
Flip It Forward
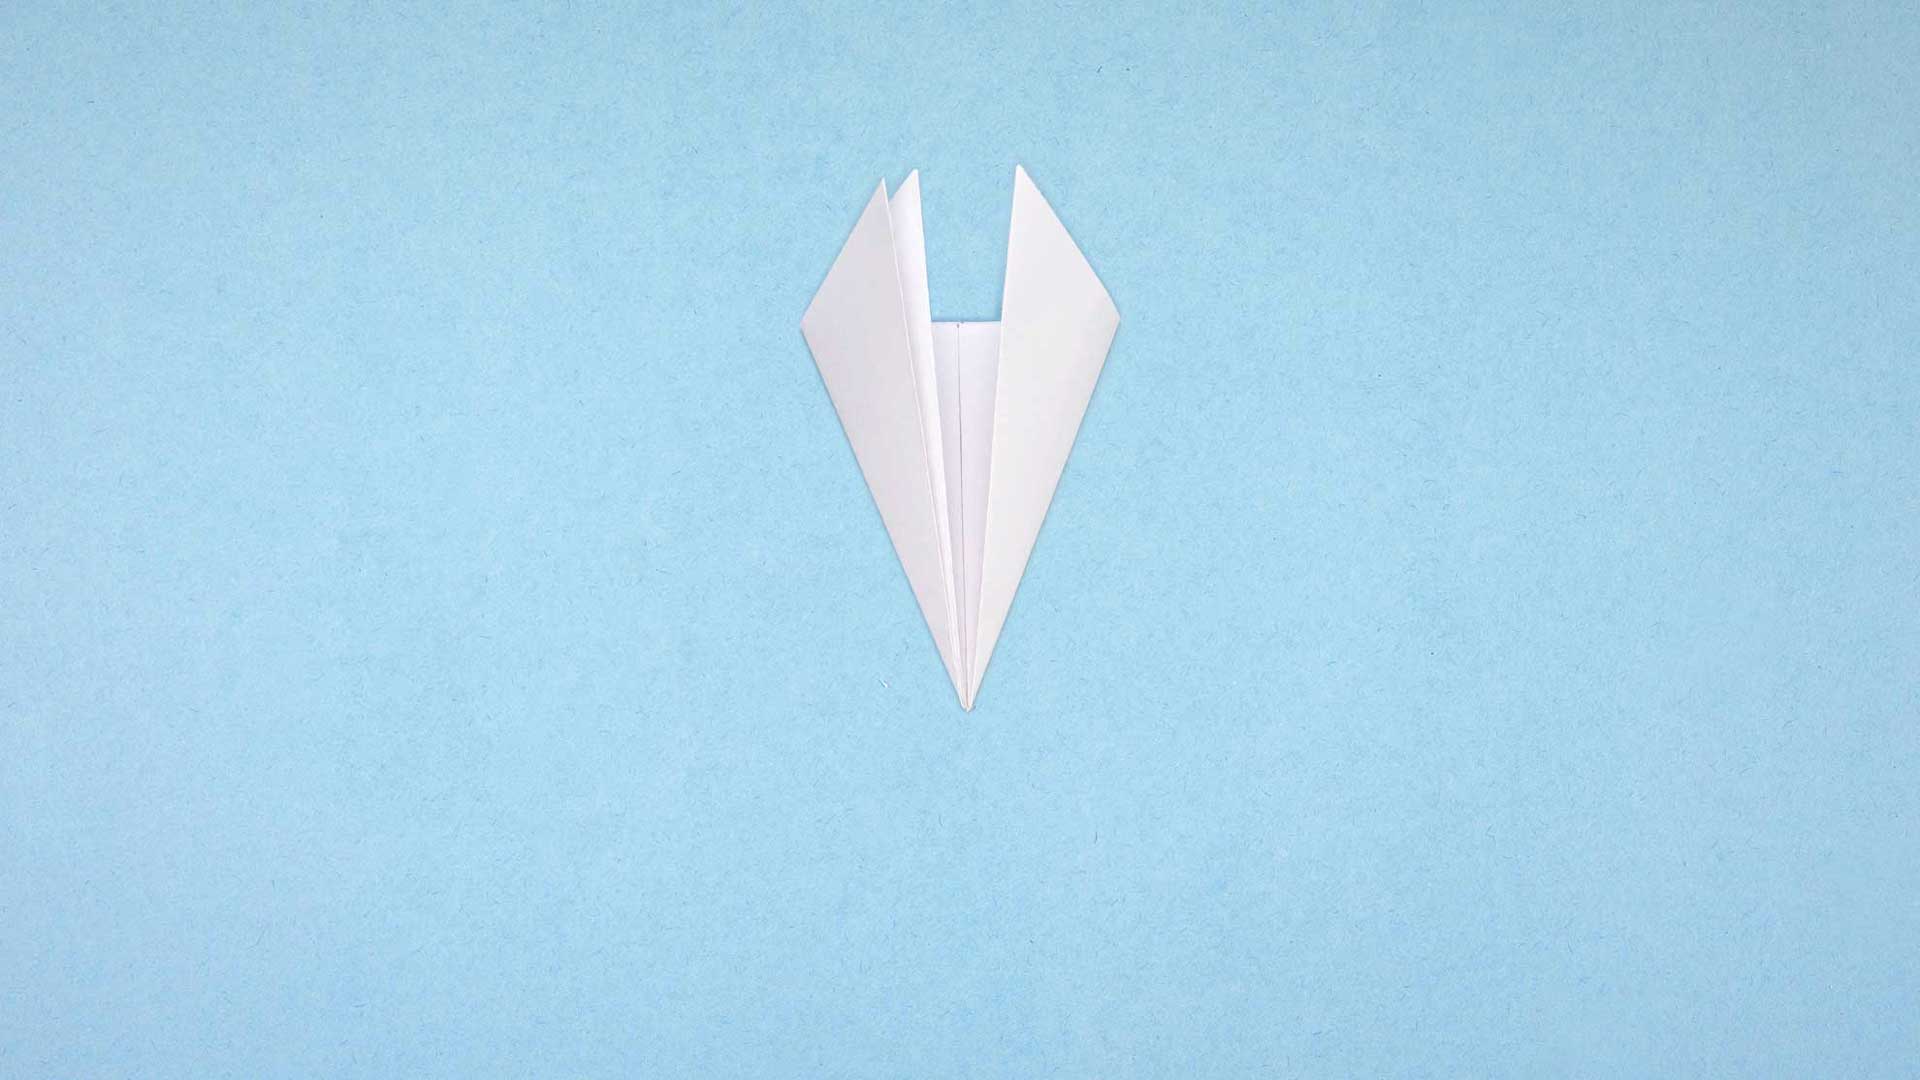
Once the folding is done, flip the arrow shape over. There should be a horizontal edge that has been created at the top. You are almost ready for the most creative step in the snowflake creating process!
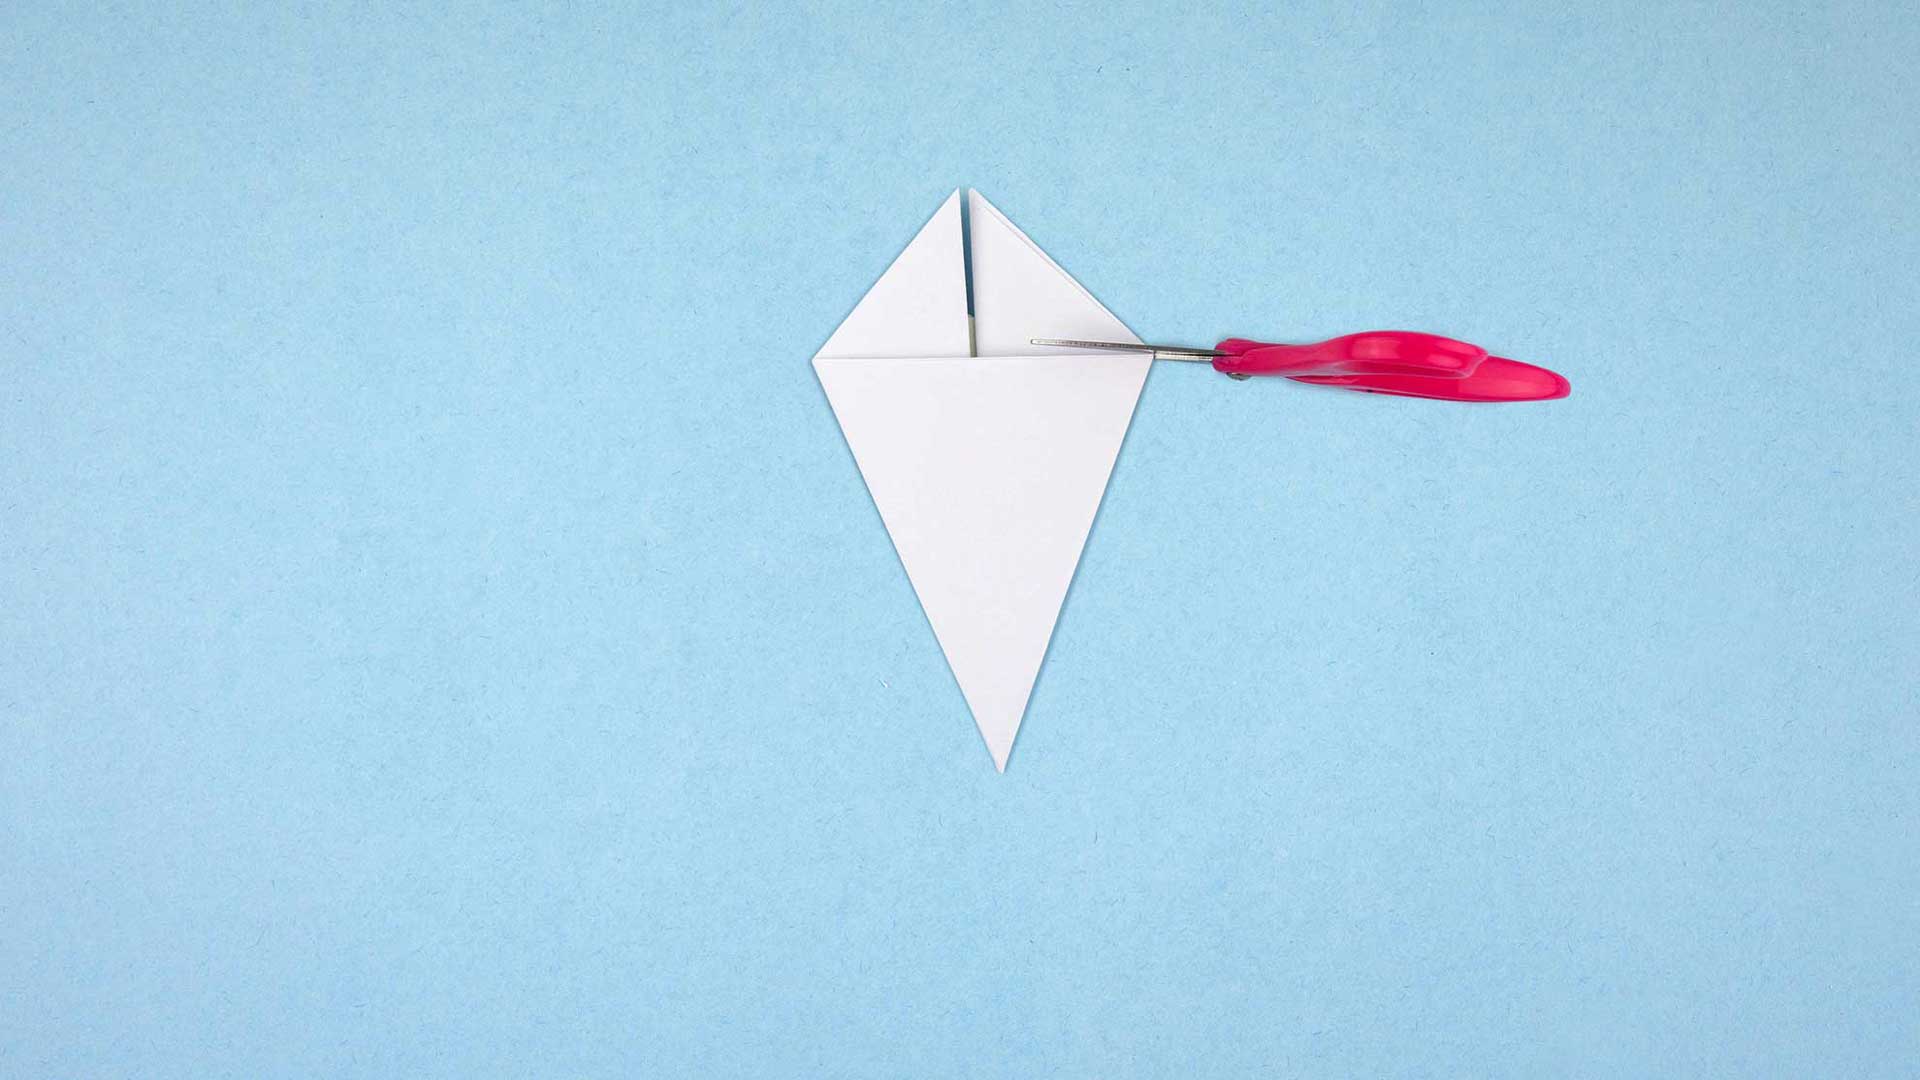
Step 8
Taking a Cut Above the Rest
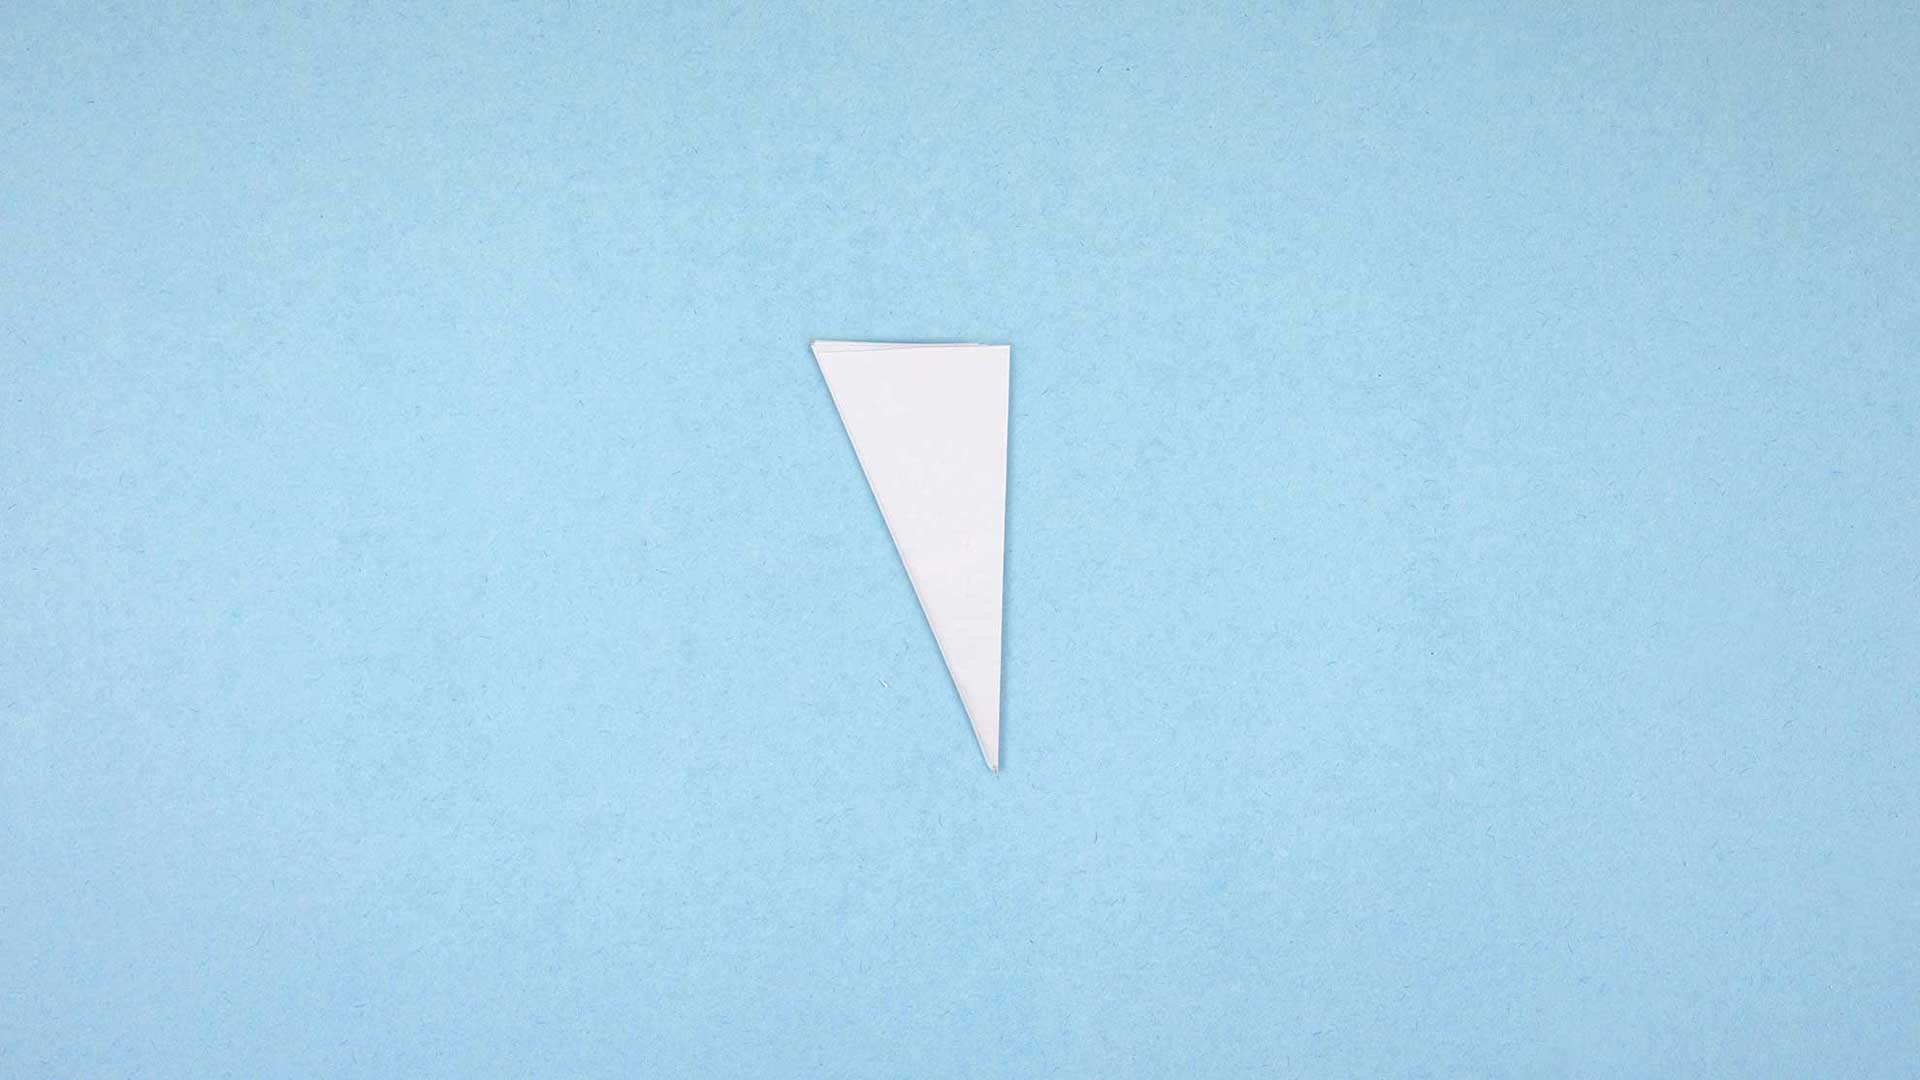
See that horizontal (left to right) edge mentioned in the previous step? It's time to take your scissors and cut along its length. Your paper should now sport a wedge-like shape.
Step 9
Shape it 'Til You Make It
Here's where many young artists get frost-bitten by the snowflake-making bug. Make sure to keep the wedge piece folded, now you can show off your shape cutting prowess and cut out shapes from the edges. Pretty soon you'll have a paper wedge that has crazy, cool designs just waiting to be revealed!

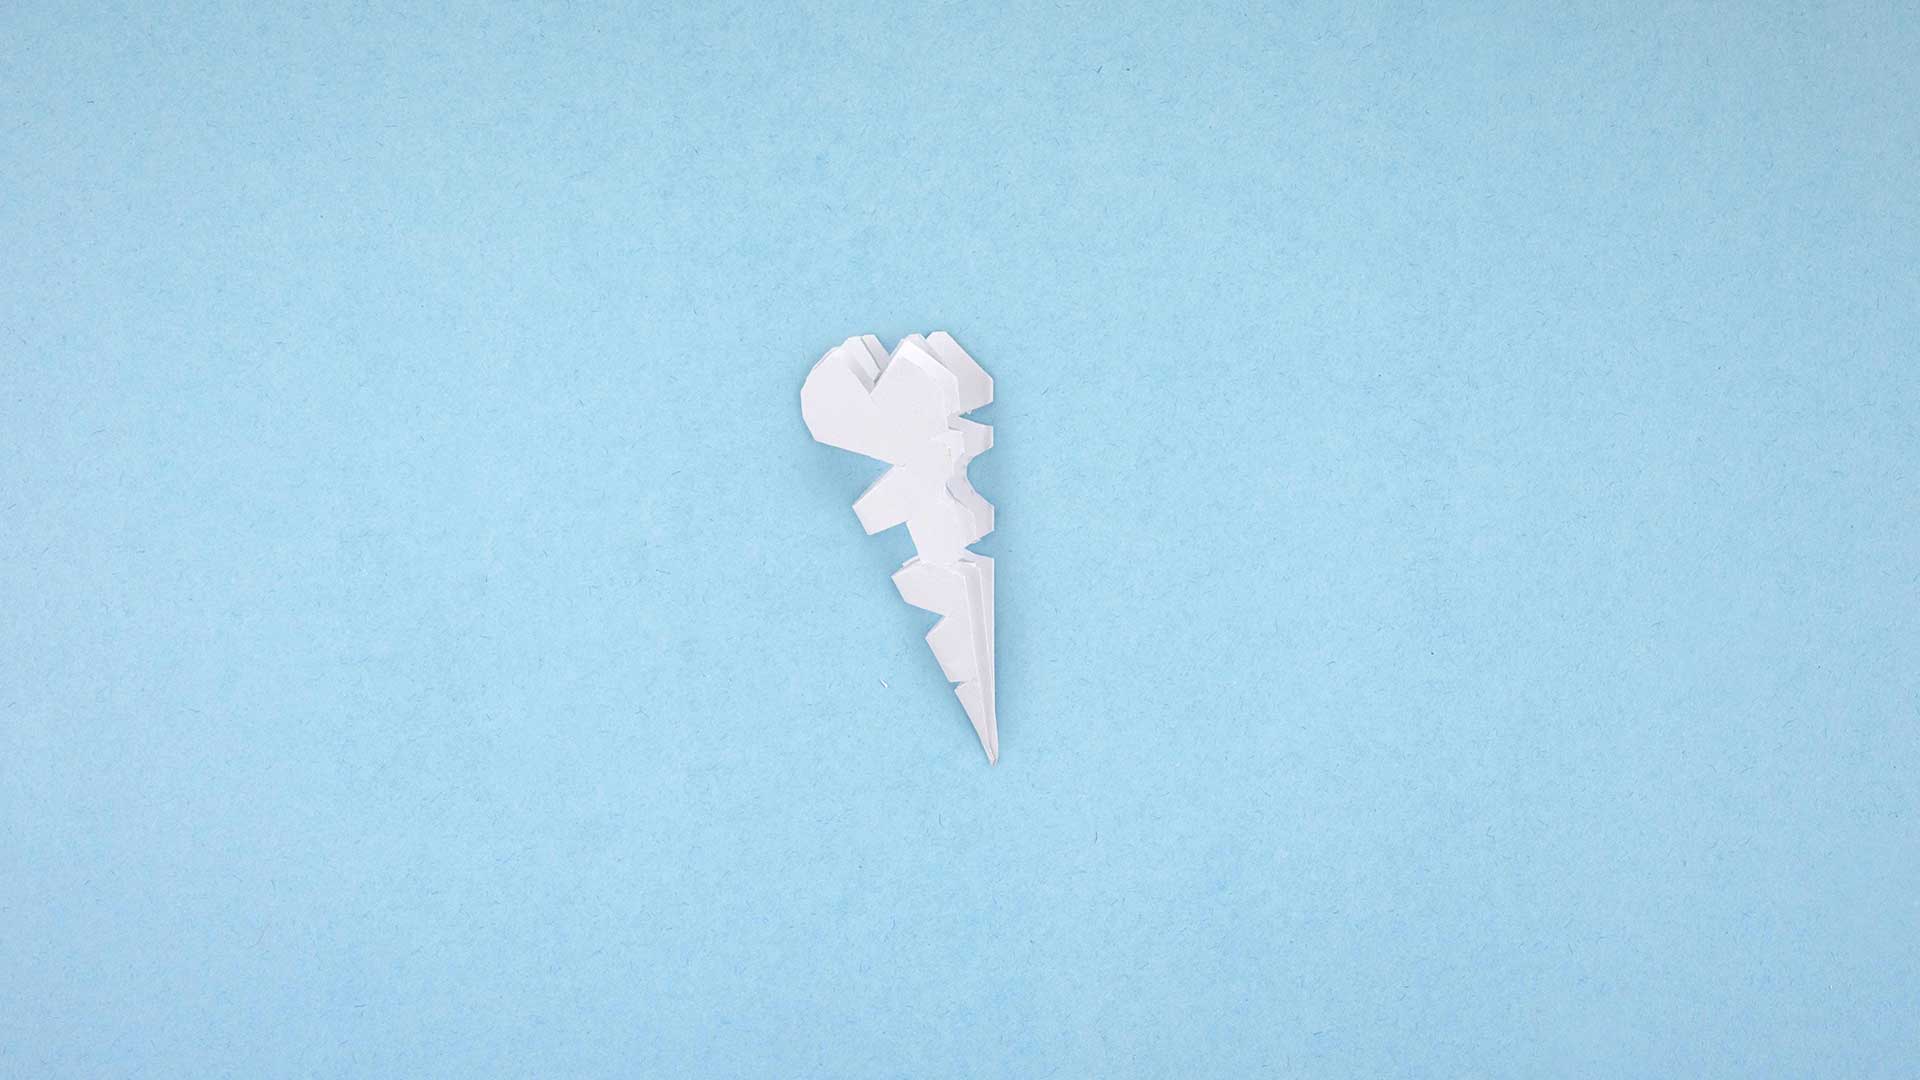
Tip
For beginners it's best to cut out small triangle shapes along the sides. After they feel confident they can try other shapes. Never cut all the way across from end to end when making shapes, it will cut your snowflake in half!
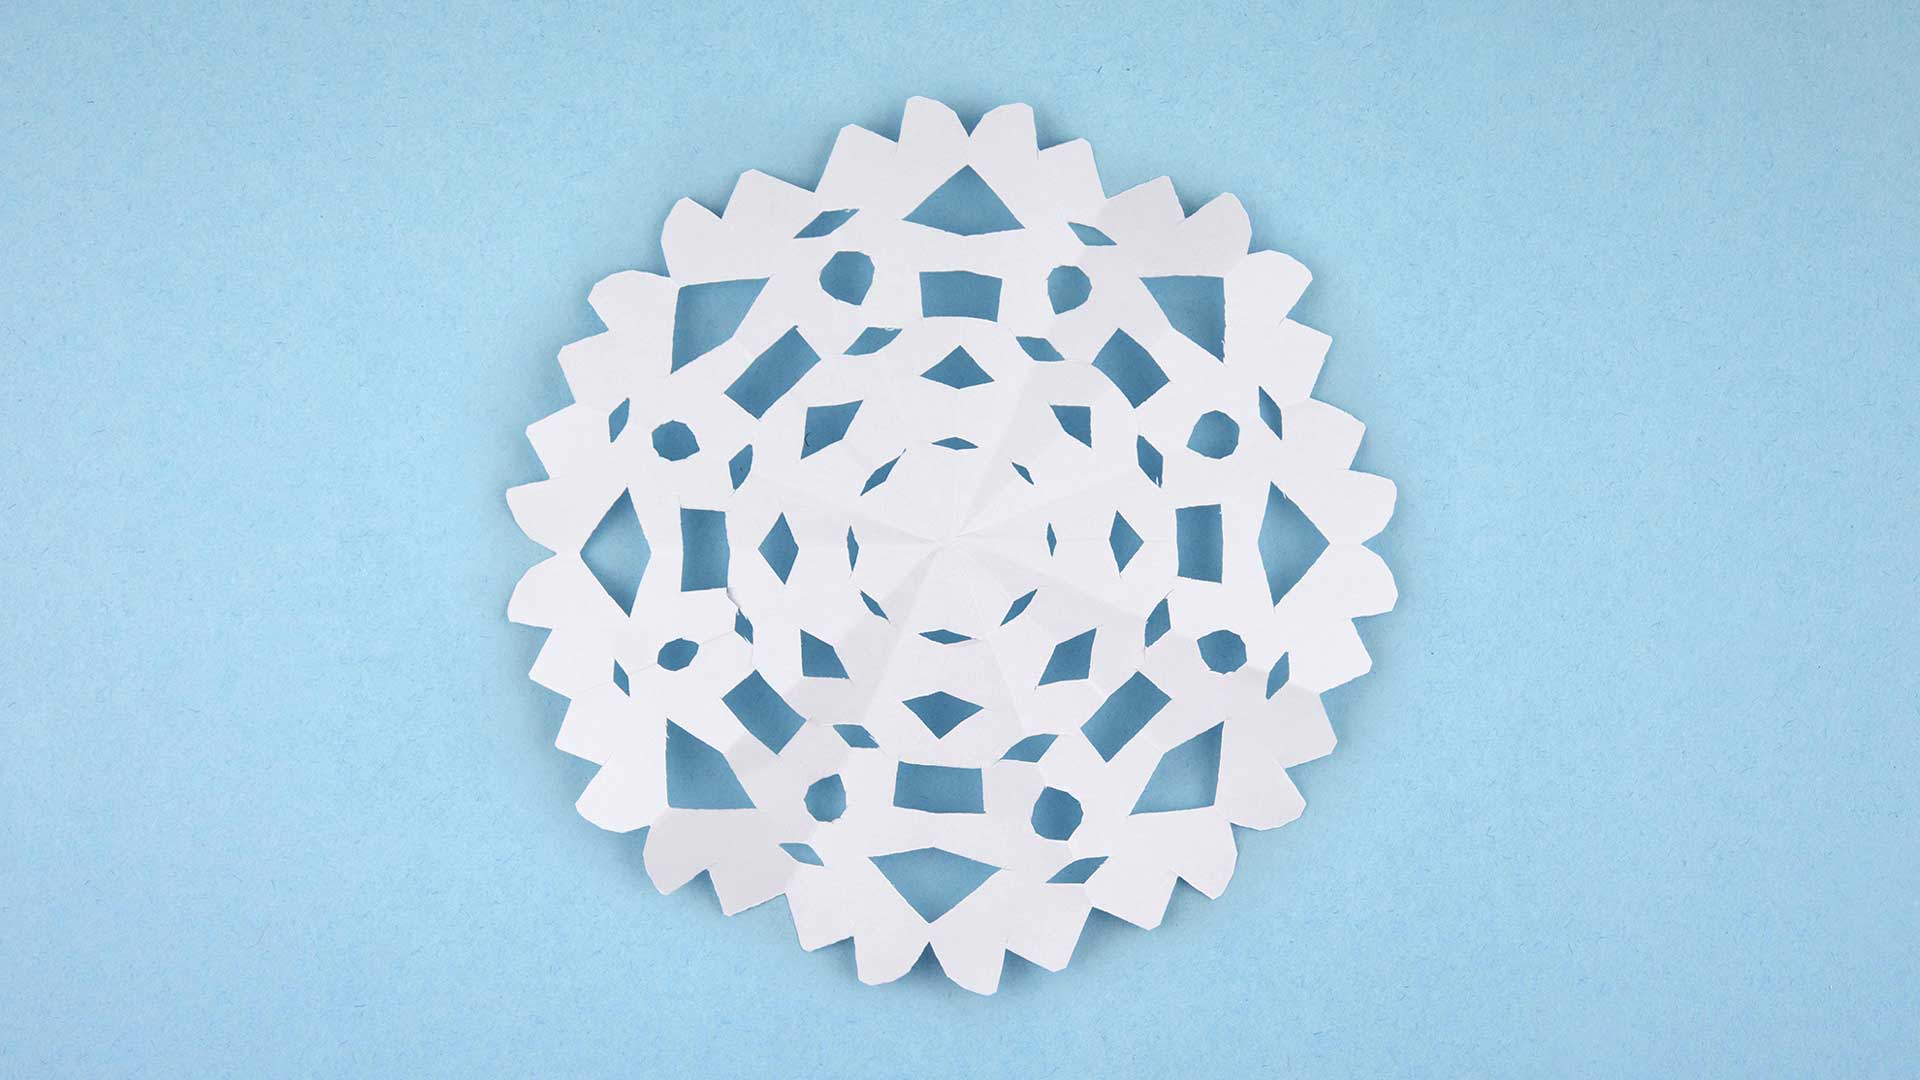
Final result!
Unveil the Snowflake Masterpiece!
Now it's time to unfold the paper. What kind of snowflake will appear? It should be a 6-pointed snowflake, but then, half the fun is in the mystery of the reveal! Every snowflake is different! If you've done all the folding and cutting, you'll have a symmetrical design that will bring a delightful shiver and warm smile! Clever crafters love being able to show off their tasteful cuts and intricately designed snow crystal creations!


