
Step-by-step tutorial
Step 1
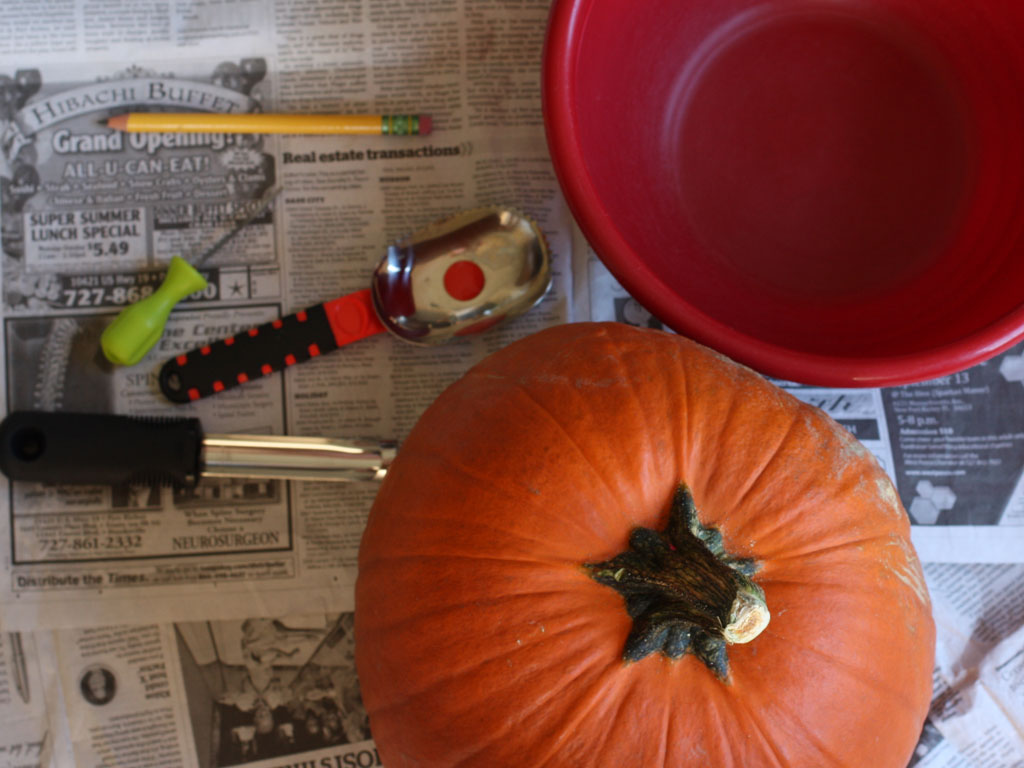
Lay newspaper on the surface you decide to make your pumpkin carving zone. We chose the ground, which gave us more room to move around.

Step 2
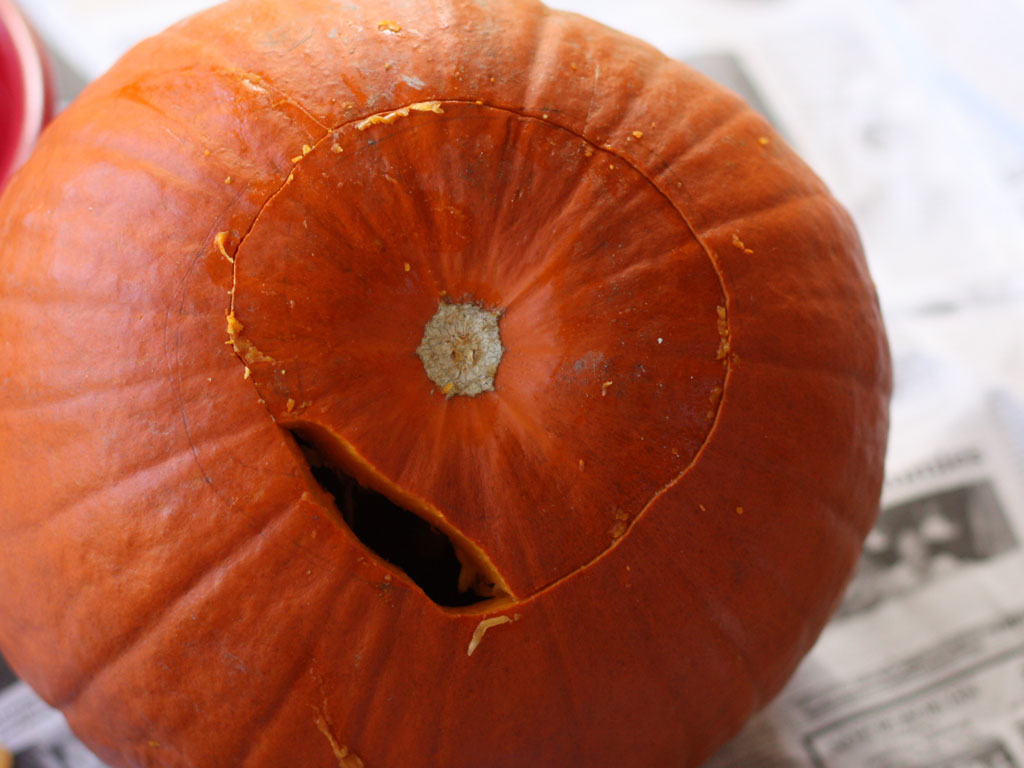
Have an adult cut a hole in the bottom of the pumpkin. We added a little slit to make it easier to get the bottom out.
Step 3
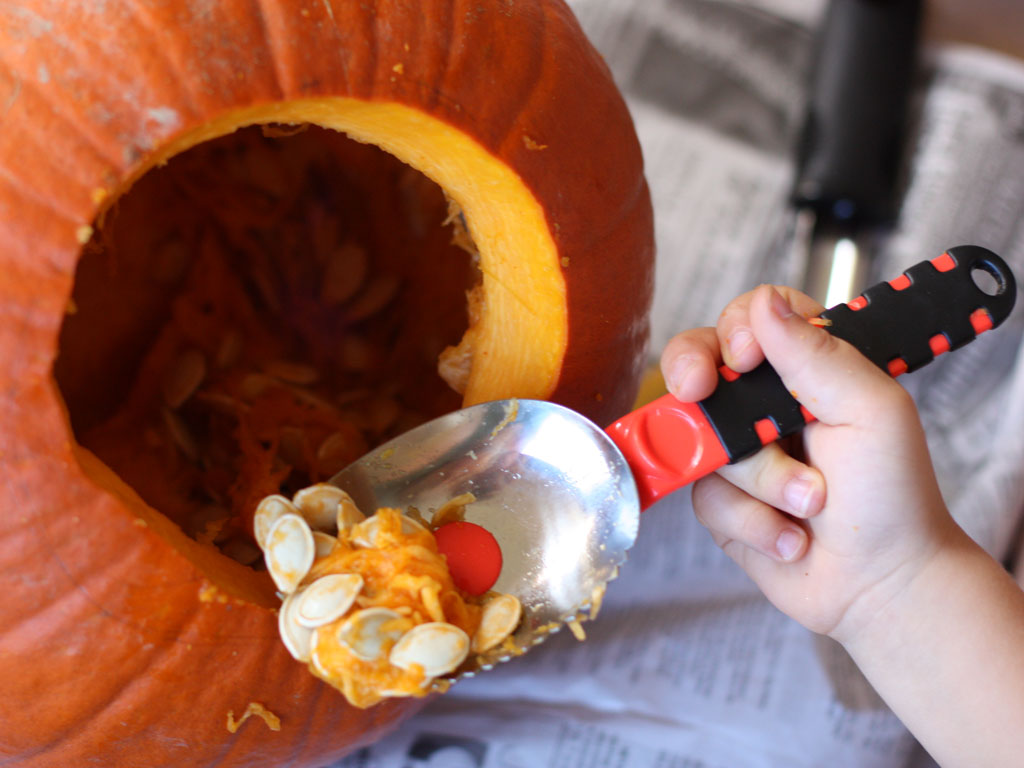
Gut the pumpkin! (This is some kids' favorite part and others' least favorite part.) We have an awesome scooper that makes the job much easier--you can see it to the left. Drop all the guts in a bowl so you can go through it later and bake pumpkin seeds.
Step 4
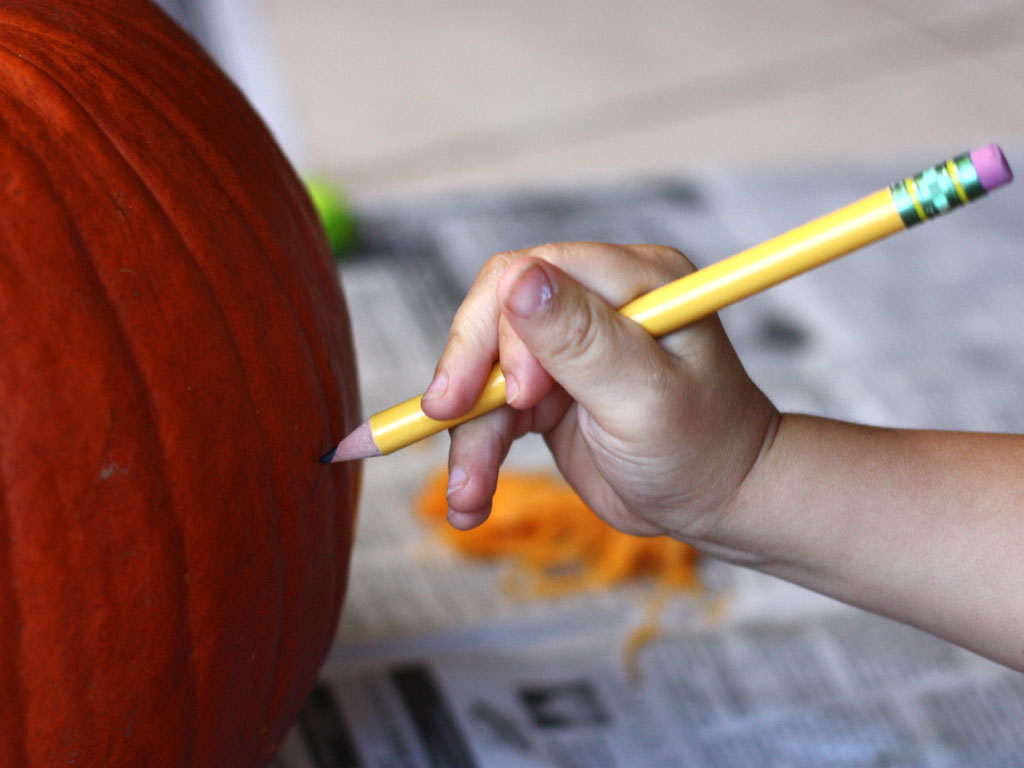
With a pencil, have your child draw a picture or write a letter onto the pumpkin. We did an "H" for our last name.
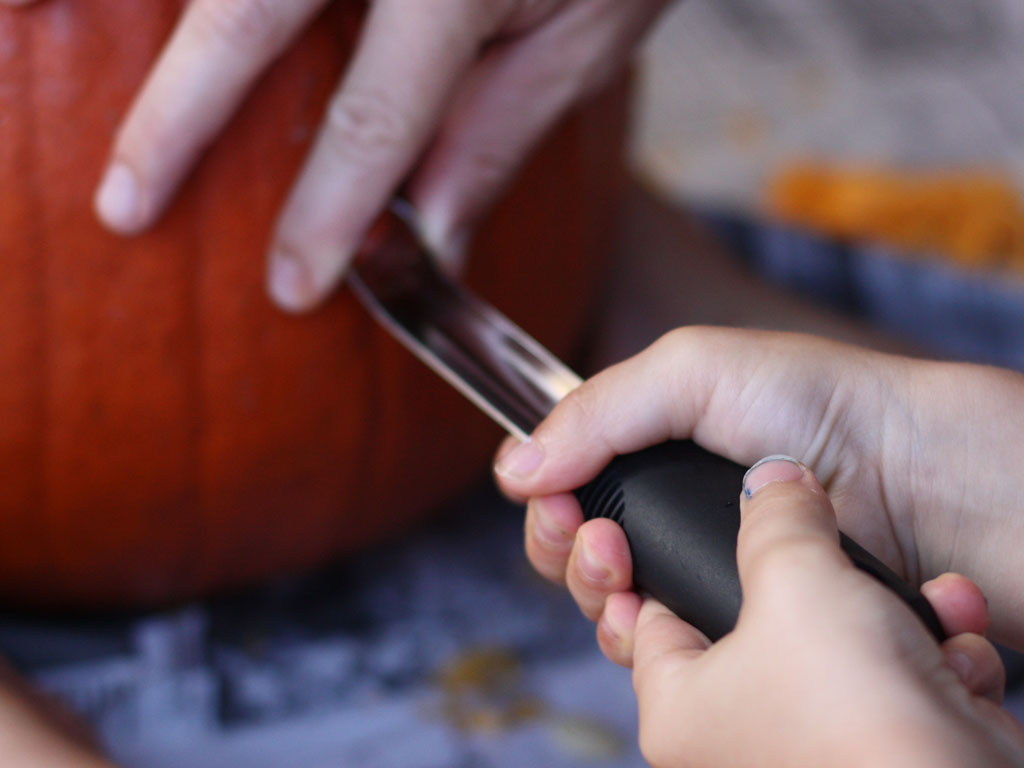
Step 5
Now take the apple corer and twist back and forth along the outside of the pumpkin. We helped guide our son where to start the holes so that the "H' was readable.
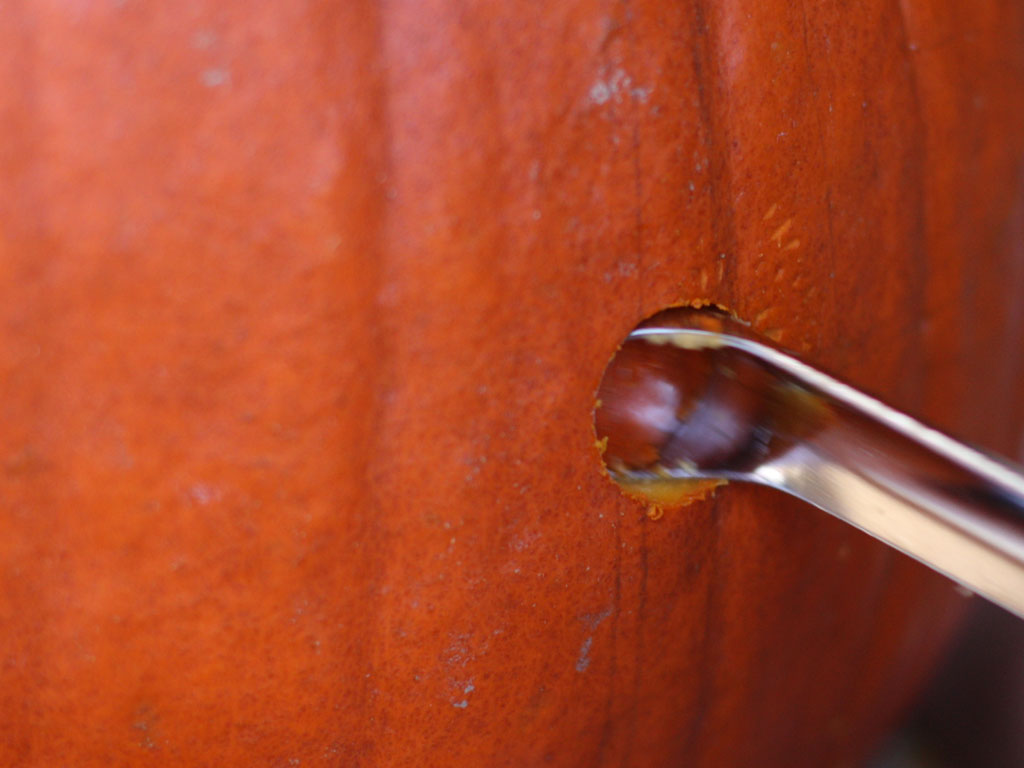
Step 6
As you twist back and forth, eventually you will put holes in the pumpkin. Keep going until you are finished with your design.
Done!
I am so happy with how ours turned out. We can't wait to do this again. Each kid wants their initials in a pumpkin now, which could make for a very cute Halloween welcome for trick-or-treaters!


