Step-by-step tutorial
Step 1
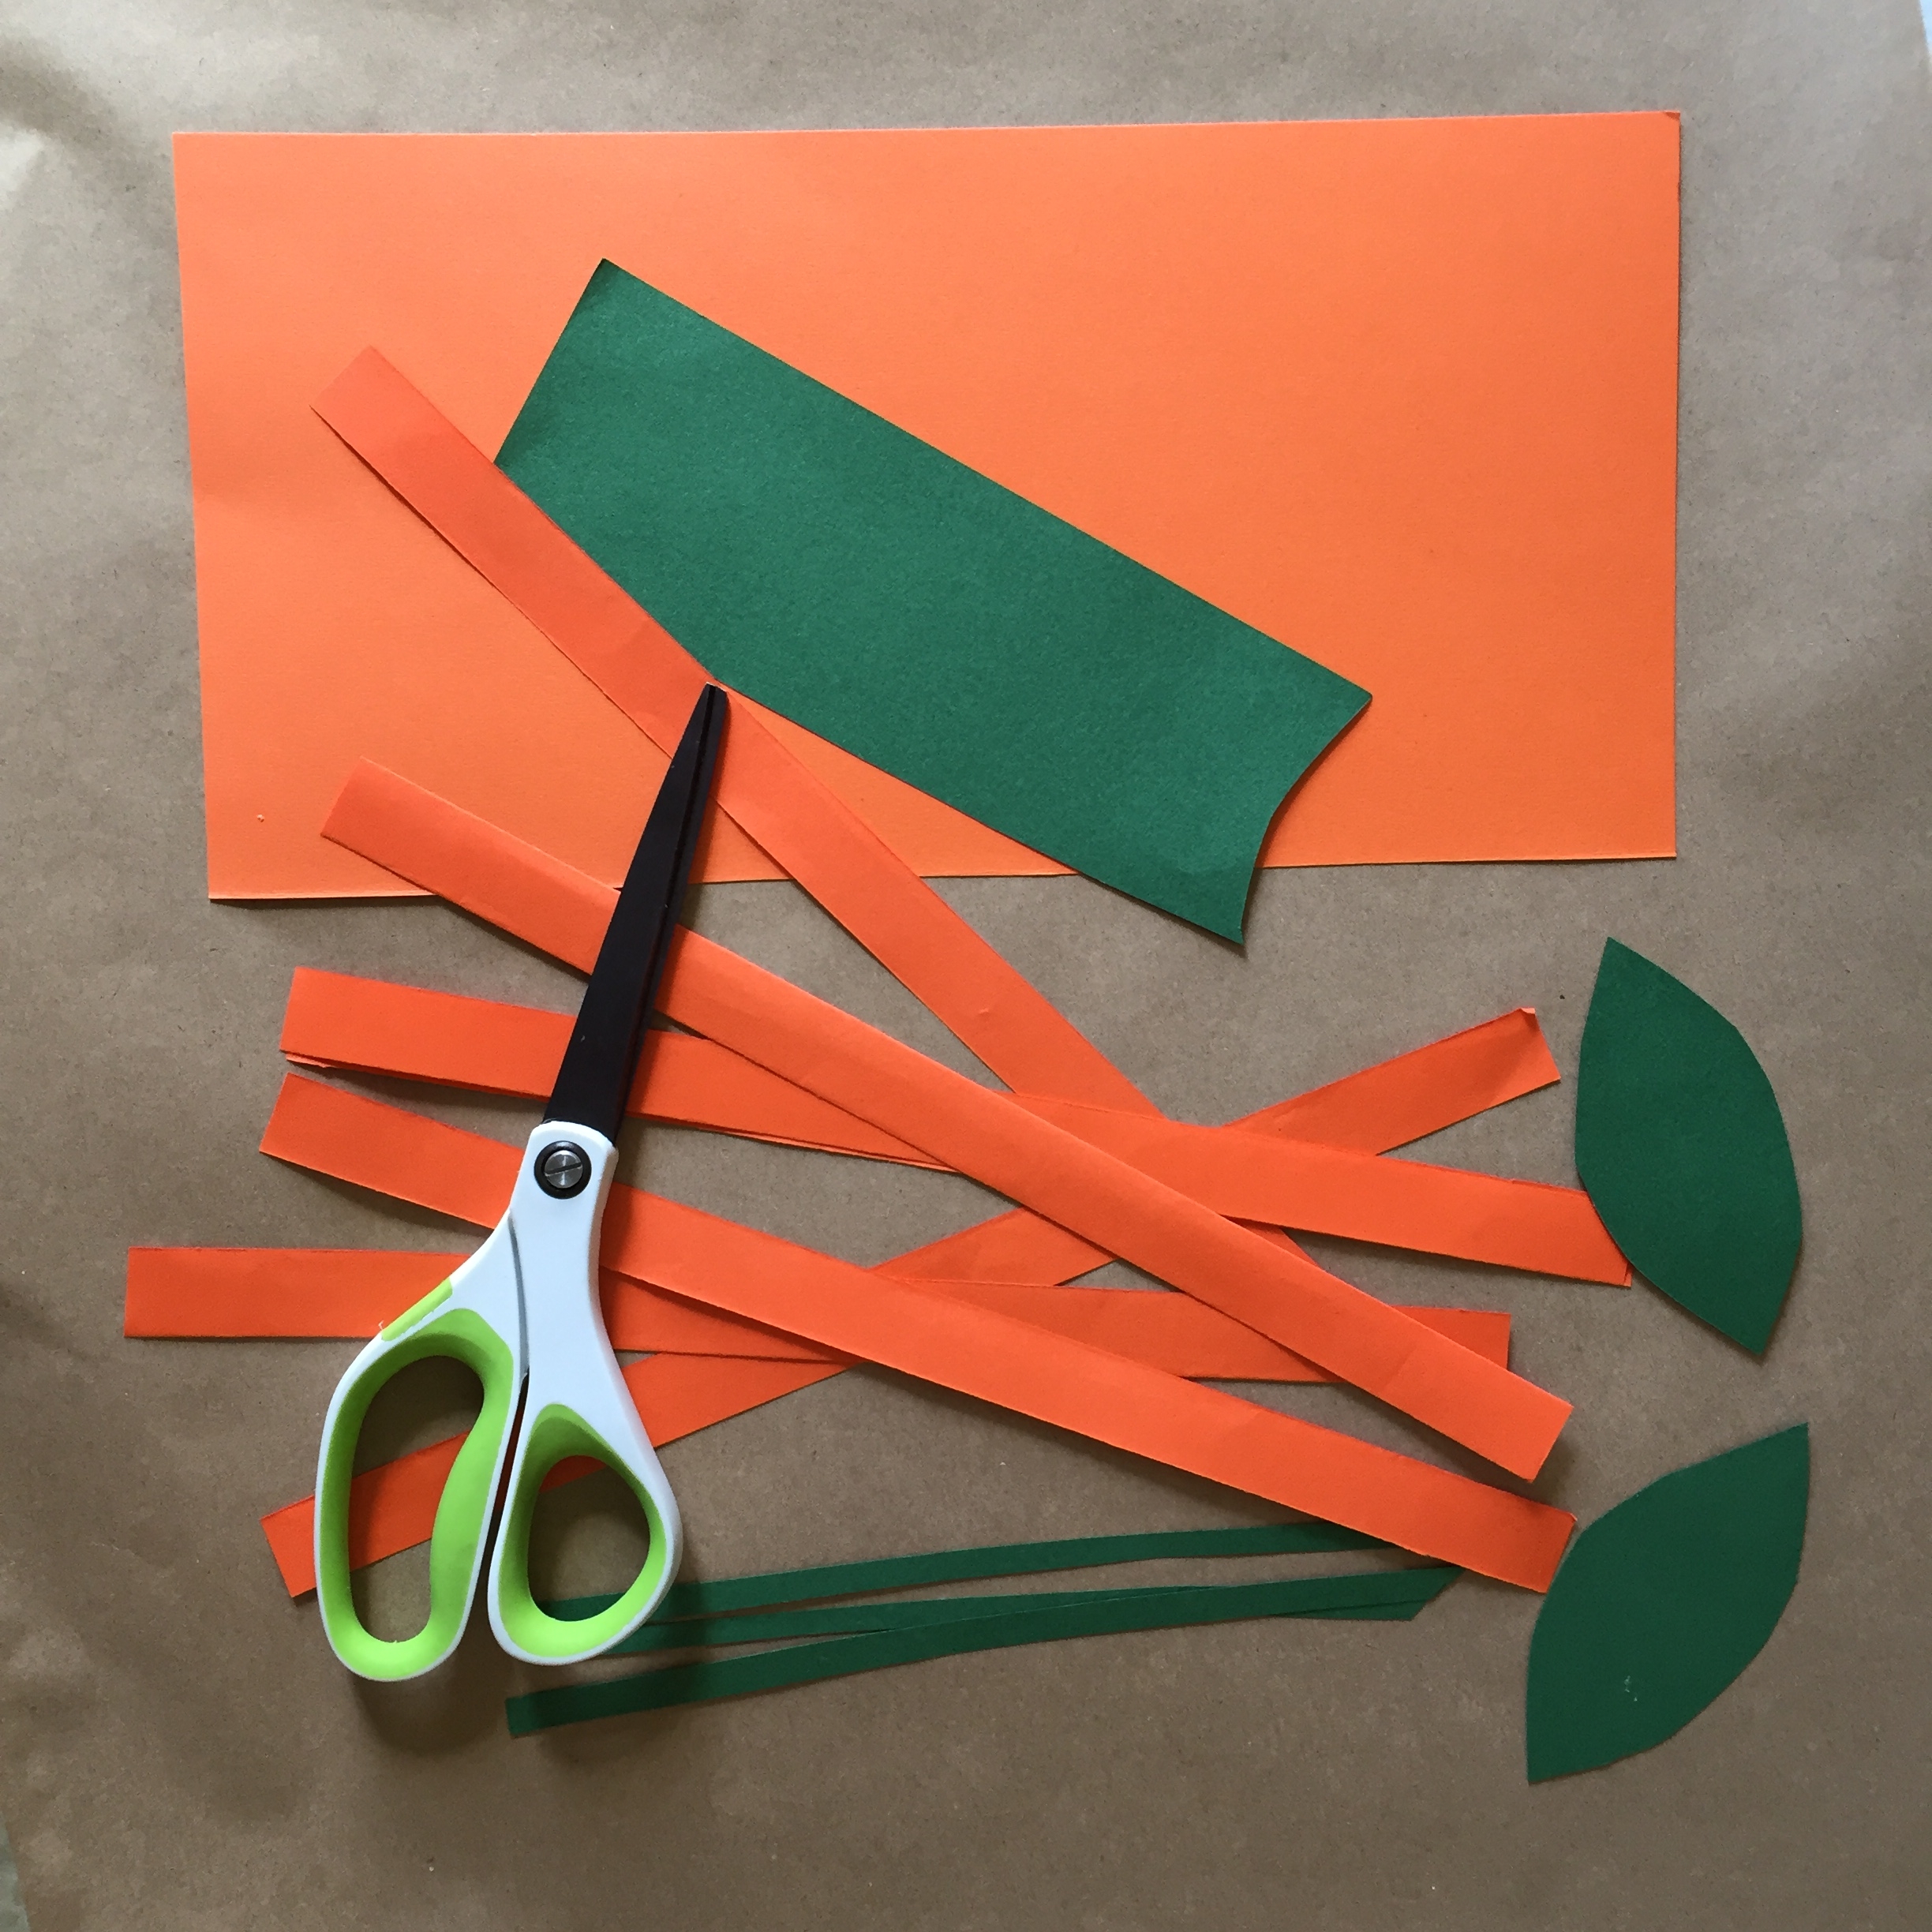
Cut strips from the orange paper. Also, cut out your pumpkin's leaves and vines.

Step 2
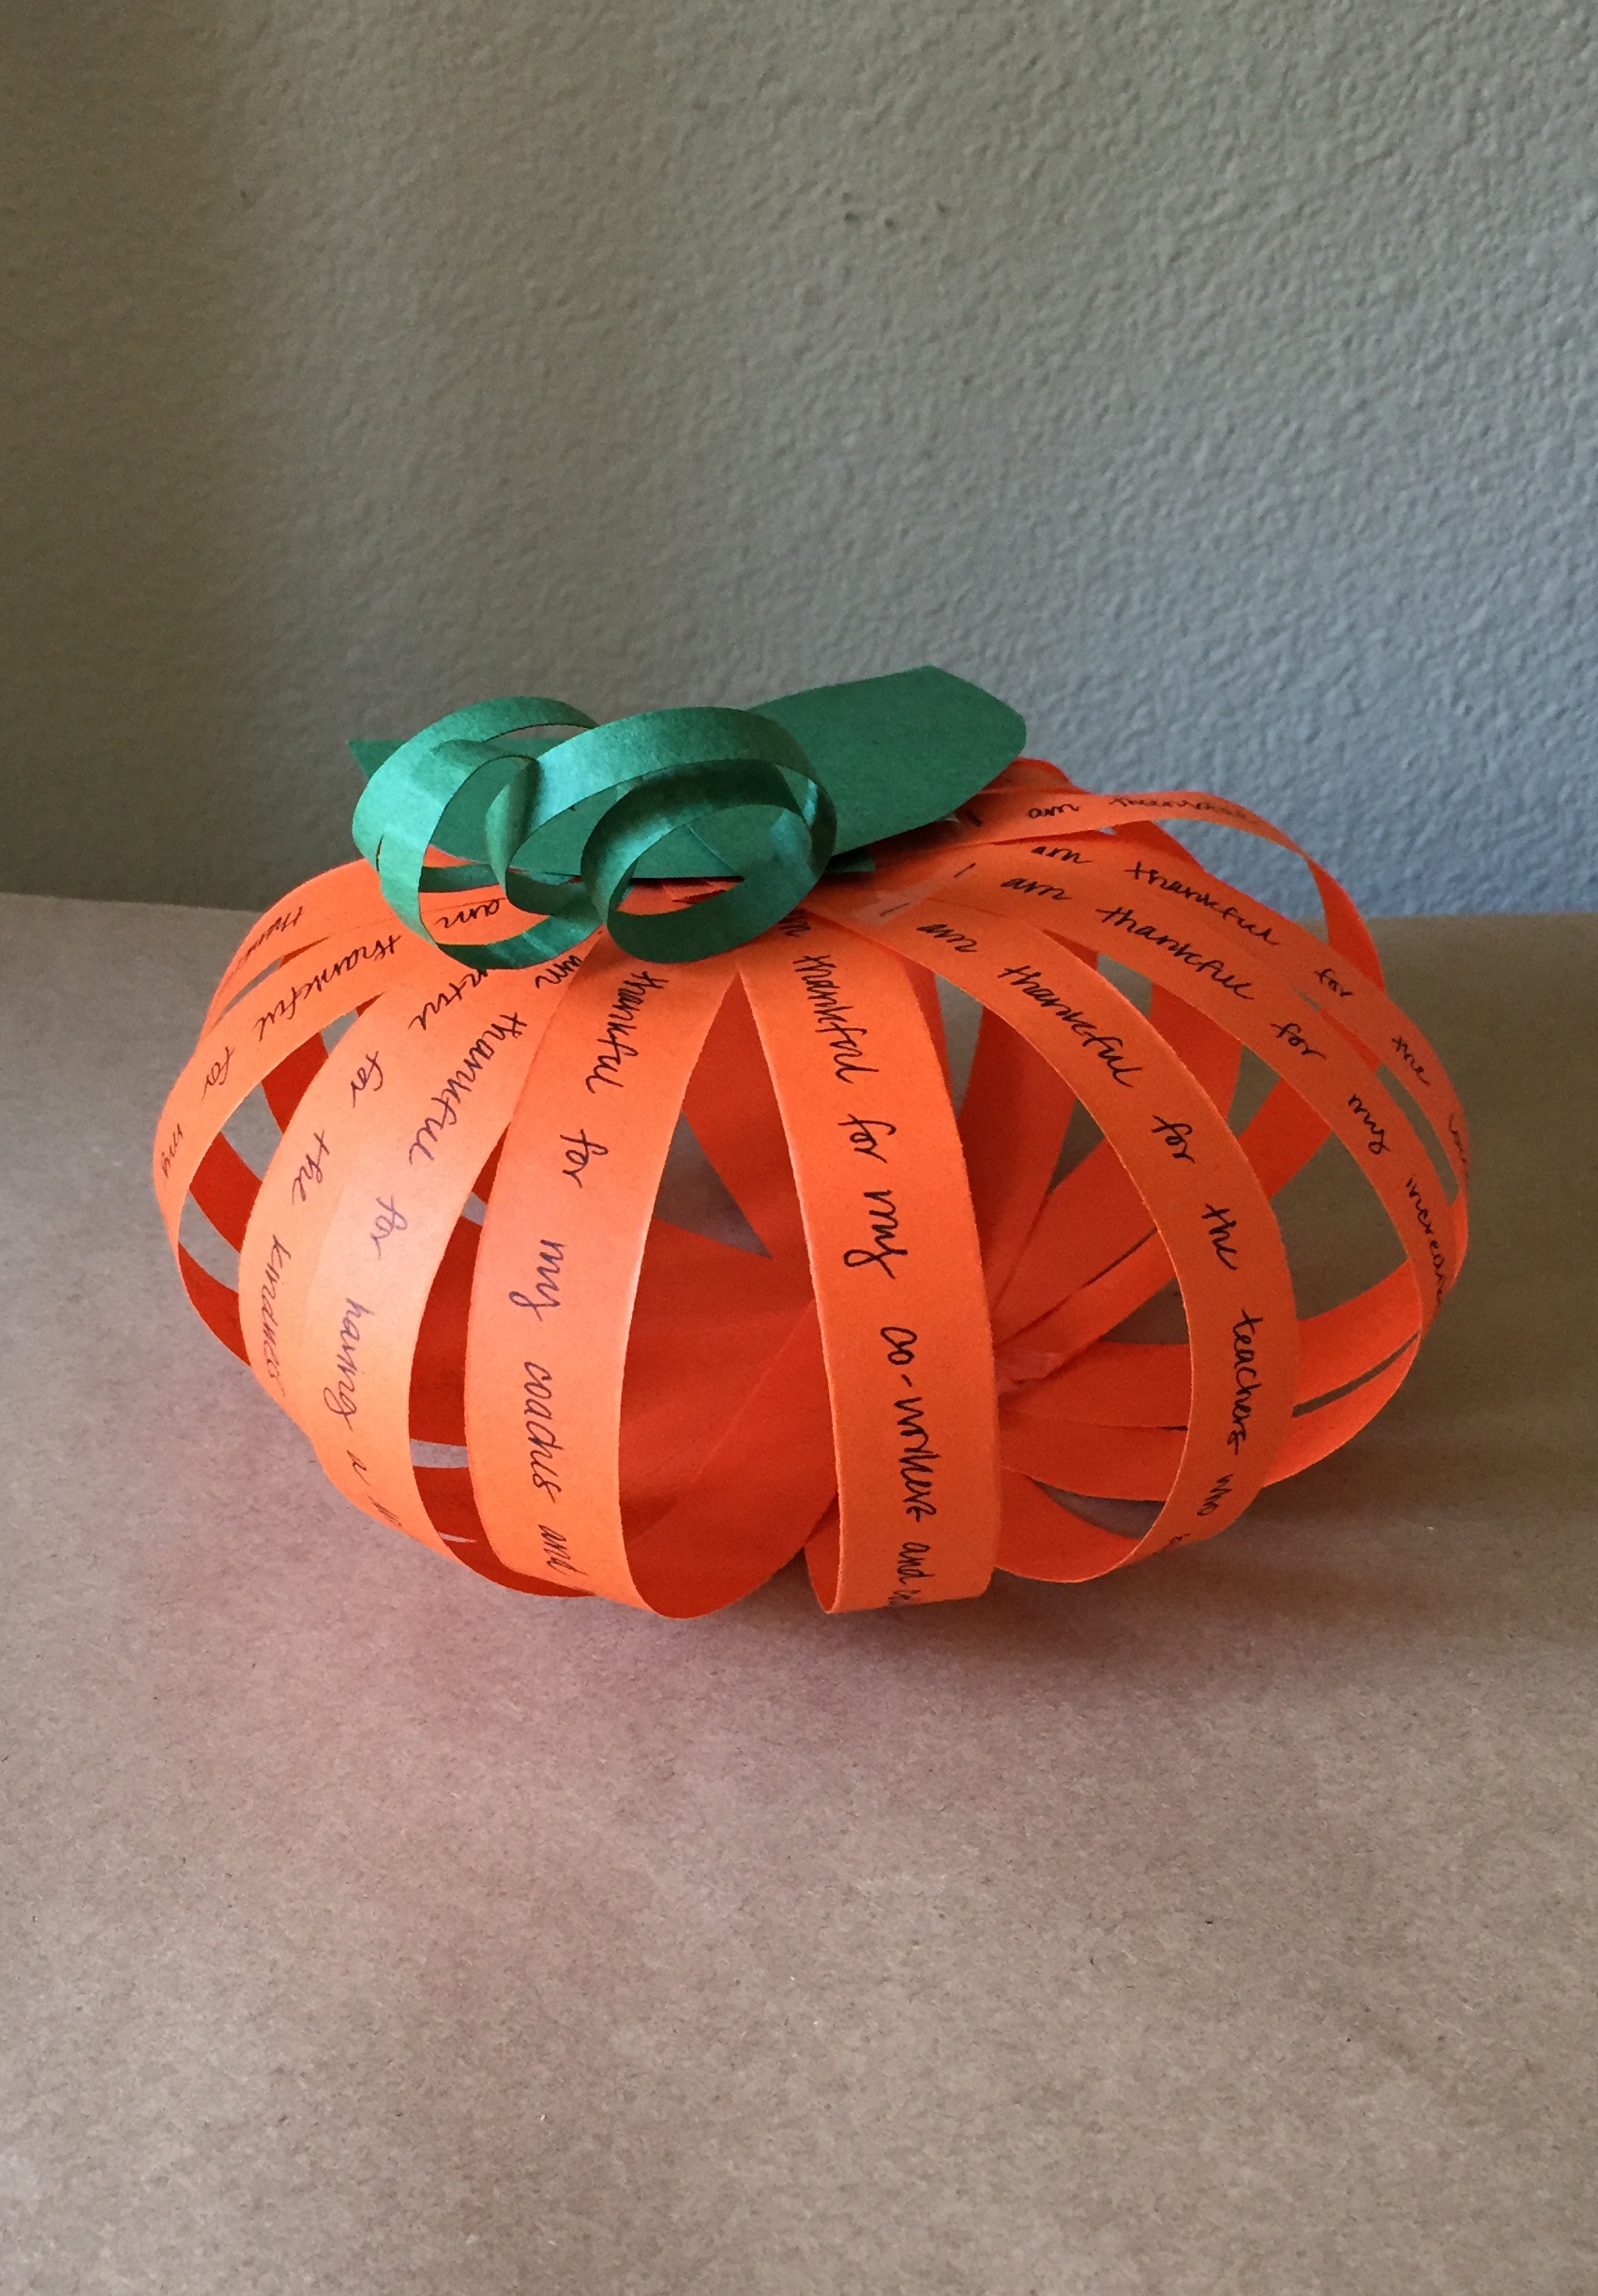
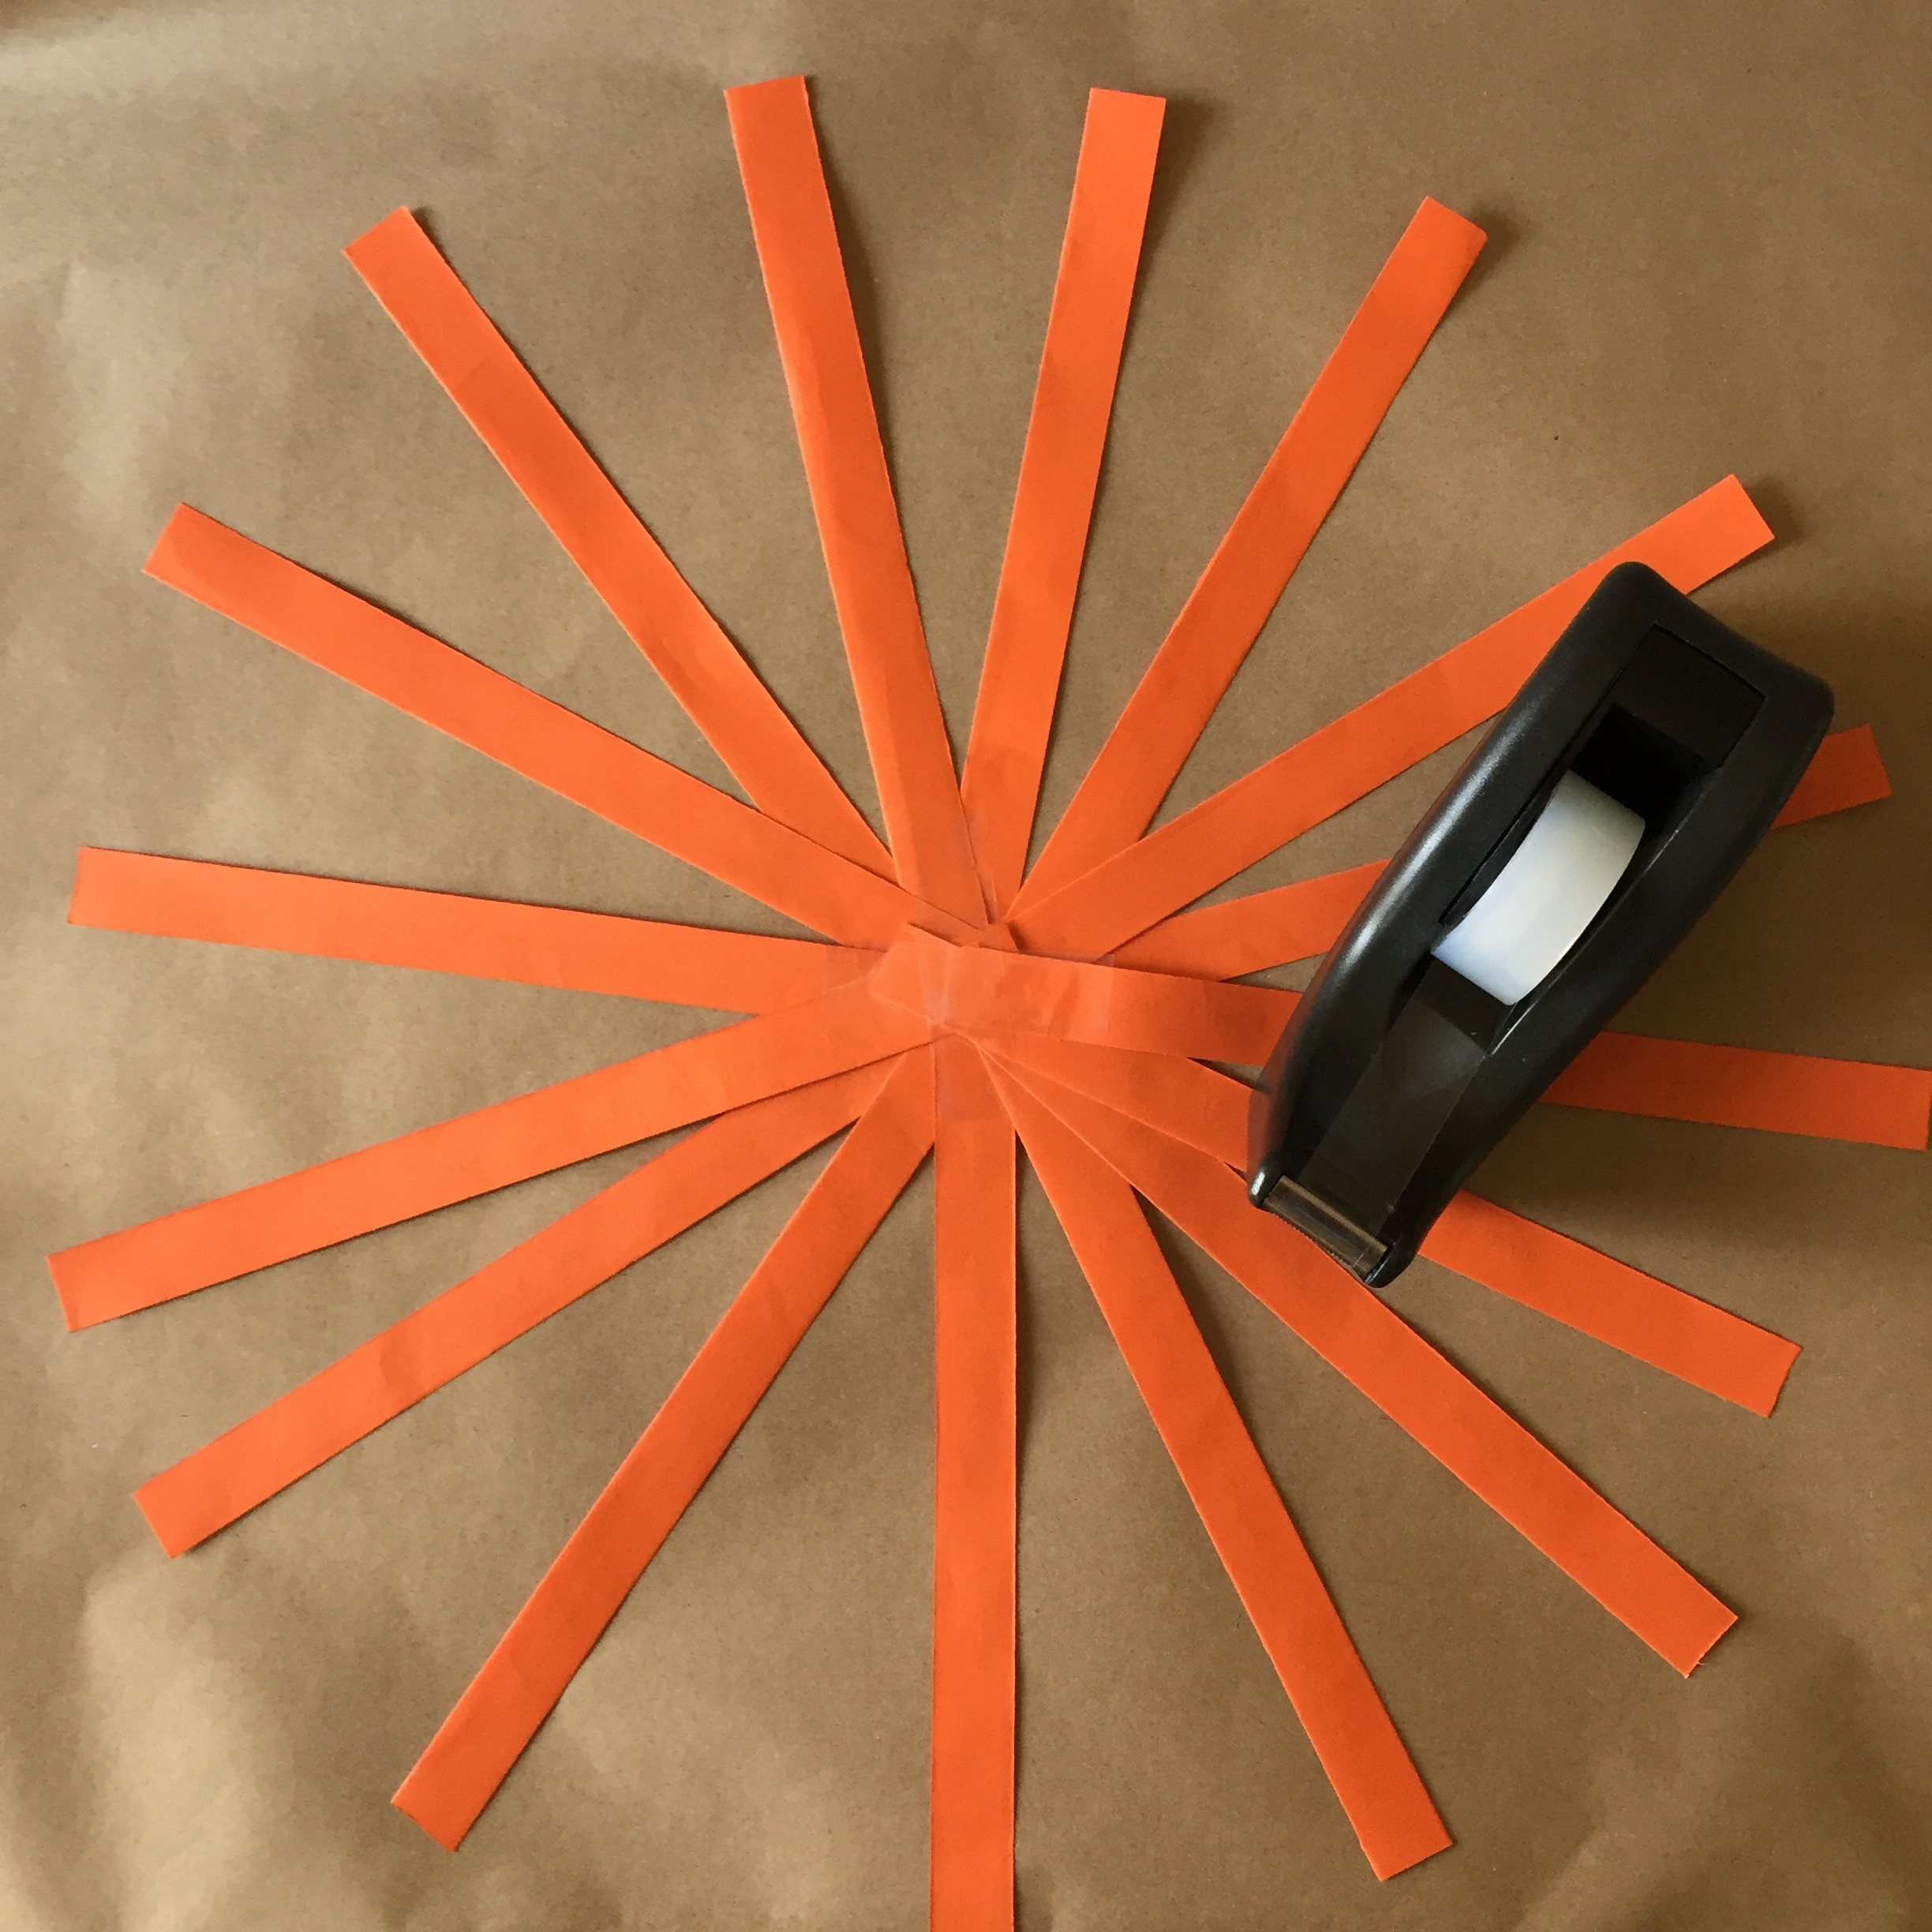
On each strip, write down something that you are grateful for. Make sure that you leave a little room on the ends of the strips without writing.

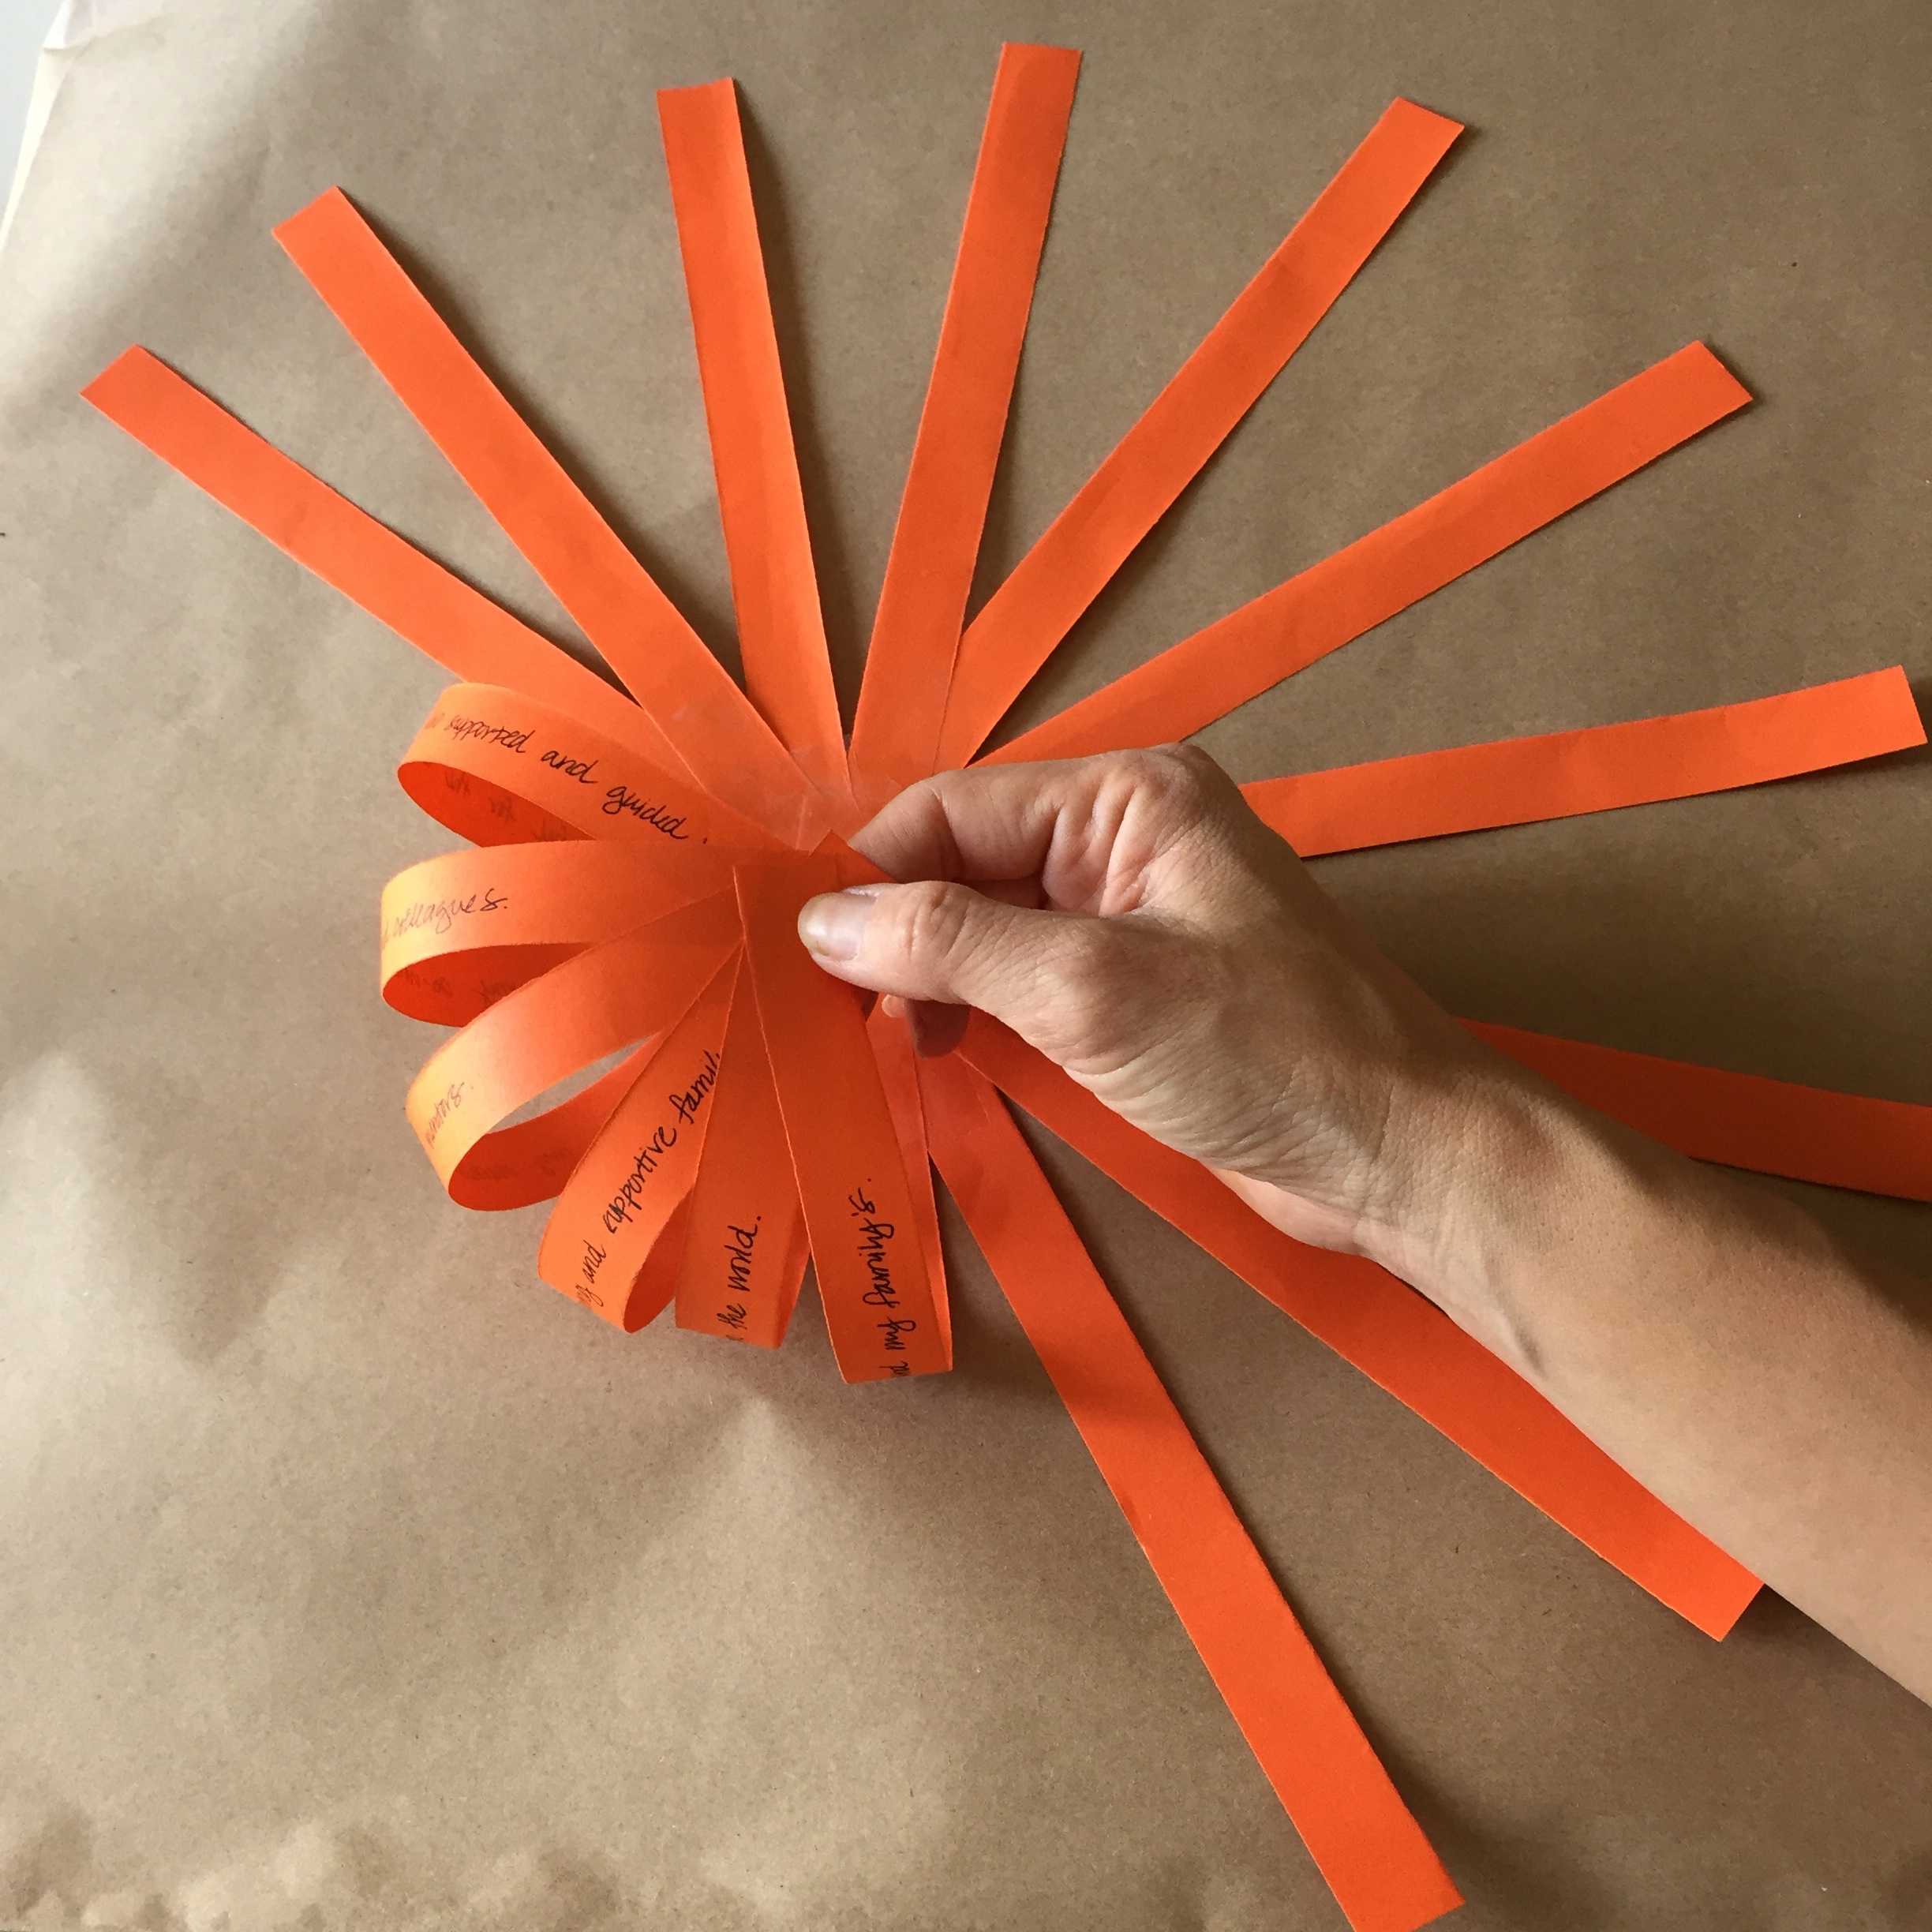
Step 3
Now you are ready to create the body of your pumpkin. Gather up the strips at one end and spread them evenly around the ends where they are gathered. Tape, glue, or staple them in place.
Step 4
Then, bring the strips around and gather the other ends at one point. Tape, glue, or staple them in place.
Step 5
We suggest curling your vines with scissors. Then, tape your leaves and vines onto the top of your pumpkin.
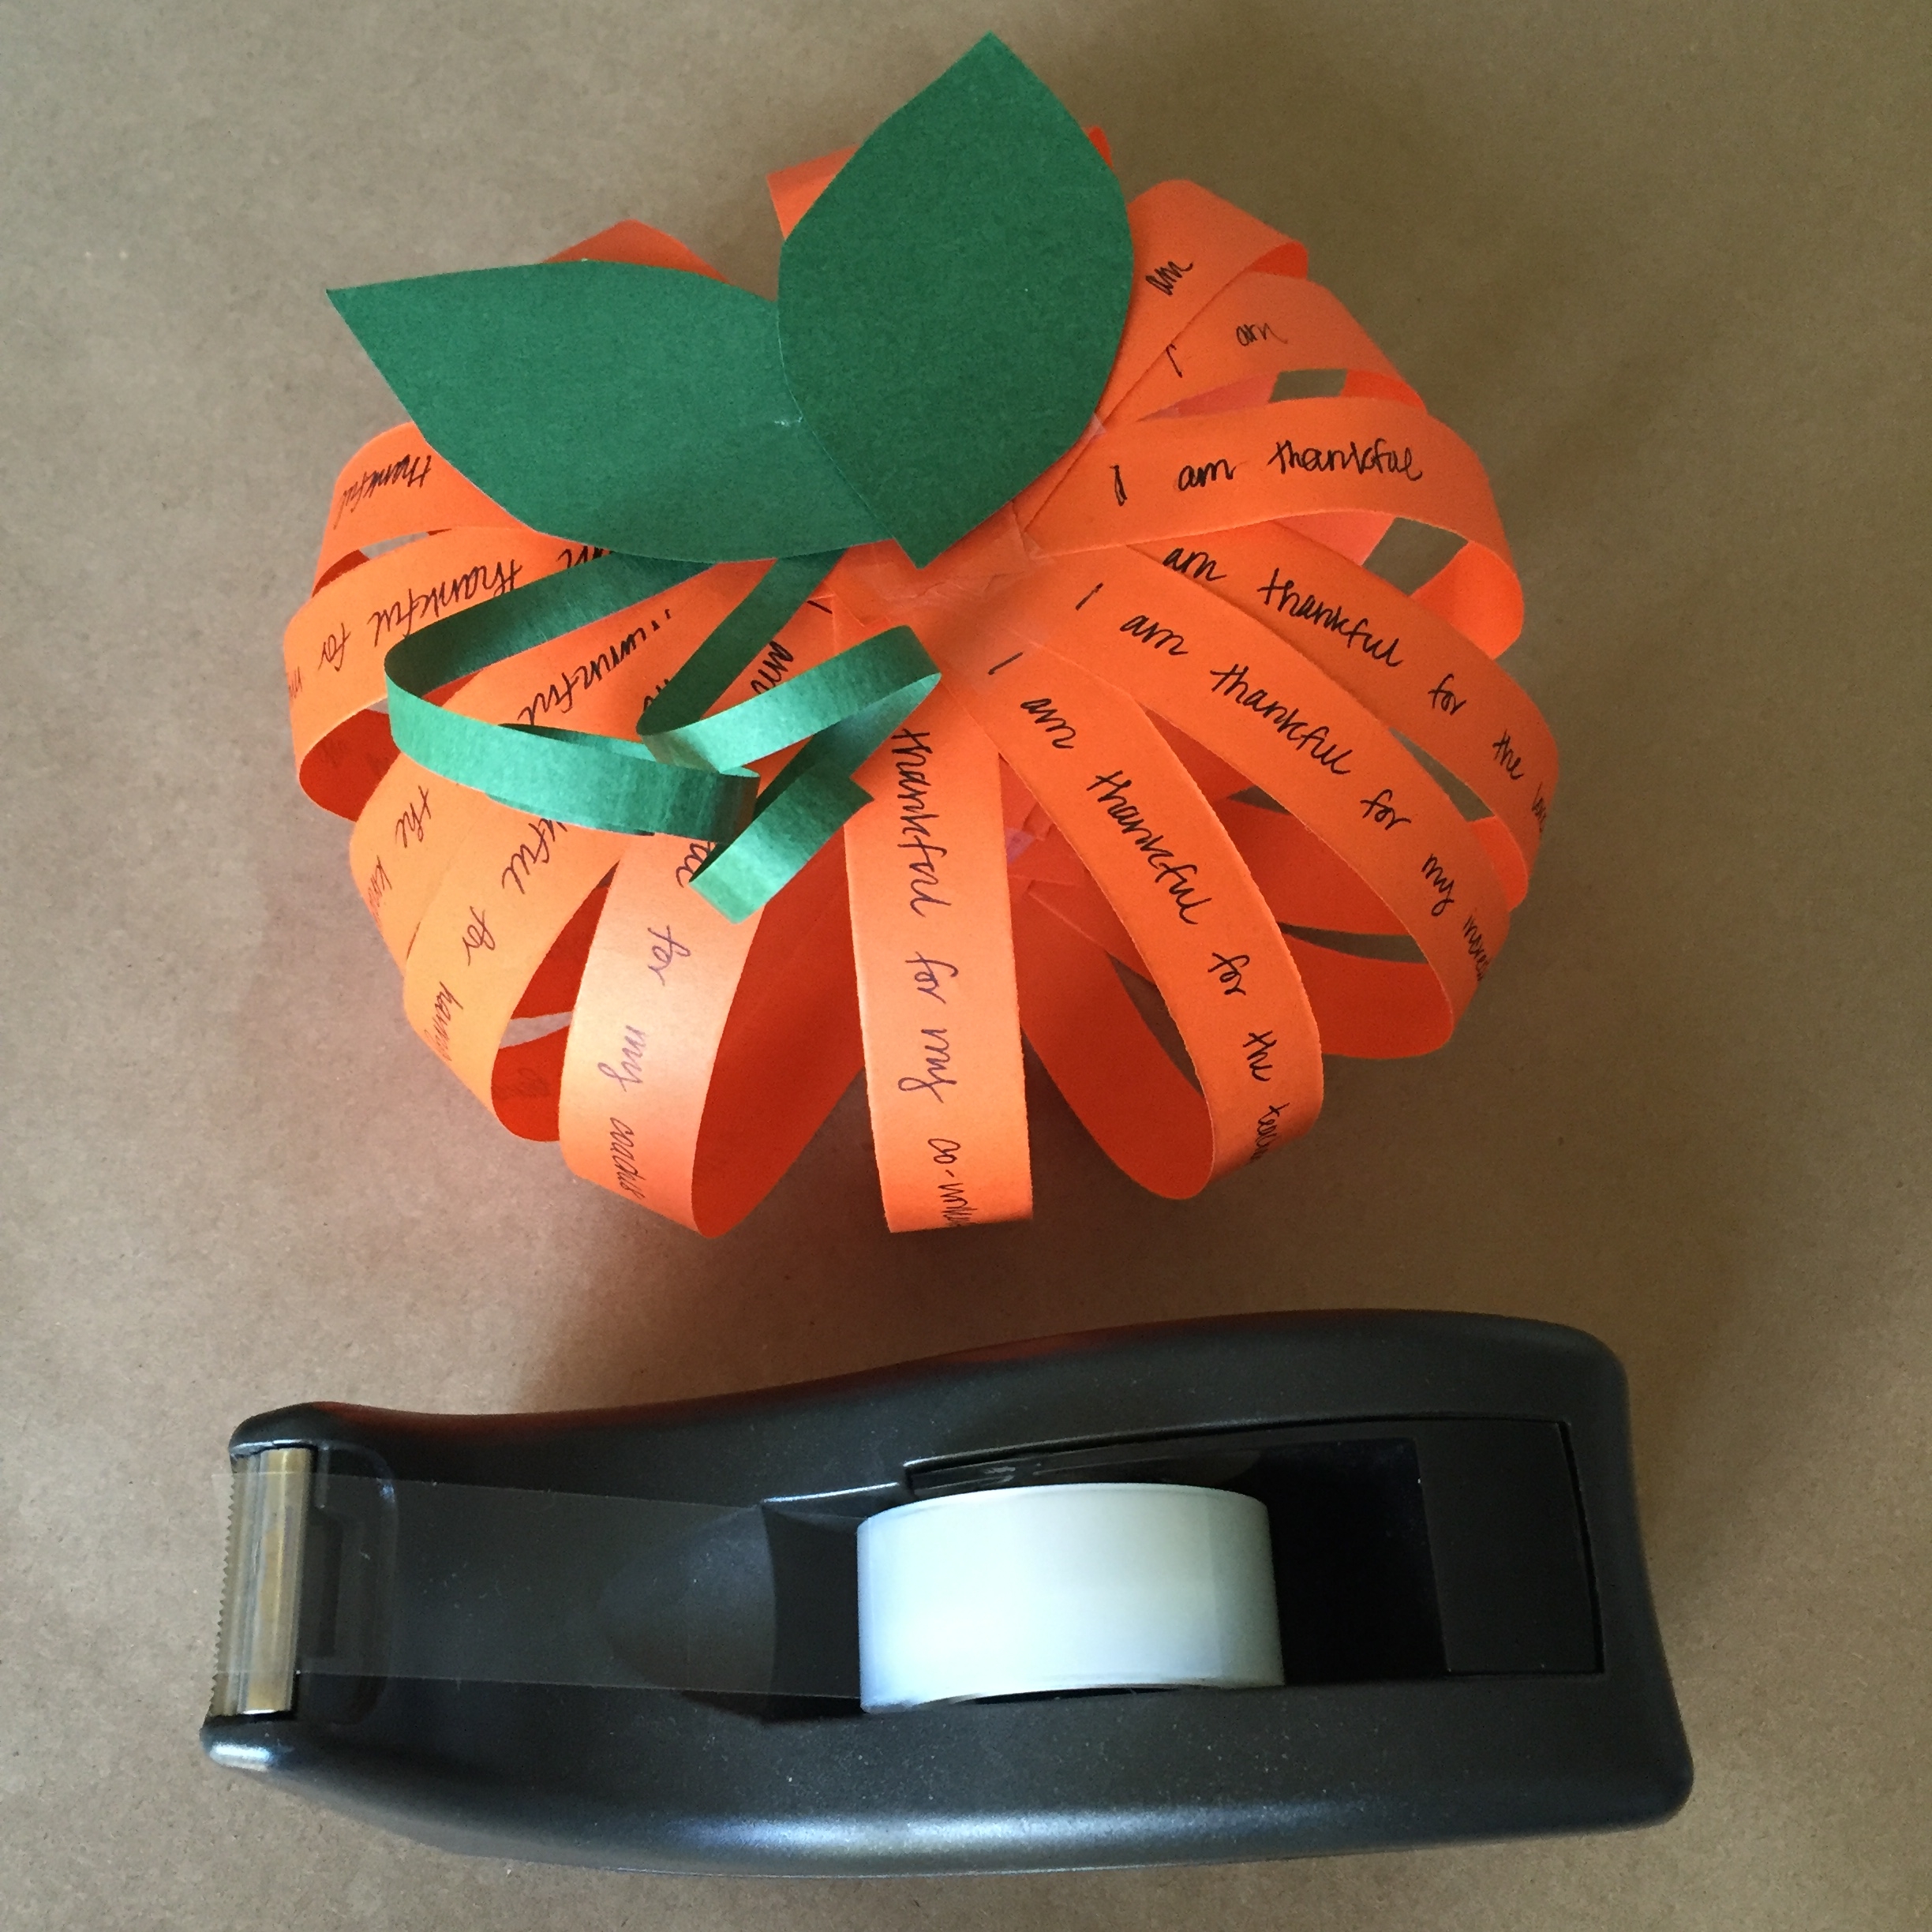
Done!
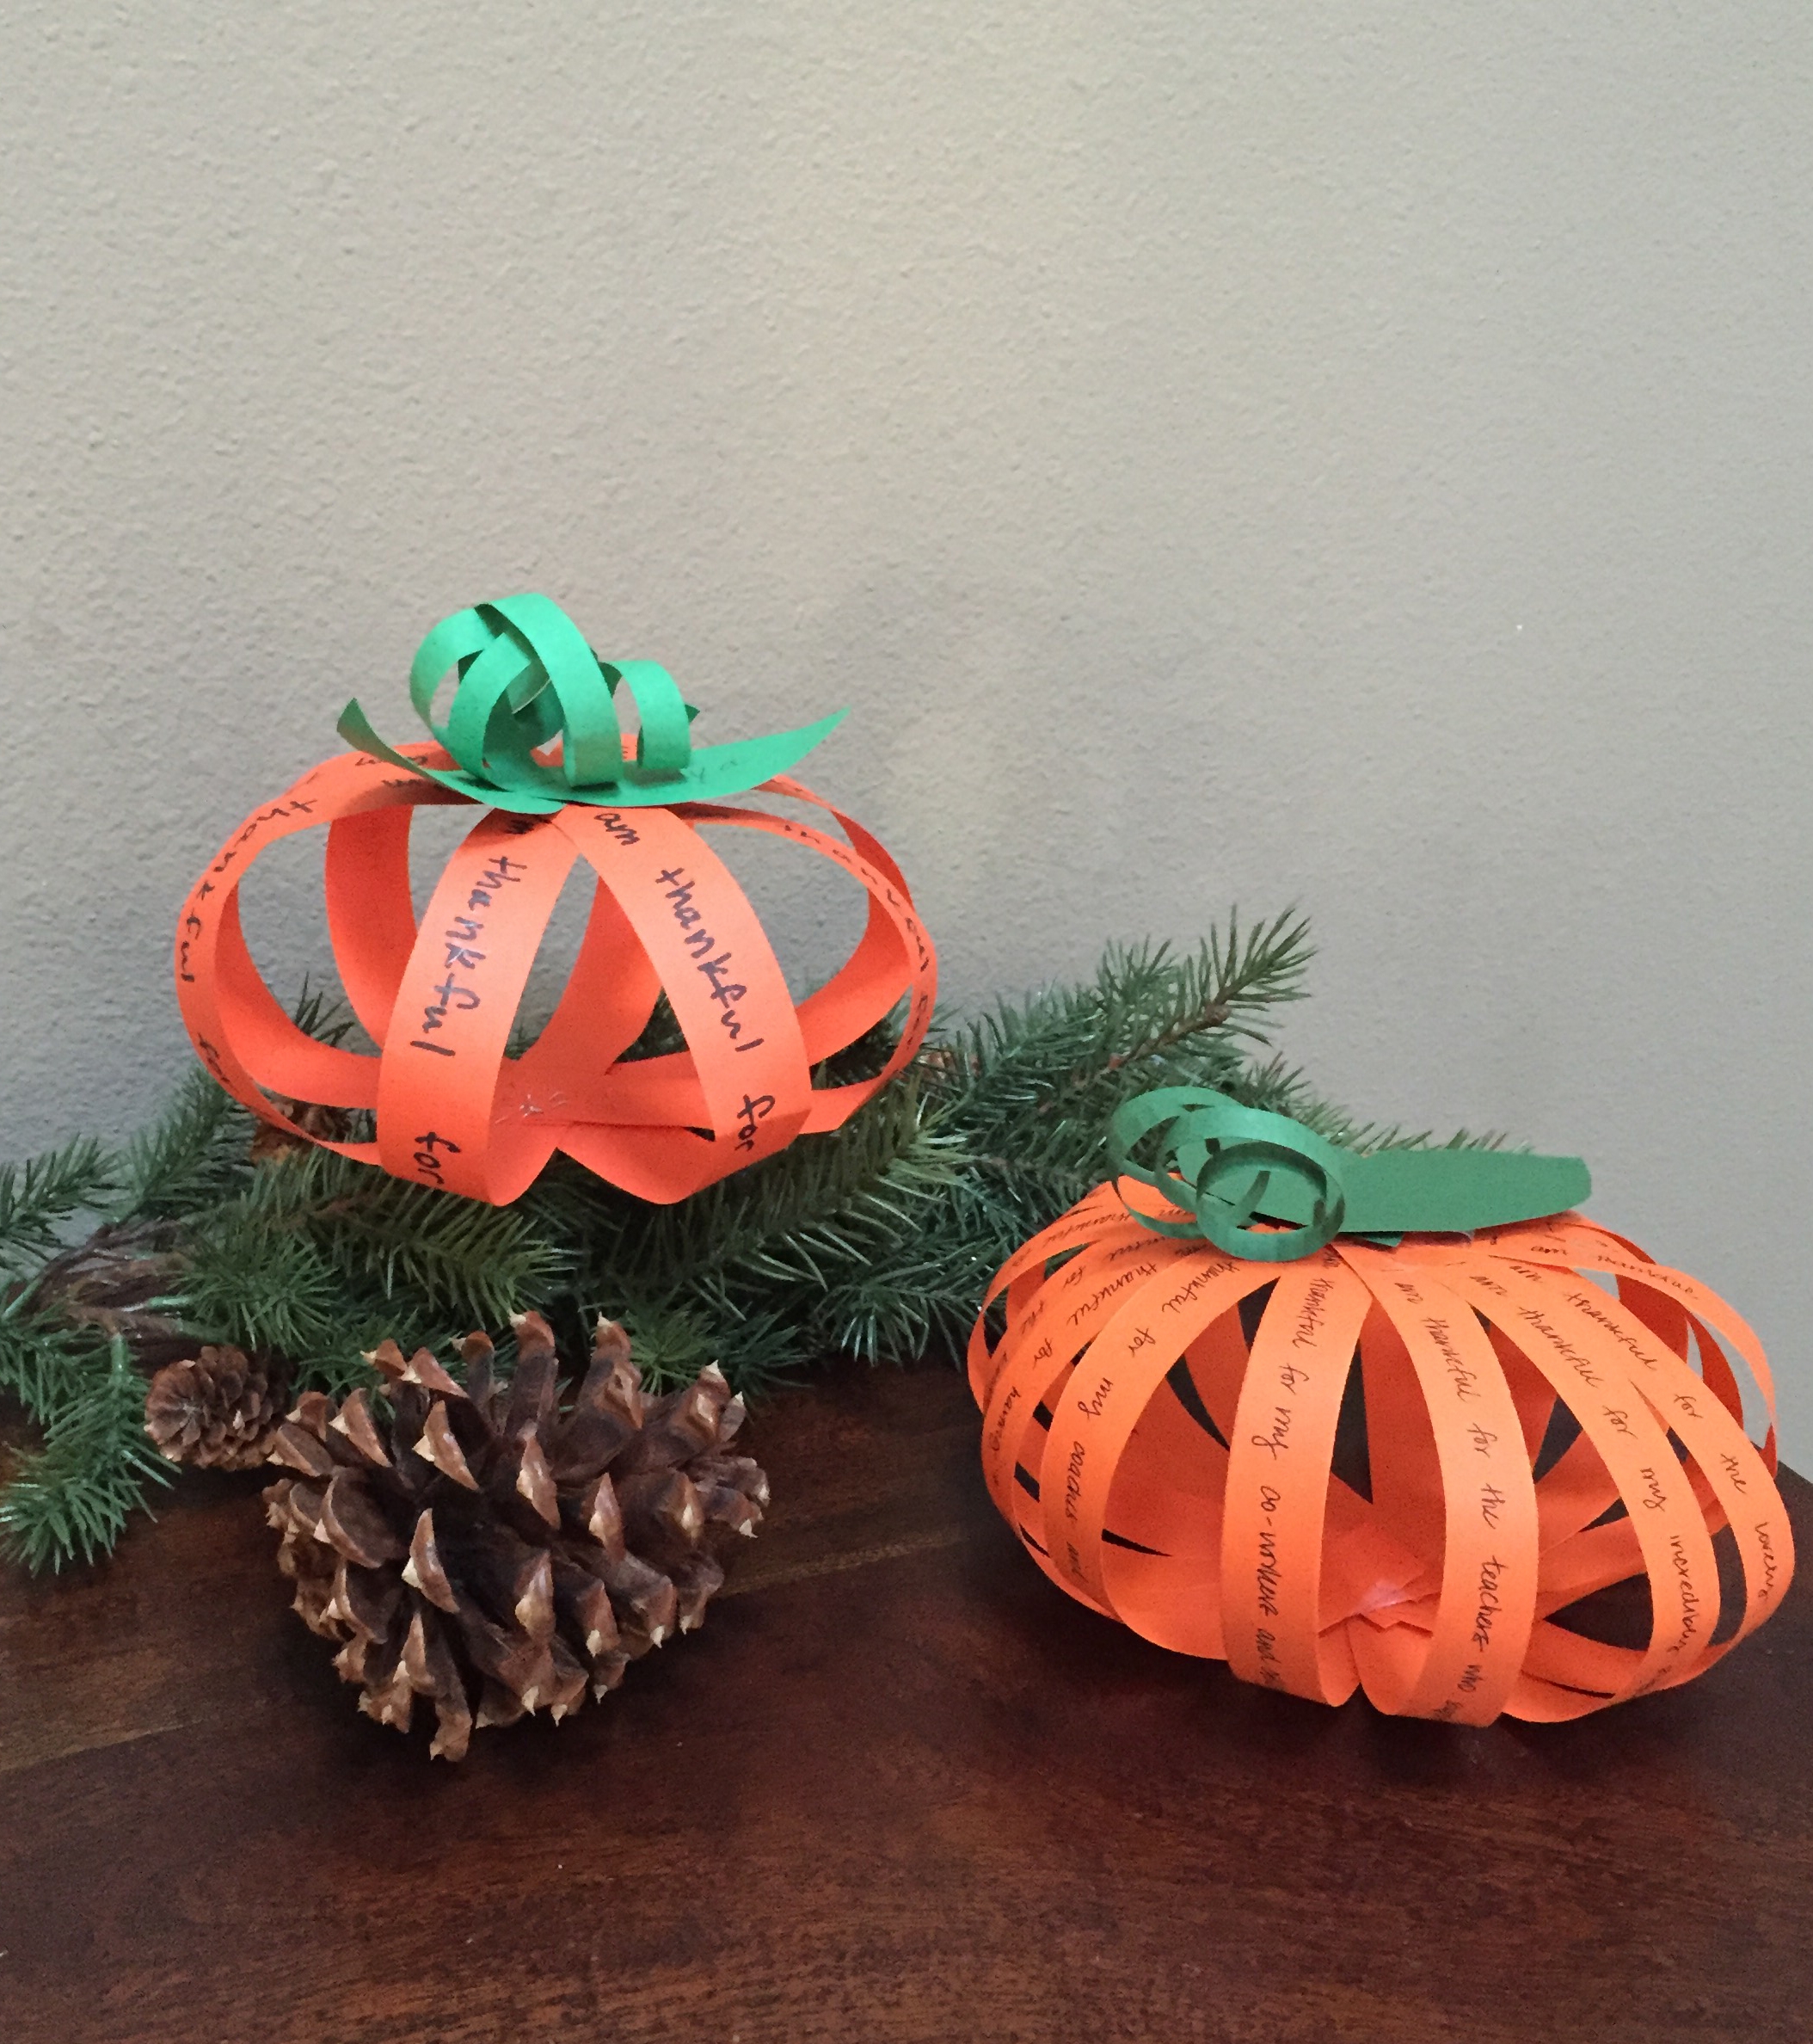
There you have your pumpkin of gratitude. I plan to use ours on our Thanksgiving table setting, but my kids seem to have other plans. My kids noticed that they have a nice springy bounce to them when you push the tops down a bit. They are also fans of throwing and catching their pumpkins in a game of catch. So the pumpkins might not survive until Thanksgiving. I guess we will simply make more!