Step-by-step tutorial
Step 1
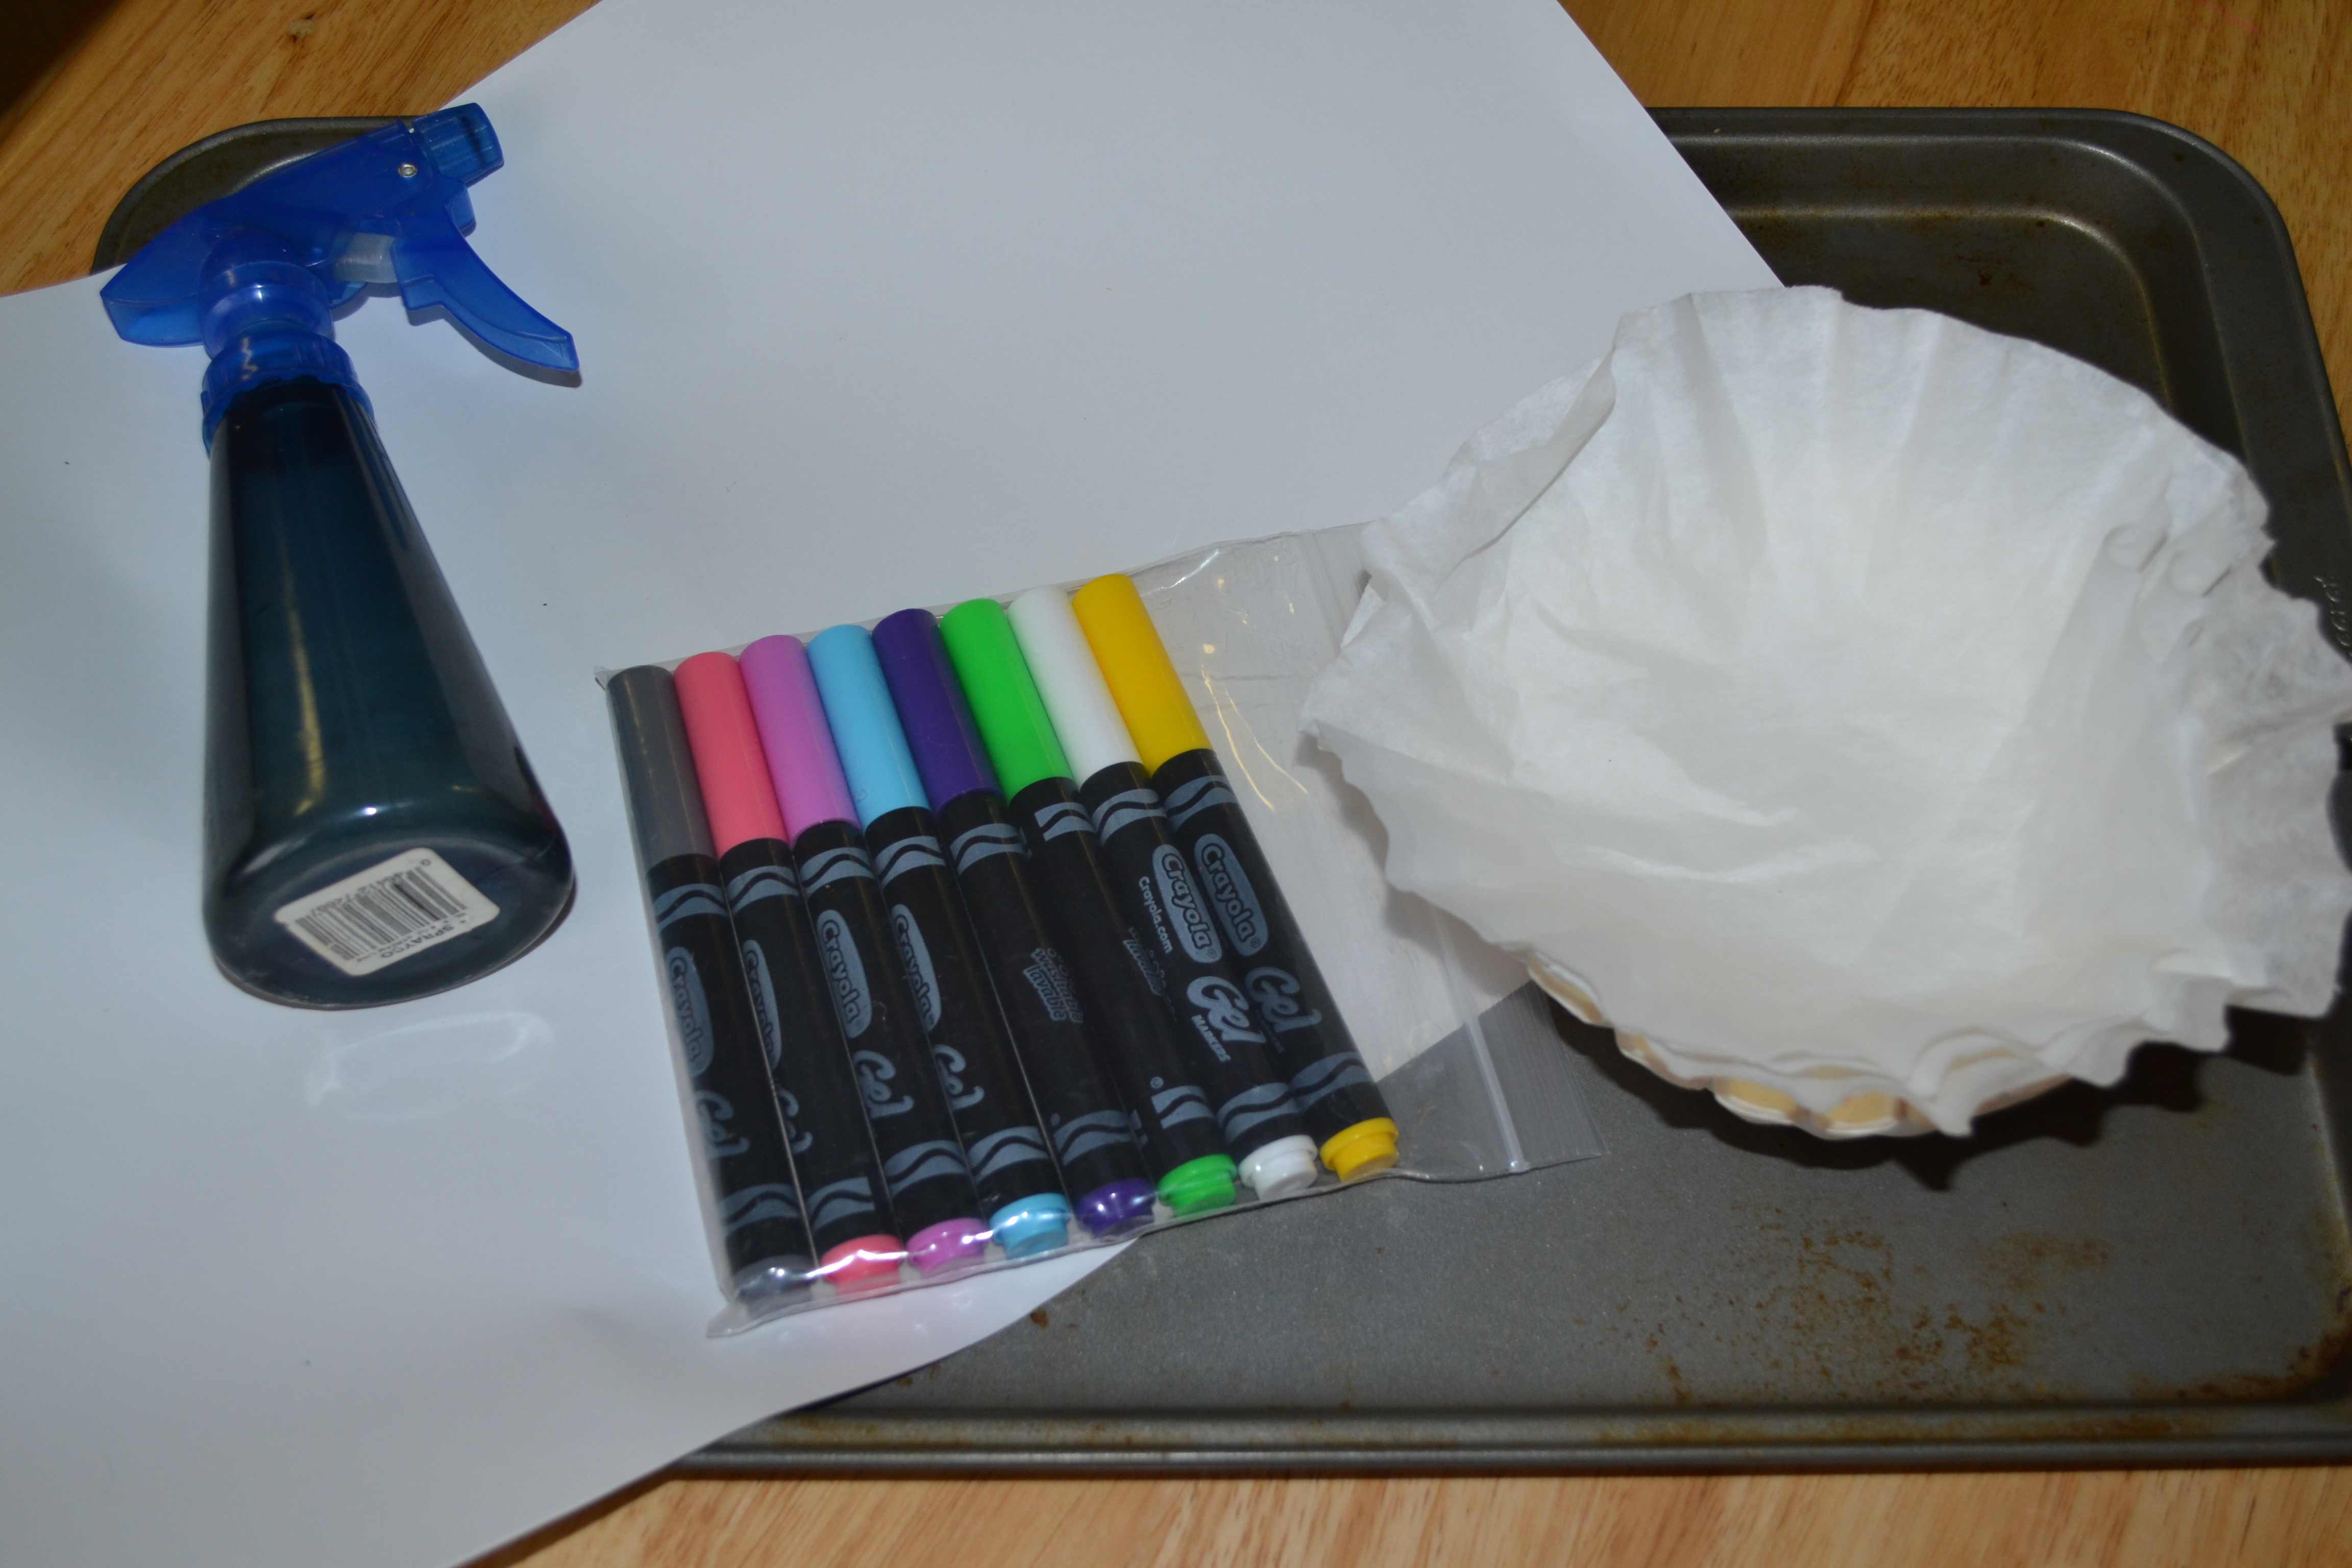
Gather all materials. We used cookie sheets for the trays and put construction paper on top since I was out of newspaper. (You could also use paper towels to protect your workspace.)

Step 2
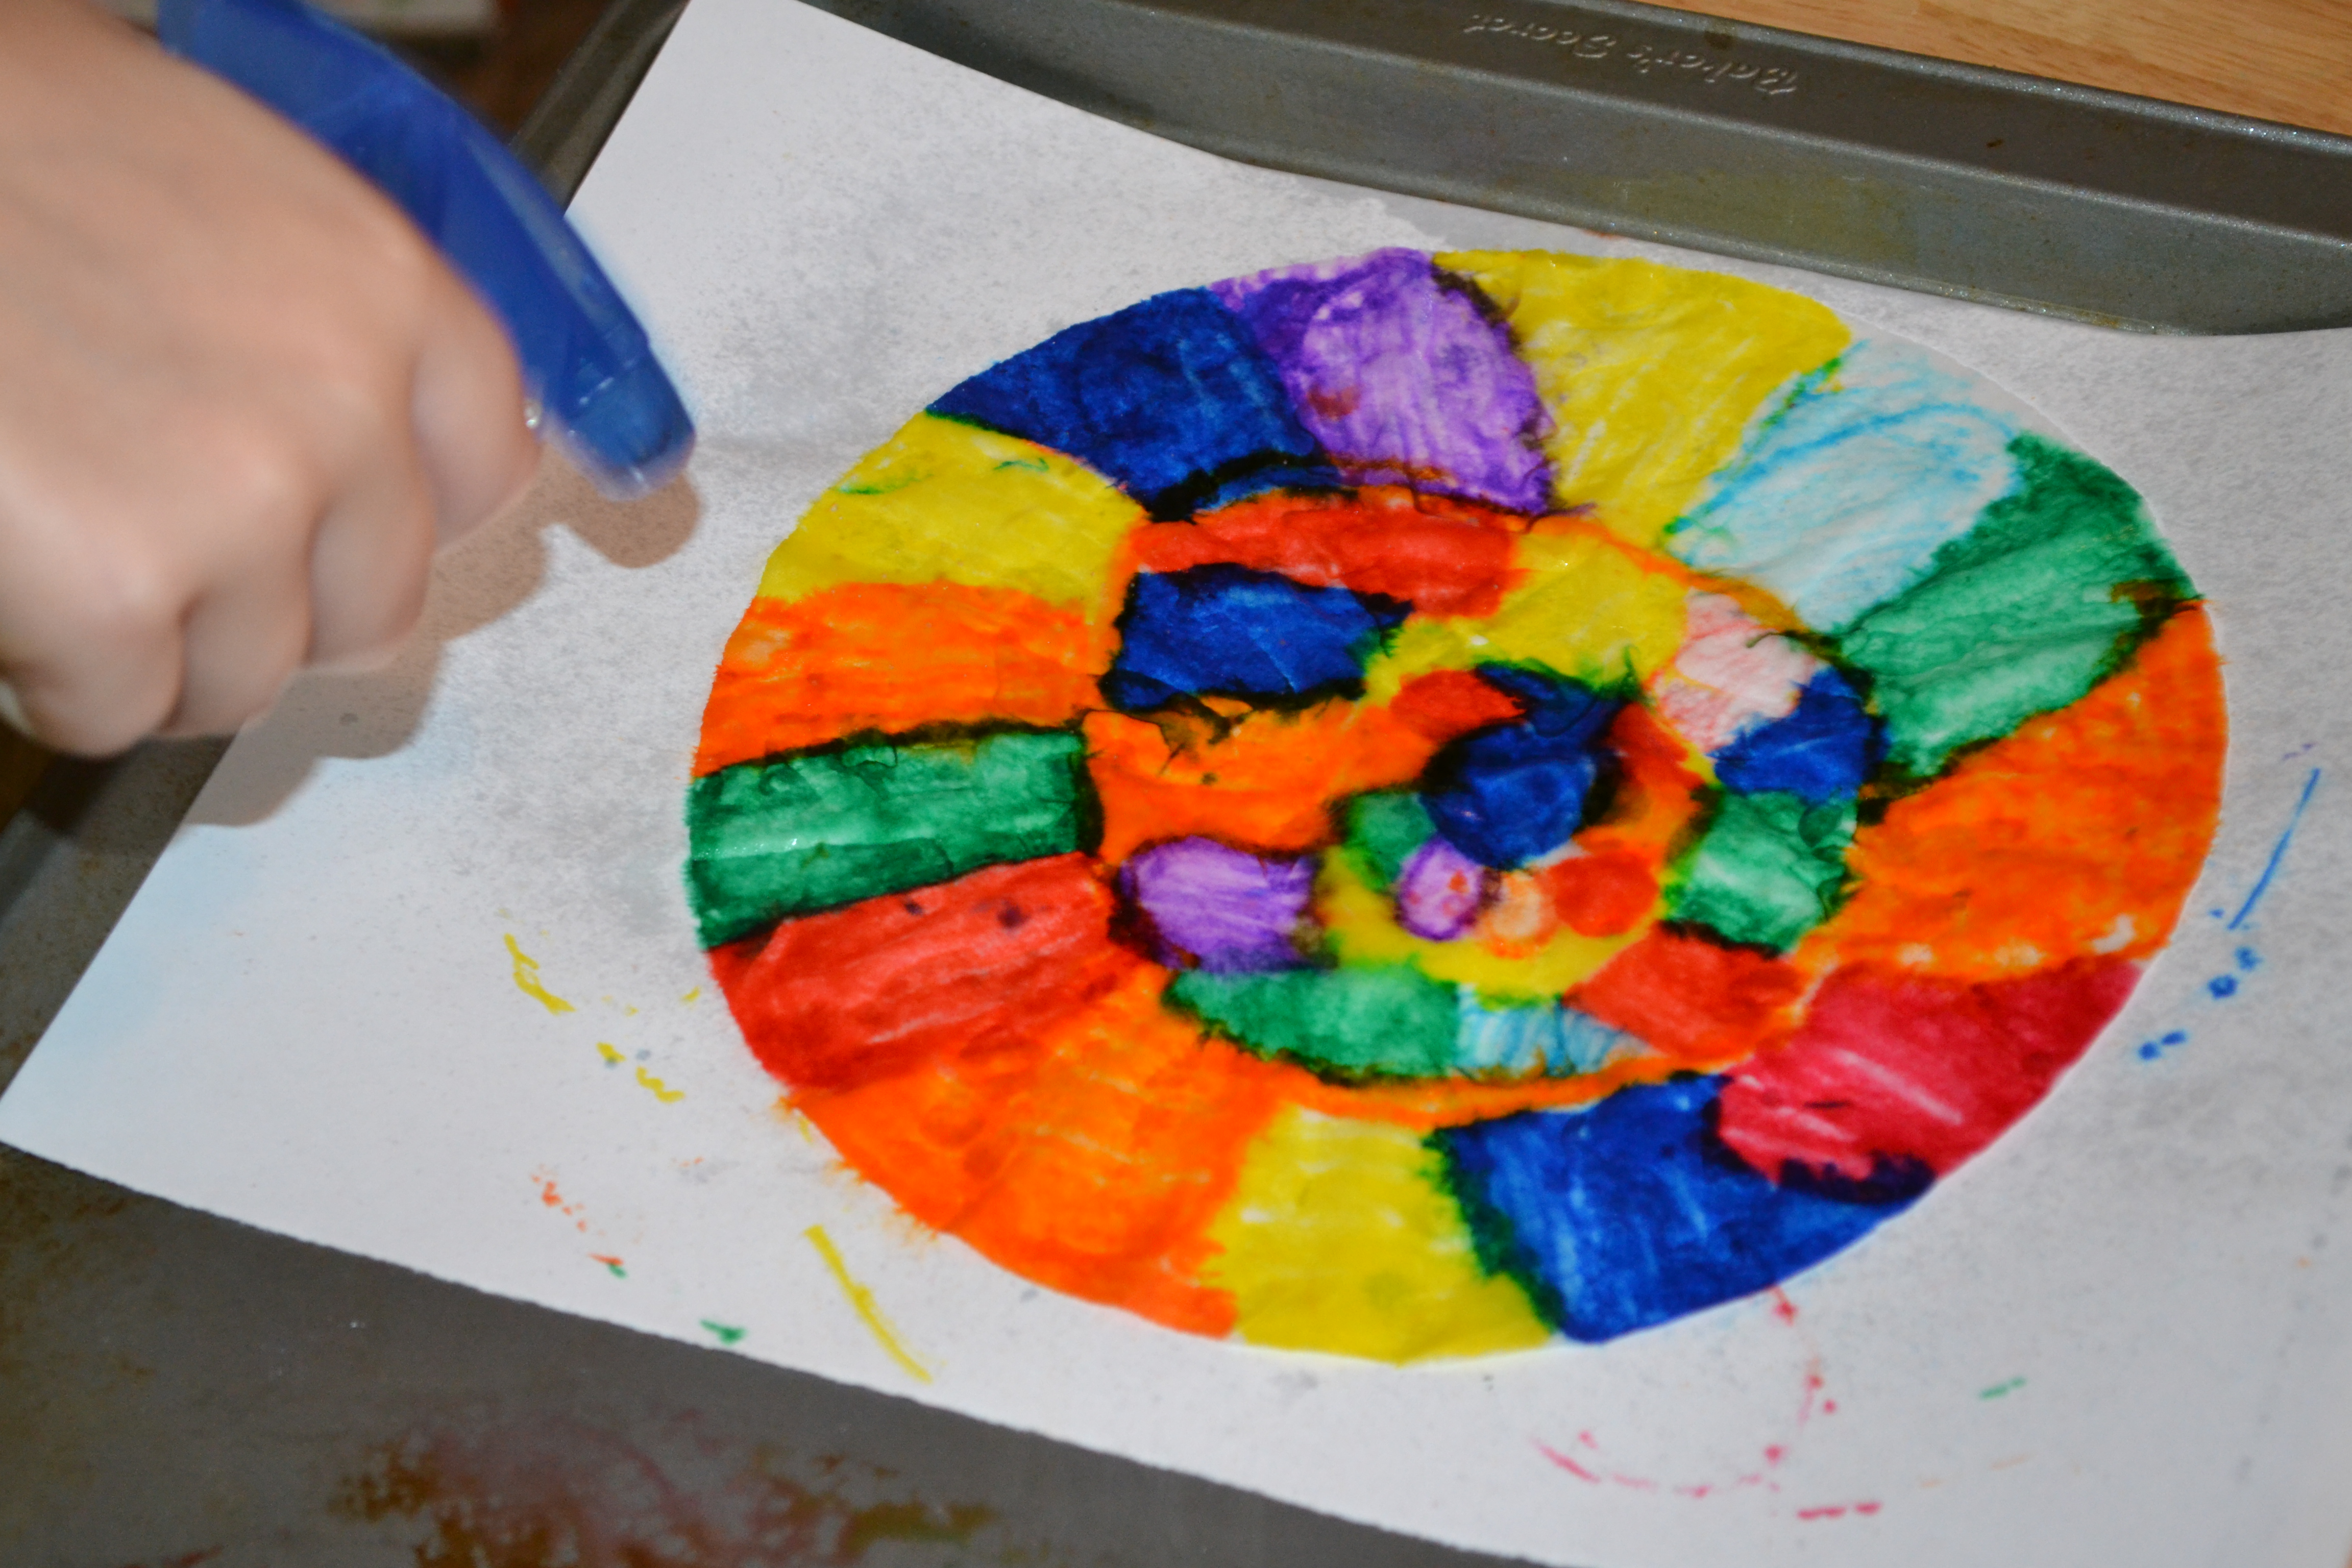
I gave each of the kids a coffee filter on a piece of construction paper and a collection of permanent markers. The kids had a great time coloring their coffee filters. Permanent markers are a rare treat in our house so they love to color with them. The construction paper underneath saved the table from the markers bleeding through.

Step 3
After they finished coloring, we put the paper with their coffee filter on a cookie sheet and the kids sprayed their coffee filters with water. This was great hand-strengthening exercise for my four-year-old. We also got to see the colors blending together as they sprayed.
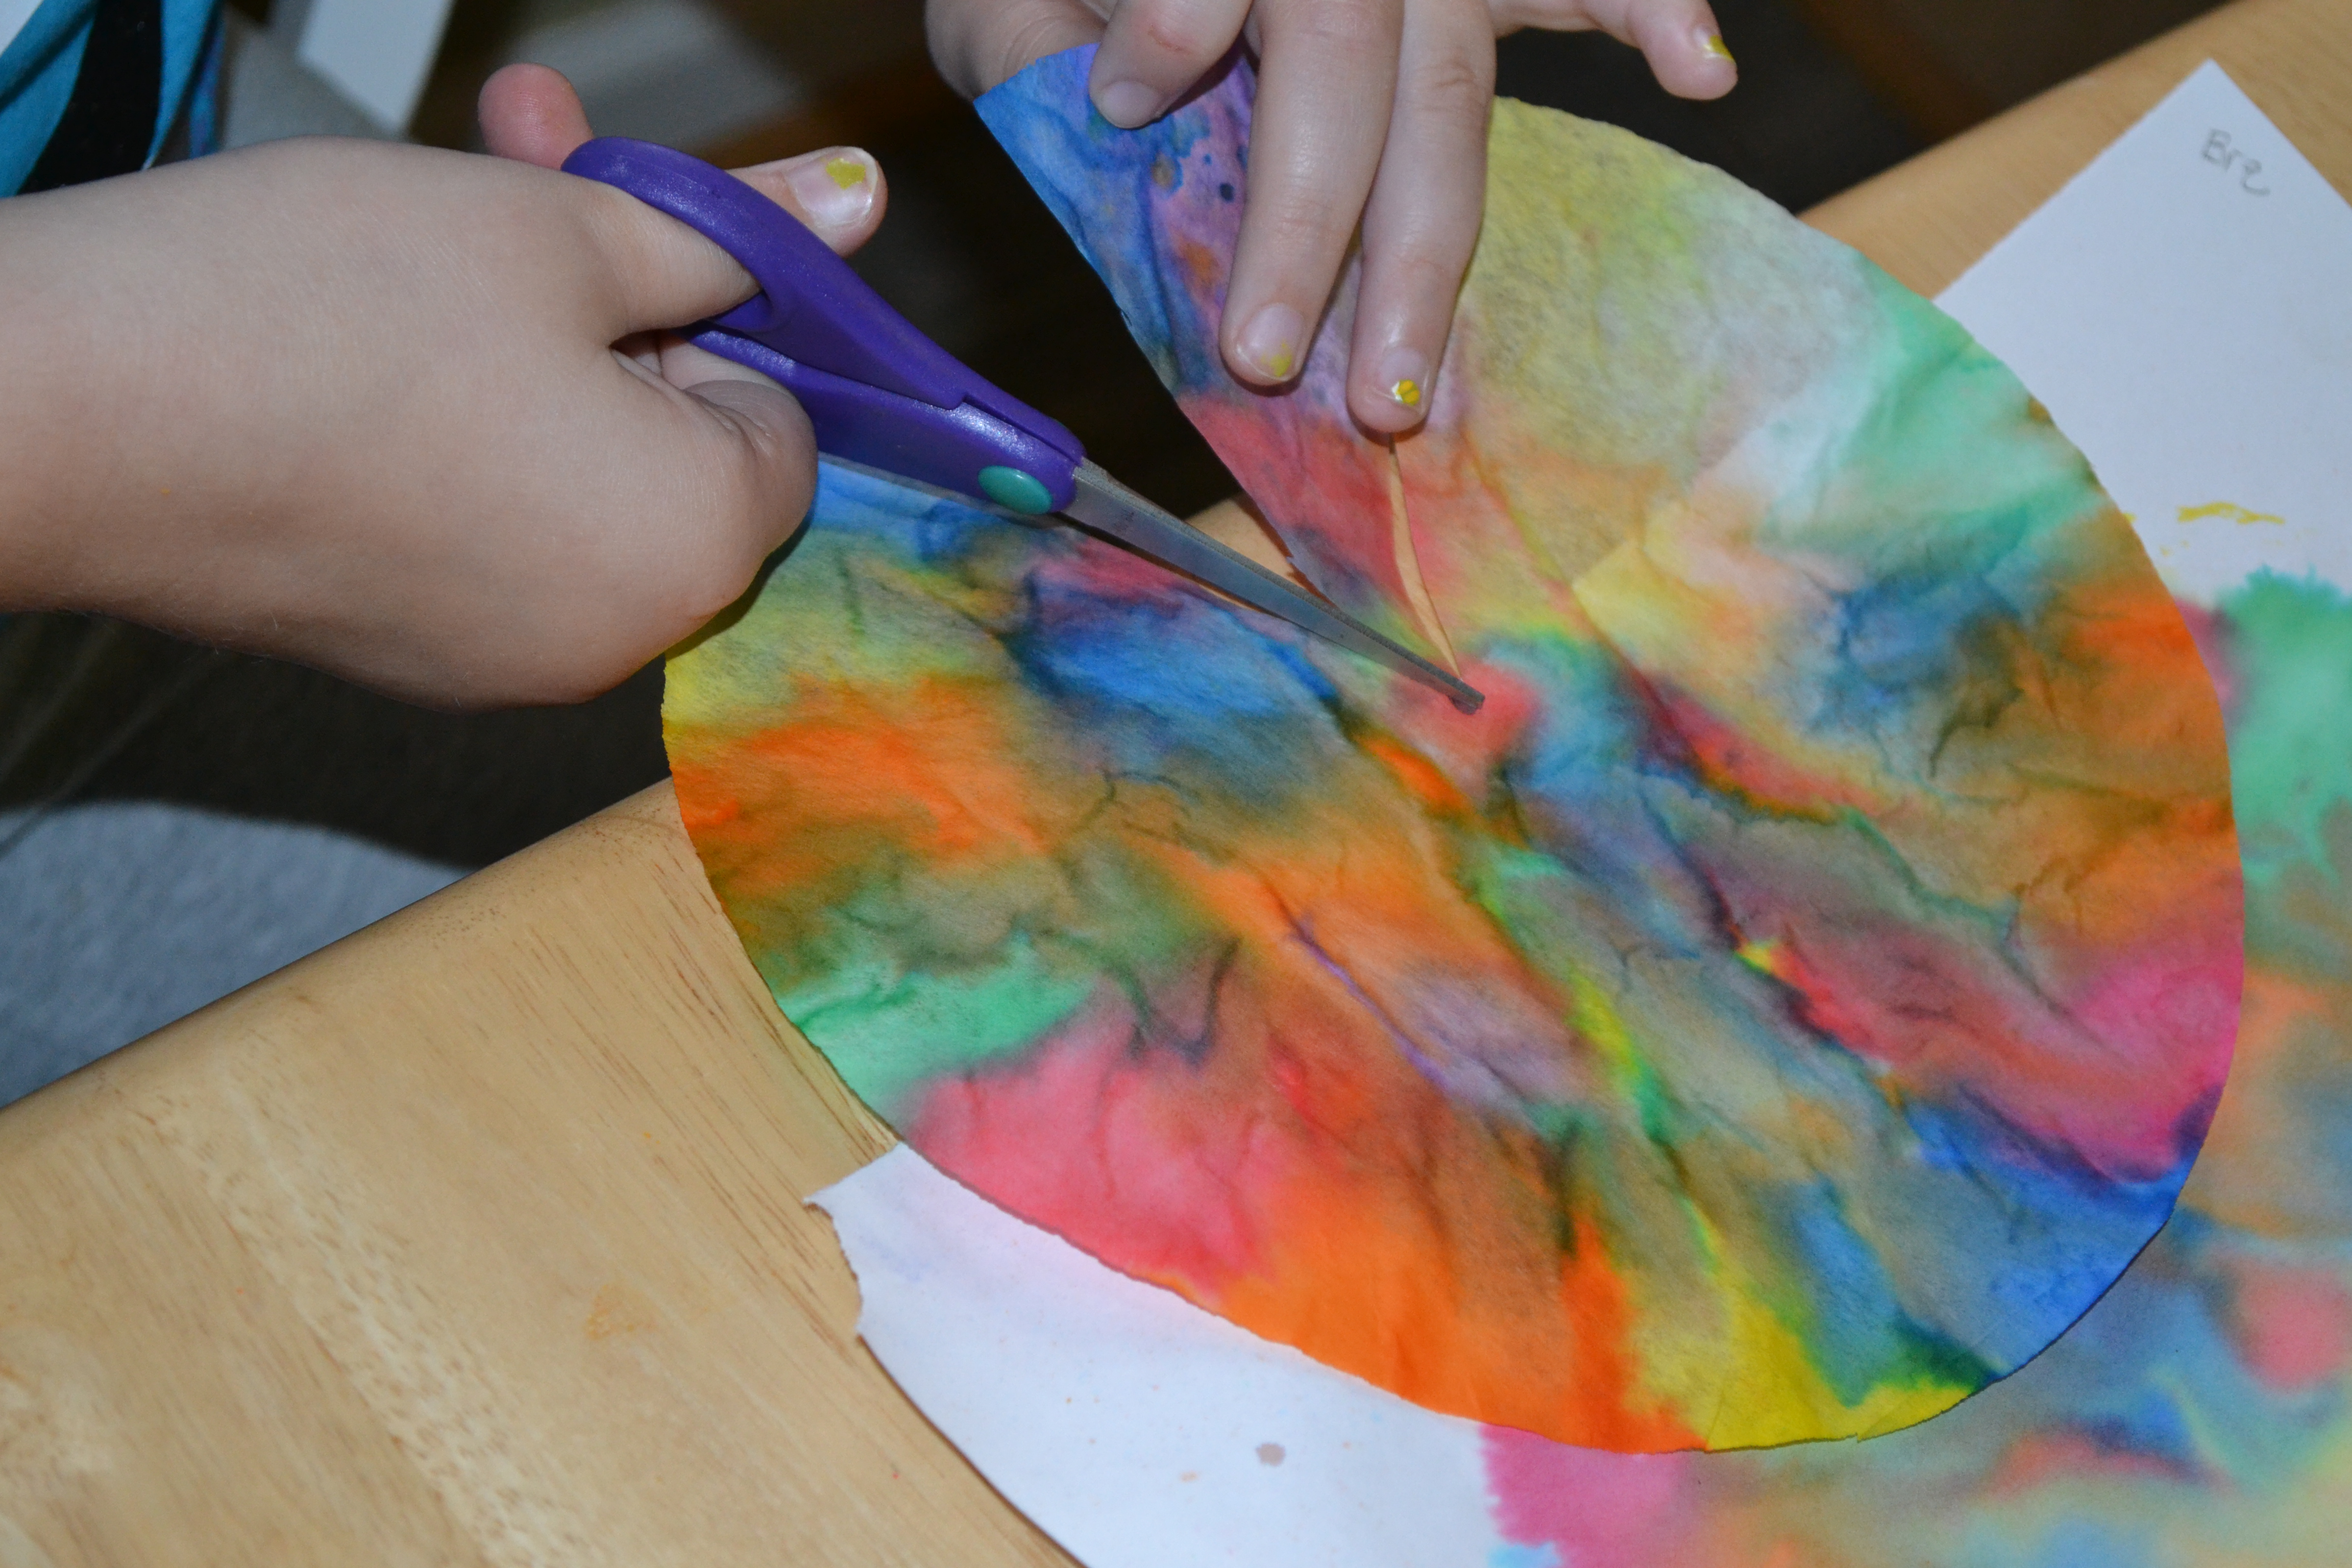
Step 4
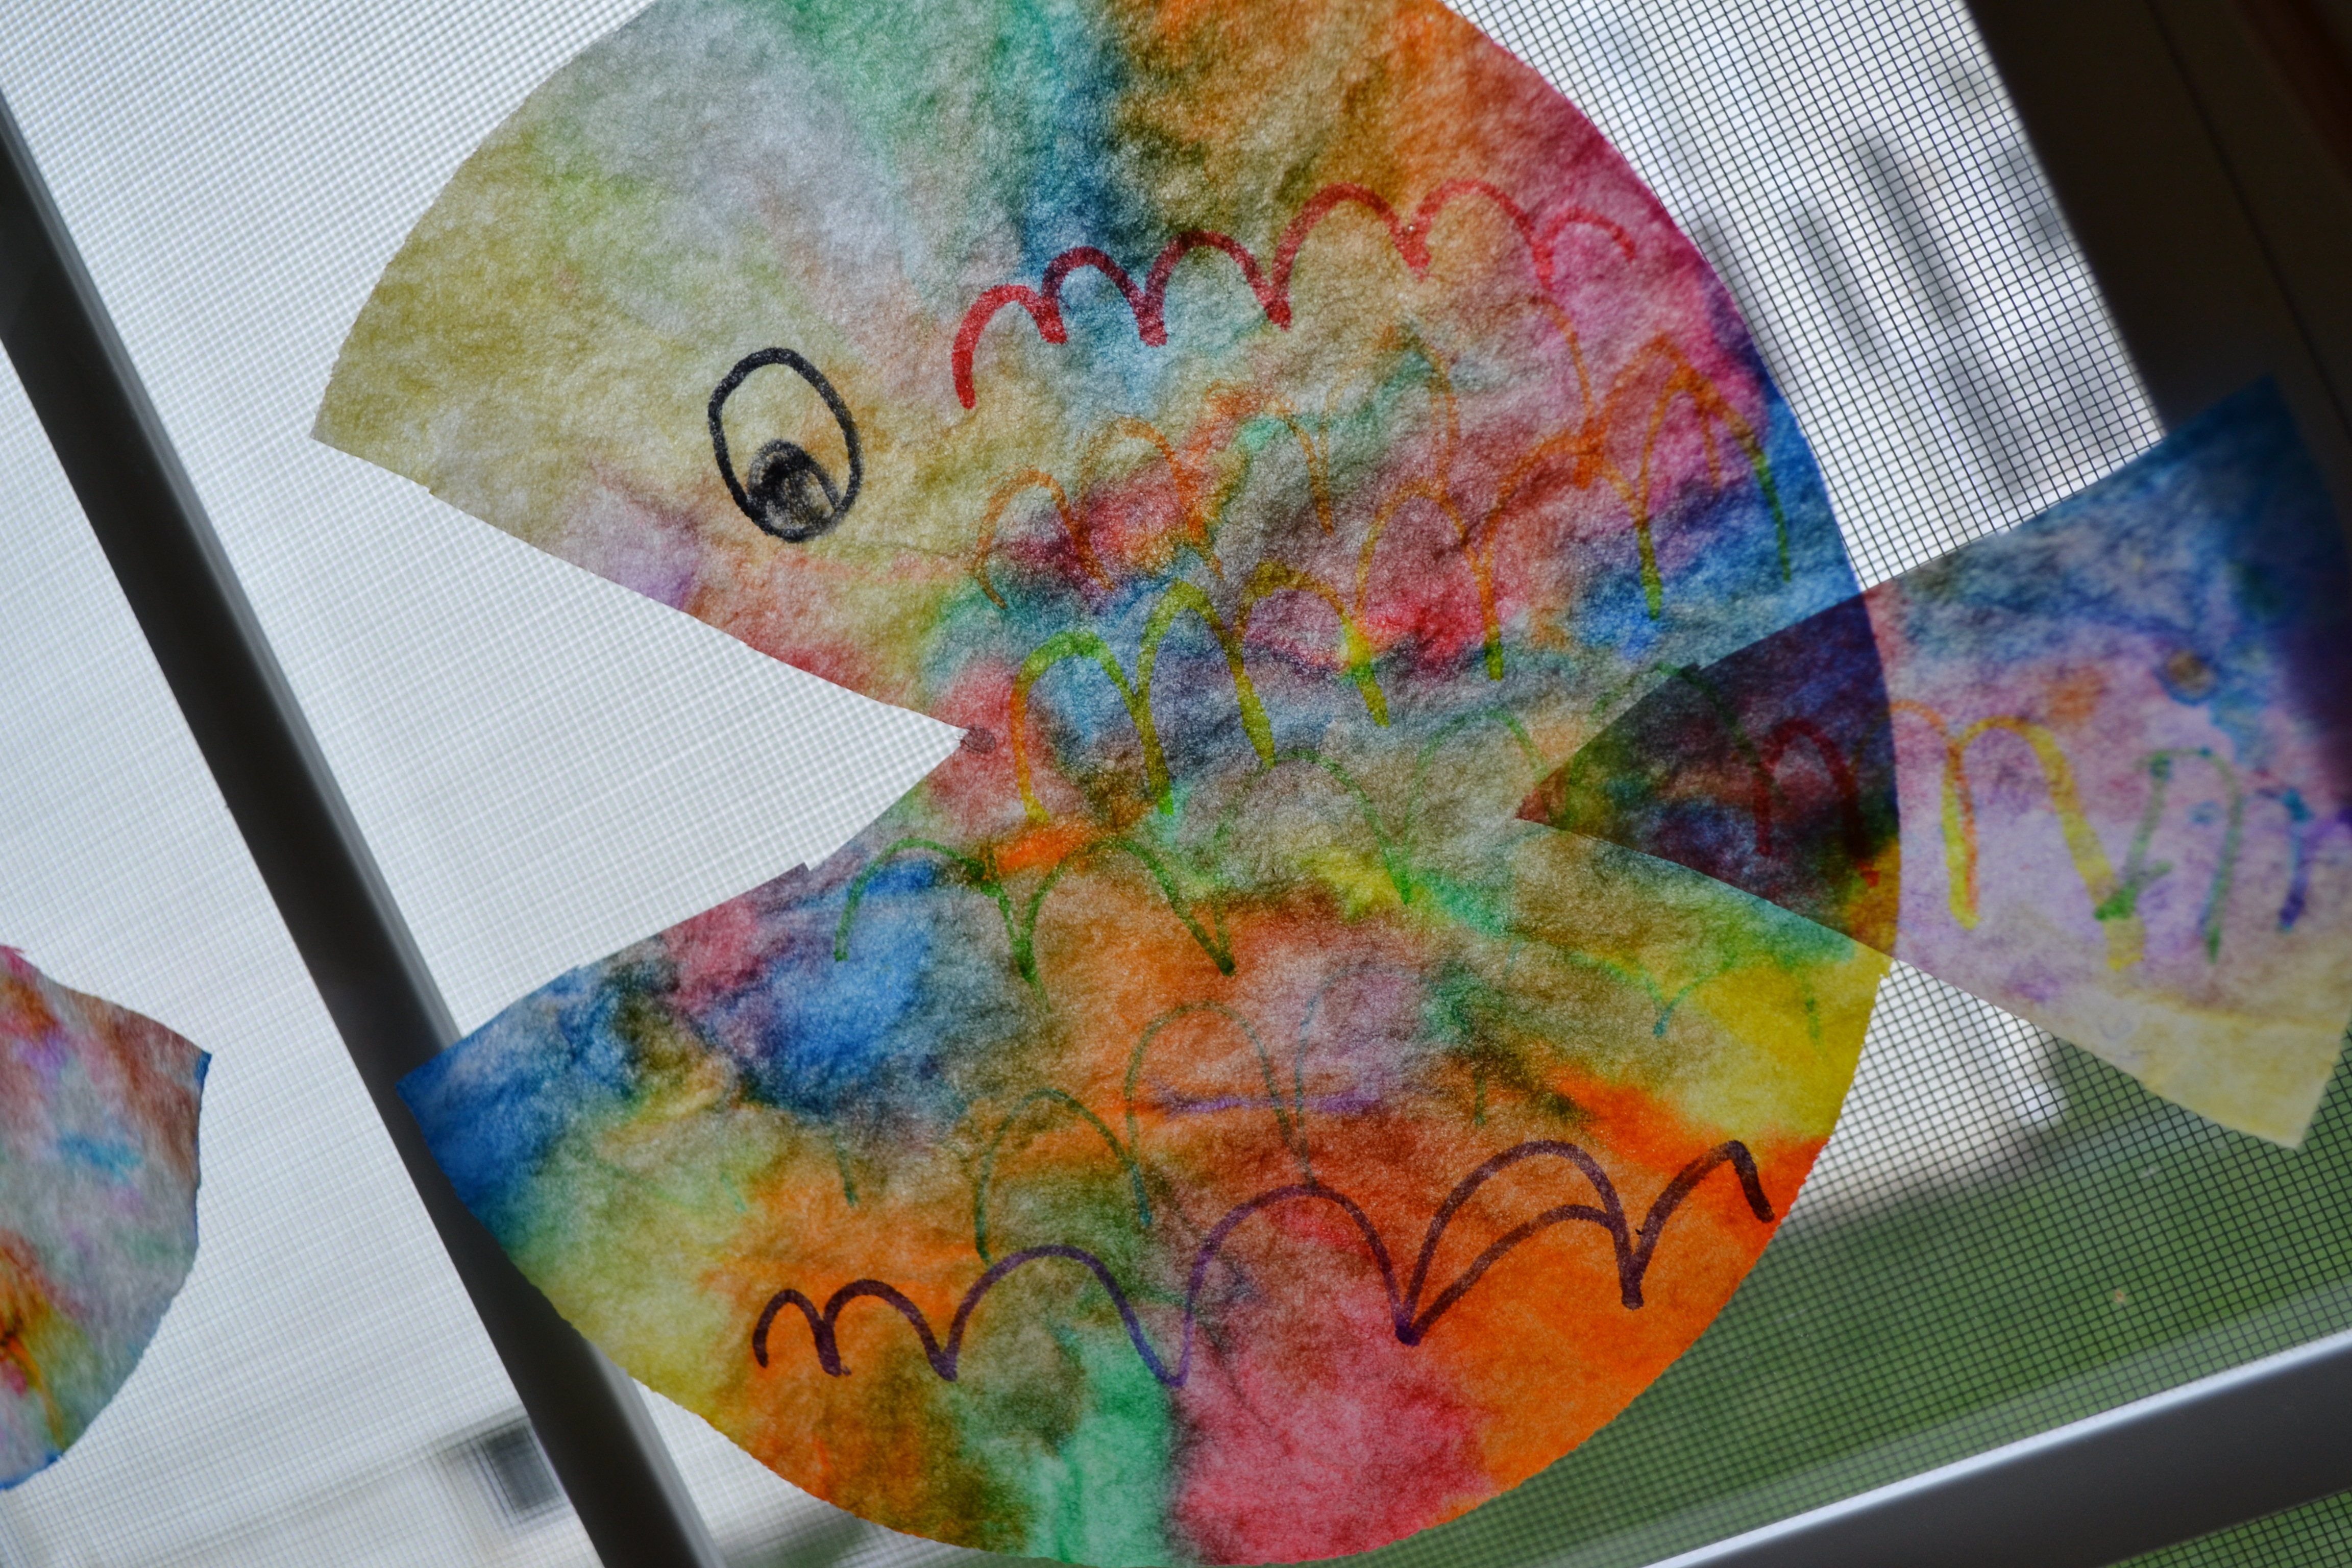
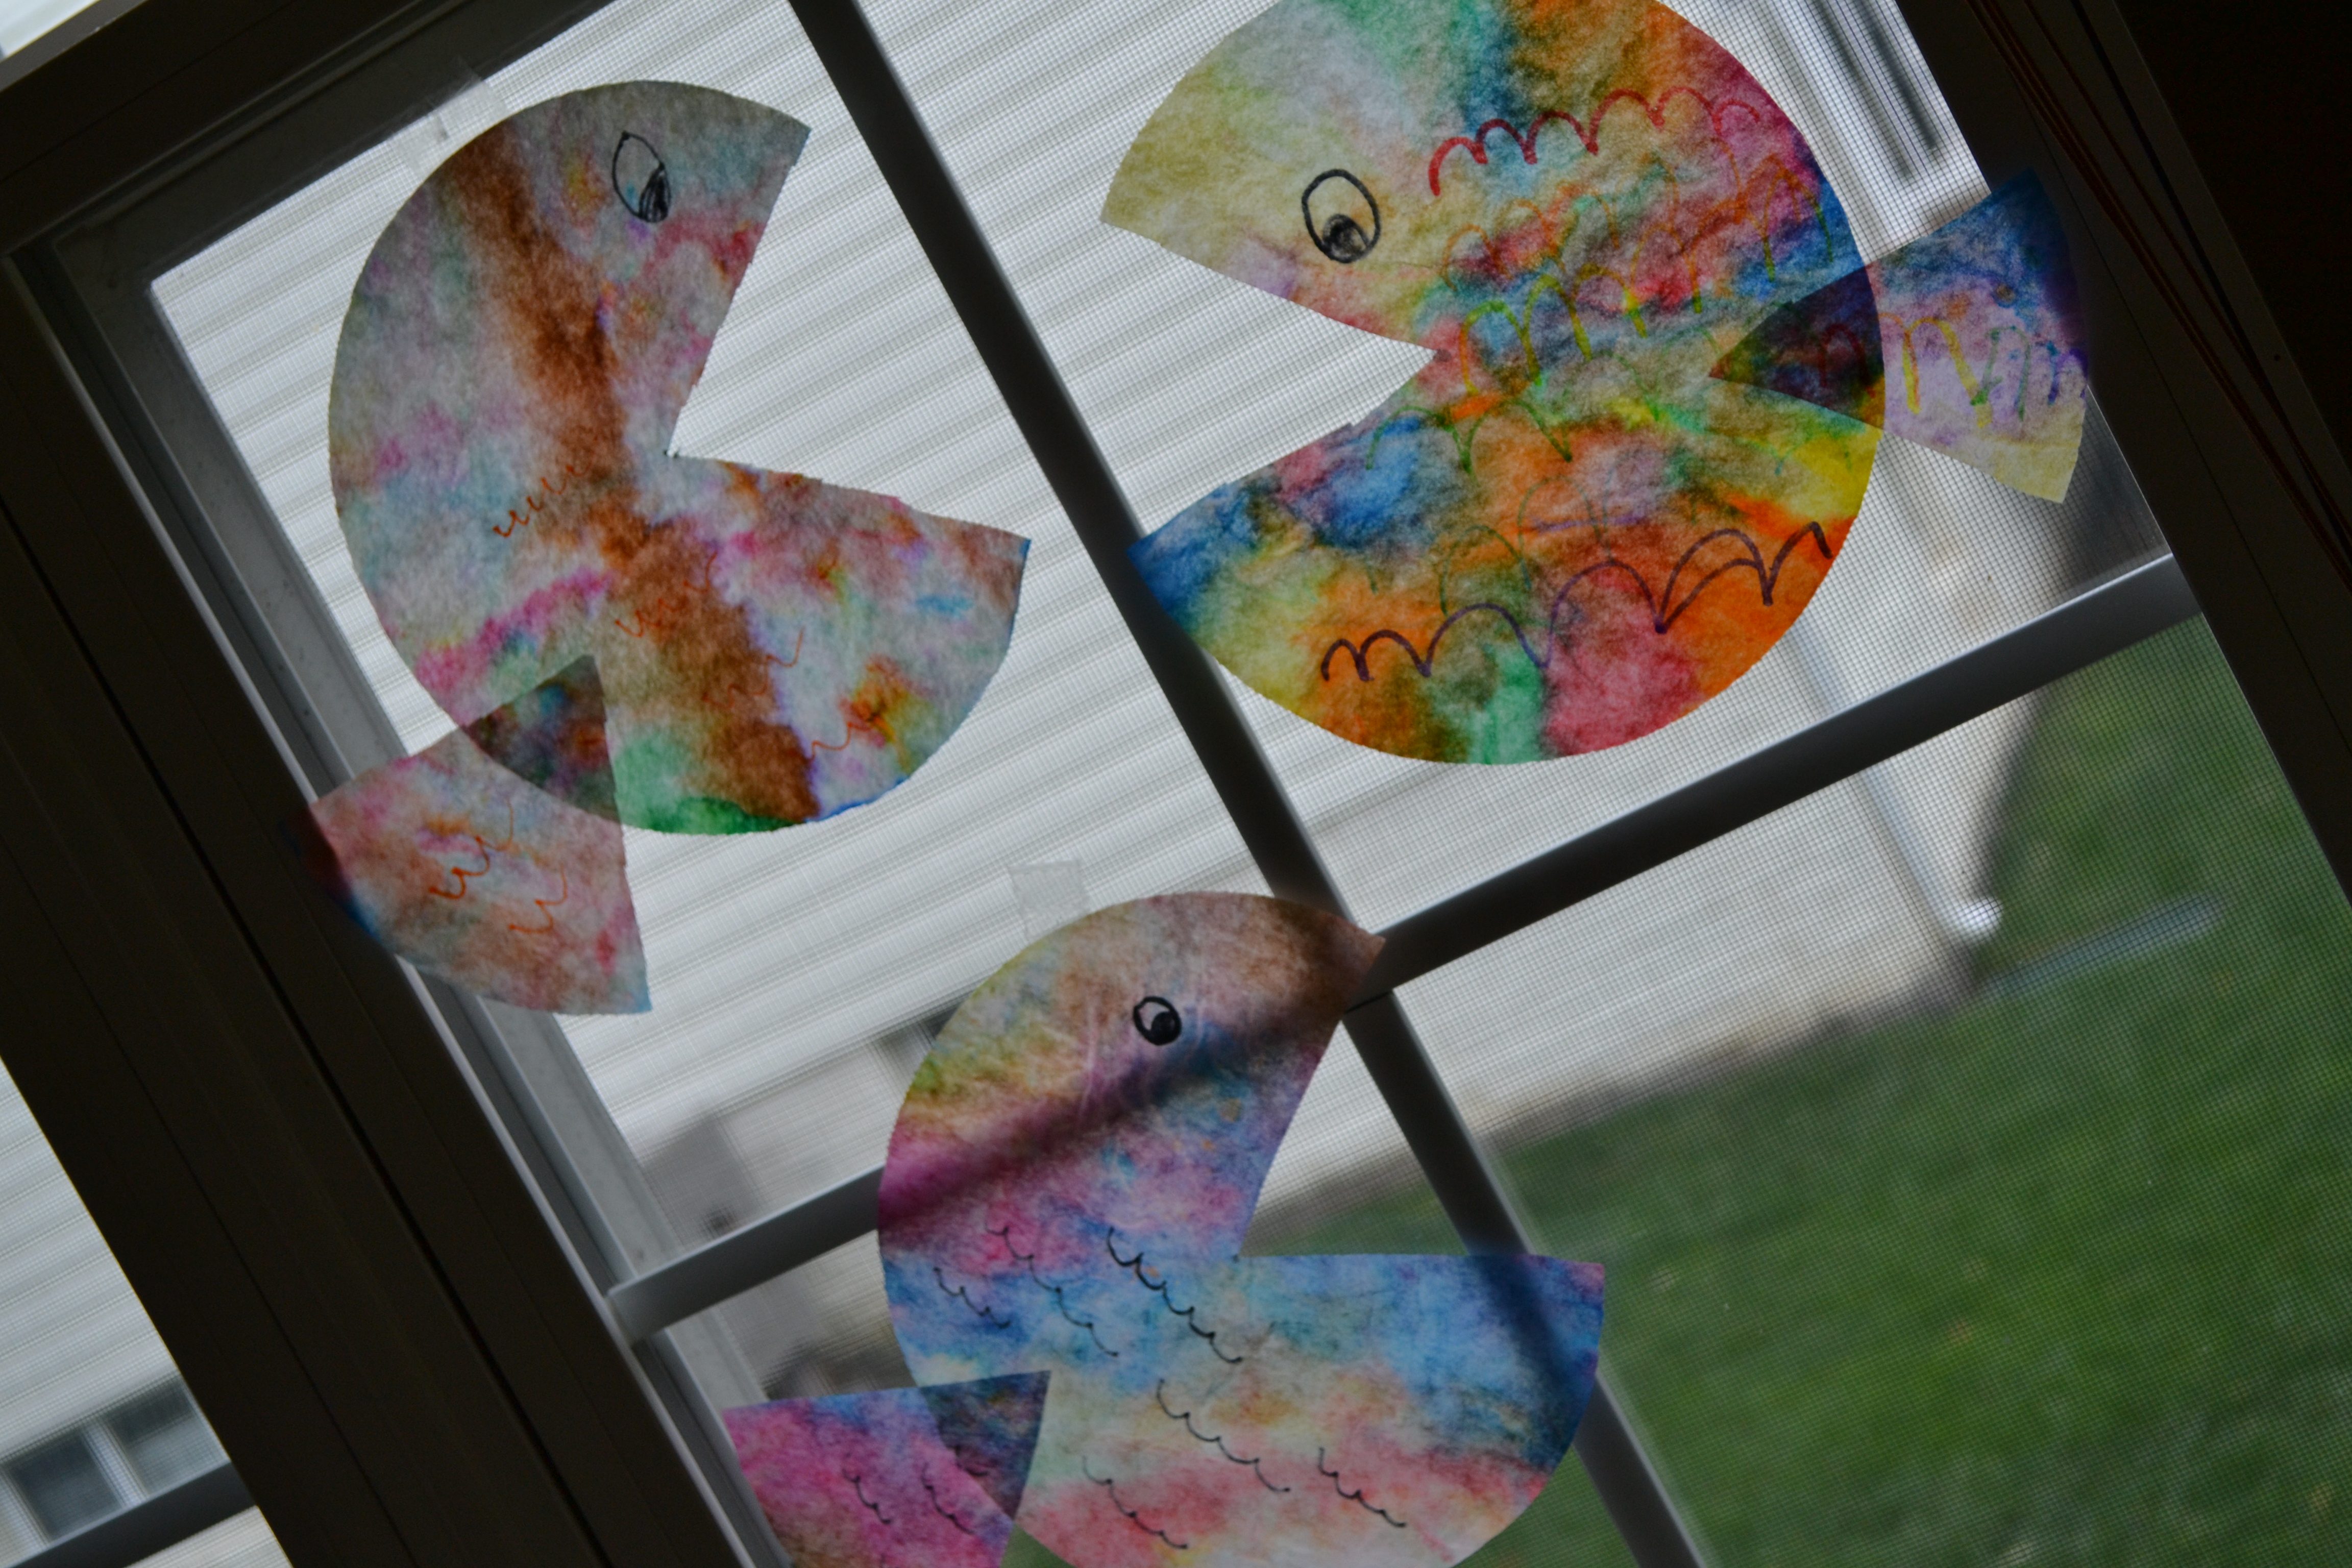
We let ours dry overnight since my kids got a little carried away with the spraying and we wanted them to be completely dry for the next step. Once they were dry, we cut a triangle out of the coffee filter for the fish's mouth.
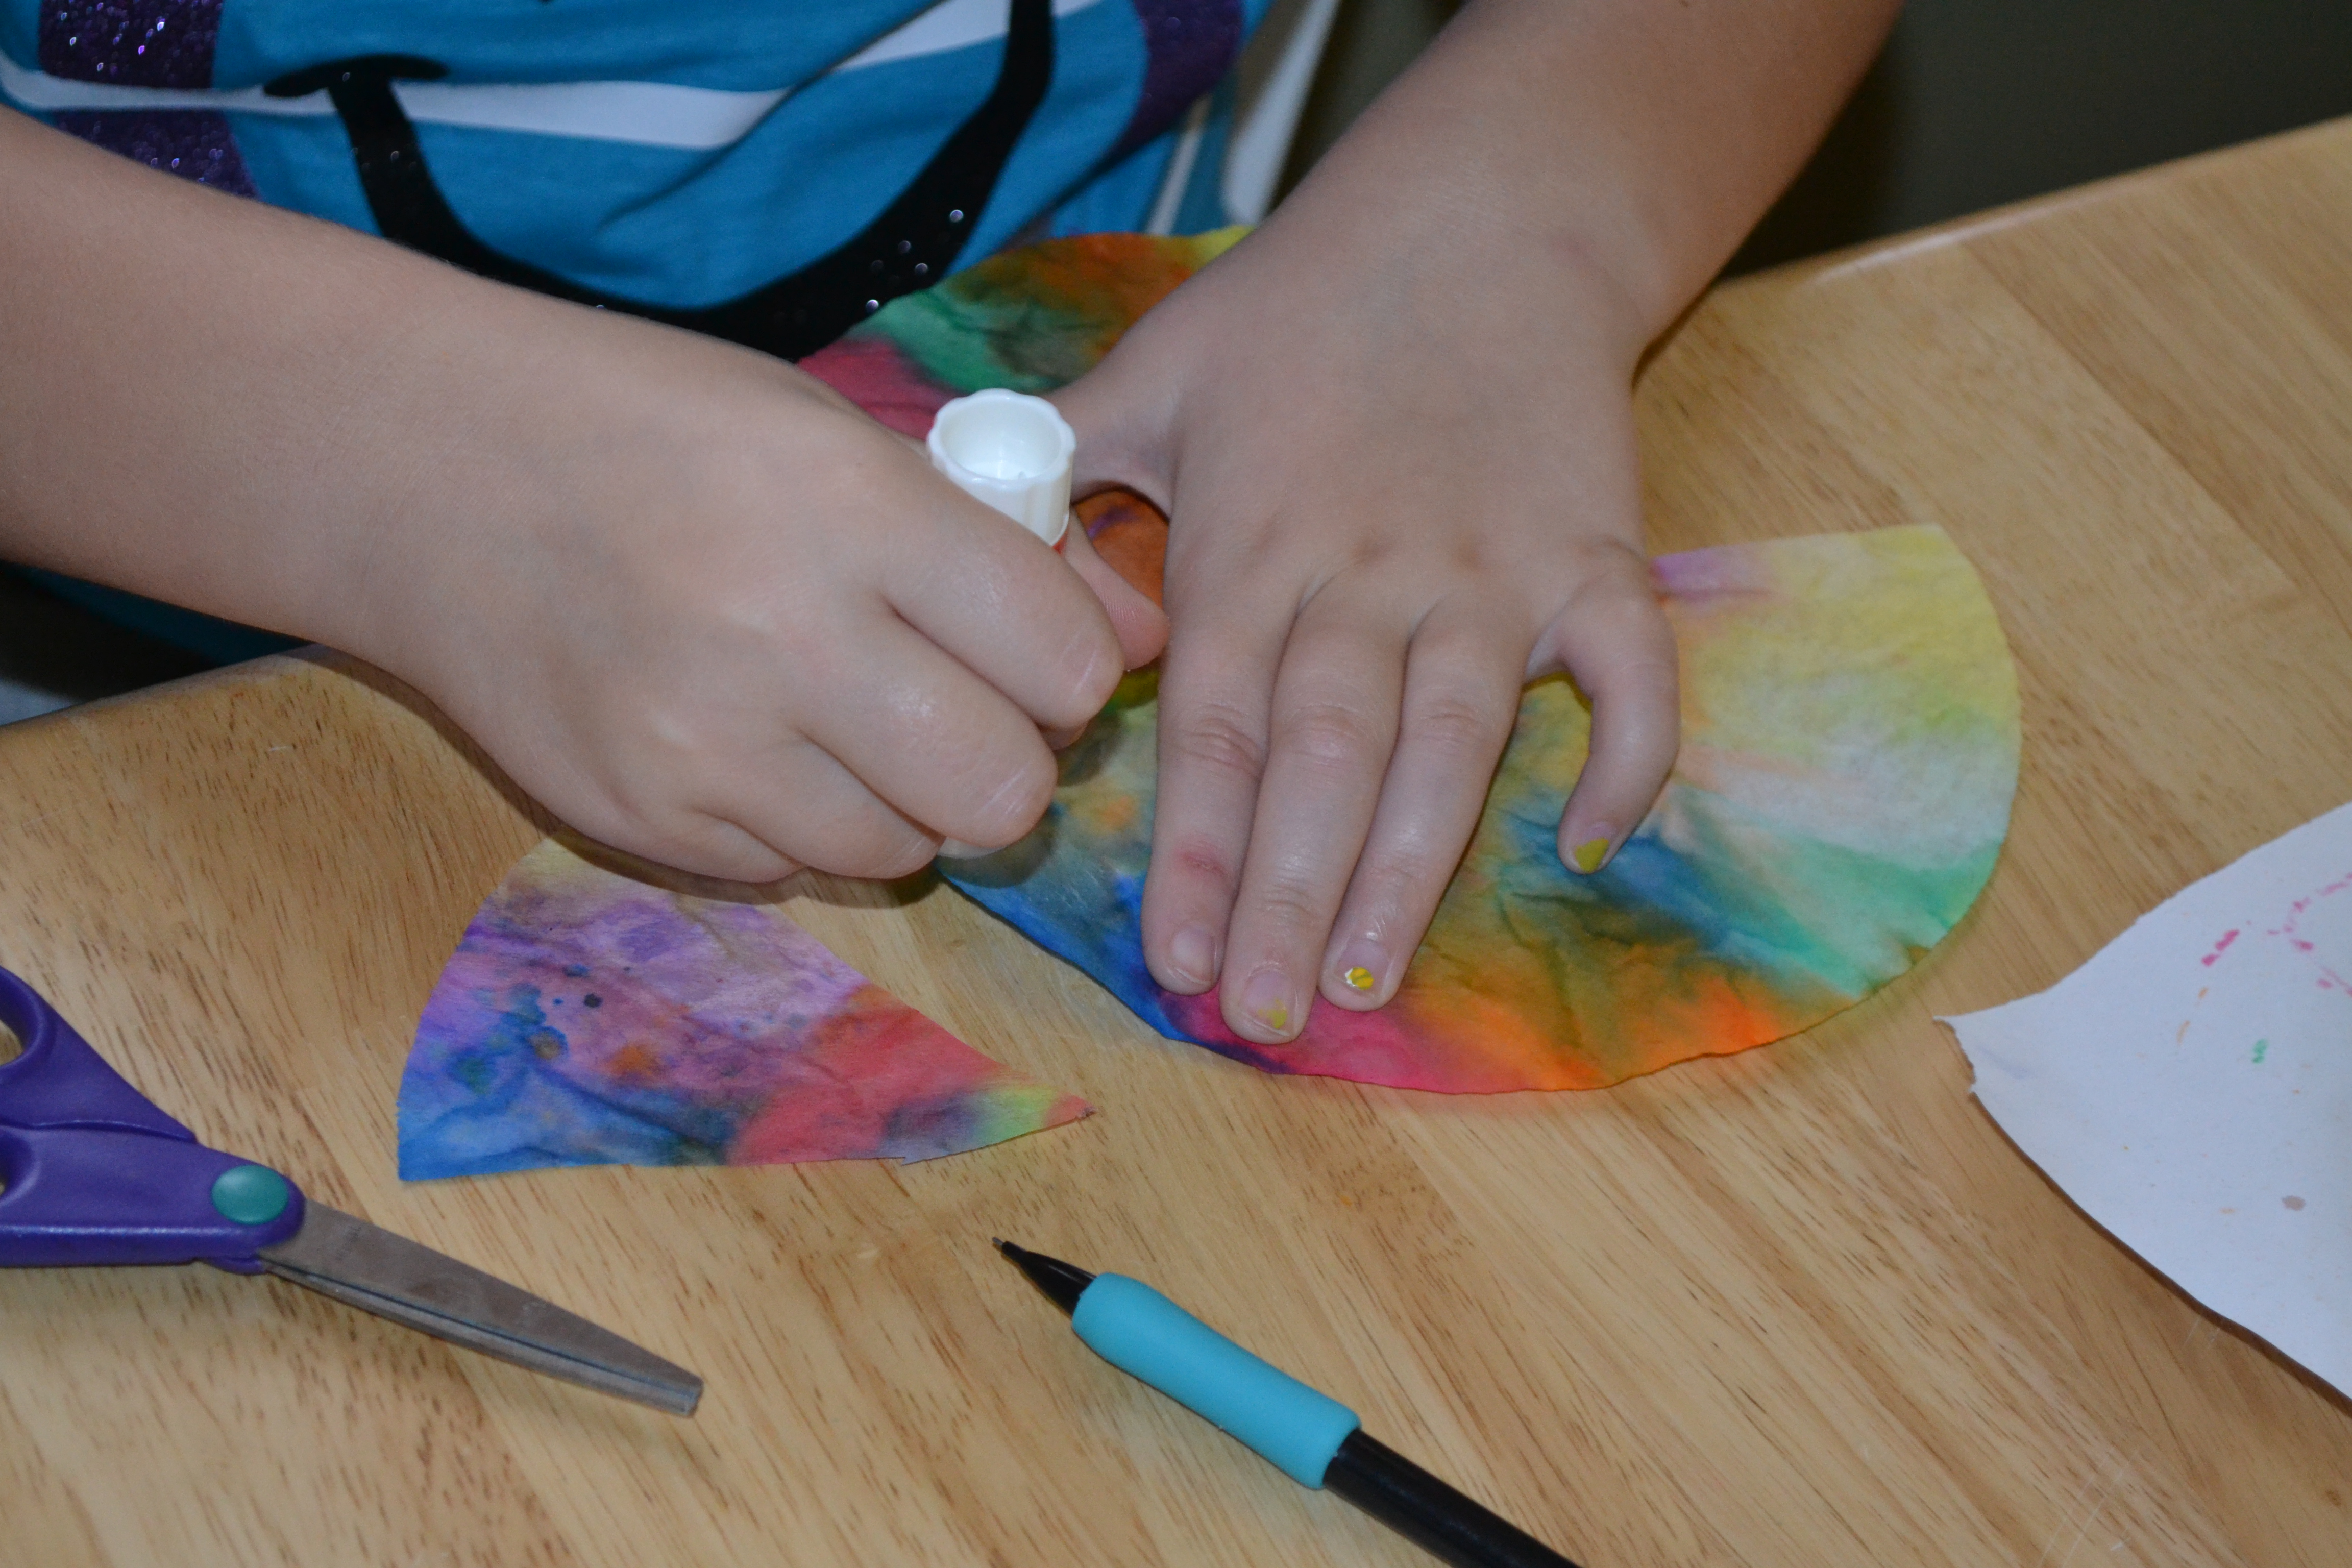
Step 5
Then, the kids glued their triangles to the opposite side of the fish to make the tail fin.
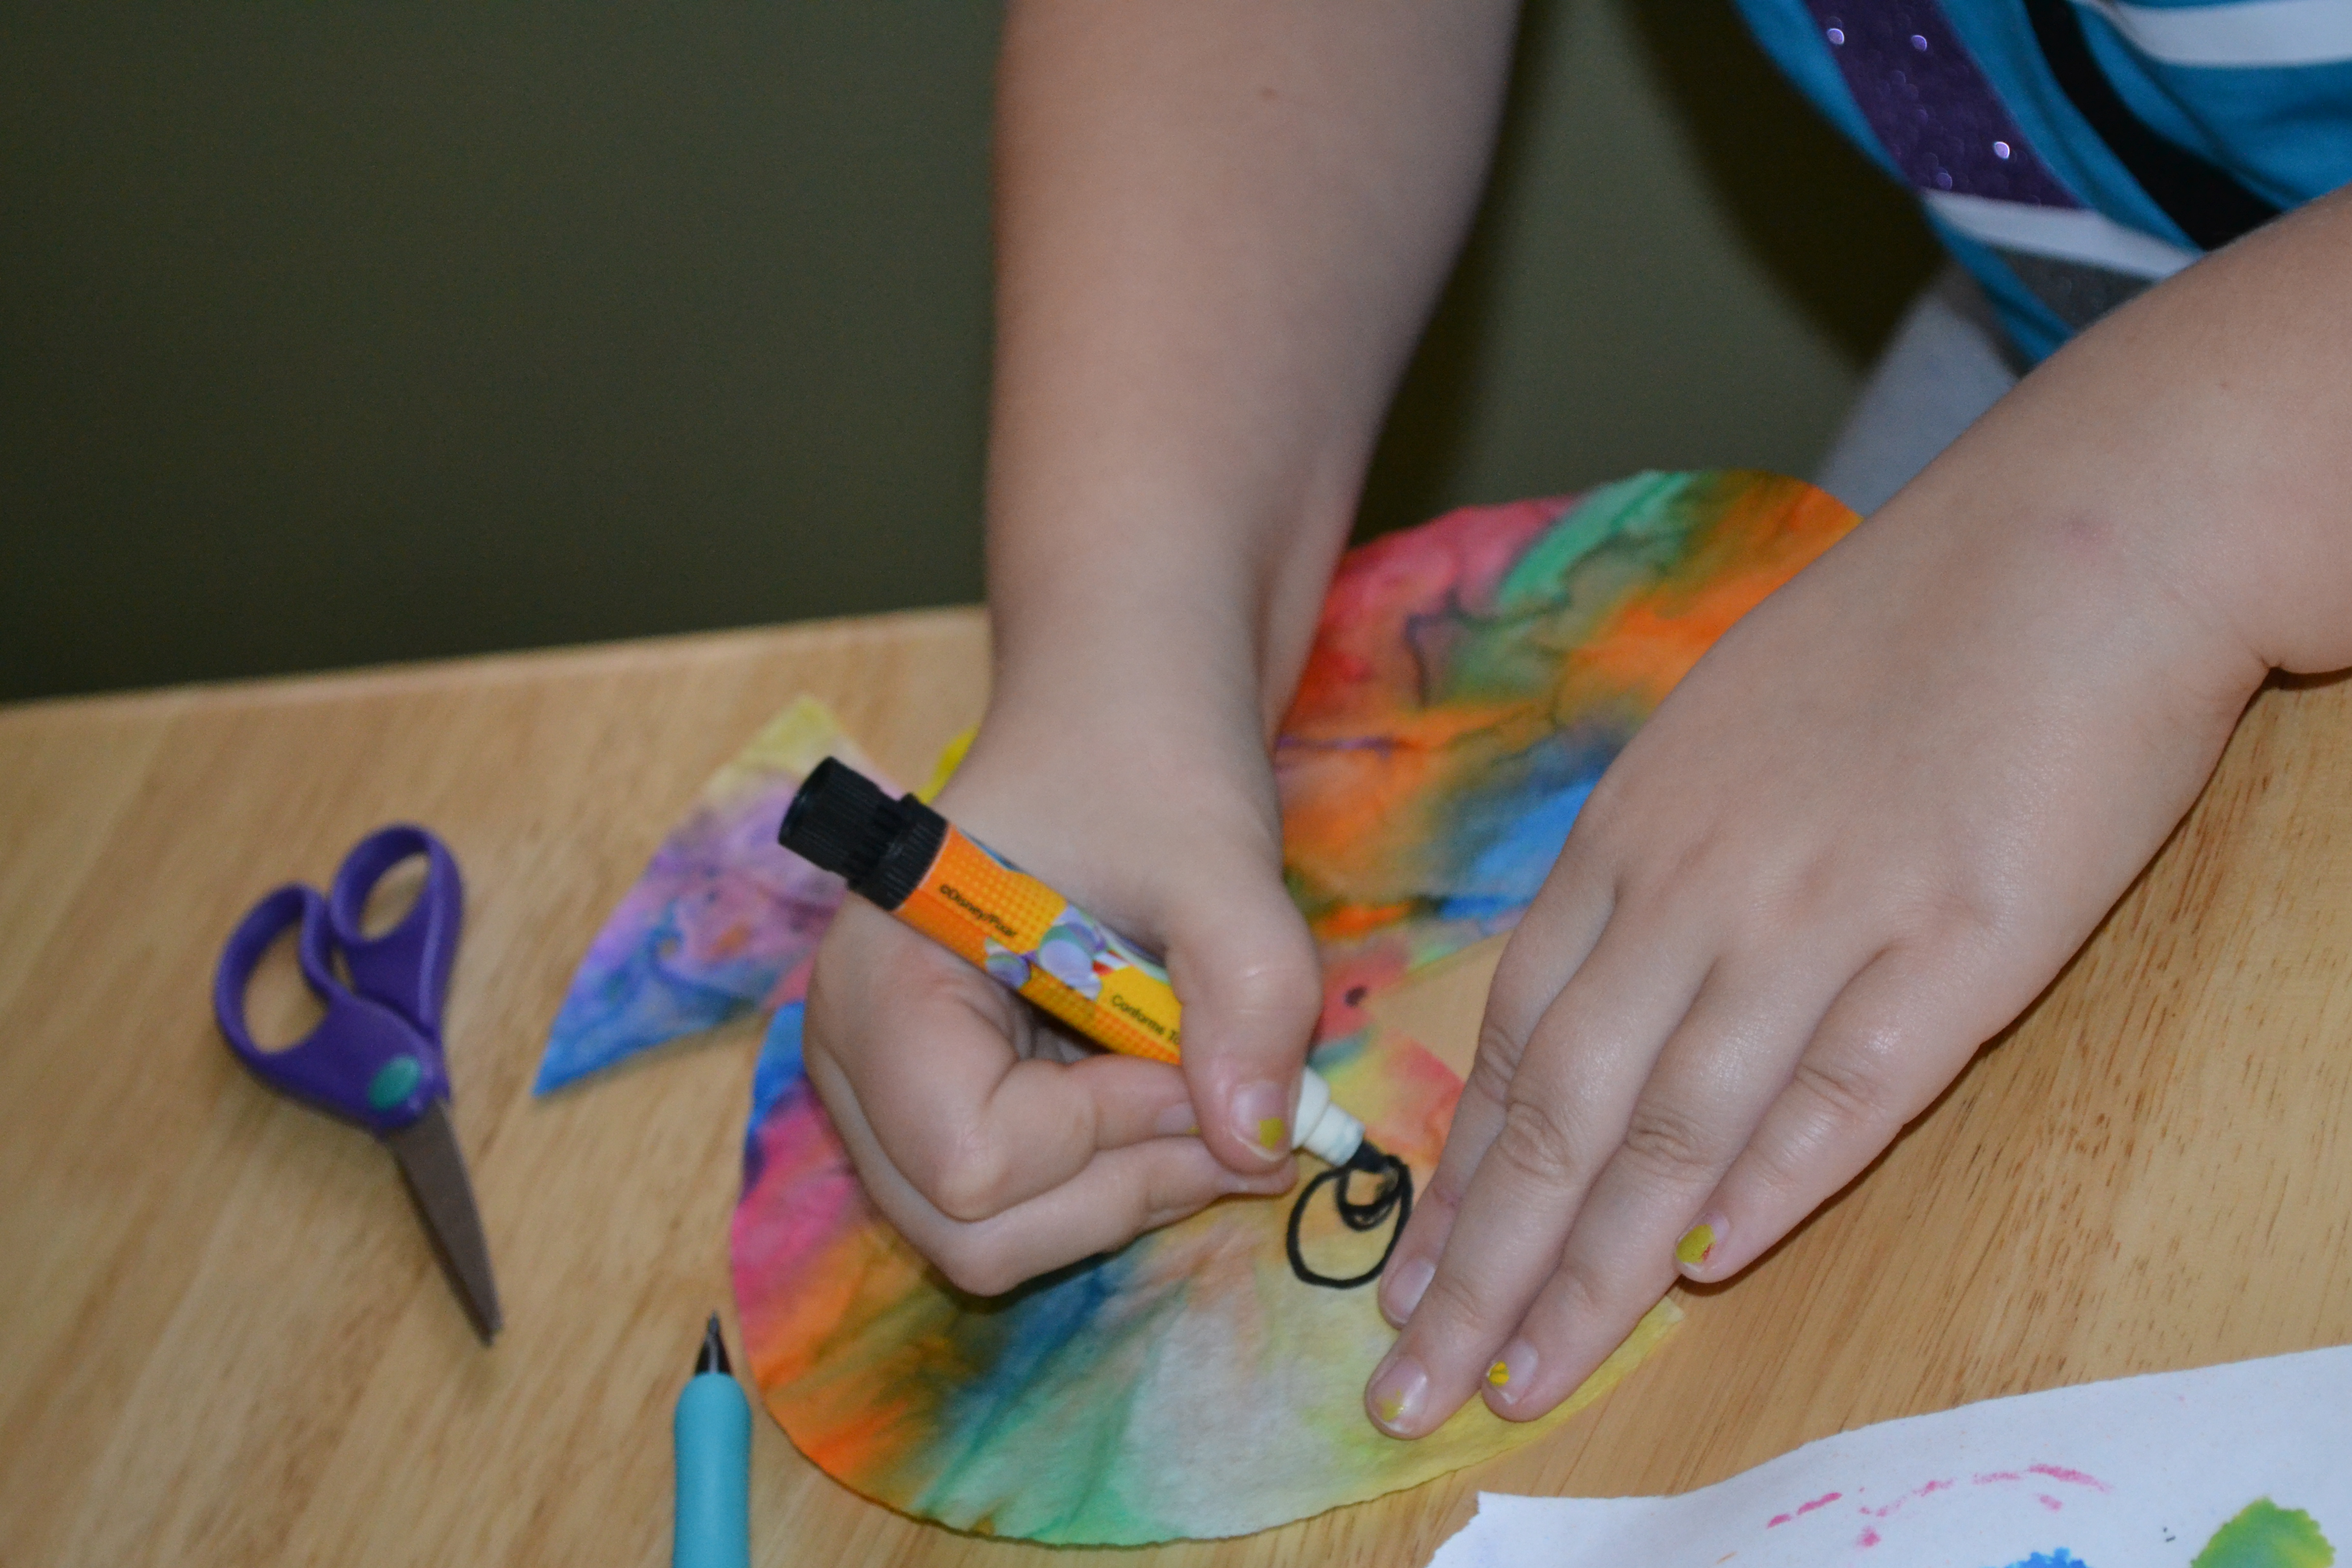
Step 6
They used markers to add scales and eyes to their fish. Some of the younger kids used large googly eyes instead of markers since they had trouble drawing circles.
Done!
The fish made colorful decorations for our windows to brighten up a rainy day!