Step-by-step tutorial
Step 1
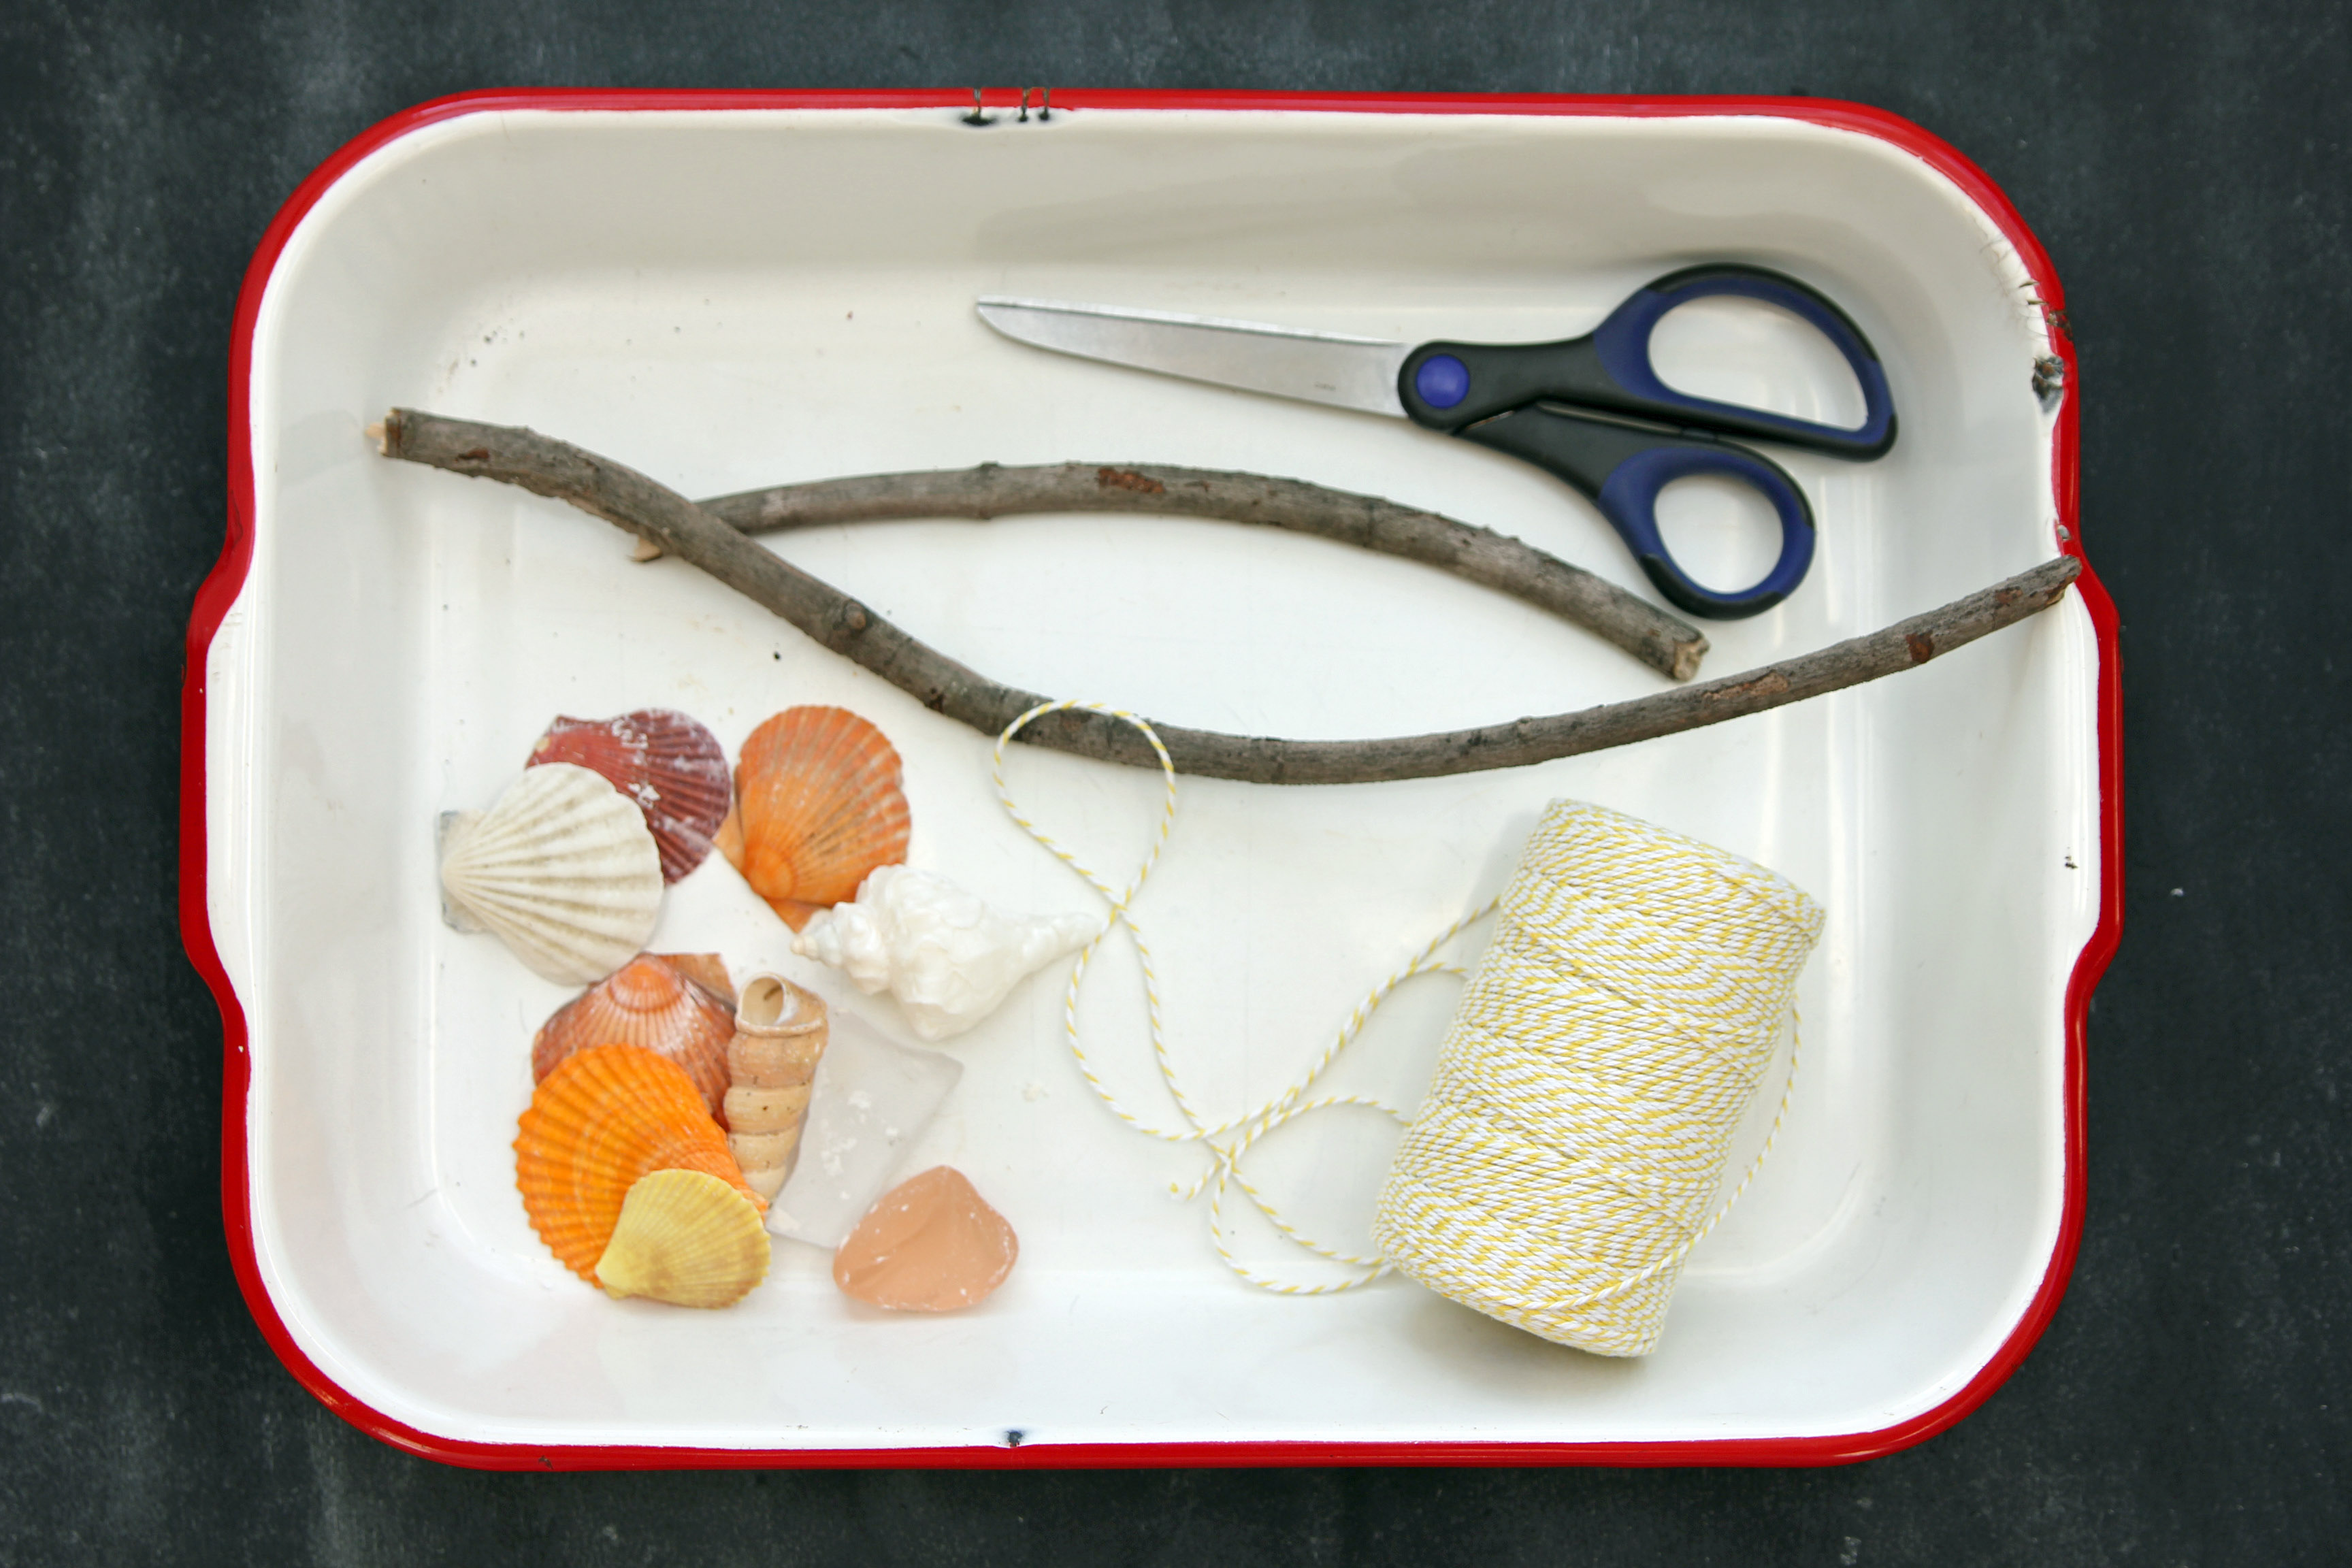
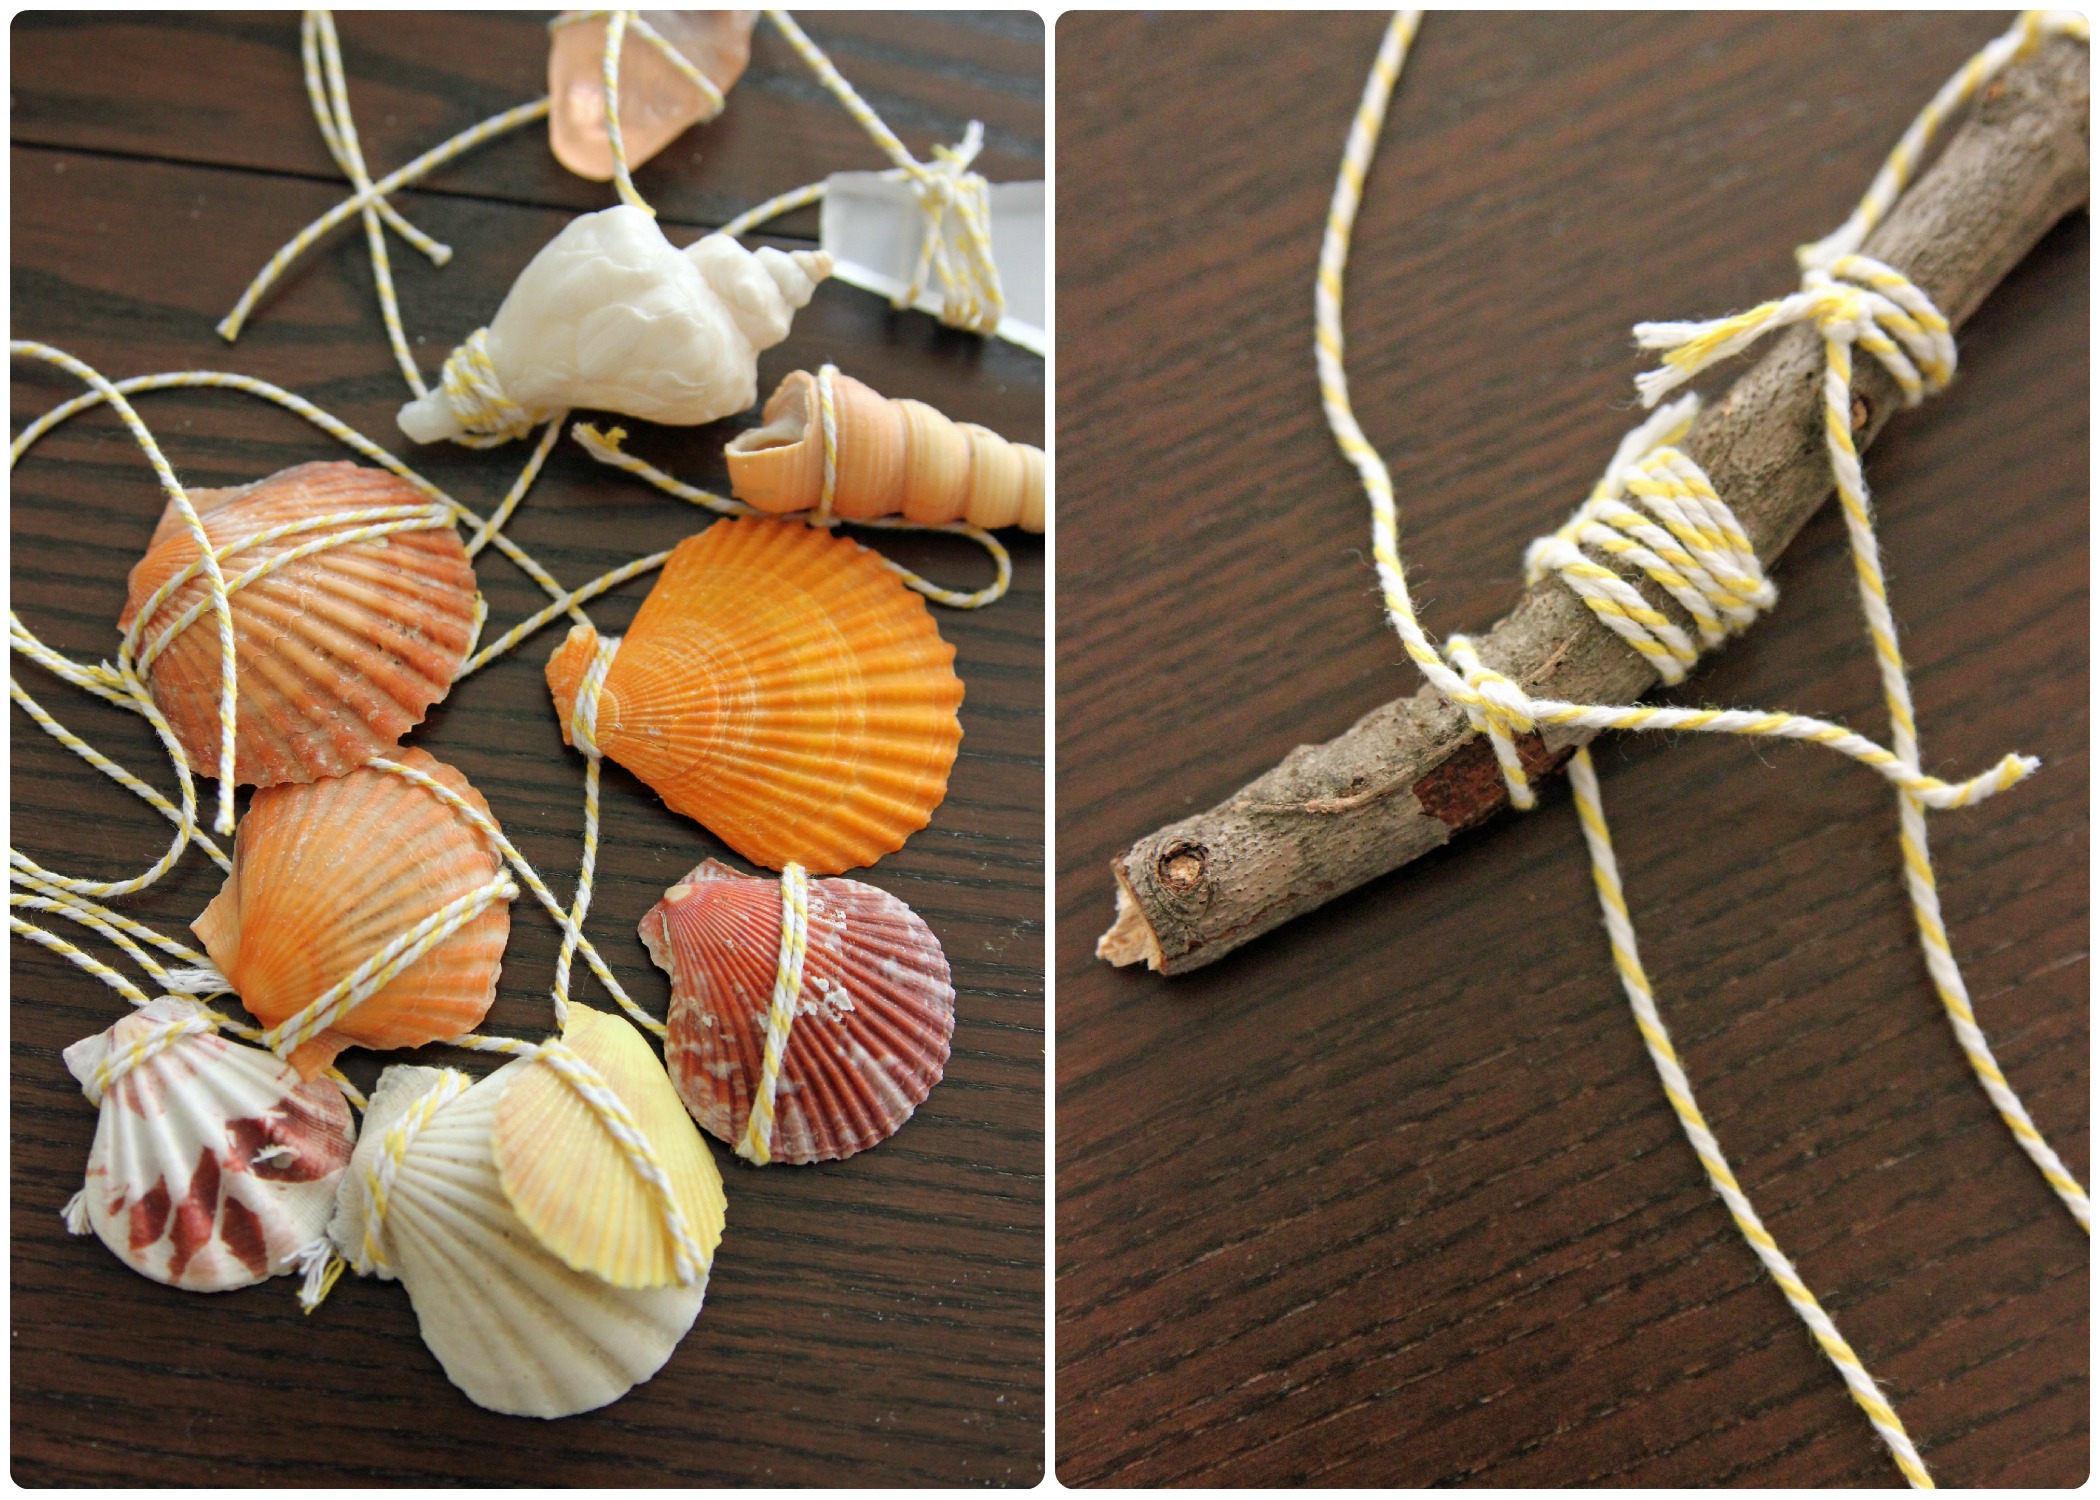
Start off by gathering your supplies. V picked up some of these shells at the beach. Then we added some more pieces, including the sea-glass, from the shell shop at the beach to make this craft. We grabbed the sticks outside from one of our nightly walks.

Step 2
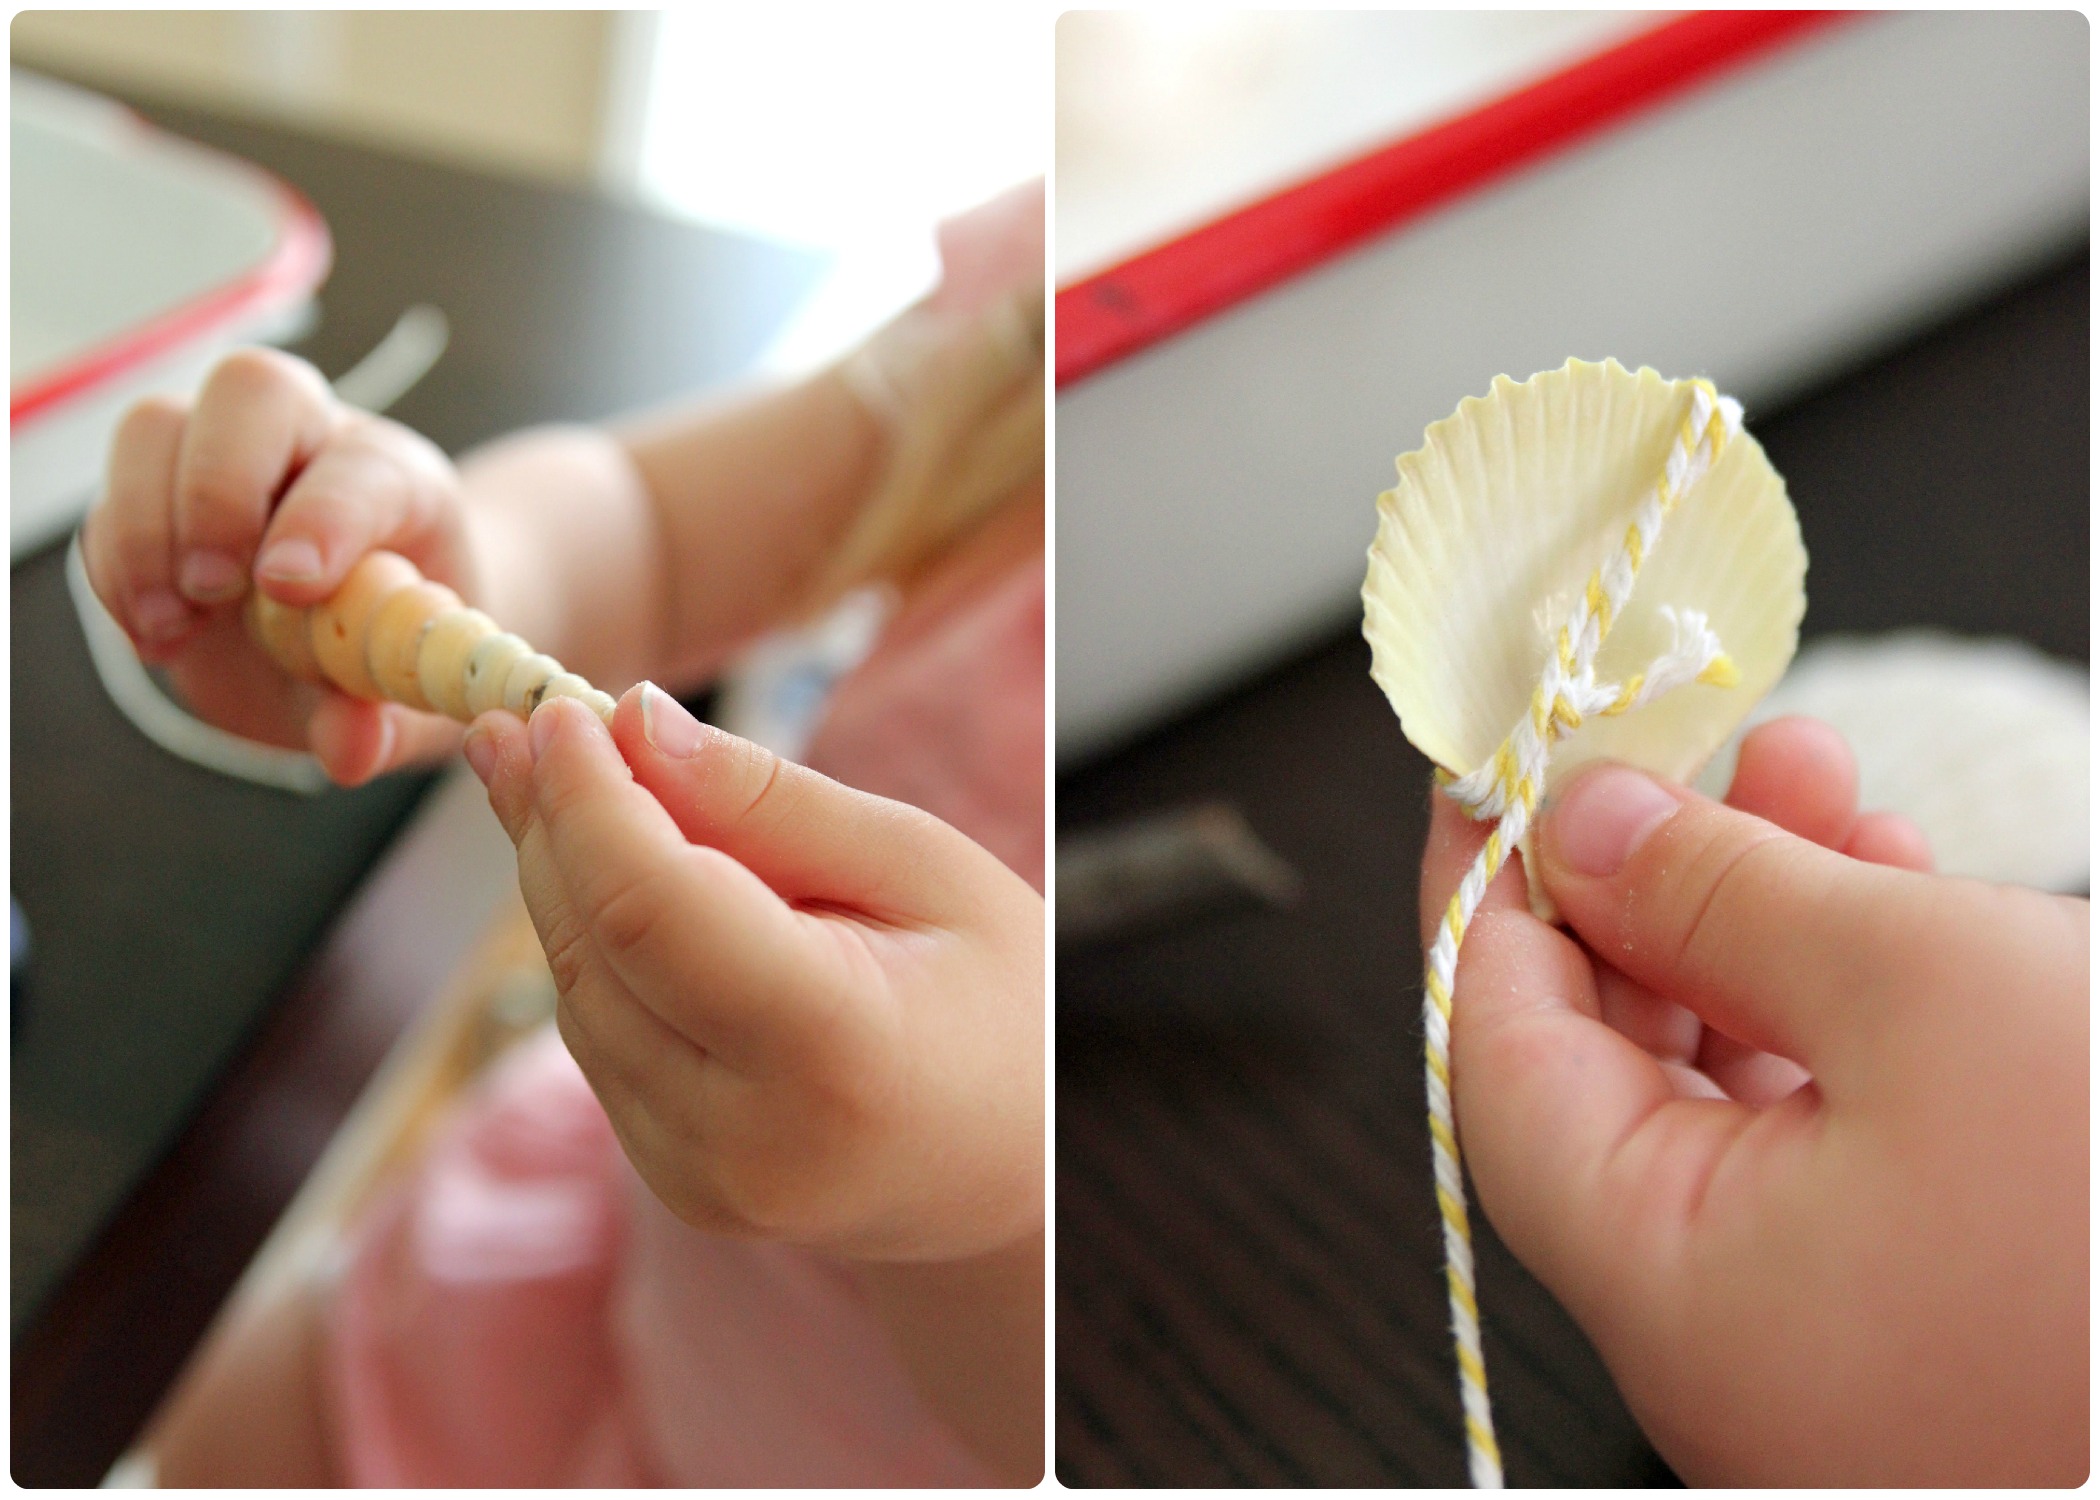
V then began by picking the order of the shells for the wind chime--this was a very meticulous process for V, who is three. She was very intent on what needed to come next in the process. We then wrapped the shells with twine and knotted them.
Step 3
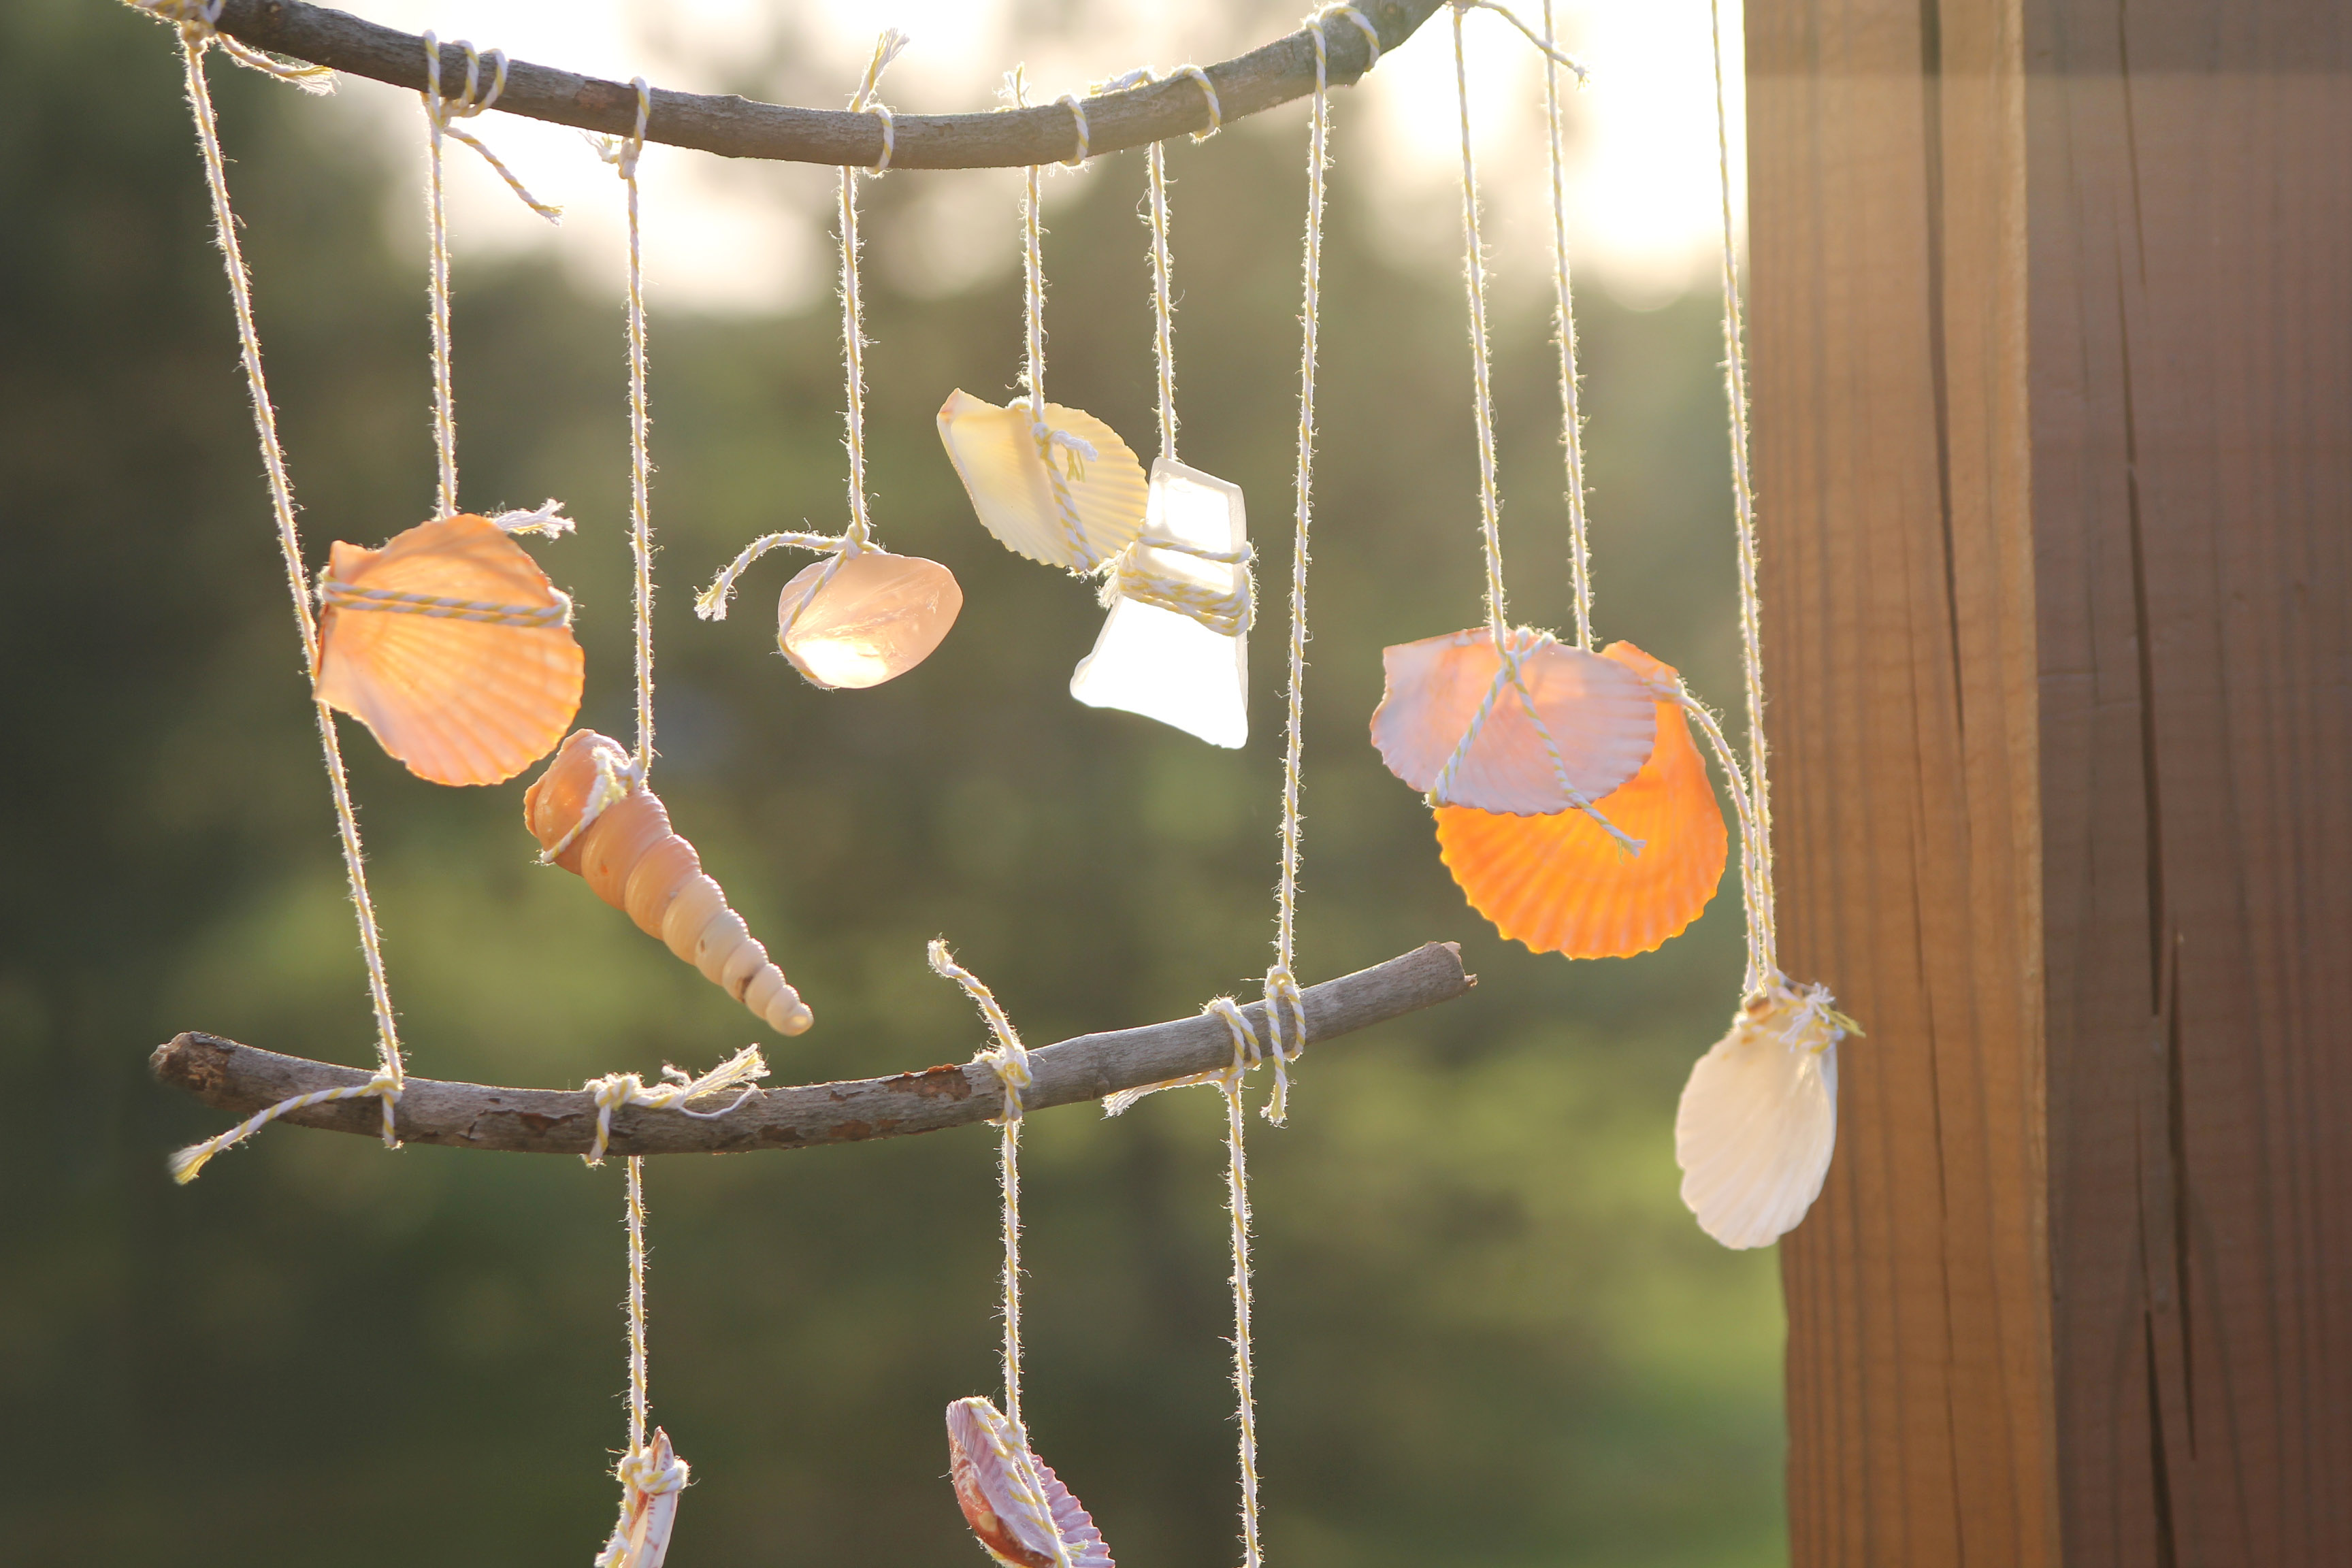
We did this for all the shells and sea-glass. We tied twine around them and sealed them with a knot, using various lengths of string for each shell. We then created a long string on the top to hang it, approximately 24 inches (61 cm).
Step 4
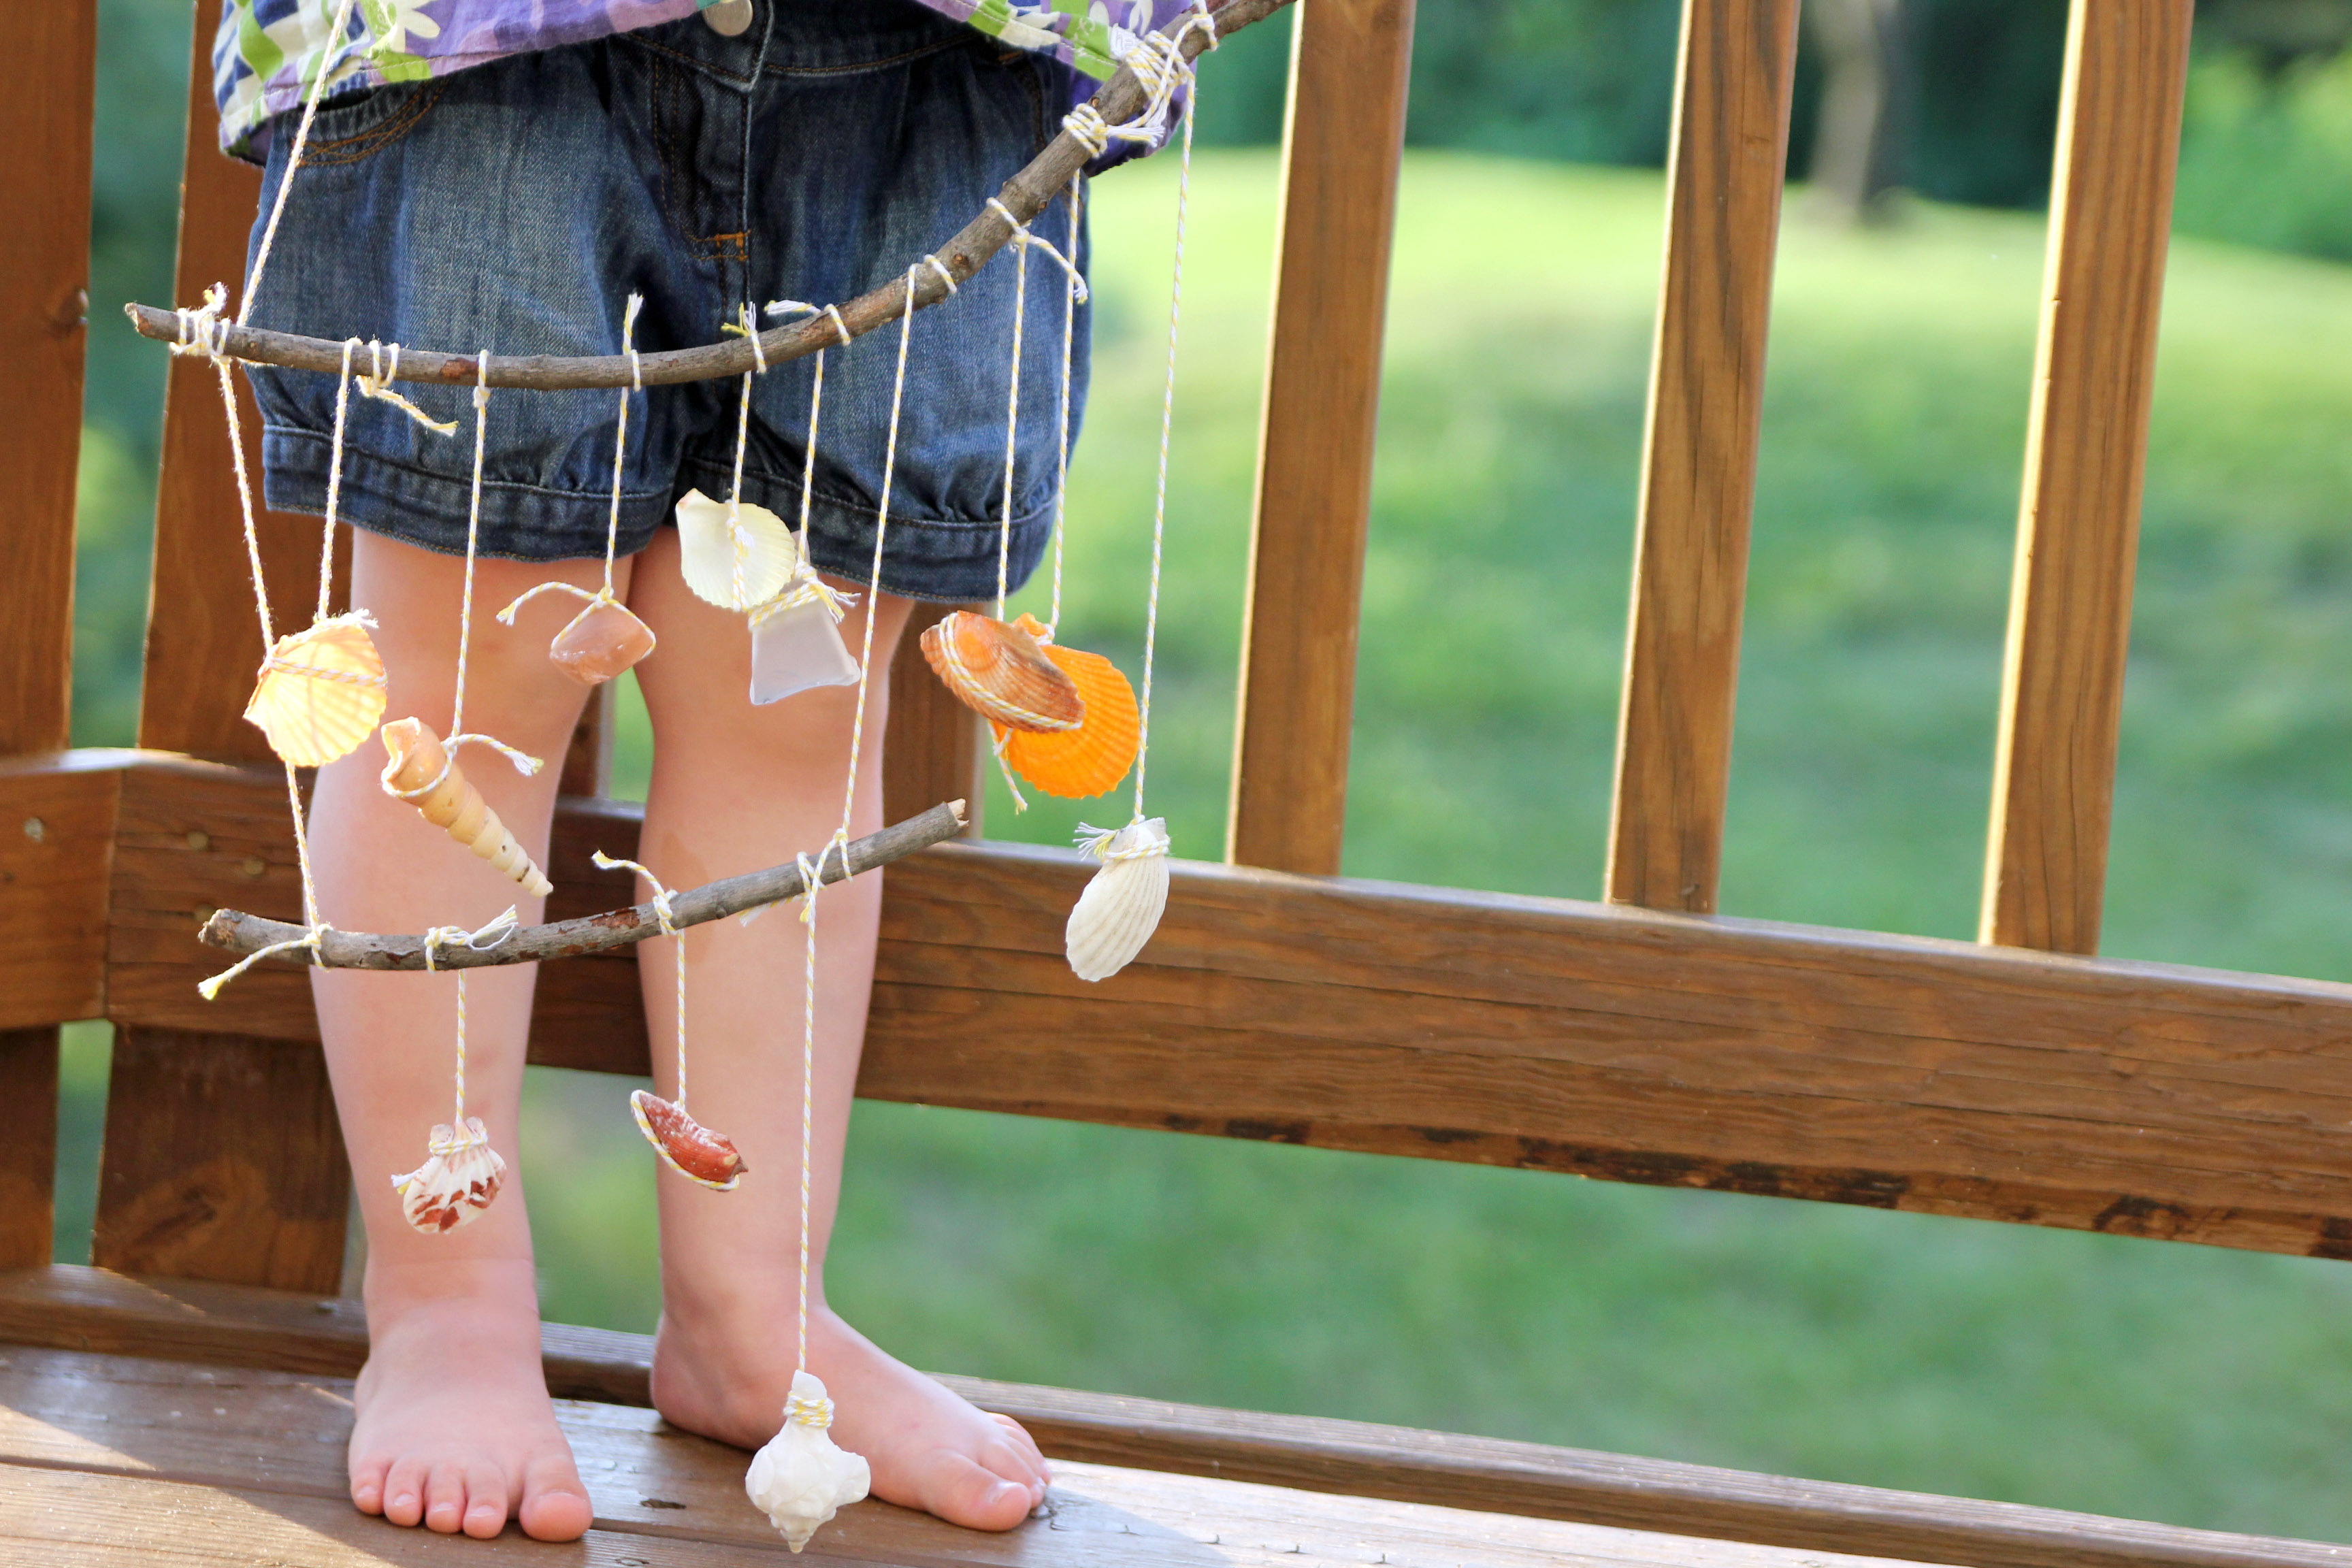
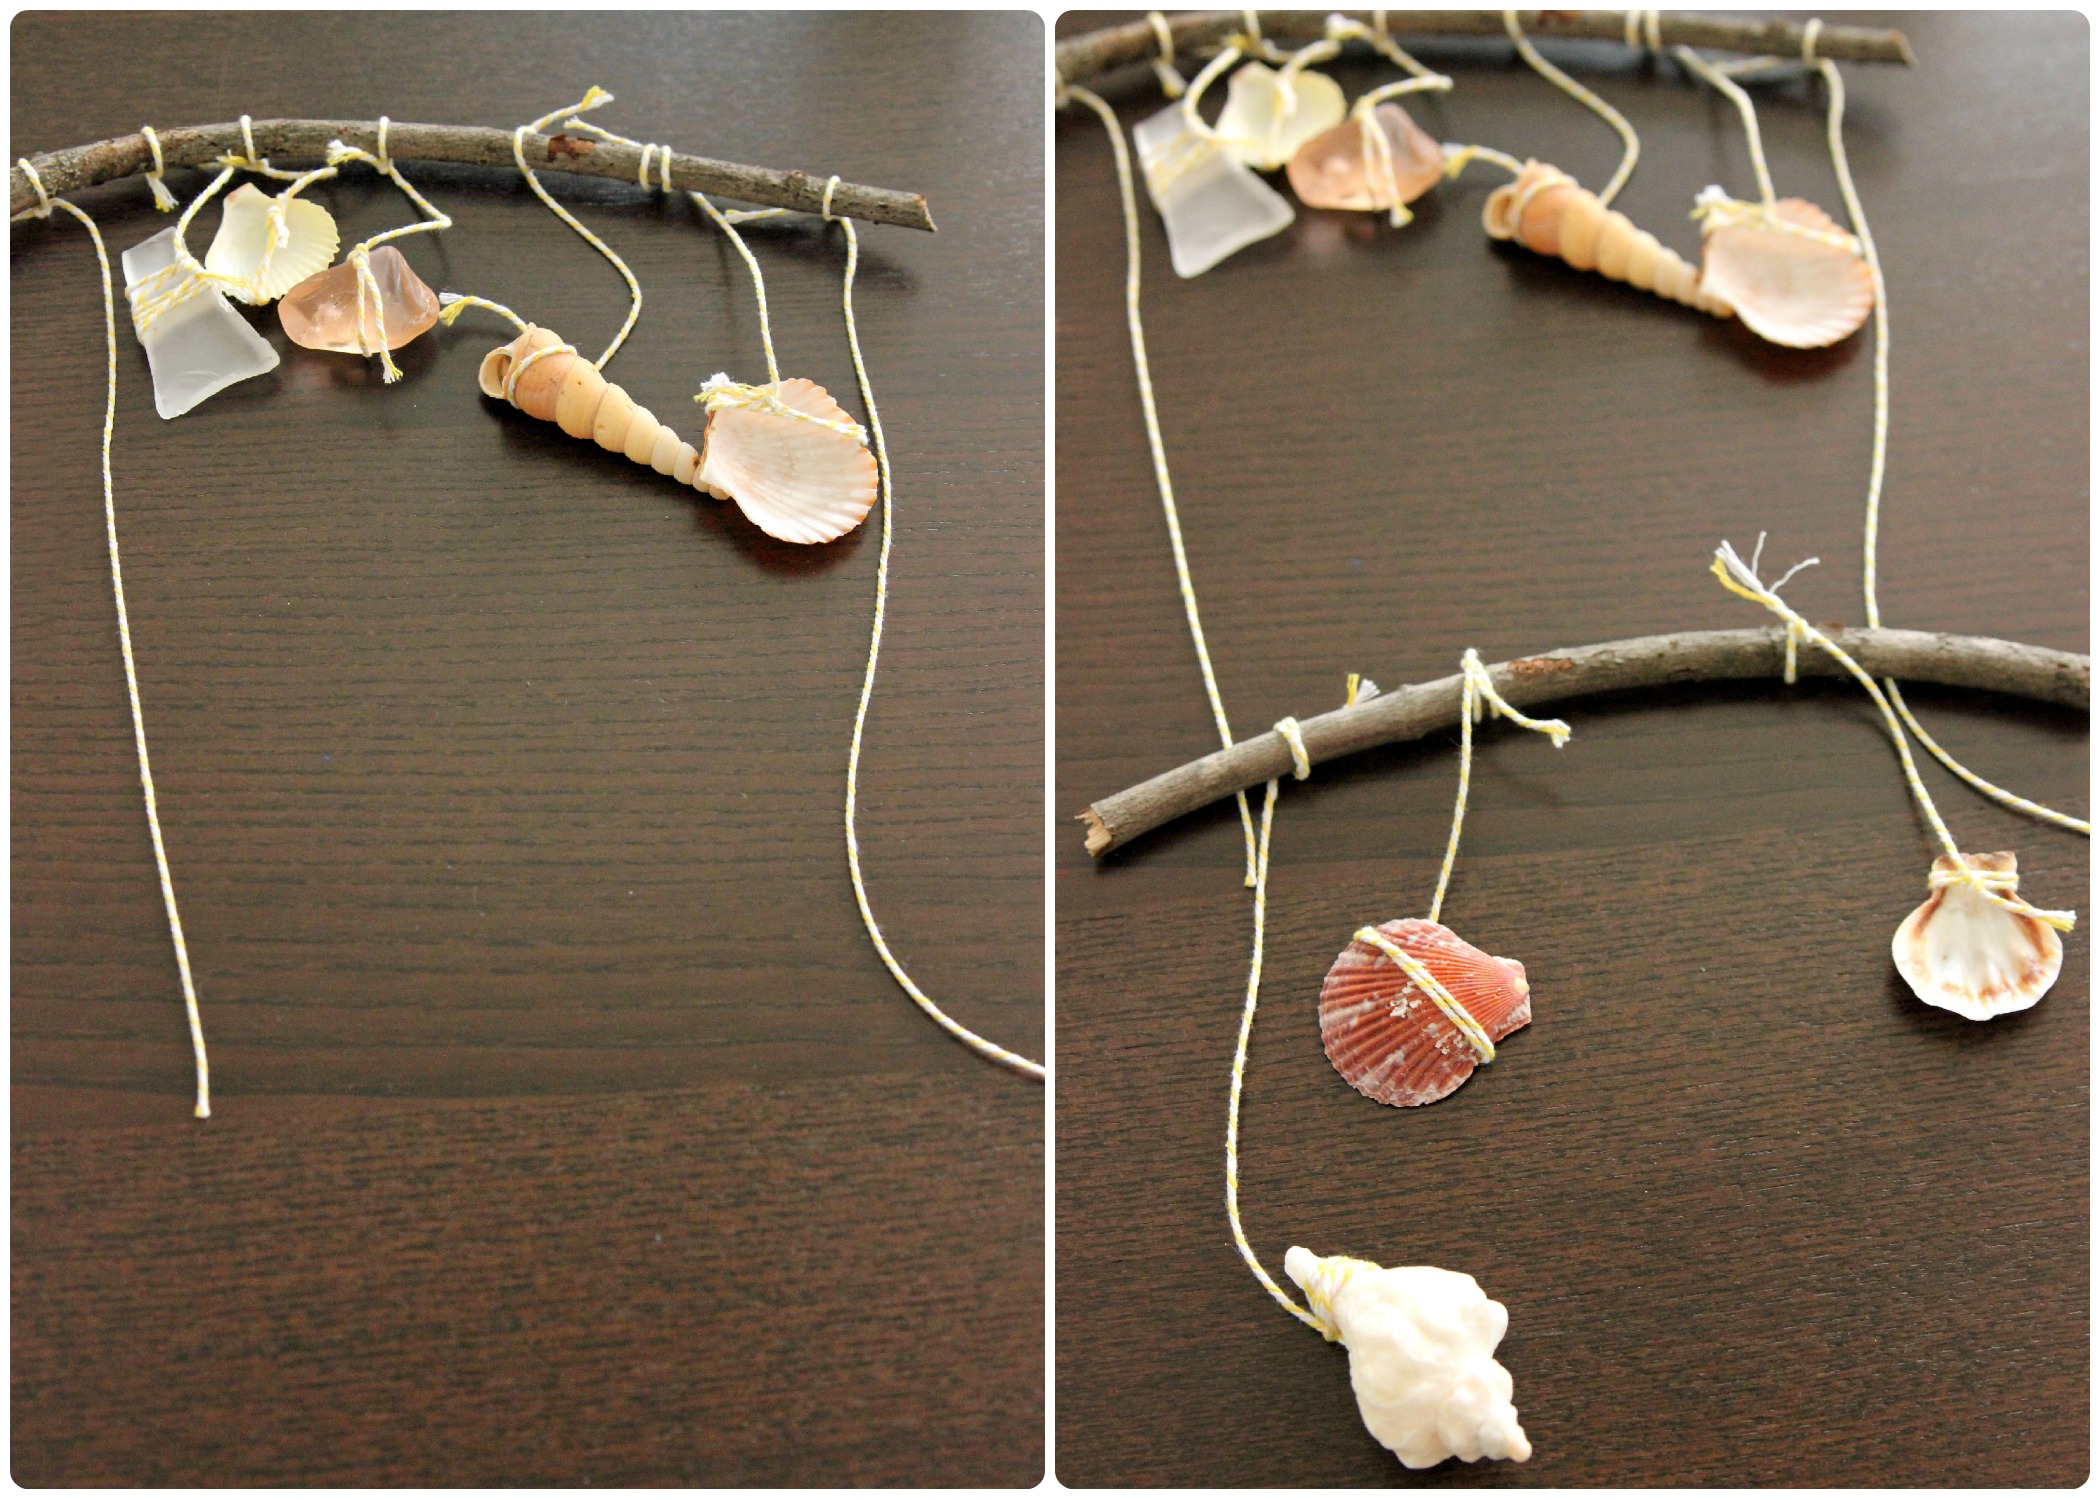
Next, we tied the twine wrapped shells to each stick, spacing them apart, in various lengths. We used a longer stick on top and a smaller one on the bottom. We then connected the two sticks with two same-size pieces of string on each end.
Done!
Then, as the sun was setting we got to hang our wind chime up on the porch and watch it in the sun.