Step-by-step tutorial
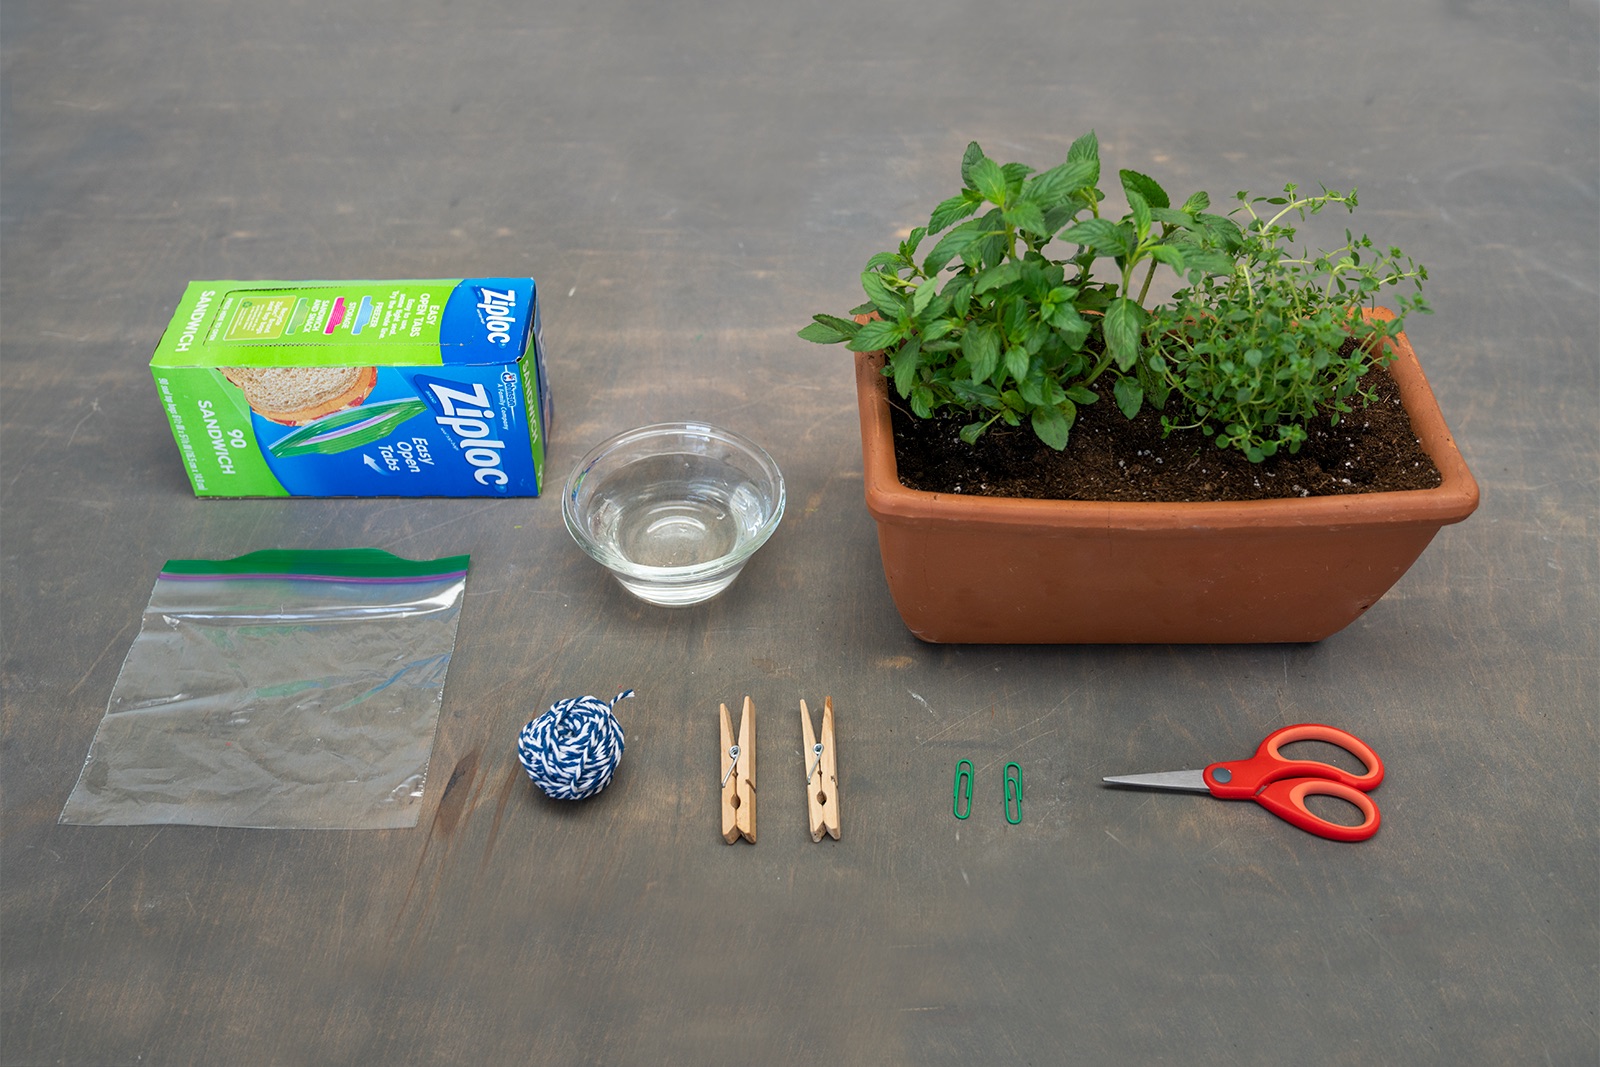
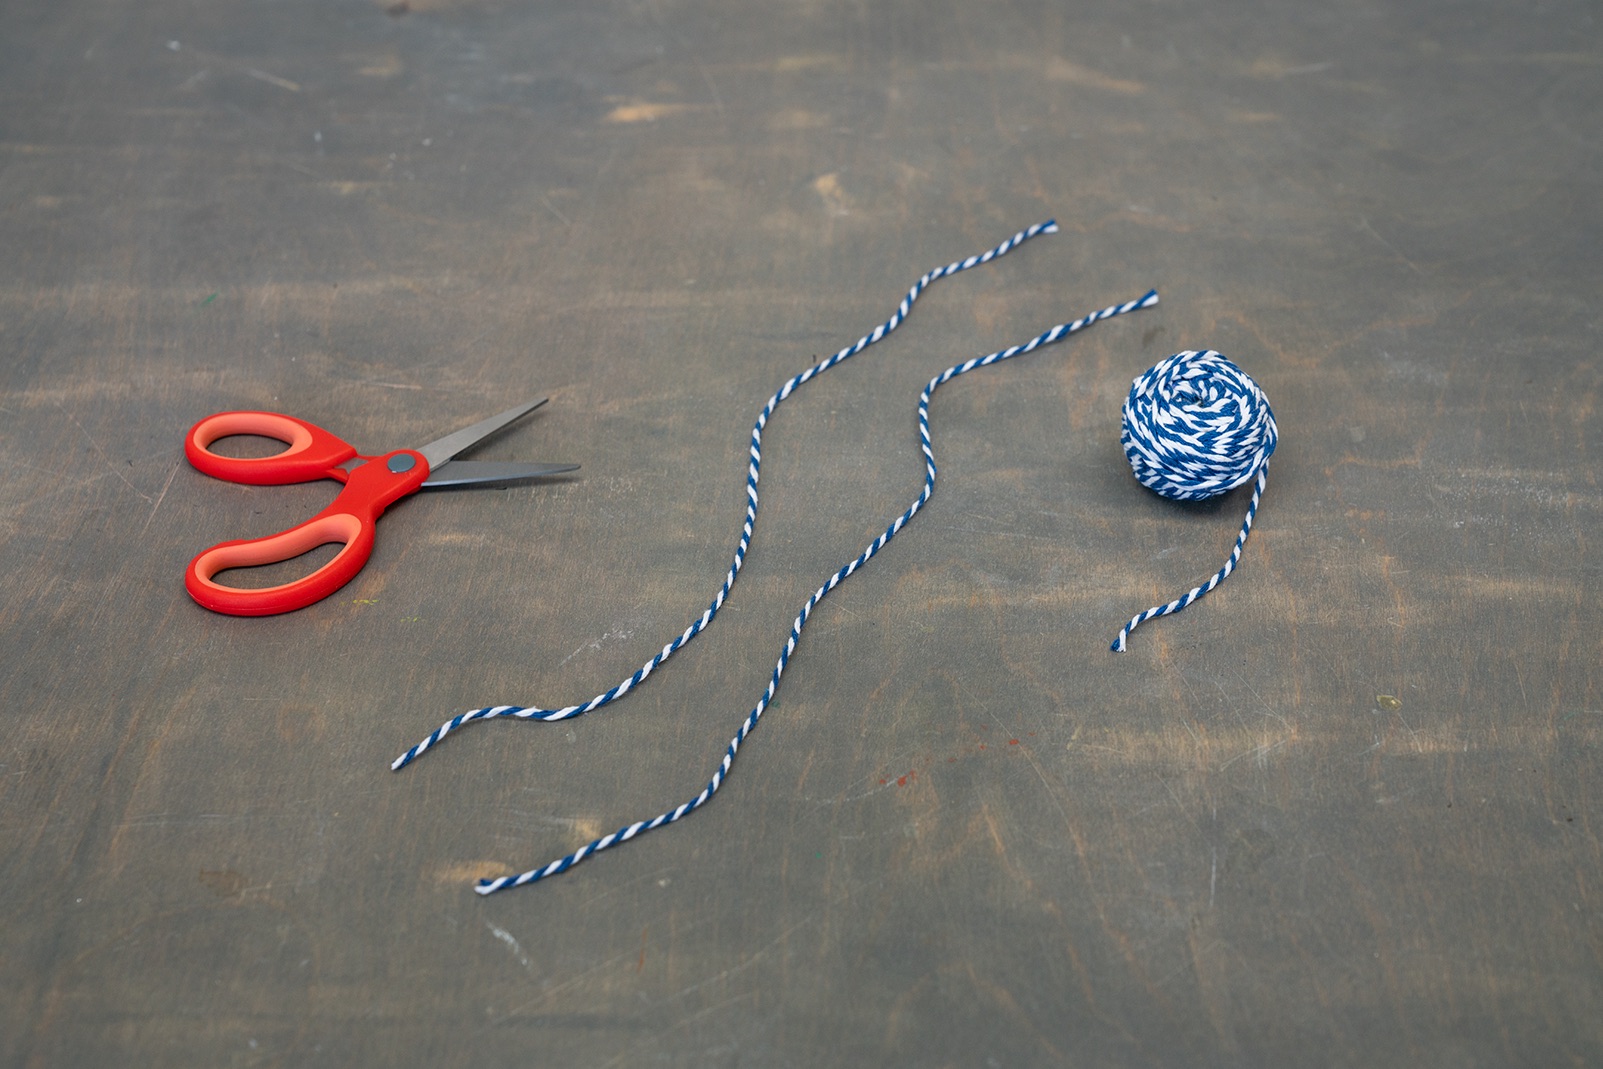
Step 1
Gather your materials.

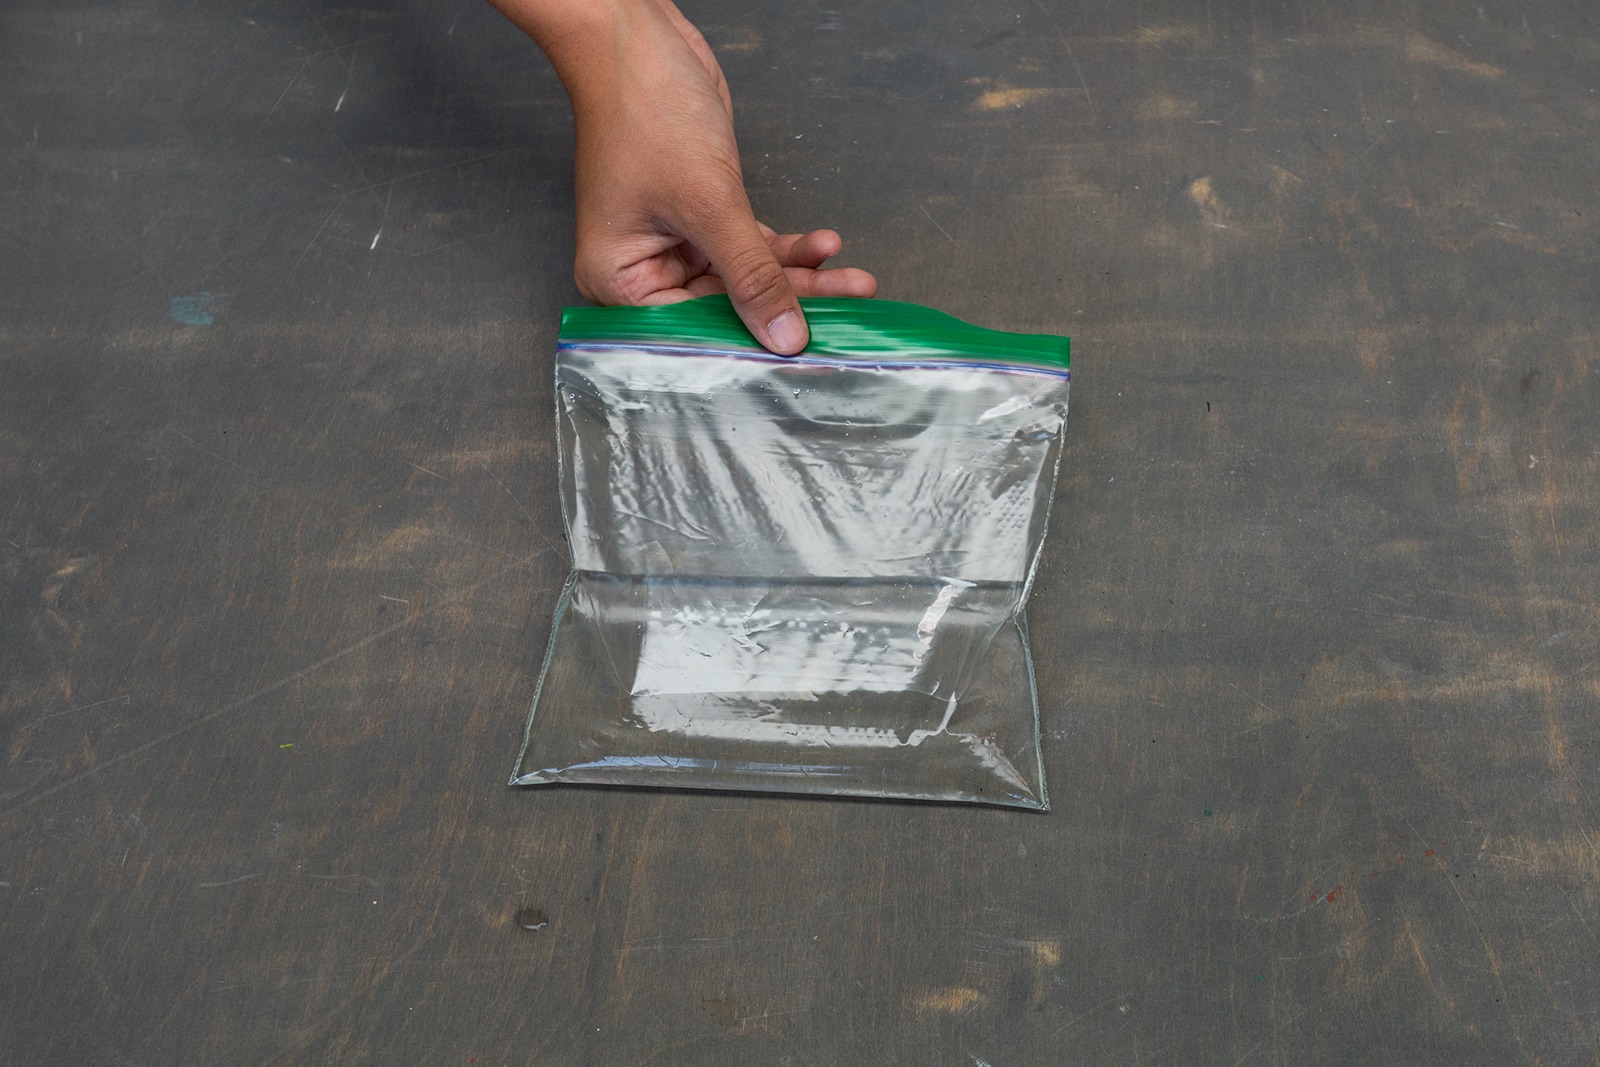
Step 2
Fill your Ziploc® brand sandwich bag with one cup of water(avoid filling the bag beyond half its size). Seal the bag.
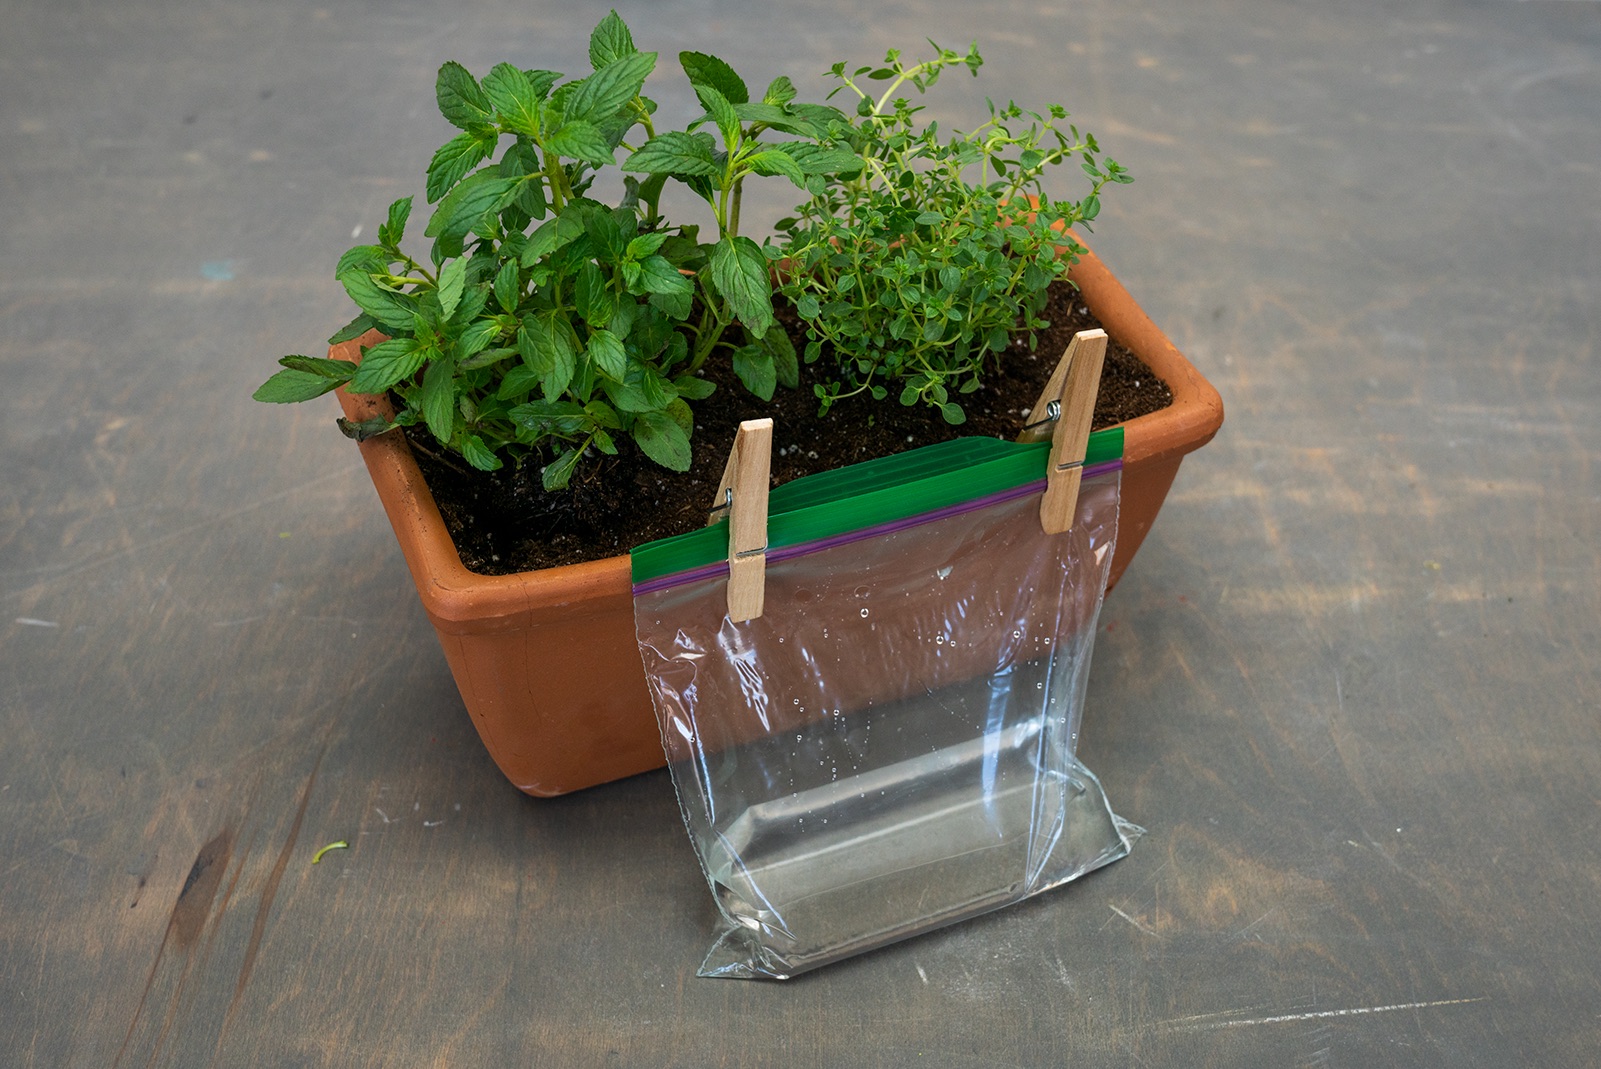
Step 3
Carefully use the two clothespins to attach the bag to one side of the potted plant. The bag should be upright and rest gently on the ground.
Step 4
Use the scissors to cut a length of string long enough to go from the bag to the pot and into the soil about 2 to 3 inches (5.1 to 7.6 cm) deep. If your pot has multiple plants, you’ll need a piece of string for each one.
Step 5
Tie the ends of the string(s)to paperclips (the paperclips will anchor the strings). Carefully open the bag and drop in the paperclip(s) so they sink to the bottom and rest on the ground.
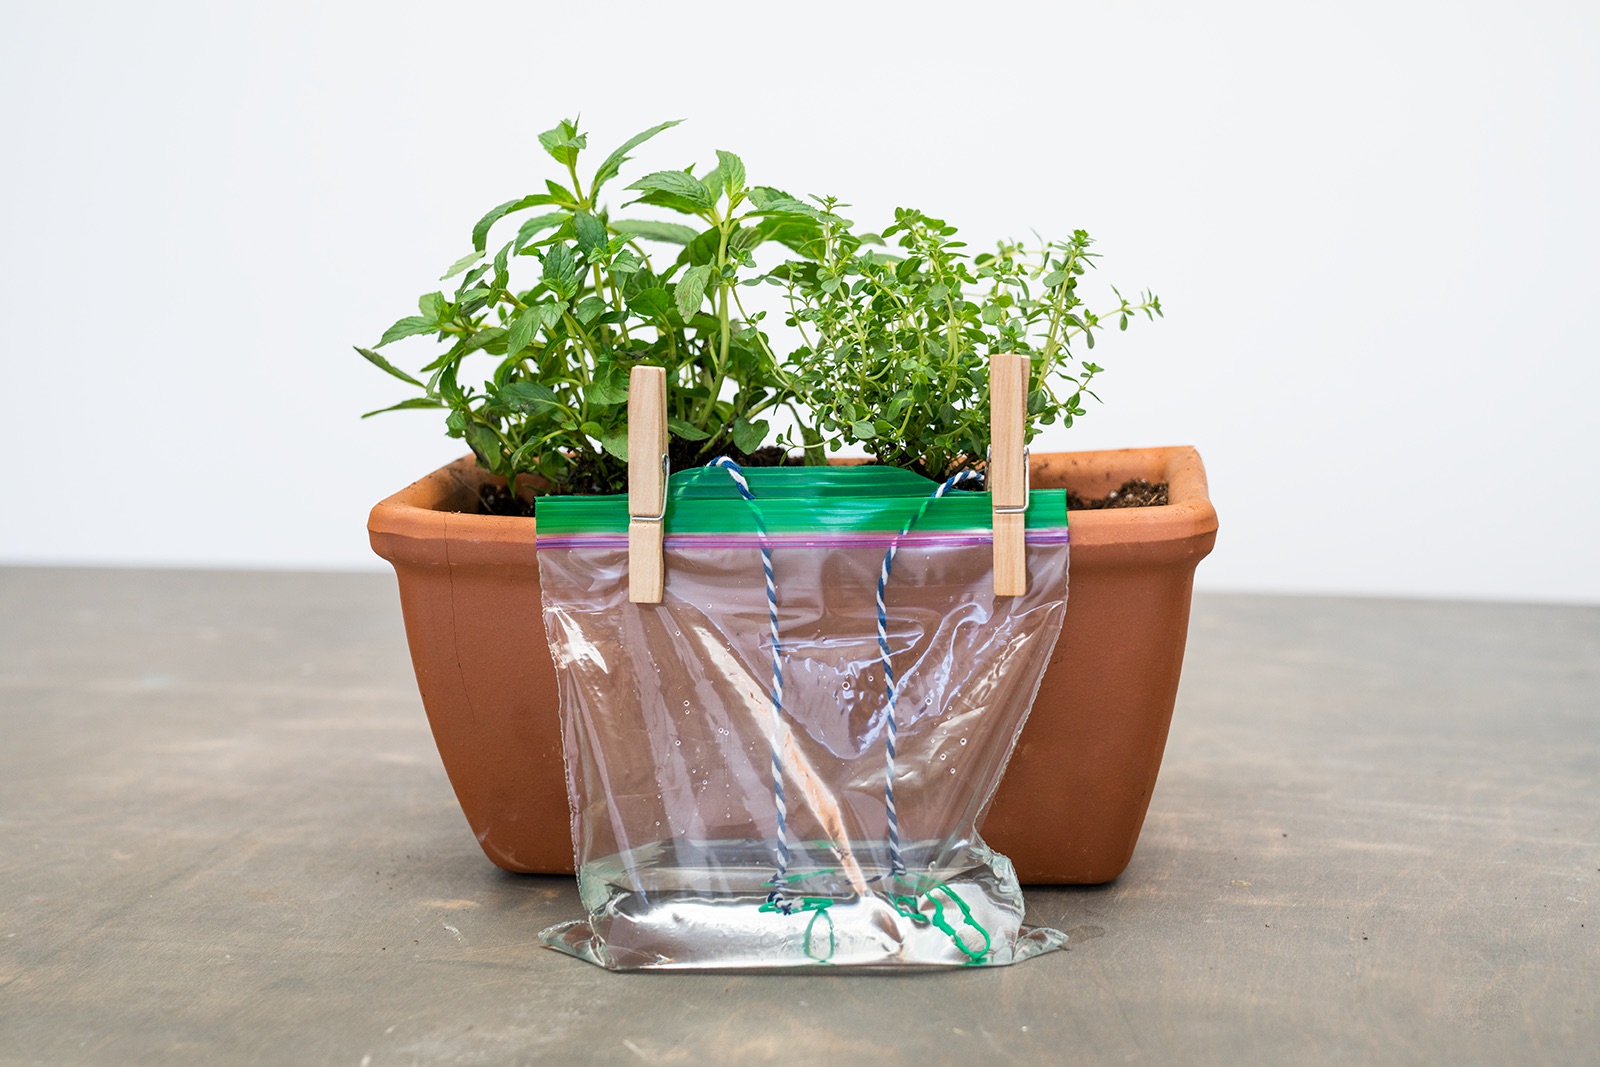
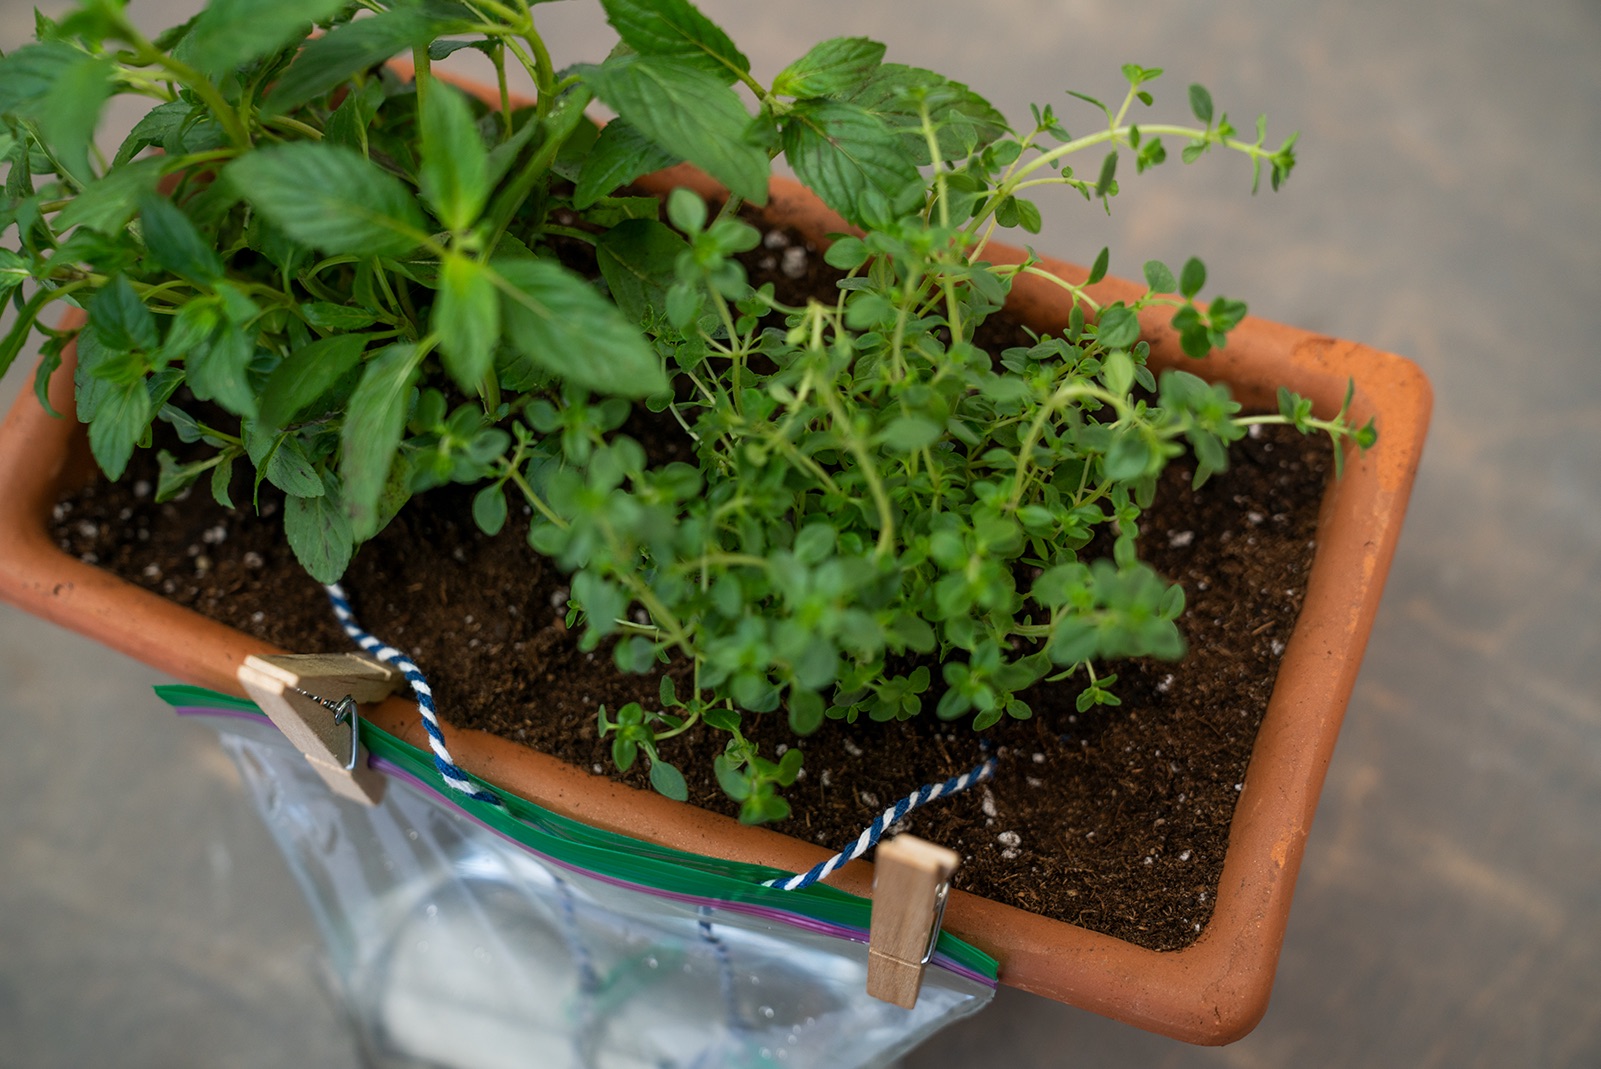
Step 6
Use your finger to make holes about three inches deep by the roots of the plant. Pull the other end of the strings over the side of the pot and bury it in the holes. Uses your fingers to press the soil and make sure the string is taut (cut it shorter if necessary).
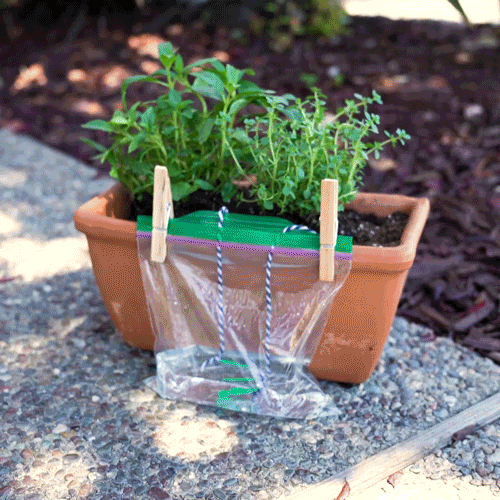
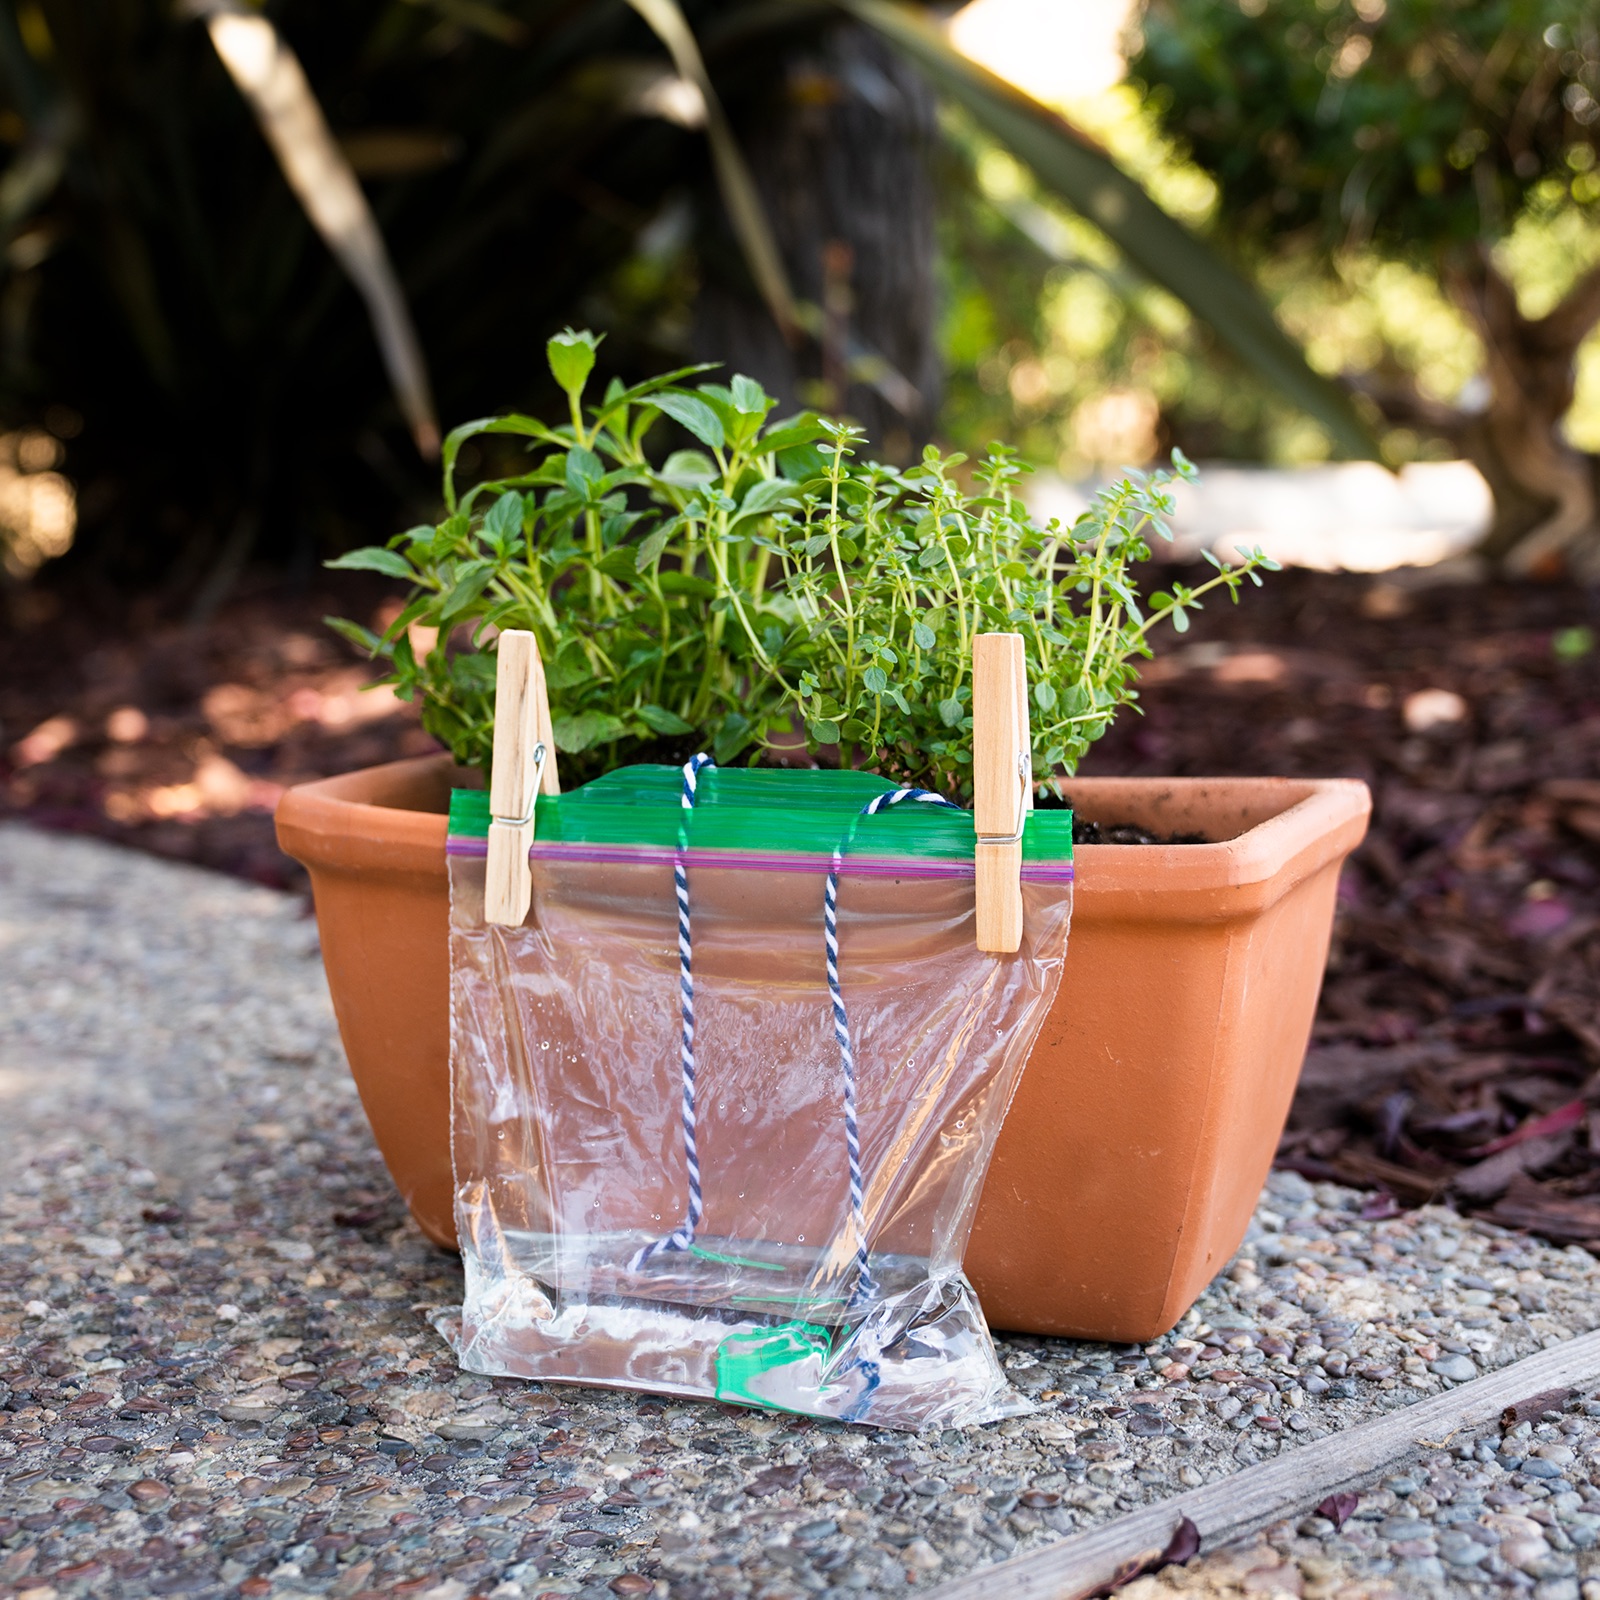
Step 7
You’ve made a self-watering planter! Make sure to refill the bag if it gets low on water.
Learn more

Capillary action describes how water moves through tiny tubes or spaces, like the fibers in string. Water molecules like to stick to each other and to other things. That’s why your finger gets wet when you dip it in water —the water molecules stick to you! In your self-watering planter, the water molecules stick to the string fibers. Because water molecules also stick to each other, the water that sticks to the fibers also pulls up its friends. The water molecules keep climbing and pulling each other up until they reach the soil, keeping your plant alive! From there, the plant’s roots also use capillary action to bring water up from the soil to the leaves.


