Step-by-step tutorial
Step 1
Gather your materials. You can find the electronic parts at your local hobby or electronic stores.


Tip
Make sure the propeller fan can fit in the base of the cups!
Step 2
Put the batteries in the connector pack. Hook the leads of the battery pack into the holes on the bottom of the motor. Twist the leads so they stay in place.

Step 3
Use the pushpin to poke a hole in the bottom of one cup (aim for the middle!). Poke the hole with a pencil to widen the hole.

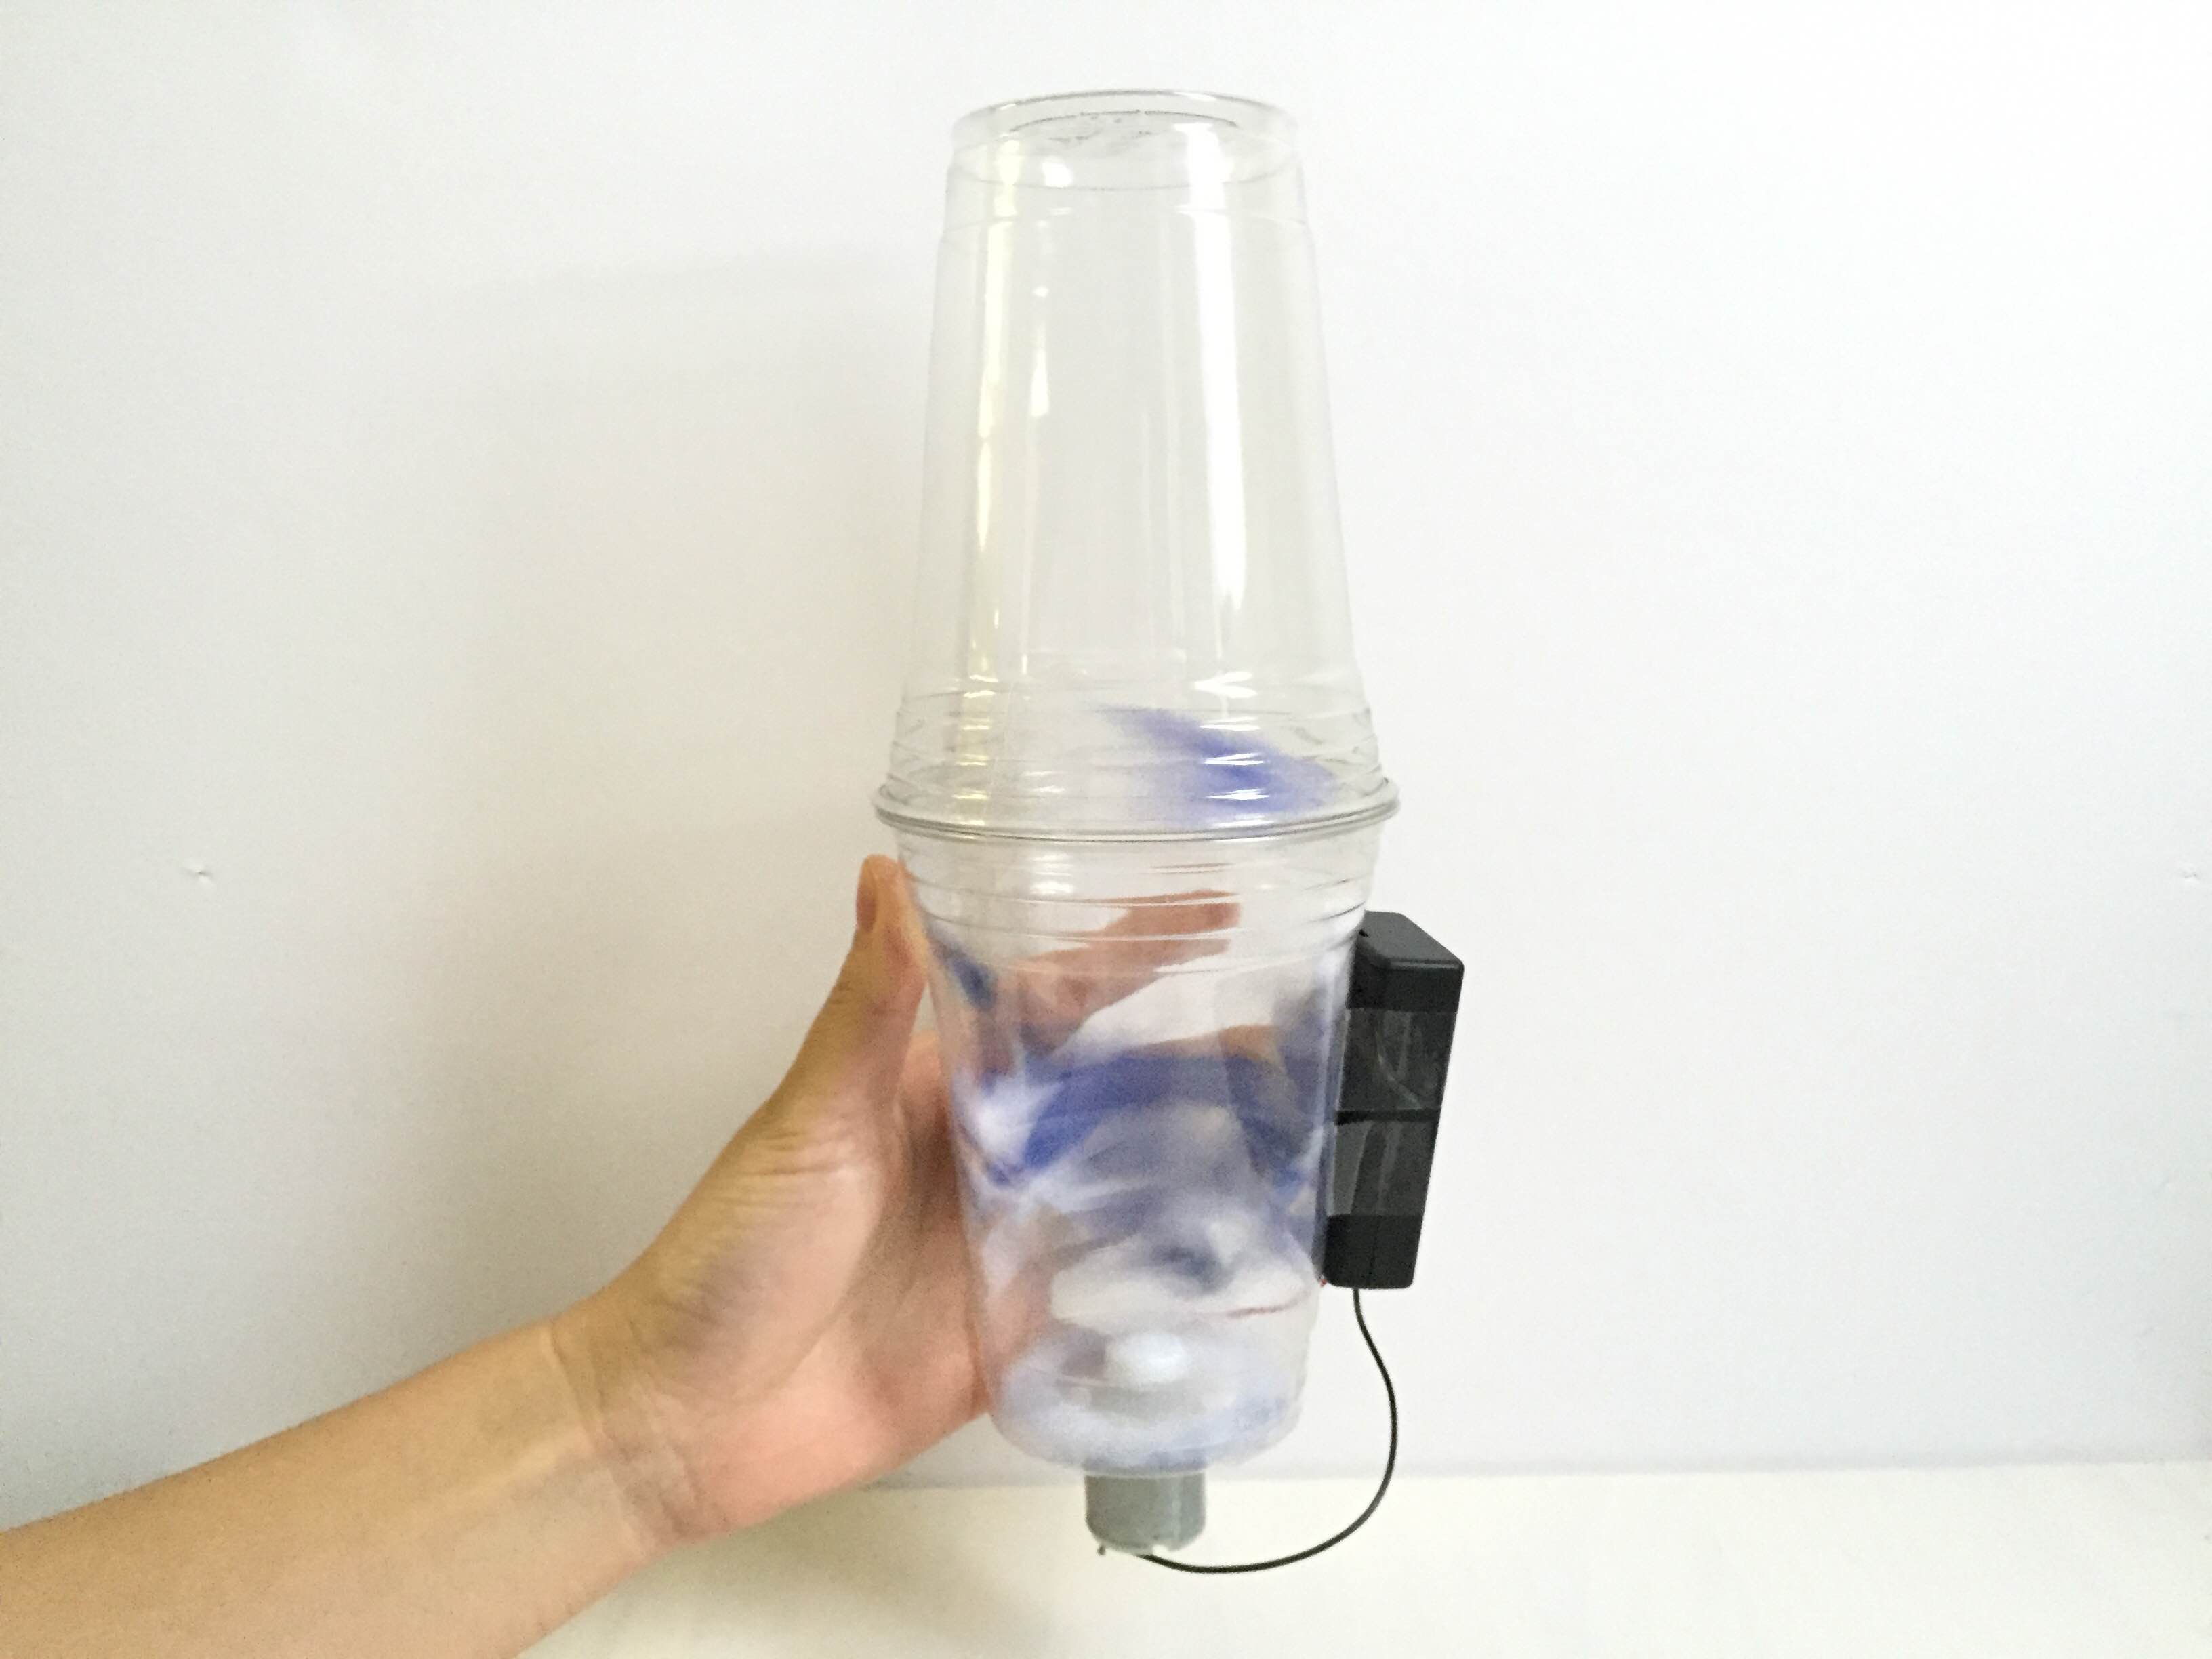
Step 4
Use tape to attach the motor to the bottom exterior of the cup. Make sure the shaft of the motor is aligned to poke into the cup. Tape the battery pack to the side of the cup.

Step 5
Lower the propeller fan into the cup so that it fits onto the motor shaft. Turn on the battery pack to give your motor and fan a test run. The fan should start spinning!

Step 6
Time to make snow! Cut your paper into small bits of confetti-like squares (ours were about quarter-inch squares).

Step 7
Pour your "snow" into your empty cup. Now, tape the two cups together, mouth-to-mouth. Use short strips of single-sided tape to hold them in place, then wrap around with a long piece to cover the seam.

Done!
Turn on your fan and watch your snow machine go! You can try shaking the cup up and down or tilting it sideways to get different patterns. If you're feeling like making a mess, you can take off the top cup and spray snow around the room!


