Step-by-step tutorial
Step 1
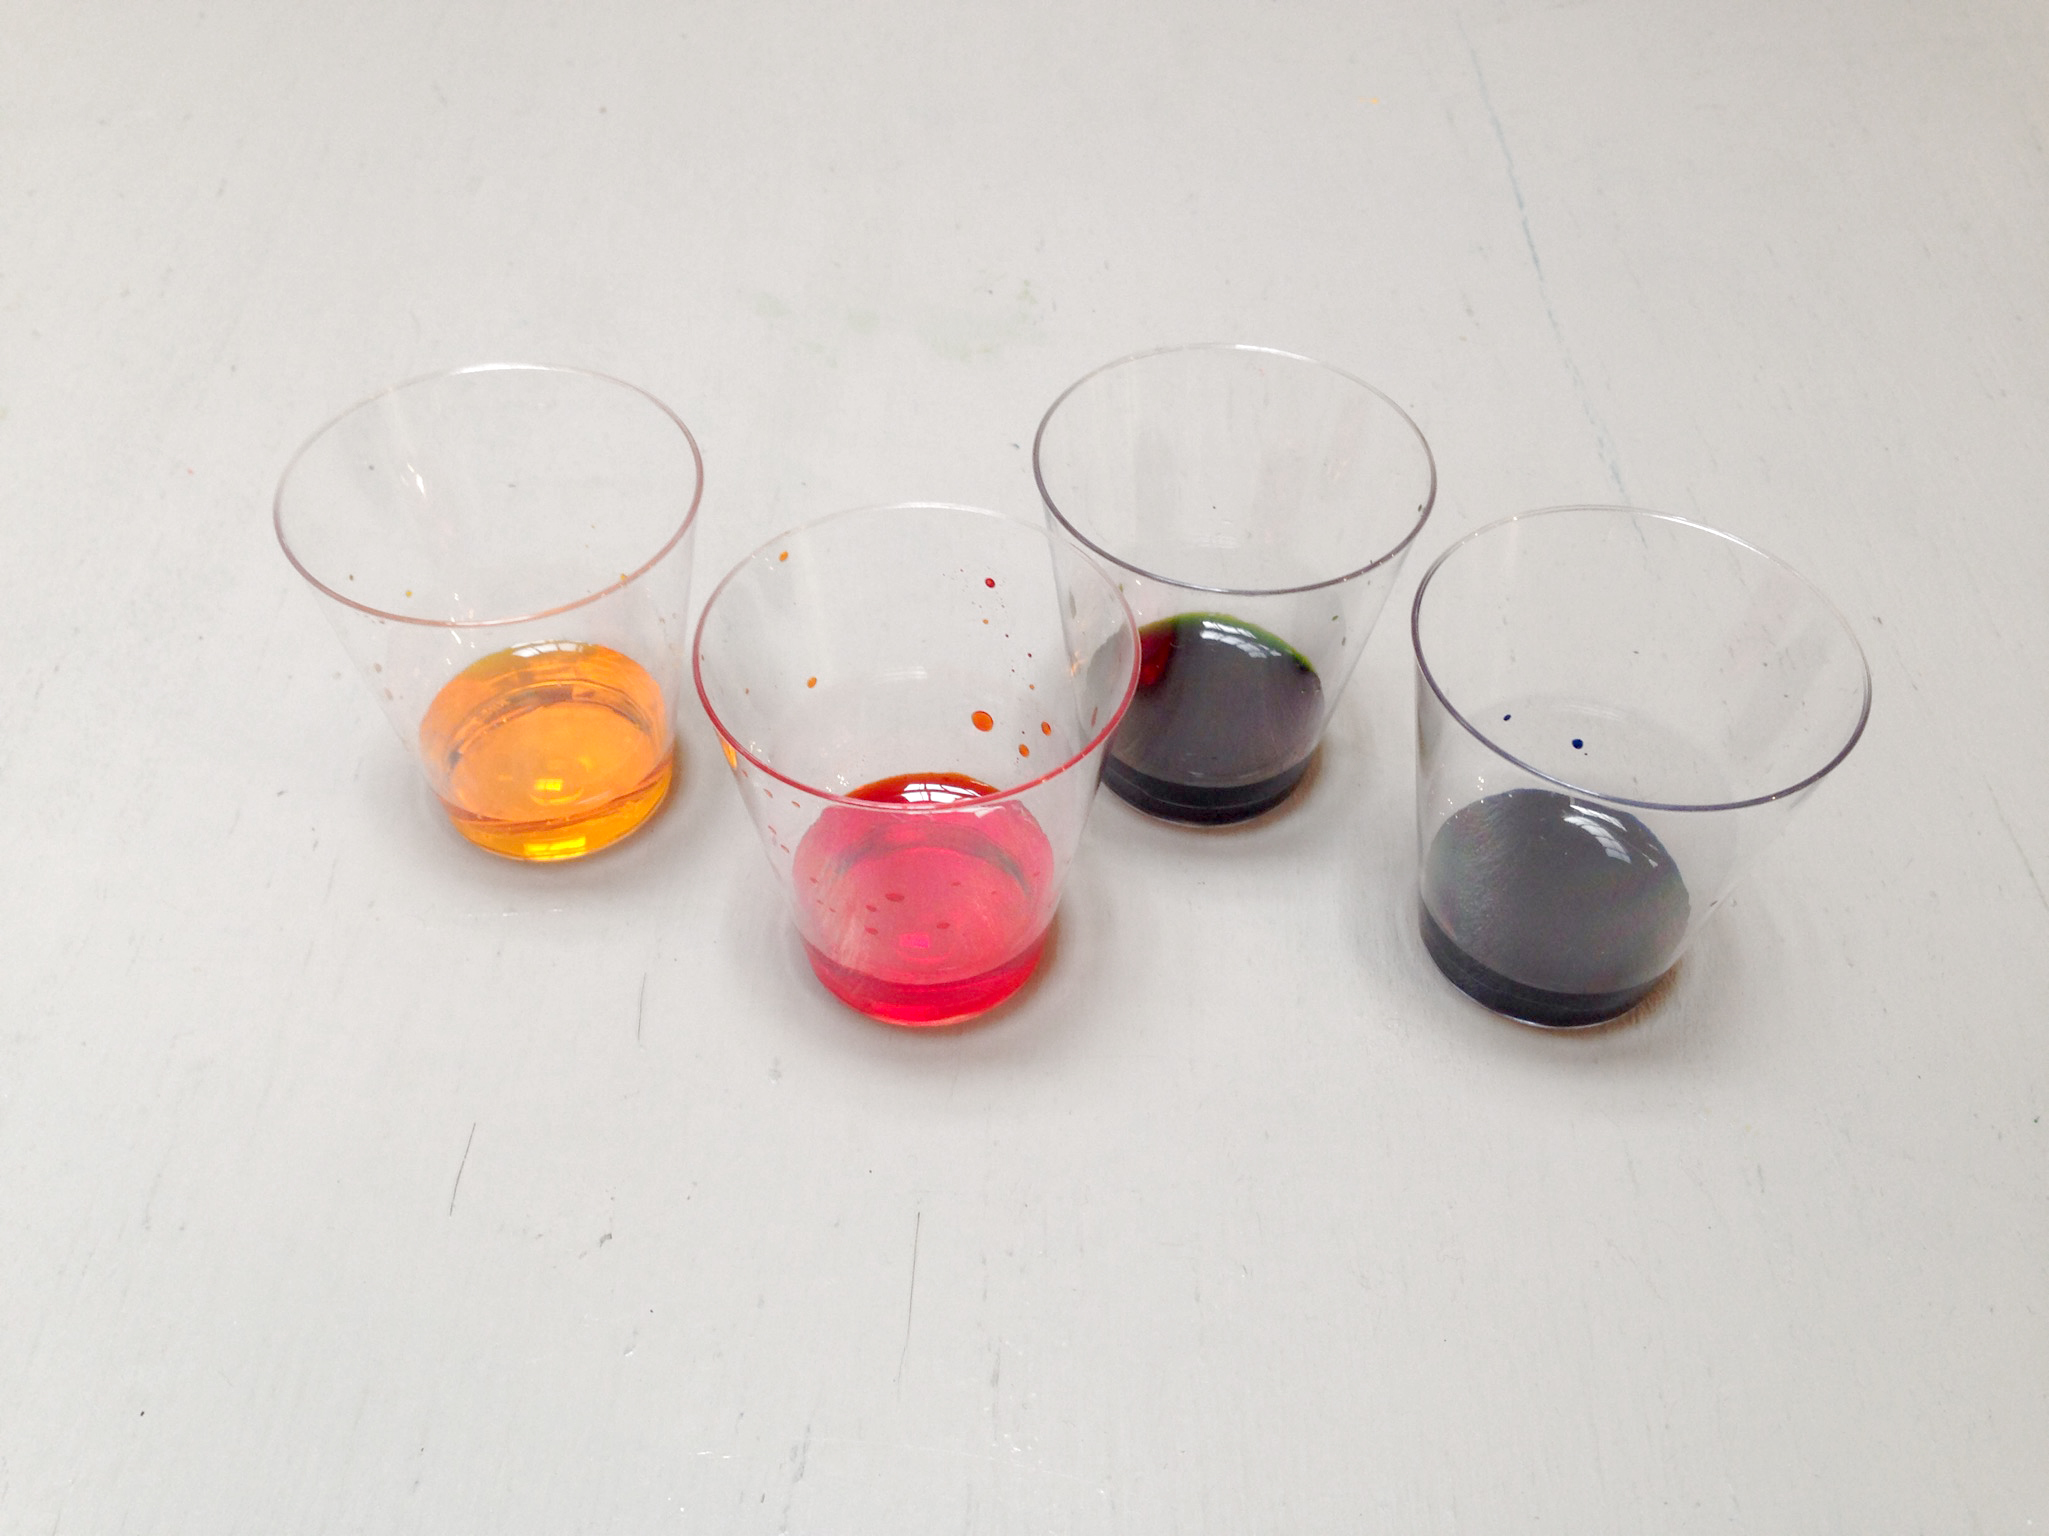
Pour out a few colors of liquid watercolor paint into small cups.

Tip
If you don't have liquid watercolors, you can make your own! Pour a little water into a cup and use a wet paintbrush to pick up pigment from a standard watercolor set to color your water.
Step 2
Pour some rubbing alcohol into a small cup

Step 3
Place a sheet of paper on the baking tray. Pour some water onto the paper to soak the entire surface. If the edges start to curl, flip the paper over to make sure both sides are evenly moistened.
Once the paper is wet and lays flat, pour out the excess water.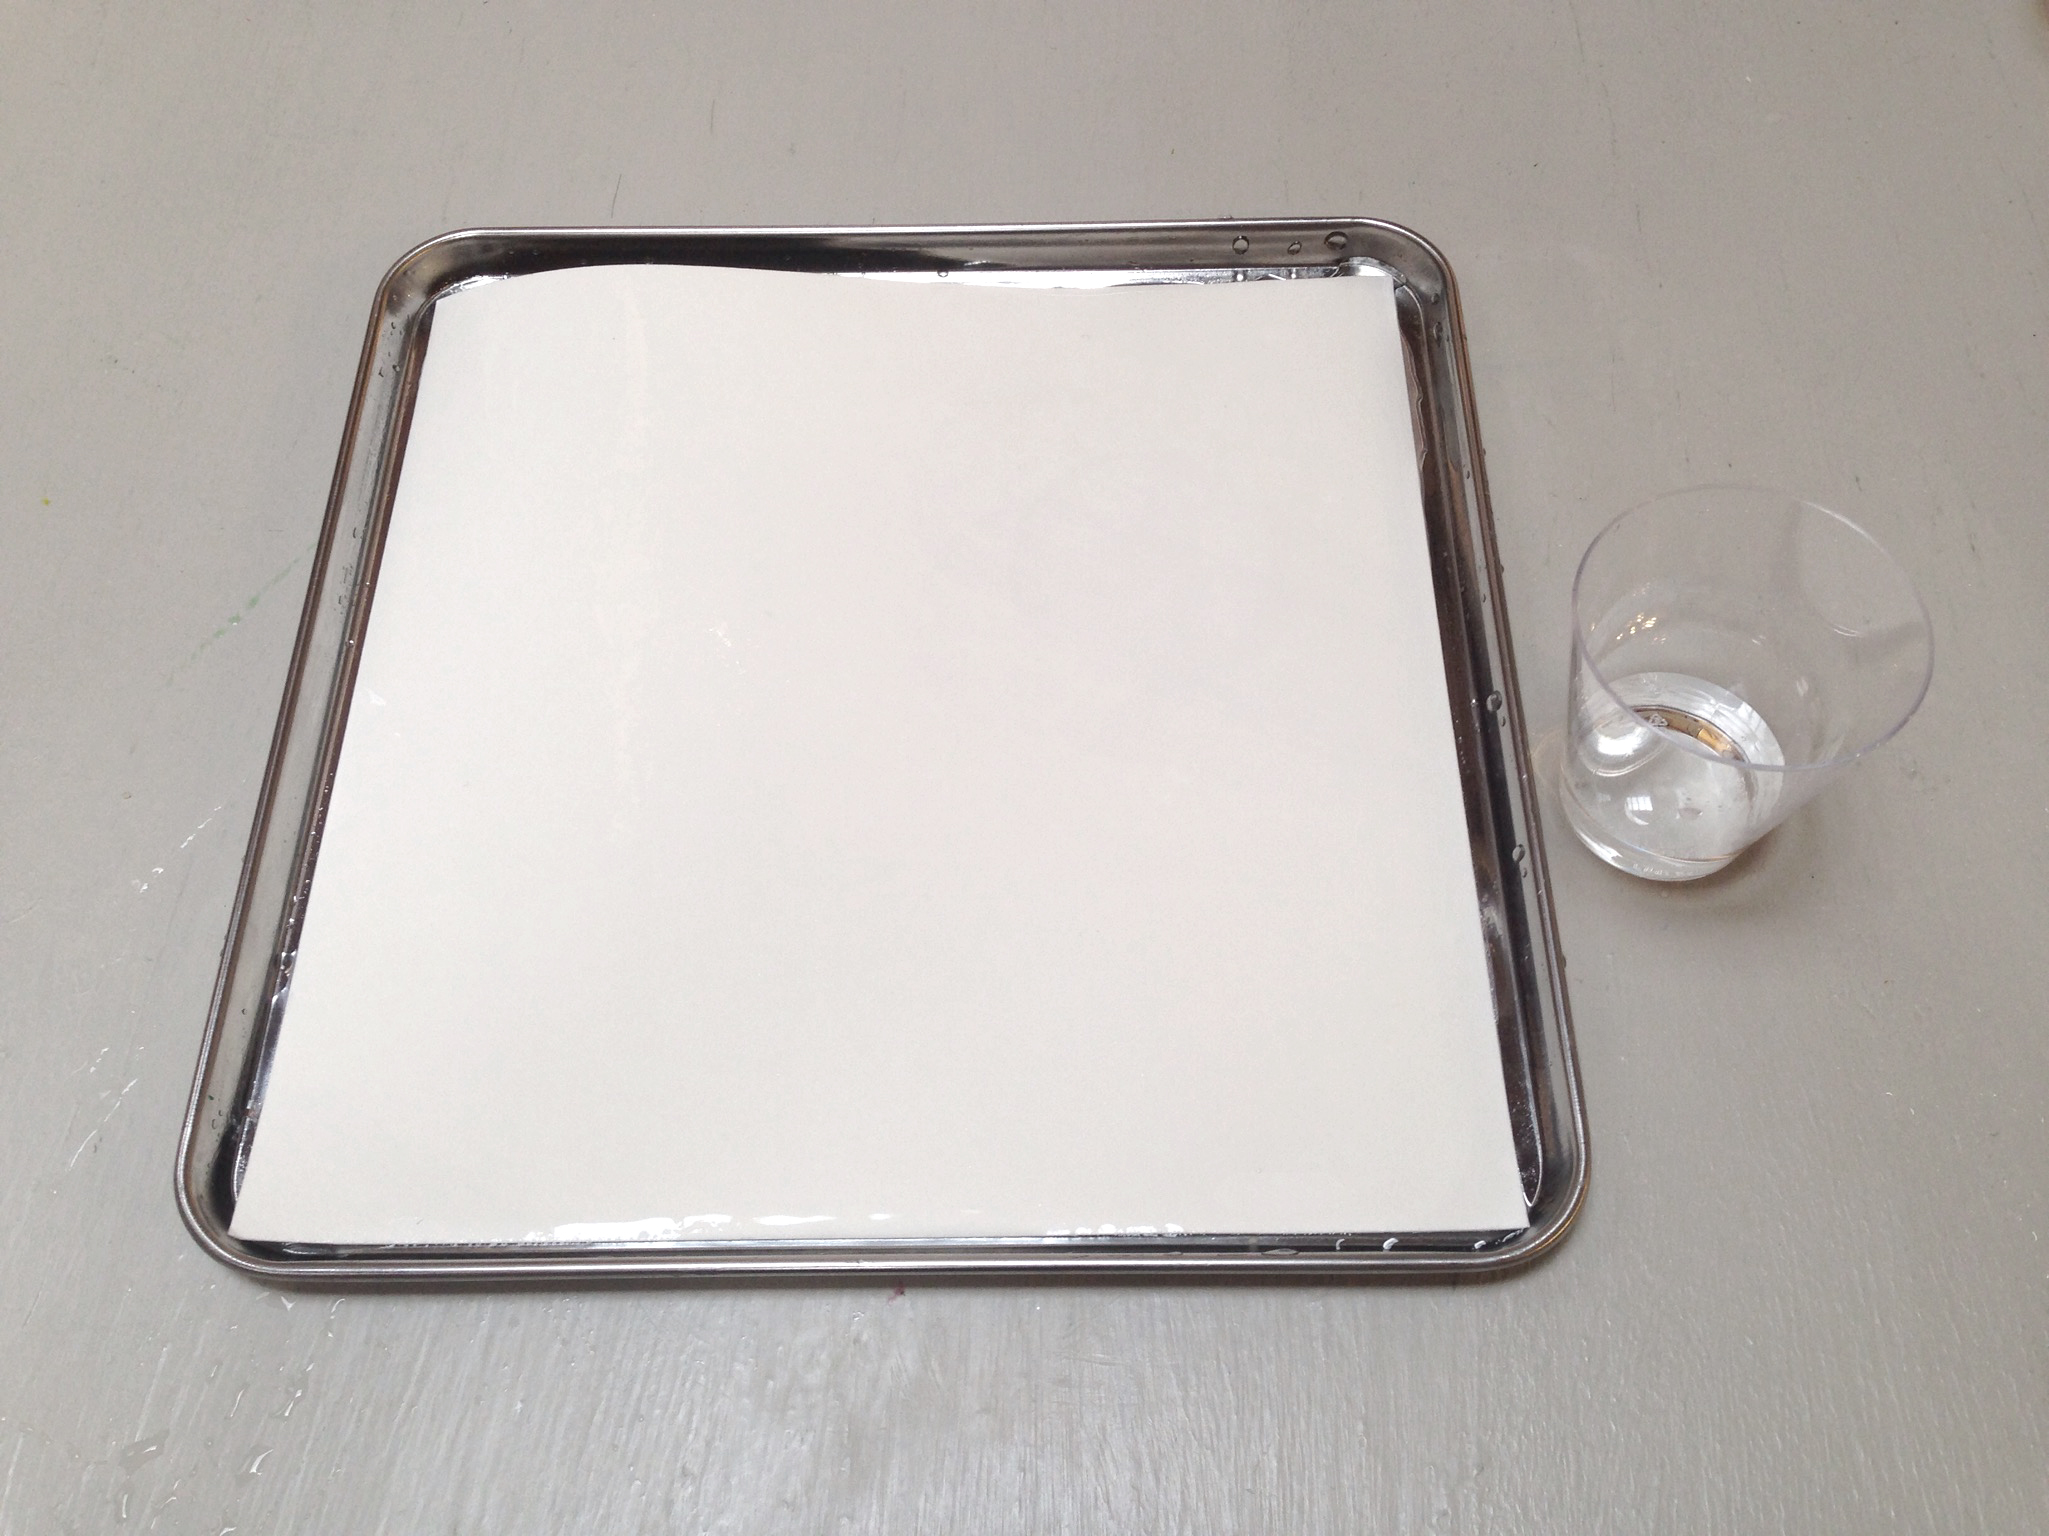
Tip
For best results, make sure your paper fits on the tray. We trimmed the edges of our paper to fit better.
Step 4
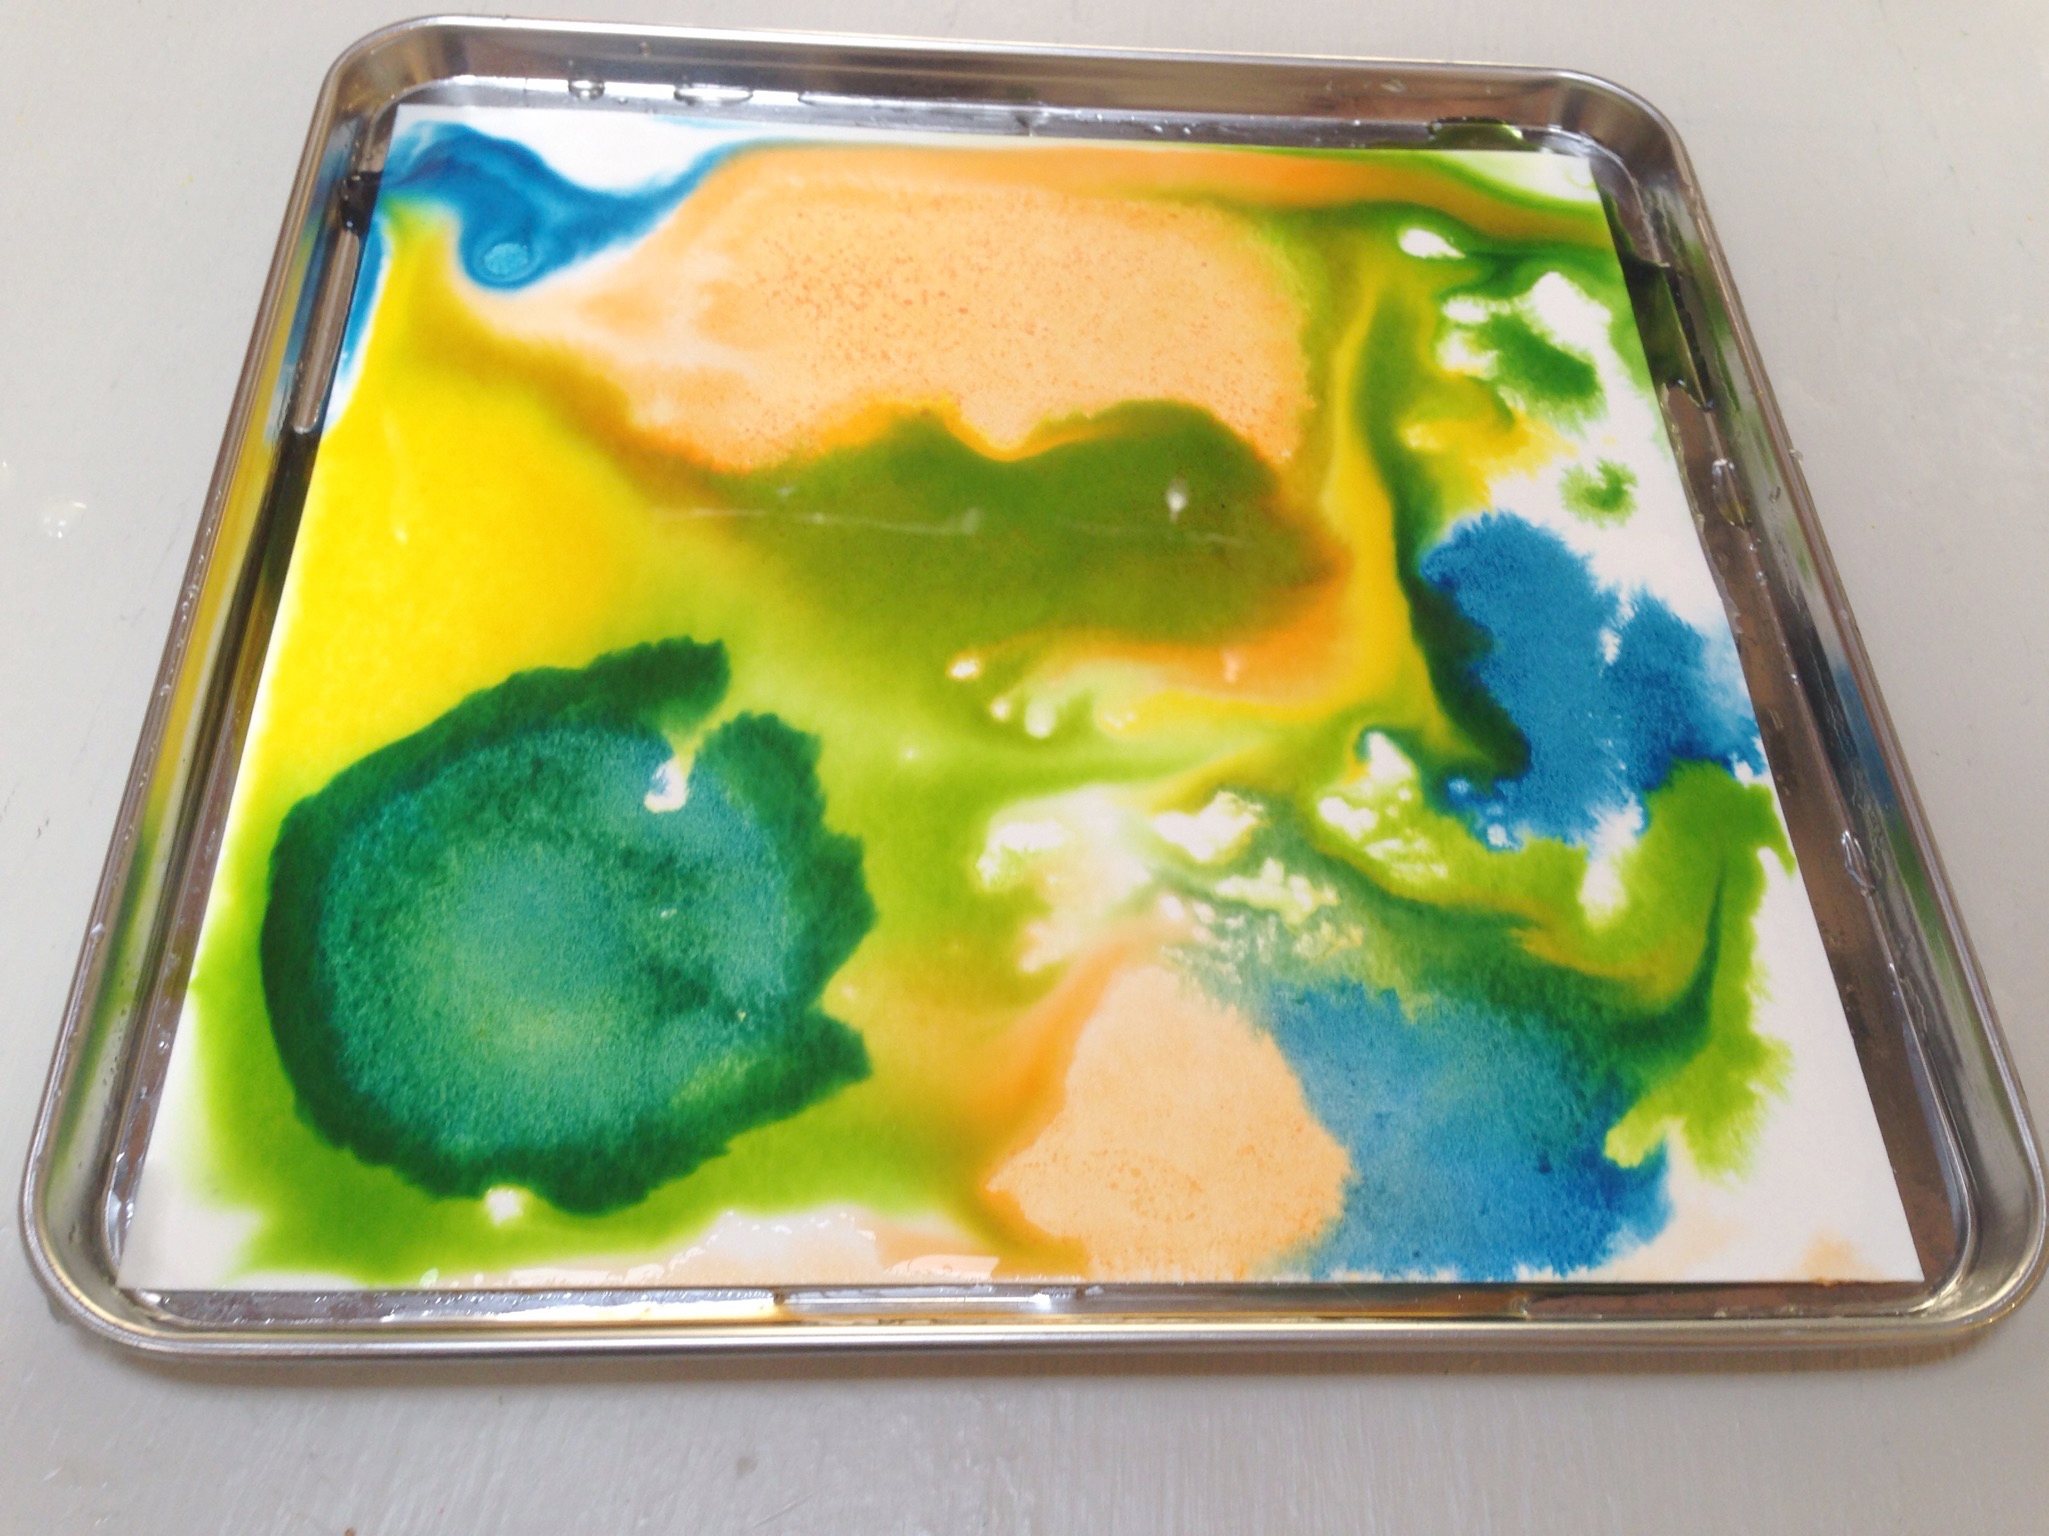
Use a dropper to drop liquid watercolors over the surface of the paper.
Tip
Adding too many different colors may start to turn your painting brown and muddy, so make sure to add colors slowly!
Step 5
With a second dropper, drop small dots of rubbing alcohol over the surface. You should see the color start to lighten in those spots.
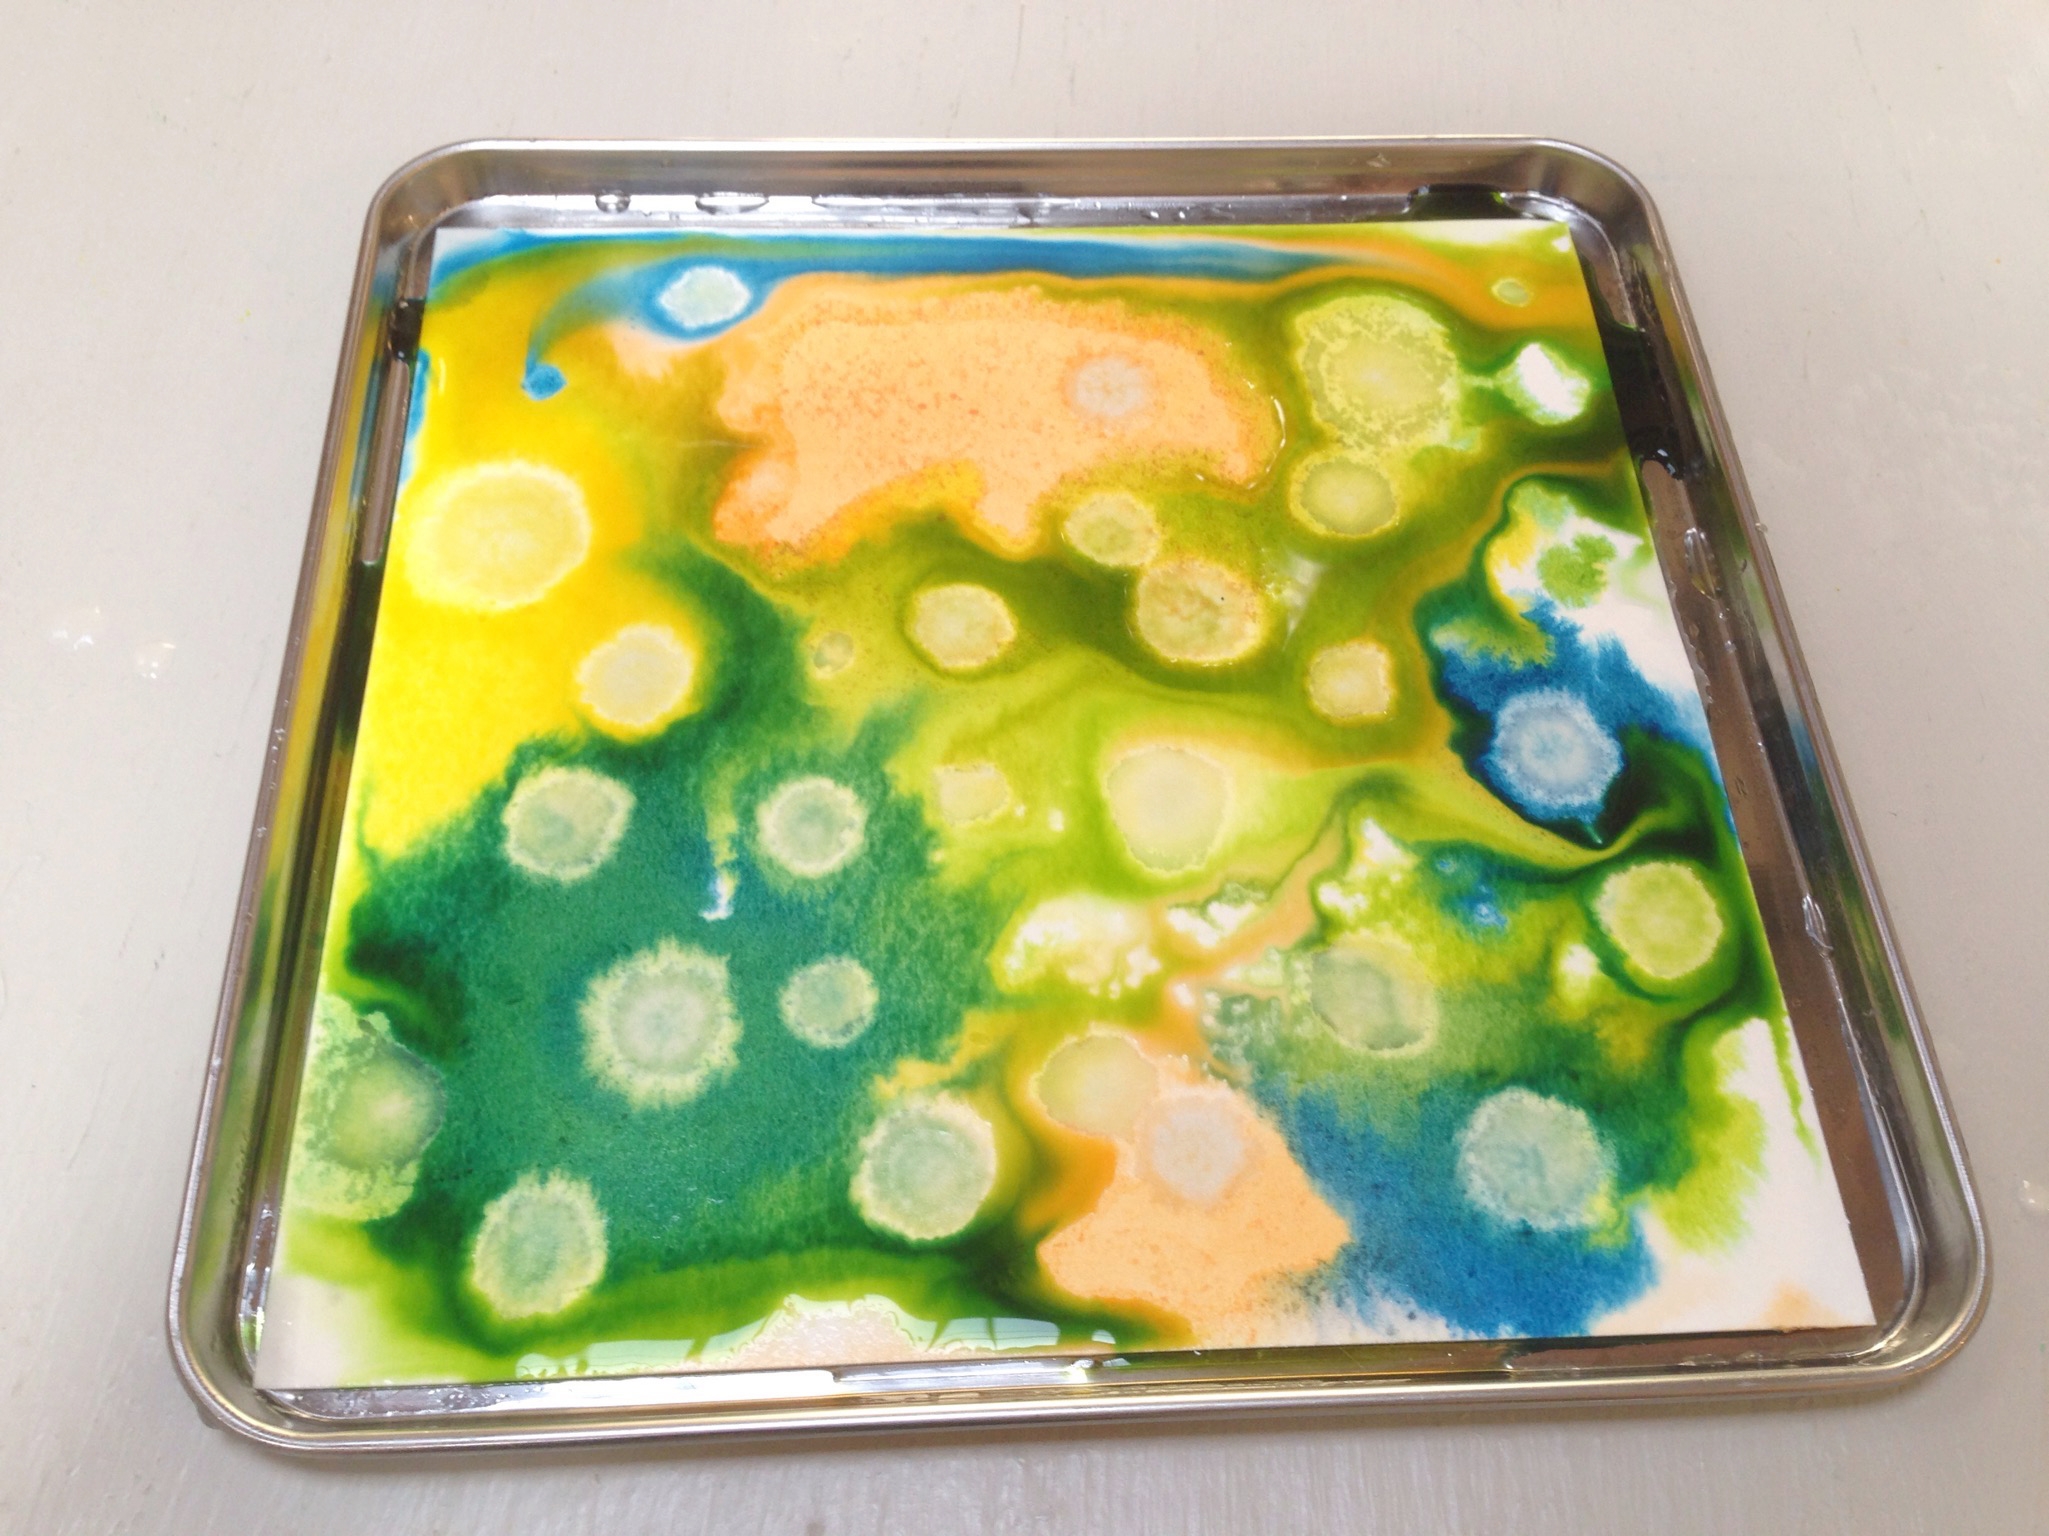
Tip
If there isn't a noticeable change, the surface of the paper may be too dry. Try experimenting with the paper and materials to get the results you like!
To try a similar technique with a different material, try dropping oil onto the watercolor instead. It creates a more subtle effect on the paper.
Step 6
Remove your painting from the tray and let it completely dry.
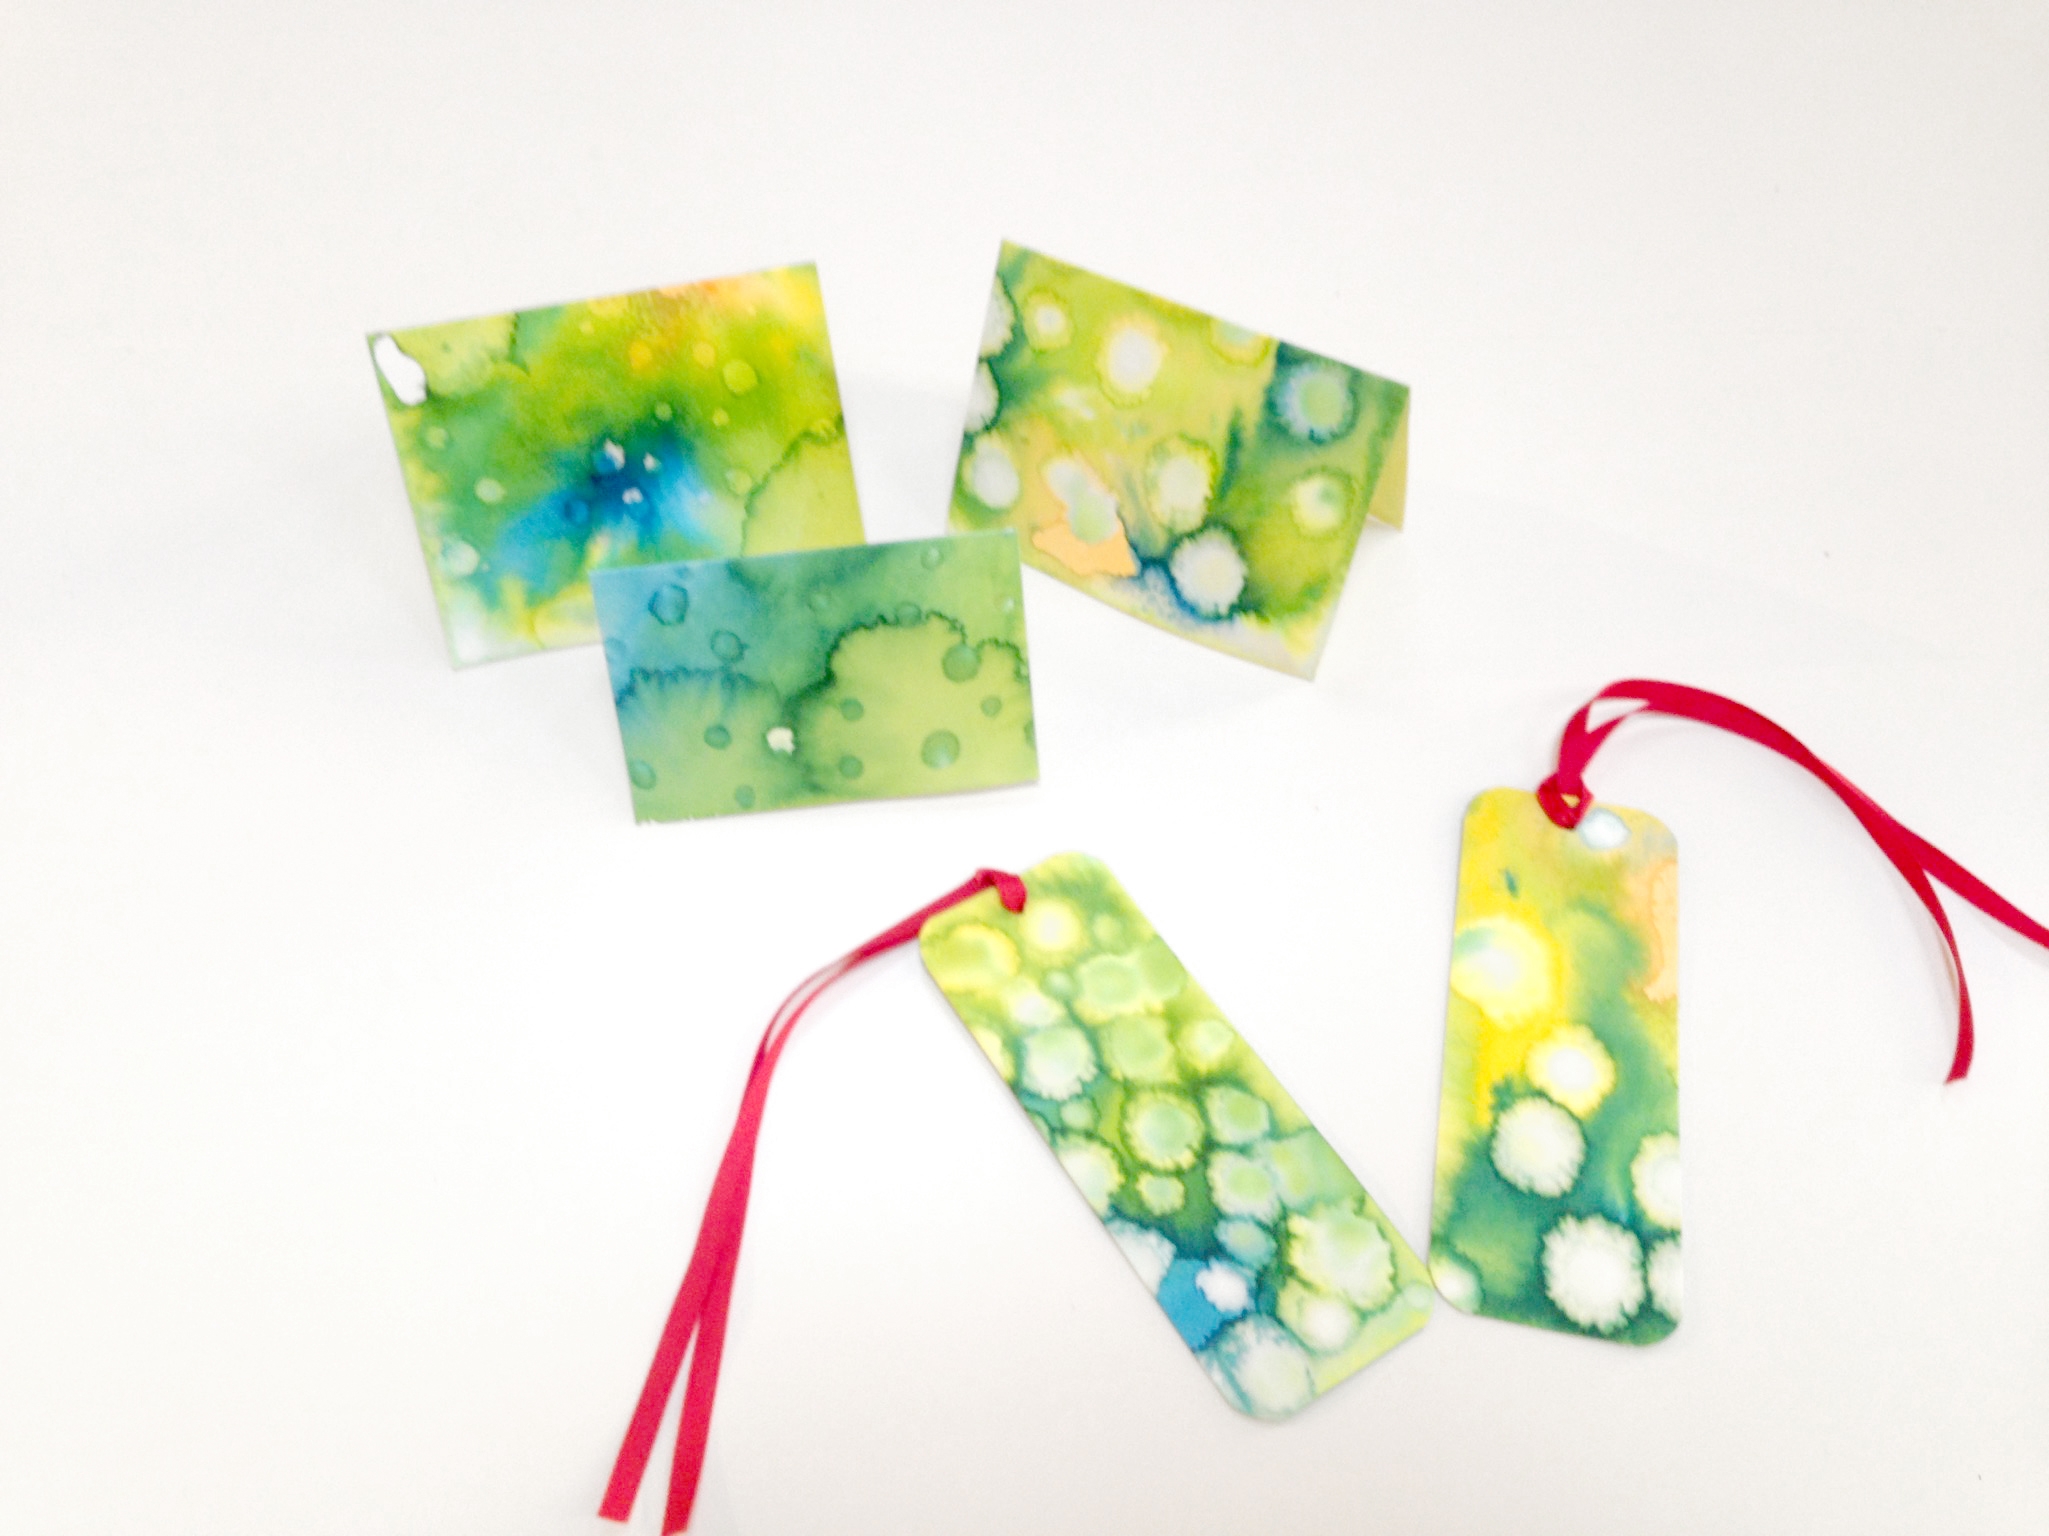
(The two on the top are water & oil paintings, the one on the bottom is a water & alcohol painting)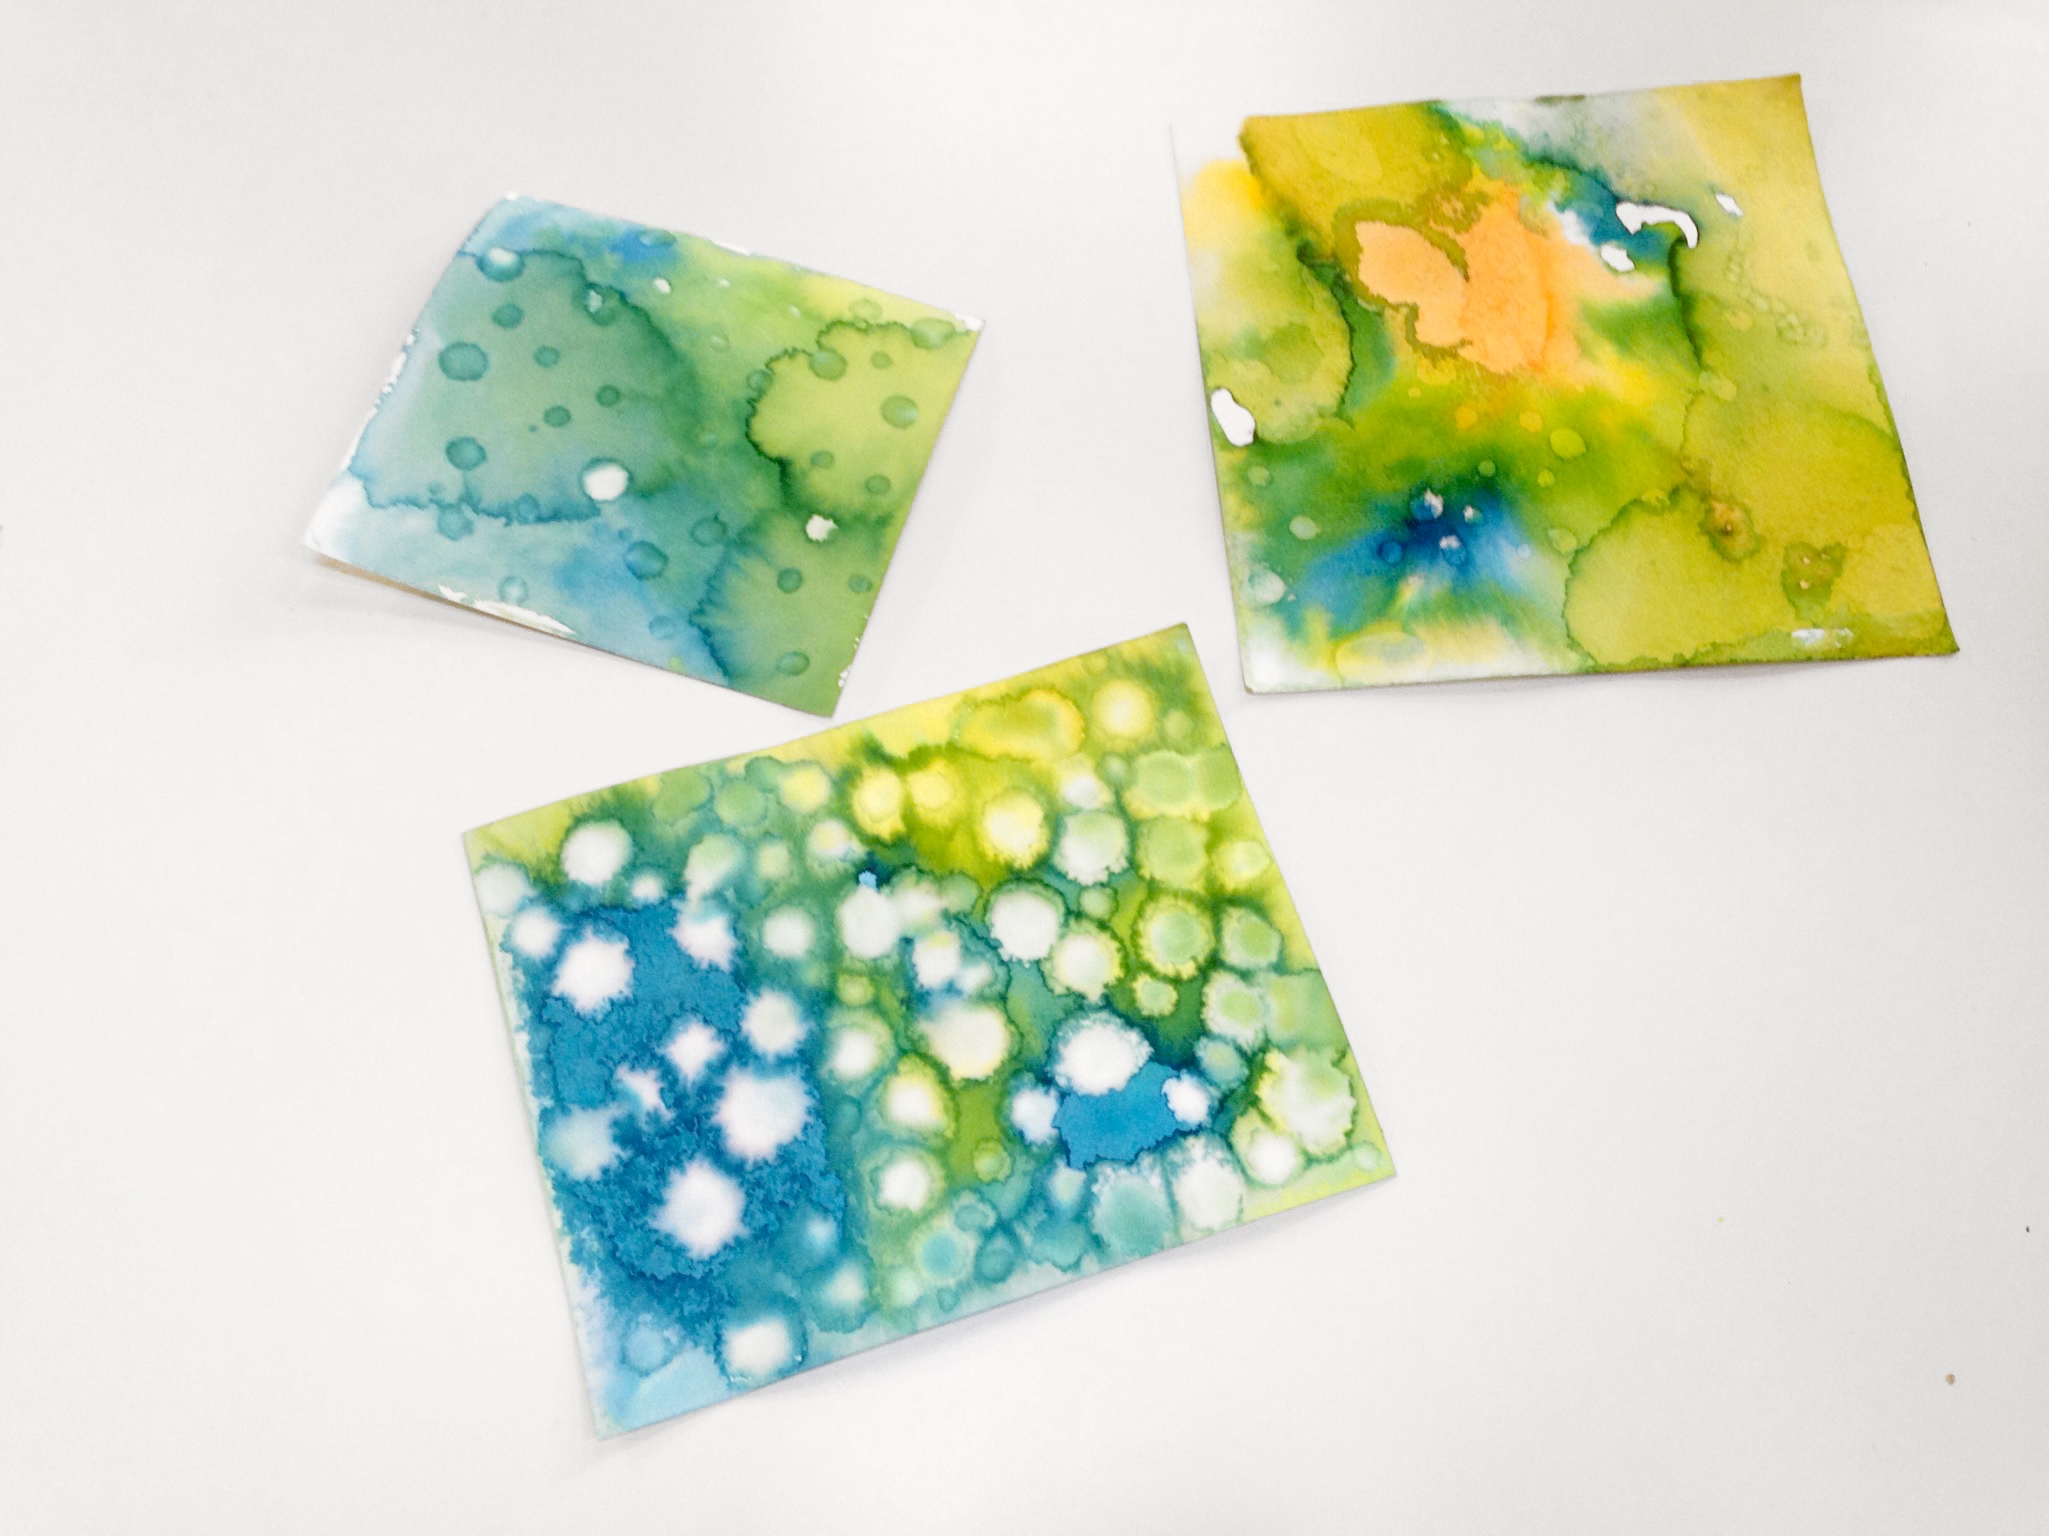
Done!
Once your creation is ready, you can turn your special new paper into bookmarks or cards! What other uses can you think of?