Step-by-step tutorial
Step 1
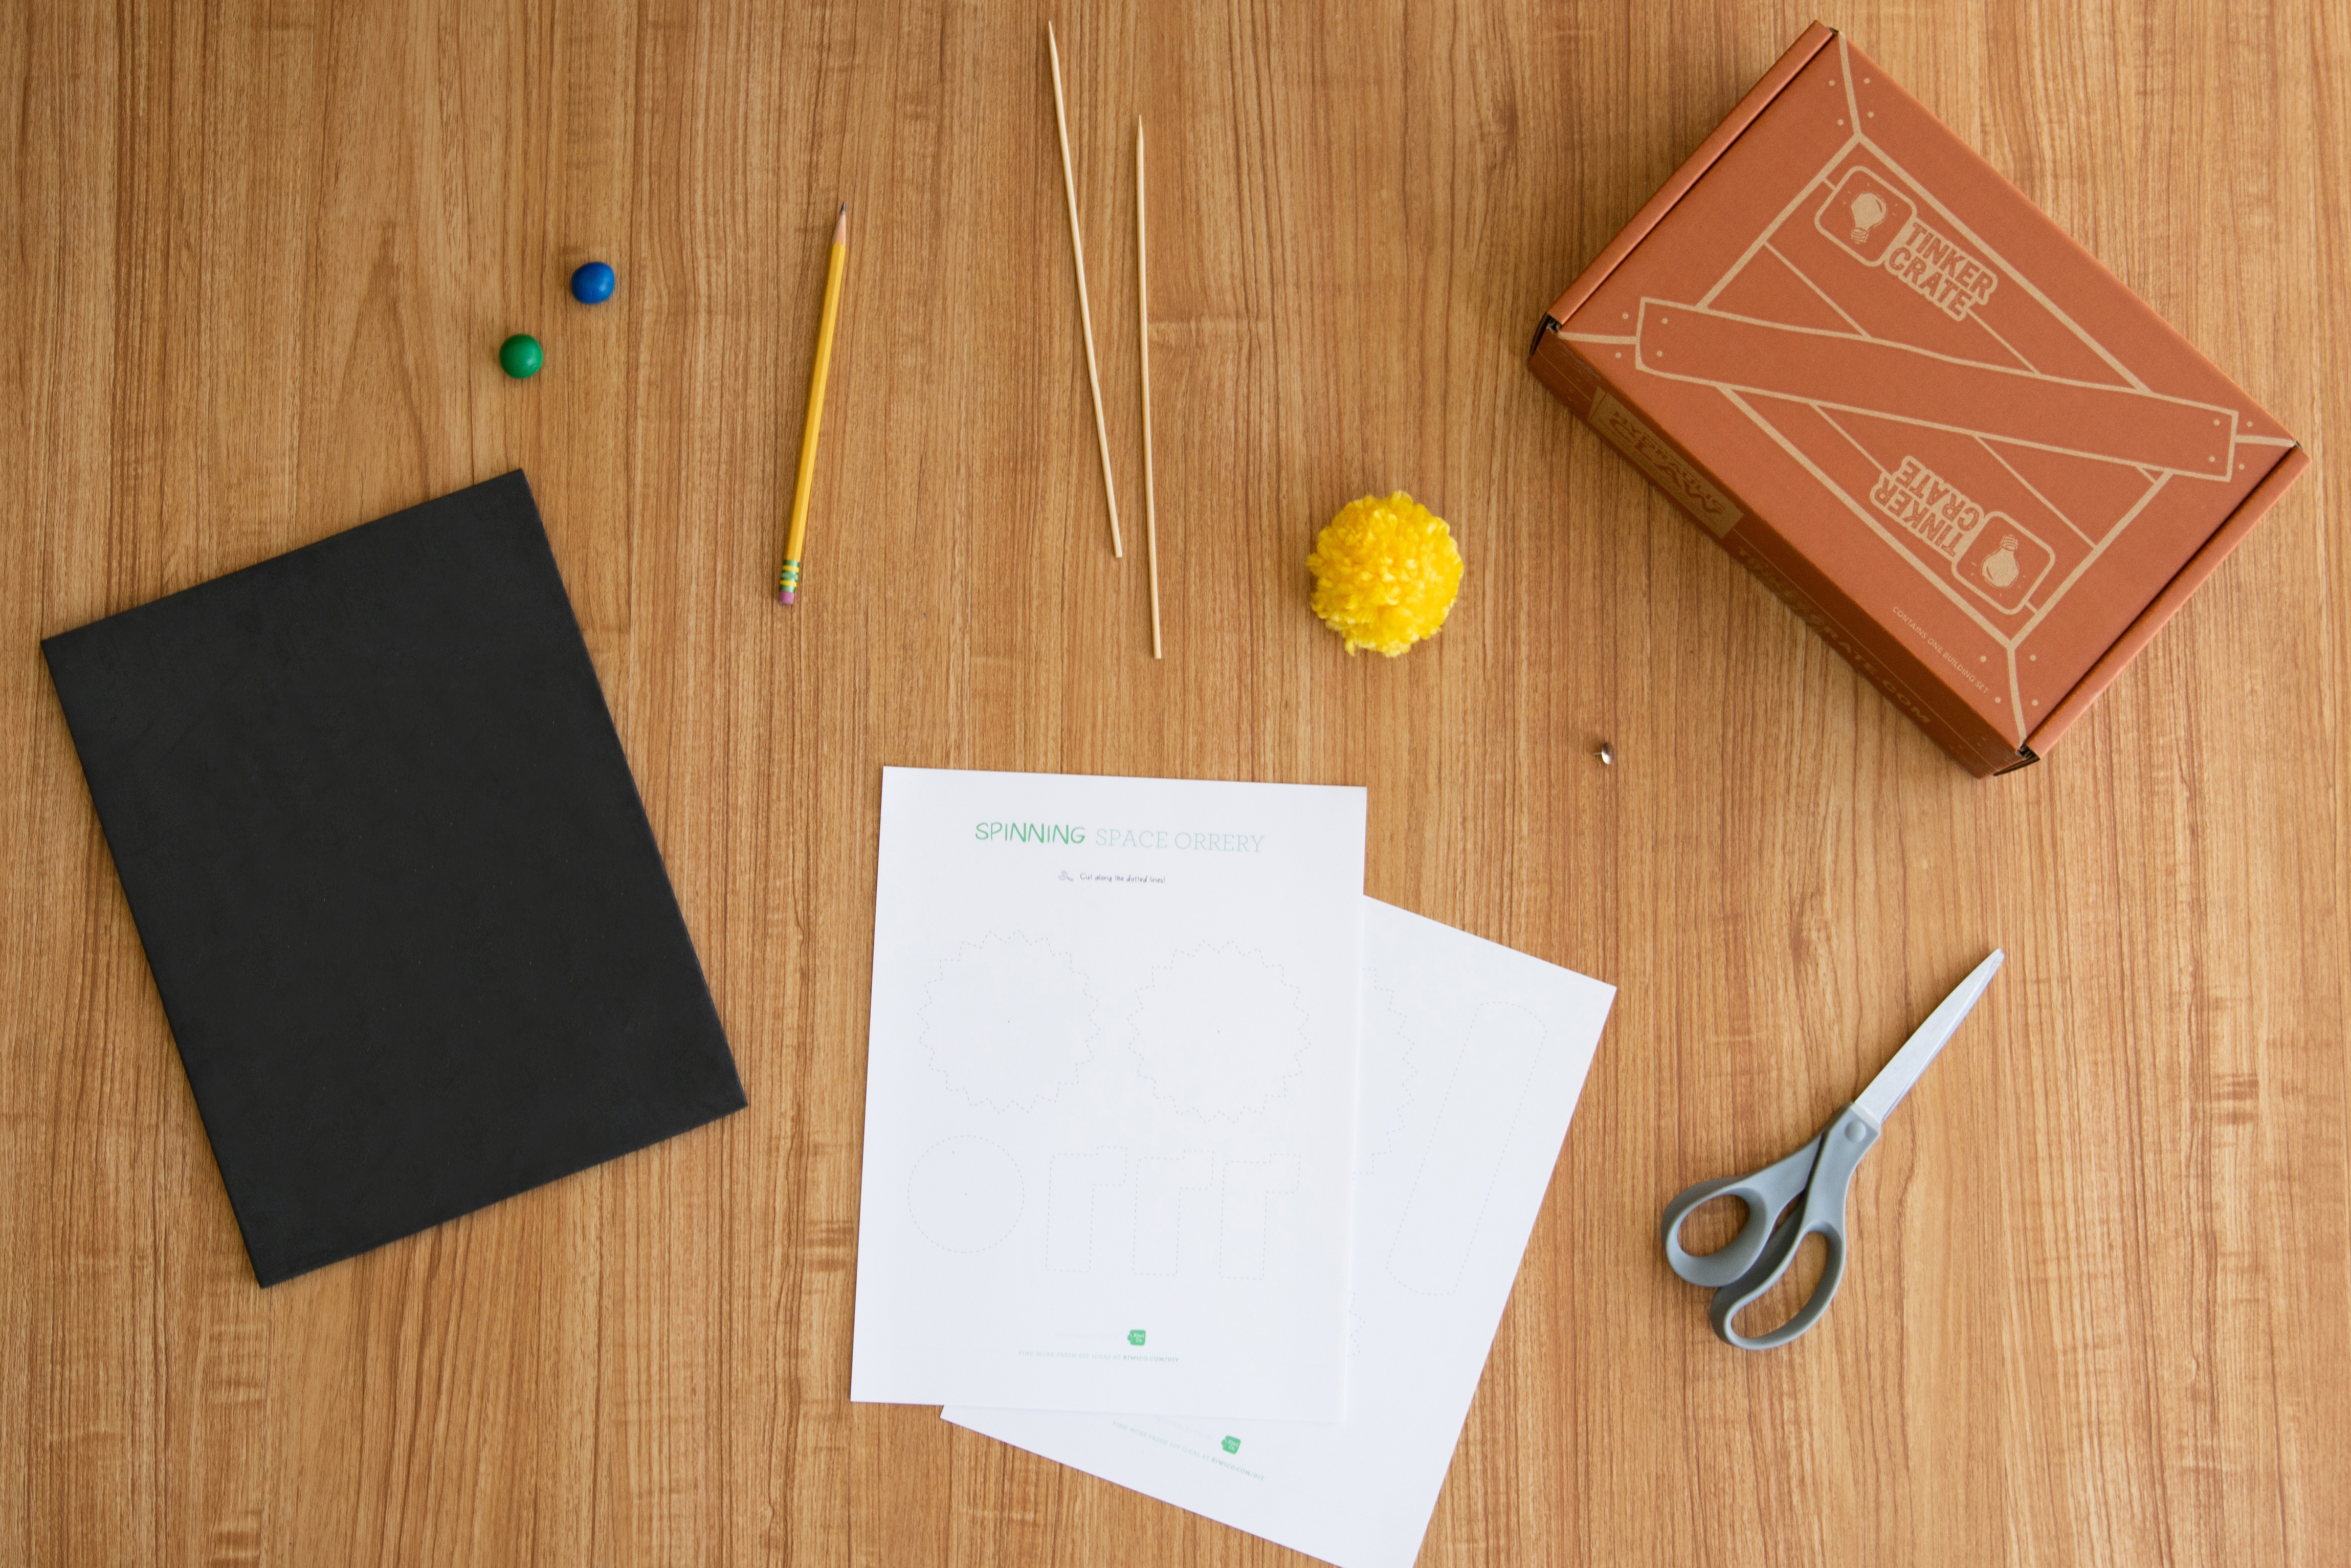
Gather your materials.

Step 2
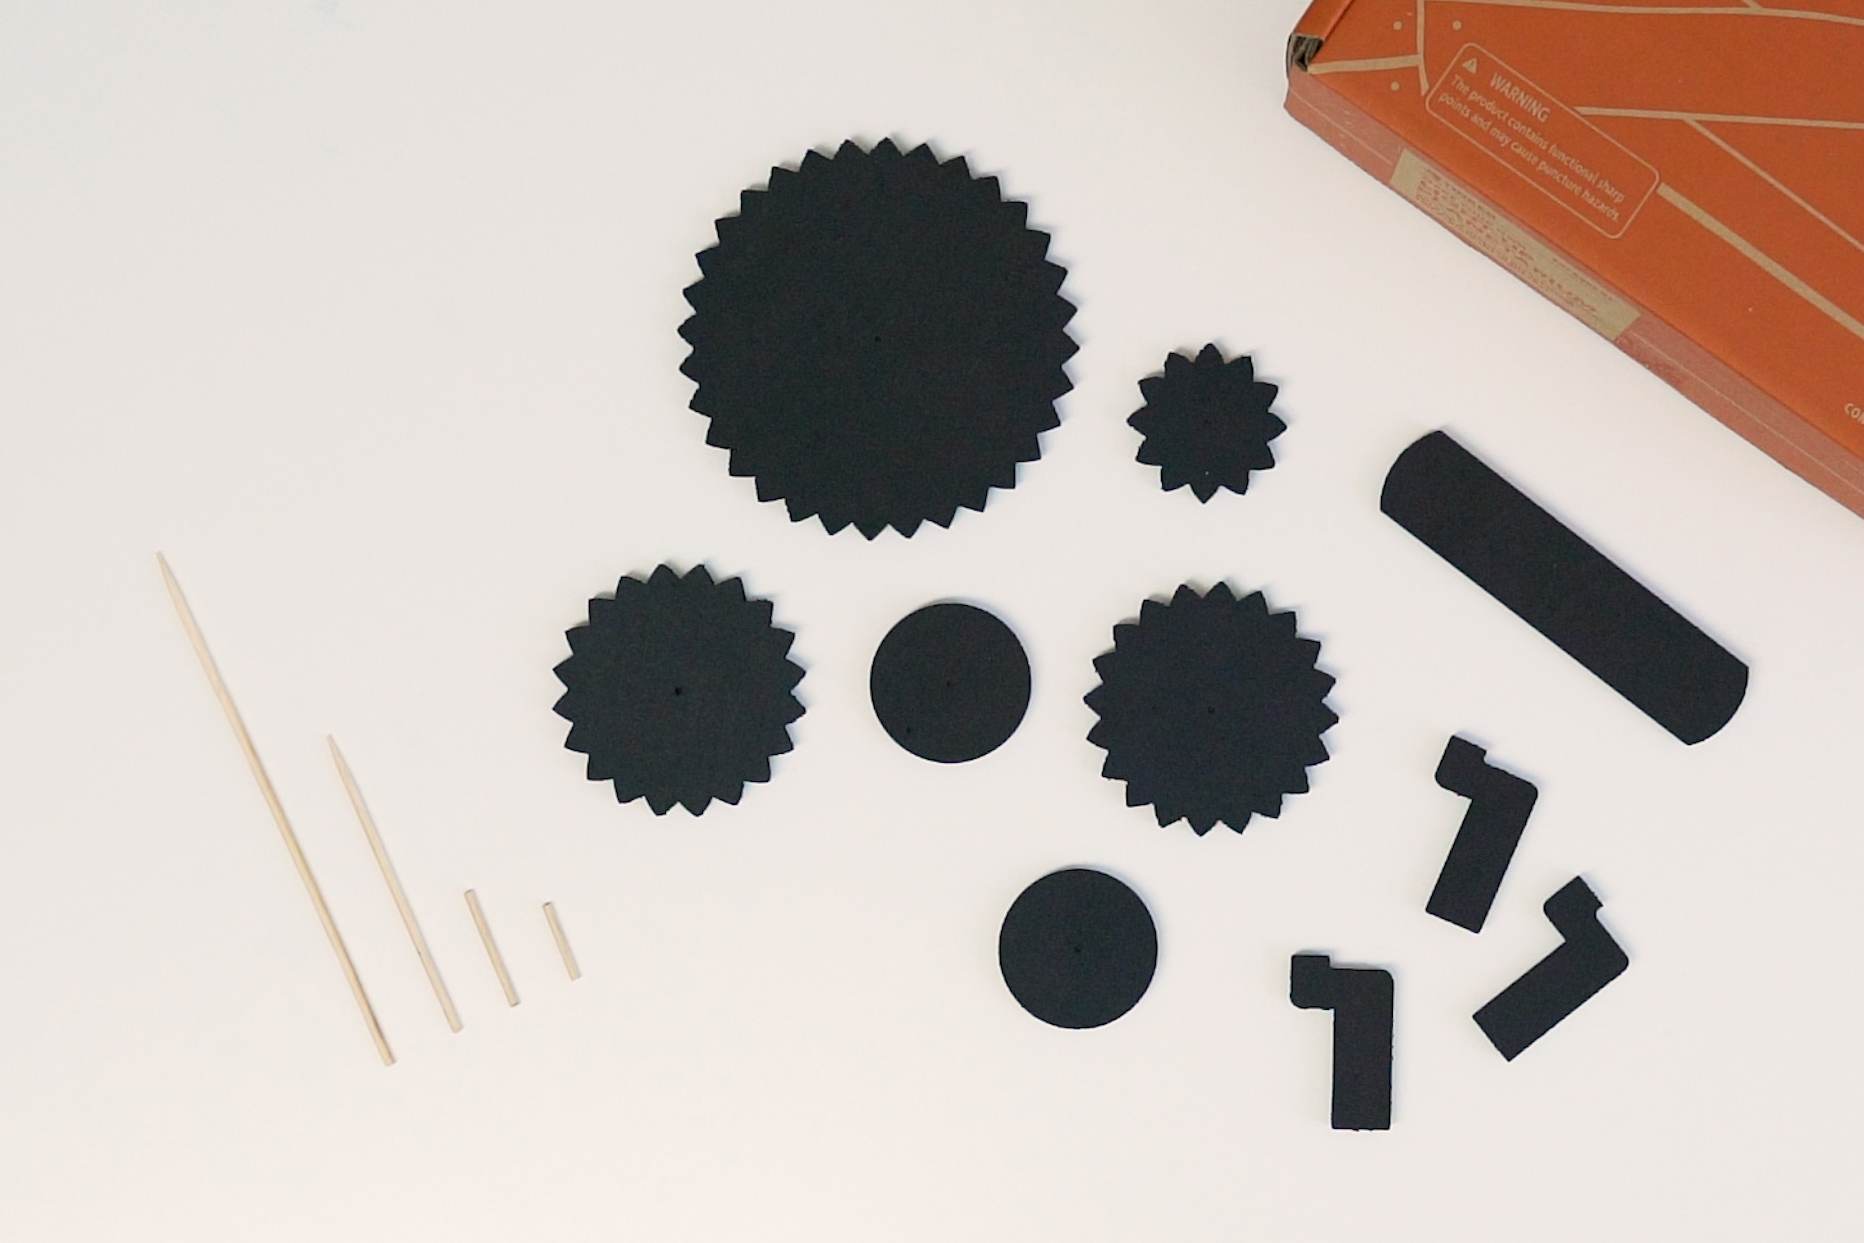
Cut out the printable along the dotted lines, then trace each piece onto a sheet of thick craft foam. Use scissors or a craft knife to carefully cut out the shape. Then cut the skewers to 4, 6, 1½, and 2 inches (10.2, 15.2, 3.8, 5.1 cm).
Tip
Make sure that the 4-inch and 6-inch (10.2, 15.2 cm) skewers have sharp points on one side.
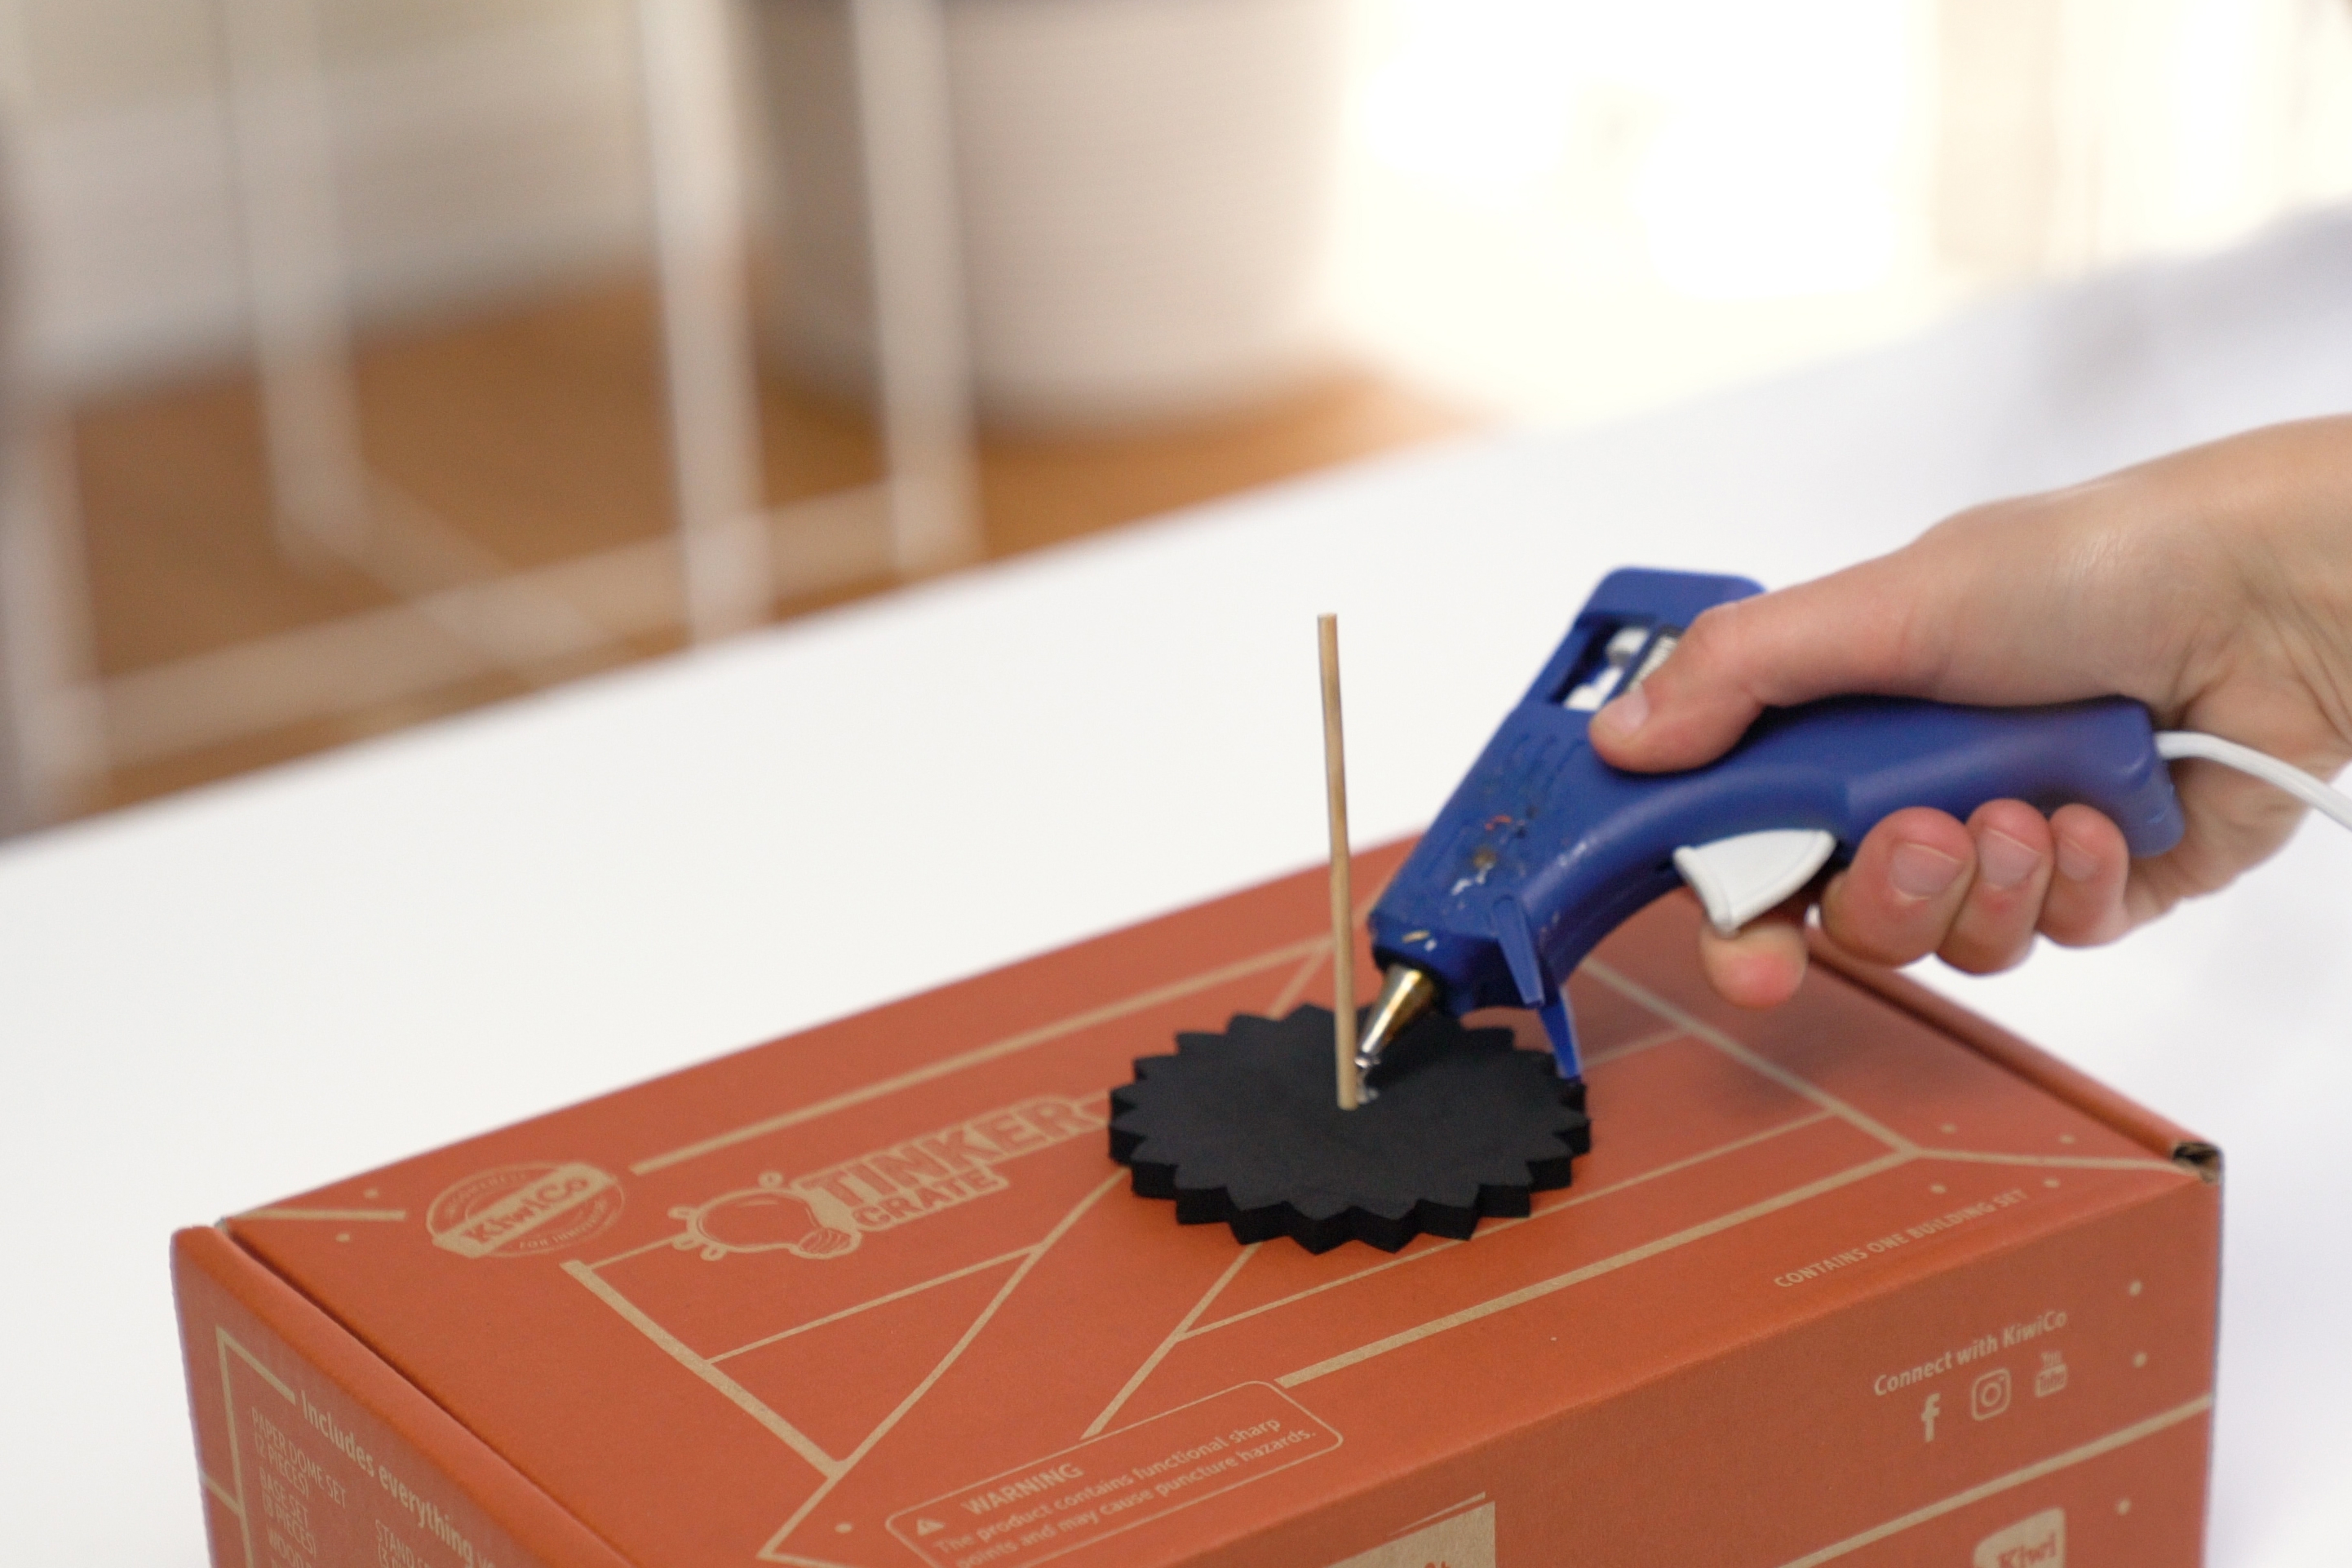
Step 3
Poke the 6-inch (15.2 cm) skewer through the top of the box, pointy-side down. The point of the skewer should puncture the bottom of the box, but shouldn't go all the way through to the table.
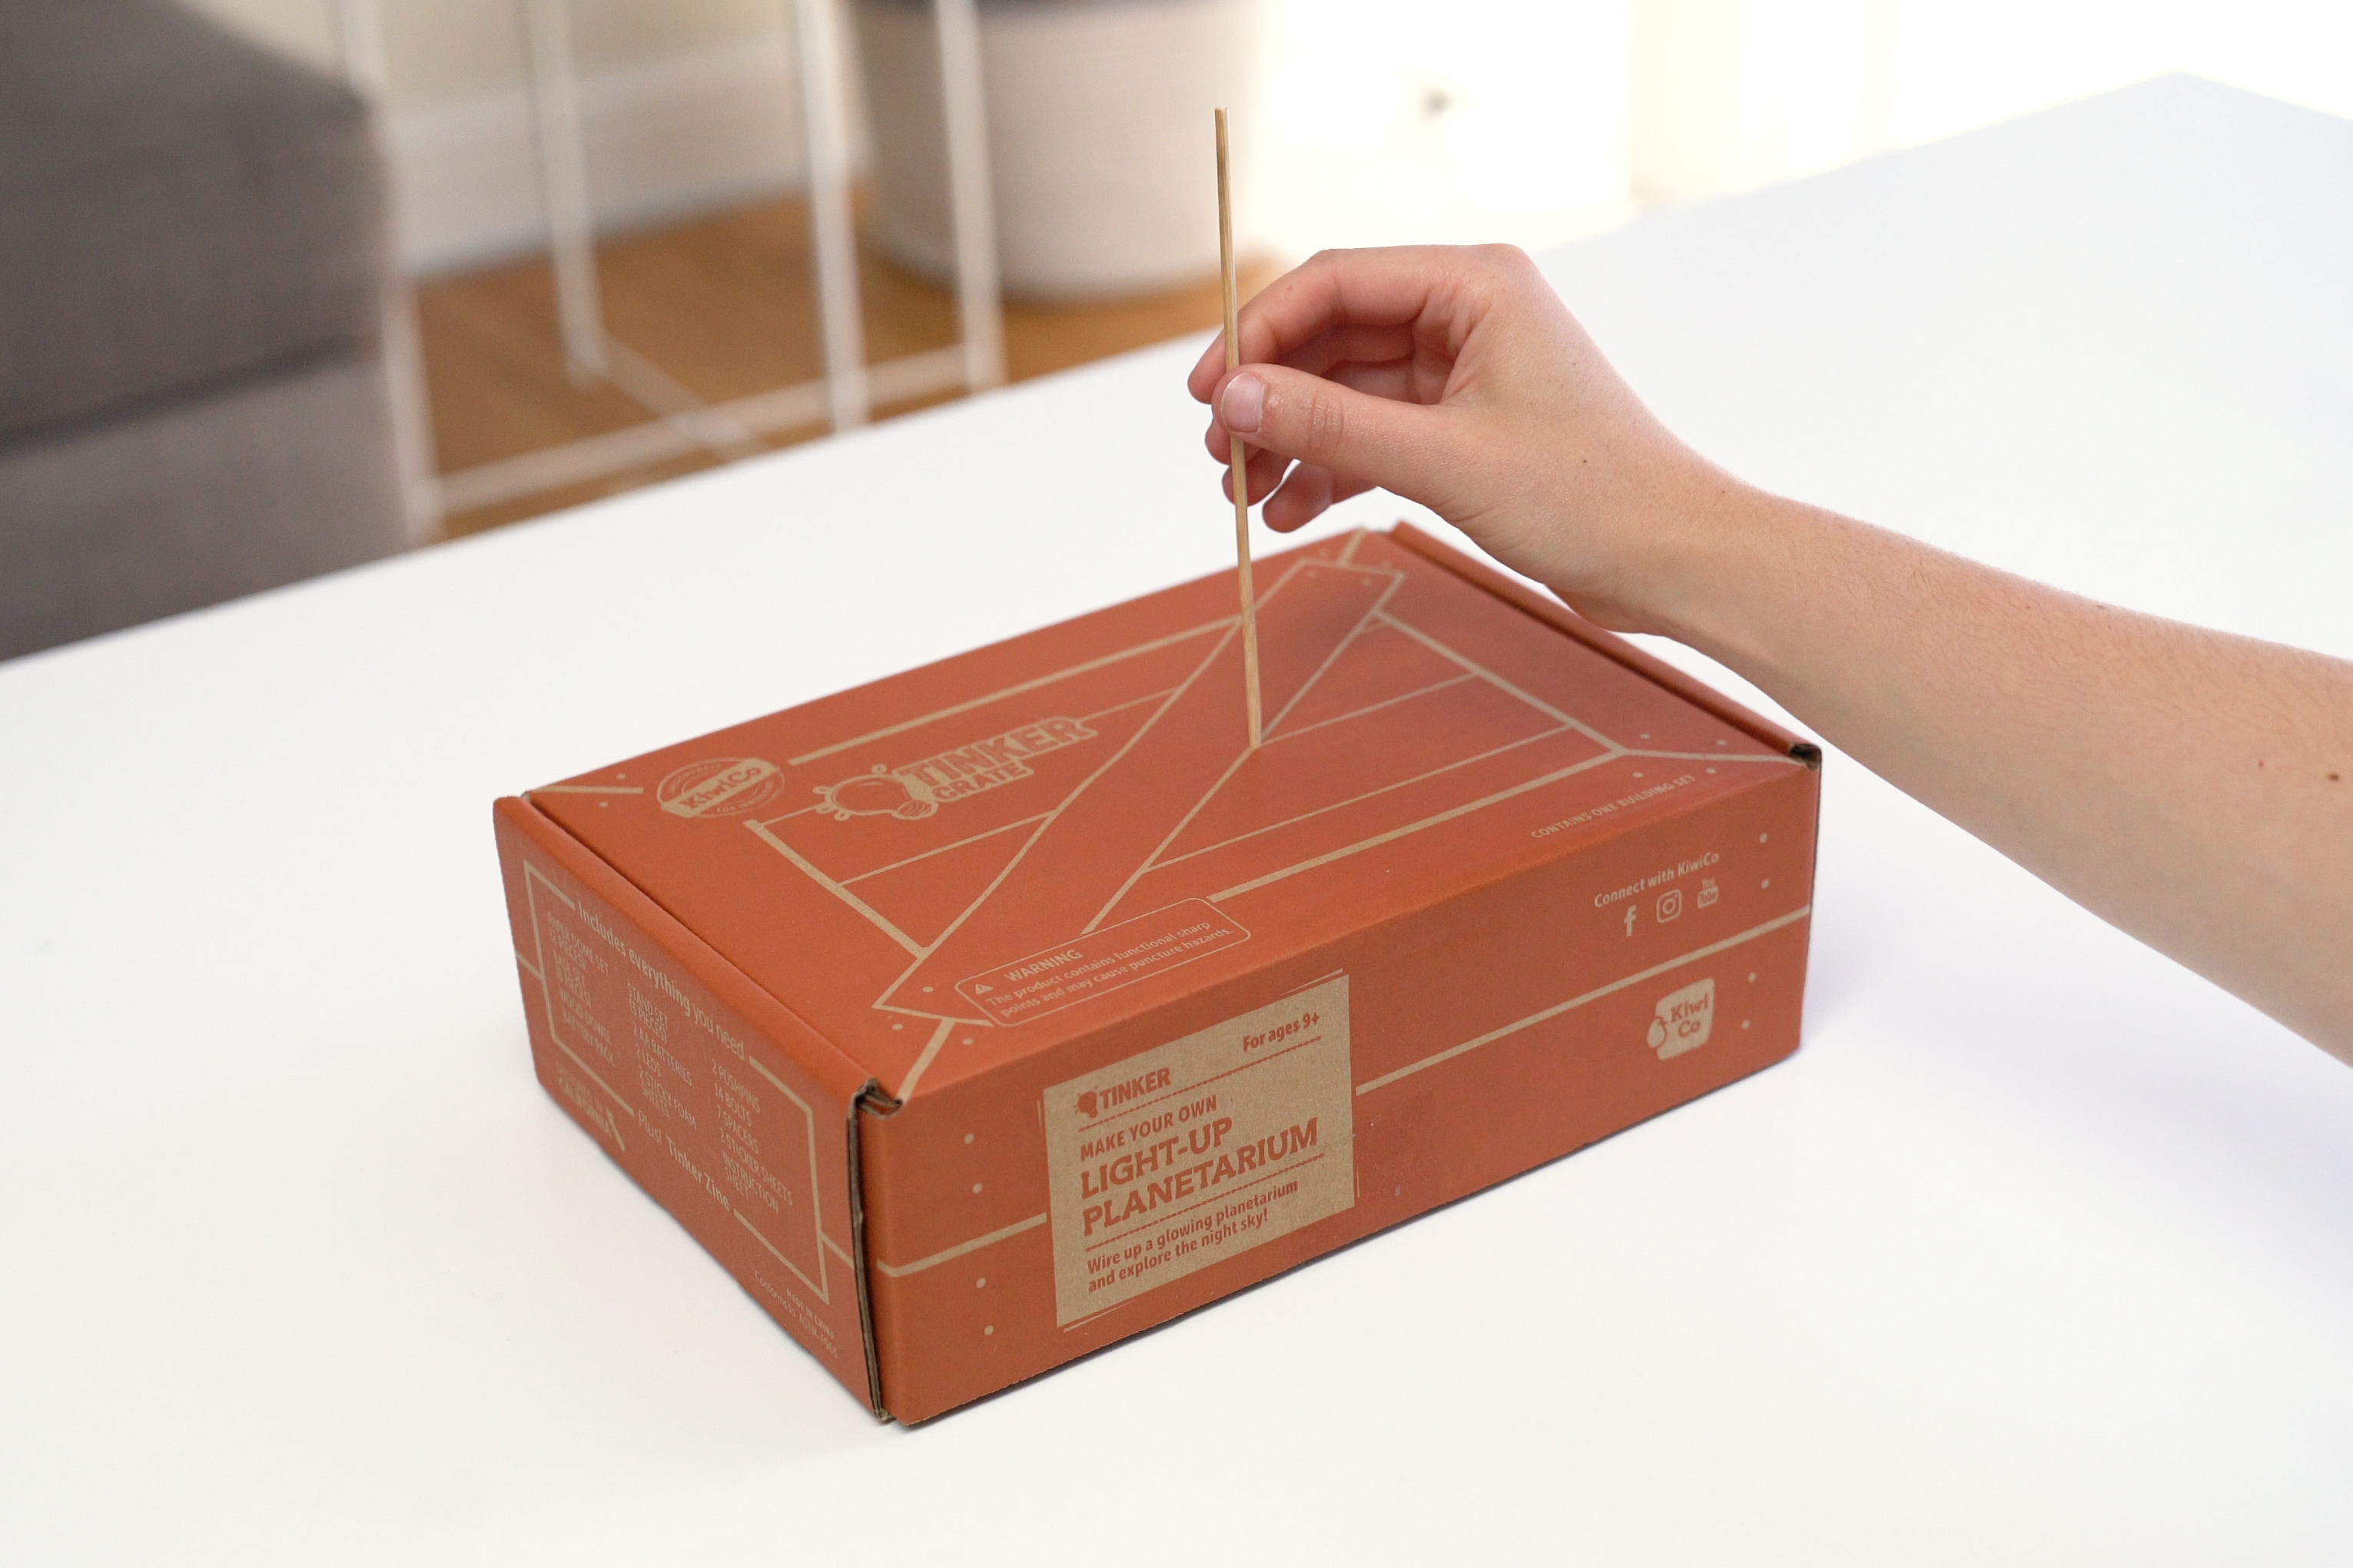
Tip
Make sure the skewer is straight up and down and can rotate smoothly.
Step 4
Press a medium-sized gear onto the skewer, then push it down so it rests on the box. Hot glue the gear to the skewer so that the skewer and the gear rotate together. Make sure you don't glue the gear to the box.
Step 5
Mate the other medium sized gear with the first one. Then, poke the 4-inch skewer through the middle of that gear and push it all the way into the box. The point of the skewer should puncture the bottom of the box, but shouldn't go all the way through to the table.
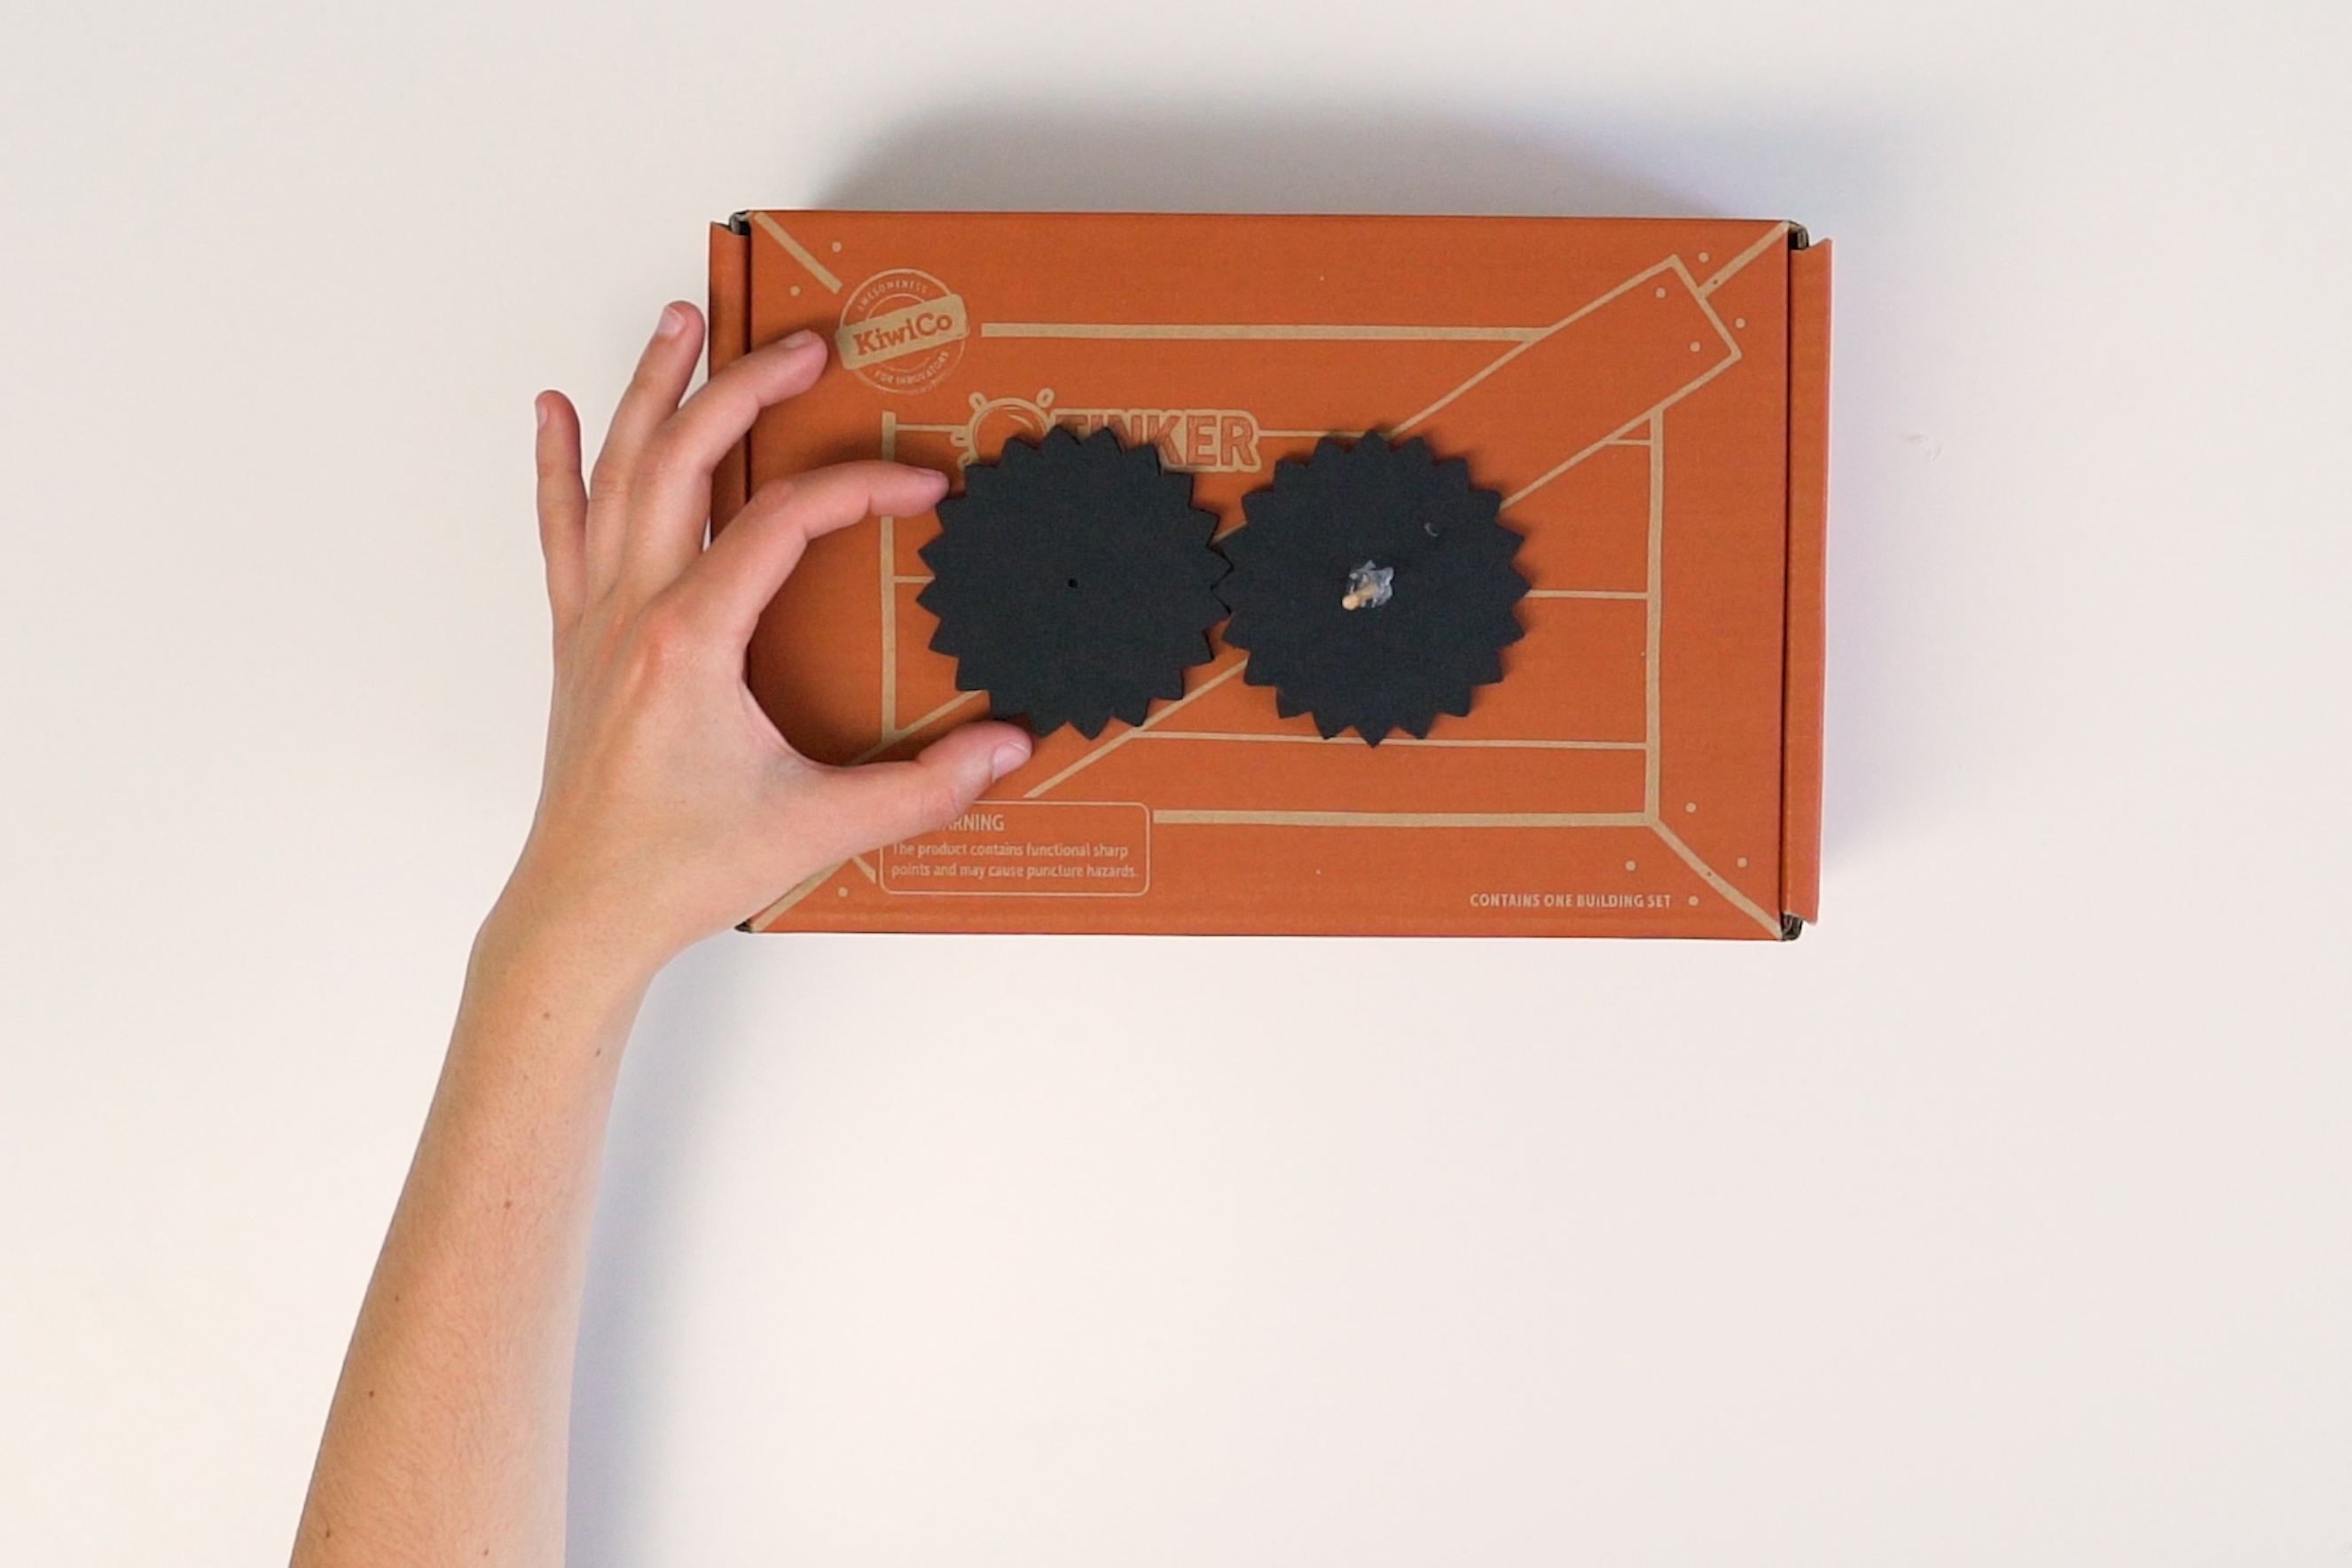
Step 6
Find the circle with two holes. Line up the center hole with the 4-inch skewer, push it all the way down, and glue it in place.
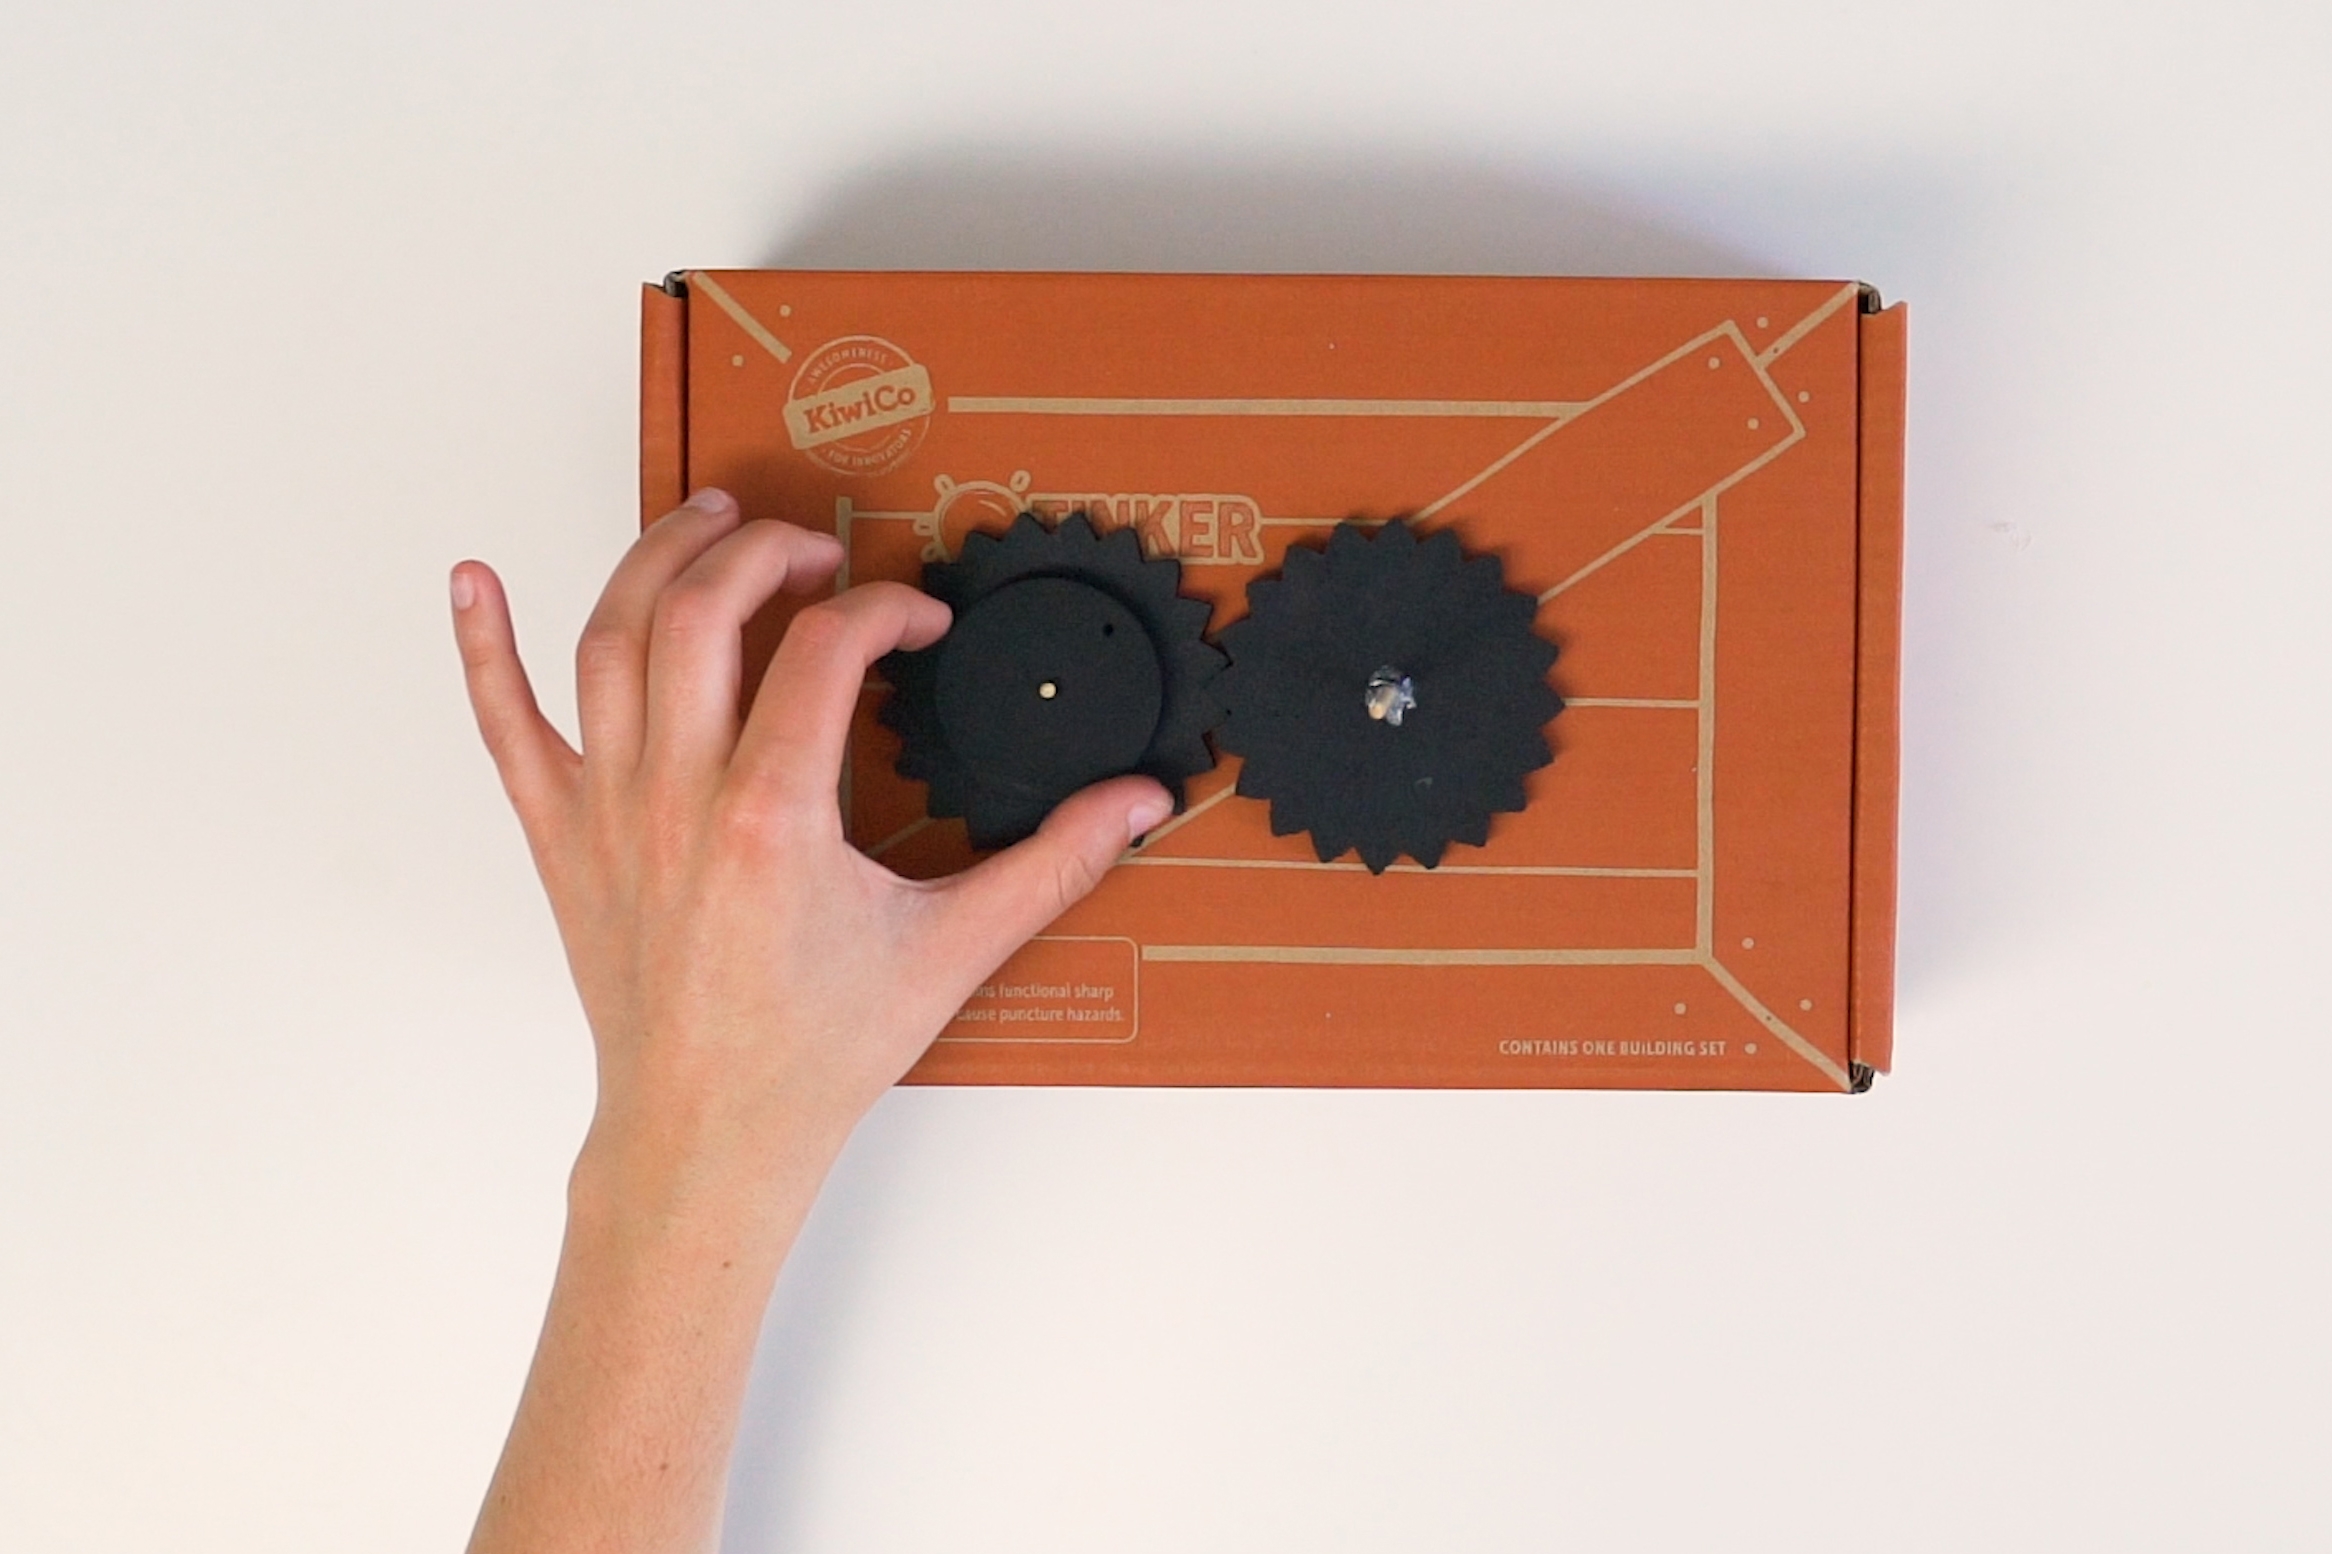
Step 7
Poke the 1 ½-inch (3.8 cm) skewer into the off-center hole and glue it in place. This will be your handle.
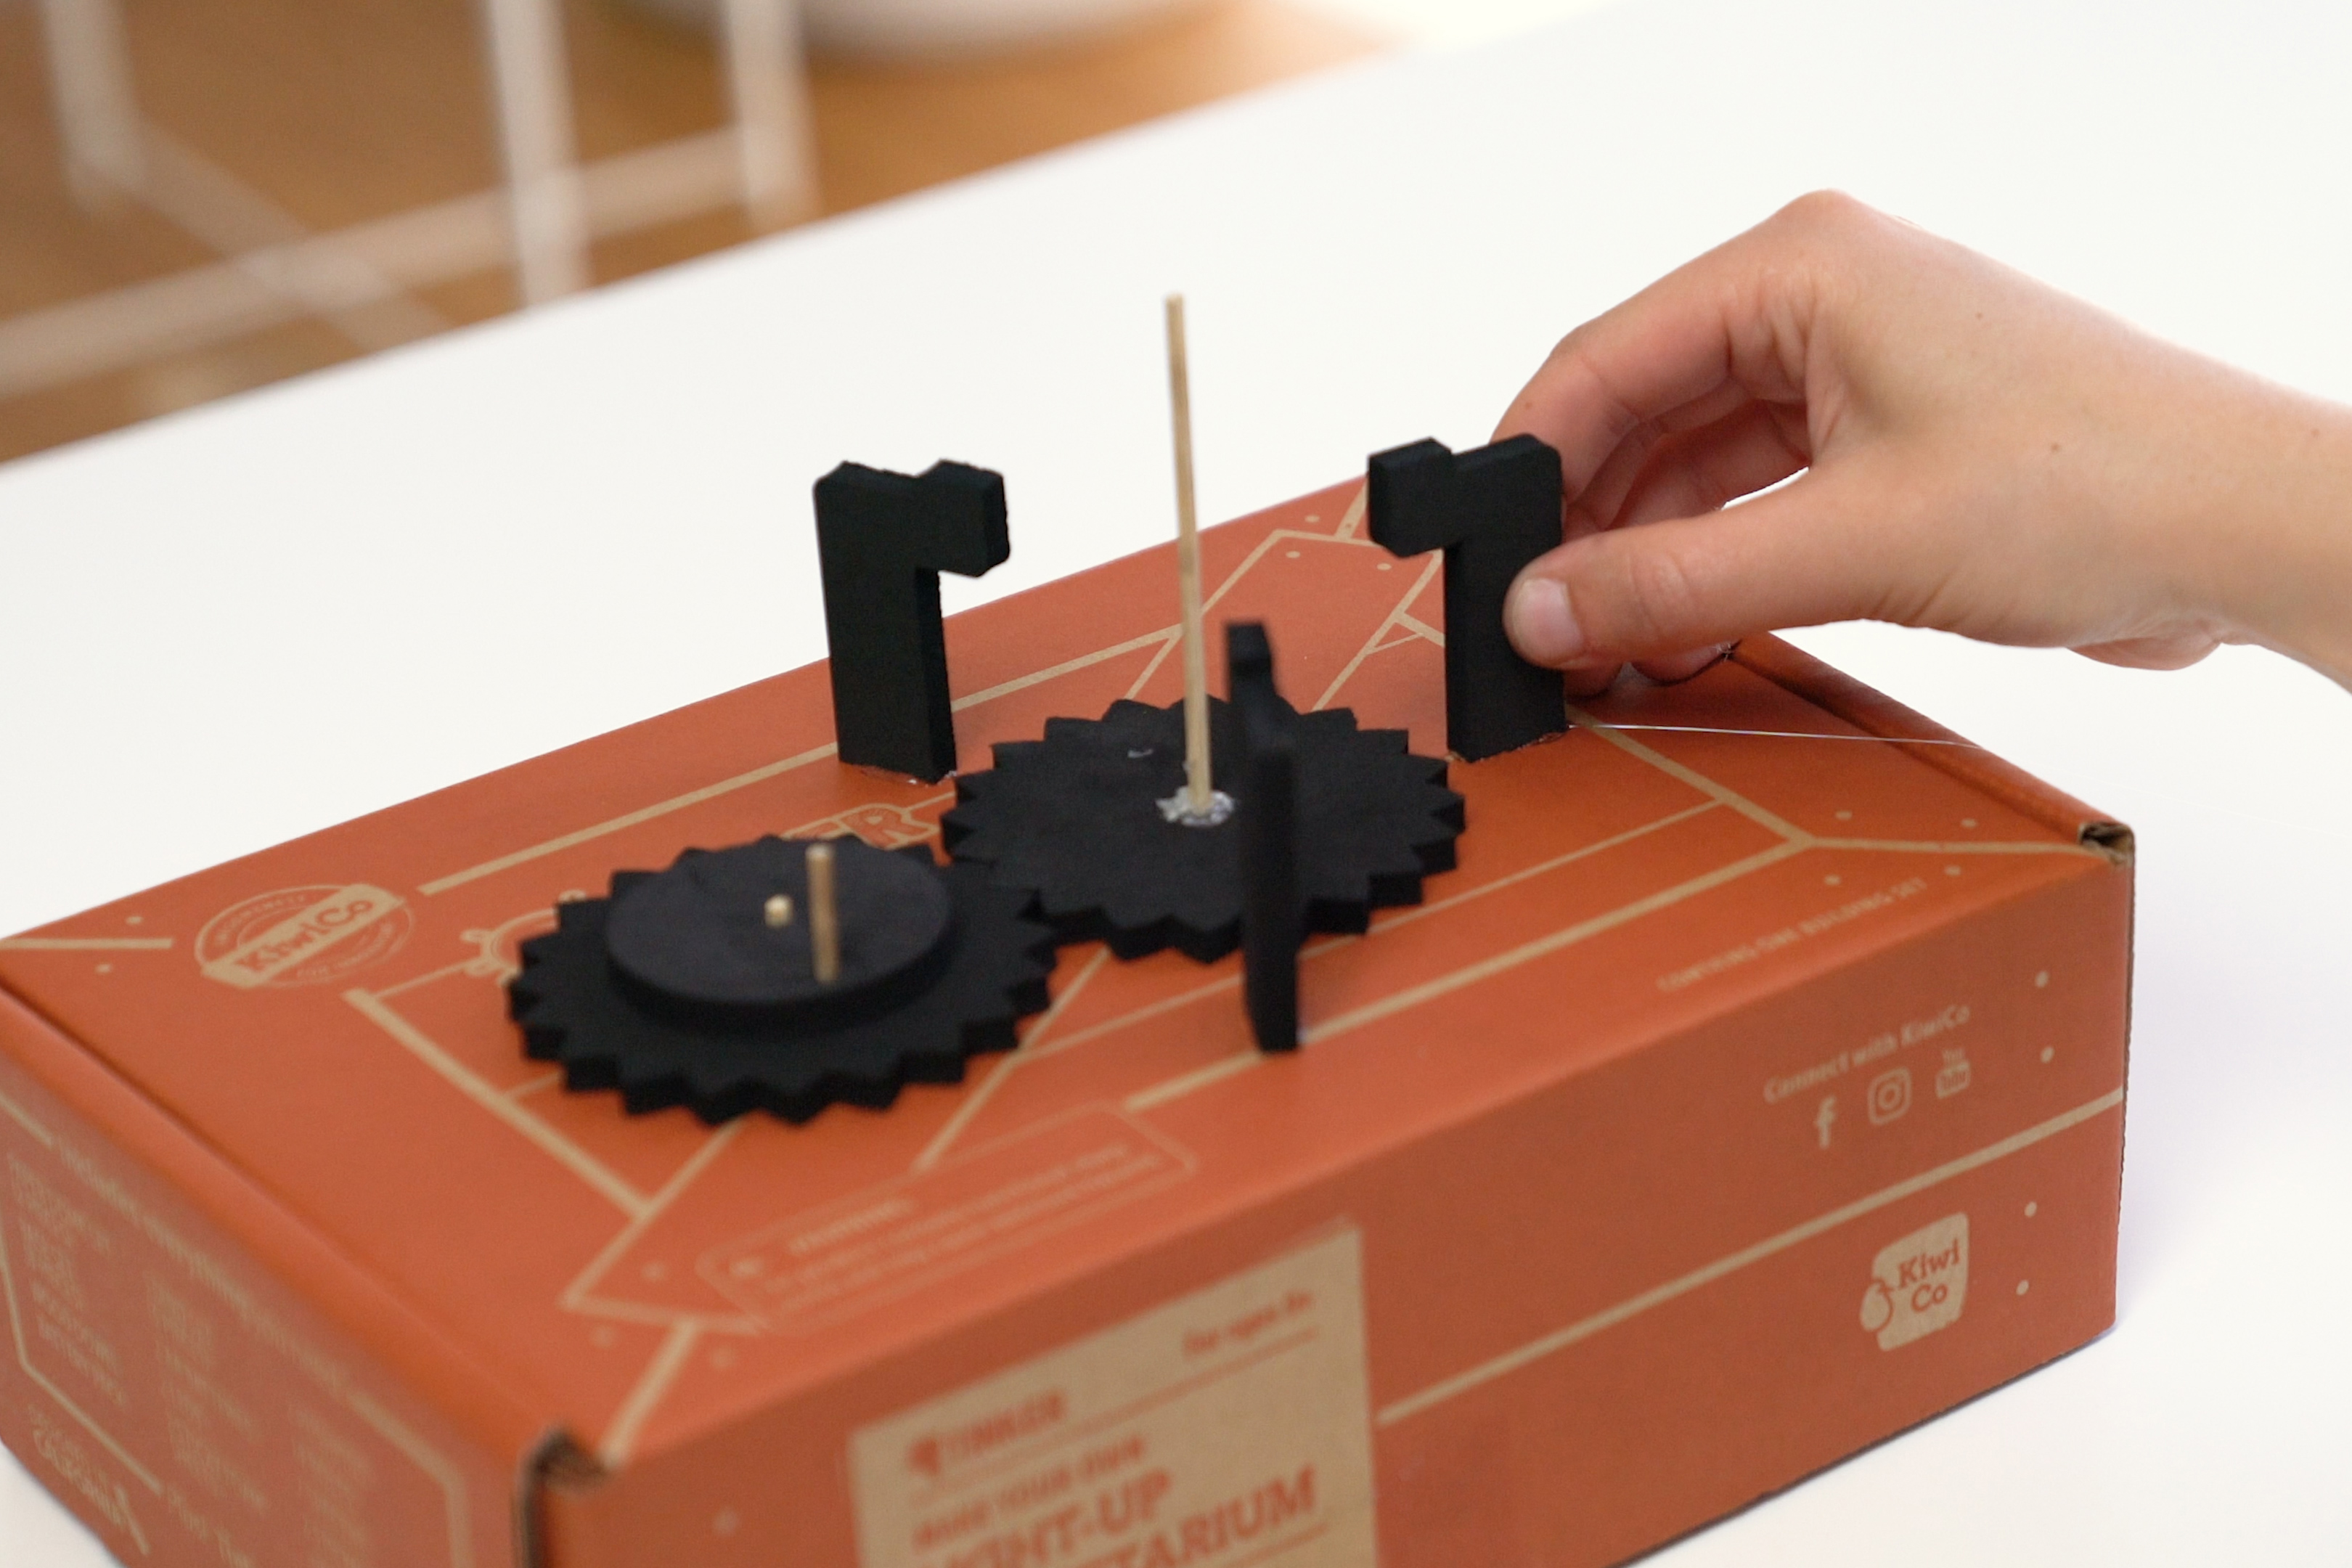
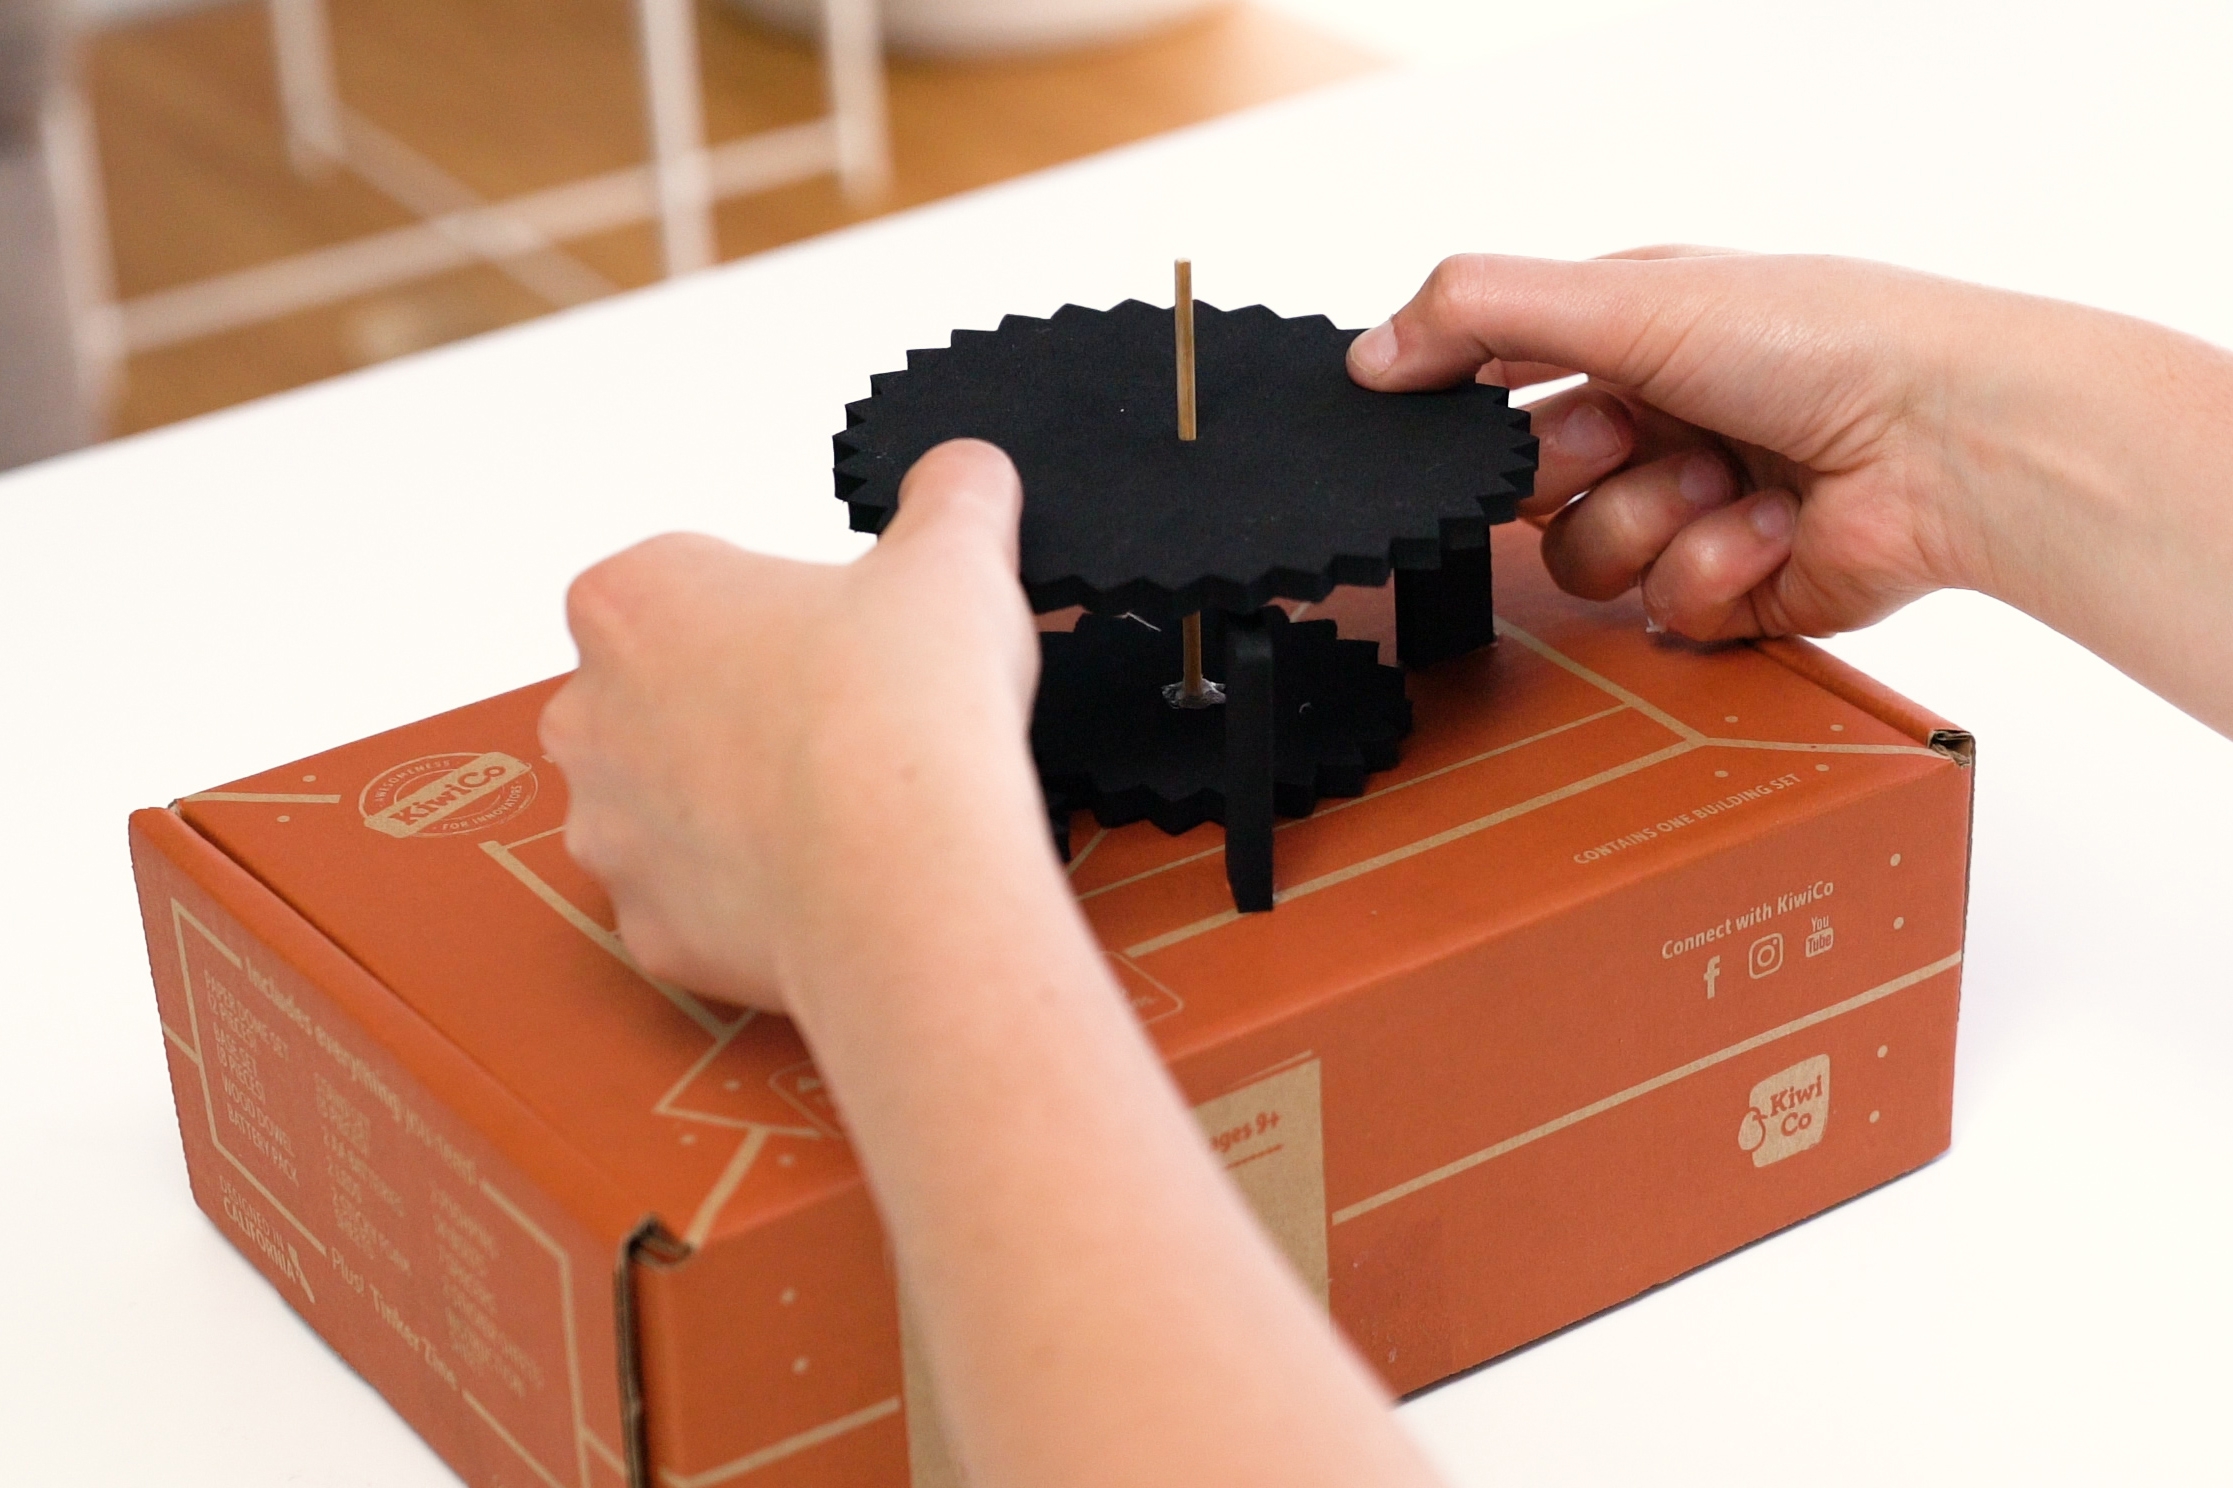
Step 8
Glue the foam offsets to the top of the box around the outside of the first medium sized gear as shown.
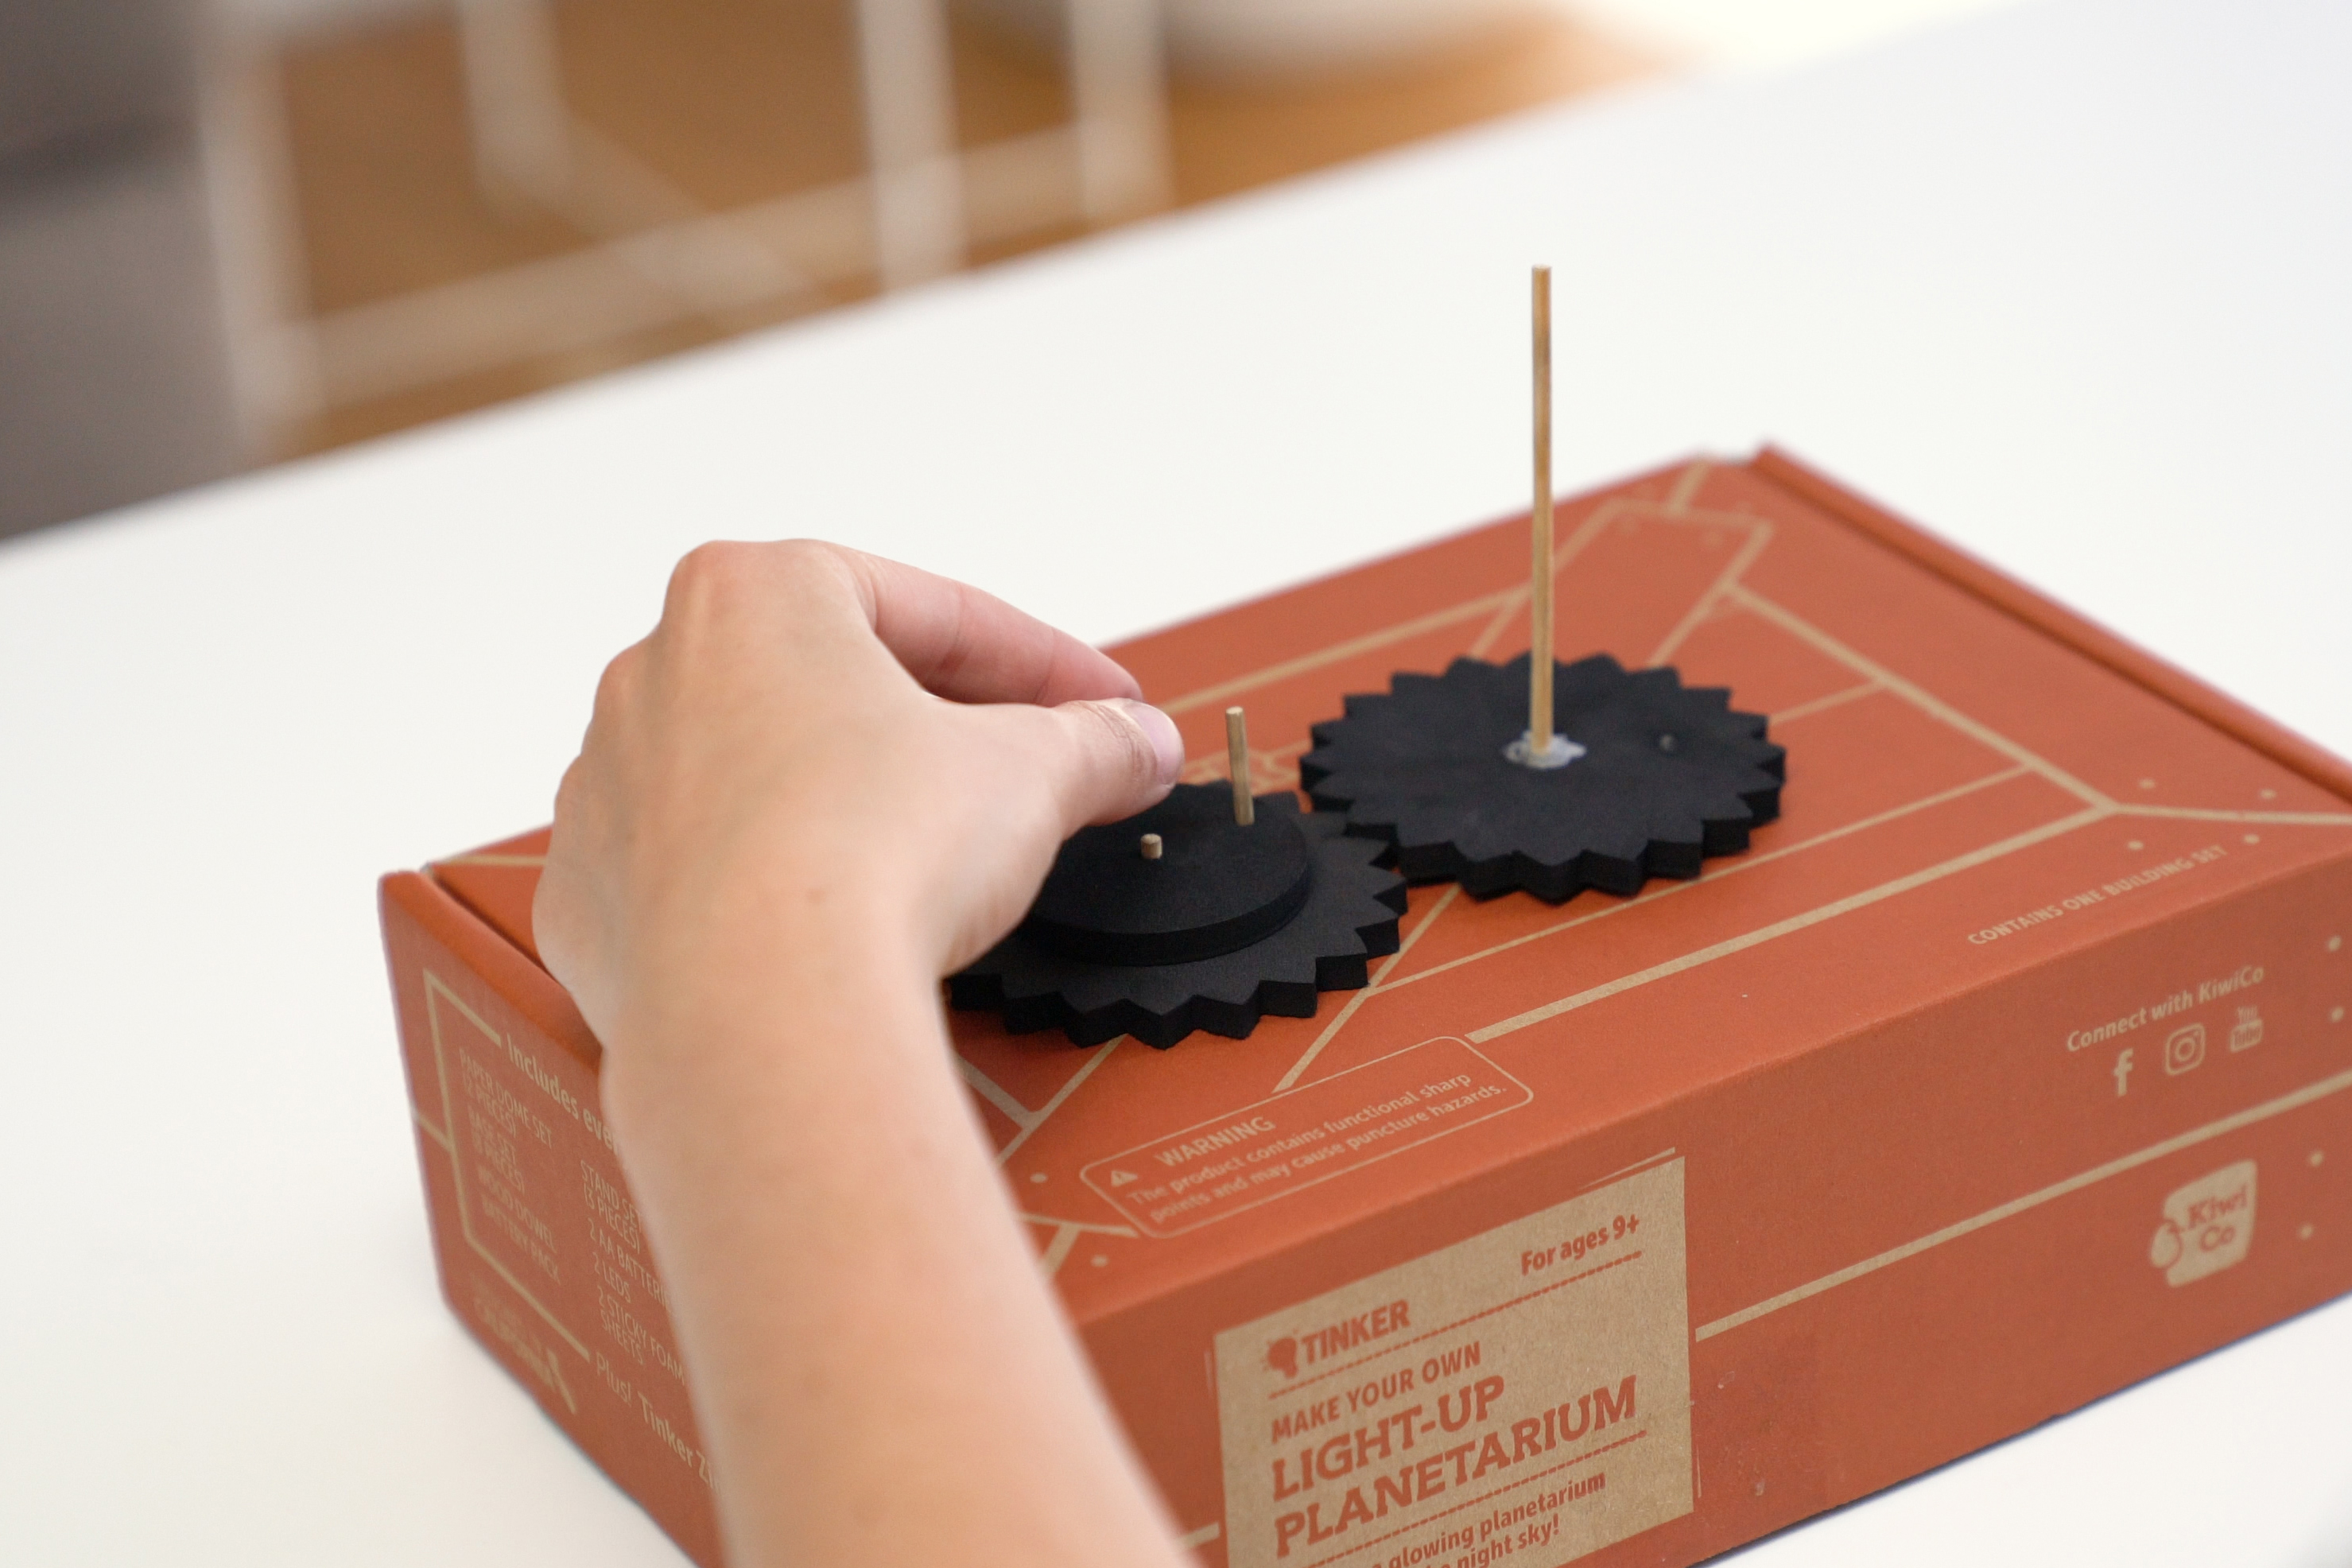
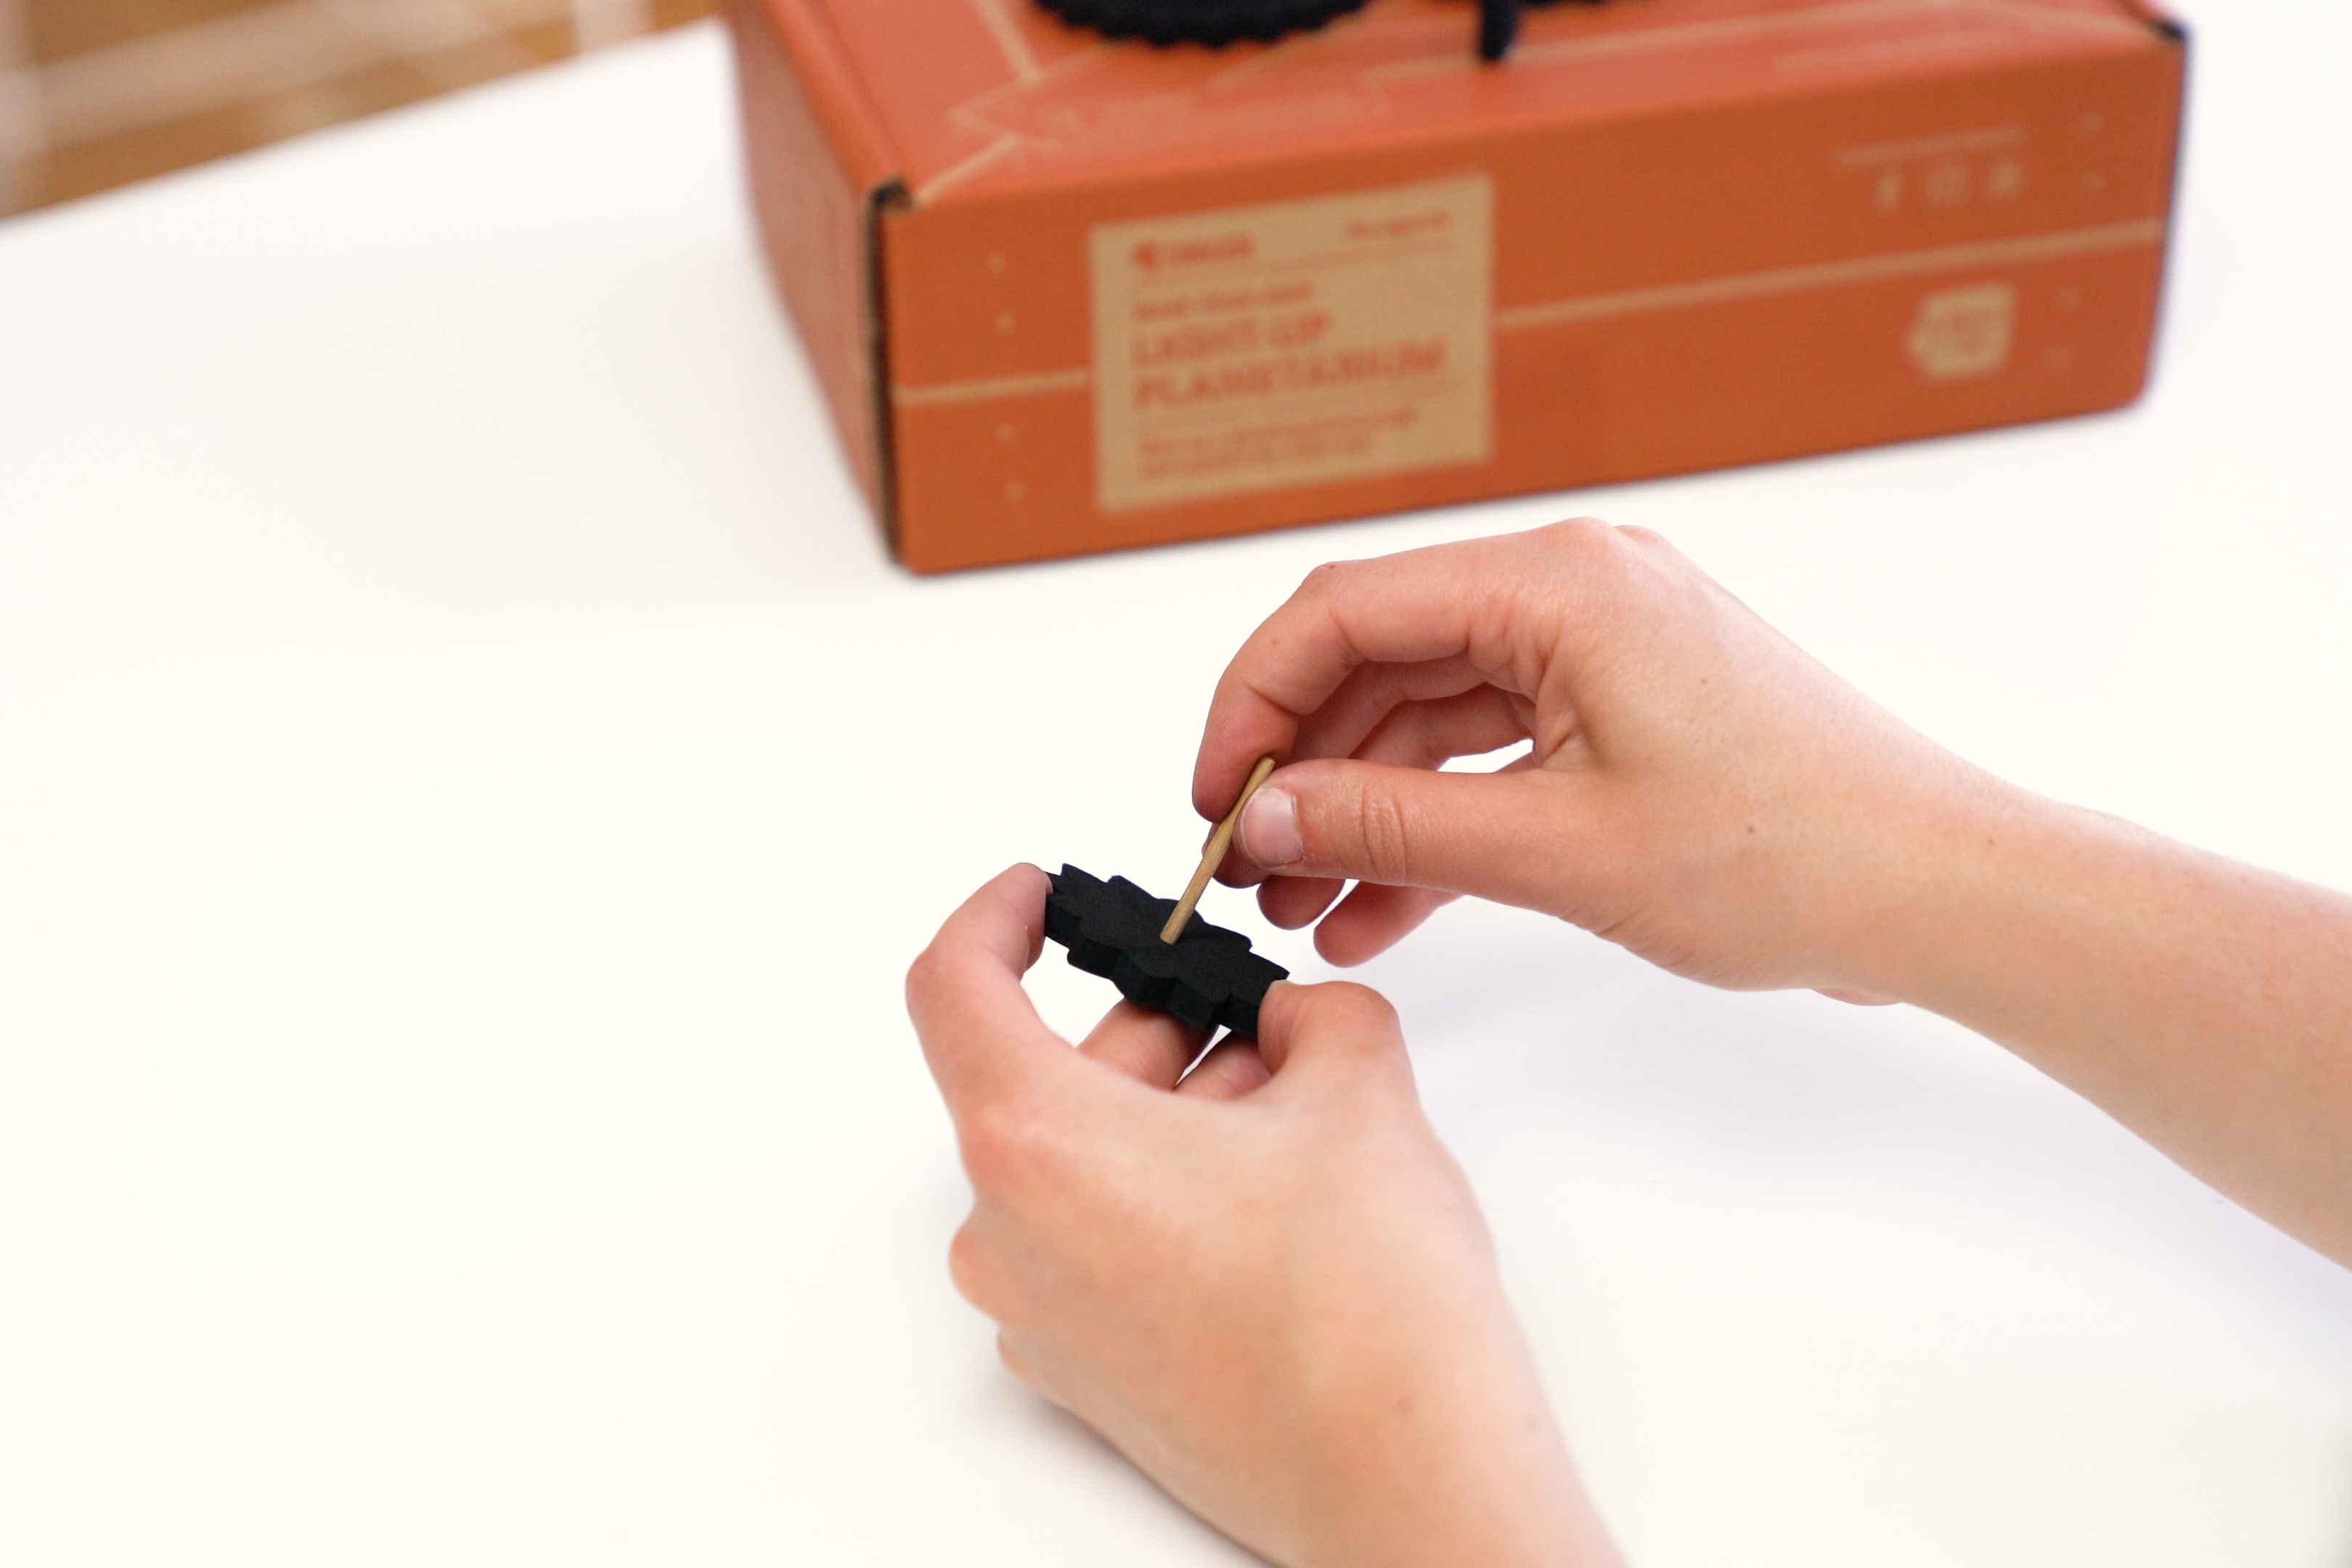
Step 9
Push the small gear onto one end of the 2-inch (5.1 cm) skewer and glue it in place.
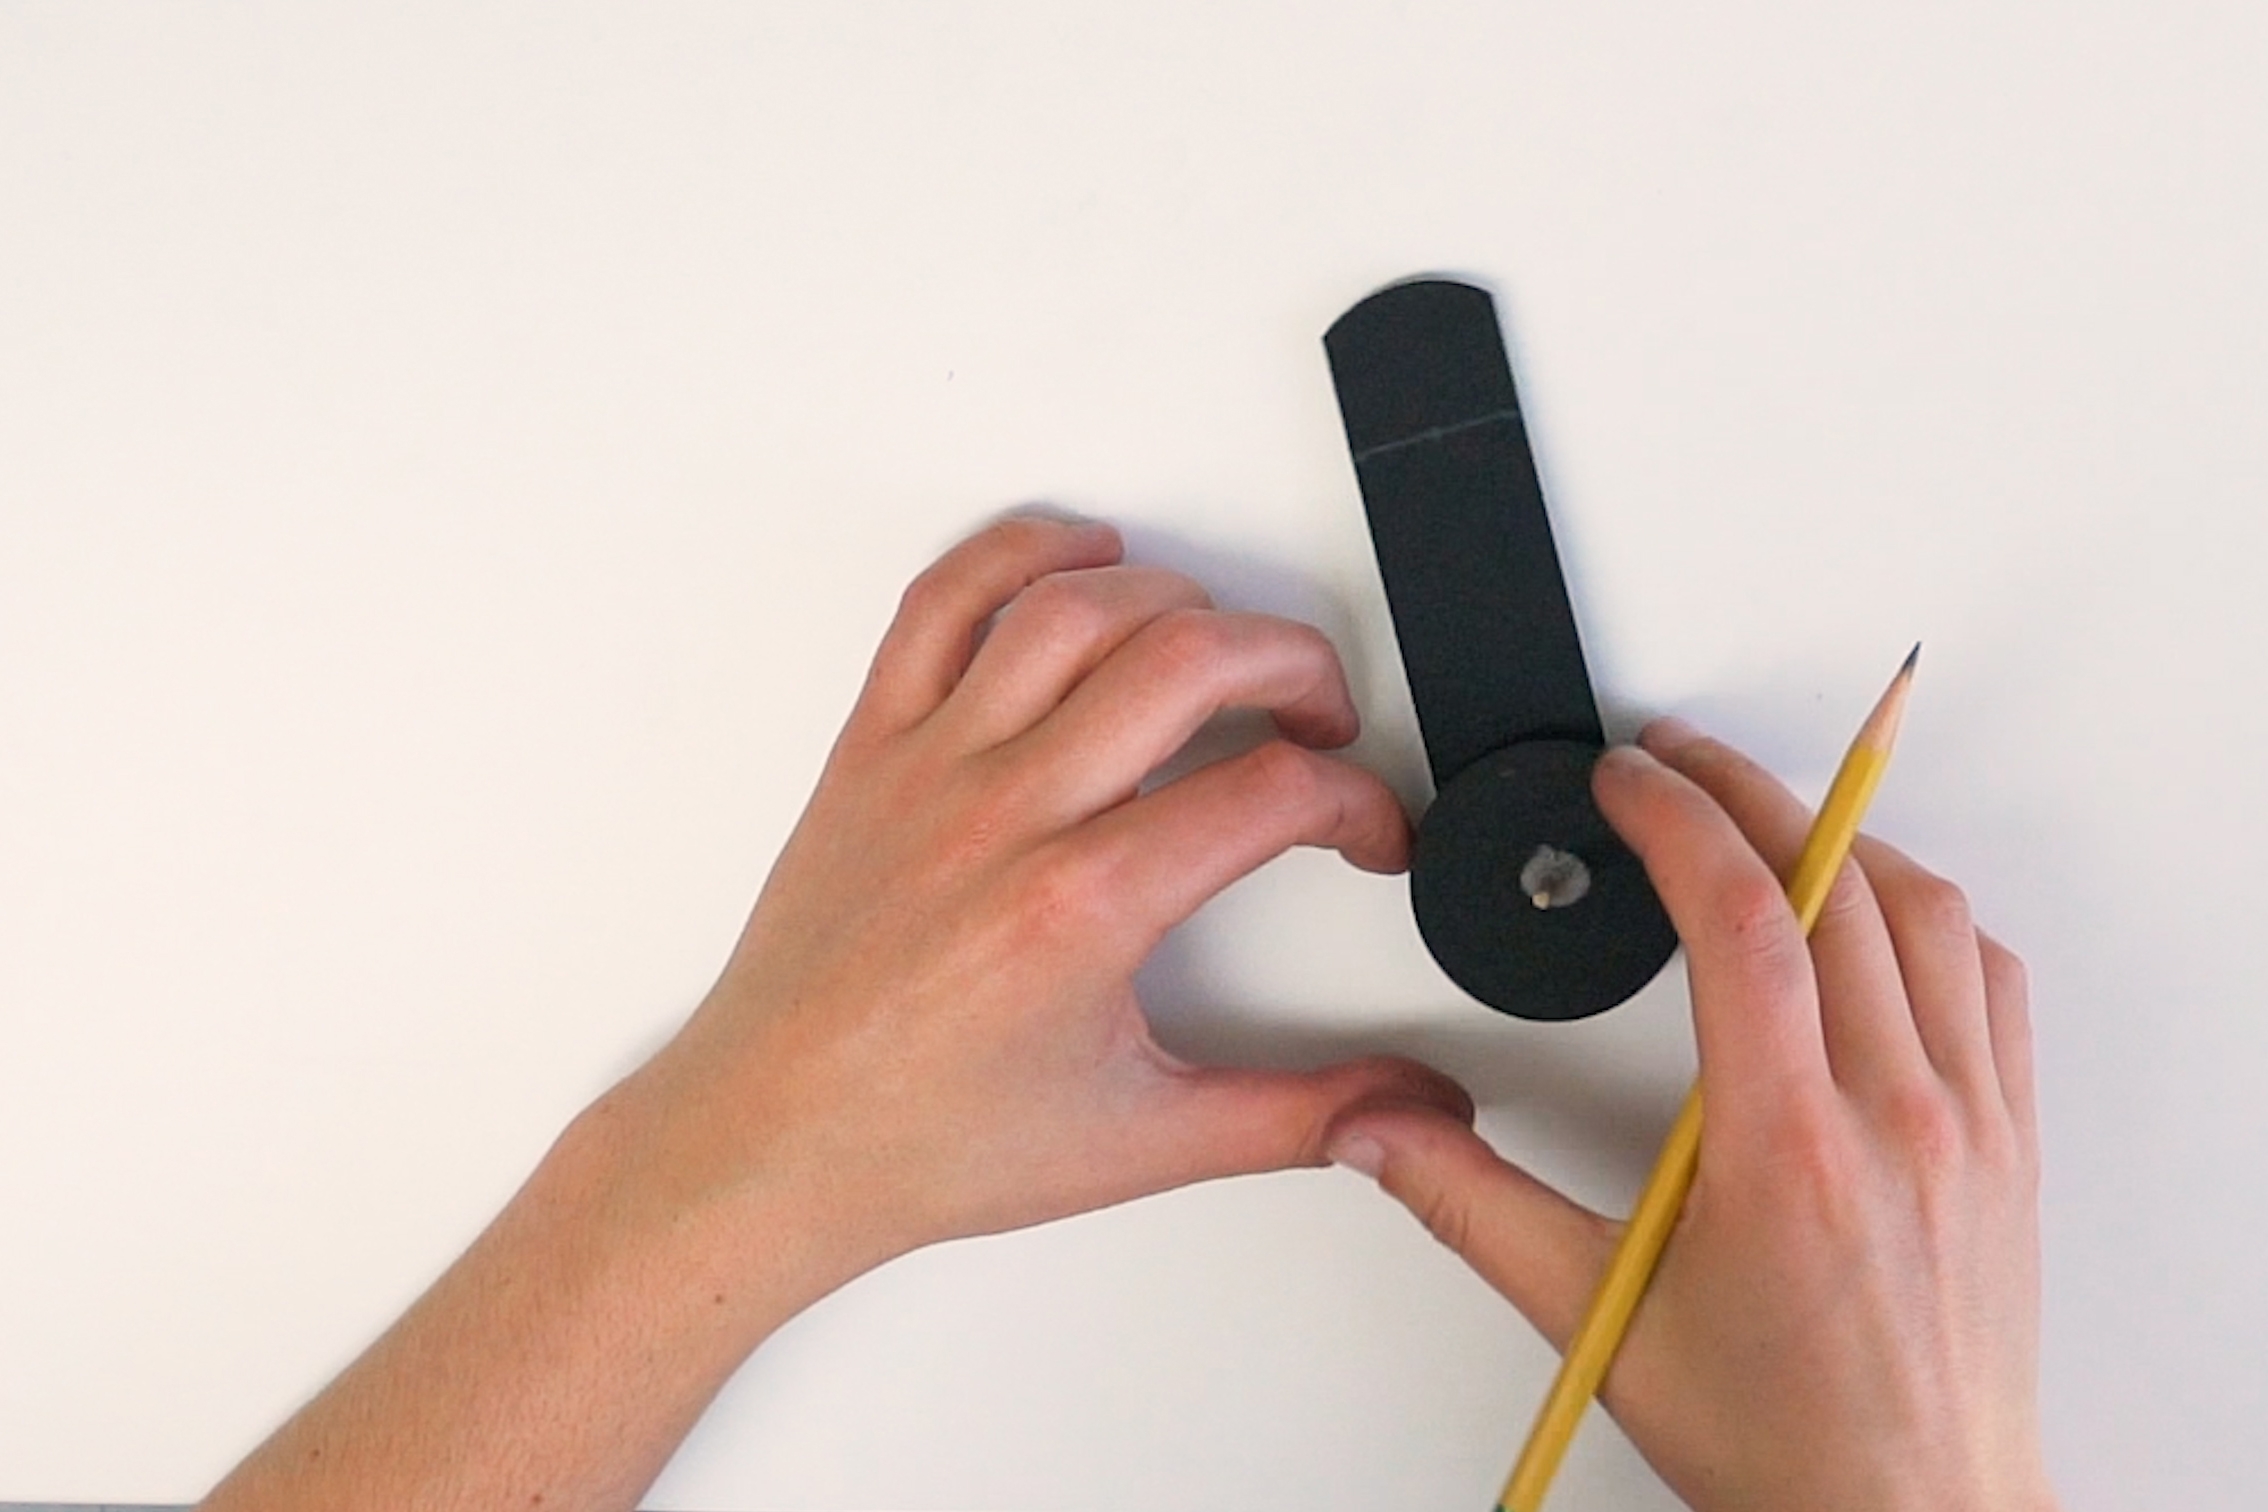
Step 10
Line up the remaining circle piece and the rectangular piece as shown. Then, poke a hole in the rectangular piece using the hole in the middle of the circle as a guide.
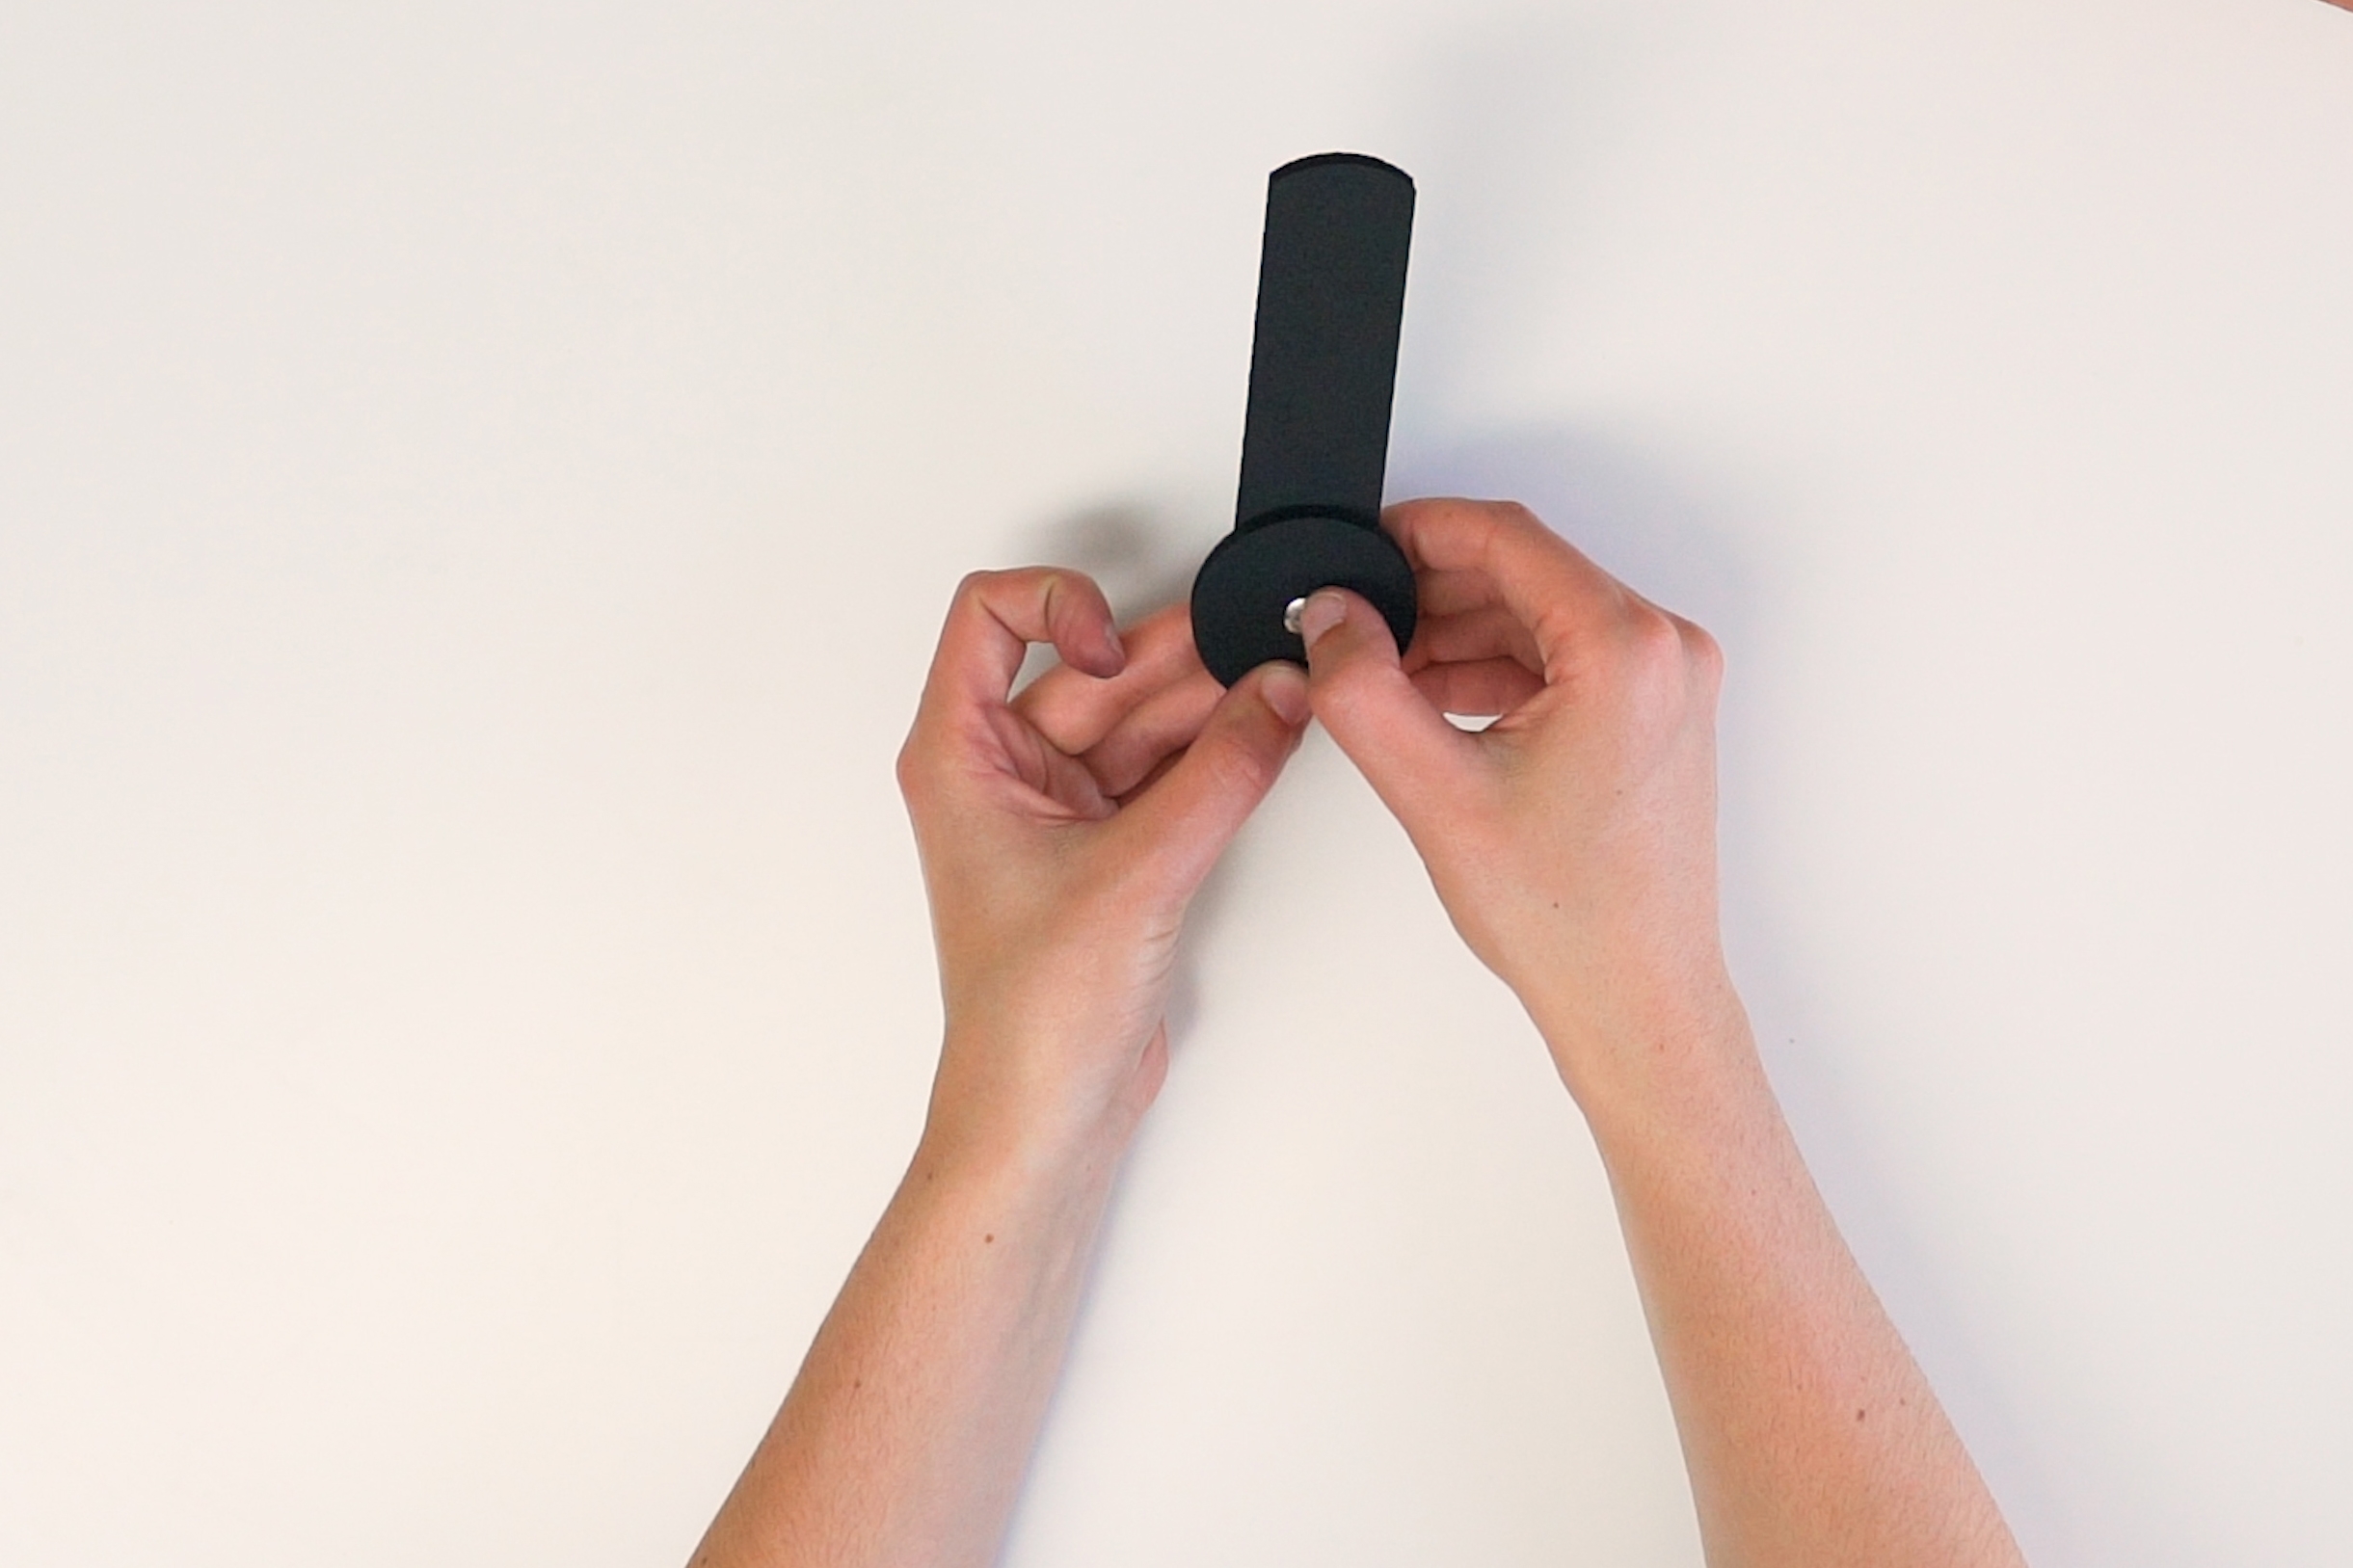
Step 11
Push the rectangular piece onto the 2-inch (5.1 cm) skewer. Then, push the circle on top of it. Glue the circle to the skewer. Do not glue the rectangular piece to the skewer. It should rotate freely! This is the arm of your orrery.
Step 12
Mate the small gear on the bottom of the arm with the large gear so that the rectangular part of the arm is resting on top of the large gear. Then, make a small mark on either side of the rectangular piece where it lines up with the hole in the center of the large gear.
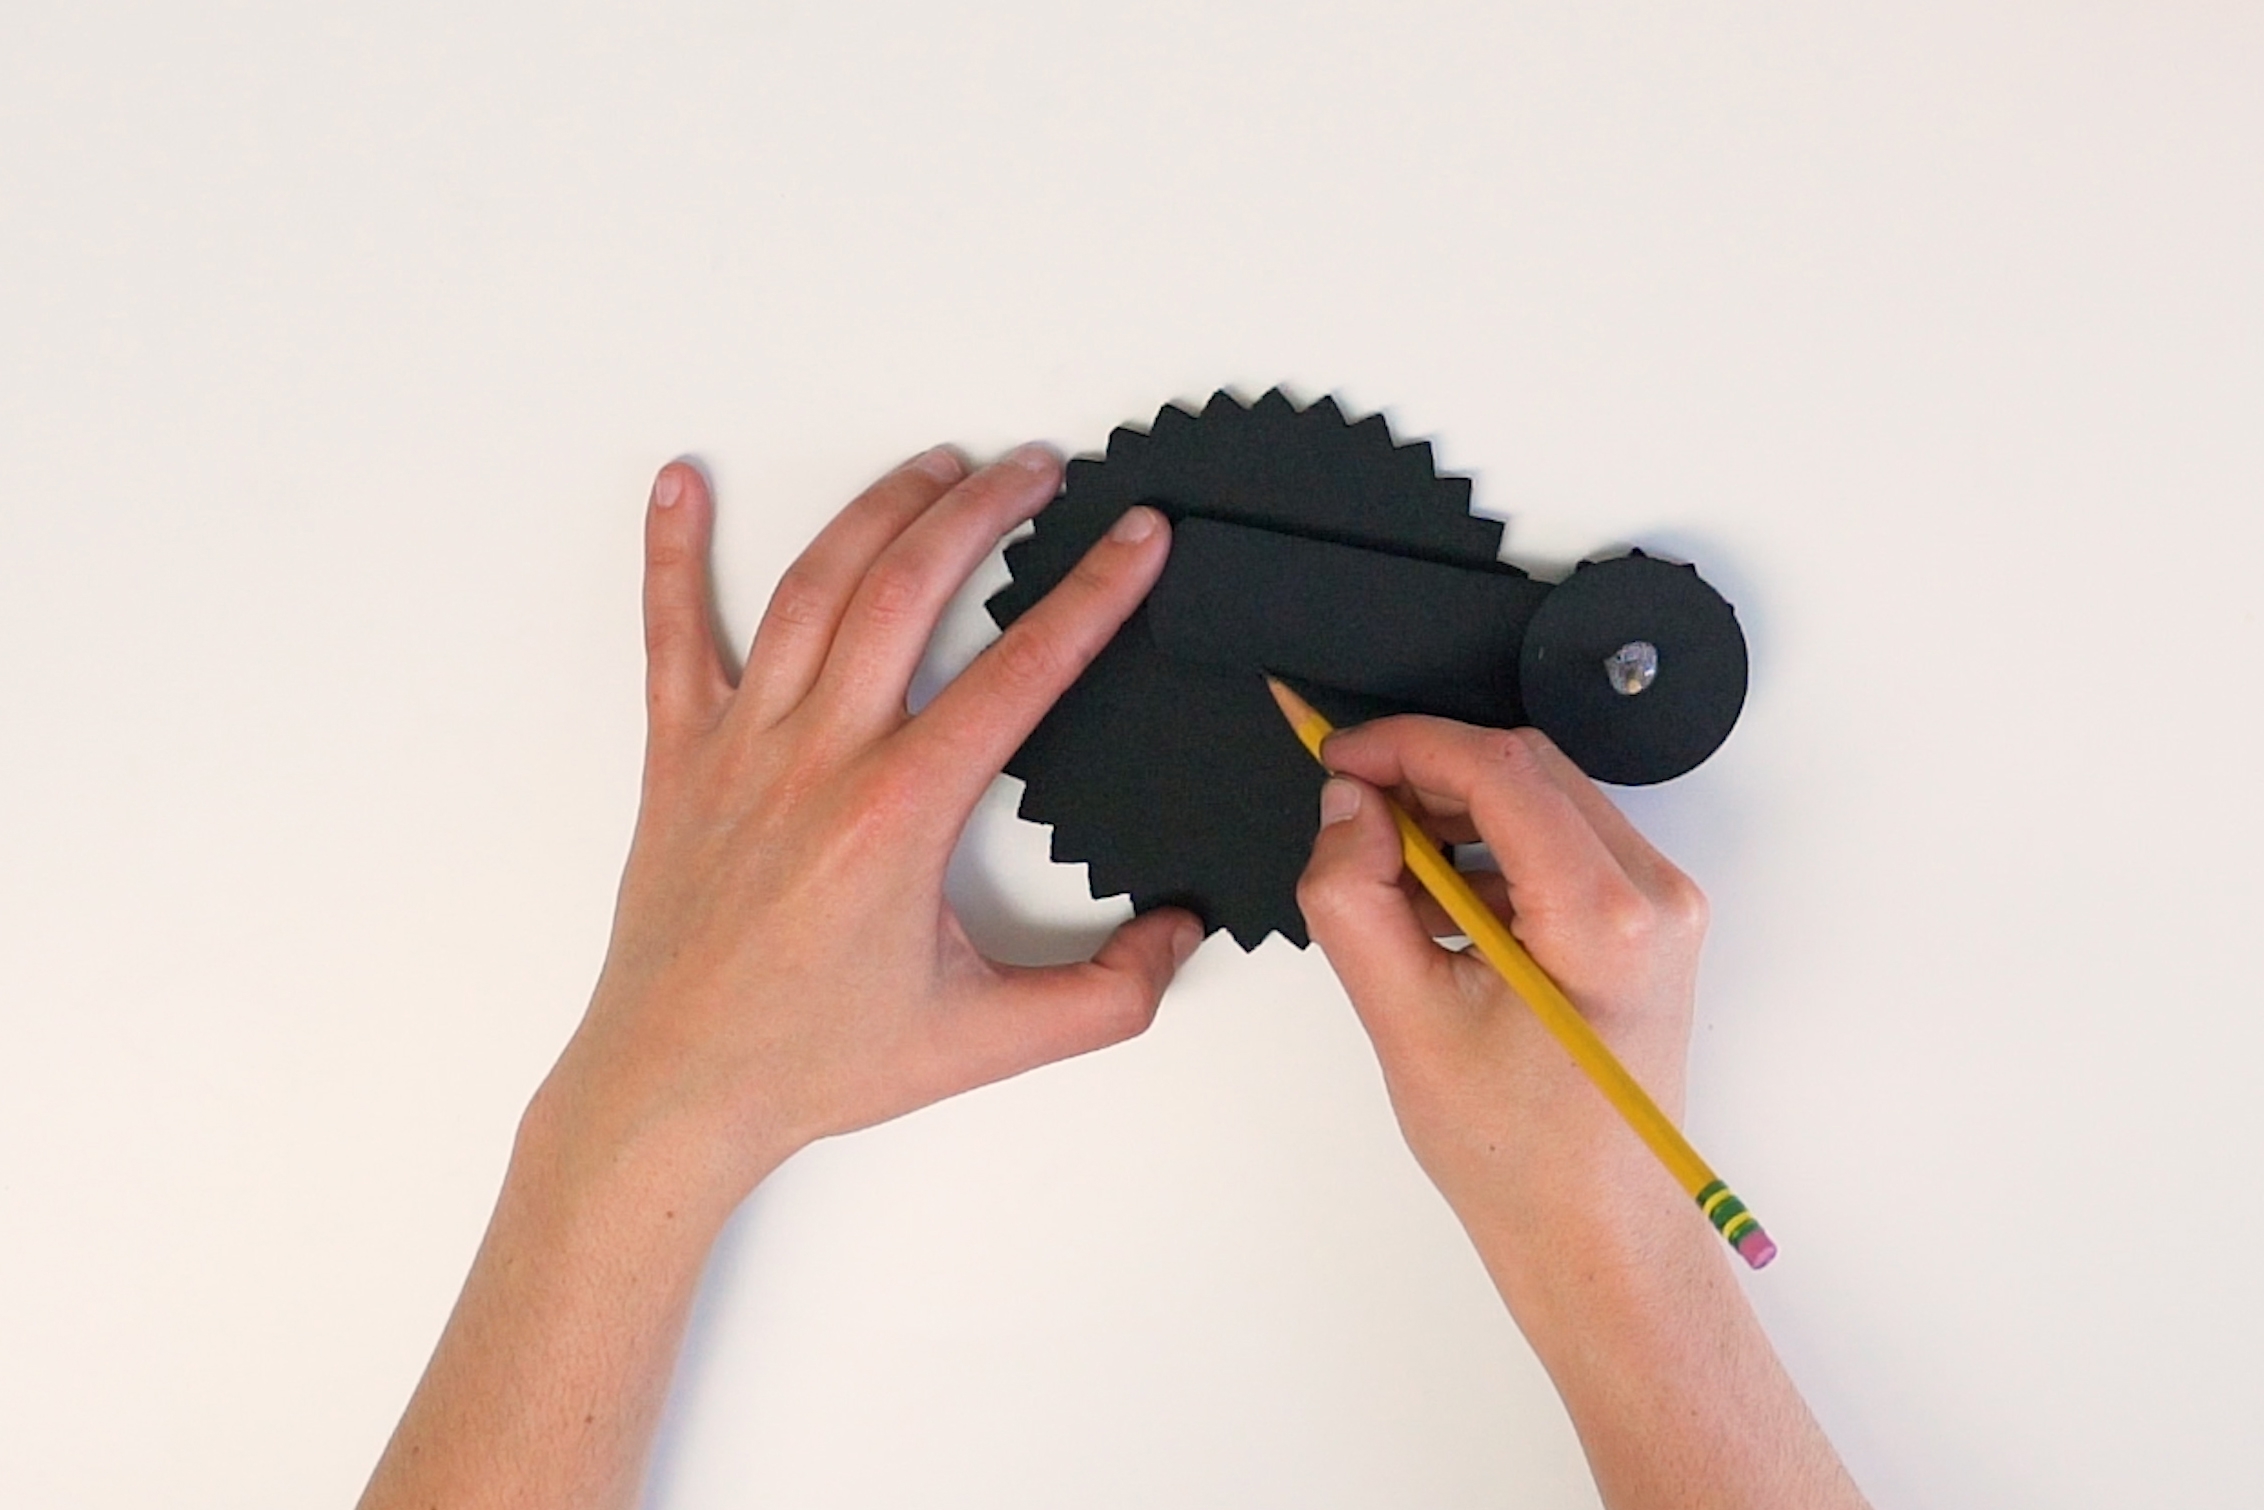
Step 13
Draw a line connecting the two marks you made in step 12. Then, make a hole in the middle of that line.
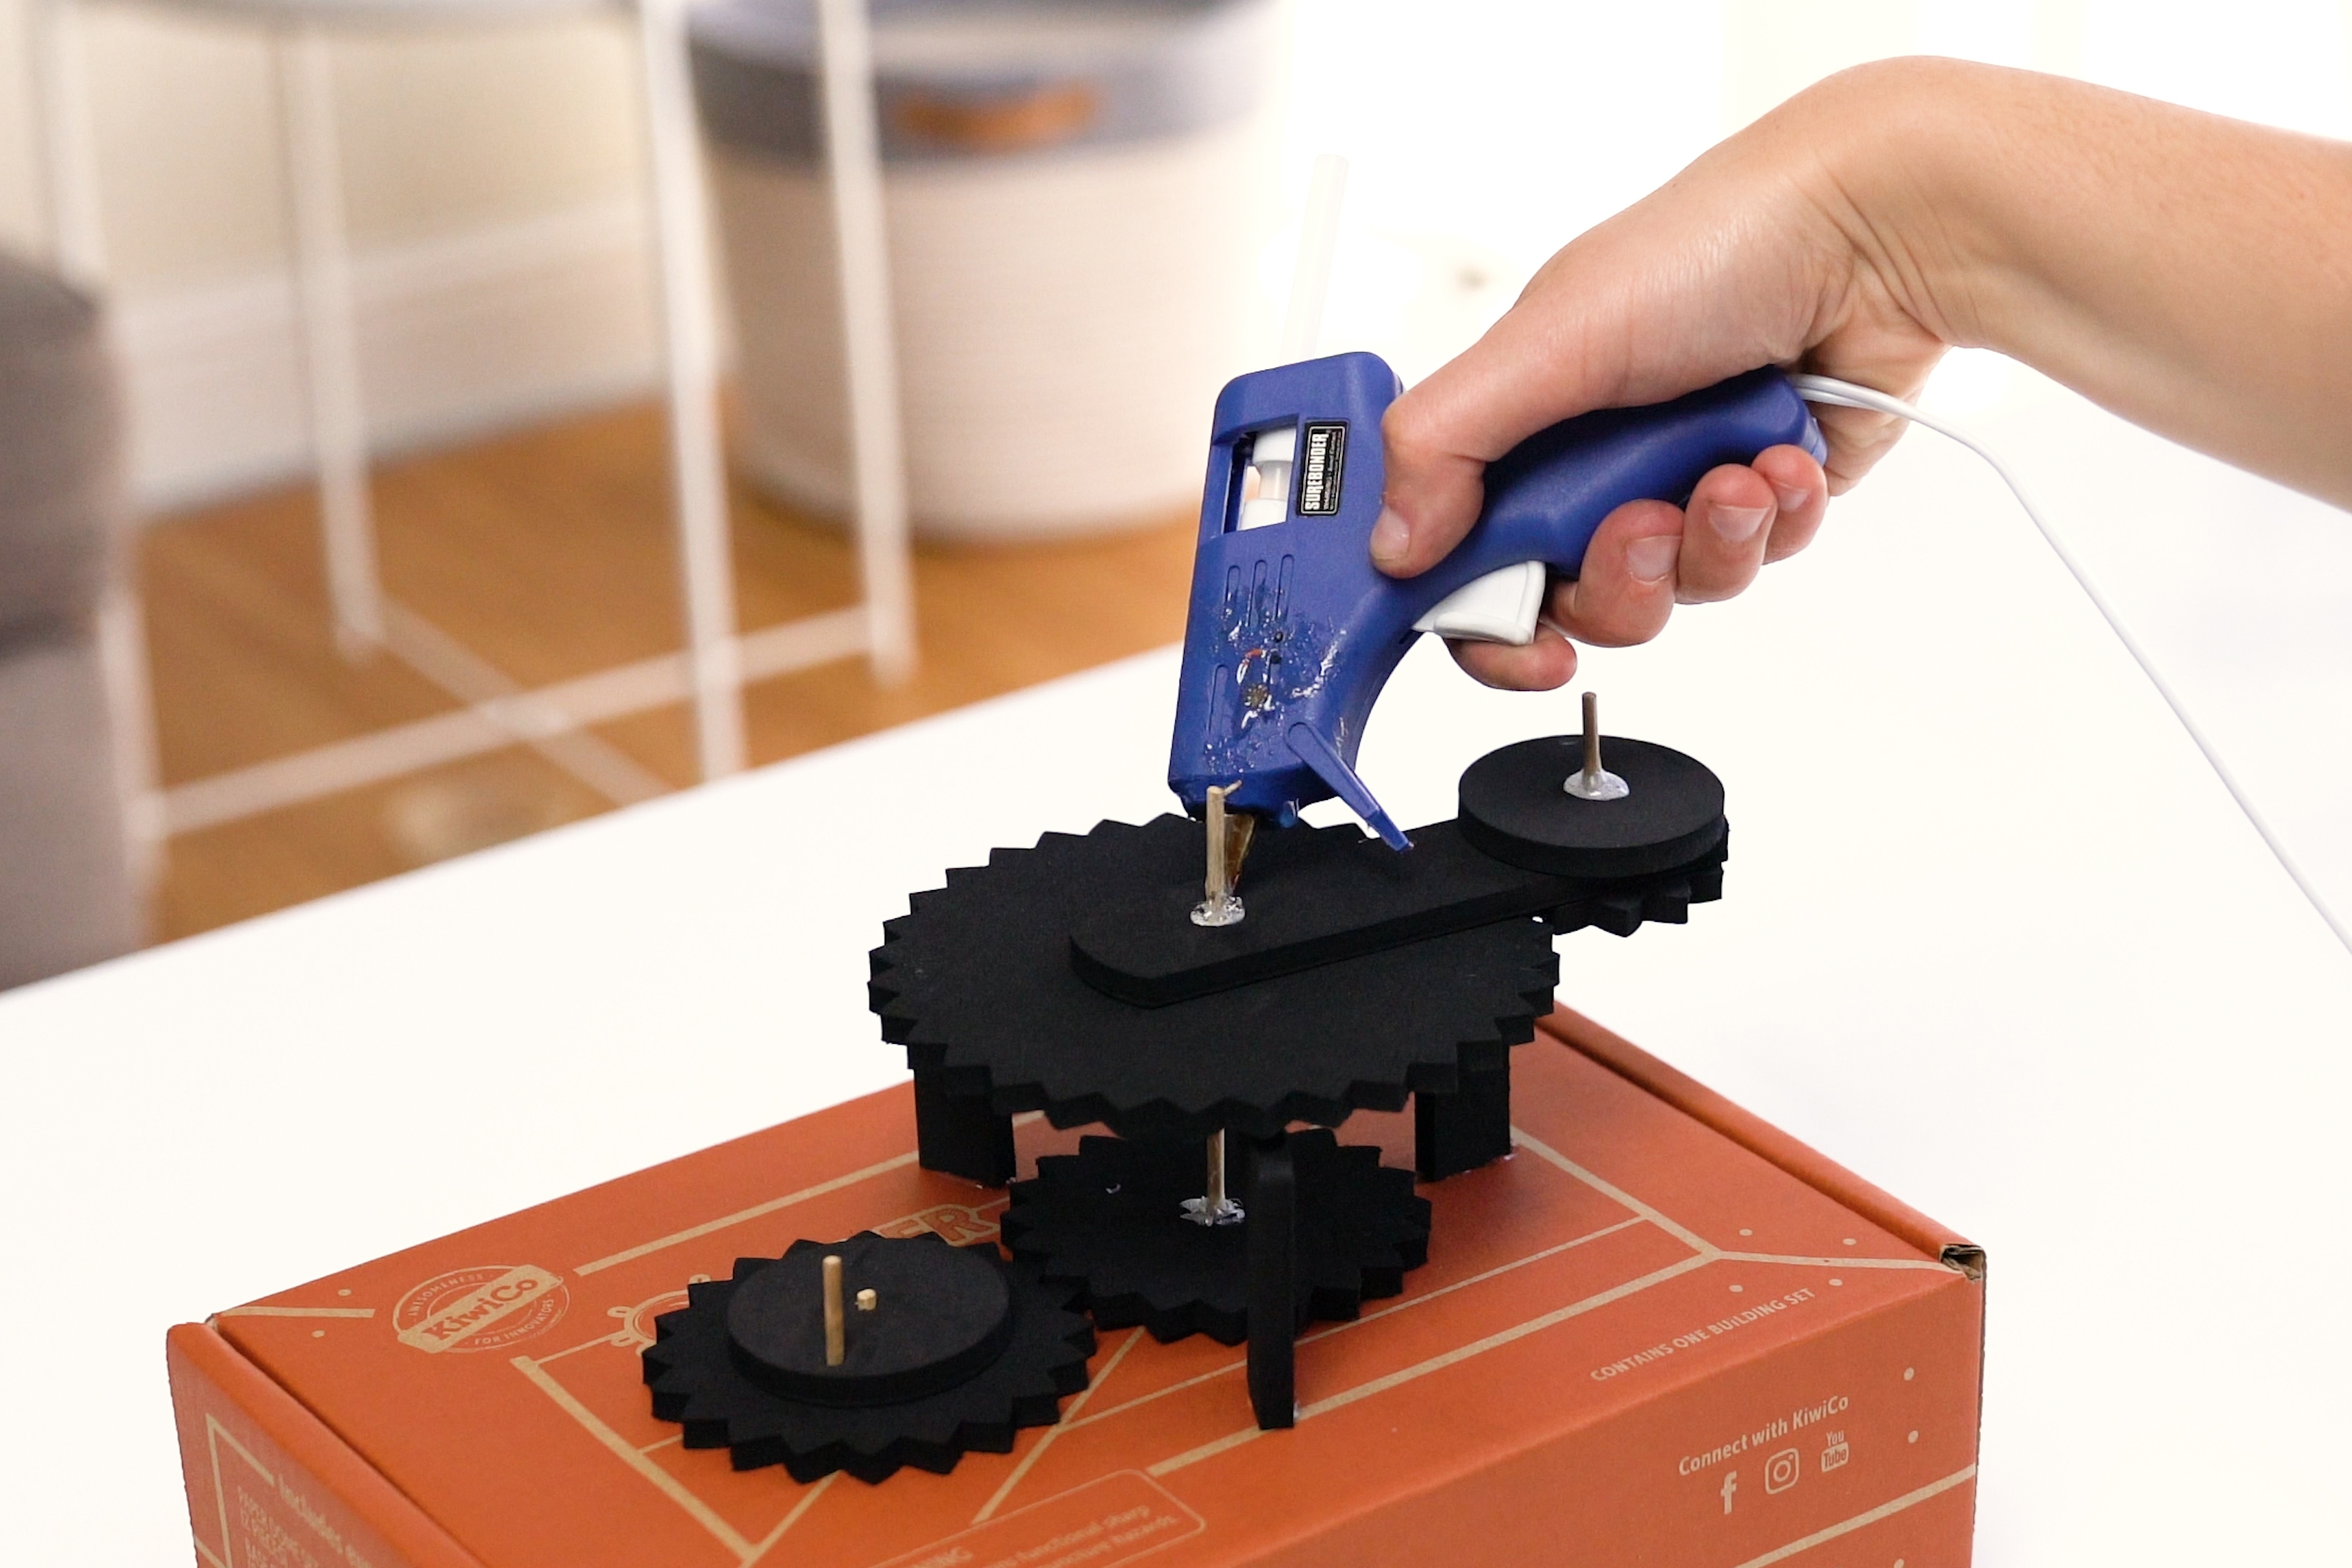
Step 14
Press the large gear onto the long skewer, then glue it down to the foam offsets on either side.
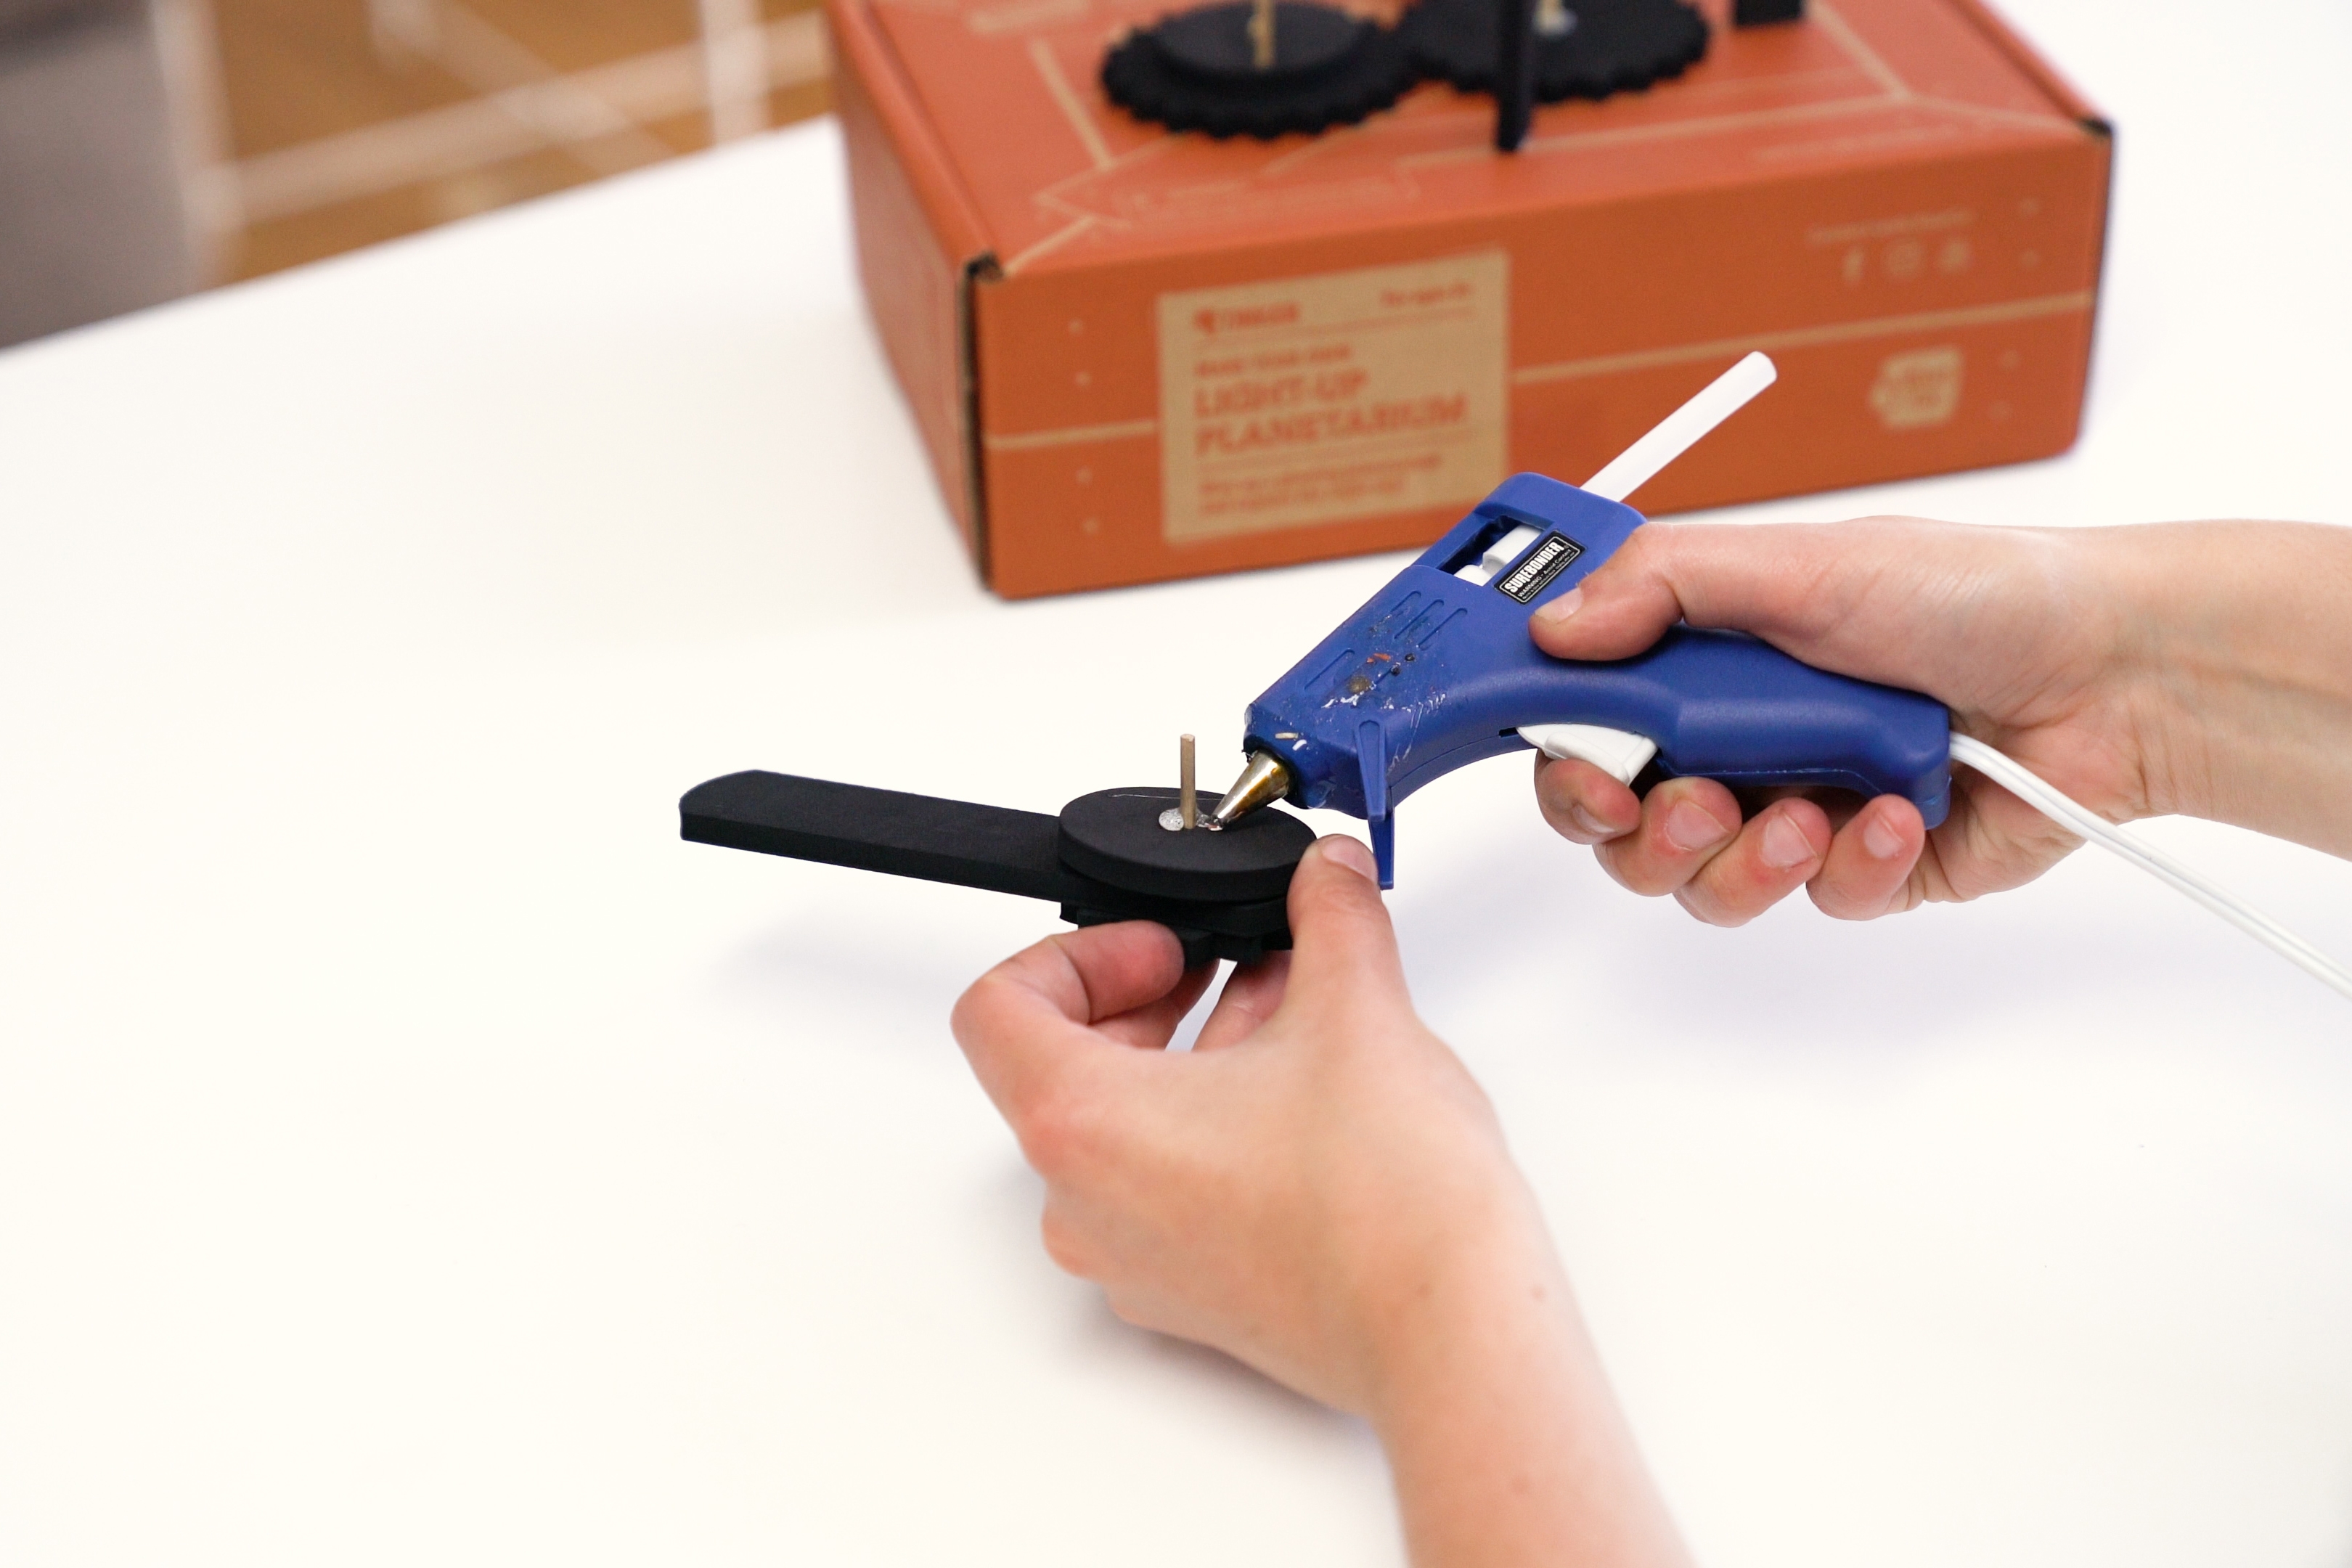
Step 15
Push the free end of the arm onto the long skewer. Then, glue it to the skewer. Do not glue it to the large gear.
Step 16
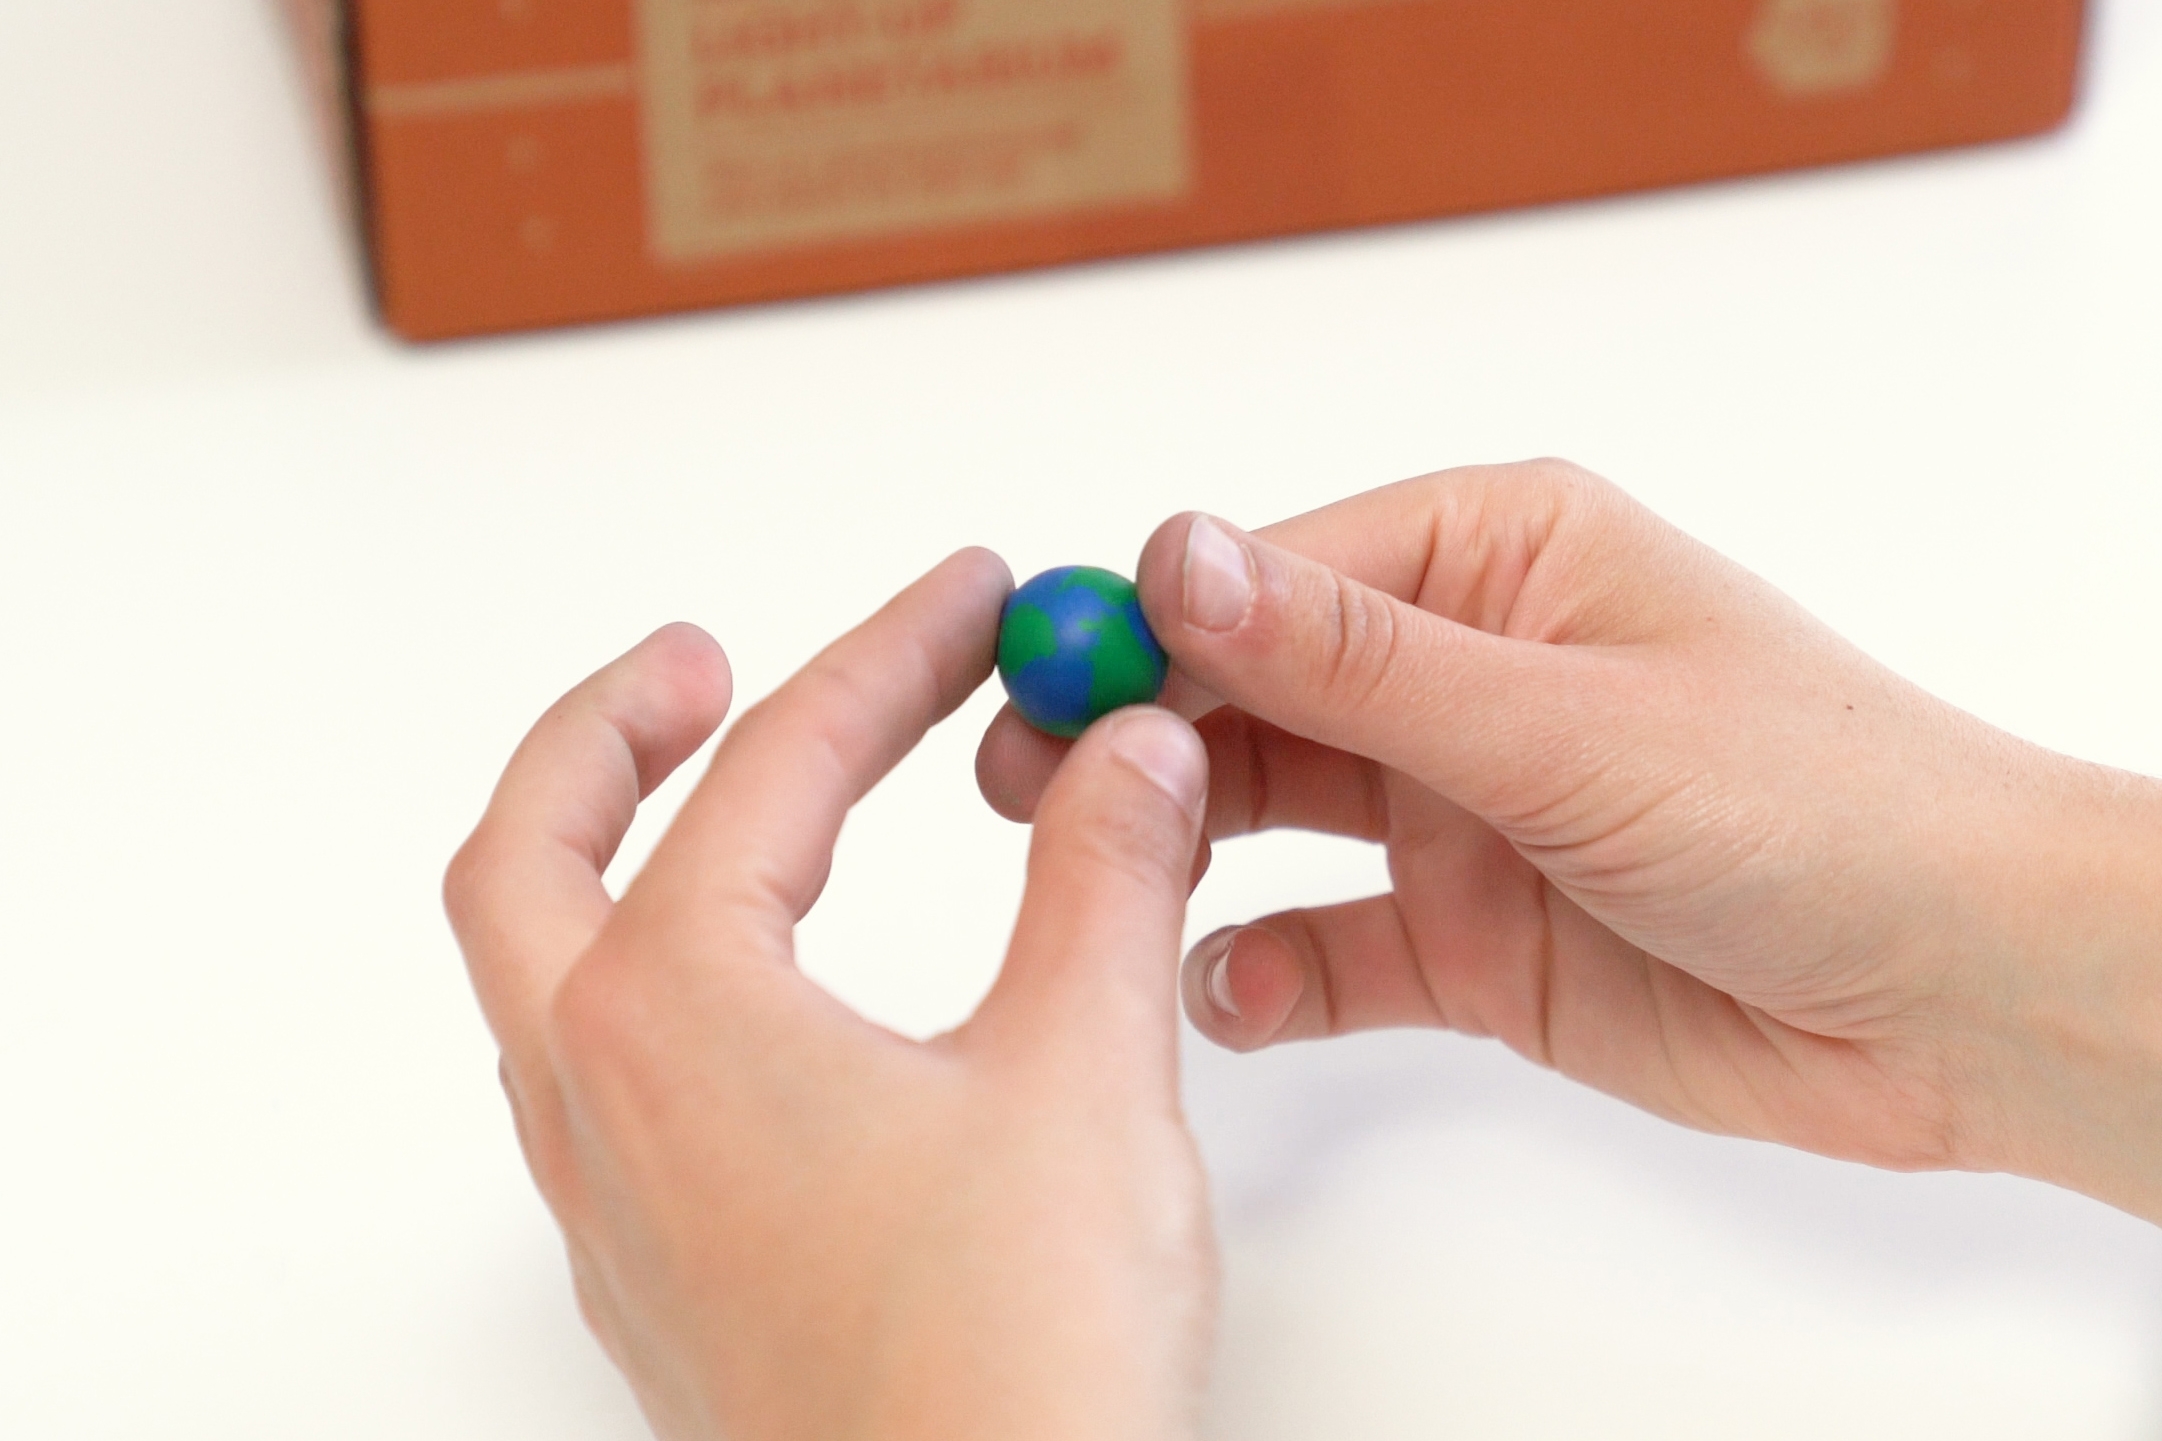
Make a small globe out of the blue and green clay by rolling them together into a small ball.
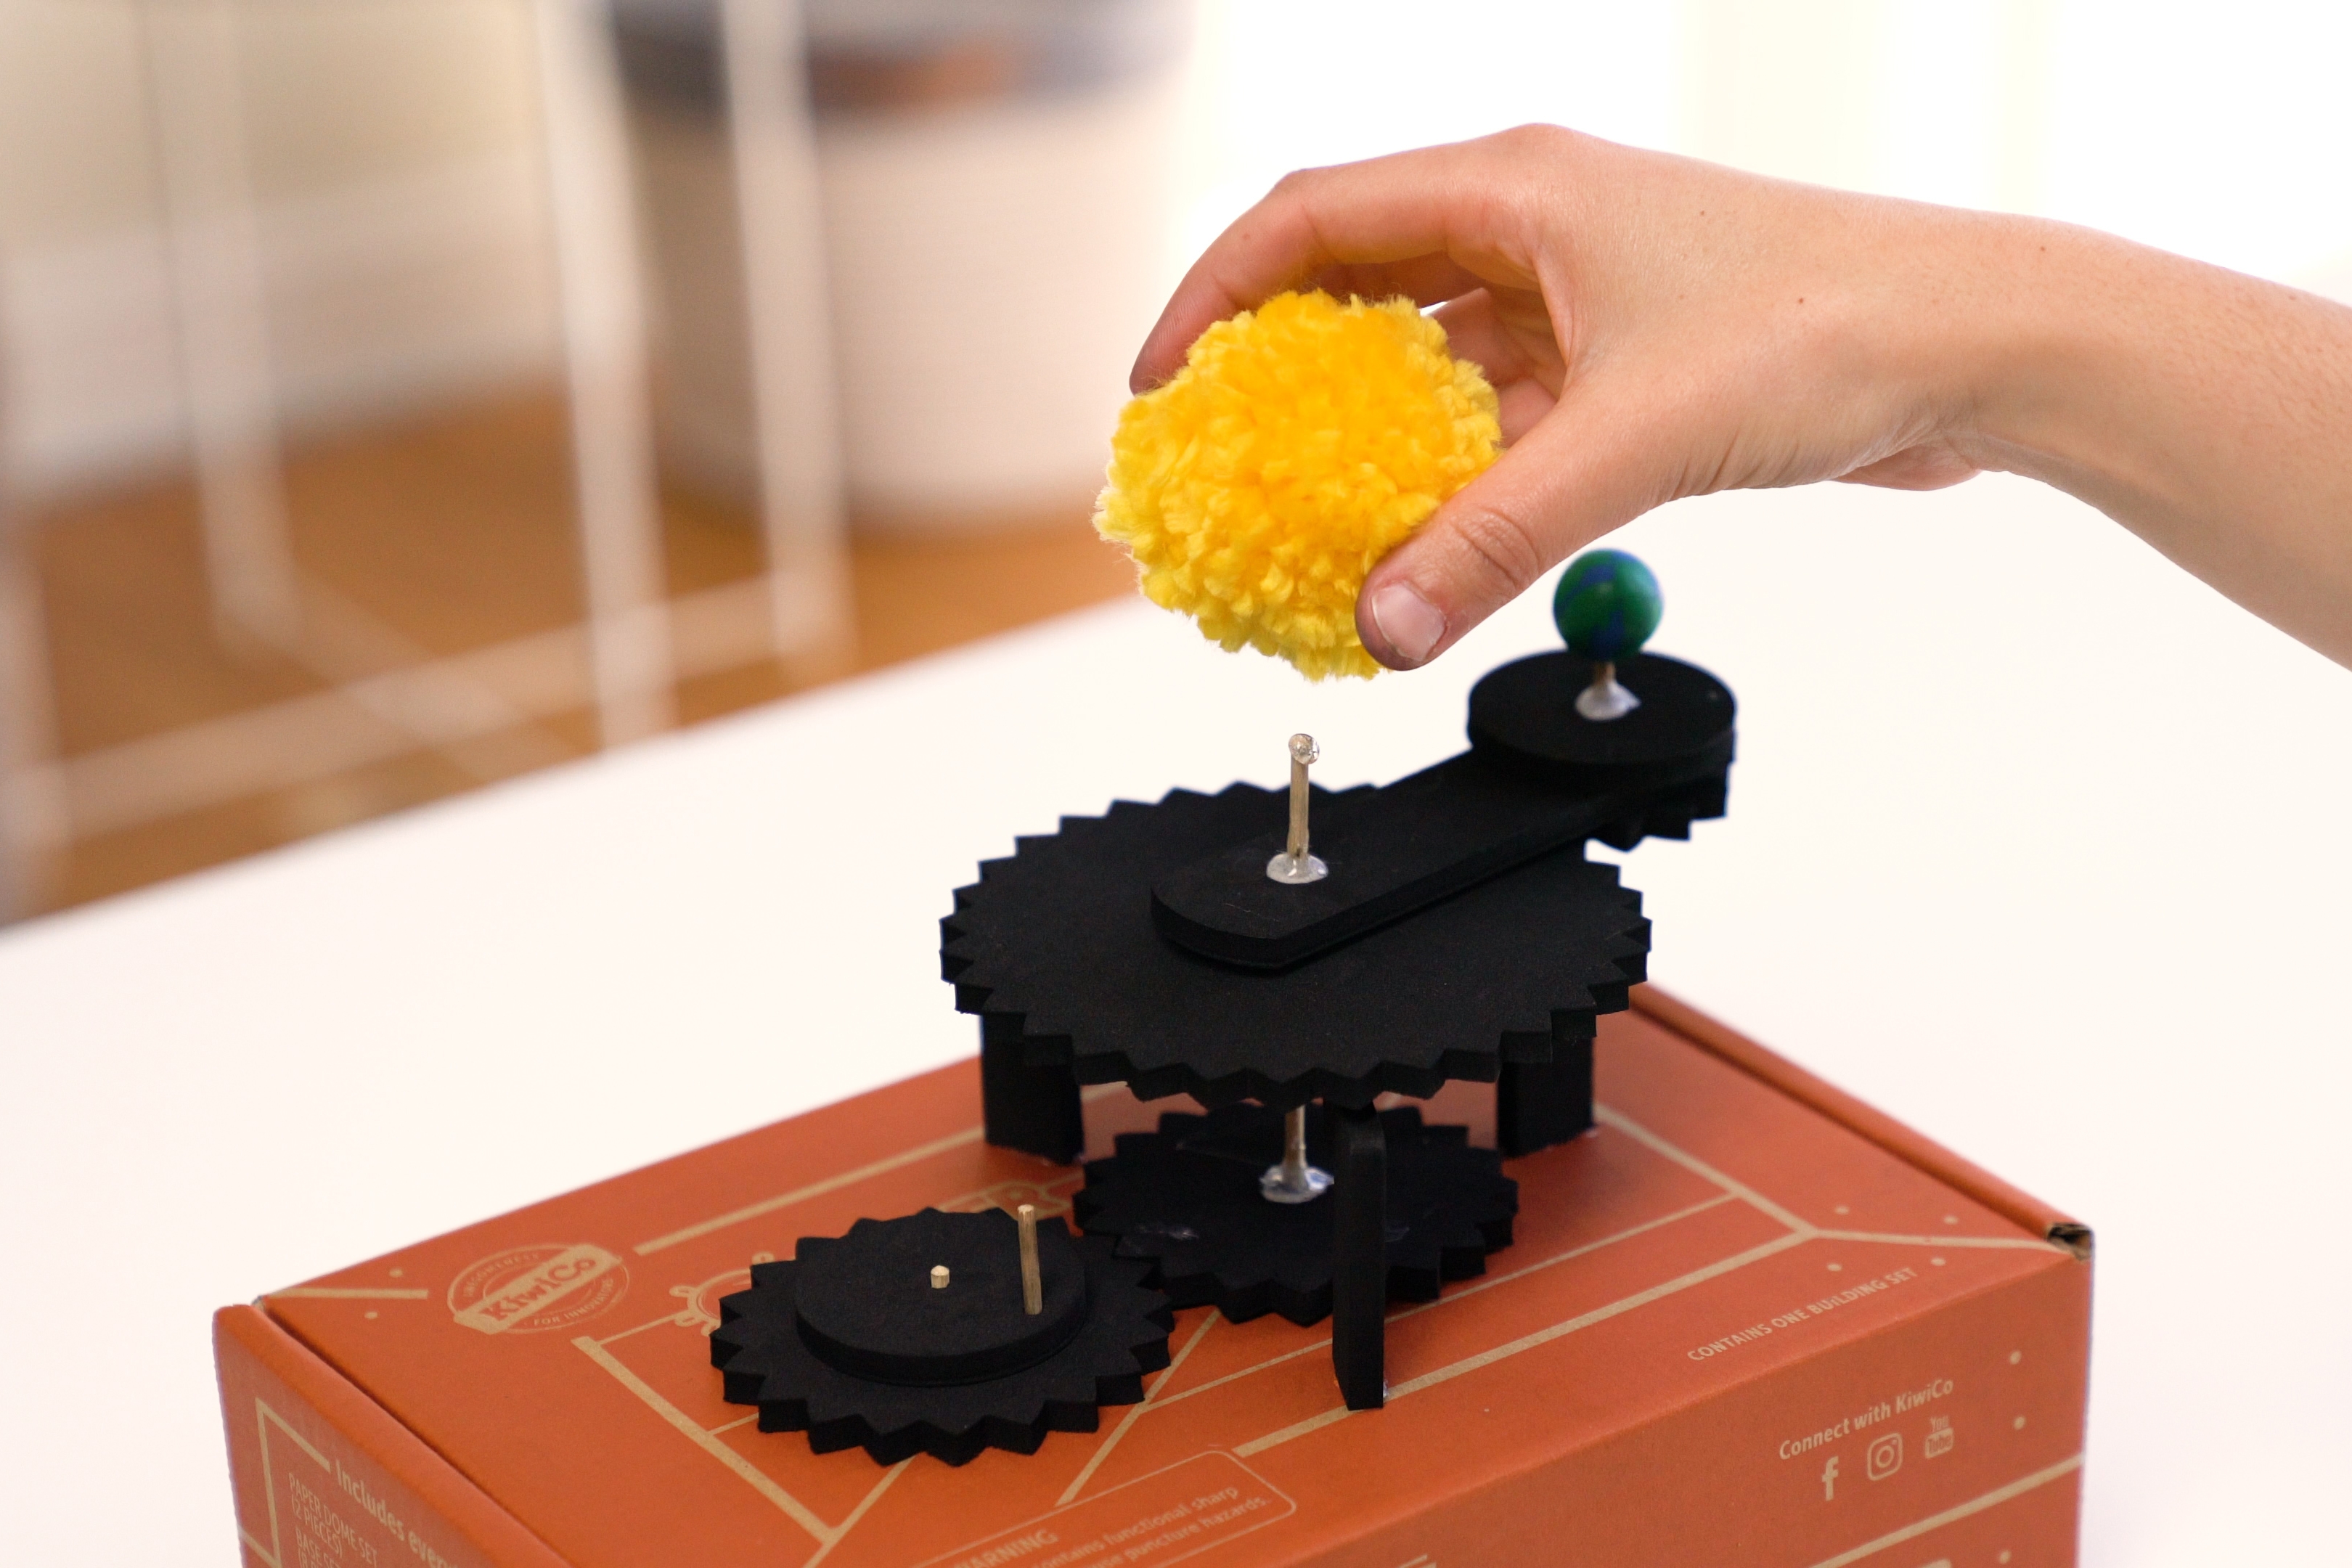
Step 17
Glue the yellow pom-pom to the top of the long skewer. Then, glue the globe to the top of the 2-inch (5.1 cm) skewer.
Step 18
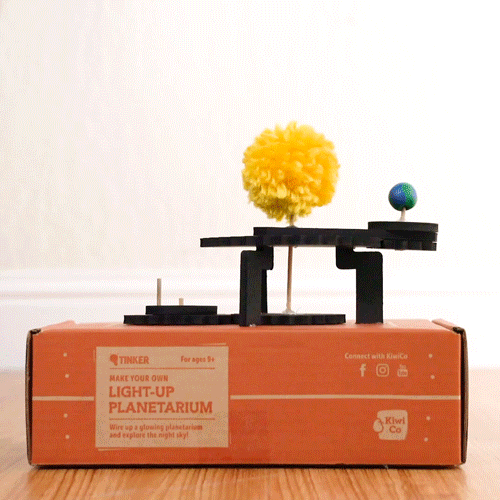
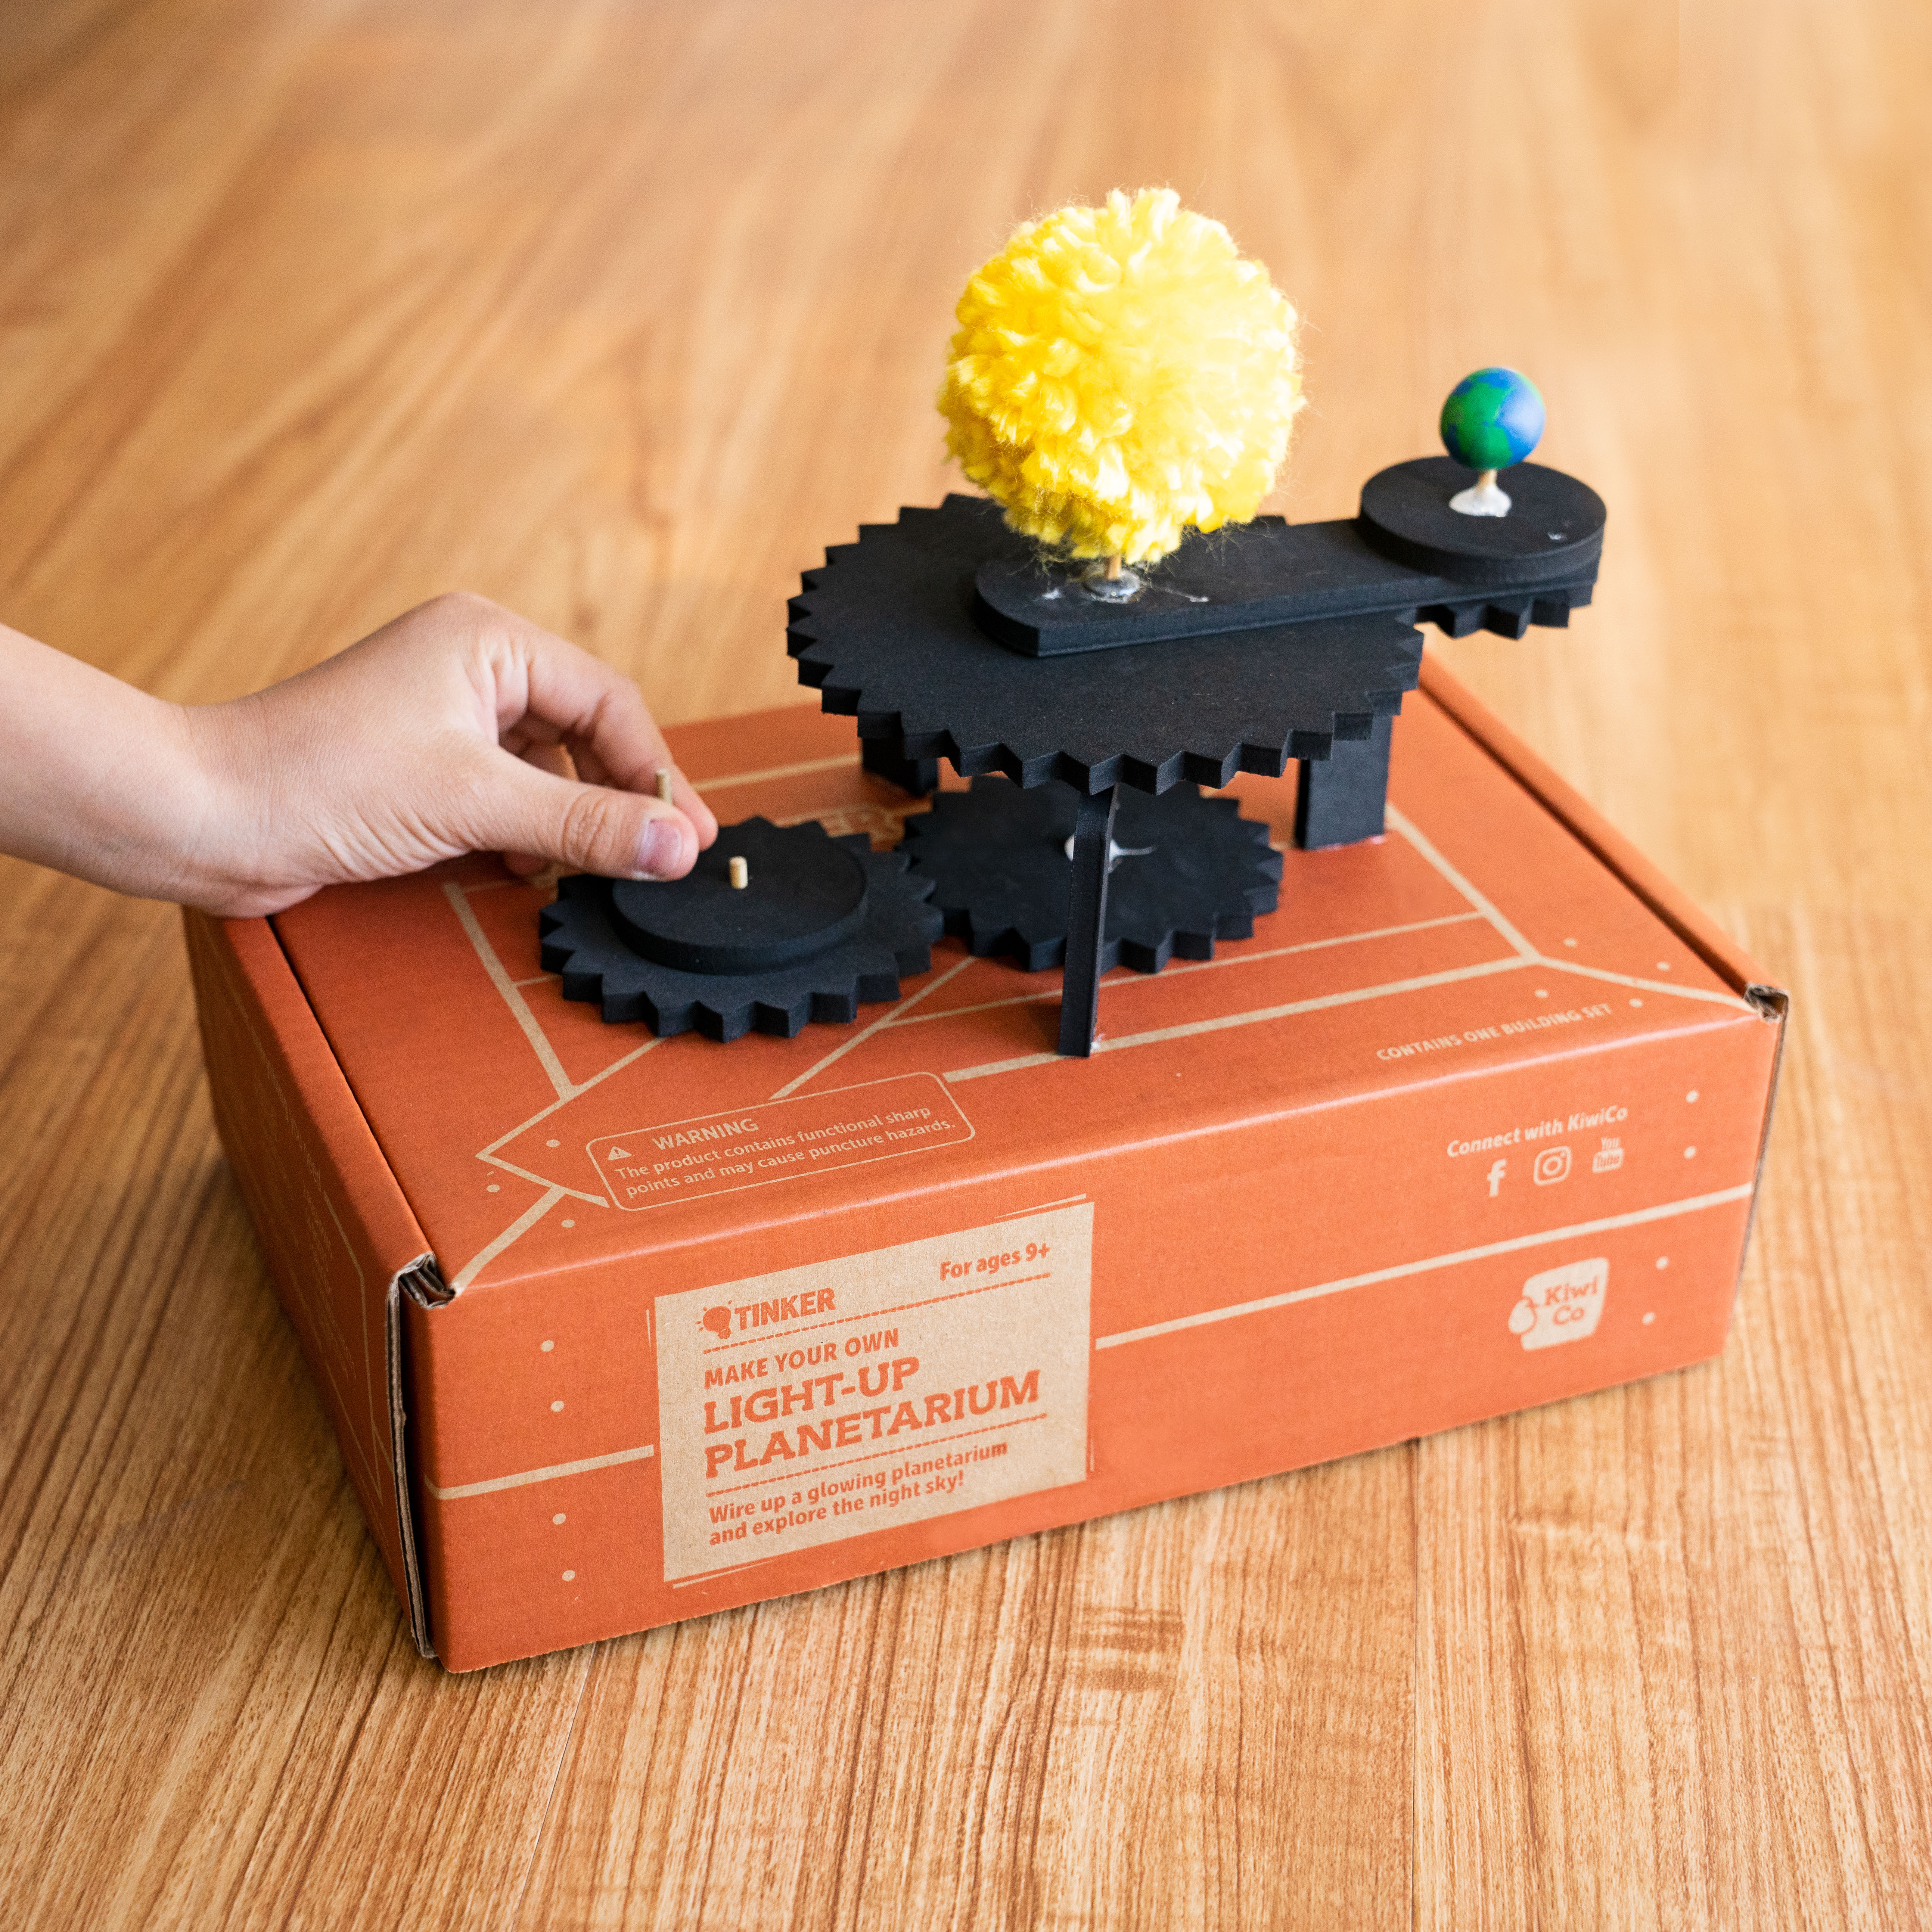
You just made an orrery! Use the handle to rotate your orrery and see a working model of part of our solar system!
Learn more

Your orrery works because of interlocking gears. The medium sized gears rotate the Sun, which causes the Earth to spin around it. As the small gear rotates around the large gear, the Earth rotates too - just like in our solar system!


