
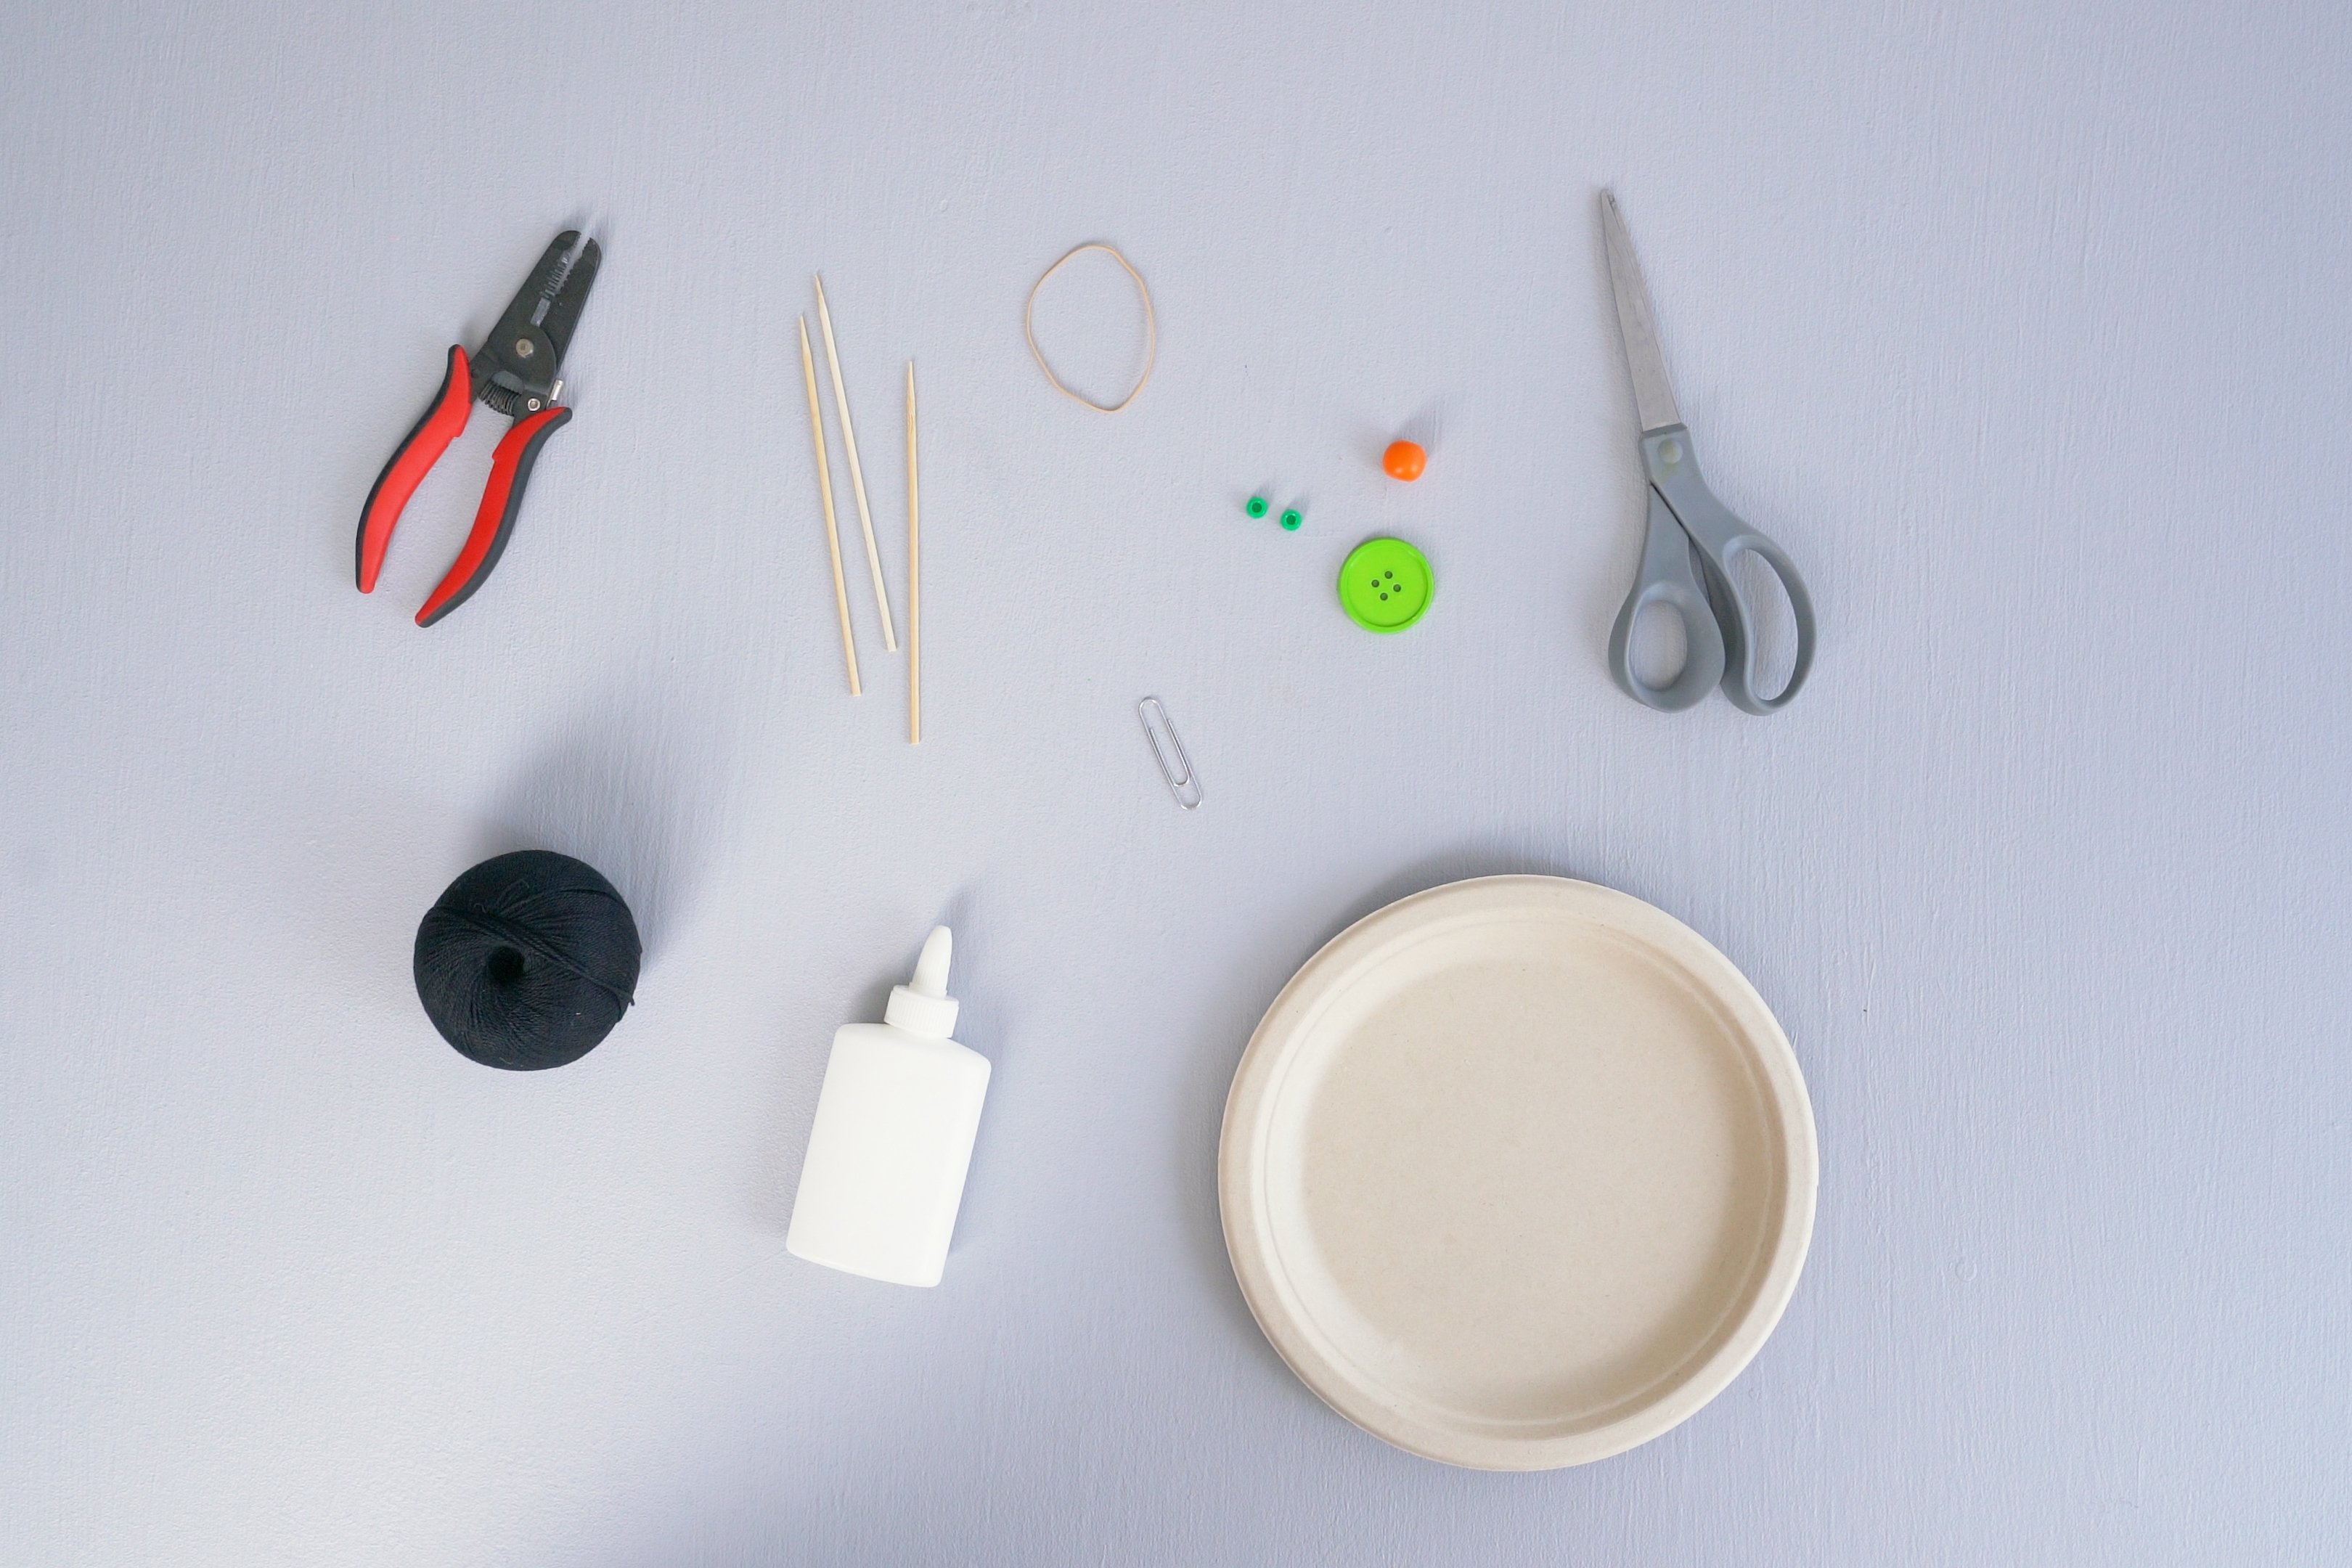
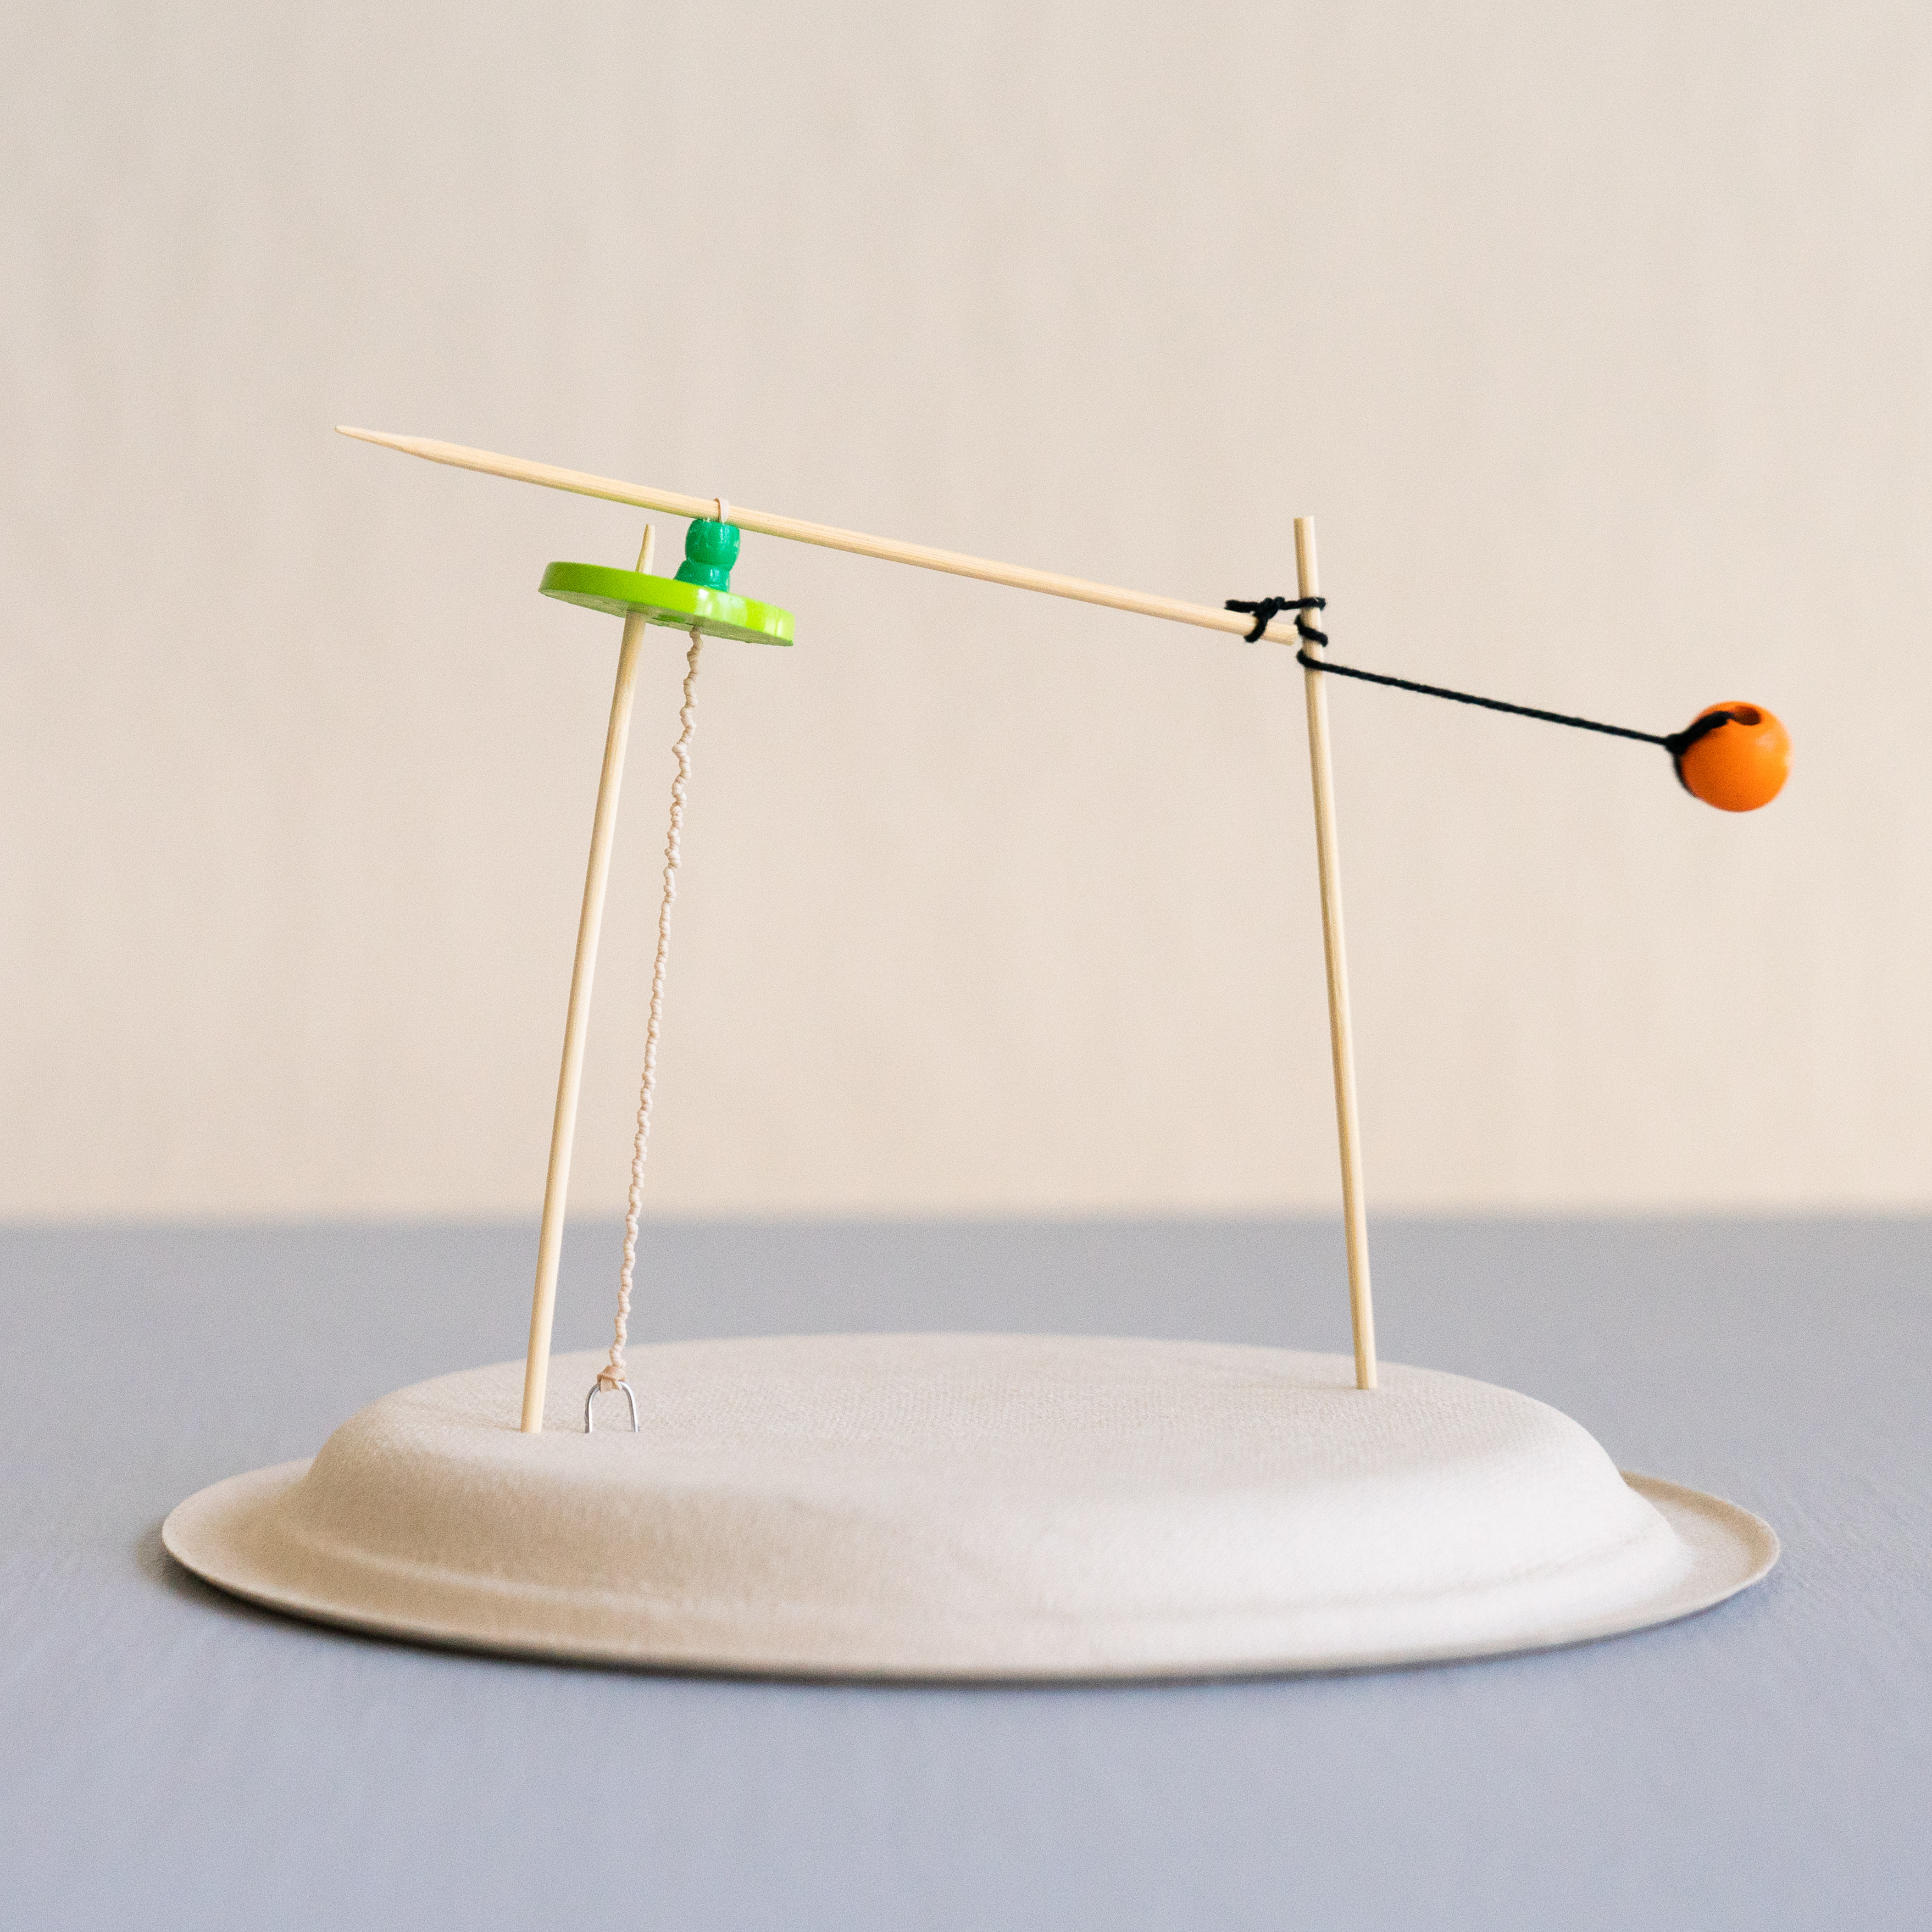
Step-by-step tutorial
Step 1
Gather your materials.

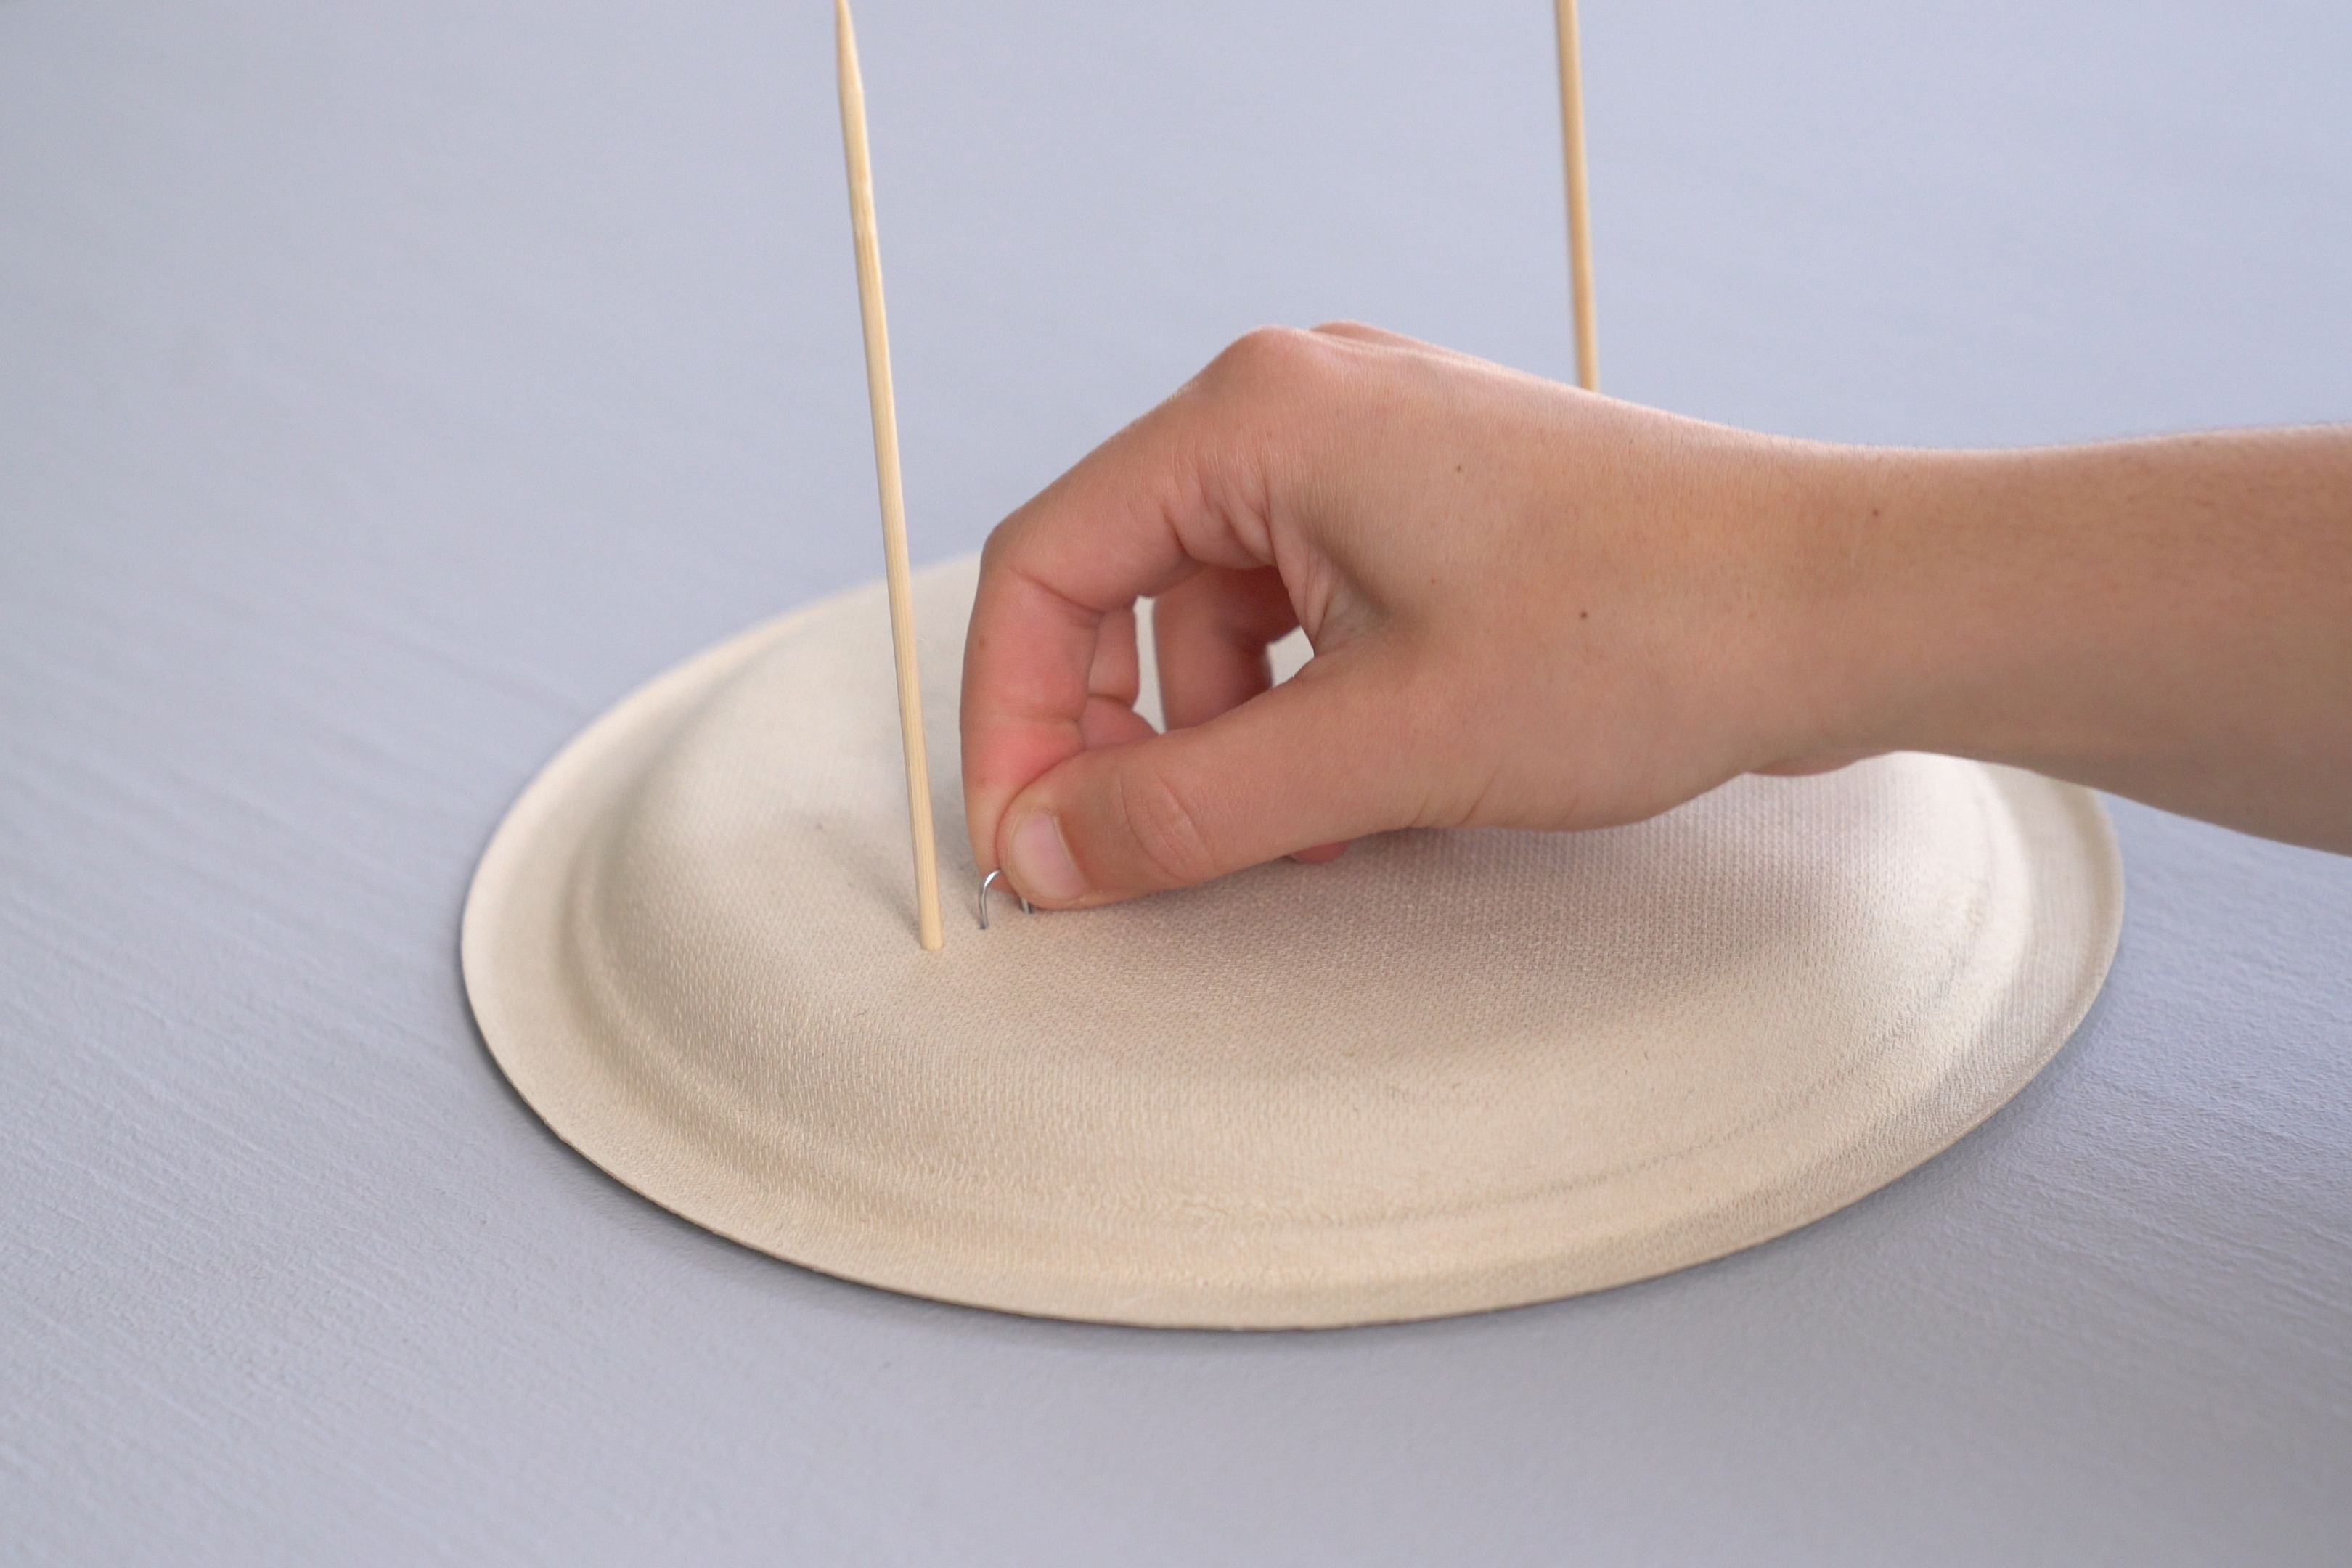
Step 2
Make two small holes on either side of the plate.

Step 3
Glue a skewer into each hole. Make sure the pointy end is facing up on one of them.

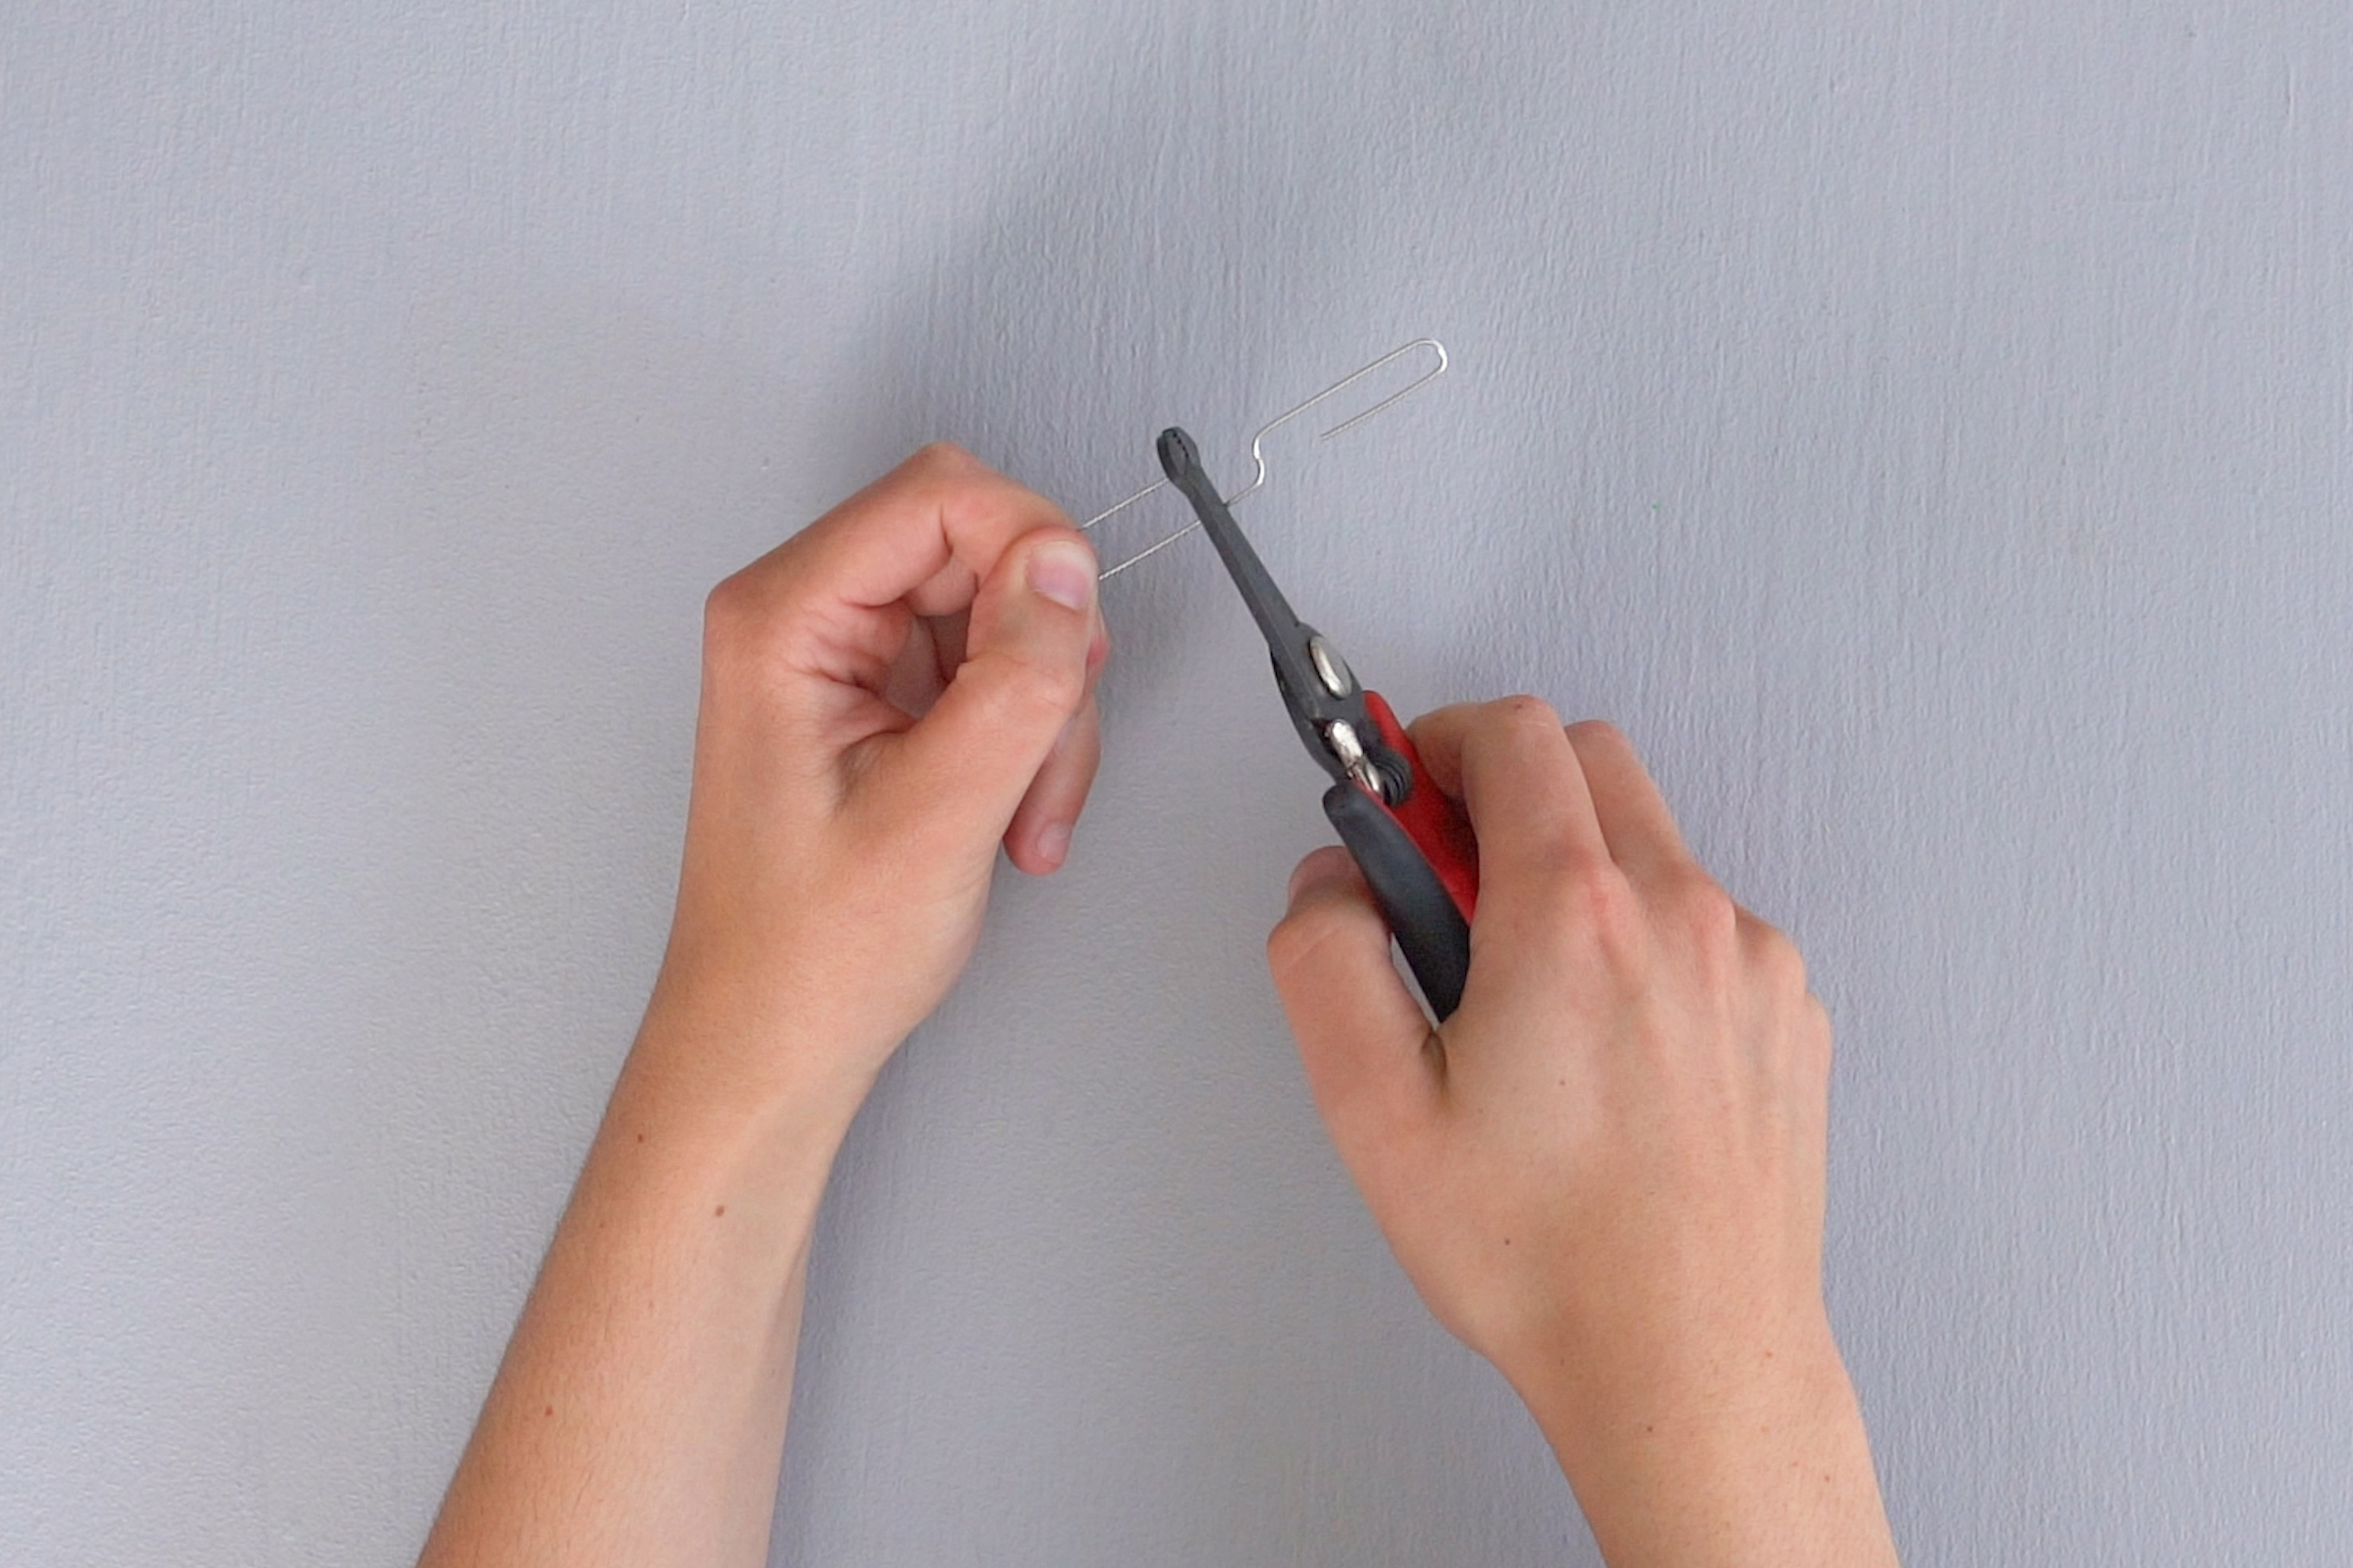
Step 4
Cut the paper clip into a loop.
Step 5
Glue the paper clip, loop end up, on the inside of the skewer that is facing pointy-end up.
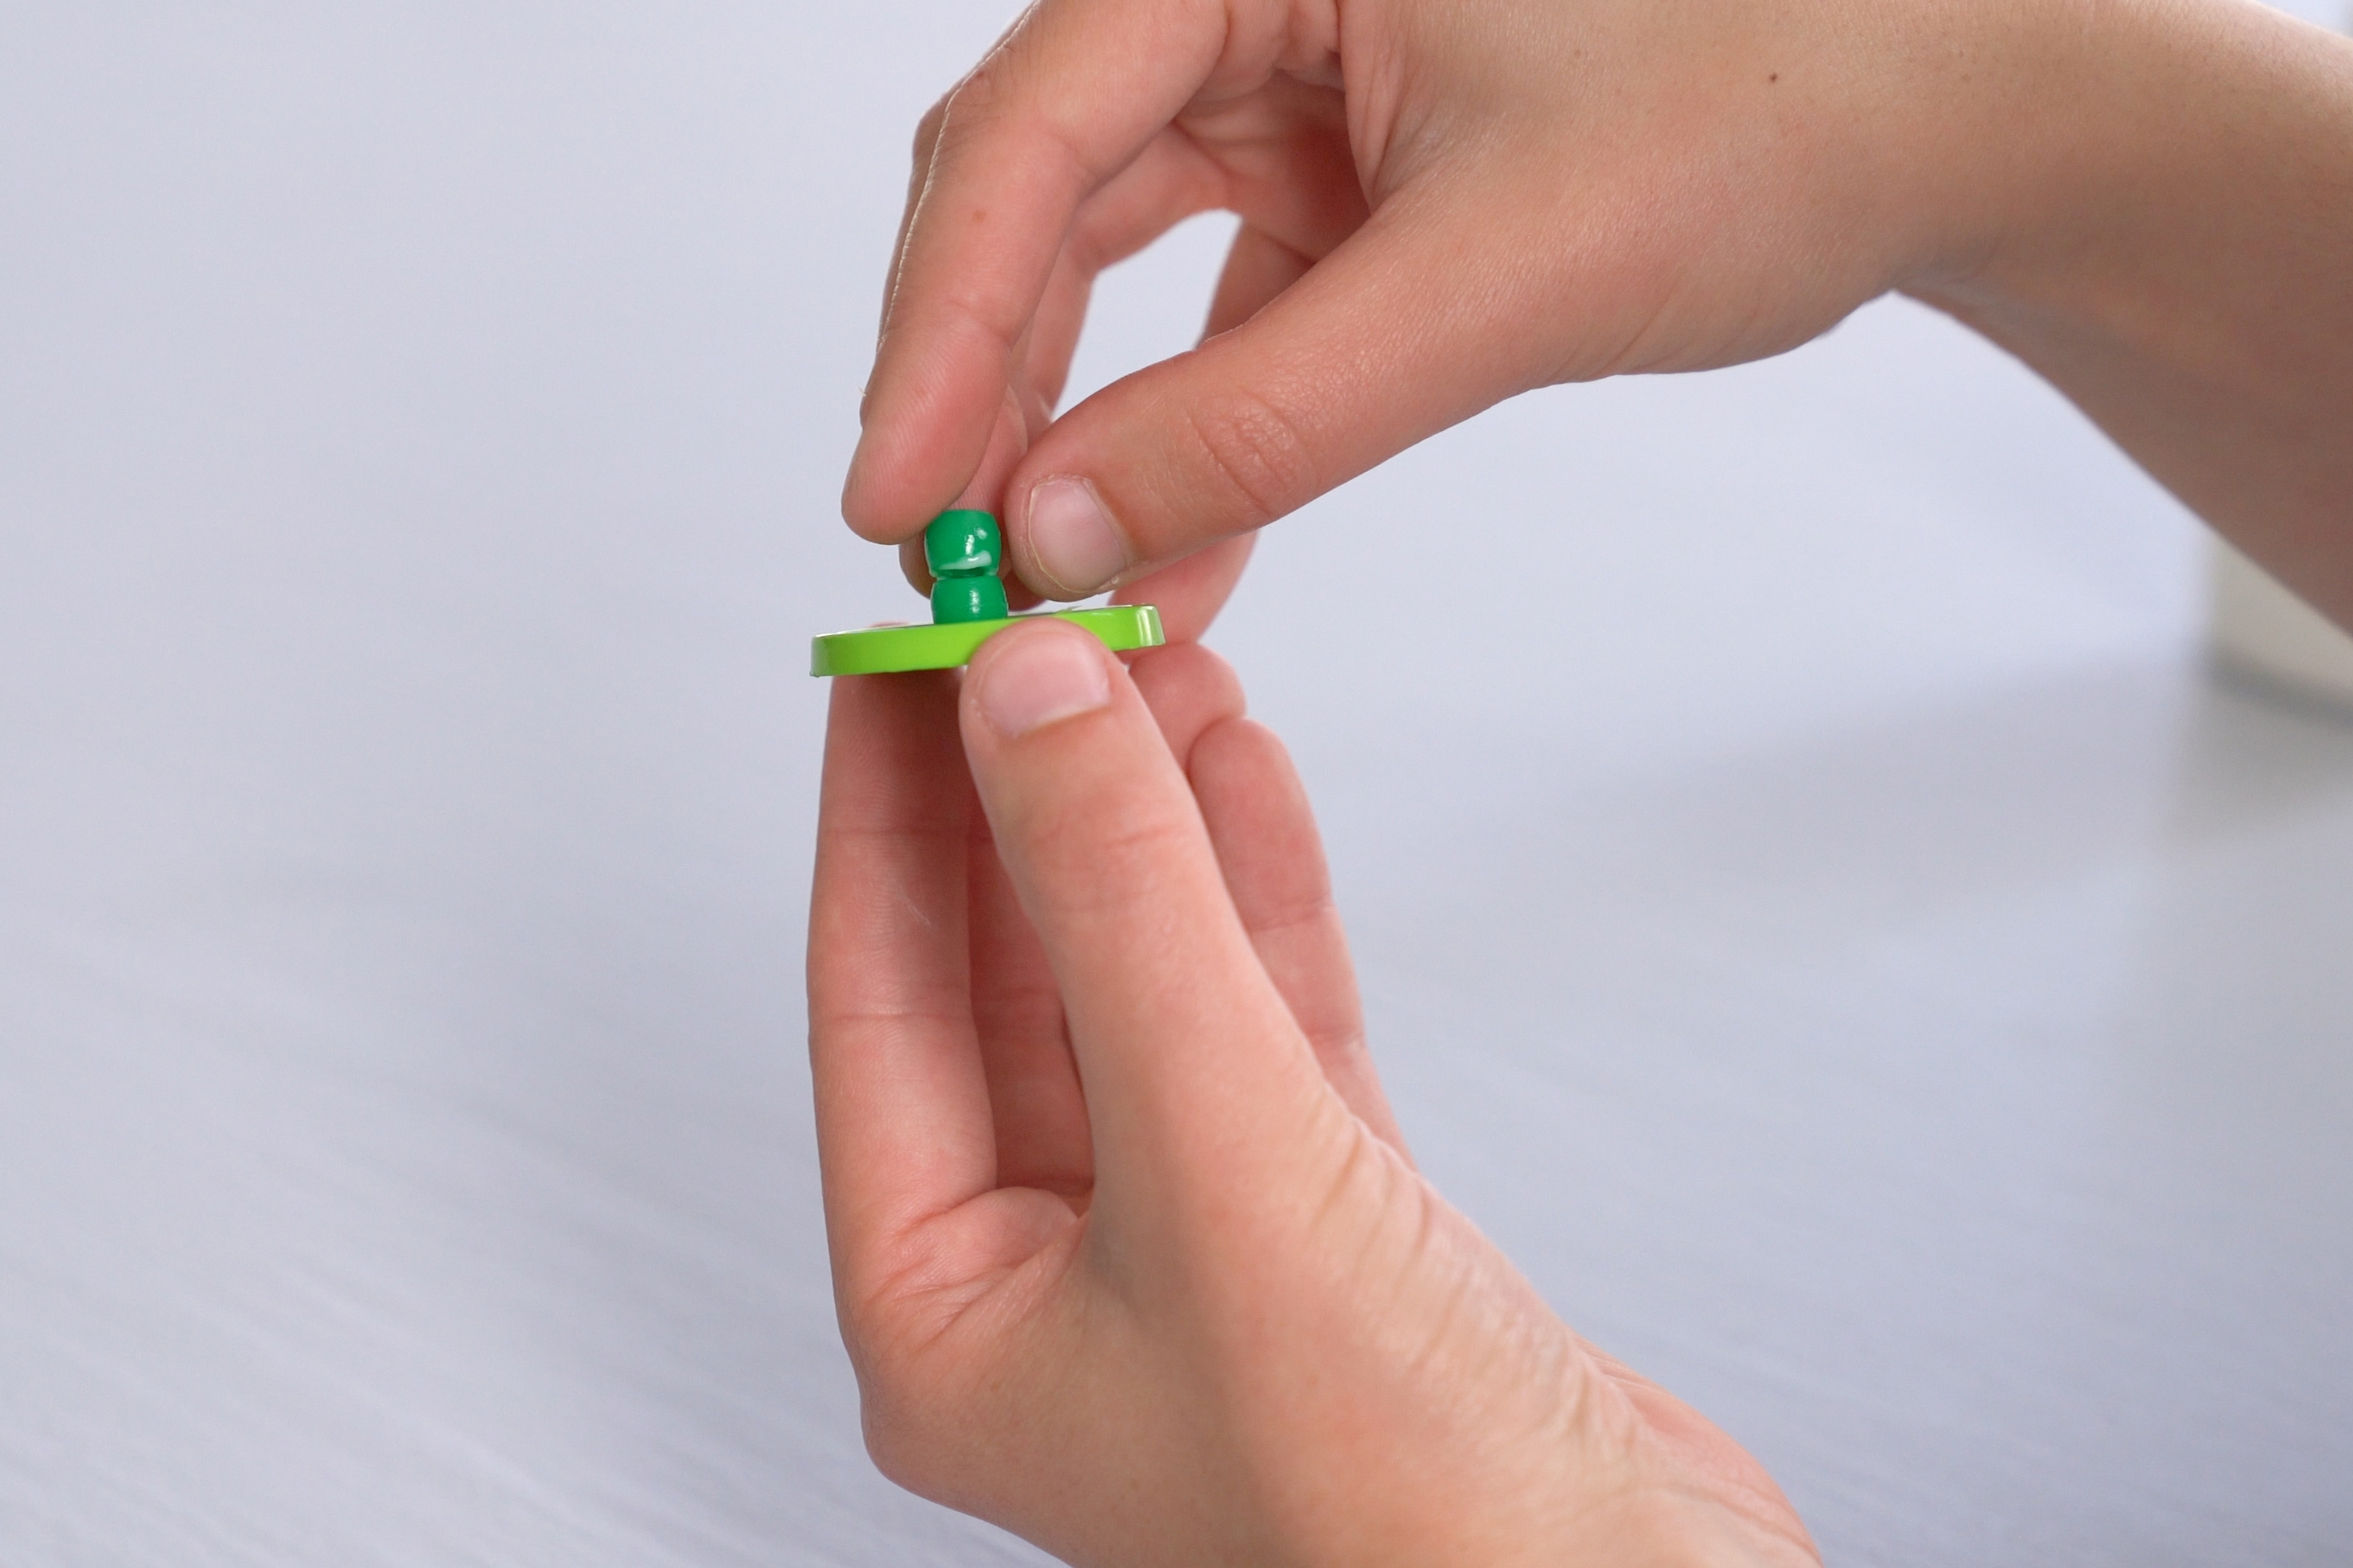
Step 6
Stack two pony beads and glue them together. Then, glue the stack of pony beads over one of the buttonholes.
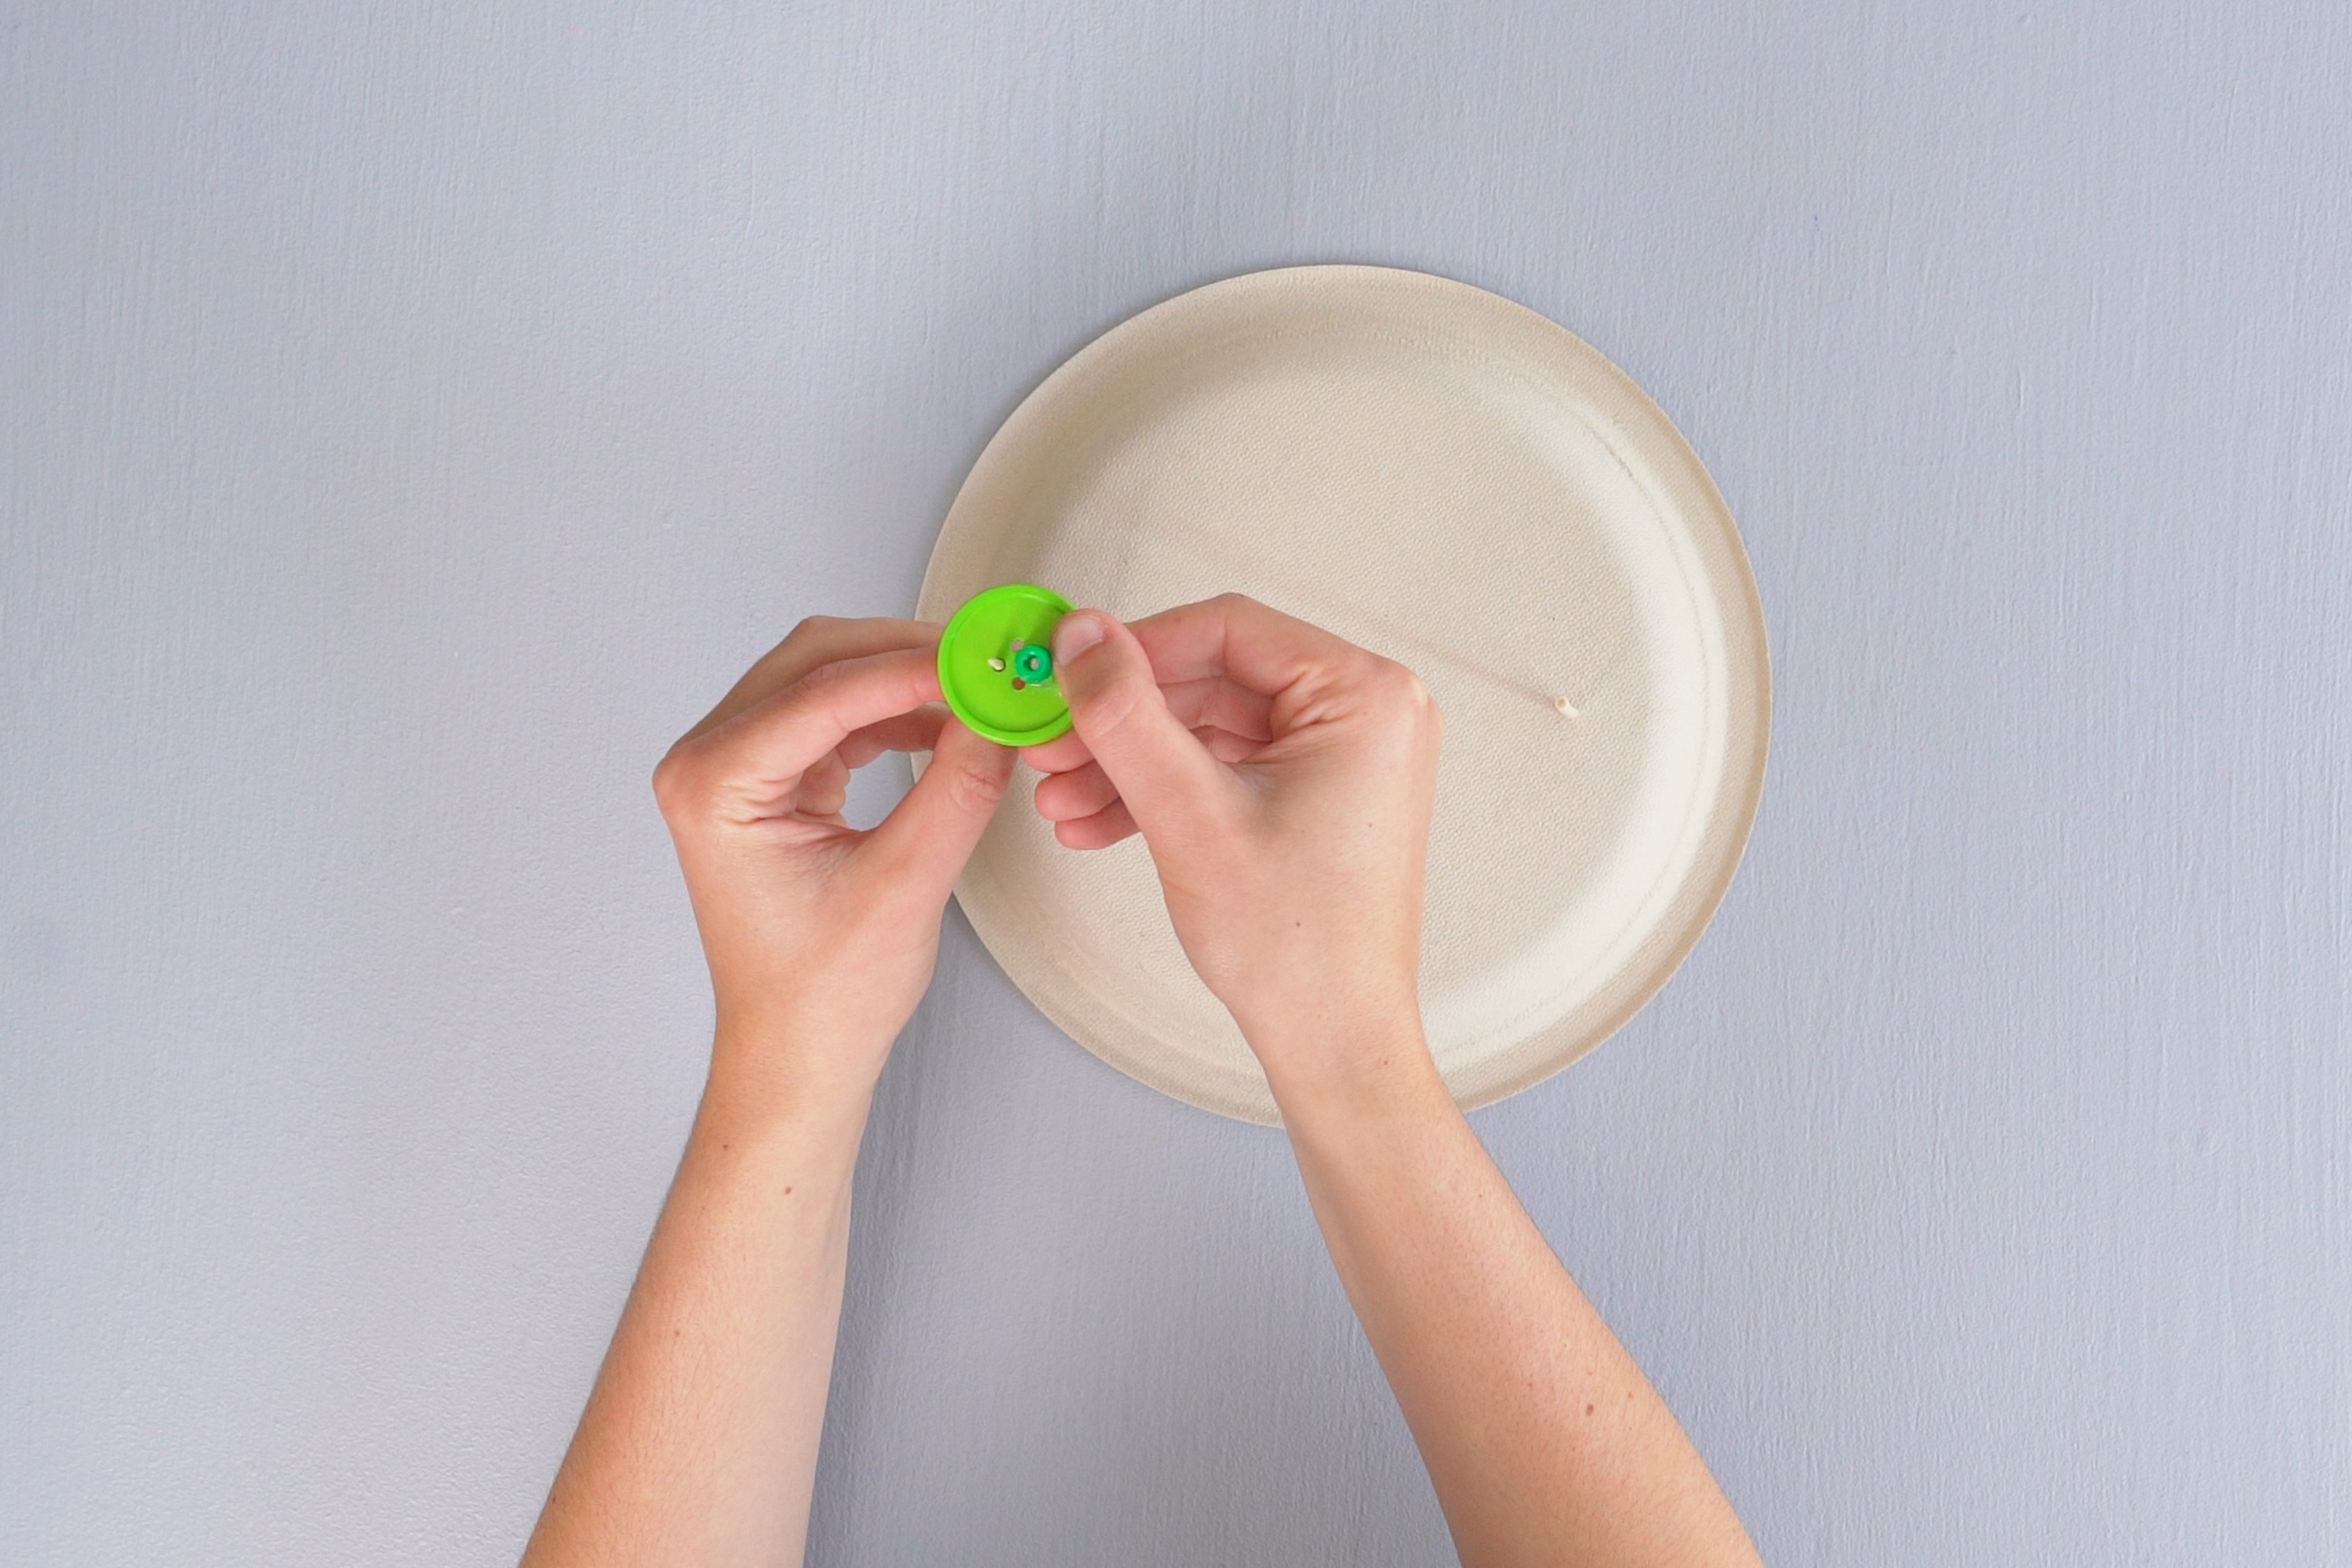
Step 7
Push the button onto the top of the skewer next to the paper clip. Do not use the buttonhole that is covered by the beads.
Step 8
Tie the rubber band to the paper clip loop.
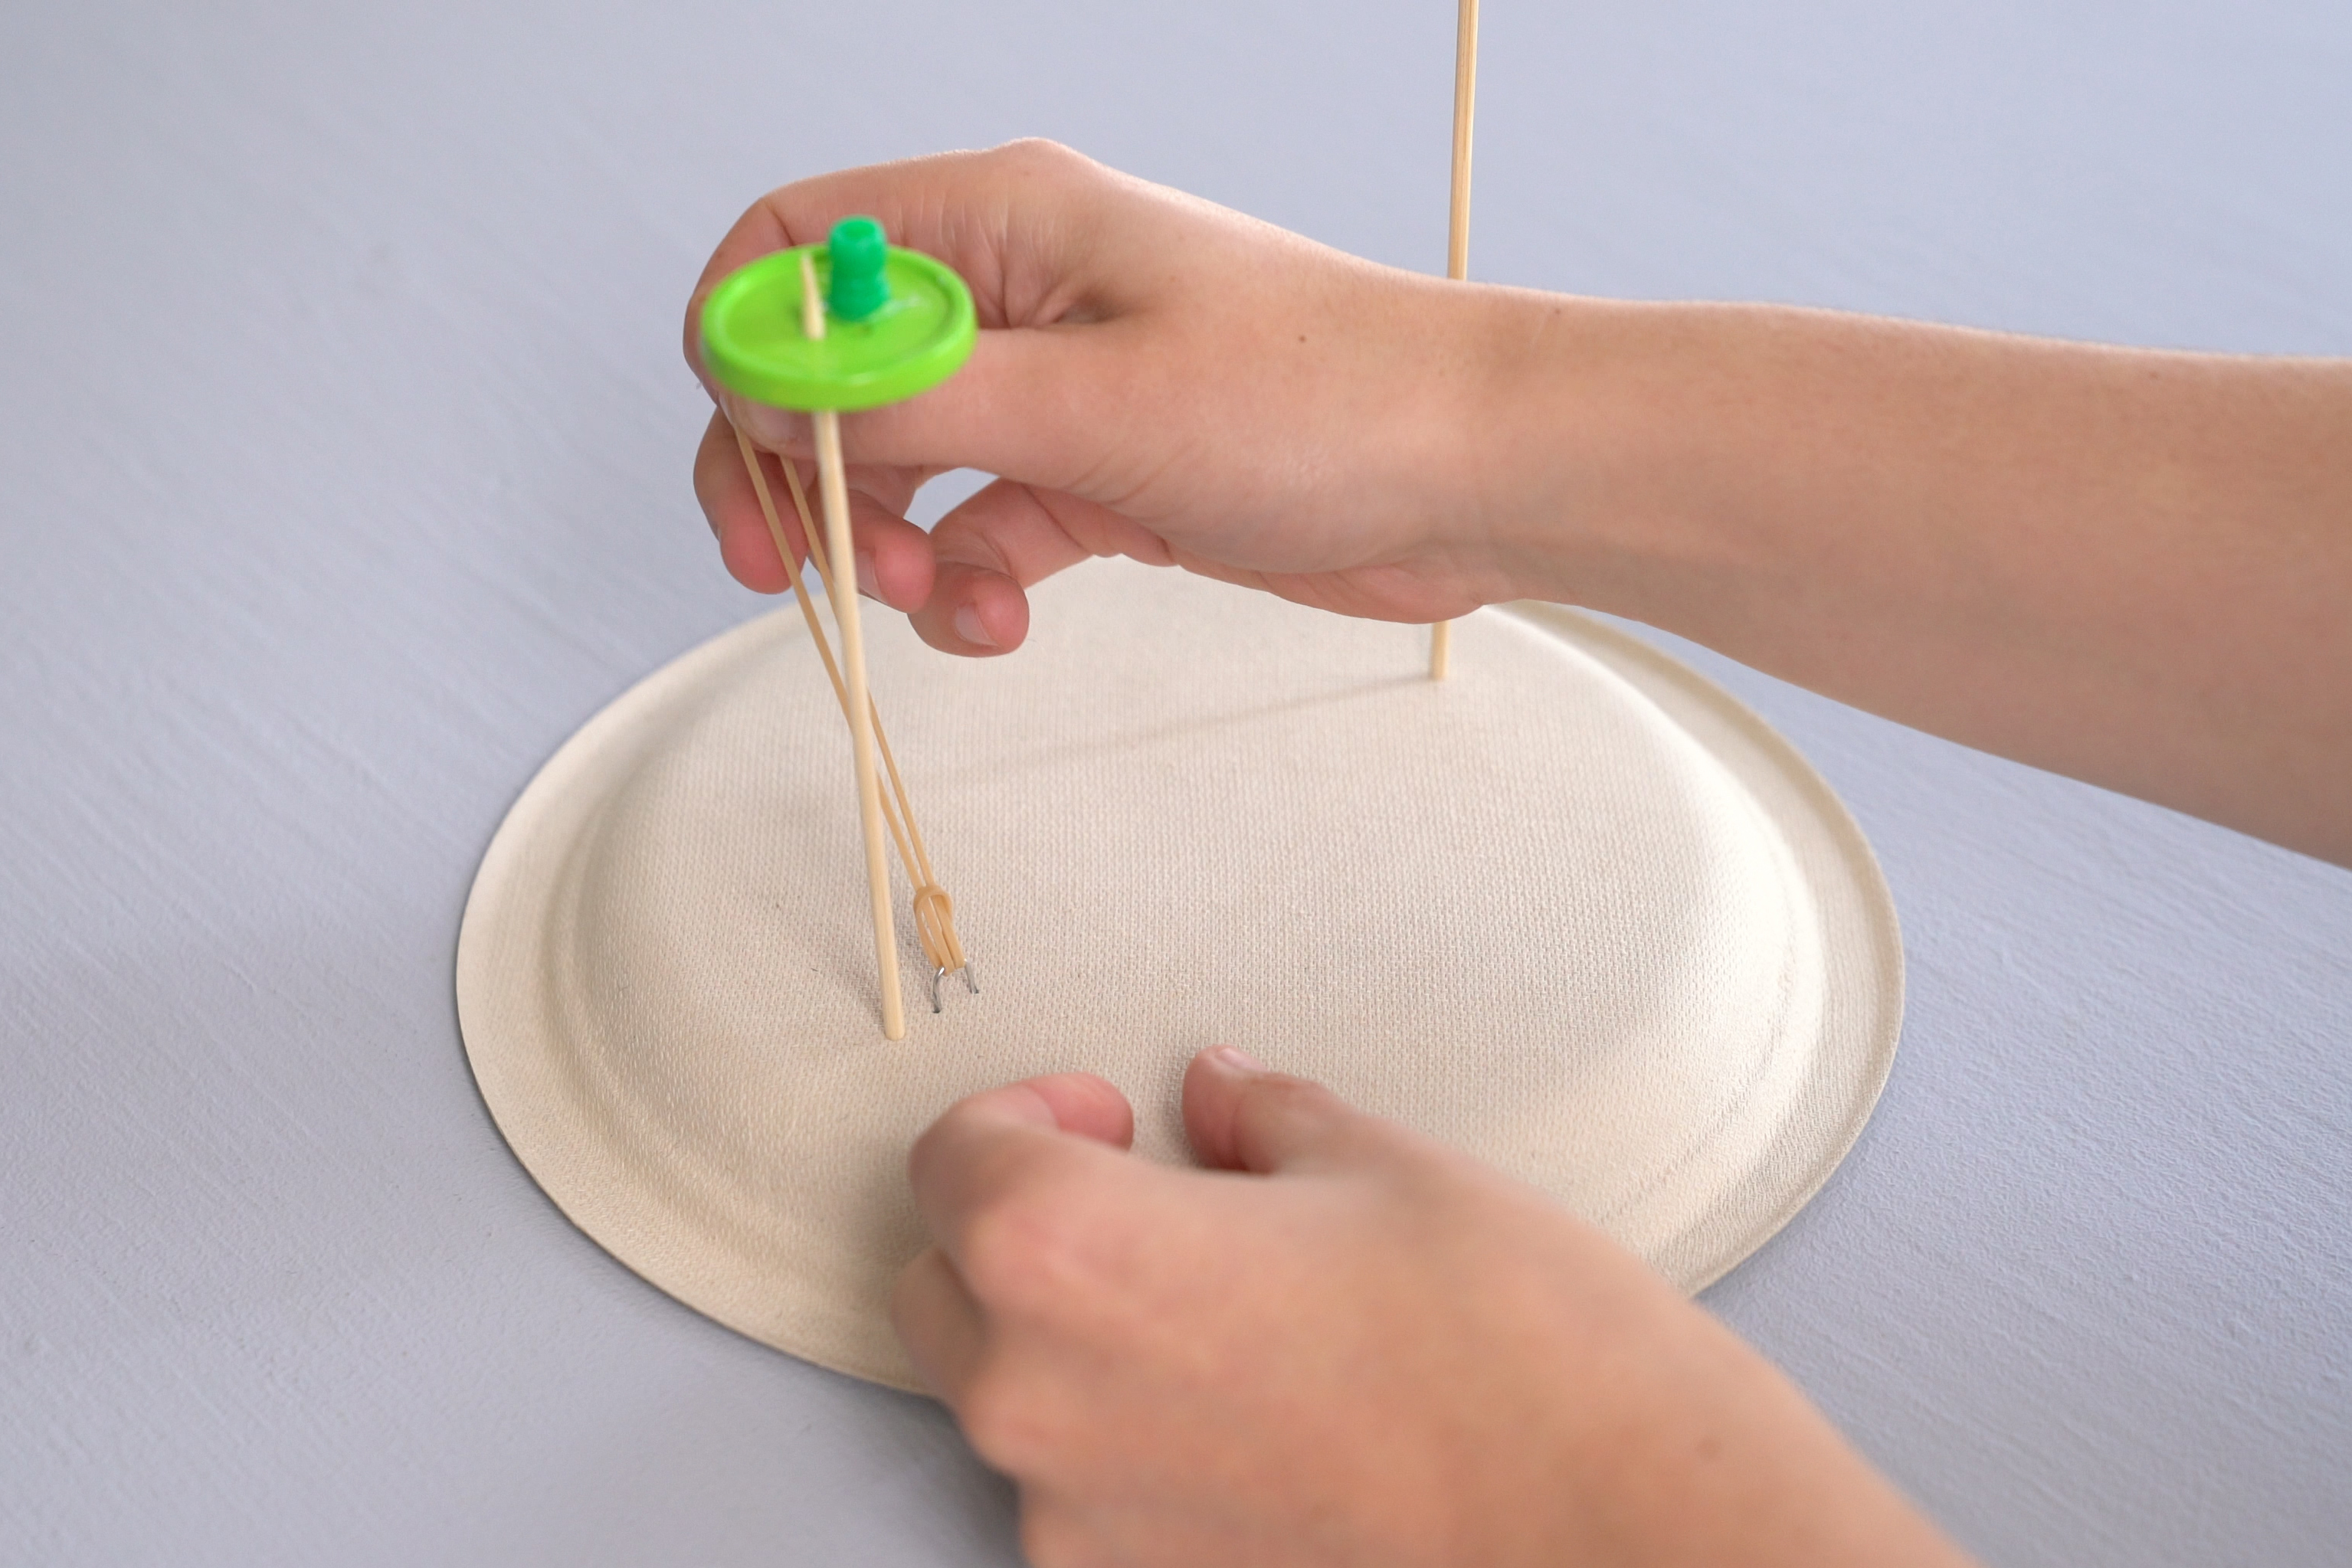
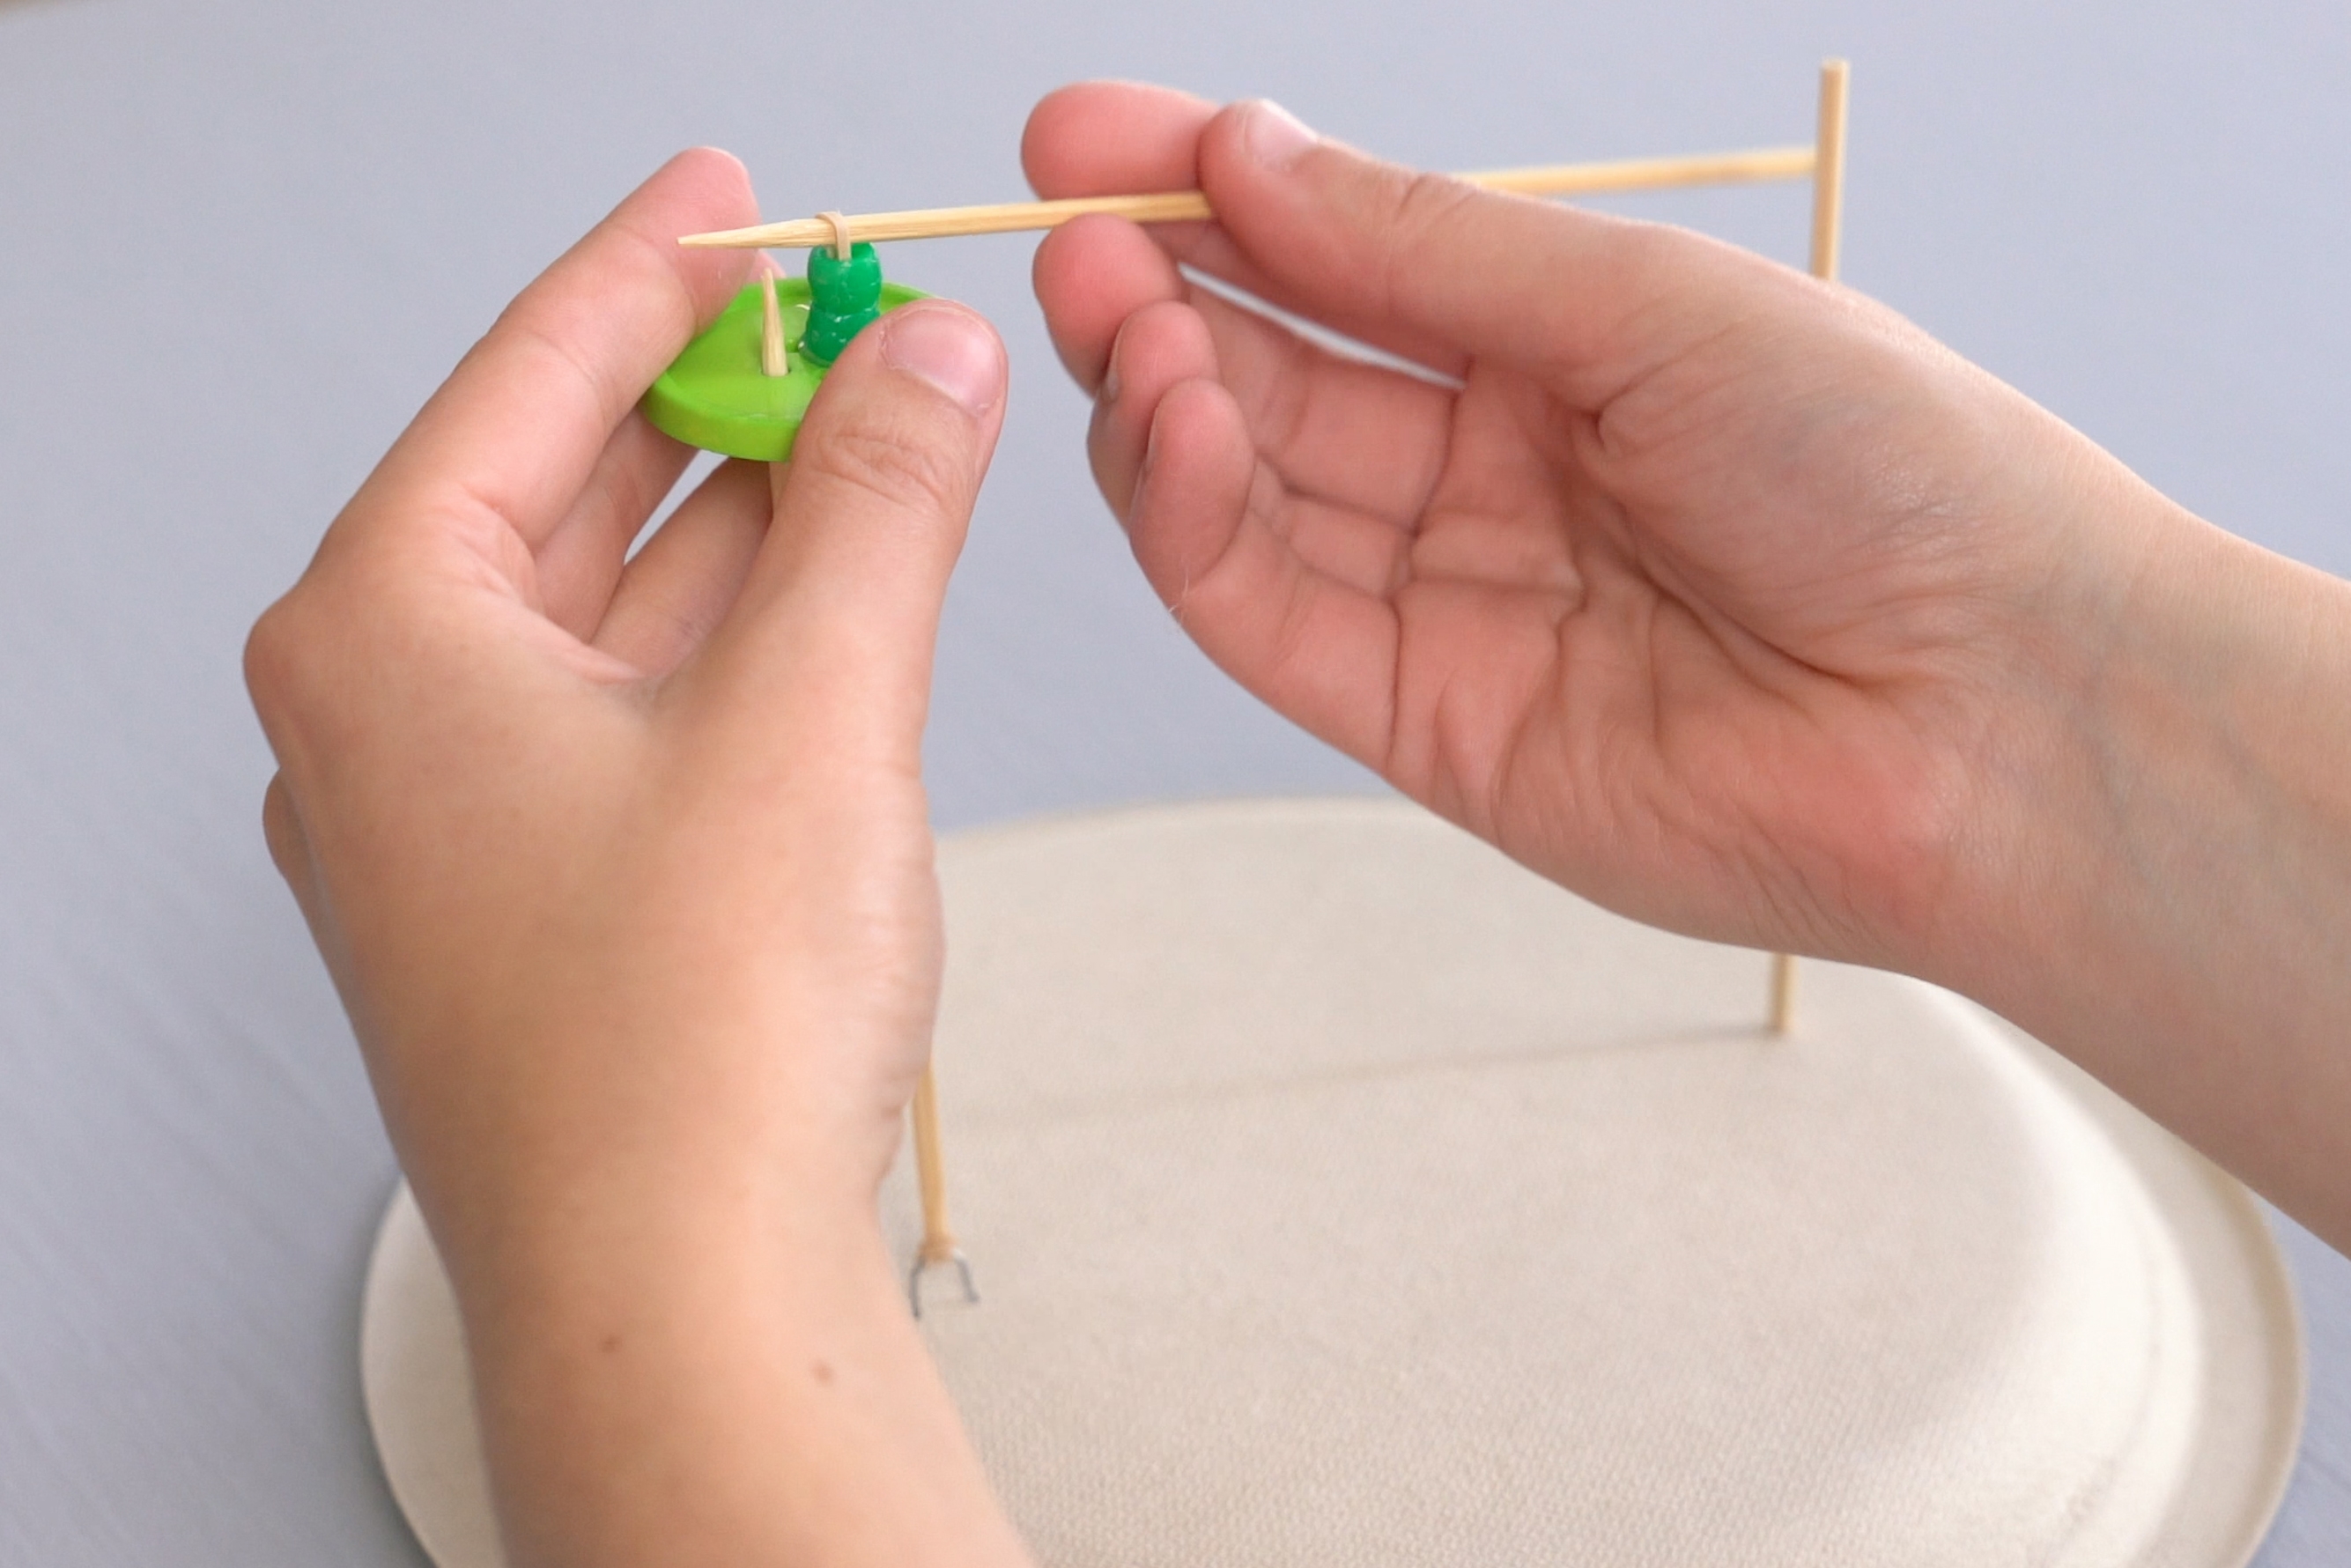
Step 9
Stretch the rubber band up through the buttonhole with the beads. Then, stick a skewer through the rubber band.
Tip
Try bending the rest of the paper clip into a small hook to help pull the rubber band through the buttonhole!
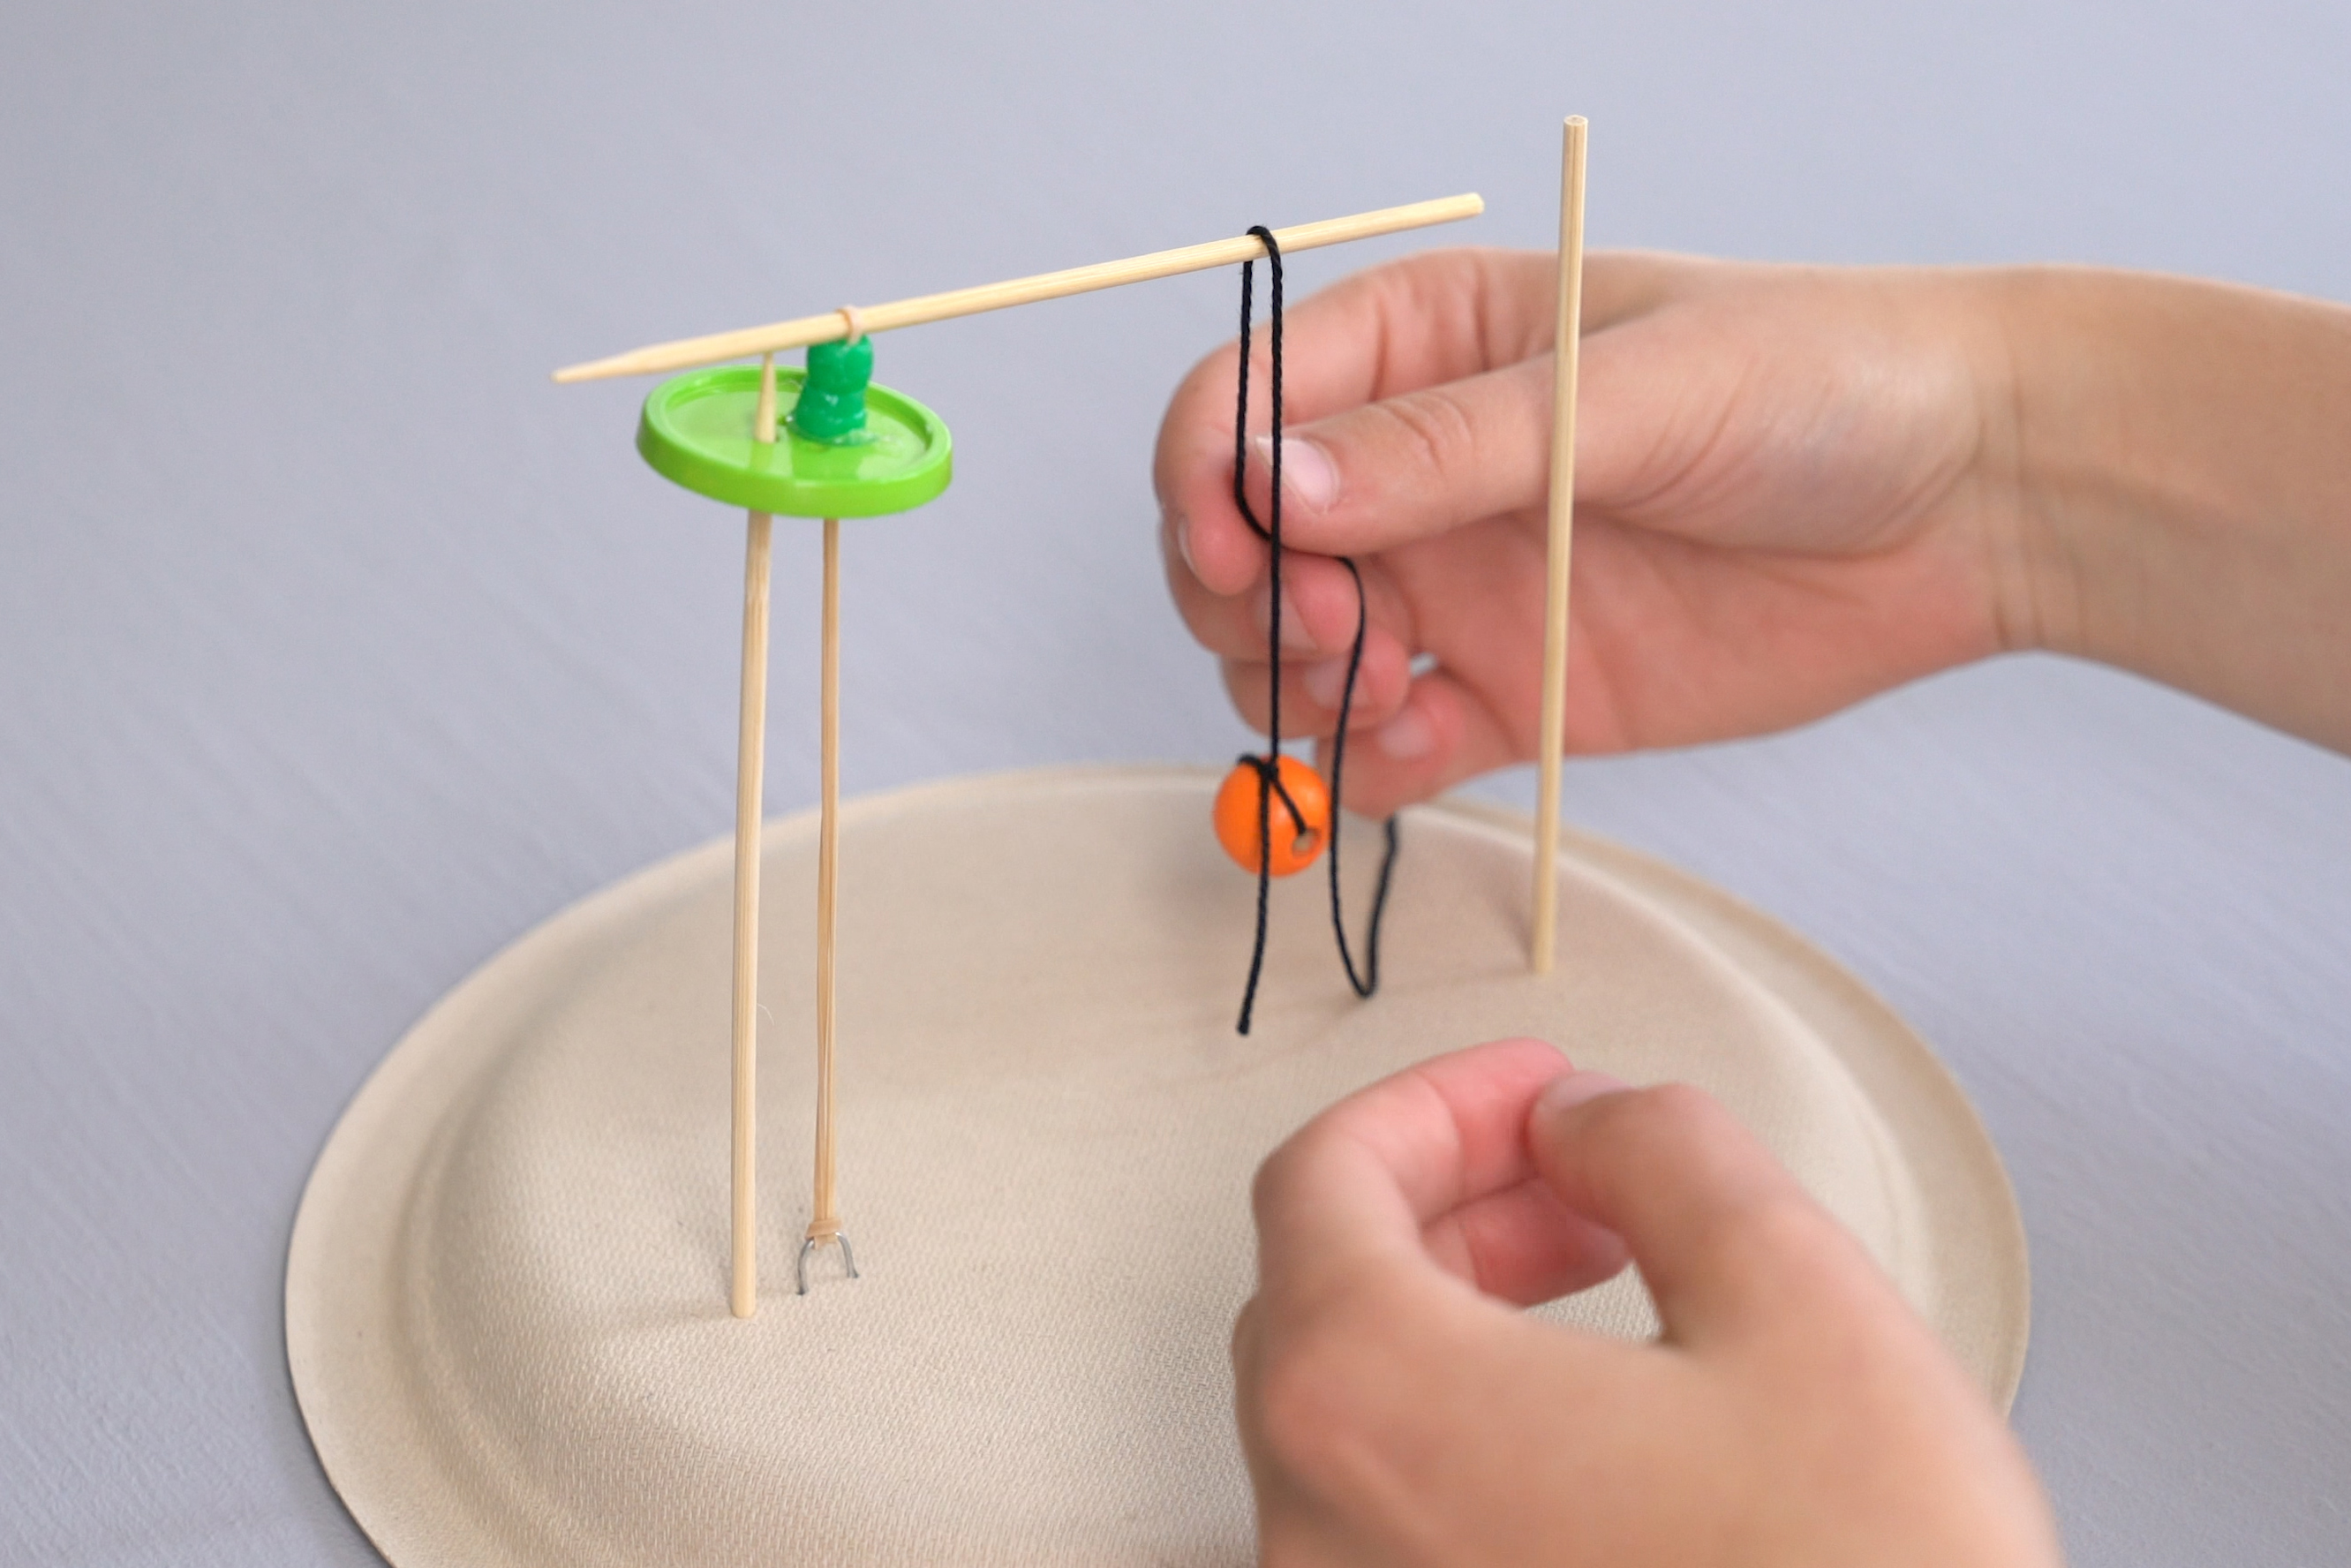
Step 10
Tie one end of a piece of string to a round bead. Then, tie the other end to the skewer.
Step 11
Turn the timer upside down and spin the horizontal skewer around and around until there is a lot of tension built up in the rubber band. Then, turn it over and let go of the skewer. GO!
Learn more

Twisting the rubber band is what sets this ticking machine in motion. Each twist stretches the rubber band and gives it tension. When you let it go, the rubber band releases its tension by unwinding. Normally, a rubber band unwinds pretty quickly. How many times would it spin? It’d be a blur! But the bead stops that by catching on the pole, and you end up with a broken motion that starts and stops and starts and stops. Not only does the rubber band unwind slower, but you can also count its turns easier. This kind of start-stop motion is used in machines that tell time, like clocks and watches. Imagine that each time the rubber band goes around, it moves a clock hand forward. And each time it hits the pole is a TICK or a TOCK! The number of twists is set to how many times your timer will tick-tock.