Step-by-step tutorial
Step 1
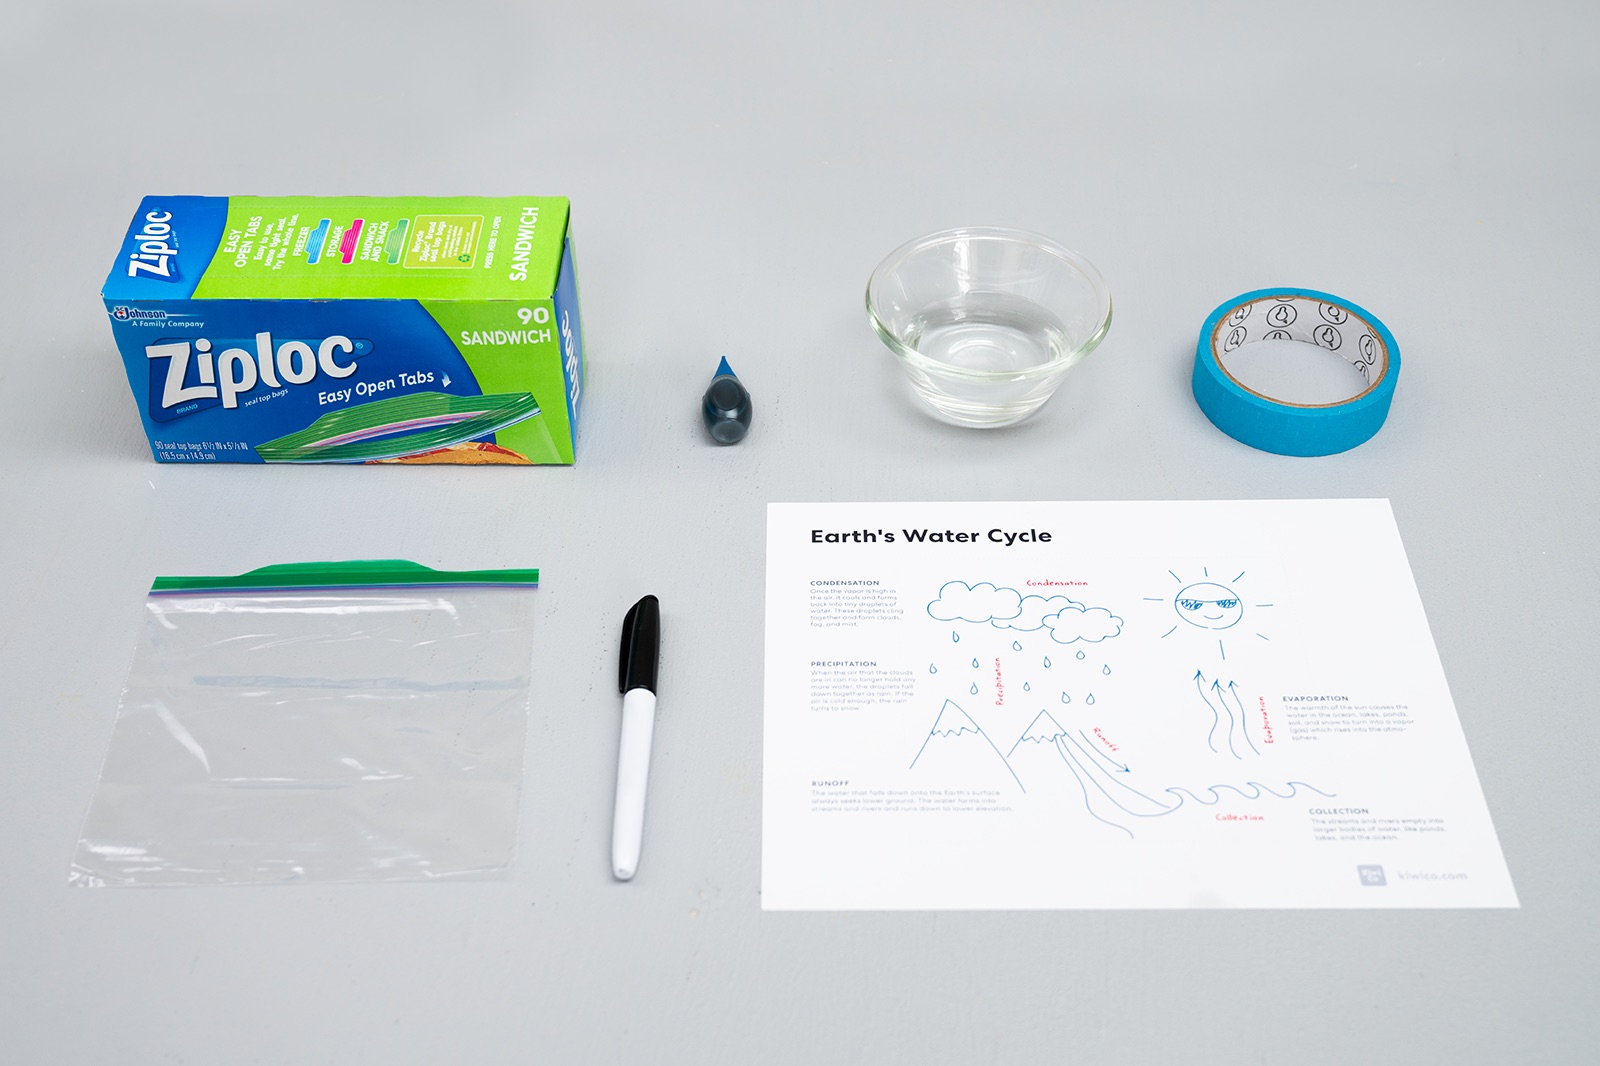
Gather your materials. Download the water cycle printable here.

Step 2
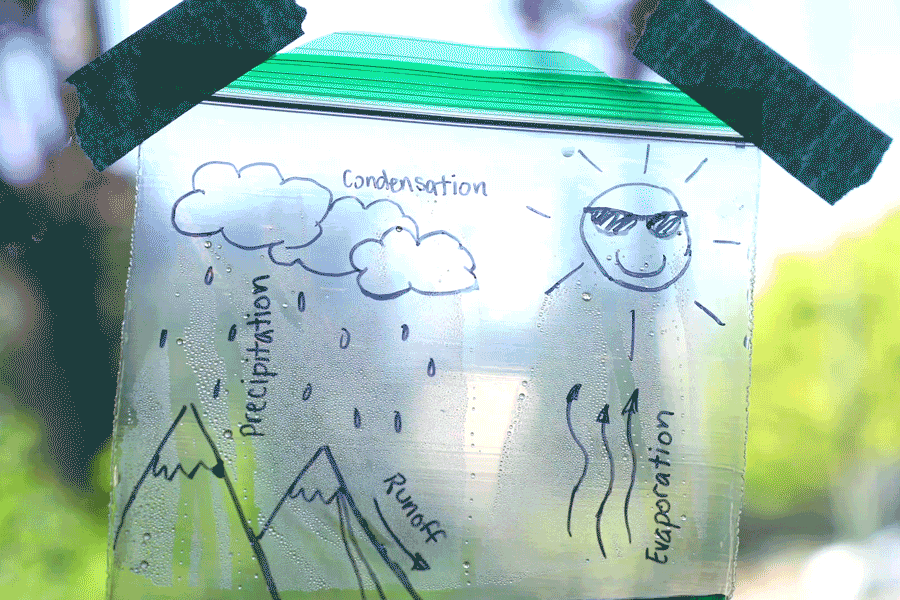
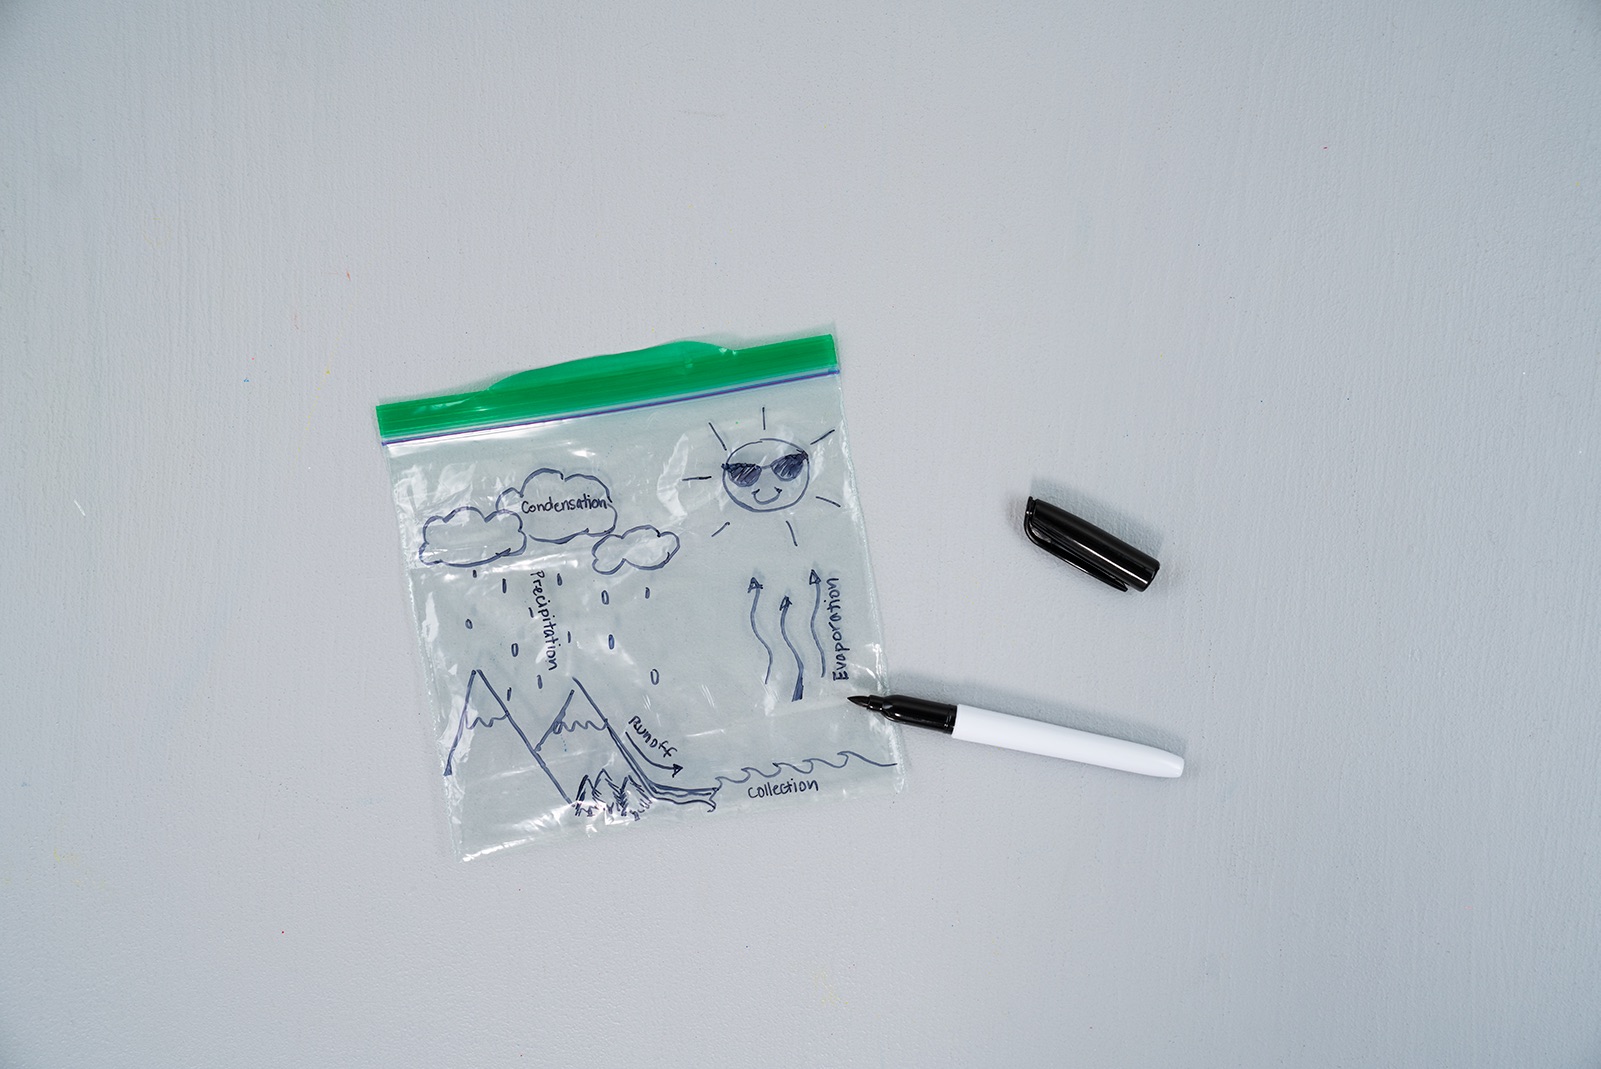
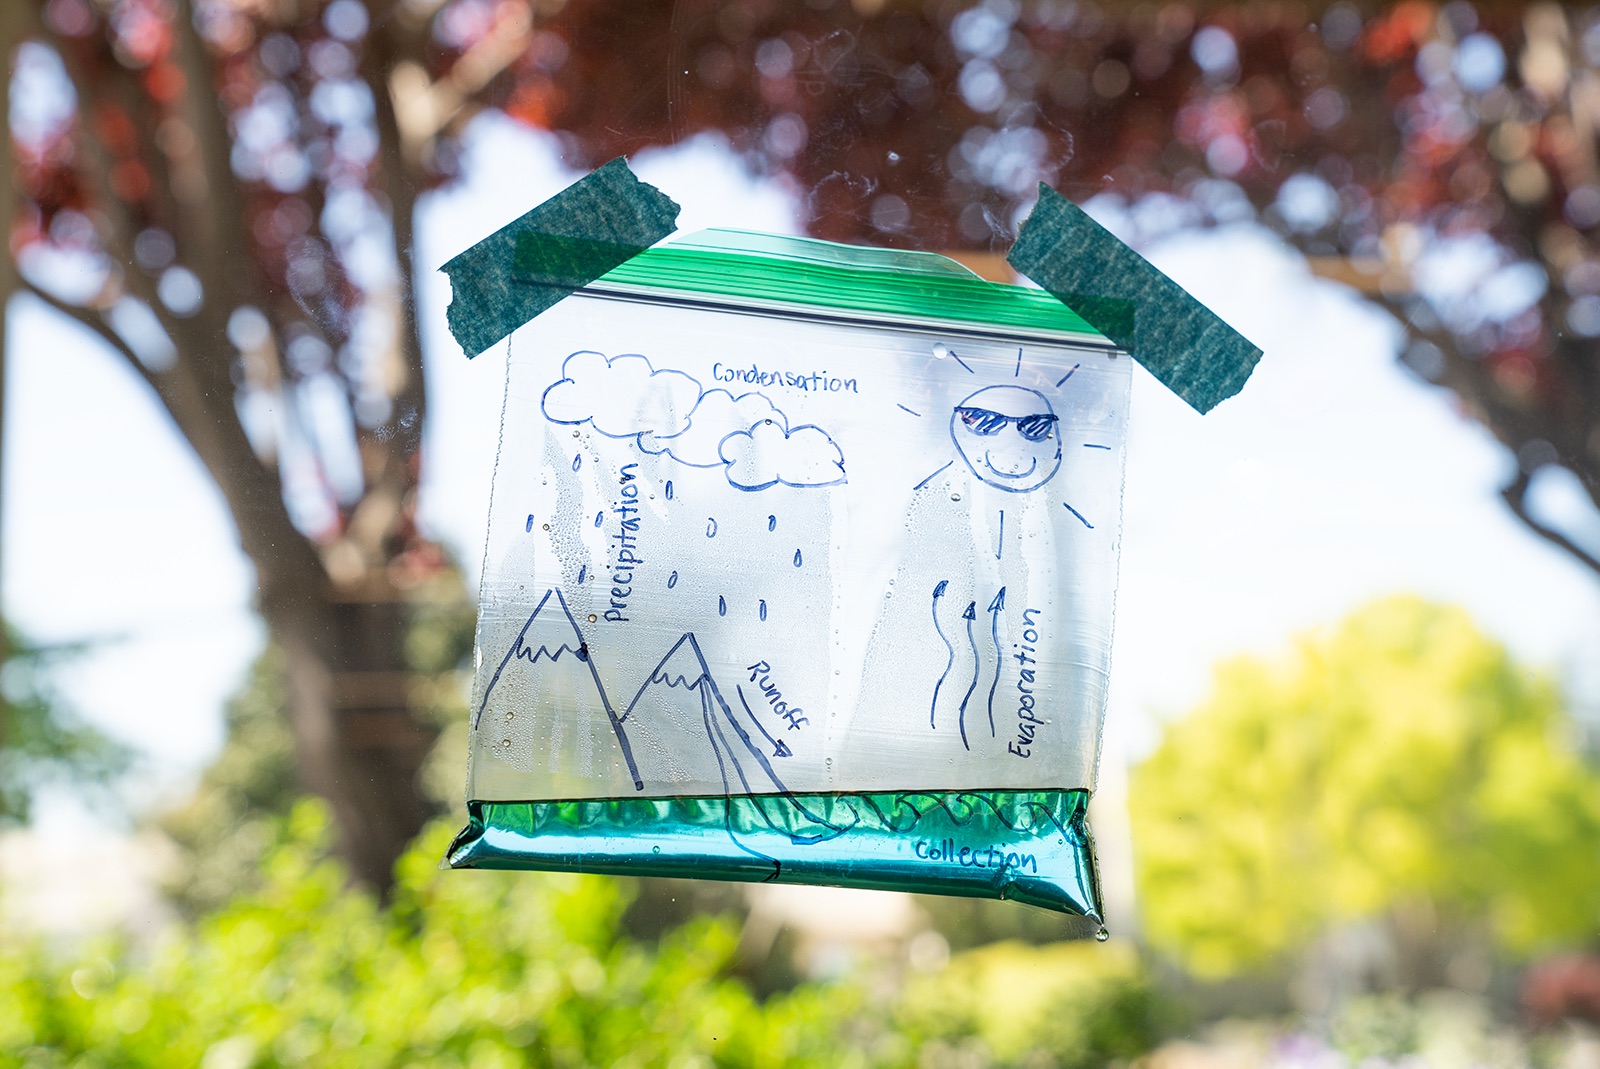
Smooth the Ziploc® brand bag out on a flat surface. Use the permanent marker to draw the water cycle from the Water Cycle Printable on the bag. (Draw carefully to avoid puncturing the bag.)
Step 3
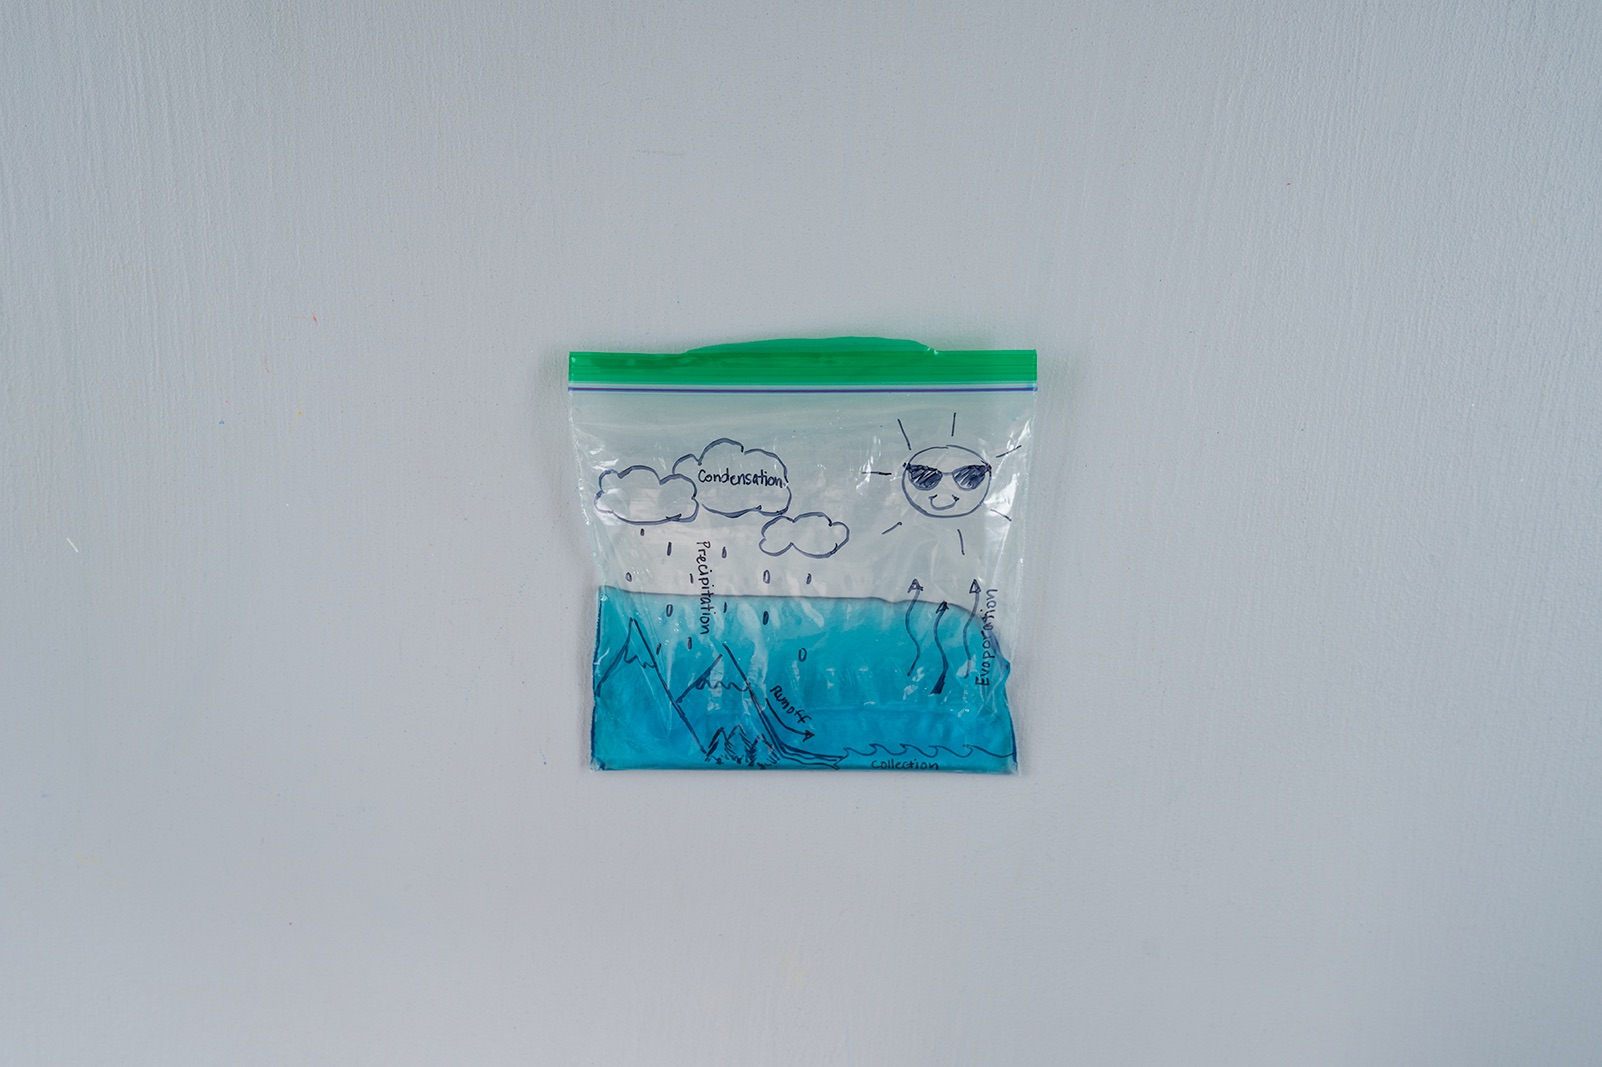
Pour ⅓ cup of water into the bag (avoid filling the bag more than halfway). Put one or two drops of blue food coloring into the water.
Step 4
Find a sunny window and tape the bag up. Tape the bag at a slight angle to simulate the runoff and collection stages of the cycle.
Step 5
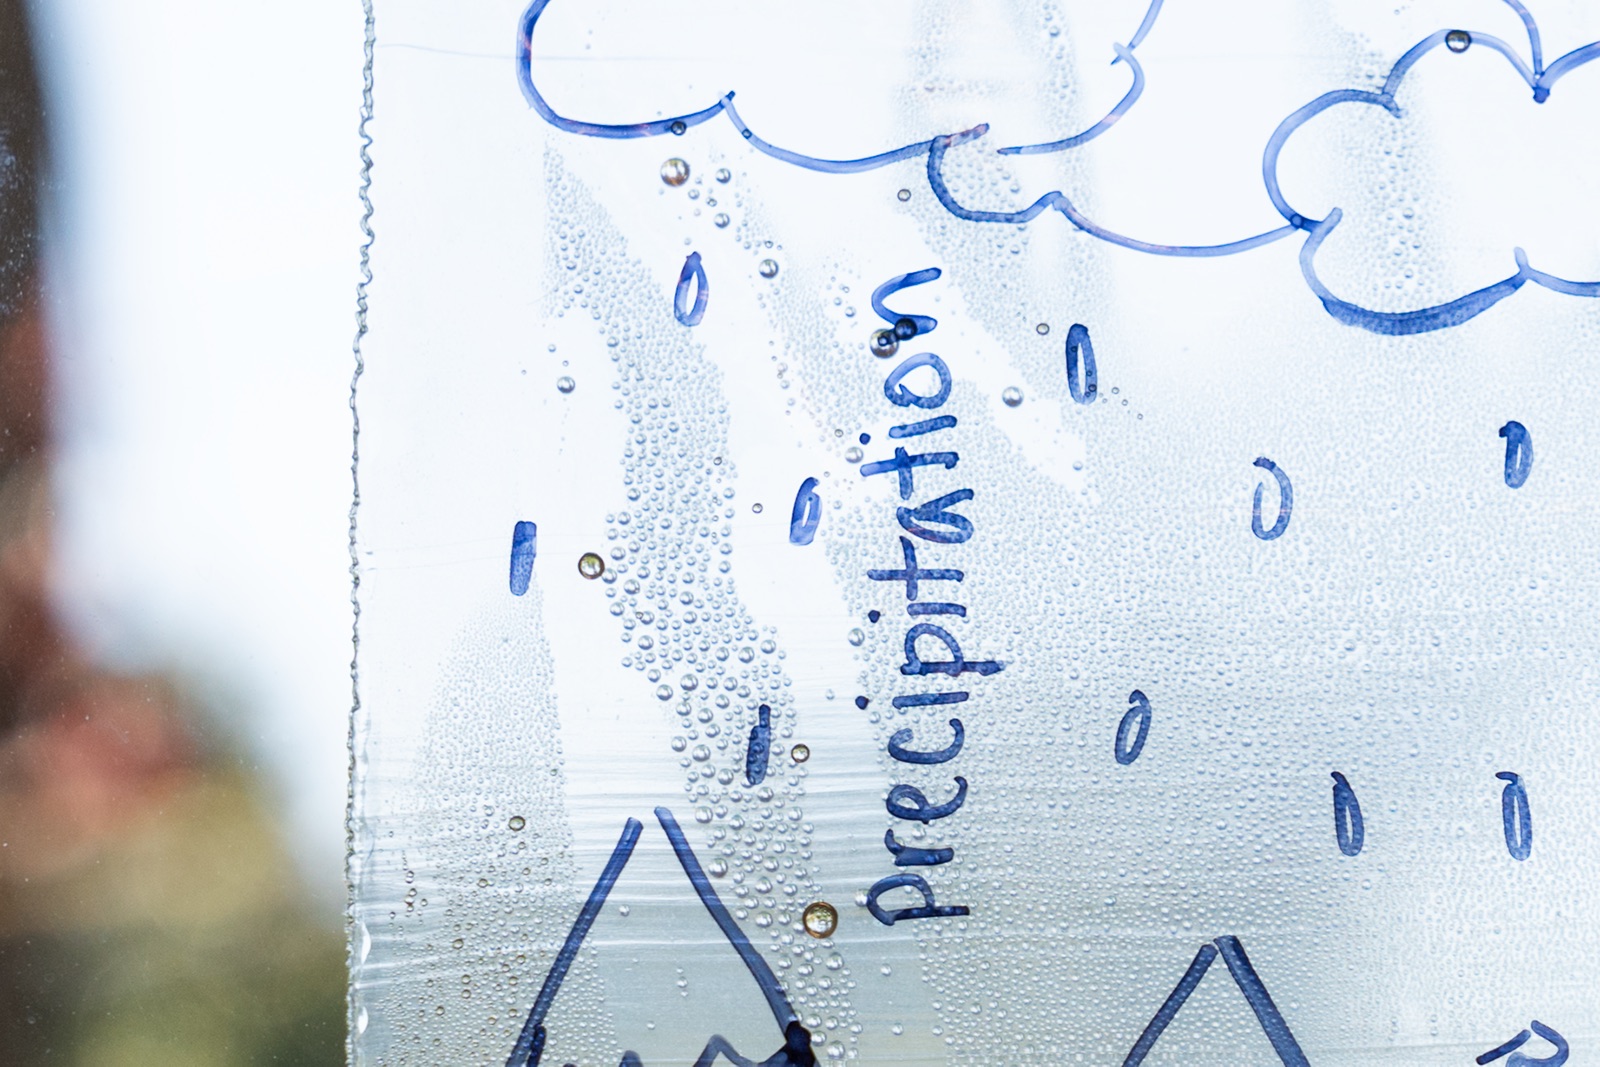
Check in on the water cycle bag at different times throughout the next few days. Do you see water droplets form along the bag from the condensation? Eventually, you’ll see streaks along the side of the bag as the droplets grow and drop down the side, representing precipitation. From there, the water will recollect and pool at the bottom. How does this mimic the water cycle we see on Earth?
Learn more

On Earth, the water cycle is influenced by many things, such as energy from the sun, temperature, and the force of gravity. What changes can you make to your bag to observe some of these factors? Try creating a second bag and placing it in a different location (perhaps a shady window) and see how the results differ. You can also leave the bag for a few days and check on it at different stages. See how time of day, temperature, and amount of sunlight affects it!


