Step-by-step tutorial
Step 1
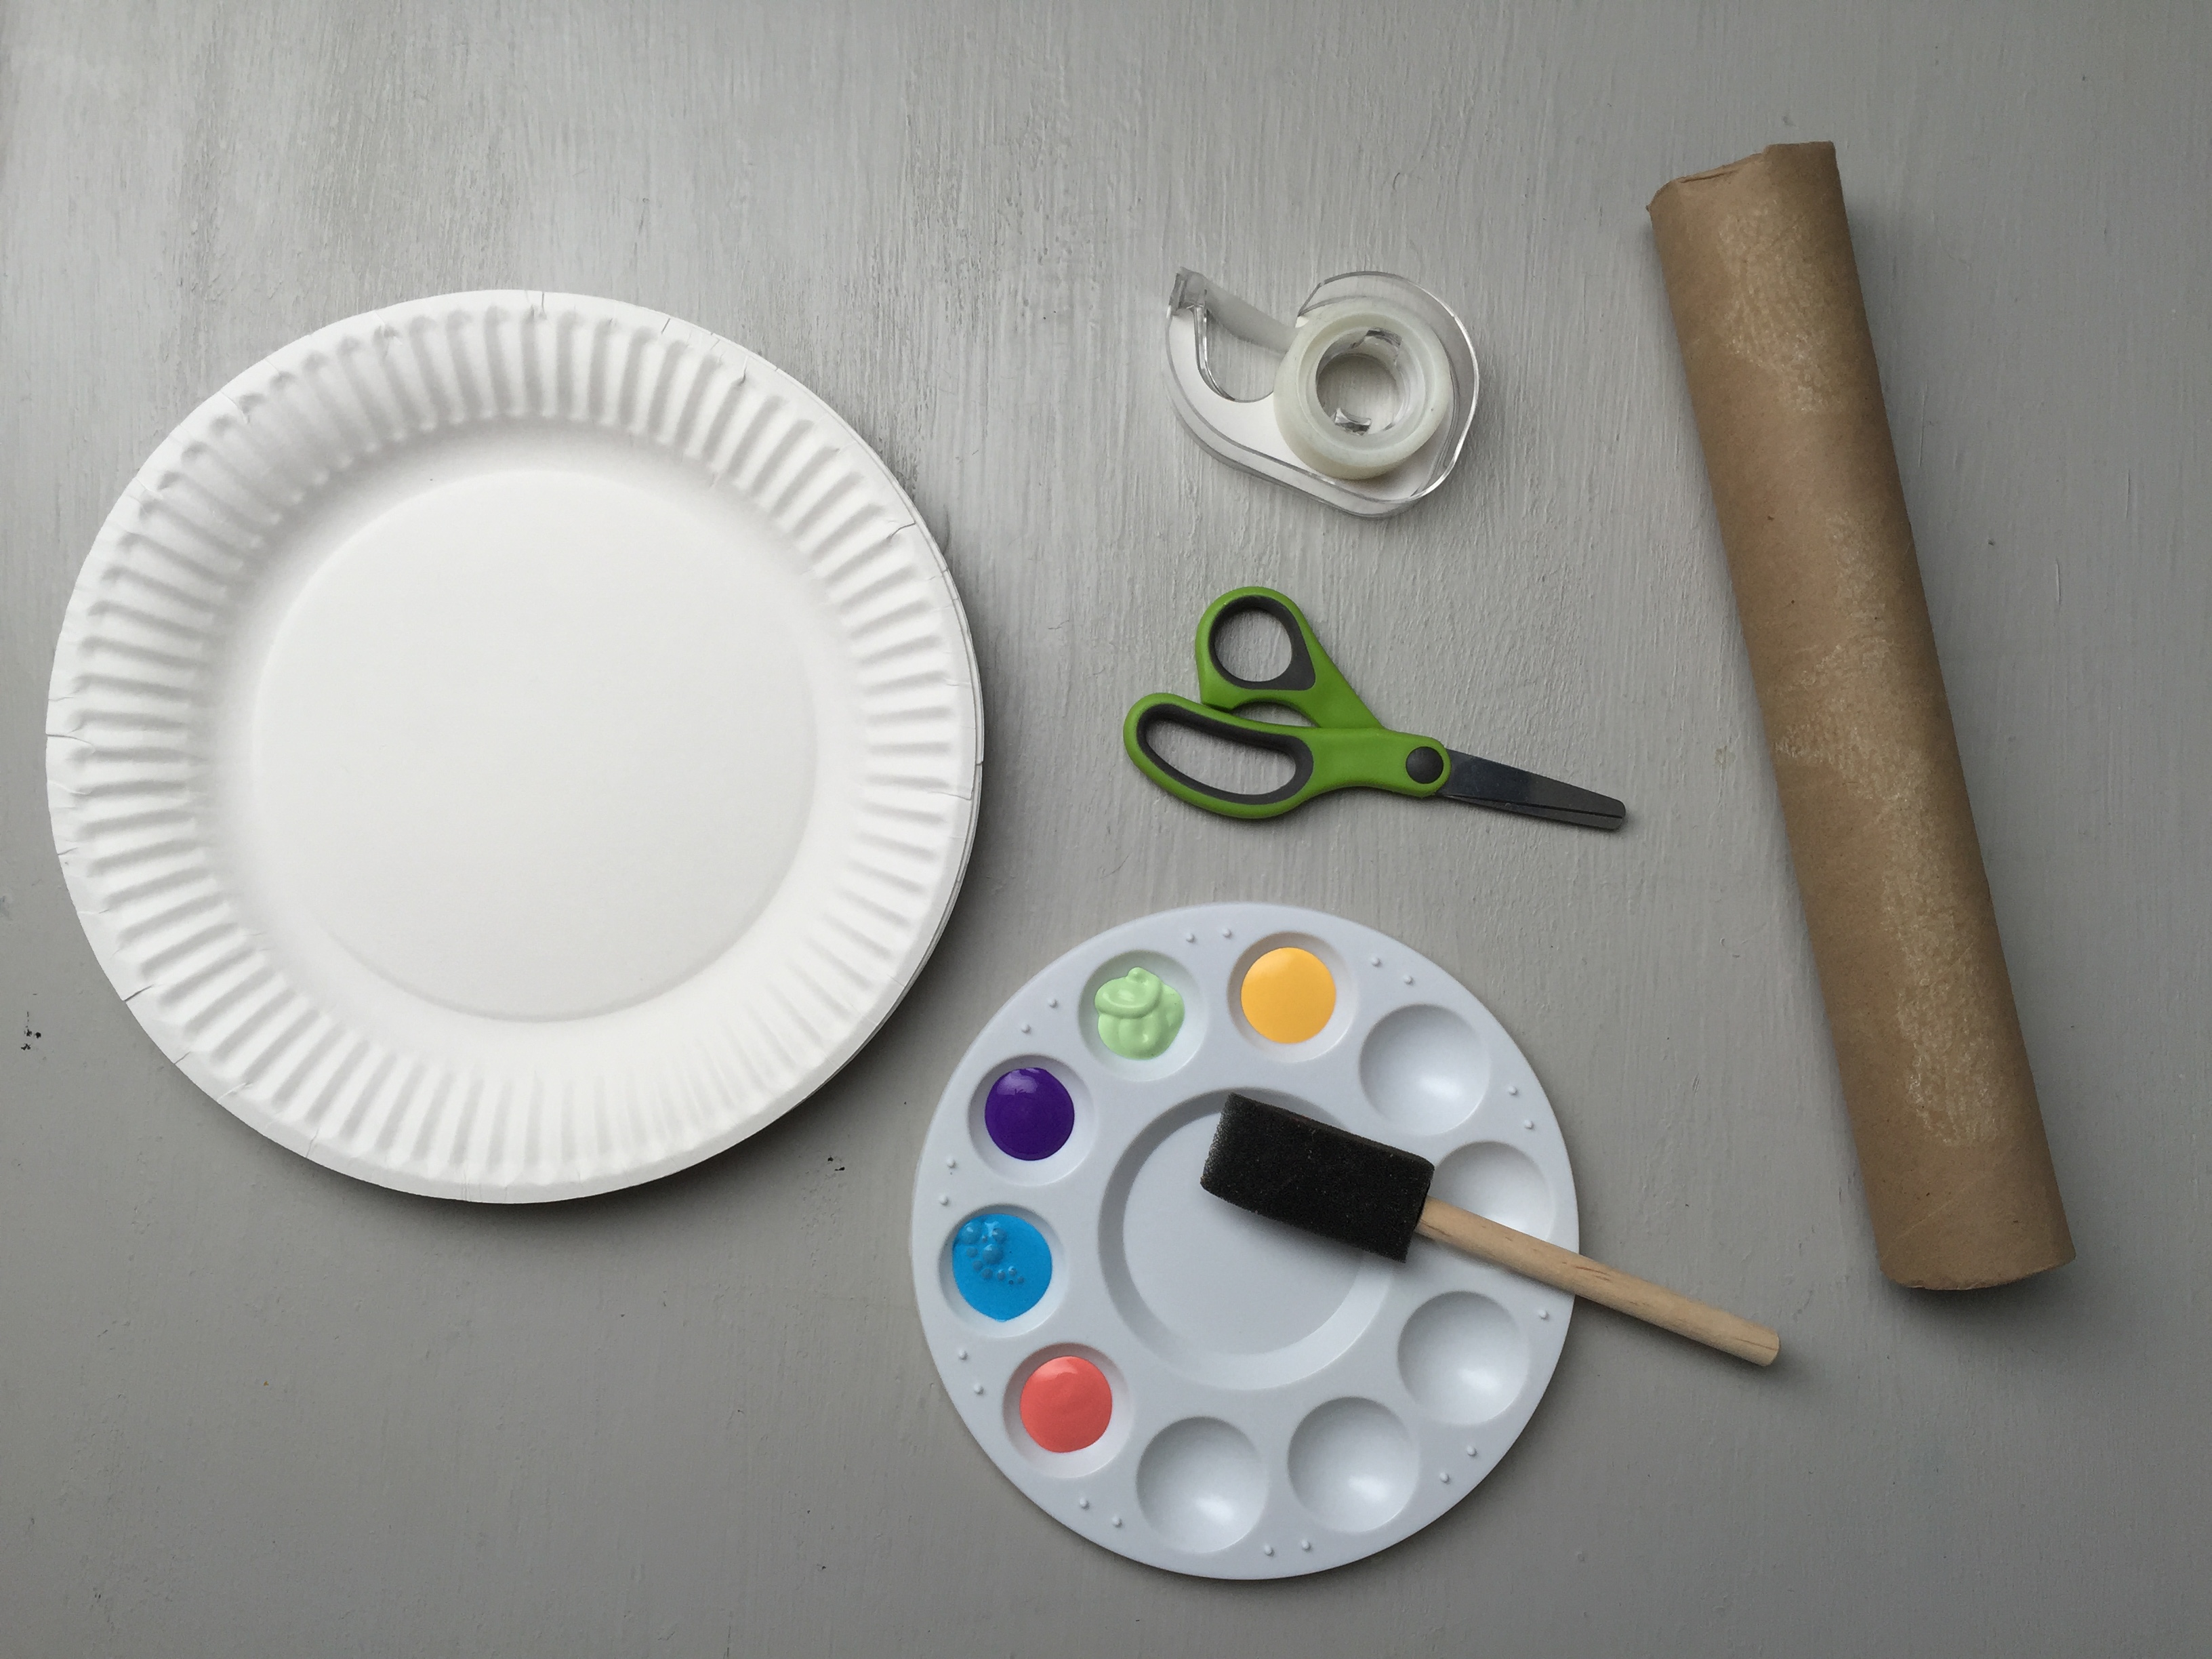
Gather all materials!

Step 2
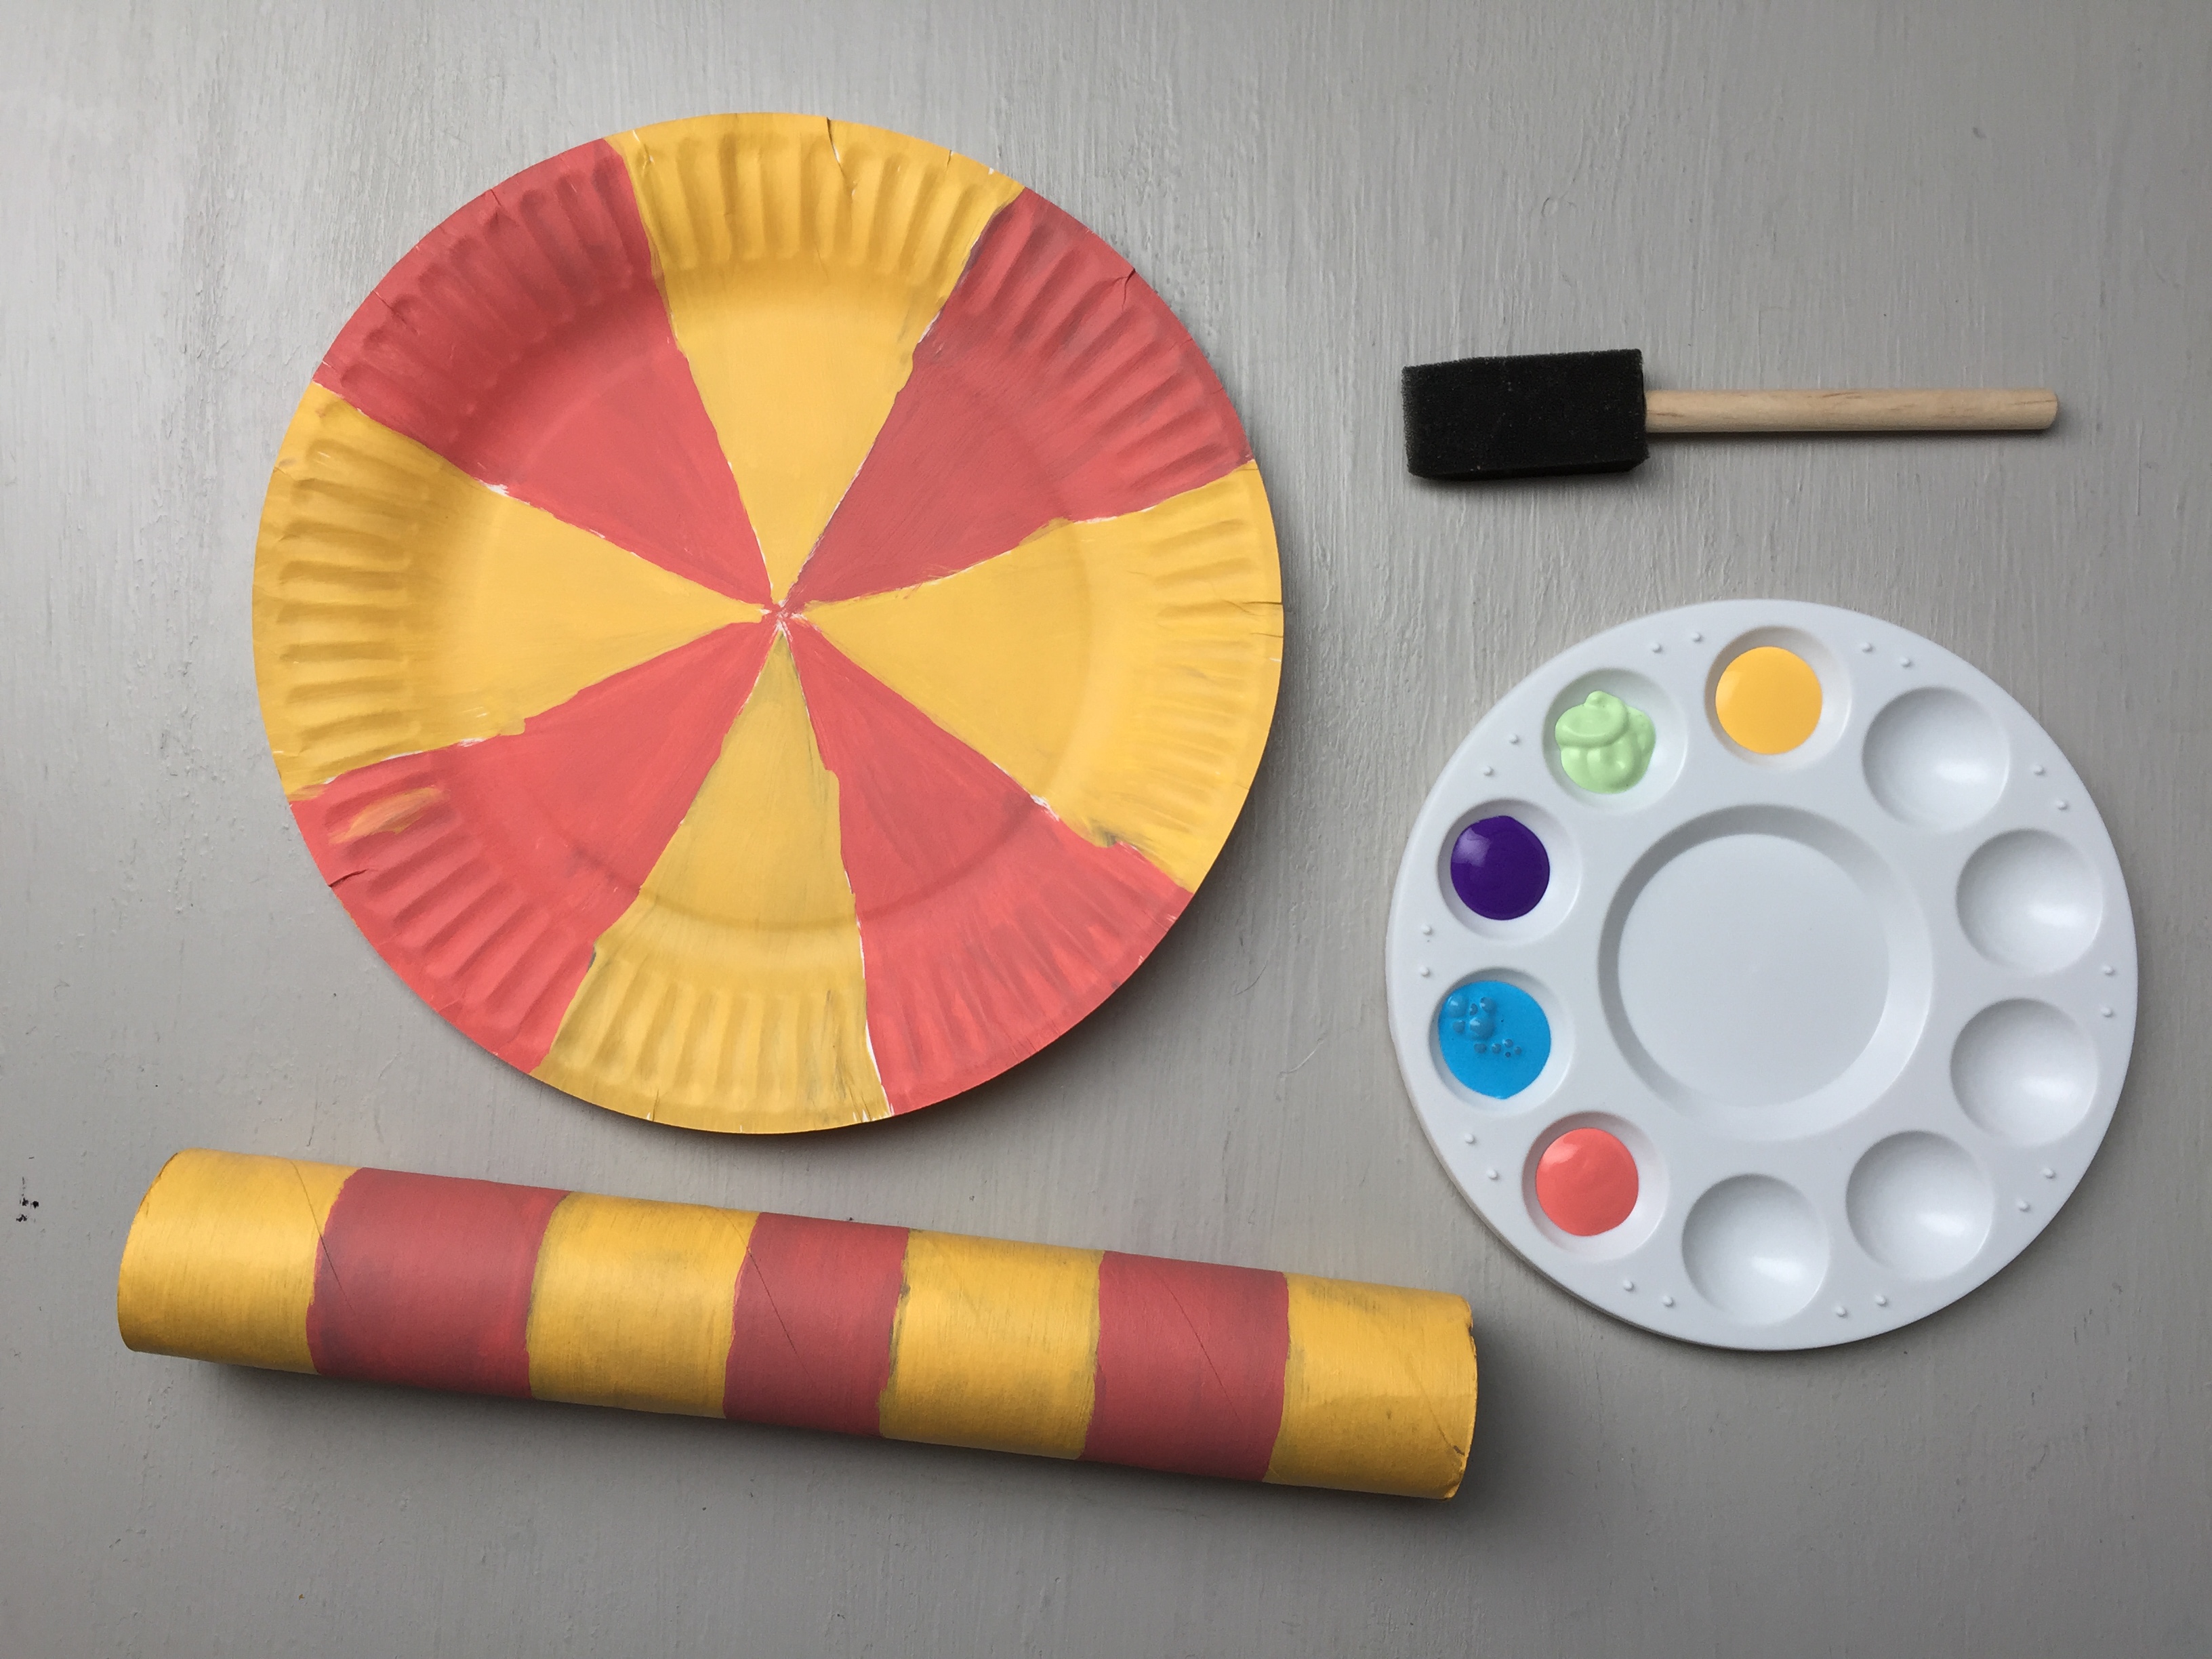
Make your ring toss base by painting the paper tube and the top of one paper plate.
Step 3
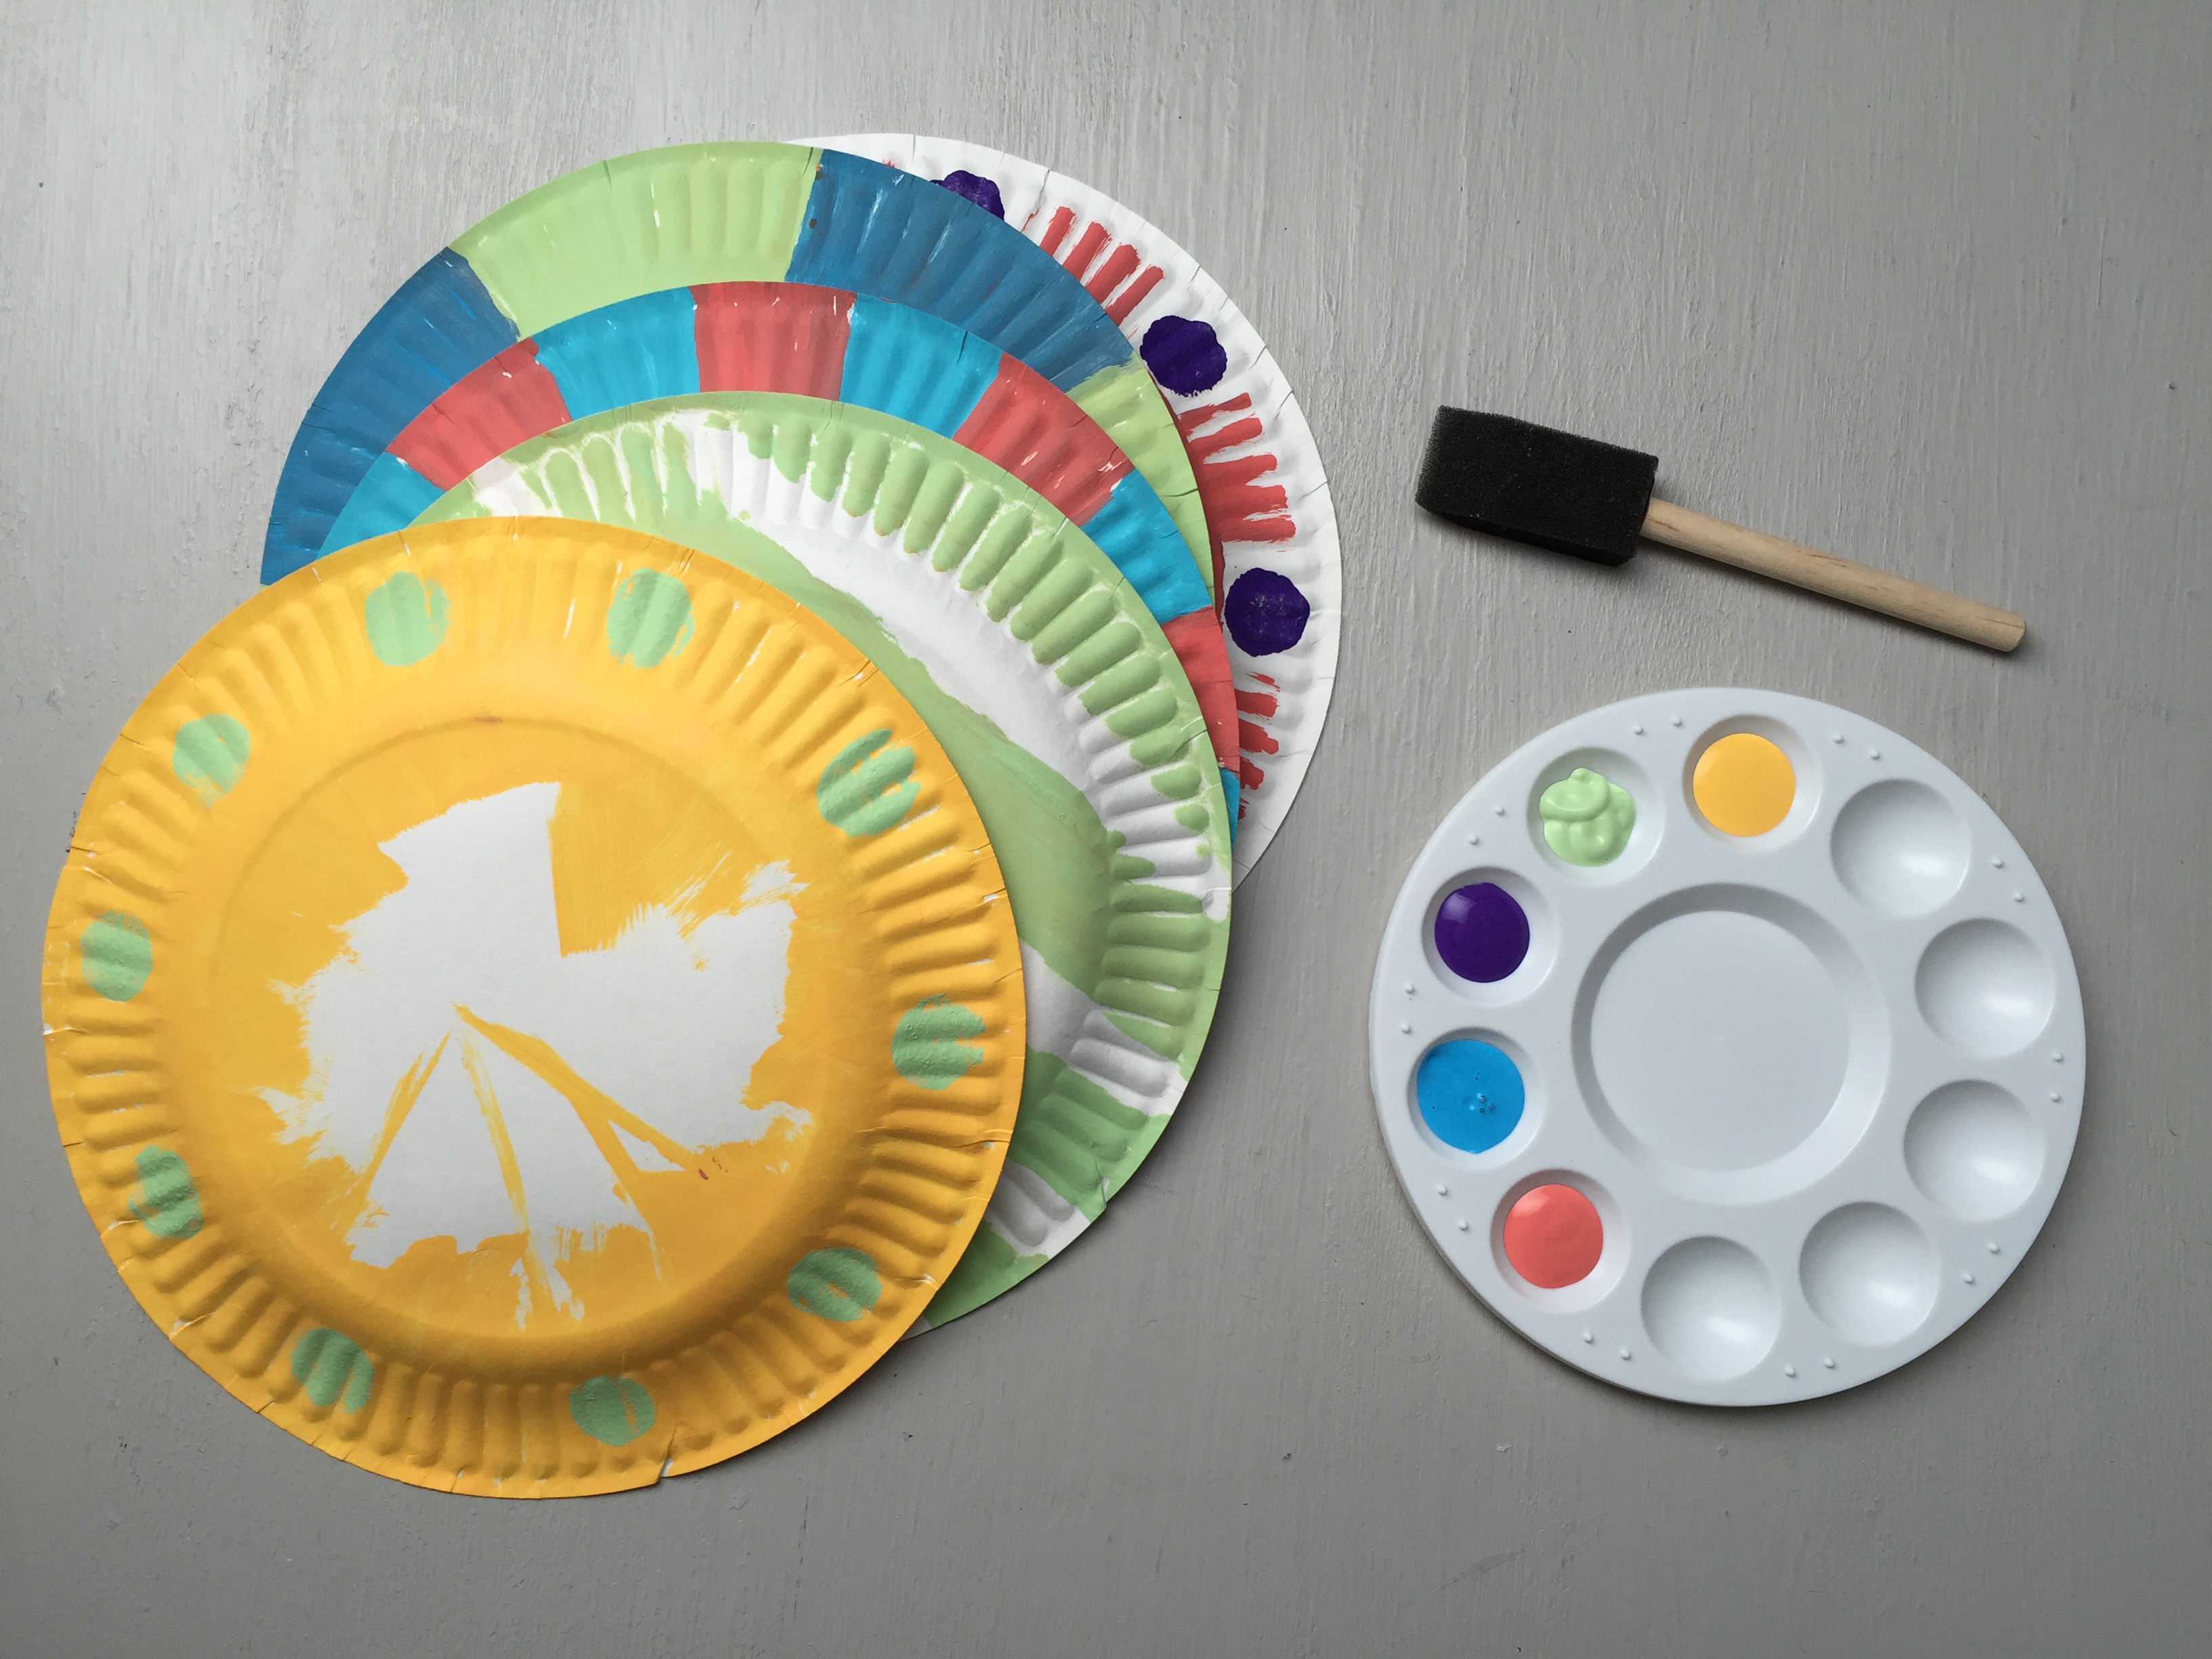
While the base is drying, start making the tossing rings. We experimented with fun patterns and colors to make each ring unique. The more plates you make, the more fun you’ll have!
Tip
You don’t need to paint the center of your paper plates, but you can!
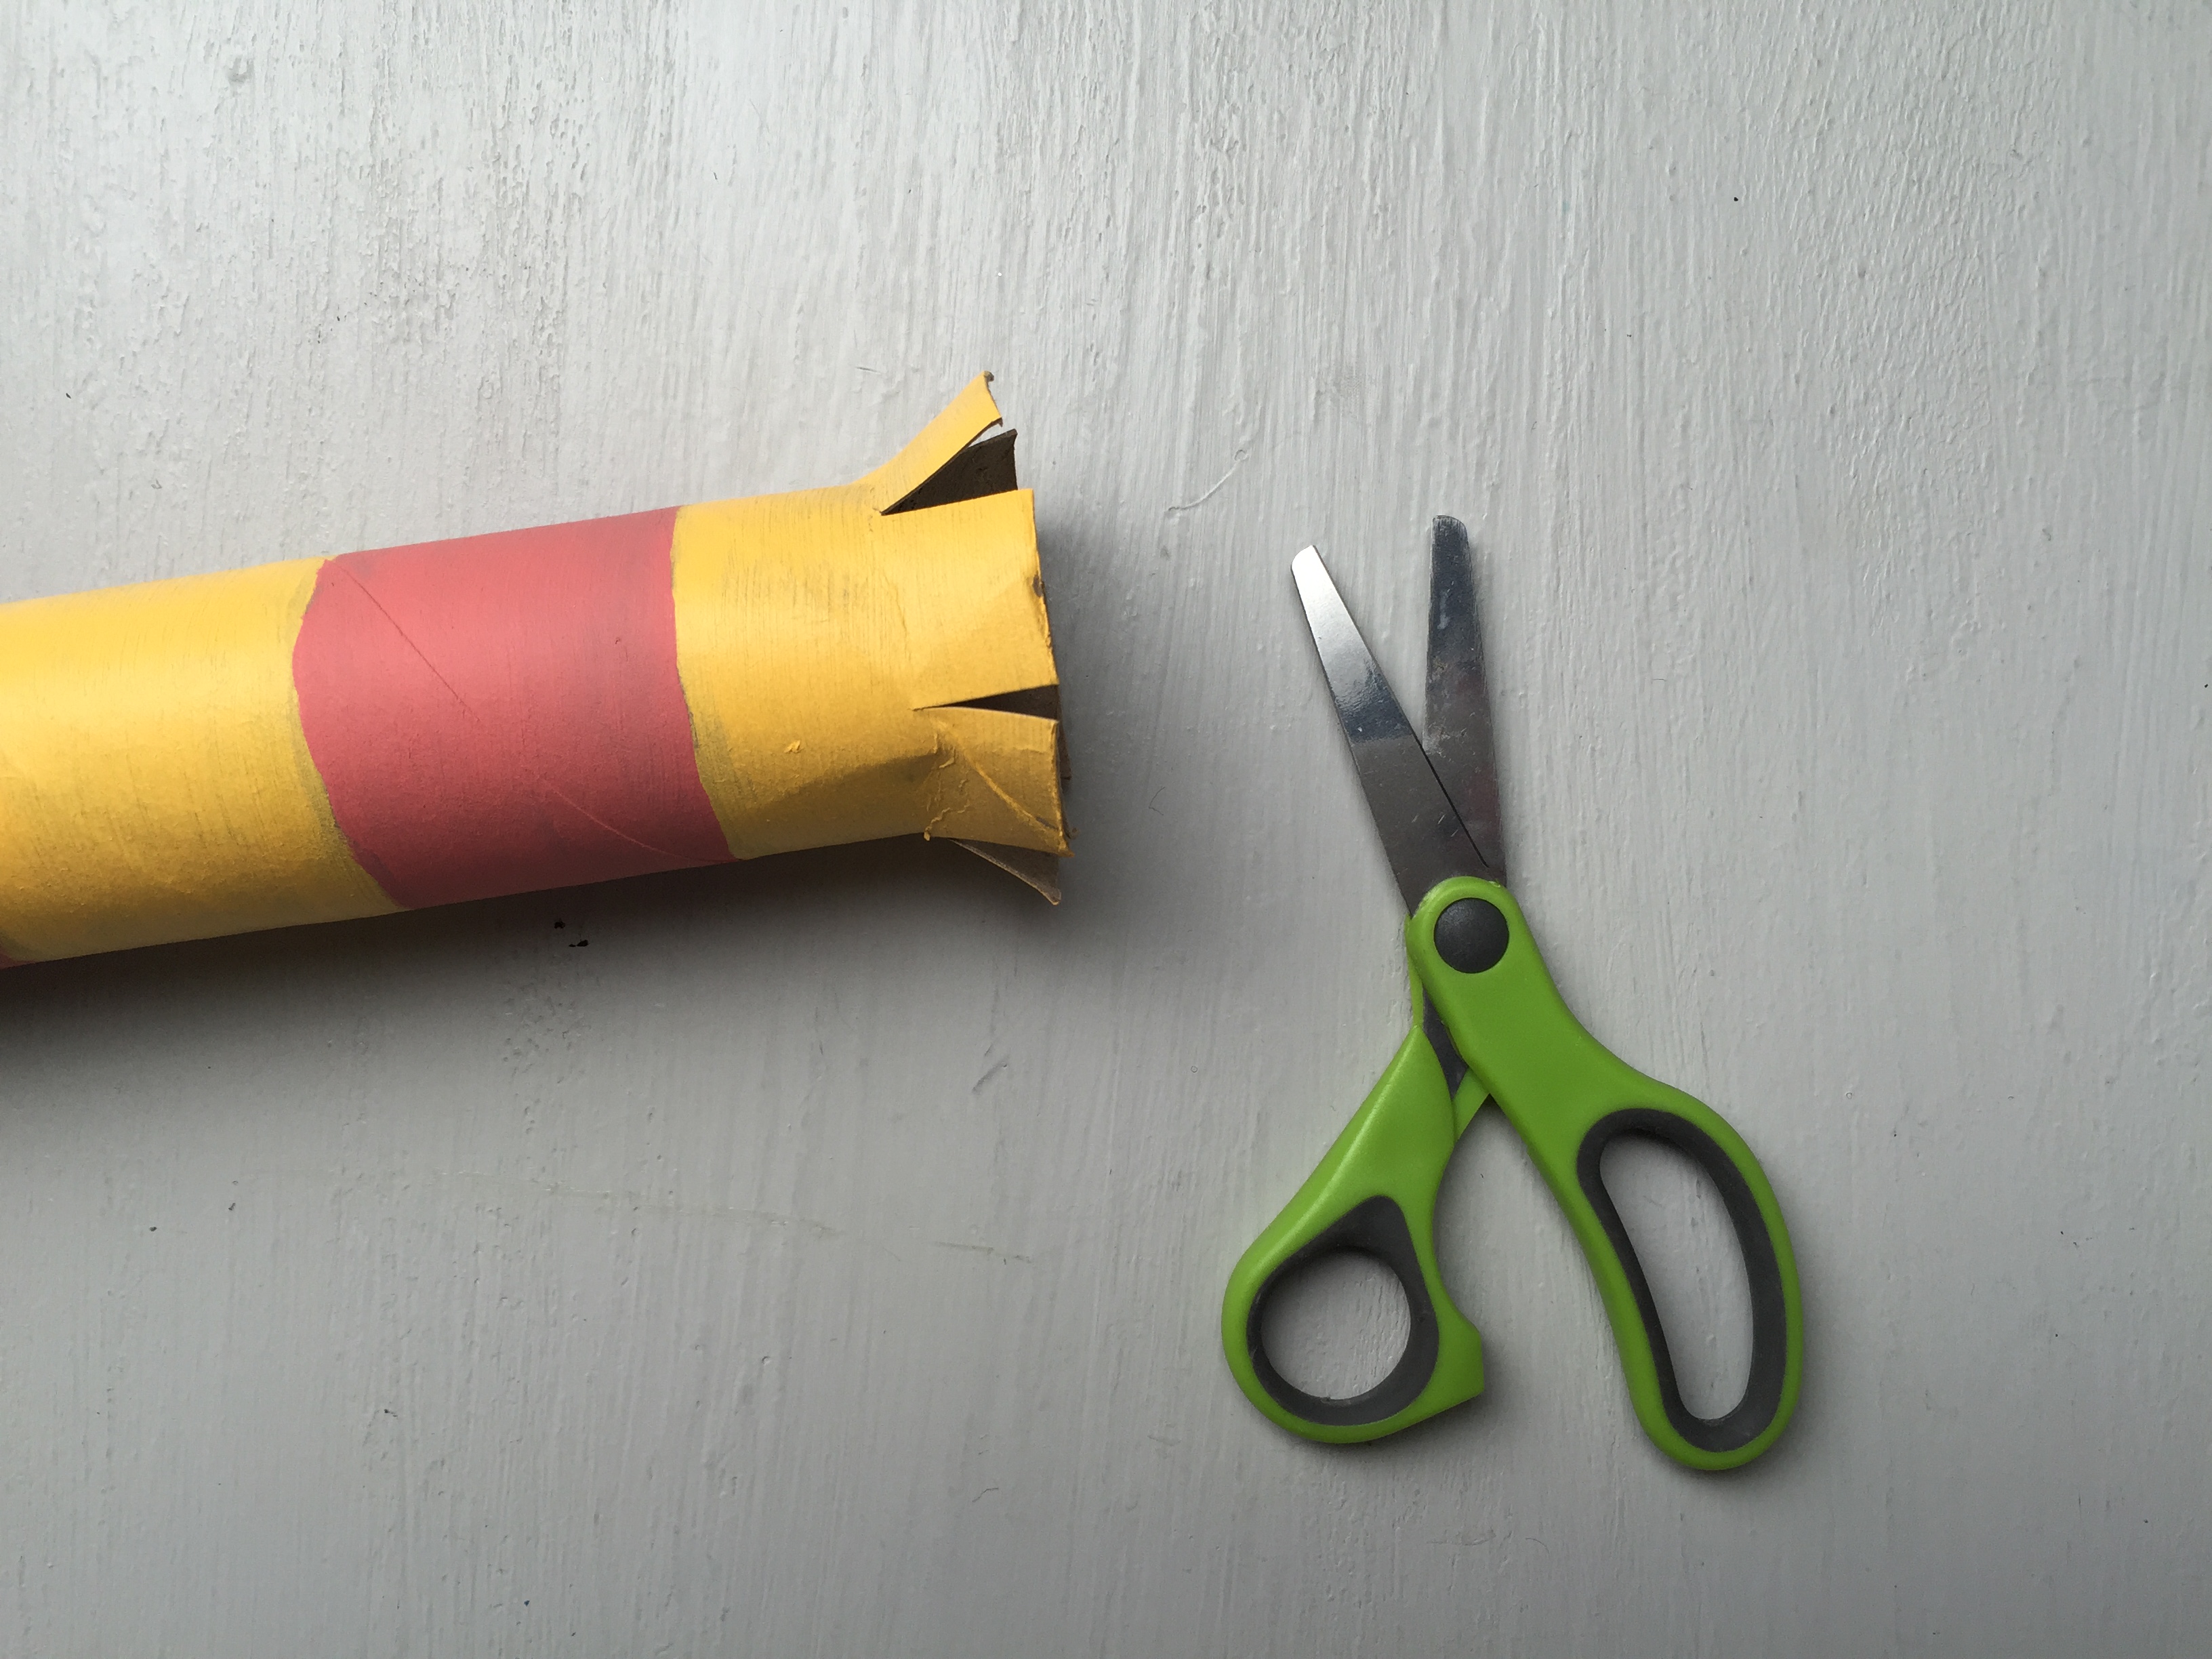
Step 4
Check back on your painted base plate and tube to see if it’s dry. Once it is dry, cut 4 to 6 slits that are a half-inch long on the bottom of the tube.
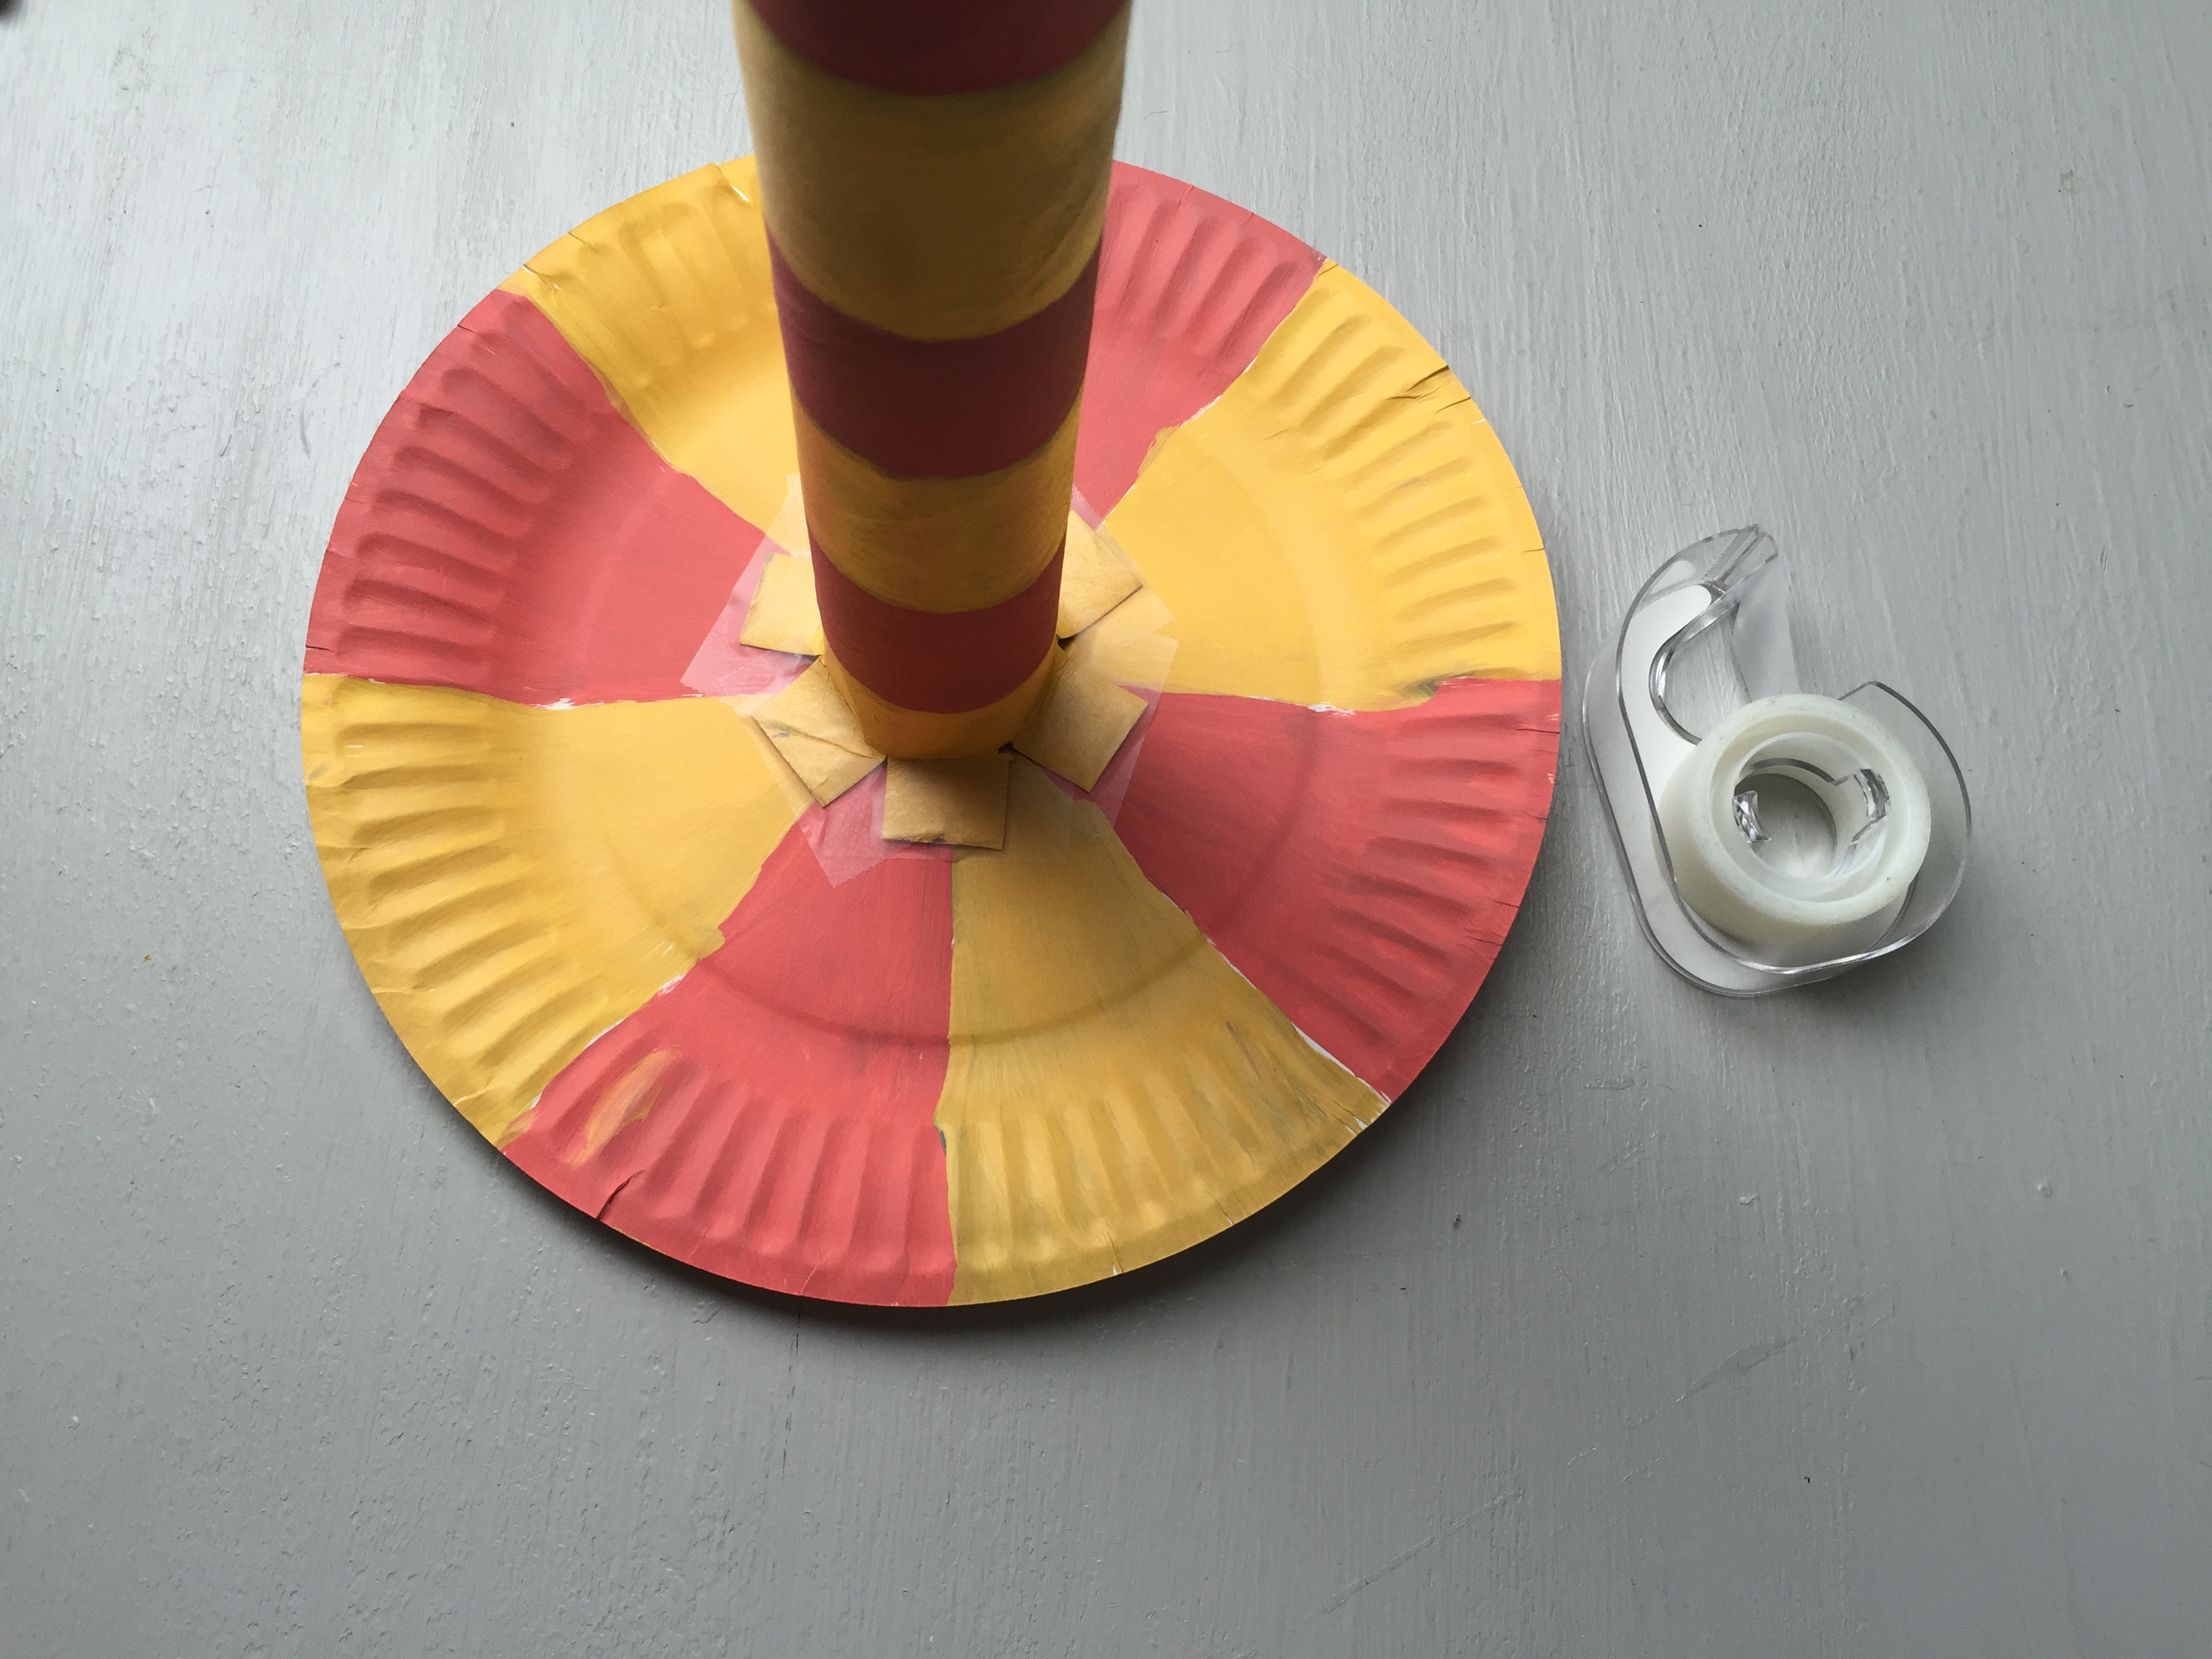
Step 5
Fold the tabs outward and tape them down onto the base plate. Your ring toss stand is complete!
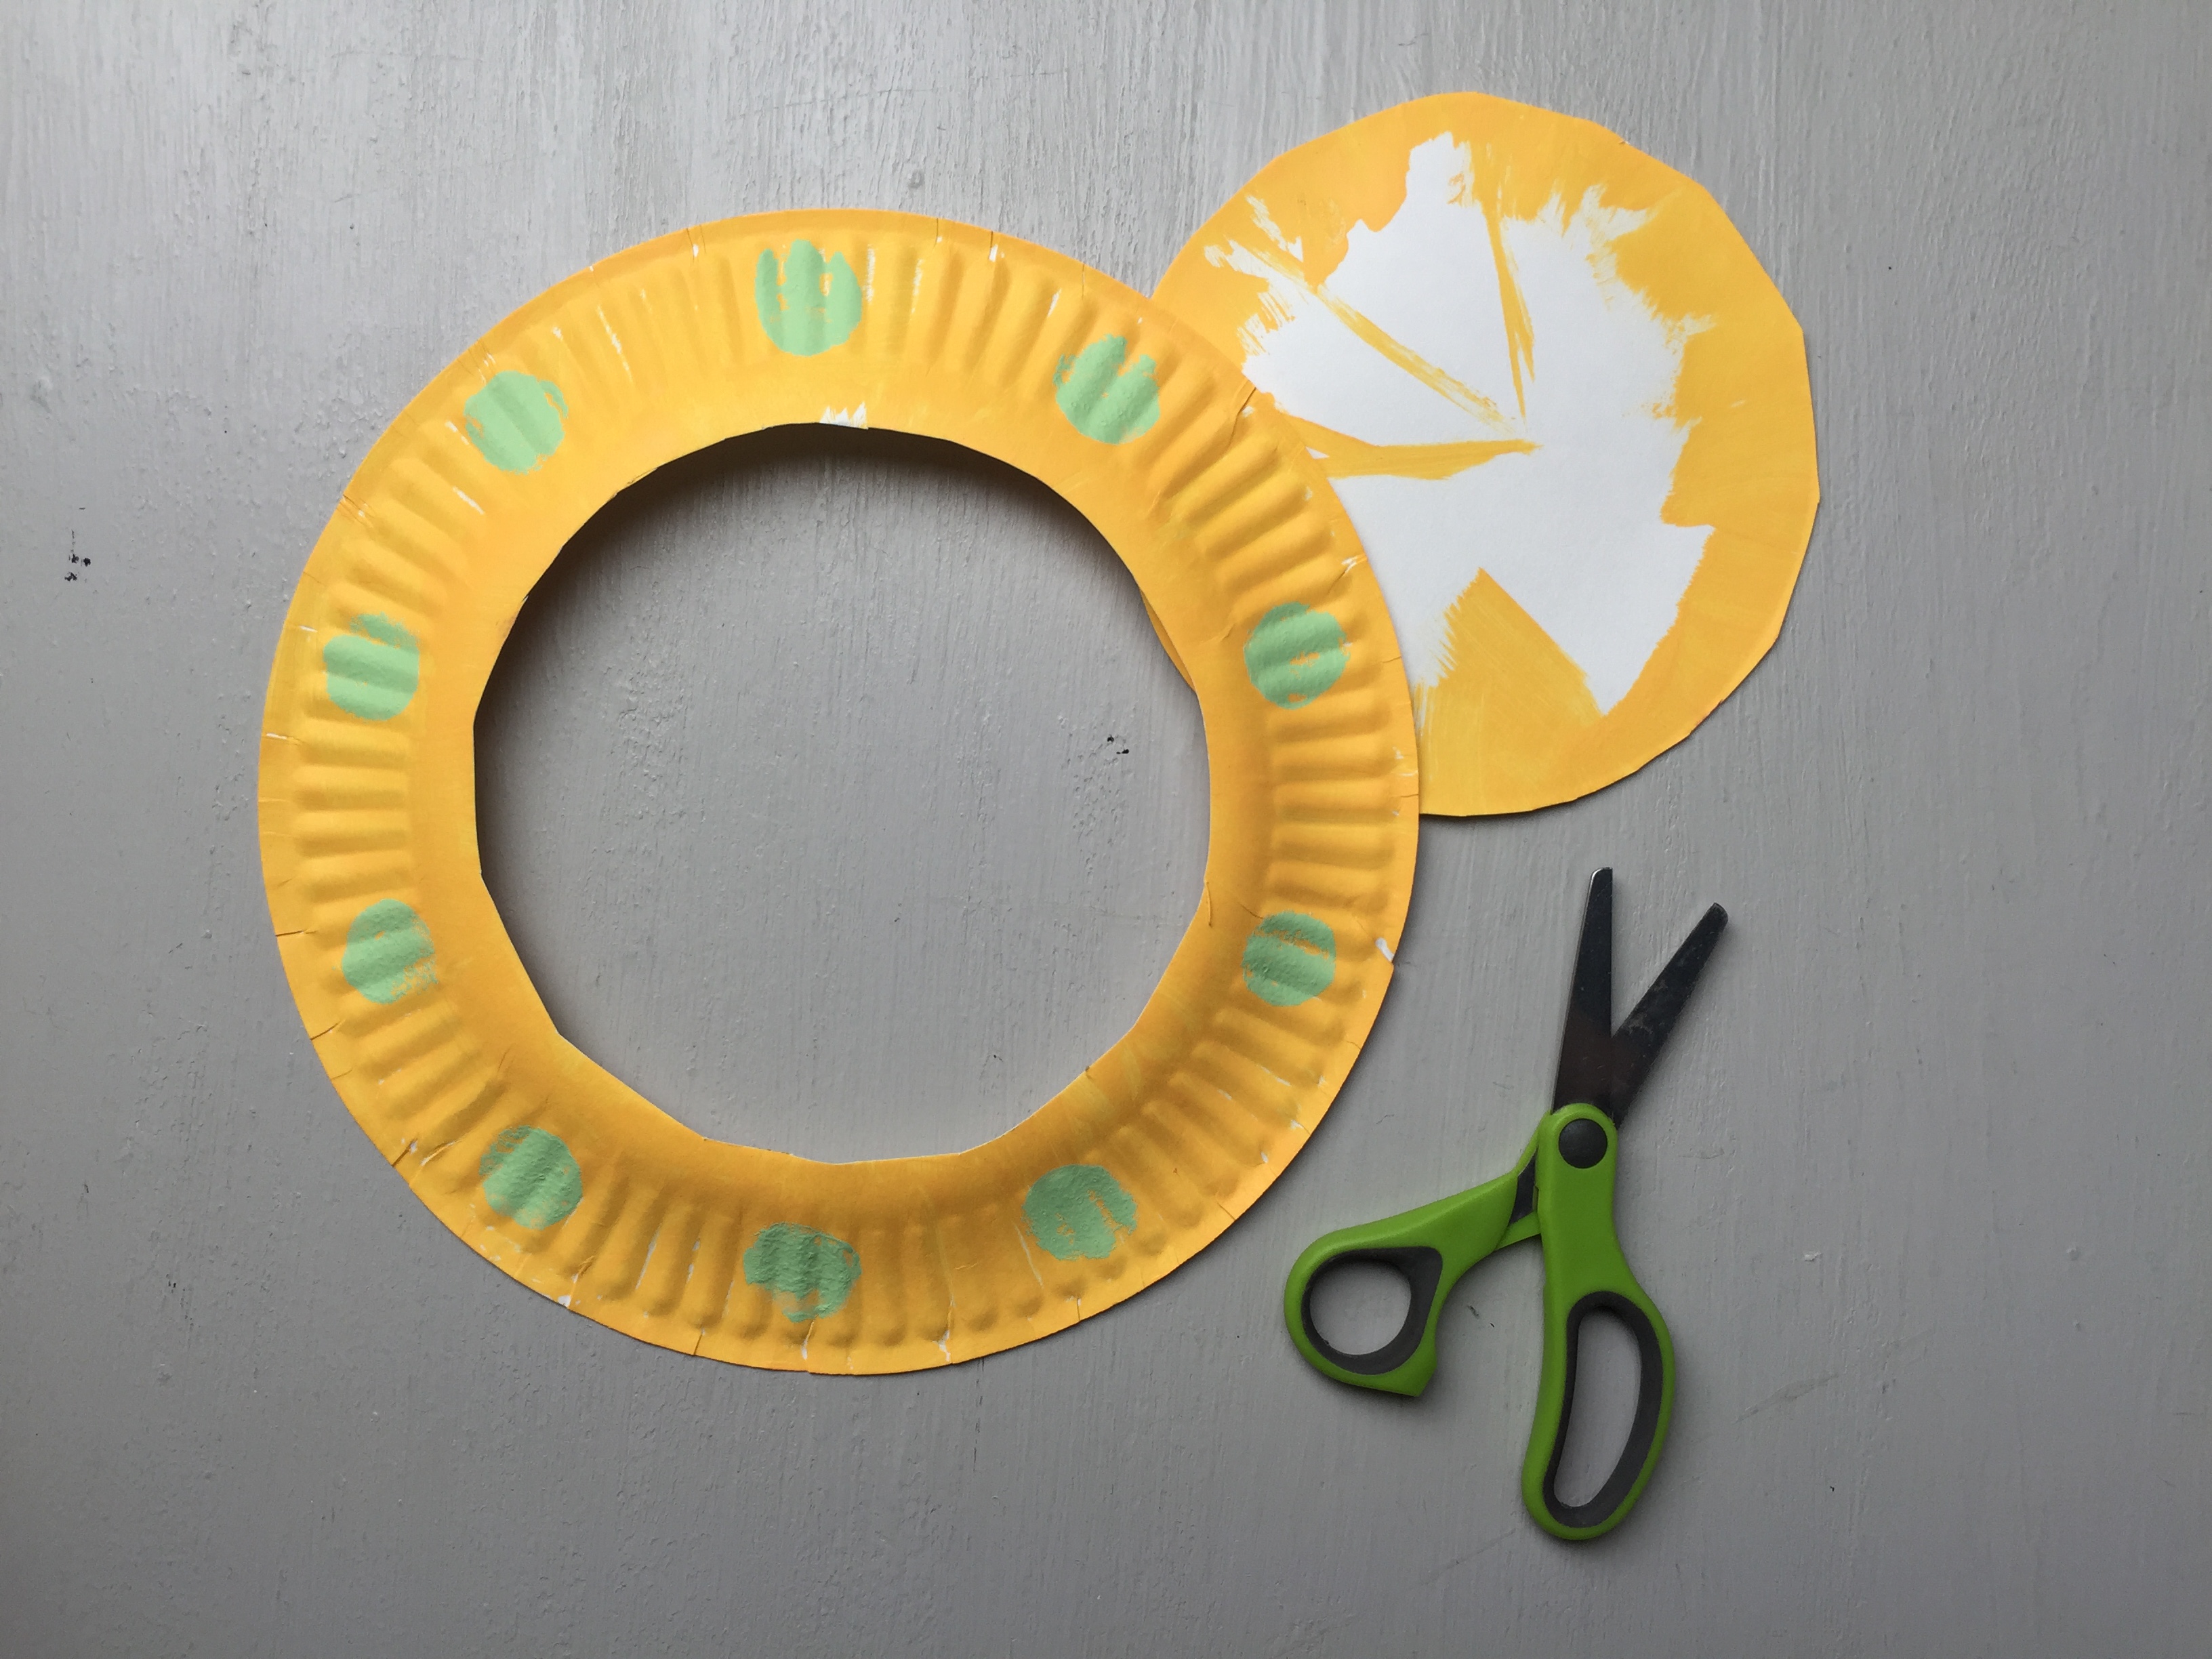
Step 6
Go back to your other painted plates — it’s time to finish the tossing rings. Once they are dry, cut out the center of the plate.
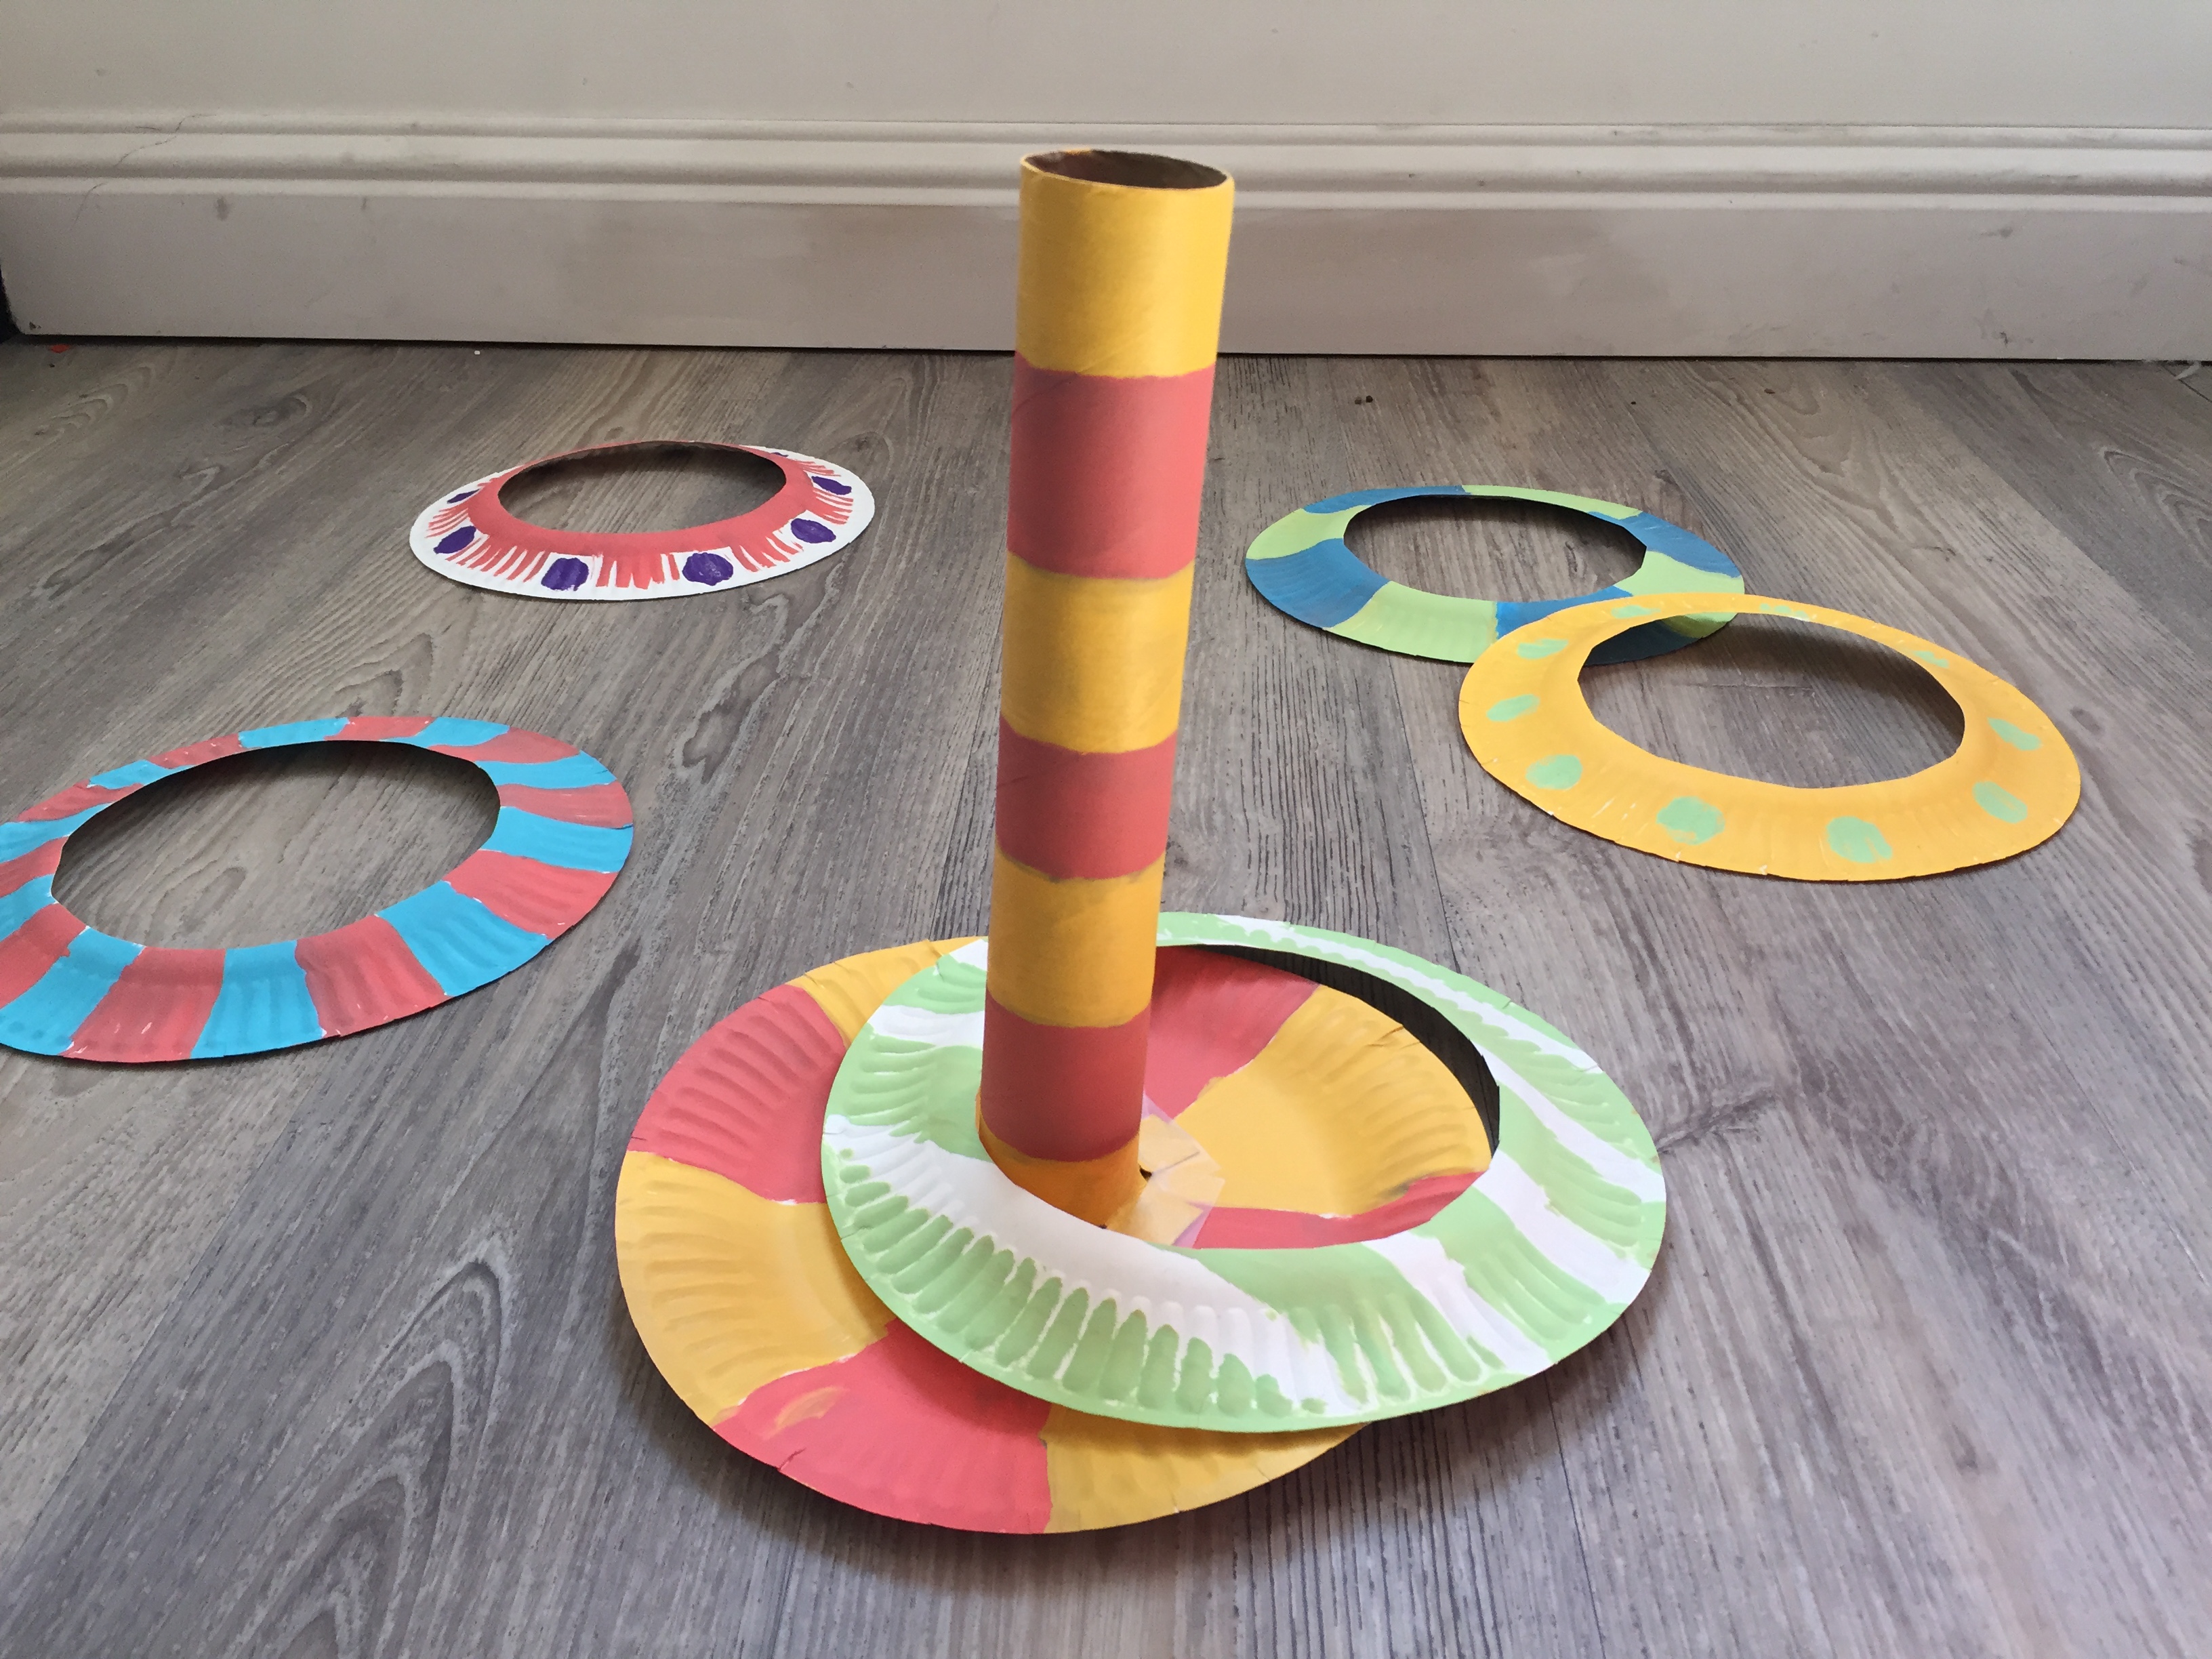
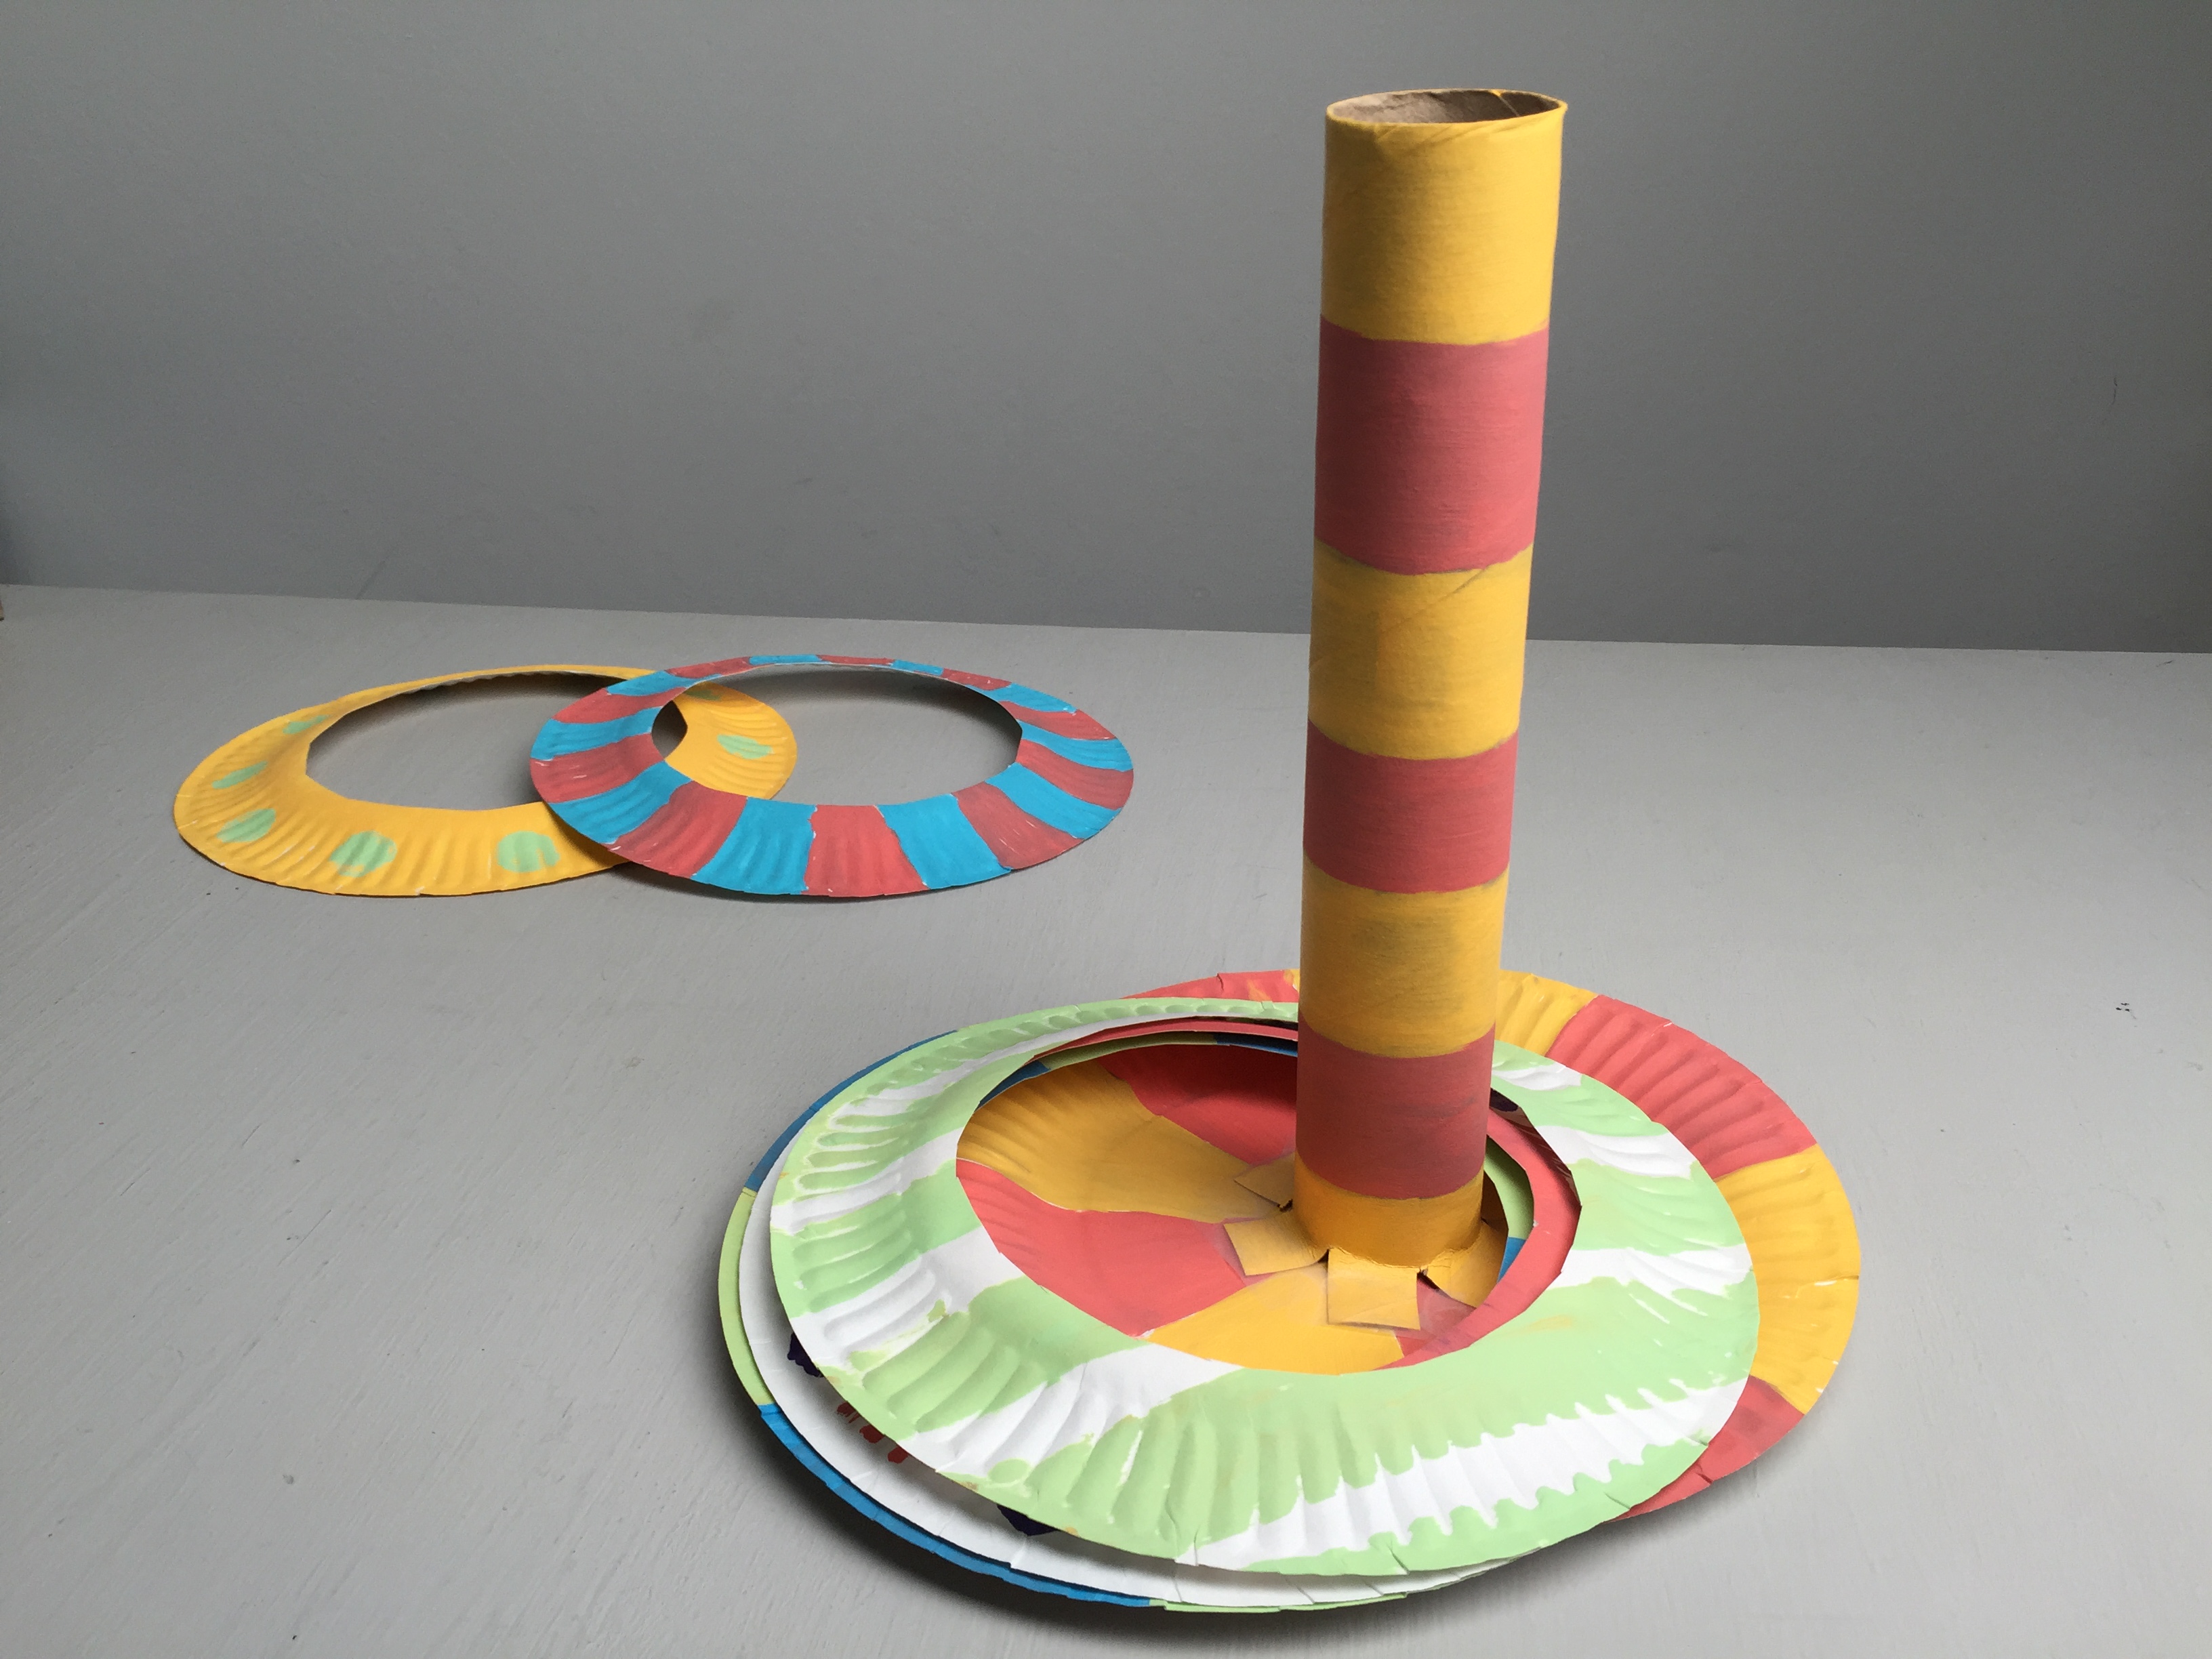
Step 7
Let the games begin! We had so much fun trying different tossing techniques and seeing how many we could get on the tube at one time.
Tip
If your plates are too light for throwing, you can tape two plates together so you can see both painted sides.


