You can bring the real thing home with this fun DIY whack-a-groundhog!
Just download the printable here.
Did you know there’s actually a lot of science behind shadows?
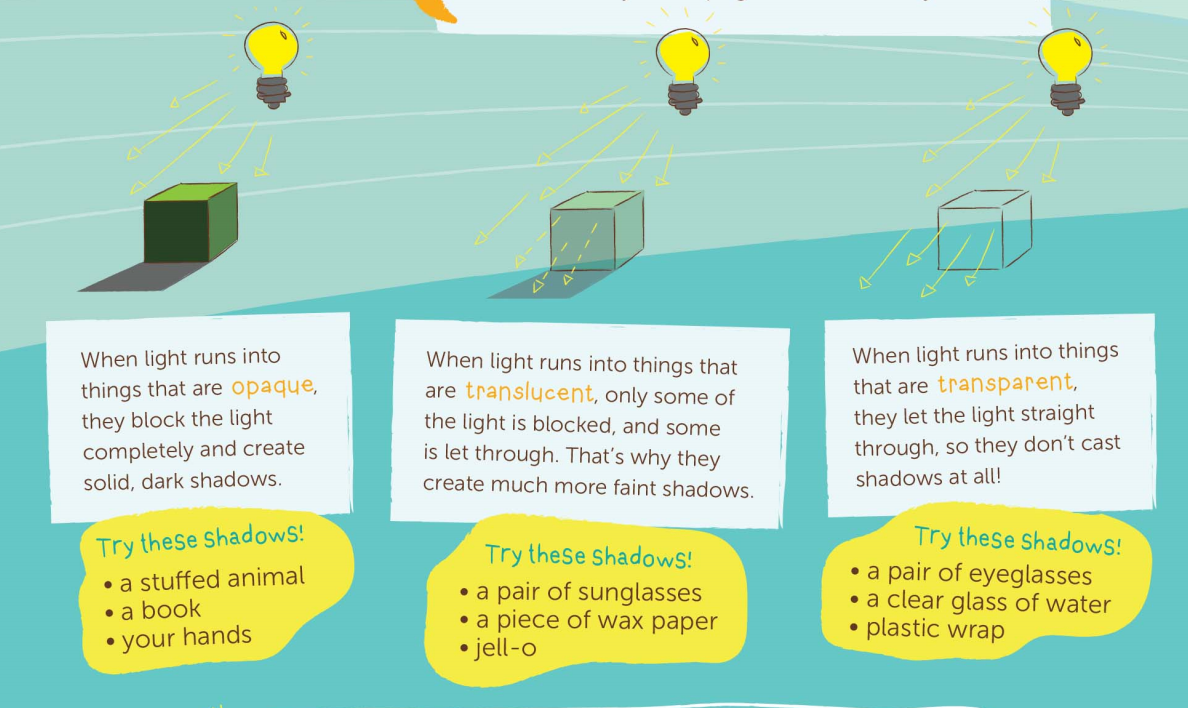
A shadow is created when light is blocked by an object. But why doesn’t a window cast a shadow? Because not all objects stop light in the same way!
You can change the size of your own shadow by getting closer to, or farther away from, a light! There are a lot of other fun shadow experiments you can do as well! The first step in the scientific process is always observation, and one of the best ways to observe is to draw 🙂
When you draw something you pay extra attention to angles, shading and movement. Artists take notice of science whenever they paint, draw or sculpt a person, place or thing. Which is why so many of the best artists are interested in scientific concepts like shadows.
So, how are shadows made? Shadows happen when an object blocks light, making it unable for the light to pass through that object. The magnitude (how dark it is) of the shadow is a result of the transparency of the object (how much light can pass through it). For example, although glass is solid, it doesn’t block light and has no shadow. The location of a shadow is a result of the position of the light source (where the light is coming from). If I place a light to the right of a rock, I’ll see the shadow on the left. If I switch the light to the left, the shadow will appear on the right. Check it out for yourself with these exercises below!
Shadow Drawing Exercise #1:
- Choose a spot outside that could have some interesting shadows or shading. Find a place with pipes, stop signs or fences, anything that sticks out a bit and can create an interesting shadow.
- Mark a spot outside where you will sit to draw. You can use a shoe, a box or a rock to mark your spot.
- Draw the same area from the same spot at 9 a.m., noon and 3 p.m.
When you finish, lay all three images side-by-side and talk about the shadows. - Hang your cool triptych!
Shadow Drawing Exercise #2:
Shadow Drawing Exercise #3:
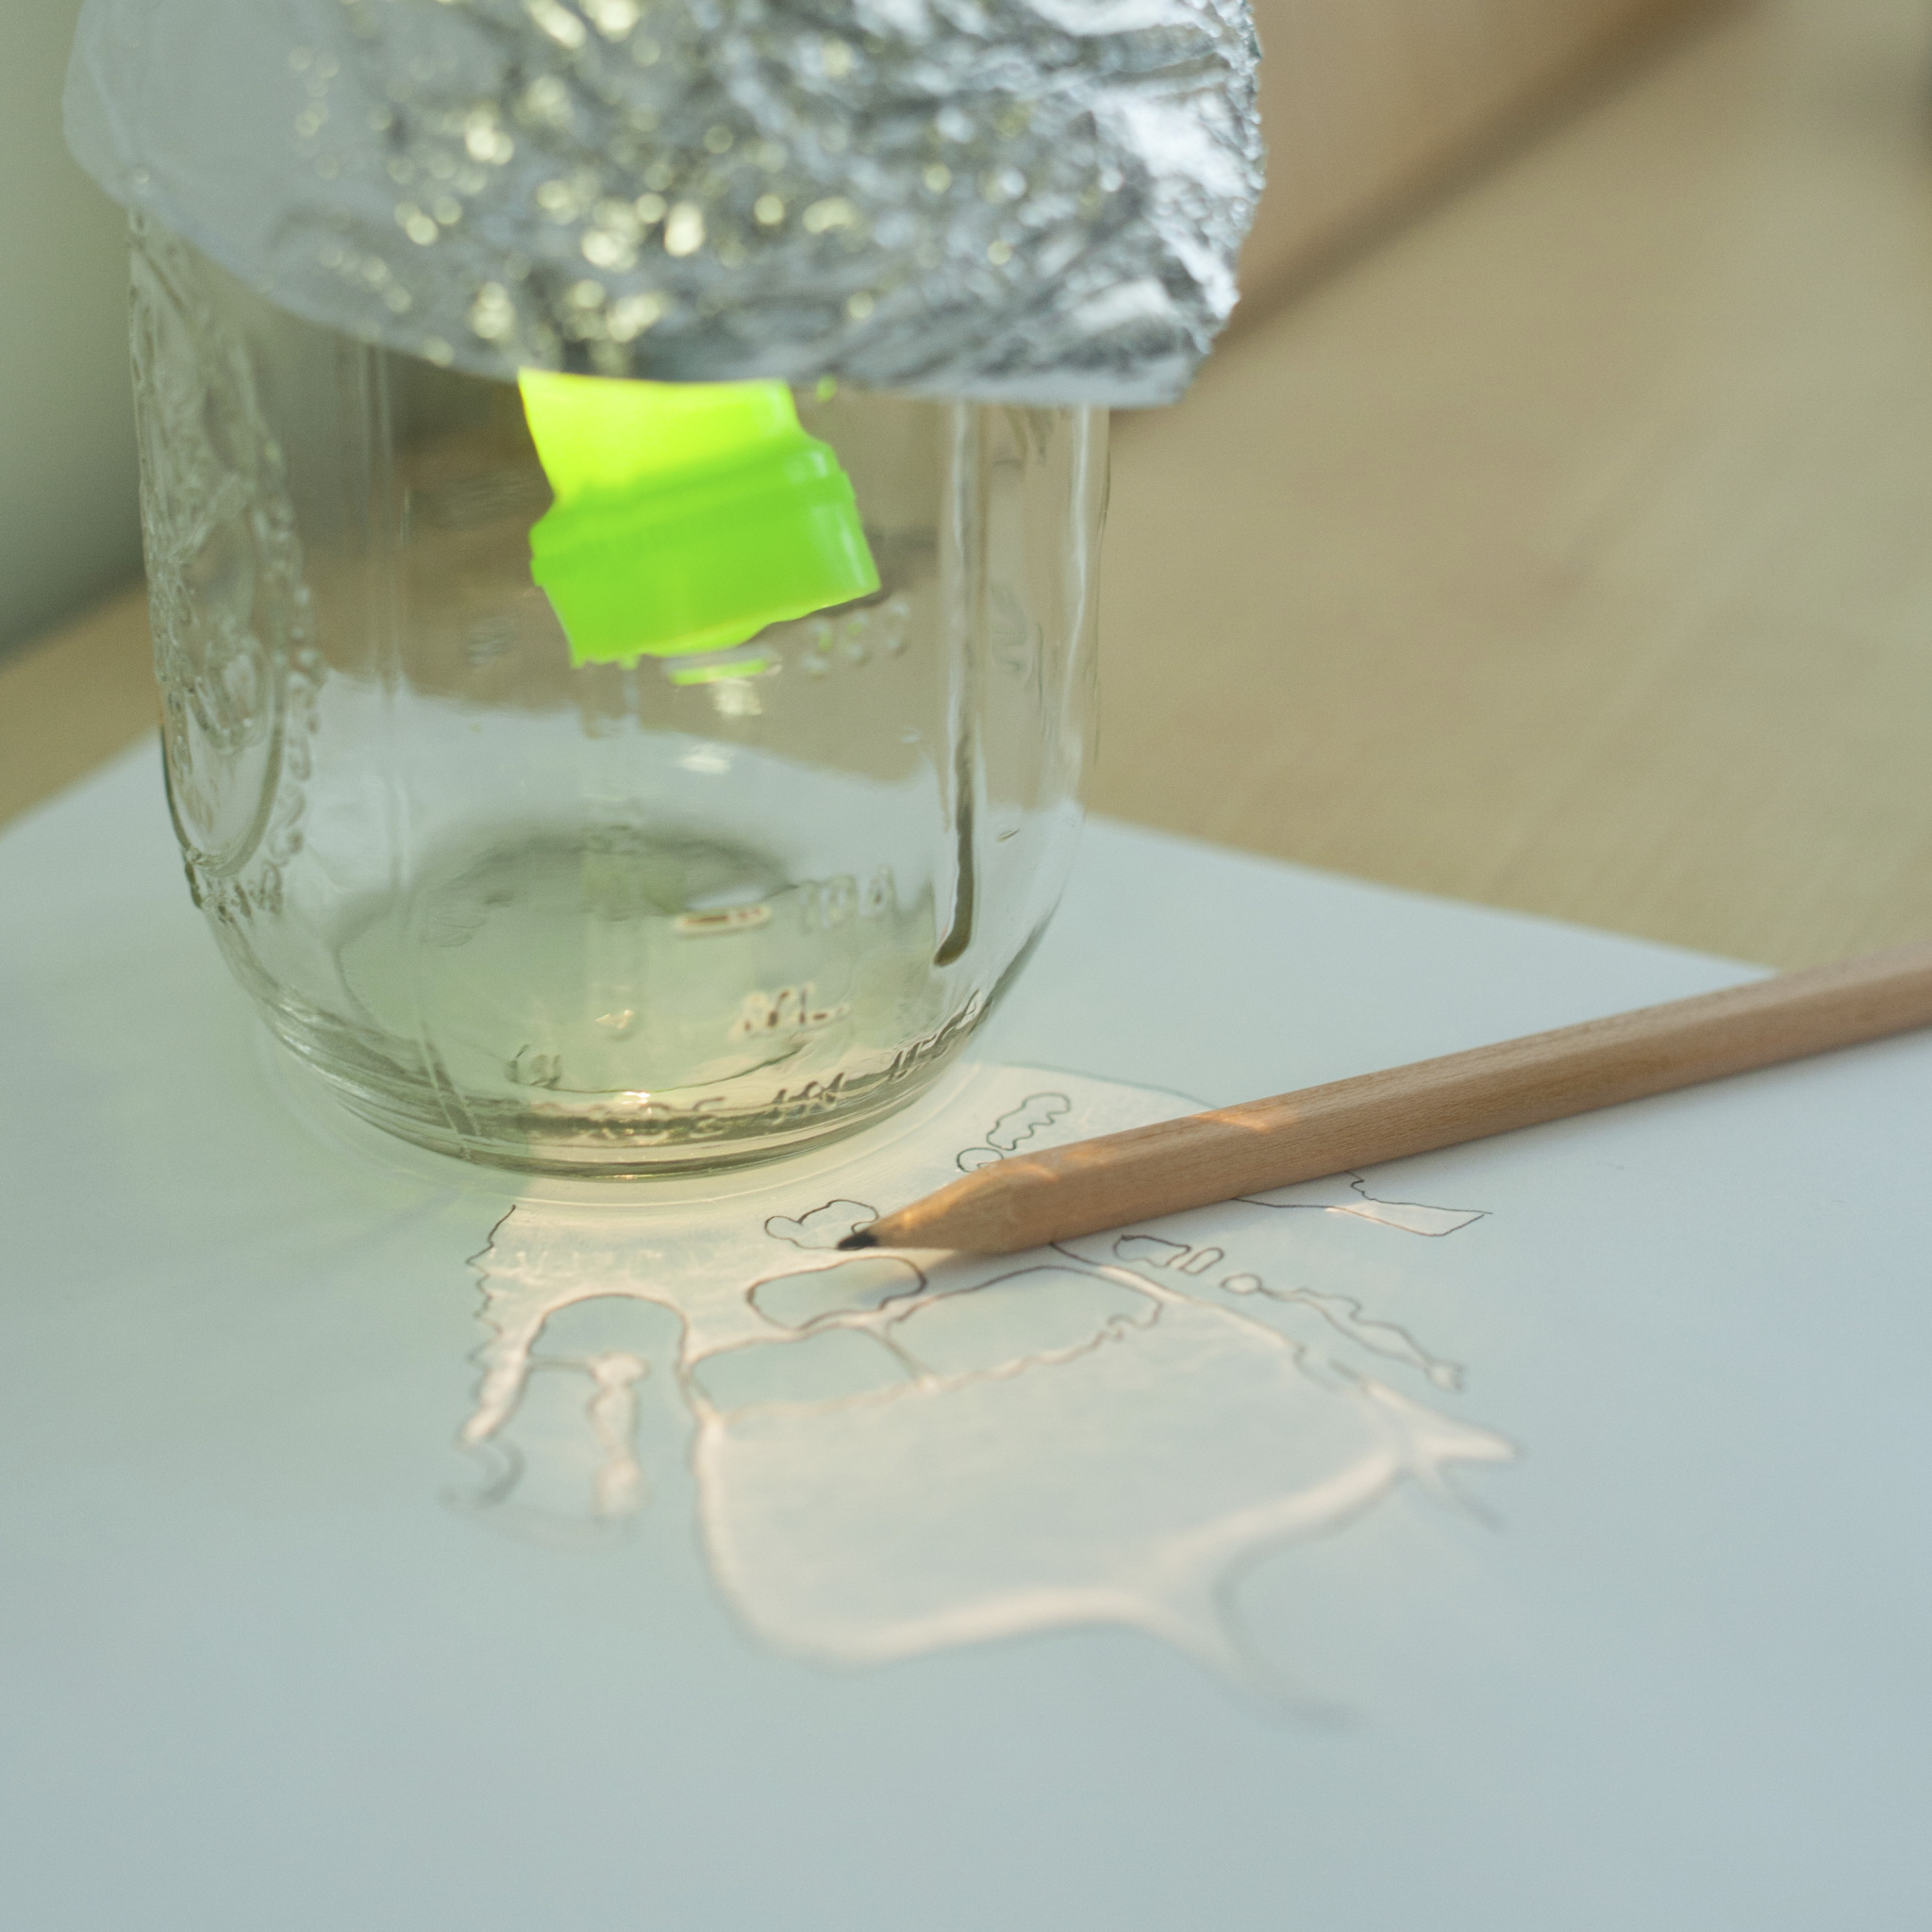
Trace the pattern of the shadow made from a mason jar for a beautiful abstract piece of artwork!
Visit this page for more amazing shadow games and DIYs!
Or, if you’re interested in learning more about shadows and light, check out our Color and Light Crate!