Step-by-step tutorial
Step 1
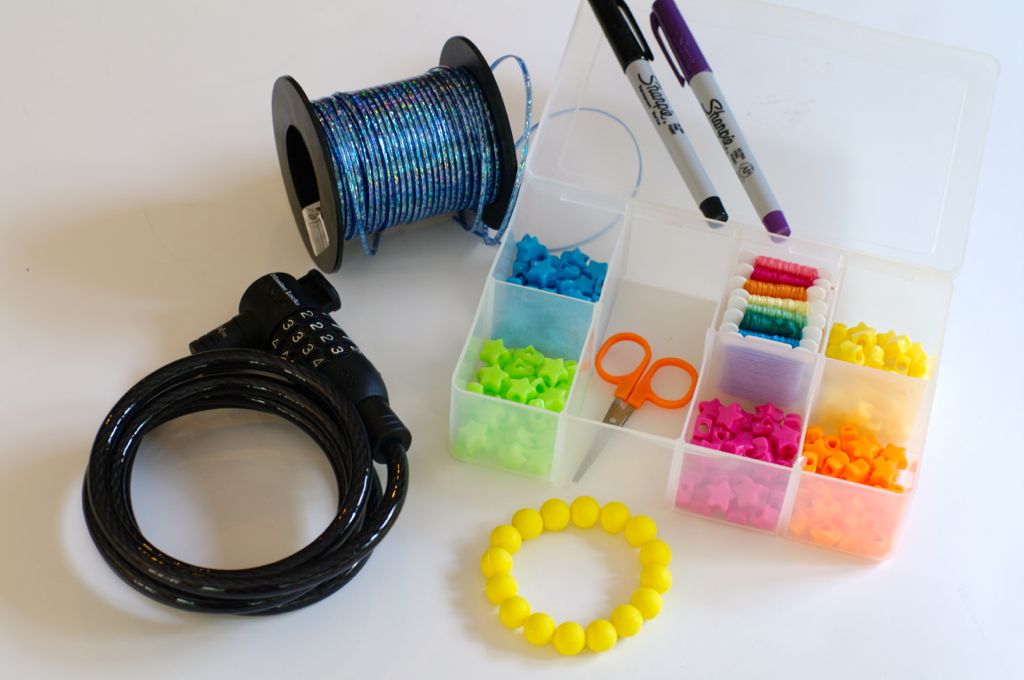
You'll need to start with your combination and the type of bracelet you want to make. We used our collection of larger beads (pony beads are too small), embroidery floss in lots of colors, a roll of plastic cording and one already-made rubber bead bracelet purchased from the dollar section of a store.

Step 2
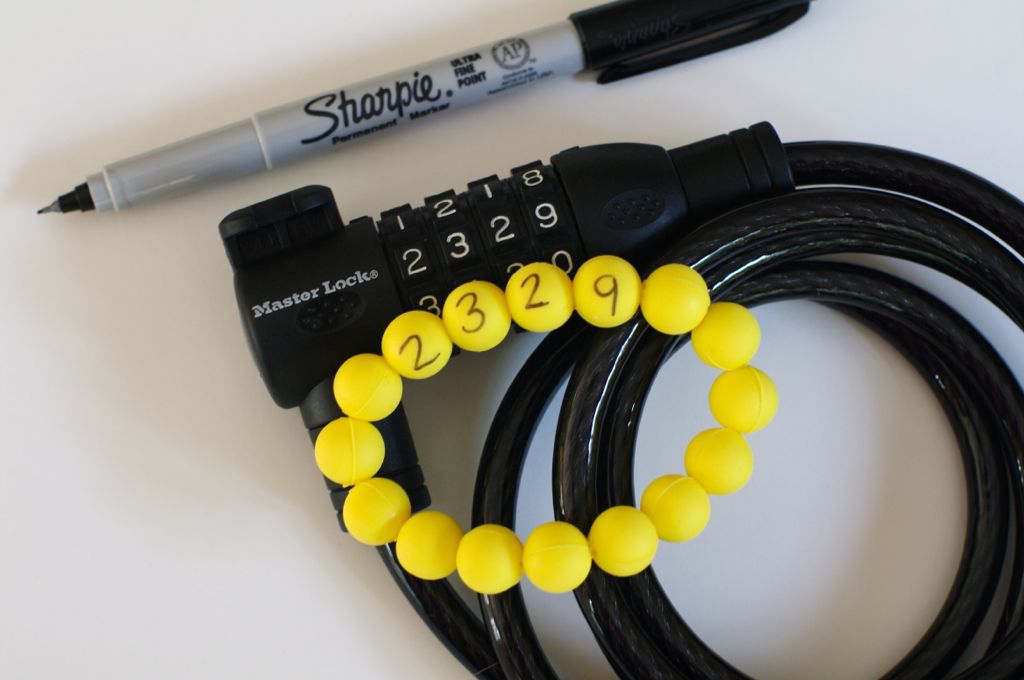
Our first bracelet was the already-made rubber bracelet. This one was super-easy: just write the combination on with a permanent marker. Although it was "permanent", the marker did smudge off a bit later, so we re-wrote it and then covered the writing with a coat of clear nail polish. That did the trick. My daughter is very pleased with this bracelet to help her remember her new bike lock combo.
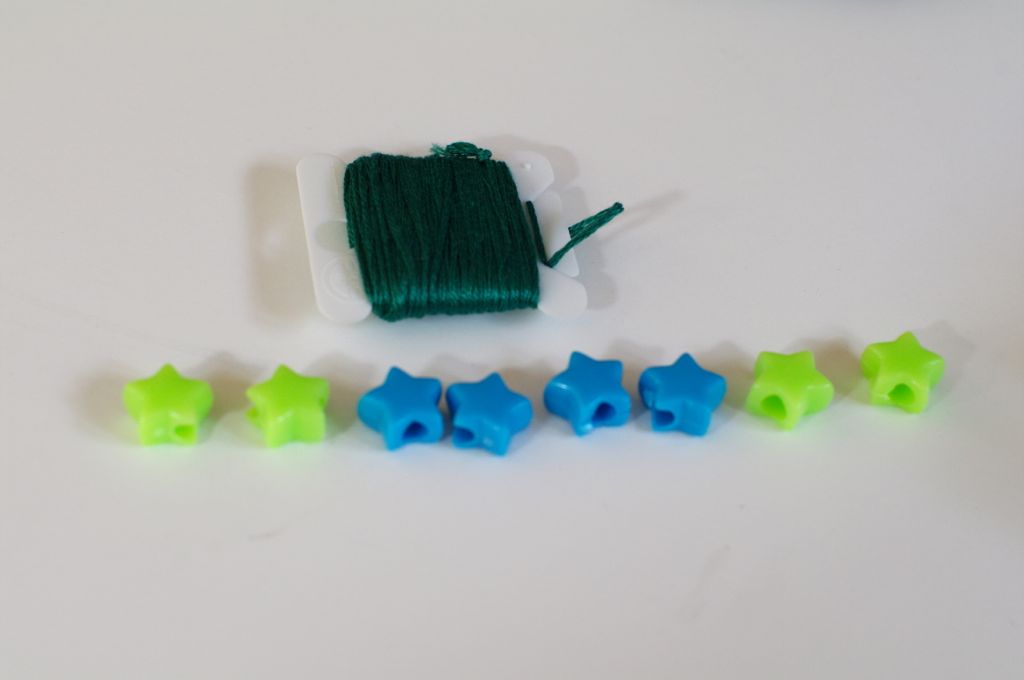
Step 3
Next, we made a bracelet with beads and embroidery floss. Embroidery floss packets can be found at any craft or fabric store. They come in an amazing array of colors and they usually cost between 40 and 80 cents. At that price, you can buy them in as many colors as you like!
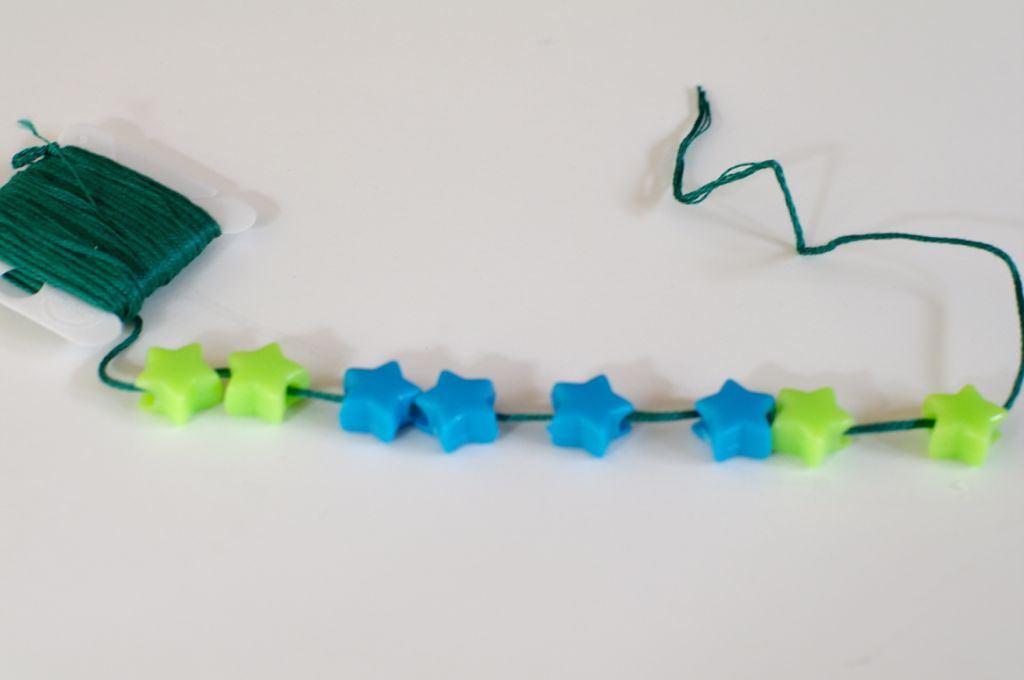
Step 4
After arranging these in a pattern, my son threaded the floss through the beads.
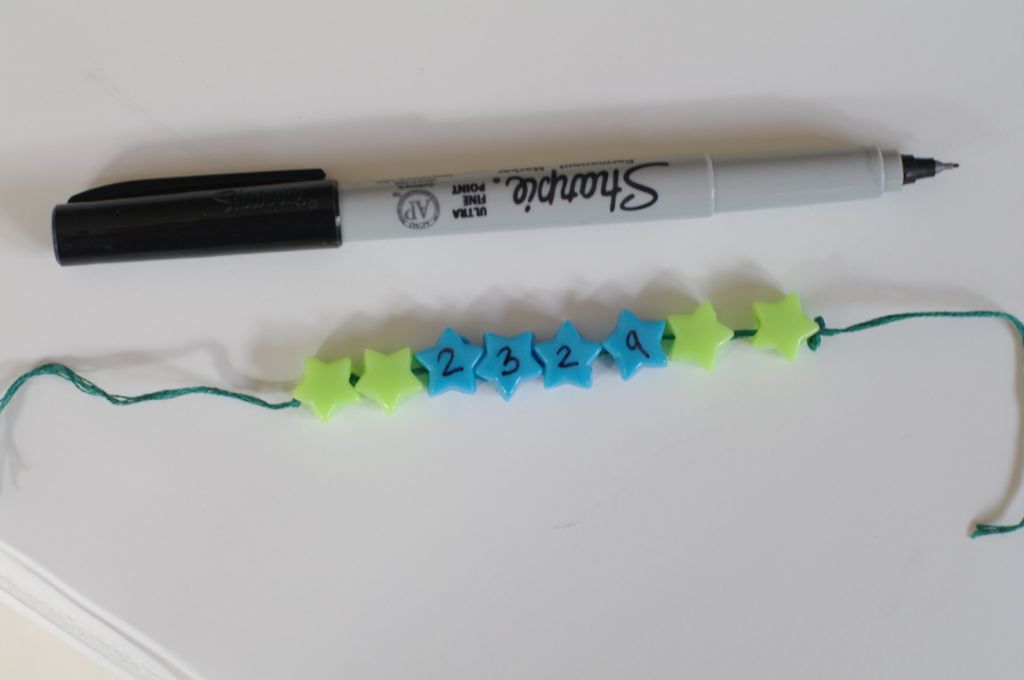
Step 5
Next we wrote the numbers on the blue beads.
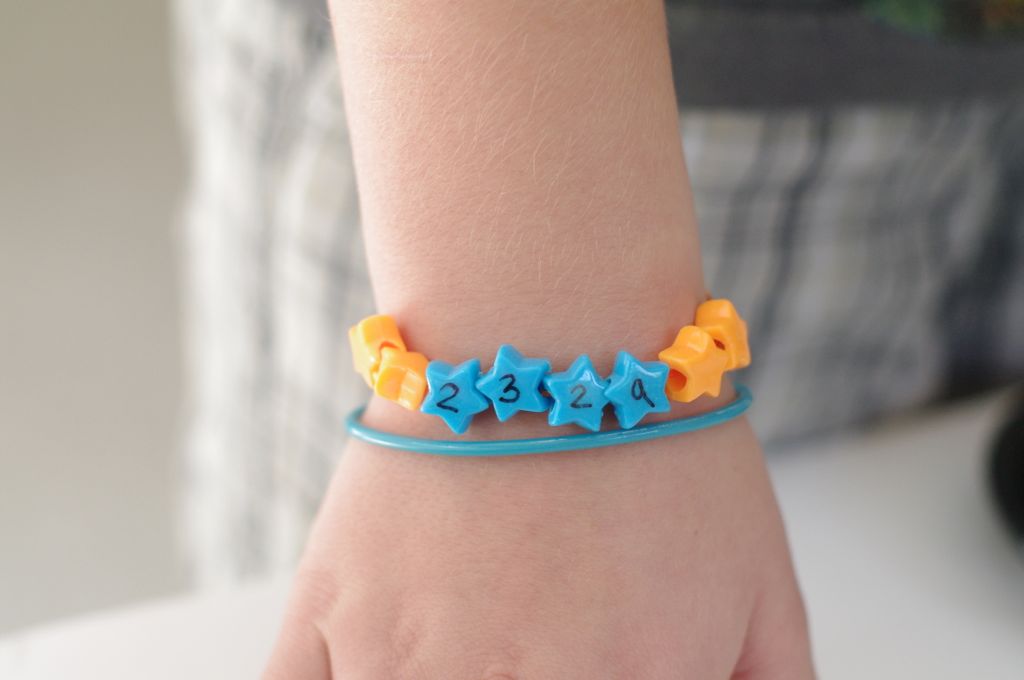
Step 6
He changed his mind and switched the green beads for orange. After that, we tied the bracelet to his wrist and cut off the excess string.
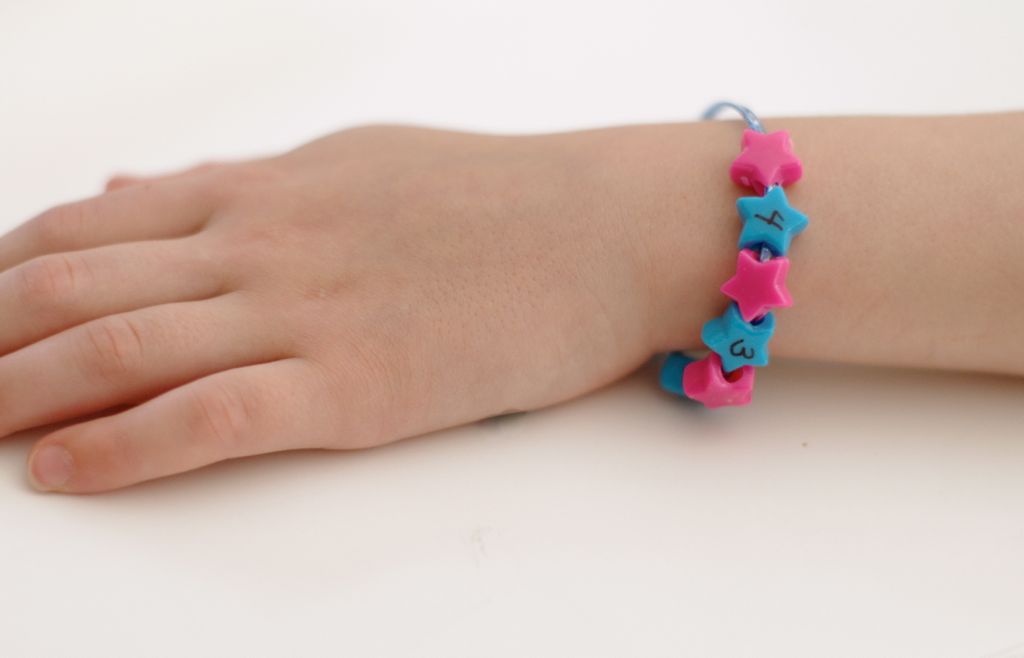
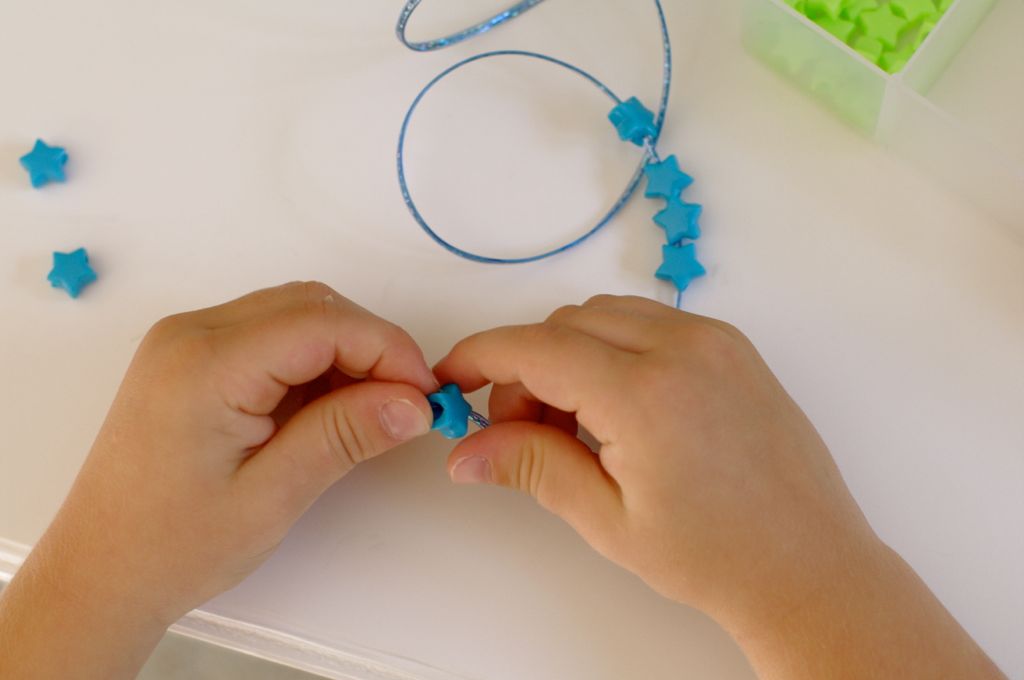
Step 7
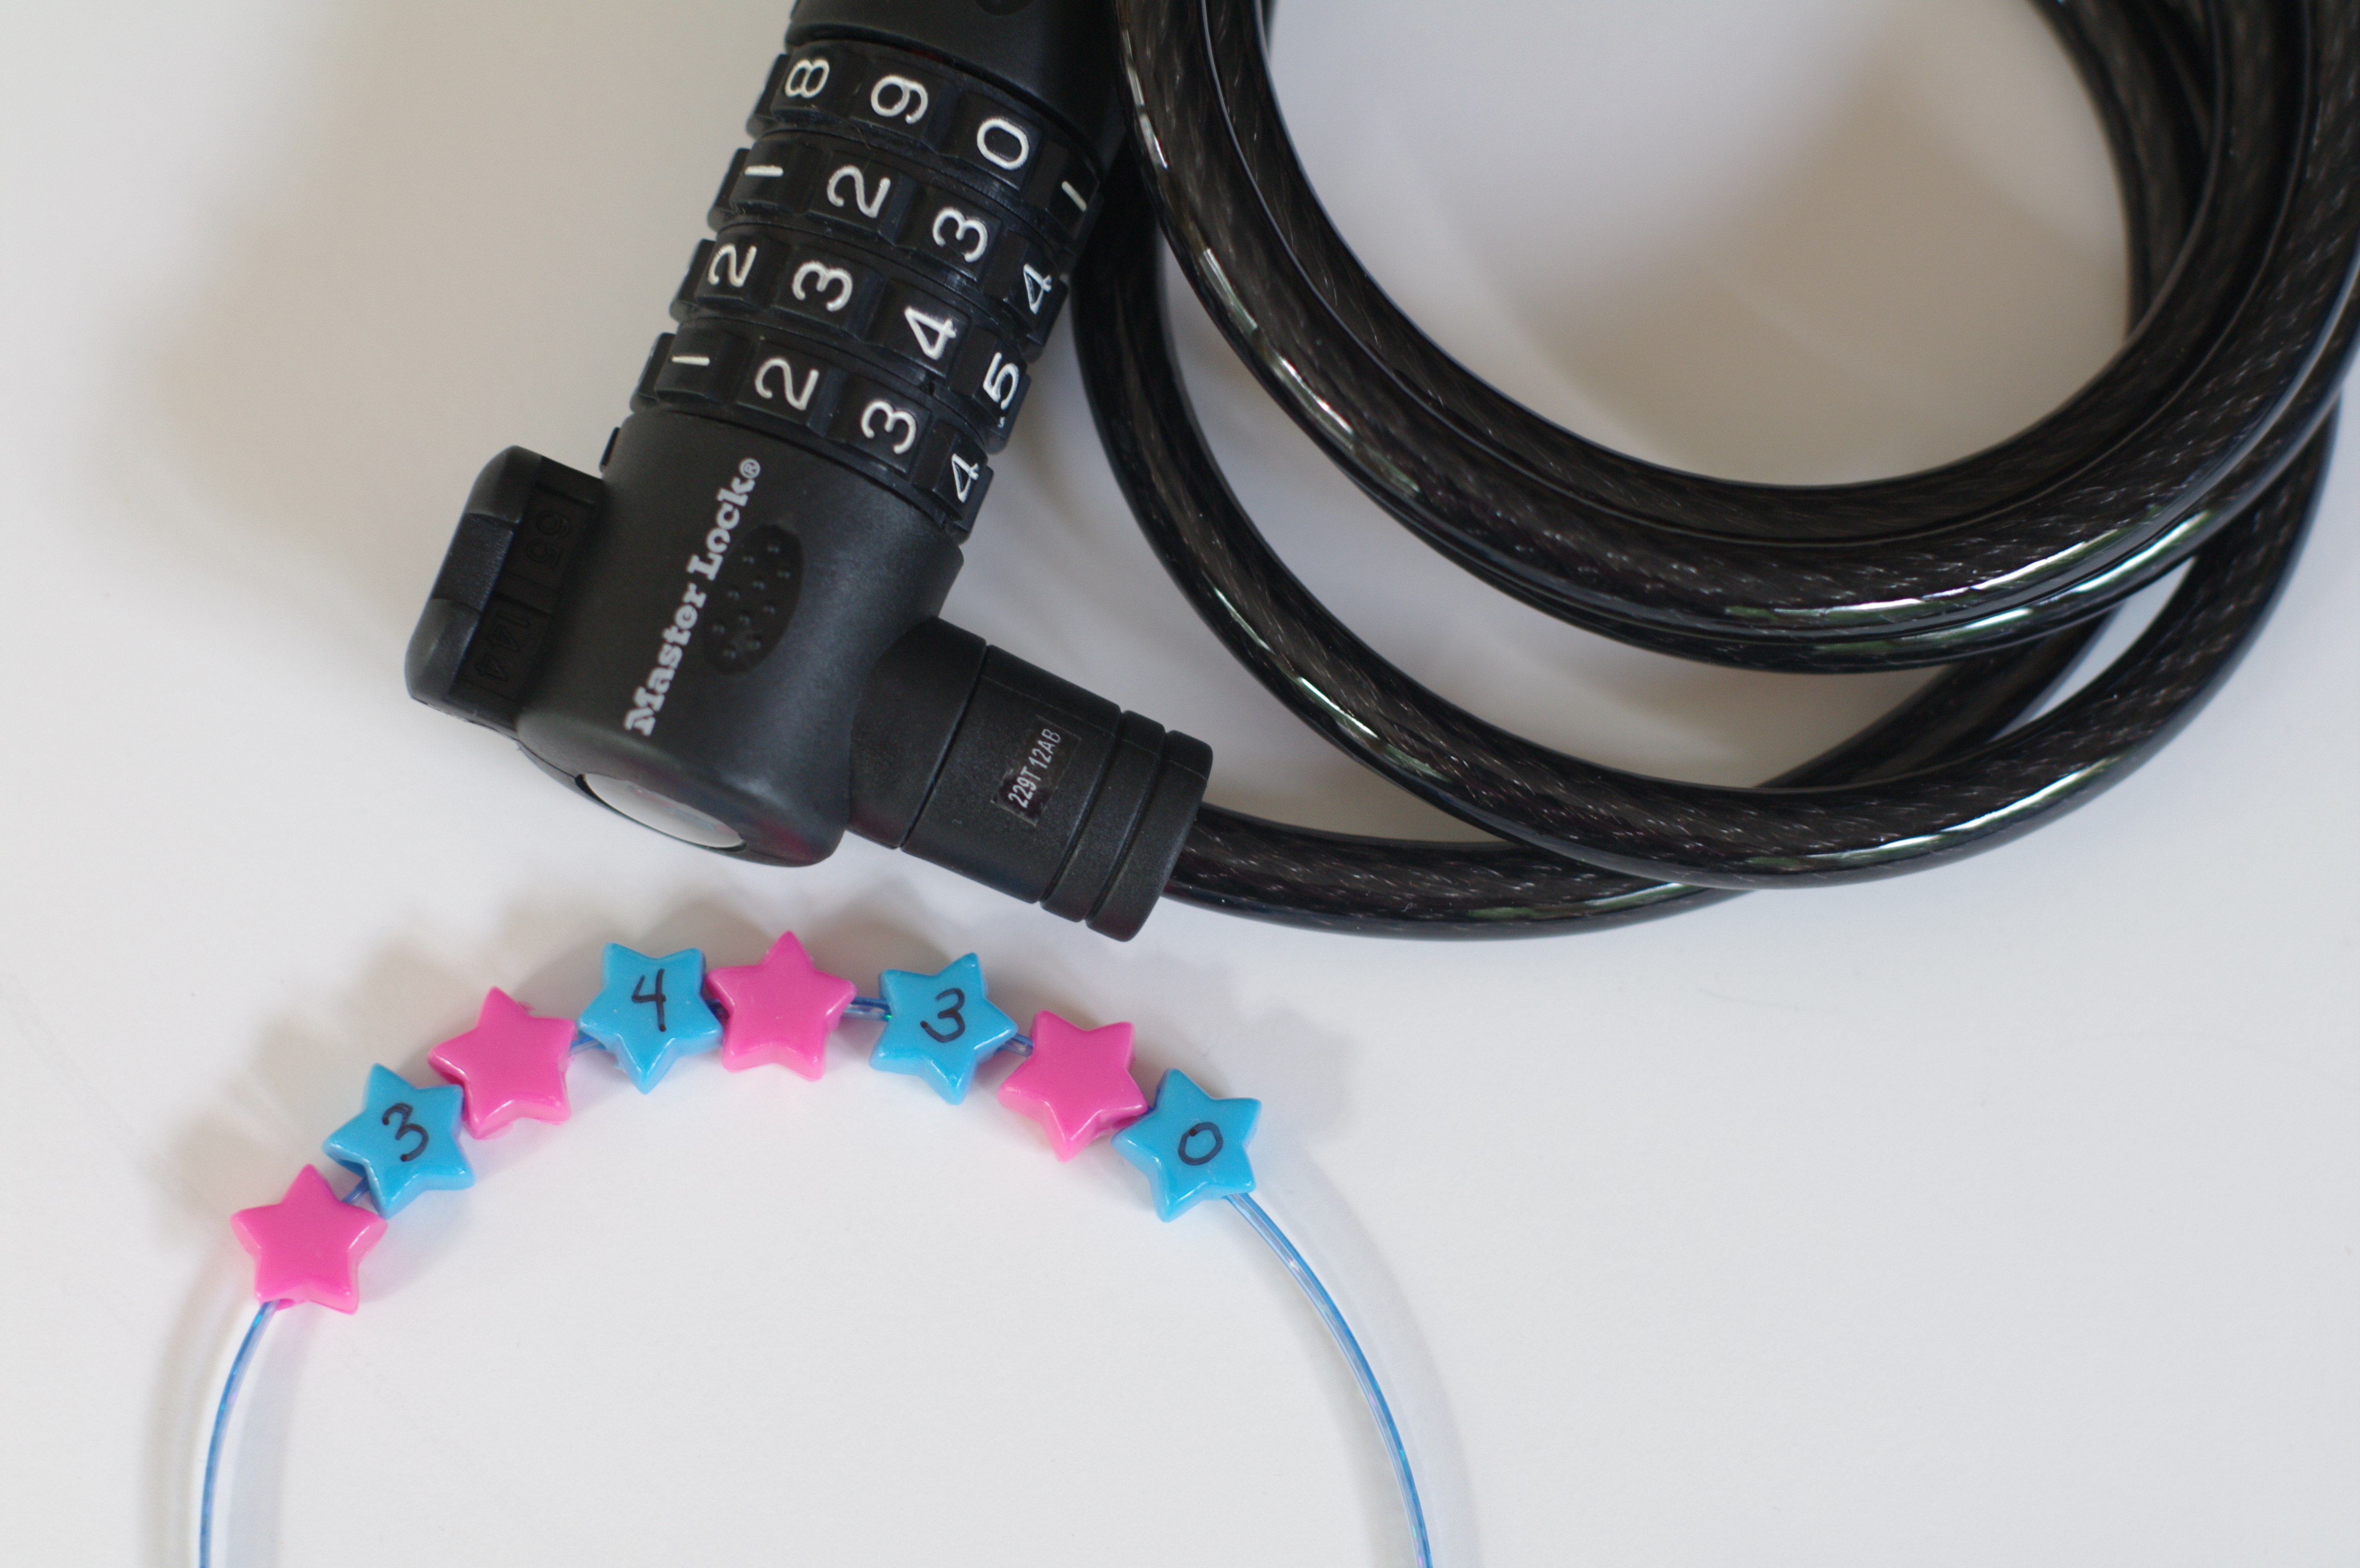
Next up, we made our third type of bracelet, with the sparkly plastic cording. This is a little stretchy so it can be slipped on and off the wrist, but it's a bit harder to work with. Here's how we met the challenges of working with the cording.
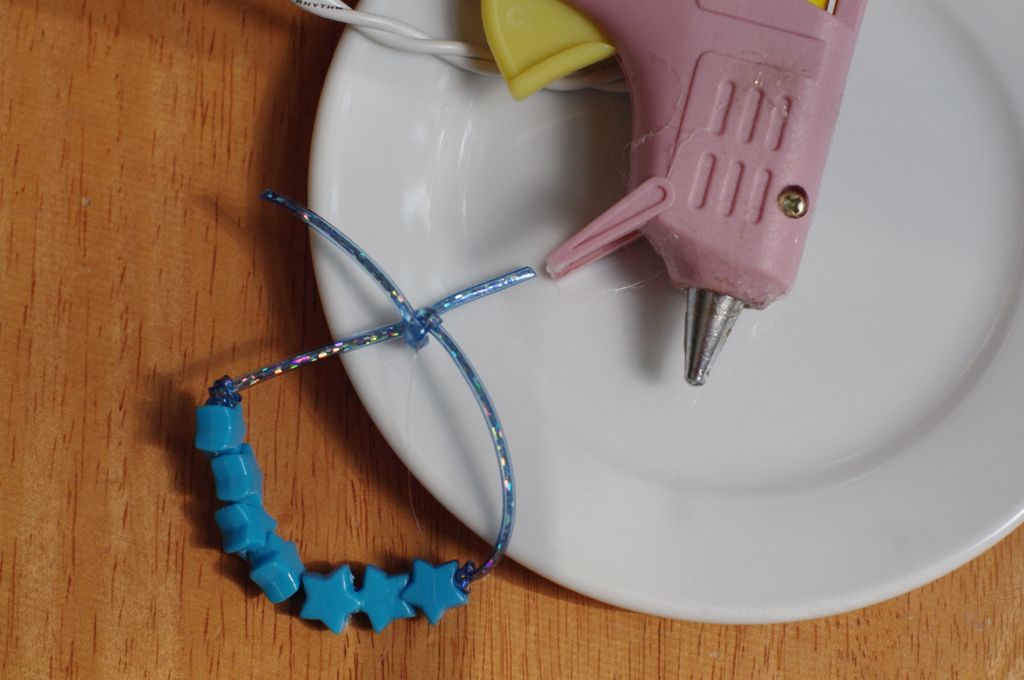
Step 8
The knot to close the cording falls out easily. If you know how to tie a square knot, this will hold it in position. Or you can do what we did, and get out the trusty glue gun. We put a drop of glue on either side of the knot and that held it nicely.
Done!
Here's our finished bracelet using the plastic cording. All three options met the task. It's just a matter of preference. The plastic cording and embroidery floss bracelets won't come off super-easily, so there's little chance of them getting lost while your child is at school or out riding his or her bike. My kids wore them for about a week, using them each day for their bike lock combinations. After that, they had the combinations memorized and no longer needed the bracelet as a reminder.